
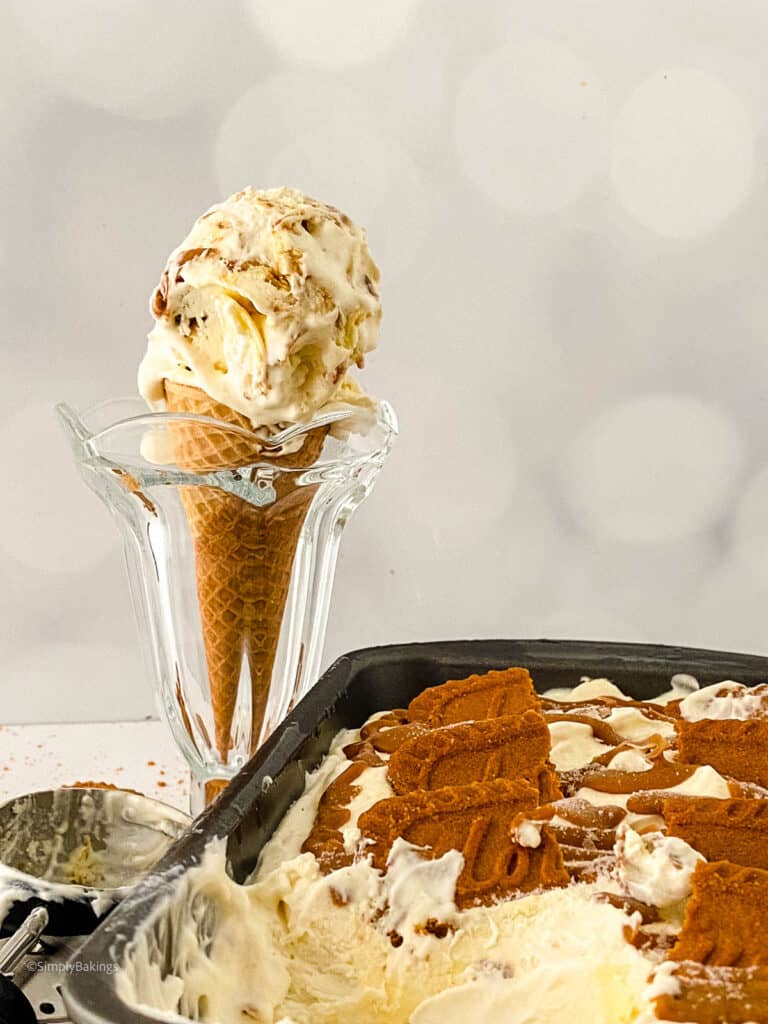
Enjoy the creamy taste of Biscoff Cheesecake Ice Cream! It's made with simple ingredients like heavy whipping cream, sweetened condensed milk, and crushed Biscoff cookies. This delicious frozen treat is perfect for satisfying your sweet tooth.
In search of quick and easy ice cream recipes? Whip up my Mocha Ice Cream, Vegan Chocolate Ice Cream, and 2-Ingredient Pineapple Ice Cream.
What is Biscoff Cheesecake Ice Cream?
The Biscoff Cheesecake Ice Cream has a cool history. It comes from mixing classic cheesecake with Biscoff cookies (with the more popular Lotus Biscoff ones), creating a tasty frozen treat. People wanted something new, so they added whipped cream, sweetened condensed milk, and vanilla. Layering it all together made a delicious dessert loved worldwide.
What makes it truly fun is the combination of rich flavors from the creamy no-bake cheesecake, the irresistible crunch of Biscoff cookies, and the decadent sweetness of cookie butter. The best part?
It's surprisingly easy to make! With just a few simple steps and minimal prep time, you'll have homemade ice cream that will impress your friends and family. So go ahead, unleash your creativity, and enjoy the satisfaction of creating a delicious frozen dessert that everyone will love.
Benefits of Biscoff Cookies
- They contain less fat than other types of cookies, making them a slightly healthier option.
- They are also free from artificial colors, flavors, and preservatives.
- Biscoff cookies are vegan and do not contain any animal products or by-products.
- They are also suitable for people with nut allergies, as they do not contain any nuts.
- However, Biscoff cookies are high in sugar and should be consumed in moderation as part of a balanced diet.
Substitution
- Different Cookies: If you can't find Biscoff cookies, go for Speculoos cookies; they're like cousins and will still taste great.
- Spread Options: If you don't have Biscoff cookie butter, try Nutella or almond butter instead. They bring their own yummy flavors to the mix.
- Change the Flavor: Instead of vanilla extract, try almond or coconut extract for a different taste.
Variations
- Sweetened Condensed Milk
- Sweetened condensed coconut milk (for a dairy-free option)
- Heavy cream with added sugar
- Homemade sweetened condensed milk
- No-Bake Cheesecake
- Cheesecake-flavored pudding mix
- Cream cheese with added sugar and lemon juice
- Mascarpone cheese
- Lotus Biscoff Biscuits
- Graham crackers
- Digestive biscuits
- Oreo cookies (without the cream filling)
- Ginger snap cookies
- Biscoff Cookie Butter
- Peanut butter
- Nutella
- Homemade cookie butter (made from graham crackers or other cookies)
- Almond butter
- Vanilla Extract
- Vanilla bean paste
- Vanilla flavoring
- Almond extract (use sparingly)
- Maple syrup (for a different flavor twist)
Storage
- Freezer: Pop it in a closed container in the freezer. For a softer treat, wait 6 hours; for a firmer one, go for 8 or more.
- Fridge: The fridge isn't the best for long-term storage, but if you have leftovers, move them to the freezer to keep the ice cream cool.
- Counter: Don't leave the ice cream out too long; it'll get too soft. But a short time on the counter before serving can make it easier to scoop.
Ingredients
Listed below are all the ingredients you will need:
- heavy whipping cream
- sweetened condensed milk
- no-bake cheesecake
- Lotus biscoff biscuits
- biscoff cookie butter
- vanilla extract

Instructions
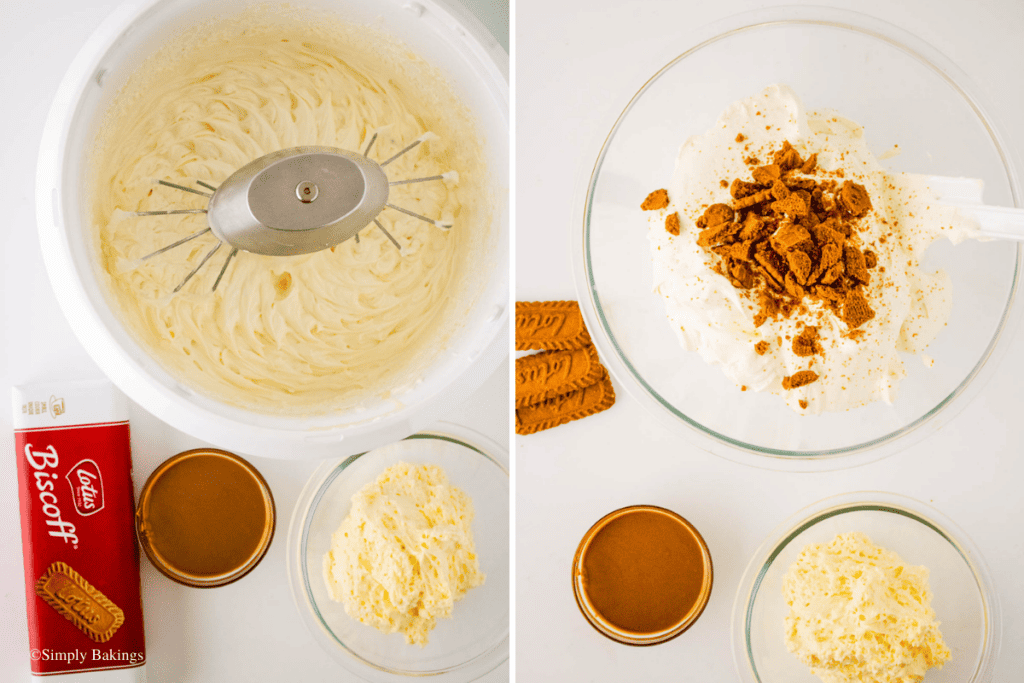
Begin by whipping the heavy cream for 2-3 minutes until it reaches a frothy consistency. Add in the vanilla and sweetened condensed milk, mixing on high until soft peaks form.
Then, stir in crushed Biscoff biscuits with the irresistible cinnamon and caramel notes that make Biscoff a beloved treat:
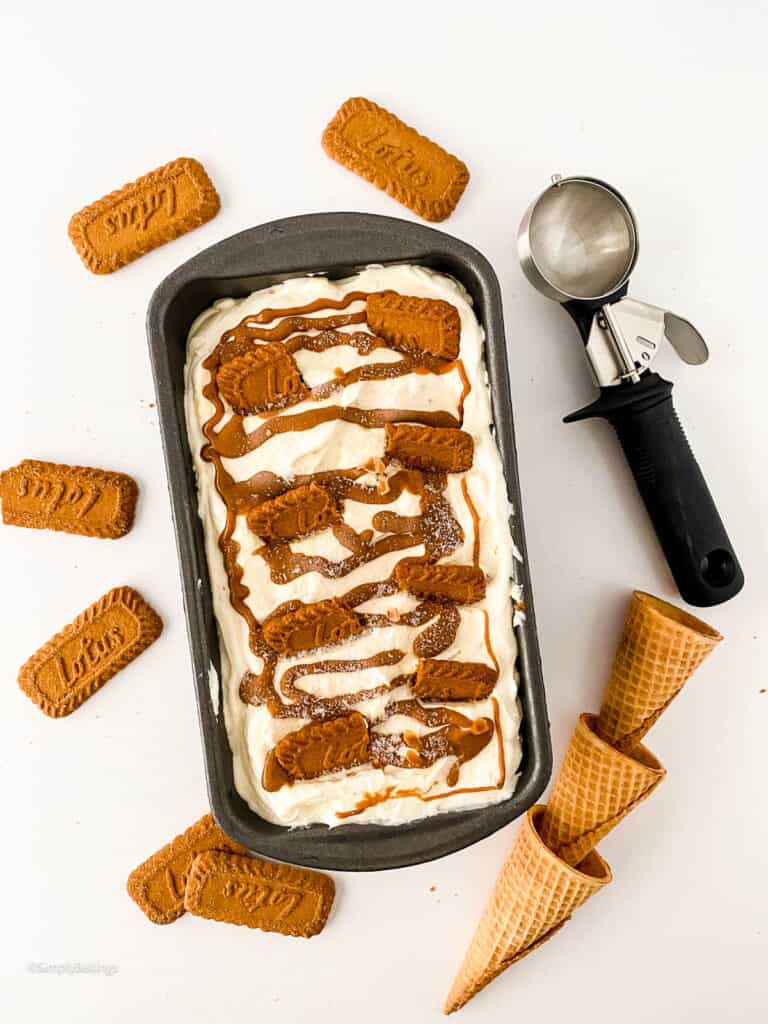
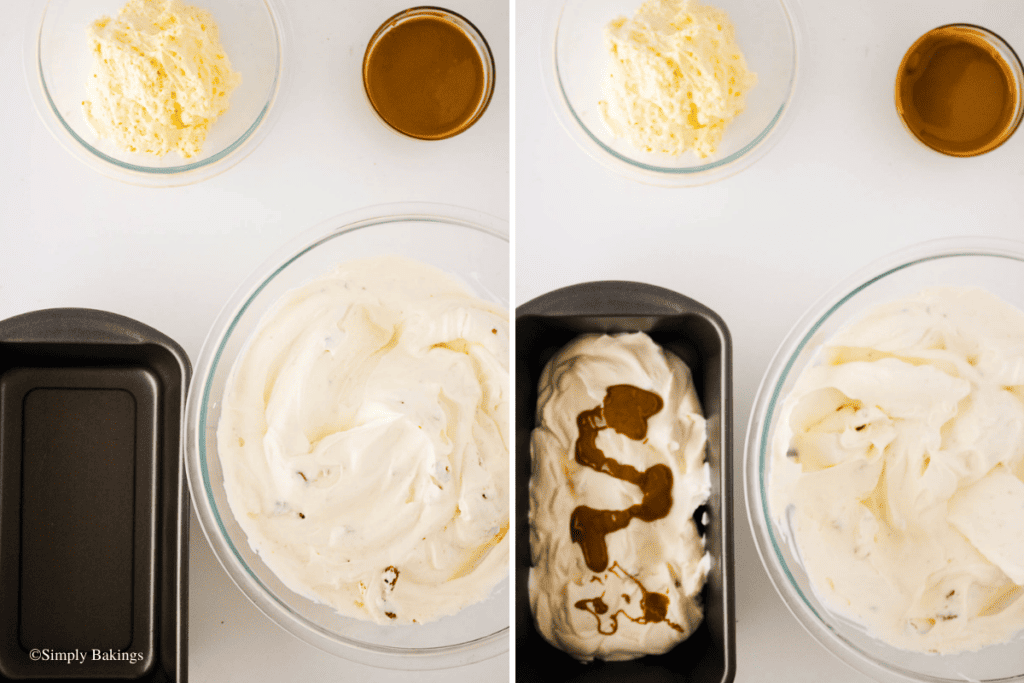
Add ⅓ of the mixture to your loaf pan or cake tin. Then, introduce melted Biscoff cookie butter, creating pockets of gooey goodness using a spatula.
Dollop a few spoonfuls of no-bake cheesecake for added richness. Continue layering with another round of whipped cream mixture, topped with more Biscoff cookie butter and no-bake cheesecake:
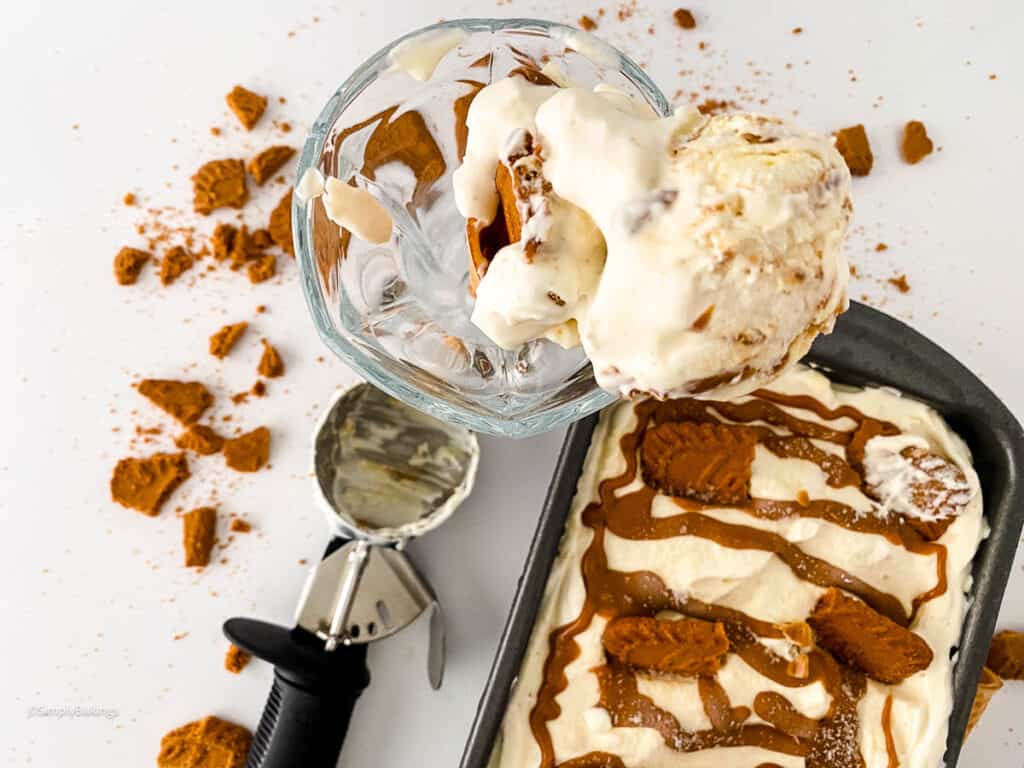
Complete your frozen masterpiece with a final layer of whipped cream, drizzled with Biscoff cookie butter, and adorned with dollops of no-bake cheesecake:

Cover the pan with plastic wrap and let the biscoff ice cream freeze for 6 hours for a soft set or 8+ hours for a more firm texture. Patience is key; the longer you wait, the more rewarding the final result. Enjoy!

Frequently Asked Questions

Biscoff Cheesecake Ice Cream
Equipment
- 1 Loaf pan
- 1 Hand or stand mixer
Ingredients
- 2 cups heavy whipping cream
- 1 14 ounces can sweetened condensed milk
- 1 tablespoon vanilla extract
- 5-7 biscoff cookies
- ¼ cup biscoff cookie butter
- 1½ cups no-bake cheesecake
Instructions
- Whip the heavy cream for about 2–3 minutes until frothy.
- Add in the sweetened condensed milk and vanilla extract, and mix on high until soft peaks form.
- Stir in crushed biscoff cookies.
- Add ⅓ to your pan.
- Add melted biscoff cookie butter and a few dollops of no bake cheesecake.
- Add another layer of whipped cream mixture.
- Top with cookie butter and no bake cheesecake.
- Add a final layer of whipped cream, cookie butter, and no-bake cheesecake.
- Cover with plastic wrap and freeze 6 hours for a soft set or 8+ hours until ready to serve.
Watch The Recipe Video!

Faye says
This tasted sooo good! Love how easy this was to make!
Lainey says
It's truly delicious and simple to make. Thank you for making this ice cream recipe, Faye!