
• Skip to primary navigation
  • Skip to main content
  • Skip to primary sidebar
Simply Bakings logo
  • Home
  • Recipes Index
  • Filipino Recipes
  • About Me
  • Nav Social Menu

menu icon
go to homepage
search icon
Homepage link
  • Recipes
  • Filipino Recipes
  • About Me
    • Facebook
    • Instagram
    • Pinterest
    • YouTube
  • ×

    Moist Mini Banana Muffins

    Moist Mini Banana Muffins

    Sep 8, 2013 · 6 Comments

    A tray of Moist Mini Banana Muffins

    Moist Mini Banana Muffins are a must-have recipe in everyone's home. This is an incredibly soft banana muffin recipe made with bakery-style muffin tops. Topped with a cinnamon sugar streusel, no one can deny!

    I love making recipes with bananas! Filipinos whip up No-Bake Banana Strawberry Pie, Papaya Banana Smoothies, and Banana Chocolate Pound Cake. So good and super easy to make!

    A tray of Moist Mini Banana Muffins
    [feast_advanced_jump_to]

    What are Moist Mini Banana Muffins?

    Moist Mini Banana Muffins are soft, bite-sized treats made with ripe bananas. They’re sweet, fluffy, and perfect for snacking. While not originally Filipino, bananas are a big part of Filipino cooking.

    The star ingredient, ripe bananas, adds natural sweetness and moisture. They’re one of those easy banana muffins that kids and adults both love!

    History of Moist Mini Banana Muffins

    Banana muffins started in the U.S. during the 1930s when baking soda and powder became popular. People wanted to use overripe bananas instead of throwing them away.

    The recipe spread fast because it was simple and tasty. Over time, mini versions became a favorite for quick snacks, especially made in mini muffin tins with big banana flavor.

    Substitutions

    • Butter – Use melted vegetable oil, coconut oil, or vegan butter for a dairy-free version.
    • Egg – Replace with 1 flax egg (1 tbsp flaxseed meal + 3 tbsp water) for a vegan option.
    • Sugar – You may substitute with coconut sugar, stevia, or a mix of erythritol and xylitol.
    • Flour – Swap regular flour with whole wheat flour or gluten-free flour if needed. Both work well with banana muffins!

    Variations

    • Add-ins – Mix in chopped nuts, mini chocolate chips, or shredded coconut to the batter.
    • Fruity Touch – Add blueberries or chopped strawberries for a fruitier twist.
    • Tropical Flavor – Add a dash of cinnamon and nutmeg or stir in 2 tablespoons of crushed pineapple (drained).

    Storage

    • Store cooled muffins in an airtight container at room temperature for up to 3 days.
    • For longer storage, refrigerate for up to a week or freeze for up to 2 months. Make sure to thaw at room temperature before serving.
    • Reheat in a toaster oven or microwave for a fresh-out-of-the-oven experience.

    Ingredients

    Listed below are all the ingredients you will need:

    • All-purpose flour
    • Baking soda
    • Baking powder
    • Salt
    • Ripe bananas
    • White sugar
    • Egg
    • Butter
    • Brown sugar
    • Ground cinnamon

    See recipe card for quantities.

    Instructions

    Preheat the oven to 375°F. Prepare your muffin pans and muffin liners.

    In a large bowl, mix together the flour, baking soda, baking powder, and salt.
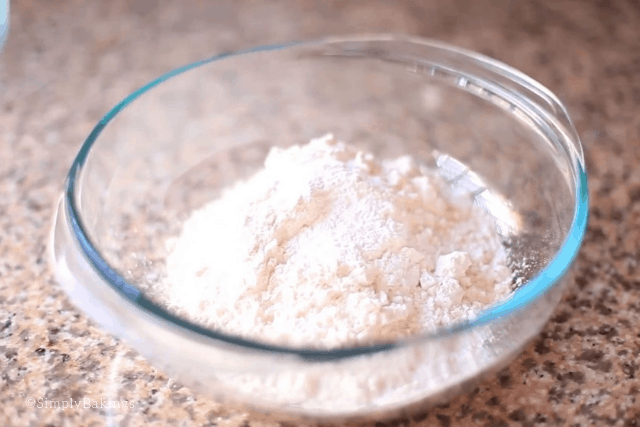
    Mixture of dry ingredients in a bowl

    In another bowl, mash the ripe bananas until they are even in texture and smooth enough.
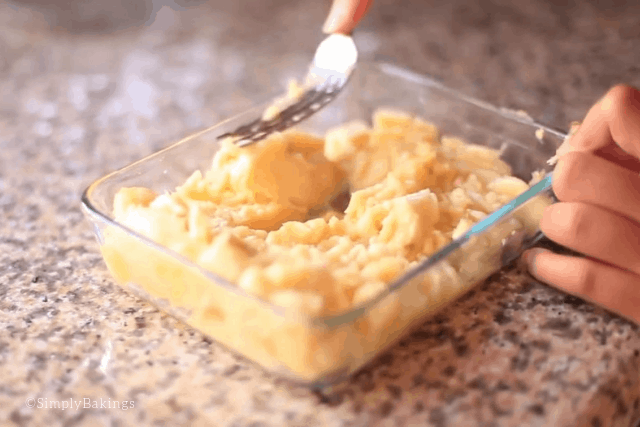
    Fork mashing the ripe bananas in a box

    After mashing the bananas, mix in the sugar and melted butter.
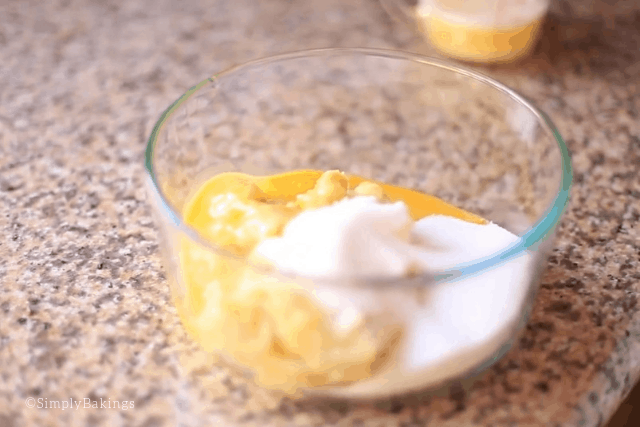
    Bowl with mashed bananas, egg and sugar

    Beat together bananas, sugar, egg, and melted butter.
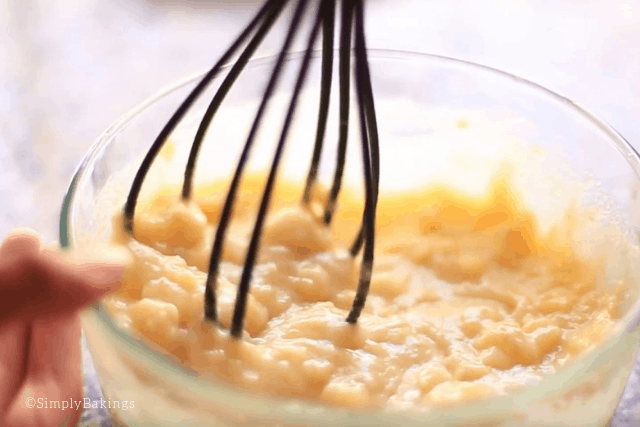
    Bowl of wet ingredients mixed together

    Stir the banana mixture into the flour mixture just until moistened.
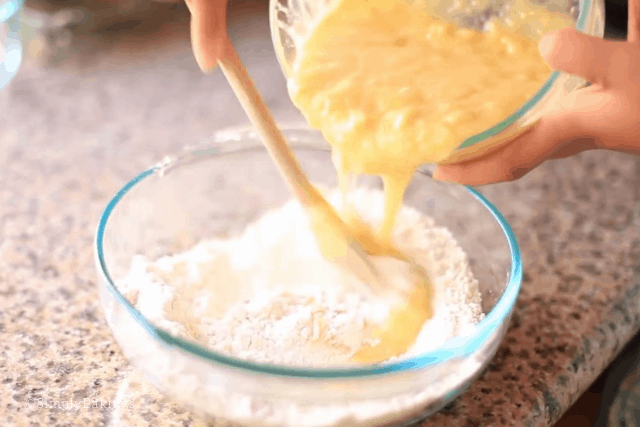
    Wet and dry ingredients in a bowl

    This is how the final batter of the banana muffins looks after mixing it well.
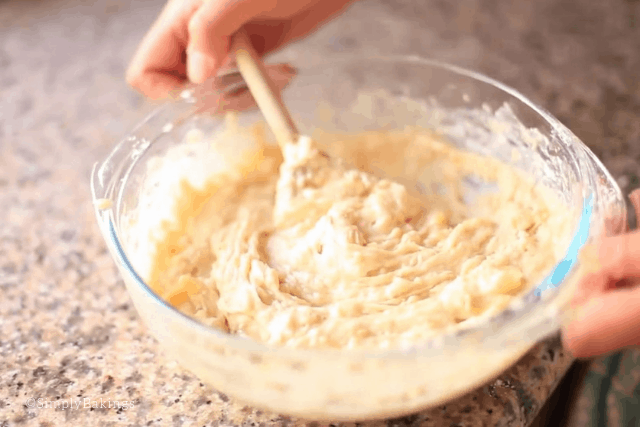
    Mixed batter with wooden spoon in bowl

    Place the muffin batter into the muffin liners. I used a small plastic spoon and a bread knife to push the sticky batter.
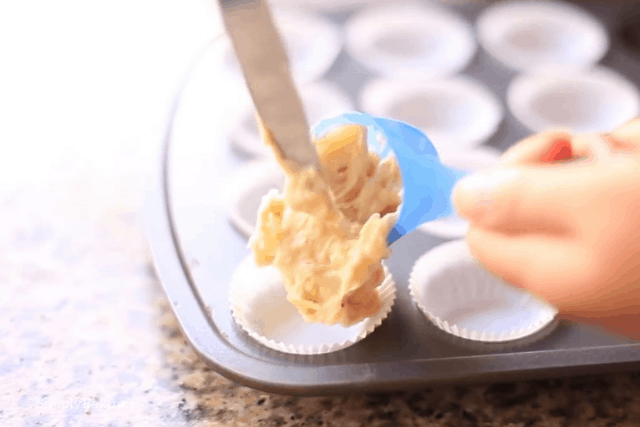
    Muffin batter poured into muffin liners

    In a small bowl, mix together brown sugar, 2 tablespoons flour, and cinnamon. Cut in 1 tablespoon butter until mixture resembles coarse cornmeal.
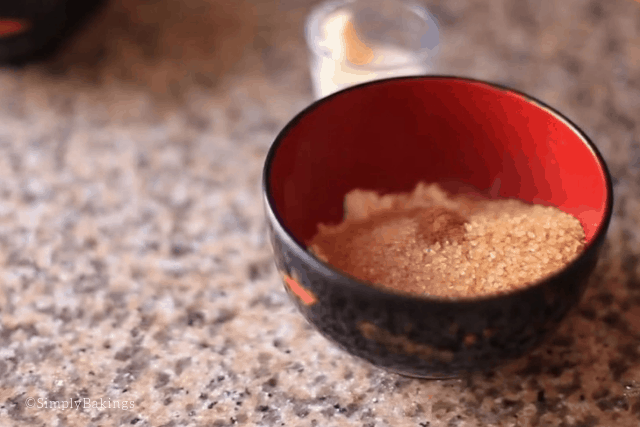
    Black bowl with sugar, cinnamon and oats

    Sprinkle topping over muffins.

    Topping sprinkled over the muffins

    Bake in preheated oven for 18 to 20 minutes, until a toothpick inserted into the center of a muffin comes out clean.

    Tray of Moist Mini Banana Muffins in the oven

    Tadaaaaa! I promise your whole house would smell so delicious!

    Moist Mini Banana Muffins taken from oven

    Hint: Make sure your bananas are super ripe. Those with brown spots are best! They’ll give your muffins the natural sweetness and moisture they need.

    ⭐ Top Tip

    Don’t overmix your batter! Stir just until the flour disappears. Overmixing can make muffins dense and chewy instead of light and fluffy. And for the perfect streusel crunch, chill the topping for a few minutes before sprinkling.

    FAQ

    What is the secret to making moist muffins?

    Use ripe bananas, don’t overmix the batter, and don’t overbake. Butter and sugar also help keep them moist.

    What is the most important rule to follow when baking muffins?

    Don’t overmix the batter. It makes muffins tough instead of soft and fluffy.

    Do mini muffins need to be refrigerated?

    Not right away. You can keep them at room temperature for 2–3 days. If you want them to last longer, store them in the fridge.

    More Banana Desserts

    • Banana Bread Cookies
    • No Bake Banana Pie
    • Banana Oatmeal Pancakes
    • Banana Cake
    4.20 from 5 votes
    Print Pin Recipe

    Moist Mini Banana Muffins

    These Moist Mini Banana Muffins are a delightful way to use up ripe bananas. Bake a batch today and enjoy the banana goodness in every bite!
    Prep Time10 minutes mins
    Cook Time20 minutes mins
    Total Time30 minutes mins
    Course: Breakfast, Snack
    Cuisine: American
    Servings: 24 mini muffins
    Calories: 108kcal
    Author: Lainey
    Prevent your screen from going dark

    Ingredients

    Muffin Batter:

    • 1 ½ cups all-purpose flour
    • 1 teaspoon baking soda
    • 1 teaspoon baking powder
    • ½ teaspoon salt
    • 3 ripe bananas mashed
    • ¾ cup white sugar
    • 1 egg lightly beaten
    • ⅓ cup melted butter

    Streusel Topping:

    • ⅓ cup packed brown sugar
    • 2 tablespoons all-purpose flour
    • ⅛ teaspoon ground cinnamon
    • 1 tablespoon butter

    Instructions

    • Preheat oven to 375°F (190°C) and line a mini muffin pan with paper liners or lightly grease.
    • In a large bowl, whisk together flour, baking soda, baking powder, and salt.
    • In another bowl, mash the bananas with a fork. Add in the sugar, egg, and melted butter.
    • Stir the banana mixture into the dry ingredients just until moistened. Do not overmix.
    • Spoon the batter evenly into the prepared mini muffin pan.
    • In a small bowl, mix brown sugar, flour, and cinnamon. Cut in 1 tablespoon butter until crumbly. Sprinkle on top of each muffin.
    • Bake for 18–20 minutes or until a toothpick inserted into the center comes out clean.
    • Cool in the pan for 5 minutes, then transfer to a wire rack to cool completely.
    Leave a Comment
    Serving: 1gCalories: 108kcalCarbohydrates: 18gProtein: 1gFat: 3gSaturated Fat: 2gPolyunsaturated Fat: 0.2gMonounsaturated Fat: 1gTrans Fat: 0.1gCholesterol: 15mgSodium: 426mgPotassium: 69mgFiber: 1gSugar: 5gVitamin A: 113IUVitamin C: 1mgCalcium: 16mgIron: 1mg

    Watch The Recipe Video!

    QR Code
    Did you make this recipe?Share it on instagram or tag @simplybakings or #simplybakings!

    Storytelling Time!

    Bananas are a staple at my house. I always have frozen bananas on hand and fresh bananas ready to eat.  However, a lot of times the bananas end up becoming overripe, and they get that smell of overripe bananas, and that's my signal to bake something with them.

    Anyways, this is my favorite banana muffin recipe, which everyone always asks for whenever I bake them!

    You can eat them fresh from the oven (but cool them a bit 🙂 ) or let them cool off while making yourself a cup of coffee. It's the perfect drink to have with these delicious banana muffins!

    Breakfast & Brunch, Desserts

    How to Make Pandesal

    Sep 8, 2013 · 31 Comments

    pandesal dough in glass baking pan

    Know how to make Pandesal in beginner steps! These homemade Filipino-style sweet rolls are best enjoyed in the morning, filled with any spread or filling! It's delicious, soft, and airy and will become your favorite bread.

    Love Filipino bread? Try my Ube Pandesal, Red Velvet Pandesal, Spanish Bread, or my Malunggay Whole Bread!

    pandesal in a glass tray
    [feast_advanced_jump_to]

    What is Pandesal?

    Pandesal, or Pan de Sal, is the most common bread roll in the Philippines. It actually traces its roots back to the Spaniards, who introduced baking traditions during the colonial period. Originally inspired by Pan de Suelo, this Filipino adaptation uses commercial yeast and all-purpose or bread flour, making it softer and lighter.

    You’ll find it everywhere—from home kitchens to local panaderias, and even sold by street vendors early in the morning. Many Filipinos enjoy their pandesal with cheese, eggs, or just plain coffee. It’s simple, affordable, and loved across all generations!

    Substitutions

    • Active dry yeast – Use instant yeast (no need to proof)
    • Sugar – Use honey, coconut sugar, or brown sugar
    • Vegetable oil – Can be replaced with butter, dairy-free butter, or coconut oil
    • All-purpose flour – Use bread flour for chewier rolls, or whole wheat flour for more fiber and nutrients

    Variations

    • Cheese Pandesal – Add a cube of cheese inside each portion
    • Egg-Stuffed Pandesal – Place a boiled egg in the center for a protein boost
    • Healthier version – Use whole wheat flour and reduce sugar
    • Stuffed with coconut jam – Add a local touch with sweet coconut filling
    • Herbed pandesal – Add garlic, malunggay, or rosemary to the dough for a savory twist
    rows of pandesal dough

    Storage

    • Countertop – Store in a sealed container for 2–3 days
    • Refrigerator – Keeps well for up to 1 week
    • Freezer – Freeze baked rolls for 1 month; reheat before serving

    Ingredients

    • warm water
    • active dry yeast
    • sugar
    • vegetable oil
    • salt
    • all-purpose flour

    Instructions

    We will be using our hands a lot in kneading the pandesal dough so we have to wash it carefully and dry it completely:

    washing hands before making pandesal

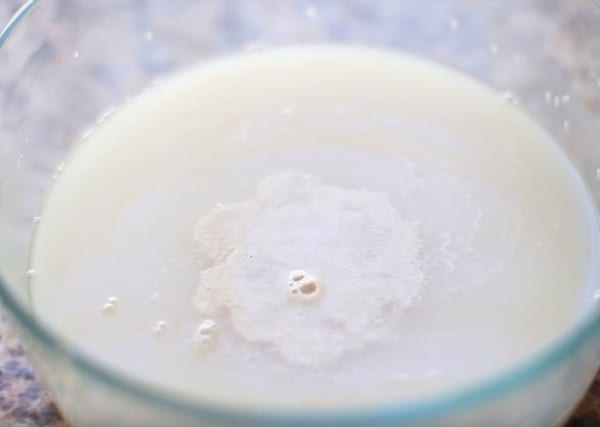
    Add the active dry yeast and the 1 teaspoon of sugar to the 2 cups of warm water mix and set aside till frothy (about 5 minutes):

    activating dry yeast in a bowl for pandesal recipe

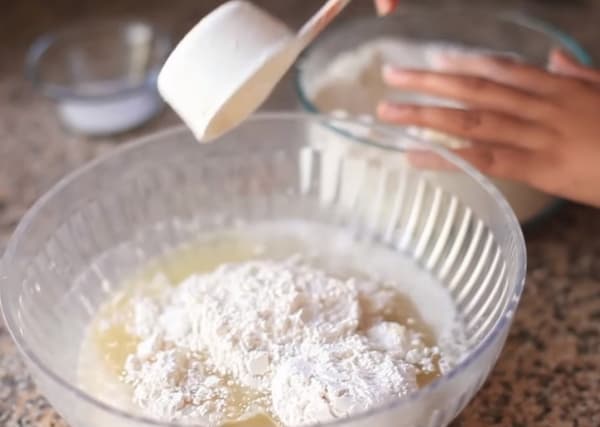
    In a separate mixing bowl, add sugar, oil, salt, and 1 cup of flour then mix. Then add the active dry yeast mix to the mixture:

    putting flour to yeast mixture for pandesal recipe

    Important Reminder:

    Gradually add the flour ½ a cup at a time. This will help you knead it properly since it will clump up if you add all of the flour at once.

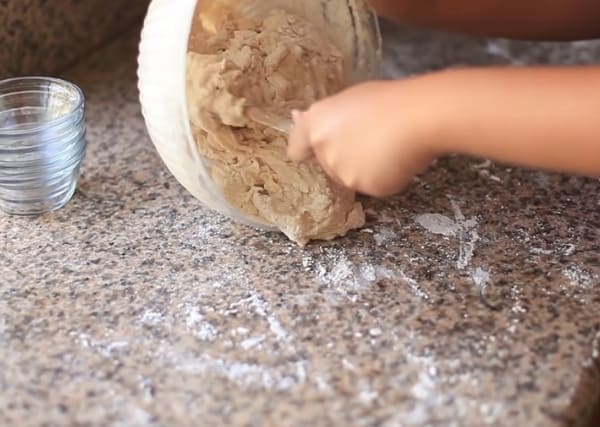
    Place the dough onto your clean kitchen counter so you can knead it carefully:

    putting pandesal dough in a surface

    To prevent the dough from sticking to your hands while kneading, sprinkle a bit of flour on the dough or you can simply rub flour in your hands:

    kneading pandesal dough with two hands

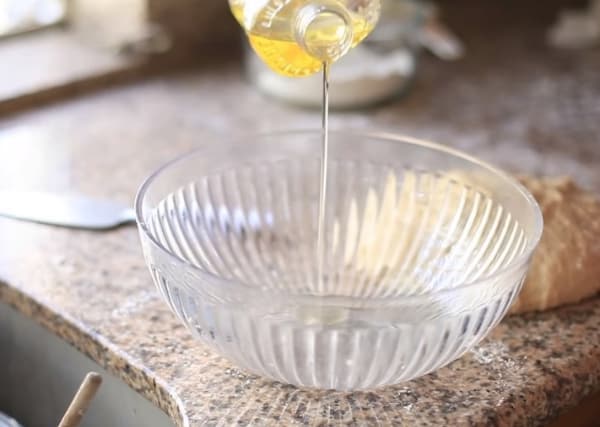
    After kneading, place it in a deep bowl for the dough to double in size. It is important to oil the bowl so you can take out the dough easily after it has risen:

    putting oil in a bowl for pandesal dough

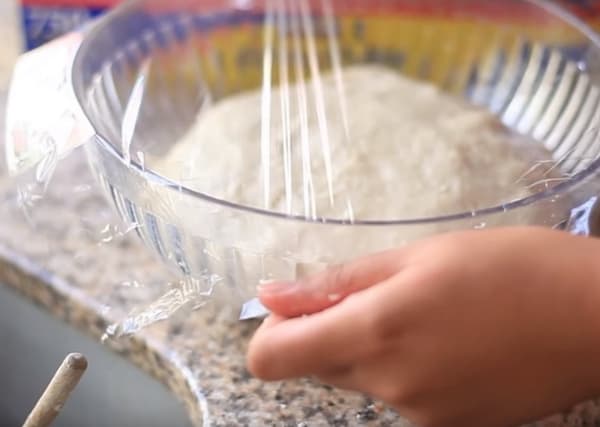
    Once all the flour is mixed, set aside in an oiled bowl in a warm place until the dough is doubled (about 1 hour). Cover it with saran wrap or a damp towel:

    covering pandesal dough with saran wrap

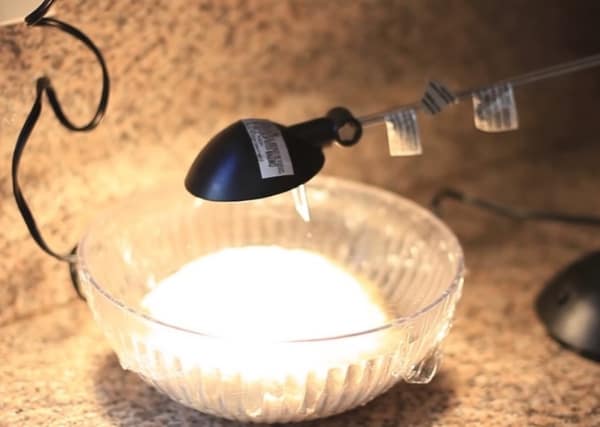
    I placed my dough under a lamp so it makes the room temperature higher, as it helps the dough rise fully:

    pandesal dough in bowl under a lamp

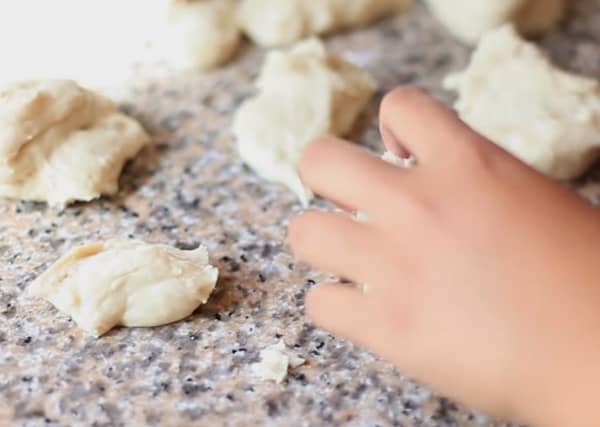
    After about an hour or so, take out the dough from the bowl and put it on a floured surface. Now it's time to shape the dough into your desired sizes:

    shaping pandesal dough into desired pieces
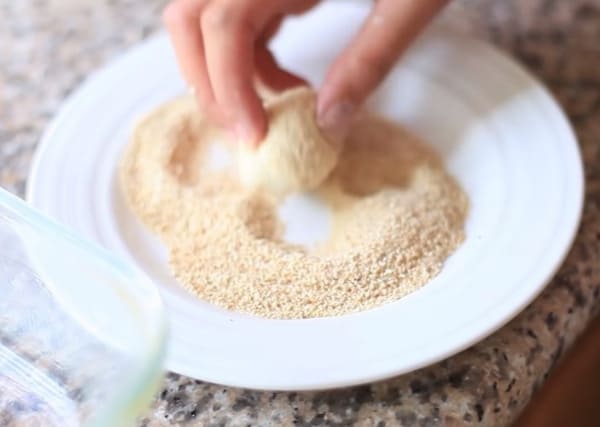
    coating pandesal with bread crumbs

    This part is optional. Most pandesal lovers want bread crumbs but personally, I do not like to coat them with bread crumbs as I make a huge mess when I eat them. (Imagine breadcrumbs all over the floor or tabletop, lol!)

    covering pandesal dough with saran wrap

    After shaping the dough, place it in a baking tray of your choice, cover it and wait for it to rise again for only 30 minutes:

    Place in oven at 375 degrees F for 20 minutes:

    baking pandesal in an oven

    After the baking time, take it out from the oven and let them cool in a cookie rack:

    cooling pandesal in a wire cookie rack

    This Filipino bread is best eaten when freshly baked. If you have a sweet tooth like me, pair it with peanut butter, condensed milk, or even ice cream!

    Top Tips

    • If you don't like the bottom crust of your pandesal burnt, use glass baking containers as it just makes the bottom crust lightly toasted. If you do not have glass bakewares on hand, you can avoid burning the bottom crust of your pandesal by lowering the oven temperature to 350 F instead of 375 F
    • Always have extra all-purpose flour handy. It is very useful in the kneading part where the dough is very sticky and makes the kneading work a bit hard. Just coat your hands with flour or sprinkle a bit of flour on top of the dough as needed
    • Check expiration dates of ingredients especially for the active dry yeast - this is the leavening agent of your pandesal so if you have an expired one, it defeats its purpose of making the dough rise
    • Punch your dough! Seriously, this is a very important step after having your dough rise for about an hour. "Punching" it down removes the air bubbles inside and doing so produces a fine-textured pandesal
    • Do not forget to cover your dough during the rising time - it helps speed up the rising of the dough and it prevents the dough from drying out
    • What makes a longer rise time of the dough? It could be two things - your room is a little bit too cold or the yeast that you used for the dough is dead
    • For a healthier alternative when greasing the large bowl for dough, use vegan butter or margarine.

    FAQ

    What does a pandesal taste like?

    Pandesal gets its fluffiness from proper proofing and the use of commercial yeast, which helps the dough rise and creates a light, airy texture. Kneading well to develop gluten also makes it soft and fluffy inside.

    How is pandesal different from bread?

    Pandesal is a type of bread, but what makes it different is its slightly sweet flavor, soft texture, and the light coating of breadcrumbs. Unlike typical Western rolls, it’s often eaten plain or with savory fillings like cheese, egg, or coconut jam.

    What makes pandesal fluffy?

    Pandesal gets its fluffiness from proper proofing and the use of yeast, which helps the dough rise and creates a light, airy texture. Kneading well to develop gluten also makes it soft and fluffy inside.


    Looking for more Filipino Dishes? Check out some of my favorites:

    • Buko Pandan
    • Shakoy
    • Turon
    • Cassava Cake

    Happy Baking!

    freshly baked filipino pandesal
    5 from 3 votes
    Print Pin Recipe

    How to Make Pandesal

    Bake soft and fluffy Filipino Pandesal bread rolls, perfect for breakfast or snacks! Learn how to make pandesal that is sweet, easy to make, and totally comforting!
    Prep Time10 minutes mins
    Cook Time20 minutes mins
    Rise Time1 hour hr 30 minutes mins
    Total Time2 hours hrs
    Course: Bread
    Cuisine: Filipino
    Servings: 12 - 16 rolls
    Calories: 348kcal
    Author: Lainey
    Prevent your screen from going dark

    Ingredients

    • 2 cups warm water 110 degrees F
    • 2 teaspoons active dry yeast
    • 1 teaspoon sugar
    • 1 cup sugar
    • ⅓ cup vegetable oil
    • 2 teaspoons salt
    • 6 cups all-purpose flour

    Instructions

    • Add the active dry yeast and the 1 teaspoon of sugar to the 2 cups of warm water mix and set aside till frothy (about 5 minutes)
    • In a separate bowl, add sugar, oil, salt, and 1 cup of flour then mix. Then add the active dry yeast mix to the mix.
    • Gradually add the flour ½ a cup at a time.
    • Once all the flour is mixed in set aside in a oiled bowl in a warm place until dough is doubled (about 1 hour).
    • Shape dough to desired sizes and let it sit for 30 minutes.
    • Place in oven at 375 degrees F for 20 minutes.
    Leave a Comment

    Notes

    Importance of Kneading Bread:
    Kneading is important in baking bread as it develops gluten. When flour is mixed with liquid, gluten forms and binds the dough, providing a cohesive texture that helps the loaf hold its shape during baking.
    Serving: 1rollCalories: 348kcalCarbohydrates: 65gProtein: 7gFat: 7gSaturated Fat: 1gPolyunsaturated Fat: 4gMonounsaturated Fat: 1gTrans Fat: 0.04gSodium: 391mgPotassium: 72mgFiber: 2gSugar: 17gVitamin C: 0.002mgCalcium: 11mgIron: 3mg

    Watch The Recipe Video!

    QR Code
    Did you make this recipe?Share it on instagram or tag @simplybakings or #simplybakings!

    I. LOVE. PANDESAL.  Many of you may ask what is pandesal? Pandesal is a Filipino Bread that is fluffy and sweet.  It can be eaten at any time of the time day with any kind of spread.

    I grew up eating this every morning for breakfast before school.  My mom would wake up early and stop by the local bread shop and pick up some pandesal and my siblings and I would eat it with Nutella.  When I got older, I got so obsessed with eating pandesal that I wanted to learn how to make it so I can eat it any time of the day.  I have many different versions of pandesal, but this one is the easiest one I have!

    Bread, Vegan Filipino Recipes

    Halo Halo Recipe

    Sep 8, 2013 · 11 Comments

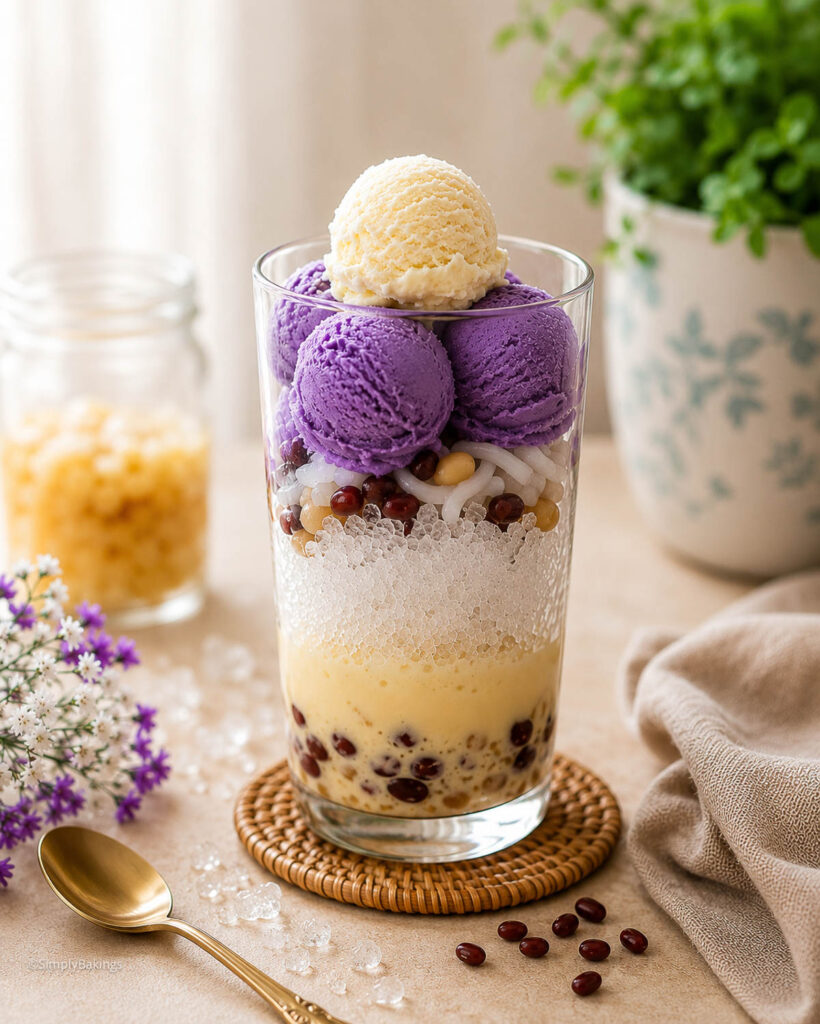
    Halo Halo is a classic Filipino shaved ice dessert layered with sweet fruits, creamy milk, and ice cream for the ultimate refreshing treat. This easy homemade version is colorful, creamy, and perfect for cooling down on a warm day.

    Similar creamy mix-ins desserts like Dirt Pudding, Cookie Butter ice cream and Mango Sago deserve a try for your sweet tastebuds too!

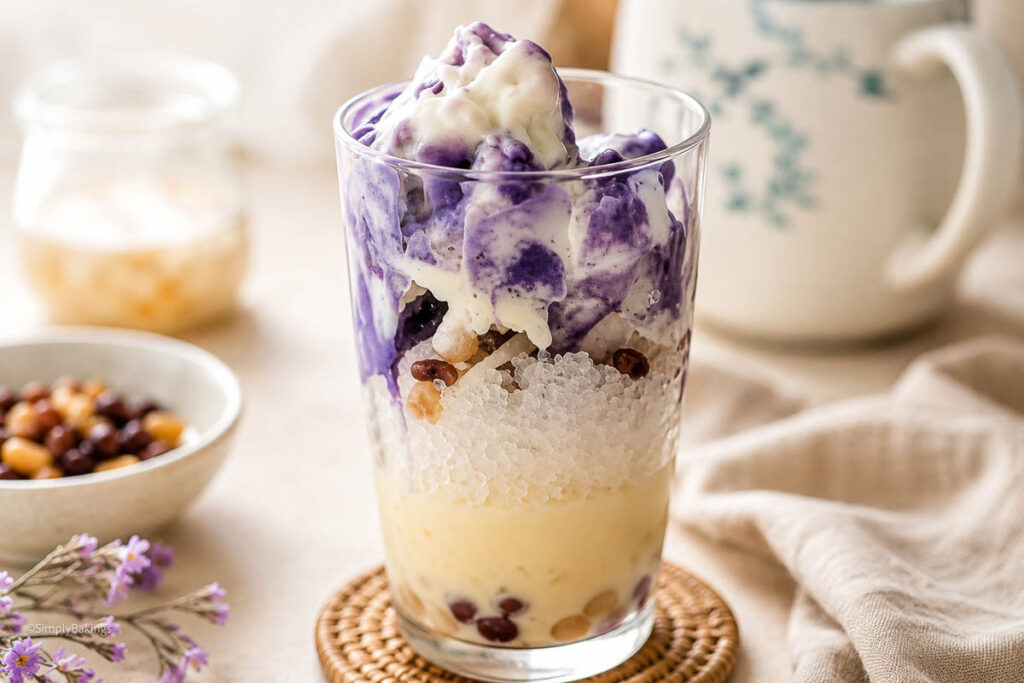
    Filipino halo halo in a cup
    [feast_advanced_jump_to]

    This shaved ice dessert is usually served as a refreshing dessert or snack during hot weather, especially in the summer months in the Philippines, typically from March to May.

    The combination of shaved ice, milk, and sweet ingredients makes it a popular way to cool down in the tropical heat.

    What is Halo Halo recipe?

    Halo Halo is a popular Filipino shaved ice dessert made with layers of sweet preserved fruits, beans, jellies, milk, and topped with ice cream. The name halo halo means “mix mix” in Tagalog, because everything is stirred together before eating.

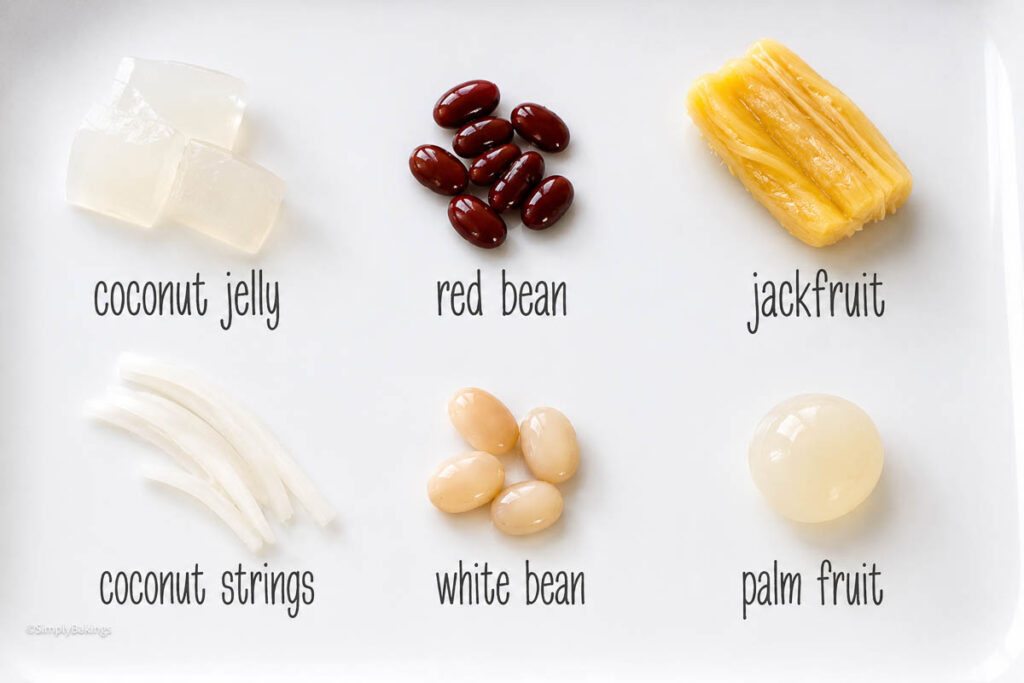
    This refreshing dessert is believed to have been inspired by Japanese kakigori and later adapted in the Philippines with local ingredients like nata de coco, sweetened beans, jackfruit, saba bananas, ube, palm fruit, and leche flan. Today, Halo Halo is one of the most iconic Filipino desserts, loved for its creamy texture, colorful layers, and mix of sweet flavors in every bite.

    halo halo ingredients labeled on.a white plate

    Substitutions

    • Shaved ice - Replace with crushed ice or pre-packaged snow cones.
    • Evaporated milk - Substitute with whole milk, coconut milk (dairy-free), almond milk, or oat milk.
    • Condensed milk - Use honey, agave syrup, or sweetened coconut cream.
    • Ube ice cream - Swap with vanilla, coconut or taro ice cream, or any dairy-free option.

    Storage

    • Do not store assembled Halo-Halo as the ice will melt, and the dessert will lose its texture. Always assemble fresh for serving.

    Ingredients

    Listed below are all the ingredients you will need (omitting quantities):

    • Halo-halo Sweet Fruit Mix
    • shaved ice
    • evaporated milk
    • condensed milk 
    • Ube ice cream

    See recipe card for quantities.

    Instructions

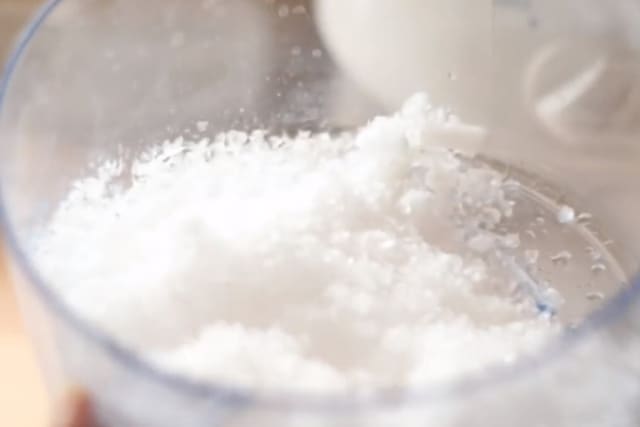
    Crush the ice depending on how many servings you will make.

    shaved ice prepared in a bowl

    Mix all the ingredients. Take note, Halo Halo looks prettier when served in tall clear glasses!

    mixed ingredients in a clear bowl

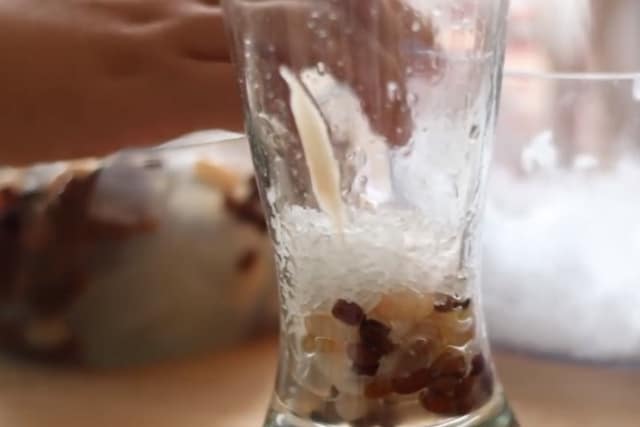
    Layer the halo halo starting with the halo halo mixture, followed by the shaved ice, and repeat till the glass is ⅓ full.

    halo halo ingredients and shaved ice in a tall glass

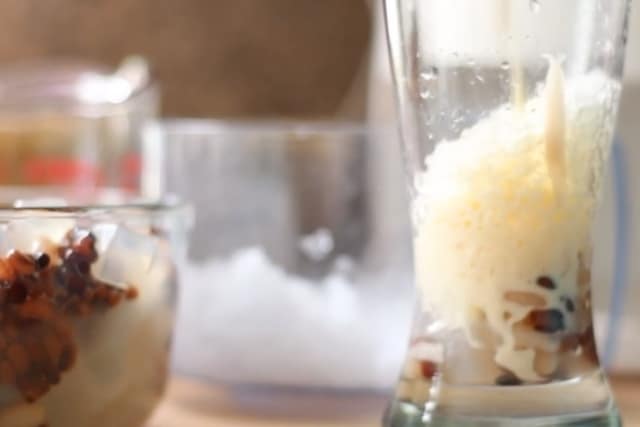
    Add evaporated milk. The quantity of evaporated milk also depends also on how liquidy you want your halo halo to be.

    shaved ice and halo halo ingredients with milk

    Finish with your flavor of ice cream.

    scooped ube vanilla ice cream for topping

    Serve and mix well before eating. Enjoy!

    I love using Ube ice cream and this flavor is the most popular flavor used when serving halo halo since the purple color is so vibrant and it makes the halo halo look more festive.

    mixed halo halo in a glass

    Now you can enjoy your halo halo but first, mix it well. Hence the name Halo Halo which means "mix-mix" in Tagalog!

    ⭐ Top Tip

    To achieve the perfect texture for shaved ice, use a hand-crank ice shaver or a blender with a pulse setting.

    FAQ

    What is the purple stuff in halo-halo?

    Ube halaya: Some versions of halo-halo will include ube, or purple yam, whether that's in ice cream form or by using ube halaya (purple yam jam). Ube is a popular ingredient in Filipino desserts.

    Why is halo-halo famous?

    The beloved summer treat Halo-halo is like an unofficial symbol of summer in the Philippines. The longing for something cold and refreshing under the sweltering heat, the sweet and surprising flavor bombs that remind us of happy times is what this colorful concoction brings to the table.

    What is the main ingredient of halo-halo brainly?

    It's the sweetened fruits! The major ingredient in the popular Filipino dessert known as halo-halo, which is made up of a variety of components, is sweetened fruit.

    More Recipes

    • Cassava Cake
    • Shakoy
    • Buko Pandan
    • Turon
    Halo Halo in glass cup
    5 from 3 votes
    Print Pin Recipe

    Halo Halo Recipe

    Halo Halo is a classic Filipino shaved ice dessert made with sweet fruits, creamy milk, and topped with ice cream for the perfect refreshing treat. It’s cold, creamy, colorful, and easy to customize with your favorite toppings.
    Prep Time10 minutes mins
    Total Time10 minutes mins
    Course: Dessert
    Cuisine: Filipino
    Servings: 1 serving
    Calories: 286kcal
    Prevent your screen from going dark

    Ingredients

    • 1 (12 oz) Halo Halo Sweet Fruit Mix
    • 2 cups shaved ice
    • ¼ - ½ cup evaporated milk
    • 1 tablespoon sweetened condensed milk optional

    For the Topping:

    • ube ice cream
    • vanilla ice cream

    Instructions

    Layer the halo halo

    • Add the halo halo mixed fruit to the bottom of a tall serving glass.
    • Fill the glass with shaved ice until about ⅔ to ¾ full.

    Add the milk and toppings

    • Pour the evaporated milk evenly over the shaved ice.
    • Drizzle sweetened condensed milk on top, if using.
    • Top with 1 scoop of ube ice cream.

    Serve

    • Serve immediately while cold and enjoy. Mix everything together before eating for the best flavor.
    Leave a Comment

    Notes

    • If you can’t find a prepared halo halo mix jar, you can easily make your own using simple ingredients from the grocery store. Try using sweetened red beans or sweetened white beans, coconut jelly, sliced mango, chopped burro bananas, and a little crushed rice cereal or crispy rice for texture. For the best halo halo flavor, I recommend using at least 2 fruits along with either red beans or white beans.
     
    • You can also top your halo halo with leche flan, jackfruit, pinipig, coconut strips, or extra sweetened beans for even more texture and flavor.
    Serving: 1gCalories: 286kcalCarbohydrates: 33gProtein: 8gFat: 14gSaturated Fat: 8gPolyunsaturated Fat: 1gMonounsaturated Fat: 4gCholesterol: 54mgSodium: 169mgPotassium: 396mgFiber: 0.5gSugar: 31gVitamin A: 482IUVitamin C: 2mgCalcium: 320mgIron: 0.2mg

    Watch The Recipe Video!

    QR Code
    Did you make this recipe?Share it on instagram or tag @simplybakings or #simplybakings!

    Storytelling Time!

    When I first tried Halo Halo, I handed the cup back to my mom and told her I didn't want it.  The second time I tried it, I took three bites and handed it back to my parents.  I tried countless times to enjoy Halo Halo, but it wasn't until one summer that my boyfriend handed me Halo Halo and told me to eat it.

    From then on I loved Halo Halo and I probably spent more than $100 on Halo Halo that summer!  Thanks, boyfriend for handing me that cup of Halo Halo and telling me to eat it!

    Desserts, Drinks, Filipino Desserts, Ice Cream, Vegetarian Filipino Recipes

    Best Ever Filipino Mango Shake

    Sep 4, 2013 · 6 Comments

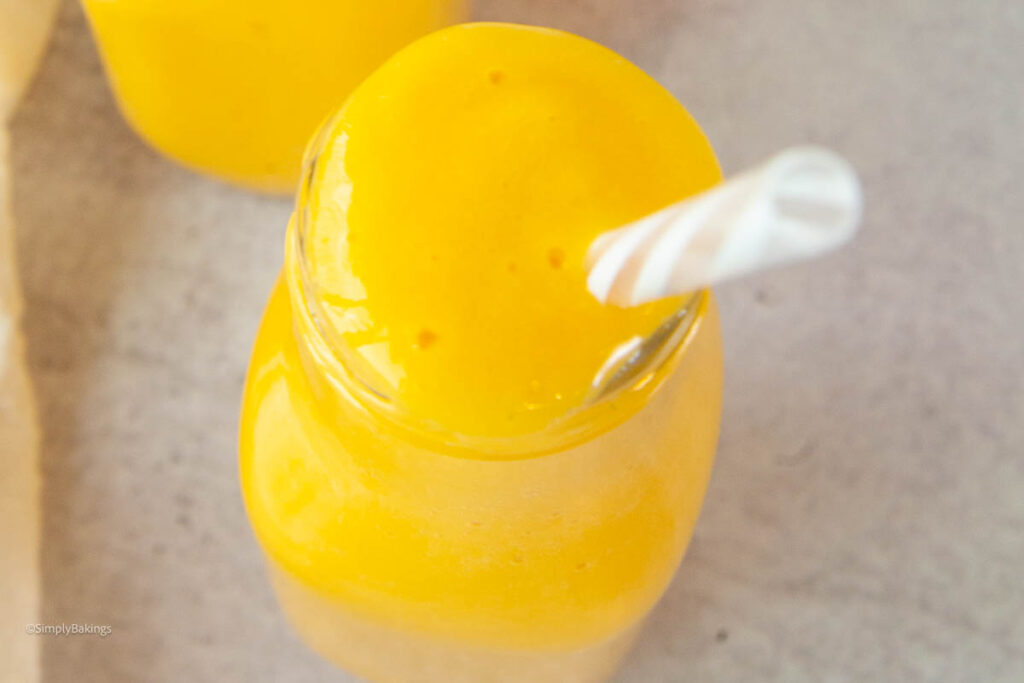
    2 Mango shakes in a glass jar with straws

    Whip up this refreshing and creamy Best Creamy Filipino Mango Shake recipe for a quick energy boost or for a refreshing dessert! Kids love it and it's made using only 5 ingredients with fresh mangos as the featured ingredient!

    Looking for more Filipino drinks? Try my amazing Green Mango Shake or my refreshing Banana Mango Smoothie.

    two Refreshing mango shake in glass bottles with straws
    [feast_advanced_jump_to]

    What type of mango should I use?

    • *Carabao Mango: Carabao mango, also known as Manila mango or Philippine mango, is a variety of mango that is native to the Philippines. It is considered one of the best-tasting mango varieties in the world and is highly prized for its sweet, aromatic flavor and smooth, buttery texture.
    • Haden: Haden mangoes are one of the most popular varieties in the United States. They have a sweet and rich flavor with a creamy texture. Haden mangoes are typically medium to large in size, with green and yellow skin when ripe.
    • Tommy Atkins: Tommy Atkins mangoes are known for their vibrant red and green skin. They are widely available year-round and have a sweet and tangy flavor. Tommy Atkins mangoes are firm and hold up well in cooking and salads.
    • Ataulfo (or Honey) Mango: Ataulfo mangoes are smaller in size and have a golden-yellow skin when ripe. They are sweet, creamy, and less fibrous than other varieties, making them perfect for eating fresh or blending into smoothies and desserts.
    • Kent: Kent mangoes are large and oval-shaped with a green and yellow skin when ripe. They have a sweet and mild flavor with minimal fiber, making them ideal for slicing and eating fresh or adding to fruit salads.
    • *Alphonso: Alphonso mangoes are often considered the "king of mangoes" for their rich, sweet, and aromatic flavor. They have a smooth, buttery texture and are highly sought after for making desserts, juices, and mango lassis.
    • Keitt: Keitt mangoes are known for their large size and green skin, even when ripe. They have a sweet and tangy flavor with a firm texture, making them suitable for slicing, grilling, or adding to salsas and chutneys.
    • Francis: Francis mangoes are prized for their sweet and fruity flavor with hints of citrus. They have a soft and juicy texture when ripe, making them perfect for eating fresh or using in smoothies and desserts.

    *I prefer using these type of mangos. 🤩

    Creamy Mango shake in a glass jar with a straw

    Mango Health Benefits

    • Rich in Nutrients: Mangos are packed with essential vitamins and minerals including vitamin C, vitamin A, vitamin E, potassium, and folate. These nutrients are vital for maintaining overall health and well-being.
    • Antioxidant Properties: Mangos contain antioxidants such as beta-carotene, zeaxanthin, and quercetin, which help to neutralize free radicals in the body. Antioxidants play a crucial role in reducing the risk of chronic diseases such as heart disease, cancer, and diabetes.
    • Boost Immune System: The high vitamin C content in mangos helps to boost the immune system and protect the body against infections and illnesses.

    Top Tip

    • The best tip for having a delicious shake is choosing the right mangoes! When choosing, always look for the natural sweet smell of mangoes. More often than not, sweet-smelling mangoes are of course, sweeter and tastier.

    Variations

    • If the mango is very sweet feel free to omit the sugar or add less.
    • If you want a creamier smoothie, add bananas, greek yogurt, or even mango ice cream to make it indulgent!

    Substitutions

    • Substitutions: To make this vegan-friendly, use plant-based milk like coconut milk or soy milk, any kind of nut milk like almond milk or cashew milk If you don't have evaporated milk available, use whatever you have on hand like whole milk or even heavy cream to make it more indulgent.
    • Use whatever sweeteners you have on hand. For this recipe I used agave, but feel free to use maple syrup, coconut sugar, even vanilla ice cream

    Ingredients

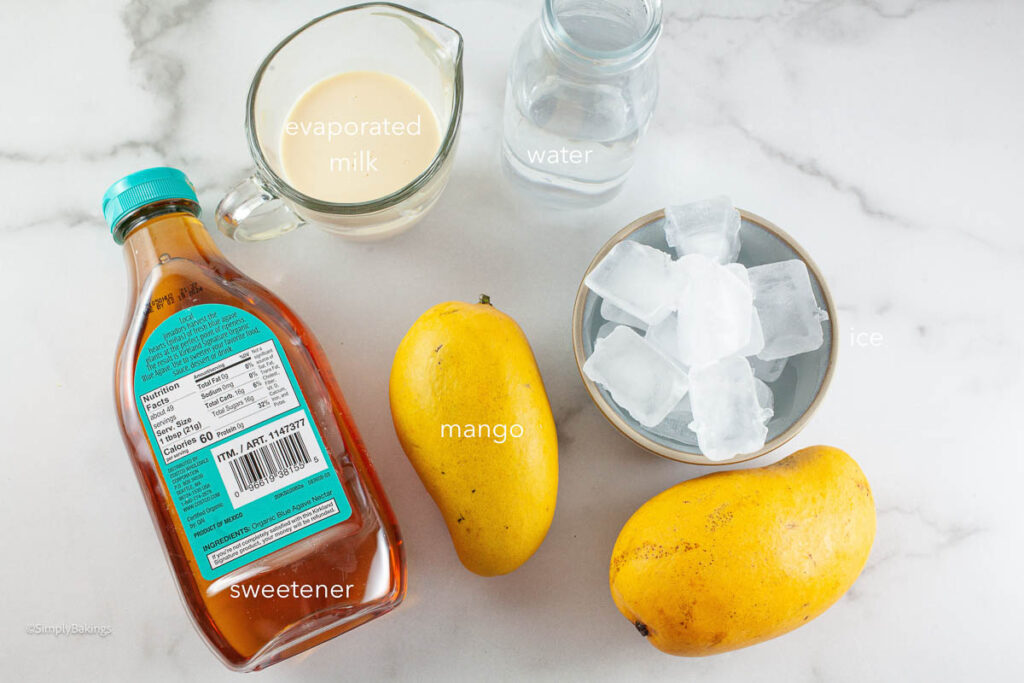
    Listed below are all the ingredients you will need:

    • mangoes (I used Ataulfo mango)
    • ice-cubes
    • water
    • evaporated milk
    • agave or brown sugar
    mango shake ingredients on a marble table

    Instructions

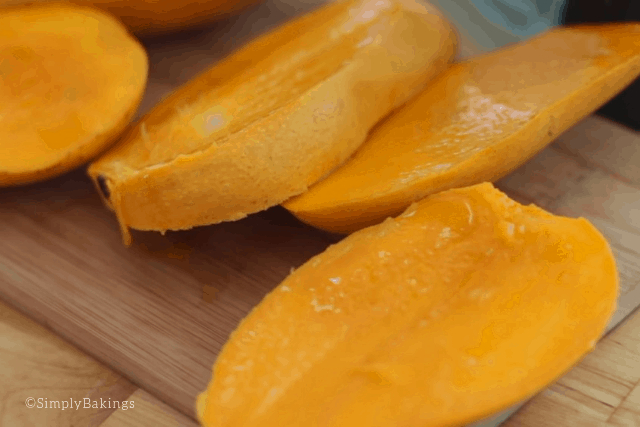
    Peel the mango and cut out the seed. Before putting the mango flesh in the blender, you can cut them or use a spoon to scoop them out of its "skin":

    delicious and sweet sliced mangoes for mango shake recipe

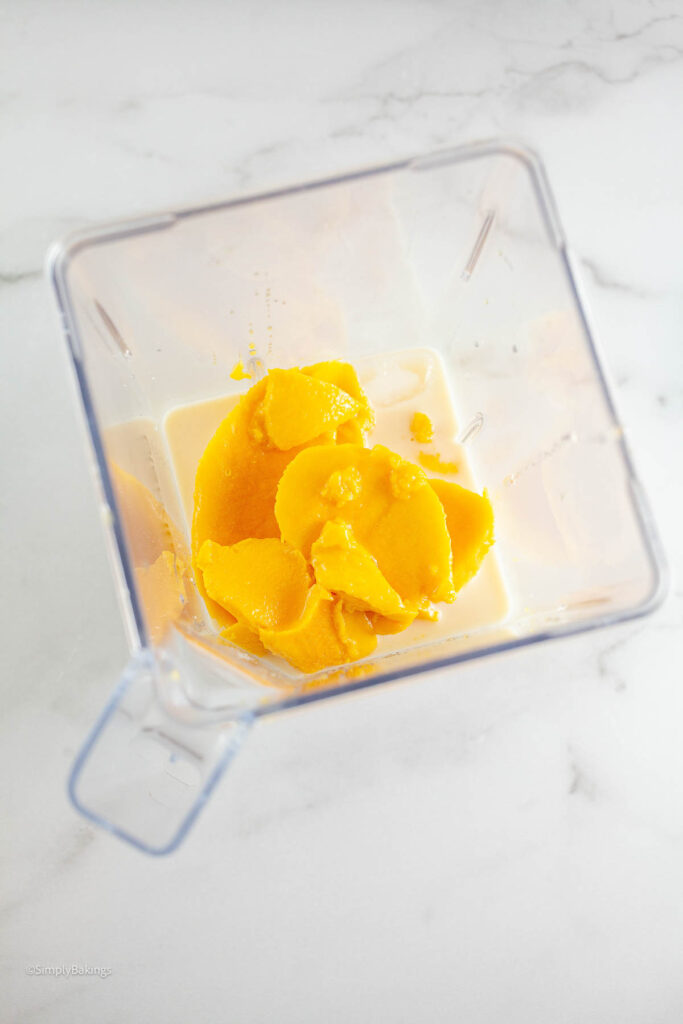
    Add the mango, ice, water, evaporated milk, and sugar to the blender and blend for 2-3 minutes or until everything is well combined:

    mango chunks and evaporated milk in a blender
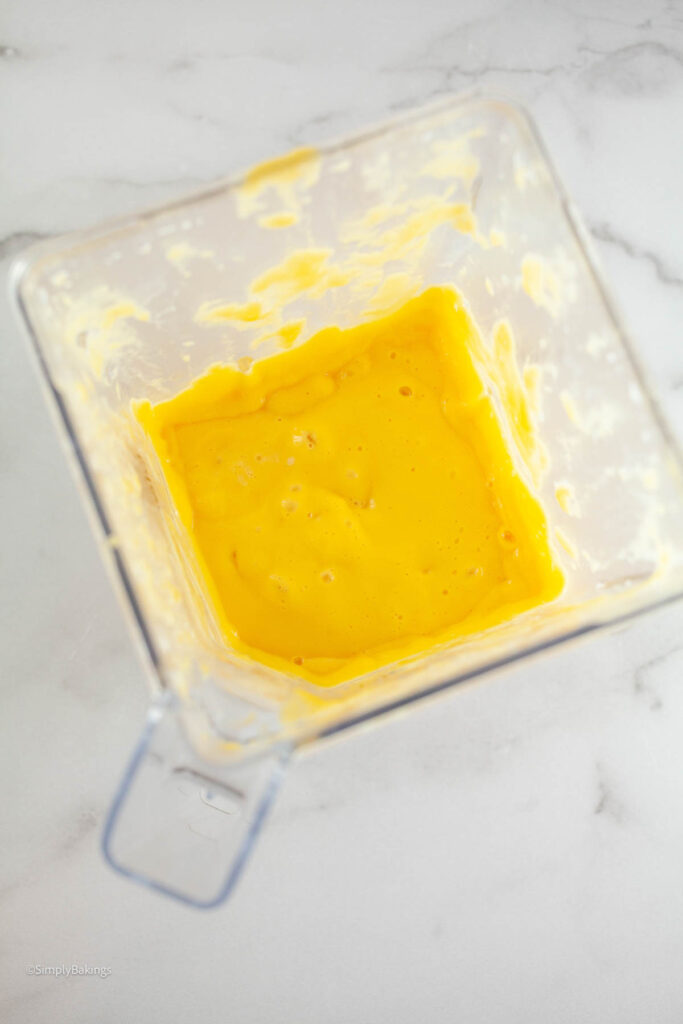
    mango shake into a blender on a marble table.

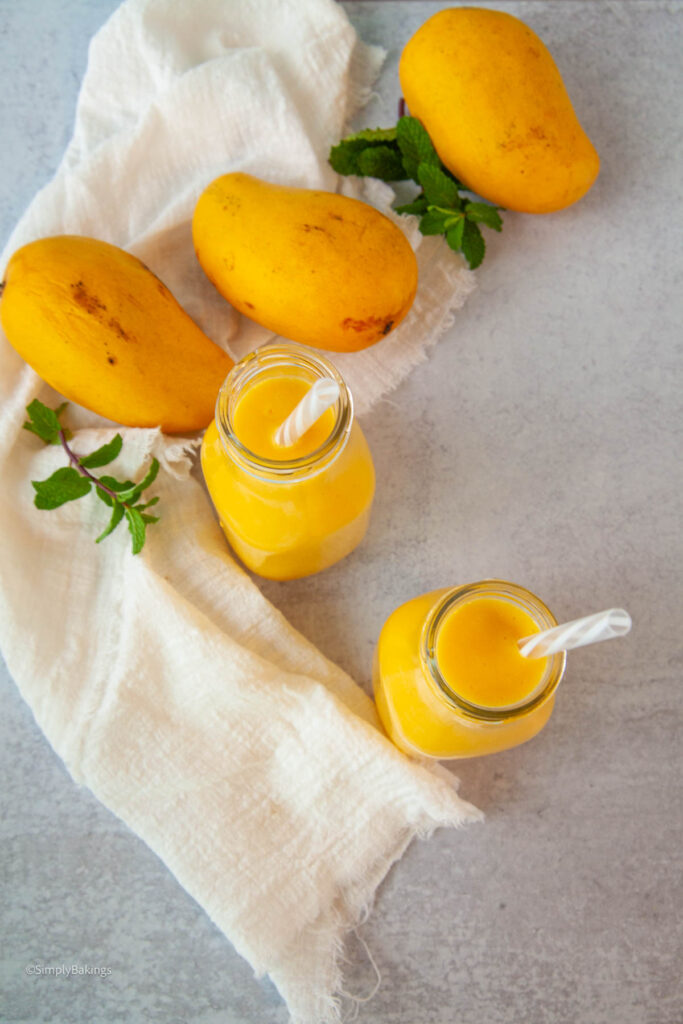
    Now pour all the refreshing goodness into your favorite smoothie glass and garnish with some mint! This delicious mango shake is best to drink during hot summer days.

    2 mango shakes in glass jars on a gray table with linen.

    Hint: Taste the mangoes first (just a bit, don't eat them all up 🙂 ) before mixing them in the blender. If the mangoes are sour, don't use them as it would turn out into a sour mango shake. Even if you adjust the sugar content, the sourness would prevail. So always go back to the first tip - choose the sweet mangoes!

    Frequently Asked Questions

    Would the shake get runny if I made it up the night before I drink it?

    Yes. I have tried to make it the night before and it got runny in the morning because I placed it in the refrigerator. Instead, freeze it, then blend it before drinking or serving it to guests.

    Can I use any type of mango for this recipe?

    Absolutely! The best mangos to use are the Philippine mangos (but I'm biased), but any mangos work well, just make sure you use a ripe mango.


    More Filipino food to try:

    • Moringa Pineapple Smoothie
    • Coconut Smoothie
    • Avocado Smoothie
    • Strawberry Banana Smoothie
    delicious mango smoothie in a glass container with a strawe
    5 from 2 votes
    Print Pin Recipe

    Filipino Mango Shake

    An Easy 5 Ingredient Mango Shake that is refreshing on hot summer days!
    Prep Time5 minutes mins
    Blend Time1 minute min
    Total Time6 minutes mins
    Course: Drinks
    Cuisine: Filipino
    Servings: 2 servings
    Calories: 272kcal
    Author: Lainey
    Prevent your screen from going dark

    Ingredients

    • 2 mangos
    • 1 ½ cup ice
    • ½ cup water
    • ¼ cup evaporated milk
    • ¼ cup brown sugar or agave

    Instructions

    • Peel, chop the mango, and discard the seed.
    • In a blender, add mango, ice, water, evaporated milk, and sugar to the blender
    • Blend for 1 minute if using a high speed blender or until everything is blended.
    • Best served immediately.
    Leave a Comment
    Serving: 1gCalories: 272kcalCarbohydrates: 61gProtein: 4gFat: 3gSaturated Fat: 2gCholesterol: 9mgSodium: 56mgPotassium: 481mgFiber: 3gSugar: 58gVitamin A: 2316IUVitamin C: 76mgCalcium: 136mgIron: 1mg

    Watch The Recipe Video!

    QR Code
    Did you make this recipe?Share it on instagram or tag @simplybakings or #simplybakings!

    When I went to the Philippines, I ate so many mangos to the point where every time I ate a mango, I had a very bad stomach ache.   Mangos from the Philippines are very good, to quote my sister "It's like eating candy!" and it is.  

    The mango is very sweet and the mangos in the states or even the imported mangos are not the same.  So if you are ever in the Philippines, please stop by a farmers market, or a restaurant and try the mangos!  

    With the extra mangos that I had, I made a mango smoothie... I know, I know, the title of the recipe says mango shake, but I realized that mango shake has to include ice cream.. right?

    Note: Recipe was originally published on September 2013

    5 Ingredients or Less, Drinks, Filipino Desserts, Summer Desserts, Vegetarian Filipino Recipes

    • « Go to Previous Page
    • Page 1
    • Interim pages omitted …
    • Page 16
    • Page 17
    • Page 18

    Primary Sidebar

    Lainey holding a muffin pan in her kitchen

    I'm Lainey, the driving force behind SimplyBakings.com, where I'm on a mission to redefine Filipino cooking through a plant-based lens.

    More about me →

    Popular

    • cookie dough bites
      Easiest Cookie Dough Bites Ever
    • delicious and soft oreo cheesecake cookies
      Soft Oreo Cheesecake Cookies
    • mini chocolate cupcakes in a white rectangular plate
      Delicious and Easy Mini Chocolate Cupcakes
    • Filipino Custard Cake drizzled with powdered sugar
      Filipino Custard Cake
    • no bake oreo cheesecake in a mason jar
      Foolproof 3 Ingredients No Bake Oreo Cheesecake
    • 3 brownies stacked
      Best and Easiest Brownies

    Footer

    Sign Up for My Email List

    Latest Posts

    • BEST Spicy Balsamic Tofu with Green Peas
    • How to Make Chili Garlic for Siomai
    • BEST Ginataang Papaya
    • Classic Monggo With Kalabasa

    Quick Links

    Kitchen Essentials

    About Lainey

    Contact

    • Facebook
    • Instagram
    • YouTube
    • Pinterest
    • TikTok

    © 2025 Auburn Digital Services LLC. All Rights Reserved | Privacy Policy

    Rate This Recipe

    Your vote:


    A rating is required
    A name is required
    An email is required