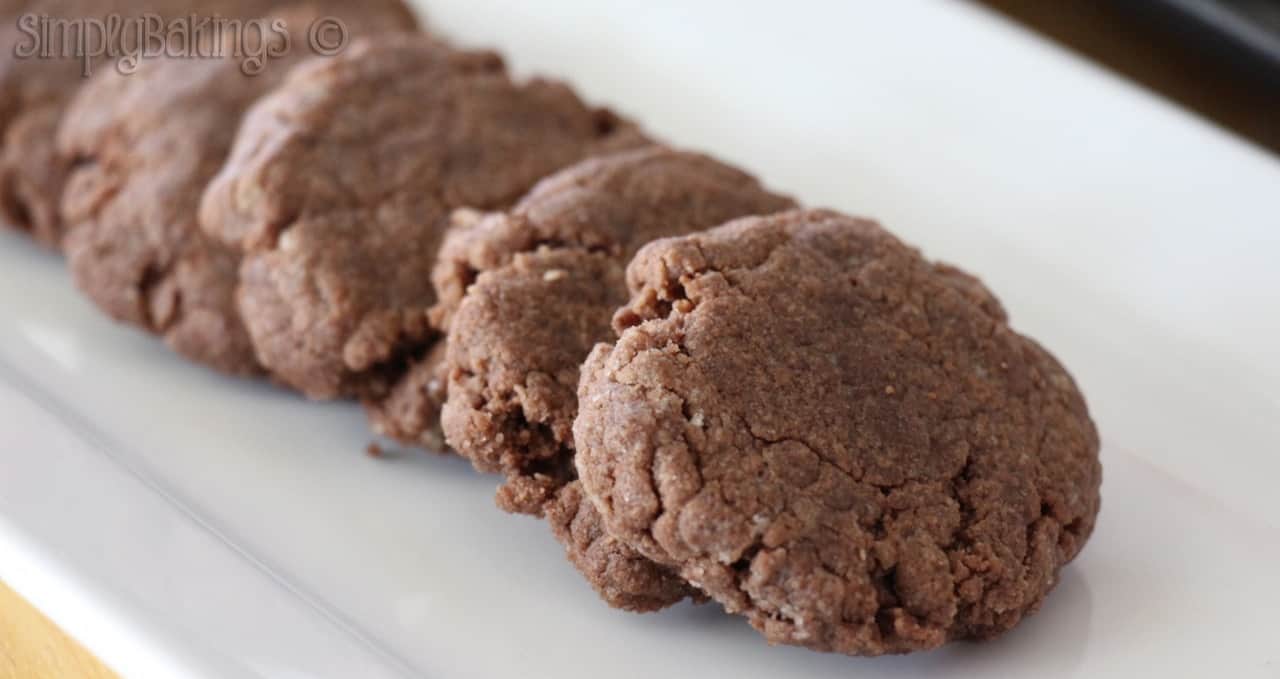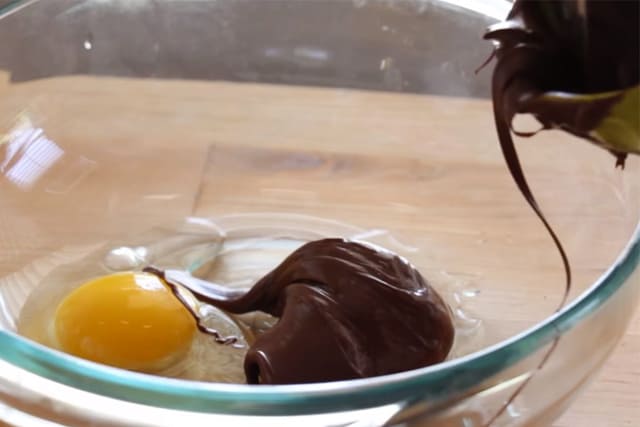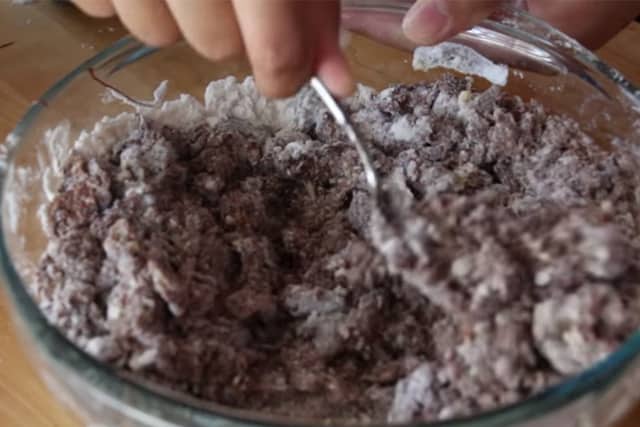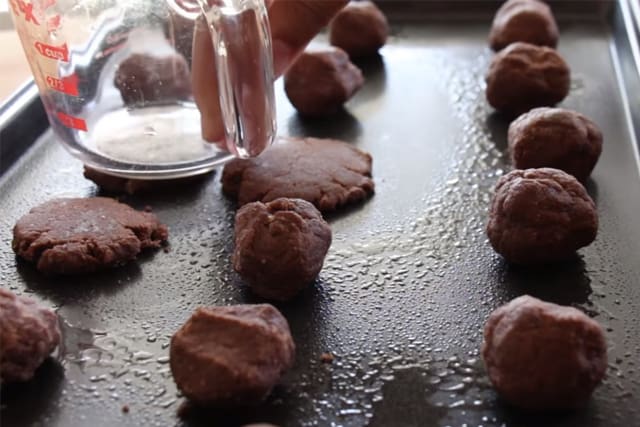

• Skip to primary navigation
  • Skip to main content
  • Skip to primary sidebar
Simply Bakings logo
  • Home
  • Recipes Index
  • Filipino Recipes
  • About Me
  • Nav Social Menu

menu icon
go to homepage
search icon
Homepage link
  • Recipes
  • Filipino Recipes
  • About Me
    • Facebook
    • Instagram
    • Pinterest
    • YouTube
  • ×

    Chocolate Chip Cream Cheese Cookies ONLY 5 Ingredients

    Chocolate Chip Cream Cheese Cookies ONLY 5 Ingredients

    Sep 24, 2013 · 4 Comments

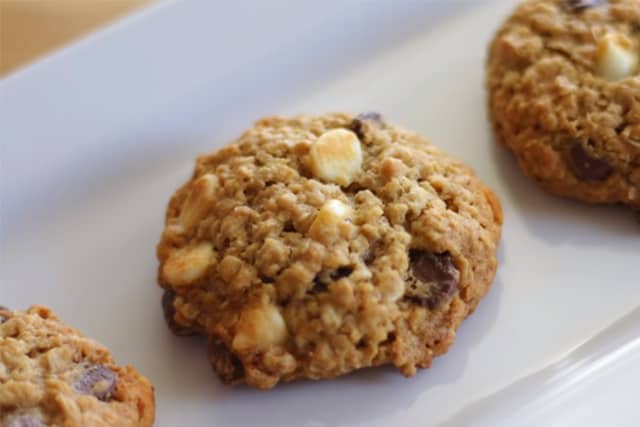
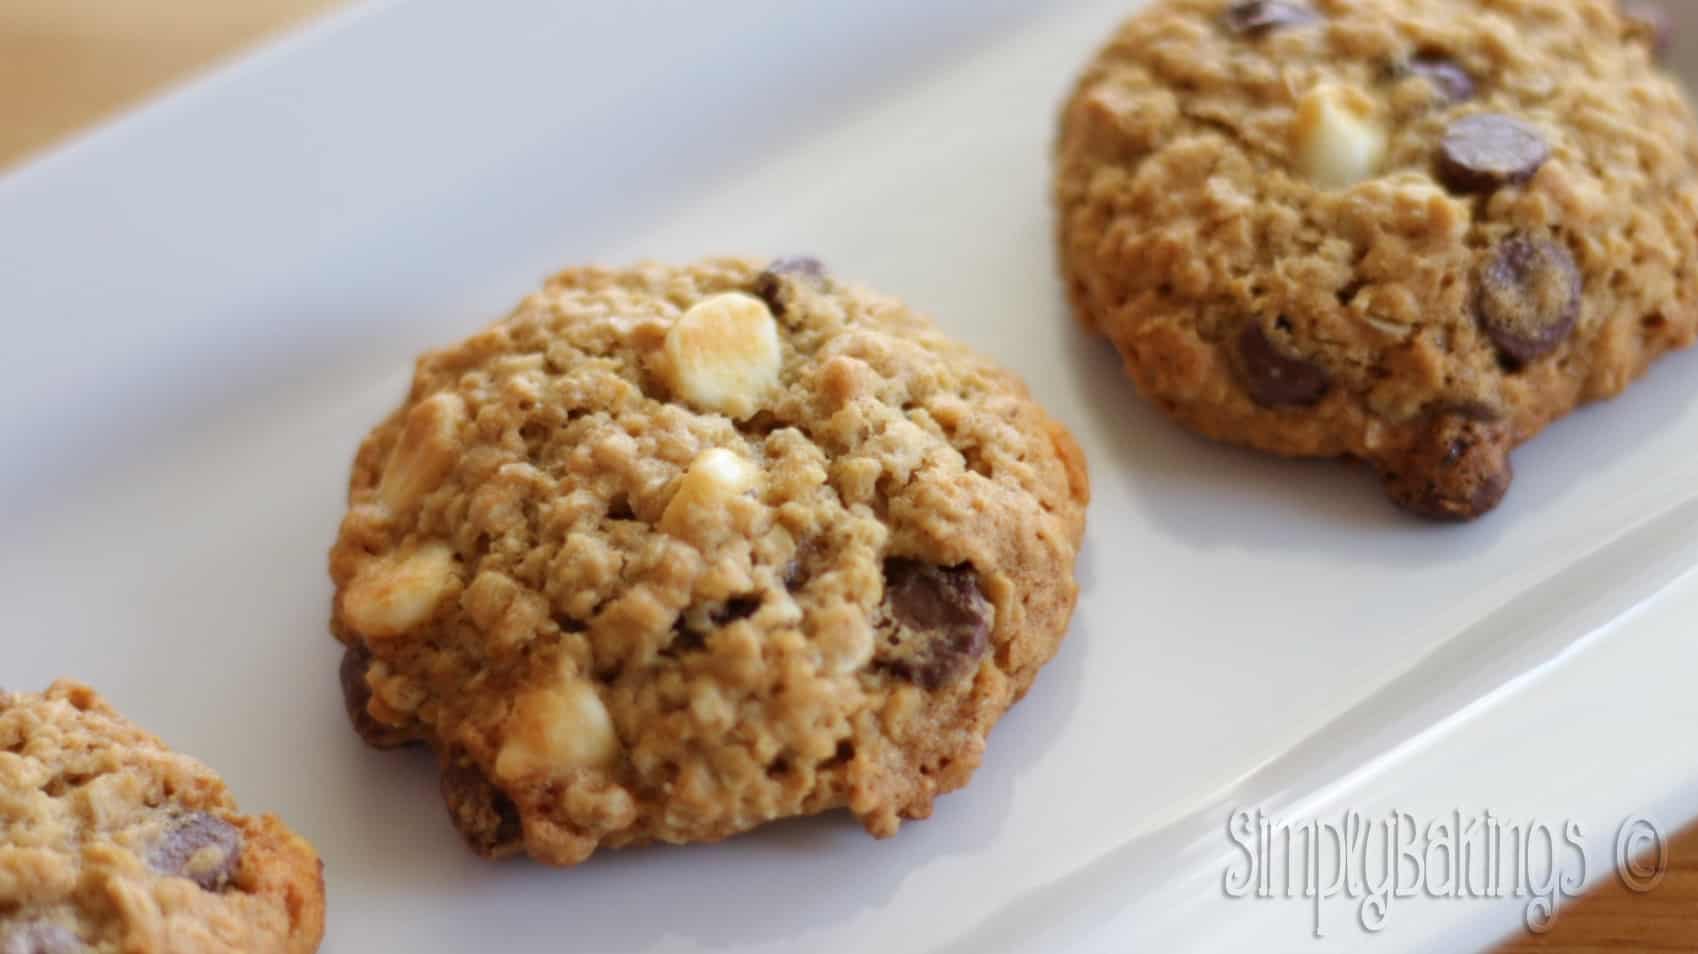
    chocolate chip cream cheese cookies on a white plate

    These Chocolate Chip Cream Cheese Cookies are chewy, soft, and delicious! And adding cream cheese creates the most dangerously delicious cookies you will enjoy!

    This recipe was inspired by Pinterest!

    chocolate chip cream cheese cookies on a white plate

    Tips and Tricks for Making This Chocolate Chip Cream Cheese Cookies Recipe: 

    • When handling the crescent roll, you might find it a bit sticky. To avoid this, dust some flour or baking powder on your hands. This will prevent the raw dough from sticking and making it hard to roll.
    • Do not skip the chilling part of this recipe. It will produce a better chocolate chip cream cheese cookie!
    • If you love the texture and taste of raisins, feel free to add in the crescent roll before sealing and rolling it.

    How to Make this Chocolate Chip Cream Cheese Cookies Recipe:

    Gather the ingredients for this Chocolate Chip Cream Cheese Cookies. Once the ingredients are all ready, let's begin!

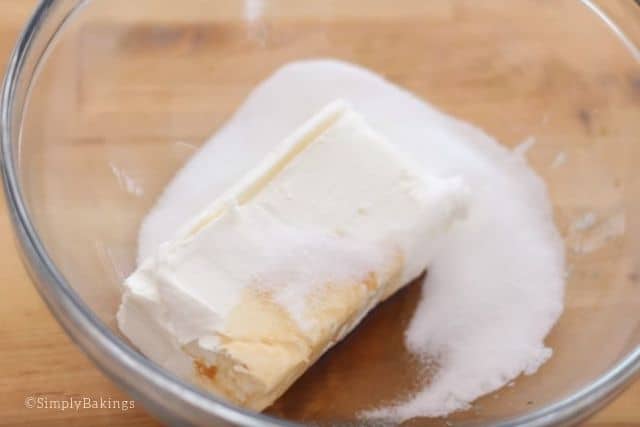
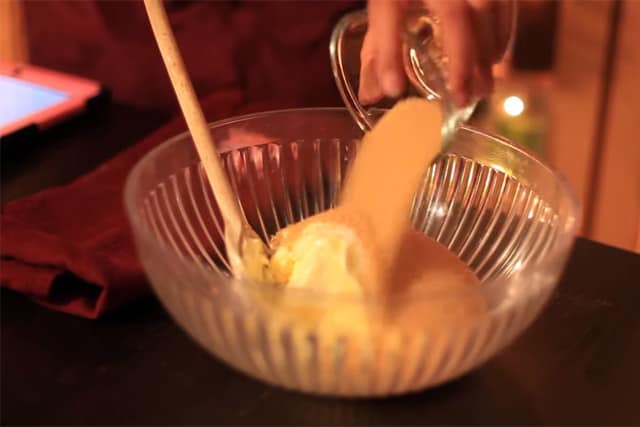
    In a bowl, add cream cheese, sugar, vanilla extract and beat until fluffy:

    cream cheese, sugar and vanilla in a clear mixing bowl

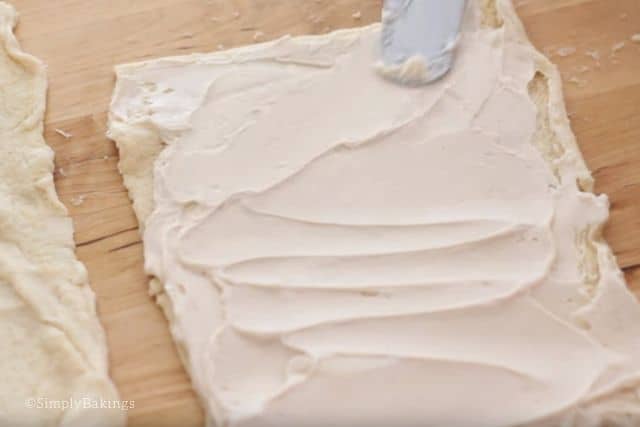
    Spread cream cheese batter on seamless crescent rolls:

    spreading the cream cheese mixture onto the crescent roll using a spatula

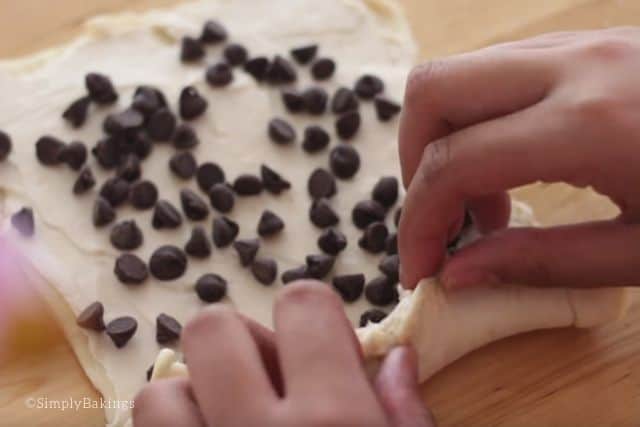
    After spreading the cream cheese mixture on top, add in the mini chocolate chips and roll into a log:

    filling the crescent roll with mini chocolate chips and rolling it

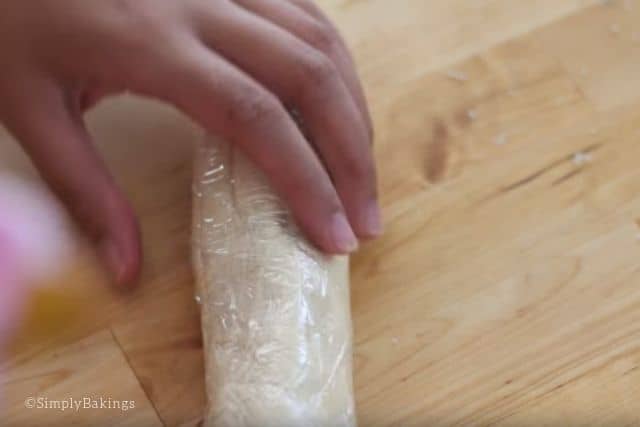
    Place in refrigerator for 6 hours or best overnight before slicing them:

    wrapping the chocolate chip cream cheese cookie dough with saran wrap

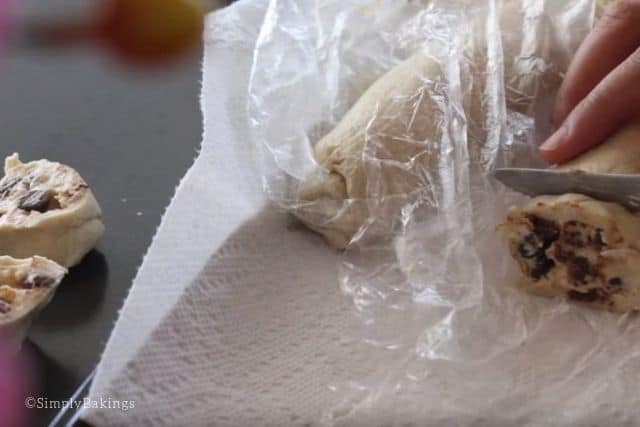
    Preheat oven to 350 degrees F and grease cookie sheet and cut cookie dough and

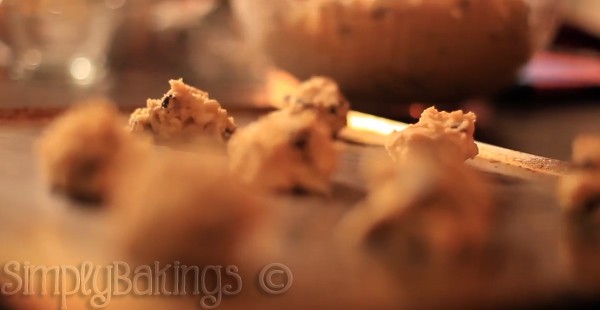
    cutting the chocolate chip cream cheese cookie dough into slices

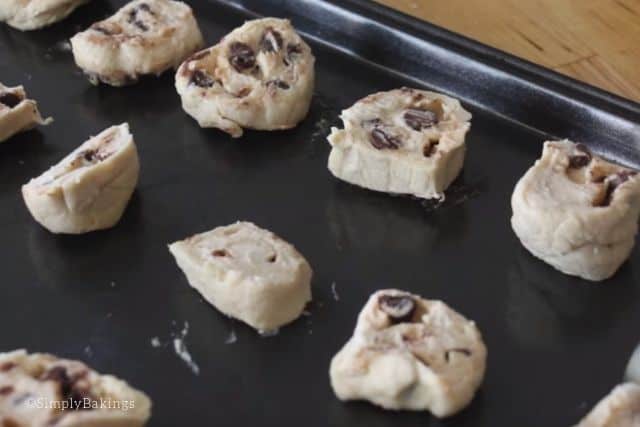
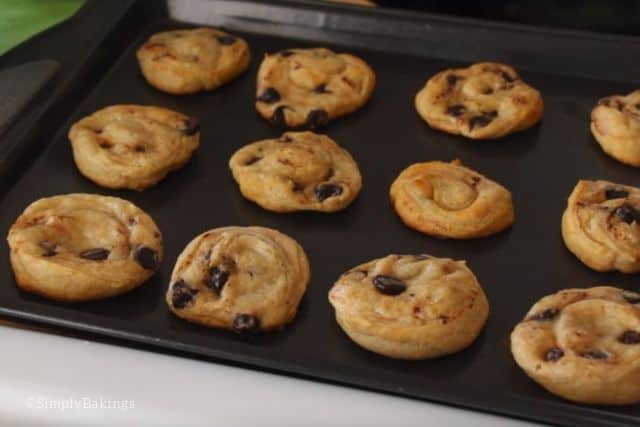
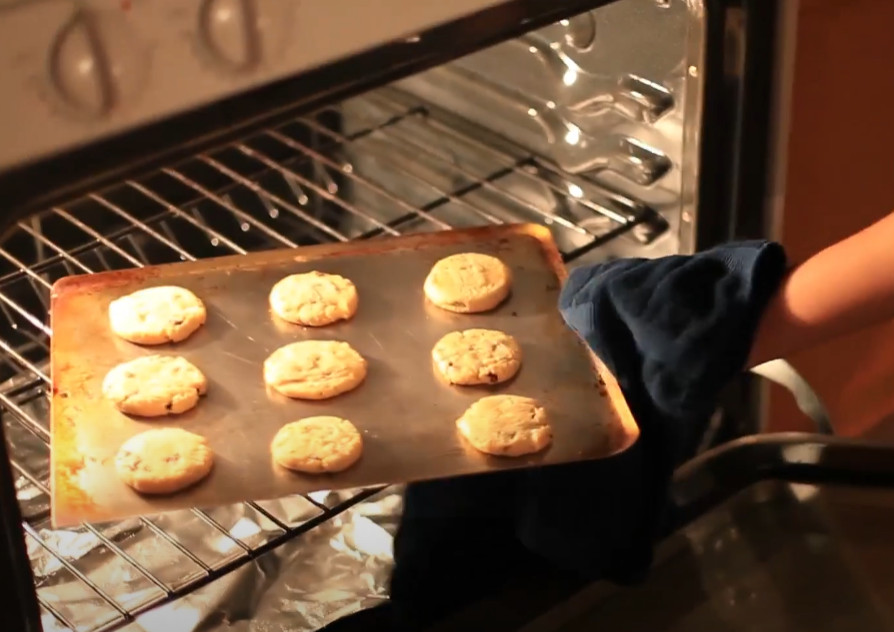
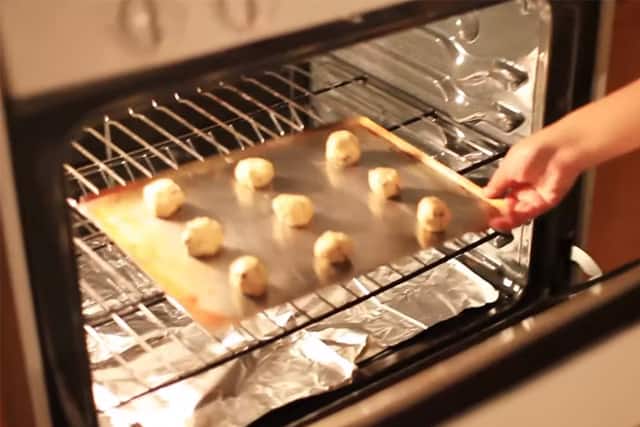
    Place the individual slices on the pan and bake for 10-12 minutes:

    placing the cookie dough into a baking pan

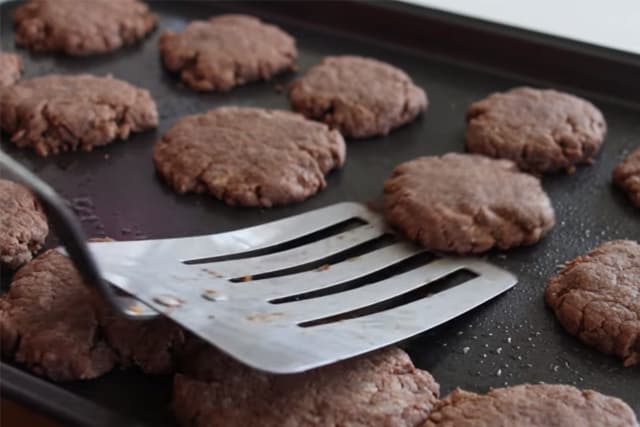
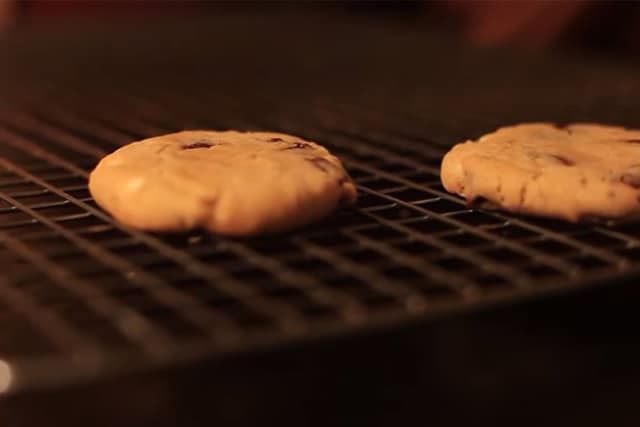
    There you go, Simply Bakers! Freshly baked Chocolate Chip Cream Cheese Cookies right in your own kitchen!

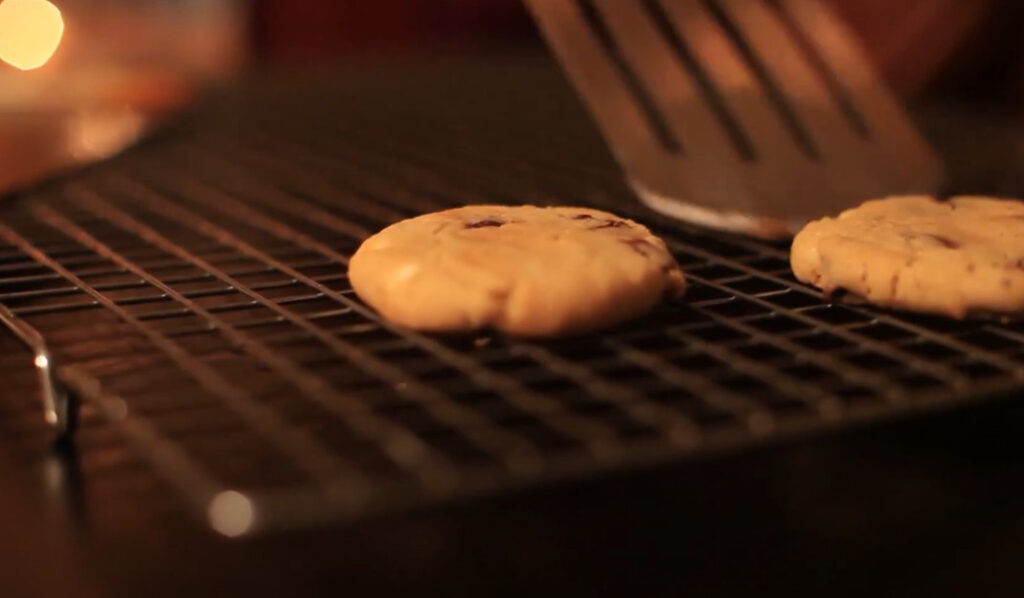
    freshly baked chocolate chip cream cheese cookies

    Frequently Asked Questions for the Chocolate Chip Cream Cheese Cookies Recipe:

    Q: How many days can I keep this refrigerated before baking it?

    A: You can keep them chilled within a day or two, but if you want to store it longer than two days, it is best to freeze it since this recipe uses cream cheese and it is more prone to spoiling.

    Q: How many cookies can this recipe do?

    A: You can make 12 to 15 slices of cookies with this recipe, depending on how thick or thin your cookie slices are.


    More Delicious Recipes with the ingredient cream cheese:

    • Mini Salted Caramel Cheesecake
    • Snickers Oreo Cheesecake
    • Chocolate Chip Cheesecake

    Happy Baking!

    freshly baked chocolate chip cream cheese cookies
    5 from 1 vote
    Print Pin Recipe

    Chocolate Chip Cream Cheese Cookies

    A perfect go-to snack or breakfast which you can make at home and it's better than store-bought chocolate chip cream cheese cookies!
    Author: Lainey
    Prevent your screen from going dark

    Ingredients

    • 1 8oz cream cheese, softened
    • 2 teaspoons vanilla extract
    • ¼ cup sugar
    • ½ cup mini chocolate chips
    • 2 cans of seamless crescent rolls

    Instructions

    • In a bowl, add cream cheese, sugar, vanilla extract and beat until fluffy.
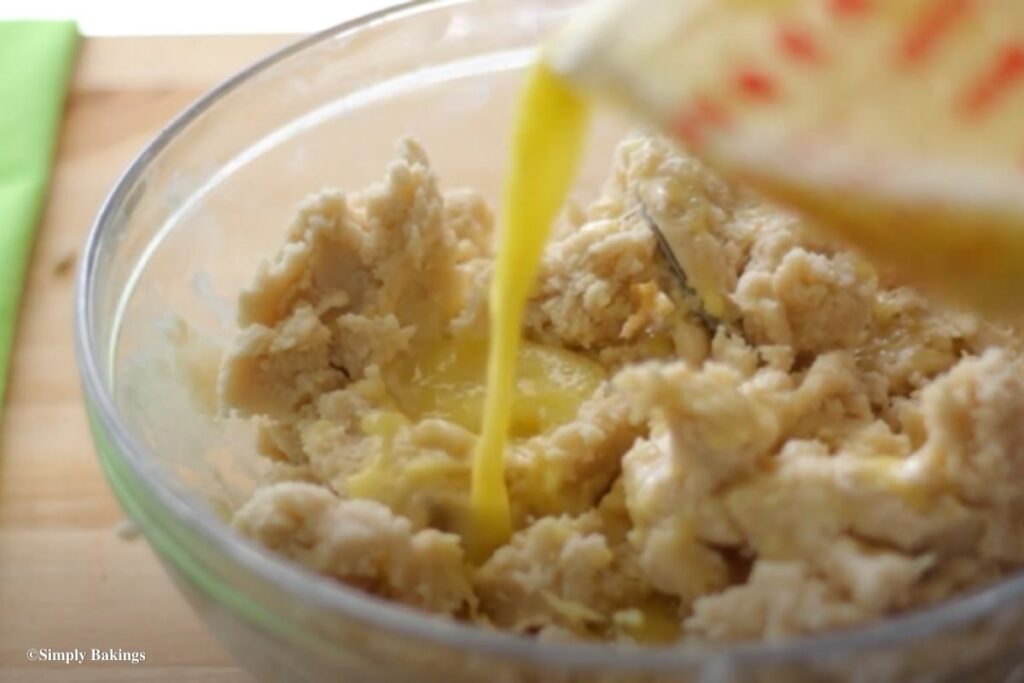
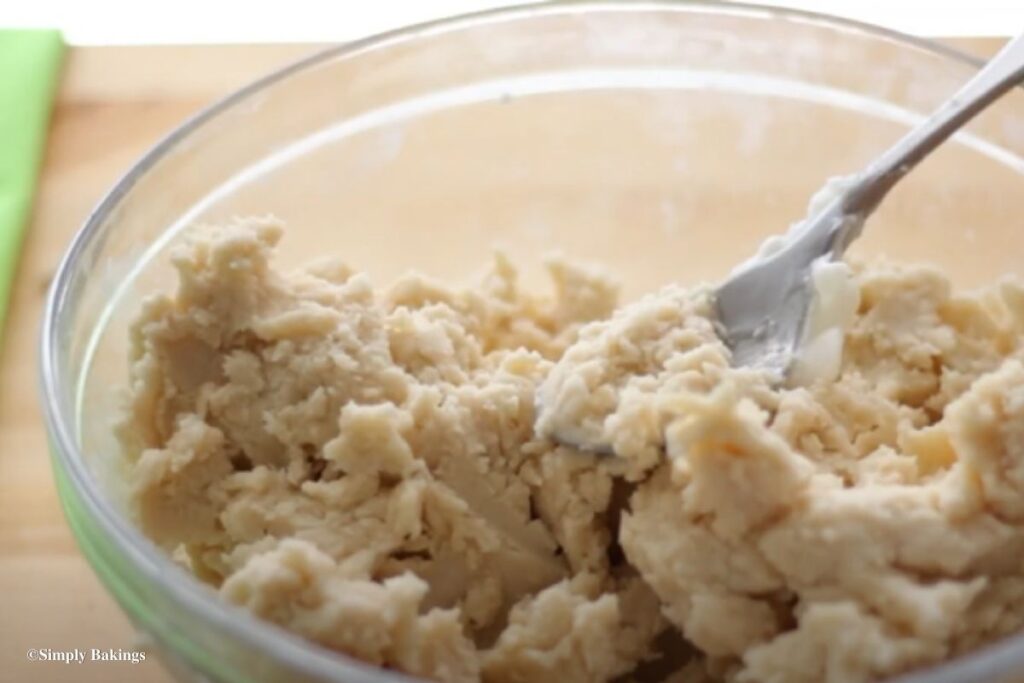
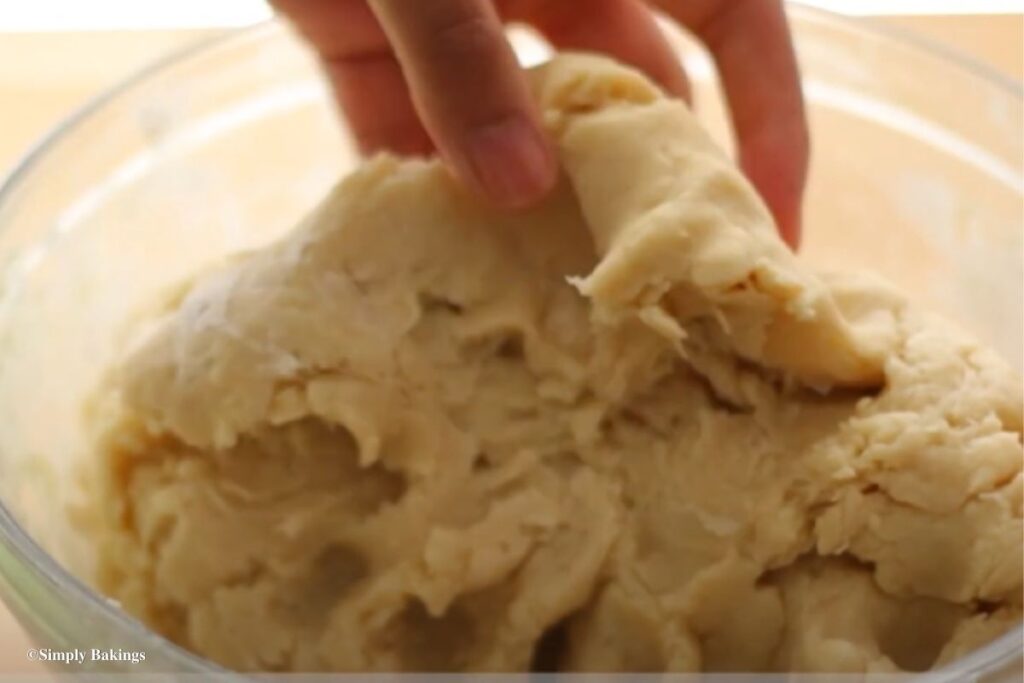
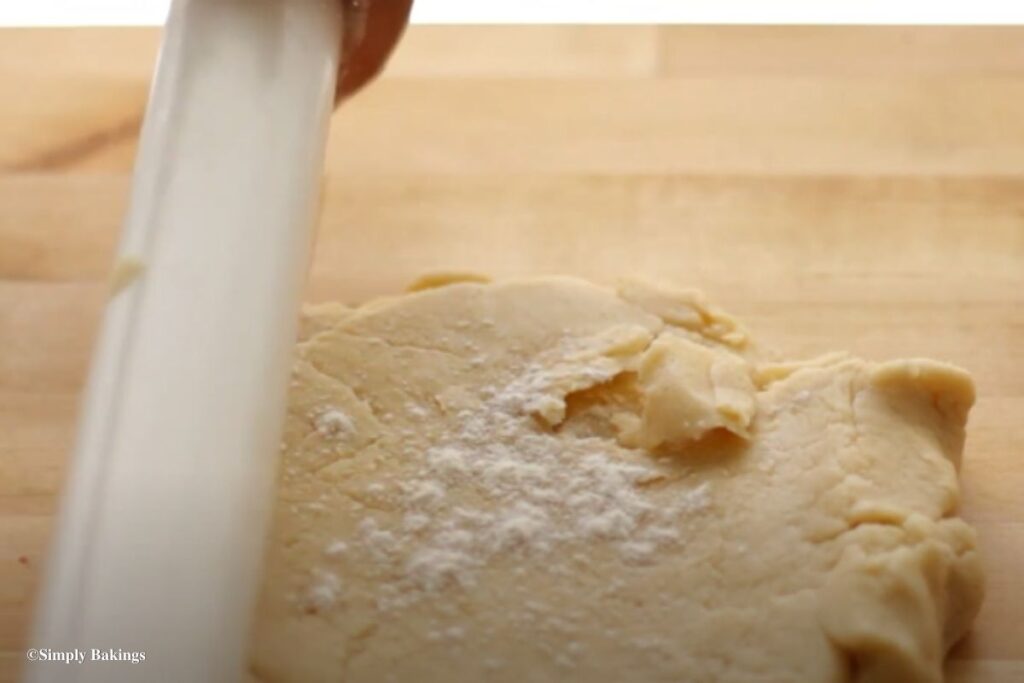
    • Spread cream cheese batter on seamless crescent rolls followed by chocolate chips and roll into a log. Place in refrigerator for 6 hours or best overnight.
    • Preheat oven to 350 degrees F and grease cookie sheet and cut cookie dough and place on pan and bake for 10-12 minutes.
    Leave a Comment
    QR Code
    Did you make this recipe?Share it on instagram or tag @simplybakings or #simplybakings!

    NEVER MISS A RECIPE!

    PINTEREST / FACEBOOK / INSTAGRAM / TWITTER

    If you’ve tried this or any other of my recipes, don’t forget to rate the recipe and to leave me a comment. I love hearing from you!
    5 Ingredients or Less, Breakfast & Brunch, Cookies, Desserts

    Delicious and Easy Mini Chocolate Cupcakes

    Sep 24, 2013 · 71 Comments

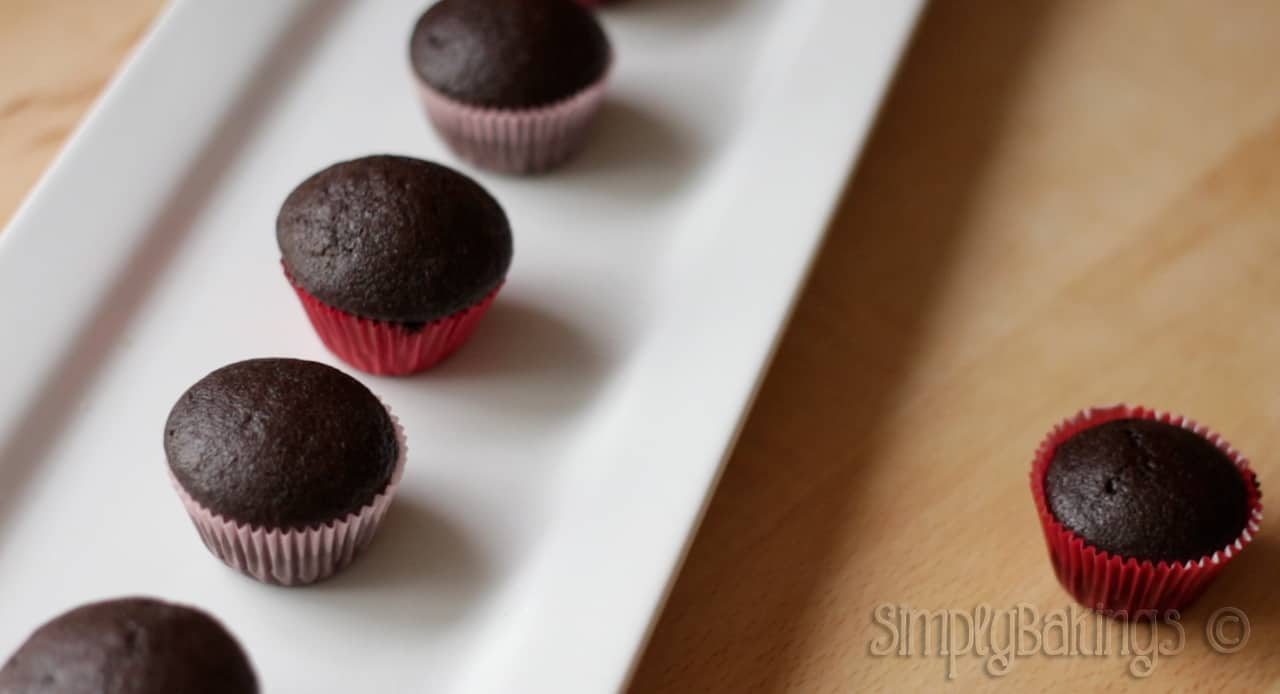
    mini chocolate cupcakes in a white rectangular plate

    These Mini Chocolate Cupcakes are perfectly moist, fluffy, and full of rich chocolate flavor! Top with your favorite buttercream, too. Make yourself the perfect treat for chocoholics!

    Try my Lemon Cupcakes, Ferrero Rocher Cupcakes, or the fan-favorite Carrot Cake Cupcakes!

    Mini chocolate cupcakes on a white plate
    [feast_advanced_jump_to]

    Why You'll Love This Recipe

    This mini chocolate cupcake recipe is easy to make and good for a start from scratch. The batter mixes quickly with no complicated steps. First-time bakers and beginners will enjoy this bite-sized treat!

    Yes, it's not vegan or dairy-free. But simple swipes can fix that. For example, unsweetened cocoa powder adds deep chocolate flavor to your cupcake batter.

    It's fine to prefer regular-sized cupcakes. But their small size makes them perfect for sharing and portion control. Also, no heavy equipment needed - just a whisk, a large mixing bowl, cooling racks and mini cupcake liners. It's very ideal for kids, parties, or dessert tables.

    Ingredients

    Listed below are all the ingredients you will need:

    • all-purpose flour
    • unsweetened cocoa powder (my favorite to use)
    • granulated sugar
    • baking soda
    • baking powder
    • salt
    • eggs + 1 yolk
    • milk
    • vegetable oil
    • vanilla extract
    • warm water

    See the recipe card for quantities.

    Instructions

    Prepare the Oven and Pan

    1. Preheat the oven to 350°F (175°C).

    2. Line a mini cupcake pan with cupcake liners.

    Mix the Dry Ingredients

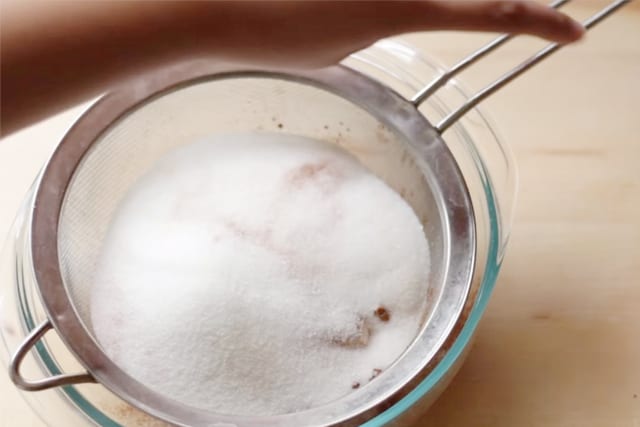
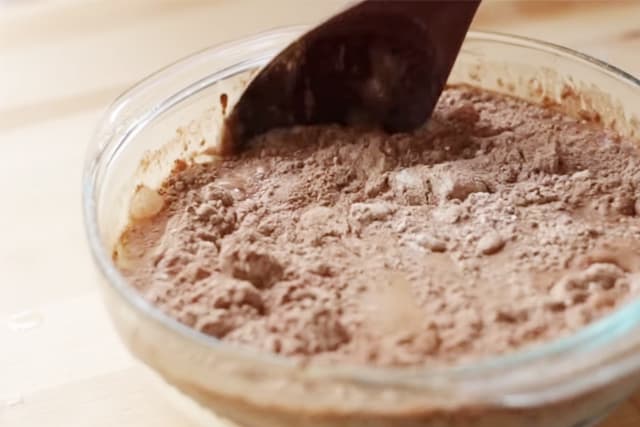
    3. In a large bowl, sift together all-purpose flour, cocoa powder, granulated sugar, baking soda, baking powder, and salt. Mix until well combined.

    Sifting the flour and sugar and pouring into bowl

    Mix the Batter

    4. In the same bowl, make a well in the center.

    5. Add eggs, egg yolk, milk, vegetable oil, vanilla extract, and warm water.

    Glass mixing bowl with dry and wet ingredients

    6. Mix until just combined, being careful not to overmix.

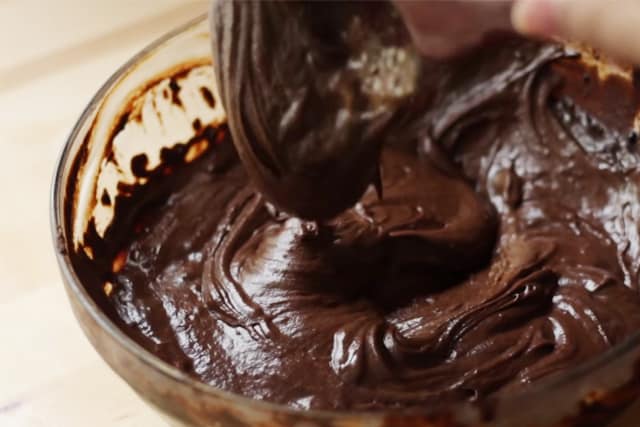
    A bowl with the cupcake batter mixture

    Bake the Cupcakes

    7. Fill each cupcake liner about ¾ full with batter.

    8. Bake for 18–20 minutes, or until a toothpick inserted comes out with a few moist crumbs or clean.

    Cool and Serve

    9. Allow the cupcakes to cool in the pan for 5 minutes.

    10. Transfer to a wire rack to cool completely.

    11. Frost with your favorite buttercream and serve.

    Mini chocolate cupcakes on a white plate

    Substitutions & Variations

    • Ingredient Swap
      Swap eggs with flax eggs if needed.
      Replace vegetable oil with melted coconut oil.
    • Variation
      Use dairy-free milk for a dairy-free version.
    • Mistake to Avoid
      Don't overbake your cupcakes. They can dry out too quickly, so watch your baking time.
    • Storage Tips
      • Without frosting, the cupcakes will be fine in the freezer for up to 2 months.
      • Use a separate bowl for the wet ingredients and dry ingredients. Store in the refrigerator. Good for 2–3 days.
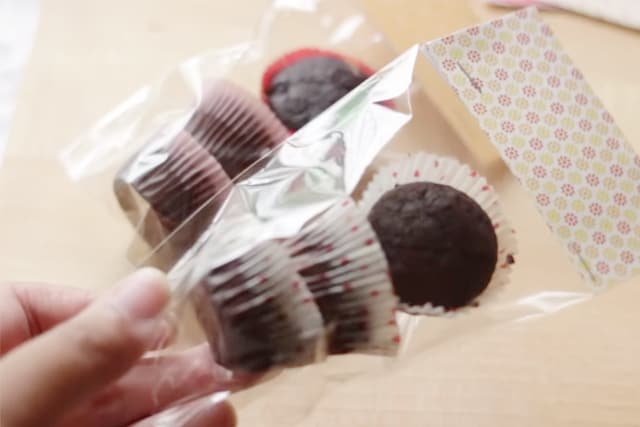
    Packed mini chocolate cupcakes in clear cellophane

    FAQs

    What should I add to cupcakes to make them moist?

    Cupcakes become moist if they have the right amount of milk, butter, and eggs, but be very careful in the measurements. Adding too much of any ingredient like butter can make your cupcakes too dense.

    How do you know when cupcakes are done?

    Insert a toothpick in the center of the cupcake. When it comes out clean, then your cupcakes are perfectly baked.

    How do I make this cupcake recipe vegan?

    Replace the milk with any vegan milk like soy milk or almond milk. For the eggs, you can use egg replacers

    a line of mini chocolate cupcakes on a white rectangular plate
    4.88 from 8 votes
    Print Pin Recipe

    Easy and Delicious Mini Chocolate Cupcakes

    These Mini Chocolate Cupcakes are perfectly moist, fluffy, and full of rich chocolate flavor! Top with your favorite buttercream - these cupcakes are the perfect treat for chocoholics.
    Prep Time10 minutes mins
    Cook Time20 minutes mins
    Total Time30 minutes mins
    Course: Cupcakes, Dessert, pastry, Snacks
    Cuisine: Fusion (American-Filipino/Asian)
    Servings: 40 mini cupcakes
    Calories: 116kcal
    Author: Lainey
    Prevent your screen from going dark

    Ingredients

    • 2 ½ cups all purpose flour
    • 2 ½ cups granulated sugar
    • 1 ¼ cup unsweetened cocoa powder
    • 2 ½ teaspoons baking soda
    • 1 ¼ teaspoons baking powder
    • 1 ¼ teaspoons salt
    • 2 eggs
    • 1 egg yolk
    • 1 ¼ cup milk
    • 1 ¼ cup warm water
    • ½ cup vegetable oil
    • 1 ¼ teaspoons vanilla extract

    Instructions

    Prepare the Oven and Pan

    • Preheat the oven to 350°F (175°C).
    • Line a mini cupcake pan with cupcake liners.

    Mix the Dry Ingredients

    • In a large bowl, sift together all-purpose flour, cocoa powder, granulated sugar, baking soda, baking powder, and salt. Mix until well combined.

    Mix the Batter

    • In the same bowl, make a well in the center.
    • Add eggs, egg yolk, milk, vegetable oil, vanilla extract, and warm water.
    • Mix until just combined, being careful not to overmix.

    Bake the Cupcakes

    • Fill each cupcake liner about ¾ full with batter.
    • Bake for 18–20 minutes, or until a toothpick inserted comes out with a few moist crumbs or clean.

    Cool and Serve

    • Allow the cupcakes to cool in the pan for 5 minutes.
    • Transfer to a wire rack to cool completely.
    • Frost with your favorite buttercream and serve.
    Leave a Comment

    Notes

    • Do not overbake to keep the cupcakes moist.
    • These cupcakes pair well with chocolate, vanilla, or cream cheese frosting.
    • Store in an airtight container at room temperature for up to 2 days or refrigerated for up to 5 days.
    Serving: 1gCalories: 116kcalCarbohydrates: 20gProtein: 2gFat: 4gSaturated Fat: 1gPolyunsaturated Fat: 2gMonounsaturated Fat: 1gTrans Fat: 0.02gCholesterol: 14mgSodium: 162mgPotassium: 65mgFiber: 1gSugar: 13gVitamin A: 31IUCalcium: 24mgIron: 1mg

    Watch The Recipe Video!

    QR Code
    Did you make this recipe?Share it on instagram or tag @simplybakings or #simplybakings!

    You Might Also Like:

    • 3 Ingredient Chocolate Cupcakes
    • White Chocolate Strawberry Cupcakes
    • Nutella Cupcakes
    • Vanilla Cupcakes

    Recipes for Every Moment

    Need an easy dessert for your party? These mini chocolate cupcakes are quick to bake, easy to serve, and disappear fast.

    Storytelling Time!

    I really love chocolate, and the great thing about this recipe is that you only need one bowl to mix all the ingredients! How awesome is that?!

    My friend Amber from SweetAmbs shared this recipe with me, which she said was inspired by Martha Stewart.  Hope you guys enjoy this yummy chocolate cupcake!

    Cupcakes, Desserts, Filipino Desserts

    Cookie Butter Ice Cream Recipe

    Sep 24, 2013 · 2 Comments

    cookie butter ice cream in a glass with chocolate chunks

    Try making this easy, creamy, and chocolatey Cookie Butter Ice Cream Recipe using 5 simple ingredients and no ice cream maker needed! Make this today and enjoy the delicious flavor combination of cookie butter and chocolate in every bite!

    Interested to make more homemade ice cream recipes? Try my 3 Ingredient Ice Cream 3 Ways Only, Ice Cream Sandwich Cookies, and Lemon Ice Cream recipe!

    a bowl of cookie butter ice cream with mini chocolate bars on top
    [feast_advanced_jump_to]

    What is Cookie Butter Ice Cream?

    Cookie Butter Ice Cream is a rich, creamy frozen dessert that combines the enjoyable flavor of cookie butter with the smoothness of homemade ice cream. A base of whipped heavy cream, condensed milk, and melted butter is combined with cookie butter and chocolate chunks to create a rich and creamy treat.

    This delicious 5-ingredient cookie butter ice cream recipe is super easy to make and doesn't require an ice cream maker. It is ideal for satisfying any sweet craving and can be serve on any occasion, too.

    Give this ice cream recipe a try and enjoy with your loved ones!

    Variations

    • Nutty Flavor -  mix equal amounts of cookie butter and peanut butter into the ice cream base for a rich and delicious nutty flavor.
    • Chocolate Swirl - before freezing, swirl melted chocolate or chocolate ganache into the ice cream recipe to give it an extra chocolatey taste.
    • Crunchy Texture - mix bits of crushed biscoff cookies or speculoos cookies into the ice cream base for a delicious crunch.
    • Warm Spices - add a pinch of nutmeg and a teaspoon of ground cinnamon to the bottom of your ice cream to flavor it with warm spices.

    Substitutions

    • Chocolate Chips- feel free to replace the chocolate bars with the same amount of chocolate chips in this recipe
    • Dairy-Free Cream - you may use chilled coconut cream instead of heavy whipped cream for a dairy-free and mildly coconut-flavored alternative
    • Peanut Butter - replace cookie butter with creamy peanut butter to make a rich, nutty ice cream.
    • Margarine - use margarine if butter is unavailable

    Storage Tips

    • Store the cookie butter ice cream in a freezer-safe container after you have done the mixing process.
    • Cover the surface with plastic wrap to avoid ice crystals from forming.
    • Put it in the coldest section of your freezer. It should take about 30 minutes to an hour to set.
    • Consume within 1-2 weeks for the optimal texture and flavor.

    Ingredients

    • chocolate bar
    • condensed milk
    • cookie butter
    • heavy whipping cream
    • butter

    Instructions

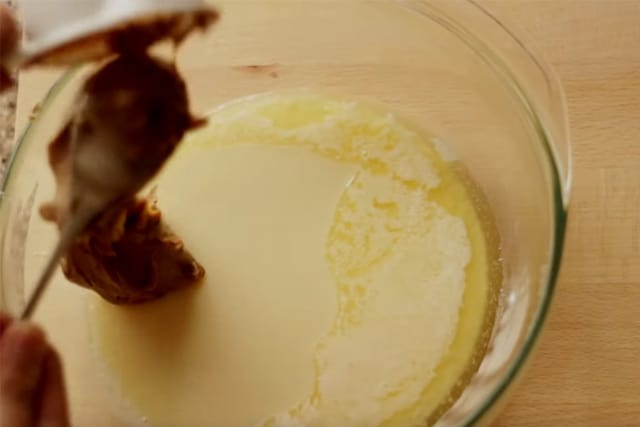
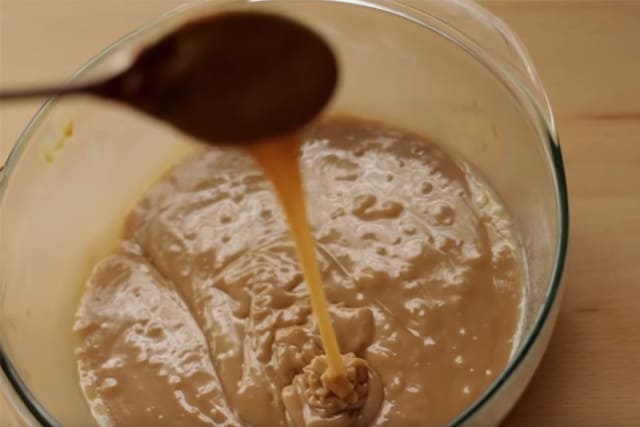
    Melt butter and add condensed milk, cookie butter, and mix:

    mixing the melted butter and cookie butter

    This is how the mixed cookie butter and melted butter looks like:

    mixed cookie butter and melted butter

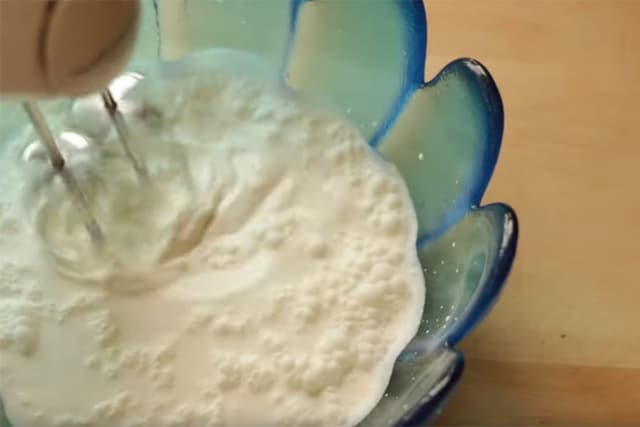
    In a large bowl, beat heavy whipping cream using a hand mixer till fluffy:

    mixing all purpose cream using a hand mixer

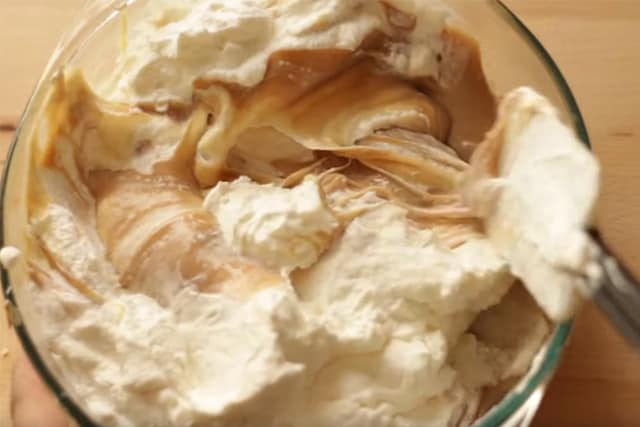
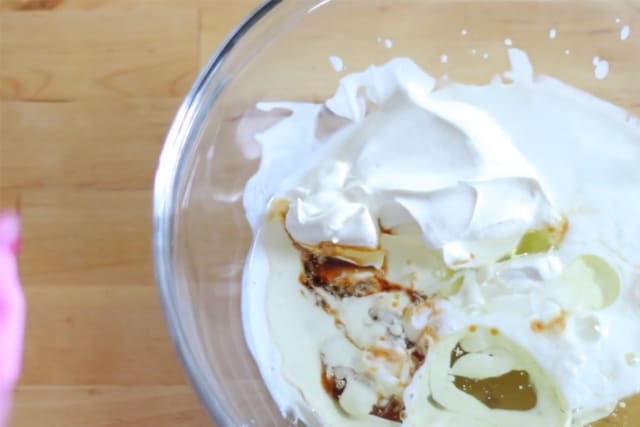
    Fold in heavy whipping cream into the cookie butter mix:

    folding in cookie butter mixture and cream in a bowl

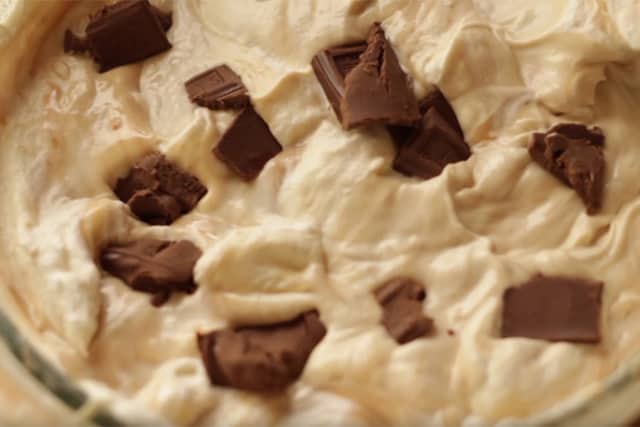
    Add in chocolate chunks into the mixture and fold them in gently:

    adding in chocolate chunks to the ice cream mixture

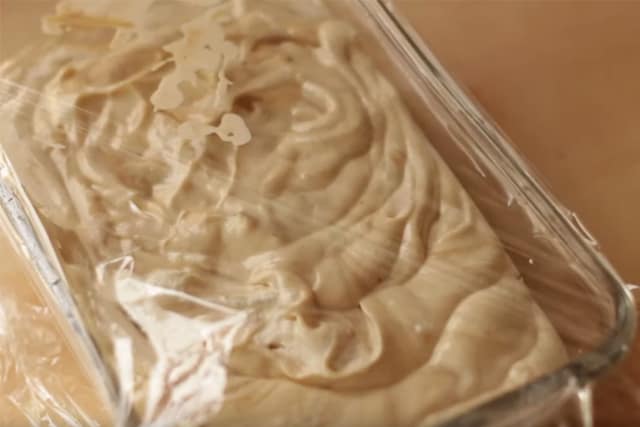
    Pour the ice cream mixture in the desired pan and cover with a plastic wrap. Then, freeze at least 6 hours or best overnight:

    covering the ice cream with a saran wrap

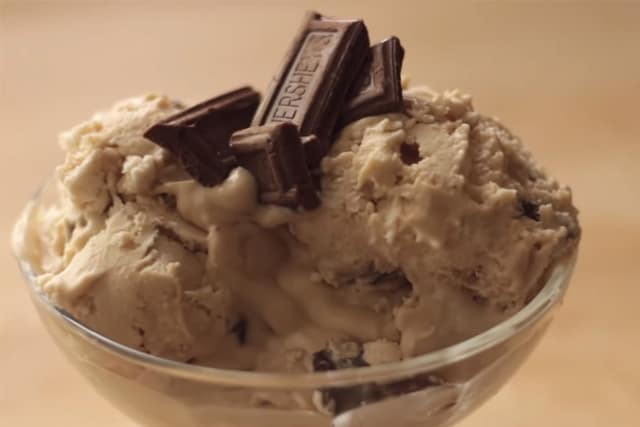
    Scoop the ice cream and serve with your favorite toppings:

    cookie butter ice cream in a glass

    You won't believe how delicious this ice cream tastes. Enjoy!

    Top Tips

    • Chill the heavy cream, condensed milk, and any other liquid ingredients before mixing for a smoother texture.
    • Use high-quality cookie butter and chocolate to get the best flavor.

    FAQ

    How long does homemade ice cream last in the freezer?

    You can keep your homemade ice cream inside the freezer for a few weeks to a month. Just make sure it is freezing well.

    How long does it take to harden the ice cream?

    After blending, put your ice cream in the freezer and wait for an hour or two.

    Can I add in nuts and dried fruits to this ice cream recipe?

    A: Yes, for sure! It would taste great and add an interesting texture.


    More Delicious Recipes:

    • Vegan Chocolate Ice Cream
    • Matcha Milkshake - 4 Ingredients Only
    • Mocha Ice Cream| 5 Ingredients ONLY
    • Papaya Banana Smoothies
    • Mini Salted Caramel Cheesecake
    a bowl of creamy and chocolaty cookie butter ice cream
    5 from 2 votes
    Print Pin Recipe

    Cookie Butter Ice Cream Recipe

    Here's an easy-to-make Cookie Butter Ice Cream recipe made with just 5 simple ingredients! This is a creamy, chocolatey, and delicious treat for everyone on any occasion!
    Prep Time20 minutes mins
    Freeze6 hours hrs
    Total Time6 hours hrs 20 minutes mins
    Course: Dessert
    Cuisine: American, Belgian
    Servings: 4
    Calories: 992kcal
    Author: Lainey
    Prevent your screen from going dark

    Ingredients

    • 2 tablespoons butter
    • 1 can condensed milk
    • ½ cup cookie butter
    • 2 cups heavy whipping cream
    • 1 chocolate bar

    Instructions

    • Melt the butter in a medium saucepan over low heat.
    • Stir in the condensed milk and cookie butter until fully combined. Set aside to cool.
    • In a separate bowl, beat the heavy whipping cream with an electric mixer until it forms stiff peaks (the cream should be fluffy and hold its shape).
    • Gently fold the whipped cream into the cooled cookie butter mixture.
    • Chop the chocolate bar into small pieces and fold it into the mixture as well.
    • Pour the mixture into a pan or container.
    • Cover the pan with plastic wrap, ensuring it touches the surface of the mixture to prevent ice crystals from forming.
    • Freeze for at least 6 hours, or preferably overnight.
    • Scoop the ice cream and serve with your favorite toppings. Enjoy!
    Leave a Comment
    Serving: 1gCalories: 992kcalCarbohydrates: 76gProtein: 14gFat: 72gSaturated Fat: 41gPolyunsaturated Fat: 3gMonounsaturated Fat: 16gTrans Fat: 0.2gCholesterol: 183mgSodium: 204mgPotassium: 532mgFiber: 1gSugar: 69gVitamin A: 2191IUVitamin C: 3mgCalcium: 366mgIron: 1mg

    Watch The Recipe Video!

    QR Code
    Did you make this recipe?Share it on instagram or tag @simplybakings or #simplybakings!

    Cookie Butter was introduced to me by my friend Stephy from Clean Eating Med Student.  I remember the day she shared it with me, we were at her house filming for Happy Healthy Me and she handed me an apple with Cookie Butter and said "You are going to LOVE this!" and I did! The taste reminds me of gingerbread cookies, but 10 times better, in fact, I think on my list of favorite spreads it has surpassed Nutella. Many people have asked me where to get this and the only place I have seen it is at Trader Joe's.

    I decided to try making it like ice cream and it was super sweet but delicious! The texture came out just like ice cream with a hint of cookie butter!

    5 Ingredients or Less, Filipino Desserts, Ice Cream

    Strawberry Banana Smoothie

    Sep 24, 2013 · 6 Comments

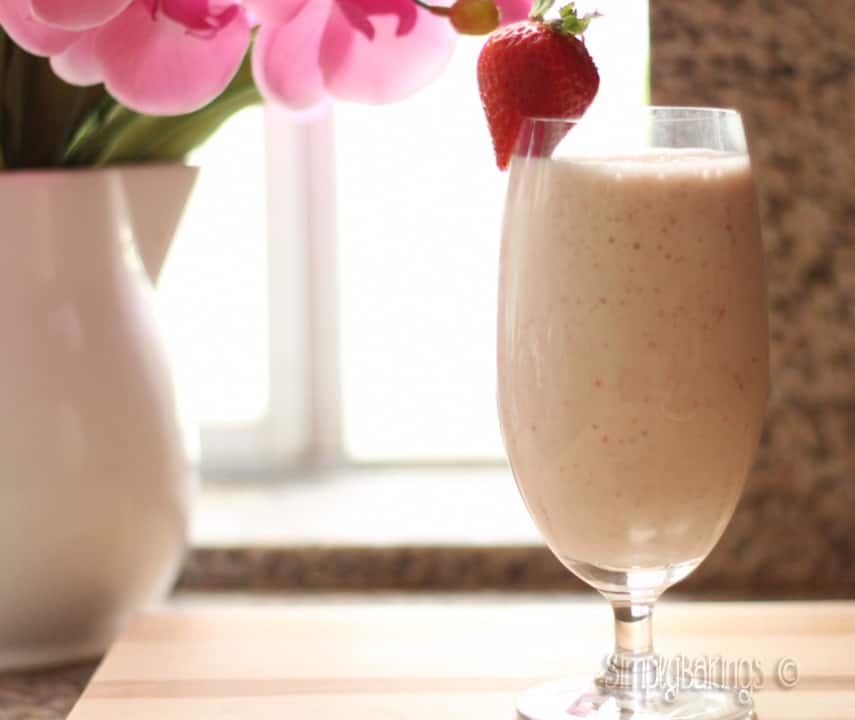
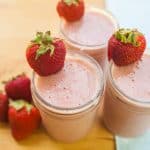
    Strawberry Banana Smoothie is my go-to drink during the summer because I always have all the ingredients on hand.  What smoothie do you like drinking during the summer?

    strawberry banana smoothie in a glass

    Tips and Tricks for Making This Strawberry Banana Smoothie Recipe: 

    • Make this great for breakfast by adding in some oats or chia seeds to your strawberry banana smoothie.
    • For a more festive look, top with whipped cream and sliced strawberries before serving.
    • Do you love greek yogurts? Add in some to make it richer and healthier!
    • This is a great breakfast alternative so adding in some more protein like peanut butter, berries, and honey would be delicious!

    How to Make this Strawberry Banana Smoothie Recipe:

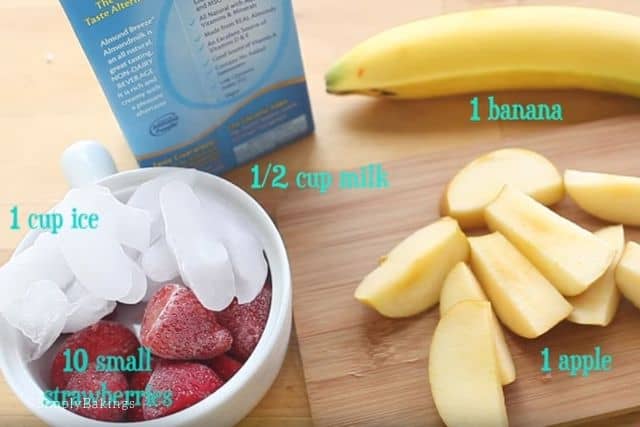
    Gather the ingredients for the Strawberry Banana Smoothie. Once the ingredients are all ready, let's begin!

    ingredients of the strawberry banana smoothie

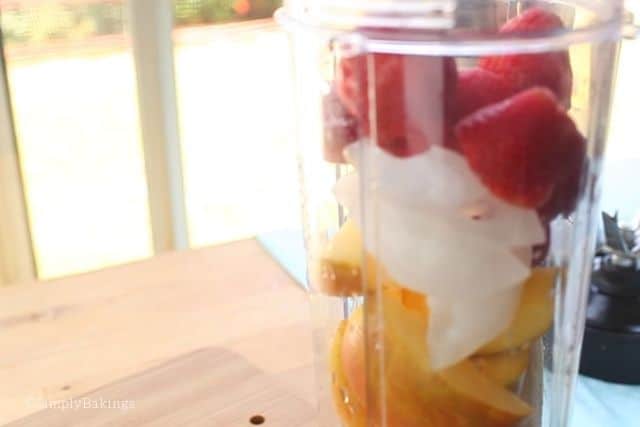
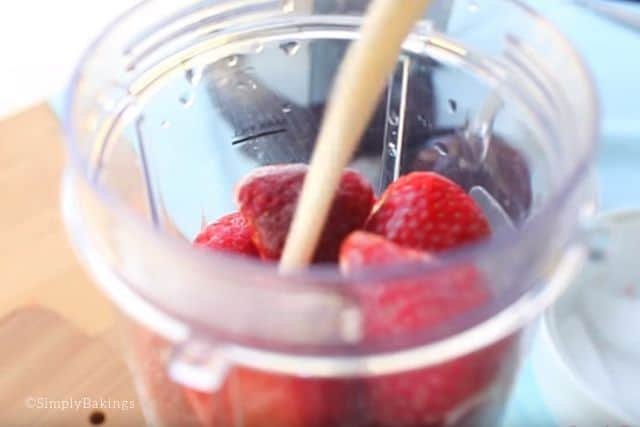
    Add in the ice, bananas, strawberries, and brown sugar:

    putting ingredients in the blender

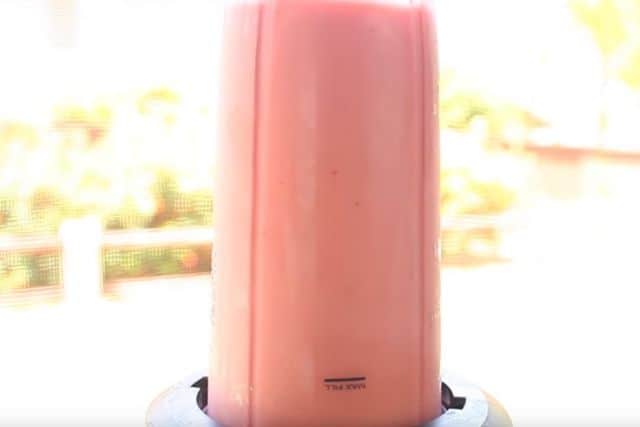
    Next, pour in the evaporated milk and water then blend for 2-3 minutes or until all the fruits and ice are well-blended and smooth:

    pouring milk to the strawberry banana smoothie ingredients
    blending the ingredients of the strawberry banana smoothie

    .Doesn't that look pretty and delicious?!? At this time, I am so excited to drink it, lol!

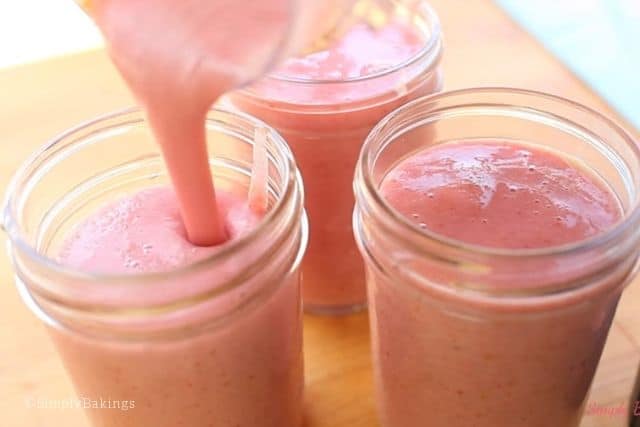
    After blending well, pour out all that fresh goodness in your favorite smoothie glass 😉

    pouring the strawberry banana smoothie into small mason jars
    Strawberry Banana Smoothie step by step guide

    Frequently Asked Questions for the Strawberry Banana Smoothie Recipe:

    Q: How many servings would this recipe do?

    A: This easy smoothie recipe could make 3 small glasses or 2 tall glasses.

    Q: Can I use sweetened strawberries instead of fresh ones?

    A: Yes you can. But obviously, that would make this smoothie much sweeter than it already is.

    Q: Can I use any brand of milk?

    A: Yes, you can use any brand, whatever is available in your area or any of your evaporated milk brands.

    Q: I love thick smoothies. How can I make this thicker?

    A: To make this smoothie thicker, just add in more bananas. When adding, add few slices then blend, until you get the consistency that you like.

    Q: Can I add vanilla protein powder to this recipe?

    A: Yes, you can. That would be a great breakfast alternative.

    mason jars of the delicious smoothie
    5 from 1 vote
    Print Pin Recipe

    Strawberry Banana Smoothie

    A refreshing, go-to, quick and easy to make Strawberry Banana Smoothie recipe you will surely love!
    Author: Lainey
    Prevent your screen from going dark

    Ingredients

    • 1 cup ice
    • 2 bananas
    • 1 cup strawberries
    • ¼ cup evaporated milk
    • ¼ cup water
    • ¼ cup brown sugar

    Instructions

    • Add ice, bananas, strawberries, evaporated milk, water, brown sugar and blend for 2-3 minutes or until blended.
    Leave a Comment

    Watch The Recipe Video!

    QR Code
    Did you make this recipe?Share it on instagram or tag @simplybakings or #simplybakings!

    NEVER MISS A RECIPE!

    PINTEREST / FACEBOOK / INSTAGRAM / TWITTER

    If you’ve tried this or any other of my recipes, don’t forget to rate the recipe and to leave me a comment. I love hearing from you!
    Breakfast & Brunch, Drinks

    White Chocolate Fruit Tart

    Sep 24, 2013 · 1 Comment

    This delicious and rich-tasting White Chocolate Fruit Tart uses 5 ingredients only and is an easy-peasy no-bake dessert! It's absolutely decadent, creamy, and refreshing, especially in summer when fresh fruits are in abundance!

    White Chocolate Fruit Tart close-up shot

    Fruit tart is my first love in baking.  I remember making it with my sister and telling her how excited I am to eat it so when I took my first bite, I ate the whole tart... just kidding I almost did because it was that good.

    Tips on How to Make the White Chocolate Fruit Tart:

    • Make this ahead and chill it to save time! Just make sure that the White Chocolate Fruit Tart is kept in an airtight container to avoid smell contamination as the cream cheese filling tends to take on the smell in the environment.
    • To add a little flair, drizzle some confectioner's sugar on top before serving!
    • Slice your fresh fruits ahead of time. It will make your prep time breezier and you will finish your delicious dessert in less than 10 minutes!

    How to Make White Chocolate Fruit Tart:

    Listed below are all the ingredients you will need:

    • white chocolate chips
    • heavy whipping cream
    • cream cheese
    • assorted fruits
    • pie crust

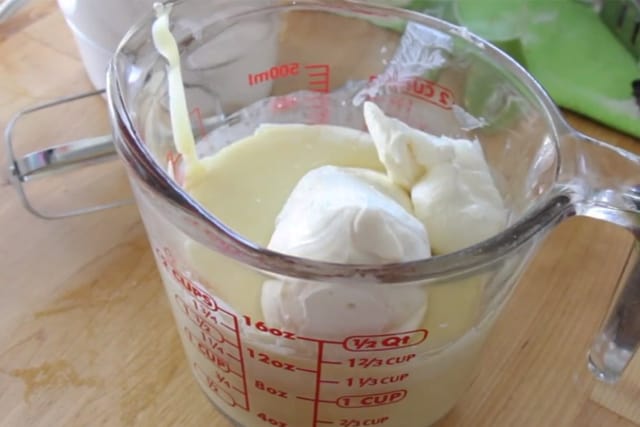
    In a bowl melt white chocolate chips, then add cream cheese and beat until no clumps and well incorporated:

    mixing cream cheese and melted white chocolate chips for White Chocolate Fruit Tart recipe

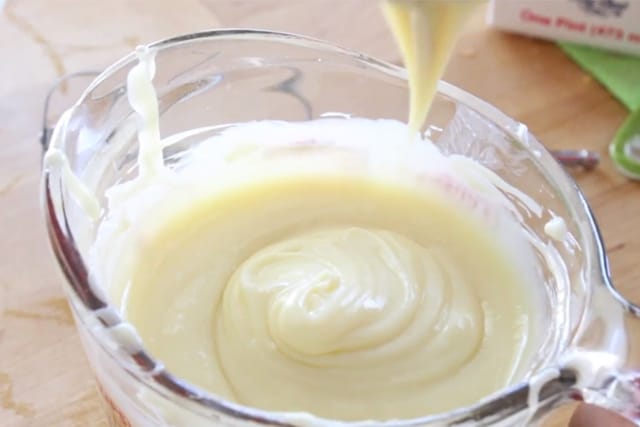
    Add heavy whipping cream and mix:

    adding and mixing the heavy whipping cream to the chocolate and cream cheese mixture of the White Chocolate Fruit Tart recipe

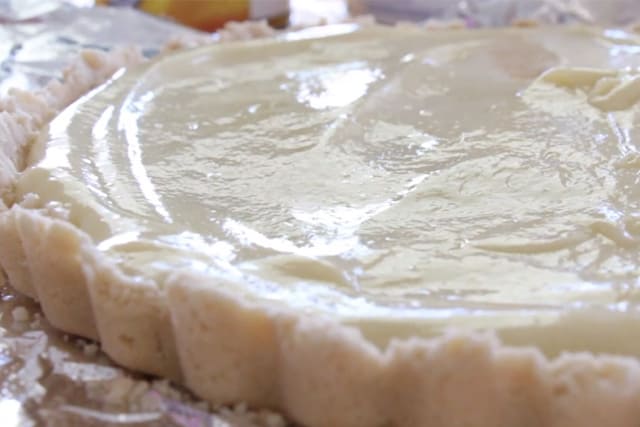
    Pour enough cream mixture onto the pie crust, like how I did it here:

    adding the pie cream mixture onto the pie crust of the White Chocolate Fruit Tart

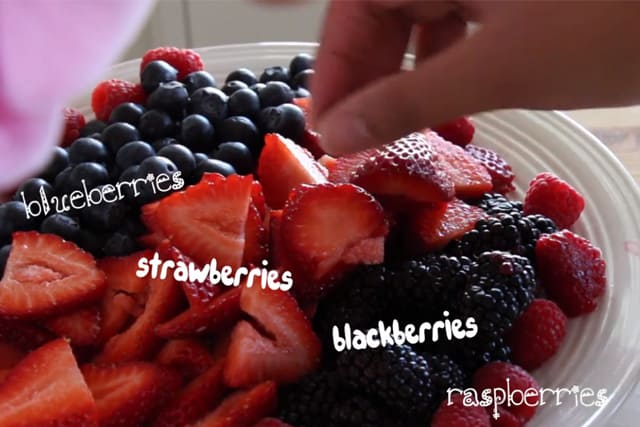
    I prepared ahead these delicious fresh fruits:

    fresh blueberries, blackberries, and sliced strawberries to be used for the White Chocolate Fruit Tart

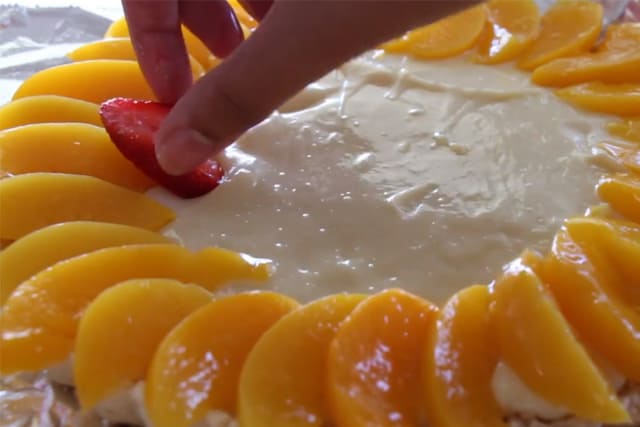
    I also had sliced peaches. I lined the sliced peaches around the surface of the pie, like so:

    arranging the peace slices and strawberry slices onto the White Chocolate Fruit Tart

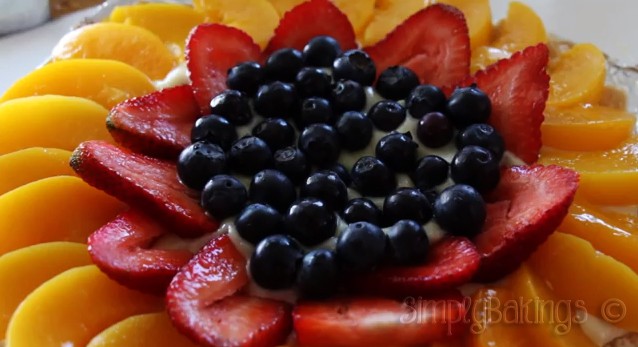
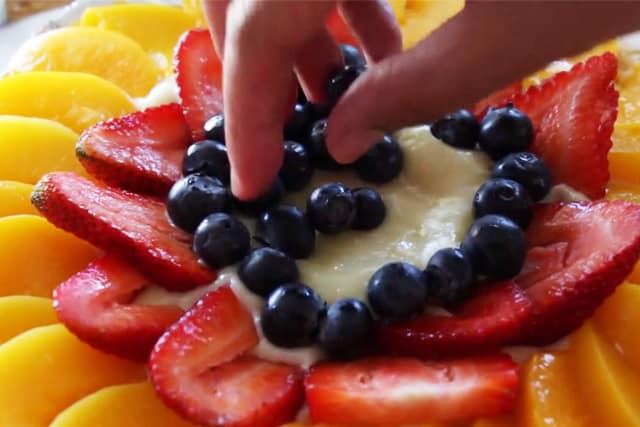
    Next, I also put around the sliced fresh strawberries then I placed the blueberries at the center. I love looking at all the vibrant colors from the fresh fruits.

    adding blackberries in the center of White Chocolate Fruit Tart

    Frequently Asked Questions for White Chocolate Fruit Tart:

    Q: What fruit is best for a fresh fruit tart?

    A: The choice of fruits to be used for fresh fruit tarts is really up to your taste and favorites. I love all the fruits I used for this recipe. Other fruits like sliced ripe mangoes, fresh sweet grapes, and other berries are also perfect for this White Chocolate Fruit Tart.

    Q: Can you freeze a fresh fruit tart?

    A: Yes, you can make it ahead and freeze it. Just secure the pie in an airtight container and thaw for at least an hour before serving it.

    Q: Can you make fruit tarts the night before?

    A: Yes, you can make this the night before. The pie crust might be soggy but if you place this in a pie plate that has enough support at the bottom, you won't have any problem.

    Q: How long do fresh fruit tarts last?

    A: It can stay chilled for 2-3 days. Make sure to keep it in a nicely closed container because it tends to absorb flavors and smell inside your chiller.

    Q: How do you keep fruit tarts from getting soggy?

    A: When putting the melted white chocolate at the bottom and sides of the tart or pie crust, just add enough. Do not put excessive liquid at the bottom to prevent the crust from getting soggy.


    More delicious dessert recipes to try!

    • Quick & Easy Cranberry Chip Cookies
    • Homemade 4 Ingredient Oreo Ice Cream
    • Keto Blueberry Pancakes
    • Vegan Blondies - Easy and Delicious
    • Mini Fruit Pizza Filling
    • Chocolate Ganache Blondies
    • White Chocolate Cranberry Cookies
    • Churro Cheesecake
    • No Bake OREO Cheesecake
    delicious White Chocolate Fruit Tart recipe
    5 from 1 vote
    Print Pin Recipe

    White Chocolate Fruit Tart

    Learn to make this delicious and rich White Chocolate Fruit Tart with using 5 ingredients only!
    Author: Lainey
    Prevent your screen from going dark

    Ingredients

    • 10 oz white chocolate chips
    • ¼ cup heavy whipping cream
    • 1 8 oz cream cheese, soften
    • assorted fruits
    • pie crust

    Instructions

    • In a bowl melt white chocolate chips, then add cream cheese and beat until no clumps and well incorporated.
    • Add heavy whipping cream and mix.
    • Serve on pie crust with assorted fruits
    Leave a Comment

    Watch The Recipe Video!

    QR Code
    Did you make this recipe?Share it on instagram or tag @simplybakings or #simplybakings!

    Desserts

    Mini Phyllo Tarts

    Sep 24, 2013 · 3 Comments

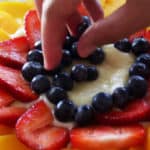
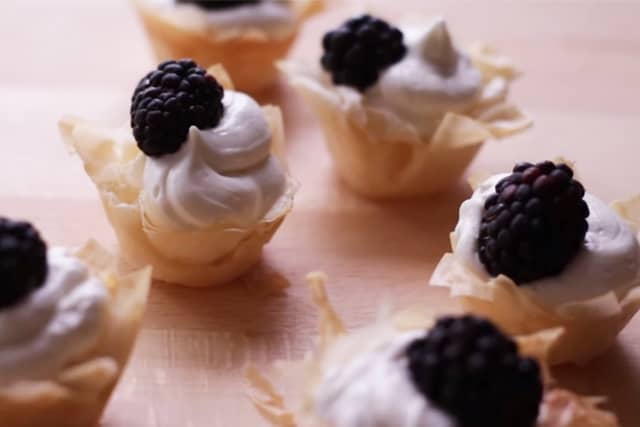
    Mini Phyllo Tarts topped with blueberries

    Make these easy, delicious, and pretty Mini Phyllo Tarts dessert at home with your kids! Every bite of the pastry is sweet, crunchy, and creamy. You can have a fresh punch of berries on top. It's perfect to make as summer treats and finger foods for garden parties!

    For more fun dessert ideas, try our Ube Tarts or Brownie Heart Bites for a sweet twist!

    Delicious Mini Phyllo Tarts
    [feast_advanced_jump_to]

    Why You’ll Love This Recipe

    These Mini Phyllo Tarts are easy to make with just simple savory ingredients. It's beginner-friendly and perfect for vegan or dairy-free diets.

    They’re a great way to indulge without feeling guilty. The savory fillings offer a boost of calcium, while the berries provide antioxidants for a healthier treat.

    You can even use the microwave to melt the chocolate if you're in a rush. Plus, you can use cooking spray to grease your mini muffin pans for easy removal.

    Ingredients

    Listed below are all the ingredients you will need:

    • Phyllo dough
    • Butter
    • Powdered sugar
    • White chocolate
    • Milk
    • Cream cheese
    • Frozen whipped topping
    • Your choice of berries

    See the recipe card for quantities.

    Instructions

    Prepare the Phyllo Tarts

    1. Preheat oven to 350°F (175°C).

    2. Brush melted butter on one sheet of phyllo dough. Sprinkle with powdered sugar and repeat twice, layering the dough.

    3. Slice the layered dough into three columns and place each piece into mini cupcake liners, alternating the sheets.

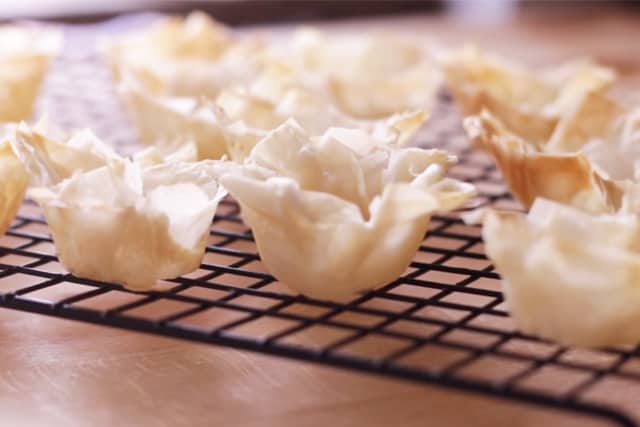
    4. Bake for 3–5 minutes, or until the dough is golden and crispy. Set aside to cool.

    Baked Phyllo cups on a cooling rack

    Make the Filling

    5. Melt the white chocolate and add it to a bowl.

    6. Add cream cheese and milk, then beat until smooth and well incorporated.

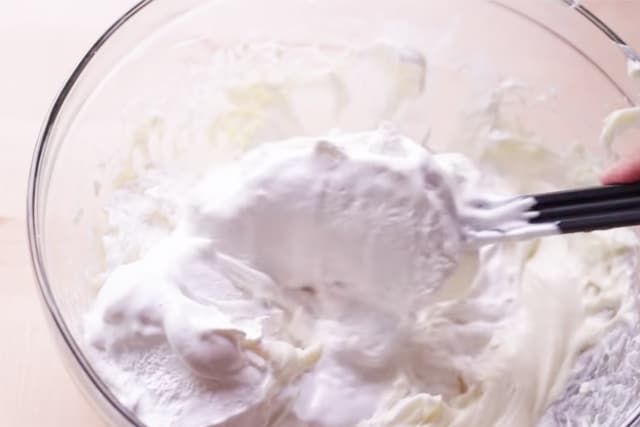
    7. Gently fold in the frozen whipped topping.

    Folding in the cream into the filling mixture

    Assemble and Serve

    8. Pipe the white chocolate filling into the cooled mini tarts.

    Piping the filling into the mini tarts

    9. Garnish with your choice of fresh berries.

    10. Serve immediately or refrigerate until ready to enjoy.

    Delicious Mini Phyllo Tarts

    Substitutions & Variations

    • Ingredient Swap
      Use dark chocolate instead of white chocolate for a richer flavor.
    • Variation
      Swap the regular whipped cream with coconut whipped cream for a dairy-free version.
    • Mistake to Avoid
      Be careful not to overfill the tarts because the Phyllo sheets or tart shells can break. Remember, stacking too many layers of phyllo can make them too thick.
    • Storage Tips
      • Store leftovers in an airtight container in the refrigerator for up to 3 days.
      • Phyllo dough doesn’t freeze well. It’s best to prepare the tarts fresh.
    Mini Phyllo Tarts topped with blueberries

    FAQs

    Can you eat raw phyllo dough?

    No, you cannot eat it raw! You must bake the Phyllo cups in muffin tins. So it would be safe to eat.

    Can I use frozen berries?

    Yes, but be sure to take them out of the freezer to thaw. Stack them on the counter at room temperature for a natural thawing method. Once thawed, drain any excess liquid before using them.

    Can I make these ahead of time?

    Yes, you can prepare the filling and store it in the fridge, then assemble the tarts when you're ready to serve.

    5 from 1 vote
    Print Pin Recipe

    Mini Phyllo Tarts

    These Mini Phyllo Tarts are a quick and delightful dessert made with flaky phyllo dough, creamy white chocolate filling, and topped with fresh berries. They’re a perfect treat for any occasion and take less than 15 minutes to prepare!
    Prep Time10 minutes mins
    Cook Time5 minutes mins
    Total Time15 minutes mins
    Course: Dessert
    Cuisine: Fusion (American-Filipino/Asian)
    Servings: 12 mini tarts
    Calories: 191kcal
    Author: Lainey
    Prevent your screen from going dark

    Ingredients

    • Phyllo dough
    • ½ cup butter melted
    • ½ cup Powdered sugar you may not use all of it
    • 1 cup white chocolate
    • 2 tablespoons milk
    • 1 8 oz package Cream cheese softened
    • 8 oz frozen whipped topping
    • your choice of berries strawberries, blueberries, raspberries

    Instructions

    Prepare the Phyllo Tarts

    • Preheat oven to 350°F (175°C).
    • Brush melted butter on one sheet of phyllo dough. Sprinkle with powdered sugar and repeat twice, layering the dough.
    • Slice the layered dough into three columns and place each piece into mini cupcake liners, alternating the sheets.
    • Bake for 3–5 minutes, or until the dough is golden and crispy. Set aside to cool.

    Make the Filling

    • Melt the white chocolate and add it to a bowl.
    • Add cream cheese and milk, then beat until smooth and well incorporated.
    • Gently fold in the frozen whipped topping.

    Assemble and Serve

    • Pipe the white chocolate filling into the cooled mini tarts.
    • Garnish with your choice of fresh berries.
    • Serve immediately or refrigerate until ready to enjoy.
    Leave a Comment

    Notes

    • Feel free to use any fruit you like to garnish the tarts.
    • If you don't have mini cupcake liners, you can bake the tarts on a baking sheet and use a tart pan for shaping.
    Serving: 1gCalories: 191kcalCarbohydrates: 16gProtein: 1gFat: 14gSaturated Fat: 9gPolyunsaturated Fat: 0.5gMonounsaturated Fat: 3gTrans Fat: 0.3gCholesterol: 23mgSodium: 86mgPotassium: 57mgFiber: 0.02gSugar: 16gVitamin A: 259IUVitamin C: 0.1mgCalcium: 41mgIron: 0.1mg

    Watch The Recipe Video!

    QR Code
    Did you make this recipe?Share it on instagram or tag @simplybakings or #simplybakings!

    You Might Also Like:

    • Cornmeal Mush
    • NO BAKE White Chocolate Cookies
    • Strawberry Pocky Cake
    • Jello Cookies
    • Cream Cheese Chocolate Chip Cookies

    Recipes for Every Moment

    Hosting a brunch and need a quick appetizer or dessert the next day? These Mini Phyllo Tarts are a light, yet impressive treat - easy to whip up with even just a muffin pan and pizza cutter!

    Appetizers, Desserts, Pastry

    Strawberry Greek Yogurt Cake

    Sep 24, 2013 · 11 Comments

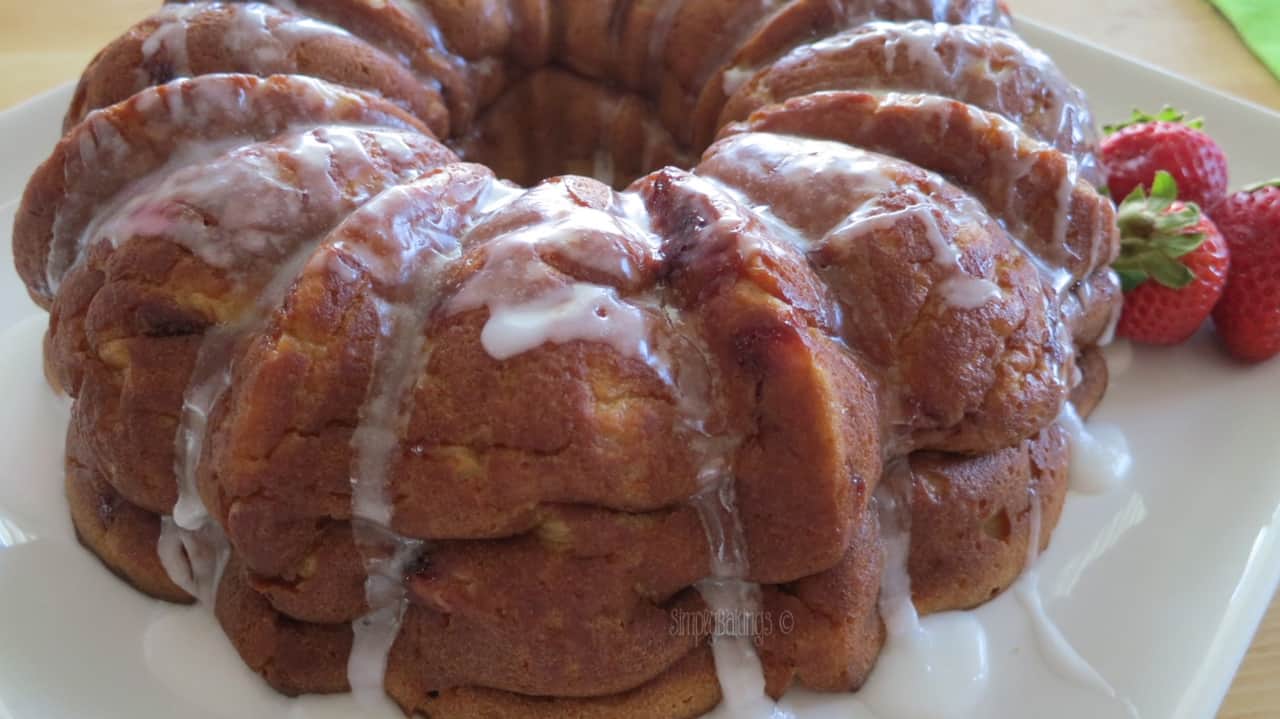
    A plate of Strawberry Greek Yogurt Cake

    Not fond of eating cake for birthdays, but want a beautiful presentation? Make a Strawberry Greek Yogurt Cake, an awesome alternative to the regular birthday cake. Made with fresh strawberries and Greek yogurt cream, it’s a simple yet delicious treat for any occasion. Give this a try!

    If you love fruity desserts, try our Mini Salted Caramel Cheesecake or indulge in a Vegan Coffee Cake for a healthier option!

    [feast_advanced_jump_to]

    Why You’ll Love This Recipe

    This fresh strawberry yogurt cake is easy to make and beginner-friendly, perfect for anyone looking for a quick dessert. It’s also a great option for those following a dairy-free or vegetarian diet.

    Greek yogurt adds a creamy texture and offers a boost of protein and probiotics, which are great for digestion. You can also use plain yogurt.

    Ingredients

    Listed below are all the ingredients you will need:

    • Strawberries
    • All-purpose flour
    • Baking soda
    • Salt
    • Zest of a lemon
    • Lemon juice
    • Butter, softened
    • Sugar
    • Eggs
    • Greek plain or vanilla yogurt
    • Powdered sugar

    See the recipe card for quantities.

    Instructions

    Prepare the Ingredients

    1. Preheat oven to 375°F (190°C). Grease a bundt pan and set aside.

    2. Cut the strawberries and set them aside.

    Mix Ingredients Together

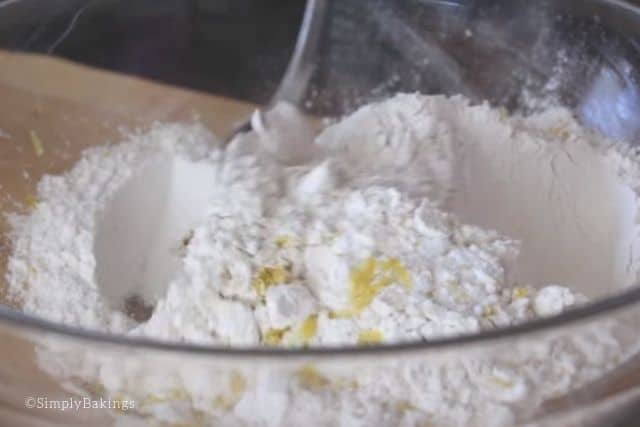
    3. In a bowl, combine all-purpose flour, baking soda, salt, and lemon zest. Mix until well combined.

    Mixing lemon zest and flour in a glass bowl

    4. In another bowl, add lemon juice, butter, eggs, and sugar. Mix until well incorporated.

    Combine Wet and Dry Ingredients

    5. Alternate adding Greek yogurt and the dry ingredients into the wet mixture, mixing after each addition.

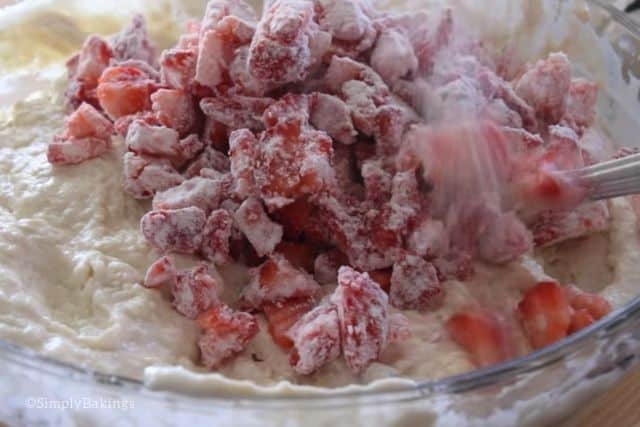
    6. Gently fold in the strawberries.

    Folding in strawberries to the cake batter

    Bake the Cake

    7. Pour the batter into the prepared bundt pan.

    8. Bake for 60 minutes or until golden brown, and a toothpick inserted comes out clean.

    Make the Glaze and Serve

    9. In a small bowl, mix powdered sugar with lemon juice until a glaze forms.

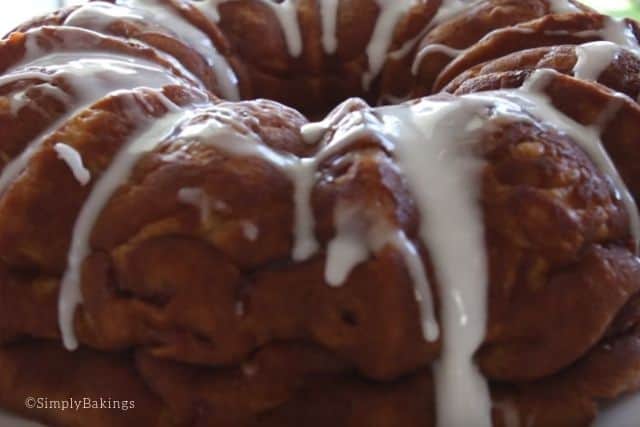
    10. Once the cake has cooled slightly, pour the glaze over the cake immediately after transferring it to a serving tray.

    Delicious Strawberry Greek Yogurt Cake with glaze on top

    Substitutions & Variations

    • Ingredient Swap
      Substitute the Greek yogurt with plant-based yogurt for a vegan version.
      Use full fat Greek yogurt for a richer, creamier texture.
    • Variation
      Use whole wheat flour instead of all-purpose flour for a healthier twist.
      Add fresh blackberries for a pop of color plus extra flavor.
    • Mistake to Avoid
      Avoid over-mixing the batter. This will make the cake dense instead of light and fluffy. Whisk gently to keep the texture airy.
    • Storage Tips
      • Store the strawberry cake in an airtight container at room temperature for 1-2 days, or refrigerate for up to 5 days.
      • The ingredients don’t freeze well, so it’s best to enjoy this cake fresh.

    FAQs

    Can I make this cake into 3 layers?

    Yes. You can slice this cake into three layers. Make sure that the cake is cool enough before you slice it horizontally or else, the cake will break.

    Can I use frozen strawberries?

    Yes, but make sure to thaw and drain them to avoid excess liquid in the batter.

    What kind of yogurt should I use?

    You can use either plain or vanilla Greek yogurt depending on your preference.

    A plate of Strawberry Greek Yogurt Cake
    5 from 2 votes
    Print Pin Recipe

    Strawberry Greek Yogurt Cake

    A super flavorful, easy to bake, soft Strawberry Greek Yogurt cake recipe that is perfect for any occasion. The combination of fresh strawberries, tangy Greek yogurt, and lemon creates a moist, delicious cake that everyone will love!
    Prep Time15 minutes mins
    Cook Time1 hour hr
    Total Time1 hour hr 15 minutes mins
    Course: Dessert
    Cuisine: American
    Servings: 1 bundt cake
    Calories: 4927kcal
    Author: Lainey
    Prevent your screen from going dark

    Ingredients

    • 12 oz fresh strawberries
    • 2 cups all-purpose flour
    • ½ teaspoon baking soda
    • ½ teaspoon salt
    • Zest of 1 lemon
    • 3 tablespoons lemon juice
    • 1 cup butter softened
    • 2 cups sugar
    • 2 eggs
    • 8 ounces Greek plain or vanilla yogurt
    • 1 cup powdered sugar

    Instructions

    Prepare the Ingredients

    • Preheat oven to 375°F (190°C). Grease a bundt pan and set aside.
    • Cut the strawberries and set them aside.

    Mix Ingredients Together

    • In a bowl, combine all-purpose flour, baking soda, salt, and lemon zest. Mix until well combined.
    • In another bowl, add lemon juice, butter, eggs, and sugar. Mix until well incorporated.

    Combine Wet and Dry Ingredients

    • Alternate adding Greek yogurt and the dry ingredients into the wet mixture, mixing after each addition.
    • Gently fold in the strawberries.

    Bake the Cake

    • Pour the batter into the prepared bundt pan.
    • Bake for 60 minutes or until golden brown, and a toothpick inserted comes out clean.

    Make the Glaze and Serve

    • In a small bowl, mix powdered sugar with lemon juice until a glaze forms.
    • Once the cake has cooled slightly, pour the glaze over the cake immediately after transferring it to a serving tray.
    Leave a Comment

    Notes

    • You can use either plain or vanilla Greek yogurt for the cake.
    • If fresh strawberries are unavailable, you can substitute with frozen strawberries—just be sure to thaw and drain them before using.
    Serving: 1gCalories: 4927kcalCarbohydrates: 750gProtein: 49gFat: 205gSaturated Fat: 125gPolyunsaturated Fat: 10gMonounsaturated Fat: 53gTrans Fat: 7gCholesterol: 845mgSodium: 3414mgPotassium: 1372mgFiber: 14gSugar: 546gVitamin A: 6416IUVitamin C: 219mgCalcium: 479mgIron: 15mg

    Watch The Recipe Video!

    QR Code
    Did you make this recipe?Share it on instagram or tag @simplybakings or #simplybakings!

    You Might Also Like:

    • Best Vegan Fruit Cheesecake
    • Malunggay Whole Wheat Bread
    • 3 Ingredient Chocolate Cupcakes

    Recipes for Every Moment

    Hosting a family gathering and need a crowd-pleasing dessert? This Strawberry Greek Yogurt Cake is easy to prepare and will impress everyone with its fresh flavor.

    Breakfast & Brunch, Cake, Desserts

    Chocolate Flourless Cake

    Sep 24, 2013 · Leave a Comment

    This is such a decadent, rich, and fudgy Chocolate flourless cake that you will love. Being low-carb and gluten-free, this is an excellent treat! Just pure chocolate goodness in one delicious cake!

    chocolate flourless cake garnished with fresh strawberries and raspberries

    Chocolate Flourless Cake has such an AWESOME chocolate flavor!  This cake is an excellent treat to bring to your friends who are gluten-free and if they don't like eating white sugar replace the sugar with stevia and or honey!

    Tips and Tricks for Making This Chocolate Flourless Cake Recipe: 

    • For a more festive look and more decadent chocolate goodness, frost with a chocolate ganache and fresh strawberries.
    • If you don't have ganache, you can simply sprinkle the chocolate flourless cake with powdered sugar and whipped cream.
    • If you love a strong chocolate flavor, you can use the bittersweet variant of mini chocolate chips.
    • Instead of the regular white sugar, you can use stevia, honey, or agave nectar.

    How to Make this Chocolate Flourless Cake Recipe:

    Here is the quick look of the ingredients for Chocolate Flourless Cake:

    • butter
    • semi-sweet chocolate
    • eggs
    • sugar
    • vanilla extract

    Once the ingredients are all ready, let's begin!

    Preheat Oven 300 degree F and oil and place parchment paper use springform pan.

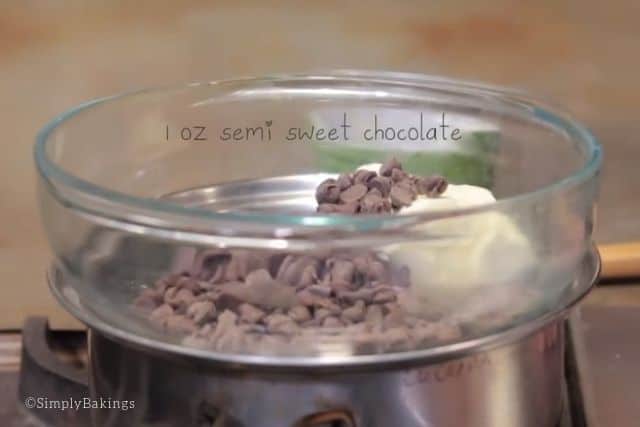
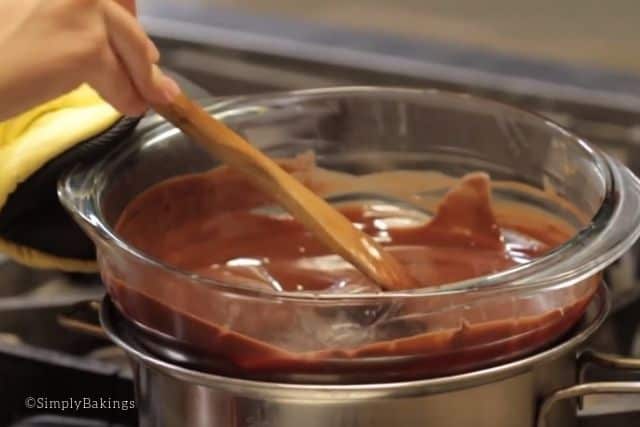
    Melt butter and semi-sweet chocolate in a double boiler:

    melting the butter and mini semi sweet chocolate chips

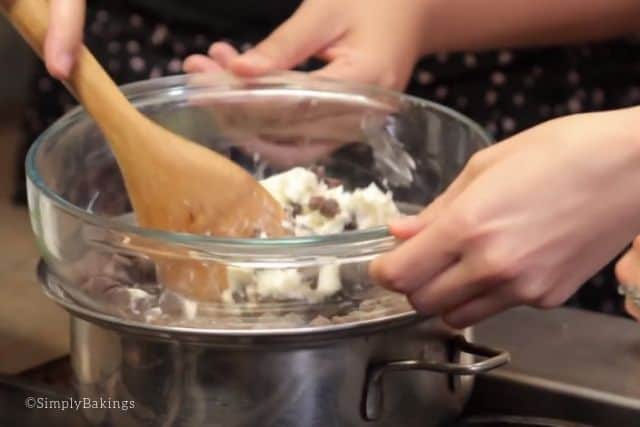
    Just keep on mixing it until it softens and melts:

    mixing the butter and mini chocolate chips with a wooden ladle

    The consistency should be like this - shiny and smooth:

    mixing the melted chocolate and butter

    In a bowl add eggs, sugar, and vanilla extract and mix. You have other options other than sugar. You can use stevia, agave nectar, or honey:

    3 eggs in a glass bowl

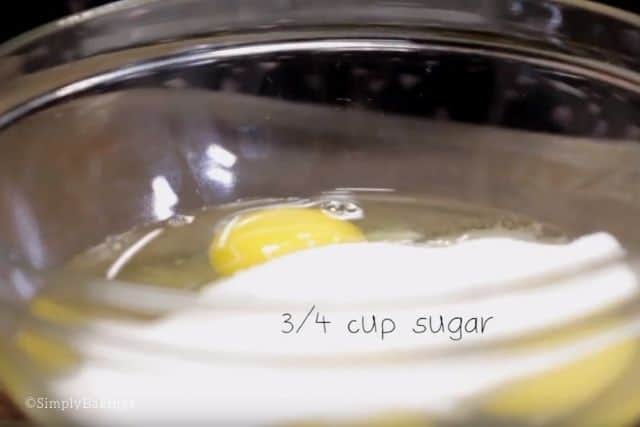
    But for this recipe, I used just plain white sugar:

    adding sugar into the eggs in a glass bowl

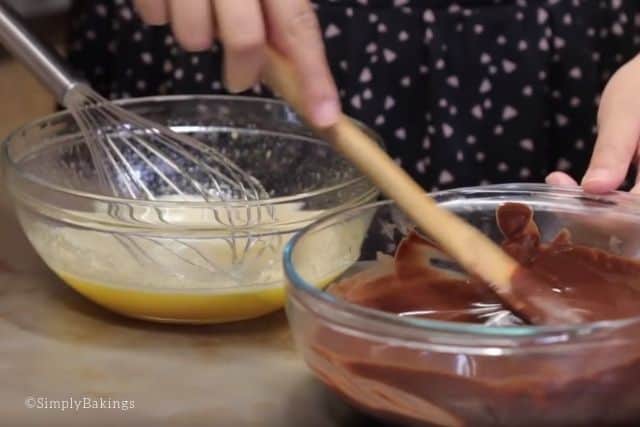
    When butter and chocolate are melted and cooled add to the bowl and mix:

    preparing the batter for the chocolate flourless cake

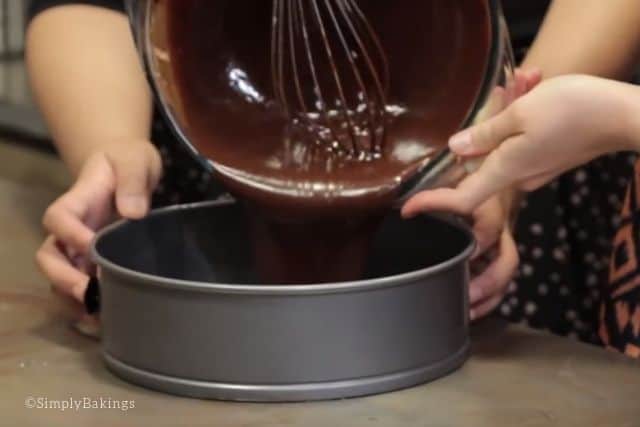
    Pour into the springform pan and bake for 30-40 minutes:

    pouring the chocolate batter into the springform pan

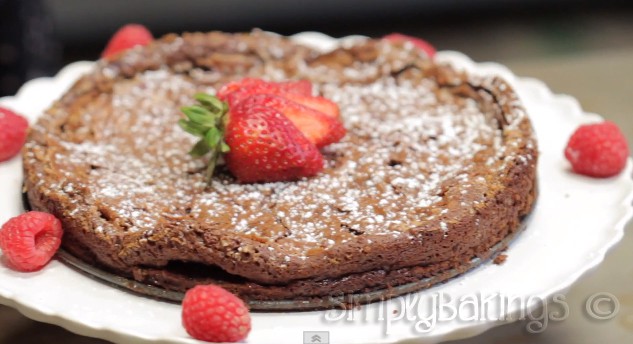
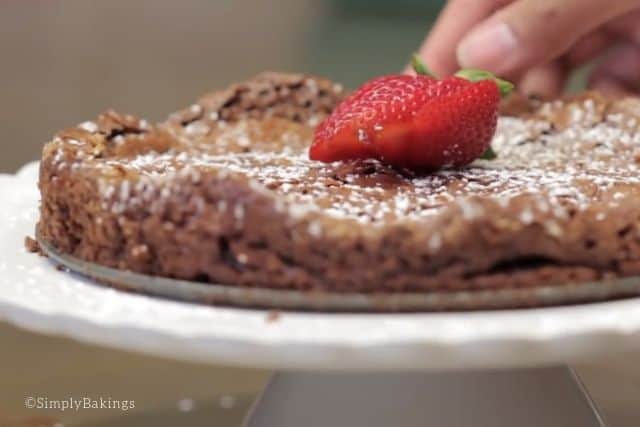
    And just like that, your Chocolate Flourless cake is done! Garnish with powdered sugar and sliced fresh strawberries 🙂

    garnishing the flourless chocolate cake with powdered sugar and sliced fresh strawberries

    Here are some great chocolate cake recipes you will surely love:

    • Chocolate Mug Cake with Protein
    • Vegan Chocolate Cake
    • Hot Fudge Chocolate Cake
    • Zebra Brownie Cake

    Frequently Asked Questions for the Chocolate Flourless Cake Recipe:

    Q: Can a flourless cake be frozen?

    A: Yes, it can be frozen as it freezes nicely.

    Q: If I can't eat eggs, what should be the replacement?

    A: You can use egg replacers which are available in grocery stores.

    Q: Can I make this recipe into cupcakes?

    A: Yes, you can bake this into cupcake pans instead of the springform pan.

    flourless chocolate cake garnished with powdered sugar and resh strawberries
    No ratings yet
    Print Pin Recipe

    Chocolate Flourless Cake

    A fudgy, super rich, easy to make, and dense chocolate flourless cake which you should definitely give a try and keep in your recipe list!
    Course: Dessert
    Author: Lainey
    Prevent your screen from going dark

    Ingredients

    • ½ cup butter
    • 1 oz semi sweet chocolate
    • 3 egg
    • ¾ sugar
    • 1 teaspoon vanilla extract

    Instructions

    • Preheat Oven 300 degree F and oil and place parchment paper use springform pan
    • Melt butter and semi sweet chocolate in a double boiler.
    • In a bowl add eggs, sugar, and vanilla extract and mix. When butter and chocolate is melted and cooled add to the bowl and mix.
    • Bake for 30-40 minutes
    Leave a Comment
    QR Code
    Did you make this recipe?Share it on instagram or tag @simplybakings or #simplybakings!

    NEVER MISS A RECIPE!

    PINTEREST / FACEBOOK / INSTAGRAM / TWITTER

    If you’ve tried this or any other of my recipes, don’t forget to rate the recipe and to leave me a comment. I love hearing from you!
    Cake, Desserts

    White Chocolate Strawberry Cupcakes

    Sep 24, 2013 · 2 Comments

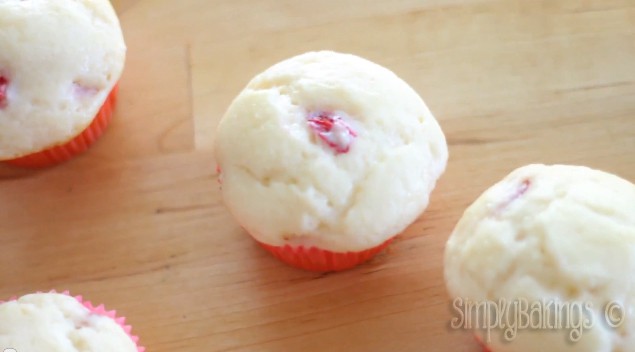
    This White Chocolate Strawberry cupcake is the perfect recipe for those who love to bake using cake mixes. This cupcake has a moist, soft, and fluffy texture! 

    white chocolate strawberry cupcakes

    Cupcakes are fun to bake and really simple.  For this recipe, I used a cake box mix and added a few ingredients to make it taste even better.

    Tips and Tricks for Making This White Chocolate Strawberry Cupcakes Recipe: 

    • If you have the vanilla plant at home, it is best to use the actual vanilla bean paste. It gives out a very natural and delicious flavor to the cupcakes.
    • Don't forget to sift the cake mix before mixing. It is best to make sure you get no lumps in your baked cupcakes.
    • If you don't have fresh strawberries at home, you can use the jam or dried strawberries instead. At least, you still get the strawberry flavor without the actual fruit.

    How to Make this White Chocolate Strawberry Cupcakes Recipe:

    Gather the ingredients for this White Chocolate Strawberry Cupcakes and once the ingredients are all ready, let's begin!

    • white cake mix
    • egg whites
    • buttermilk
    • oil
    • sour cream
    • vanilla extract
    • strawberries

    Preheat oven 350 degrees and line cupcake liners

    Add white cake mix into a bowl, separate egg yolk from egg whites and add the egg whites, buttermilk, oil, sour cream, and vanilla extract into the bowl:

    wet ingredients for the white chocolate strawberry cupcakes recipe

    Beat for 2 minutes until well incorporated:

    well mixed wet ingredients of white chocolate strawberry cupcakes recipe

    The cupcake batter should look like this:

    mixed cupcake batter of white chocolate strawberry cupcakes

    Cut the strawberries, then fold the strawberries in the batter:

    adding the sliced fresh strawberries to the cupcake batter

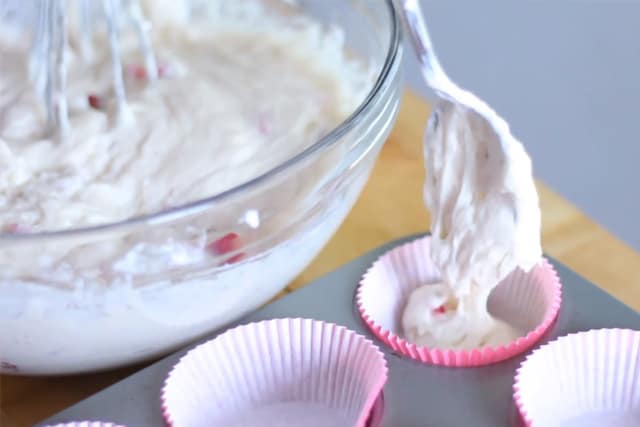
    Pour batter into the cupcake pan and bake for 15-20 minutes:

    placing the cupcake batter into individual cupcake liners

    Let your Strawberry cupcakes cool completely before glazing them:

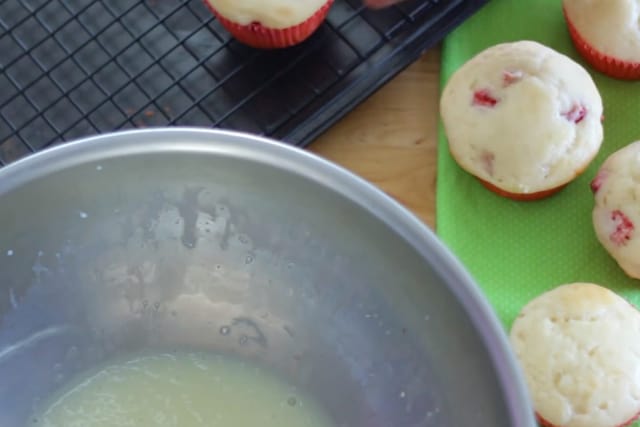
    perfectly baked white chocolate strawberry cupcakes in a baking pan

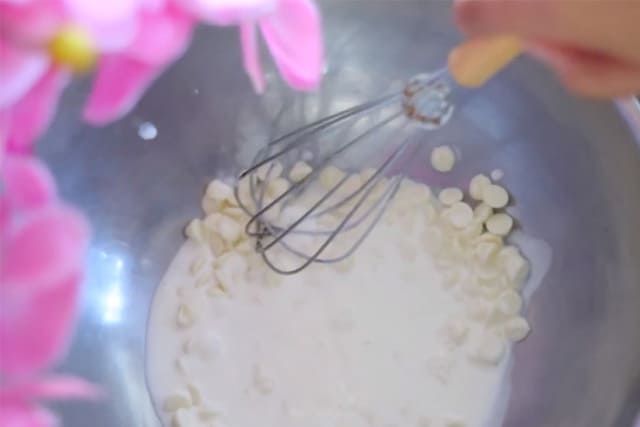
    For your white chocolate glaze, melt mini white chocolate chips in warm milk until the mini white chocolate chips are liquified:

    melting the mini white chocolate chips in a bowl using a whisk

    Dip each White Chocolate Strawberry Cupcakes into the white chocolate glaze:

    white chocolate glaze for white chocolate strawberry cupcakes

    For a pop of color and a pretty garnish, top White Chocolate Strawberry Cupcakes with fresh strawberries, like so:

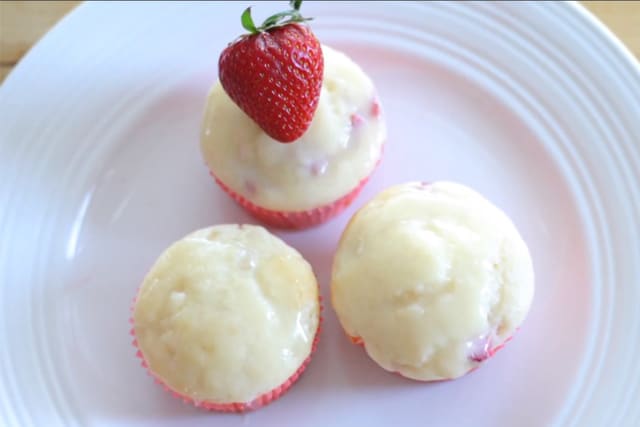
    three pieces white chocolate strawberry cupcakes on a white round plate with fresh strawberry

    Frequently Asked Questions for the White Chocolate Strawberry Cupcakes Recipe:

    Frequently Asked Questions for the Blueberry Cupcake Bouquet Recipe:

    Q: How many cupcakes does this recipe make?

    A: This recipe makes 12 White Chocolate Strawberry Cupcakes cupcakes.

    Q: Can we make this ahead and freeze it? 

    A: Yes, you can freeze the cupcakes and thaw them when you are ready to serve.

    Q: How can you store these White Chocolate Strawberry Cupcakes cupcakes? 

    A: You can freeze the cupcakes if you are going to keep them for a week or you can just store them in an airtight container and chill if you are going to serve it within a few days.

    Q: Can I make this into a cake instead? 

    A: Yes, you can! Just use a cake pan instead of cupcake pans.

    Q: What if I don't have the fresh strawberries, can I use the dried strawberries or strawberry jam instead? 

    A: Fresh ones taste so much better and would give a delicious texture to your White Chocolate Strawberry Cupcakes but if you don't have those, you can use the jam or dried strawberries instead. At least, you still get the strawberry flavor without the actual fruit.


    More fun cupcake recipes and strawberry dessert recipes you can try:

    • Strawberry Poke Cake
    • No-Bake Strawberry Float
    • Easy Strawberry Shortcake Cookies
    • 3 Ingredient Chocolate Cupcakes
    • Nutella Cupcakes
    freshly baked white chocolate strawberry cupcakes
    No ratings yet
    Print Pin Recipe

    White Chocolate Strawberry Cupcakes

    If you love a cupcake with a delicious, milky taste and fresh strawberries, this White Chocolate Strawberry Cupcakes is the perfect recipe for you!
    Course: Dessert
    Author: Lainey
    Prevent your screen from going dark

    Ingredients

    • 1 box of white cake mix
    • 4 egg whites
    • ¾ cup buttermilk
    • ⅓ cup oil
    • ¾ cup sour cream
    • 1 tablespoon vanilla extract
    • 6 strawberries

    Instructions

    • Preheat oven 350 degrees and line cupcake liners
    • Add white cake mix into a bowl, separate egg yolk from egg whites and add the egg whites, buttermilk oil sour cream and vanilla extract into the bowl and beat for 2 minutes.
    • Cut the strawberries, then fold the strawberries in the batter.
    • Pour batter into the cupcake pan and bake for 15-20 minutes
    Leave a Comment

    Watch The Recipe Video!

    QR Code
    Did you make this recipe?Share it on instagram or tag @simplybakings or #simplybakings!

    NEVER MISS A RECIPE!

    PINTEREST / FACEBOOK / INSTAGRAM / TWITTER

    If you’ve tried this or any other of my recipes, don’t forget to rate the recipe and to leave me a comment. I love hearing from you!

    Cupcakes, Desserts

    Mini Fruit Pizza Filling - 3 Ingredients ONLY

    Sep 24, 2013 · 3 Comments

    delicious mini fruit pizza using sugar cookies

    Indulge in the delightful creation of mini fruit pizza fillings for your bite-sized treats! Begin with a base of soft, chewy sugar cookies, generously adorned with creamy cream cheese frosting and an abundance of freshly sliced fruits.

    Looking for more summer dessert recipes that is no bake? Try my Easy Oreo Cheesecake Bites or my 3 Ingredient Ice Creams!

    mini fruit pizza cookie
    [feast_advanced_jump_to]

    Top Tips

    • To soften the cream cheese for the mini fruit pizza filling, you can pop it on the microwave for a few seconds.
    • Using store-bought sugar cookie dough for a pie crust is a convenient shortcut that can save time and effort in the kitchen.
    • Never leave out the cream cheese for more than an hour. It will attract bacteria which can cause serious illness.

    Variations

    • Tropical Twist: Top your sugar cookie base with a coconut cream cheese frosting and decorate with slices of mango, pineapple, kiwi, and a sprinkle of toasted coconut flakes.
    • Berry Bliss: Spread a layer of whipped cream cheese on your cookie base, then arrange a colorful assortment of fresh strawberries, blueberries, raspberries, and blackberries for a burst of fruity flavor.
    • Citrus Delight: Combine cream cheese with a hint of lemon zest for a tangy frosting. Arrange slices of oranges, grapefruits, and mandarins on top for a zesty and refreshing twist.
    • Apples are also an excellent choice. Just remember to squeeze some lemon juice over them to prevent discoloration.
    • Nutty Crunch: Mix cream cheese with a touch of almond extract for a nutty flavor. Layer sliced bananas, strawberries, and toasted almonds on top of your cookie base for a delightful crunch.
    • Chocolate Drizzle: Add a dollop of chocolate-hazelnut spread to your cream cheese frosting for a rich and decadent flavor. Top with sliced bananas, strawberries, and a drizzle of melted chocolate for an extra indulgent treat.
    • Garnish: Sprinkle powdered sugar or confectioners' sugar right before serving.
    • If you prefer not to prepare these as mini cookies, you can use a pizza pan to create a larger version of this recipe.

    Substitutions

    • Cream Cheese Frosting: Substitute with Greek yogurt mixed with a bit of honey or maple syrup for a lighter option. Alternatively, try whipped coconut cream for a dairy-free alternative.
    • Sugar Cookie Base: Instead of traditional sugar cookies, consider using a shortbread or buttery biscuit base for a different texture and flavor profile. You could also opt for a graham cracker crust for a hint of sweetness and crunch.
    • Fresh Fruits: Feel free to substitute any fruits based on personal preference or seasonal availability. Some options include sliced peaches, nectarines, grapes, cherries, or even exotic fruits like dragon fruit or star fruit.
    • Flavor Additions: Experiment with different flavorings for your cream cheese frosting, such as vanilla extract, almond extract, or citrus zest. You can also add spices like cinnamon or nutmeg for extra warmth and depth of flavor.

    Storage

    • Refrigeration: If your mini fruit pizzas contain perishable ingredients like cream cheese frosting or fresh fruits, store them in an airtight container in the refrigerator. They can typically last for up to 2-3 days, but it's best to consume them within 1-2 days for optimal freshness.
    • Assembly Ahead of Time: If you're preparing mini fruit pizzas for an event or gathering, you can assemble the cookie base and frosting ahead of time and store them separately in the refrigerator. When ready to serve, simply spread the frosting on the cookie base and top with fresh fruits.

    Ingredients

    Listed below are all the ingredients you will need:

    • cream cheese
    • sugar
    • vanilla extract
    • fresh fruits (strawberry, grapes, kiwi, or any fruit of your choice)
    mini fruit pizza ingredients with cream cheese

    Instructions

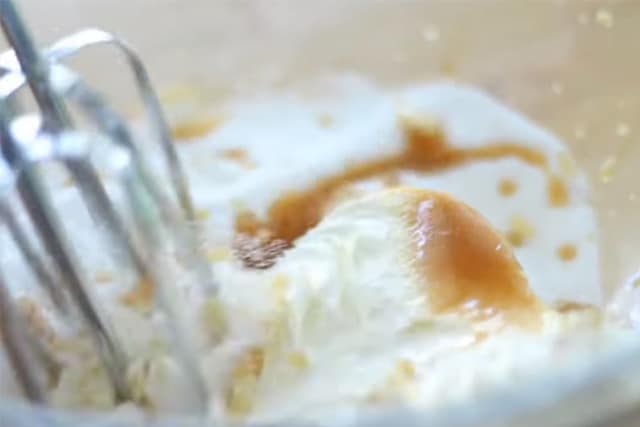
    In a large bowl, add cream cheese, sugar, and vanilla extract and mix on high until everything is incorporated. (Feel free to use a stand mixer.)

    Feel free to chill overnight, for best results.

    mixing the cream cheese, sugar, and vanilla for mini fruit pizza using a handheld mixer

    Use filling for pastries or cookies:

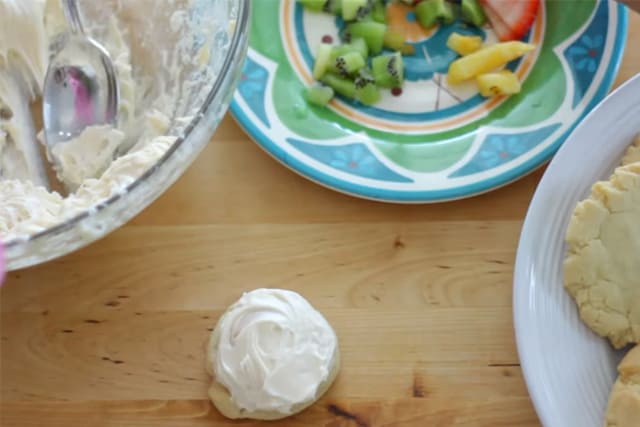
    putting the creamy pizza cream cheese filling on top of the sugar cookie

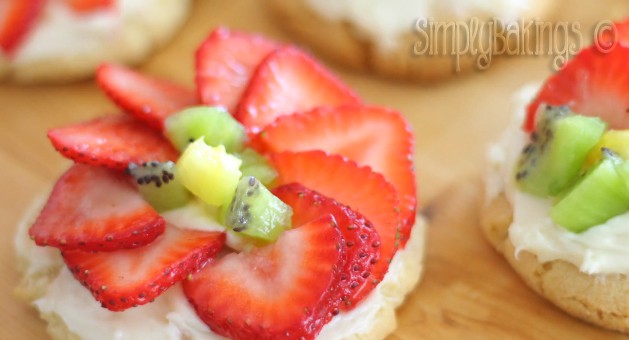
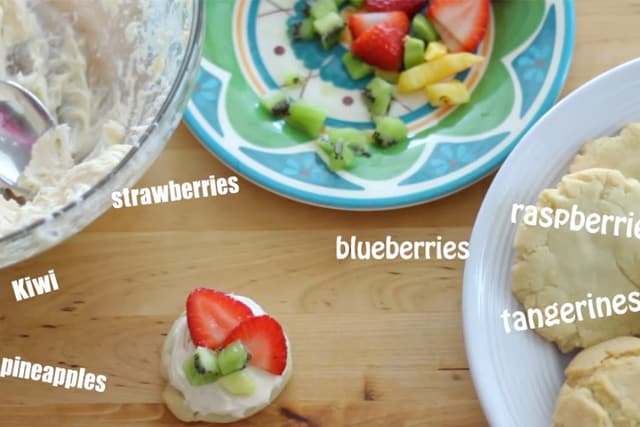
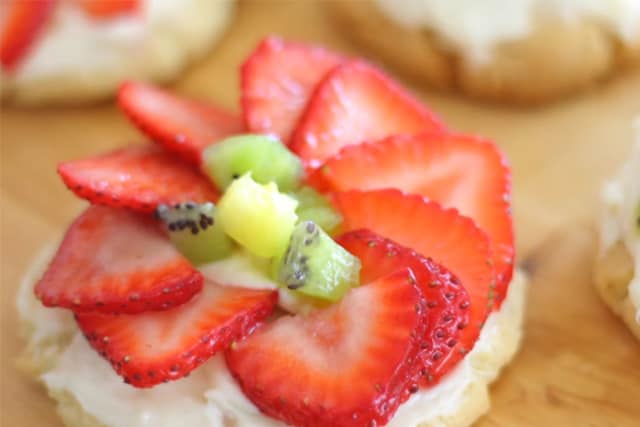
    Top with your favorite fresh fruits. I used sliced fresh strawberries and kiwi for this recipe:

    delicious mini fruit pizza with cream cheese filling and sliced fruits

    If you're looking for a good base try my Sugar Cookie or my Pie Crust Recipe.

    Frequently Asked Questions

    What fruits are good on pizza?

    Fruits to avoid if you're looking to minimize juiciness and watery texture include watermelon, cantaloupe, and citrus fruits like oranges and grapefruits. These fruits can release a lot of juice, which may make the cookie base soggy if not consumed immediately.
    Berries: Strawberries, blueberries, raspberries, and blackberries are all excellent options. They are firm when ripe and add vibrant color and flavor to your mini fruit pizzas.
    Stone Fruits: Fruits like peaches, nectarines, and apricots are juicy but can still hold their shape well when sliced thinly. They provide a sweet and juicy contrast to the creamy frosting and cookie base.
    Pineapple: Fresh pineapple chunks or rings are firm and have a tangy sweetness that pairs nicely with the other flavors on the pizza.
    Kiwi: Kiwi is firm and slightly tart, adding a refreshing pop of green color and flavor to your mini fruit pizzas.
    Bananas: While bananas can be creamy and soft, they can still hold their shape when sliced thinly. They add a natural sweetness and creamy texture to the pizzas.


    Can I make fruit pizza the day before?

    Usually, the cookie or your fruit pizza base will get soggy if you place the cream cheese filling and fruits the day before. What you can do to save time is to mix the filling and slice the fruits ahead and refrigerate them. On the day that you will be serving them, all you have to do is assemble the mini fruit pizza.

    What's the difference between a fruit pizza and a fruit tart?

    A fruit pizza typically features a softer, chewier base topped with cream cheese frosting and fresh fruits, while a fruit tart has a flaky pastry crust filled with pastry cream or custard and adorned with fresh fruits.

    mini fruit pizza with cream cheese filling and strawberries and kiwi.
    4 from 2 votes
    Print Pin Recipe

    Mini Fruit Pizza Filling - 3 Ingredients ONLY

    Create these delightful and refreshing mini fruit pizzas with a mouthwatering fruit filling! Simply mix and assemble the fruits for a super easy process, perfect for beginners and seasoned bakers alike.
    Prep Time10 minutes mins
    Cool Time6 hours hrs
    Total Time6 hours hrs 10 minutes mins
    Course: Dessert
    Cuisine: American
    Servings: 12 cookies
    Calories: 17kcal
    Author: Lainey
    Prevent your screen from going dark

    Ingredients

    Filling

    • 1 (8) oz cream cheese softened
    • ¼ cup granulated sugar
    • ½ teaspoon vanilla extract

    Fruit Suggestions

    • Strawberries
    • Kiwi
    • Blueberries
    • Raspberries
    • Pineapple
    • Mandarin oranges
    • Grapes
    • Mango
    • Banana
    • Peach
    • Blackberries
    • Apples
    • Pears
    • Cherries
    • Pomegranate seeds
    • Cranberries
    • Apricots
    • Plums
    • Figs
    • Passion fruit

    Instructions

    • Add cream cheese, sugar, and vanilla extract in a large bowl and beat on high until everything is incorporated.
    • Chill overnight for best results.
    • Spread the cream cheese mixture over the cookies, followed by your choice of fruit(s).
    Leave a Comment

    Notes

    If you're looking for a good base try my Sugar Cookie or my Pie Crust Recipe.
    Serving: 1gCalories: 17kcalCarbohydrates: 4gProtein: 0.01gFat: 0.04gSaturated Fat: 0.02gPolyunsaturated Fat: 0.001gMonounsaturated Fat: 0.01gCholesterol: 0.1mgSodium: 0.3mgPotassium: 0.4mgSugar: 4gVitamin A: 1IUCalcium: 0.1mgIron: 0.003mg

    Watch The Recipe Video!

    QR Code
    Did you make this recipe?Share it on instagram or tag @simplybakings or #simplybakings!

    I have tried different kinds of fillings for tarts and pastries and I found this to be the easiest to make.  This recipe only requires three ingredients and if topped with fruit it's a party in your mouth!  For the cookie, I used my sugar cookie recipe found here which I know you will love!

    If you do decide to make this please tag me on Facebook or Pinterest!

    Cookies, Desserts

    Easy Sugar Cookies

    Sep 11, 2013 · 11 Comments

    Here are Easy Sugar Cookies to make for any occasion. Using only 7 ingredients, this chewy and scrumptious cookie will please any cookie haters. 

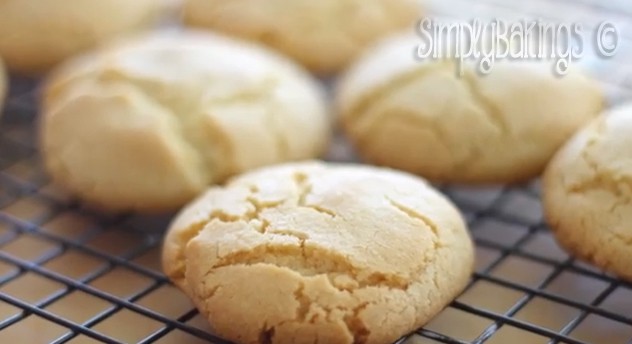
    sugar cookies on a cooling rack

    Cookies are my weakness!  Hand me a cookie and I will do almost anything for you...almost 🙂

    Tips on How to Make Easy Sugar Cookies

    • Are you preparing cookies for a party? You can use this recipe and just multiply the ingredient measurements according to the number of cookies you need.
    • Don't forget to sift your dry ingredients. It is a VERY important step so you can avoid a lumpy cookie dough.
    • Before making the cookie dough balls, rub some flour on both hands so that the cookie dough won't stick as you form them into balls.
    • If you want your cookies to be extra sweet, roll the cookie dough balls in sugar before placing them on the cookie sheets.

    How to Make Easy Sugar Cookies

    Before mixing the ingredients, first, preheat oven to 375 degrees F and grease cookie sheet.

    In a large bowl, soften the butter before adding any other ingredients:

    mixture of easy sugar cookie recipe ingredients

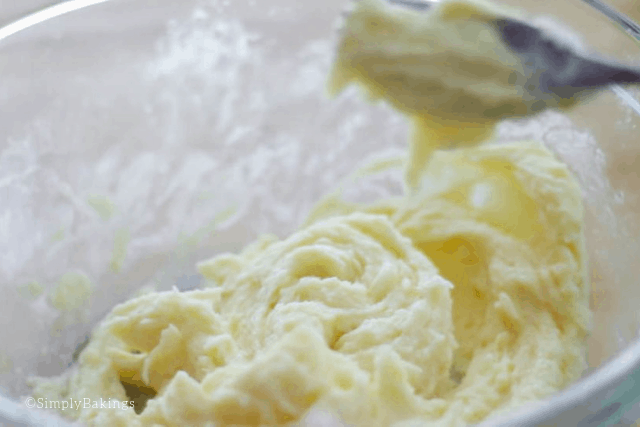
    Next, add in the sugar, egg, and vanilla to the softened butter, like so:

    mixture of sugar, egg, vanilla, and butter for easy sugar cookie recipe

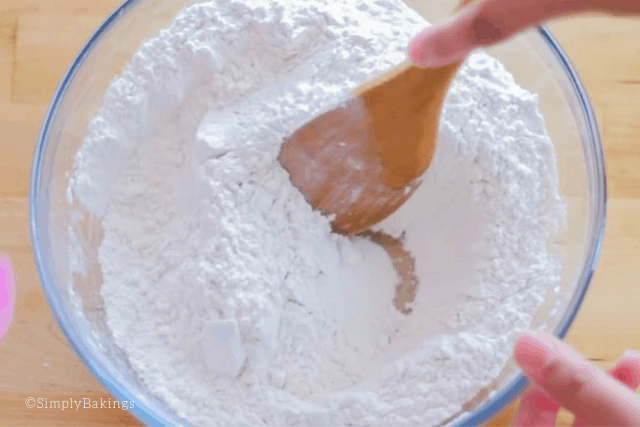
    In a bowl add all purpose flour, baking soda, baking powder, and mix:

    dry ingredients mixed in a bowl for easy sugar cookie recipe

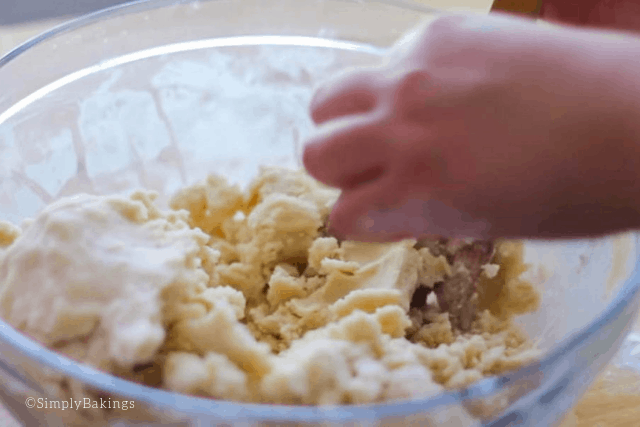
    Add the dry ingredients to the wet ingredients and mix:

    forming cookie dough balls for sugar cookies recipe

    Make 1-inch balls by simply rolling the dough with your hands:

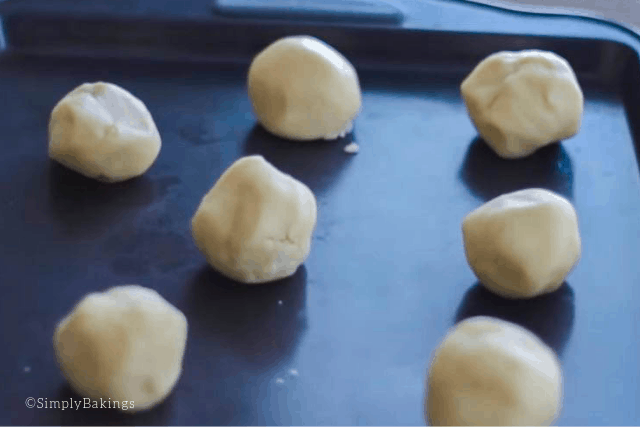
    easy sugar cookie dough balls on a cookie sheet

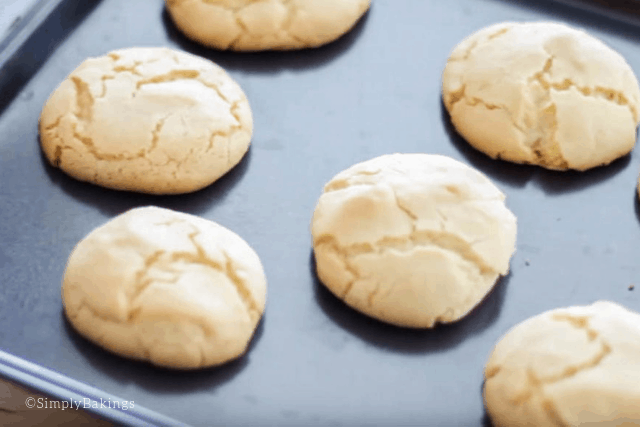
    Bake for 12-15 minutes and tadaaah! Those beautiful cookie cracks are the signs of perfectly-baked cookies!

    freshly baked easy sugar cookies

    Frequently Asked Questions for Easy Sugar Cookies Recipe:

    Q: Can I convert this recipe into a chocolate sugar cookie if I add in cocoa or chocolate powder?

    A: Certainly yes! Just look for chocolate cookie recipes and see how much cocoa or chocolate powder should you add in.

    Q: Can I add chocolate chips or colorful sprinkles to this recipe?

    A: Yes, that is absolutely a delicious idea! If you are not into counting calories, add a scoop 🙂

    Q: Can I use a stand mixer for this recipe?

    A: If you have a stand mixer available, you may use that for mixing the cookie dough.

    Q: Can I use margarine instead of butter?

    A: For all my cookie recipes (that need butter), I always use butter but yes, you can use margarine. I have not tried using margarine but I am sure it would taste just as good.


    Here are more popular cookies recipes you will enjoy.

    • Jello Cookies
    • Oreo Cheesecake Cookies
    • Pokey Cookies
    • Coffee Mint Cookies

    Happy Baking!

    5 from 1 vote
    Print Pin Recipe

    Sugar Cookies

    Prep Time10 minutes mins
    Cook Time15 minutes mins
    Author: Lainey
    Prevent your screen from going dark

    Ingredients

    • 2 ¾ cups all-purpose flour
    • 1 teaspoon baking soda
    • ½ teaspoon baking powder
    • 1 cup butter softened
    • 1 ½ cups white sugar
    • 1 egg
    • 1 teaspoon vanilla

    Instructions

    • Preheat oven to 375 degrees F and grease cookie sheet
    • In a bowl add all purpose flour, baking soda, baking powder and mix.
    • In another bowl mix butter, sugar, egg, and vanilla. Add the dry ingredients to the wet ingredients and mix
    • Make 1-inch balls and bake for 12-15 minutes
    Leave a Comment

    Watch The Recipe Video!

    QR Code
    Did you make this recipe?Share it on instagram or tag @simplybakings or #simplybakings!

    Cookies, Desserts

    Fried Rice

    Sep 11, 2013 · 1 Comment

    Filipinos have this amazing food for breakfast. I understand how this Fried Rice has become a Filipino favorite. It's so easy to make and you can definitely make it from scratch and day-old rice!

    fried rice

    Fried Rice is my go-to recipe which I make pretty much every other day of the week.  I come from a large family and we have an open-door policy.  So most of our friends always drop and my parents taught me to always have food prepared and if someone drops by and you don't have food prepared,  whip something up and fried rice is one of those foods.  This is just my take on fried rice and every time I make it, it tastes different but delicious!

    Tips and Tricks for Making This Fried Rice Recipe: 

    • To bring out the aroma of spices into the oil where you will fry your rice, add in the spices while the oil is still slightly warm. It will cook the spices slowly and the aroma and taste of spices will infuse with the oil.
    • If your rice is frozen, it helps to thaw it in room temperature for at least an hour before frying it.
    • If you do not like to make your fried rice brown in color because of the soy sauce, you can season it with just plain rock salt or if you want the healthier version, use pink Himalayan salt if you have it.

    How to Make this Fried Rice Recipe:

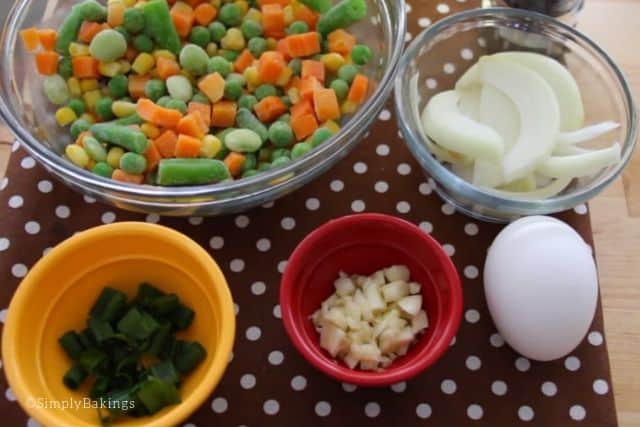
    Here is a glimpse of the ingredients that you will need to make this delicious, made from scratch Fried Rice:

    • day-old rice
    • cloves of garlic
    • onion
    • oil
    • soy sauce (rice will be brown)
    • egg
    • frozen vegetables
    • salt to taste
    • pepper to taste
    ingredients for Fried rice recipe

    When all of the ingredients and kitchen tools you will need are ready, let's begin!

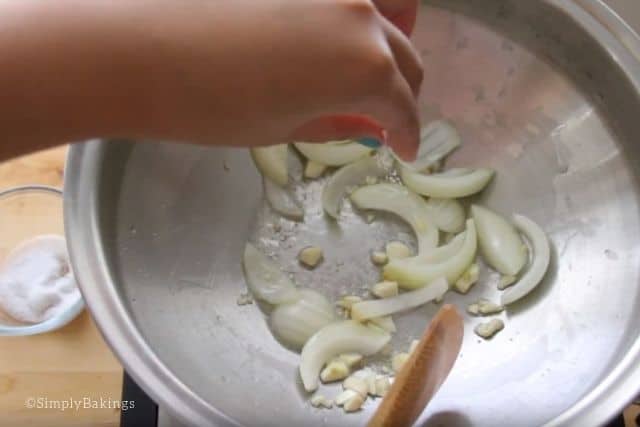
    In a wok add oil, garlic, salt to taste and onions and fry till onion is translucent:

    sauteing onion and garlic for fried rice recipe

    Add the eggs and cook:

    cooking eggs in a wok for fried rice recipe

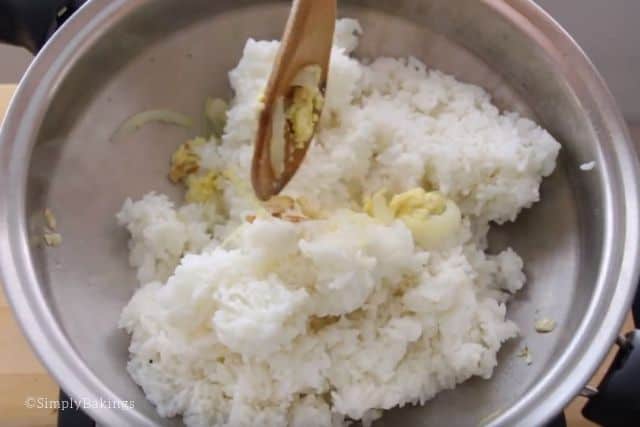
    Add the rice, soy sauce, and pepper to taste:

    adding the rice in the cooked egg

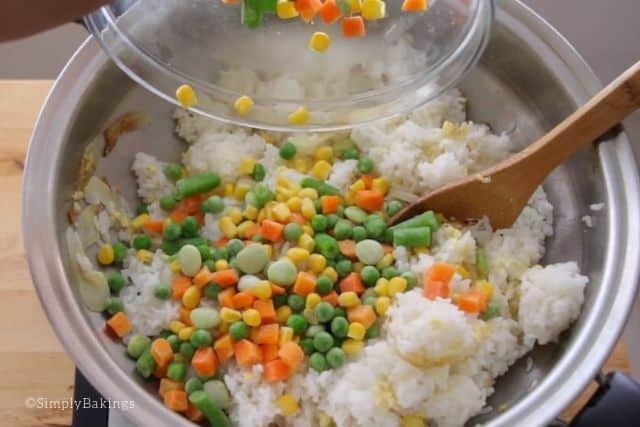
    At this time you can add the frozen vegetables and cook until vegetables are tender:

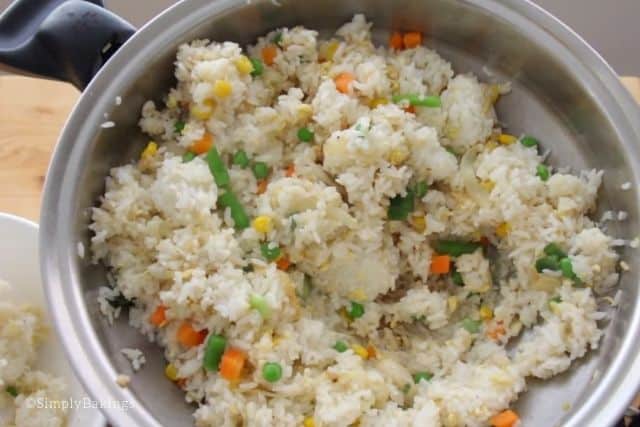
    adding the frozen vegetables to be cooked with the rice and egg

    Season with soy sauce and mix:

    seasoning the fried rice with soy sauce

    Garnish with sliced green onions and serve:

    garnishing the fried rice with green onions

    Frequently Asked Questions for the Fried Rice Recipe:

    Q: What other ingredients can I add into this Fried Rice recipe aside from frozen veggies?

    A: There are a lot of possibilities for Fried rice ingredients! You can add in cubed fried tofu, mushrooms, even edible flowers. You just toss in whatever you think will go well with rice.

    Q: Can I make fried rice in advance, like a day before?

    A: Yes, you can cook it ahead and let it cool before putting it in the freezer. When you are ready to serve them, just heat in the microwave for a few seconds.

    Q: Can I skip the eggs for this Fried rice recipe?

    A: Yes, you can skip putting eggs to this recipe.


    If you like this recipe you will enjoy these as well:

    • Tofu Sisig
    • Buko Pandan
    • Cassava Cake
    • Shakoy
    • Halo Halo
    • Turon
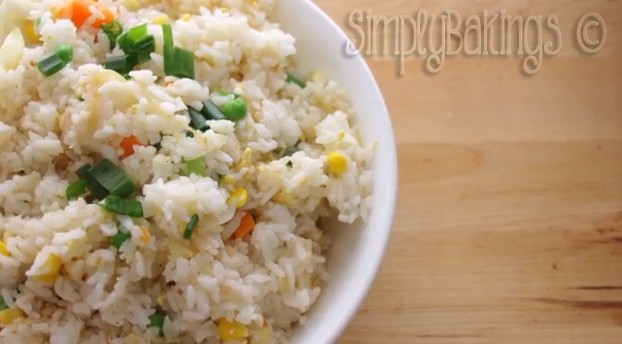
    ready to serve fried rice
    No ratings yet
    Print Pin Recipe

    Fried Rice

    See how easy it is to whip up a quick and delicious Fried Rice with just a few ingredients and let your family and friends enjoy this Filipino breakfast recipe!
    Cuisine: Filipino
    Author: Lainey
    Prevent your screen from going dark

    Ingredients

    • 4 cups day old rice
    • 3 cloves of garlic minced
    • ½ of onion sliced
    • 2 tablespoon oil
    • 4 tablespoon soy sauce rice will be brown
    • 1 egg beaten or 1 cup of meat of your choice
    • 2 cups frozen vegetables
    • salt to taste
    • pepper to taste

    Instructions

    • In a wok add oil, garlic, salt to taste and onions and fry till onion is translucent. Add the eggs and cook, then add the frozen vegetables and cook until vegetables are tender.
    • Add the rice, soy sauce and pepper to taste. Garnish with sliced green onions.
    Leave a Comment

    Notes

    Fried rice is made best with at least 1 day old rice.

    Watch The Recipe Video!

    QR Code
    Did you make this recipe?Share it on instagram or tag @simplybakings or #simplybakings!

    NEVER MISS A RECIPE!

    PINTEREST / FACEBOOK / INSTAGRAM / TWITTER

    If you’ve tried this or any other of my recipes, don’t forget to rate the recipe and to leave me a comment. I love hearing from you!
    Rice, Noodles, Potatoes, Vegan Filipino Recipes

    French Breakfast Bread

    Sep 11, 2013 · 15 Comments

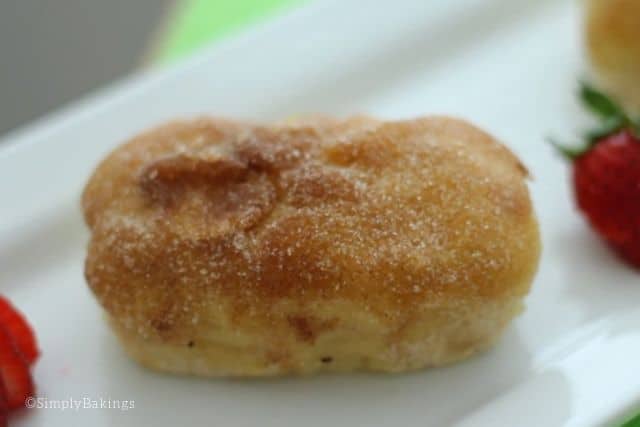
    French Breakfast bread on a white place garnished with strawberries

    This Mini French Breakfast Bread is soft, cinnamony and addicting. Perfect for any special occasion and quick enough to make at any hour!

    French breakfast bread on a white plate

    Breakfast is the most important meal of the day and many of us don't eat breakfast.  However, this French Breakfast Bread is going to be the one thing you and your family, friends or significant other will be asking for every morning.  I tried making this in a regular loaf pan, but it was not as good as the mini loaf pan that I used.  So I strongly suggest to use a mini bread loaf pan or use mini loaf liners; enjoy!

    Tips and Tricks for Making This French Breakfast Bread Recipe: 

    • Make these French breakfast bread with a little summer twist! Mix in some orange zest into the batter just before baking. It would smell so good, you guys!
    • For the dry ingredients, make sure to sift them carefully to avoid lumps in the final bread batter.

    How to Make this French Breakfast Bread Recipe:

    Before we start mixing the ingredients, don't forget to preheat oven 350 degrees F. This would save you a lot of time and won't keep you waiting when you are ready to bake.

    Now, if you have the ingredients ready, let's begin!

    In a large bowl add all-purpose flour, white sugar, baking powder, ground nutmeg, salt, and mix:

    mixture of dry ingredients for french breakfast bread recipe in a clear bowl

    In another bowl add the egg, milk, and butter and mix very well:

    mixture of egg, milk and melted butter in a clear bowl with a wire whisk

    Make a well in the dry ingredients and add the wet ingredients and mix:

    pouring in the wet ingredients to the dry ingredients
    final batter of the french breakfast bread

    Make sure  mix  it  well  and  get  rid  of  clumpy  flour  in   your  batter:

    In mini bread liners add the batter and bake for 35 minutes:

    putting the batter of the french breakfast bread in individual mini bread liners

    Now that we have freshly baked French breakfast bread, allow them to cool completely:

    freshly baked french breakfast bread

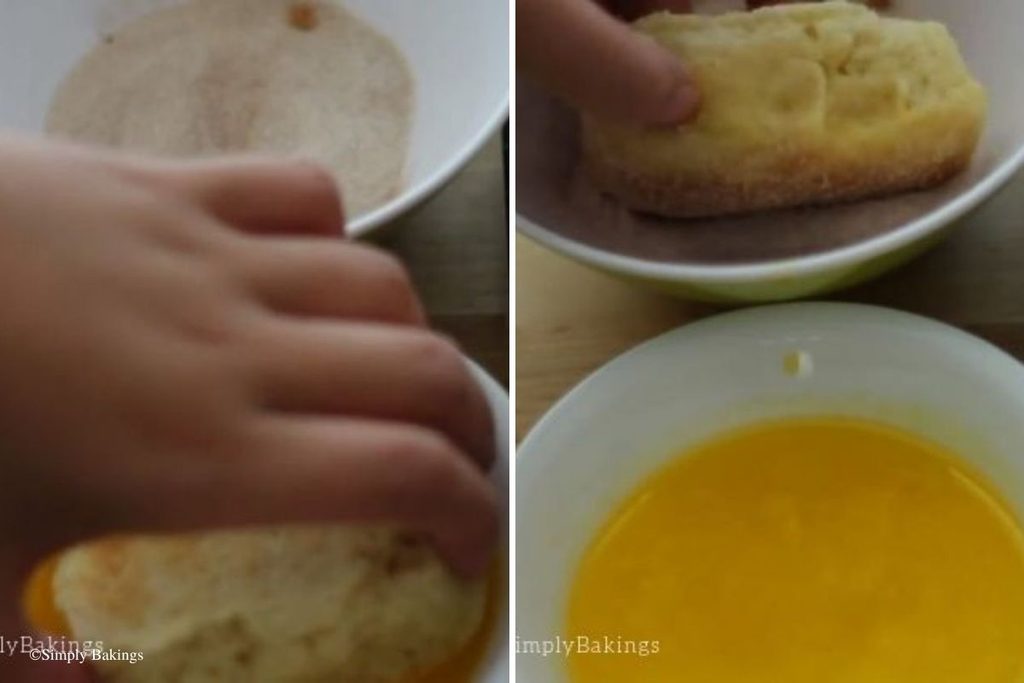
    After cooling them, dip each bread in melted butter, like so:

    dipping the bread in melted butter

    Then, dunk it right into a bowl of cinnamon-sugar mixture, covering all the topmost part of the bread:

    coating the bread with cinnamon-sugar mixture

    See how easy that was, guys? I promise this recipe will give you a delicious French breakfast bread that is worth dunking in your coffee 😉

    French Breakfast bread on a white place garnished with strawberries

    Frequently Asked Questions for the French Breakfast Bread Recipe:

    Q: Can I freeze the bread after baking them?

    A: Yes you can. Just make sure to heat it before serving.

    Q: Can I make this recipe into one whole loaf of bread? 

    A: For this recipe, it's better to use mini muffin bread pans.


    More Bread Recipes to enjoy:

    • 2 Ingredient Bread
    • Chocolate Filled Bread
    • 3 Ingredient Bread
    • 7 up Biscuits
    • Monkey Bread

    Happy Baking!

    French Breakfast bread on a white place
    5 from 4 votes
    Print Pin Recipe

    French Breakfast Bread

    Make and share this sure hit, delicious and easy to make Mini French Bread recipe!
    Course: Bread
    Author: Lainey
    Prevent your screen from going dark

    Ingredients

    • 1 ½ cups all purpose flour
    • ½ cup white sugar
    • 1 ½ teaspoons baking powder
    • ¼ teaspoon ground nutmeg
    • ⅛ teaspoon salt
    • 1 egg
    • ½ cup milk
    • ⅓ cup butter melted

    Topping:

    • ¼ cup white sugar
    • ½ teaspoon ground cinnamon
    • ⅓ cup butter

    Instructions

    • Preheat oven 350 degrees F
    • In a large bowl add all purpose flour, white sugar, baking powder, ground nutmeg, salt, and mix.
    • In another bowl add the egg, milk, and butter and mix very well. Make a well in the dry ingredients and add the wet ingredients and mix.
    • In mini bread liners add the batter and bake for 35 minutes
    Leave a Comment

    Watch The Recipe Video!

    QR Code
    Did you make this recipe?Share it on instagram or tag @simplybakings or #simplybakings!

    NEVER MISS A RECIPE!

    PINTEREST / FACEBOOK / INSTAGRAM / TWITTER

    If you’ve tried this or any other of my recipes, don’t forget to rate the recipe and to leave me a comment. I love hearing from you!
    Bread, Breakfast & Brunch, Christmas Desserts, Thanksgiving Brunch

    How To Make Chocolate Ganache

    Sep 11, 2013 · 3 Comments

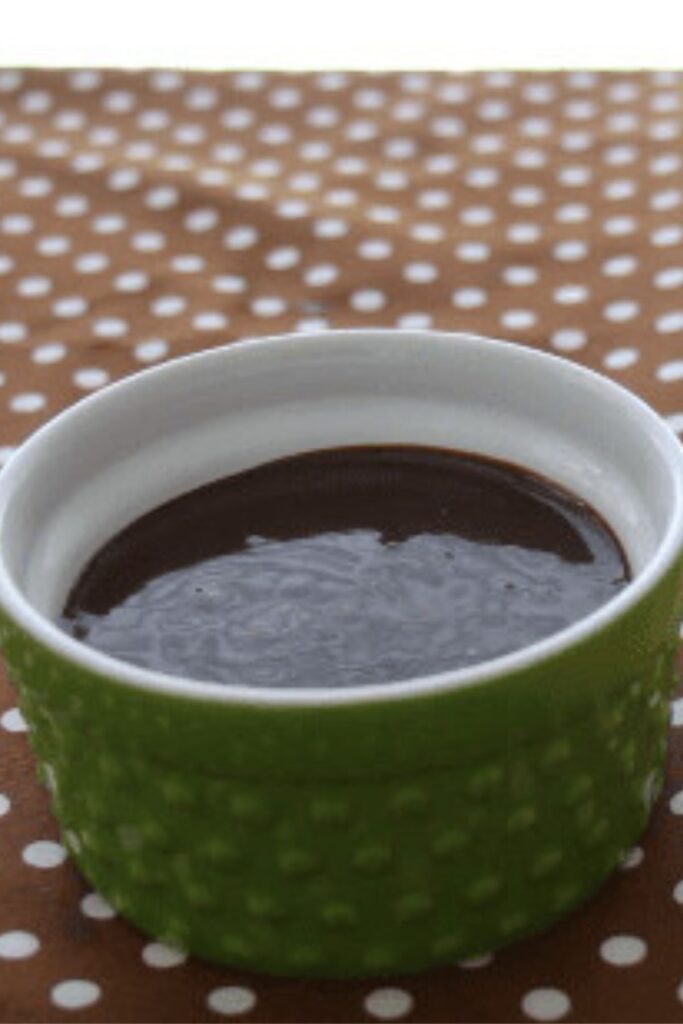
    chocolate ganache in a small green bowl

    Learn how to make chocolate ganache for your cakes and other desserts using just 2 ingredients! This is a rich, smooth chocolate ganache perfect for frosting and drizzling over your favorite desserts!

    Looking for more chocolate desserts? Try my Chocolate Ganache Blondies and No Bake Cookie Dough Truffles recipes!

    chocolate ganache in a small green bowl
    [feast_advanced_jump_to]

    What is Chocolate Ganache?

    Chocolate ganache is a delicious combination of chocolate and heavy cream. It is such a versatile recipe that you can use it for cupcakes, chocolate-covered strawberries, and more. It is simple to make yet surprisingly mindful and decadent, and it will quickly become a favorite.

    If you're looking for a satisfying sweet comfort food, this chocolate ganache recipe is perfect for you. Give this a try!

    Ingredients

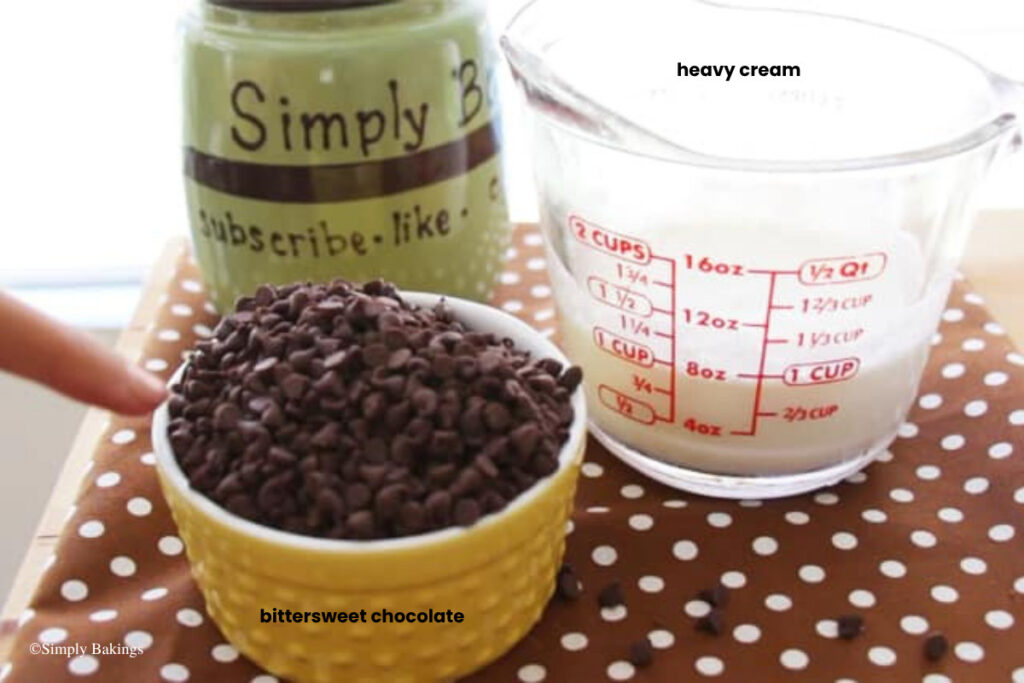
    Listed below are all the ingredients you will need:

    • bittersweet chocolate
    • heavy cream
    ingredients for chocolate ganache recipe

    Instructions

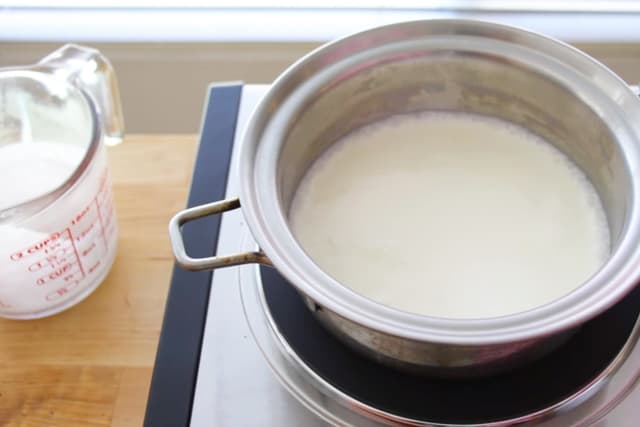
    Place the bittersweet chocolate in a large bowl. Then, pour the heavy cream into a small saucepan and bring it to a boil over medium heat.

    heating the heavy cream in a small saucepan

    Immediately pour the hot cream over the chocolate and stir until it is thick and smooth.

    pouring over the hot heavycream into the bittersweet chocolate chips

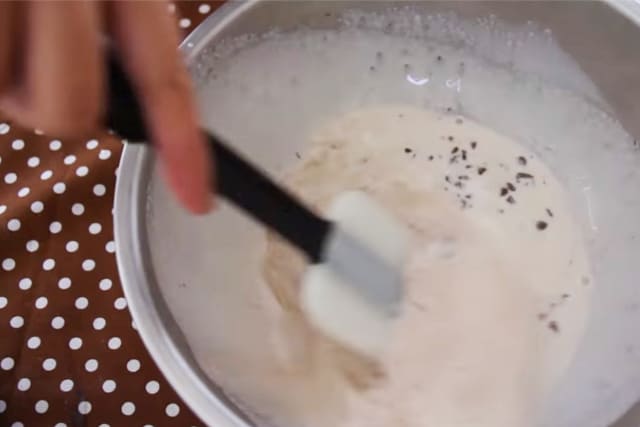
    Grab your spatula and start stirring! Keep a steady pace until the mixture transforms into a smooth, decadent glaze.

    mixing the heavy cream and chocolate chips using a spatula

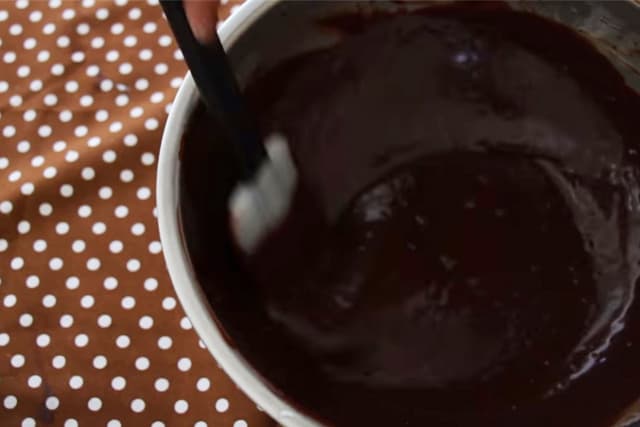
    Don't give up too soon. Once the mixture looks smooth and shiny, it's ready to use.

    chocolate ganache in a bowl

    Substitutions and Variations

    • You can swap the bittersweet chocolate for semi-sweet, dark, or milk chocolate.
    • If you want to use white chocolate, you'll need to increase the chocolate-to-heavy cream ratio to 3 parts chocolate to 1 part heavy cream, since white chocolate melts more thinly.
    • For a vegan or dairy-free version, replace the heavy cream with full-fat canned coconut milk or coconut cream in a 1:1 ratio.

    Storage Tips

    • Store the chocolate ganache at room temperature, covered, for up to two days, or in an airtight container in the refrigerator for up to two weeks.
    • Cover it with plastic wrap and press directly on the surface to prevent a skin from forming.
    • It can be frozen for as long as two months. When ready to use, thaw it overnight in the refrigerator, bring it to room temperature, and gently stir or whisk it until it’s the desired consistency.
    Chocolate ganache in a green bowl

    FAQ

    Q: Can I use white chocolate for this ganache recipe?

    A: Yes, you can. But adjust the quantity of the white chocolate chips. It must be three portions to one portion of the heavy cream.

    Q: How long can we keep the chocolate ganache?

    A: You can keep it at room temperature for two days, but if you keep it in the fridge, it can last up to 5 days or a week.

    Q: Can I freeze chocolate ganache?

    A: Yes you can. It can stay up to two months in the freezer.

    chocolate ganache in a small green bowl
    5 from 1 vote
    Print Pin Recipe

    How To Make Chocolate Ganache

    This quick and easy recipe shows you how to make chocolate ganache for your cakes and other desserts with just 2 ingredients!
    Prep Time5 minutes mins
    Cook Time10 minutes mins
    Total Time15 minutes mins
    Course: Dessert
    Cuisine: French
    Servings: 1
    Calories: 2286kcal
    Author: Lainey
    Prevent your screen from going dark

    Ingredients

    • 9 ounces bittersweet chocolate
    • 1 cup heavy cream

    Instructions

    • Place the bittersweet chocolate in a large bowl.
    • Pour the heavy cream into a small saucepan and bring it to a boil over medium heat.
    • Immediately pour the hot cream over the chocolate and stir until it is thick and smooth.
    • Grab your spatula and start stirring! Keep a steady pace until the mixture transforms into a smooth, decadent glaze.
    • Once the mixture looks smooth and shiny, it's ready to use.
    Leave a Comment
    Serving: 1gCalories: 2286kcalCarbohydrates: 141gProtein: 22gFat: 184gSaturated Fat: 111gPolyunsaturated Fat: 7gMonounsaturated Fat: 51gTrans Fat: 0.2gCholesterol: 284mgSodium: 90mgPotassium: 1673mgFiber: 20gSugar: 101gVitamin A: 3626IUVitamin C: 1mgCalcium: 315mgIron: 16mg

    Watch The Recipe Video!

    QR Code
    Did you make this recipe?Share it on instagram or tag @simplybakings or #simplybakings!

    When I first started uploading video tutorials on YouTube, I didn't realize how important thumbnails and pictures were, so bear with me, but don't let this picture be the judge of how great the chocolate ganache is!

    You Might Also Like:

    • Hot Fudge Chocolate Cake
    • Foolproof Chocolate Vanilla Creme Puffs
    • Nutella Hot Chocolate

    5 Ingredients or Less, Desserts, No Bake Dessert Recipes

    Buttermilk Chocolate Loaf Cake

    Sep 11, 2013 · 10 Comments

    Buttermilk Chocolate Loaf Cake slices arranged on the plate

    When you say chocolate cake, this Buttermilk Chocolate Loaf Cake recipe is worth keeping! It's easy to make with the basic flour mixture and large eggs. Chocolate lovers will find this dessert and snack soft and comforting. It's fluffy and very filling, with the right amount of sugar and chocolate in every bite!

    If you love this cake, try these delicious dishes: Cassava Cake and Banana Chocolate Chip Pound Cake.

    Buttermilk Chocolate Loaf Cake slices arranged on the plate
    [feast_advanced_jump_to]

    Why You’ll Love This Recipe

    This moist chocolate loaf cake is beginner-friendly, dairy-filled, and perfect for chocolate cravings. The buttermilk adds a slight tang that balances the sweetness and makes the cake extra moist.

    Plus, it’s quick to make, ideal for beginner bakers or anyone looking for a simple but indulgent treat. The wet ingredients and dry ingredients combine seamlessly, creating a perfect ratio for a soft and delicious cake.

    Ingredients

    Listed below are all the ingredients you will need:

    • Sugar
    • Butter
    • Buttermilk
    • Eggs
    • All-purpose flour
    • Unsweetened cocoa powder
    • Baking powder
    • Baking soda
    • Salt
    • Chopped nuts (optional)

    See the recipe card for quantities.

    Instructions

    Prepare the Pan and Oven

    1. Preheat oven to 350°F (175°C) and grease a bread pan.

    Mix the Batter

    2. In a large bowl, beat sugar and butter together until light and fluffy.

    Butter and sugar in a clear mixing bowl

    3. Add eggs and buttermilk, mixing until well combined.

    4. Add all-purpose flour, cocoa powder, baking powder, baking soda, and salt. Mix until fully incorporated.

    Dry ingredients and wet ingredients mixed together

    Bake the Cake

    5. Pour the batter into the prepared bread pan.

    6. Bake for 40–60 minutes, or until a toothpick inserted into the center comes out clean.

    Small pans filled with cake batter

    Serve

    7. Allow to cool in the pan for 10–15 minutes, then transfer to a wire rack to cool completely before slicing and serving.

    Buttermilk Chocolate Loaf Cake slices arranged on the plate

    Substitutions & Variations

    • Ingredient Swap
      Substitute with the same amount of vegetable oil for a moister crumb.
    • Variation
      Add in some chocolate chips if you love sugar-loading. It would definitely take your bread to a higher level of deliciousness!
      Are you a peanut butter lover? Swirl in a generous amount of peanut butter in the batter just before popping them into the oven.
    • Mistake to Avoid
      Make sure you don't over-mix the batter. It will make the cake dense and form lumps. Use a whisk or mixer on low to combine the ingredients.
    • Storage Tips
      • Store at room temperature in an airtight container for 3–4 days. For extra moisture, you can glaze the cake lightly with a chocolate glaze after it cools.
      • Freeze slices individually for up to 2 months in the fridge. Thaw at room temperature or microwave for 10–15 seconds. You’ll enjoy moist crumbs just like the day it was baked!
    Buttermilk Chocolate Loaf Cake wrapped like a gift

    FAQs

    Can I make this recipe without eggs?

    Yes! Replace the eggs with flaxseed meal or a commercial egg replacer.

    Can I use a different type of flour?

    All-purpose flour works best, but you can use whole wheat flour for a healthier option.

    How do I know when the cake is done?

    Insert a toothpick in the center; it should come out clean when the cake is baked through.

    White plate of Buttermilk Chocolate Loaf Cake
    5 from 4 votes
    Print Pin Recipe

    Buttermilk Chocolate Loaf Cake

    This Buttermilk Chocolate Loaf Cake is a rich, moist breakfast treat, with the perfect balance of tangy buttermilk and chocolatey goodness. It’s easy to make and a sweet way to start the day!
    Prep Time10 minutes mins
    Cook Time1 hour hr
    Total Time1 hour hr 10 minutes mins
    Course: Bread
    Cuisine: Fusion (American-Filipino/Asian)
    Servings: 1 loaf
    Calories: 3009kcal
    Author: Lainey
    Prevent your screen from going dark

    Ingredients

    • 1 cup sugar
    • ½ cup butter softened
    • 1 cup buttermilk
    • 2 eggs
    • 1 ¾ cups all-purpose flour
    • ½ cup unsweetened cocoa powder
    • ½ teaspoon baking powder
    • ½ teaspoon baking soda
    • ½ teaspoon salt
    • ⅓ cup chopped nuts optional

    Instructions

    Prepare the Pan and Oven

    • Preheat oven to 350°F (175°C) and grease a bread pan.

    Mix the Batter

    • In a large bowl, beat sugar and butter together until light and fluffy.
    • Add eggs and buttermilk, mixing until well combined.
    • Add all-purpose flour, cocoa powder, baking powder, baking soda, and salt. Mix until fully incorporated.

    Bake the Cake

    • Pour the batter into the prepared bread pan.
    • Bake for 40–60 minutes, or until a toothpick inserted into the center comes out clean.

    Serve

    • Allow to cool in the pan for 10–15 minutes, then transfer to a wire rack to cool completely before slicing and serving.
    Leave a Comment

    Notes

    • If using three small loaf pans, bake for 35–40 minutes.
    • If using an 8x4 or 9x5 loaf pan, bake for 40–60 minutes.
    • You can add ⅓ cup of chopped nuts for extra texture and flavor.
    Serving: 1gCalories: 3009kcalCarbohydrates: 409gProtein: 57gFat: 142gSaturated Fat: 72gPolyunsaturated Fat: 25gMonounsaturated Fat: 35gTrans Fat: 4gCholesterol: 598mgSodium: 3045mgPotassium: 1537mgFiber: 24gSugar: 214gVitamin A: 3715IUVitamin C: 1mgCalcium: 599mgIron: 19mg

    Watch The Recipe Video!

    QR Code
    Did you make this recipe?Share it on instagram or tag @simplybakings or #simplybakings!

    You Might Also Like:

    • Easy Nutella Cookies only 4 Ingredients
    • Lemon Brownies – Quick & Delicious
    • Snickers Oreo Cheesecake
    • Best Coconut Flour Chocolate Chip Cookies

    Recipes for Every Moment

    Craving a chocolatey snack that doesn’t take long to make? This Buttermilk Chocolate Loaf Cake comes together in no time and is the perfect treat for your sweet tooth!

    Bread, Cake, Desserts

    Easy Zebra Cake Recipe

    Sep 11, 2013 · 3 Comments

    Freshly baked easy Zebra Cake in pan

    Wanna bake brownies with the easiest recipe? Here it is! No need for the store-bought. Make your own easy Zebra Cake. With only 5 ingredients, beginners, busy bakers, and anyone who loves a tasty shortcut will enjoy the simple delights of this recipe!

    Quick and magical desserts, these Magic Cake and Filipino Chiffon Cake recipes are surely some you'll enjoy, too!

    Freshly baked easy Zebra Cake in pan
    [feast_advanced_jump_to]

    Why You’ll Love This Recipe

    This easy brownie recipe is simple, inexpensive, and made with ingredients you likely already have on hand on your counter or in your pantry. There is no special equipment required - an electric mixer on low speed or even a spoon will do. And the swirl naturally develops as it bakes into beautiful stripes.

    The cream cheese provides a creamy element to contrast the fudgy brownie bottom, and cream cheese also supplies calcium, which is good for your bones. Mix it gently with the eggs for better consistency, and you’ll get that perfect balance in every forkful.

    It works for impromptu get-togethers, potlucks, or just when you have a hankering for brownies. A quick toothpick test will tell you when it’s done: look for moist crumbs, not raw batter.

    Ingredients

    Listed below are all the ingredients you will need:

    • Cream cheese
    • Sugar
    • Vanilla extract
    • Egg
    • Fudge brownie mix

    See the recipe card for quantities.

    Instructions

    Prepare the Oven and Pan

    1. Preheat oven to 350°F (175°C).

    2. Grease a 9x13-inch or 9x9-inch baking pan (see Notes for texture preferences).

    Make the Cream Cheese Mixture

    3. In a large bowl, beat cream cheese, sugar, vanilla extract, and egg until smooth. Set aside.

    Mixing butter, sugar, and vanilla in a glass bowl

    Prepare the Brownie Batter

    4. Follow the package instructions for preparing the fudge brownie mix.

    The wet and dry ingredients mixed together

    Assemble the Zebra Swirls

    5. Pour ¼ of the brownie batter into the greased pan and spread evenly.

    6. Add ¼ of the cream cheese mixture over the brownie batter.

    7. Alternate layers of brownie batter and cream cheese mixture, continuing until both are used up, creating a zebra swirl pattern.

    Pouring in a layer of  the cake batter

    Bake and Serve

    8. Bake at 350°F for:

    • 30–40 minutes if using a 9x13-inch pan for a brownie-like texture
    • 50–60 minutes if using a 9x9-inch pan for a more cake-like texture

    9. Cool before slicing and serving.

    A slice of easy Zebra Cake on a plate

    Substitutions & Variations

    • Ingredient Swap
      Swap the cream cheese with a plant-based cream cheese.
      Use coconut sugar instead of white sugar for a deeper flavor.
    • Variation
      Add chocolate chips to the brownie batter for extra richness.
      A small pinch of salt can also help balance the sweetness, especially when working with white chocolate.
      Add a touch of melted chocolate for a richer chocolate batter.
      Sift in a little cocoa powder for a deeper flavor.
      Fold in whipped egg whites beaten to stiff peaks for lighter texture tricks in the chocolate cake batter.
    • Mistake to Avoid
      Avoid overmixing the cream cheese mixture because it can lose its silky texture. Work slowly, especially when combining the dry ingredients with the butter and flour.
    • Storage Tips
      • Make sure everything is at room temperature for smoother mixing.
      • These ingredients don’t stand up well to freezing, so enjoy within a few days.
      • Line your pan with parchment paper so you can lift the brownies easily onto a cooling rack after baking.
      • Store the cheesecake mixture and brownie mixture separately in the fridge. Then assemble when ready to bake. Good for 2–3 days.
    Taking a slice of Zebra Cake using a spatula

    FAQs

    How long should brownies cool before cutting?

    Let your freshly baked Zebra Brownie Cake cool for at least30 minutes before taking the first slice.

    Why do brownies taste better the next day?

    It is because the chocolate gives a more evident flavor the next day, combined with all the other ingredients that give that more delicious flavor the next day after baking it.

    Should I refrigerate my brownies after baking?

    If you plan to serve it the next day or keep it for days, you can keep it in an airtight container and place it in the refrigerator.

    A plate with a slice of easy Zebra Cake
    5 from 2 votes
    Print Pin Recipe

    Easy Zebra Cake Recipe

    Make an amazing Zebra Cake with just 5 simple ingredients and beautiful cream cheese swirls! This recipe starts with a brownie mix and ends with a stunning, irresistible dessert—perfect for any gathering.
    Prep Time10 minutes mins
    Cook Time1 hour hr
    Total Time1 hour hr 10 minutes mins
    Course: Dessert
    Cuisine: American
    Servings: 1 (9x13-inch or 9x9-inch) cake
    Calories: 273kcal
    Author: Lainey
    Prevent your screen from going dark

    Ingredients

    • 2 (3 oz) packages Cream cheese
    • ¼ cup Sugar
    • ½ teaspoon Vanilla extract
    • 1 Egg
    • 1 (21.5 oz) package Fudge brownie mix (plus ingredients as instructed on the box)

    Instructions

    Prepare the Oven and Pan

    • Preheat oven to 350°F (175°C).
    • Grease a 9x13-inch or 9x9-inch baking pan (see Notes for texture preferences).

    Make the Cream Cheese Mixture

    • In a large bowl, beat cream cheese, sugar, vanilla extract, and egg until smooth. Set aside.

    Prepare the Brownie Batter

    • Follow the package instructions for preparing the fudge brownie mix.

    Assemble the Zebra Swirls

    • Pour ¼ of the brownie batter into the greased pan and spread evenly.
    • Add ¼ of the cream cheese mixture over the brownie batter.
    • Alternate layers of brownie batter and cream cheese mixture, continuing until both are used up, creating a zebra swirl pattern.

    Bake and Serve

    • Bake at 350°F for:
    • 30–40 minutes if using a 9x13-inch pan for a brownie-like texture
    • 50–60 minutes if using a 9x9-inch pan for a more cake-like texture
    • Cool before slicing and serving.
    Leave a Comment

    Notes

    • For more of a cakelike texture I used a 9x9 inch pan, but if you want a brownie like texture use a 13x9 inch pan.
    • Bake: 350 degrees Fahrenheit 9x9 inch pan, 50-60 minutes
    • 350 degrees Fahrenheit 9x13 inch, 30-40 minutes
    Serving: 1gCalories: 273kcalCarbohydrates: 51gProtein: 6gFat: 5gSaturated Fat: 2gPolyunsaturated Fat: 1gMonounsaturated Fat: 2gTrans Fat: 0.02gCholesterol: 166mgSodium: 72mgPotassium: 67mgSugar: 51gVitamin A: 264IUCalcium: 27mgIron: 1mg

    Watch The Recipe Video!

    QR Code
    Did you make this recipe?Share it on instagram or tag @simplybakings or #simplybakings!

    You Might Also Like:

    • Snickers Oreo Cheesecake
    • Monkey Bread with Cream Cheese
    • Churro Cheesecake
    • No Bake OREO Cheesecake
    • Strawberry Pocky Cake

    Recipes for Every Moment

    Craving something sweet with only a few minutes to spare? This Easy Zebra Cake comes together fast, especially if you prep your chocolate cream cheese frosting ahead of time. The stripes make it fun, the texture is soft, and it always hits the spot!

    5 Ingredients or Less, Cake, Desserts

    Avocado Ice Candy

    Sep 11, 2013 · 5 Comments

    frozen avocado ice candies on cloth

    This Avocado Ice Candy recipe is made with fresh avocados, sweetened condensed milk, and evaporated milk.  It's the Filipino version of ice pops and it's delicious and a great summer treat to eat on a hot humid day. 

    If you're looking for more delicious Filipino desserts to cool you down, try Buko Pandan and Halo Halo.

    chilled avocado ice candy


    [feast_advanced_jump_to]

    What is Avocado Ice Candy?

    Avocado ice candy is a popular frozen treat in the Philippines, made by blending ripe avocado with sweetened condensed milk, brown sugar, and evaporated milk (or water) before freezing in ice trays or plastic molds.

    This is like popsicles but has a creamy texture because of the avocado. Avocado is a special fruit that makes desserts rich and smooth, so these popsicles taste both refreshing and a little fancy.

    Health Benefits of Avocado

    • Avocados are a nutrient powerhouse! They’re rich in healthy fats, fiber, and essential vitamins like vitamin C, vitamin K, and B vitamins.
    • The monounsaturated fats in avocado support heart health and help keep you feeling full longer. Plus, avocados are low in sugar, making them a guilt-free treat!

    Substitutions

    • Sweetened Condensed Milk – Substitute with coconut condensed milk for a dairy-free option or mix evaporated milk with sugar (about ½ cup of sugar per cup of milk) for a similar sweetness.
    • Brown Sugar – Swap with white sugar, honey, maple syrup, or coconut sugar for a slightly different flavor.
    • Evaporated Milk or Water – Use almond milk, coconut milk, oat milk, or regular whole milk or fresh milk depending on your dietary preference.
    avocado ice candy in  plastic tubes

    Variations

    • Chocolate Avocado Ice Candy - Add 1 tablespoon of cocoa powder to the mixture.
    • Nutty Avocado Ice Candy- Mix in crushed peanuts or almonds.
    • Vegan Option - Substitute condensed milk with coconut cream and use almond milk instead of evaporated milk.
    • Fruity Avocado Ice Candy - Add in young coconut slices, melon cubes, pineapple, or strawberry.

    Storage

    • Store leftover ice candy in an airtight container or freezer bag.
    • Keeps well for up to 2 weeks in the freezer.
    • If ice crystals form, let it sit at room temperature for a few minutes before eating.

    Ingredients

    • avocado
    • sweetened condensed milk
    • brown sugar
    • evaporated milk or water
    avocado ice candy ingredients

    Instructions

    Cut the avocado in half and remove the pit (seed). Scoop out the avocado flesh.

    avocado in half with other ingredients

    In a blender, add the avocado, sweetened condensed milk, brown sugar, and blend.

    avocado mixture in blender

    Pour the blended mixture into ice trays or plastic tubes, using a funnel to minimize spills. Secure the plastic tubes by tying a knot at the end. Freeze for at least 4-6 hours, or ideally overnight for best results.

    pouring green liquid through funnel

    Top Tips

    • When choosing the right "ripeness" of an avocado, pinch it a bit. If it's soft but not too soft, that is the best avocado to use for this recipe.
    • If you happen to buy an unripe avocado, the best way to ripen it is to place it in a brown paper bag with an apple or banana and wait for two to three days. It is best to check daily if it has ripened to avoid having a very mushy avocado
    • Here's another trick to know if an avocado is ripe enough: Peel back or cut off the stem or cap at the top of the avocado. If it comes off easily, you've got a good ripe avocado
    • One way of packaging your avocado ice candy in the freezer is by using tiny plastic bags, the long ones, which you can find in grocery stores. In the Philippines, that is the most popular way of packing their avocado ice candy before popping them in the freezer.
    • You can also pour this avocado ice cream in popsicle molds and enjoy it just the same.
    • Feeling adventurous in making this avocado ice candy? You can add in sweetened coconut strips or put a few drops of flavoring like mint, vanilla extract, or even ripe mango!

    FAQ

    What is ice candy in the Philippines?

    Ice candy is a popular frozen treat made from flavored water, fruits, or milk, often enjoyed as a refreshing snack.

    How many calories are in avocado ice candy?

    Avocado ice candy typically contains around 100-160 calories per serving, depending on the ingredients used.

    Can I use a hand mixer to smash the avocado?

    Yes, a hand mixer can be used. Just be extra careful because it can easily mess up your kitchen counter since it will become liquidy after a few seconds. It is best to use a deep mixing bowl for that.


    If you want more Filipino Desserts like this try:

    • Cassava Cake
    • Shakoy
    • Turon
    avocado ice candy on a white plate
    4.80 from 5 votes
    Print Pin Recipe

    Avocado Ice Candy

    Enjoy a creamy Filipino Avocado Ice Candy! Easy to make. Just mix, chill, then serve! A refreshing treat for hot days.
    Prep Time10 minutes mins
    Chill Time4 hours hrs
    Total Time4 hours hrs 10 minutes mins
    Course: Dessert
    Cuisine: Filipino
    Servings: 4 - 6 servings
    Calories: 151kcal
    Author: Lainey
    Prevent your screen from going dark

    Ingredients

    • 1 avocado
    • ¼ cup sweetened condensed milk
    • 1 tsp brown sugar
    • 1-2 tablespoon evaporated milk or water*

    Instructions

    • Cut the avocado in half and remove the seed.
    • In a blender add the avocado, sweetened condensed milk, brown sugar, and blend.
    • Place into ice trays and freeze at least 4-6 hours or best overnight.
    Leave a Comment

    Notes

    *evaporated milk is preferable
    Serving: 1servingCalories: 151kcalCarbohydrates: 16gProtein: 3gFat: 9gSaturated Fat: 2gPolyunsaturated Fat: 1gMonounsaturated Fat: 5gCholesterol: 8mgSodium: 32mgPotassium: 327mgFiber: 3gSugar: 12gVitamin A: 133IUVitamin C: 6mgCalcium: 71mgIron: 0.3mg

    Watch The Recipe Video!

    QR Code
    Did you make this recipe?Share it on instagram or tag @simplybakings or #simplybakings!

    Not very many people know that avocado tastes delicious as a sweet treat and Filipino's love eating it with condensed milk and brown sugar.

    How do you like eating avocados? Drop your delicious ways of eating in the comment section 🙂

    Desserts, Ice Cream, St Patrick's Day Desserts, Vegan Filipino Recipes

    Sweet Pie Crust Recipe

    Sep 11, 2013 · 4 Comments

    A Sweet Pie Crust is the perfect base for your favorite desserts, offering a buttery, flaky, and slightly sweet foundation for everything from fruit pies to custard tarts. This easy-to-make sweet pie crust will elevate your homemade pies to the next level!

    Try this recipe with my classic Buko Pie or special Pumpkin Hand Pie!

    Sweet Pie Crust in a pie pan ready to be filled
    [feast_advanced_jump_to]

    What is Sweet Pie Crust?

    Sweet pie crust, also known as pâte sucrée, is a buttery, slightly sweet pastry dough used as the base for desserts like fruit pies, tarts, and custard-filled pastries. Unlike traditional flaky pie crusts, this dough has a tender, crisp texture due to the addition of sugar and sometimes egg yolks, which provide richness and structure. It holds its shape well when baked, making it perfect for decorative edges and intricate tart shells.

    History of Sweet Pie Crust

    Sweet pie crust, or pâte sucrée, originates from French pastry traditions dating back to the 17th century. French bakers developed this dough to create sturdy yet tender tart shells that wouldn’t shrink during baking. Unlike flaky American pie crusts, pâte sucrée was enriched with sugar and egg yolks, giving it a more structured, cookie-like texture.

    By the 18th and 19th centuries, this dough became a staple in European baking, forming the base for fruit tarts, custard pies, and chocolate-filled pastries. It spread to England and the U.S., where bakers adapted it into various sweet pie crust recipes for desserts like lemon meringue pie, pumpkin pie, and pecan pie.

    Substitutions

    • All-Purpose Flour - Gluten-Free Flour Blend (1:1 ratio; add ½ tsp xanthan gum for structure)
    • Shortening - Butter (Use the same amount for a richer flavor) or Coconut Oil (For a dairy-free option)
    • Sugar - Honey or Maple Syrup (Use ¾ the amount; adjust liquid if needed) or Powdered Sugar (For a finer texture)
    • Water - Milk or Plant-Based Milk (Enhances richness) or Vinegar + Water (1 tbsp vinegar in cold water for extra flakiness)
    A pie pan wrapped with uncooked crust

    Recipe Variations

    • Gluten-Free – Made with a gluten-free flour blend and xanthan gum.
    • Nutty – Replaces some flour with almond or hazelnut flour for added flavor.
    • Whole Wheat – Uses a mix of whole wheat and all-purpose flour for a hearty crust.
    • Shortbread-Style – Uses powdered sugar for a crumbly, cookie-like texture.

    Storage

    • Refrigerate dough wrapped in plastic wrap for up to 3 days before rolling out.
    • Freeze pie dough for up to 3 months. Thaw overnight in the refrigerator before using.

    Ingredients

    Listed below are all the ingredients you will need (omitting quantities):

    • All-purpose flour
    • Shortening
    • Sugar
    • Salt
    • Egg
    • Water

    See recipe card for quantities.

    Instructions

    In a bowl of a food processor, mix together the flour, vegetable shortening, tablespoon sugar, and kosher salt until crumbly.

    Ingredients mixed in a large bowl

    In a separate bowl, beat egg and water together.

    Egg poured into a measuring cup and whisked

    Pour the egg mixture into the flour mixture.

    Whisked egg poured into a large bowl

    Mix with a fork until combined.

    A fork being pressed into the batter in a bowl

    Knead the dough lightly until it comes together. Do not overwork the dough to keep it flaky.

    A hand kneading the dough in the bowl

    Using a rolling pin, roll it out on a floured surface or parchment paper.

    Pie dough being rolled flat on a wooden surface

    Place the dough into a pie dish and trim excess edges.

    Two hands pressing the dough flat on the surface

    And, that's it. Use as needed for your favorite fruit pies!

    A golden and freshly baked pie crust

    Hint: For extra flakiness, use cold shortening and chill the dough for 30 minutes before rolling out.

    ⭐ Top Tip

    Blind bake the crust before filling for a crispier texture - bake at 375°F (190°C) for 10-12 minutes with pie weights.

    Substitute butter for a richer flavor, or mix half butter, half shortening for a balance of flakiness and taste.

    Brush with egg wash (1 egg + 1 tbsp water) before baking for a golden brown crust. And it works well for apple, berry, and peach pies!

    FAQ

    What type of pastry is best for pies?

    Shortcrust in particular works best for a pie which has a pastry top and bottom, as it can stand up to the wet filling being placed on top. Puff pastry is slightly more complicated - the aim of the game is lamination, or layers! The end result is a delicious flaky pastry with a fantastic buttery taste.

    Why is butter the best choice for pie dough?

    The pros: Butter has the best flavor. A butter pie crust forms light, lofty, flaky layers while it bakes. The flakiness comes partially from the water content of butter, which evaporates as the pie bakes and turns to steam, separating and puffing up the layers in dough.

    What happens when you add sugar to pie dough?

    Sugar. Adding sugar to the dry ingredients for pie dough interferes with gluten development, aids in browning and, of course, adds sweetness.

    More Recipes

    Craving more pastries? Try the following:

    • Filipino Spanish Bread
    • Ube Cheese Pandesal
    • Cookie Dough Bites
    • Oreo Waffles
    Golden, flaky sweet pie crust in a baking dish
    5 from 3 votes
    Print Pin Recipe

    Easy Fruit Pie Crust

    A buttery, slightly sweet crust perfect for pies and tarts. Crisp, tender, and easy to make - ideal for any filling!
    Prep Time10 minutes mins
    Chilling Time30 minutes mins
    Total Time40 minutes mins
    Course: Dessert
    Cuisine: American
    Servings: 2 pie crusts
    Calories: 2596kcal
    Author: Lainey
    Prevent your screen from going dark

    Ingredients

    • 4 cups all-purpose flour
    • 1 ¾ cups shortening
    • 3 tablespoons sugar
    • 1 teaspoon salt
    • 1 egg
    • ½ cup water

    Instructions

    • In a large bowl, mix together the flour, shortening, sugar, and salt until crumbly.
    • In a separate bowl, beat egg and water together.
    • Pour the egg mixture into the dry ingredients and mix with a fork until combined.
    • Knead the dough lightly until it comes together. Do not overwork the dough to keep it flaky.
    • Divide the dough into two portions and roll it out on a floured surface.
    • Place the dough into a pie pan and trim excess edges. Use as needed for your favorite fruit pies!
    Leave a Comment

    Notes

    Crust can be baked with the filling or bake the crust at 350 degrees F for 15-20 minutes.
    Makes two crusts
    Serving: 1gCalories: 2596kcalCarbohydrates: 209gProtein: 29gFat: 184gSaturated Fat: 46gPolyunsaturated Fat: 52gMonounsaturated Fat: 75gTrans Fat: 24gCholesterol: 82mgSodium: 1209mgPotassium: 298mgFiber: 7gSugar: 19gVitamin A: 119IUCalcium: 54mgIron: 12mg

    Watch The Recipe Video!

    QR Code
    Did you make this recipe?Share it on instagram or tag @simplybakings or #simplybakings!

    Desserts

    Chocolate Filled Bread

    Sep 11, 2013 · 7 Comments

    freshly baked chocolate filled bread on a cooling rack

    Say hello to warm, gooey Chocolate Filled Bread—a fun and foolproof recipe kids can actually make! With soft, fluffy bread on the outside and melty dark chocolate inside, this recipe brings bakery vibes right to your kitchen.

    If you love baking with chocolate, check out these yummy recipes too: Chocolate Oatmeal and Chocolate Oreo Ice Cream.

    opened bread with chocolate filling
    [feast_advanced_jump_to]

    What is Chocolate Filled Bread?

    This Chocolate Filled Bread is inspired by the idea of combining a sweet bread with a melty surprise inside—semi-sweet chocolate chips or a rich chocolate bar. Popular in bakeries across the world, chocolate-filled breads are often seen as treats or breakfast goodies.

    This version is super kid-friendly and uses a “mix-in-a-bag” method, making it mess-free and simple enough for little hands. Whether it’s a rainy day project or weekend family baking, this recipe is bound to become a favorite.

    Substitutions

    • all-purpose flour – sub with bread flour or mix with brioche dough for richness
    • yeast – instant yeast works great; just mix right in
    • warm water – swap with warm milk for a richer dough
    • dry milk – replace with heavy cream or fresh milk and adjust liquids
    • oil – use tablespoons butter for a buttery flavor or coconut oil for a lighter taste
    • chocolate – use dark chocolate, semi-sweet chocolate chips, or even cocoa powder mixed with a little sugar and butter

    Variations

    • Nutty – sprinkle chopped hazelnuts or almonds into the chocolate filling
    • Fruity – add sliced bananas or strawberries before sealing the bread
    • Mini rolls – shape into cinnamon rolls or smaller sweet rolls
    • Vegan – use non-dairy chocolate and replace dry milk with plant-based milk powder
    bread with melted chocolate inside

    Storage

    • Countertop – Store in an airtight container for up to 3 days
    • Refrigerator – Keeps well for up to 5 days
    • Freezer – Freeze for up to 1 month; reheat in oven or toaster

    Ingredients

    • all-purpose flour
    • yeast
    • white sugar
    • warm water
    • dry milk
    • oil
    • salt
    • chocolate (for filling, your choice!)

    Instructions

    Before assembling the bread, make sure to preheat the oven to 375 degrees F and grease the baking pan.

    In the bag, add 1 cup of flour, yeast, and sugar:

    chocolate filled bread mixture in a ziplock bag

    Pour in the warm water, squish until well blended, then set aside:

    adding water to the chocolate filled bread mixture

    In a separate bowl, mix 1 cup of flour, dry milk, salt, and oil, then mix into the bag. Then add the last cup of flour and mix well:

    adding oil to the chocolate filled bread dough

    Take the dough out onto a lightly floured surface and knead for 5–10 minutes until smooth:

    shaping the dough using the fist

    Flatten dough into a rectangle, place your chocolate bar or chips in the center, fold, and seal the seams:

    putting chocolate chips inside the dough

    Shape as desired (try a braid or sweet roll!) and place seam-side down on a baking sheet lined with parchment paper. Bake for 30–35 minutes or until golden brown:

    kneading the dough of the chocolate filled bread

    Now, this is ready to go inside the oven! See how easy that was, even your kids can make it with you 😉

    ready to bake chocolate filled bread

    Top Tips

    • For the chocolate filling, feel free to use any store-bought chocolate filling of your choice.
    • Kneading this well is important. Even if kids can do this recipe, it is good that you guide them in the kneading step.
    • Do you love fresh-tasting bread? Add a little orange zest to the dough. I am sure it will smell so delicious!
    • You can use vegan chocolate chips to fill this bread. It will melt deliciously inside the bread while baking it. Yum!

    FAQ

    What type of chocolate works best for the filling?

    You can use chocolate chips, chocolate bars, or even Nutella! Just make sure it’s something that melts nicely.

    Can I make this without dry milk?

    Yes! Use fresh milk and reduce the water by 3 tablespoons.

    Can I make this dough ahead of time?

    Yes, you can refrigerate the dough for up to 24 hours before baking.


    More delicious recipes to try!

    • Peanut Butter Cookies With A Twist
    • Strawberry Greek Yogurt Cake
    • S’mores Cookies
    bread with gooey chocolate inside
    5 from 2 votes
    Print Pin Recipe

    Chocolate Filled Bread

    Whip up a fun treat with this Chocolate Filled Bread recipe! Perfectly fluffy and filled with sweet melted chocolate, it’s a kid-friendly baking win!
    Prep Time15 minutes mins
    Bake Time35 minutes mins
    Total Time50 minutes mins
    Course: Bread
    Cuisine: American
    Servings: 15 - 20 pieces
    Calories: 133kcal
    Author: Lainey
    Prevent your screen from going dark

    Ingredients

    • 3 cups all-purpose flour
    • 2 ¼ teaspoons of yeast
    • 4 tablespoons white sugar
    • 1 cup warm water
    • 3 tablespoons dry milk
    • 3 tablespoons oil
    • 1 ½ teaspoons salt
    • chocolate chips

    Instructions

    • Preheat oven to 375 degrees F and grease pan
    • In the bag add 1 cup of flour, yeast, sugar & warm water, squish until well blended, then set aside.
    • In a separate bowl, mix 1 cup of flour, dry milk, salt and oil, then mix into the bag. Then add the last cup of flour and mix well
    • Then remove the dough from the bag and knead for 5-10 minutes
    • Flatten the dough, place your desired amount of chocolate in the center, fold over, and shape as you like
    • Roll to desired shapes and bake for 30-35 minutes
    Leave a Comment
    Serving: 1pieceCalories: 133kcalCarbohydrates: 22gProtein: 3gFat: 3gSaturated Fat: 1gPolyunsaturated Fat: 1gMonounsaturated Fat: 2gTrans Fat: 0.01gCholesterol: 1mgSodium: 343mgPotassium: 51mgFiber: 1gSugar: 1gVitamin A: 14IUVitamin C: 0.1mgCalcium: 18mgIron: 1mg

    Watch The Recipe Video!

    QR Code
    Did you make this recipe?Share it on instagram or tag @simplybakings or #simplybakings!

    Bread

    Milk Chocolate Cake

    Sep 11, 2013 · 9 Comments

    An amazing Milk Chocolate Cake recipe which is perfect for birthdays and all parties. Decadent, milky and moist, this Milk Chocolate Cake will make you drool and hungry at the same time!

    milk chocolate cake

    Tips and Tricks for Making This Milk Chocolate Cake Recipe: 

    • When decorating the cake, you can frost it and sprinkle some mini chocolate chips on top.
    • To make the mixing of the batter easier, you can use an electric mixer like a handheld mixer or a stand mixer.
    • When baking using a pan which is not of the non-stick kind, line the baking pan with parchment paper to prevent the cake from sticking onto the pan.
    • If you are having a party and would want more yield for this recipe, you can make this into a sheet cake and slice into desired sizes.

    How to Make this Milk Chocolate Cake Recipe:

    Here is the quick look of the ingredients for Milk Chocolate Cake:

    • softened butter
    • eggs
    • all-purpose flour
    • unsweetened cocoa powder
    • baking soda
    • baking powder
    • salt
    • sugar
    • vanilla
    • milk

    Don't forget to preheat oven to 350 degrees F and grease two 8-inch pans to save time.

    In a medium-size bowl add the all-purpose flour, cocoa powder, baking soda, baking powder, salt, and mix:

    mixing the dry ingredients of milk chocolate cake in a glass bowl

    In a large bowl, beat the sugar and butter and mix:

    mixing butter and sugar using a handheld mixer

    When you achieve a light and fluffy texture, add eggs and vanilla extract and mix again:

    adding vanilla and eggs to the butter and sugar mixture

    Add the milk and the dry ingredients alternating both until the batter is well mixed. I did the adding of the dry ingredients little by little so that there would be minimal lumps or best, no lumps at all:

    adding the dry ingredients to the wet ingredients of the milk chocolate cake

    Pour into the pans. I also used other mini cake boxes because I just found them cute 🙂

    pouring the milk chocolate cake batter to the baking pan

    Bake for 30 to 40 minutes:

    baking the milk chocolate cake in an oven

    Here you go! Just a bit of mixing and a little waiting, you have a delicious Milk Chocolate Cake!

    freshly baked milk chocolate cake

    Here are some great chocolate cake recipes you will surely love:

    • Chocolate Mug Cake with Protein
    • Vegan Chocolate Cake
    • Hot Fudge Chocolate Cake
    • Zebra Brownie Cake

    Frequently Asked Questions for the Milk Chocolate Cake Recipe:

    Q: Can I use coconut oil instead of butter for this recipe?

    A: Yes you can. It might not just be as fluffy as when you use butter.

    Q: What frostings can I use for this Milk Chocolate Cake?

    A: You can use chocolate ganache, milk chocolate frosting, buttercream frosting, or whipped frosting which are ready-made, and also you can use caramel sauce if you love really sweet cakes.

    Q: Can I make this cake a day before?

    A: Yes for sure! Actually, for me, a day-old cake tastes so much better than a freshly baked one because all the milk and chocolate kind of infused together after the baking process.

    freshly baked milk chocolate cake
    5 from 3 votes
    Print Pin Recipe

    Milk Chocolate Cake

    For milk chocolate cake lovers, this delicious and easy Milk Chocolate Cake recipe is packed with milky, chocolatey goodness!
    Author: Lainey
    Prevent your screen from going dark

    Ingredients

    • ¾ cup butter softened
    • 3 eggs
    • 2 cups all-purpose flour
    • ¾ cup unsweetened cocoa powder
    • 1 teaspoon baking soda
    • ¾ teaspoon baking powder
    • ½ teaspoon salt
    • 1 ¼ cup sugar
    • 2 teaspoons vanilla
    • 1 ½ cups milk

    Instructions

    • Preheat oven to 350 degrees F and grease two 8-inch pans
    • In a medium size bowl add the all purpose flour, cocoa powder, baking soda, baking powder, salt and mix
    • In a large bow beat the sugar and butter until light and fluffy and add eggs and vanilla extract and mix. Add the milk and the dry ingredients alternating both until the batter is well mixed.
    • Pour into the pans and bake for 30-35 minutes
    Leave a Comment

    Notes

    **Recipe is similar to Starbucks Chocolate Cake Pop.

    Watch The Recipe Video!

    QR Code
    Did you make this recipe?Share it on instagram or tag @simplybakings or #simplybakings!

    NEVER MISS A RECIPE!

    PINTEREST / FACEBOOK / INSTAGRAM / TWITTER

    If you’ve tried this or any other of my recipes, don’t forget to rate the recipe and to leave me a comment. I love hearing from you!
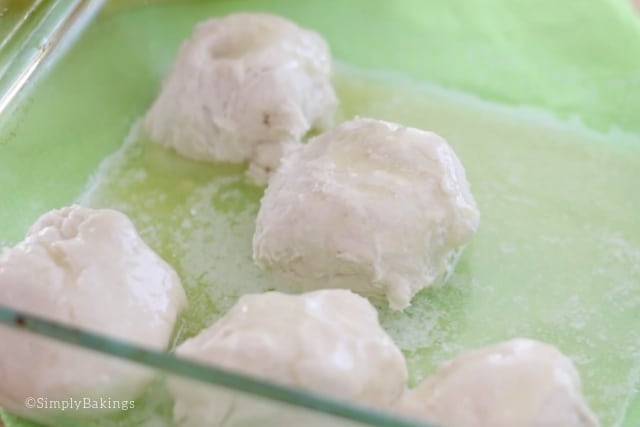
    Cake, Desserts, Vegetarian Filipino Recipes

    Brownielike Mug Cake

    Sep 11, 2013 · 11 Comments

    simplybakings mug


    No ratings yet
    Print Pin Recipe

    Brownielike Mug Cake

    Author: Lainey
    Prevent your screen from going dark

    Ingredients

    • ¼ cup all purpose flour
    • ¼ cup sugar
    • 2 tablespoons unsweetened cocoa powder
    • 1 tablespoon oil
    • 2 tablespoons water
    • handful of nuts

    Instructions

    • In a large mug add all purpose flour, sugar unsweetened cocoa powder, oil, water, nuts and mix very well.
    • Microwave on high for 2 minutes
    Leave a Comment
    QR Code
    Did you make this recipe?Share it on instagram or tag @simplybakings or #simplybakings!

    NEVER MISS A RECIPE!

    PINTEREST / FACEBOOK / INSTAGRAM / TWITTER

    If you’ve tried this or any other of my recipes, don’t forget to rate the recipe and to leave me a comment. I love hearing from you!

    Desserts

    Easy Hot Chocolate Mug Cake

    Sep 11, 2013 · 3 Comments

    three freshly baked easy chocolate mug cakes

    Craving something chocolatey but don't want to bake a whole cake? This Easy Hot Chocolate Mug Cake is the perfect fix! With simple pantry staples like flour, cocoa powder, sugar, and a splash of vanilla, you’ll be diving into warm, gooey chocolate goodness in just 2 minutes—no oven required!

    If you're a chocolate lover, you’ll also love my rich Graham Cracker Mug Cake and this sweet Nutella Mug Cake—both made for quick cravings!

    three mug cakes
    [feast_advanced_jump_to]

    What is Easy Hot Chocolate Mug Cake?

    The Easy Hot Chocolate Mug Cake is a fun and fast dessert that brings all the cozy flavors of classic hot chocolate into cake form. It became popular thanks to the rise of microwaves and the love for fast, no-fuss desserts.

    Think of it as your favorite hot chocolate cake, but quicker! It’s made by mixing all of the ingredients in a mug, zapping it in the microwave, and voilà—you get fluffy cake batter turned into a soft, moist cake. It’s a cozy go-to for the colder time of year and is great for when you don’t feel like baking a whole cake.

    Subsitutions

    • all-purpose flour – use almond flour or a gluten-free blend
    • sugar – replace with maple syrup, coconut sugar, or monk fruit sweetener
    • unsweetened cocoa powder – swap with hot chocolate powder or a Swiss Miss packet for extra sweetness
    • milk – use whole milk, oat, soy, or almond milk
    • egg – use 1 tbsp flaxseed + 2.5 tbsp water (flax egg) or ¼ mashed banana
    • vegetable oil – sub with coconut oil, canola oil, melted butter, unsalted butter, or applesauce
    • vanilla extract – almond, or peppermint extract work for fun flavor twists
    • pinch of salt – optional, but enhances the chocolate flavor

    Variations

    • Chocolate overload – add dark chocolate, semi-sweet chocolate chips, or a spoonful of Nutella or peanut butter
    • Holiday style – mix in crushed candy canes or top with mini marshmallows
    • Extra moist – add a drizzle of chocolate syrup, hot fudge, or chocolate sauce
    • Dessert mode – top with vanilla ice cream and your favorite toppings
    freshly baked easy mug cakes

    Storage

    • Countertop – Best eaten fresh, but can sit for a few hours at room temperature
    • Fridge – Store for up to 2 days in the mug, cover with plastic wrap
    • Freezer – Not recommended; texture changes when reheated

    Ingredients

    • all-purpose flour
    • sugar
    • unsweetened cocoa powder
    • milk
    • egg
    • oil
    • salt
    • vanilla extract

    Instructions

    In a large microwave-safe mug or bowl, add the dry ingredients: flour, sugar, and cocoa powder. Stir in the wet ingredients: milk, egg, oil, and vanilla extract. Add a pinch of salt. Mix well until the cake batter is smooth.

    mixing ingredients

    Microwave on high for 2 mins. Check doneness with a toothpick—it should come out clean or with moist crumbs. Let it cool slightly, then enjoy it with your favorite toppings!

    mixing chocolate cake batter

    Top Tips

    To keep your mug cake super moist, don’t overcook it—microwave for exactly 2 minutes and let it sit for a minute to finish cooking through.

    FAQ

    Can you make a mug cake with hot chocolate?

    Yes, you totally can! Just swap the cocoa powder with your favorite hot chocolate mix or a Swiss Miss packet. It makes the cake sweeter and gives it that classic cozy hot cocoa taste.

    How do you know when a mug cake is done?

    Insert a toothpick—if it comes out clean, your mug cake is ready.

    Why is my mug cake rubbery?

    That usually means it was overcooked. Microwave times can vary, so try cooking it for a little less—start with 1 minute and 45 seconds and check it with a toothpick. Also, don’t overmix the cake batter—just stir until combined for a softer texture.


    two hot chocolate mug cakes
    5 from 1 vote
    Print Pin Recipe

    Easy Hot Chocolate Mug Cake

    Whip up this Hot Cocoa Mug Cake in 2 mins using simple ingredients! A cozy microwave dessert for your sweet tooth and chocolate cravings.
    Prep Time3 minutes mins
    Cook Time2 minutes mins
    Total Time5 minutes mins
    Course: Dessert
    Cuisine: American
    Servings: 1 mug cake
    Calories: 736kcal
    Author: Lainey
    Prevent your screen from going dark

    Ingredients

    • ¼ cup all purpose flour
    • 3 tablespoons sugar
    • 2 tablespoons unsweetened cocoa powder
    • 3 tablespoons milk
    • 1 egg
    • 3 tablespoons oil
    • pinch salt
    • few drops vanilla extract

    Instructions

    • In a large mug, add all purpose flour, sugar, unsweetened cocoa powder, milk, egg oil, pinch of salt and vanilla extract and mix very well.
    • Microwave on high for 2 minutes.
    Leave a Comment

    Notes

    optional add white chocolate chips
    Serving: 1servingCalories: 736kcalCarbohydrates: 68gProtein: 12gFat: 49gSaturated Fat: 6gPolyunsaturated Fat: 13gMonounsaturated Fat: 29gTrans Fat: 0.2gCholesterol: 169mgSodium: 83mgPotassium: 314mgFiber: 5gSugar: 39gVitamin A: 311IUCalcium: 98mgIron: 4mg
    QR Code
    Did you make this recipe?Share it on instagram or tag @simplybakings or #simplybakings!

    Desserts

    Nutella Mug Cake (No Baking Powder)

    Sep 11, 2013 · 9 Comments

    This Nutella Mug Cake just takes a few ingredients, pop it in the microwave, and you've got a delicious dessert and requires no baking powder required.

    This was inspired by my other mug cake recipes on this site like Microwave S’more Fudge Mug Cake, and Chocolate Mug Cake with Protein. You can pair this well with Easy Dalgona Coffee.

    simply bakings mug
    [feast_advanced_jump_to]

    Ingredients

    • all-purpose flour
    • white sugar
    • egg
    • unsweetened cocoa powder
    • oil
    • milk
    • nutella

    See recipe card for quantities.

    Instructions

    green simply bakings mug on a brown table

    Grab your microwave-safe large mug.

    mixed ingredients in the mug

    Add the all purpose flour, sugar, egg unsweetened cocoa powder, oil, milk and nutella in a large mug and mix very well. Microwave on high for two minutes

    Substitutions

    • Milk or Water: Use interchangeably in recipes.
    • Hazelnut Crunch: Sprinkle chopped hazelnuts.
    • Cocoa Powder or Chocolate Flavor: Swap for chocolate flavoring.

    Variations

    • Add chocolate chips and bananas to the batter.
    • Use peanut butter instead of Nutella.
    • Top with fresh berries like raspberries or strawberries.

    Equipment

    • Large microwave-safe mug
    • Measuring spoons
    • Mixing spoon

    Storage

    If you somehow find yourself with leftover Nutella Mug Cake (which is rare!), you can store it in an airtight container in the refrigerator for up to two days. Just be sure to reheat it in the microwave before enjoying it again.

    Top Tip

    For a gooey center, slightly undercook your Nutella Mug Cake and top it with vanilla ice cream.

    FAQ

    Can I substitute water for milk in mug cake?

    Yes, you can substitute water for milk in mug cake, but it may result in a slightly different texture and taste.

    Is cake better with milk or water?

    The cake is typically better with milk, as it adds richness and moisture to the final result.

    Why is my mug cake rubbery?

    A rubbery mug cake may occur if it's overcooked or if the proportions of ingredients are not balanced properly. Try adjusting the cooking time or ingredient ratios for better results.

    simplybakings mug
    simply bakings mug
    5 from 4 votes
    Print Pin Recipe

    Nutella Mug Cake (No Baking Powder)

    Nutella, the chocolate hazelnut spread that everyone loves to eat, dessert cake in a mug!
    Prep Time3 minutes mins
    Cook Time2 minutes mins
    Total Time5 minutes mins
    Course: Dessert
    Cuisine: American
    Servings: 1 mug
    Calories: 870kcal
    Prevent your screen from going dark

    Ingredients

    • 3 tablespoons all purpose flour
    • 3 tablespoons white sugar
    • 1 egg
    • 3 tablespoons unsweetened cocoa powder
    • 3 tablespoons oil
    • 3 tablespoons milk
    • 2 tablespoons nutella

    Instructions

    • Add the all purpose flour, sugar, egg unsweetened cocoa powder, oil, milk and nutella in a large mug and mix very well until combined.
    • Microwave on high for two minutes and serve with a dollop of ice cream and whipped cream.
    Leave a Comment
    Calories: 870kcalCarbohydrates: 74gProtein: 14gFat: 61gSaturated Fat: 17gPolyunsaturated Fat: 13gMonounsaturated Fat: 29gTrans Fat: 0.2gCholesterol: 169mgSodium: 1261mgPotassium: 531mgFiber: 8gSugar: 23gVitamin A: 312IUCalcium: 143mgIron: 6mg

    Watch The Recipe Video!

    QR Code
    Did you make this recipe?Share it on instagram or tag @simplybakings or #simplybakings!

    Desserts

    Easy Lemon Bars 9x13 pan

    Sep 11, 2013 · 3 Comments

    Easy Lemon Bars sprinkled with powdered sugar

    Easy Lemon Bars 9x13 pan are always a great dessert idea. This quick and easy Lemon Bars recipe is perfect for you! It is topped with a sweet and tangy tart lemon filling. The crust is so simple to make. You will love the flakiness in every bite. Grab this recipe and make it at home today using your favorite baking dish!
    I live for delicious cakes. Don't you? Strawberry Bundt Shortcake, Cassava Cake, and even the classic Chiffon Cake can make me melt!

    Easy Lemon Bars cut into slices with a knife
    [feast_advanced_jump_to]

    What are Easy Lemon Bars?

    Easy Lemon Bars are a two-layer dessert. It has a buttery shortbread crust and a tangy-sweet lemon filling. They’re simple to make. They are bursting with citrus lemon flavor. They are finished with a dusting of powdered sugar. The filling sometimes develops small air bubbles while baking. This is totally normal and adds a homemade charm.

    History of Easy Lemon Bars

    Homemade lemon bars became popular in American home baking during the mid-20th century. They became especially popular in the 1960s when citrus desserts were gaining attention. They likely evolved from lemon curd recipes and British-style lemon tarts. These were adapted into a simpler bar form for convenience.

    The “easy” part came later. Home bakers began using fewer ingredients and faster methods. This turned the once-fancy dessert into an everyday favorite. It still feels special.

    Substitutions

    • All-purpose flour – Use whole wheat flour for a nuttier crust. Or use a 1:1 gluten-free flour blend to make it gluten-free.
    • White sugar – Swap with coconut sugar, maple sugar, or light brown sugar for a deeper sweetness.
    • Butter – Substitute with solid coconut oil for a dairy-free version. You can also use melted butter for easier mixing.
    • Eggs – Use flax eggs (1 tbsp flaxseed meal + 3 tbsp water per egg) or a commercial egg replacer for a vegan option.
    • Lemon juice – Replace with lime juice for a different citrus flavor or bottled lemon juice if fresh lemons aren't available.
    Delicious Easy Lemon Bars in a glass tray

    Recipe Variations

    • Lemon Raspberry Bars - Swirl fresh or frozen raspberries into the lemon filling for a burst of berry flavor and a pop of color.
    • Lavender Lemon Bars - Add a pinch of dried culinary lavender to the filling for a fragrant, fancy dessert perfect for springtime tea.
    • Cream Cheese Lemon Bars - Blend softened cream cheese into the filling for a richer, creamier texture.

    Storage

    • Room Temperature: Store lemon bars in an airtight container at room temperature for up to 2 days if your kitchen is cool and dry.
    • Refrigerator: Keep them in an airtight container or cover tightly with plastic wrap and refrigerate for up to 5–7 days. This helps maintain their texture and tart flavor.
    • Freezer: Freeze cooled, uncut bars or individual slices by wrapping them in plastic wrap and placing them in a freezer-safe container. They’ll keep for up to 3 months. Thaw in the fridge overnight before serving.

    Ingredients

    Listed below are all the ingredients you will need:

    • All-purpose flour
    • White sugar
    • Butter
    • Eggs
    • Lemon juice

    See recipe card for quantities.

    All ingredients for Easy Lemon Bar ingredients

    Instructions

    Make the Crust:

    Preheat oven to 350°F (175°C) and lightly grease a 9x13-inch baking pan.

    In a medium bowl, mix together the crust ingredients: flour, sugar, salt, and softened or melted butter until a crumbly dough forms.

    Mixing all ingredients of the Easy Lemon Bar crust

    Press evenly into the bottom of the prepared pan. Bake the crust for 15–20 minutes or until lightly golden.

    Tapping the Easy Lemon Bars crust with hand

    Remove from oven and set aside. This is how the final crust will look:

    Easy Lemon Bars crust out of the oven

    Make the Lemon Curd Filling:

    In a separate large bowl, whisk together eggs, sugar, flour, and fresh lemon juice until smooth.

    Mixing ingredients for the Easy Lemon Bar filling

    Pour the mixture over the pre-baked crust and return to the oven. Bake for another 15–20 minutes, or until the center is set and no longer jiggles.

    Adding filling into the Easy Lemon Bar crust

    Cool completely. It smells very nice!

    Easy Lemon Bars in a glass pan

    Slice into bars and serve chilled or at room temperature. Drizzle with confectioner's sugar!

    Easy Lemon Bars sprinkled with powdered sugar

    Hint: Choose eggs carefully. For this recipe, it is important to use large and fresh eggs.

    ⭐ Top Tip

    Before mixing the dry ingredients like all-purpose flour and granulated sugar, sift them individually. This easy but very important step would make your Lemon Bars nice and evenly textured. It wouldn’t be fun biting into a lump of flour in between.

    Mix carefully the wet ingredients of the Lemon Bars. You can also run it through a sifter to get a smooth filling. For an extra boost of citrus flavor, add lemon zest and a splash of orange juice to the filling. A dash of vanilla extract adds warmth and depth to balance the tartness.

    FAQ

    Is it better to bake lemon bars in a glass or metal pan?

    Always bake in glass pans to avoid a metallic taste. Metal can react with the acidity in the lemon juice.

    Why does my lemon tart taste eggy?

    Lemon tart filling is a lemon flavored custard which includes eggs (whole, yolks, whites), lemon (zest & juice), sugar, and cream. If the tart tastes eggy, then the tart filling is overcooked.

    What is the best way to store lemon bars?

    To store lemon bars, simply place in an airtight container and seal tightly, then put them in the fridge. If you're stacking lemon bars, insert a sheet of parchment paper between layers to prevent sticking. According to the USDA, lemon bars will last in the refrigerator up to 7 days.

    More Recipes

    • Milk Chocolate Cake
    • Buttermilk Chocolate Bread
    • Easy Nutella Cookies only 4 Ingredients
    • Blueberry Cupcake Bouquet
    • Double Chocolate Cranberry Cookies
    • Carrot Cake Cupcakes
    Sugar all over the Easy Lemon Bars
    5 from 2 votes
    Print Pin Recipe

    Easy Lemon Bars 9x13 pan

    These Easy Lemon Bars are the perfect summer dessert. With a buttery shortbread crust and a sweet lemony filling, they taste even better chilled!
    Prep Time15 minutes mins
    Cook Time40 minutes mins
    Total Time55 minutes mins
    Course: Dessert
    Cuisine: American
    Servings: 12 -16 bars
    Calories: 367kcal
    Author: Lainey
    Prevent your screen from going dark

    Ingredients

    • 2 cups All-purpose flour
    • ½ cup White sugar
    • 1 cup Butter softened
    • 4 Eggs
    • 1 ½ cups White sugar
    • ¼ cup All-purpose flour
    • ½ cup Lemon juice

    Instructions

    Make the Crust:

    • Preheat oven to 350°F (175°C) and lightly grease a 9x13-inch baking pan.
    • In a bowl, mix together 2 cups flour, ½ cup sugar, and softened butter until a crumbly dough forms. Press evenly into the bottom of the prepared pan.
    • Bake the crust for 15–20 minutes or until lightly golden. Remove from oven and set aside.

    Make the Filling:

    • In a separate bowl, whisk together eggs, 1 ½ cups sugar, ¼ cup flour, and lemon juice until smooth.
    • Pour the filling over the pre-baked crust and return to the oven. Bake for another 15–20 minutes, or until the center is set and no longer jiggles.

    Serve:

    • Cool completely, then dust with powdered sugar if desired. Slice into bars and serve chilled or at room temperature.
    Leave a Comment
    Serving: 1gCalories: 367kcalCarbohydrates: 48gProtein: 4gFat: 17gSaturated Fat: 10gPolyunsaturated Fat: 1gMonounsaturated Fat: 5gTrans Fat: 1gCholesterol: 95mgSodium: 1671mgPotassium: 60mgFiber: 1gSugar: 0.4gVitamin A: 553IUVitamin C: 4mgCalcium: 17mgIron: 1mg

    Watch The Recipe Video!

    QR Code
    Did you make this recipe?Share it on instagram or tag @simplybakings or #simplybakings!

    Desserts

    Turon

    Sep 11, 2013 · 2 Comments

    delicious turon on a plate

    Turon is a super easy, classic Filipino banana dessert recipe! It is a quick snack to prepare that is perfect anytime you want a no-bake fruit-based snack! Turon is a favorite of most Filipinos - it is so easy to make and all ingredients are conveniently available! 

    Turon in a pan

    Tips and Procedures: 

    • If you want your Turon to be crispier on the outside, sprinkle some brown sugar on them while frying. Just be careful not to put too much so the brown sugar won't cause the oil to burn.
    • To make your Turon extra special, serve it with a scoop of vanilla ice cream! Yum!
    • To prevent tearing off of the Turon, you can use two pieces for each Turon.

    How to Make this Turon Recipe:

    Gather the ingredients for Turon and once the ingredients are all ready, let's begin!

    • Burro Bananas
    • Spring Roll Wrappers
    • Jackfruit
    • Water
    • Oil for frying
    ingredients for turon recipe with jackfruit

    Peel the bananas and slice vertically into three:

    slicing bananas thinly for turon recipe

    Slice the jackfruit thinly, just like so:

    slicing jackfruit thinly for turon recipe

    Assemble starting with the spring roll wrappers, bananas, jackfruit, and water. Lay the wrapper down, place the banana in the middle followed by the jackfruit:

    assembling jackfruit and banana slices on the molo wrapper

    Roll till about halfway and then grab the ends and fold in and continue rolling:

    wrapping the banana and jackfruit in the turon wrapper

    When you have about an inch left dip your finger in the water and wet the last inch and continue rolling:

    wrapping the turon before frying

    Once all the bananas are wrapped, pour oil into the pan and fry till all sides are golden brown:

    frying the turon in a shallow pan

    When you see that the Turon has this color on both sides, this is ready to be taken out from the oil:

    turning the other side of the turon

    Let the Turon cool and to take away the excess oil from the Turon wrapper, you can let it sit on a paper towel before serving:

    cooling the turon on top of the kitchen towel

    Frequently Asked Questions for the Turon Recipe:

    Q: Can I assemble the Turon in advance and freeze it?

    A: Yes, definitely. You just thaw it for about 30 minutes before frying.

    Q: Is the Turon wrapper the same as the wrapper used in lumpia or spring roll?

    A: Yes, it is the same and is also called spring roll wrappers.

    Q: Can I make it into banana cue?

    A: For sure, you can make into a Turon banana cue or Turon cue, just poke through a stick and serve!

    Q: What oil should I use when frying Turon?

    A: I used vegetable oil but any kind of oil will do.


    If you like this recipe you will enjoy these as well:

    • Tofu Sisig
    • Buko Pandan
    • Cassava Cake
    • Shakoy
    • Halo Halo
    • Turon
    camote spring rolls with a banana leaf on a wooden board
    No ratings yet
    Print Pin Recipe

    Turon

    Filipino Turon is burro bananas and jackfruit wrapped in spring roll wrappers.
    Course: Dessert
    Cuisine: Filipino
    Author: Lainey
    Prevent your screen from going dark

    Ingredients

    • Burro Bananas
    • Spring Roll Wrappers
    • Jackfruit
    • Water
    • Oil for frying

    Instructions

    • Peel the bananas and slice vertically into three
    • Slice the jackfruit thinly
    • Assemble starting with the spring roll wrappers, bananas, jackfruit and water
    • Lay the wrapper down, place the banana in the middle followed by the jackfruit
    • Roll till about halfway and then grab the ends and fold in and continue rolling. When you have about an inch left dip your finger in the water and wet the last inch and continue rolling.
    • Once all the bananas are wrapped, pour oil into pan and fry till all sides are golden brown.
    Leave a Comment

    Watch The Recipe Video!

    QR Code
    Did you make this recipe?Share it on instagram or tag @simplybakings or #simplybakings!

    Christmas Desserts, Desserts, Filipino Desserts, Vegan Filipino Recipes, Vegetarian Filipino Recipes

    Filipino Vanilla Cupcakes

    Sep 11, 2013 · 7 Comments

    filipino vanilla cupcake bouquet

    Make a special yet so easy-to-do Filipino Vanilla Cupcake bouquet! If you are looking for a perfect Mother's Day gift for your Mom or someone special, this is the recipe for you! These vanilla cupcakes need only a few ingredients and the bouquet is so quick and easy to assemble!
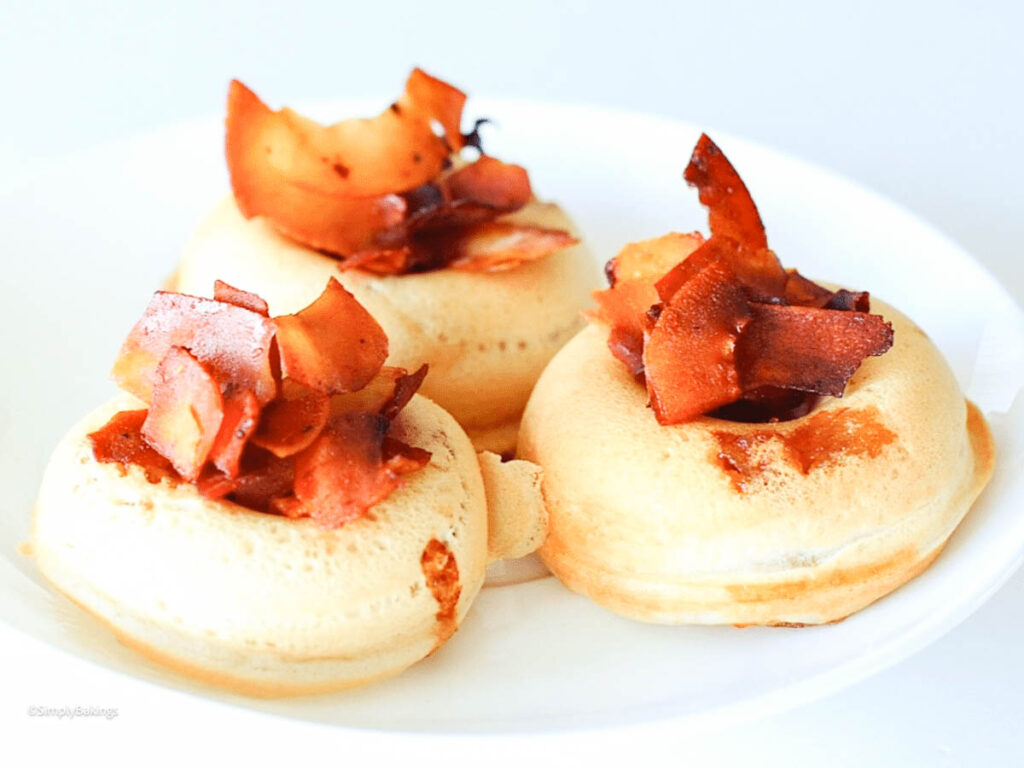
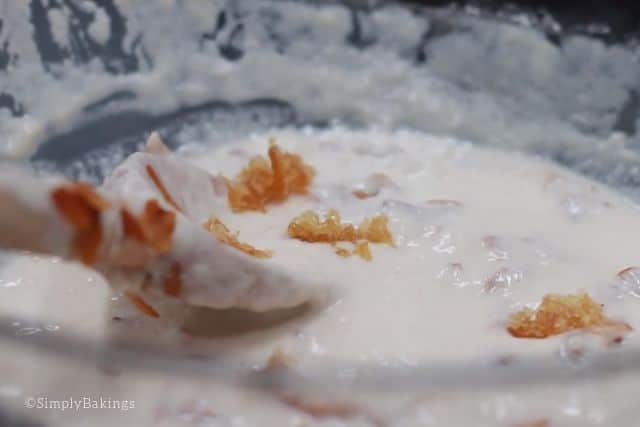
    If you love cupcakes, you’ll also enjoy Blueberry Cupcake Bouquet for a fun twist, or try Nutella Cupcakes and Ferrero Rocher Cupcakes for a chocolate-flavored delight!
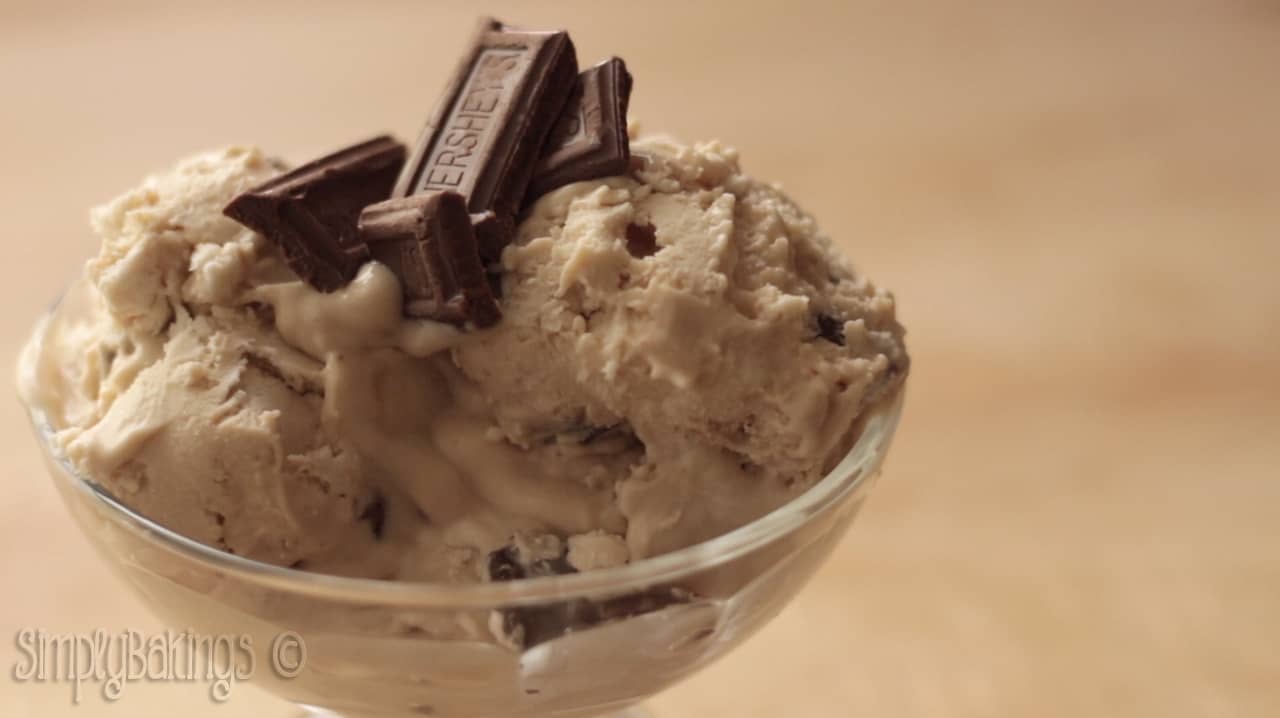
    bouquet cupcake with a valentine letter
    [feast_advanced_jump_to]

    What are Filipino Vanilla Cupcakes?

    This Filipino Vanilla Cupcake recipe is a classic dessert loved by many families in the Philippines. They’re often baked for parties, school events, or just as a special merienda (snack).

    Unlike store-bought cupcakes, these homemade ones have a soft, moist crumb and a buttery vanilla flavor. It’s a basic cupcake that gives comfort and nostalgia, reminding many of growing up with sweet treats from the local bakery or mom’s kitchen.

    Substitutions

    • butter - use vegetable oil or coconut oil for a dairy-free option
    • sugar - use coconut sugar or monk fruit sweetener for a healthier twist
    • eggs - swap with ¼ cup applesauce per egg or use flax eggs for vegan version
    • vanilla extract - use almond extract or maple syrup (for a different flavor)
    • all-purpose flour - replace with cake flour for a softer texture, or gluten-free flour
    • baking powder - use ¼ teaspoon baking soda + ½ teaspoon cream of tartar
    • salt - omit if using salted butter
    • milk - try almond milk, soy milk, or evaporated milk
    assembling the filipino vanilla cupcake into a bouquet

    Variations

    • Chocolatey - Mix in mini chocolate chips
    • Fruity - Add fresh blueberries or chopped strawberries
    • Topped - Top with powdered sugar or whipped heavy cream

    Storage

    • Countertop - Store in an airtight container for 2-3 days
    • Refrigerator - Keeps fresh for up to 1 week
    • Freezer - Freeze for up to 3 months, thaw before serving
    pink cupcake bouquet with chocolate hearts

    Ingredients

    Gather the ingredients for this Vanilla Cupcakes and once the ingredients are all ready, let's begin!

    • softened butter
    • white sugar
    • eggs
    • vanilla extract
    • all-purpose flour
    • baking powder
    • salt
    • cold milk
    filipino vanilla cupcake ingredients in separate bowls

    Instructions

    Preheat oven to 350 degrees F / 175 degrees C and line your muffin pan with paper cups or lightly greased muffin pan.

    In a medium bowl, mix softened butter and sugar until fluffy then add eggs and vanilla extract and mix:

    mixing sugar, butter, and eggs in a clear glass bowl with a whisk

    In a separate bowl add the all-purpose flour, baking powder, and salt and mix till well combined:

    mixing the dry ingredients for the vanilla cupcakes recipe

    Alternate adding the dry and wet ingredients and mix well:

    gradually adding the dry ingredients to the wet ingredients of vanilla cupcakes recipe

    Alternately add the milk to the flour mixture:

    adding milk to the vanilla cupcakes ingredients

    Once the cupcake batter is mixed well, place in individual cupcake liners and bake in preheated oven for 20-25 minutes:

    placing vanilla cupcake batter to cupcake liners

    Once the cupcakes are baked, let them cool on a cooling rack and frost them. You can make your own frosting or you can just buy a ready-to-use frosting, like what I used here:

    frosting the cupcakes with store-bought frosting

    After frosting all your cupcakes, assemble the "vase" for your cupcake bouquet. Here, I used a small tin bucket and glued the styrofoam ball into it:

    adding glue to the tin can for the vanilla cupcake bouquet

    Insert toothpicks into the styrofoam ball for the cupcakes to adhere:

    inserting toothpicks into the Styrofoam ball

    Arrange all your cupcakes until all of them are inserted into the toothpicks:

    arranging the vanilla cupcakes into the styrofoam ball

    I had mini heart chocolates at home when I made these cupcakes so I felt I wanted to make the bouquet extra special so I inserted toothpicks and placed the chocolate hearts in between the cupcakes:

    chocolate hearts inserted with toothpicks

    My vanilla cupcake bouquet is almost done! I was so excited to show this to my family, and I was so happy they loved it!

    inserting chocolate hearts in between the vanilla cupcakes

    Top Tips

    • Before frosting, make sure the cupcakes are completely cooled to avoid the melting of the frosting.
    • Make the frostings ahead in one big batch and just chill it. Take them out from the chiller and frost your Vanilla cupcakes before assembling it into a bouquet.
    • You can place mini candy flowers on top of the frosting for a prettier edible bouquet arrangement.
    • If you are making your own frosting and you don't have a piping tip to use when frosting, simply place the whipped cream into a piping bag and make a cut in the corner of the bag and frost. Such a clever frosting hack!
    • If you have the vanilla plant at home, it is best to use the actual vanilla bean paste. It gives out a very natural and delicious flavor to the cupcakes.
    • Don't forget to sift all the dry ingredients before mixing. It is best to make sure you get no lumps in your baked cupcakes.
    • Use room temperature ingredients for a smooth batter and even baking—especially the unsalted butter, whole milk, and large eggs!

    FAQ

    How do I know when the cupcakes are done?

    Check the center of a cupcake with a toothpick—it should come out clean.

    What does vanilla extract do for cupcakes?

    Vanilla extract adds a warm, sweet flavor and enhances the taste of all the other ingredients. It makes cupcakes smell amazing and taste rich and delicious, even though you only need a little bit!

    What causes cupcakes to deflate?

    This is often caused by too much butter or you did not add enough baking powder.


    Here are more cupcake recipes you can try! Happy Baking!

    • 3 Ingredient Chocolate Cupcakes
    • White Chocolate Strawberry Cupcakes
    • S’mores Cupcakes
    filipino vanilla cupcake bouquet
    5 from 2 votes
    Print Pin Recipe

    Filipino Vanilla Cupcakes

    Bake soft and fluffy basic Filipino Vanilla Cupcakes packed with rich vanilla flavor—easy to make and perfect for any sweet occasion!
    Prep Time10 minutes mins
    Bake Time20 minutes mins
    Total Time30 minutes mins
    Course: Dessert
    Cuisine: American, Fusion (American-Filipino/Asian)
    Servings: 24 cupcakes
    Calories: 193kcal
    Author: Lainey
    Prevent your screen from going dark

    Ingredients

    • 1 cup softened butter
    • 1 ½ cups sugar
    • 4 eggs
    • 3 teaspoons vanilla extract
    • 3 cups all-purpose flour
    • 1 teaspoon baking powder
    • ½ teaspoon salt
    • 1 ⅓ cups cold milk

    Instructions

    • Preheat oven to 350 degrees F and line the cupcake pan with liners.
    • Mix softened butter and sugar until fluffy then add eggs and vanilla extract and mix.
    • In a separate bowl add the all-purpose flour, baking powder, and salt and mix till well combined.
    • Alternate adding the dry and wet ingredients.
    • Bake for 20-25 minutes.
    Leave a Comment
    Serving: 1cupcakeCalories: 193kcalCarbohydrates: 25gProtein: 3gFat: 9gSaturated Fat: 2gPolyunsaturated Fat: 2gMonounsaturated Fat: 4gTrans Fat: 0.003gCholesterol: 29mgSodium: 171mgPotassium: 52mgFiber: 0.4gSugar: 13gVitamin A: 400IUVitamin C: 0.02mgCalcium: 36mgIron: 1mg

    Watch The Recipe Video!

    QR Code
    Did you make this recipe?Share it on instagram or tag @simplybakings or #simplybakings!

    Cupcakes, Desserts

    Filipino Fruit Salad Recipe

    Sep 9, 2013 · 19 Comments

    a bowl of delicious Filipino fruit salad

    This Filipino Fruit Salad Recipe is a quick and easy dessert perfect for the warm weather. This recipe uses canned fruit cocktail, table cream, and a Filipino favorite- condensed milk. Get ready to taste the tropical goodness in every bite of this super easy treat!

    Looking for more delicious Filipino Desserts? Try my Easy and Delicious Maja Blanca, Ube Flan, and Ube Biko!

    Filipino Fruit Salad in a bowl


    [feast_advanced_jump_to]

    What is Filipino Fruit Salad Recipe?

    The Filipino Fruit Salad Recipe is a beloved dessert in the Philippines, often enjoyed during festive occasions like Christmas, New Year, and family gatherings. What makes this dessert special is its simplicity and the unique combination of ingredients that come together to create a creamy, sweet, and refreshing treat. This recipe is perfect for those who love desserts with a rich, creamy texture and a burst of fruity flavors.

    What is Nata de coco?

    Nata de coco is a chewy, jelly-like Filipino treat made from fermented coconut water. It has a slightly sweet, firm texture and is commonly used in desserts and drinks like fruit salads, bubble teas, yogurts, and ice creams.

    What is Sweetened Macapuno Strings?

    Sweetened macapuno strings are a Filipino dessert made from the soft, jelly-like flesh of a special coconut variety. The coconut is cut into thin strips, cooked with sugar, and turned into a sweet, chewy treat. Macapuno strings are commonly used in Filipino desserts like halo-halo, cakes, and pastries, adding a unique sweetness and texture.

    Ingredients

    Listed below are all the ingredients you will need:

    • fruit cocktail
    • nata de coco
    • sweetened macapuno strings
    • Nestle table cream
    • sweetened condensed milk
    ingredients for Filipino Fruit Salad recipe

    Instructions

    Let's begin!

    Strain the juice of the fruit cocktail, nata de coco, and macapuno strings:

    straining the fruit cocktail for filipino fruit salad recipe

    Place fruit in a large bowl and add the nestle cream and sweetened condensed milk and mix:

    adding the cream to the strained fruit cocktail for filipino fruit salad recipe

    Add the macapuno strings and mix:

    adding the macapuno strings for filipino salad recipe

    Now it's time to add in the nata de coco and mix well:

    mixing in nata de coco for filipino fruit salad recipe

    Refrigerate overnight and serve:

    ready to be chilled mixed filipino fruit salad

    For me, this is one of the best Filipino desserts I have ever eaten. A popular fiesta dessert which everybody loves and looks for in every occasion!

    serving the delicious filipino fruit salad

    Substitutions

    • Fruits: Substitute fruit cocktail with fresh fruits like pineapple chunks, peaches, lychees, pears, or diced fresh apple. You can also add maraschino cherries for extra color and sweetness.
    • Cream and Milk: Use heavy whipping cream or softened cream cheese instead of cream. You can also mix in a splash of vanilla to enhance the flavor.
    • Additional Ingredients: Incorporate kaong (sugar palm fruit), coconut gel (nata de coco), or young coconut (buko) for added texture and sweetness. For a twist, add cooked macaroni or corn kernels.

    Variations

    • Cheese Addition: Add small cubes of cheddar cheese to introduce a savory contrast to the sweetness.
    • Buko Pandan: Include buko pandan jelly cubes for an authentic Filipino twist.
    • Unique Additions: Try adding cooked macaroni for a different twist, or corn kernels for a surprising sweet crunch.

    Storage

    • Store the fruit salad in an airtight container in the refrigerator. It can be kept for up to three days.
    • Although not recommended due to texture changes, you can freeze the salad in a sealed container. Thaw it in the refrigerator before serving and mix well to restore its creamy consistency.

    Top Tips

    • Use a colander to drain the liquids from your canned fruits, like the fruit cocktail, jar nata de coco, and kaong. This prevents your salad from becoming too watery.
    • Refrigerate the salad immediately after mixing all the ingredients. The cream and milk can spoil quickly if left at warm room temperature.

    FAQ

    What fruits should not be mixed in fruit salad?

    Fruits like bananas and apples can turn brown and mushy, so it's best to avoid them unless you serve the salad immediately.

    Why is fruit salad called macedonia in Italy?

    The term "macedonia" in Italy refers to fruit salad, likely originating from the diverse mix of fruits resembling the cultural diversity of the Macedonian region.

    What is the main nutrient in fruit salad?

    The main nutrient in fruit salad is vitamin C, thanks to the variety of fruits included.

    a bowl of delicious Filipino fruit salad
    4.89 from 9 votes
    Print Pin Recipe

    Filipino Fruit Salad Recipe

    The Filipino Fruit Salad is not your average fruit salad. This easy dessert combines canned fruit cocktail with table cream and that classic Filipino ingredient - condensed milk.
    Prep Time25 minutes mins
    Chill Time6 hours hrs
    Total Time6 hours hrs 25 minutes mins
    Course: Dessert
    Cuisine: Filipino
    Servings: 6
    Calories: 82kcal
    Author: Lainey
    Prevent your screen from going dark

    Ingredients

    • 1 can (8.5) oz fruit cocktail
    • ½ cup nata de coco
    • ½ cup macapuno strings
    • 1 can (7.6) oz nestle cream
    • ½ cup sweetened condensed milk

    Instructions

    • Strain the juice of the fruit cocktail, nata de coco,and macapuno strings
    • Place fruit mix in a large bowl and add the nestle cream and sweetened condensed milk and mix until combined
    • Refrigerate at least 6 hours or overnight and serve.
    Leave a Comment

    Notes

    This recipe makes 
    Serving: 1gCalories: 82kcalCarbohydrates: 14gProtein: 2gFat: 2gSaturated Fat: 1gPolyunsaturated Fat: 0.1gMonounsaturated Fat: 1gCholesterol: 9mgSodium: 32mgPotassium: 95mgFiber: 0.002gSugar: 14gVitamin A: 68IUVitamin C: 1mgCalcium: 72mgIron: 0.05mg

    Watch The Recipe Video!

    QR Code
    Did you make this recipe?Share it on instagram or tag @simplybakings or #simplybakings!

    Filipino Desserts

    Old Fashioned Lemon Cookies Recipe

    Sep 9, 2013 · 9 Comments

    freshly baked old fashioned lemon cookies

    These Old Fashioned Lemon Cookies are soft, buttery, and bursting with fresh lemon flavor! With ingredients like fresh lemon juice and lemon zest, each bite melts in your mouth and gives you that perfect cookie texture you crave. If you’re into lemon cookie recipes or need a break from chocolate chips, this one’s going to be a hit!

    Love lemon treats? Check out some more citrusy goodness like Snowball Lemon Drop Cookies, Funfetti Lemon Cake Mix Cookies, Simple Lemon Cake or these soft and chewy Lemon Brownies!

    lemon cookies dusted with powdered sugar
    [feast_advanced_jump_to]

    What is Old Fashioned Lemon Cookies Recipe?

    This Old Fashioned Lemon Cookies Recipe brings together classic baking vibes and bright citrus flavor. It's one of those old-school lemon sugar cookies that never go out of style. Perfect for spring, summer, or whenever you want a fresh-tasting dessert!

    The dough is made by creaming unsalted butter and granulated sugar together, then adding in egg, syrup, and citrus goodness. What you get is a soft cookie with a lightly crisp edge and a chewy center.

    Substitutions

    • all-purpose flour – can use gluten-free baking mix for a GF version
    • unsalted butter – swap with vegan butter or margarine
    • egg – use a flax egg or applesauce (¼ cup) for egg-free option
    • corn syrup – sub with honey, maple syrup, or agave syrup
    • baking soda + baking powder – if missing one, use 1½ tsp baking powder

    Variations

    • Lemon glaze – drizzle a simple glaze with powdered sugar + lemon juice
    • Extra lemony – add ½ tsp more lemon extract for a stronger citrus flavor
    • With vanilla – add 1 teaspoon vanilla extract for a smoother flavor
    • Lemon poppyseed – stir in 1 tbsp poppyseeds for bakery vibes

    Storage

    • Countertop – Store in an airtight container for up to 5 days
    • Refrigerator – Keeps fresh in an airtight container for 7–10 days
    • Freezer – Freeze baked cookies or dough balls up to 3 months; thaw before serving

    Ingredients

    These are the ingredients that you will need:

    • all-purpose flour
    • white sugar
    • butter
    • lemon zest
    • lemon juice
    • egg
    • baking soda
    • baking powder
    • corn syrup
    ingredients for lemon cookies

    Instructions

    Preheat oven to 325°F and line a baking sheet with parchment paper or silicone mats.

    In a large bowl or the bowl of a stand mixer, cream the butter and granulated sugar using an electric mixer on medium speed until light and fluffy:

    mixing the butter and sugar together in a bowl

    Then add egg and corn syrup and mix. Next, add the lemon zest and lemon juice:

    adding eggs to the sugar and butter mixture

    In a separate bowl mix, all-purpose flour and baking soda then add it to the wet ingredients:

    adding the dry ingredients to the wet ingredients

    Refrigerate for at least one hour:

    covering the cookie dough with saran wrap

    After chilling the dough,  form cookie dough balls, like so:

    ready to bake lemon cookie dough on a cookie sheet

    Bake for 12-15 minutes for large cookies on a baking sheet lined with parchment paper or silicone mats, and cool them on wire racks for best results:

    freshly baked lemon cookies on a cookie sheet

    Top Tips

    • Make sure to sift the powdered sugar because if you don't, you are going to have lumpy cookie dough.
    • Use a stand electric mixer when kneading a larger batch of Old Fashioned Lemon Cookies dough.
    • Melt the butter completely so that it will incorporate well with the cookie dough.
    • To save time, zest the lemon in advance and also, take the juice out a night before baking the Old Fashioned Lemon Cookies.

    FAQ

    What is the secret ingredient to keep cookies soft?

    The secret is corn syrup! It helps retain moisture, giving the cookies that soft, chewy texture. Also, using unsalted butter and not overbaking helps keep them perfectly tender!

    How can I keep my cookies from spreading too much?

    You can leave them as cookie balls before you bake them. In that way, the spread of the cookie will not be as much compared to when you flatten the dough.

    Can I double the recipe?

    Yes, for sure! You might want to use a stand mixer when you are doing a larger batch of cookies.


    old fashioned lemon cookies
    5 from 1 vote
    Print Pin Recipe

    Old Fashioned Lemon Cookies Recipe

    Whip up these Old Fashioned Lemon Cookies and treat yourself to a chewy, zesty cookie with buttery goodness in every bite—your new go-to citrus cookie!
    Prep Time15 minutes mins
    Cook Time15 minutes mins
    Chill Time1 hour hr
    Total Time1 hour hr 30 minutes mins
    Course: Cookies, Dessert
    Cuisine: American
    Servings: 24 cookies
    Calories: 128kcal
    Author: Lainey
    Prevent your screen from going dark

    Ingredients

    • 2 cups all-purpose flour
    • 1 cup white sugar
    • ¾ cup butter
    • 1 tsp lemon zest
    • 1 teaspoon lemon juice
    • 1 egg
    • 1 teaspoon baking soda
    • 1 teaspoon baking powder
    • 2 tablespoons corn syrup

    Instructions

    • Preheat oven to 325°F and line a baking sheet with parchment paper or silicone mats.
    • Mix butter and sugar until fluffy then add egg and corn syrup and mix. Next add the lemon zest and lemon juice.
    • In a separate bowl mix all purpose flour and baking soda then add it to the wet ingredients.
    • Refrigerate for at least one hour.
    • Bake for 12-15 minutes for large cookies
    Leave a Comment
    Serving: 1cookieCalories: 128kcalCarbohydrates: 17gProtein: 1gFat: 6gSaturated Fat: 4gPolyunsaturated Fat: 0.3gMonounsaturated Fat: 2gTrans Fat: 0.2gCholesterol: 22mgSodium: 495mgPotassium: 16mgFiber: 0.3gSugar: 1gVitamin A: 187IUVitamin C: 0.2mgCalcium: 14mgIron: 1mg

    Watch The Recipe Video!

    QR Code
    Did you make this recipe?Share it on instagram or tag @simplybakings or #simplybakings!

    I want to show you, Simply Bakers where I got my fresh lemons! We have a lot of them in our backyard and this always pushes me to make delicious lemon desserts.

    beautiful lemon trees

    Cookies

    Filipino Bread Pudding

    Sep 8, 2013 · 7 Comments

    filipino bread pudding in a glass baking dish

    Have leftover bread slices lying around? This Filipino Bread Pudding recipe is made with simple ingredients like milk, large eggs, and vanilla extract, the bread soaks up a sweet custard mixture and then bakes to a golden brown in a baking dish. It's the perfect use for slices of day-old bread like pandesal, sandwich bread, or even brioche!

    Love Pinoy-style desserts? Check out my other pudding recipe Black Sesame Pudding, this soft and cheesy Ube Cheese Pandesal and my crunchy Shamrock Cookies that melt in your mouth!

    pinoy bread pudding
    [feast_advanced_jump_to]

    What is Filipino Bread Pudding?

    Bread pudding is a popular dessert in many cultures, and this Filipino bread pudding recipe puts a fun, Pinoy twist on a classic!

    Originally a way to avoid wasting food, bread pudding has become a favorite easy treat that families enjoy together. In the Philippines, it's often made using leftover pandesal or sandwich bread, then baked in a baking dish until perfectly set.

    Some even serve it with fruity caramel sauce, yema spread, or langka jam to add more tropical flavors!

    Benefits of Cinnamon

    • Rich in antioxidants – Helps fight free radicals in the body
    • Supports heart health – May help lower cholesterol and blood pressure
    • Anti-inflammatory – Can reduce swelling and inflammation
    • Regulates blood sugar – Known to help balance blood sugar levels

    Substitutions

    • milk – use Nestle purpose cream, almond milk, or 2-3 tbsp of honey mixed with water
    • sugar – replace with honey, coconut sugar, or maple syrup
    • large eggs – swap with flax eggs for a vegan version
    • slices day-old bread – use pandesal, sourdough, brioche
    • vanilla extract – try maple or almond extract
    • cinnamon – replace or mix with nutmeg or spices like ginger
    • unsalted butter – use coconut oil or vegan butter
    freshly baked pandesal bread pudding

    Variations

    • Pinoy-style – Mix in langka jam, yema spread, or crushed polvoron
    • Fruity – Add canned pineapples or raisins
    • Chocolate – Sprinkle in chocolate chips
    • Tropical – Serve with fruity caramel sauce or a drizzle of honey
    • Mini versions – Bake in muffin tins for individual portions

    Storage

    • Countertop – Cover with foil and keep for 1 day
    • Fridge – Store in a refrigerator up to 5 days
    • Freezer – Wrap tightly and freeze up to 2 months
    • Reheat – Warm in oven or microwave until soft and heated through

    Ingredients

    • milk
    • sugar
    • large eggs
    • slices day-old bread
    • vanilla extract
    • cinnamon
    • unsalted butter
    ingredients for bread pudding recipe

    Instructions

    Before you start with the recipe, make sure to preheat the oven to 350 F and prepare all the ingredients.

    After which, let's begin!

    Add eggs, sugar, milk, cinnamon in a large bowl:

    mixing wet ingredients for bread pudding recipe

    Using your handheld mixer or a whisk, mix well until everything is well combined:

    mixing wet ingredients for bread pudding with a handheld mixer

    Yes, the bubbles are just normal, just like when you scramble eggs for breakfast 😉

    mixed wet ingredients in a clear bowl

    In an 8x8 inch pan, add the melted butter:

    putting melted butter to the bottom of the baking pan

    After that, place the day-old bread pieces into the baking pan or dish:

    adding the day-old bread to the baking pan

    Pour the wet ingredients over the bread:

    pouring the wet ingredients to the bread

    Press with a fork to ensure the bread is soaked, just like so:

    pushing the bread using a fork to soak it into the mixture

    Bake for 45 minutes and cool completely before serving:

    freshly baked bread pudding

    Top Tips

    • The best bread to use for this pudding recipe is a day or two old bread.
    • Add some raisins before baking and you now have a raisin pudding bread!

    FAQ

    Is bread pudding high in carbs?

    Yes, it usually is because it’s made with bread, sugar, and sometimes milk or sweetened condensed milk—all of which have carbohydrates. But you can make it a bit lighter by using low-carb bread or sugar-free sweeteners.

    Can you use sweetened condensed milk instead of milk in pudding?

    Yes, you can! Just remember that sweetened condensed milk is very thick and sweet, so you’ll want to reduce or skip the added sugar in your recipe. You might also need to add a little water to thin it out.

    What is the origin of bread pudding?

    Bread pudding dates back to the 11th or 12th century in Europe. It started as a way to use up stale bread so it wouldn’t go to waste. Over time, it became a popular homey dessert in many cultures, including Pinoy kitchens!


    More delicious recipes to try!

    • Best and Easiest Brownies
    • Chocolate Chip Cheesecake
    • Dairy-Free Chocolate Chip Cookies
    • Pretzel Pumpkins

    Yummy ice cream and beverage recipes to go with the Bread Pudding!

    • Vegan Chocolate Ice Cream
    • Avocado Milkshake
    • 3 Ingredient Ice Cream 3 Ways Only
    filipino bread pudding in glass baking dish
    No ratings yet
    Print Pin Recipe

    Filipino Bread Pudding

    Bake a cozy Filipino Bread Pudding Recipe using slices of day-old pandesal and a cinnamon-vanilla custard—it's a soft, tasty bread dessert the whole family will love!
    Prep Time10 minutes mins
    Bake Time45 minutes mins
    Total Time55 minutes mins
    Course: Bread, Breakfast
    Cuisine: Fusion (American-Filipino/Asian)
    Servings: 6 – 8 servings
    Calories: 300kcal
    Author: Lainey
    Prevent your screen from going dark

    Ingredients

    • 2 cups milk
    • ¾ cups sugar
    • 4 eggs
    • 6 slices of day old bread
    • 1 teaspoon vanilla
    • 1 teaspoon cinnamon
    • 2 tablespoons butter

    Instructions

    • Preheat oven to 350°F (175°C).
    • Add eggs, sugar, milk, cinnamon in a bowl and mix.
    • In an 8x8 inch pan, add the melted butter and the day old bread then pour the wet ingredients over the bread. Press with fork to ensure the bread is soaked.
    • Bake for 45 minutes.
    Leave a Comment
    Serving: 1servingCalories: 300kcalCarbohydrates: 43gProtein: 9gFat: 11gSaturated Fat: 5gPolyunsaturated Fat: 1gMonounsaturated Fat: 3gTrans Fat: 0.2gCholesterol: 129mgSodium: 235mgPotassium: 206mgFiber: 1gSugar: 31gVitamin A: 408IUVitamin C: 0.1mgCalcium: 156mgIron: 2mg

    Watch The Recipe Video!

    QR Code
    Did you make this recipe?Share it on instagram or tag @simplybakings or #simplybakings!

    Bread, Breakfast & Brunch, Thanksgiving Brunch

    Monkey Bread

    Sep 8, 2013 · 8 Comments

    Monkey Bread piled on a white plate

    With buttery brown sugar sauce poured over pillowy biscuit dough, my easy Monkey Bread recipe makes the ideal cinnamon rolls. The aroma will fill your kitchen. Family and friends will enjoy getting together to savor the pull-apart bread.

    Try my Filipino Spanish Bread, Malunggay Whole Wheat Bread, and Chocolate Filled Bread recipes, too!

    Layers of Monkey Bread in a Bundt pan freshly baked
    [feast_advanced_jump_to]

    What is Monkey Bread?

    Monkey Bread is a sweet, pull-apart pastry popular in the United States, made by coating small dough balls in butter, sugar, and cinnamon before baking. Despite the best monkey bread recipes made with endless variations, this particular dish is distinctly American.

    It gained popularity in mid-20th-century home baking. It's convenient for many because it's made with canned biscuit dough, a unique ingredient that’s not commonly used in Filipino cooking.

    When is this Dish Typically Enjoyed?

    Monkey Bread is enjoyed year-round in the United States, but it’s particularly popular for breakfast or brunch and often appears at holiday gatherings.

    It's usually served during Christmas morning, Easter brunches, and other festive occasions. Its sweet pull-apart nature adds to the celebratory mood.

    Substitutions

    • Biscuit Dough – Try homemade yeast dough made with instant yeast for a similar texture, or use frozen bread dough for convenience; puff pastry gives a flakier twist
    • Ground Cinnamon – Swap with pumpkin pie spice or a touch of nutmeg or allspice for similar warmth
    • White Sugar – Replace with granulated sugar, brown sugar, coconut sugar, or a sugar substitute like erythritol
    • Chopped Walnuts – Pecans, almonds, hazelnuts, or seeds like sunflower or pumpkin seeds work well for different textures and flavors
    Monkey Bread drizzled with glaze on tray

    Recipe Variations

    • Apple Pie – Toss dough pieces with diced apples, cinnamon, and a bit of nutmeg. Use brown sugar and butter to create a caramel apple effect.
    • Orange Cream Cheese – Add fresh orange zest to the sugar mix, and tuck small cubes of cream cheese inside each dough ball. Glaze with orange juice and powdered sugar.
    • S’mores – Roll dough in graham cracker crumbs and sugar, layer chocolate chips between dough layers, and add mini marshmallows on top for the last few minutes of baking.
    • Pumpkin Spice – Mix pumpkin puree with melted butter, coat dough balls in a pumpkin spice-sugar blend, then glaze with cinnamon icing.

    Storage

    • Room Temperature – Keep it in an airtight container (or covered tightly in plastic wrap) at room temperature for up to 2 days. This helps maintain its soft texture.
    • Refrigeration – Store Monkey Bread in a sealed container in the fridge for up to 3-4 days. Warm it in the microwave or oven to restore its softness before serving.
    • Freezing – For extended storage (up to 2–3 months), wrap leftover Monkey Bread thoroughly in plastic wrap and place in a zip-top freezer bag or airtight container. Thaw overnight in the fridge, then reheat gently in an oven preheated to 300°F (150°C) until warmed through.
    • Reheating – If it starts to dry out, place a small dish of water in the microwave or oven to generate steam while warming, which helps preserve moisture. Alternatively, cover the bread with foil in the oven to prevent further browning or drying out.

    Ingredients

    Listed below are all the ingredients you will need (omitting quantities):

    • biscuit dough
    • ground cinnamon
    • white sugar
    • butter or margarine
    • packed brown sugar
    • raisins
    • walnuts 

    See recipe card for quantities.

    Instructions

    In a Ziplock bag, mix cinnamon and white sugar. Set aside.

    Cinnamon and sugar in a Ziploc bag

    Shake Ziploc bag to thoroughly mix.

    Shaking a Ziploc bag to mix ingredients thoroughly

    Cut each biscuit dough into quarters like this.

    Hand holding up a piece of the bread dough

    Add 7-8 dough pieces to the Ziplock bag, shake to coat, and layer them into the prepared Bundt pan.

    Repeat until all dough pieces are coated and placed in the pan.

    Pieces of the bread dough in a bag of dry ingredients

    Preheat oven to 350°F (175°C) and grease a Bundt pan with butter or nonstick spray.

    Non stick spray aimed at Bundt pan next to plate

    Put each coated piece into the Bundt pan and spread all over.

    Hand putting the pieces of dough in the pan

    In a saucepan over low heat, melt the butter and sugar.

    Wooden spoon in a pan with butter and sugar

    Then stir until fully dissolved.

    Sugar melting in a pan mixed with butter

    Pour the butter mixture evenly over the dough.

    Bake for 35 minutes until golden brown and bubbly.

    Bundt pan filled with pieces of the bread

    Let it cool for 5-10 minutes, then invert onto a serving plate. Serve warm and enjoy!

    Delicious sticky bread with a glossy sugar glaze

    Hint: Want extra gooeyness? Drizzle caramel sauce or melted chocolate on top before serving.

    ⭐ Top Tip

    Grease your pan well, roll each biscuit piece in cinnamon-sugar for flavor, and layer in raisins and walnuts. Melt butter with brown sugar to form a syrup, then pour it over the dough before baking until golden. Finally, invert the bread while warm and serve fresh - or reheat later for best texture.

    FAQ

    Why did Monkey Bread get its name?

    Some food historians suggest that it comes from the pastry being a finger food, and that those eating it pick apart the bread with their hands as a monkey might. Others suggest that it comes from the pastry's resemblance to the monkey puzzle tree Araucaria araucana.

    What can I use instead of a bundt pan for Monkey Bread?

    A tube pan works, too. You could bake it in a muffin tin for individual monkey bread "muffins." Just be sure to adjust the baking time; these won't take as long to cook through.

    What is monkey bread and why is it called that?

    The origin of the term "monkey bread" is unknown. Some food historians suggest that it comes from the pastry being a finger food, and that those eating it pick apart the bread with their hands as a monkey might. Others suggest that it comes from the pastry's resemblance to the monkey puzzle tree Araucaria Araucana.

    Monkey Bread on a white plate drizzled with caramel
    5 from 3 votes
    Print Pin Recipe

    Monkey Bread

    With luscious sugar-butter glaze, and bursting with flavor and crunch, Monkey bread is a quick and easy treat to take to potlucks!
    Prep Time10 minutes mins
    Cook Time35 minutes mins
    Total Time45 minutes mins
    Course: Bread, Dessert
    Cuisine: American
    Servings: 8 -10 servings
    Calories: 375kcal
    Prevent your screen from going dark

    Ingredients

    • 2 packages biscuit dough (or three 12-ounce packages) refrigerated
    • 2 teaspoons ground cinnamon
    • 1 cup white sugar
    • ½ cup butter or margarine
    • 1 cup packed brown sugar
    • ½ cup raisins optional
    • ½ cup chopped walnuts optional

    Instructions

    • Preheat oven to 350°F (175°C) and grease a bundt pan with butter or nonstick spray.
    • In a ziplock bag, mix cinnamon and white sugar. Set aside.
    • Cut each biscuit dough into quarters.
    • Add 7-8 dough pieces to the ziplock bag, shake to coat, and layer them into the prepared bundt pan. Repeat until all dough pieces are coated and placed in the pan.
    • In a saucepan over low heat, melt the butter, then stir in brown sugar until fully dissolved.
    • Pour the butter mixture evenly over the dough.
    • Bake for 35 minutes until golden brown and bubbly.
    • Let it cool for 5-10 minutes, then invert onto a serving plate. Serve warm and enjoy!
    Leave a Comment
    Serving: 1gCalories: 375kcalCarbohydrates: 58gProtein: 2gFat: 16gSaturated Fat: 8gPolyunsaturated Fat: 4gMonounsaturated Fat: 4gTrans Fat: 0.5gCholesterol: 31mgSodium: 1248mgPotassium: 149mgFiber: 1gSugar: 27gVitamin A: 357IUVitamin C: 1mgCalcium: 41mgIron: 1mg

    Watch The Recipe Video!

    QR Code
    Did you make this recipe?Share it on instagram or tag @simplybakings or #simplybakings!

    More Recipes

    You might want some drink to go along with your Monkey Bread, so try any of these:

    • Calamansi Juice
    • Sweet Potato Juice
    • Cantaloupe Melon Juice
    • Avocado Milkshake
    • Matcha Milkshake

    Bread, Breakfast & Brunch

    The Worst Chocolate Chip Cookies

    Sep 8, 2013 · 5 Comments

    worst chocolate chip cookies in a cookie sheet

    Ready to bake The Worst Chocolate Chip Cookies ever? Don’t let the name fool you—these are the kind of “worst” that means dangerously addictive. Packed with gooey chocolate chips and creamy white chocolate, this easy cookie recipe uses everyday ingredients and is perfect for quick desserts or late-night cravings.

    If you love this, you might also enjoy these other sweet treats: Best and Easiest Brownies, No Bake Oreo Pie, and this yummy Vegan Pumpkin Pie.

    freshly baked cookies on cooling rack
    [feast_advanced_jump_to]

    What is the Worst Chocolate Chip Cookies?

    The Worst Chocolate Chip Cookies is a cheeky name for what might become your new favorite cookie recipe! It combines rich butter, sweet white and brown sugars, and lots of chocolate chips to create that perfect soft-in-the-middle, crispy-on-the-edges bite.

    There’s no fancy chilling or browning butter required—just mix, scoop, and bake! These cookies are perfect for everyday treats, holiday baking, or as a fun weekend bake with kids.

    Substitutions

    • Butter – Use coconut oil or vegan butter for a dairy-free version
    • White sugar – Swap with coconut sugar or monk fruit sweetener
    • Brown sugar – Use more white sugar or maple syrup (adjust flour if using liquid)
    • Vanilla extract – Almond extract or maple extract works well
    • Chocolate chips – Use dark chocolate, milk chocolate, or even carob chocolate chips

    Variations

    • Cornstarch cookies – Add 1 tablespoon cornstarch to the flour mixture for extra soft cookies
    • Extra chewy – Slightly underbake and cool on hot cookie sheets for chewier texture
    • Nutty – Fold in chopped walnuts or pecans
    • Double chocolate – Add cocoa powder for more chocolate flavor
    • Holiday style – Stir in crushed peppermint or M&Ms
    baked cookies taken out of the oven

    Storage

    • Countertop – Store in an airtight container for up to 4 days
    • Fridge – Keeps well for 1 week, reheat to enjoy warm
    • Freezer – Freeze dough balls for up to 2 months; bake directly from frozen

    Ingredients

    These are the ingredients that you will need:

    • butter
    • white sugar
    • brown sugar
    • eggs
    • vanilla extract
    • salt
    • baking soda
    • hot water
    • all-purpose flour
    • chocolate chips

    Instructions

    Preheat oven to 350 degrees F and lightly grease the cookie baking sheet.

    Then in a mixing bowl or using a stand mixer, add the unsalted butter, white sugar, and brown sugar and beat until fluffy:

    mixing the butter and sugar

    Add the eggs and vanilla extract and mix:

    adding the eggs to the butter and sugar mixture

    In a small bowl mix 2 teaspoons of hot water and baking soda and add to the mixture:

    mixing baking soda

    In a separate large bowl mix the salt and all-purpose flour and then add to the wet ingredients:

    adding dry ingredients to the wet ingredients

    Then mix in the chocolate chips:

    adding chocolate chips to the cookie dough

    Bake for 8-10 minutes for small cookies:

    baking the chocolate chips cookies

    Set aside to cool down at room temperature. These delicious cookies smell so good, Simply Bakers! You won't get enough by just eating a cookie or two! 🙂

    freshly baked chocolate chip cookies in the oven

    Top Tips

    • Always sift all the dry ingredients before starting the mixing process. It will prevent lumps in your cookies.
    • Adjust your cooking time depending on the size of your cookies. Smaller cookies tend to bake faster.

    FAQ

    Why do I need to mix baking soda with hot water?

    This helps evenly distribute the baking soda, giving you better rise and texture.

    Can I use just white sugar for this cookie recipe?

    If you don't have brown sugar available, you can use white sugar. It's just that brown sugar has a more rich sweetness when used in baking cookies that's why I used both white and brown sugar for this recipe.

    Can I double this cookie recipe if I need a bigger batch?

    Yes, for sure. Just double or triple the ingredients listed.


    Here are more delicious and easy cookie and dessert recipes you can try!

    • No-Bake Cookie Dough Truffles
    • Cassava Cake
    • Pretzel Cake for Beginners
    • Best Coconut Flour Chocolate Chip Cookies
    chocolate chip cookies
    5 from 2 votes
    Print Pin Recipe

    The Worst Chocolate Chip Cookies

    Whip up The Worst Chocolate Chip Cookies with gooey chocolate chips, chewy texture, and golden-brown edges. Easy, quick, and ridiculously good!
    Prep Time10 minutes mins
    Bake Time10 minutes mins
    Total Time20 minutes mins
    Course: Cookies, Dessert
    Cuisine: American
    Servings: 12 cookies
    Calories: 477kcal
    Author: Lainey
    Prevent your screen from going dark

    Ingredients

    • 1 cup of butter softened
    • ½ cup white sugar
    • ½ cup brown sugar
    • 2 eggs
    • 2 teaspoons vanilla extract
    • ½ teaspoon salt
    • 1 teaspoon baking soda
    • 2 teaspoons hot water
    • 3 cups all-purpose flour
    • 2 cups chocolate chips

    Instructions

    • Preheat oven to 350 degrees F and lightly grease cookie shoot.
    • In a mixing bowl, add butter, white sugar and brown sugar and beat until fluffy. Add the eggs and vanilla extract and mix.
    • in a small bowl mix 2 teaspoons of hot water and baking soda and add to the mixture.
    • In a separate bowl mix the salt and all purpose flour and then add to the wet ingredients. Then mix in the chocolate chips.
    • Bake for 8-10 minutes for small cookies.
    Leave a Comment
    Serving: 1cookieCalories: 477kcalCarbohydrates: 60gProtein: 4gFat: 25gSaturated Fat: 15gPolyunsaturated Fat: 1gMonounsaturated Fat: 4gTrans Fat: 1gCholesterol: 68mgSodium: 705mgPotassium: 147mgFiber: 1gSugar: 26gVitamin A: 512IUCalcium: 43mgIron: 2mg

    Watch The Recipe Video!

    QR Code
    Did you make this recipe?Share it on instagram or tag @simplybakings or #simplybakings!

    Cookies, Desserts

    Moist Mini Banana Muffins

    Sep 8, 2013 · 6 Comments

    A tray of Moist Mini Banana Muffins

    Moist Mini Banana Muffins are a must-have recipe in everyone's home. This is an incredibly soft banana muffin recipe made with bakery-style muffin tops. Topped with a cinnamon sugar streusel, no one can deny!

    I love making recipes with bananas! Filipinos whip up No-Bake Banana Strawberry Pie, Papaya Banana Smoothies, and Banana Chocolate Pound Cake. So good and super easy to make!

    A tray of Moist Mini Banana Muffins
    [feast_advanced_jump_to]

    What are Moist Mini Banana Muffins?

    Moist Mini Banana Muffins are soft, bite-sized treats made with ripe bananas. They’re sweet, fluffy, and perfect for snacking. While not originally Filipino, bananas are a big part of Filipino cooking.

    The star ingredient, ripe bananas, adds natural sweetness and moisture. They’re one of those easy banana muffins that kids and adults both love!

    History of Moist Mini Banana Muffins

    Banana muffins started in the U.S. during the 1930s when baking soda and powder became popular. People wanted to use overripe bananas instead of throwing them away.

    The recipe spread fast because it was simple and tasty. Over time, mini versions became a favorite for quick snacks, especially made in mini muffin tins with big banana flavor.

    Substitutions

    • Butter – Use melted vegetable oil, coconut oil, or vegan butter for a dairy-free version.
    • Egg – Replace with 1 flax egg (1 tbsp flaxseed meal + 3 tbsp water) for a vegan option.
    • Sugar – You may substitute with coconut sugar, stevia, or a mix of erythritol and xylitol.
    • Flour – Swap regular flour with whole wheat flour or gluten-free flour if needed. Both work well with banana muffins!

    Variations

    • Add-ins – Mix in chopped nuts, mini chocolate chips, or shredded coconut to the batter.
    • Fruity Touch – Add blueberries or chopped strawberries for a fruitier twist.
    • Tropical Flavor – Add a dash of cinnamon and nutmeg or stir in 2 tablespoons of crushed pineapple (drained).

    Storage

    • Store cooled muffins in an airtight container at room temperature for up to 3 days.
    • For longer storage, refrigerate for up to a week or freeze for up to 2 months. Make sure to thaw at room temperature before serving.
    • Reheat in a toaster oven or microwave for a fresh-out-of-the-oven experience.

    Ingredients

    Listed below are all the ingredients you will need:

    • All-purpose flour
    • Baking soda
    • Baking powder
    • Salt
    • Ripe bananas
    • White sugar
    • Egg
    • Butter
    • Brown sugar
    • Ground cinnamon

    See recipe card for quantities.

    Instructions

    Preheat the oven to 375°F. Prepare your muffin pans and muffin liners.

    In a large bowl, mix together the flour, baking soda, baking powder, and salt.

    Mixture of dry ingredients in a bowl

    In another bowl, mash the ripe bananas until they are even in texture and smooth enough.

    Fork mashing the ripe bananas in a box

    After mashing the bananas, mix in the sugar and melted butter.

    Bowl with mashed bananas, egg and sugar

    Beat together bananas, sugar, egg, and melted butter.

    Bowl of wet ingredients mixed together

    Stir the banana mixture into the flour mixture just until moistened.

    Wet and dry ingredients in a bowl

    This is how the final batter of the banana muffins looks after mixing it well.

    Mixed batter with wooden spoon in bowl

    Place the muffin batter into the muffin liners. I used a small plastic spoon and a bread knife to push the sticky batter.

    Muffin batter poured into muffin liners

    In a small bowl, mix together brown sugar, 2 tablespoons flour, and cinnamon. Cut in 1 tablespoon butter until mixture resembles coarse cornmeal.

    Black bowl with sugar, cinnamon and oats

    Sprinkle topping over muffins.

    Topping sprinkled over the muffins

    Bake in preheated oven for 18 to 20 minutes, until a toothpick inserted into the center of a muffin comes out clean.

    Tray of Moist Mini Banana Muffins in the oven

    Tadaaaaa! I promise your whole house would smell so delicious!

    Moist Mini Banana Muffins taken from oven

    Hint: Make sure your bananas are super ripe. Those with brown spots are best! They’ll give your muffins the natural sweetness and moisture they need.

    ⭐ Top Tip

    Don’t overmix your batter! Stir just until the flour disappears. Overmixing can make muffins dense and chewy instead of light and fluffy. And for the perfect streusel crunch, chill the topping for a few minutes before sprinkling.

    FAQ

    What is the secret to making moist muffins?

    Use ripe bananas, don’t overmix the batter, and don’t overbake. Butter and sugar also help keep them moist.

    What is the most important rule to follow when baking muffins?

    Don’t overmix the batter. It makes muffins tough instead of soft and fluffy.

    Do mini muffins need to be refrigerated?

    Not right away. You can keep them at room temperature for 2–3 days. If you want them to last longer, store them in the fridge.

    More Banana Desserts

    • Banana Bread Cookies
    • No Bake Banana Pie
    • Banana Oatmeal Pancakes
    • Banana Cake
    4.20 from 5 votes
    Print Pin Recipe

    Moist Mini Banana Muffins

    These Moist Mini Banana Muffins are a delightful way to use up ripe bananas. Bake a batch today and enjoy the banana goodness in every bite!
    Prep Time10 minutes mins
    Cook Time20 minutes mins
    Total Time30 minutes mins
    Course: Breakfast, Snack
    Cuisine: American
    Servings: 24 mini muffins
    Calories: 108kcal
    Author: Lainey
    Prevent your screen from going dark

    Ingredients

    Muffin Batter:

    • 1 ½ cups all-purpose flour
    • 1 teaspoon baking soda
    • 1 teaspoon baking powder
    • ½ teaspoon salt
    • 3 ripe bananas mashed
    • ¾ cup white sugar
    • 1 egg lightly beaten
    • ⅓ cup melted butter

    Streusel Topping:

    • ⅓ cup packed brown sugar
    • 2 tablespoons all-purpose flour
    • ⅛ teaspoon ground cinnamon
    • 1 tablespoon butter

    Instructions

    • Preheat oven to 375°F (190°C) and line a mini muffin pan with paper liners or lightly grease.
    • In a large bowl, whisk together flour, baking soda, baking powder, and salt.
    • In another bowl, mash the bananas with a fork. Add in the sugar, egg, and melted butter.
    • Stir the banana mixture into the dry ingredients just until moistened. Do not overmix.
    • Spoon the batter evenly into the prepared mini muffin pan.
    • In a small bowl, mix brown sugar, flour, and cinnamon. Cut in 1 tablespoon butter until crumbly. Sprinkle on top of each muffin.
    • Bake for 18–20 minutes or until a toothpick inserted into the center comes out clean.
    • Cool in the pan for 5 minutes, then transfer to a wire rack to cool completely.
    Leave a Comment
    Serving: 1gCalories: 108kcalCarbohydrates: 18gProtein: 1gFat: 3gSaturated Fat: 2gPolyunsaturated Fat: 0.2gMonounsaturated Fat: 1gTrans Fat: 0.1gCholesterol: 15mgSodium: 426mgPotassium: 69mgFiber: 1gSugar: 5gVitamin A: 113IUVitamin C: 1mgCalcium: 16mgIron: 1mg

    Watch The Recipe Video!

    QR Code
    Did you make this recipe?Share it on instagram or tag @simplybakings or #simplybakings!

    Storytelling Time!

    Bananas are a staple at my house. I always have frozen bananas on hand and fresh bananas ready to eat.  However, a lot of times the bananas end up becoming overripe, and they get that smell of overripe bananas, and that's my signal to bake something with them.

    Anyways, this is my favorite banana muffin recipe, which everyone always asks for whenever I bake them!

    You can eat them fresh from the oven (but cool them a bit 🙂 ) or let them cool off while making yourself a cup of coffee. It's the perfect drink to have with these delicious banana muffins!

    Breakfast & Brunch, Desserts

    How to Make Pandesal

    Sep 8, 2013 · 31 Comments

    pandesal dough in glass baking pan

    Know how to make Pandesal in beginner steps! These homemade Filipino-style sweet rolls are best enjoyed in the morning, filled with any spread or filling! It's delicious, soft, and airy and will become your favorite bread.

    Love Filipino bread? Try my Ube Pandesal, Red Velvet Pandesal, Spanish Bread, or my Malunggay Whole Bread!

    pandesal in a glass tray
    [feast_advanced_jump_to]

    What is Pandesal?

    Pandesal, or Pan de Sal, is the most common bread roll in the Philippines. It actually traces its roots back to the Spaniards, who introduced baking traditions during the colonial period. Originally inspired by Pan de Suelo, this Filipino adaptation uses commercial yeast and all-purpose or bread flour, making it softer and lighter.

    You’ll find it everywhere—from home kitchens to local panaderias, and even sold by street vendors early in the morning. Many Filipinos enjoy their pandesal with cheese, eggs, or just plain coffee. It’s simple, affordable, and loved across all generations!

    Substitutions

    • Active dry yeast – Use instant yeast (no need to proof)
    • Sugar – Use honey, coconut sugar, or brown sugar
    • Vegetable oil – Can be replaced with butter, dairy-free butter, or coconut oil
    • All-purpose flour – Use bread flour for chewier rolls, or whole wheat flour for more fiber and nutrients

    Variations

    • Cheese Pandesal – Add a cube of cheese inside each portion
    • Egg-Stuffed Pandesal – Place a boiled egg in the center for a protein boost
    • Healthier version – Use whole wheat flour and reduce sugar
    • Stuffed with coconut jam – Add a local touch with sweet coconut filling
    • Herbed pandesal – Add garlic, malunggay, or rosemary to the dough for a savory twist
    rows of pandesal dough

    Storage

    • Countertop – Store in a sealed container for 2–3 days
    • Refrigerator – Keeps well for up to 1 week
    • Freezer – Freeze baked rolls for 1 month; reheat before serving

    Ingredients

    • warm water
    • active dry yeast
    • sugar
    • vegetable oil
    • salt
    • all-purpose flour

    Instructions

    We will be using our hands a lot in kneading the pandesal dough so we have to wash it carefully and dry it completely:

    washing hands before making pandesal

    Add the active dry yeast and the 1 teaspoon of sugar to the 2 cups of warm water mix and set aside till frothy (about 5 minutes):

    activating dry yeast in a bowl for pandesal recipe

    In a separate mixing bowl, add sugar, oil, salt, and 1 cup of flour then mix. Then add the active dry yeast mix to the mixture:

    putting flour to yeast mixture for pandesal recipe

    Important Reminder:

    Gradually add the flour ½ a cup at a time. This will help you knead it properly since it will clump up if you add all of the flour at once.

    Place the dough onto your clean kitchen counter so you can knead it carefully:

    putting pandesal dough in a surface

    To prevent the dough from sticking to your hands while kneading, sprinkle a bit of flour on the dough or you can simply rub flour in your hands:

    kneading pandesal dough with two hands

    After kneading, place it in a deep bowl for the dough to double in size. It is important to oil the bowl so you can take out the dough easily after it has risen:

    putting oil in a bowl for pandesal dough

    Once all the flour is mixed, set aside in an oiled bowl in a warm place until the dough is doubled (about 1 hour). Cover it with saran wrap or a damp towel:

    covering pandesal dough with saran wrap

    I placed my dough under a lamp so it makes the room temperature higher, as it helps the dough rise fully:

    pandesal dough in bowl under a lamp

    After about an hour or so, take out the dough from the bowl and put it on a floured surface. Now it's time to shape the dough into your desired sizes:

    shaping pandesal dough into desired pieces
    coating pandesal with bread crumbs

    This part is optional. Most pandesal lovers want bread crumbs but personally, I do not like to coat them with bread crumbs as I make a huge mess when I eat them. (Imagine breadcrumbs all over the floor or tabletop, lol!)

    covering pandesal dough with saran wrap

    After shaping the dough, place it in a baking tray of your choice, cover it and wait for it to rise again for only 30 minutes:

    Place in oven at 375 degrees F for 20 minutes:

    baking pandesal in an oven

    After the baking time, take it out from the oven and let them cool in a cookie rack:

    cooling pandesal in a wire cookie rack

    This Filipino bread is best eaten when freshly baked. If you have a sweet tooth like me, pair it with peanut butter, condensed milk, or even ice cream!

    Top Tips

    • If you don't like the bottom crust of your pandesal burnt, use glass baking containers as it just makes the bottom crust lightly toasted. If you do not have glass bakewares on hand, you can avoid burning the bottom crust of your pandesal by lowering the oven temperature to 350 F instead of 375 F
    • Always have extra all-purpose flour handy. It is very useful in the kneading part where the dough is very sticky and makes the kneading work a bit hard. Just coat your hands with flour or sprinkle a bit of flour on top of the dough as needed
    • Check expiration dates of ingredients especially for the active dry yeast - this is the leavening agent of your pandesal so if you have an expired one, it defeats its purpose of making the dough rise
    • Punch your dough! Seriously, this is a very important step after having your dough rise for about an hour. "Punching" it down removes the air bubbles inside and doing so produces a fine-textured pandesal
    • Do not forget to cover your dough during the rising time - it helps speed up the rising of the dough and it prevents the dough from drying out
    • What makes a longer rise time of the dough? It could be two things - your room is a little bit too cold or the yeast that you used for the dough is dead
    • For a healthier alternative when greasing the large bowl for dough, use vegan butter or margarine.

    FAQ

    What does a pandesal taste like?

    Pandesal gets its fluffiness from proper proofing and the use of commercial yeast, which helps the dough rise and creates a light, airy texture. Kneading well to develop gluten also makes it soft and fluffy inside.

    How is pandesal different from bread?

    Pandesal is a type of bread, but what makes it different is its slightly sweet flavor, soft texture, and the light coating of breadcrumbs. Unlike typical Western rolls, it’s often eaten plain or with savory fillings like cheese, egg, or coconut jam.

    What makes pandesal fluffy?

    Pandesal gets its fluffiness from proper proofing and the use of yeast, which helps the dough rise and creates a light, airy texture. Kneading well to develop gluten also makes it soft and fluffy inside.


    Looking for more Filipino Dishes? Check out some of my favorites:

    • Buko Pandan
    • Shakoy
    • Turon
    • Cassava Cake

    Happy Baking!

    freshly baked filipino pandesal
    5 from 3 votes
    Print Pin Recipe

    How to Make Pandesal

    Bake soft and fluffy Filipino Pandesal bread rolls, perfect for breakfast or snacks! Learn how to make pandesal that is sweet, easy to make, and totally comforting!
    Prep Time10 minutes mins
    Cook Time20 minutes mins
    Rise Time1 hour hr 30 minutes mins
    Total Time2 hours hrs
    Course: Bread
    Cuisine: Filipino
    Servings: 12 - 16 rolls
    Calories: 348kcal
    Author: Lainey
    Prevent your screen from going dark

    Ingredients

    • 2 cups warm water 110 degrees F
    • 2 teaspoons active dry yeast
    • 1 teaspoon sugar
    • 1 cup sugar
    • ⅓ cup vegetable oil
    • 2 teaspoons salt
    • 6 cups all-purpose flour

    Instructions

    • Add the active dry yeast and the 1 teaspoon of sugar to the 2 cups of warm water mix and set aside till frothy (about 5 minutes)
    • In a separate bowl, add sugar, oil, salt, and 1 cup of flour then mix. Then add the active dry yeast mix to the mix.
    • Gradually add the flour ½ a cup at a time.
    • Once all the flour is mixed in set aside in a oiled bowl in a warm place until dough is doubled (about 1 hour).
    • Shape dough to desired sizes and let it sit for 30 minutes.
    • Place in oven at 375 degrees F for 20 minutes.
    Leave a Comment

    Notes

    Importance of Kneading Bread:
    Kneading is important in baking bread as it develops gluten. When flour is mixed with liquid, gluten forms and binds the dough, providing a cohesive texture that helps the loaf hold its shape during baking.
    Serving: 1rollCalories: 348kcalCarbohydrates: 65gProtein: 7gFat: 7gSaturated Fat: 1gPolyunsaturated Fat: 4gMonounsaturated Fat: 1gTrans Fat: 0.04gSodium: 391mgPotassium: 72mgFiber: 2gSugar: 17gVitamin C: 0.002mgCalcium: 11mgIron: 3mg

    Watch The Recipe Video!

    QR Code
    Did you make this recipe?Share it on instagram or tag @simplybakings or #simplybakings!

    I. LOVE. PANDESAL.  Many of you may ask what is pandesal? Pandesal is a Filipino Bread that is fluffy and sweet.  It can be eaten at any time of the time day with any kind of spread.

    I grew up eating this every morning for breakfast before school.  My mom would wake up early and stop by the local bread shop and pick up some pandesal and my siblings and I would eat it with Nutella.  When I got older, I got so obsessed with eating pandesal that I wanted to learn how to make it so I can eat it any time of the day.  I have many different versions of pandesal, but this one is the easiest one I have!

    Bread, Vegan Filipino Recipes

    Halo Halo Recipe

    Sep 8, 2013 · 11 Comments

    Halo Halo is a classic Filipino shaved ice dessert layered with sweet fruits, creamy milk, and ice cream for the ultimate refreshing treat. This easy homemade version is colorful, creamy, and perfect for cooling down on a warm day.

    Similar creamy mix-ins desserts like Dirt Pudding, Cookie Butter ice cream and Mango Sago deserve a try for your sweet tastebuds too!

    Filipino halo halo in a cup
    [feast_advanced_jump_to]

    This shaved ice dessert is usually served as a refreshing dessert or snack during hot weather, especially in the summer months in the Philippines, typically from March to May.

    The combination of shaved ice, milk, and sweet ingredients makes it a popular way to cool down in the tropical heat.

    What is Halo Halo recipe?

    Halo Halo is a popular Filipino shaved ice dessert made with layers of sweet preserved fruits, beans, jellies, milk, and topped with ice cream. The name halo halo means “mix mix” in Tagalog, because everything is stirred together before eating.

    This refreshing dessert is believed to have been inspired by Japanese kakigori and later adapted in the Philippines with local ingredients like nata de coco, sweetened beans, jackfruit, saba bananas, ube, palm fruit, and leche flan. Today, Halo Halo is one of the most iconic Filipino desserts, loved for its creamy texture, colorful layers, and mix of sweet flavors in every bite.

    halo halo ingredients labeled on.a white plate

    Substitutions

    • Shaved ice - Replace with crushed ice or pre-packaged snow cones.
    • Evaporated milk - Substitute with whole milk, coconut milk (dairy-free), almond milk, or oat milk.
    • Condensed milk - Use honey, agave syrup, or sweetened coconut cream.
    • Ube ice cream - Swap with vanilla, coconut or taro ice cream, or any dairy-free option.

    Storage

    • Do not store assembled Halo-Halo as the ice will melt, and the dessert will lose its texture. Always assemble fresh for serving.

    Ingredients

    Listed below are all the ingredients you will need (omitting quantities):

    • Halo-halo Sweet Fruit Mix
    • shaved ice
    • evaporated milk
    • condensed milk 
    • Ube ice cream

    See recipe card for quantities.

    Instructions

    Crush the ice depending on how many servings you will make.

    shaved ice prepared in a bowl

    Mix all the ingredients. Take note, Halo Halo looks prettier when served in tall clear glasses!

    mixed ingredients in a clear bowl

    Layer the halo halo starting with the halo halo mixture, followed by the shaved ice, and repeat till the glass is ⅓ full.

    halo halo ingredients and shaved ice in a tall glass

    Add evaporated milk. The quantity of evaporated milk also depends also on how liquidy you want your halo halo to be.

    shaved ice and halo halo ingredients with milk

    Finish with your flavor of ice cream.

    scooped ube vanilla ice cream for topping

    Serve and mix well before eating. Enjoy!

    I love using Ube ice cream and this flavor is the most popular flavor used when serving halo halo since the purple color is so vibrant and it makes the halo halo look more festive.

    mixed halo halo in a glass

    Now you can enjoy your halo halo but first, mix it well. Hence the name Halo Halo which means "mix-mix" in Tagalog!

    ⭐ Top Tip

    To achieve the perfect texture for shaved ice, use a hand-crank ice shaver or a blender with a pulse setting.

    FAQ

    What is the purple stuff in halo-halo?

    Ube halaya: Some versions of halo-halo will include ube, or purple yam, whether that's in ice cream form or by using ube halaya (purple yam jam). Ube is a popular ingredient in Filipino desserts.

    Why is halo-halo famous?

    The beloved summer treat Halo-halo is like an unofficial symbol of summer in the Philippines. The longing for something cold and refreshing under the sweltering heat, the sweet and surprising flavor bombs that remind us of happy times is what this colorful concoction brings to the table.

    What is the main ingredient of halo-halo brainly?

    It's the sweetened fruits! The major ingredient in the popular Filipino dessert known as halo-halo, which is made up of a variety of components, is sweetened fruit.

    More Recipes

    • Cassava Cake
    • Shakoy
    • Buko Pandan
    • Turon
    Halo Halo in glass cup
    5 from 3 votes
    Print Pin Recipe

    Halo Halo Recipe

    Halo Halo is a classic Filipino shaved ice dessert made with sweet fruits, creamy milk, and topped with ice cream for the perfect refreshing treat. It’s cold, creamy, colorful, and easy to customize with your favorite toppings.
    Prep Time10 minutes mins
    Total Time10 minutes mins
    Course: Dessert
    Cuisine: Filipino
    Servings: 1 serving
    Calories: 286kcal
    Prevent your screen from going dark

    Ingredients

    • 1 (12 oz) Halo Halo Sweet Fruit Mix
    • 2 cups shaved ice
    • ¼ - ½ cup evaporated milk
    • 1 tablespoon sweetened condensed milk optional

    For the Topping:

    • ube ice cream
    • vanilla ice cream

    Instructions

    Layer the halo halo

    • Add the halo halo mixed fruit to the bottom of a tall serving glass.
    • Fill the glass with shaved ice until about ⅔ to ¾ full.

    Add the milk and toppings

    • Pour the evaporated milk evenly over the shaved ice.
    • Drizzle sweetened condensed milk on top, if using.
    • Top with 1 scoop of ube ice cream.

    Serve

    • Serve immediately while cold and enjoy. Mix everything together before eating for the best flavor.
    Leave a Comment

    Notes

    • If you can’t find a prepared halo halo mix jar, you can easily make your own using simple ingredients from the grocery store. Try using sweetened red beans or sweetened white beans, coconut jelly, sliced mango, chopped burro bananas, and a little crushed rice cereal or crispy rice for texture. For the best halo halo flavor, I recommend using at least 2 fruits along with either red beans or white beans.
     
    • You can also top your halo halo with leche flan, jackfruit, pinipig, coconut strips, or extra sweetened beans for even more texture and flavor.
    Serving: 1gCalories: 286kcalCarbohydrates: 33gProtein: 8gFat: 14gSaturated Fat: 8gPolyunsaturated Fat: 1gMonounsaturated Fat: 4gCholesterol: 54mgSodium: 169mgPotassium: 396mgFiber: 0.5gSugar: 31gVitamin A: 482IUVitamin C: 2mgCalcium: 320mgIron: 0.2mg

    Watch The Recipe Video!

    QR Code
    Did you make this recipe?Share it on instagram or tag @simplybakings or #simplybakings!

    Storytelling Time!

    When I first tried Halo Halo, I handed the cup back to my mom and told her I didn't want it.  The second time I tried it, I took three bites and handed it back to my parents.  I tried countless times to enjoy Halo Halo, but it wasn't until one summer that my boyfriend handed me Halo Halo and told me to eat it.

    From then on I loved Halo Halo and I probably spent more than $100 on Halo Halo that summer!  Thanks, boyfriend for handing me that cup of Halo Halo and telling me to eat it!

    Desserts, Drinks, Filipino Desserts, Ice Cream, Vegetarian Filipino Recipes

    Best Ever Filipino Mango Shake

    Sep 4, 2013 · 6 Comments

    2 Mango shakes in a glass jar with straws

    Whip up this refreshing and creamy Best Creamy Filipino Mango Shake recipe for a quick energy boost or for a refreshing dessert! Kids love it and it's made using only 5 ingredients with fresh mangos as the featured ingredient!

    Looking for more Filipino drinks? Try my amazing Green Mango Shake or my refreshing Banana Mango Smoothie.

    two Refreshing mango shake in glass bottles with straws
    [feast_advanced_jump_to]

    What type of mango should I use?

    • *Carabao Mango: Carabao mango, also known as Manila mango or Philippine mango, is a variety of mango that is native to the Philippines. It is considered one of the best-tasting mango varieties in the world and is highly prized for its sweet, aromatic flavor and smooth, buttery texture.
    • Haden: Haden mangoes are one of the most popular varieties in the United States. They have a sweet and rich flavor with a creamy texture. Haden mangoes are typically medium to large in size, with green and yellow skin when ripe.
    • Tommy Atkins: Tommy Atkins mangoes are known for their vibrant red and green skin. They are widely available year-round and have a sweet and tangy flavor. Tommy Atkins mangoes are firm and hold up well in cooking and salads.
    • Ataulfo (or Honey) Mango: Ataulfo mangoes are smaller in size and have a golden-yellow skin when ripe. They are sweet, creamy, and less fibrous than other varieties, making them perfect for eating fresh or blending into smoothies and desserts.
    • Kent: Kent mangoes are large and oval-shaped with a green and yellow skin when ripe. They have a sweet and mild flavor with minimal fiber, making them ideal for slicing and eating fresh or adding to fruit salads.
    • *Alphonso: Alphonso mangoes are often considered the "king of mangoes" for their rich, sweet, and aromatic flavor. They have a smooth, buttery texture and are highly sought after for making desserts, juices, and mango lassis.
    • Keitt: Keitt mangoes are known for their large size and green skin, even when ripe. They have a sweet and tangy flavor with a firm texture, making them suitable for slicing, grilling, or adding to salsas and chutneys.
    • Francis: Francis mangoes are prized for their sweet and fruity flavor with hints of citrus. They have a soft and juicy texture when ripe, making them perfect for eating fresh or using in smoothies and desserts.

    *I prefer using these type of mangos. 🤩

    Creamy Mango shake in a glass jar with a straw

    Mango Health Benefits

    • Rich in Nutrients: Mangos are packed with essential vitamins and minerals including vitamin C, vitamin A, vitamin E, potassium, and folate. These nutrients are vital for maintaining overall health and well-being.
    • Antioxidant Properties: Mangos contain antioxidants such as beta-carotene, zeaxanthin, and quercetin, which help to neutralize free radicals in the body. Antioxidants play a crucial role in reducing the risk of chronic diseases such as heart disease, cancer, and diabetes.
    • Boost Immune System: The high vitamin C content in mangos helps to boost the immune system and protect the body against infections and illnesses.

    Top Tip

    • The best tip for having a delicious shake is choosing the right mangoes! When choosing, always look for the natural sweet smell of mangoes. More often than not, sweet-smelling mangoes are of course, sweeter and tastier.

    Variations

    • If the mango is very sweet feel free to omit the sugar or add less.
    • If you want a creamier smoothie, add bananas, greek yogurt, or even mango ice cream to make it indulgent!

    Substitutions

    • Substitutions: To make this vegan-friendly, use plant-based milk like coconut milk or soy milk, any kind of nut milk like almond milk or cashew milk If you don't have evaporated milk available, use whatever you have on hand like whole milk or even heavy cream to make it more indulgent.
    • Use whatever sweeteners you have on hand. For this recipe I used agave, but feel free to use maple syrup, coconut sugar, even vanilla ice cream

    Ingredients

    Listed below are all the ingredients you will need:

    • mangoes (I used Ataulfo mango)
    • ice-cubes
    • water
    • evaporated milk
    • agave or brown sugar
    mango shake ingredients on a marble table

    Instructions

    Peel the mango and cut out the seed. Before putting the mango flesh in the blender, you can cut them or use a spoon to scoop them out of its "skin":

    delicious and sweet sliced mangoes for mango shake recipe

    Add the mango, ice, water, evaporated milk, and sugar to the blender and blend for 2-3 minutes or until everything is well combined:

    mango chunks and evaporated milk in a blender
    mango shake into a blender on a marble table.

    Now pour all the refreshing goodness into your favorite smoothie glass and garnish with some mint! This delicious mango shake is best to drink during hot summer days.

    2 mango shakes in glass jars on a gray table with linen.

    Hint: Taste the mangoes first (just a bit, don't eat them all up 🙂 ) before mixing them in the blender. If the mangoes are sour, don't use them as it would turn out into a sour mango shake. Even if you adjust the sugar content, the sourness would prevail. So always go back to the first tip - choose the sweet mangoes!

    Frequently Asked Questions

    Would the shake get runny if I made it up the night before I drink it?

    Yes. I have tried to make it the night before and it got runny in the morning because I placed it in the refrigerator. Instead, freeze it, then blend it before drinking or serving it to guests.

    Can I use any type of mango for this recipe?

    Absolutely! The best mangos to use are the Philippine mangos (but I'm biased), but any mangos work well, just make sure you use a ripe mango.


    More Filipino food to try:

    • Moringa Pineapple Smoothie
    • Coconut Smoothie
    • Avocado Smoothie
    • Strawberry Banana Smoothie
    delicious mango smoothie in a glass container with a strawe
    5 from 2 votes
    Print Pin Recipe

    Filipino Mango Shake

    An Easy 5 Ingredient Mango Shake that is refreshing on hot summer days!
    Prep Time5 minutes mins
    Blend Time1 minute min
    Total Time6 minutes mins
    Course: Drinks
    Cuisine: Filipino
    Servings: 2 servings
    Calories: 272kcal
    Author: Lainey
    Prevent your screen from going dark

    Ingredients

    • 2 mangos
    • 1 ½ cup ice
    • ½ cup water
    • ¼ cup evaporated milk
    • ¼ cup brown sugar or agave

    Instructions

    • Peel, chop the mango, and discard the seed.
    • In a blender, add mango, ice, water, evaporated milk, and sugar to the blender
    • Blend for 1 minute if using a high speed blender or until everything is blended.
    • Best served immediately.
    Leave a Comment
    Serving: 1gCalories: 272kcalCarbohydrates: 61gProtein: 4gFat: 3gSaturated Fat: 2gCholesterol: 9mgSodium: 56mgPotassium: 481mgFiber: 3gSugar: 58gVitamin A: 2316IUVitamin C: 76mgCalcium: 136mgIron: 1mg

    Watch The Recipe Video!

    QR Code
    Did you make this recipe?Share it on instagram or tag @simplybakings or #simplybakings!

    When I went to the Philippines, I ate so many mangos to the point where every time I ate a mango, I had a very bad stomach ache.   Mangos from the Philippines are very good, to quote my sister "It's like eating candy!" and it is.  

    The mango is very sweet and the mangos in the states or even the imported mangos are not the same.  So if you are ever in the Philippines, please stop by a farmers market, or a restaurant and try the mangos!  

    With the extra mangos that I had, I made a mango smoothie... I know, I know, the title of the recipe says mango shake, but I realized that mango shake has to include ice cream.. right?

    Note: Recipe was originally published on September 2013

    5 Ingredients or Less, Drinks, Filipino Desserts, Summer Desserts, Vegetarian Filipino Recipes

    • « Go to Previous Page
    • Page 1
    • Interim pages omitted …
    • Page 15
    • Page 16
    • Page 17

    Primary Sidebar

    Lainey holding a muffin pan in her kitchen

    I'm Lainey, the driving force behind SimplyBakings.com, where I'm on a mission to redefine Filipino cooking through a plant-based lens.

    More about me →

    Popular

    • cookie dough bites
      Easiest Cookie Dough Bites Ever
    • delicious and soft oreo cheesecake cookies
      Soft Oreo Cheesecake Cookies
    • mini chocolate cupcakes in a white rectangular plate
      Delicious and Easy Mini Chocolate Cupcakes
    • Filipino Custard Cake drizzled with powdered sugar
      Filipino Custard Cake
    • no bake oreo cheesecake in a mason jar
      Foolproof 3 Ingredients No Bake Oreo Cheesecake
    • 3 brownies stacked
      Best and Easiest Brownies

    Footer

    Sign Up for My Email List

    Latest Posts

    • Foolproof Taro Recipe
    • Best Matcha Strawberry Popsicles
    • Classic Filipino Lentil Soup
    • BEST Kinamatisang Tofu

    Quick Links

    Kitchen Essentials

    About Lainey

    Contact

    • Facebook
    • Instagram
    • YouTube
    • Pinterest
    • TikTok

    © 2025 Auburn Digital Services LLC. All Rights Reserved | Privacy Policy

    Rate This Recipe

    Your vote:


    A rating is required
    A name is required
    An email is required