
• Skip to primary navigation
  • Skip to main content
  • Skip to primary sidebar
Simply Bakings logo
  • Home
  • Recipes Index
  • Filipino Recipes
  • About Me
  • Nav Social Menu

menu icon
go to homepage
search icon
Homepage link
  • Recipes
  • Filipino Recipes
  • About Me
    • Facebook
    • Instagram
    • Pinterest
    • YouTube
  • ×

    Shamrock Sugar Cookies Recipe

    Shamrock Sugar Cookies Recipe

    Mar 11, 2014 · 6 Comments

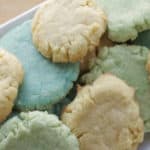
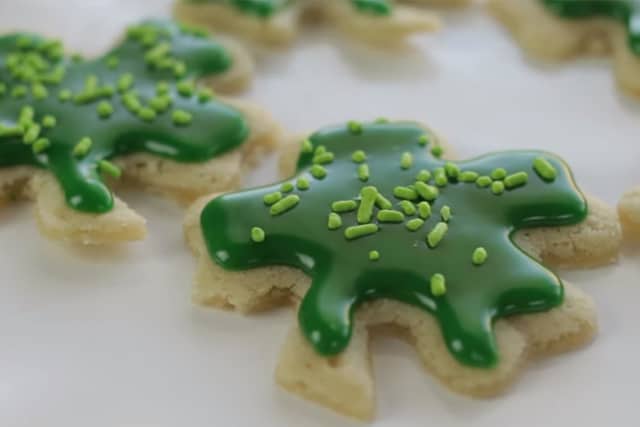
    These cookies will bring you the Luck of the Irish this coming St. Patrick's Day! Make these easy, quick, and delicious Shamrock Sugar Cookies recipe with your kids. It's so fun to make when I frosted it with ready-made green cookie icing. It made me look like a frosting pro!

    Love making fun and simple cookies with your family? Try my Rice Krispies Cookies or No-Bake Oreo Cookies!

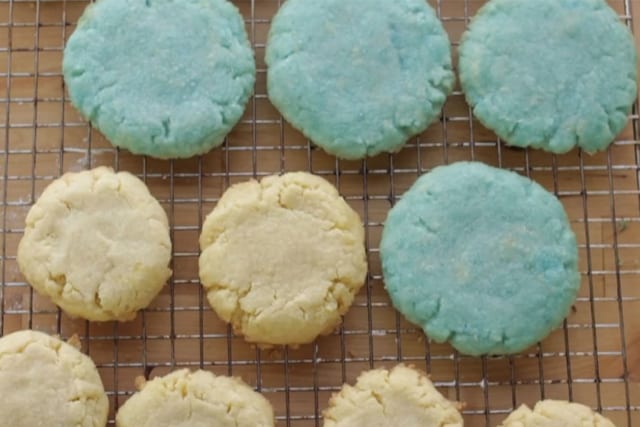
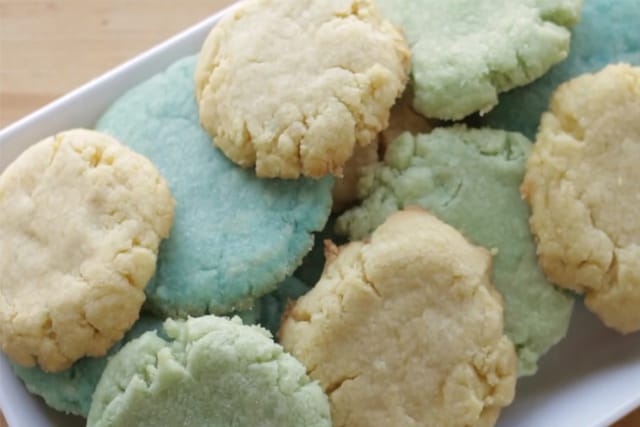
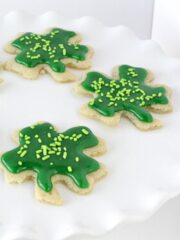
    Some Shamrock Sugar Cookies on a plate
    [feast_advanced_jump_to]

    Why You’ll Love This Recipe

    If Saint Patrick's Day is just around the corner, why not get festive? These cookies are beginner-friendly and easy to make at home. I even used my Rolled Sugar Cookies. No fancy tools are needed, just simple ingredients you likely already have.

    They’re also family-friendly and perfect for kids who want to help decorate. Making them vegan or dairy-free is easy with a few substitutions, so everyone can enjoy. I also used Betty Crocker's cookie icing and instantly fell in love with it! It was very easy to squeeze out the icing and hold it without getting cramps in your hand.

    Also, you are probably wondering why I get hand cramps just holding the icing bag. Well, I've been playing the piano since I was 5, and pulled a nerve or something... I can't remember exactly. Anyway, you must try the Betty Crocker icing, it's awesome!

    Additionally, vanilla extract adds a hint of natural flavor. Butter provides richness while offering a small boost of healthy fats for energy.

    Ingredients

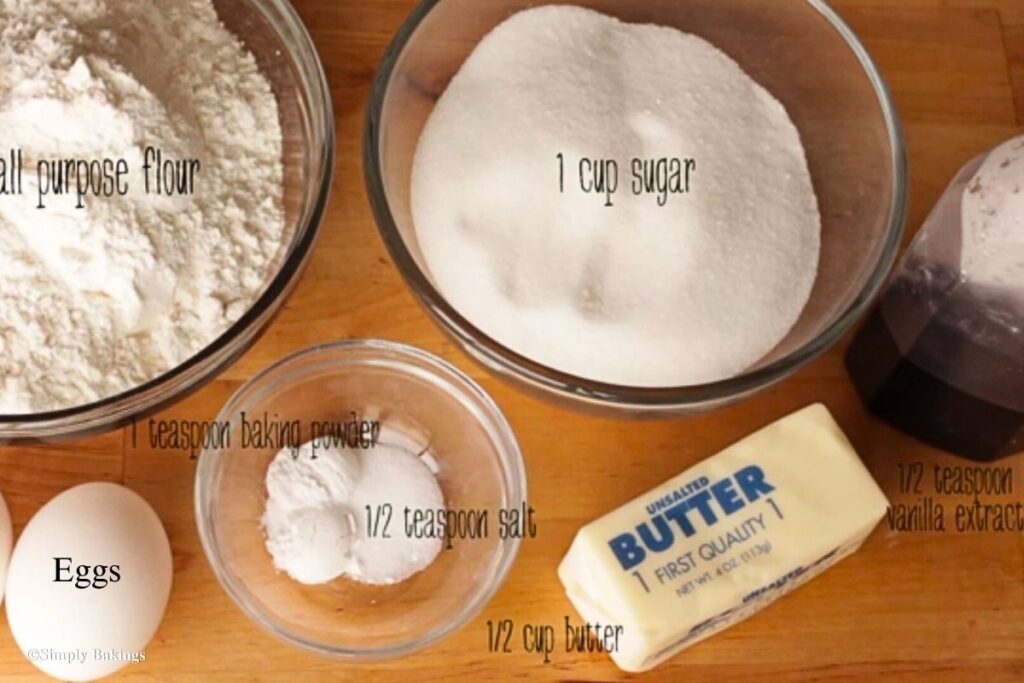
    Listed below are all the ingredients you will need:

    For the Sugar Cookies:

    • Unsalted butter
    • Granulated sugar
    • Egg
    • Vanilla extract
    • All-purpose flour
    • Baking powder
    • Salt
    • Green icing
    • Green sprinkles

    For Decorating:

    • Edible glitter
    • Mini shamrock decorations

    See the recipe card for quantities.

    Instructions

    Make the Cookie Dough:

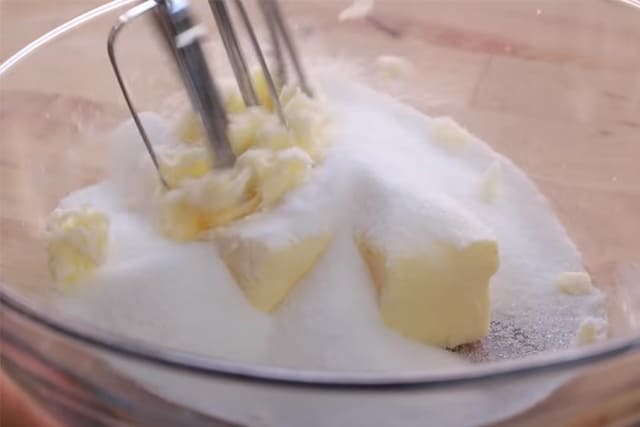
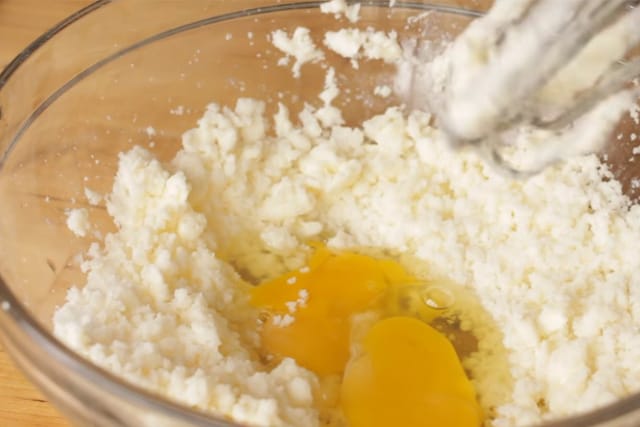
    1. In a large or medium bowl, cream together the butter and sugar until light and fluffy.

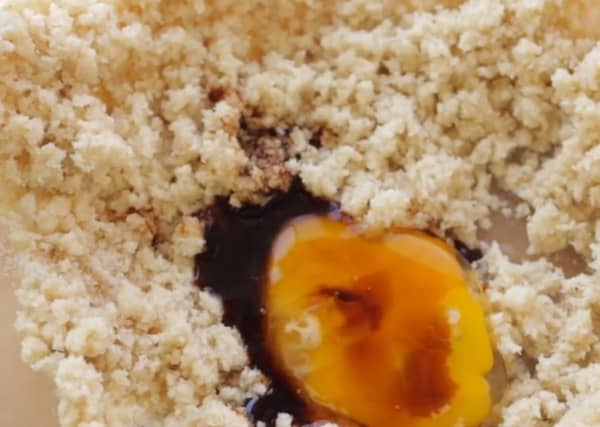
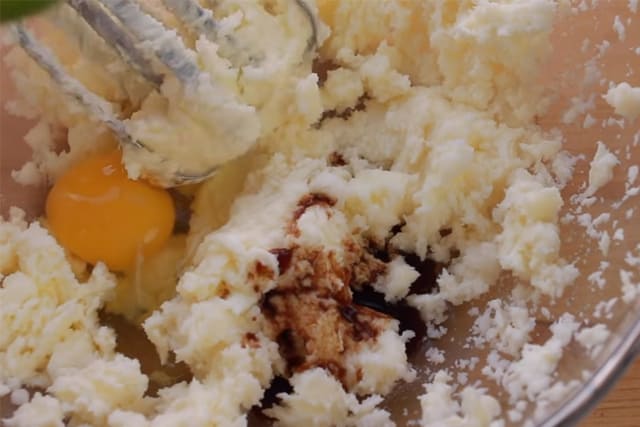
    2. Add the egg and vanilla extract, and mix until fully combined.

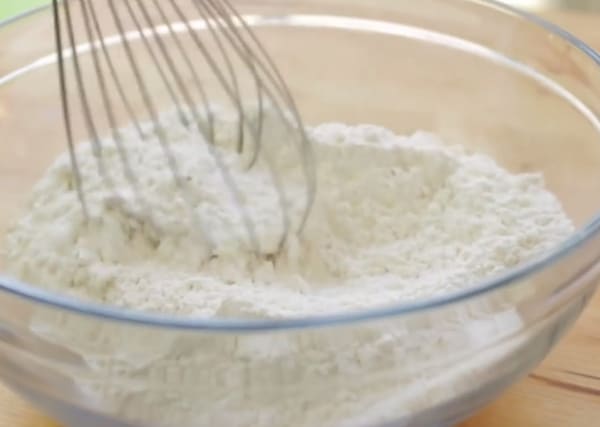
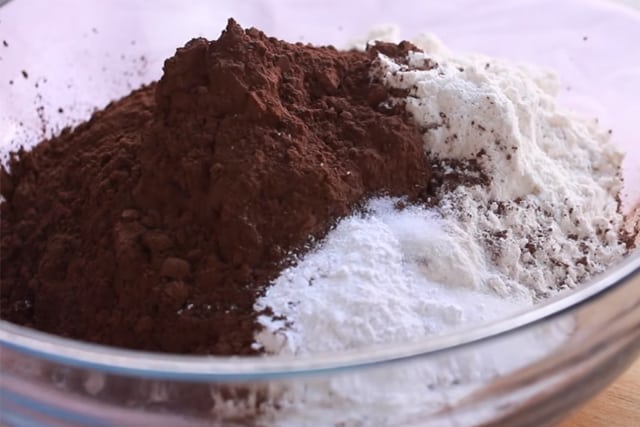
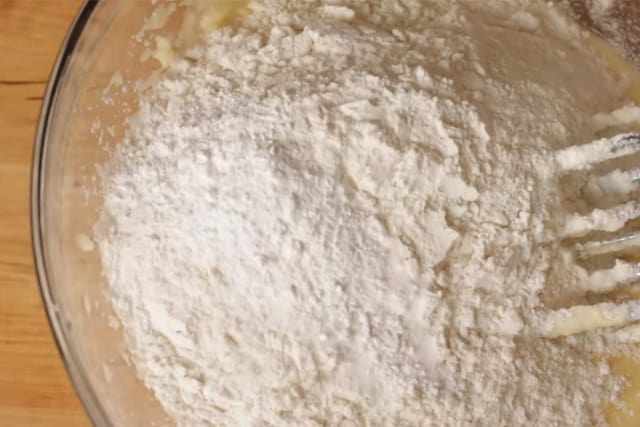
    3. In a separate bowl, whisk together the flour, baking powder, and salt.

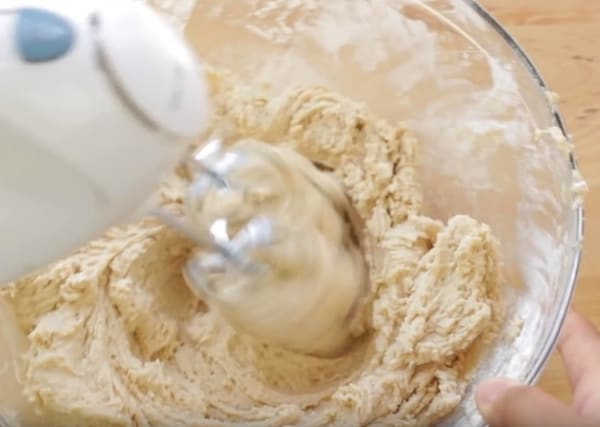
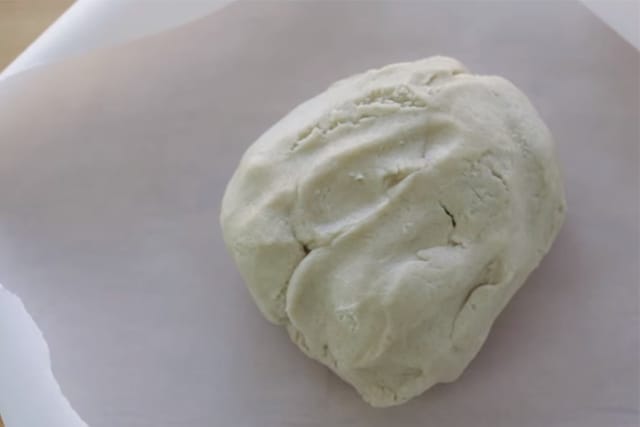
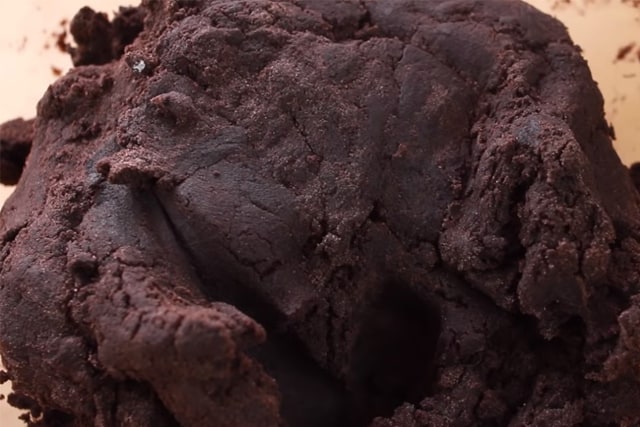
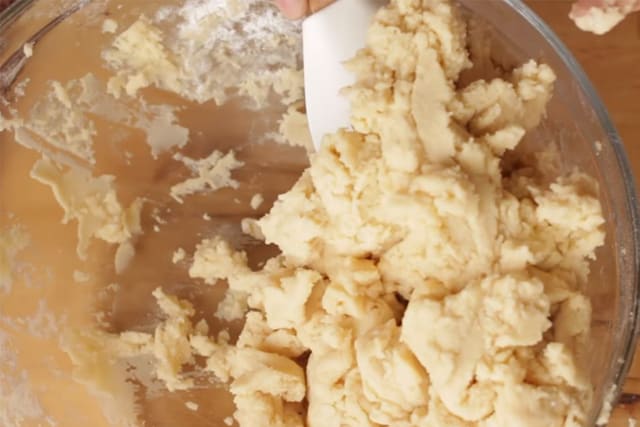
    4. Gradually add the flour mixture to the wet ingredients. Mix until a soft dough forms.

    A bowl of the Shamrock cookie batter

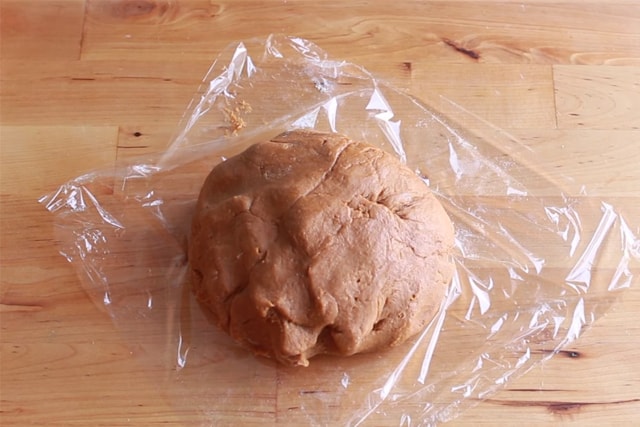
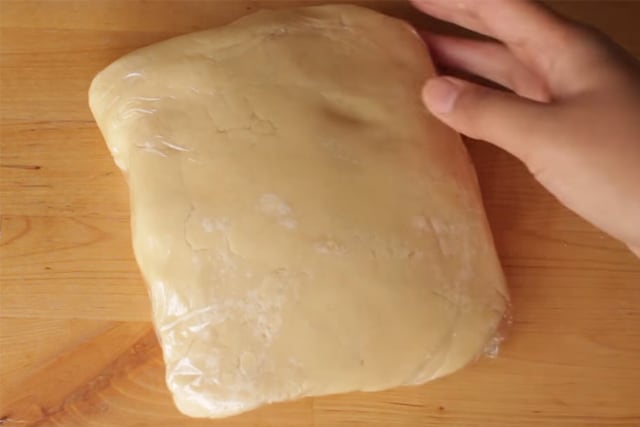
    5. (Optional) Wrap the sugar cookie dough in plastic wrap and chill for 30 minutes for easier handling.

    Bake the Cookies:

    6. Preheat oven to 350°F (175°C).

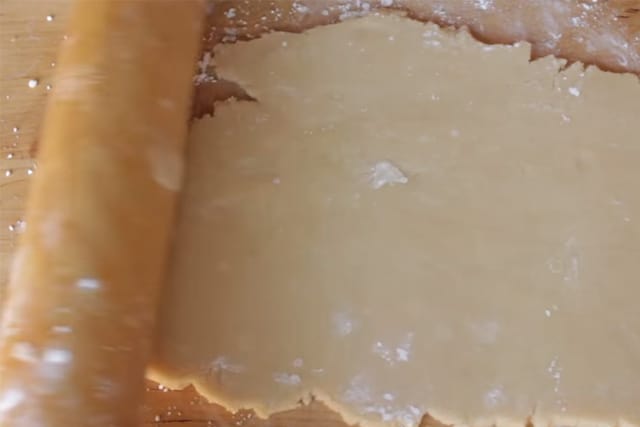
    7. Using a rolling pin, spread the batter to about ¼ inch thick on a lightly floured surface.

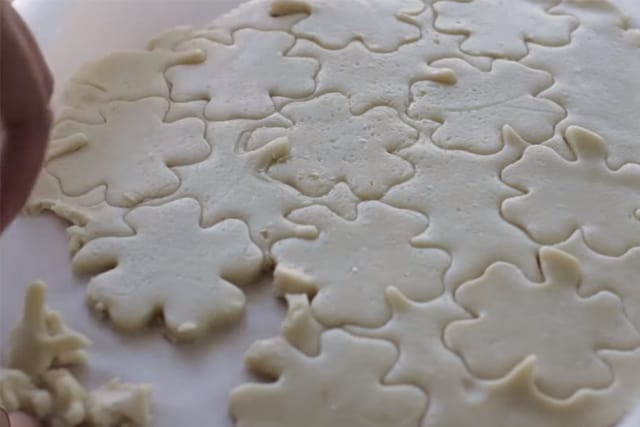
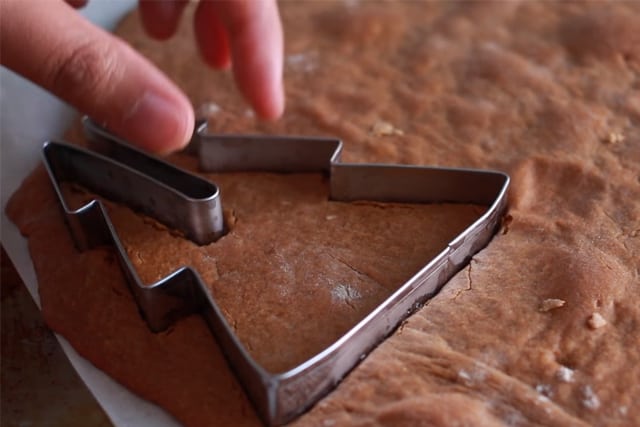
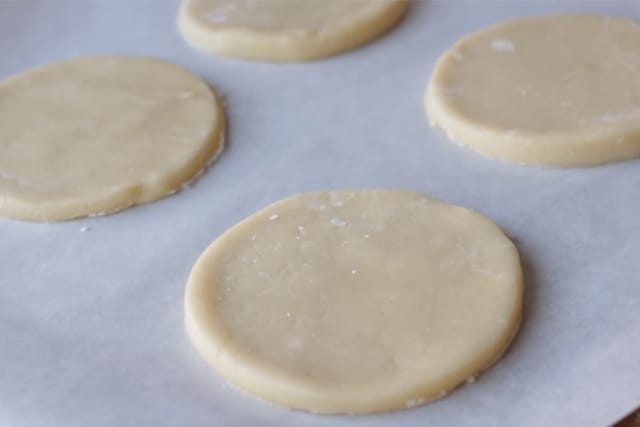
    8. Use a round cookie cutter or shape of choice. Place cookies on a baking or cookie sheet with parchment paper.

    Cookie cutter shaping pieces from the dough

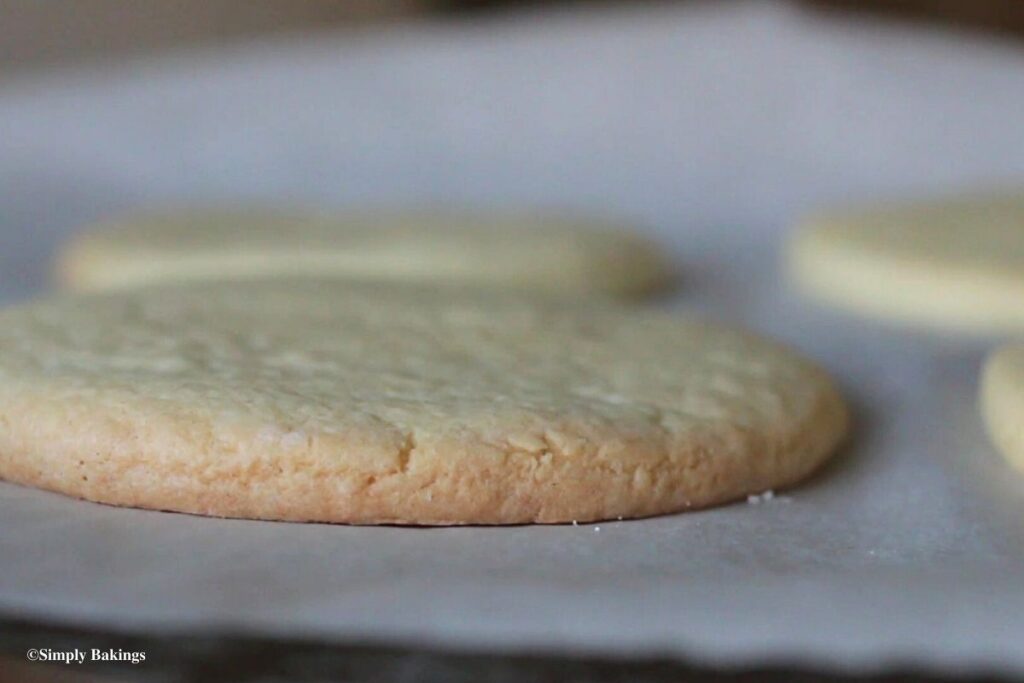
    9. Bake for 8–10 minutes, or until the edges are just barely golden.

    10. Remove from the oven and immediately use a Shamrock cookie cutter to cut out the shamrock shape while the cookies are still soft.

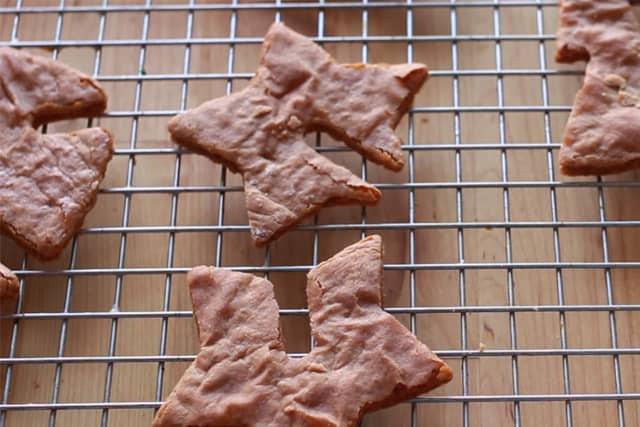
    11. Let cool in the pan for 5 minutes. Then transfer to a cooling rack to cool completely.

    Decorate the Cookies:

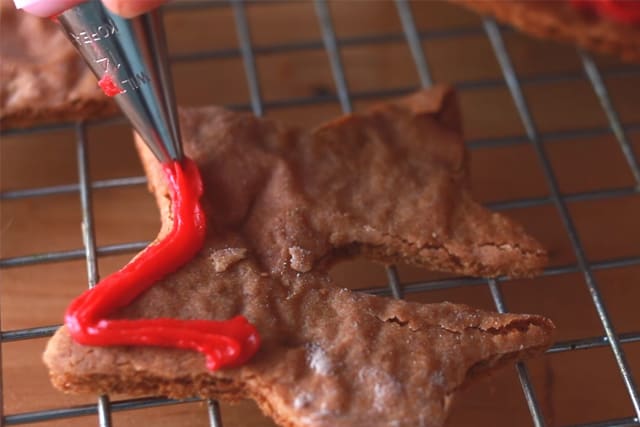
    12. Once cookies are completely cooled, ice with green icing.

    Cookies on the tray being decorated

    13. Decorate with sprinkles or edible glitter as desired.

    14. Let icing set before serving or storing. And your Shamrock Cookies are ready to serve!

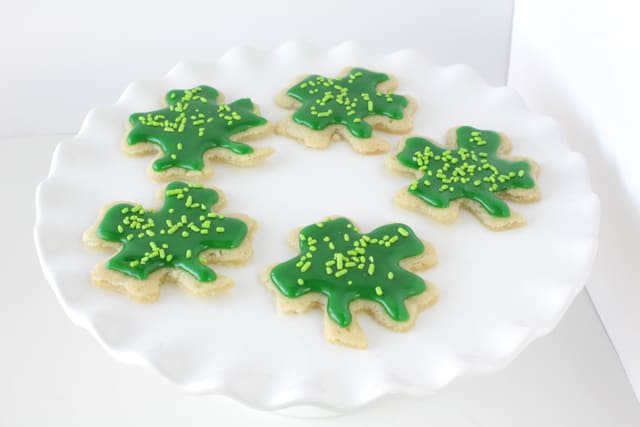
    Shamrock Sugar Cookies on a tray

    Substitutions & Variations

    • Ingredient Swap
      You can swap butter with vegan butter or sugar with coconut sugar.
    • Variation
      Add almond extract for a twist in flavor.
    • Mistake to Avoid
      Avoid overmixing the dough, or the cookies will turn tough.
    • Storage Tips
      • These cookies freeze well in the refrigerator for up to 2 months, so you can prep ahead.
      • Store decorated cookies in an airtight container at room temperature for up to 5 days.
    decorated Shamrock Sugar Cookies

    FAQs

    Do I need a shamrock-shaped cookie cutter?

    No, but it helps. You can cut simple shapes by hand if needed.

    Can I make the dough ahead of time?

    Yes! Chill the dough for up to 3 days before baking.

    Is homemade icing better than store-bought?

    Homemade royal icing tastes fresher, but store-bought saves time.

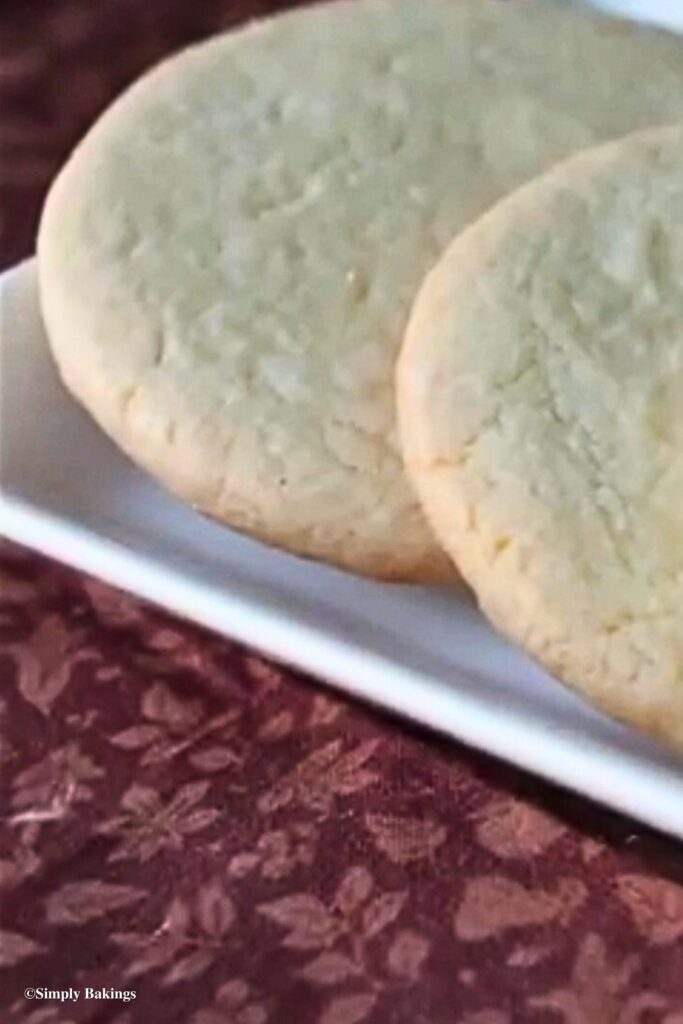
    Shamrock Sugar Cookies on a white plate
    4 from 1 vote
    Print Pin Recipe

    Shamrock Sugar Cookies recipe

    Bringing you the Luck of the Irish with these fun and festive Shamrock Sugar Cookies! Perfect for St. Patrick’s Day and easy enough to make with kids, these cookies are soft, buttery, and topped with bright green icing.
    Prep Time15 minutes mins
    Bake Time10 minutes mins
    Total Time25 minutes mins
    Course: Dessert, Snack
    Cuisine: American
    Servings: 24 cookies
    Calories: 83kcal
    Author: Lainey
    Prevent your screen from going dark

    Ingredients

    For the Sugar Cookies:

    • 1 (226g) cup Unsalted butter softened
    • 1 cup Granulated sugar
    • 1 Large egg
    • 1½ teaspoons Vanilla extract
    • 2½ cups All-purpose flour
    • ½ teaspoon Baking powder
    • ½ teaspoon Salt

    For Decorating:

    • Green icing store-bought or homemade royal icing
    • Green sprinkles (optional) edible glitter, or mini shamrock decorations

    Instructions

    Make the Cookie Dough:

    • In a large bowl, cream together the butter and sugar until light and fluffy.
    • Add the egg and vanilla extract, and mix until fully combined.
    • In a separate bowl, whisk together the flour, baking powder, and salt.
    • Gradually add the dry ingredients into the wet ingredients. Mix until a soft dough forms.
    • (Optional) Wrap the dough in plastic wrap and chill for 30 minutes for easier handling.

    Bake the Cookies:

    • Preheat oven to 350°F (175°C).
    • Roll out the dough to about ¼ inch thick on a lightly floured surface.
    • Use a round cookie cutter or shape of choice and place cookies on a parchment-lined baking sheet.
    • Bake for 8–10 minutes, or until the edges are just barely golden.
    • Remove from the oven and immediately use a shamrock-shaped cookie cutter to cut out the shamrock shape while cookies are still soft.
    • Let cool on the pan for 5 minutes, then transfer to a wire rack to cool completely.

    Decorate the Cookies:

    • Once cookies are completely cooled, ice with green icing.
    • Decorate with sprinkles or edible glitter as desired.
    • Let icing set before serving or storing.
    Leave a Comment
    Serving: 1gCalories: 83kcalCarbohydrates: 18gProtein: 2gFat: 0.4gSaturated Fat: 0.1gPolyunsaturated Fat: 0.1gMonounsaturated Fat: 0.1gTrans Fat: 0.002gCholesterol: 7mgSodium: 60mgPotassium: 17mgFiber: 0.4gSugar: 8gVitamin A: 11IUCalcium: 8mgIron: 1mg

    Watch The Recipe Video!

    QR Code
    Did you make this recipe?Share it on instagram or tag @simplybakings or #simplybakings!

    You Might Also Like:

    • Vegan Shortbread Cookies
    • Lemon Cookies
    • Rocky Road Cookies

    Recipes for Every Moment

    Hosting a St. Patrick’s Day party and need a festive dessert? These Shamrock Sugar Cookies are easy to make, tasty, and sure to impress.

    Cookies, Desserts, Snacks, St Patrick's Day Desserts

    Salted Caramel Bundt Cake with Cake Mix

    Mar 8, 2014 · 14 Comments

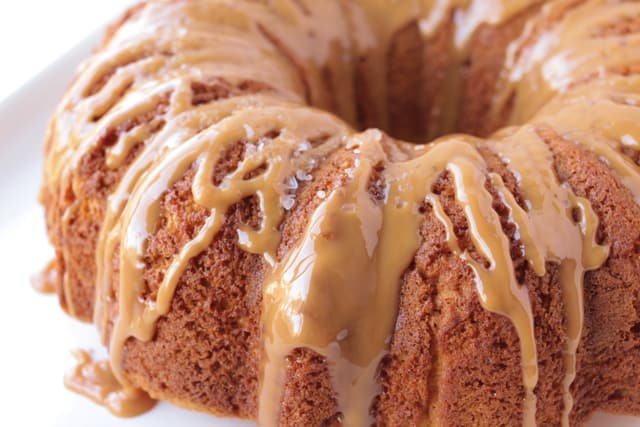
    This Salted Caramel Bundt Cake with Cake Mix is simple to make, and has a wonderful moist crumb, with a caramelized and flavorful crust. Finished with caramel and salt, this cake is perfect for brunch or afternoon tea.

    Monkey Bread, Cinnamon Roll Bites, and Breakfast French Bread are some of my other favorite brunch recipes to make at home. Give it a try and let me know how it goes in the comments below!

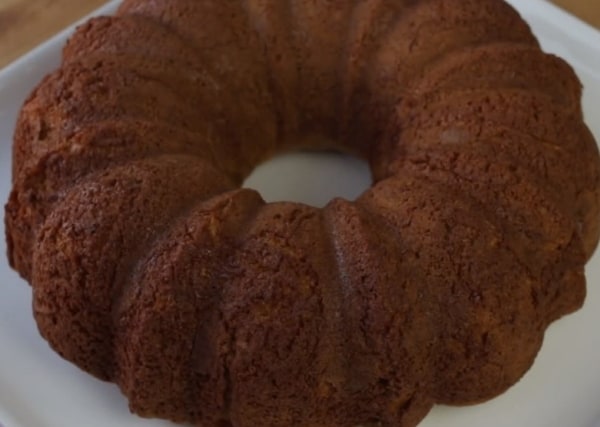
    salted caramel bundt cake on a cake plate
    [feast_advanced_jump_to]

    Substitution

    • Swap the yellow cake mix for a chocolate cake mix and replace the butterscotch pudding with chocolate pudding. You’ll get a salted chocolate caramel bundt cake that’s equally delicious.

    Variations

    • Add a handful of chopped pecans or walnuts to the cake batter for some added texture and a nutty flavor that pairs perfectly with the caramel glaze.
    • This Salted Caramel Bundt Cake pairs beautifully with a hot cup of coffee or tea. For a more decadent experience, serve it with a scoop of vanilla ice cream or a dollop of whipped cream.

    Storage

    • If you have any leftovers (though it’s unlikely!), store the cake in an airtight container at room temperature for up to 3 days.
    • You can also refrigerate it, but be sure to let the cake come to room temperature before serving, as the caramel glaze can harden when chilled.

    Top Tips

    • Always sift dry ingredients like flour, baking powder, baking soda, and even sugar. It will help you achieve a smoother batter in a shorter period of time.
    • For your cake to cool down faster take it out from the pan and let it sit on a cooling wire rack.
    • If you want mini bundt cakes, you can use the same recipe but just use smaller bundt cake pans.
    • Always have a cooking spray handy in your kitchen. It will make your baking and cooking sessions so much easier.
    • Feel free to omit the caramel sauce and use icing sugar instead or go without the sauce completely.  It will still taste just as good.

    Ingredients

    • yellow cake mix
    • butterscotch flavored instant pudding mix
    • milk
    • eggs
    • sugar
    • butter
    • heavy cream
    • sea salt

    Instructions

    As always, before starting working on any baking recipe, preheat the oven to 325 degrees F. Grease bundt pan generously.

    mixing dry ingredients for salted caramel bundt cake

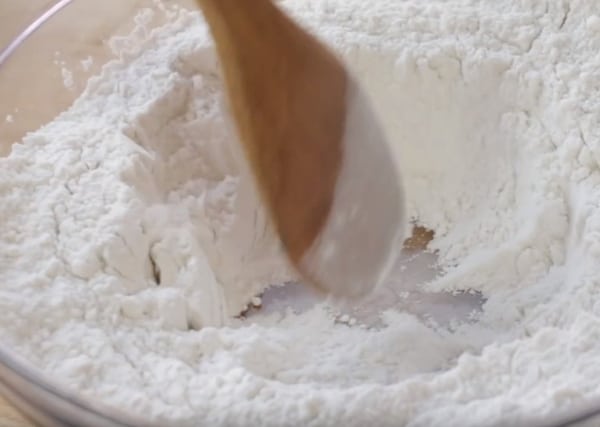
    In a large bowl mix yellow cake mix, pudding mix, and mix until well combined:

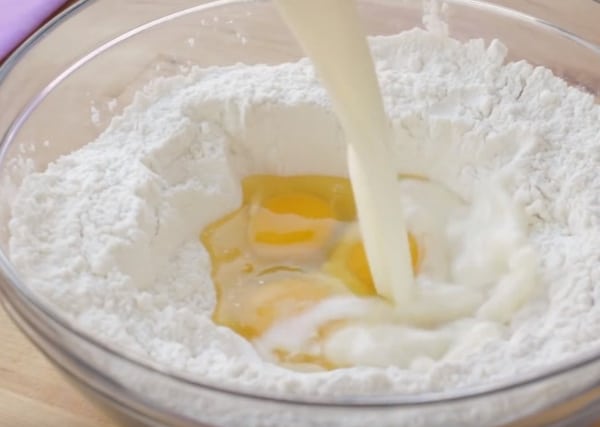
    In the same bowl, make a well in the middle and add eggs and milk:

    pouring in eggs and milk into the dry ingredients for salted caramel bundt cake recipe

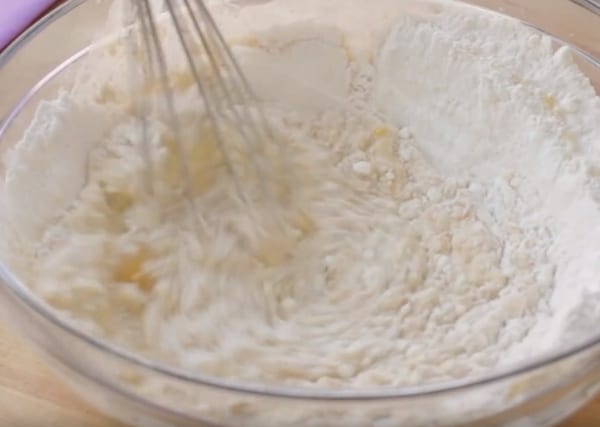
    Start mixing it with a wire whisk or you can also use a hand-held mixer or a stand mixer:

    mixing ingredients for salted caramel bundt cake recipe

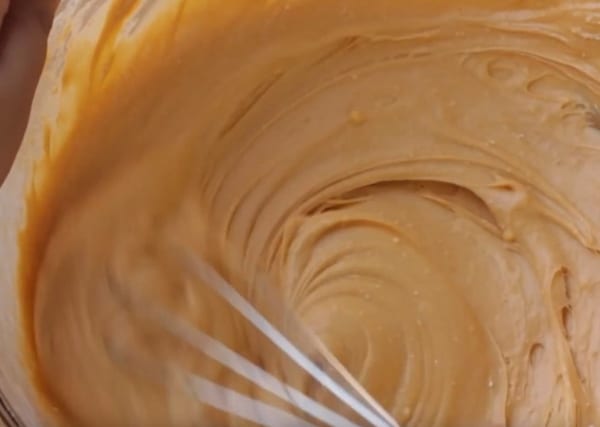
    Mix it until well combined:

    mixing salted caramel bundt cake batter with a wire whisk

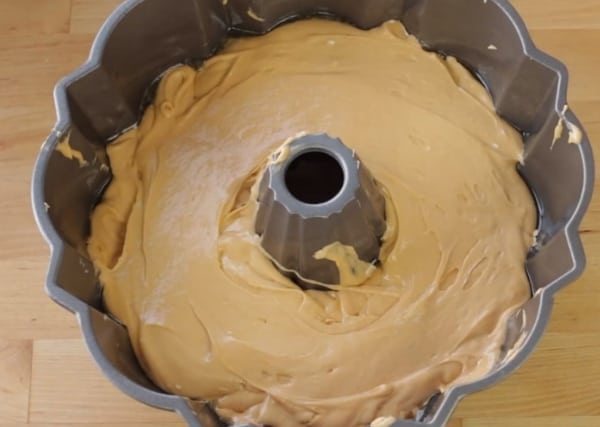
    Pour batter into prepared bundt pan and bake for 40-50 minutes:

    salted caramel bundt cake batter in a bundt cake pan

    This is it! Allow your bundt cake to cool down for about 15-20 minutes until it's ready to be glazed:

    freshly baked salted caramel bundt cake on a white plate

    While waiting for the cake to cool down, you can make the caramel glaze.

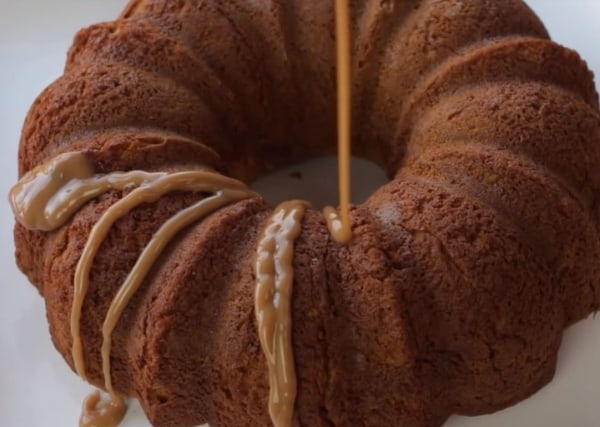
    Drizzle the caramel glaze over bundt cake and sprinkle with sea salt for that perfect sweet and salty taste:

    pouring caramel glaze over salted caramel bundt cake

    Making the Salted Caramel Glaze

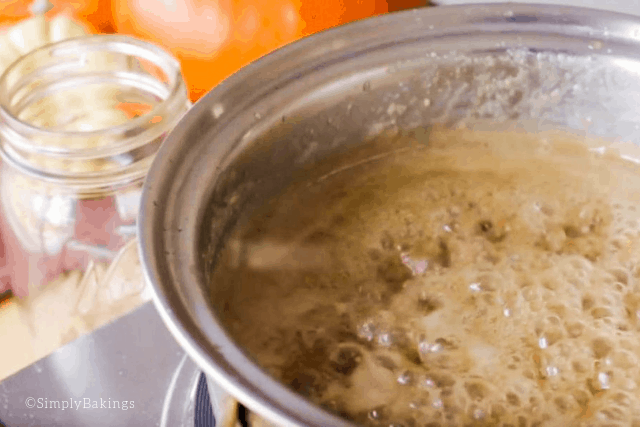
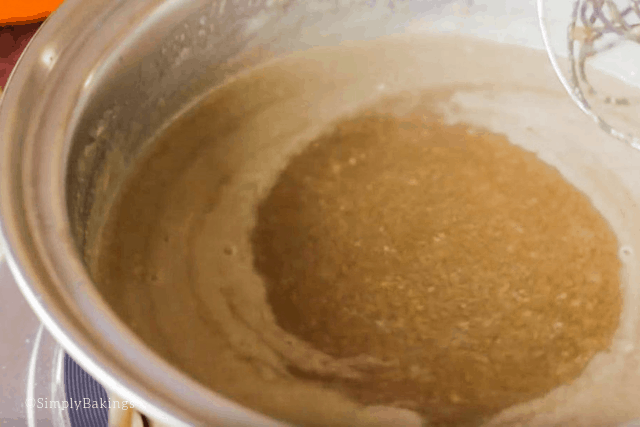
    1. Melting the Sugar: In a medium saucepan over low-medium heat, add the sugar and whisk constantly for 3-5 minutes. You want to make sure the sugar melts evenly. Be patient, as this step requires attention – sugar can burn quickly if left unattended!

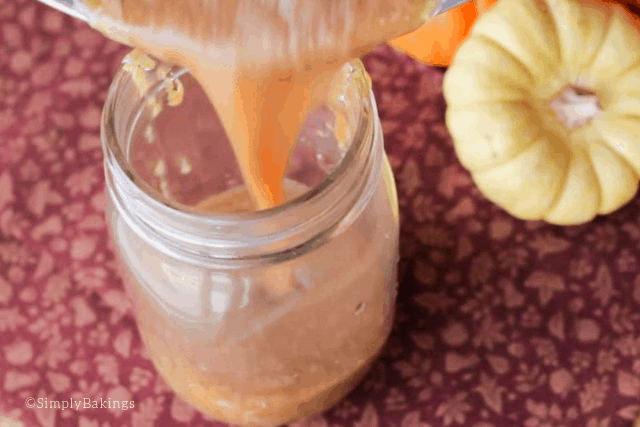
    2. Adding Butter and Cream: Once the sugar becomes slightly sticky and amber in color, add the butter. Continue whisking for 4-5 minutes until the butter and sugar are fully combined. Remove the pot from the heat and slowly add the heavy cream, whisking continuously to avoid lumps. The caramel will thicken as it cools.

    Just by staring at the picture makes my mouth salivate for more salted caramel recipes!

    salted caramel bundt cake on a white plate

    FAQ

    Why are bundt cakes better?

    Bundt cakes are often more visually appealing due to their unique shapes and designs, making them a centerpiece for any gathering. Additionally, their thicker edges create a delightful crust, enhancing both texture and flavor compared to traditional layer cakes.

    How long to let cake cool before glaze?

    It's best to let the bundt cake cool in the pan for about 10 minutes before inverting it onto a wire rack. After removing it from the pan, allow it to cool completely before adding the glaze to ensure it doesn’t melt and run off.

    How do I prevent the cake from sticking to the pan?

    Make sure to generously grease your bundt pan and let the cake cool in the pan for about 10 minutes before inverting.

    3.86 from 7 votes
    Print Pin Recipe

    Salted Caramel Bundt Cake with Cake Mix

    Craving the perfect balance of sweet and salty? This Salted Caramel Bundt Cake with Cake Mix combines rich caramel, moist cake, and a sprinkle of sea salt for an irresistible treat. Save this recipe now and impress your guests with an easy, delicious dessert!
    Prep Time20 minutes mins
    Bake Time40 minutes mins
    Total Time1 hour hr
    Servings: 12 slices
    Calories: 302kcal
    Prevent your screen from going dark

    Ingredients

    • 1 package yellow cake mix
    • 1 package butterscotch flavored instant pudding mix
    • 1 cup milk
    • 3 eggs
    • 1 cup sugar
    • ½ stick of butter
    • ¾ cup heavy cream
    • sea salt

    Instructions

    • Preheat oven to 325 degrees F. Grease bundt pan generously.
    • In a large bowl mix yellow cake mix, pudding mix and mix until well combined. In the same bowl, make a well in the middle and add eggs, milk and mix until well combined. Pour into bundt pan.
    • Bake for 40-50 minutes.
    • For glaze, in a medium sized pot and the heat over low-medium heat, add the sugar and whisk constantly for 3-5 minutes.
    • When sugar becomes slightly sticky, add butter and continue whisking until well combined, this will take about 4-5 minutes. Remove from the stove.
    • In the same pot, add heavy cream and stir until caramel is thick and cream. Pour glaze into a bowl and set aside to cool.
    • Pour the caramel glaze over bundt cake and sprinkle with sea salt.
    Leave a Comment
    Serving: 1sliceCalories: 302kcalCarbohydrates: 54gProtein: 4gFat: 8gSaturated Fat: 5gPolyunsaturated Fat: 1gMonounsaturated Fat: 2gTrans Fat: 0.1gCholesterol: 60mgSodium: 342mgPotassium: 80mgFiber: 1gSugar: 37gVitamin A: 311IUVitamin C: 0.1mgCalcium: 132mgIron: 1mg

    Watch The Recipe Video!

    QR Code
    Did you make this recipe?Share it on instagram or tag @simplybakings or #simplybakings!

    First of all, I was not a fan of caramel at all.  In fact, I avoided it at all costs only because when I was in high school, the caramel always stuck to my braces and I had a hard time cleaning it out.

    However, just this past year I've grown to love eating caramel, especially any recipes that have the phrase "salted caramel".  I really hope you enjoy this recipe and let me know what is your favorite salted caramel recipe!

    Cake, Desserts

    Shortbread Cookies

    Mar 4, 2014 · 3 Comments

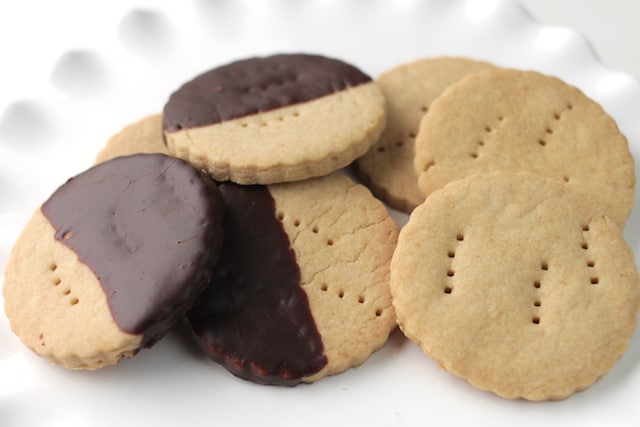
    Delicious Shortbread Cookies on a white plate

    Got little patience to bake fancy Christmas cookies? With just 3 ingredients, you can make these easy Shortbread Cookies! They are so delicious that they melt in your mouth. It's anyone's perfect snack that can be enjoyed on any occasion!

    Try our Amaretti Cookies or the crunchy and fun Rice Krispies Cookies next!

    Delicious Shortbread Cookies on a white plate
    [feast_advanced_jump_to]

    Why You’ll Love This Recipe

    Whenever Christmas comes around, I always stop by Costco and pick up the huge box of golden brown Shortbread cookies! I can eat these cookies for days and never get tired of them! So me being me, I decided to try making a beginner-friendly Shortbread recipe using 3 basic ingredients.

    Your classic Shortbread cookies can also be made dairy-free with vegan butter. It can fit many diets. And it's perfect for new bakers.

    Plus, brown sugar adds a touch of molasses. It doesn't just give it flavor but also a small dose of minerals like calcium and potassium.

    Ingredients

    Listed below are all the ingredients you will need:

    • Unsalted butter
    • Brown sugar
    • All-purpose flour

    See the recipe card for quantities.

    Instructions

    Make the Dough:

    1. Preheat oven to 300°F (150°C).

    2. Line an ungreased cookie sheet with parchment paper or a silicone baking mat.

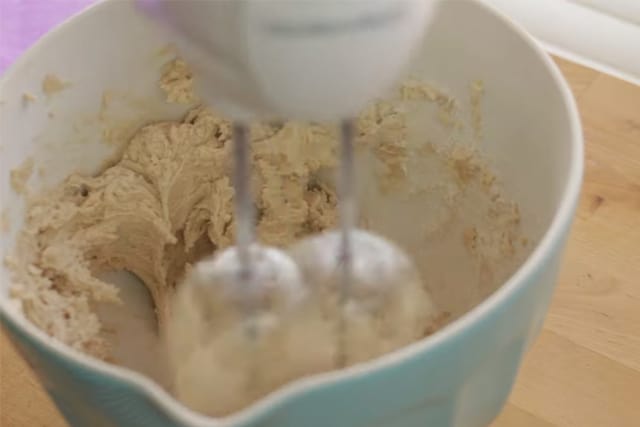
    3. In a large bowl, cream together the softened butter and brown sugar until light and fluffy.

    4. Gradually add the flour, mixing until a soft dough forms.

    Stand mixer with the cookie batter in it

    Roll and Shape:

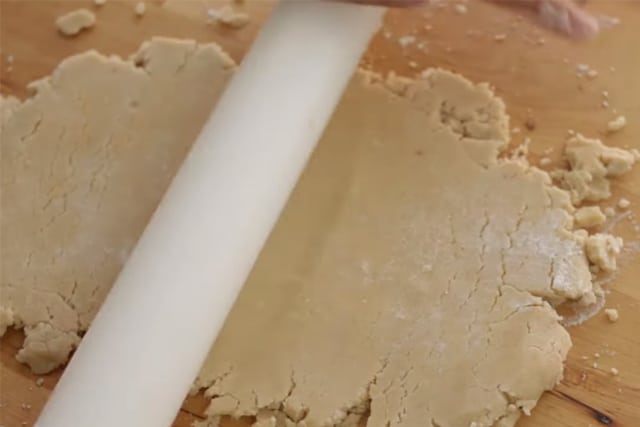
    5. Lightly flour your work surface. Roll out the dough to your desired thickness (about ¼ inch is typical). You can use a rolling pin.

    Cookie dough flattened by rolling pin

    6. Cut into shapes using a cookie cutter or slice into squares or rectangles.

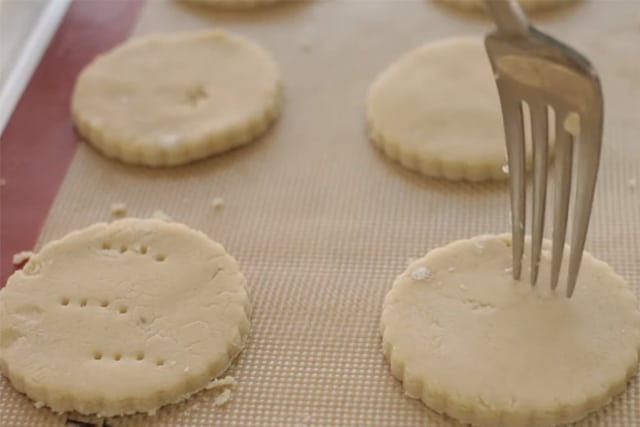
    7. Place the cookies on the prepared baking sheet, spacing slightly apart. Using a fork, gently prick the tops of each cookie to help them bake evenly.

    Fork lightly piercing the cookie dough

    Bake:

    8. Let the cookies cool on the pan for 5 minutes. Then transfer to a wire rack to cool completely.

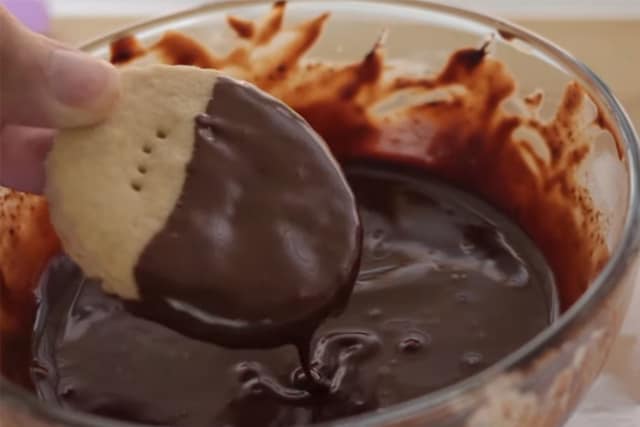
    9. Dip in chocolate if you want, and enjoy!

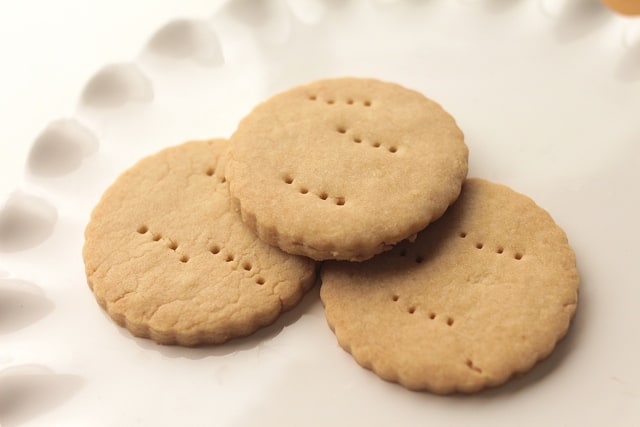
    Three pieces of Shortbread Cookies

    Substitutions & Variations

    • Ingredient Swap
      You can swap butter with vegan butter.
      Substitute brown sugar with coconut sugar.
    • Variation
      Add almond extract for extra flavor.
      Top it with nuts, sprinkles, melted chocolate or chocolate chips on top of the dough. Make it to your personal preference!
    • Mistake to Avoid
      Avoid overbaking, as it makes the cookies dry and crumbly.
    • Storage Tips
      • These cookies freeze well for up to 2 months and stay fresh in an airtight container for 1 week.
    Shortbread Cookies dipped in chocolate

    FAQs

    Do I need to chill the dough?

    Yes, you do! Chilling it will help the cookies hold their shape.

    Can I cut these into shapes?

    Absolutely! They’re sturdy enough for cookie cutters.

    Can kids help with this recipe?

    Yes, it’s simple and safe for kids to join in the fun.

    delicious shortbread cookies with chocolate ganache
    5 from 1 vote
    Print Pin Recipe

    Shortbread Cookies

    Try baking these easy, delicious and pretty Shortbread cookies dipped in a rich, chocolate ganache! This recipe uses just 3 ingredients and is so easy to bake.
    Prep Time15 minutes mins
    Cook Time25 minutes mins
    Total Time40 minutes mins
    Course: Dessert, Snack
    Cuisine: American, Scottish
    Servings: 24 cookies
    Calories: 128kcal
    Author: Lainey
    Prevent your screen from going dark

    Ingredients

    • 1 cup Unsalted butter softened
    • ½ cup packed brown sugar
    • 2¼ cups All-purpose flour

    Instructions

    Make the Dough:

    • Preheat oven to 300°F (150°C).
    • Line an ungreased cookie sheet with parchment paper or a silicone baking mat.
    • In a large bowl, cream together the softened butter and brown sugar until light and fluffy.
    • Gradually add the flour, mixing until a soft dough forms.

    Roll and Shape:

    • Lightly flour your work surface. Roll out the dough to your desired thickness (about ¼ inch is typical).
    • Cut into shapes using a cookie cutter or slice into squares or rectangles.
    • Place the cookies on the prepared baking sheet, spacing slightly apart. Using a fork, gently prick the tops of each cookie to help them bake evenly.

    Bake:

    • Bake for 25 minutes, or until the edges are lightly golden.
    • Let the cookies cool on the pan for 5 minutes, then transfer to a wire rack to cool completely.
    • Dip in chocolate if you want, and enjoy!
    Leave a Comment
    Serving: 1gCalories: 128kcalCarbohydrates: 13gProtein: 1gFat: 8gSaturated Fat: 5gPolyunsaturated Fat: 0.3gMonounsaturated Fat: 2gTrans Fat: 0.3gCholesterol: 20mgSodium: 3mgPotassium: 21mgFiber: 0.3gSugar: 4gVitamin A: 236IUCalcium: 8mgIron: 1mg

    Watch The Recipe Video!

    QR Code
    Did you make this recipe?Share it on instagram or tag @simplybakings or #simplybakings!

    You Might Also Like:

    • Peanut Butter and Jelly Cookies
    • Sunbutter Cookies - 5 Ingredients only - Nut & Dairy Free
    • Funfetti Lemon Cake Mix Cookies
    • Christmas Tree Shortbread Cookies
    • Nutella Stuffed Cookies

    Recipes for Every Moment

    Hosting last-minute guests and need a quick dessert? The best Shortbread Cookie recipe will help the cookies bake fast, look pretty, and taste great!

    Cookies, Desserts

    Graham Cracker Mug Cake

    Feb 28, 2014 · 4 Comments

    Microwave S'more Fudge Mug Cake

    Indulge in the irresistible charm of our Graham Cracker Mug Cake – it's quick, easy, and utterly addictive! Packed with rich chocolate, crunchy graham cracker crumbs, and gooey melted marshmallows, it's the perfect treat for when you're craving the taste of a s'more in a mug cake.

    Looking for more mug cake recipes? Nutella Mug Cake, Brownie Mug Cake or Protein Mug Cake.

    microwave smore mugcake

    [feast_advanced_jump_to]

    Top Tip

    Serve immediately after taking it out from the microwave. The chocolate chips tend to go back to their harder state when left out in a cold area for a while.

    Variations

    • Pumpkin Spice Mug Cake: Mix in pumpkin puree, cinnamon, nutmeg, and a pinch of cloves to the batter for a cozy autumn twist. Top with whipped cream and a sprinkle of cinnamon.
    • Banana Graham Cracker Mug Cake: Fold mashed ripe bananas into the batter and add a dash of cinnamon. Top with sliced bananas and a sprinkle of cinnamon sugar.
    • Berry Graham Cracker Mug Cake: Stir fresh or frozen berries (such as raspberries, blueberries, or strawberries) into the batter. Top with a dollop of Greek yogurt or whipped cream and a few extra berries.
    • Lemon Blueberry Graham Cracker Mug Cake: Add lemon zest and blueberries to the batter. After cooking, drizzle with a lemon glaze made from powdered sugar and lemon juice.

    Substitutions

    • Flour: Instead of all-purpose flour, you can use whole wheat flour, almond flour, coconut flour, or a gluten-free flour blend for a healthier or gluten-free option.
    • Sweetener: Replace granulated sugar with brown sugar, coconut sugar, honey, maple syrup, or a sugar substitute like stevia or erythritol. Adjust the amount based on sweetness preference.
    • Liquid: Instead of milk, you can use almond milk, coconut milk, soy milk, or any other non-dairy milk for a lactose-free option. For a richer flavor, try using buttermilk or yogurt.
    • Flavorings: Experiment with different extracts such as vanilla, almond, coconut, or peppermint for unique flavor profiles. You can also add spices like cinnamon, nutmeg, or cardamom for extra warmth.
    • Mix-ins: Get creative with mix-ins like chopped nuts (such as pecans, walnuts, or almonds), dried fruits (like raisins, cranberries, or chopped apricots), chocolate chips, or shredded coconut for added texture and flavor.
    • Toppings: Customize your mug cake with various toppings such as whipped cream, ice cream, caramel sauce, chocolate ganache, fresh fruit, crushed graham crackers, or a sprinkle of powdered sugar.
    • Graham Cracker Crumbs: If you don't have graham crackers on hand, you can substitute crushed digestive biscuits, vanilla wafers, or any other similar cookie or biscuit for the same crunchy, sweet texture. Adjust the sweetness accordingly based on the substitution.

    Storage

    • Refrigeration: If you have leftover mug cake, allow it to cool completely first. Then, transfer it to an airtight container or wrap it tightly with plastic wrap. Store it in the refrigerator for up to 2-3 days. When you're ready to eat it, you can enjoy it cold or reheat it in the microwave for a few seconds until warm. (But this recipe taste best fresh.)

    Ingredients

    Gather the ingredients for this Graham Cracker Mug Cake:

    • graham cracker crumbs
    • unsalted butter
    • chocolate chips
    • granulated sugar
    • egg
    • vanilla extract
    • all-purpose flour
    • unsweetened cocoa powder
    • baking powder
    • salt
    • mini marshmallows

    Instructions

    Once the ingredients are all ready, let's begin!

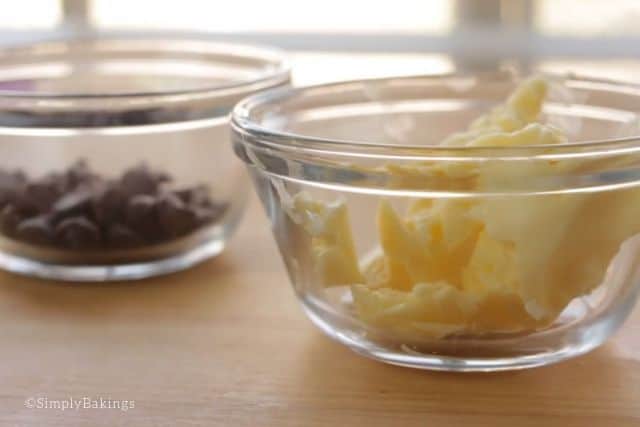
    In a small bowl, combine 3 tablespoons of butter and 1 oz of chocolate:

    chocolate chips and butter in bowls

    Melt in the microwave for 20-30 seconds, and set aside.

    melting the mini chocolate chips

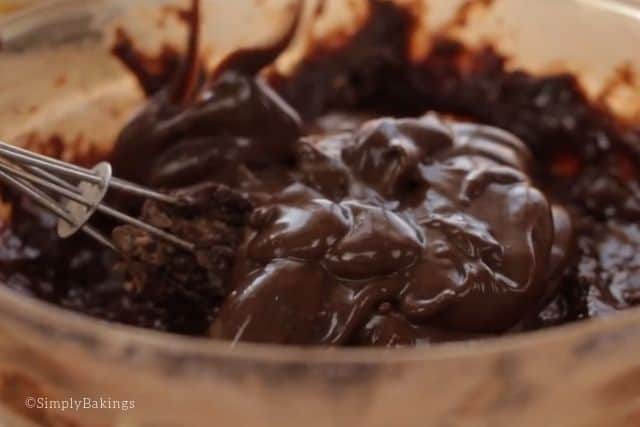
    The consistency of the chocolate should be like this:

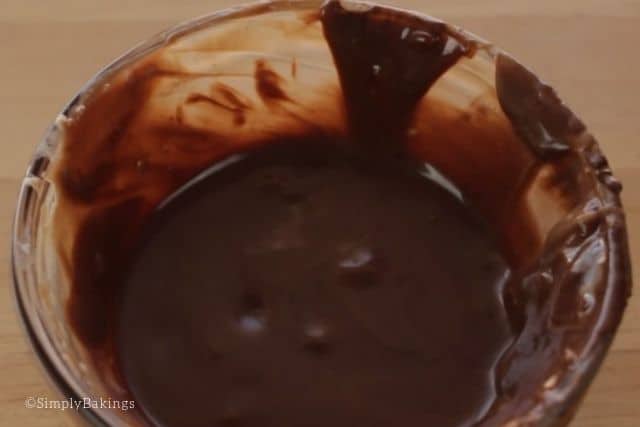
    perfectly melted chocolate chips in a bowl

    In another bowl, melt ½ tablespoon butter then add 3 tablespoons of graham cracker crumbs and stir until moistened, then press graham crumbs into the bottom of the mug.

    In another bowl, whisk the egg, sugar, and vanilla until smooth. Then add flour, cocoa, baking powder, salt, and mix until well combined:

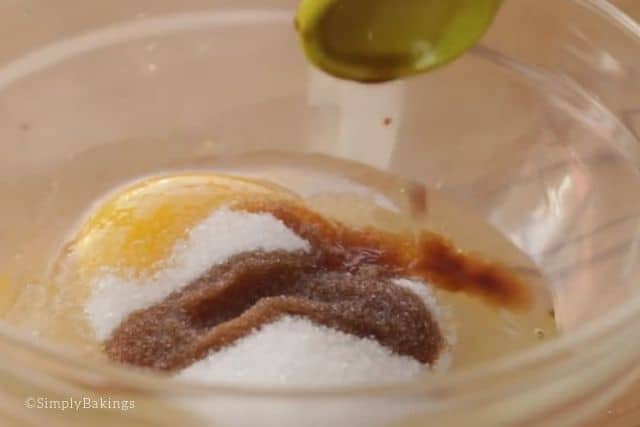
    mixing in the vanilla sugar and eggs in a bowl

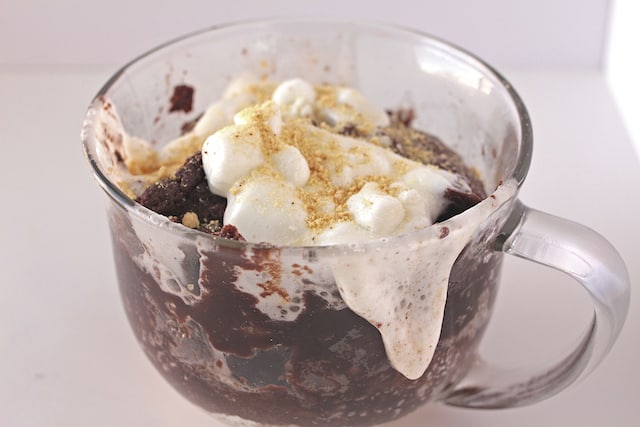
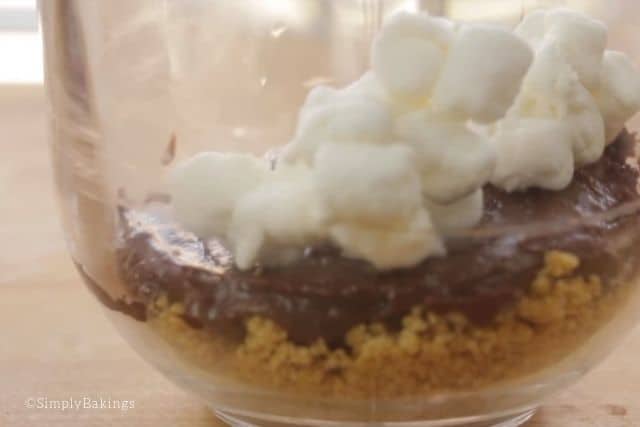
    Add half of the batter to the mug, followed by a handful of mini marshmallows. Add the remaining batter on top and microwave for 1 minute and 40 seconds. Remove and top with additional marshmallows and microwave for 15-20 seconds:

    assembling the layers of the cake

    Sprinkle with graham crumbs!

    FAQ

    Why did my mug cake turn out rubbery?

    Your mug cake may have turned out rubbery due to overcooking or using too much flour, causing it to become dense and tough.

    Why is my mug cake so gooey?

    Your mug cake might be too gooey if it was undercooked or if you added too much liquid, causing it to remain overly moist. To try to fix it: Microwave it in 15-second increments; if it exceeds 45 seconds, it may not reach the desired consistency.

    Why is my mug cake so dry?

    Your mug cake may be dry due to overcooking or using too little liquid in the batter.

    Why is my cake tough and chewy?

    Your cake may be tough and chewy due to overmixing the batter, which develops gluten and leads to a dense texture. So don't overmix!

    Graham Cracker Mug Cake in a glass mug with melted marshmallows
    5 from 2 votes
    Print Pin Recipe

    Graham Cracker Mug Cake

    Indulge your chocolate cravings with a speedy, no-bake treat: the Microwave Graham Cracker Mug Cake! This delightful dessert features the irresistible combination of gooey marshmallows, rich chocolate, and crunchy graham crackers, all in a convenient mug-sized portion.
    Prep Time5 minutes mins
    Cook Time2 minutes mins
    Total Time7 minutes mins
    Course: Dessert, Snack
    Cuisine: American, Filipino
    Servings: 1 person
    Calories: 1017kcal
    Author: Lainey
    Prevent your screen from going dark

    Ingredients

    • 3 tablespoons graham cracker crumbs
    • 3 tablespoons unsalted butter
    • ½ tablespoon unsalted butter melted
    • 1 oz chocolate chips
    • 3 tablespoons granulated sugar
    • 1 medium egg
    • 1 teaspoon vanilla extract
    • ¼ cups all purpose flour
    • 2 tablespoons unsweetened cocoa powder
    • ⅕ teaspoon baking powder
    • pinch salt
    • 1 tablespoon mini marshmallows

    Instructions

    • In a small bowl, combine 3 tablespoons butter and 1 oz of chocolate and melt in the microwave for 20-30 seconds, set aside.
    • In another bowl, melt ½ tablespoon butter then add 3 tablespoon of graham cracker crumbs and stir until moistened, then press graham crumbs into bottom of mug.
    • In another bowl, whisk egg, sugar, vanilla until smooth. Then add flour, cocoa, baking powder, salt, and mix until well combined.
    • Add half of the batter in the mug, followed by a handful of mini marshmallow. Add remaining batter on top and microwave for 1 minutes and 40 seconds. Remove and top with additional marshmallows and microwave for 15-20 seconds. Sprinkle with graham crumbs!
    Leave a Comment
    Serving: 1gCalories: 1017kcalCarbohydrates: 120gProtein: 14gFat: 57gSaturated Fat: 33gPolyunsaturated Fat: 3gMonounsaturated Fat: 13gTrans Fat: 2gCholesterol: 269mgSodium: 366mgPotassium: 400mgFiber: 6gSugar: 69gVitamin A: 1462IUCalcium: 146mgIron: 5mg

    Watch The Recipe Video!

    QR Code
    Did you make this recipe?Share it on instagram or tag @simplybakings or #simplybakings!

    There are days when I want to bake and eat a quick and tasty dessert, but I don't want to go through the whole process of baking a bunch of them.  Who's with me?!

    Well, this recipe is for you!  A quick and tasty dessert is ready in moments!  If you love to eat Graham Crackers, I suggest adding whole pieces of Graham Crackers after the first batch of marshmallows.

    Let me know how this recipe goes for you and tag me on Facebook or Twitter with a picture!

    Cake, Desserts

    Strawberry Cookies

    Feb 25, 2014 · 25 Comments

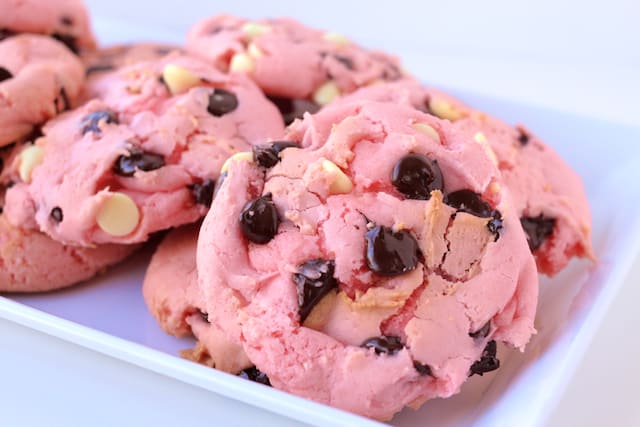
    Who knew Strawberry Cookies would be such a hit?!   After many requests to make strawberry cookies, I decided to try them out and I'm very thankful that I did.  These cookies were VERY delicious, sweet and tart at the same time.

    Looking for more cookies made with cake mix? Try my Easy Peppermint Oreo Cookies.

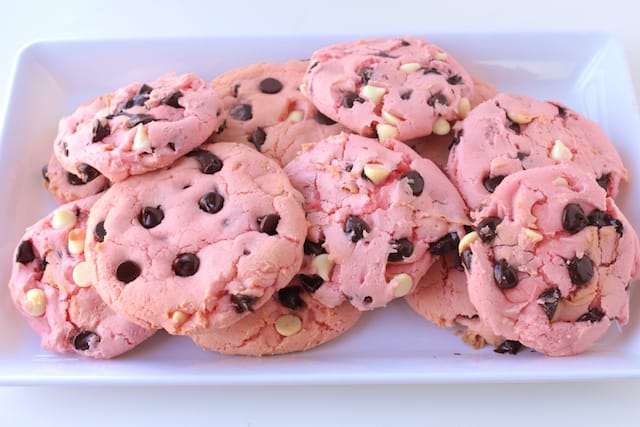
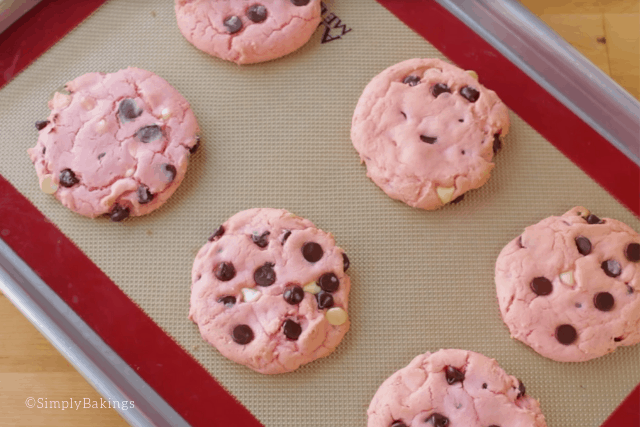
    freshly baked strawberry cookies

    Tips and Tricks for Making This Strawberry Cookies Recipe: 

    • For uniform-sized cookies, use a cookie scooper or ice cream scooper to form the dough.
    • The cookies will spread out when baking. To avoid the strawberry cookies from sticking to each side after baking, make sure to place them at least 2 inches apart.
    • If you love to have actual strawberries in your cookies, you can mix in some finely diced fresh strawberries. They would taste incredibly delicious with the chocolate chips!

    How to Make this Strawberry Cookies Recipe:

    Before starting off with the mixing process, make sure to preheat oven to 350F and grease cookie sheets or use parchment paper or a baking mat.

    Let's begin!

    In a large bowl, mix cake mix, eggs, oil, and mix until well combined:

    cake mix, eggs and oil in a bowl for strawberry cookie recipe

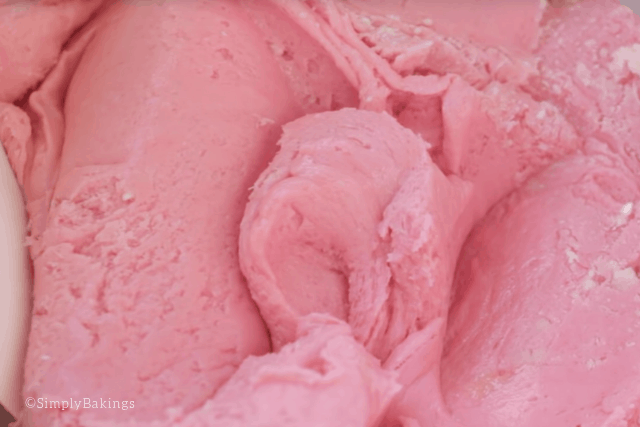
    Make sure to mix thoroughly to avoid cake mix lumps in your cookies:

    thoroughly mixed strawberry cookies dough

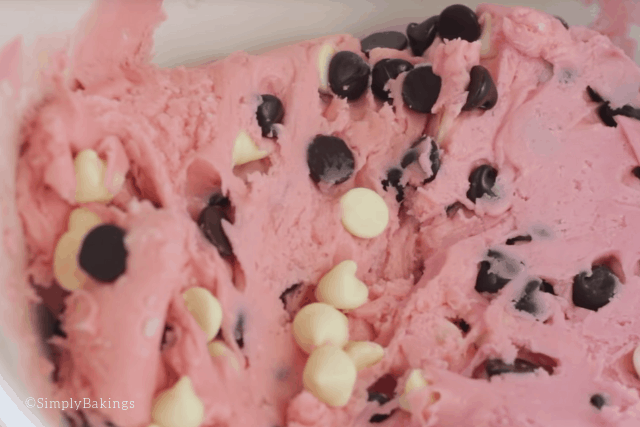
    Once everything is mixed in add the chocolate chips:

    strawberry cookie dough mixed with dark and white chocolate chips

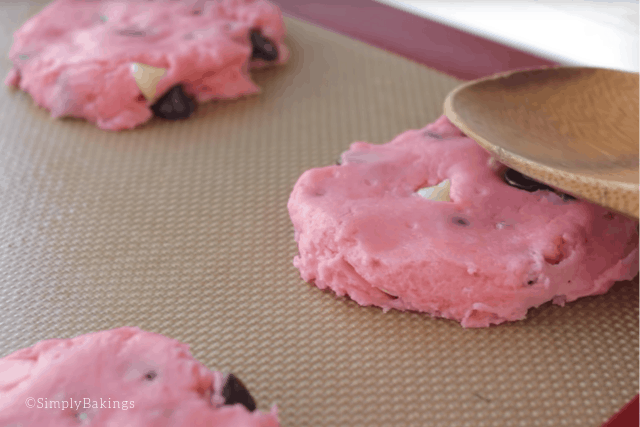
    Take 2 tablespoons of dough and form into ball and place on cookie sheet. Flatten with a wooden spoon or a cup. You can even use your hands to flatten them but just make sure your hands are clean 😉

    flattening the strawberry cookies with a wooden spoon

    Bake for 12 minutes. Here they are! Look at those delicious cracks <3

    freshly baked strawberry cookies on a baking sheet

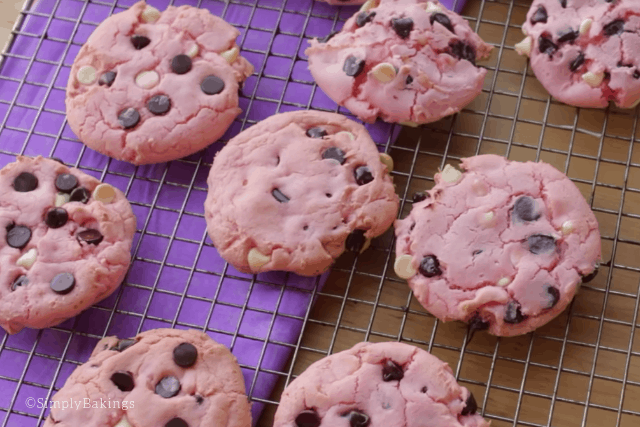
    Take the freshly baked strawberry cookies from the cookie sheet and place them on a cooling wire rack:

    freshly baked strawberry cookies on a cooling rack

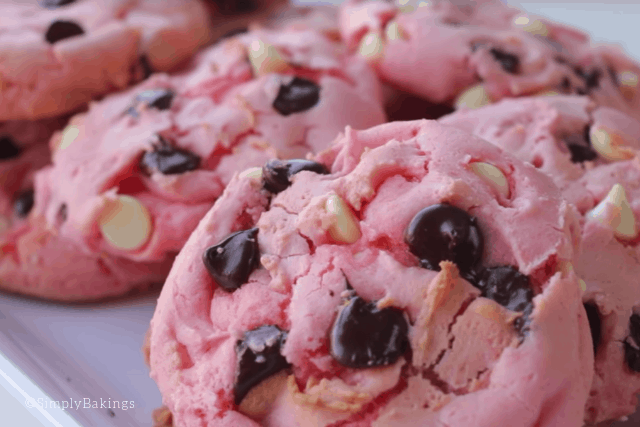
    Aren't they pretty? They are delicious, too! with just a few minutes, you can offer guests these delicious strawberry cookies. I promise you would look like a cookie pro!

    up close shot of the freshly baked strawberry cookies

    What is your favorite kind of fruit cookie? Let me know in the comments!

    Everyplate.com

    Frequently Asked Questions for the Strawberry Cookies Recipe:

    Q: Can I make the dough the night before baking them?

    A: Sure, you can. Just cover it with saran wrap and chill it. Take it to room temperature for at least 30 minutes before baking them.

    Q: I love marshmallows in my cookies. Can I mix in some?

    A: Definitely! That would add to the sweetness and would make the strawberry cookies taste so much better!

    Q: How many cookies does this recipe make?

    A: You can make about 12 to 15 cookies with this recipe, depending on the size of your cookies.

    Q: I want to make 4 dozens of this cookie. Can I tweak this recipe to make that?

    A: Sure, for sure! Just make the ingredients quadruple to make several cookies!

    Step by Step Video:

    freshly baked strawberry cookies on a cooling rack
    5 from 3 votes
    Print Pin Recipe

    Strawberry Cookies

    Prevent your screen from going dark

    Ingredients

    • 1 box strawberry cake mix
    • 2 egg
    • ⅓ cup oil
    • 1 cup chocolate chips

    Instructions

    • Preheat oven to 350 degrees F and grease cookie sheets or use parchment paper or baking mat.
    • In a large bowl, mix cake mix, eggs, oil and mix until well combined. Once everything is mixed in add the chocolate chips
    • Take 2 tablespoons of dough and form into ball and place on cookie sheet. Flatten with a wooden spoon or a cup.
    • Bake for 12 minutes.
    Leave a Comment

    Watch The Recipe Video!

    QR Code
    Did you make this recipe?Share it on instagram or tag @simplybakings or #simplybakings!

    NEVER MISS A RECIPE!

    PINTEREST / FACEBOOK / INSTAGRAM / TWITTER

    If you’ve tried this or any other of my recipes, don’t forget to rate the recipe and to leave me a comment. I love hearing from you!

    Cookies, Desserts

    Reese's Peanut Butter Cake

    Feb 22, 2014 · 3 Comments

    the best Reese's Peanut Butter Cake

    This Reese's Peanut Butter Cake is definitely a decadent cake perfect for any party! It's made with creamy peanut butter, vanilla cake mix, and Reese's chocolates. Easy to bake, easy to frost, and easy to decorate. This cake is such a winner!

    Reese's Peanut Butter Cake

    Tips and Tricks for Making This Reese's Peanut Butter Cake Recipe: 

    • For a delicious textured frosting, you can mix in peanut butter chips and frost!
    • When making or mixing the peanut butter frosting, it is best to use a stand mixer since it is a creamy frosting and might be a bit hard to mix when using a wire whip or handheld mixer.
    • Cool the cake completely before slicing it horizontally. It will prevent the cake from breaking and crumbling.

    How to Make this Reese's Peanut Butter Cake Recipe:

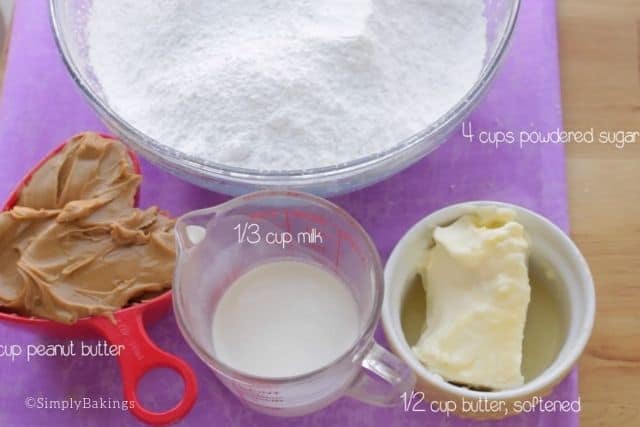
    Here is a quick look at the ingredients for Reese's Peanut Butter Cake:

    • creamy peanut butter
    • softened butter, unsalted
    • eggs
    • vanilla cake mix
    • water
    • peanut butter
    • powdered sugar
    • milk
    Reese's Peanut Butter Cake ingredients

    Preheat oven to 325 degrees F. Grease two 9 inch round cake pans.

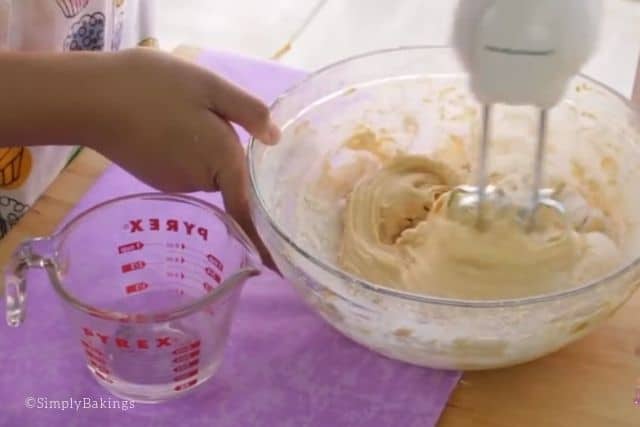
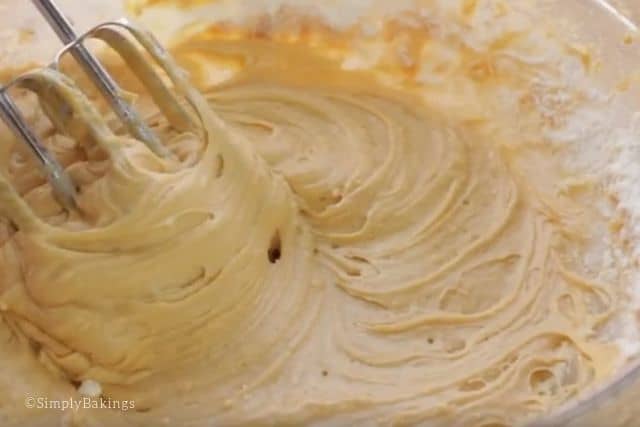
    In a large bowl, combine peanut butter, butter, and cream until light and fluffy:

    mixing the dry ingredients for the Reese's Peanut Butter cake recipe

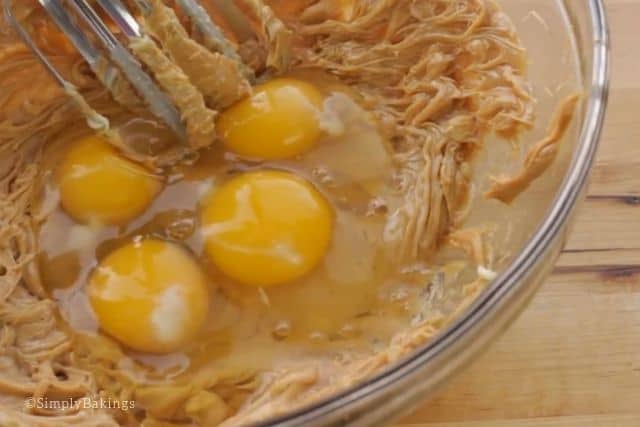
    Add eggs and mix:

    mixing the eggs to the batter using a handheld mixer

    Alternately add cake mix and water until combined:

    adding the cake mix to the batter mixture

    Mix well until the cake batter looks like this:

    mixed batter of Reese's Peanut Butter Cake

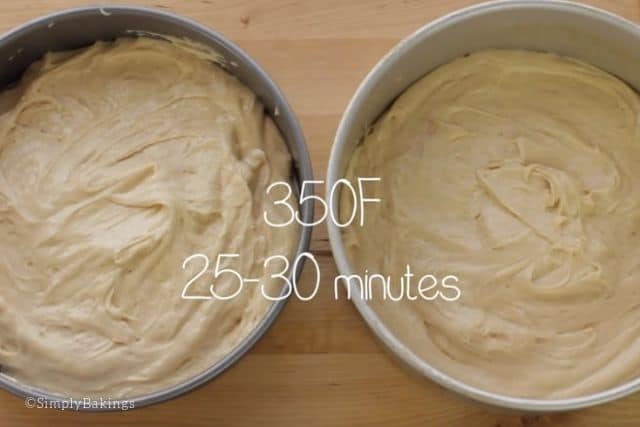
    Pour batter into the cake pan and bake for 25-30 minutes or until a toothpick comes out clean:

    ready to bake Reese's Peanut Butter Cake

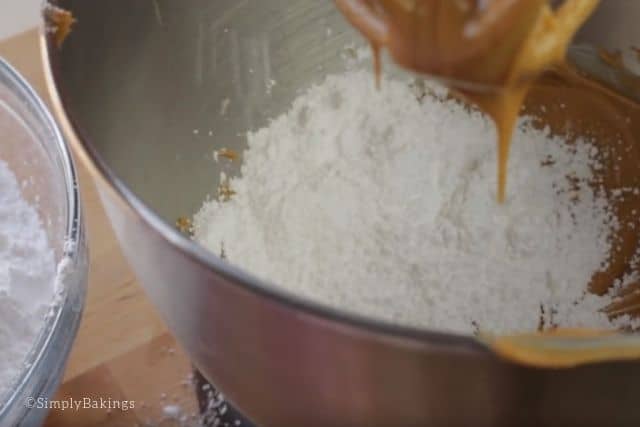
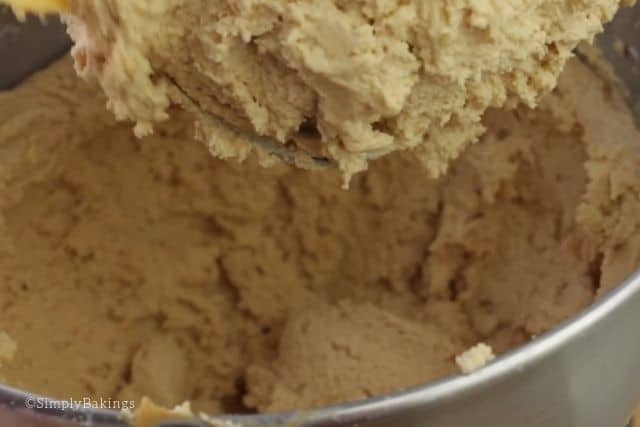
    To make the frosting, in a stand mixer combine 1 cup of peanut butter and butter and cream until light and fluffy. Alternately add powdered sugar and milk until you get the frosting consistency you want:

    peanut butter frosting of the Reese's Peanut Butter Cake

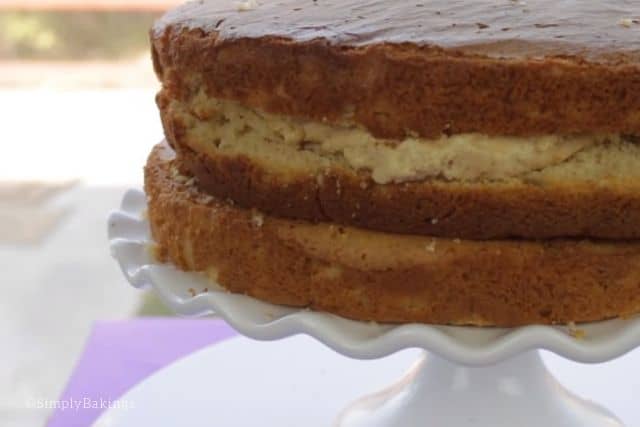
    After cooling the cake completely, you can slice the cake horizontally and put the peanut butter frosting in each layer:

    ready to frost Reese's Peanut Butter cake

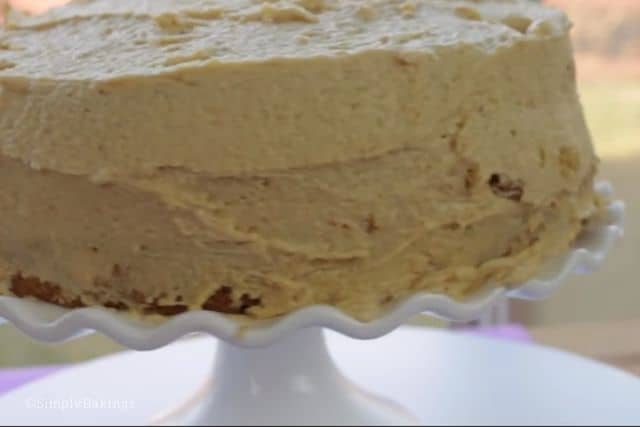
    After filling the cake, frost the cake with the rest of the peanut butter frosting, like so:

    frosted Reese's Peanut Butter Cake on a cake stand

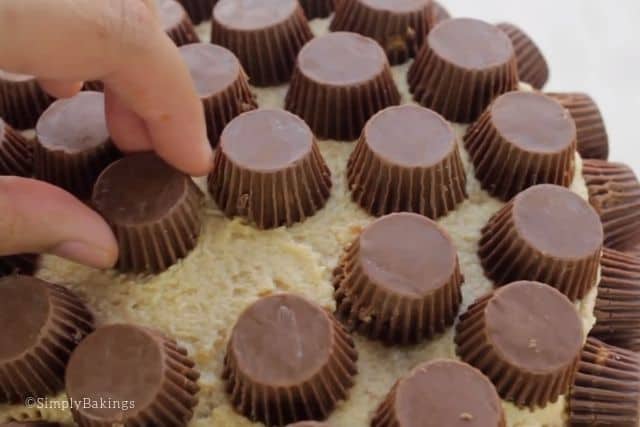
    This is my favorite part! Decorating this decadent cake with Reese's chocolates!

    decorating the cake with Reese

    Frequently Asked Questions for the Reese's Peanut Butter Cake Recipe:

    Q: Can I make this cake with a different cake mix?

    A: Yes sure you can. You can use other variants of cake mixes.

    Q: What other frostings can be used for this cake?

    A: This Reese's Peanut Butter Cake can be frosted with chocolate ganache and other decadent frostings.

    Q: Can I make this recipe into cupcakes instead?

    A: Yes for sure. Just use cupcake pans instead of the usual cake pan.


    Looking for more chocolate cake recipes? Try these:

    •  Zebra Brownie Cake
    • Chocolate Mug Cake with Protein
    • Vegan Chocolate Cake
    • Snickers Bites Cheesecake
    the best Reese's Peanut Butter Cake
    No ratings yet
    Print Pin Recipe

    Reese's Peanut Butter Cake

    The best Reese's Peanut Butter Cake loaded with your favorite Reese chocolates and peanut butter, all in one delicious cake recipe!
    Author: Lainey
    Prevent your screen from going dark

    Ingredients

    • ½ cup creamy peanut butter
    • ½ cup butter softened
    • 4 eggs
    • 1 package vanilla cake mix
    • ⅔ cup water
    • 1 cup peanut butter
    • ½ cup butter softened
    • 4 cups powdered sugar
    • ⅓ milk

    Instructions

    • Preheat oven to 325 degrees F. Grease two 9 inch round cake pans.
    • In a large bowl, combine peanut butter, butter and cream until light and fluffy. Add eggs and mix. Alternately add cake mix and water until combined.
    • Pour batter into cake pan and bake for 25-30 minutes or until toothpick comes out clean.
    • To make frosting, in a stand mixer combine 1 cup peanut butter and butter and cream until light and fluffy. Alternately add powdered sugar and milk until you get the frosting consistency you want.
    Leave a Comment

    Watch The Recipe Video!

    QR Code
    Did you make this recipe?Share it on instagram or tag @simplybakings or #simplybakings!

    NEVER MISS A RECIPE!

    PINTEREST / FACEBOOK / INSTAGRAM / TWITTER

    If you’ve tried this or any other of my recipes, don’t forget to rate the recipe and to leave me a comment. I love hearing from you!

    Cake, Desserts, Summer Desserts

    S'mores Cookies

    Feb 18, 2014 · 9 Comments

    delicious and freshly baked s'mores cookies on a white plate

    If you are craving chocolate and cookies at the same time, try baking these deliciously textured S'mores cookies. It is chewy, soft, and rich in flavor which kids and adults will surely love!

    s'mores cookies on a white plate

    Five days later, these cookies are still soft and chewy!!  Can you believe it?!  Usually, if I don't add the secret ingredient the cookie does not stay soft but becomes very hard.  Anyway, I think the reason these cookies stayed soft and chewy was because of the marshmallows!  What do you think?

    closeup shot of s'mores cookies

    Tips and Procedures:

    • Before mixing the dry ingredients like all-purpose flour, baking soda, and brown sugar, sift them individually. This easy but very important step would make your cookies nice and evenly textured. It wouldn't be fun biting into a lump of flour in between 🙂
    • Try your best to place the mini marshmallows in the middle part of each cookie to avoid them from melting and spilling out of each cookie.
    • Add dried fruits if you love more texture to your S'mores cookies. Just make sure not to add too much.
    • Make sure to not put the raw cookie dough balls too near each other. Spacing them out properly will prevent the cookies from sticking together after baking.

    How to Make S'mores Cookies:

    These are the ingredients that you will need:

    • butter, softened
    • granulated sugar
    • brown sugar
    • eggs
    • vanilla extract
    • all-purpose flour
    • baking soda
    • salt
    • graham crackers crumbs
    • graham crackers, crushed
    • Hershey bars, chopped
    • mini chocolate chips
    • mini marshmallows

    Preheat oven to 375 degrees F, grease cookie sheets or use parchment paper or a baking mat.

    In a large bowl, add butter, granulated sugar, and brown sugar, and mix until light and fluffy:

    mixing butter and sugar in a bowl using a handheld mixer

    Add eggs mix, then add vanilla extract and mix until well combined:

    adding eggs and vanilla extract to the cookie batter

    In a medium-sized bowl, add all-purpose flour, baking soda, salt, and mix until well combined:

    mixing the dry ingredients

    Add to wet ingredients and mix. Then add graham crackers, and mix well. Now you can add Hershey bars, mini chocolate chips, and marshmallows, and mix until the ingredients are well combined:

    adding the graham to the cookie batter

    Remember that I mentioned a secret ingredient above? Here they are! The mini marshmallows! 🙂

    adding the marshmallows and hershey chocolate to the cookie dough

    Place the cookie dough balls on a baking mat, like so:

    ready to bake s'mores cookies

    Flatten using anything you have in your kitchen. For me, it was this random mason jar that I have 🙂

    flattening the cookies with a mason jar

    Bake for 13-15 minutes or until golden brown. Look at how yummy these cookies looked! But, you can't eat them yet!

    freshly baked S'mores cookies on a baking mat

    Let them cool down completely, or if you really can't wait, eat them right away, lol! I know it's so hard to resist when the S'mores cookies look this good. 😉

    delicious s'mores cookies on a white plate

    Frequently Asked Questions:

    Q: Can I freeze this cookie dough a few days before baking?

    A: Sure, you can. Just make sure to thaw it before baking.

    Q: How many cookies did this recipe make?

    A: I have made about 24 cookies using this recipe.

    Q: Can I make big cookies out of this recipe?

    A: I do not advise making very large cookies as it will affect the cooking time and also the quality of the cookies.


    More delicious and easy cookie recipes:

    • Rocky Road Popsicles – 5 Ingredients ONLY
    • NO BAKE White Chocolate Cookies
    • Cookie Dough Bites
    • Fruity Pebble Marshmallow Cookies
    • Caramel Salted Chocolate Cookies
    delicious and freshly baked s'mores cookies on a white plate
    5 from 1 vote
    Print Pin Recipe

    S'mores Cookies

    These S'mores cookies are chewy, soft, gooey, and rich in chocolate flavor, surely in every bite!
    Author: Lainey
    Prevent your screen from going dark

    Ingredients

    • 1 cup butter softened
    • ⅓ cup granulated sugar
    • ⅓ cup brown sugar
    • 2 eggs
    • 2 teaspoons vanilla extract
    • 2 cups all purpose flour
    • 1 teaspoon baking soda
    • 1 teaspoon salt
    • 1 cup graham crackers crumbs
    • ½ cup graham crackers crushed
    • 3 hershey bars chopped
    • ½ cup mini chocolate chips
    • 1 ½ cups mini marshmallows

    Instructions

    • Preheat oven to 375 degrees F, grease cookie sheets or use parchment paper or baking mat.
    • In a large bowl, add butter, granulated sugar, brown sugar and mix until light and fluffy. Add eggs mix, then add vanilla extract and mix until well combined.
    • In a medium sized bowl, add all purpose flour, baking soda, salt and mix until well combined. Add to wet ingredients and mix.
    • Add graham crackers, mix, then add hershey bars, mini chocolate chips, marshmallows, and mix until the ingredients are well combined.
    • Bake for 13-15 minutes or until golden brown.
    Leave a Comment

    Notes

    TIP: Make sure the marshmallows are toward the center of the cookie or else it will liquidfy on the cookie sheet.
    QR Code
    Did you make this recipe?Share it on instagram or tag @simplybakings or #simplybakings!

    NEVER MISS A RECIPE!

    PINTEREST / FACEBOOK / INSTAGRAM / TWITTER

    If you’ve tried this or any other of my recipes, don’t forget to rate the recipe and to leave me a comment. I love hearing from you!

    Cookies, Desserts

    Reese's Cookies Recipe

    Feb 11, 2014 · 17 Comments

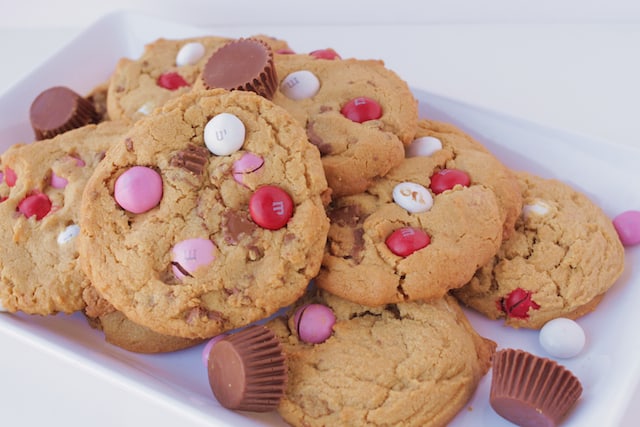
    freshly baked Reese's cookies on a white plate

    These Reese's Cookies Recipe are soft, gooey, and rich in chocolate and peanut butter flavor in every bite! You will love the combination of flavors plus the sumptuous texture that the m&m's and peanut butter cups have.

    If you want more Reese-flavored recipes like this, try my Reese's Peanut Butter Cake and 3-ingredients Peanut Butter Fudge Condensed Milk recipe on this site.

    pb reese's cookies on a white plate
    [feast_advanced_jump_to]

    Ingredients

    These are the ingredients that you will need:

    • butter softened
    • white sugar
    • brown sugar
    • large egg
    • vanilla extract
    • creamy peanut butter
    • all-purpose flour
    • baking soda
    • baking powder
    • salt
    • peanut butter M&M's
    • chopped Reese's cups

    See the recipe card for quantities.

    Instructions

    Preheat the oven to 350 degrees F. Grease a cookie sheet; use parchment paper or a baking mat.

    In a large bowl, add butter, white and brown sugar, eggs, vanilla extract, peanut butter, and cream with a beater:

    mixing the peanut butter, sugar and butter in a bowl

    In a medium-sized bowl, add all-purpose flour, baking soda, baking powder, and salt, then mix with a whisk:

    mixing dry ingredients together

    Add the dry ingredients to the wet ingredients and mix until combined:

    mixing wet and dry ingredients together

    Add M&M's and Reese's cups and mix with a wooden spoon:

    mixing chocolate and candies to the cookie dough

    Flatten each cookie using something that has a flat surface. I used my handy-dandy mason jar to do this. Place in the oven for 12–15 minutes, or until golden brown:

    flattening each cookie using a mason jar

    And, tadaaahhh! These are freshly baked Reese's cookies. Simply Bakers, I tell you, these cookies smell so good!

    freshly baked pb reese's cookies

    You can find every flavor you love when it comes to sweet candies, peanut butter, and chocolate!

    So, what are you waiting for? Get your baking tools and ingredients and make your own Reese's cookies at home. I am sure your family will love it!

    delicious PB Reese's cookies and peanut butter cups on a white plate

    Substitutions

    • Peanut Butter Flavor: Instead of chopped Reese's Peanut Butter Cups, you can substitute peanut butter chips for the peanut butter flavor in another form.
    • Chocolate Flavor: You can substitute Nutella for the chopped Reese's Peanut Butter Cups to create a different chocolate and nut flavor. Swirl it into the batter before baking for a rich, hazelnut flavor.
    • Dried Fruit: If you want a healthier or alternative flavor profile, you can replace the Reese's Peanut Butter Cups with chopped dried fruit, such as cranberries, cherries, or apricots. This gives the cookies a chewy texture and hints of natural sweetness.

    Variations

    • Oatmeal Reese's Cookies: For more texture and flavor, add 1 cup of old-fashioned oats to the dough. You can also use a little less flour to compensate for the oats.
    • Double Chocolate Reese's Cookies: For an extra chocolatey treat, mix in 1 cup of chocolate chips and chopped Reese's Peanut Butter Cups.
    • Chunky Reese's Cookies: Instead of chopping Reese's Peanut Butter Cups, use Reese's Miniatures or Reese's Pieces to create larger, chunkier peanut butter pockets.

    Equipment

    In making this easy and delicious Reese's Cookies recipe, you'll need the following things:

    • oven
    • large bowl
    • medium-sized bowl
    • parchment paper or baking mat
    • beater
    • wooden spoon

    Feel free to use whatever is available in your kitchen as a substitute for some of the items listed above.

    Storage

    • After the cookies have cooled, store them in an airtight container at room temperature for 2-3 days, depending on the weather where you are.
    • Place a piece of parchment paper between each layer of cookies to maintain their texture and flavor.
    • Avoid storing them in direct sunlight or near heat sources, as this might cause them to spoil or melt.

    Top Tip

    • Before mixing the dry ingredients, like all-purpose flour, baking soda, and brown sugar, sift them individually. This easy but very important step would make your cookies nice and evenly textured. It wouldn't be fun biting into a lump of flour in between 🙂
    • Make sure not to put the raw cookie dough balls too close to each other. By spacing them out properly, it will prevent the cookies from sticking together after baking.

    FAQs

    Can I freeze this cookie dough a few days before baking?

    Sure, you can. Just make sure to thaw it before baking.

    Can I make big cookies out of this recipe?

    I do not advise making very large cookies, as it will affect the cooking time and the quality of the cookies.

    How many days can I keep this cookie at room temperature?

    You can keep these Reese's cookies at room temperature for 2–3 days, depending on the weather where you are located. Just keep the cookies in an airtight container.


    More delicious and easy cookie recipes:

    • Peanut Butter Sprinkle Cookies
    • Easy Sugar Cookies
    • Mini Chocolate Chip Cookies | VEGAN & GLUTEN FREE
    • Red Velvet Cookies
    • Nutella Peanut Butter Cookies
    • S’mores Cookies
    • Peanut Butter Cookies (Flourless)
    freshly baked pb reese's cookies on a white plate
    5 from 3 votes
    Print Pin Recipe

    Reese's Cookies Recipe

    These Reese's cookies are soft, gooey, and rich in chocolate and peanut butter flavor. You will love the combination of flavors plus the sumptuous texture that the M&M's and peanut butter cups have in this easy cookie recipe. Check this out!
    Prep Time10 minutes mins
    Bake Time15 minutes mins
    Total Time25 minutes mins
    Course: Dessert, Snack
    Cuisine: American, Filipino
    Servings: 20 cookies
    Calories: 2293kcal
    Author: Lainey
    Prevent your screen from going dark

    Ingredients

    • ½ cup butter softened
    • ½ cup white sugar
    • ½ cup brown sugar
    • 1 large egg
    • 2 teaspoons vanilla extract
    • ½ cup creamy peanut butter
    • 1 ¼ cups all purpose flour
    • ½ teaspoon baking soda
    • ½ teaspoon baking powder
    • 1 teaspoon salt
    • 1 package peanut butter M&M's
    • handful chopped Reese's cups

    Instructions

    • Preheat the oven to 350 degrees F. Then, grease the cookie sheet, and use parchment paper or a baking mat.
    • In a large bowl, add butter, white and brown sugar, an egg, vanilla extract, peanut butter, and cream with a beater.
    • In a medium-sized bowl, add all-purpose flour, baking soda, baking powder, and salt and mix with a whisk.
    • Add dry ingredients to wet ingredients and mix until combined.
    • Add M&M's, and Reese's cups and mix with a wooden spoon.
    • Place in the oven for 12–15 minutes, or until golden brown and transfer to cookie rack to cool completely.
    Leave a Comment
    Calories: 2293kcalCarbohydrates: 353gProtein: 55gFat: 76gSaturated Fat: 17gPolyunsaturated Fat: 18gMonounsaturated Fat: 36gTrans Fat: 0.02gCholesterol: 177mgSodium: 8446mgPotassium: 1276mgFiber: 10gSugar: 128gVitamin A: 438IUVitamin C: 0.01mgCalcium: 462mgIron: 11mg

    Watch The Recipe Video!

    QR Code
    Did you make this recipe?Share it on instagram or tag @simplybakings or #simplybakings!

    I am actually a big fan of peanut butter, especially peanut butter M&M's! In addition, my favorite thing about this recipe was that I added all the wet ingredients to the bowl and creamed them all at once! I'm all about quick and easy recipes, so this would be the recipe if you are looking to make and bake in under 20 minutes!

    Cookies, Desserts

    Strawberry Pocky Cake

    Feb 8, 2014 · 6 Comments

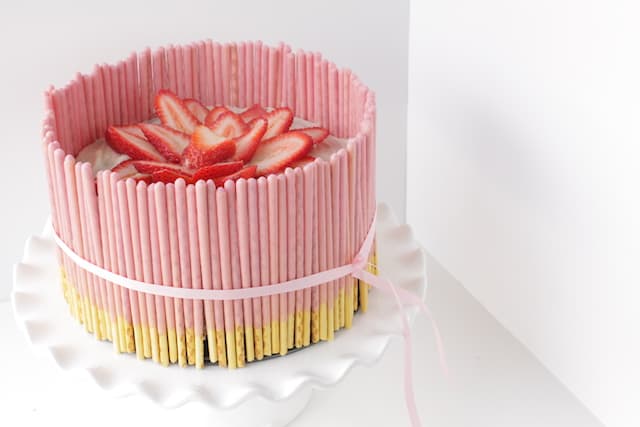
    strawberry pocky cake on a cake stand

    Valentines Day is exactly one week from today, February 7.  What are you making?  I am willing to share with you one of my favorite and easiest cake recipe yet. This Strawberry Pocky Cake is such an easy cake to make and the decorating part is equally easy and fun to do!

    strawberry pocky cake

    Tips and Tricks for Making This Strawberry Pocky Cake Recipe: 

    • If you are a chocolate lover, decorate the top of this Strawberry Pocky Cake with chocolate-dipped strawberries. Yum!
    • For a more rich taste, you can slice the cake horizontally with a serrated knife and fill with strawberry jams in between the laters!

    How to Make this Strawberry Pocky Cake Recipe:

    Gather the ingredients for this Strawberry Pocky Cake. Once the ingredients are all ready, let's begin!

    • cream cheese, softened
    • butter
    • vanilla extract
    • powdered sugar, sifted

    For the heart shapes, I used a strawberry cake box mix and my vanilla cake recipe which you can find here.

    This recipe is very easy to make,  basically just follow the steps.  However the cream cheese frosting was to die for, it goes very well with the strawberries!  I hope you have a wonderful Valentine's day!

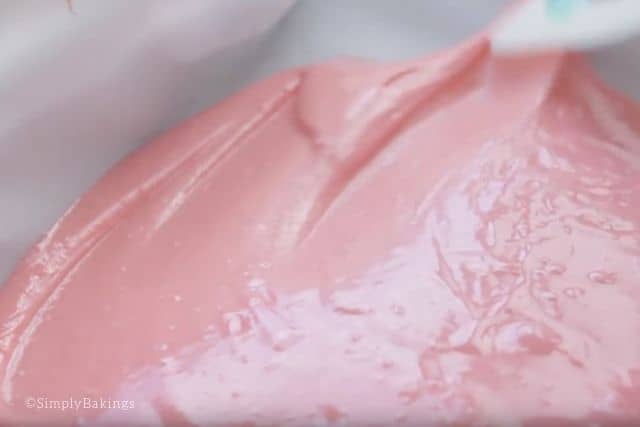
    Here is the pink cake mix that I made or just mixed. This is ready for baking. We will use this for the pink cake hearts later:

    pink cake batter for strawberry pocky cake

    After cooling the cake for 15-20 minutes, you can cut out the cake hearts:

    cutting out hearts from the pink cake

    After cutting them out from the pink cake, I let them stay in the fridge for about 10 minutes just to let them become firm before putting them in the white cake mix batter:

    pink cake hearts cutouts on a plate

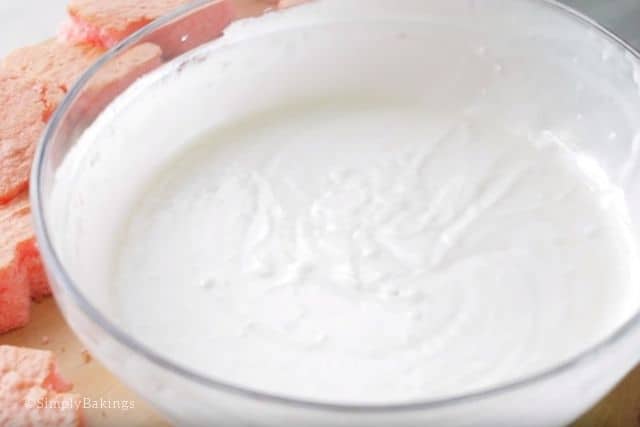
    Follow the instructions on the cake box and tadaaaah! You now have your white cake mix batter, ready for baking!

    white cake batter for strawberry pocky cake batter
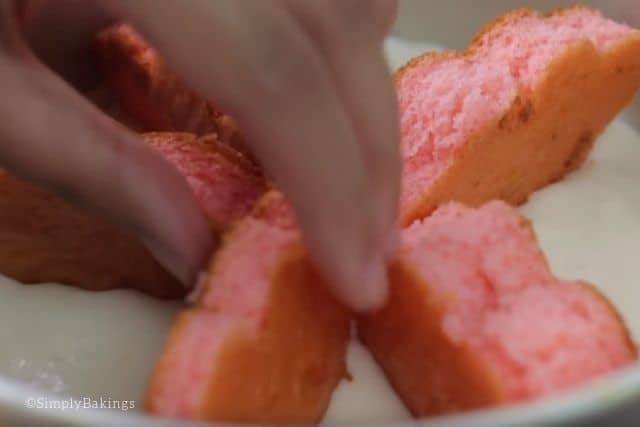
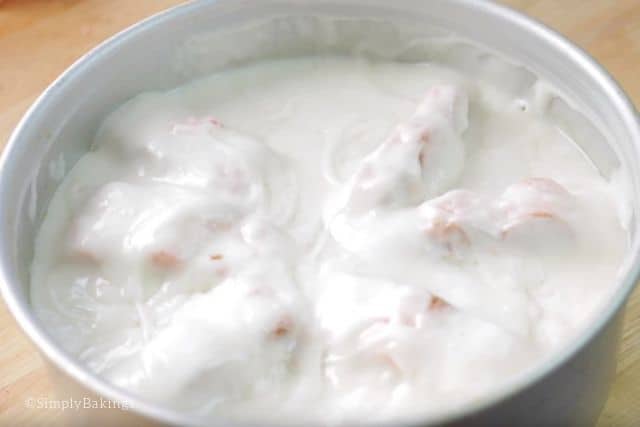
    placing the pink cake hearts on the white cake batter

    Add the white cake batter to the cake pan and place the cake hearts on the cake batter, like this:

    You can put as many cake hearts as you want. Here I put six cake hearts <3 Once that is finished, add the rest of the cake batter:

    Don't worry if the cake batter did not cover up all the cake hearts, the cake will rise 😉

    ready to bake strawberry pocky cake

    While waiting for the cake to get baked, let's make the frosting!

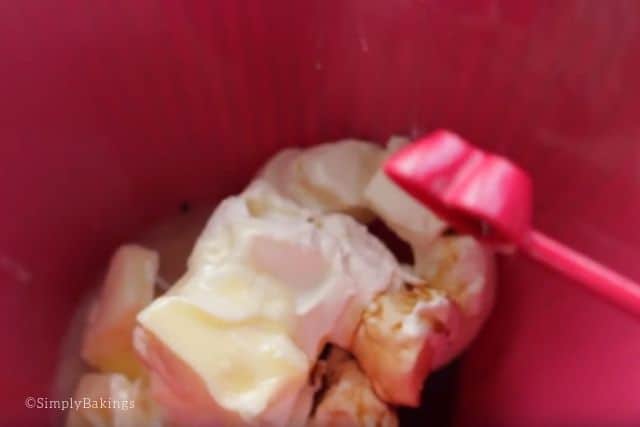
    Into a large bowl, add the softened butter and vanilla extract:

    adding vanilla to the cream cheese for the cream cheese frosting

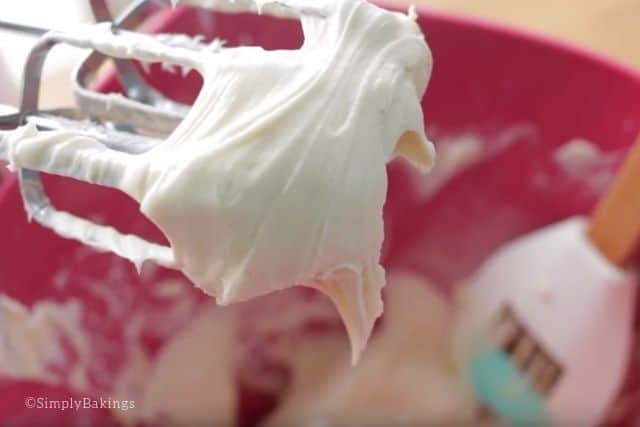
    Slowly add the powdered sugar while mixing it with a handheld mixer or a stand mixer until it reaches a creamy and fluffy consistency. Set aside:

    ready to use cream cheese frosting for the strawberry pocky cake

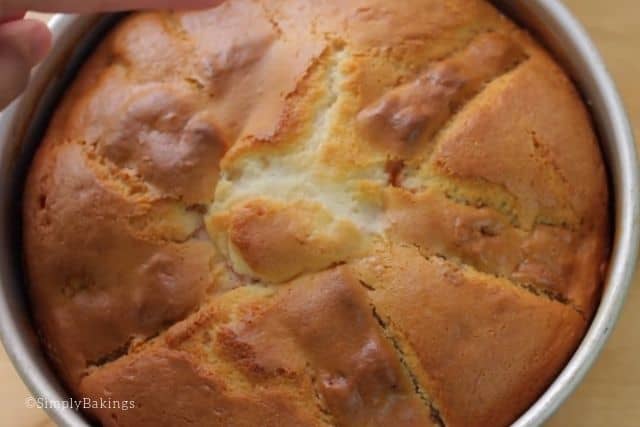
    Here it is! The cake is ready to be decorated after cooling it for 15-20 minutes:

    freshly baked cake for strawberry pocky cake

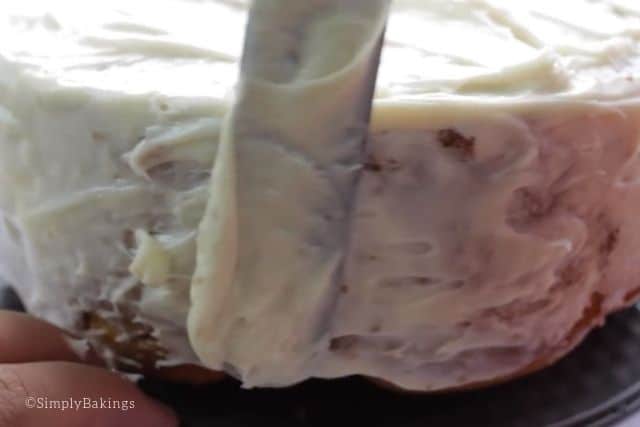
    Frost the cake with the cream cheese frosting! This part is exciting and it's okay for it not to be perfect 😉

    frosting the cake with cream cheese frosting

    Prepare your strawberry pocky sticks and fresh sliced strawberries 🙂

    strawberry pocky sticks
    sliced fresh strawberries

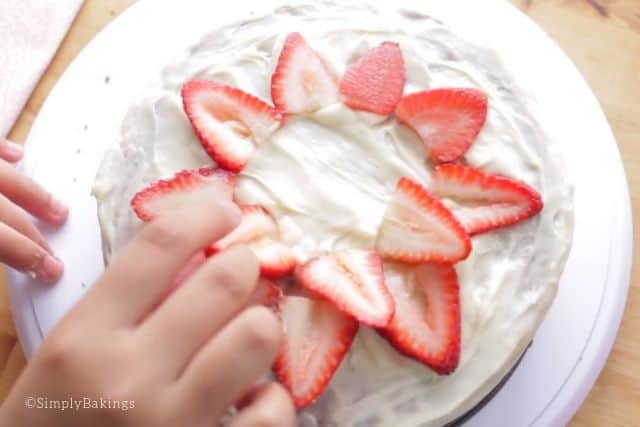
    Decorate the cake as you like. This is what I had in mind when I was making the cake <3

    decorating the cake with sliced strawberries

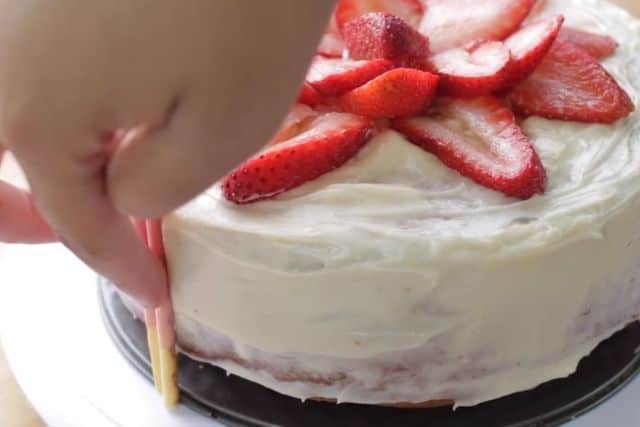
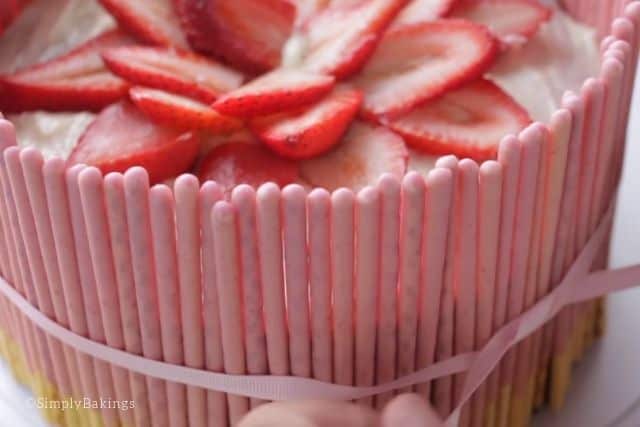
    After decorating the cake top, place the strawberry pocky sticks around the cake. I know this will come out so pretty!

    decorating the cake with strawberry pocky sticks

    We are almost done!!!!

    almost done decorating with strawberry pocky sticks

    To secure the pocky sticks, I tied a pink ribbon around the cake and tied it in a cute way 🙂

    tying the strawberry pocky cake with a pink ribbon

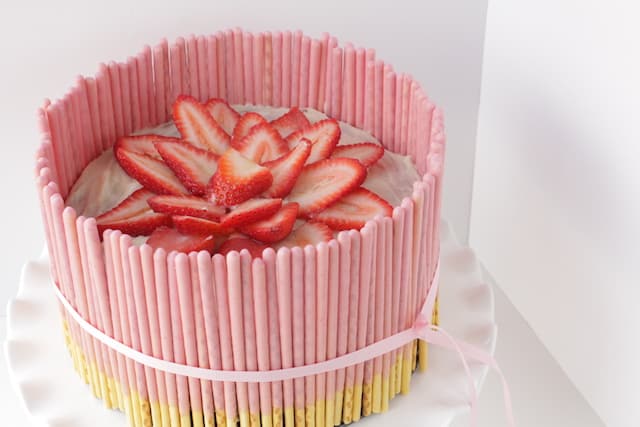
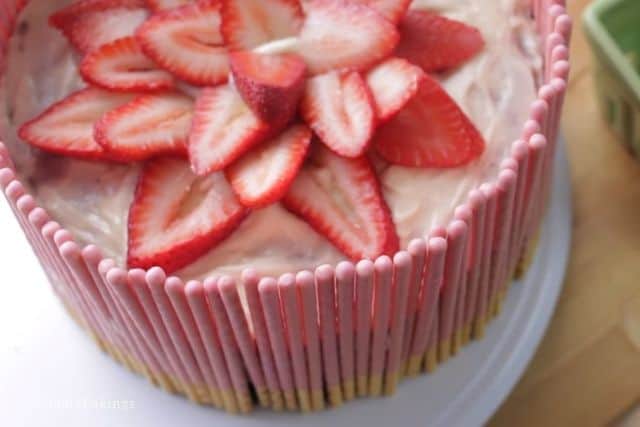
    Here is a top view of the cake. I AM SO IN LOVE with this cake! It took me a while to slice it, lol!

    top view of the strawberry pocky cake

    Here are more strawberry dessert recipes you will surely love:

    • No Bake Strawberry Float
    • Strawberry Bundt Shortcake
    • White Chocolate Strawberry Pie
    • Strawberry Greek Yogurt Cake

    Frequently Asked Questions for the Strawberry Pocky Cake Recipe:

    Q: How many servings would this recipe do?

    A: This delicious and easy pie recipe could make six to 8 slices, depending on how big your slices are.

    Q: Can I use sweetened strawberries instead of fresh ones?

    A: Yes you can. But obviously, that would make this dessert much sweeter than it already is.

    Q: Can I use any brand of cake mix?

    A: Yes, you can use any brand, whatever is available in your area or any of your favorite cake mix brands.

    strawberry pocky cake on a cake stand
    No ratings yet
    Print Pin Recipe

    Cream Cheese Frosting

    This is an ultimate Valentine's day cake and the easiest you will ever make!
    Author: Lainey
    Prevent your screen from going dark

    Ingredients

    • 1 8 oz cream cheese, softened
    • ¼ cup butter
    • 1 ½ teaspoon vanilla extract
    • 2-3 cups powdered sugar sifted

    Instructions

    • In a large mixing bowl add cream cheese, butter, vanilla extract, and beat until creamy.
    • Slowly add powdered sugar 1 cup at a time.
    Leave a Comment

    Watch The Recipe Video!

    QR Code
    Did you make this recipe?Share it on instagram or tag @simplybakings or #simplybakings!

    NEVER MISS A RECIPE!

    PINTEREST / FACEBOOK / INSTAGRAM / TWITTER

    If you’ve tried this or any other of my recipes, don’t forget to rate the recipe and to leave me a comment. I love hearing from you!

    Cake, Desserts

    Homemade Oreo Cookies

    Feb 4, 2014 · 13 Comments

    freshly baked homemade oreo cookies

    Pretty, delicious, and chocolatey! Those are the words that perfectly describe this easy, quick, and fun homemade Oreo Cookies! After biting into the crunch, you can taste the sweet and creamy homemade filling that takes this Oreo cookie to a whole new level!

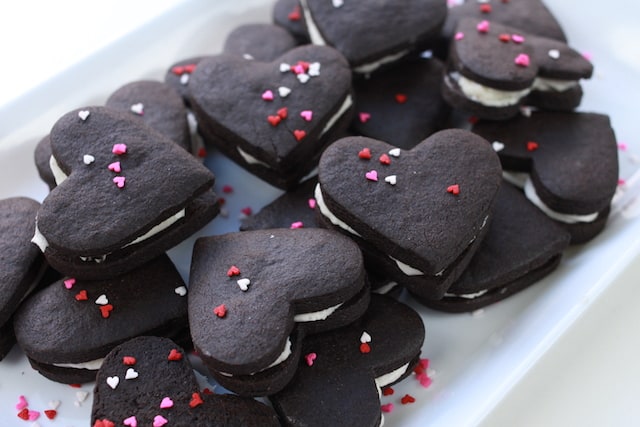
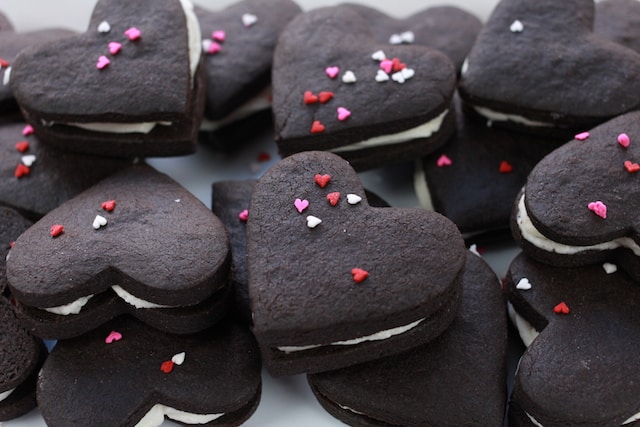
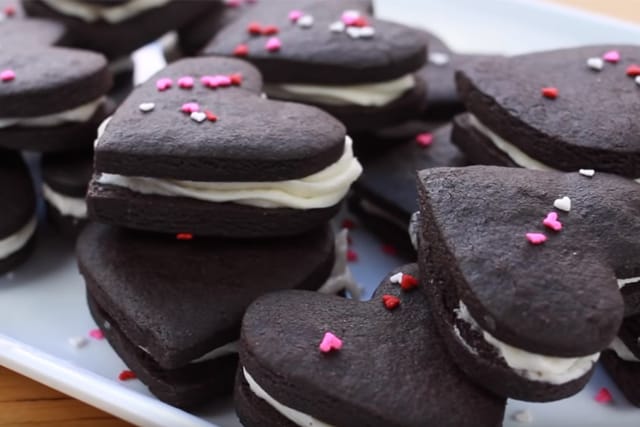
    heart-shaped Homemade oreo cookies

    I grew up loving Oreo Cookies! I was not a fan of the cream, but the cookies were very tasty.  I actually had a lot of fun making these cookies, especially using the heart-shaped cookie cutters! Hopefully, I will get to use more cookie cutters throughout the year!

    This cookie was chewier than an Oreo cookie. However, one way to make it less chewy is to make the cookies thinner and bake them for 16 minutes.

    Tips on How to Make Homemade Oreo Cookies:

    • Before mixing the dry ingredients like all-purpose flour, baking soda, and brown sugar, sift them individually. This easy but very important step would make your cookies nice and evenly textured. It wouldn't be fun biting into a lump of flour in between 🙂
    • You can use a round cookie cutter in cutting the Oreo Cookies if you don't have the heart-shaped ones.
    • Wrap these cookies and tie them with a beautifully-colored ribbon to give as a holiday or Valentine's day present. I am sure the receiver will love it!

    How to Make Homemade Oreo Cookies:

    These are the ingredients that you will need:

    • unsalted butter
    • white sugar (granulated)
    • egg
    • vanilla extract
    • all-purpose flour
    • dark unsweetened cocoa powder
    • baking powder
    • salt
    • unsalted butter
    • half and half or milk
    • pinch of salt
    • powdered sugar

    Preheat the oven to 350F before starting the mixing process. Then, in a large bowl, add butter and sugar, and mix until light and fluffy:

    mixing butter and sugar using a handheld mixer

    Add egg, and vanilla, and beat until well incorporated:

    adding egg and vanilla extract to the sugar and butter mixture

    In a medium-sized bowl add all-purpose flour, baking powder, and cocoa powder, and mix:

    mixing the dry ingredients in a bowl

    Gradually add dry ingredients to wet ingredients until well incorporated:

    homemade oreo cookie dough in a bowl

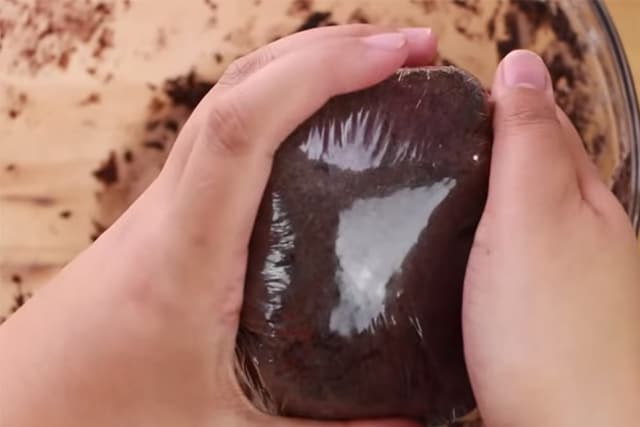
    Divide dough in half and wrap in plastic and refrigerate for at least 30 minutes:

    wrapping the cookie dough with saran wrap

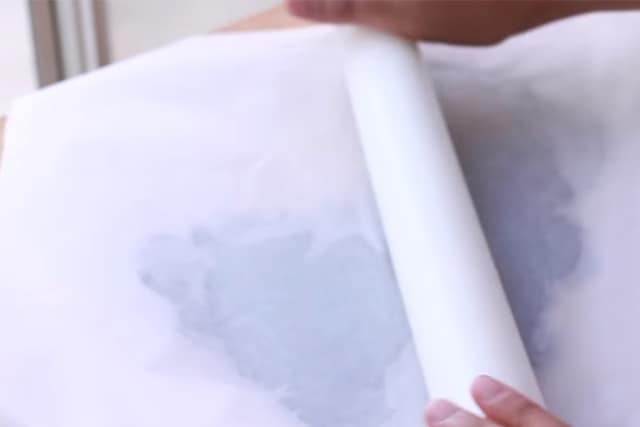
    Remove dough from the fridge, then using parchment paper below and above the dough, roll it out flat with a rolling pin:

    flattening the cookie dough with a rolling pin

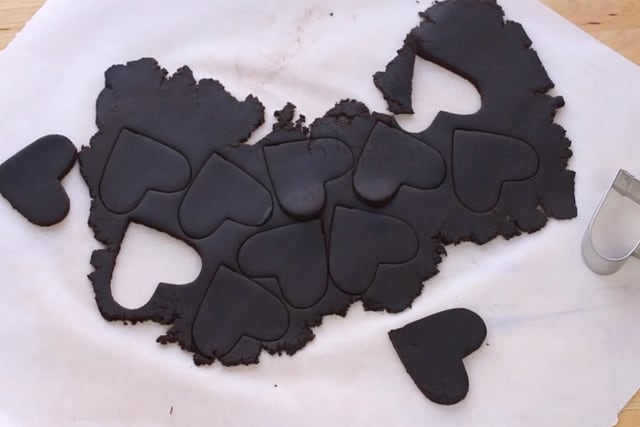
    Cut using heart-shaped cutters and place on a greased baking pan and bake for 12 minutes:

    cutting out heart shapes out of the cookie dough

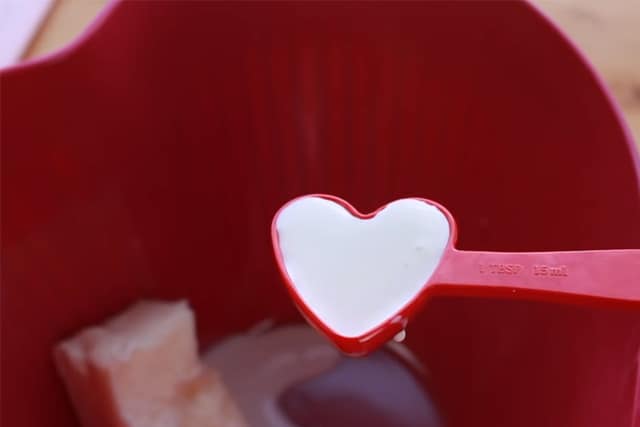
    To make the filling, add ½ cup butter, half and half, a pinch of salt, and cream until light and fluffy. Gradually add powdered sugar:

    making the cream cheese filling for oreo cookies

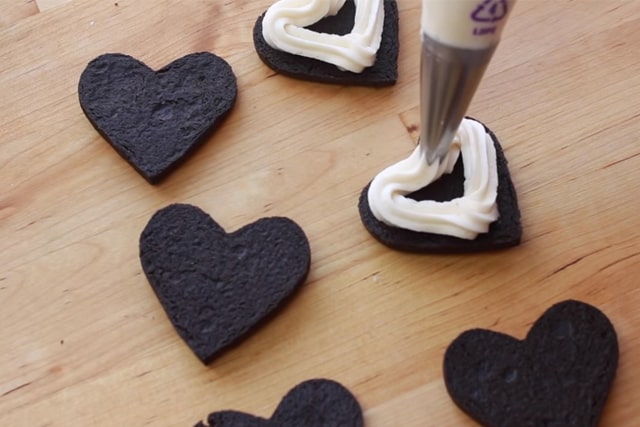
    With a start tip pipe the filling onto the cookie:

    putting cream filling in between oreo cookies

    Place another cookie on top to make an Oreo Cookie, like so:

    putting another oreo cookie on top of the cream filling

    Aren't they so pretty, Simply Bakers?!? I am sure that this will be a perfect Valentine's or holiday cookie for you!

    pretty oreo cookies with heart sprinkles on a plate

    Frequently Asked Questions for the Homemade Oreo Cookies:

    Q: Can I freeze this cookie dough a few days before baking?

    A: Sure, you can. Just make sure to thaw it before baking.

    Q: How many cookies did this recipe make?

    A: I have made about 24 cookies using this recipe.

    Q: Can I make big cookies out of this recipe?

    A: I do not advise making very large cookies as it will affect the cooking time and also the quality of the cookies.


    More delicious and easy cookie recipes:

    • Rocky Road Popsicles – 5 Ingredients ONLY
    • NO BAKE White Chocolate Cookies
    • Cookie Dough Bites
    • Fruity Pebble Marshmallow Cookies
    • Caramel Salted Chocolate Cookies
    • Dairy-Free Chocolate Chip Cookies
    • Best and Easiest Brownies
    homemade oreo cookies on a white plate
    5 from 2 votes
    Print Pin Recipe

    Oreo Cookies

    Take a bite into a crunchy, chocolatey and rich in chocolate flavor with each of these Homemade Oreo Cookies from scratch!
    Author: Lainey
    Prevent your screen from going dark

    Ingredients

    • 1 cup unsalted butter softened
    • 1 cup white sugar granulated
    • 1 egg
    • 1 teaspoon vanilla extract
    • 2 cups all purpose flour
    • ¾ cup dark unsweetened cocoa powder
    • 1 ½ teaspoons baking powder
    • 1 teaspoon salt
    • ½ cup unsalted butter softened
    • 2 tablespoons half and half or milk
    • pinch of salt
    • 2 cups powdered sugar sifted

    Instructions

    • In a large bowl add butter, sugar, and mix until light and fluffy. Add egg, vanilla, and beat until well incorporated.
    • In a medium sized bowl add all purpose flour, baking powder, cocoa powder, and mix. Gradually add dry ingredients into wet ingredients until well incorporated.
    • Divide dough in half and wrap in plastic and refrigerate for at least 30 minutes
    • Preheat oven to 350F
    • Remove dough from fridge, using parchment paper below and above the dough roll out with a rolling pin.
    • Cut using heart shaped cutters and place on a greased baking pan and bake for 12 minutes.
    • To make the filling add ½ cup butter, half and half, pinch of salt and cream until light and fluffy. Gradually add powdered sugar.
    • With a start tip pipe the filling onto the cookie and place another cookie on top to make an Oreo Cookie
    Leave a Comment

    Watch The Recipe Video!

    QR Code
    Did you make this recipe?Share it on instagram or tag @simplybakings or #simplybakings!

    NEVER MISS A RECIPE!

    PINTEREST / FACEBOOK / INSTAGRAM / TWITTER

    If you’ve tried this or any other of my recipes, don’t forget to rate the recipe and leave me a comment. I love hearing from you!

    Cookies, Desserts

    Red Velvet Cookies

    Jan 28, 2014 · 15 Comments

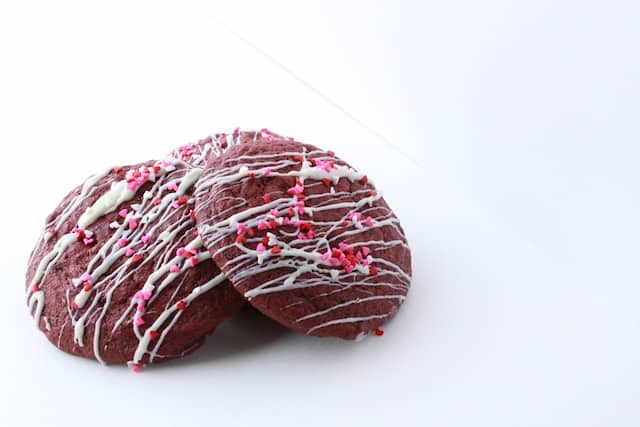
    red velvet cookies on a white background

    Have you ever heard of Red Velvet Cookies? It's a delicious, soft, and chewy cookie with a rich, melted white chocolate frost. This cookie is perfect for Valentine's Day, Christmas Day, or just about any day that you crave a delicious but easy chocolate cookie with a red velvet twist!

    Red Velvet Cookies

    Tips and Procedures:

    • I like to scoop my cookie dough and freeze them for about 15 minutes before baking. This allows the butter to chill up that way when they bake, they don't spread as much and you're left with a thicker chewier cookie.
    • Before mixing the dry ingredients like all-purpose flour, baking soda, and brown sugar, sift them individually. This easy but very important step would make your cookies nice and evenly textured. It wouldn't be fun biting into a lump of flour in between 🙂

    How to Make Red Velvet Cookies:

    These are the ingredients that you will need:

    • brown sugar
    • softened butter
    • egg
    • red food coloring
    • vanilla extract
    • all-purpose flour
    • cocoa powder
    • baking soda
    • salt

    Preheat oven to 350 degrees F, grease the cookie sheet or use parchment paper or a baking mat.

    In a large bowl add brown sugar and softened butter and mix until light and fluffy:

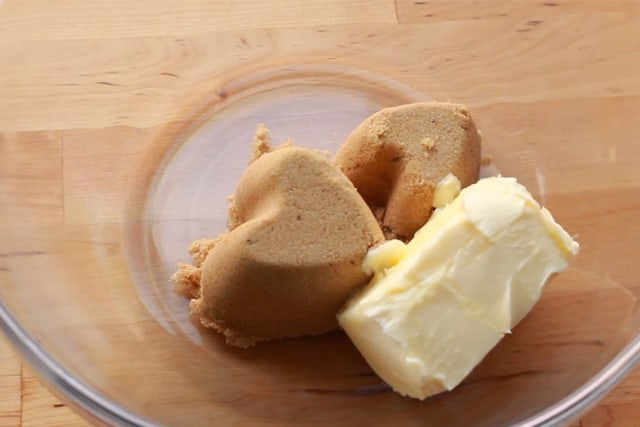
    brown sugar and butter in a mixing bowl

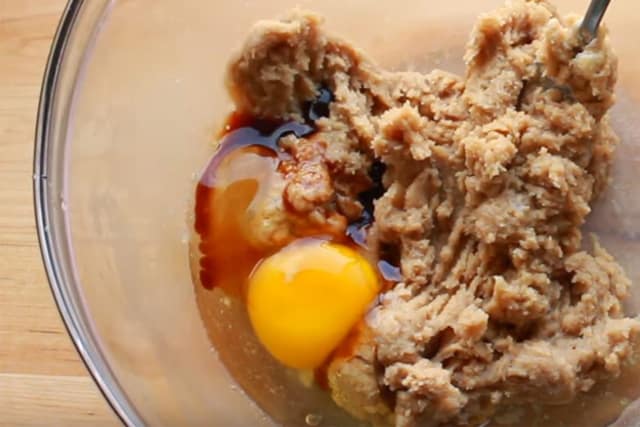
    Add the egg, vanilla extract, and mix:

    mixing the butter and sugar with eggs

    Next, add red food coloring:

    adding red food color to the cookie batter

    The cookie batter will look like this:

    red velvet cookies batter

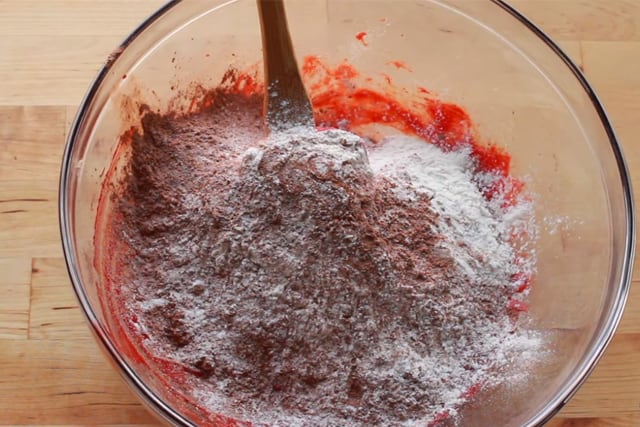
    In another bowl sift the all-purpose flour, baking soda, and salt. Mix and add to the wet ingredients:

    adding the flour, baking soda, and salt to the cookie batter

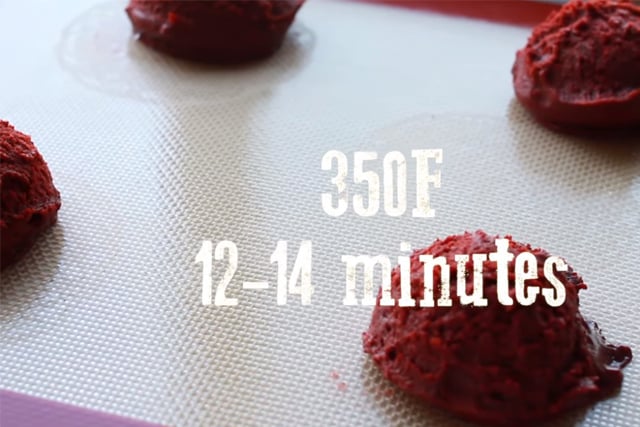
    Shape dough to about 1 ½ to 2 inch balls and bake for 12-14 minutes:

    ready to bake Red velvet cookie dough on a baking mater

    I promise, Simply Bakers, these smelled so yummy in my kitchen!

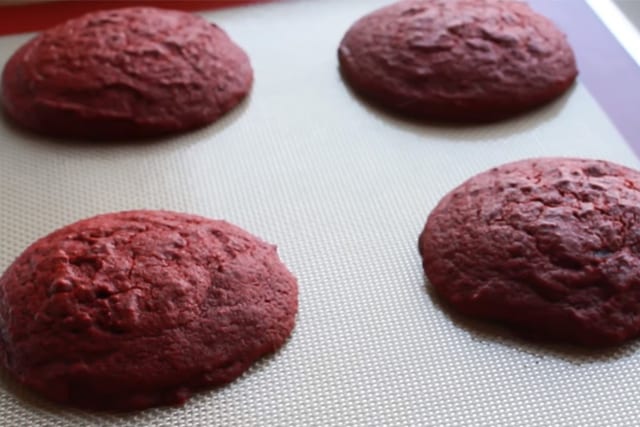
    freshly baked red velvet cookies

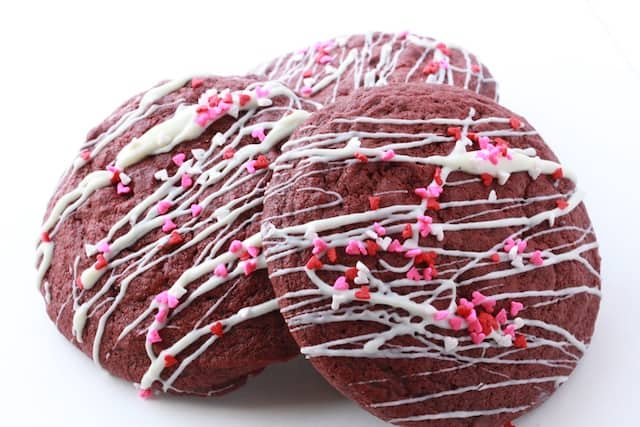
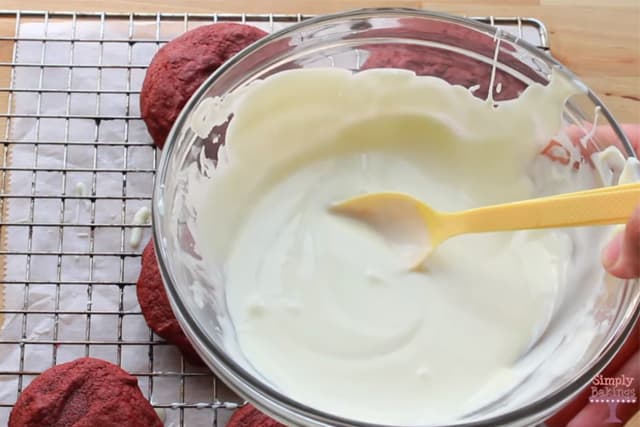
    Melt the white chocolate in a microwave and you are ready to drizzle some sweet chocolate on top of the cooled Red Velvet Cookies!

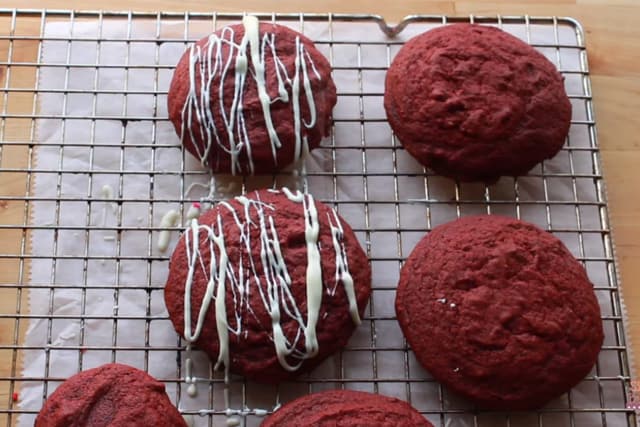
    drizzling the melted white chocolate

    There's no really perfect way to do it. I just did it "freestyle" but it still looked pretty! ♥

    Frequently Asked Questions for the Red Velvet Cookies Recipe:

    Q: Can I freeze this cookie dough a few days before baking?

    A: Sure, you can. Just make sure to thaw it before baking.

    Q: How many cookies did this recipe make?

    A: I have made about 24 cookies using this recipe.

    Q: Can I make big cookies out of this recipe?

    A: I do not advise making very large cookies as it will affect the cooking time and also the quality of the cookies.


    More delicious and easy cookie recipes:

    • Jello Cookies
    • Choco Mint Blossom Cookies
    • Cream Cheese Chocolate Chip Cookies
    • Snickers Oreo Cheesecake
    • Easy Nutella Cookies only 4 Ingredients
    • Double Chocolate Cranberry Cookies
    red velvet cookies on a white background
    3 from 1 vote
    Print Pin Recipe

    Red Velvet Cookies

    Red Velvet cookies are delicious, soft and chewy cookies with a rich, melted white chocolate frost that is perfect for Valentine's Day, Christmas Day, or just any day that you crave for a delicious but easy chocolate cookie!
    Author: Lainey
    Prevent your screen from going dark

    Ingredients

    • ¾ cup brown sugar
    • ½ cup softened butter
    • 1 egg
    • 1 teaspoon red food coloring
    • 1 ½ teaspoon vanilla extract
    • 1 cup all purpose flour
    • ¼ cup cocoa powder
    • ½ teaspoon baking soda
    • ⅛ teaspoon salt

    Instructions

    • Preheat oven to 350 degrees F, grease cookie sheet or use parchment paper or baking mat.
    • In a large bowl add brown sugar and softened butter and mix until light and fluffy. Add egg, vanilla extract and mix. Next add red food coloring.
    • In another bowl sift, all purpose flour, cocoa powder, baking soda and salt. Mix and add to the wet ingredients.
    • Shape dough to about 1 ½ to 2 inch balls.
    • Bake for 12-14 minutes
    Leave a Comment

    Notes

    If you want to drizzle white chocolate on the red velvet cookies, melt 10 oz of white chocolate

    Watch The Recipe Video!

    QR Code
    Did you make this recipe?Share it on instagram or tag @simplybakings or #simplybakings!

    NEVER MISS A RECIPE!

    PINTEREST / FACEBOOK / INSTAGRAM / TWITTER

    If you’ve tried this or any other of my recipes, don’t forget to rate the recipe and to leave me a comment. I love hearing from you!

    Cookies, Desserts

    Peanut Butter Stuffed Cookies

    Jan 21, 2014 · 11 Comments

    stack of peanut Butter cookies on a white plate

    These Peanut Butter Stuffed Cookies are simple to make, and have a wonderfully, crunchy moist crumb, with caramel surprise in every bite! These cookies are perfect to have for dessert after meals or with your afternoon tea.

    Check out my other delicious cookie recipes, including Nutella Cookies, Fruity Pebble Marshmallow Cookies, and 3 Ingredient Macaroon Cookies!

    stack of peanut Butter stuffed cookies on a white plate
    [feast_advanced_jump_to]

    What are Peanut Butter Stuffed Cookies?

    These cookies take a classic peanut butter cookie recipe to the next level by hiding a piece of Ghirardelli dark salted caramel chocolate inside. The result? A perfectly baked cookie with a melty, sweet, and salty surprise in every bite.

    Why You’ll Love This Recipe

    • Easy to make – No complicated steps or chilling time.
    • Rich and indulgent – The perfect balance of peanut butter and chocolate.
    • Great for gifting – These cookies stay fresh and make a fantastic homemade gift.
    • Kid-approved – Both kids and adults will love them!

    Substitutions

    • Butter - Coconut oil, margarine, unsweetened applesauce
    • Peanut Butter - Almond butter, cashew butter, sunflower seed butter
    • Milk - Almond milk, oat milk, soy milk, water, heavy cream
    • Salt - Sea salt, Himalayan pink salt, soy sauce, miso paste
    • All-Purpose Flour - Gluten-free flour blend, whole wheat flour, oat flour
    • Ghirardelli Dark Salted Caramel Chocolate - Milk chocolate + sea salt, dark chocolate + caramel, chocolate chips or chunks
    stack of peanut butter stuffed cookies on a white plate

    Variations

    • Classic Chocolate Peanut Butter Stuffed Cookies - A rich cocoa powder cookie base with a creamy pb filling creates the perfect balance of chocolate and peanut butter. Use a bowl of a stand mixer with a paddle attachment to ensure a smooth butter mixture for a chewy texture.
    • Peanut Butter & Jelly Stuffed Cookies - A nostalgic twist, these chocolate peanut butter cookies have a gooey pb filling mixed with jam for a PB&J-inspired treat. Follow the step instructions, placing a dollop of peanut butter and jam in the center before sealing the dough.
    • Protein-Packed Chocolate Peanut Butter Cookie - Boosted with peanut butter protein powder, these chocolate peanut butter stuffed cookies are a great post-workout snack. Replace butter with coconut oil, use large eggs for structure, and swap flour for oats to keep them wholesome and chewy.

    Storage

    • Store cookies in an airtight container at room temperature for up to 5 days.
    • For longer storage, freeze them for up to 3 months.
    • Reheat in the microwave for 10 seconds for that fresh-from-the-oven taste.

    Ingredients

    These are the ingredients that you will need:

    • butter
    • brown sugar
    • white sugar
    • egg
    • peanut butter
    • milk
    • vanilla extract
    • baking soda
    • salt
    • all-purpose flour
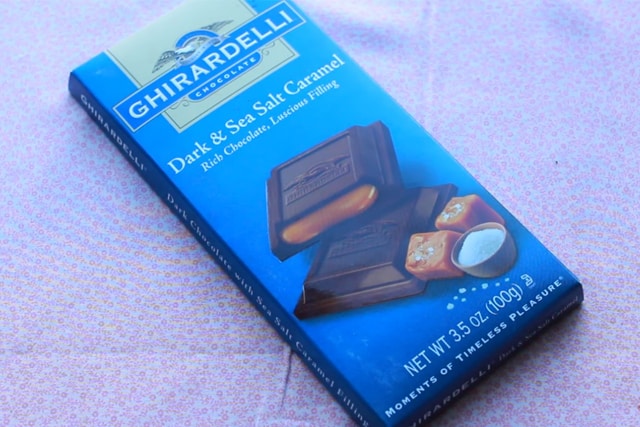
    • Ghirardelli dark salted caramel chocolate

    Instructions

    Preheat oven to 375 degrees F and grease the cookie sheet, use parchment paper or Silpat.

    Then in a large bowl add butter, brown and white sugars, and cream until fluffy. Add egg, creamy peanut butter, milk, vanilla extract, and mix:

    mixing butter, eggs, vanilla, and peanut butter in a bowl using a fork

    Then add the other dry ingredients: baking soda, salt, all-purpose flour, and whisk using a standing mixer:

    mixing the dry and wet ingredients in a bowl

    Roll into large cookie dough balls about 2 inches or use large cookie scoops and press in the center of the cookie Ghirardelli dark salted caramel bar:

    scooping a cookie dough

    I used this chocolate brand specifically because I love the rich taste of both dark and salted caramel that it gives to the cookie 🙂

    ghirardelli chocolate

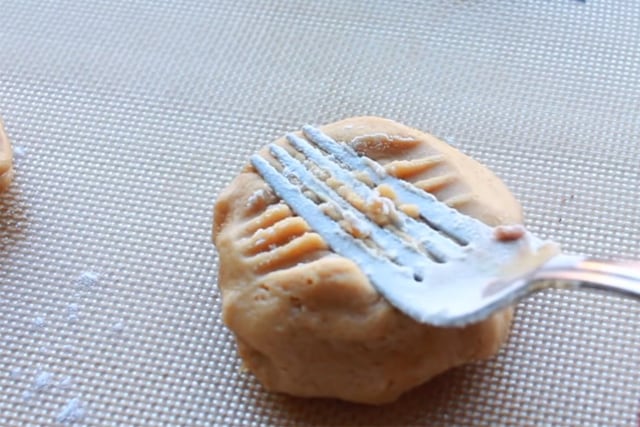
    Place cookie dough balls on a baking sheet. Press with a fork to flatten the cookie and bake for 14-16 minutes or until golden brown:

    making criss cross mark in each cookie using a fork

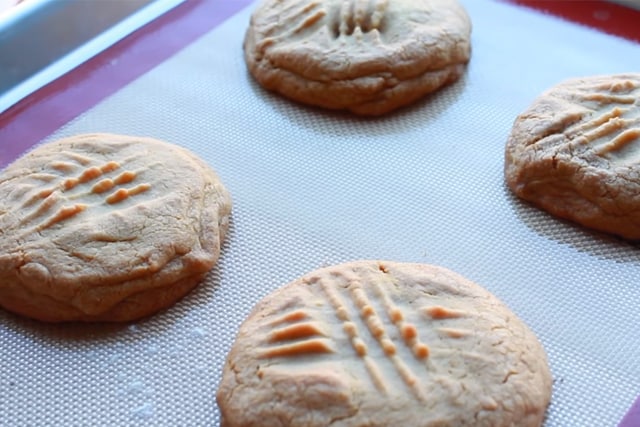
    Then let them rest on a wire rack. There you go! Your delicious peanut butter stuffed cookies are done! Those are just a few easy steps, right?

    freshly baked peanut butter stuffed cookies

    Top Tips

    • VERY IMPORTANT TIP: Make sure to allow the cookies to sit on the pan for about 10 minutes for the caramel to harden, or else caramel will be everywhere!
    • If you will be adding some more nuts or maybe chocolate chips, just make sure you do not add too much of everything since it will break your cookies and won't form nicely.
    • Keep your peanut butter stuffed cookies fresh for days. Store them in an airtight container and grab some delicious treat anytime!
    • Wrap these delicious cookies and give them a pretty and edible holiday gift.

    FAQ

    How to improve peanut butter cookie mix?

    To enhance the peanut butter cookie mix, consider adding a pinch of cinnamon or a splash of maple syrup for added flavor depth. Additionally, using a mix of different types of sugar, like brown and white, can improve texture and sweetness balance.

    What causes peanut butter cookies to fall apart?

    Peanut butter cookies may fall apart due to insufficient binding agents; ensure you have the right amount of egg and flour in the mixture. Overmixing can also lead to a crumbly texture, so mix just until combined.

    Why do peanut butter cookies have lines on them?

    The characteristic lines on peanut butter cookies are created by pressing the dough with a fork, which helps flatten the cookie and gives it a decorative touch. This technique also helps to evenly distribute heat during baking, promoting a consistent texture.


    More delicious and easy cookie recipes:

    • 3 Ingredient No-Bake Cheesecake
    • Best Chocolate Chip Cookies
    • Brownie Cookies
    • Oreo Peanut Butter Bark
    • Assorted Candy Mix Cookies
    • Cookie Butter Cookies
    stack of peanut Butter cookies on a white plate
    5 from 2 votes
    Print Pin Recipe

    Peanut Butter Stuffed Cookies

    Make these Peanut Butter Stuffed Cookies at home - super easy, old-fashioned Peanut butter cookies with a delicious sea salted caramel in every bite!
    Prep Time20 minutes mins
    Bake Time16 minutes mins
    Total Time36 minutes mins
    Course: Cookies, Desserts
    Cuisine: American, Cookies
    Servings: 15 - 18 large cookies
    Calories: 286kcal
    Author: Lainey
    Prevent your screen from going dark

    Ingredients

    • ½ cup softened butter
    • ½ cup brown sugar
    • ¼ cup white sugar
    • 1 egg
    • ½ cup peanut butter
    • 2 tablespoons milk
    • 1 teaspoon vanilla extract
    • 1 teaspoon baking soda
    • ½ teaspoon salt
    • 1 ¾ cups all purpose flour
    • 2 bars of Ghirardelli dark salted caramel Chocolate

    Instructions

    • Preheat oven 375 degrees F and grease cookie sheet, use parchment paper or silpat.
    • In a large bowl add butter, brown and white sugars and cream until fluffy.
    • Add egg, peanut butter, milk, vanilla extract, and mix. Then add baking soda, salt, all purpose flour and mix.
    • Roll into large ball about 2 inches and press in the center of the cookie Ghirardelli dark salted caramel bar. Press with a fork to flatten the cookie.
    • Bake for 14-16 minutes or until golden brown.
    Leave a Comment
    Serving: 1cookieCalories: 286kcalCarbohydrates: 30gProtein: 5gFat: 17gSaturated Fat: 6gPolyunsaturated Fat: 3gMonounsaturated Fat: 7gTrans Fat: 0.01gCholesterol: 12mgSodium: 422mgPotassium: 181mgFiber: 2gSugar: 11gVitamin A: 295IUVitamin C: 0.02mgCalcium: 29mgIron: 3mg

    Watch The Recipe Video!

    QR Code
    Did you make this recipe?Share it on instagram or tag @simplybakings or #simplybakings!

    It's COOKIE MONDAY time!  A new series that I started on my YouTube Channel!  I've made peanut butter cookies many times, but these were my favorite because I not only put Ghirardelli Dark Sea Salt Caramel in the center, but I also tried it with Cookie Butter from Trader Joes.

    The texture is chewy even after I left it sitting in the open air for about two hours!  I probably could have made the cookies bite-sized, but if you are having a bake sale these cookies would be perfect to sell individually.

    There are so many different ways I  can make peanut butter cookies, what are some ways you have made them?

    Cookies, Desserts

    Vanilla Baked Donut Recipe

    Jan 17, 2014 · 10 Comments

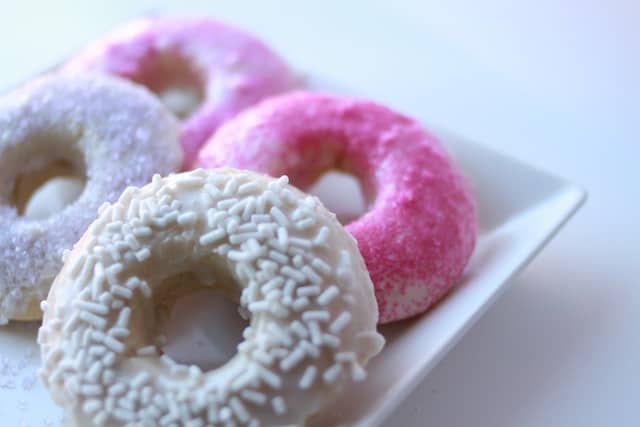
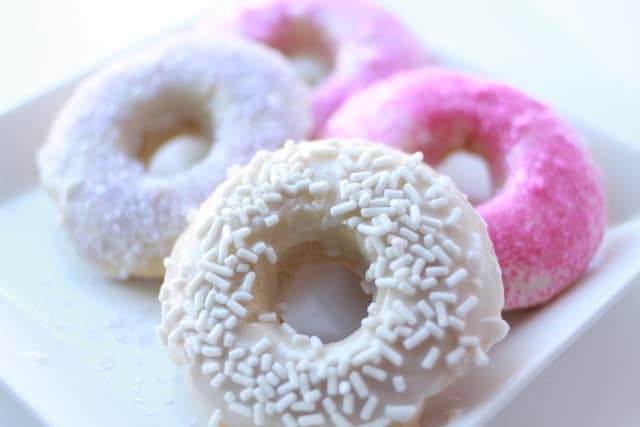
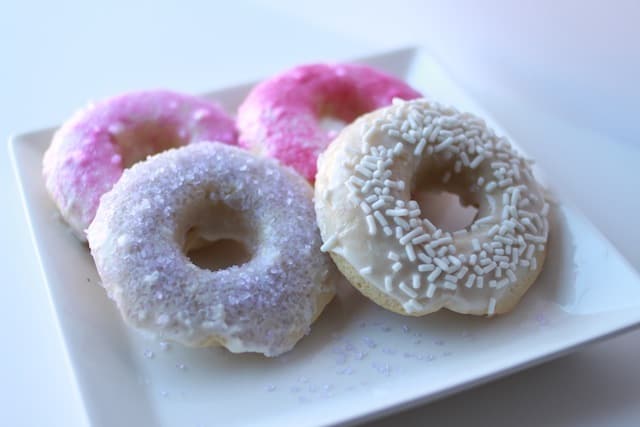
    pink and white vanilla glazed donuts

    These Vanilla Baked Donuts offer a perfect blend of sweetness and simplicity. With a soft, moist interior and a crisp exterior, they are a healthier alternative to their fried counterparts. Plus, the vanilla glaze and colorful sprinkles add a festive touch that makes them irresistible!

    Want to add some new recipes to your baking collection? Give our tasty Chocolate Chip Cookies or our irresistible Keto Blueberry Lemon Muffins a try. And if you're craving more sweet treats, our Mini Apple Pie Pops is always a hit with a crowd.

    Vanilla donuts on a white plate
    [feast_advanced_jump_to]

    Variations

    Want to switch up the flavors of your baked vanilla donuts? Here are some tasty ideas:

    • Chocolate Glaze - Replace the vanilla glaze with a rich chocolate glaze for a decadent twist.
    • Cinnamon Sugar - After baking, dip the donuts in a mix of cinnamon sugar to add a classic and comforting taste.
    • Nutty Delight - Incorporate finely chopped nuts into your batter for a crunchy texture and nutty flavor.
    Vanilla glazed donuts with pretty sprinkles

    Substitutions

    Need to make some ingredient swaps? Here are some options:

    • Milk - Swap out dairy milk with almond milk or oat milk for a dairy-free alternative.
    • Butter - Use melted coconut oil instead of unsalted butter for a non-friendly option.
    • Flour - If you're avoiding gluten, try using gluten-free flour in place of regular all-purpose flour.

    Storage

    Storing your baked vanilla donuts properly ensures they stay fresh and tasty:

    • Once cooled, place the donuts on a wire rack to cool completely before glazing or frosting.
    • Store the glazed or frosted donuts in an airtight container at room temperature for up to 2 days, or refrigerate for a longer shelf life.

    Ingredients

    Listed below are all the ingredients you will need:

    • all purpose flour
    • baking powder
    • salt
    • sugar
    • egg
    • milk
    • vanilla extract
    • butter
    • milk
    • powdered sugar

    See recipe card for quantities.

    Instructions

    Gather the ingredients for this Vanilla Baked Donut. Once the ingredients are all ready, preheat oven to 325 degrees F and spray donut baking pan with a nonstick spray.

    Let's begin!

    In a medium-sized bowl add flour, salt, baking powder, and mix using a whisk:

    mixing the dry ingredients for vanilla donut recipe

    In a large bowl add sugar, egg, milk, vanilla extract, butter, and beat until well combined:

    eggs, vanilla, milk and butter in a bowl for vanilla donuts recipe

    Add dry ingredients into the wet ingredients and mix, but don't over mix:

    mixing in the dry ingredients to the wet ingredients of vanilla donuts recipe

    This is how the donut batter should look like:

    ready to bake vanilla donut batter

    In a ziplock bag add the batter and snip off one of the corners of the edges and pipe it into the donut pan:

    putting the donut batter in a ziplock back with an opening

    Bake for 12-15 minutes:

    freshly baked vanilla donuts

    In another bowl, add ¼ cup milk and slowly add powdered sugar ¼ cup at a time while mixing:

    vanilla glaze and colorful sprinkles for vanilla donuts

    After giving the donuts enough time to cool in a cooling rackDip donuts in the glaze and add sprinkles:

    putting sweet sprinkles on vanilla glaze

    Aren't the donuts pretty as well as delicious?!? And it is equally delicious, too! These vanilla baked donut are even perfect for Valentine's day!

    photo collage of vanilla donuts recipe

    ⭐ Top Tips

    • Enhance the flavor of your cake donuts with pure vanilla extract. To ensure moist and rich donuts, incorporate sour cream into your batter.
    • For a more festive look, sprinkle with colorful candy sprinkles. The more color you sprinkle, the merrier!

    Frequently Asked Questions

    How do you soften hard donuts?

    To soften hard donuts, you can microwave them for a few seconds or wrap them in a damp paper towel and heat in the oven.

    Are baked donuts healthier than fried?

    Generally, baked donuts are considered healthier than fried ones because they have less fat and fewer calories.

    Are store bought donuts baked or fried?

    Most store-bought donuts are fried, but there are also baked options available depending on the brand and type you choose.

    pretty and delicious vanilla glazed donuts
    5 from 3 votes
    Print Pin Recipe

    Vanilla Baked Donut Recipe

    Soft and delicious, easy to make Vanilla glazed donuts that is a sure crowd pleaser!
    Prep Time10 minutes mins
    Bake Time15 minutes mins
    Total Time25 minutes mins
    Course: Breakfast, Dessert, Desserts
    Cuisine: American, Filipino
    Servings: 12 donuts
    Calories: 146kcal
    Author: Lainey
    Prevent your screen from going dark

    Ingredients

    • 1 cup all purpose flour
    • 1 teaspoon baking powder
    • ¼ teaspoon salt
    • ¼ cup sugar
    • 1 large egg
    • 5 tablespoons milk
    • 1 teaspoon vanilla extract
    • 1 ½ tablespoons butter
    • ¼ cup whole milk
    • 2 cups powdered sugar sifted

    Instructions

    • Preheat oven to 325 degrees F and oil donut baking pan.
    • In a medium sized bowl add flour, salt, baking powder, and mix.
    • In a large bowl add sugar, egg, milk, vanilla extract, butter, and beat until well combined. Add dry ingredients into the wet ingredients and mix, but don't over mix.
    • In a ziplock bag add the batter and snip of one of the corners of the edges and pipe it into the donut pan.
    • Bake for 12-15 minutes.
    • In another bowl, add ¼ cup milk and slowly add powdered sugar ¼ cup at a time while mixing.
    • Dip the donuts into the glaze, sprinkle them with toppings, and then set them on a cooling rack with parchment paper underneath to let the glaze fully dry.
    Leave a Comment
    Serving: 1gCalories: 146kcalCarbohydrates: 33gProtein: 2gFat: 1gSaturated Fat: 0.4gPolyunsaturated Fat: 0.1gMonounsaturated Fat: 0.2gTrans Fat: 0.002gCholesterol: 15mgSodium: 96mgPotassium: 37mgFiber: 0.3gSugar: 24gVitamin A: 41IUCalcium: 40mgIron: 1mg

    Watch The Recipe Video!

    QR Code
    Did you make this recipe?Share it on instagram or tag @simplybakings or #simplybakings!

    Growing up I was not allowed to eat sweets, however when I was in third or maybe fourth grade I was introduced to donuts.  My teachers would allow parents to bring breakfast for the class and most parents would bring donuts because it was easy and kids love them.  My love for donuts began and it only grew worse as I got older.

    Now that I'm a little older, I try to eat a little bit better.  So instead of deep frying the donuts, I baked them instead.  It's not as fluffy, but it's still delicious!  What kind of donuts do you like eating?  My favorite one is the plain donut with no glaze or sprinkles.

    Breakfast & Brunch, Desserts

    Cake Mix Cookies With Butter

    Jan 14, 2014 · 9 Comments

    stack of cookies on a white plate

    Get an ultimate sugar load with these gorgeous, easy sprinkle-filled, soft and chewy Cake Mix Cookies With Butter that are simple to make with chocolate chips. Is there anything more to ask in a cookie?!?

    Love easy cookie recipes? Check out my Strawberry Cookies and Funfetti Lemon Cake Mix Cookies—they’re full of flavor and simple to make with a cake mix!

    cooling cookies in a wire rack
    [feast_advanced_jump_to]

    What are Cake Mix Cookies With Butter?

    These Cake Mix Cookies With Butter are one of the fastest cookie recipes you'll ever try! Using a box of yellow cake mix means you skip most of the measuring.

    All you need is melted butter (or softened), large eggs, and your favorite extras like chocolate chips or sprinkles.

    Cake mix cookies first became popular in the 1980s, and they’ve stayed a favorite ever since because they’re fast, fun, and super customizable.

    They're perfect for using up that leftover cake mix or getting creative with mix-ins like nuts, white chocolate chips, or even peanut butter chips.

    Substitutions

    • yellow cake mix – use vanilla cake mix, devil’s food, red velvet cake mix, lemon cake mix, or strawberry cake mix
    • butter – swap with melted butter, canola oil, vegetable oil, or coconut oil
    • eggs – use 2 flax eggs or chia eggs for a vegan-friendly version
    • all-purpose flour – sub with almond flour or gluten-free baking flour
    • semi-sweet chocolate chips – use white chocolate chips, peanut butter chips, or chopped strawberries
    • heart sprinkles – switch to seasonal sprinkles or skip entirely for a more classic cookie
    stack of chocolate cake mix cookies on a white plate

    Variations

    • Cream Cheese Swirl – mix in softened cream cheese for gooey butter cake cookie
    • Strawberry – use strawberry cake mix and chopped strawberries
    • Red Velvet – use red velvet cake mix and white chocolate chips
    • Nutty Crunch – stir in chopped pecans or walnuts
    • Chocolate Lover – use chocolate cake mix and add dark chocolate chips
    • Peanut Butter – add peanut butter chips or swirl in creamy peanut butter

    Storage & Leftovers

    • Countertop – store cookies in an airtight container for up to 4 days
    • Fridge – cookies last 5–7 days in a sealed container
    • Freezer (baked cookies) – freeze up to 2 months; thaw at room temp
    • Freezer (cookie dough) – scoop onto a baking sheet, freeze, then store in freezer-safe bag
    cooling the cookies on a wire rack

    Ingredients

    • golden white cake mix
    • butter
    • eggs
    • all-purpose flour
    • vanilla extract
    • semi-sweet chocolate chips
    • heart sprinkles

    Instructions

    Preheat the oven to 350 degrees F. Grease a pan or use a baking mat.

    I used Betty Crocker for the cake mix ingredient of this cookie:

    cake mix box

    In a large mixing bowl, cream together cake mix, eggs, flour, and vanilla extract.

    mixing sugar butter and eggs in a pink bowl

    Fold in chocolate chips and sprinkles:

    mixing the cookie dough with chocolate chips

    Roll the dough into a 2-inch ball and place on the mat:

    scooping a cookie dough

    Bake for 14-16 minutes or until golden brown:

    freshly baked chocolate chip cake batter cookies on a baking mat

    After taking them out from the oven, let the cookies cool completely on a wire rack. Well, you can take one and have a taste test 😉

    The inside of these cookies is soft and moist!

    holding a cookie

    Top Tips

    • Make it a day before and chill or freeze the dough. Simply thaw it before serving or before baking.
    • If you don't have chocolate chips and have a chocolate bar instead, simply chop it in small bits.
    • Before mixing the dry ingredients like all-purpose flour, baking soda, and granulated sugar, sift them individually. This easy but very important step would make your cookies nice and evenly textured. It wouldn't be fun biting into a lump of flour in between 🙂

    FAQ

    What happens when you substitute butter for oil in cake mix?

    When you use butter instead of oil in cake mix, your baked goods usually turn out richer and more flavorful. Butter also makes the texture a bit denser and softer, while oil tends to keep cakes more moist and light.

    What is the difference between cake mix and cookie mix?

    Cake mix has more leavening and sugar to make a light, fluffy texture, while cookie mix has less liquid and more fat to keep cookies thick and chewy. You can tweak cake mix to work like cookie mix with a few ingredient changes, like what I did in this recipe!

    Can I turn a cake mix into cookies?

    Yes, you can! Just add less liquid and a bit more flour or mix-ins like eggs and butter. Cake mix cookies are super easy and taste just like homemade—with a fun shortcut!

    a stack of cake mix cookies
    No ratings yet
    Print Pin Recipe

    Cake Mix Cookies With Butter

    Have these gorgeous, easy sprinkle-filled, soft and chewy Cake Mix Cookies With Butter that are simple to make with chocolate chips!
    Prep Time10 minutes mins
    Cook Time16 minutes mins
    Chill Time (optional)5 minutes mins
    Total Time31 minutes mins
    Course: Cookies
    Cuisine: American
    Servings: 18 -20 cookies
    Calories: 224kcal
    Author: Lainey
    Prevent your screen from going dark

    Ingredients

    • 1 box golden white cake mix
    • ½ cup butter softened
    • 2 eggs
    • 1 tablespoon all purpose flour
    • 1 teaspoon vanilla extract
    • 1 cup semi-sweet chocolate chips
    • ⅛ cup heart sprinkles

    Instructions

    • Preheat oven 350 degrees F, grease pan or use baking mat.
    • In a large bowl, cream together cake mix, eggs, flour, and vanilla extract. Fold in chocolate chips and sprinkles. Roll the dough into a 2 inch ball and place on mat.
    • Bake for 14-16 minutes or until golden brown.
    Leave a Comment
    Serving: 1cookieCalories: 224kcalCarbohydrates: 30gProtein: 3gFat: 11gSaturated Fat: 6gPolyunsaturated Fat: 1gMonounsaturated Fat: 3gTrans Fat: 0.3gCholesterol: 32mgSodium: 248mgPotassium: 84mgFiber: 1gSugar: 17gVitamin A: 189IUCalcium: 73mgIron: 1mg

    Watch The Recipe Video!

    QR Code
    Did you make this recipe?Share it on instagram or tag @simplybakings or #simplybakings!

    Cookies, Desserts

    Cookies with Pretzels and M&Ms

    Jan 11, 2014 · 22 Comments

    These Cookies with Pretzels and M&Ms are a mix of soft, chewy, and crunchy textures. Every bite is packed with caramel candy and colorful M&Ms. They offer a sweet and salty treat that’s hard to resist!

    Today’s recipe is all about cookies. And honestly? This one might just be my favorite. But no shade to the others! Sweet Potato Cookies, Apple Pancake Cookies, and Chocolate Oatmeal Cookies still make me happy.

    Some Cookies with Pretzels and M&Ms on tray
    [feast_advanced_jump_to]

    What are Cookies with Pretzels and M&Ms?

    These Pretzel M&M cookies are sweet and salty treats. They mix soft cookie dough with crunchy pretzels and colorful candy-coated chocolate. The cookies are fun, chewy, and slightly crispy. The pretzels give them that extra crunch. A touch of sea salt boosts the flavor even more!

    They’re popular in many American homes. Especially during Christmas and holidays. One unique ingredient is caramel candy. It adds a gooey, buttery bite in the center.

    History of Cookies with Pretzels and M&Ms

    This cookie style started in the United States. Sweet-and-salty desserts became popular in the 2000s. Home bakers began mixing cookie dough with snacks like pretzels, M&Ms, and caramel. That’s how “kitchen sink” cookies were born.

    Many say moms and food bloggers helped make it popular. Sprinkles and holiday cookies started trending on social media. This fun flavor combo became a favorite.

    Substitutions

    • Butter – Use vegan butter or coconut oil to cut down on trans fat and make it plant-based.
    • Eggs – Replace each egg with a flax egg (1 tbsp flaxseed meal + 3 tbsp water).
    • M&Ms – Use vegan candy-coated chocolate or dark chocolate chips.
    • Caramel candy – Try soft vegan caramels or dates chopped and rolled in a little flour.
    • All-purpose flour – Replace with a gluten-free 1:1 flour mixture for gluten-sensitive diets.
    Freshly baked Cookies with Pretzels and M&Ms

    Recipe Variations

    • Peanut butter twist – Add ¼ cup peanut butter to boost protein and flavor.
    • Double chocolate – Swap ¼ cup flour for cocoa powder for a chocolate base.
    • Trail mix cookies – Add chopped nuts and dried fruit for more fiber.
    • Mini cookies – Roll into ½-inch balls for bite-sized treats that fit perfectly in lunchboxes or holiday gift bags.

    Storage

    • These cookies freeze well. You can store them for up to 2 months.
    • Keep baked cookies in an airtight container. You can store them in the fridge or at room temperature for up to 5 days.
    • To keep them fresh, layer with parchment or wax paper. Cool them first on wire racks or a cooling rack.

    Ingredients

    Listed below are all the ingredients you will need:

    • Butter (vegan substitute)
    • White sugar
    • Brown sugar
    • Salt
    • Baking soda
    • Vanilla extract
    • Eggs
    • All-purpose flour
    • Pretzels
    • M&Ms
    • Caramel candy

    See recipe card for quantities.

    Instructions

    Before starting with the mixing process, make sure to preheat the oven to 375°F and grease cookie sheets or use a silicone mat.

    Then let's begin! In a large bowl, add butter, sugars, and cream.

    Sugars, cream and butter in a clear bowl for Cookies with Pretzels and M&Ms recipe

    Mix it thoroughly until all the added ingredients are well combined.

    Mixing all ingredients for Cookies with Pretzels and M&Ms recipe

    Add vanilla extract, eggs, and mix until well blended.

    Eggs and vanilla into the mixture for Cookies with Pretzels and M&Ms recipe

    Add flour, baking soda, and salt. Then mix.

    Flour and baking soda added to the mixture for Cookies with Pretzels and M&Ms recipe

    In this step, I was having a slightly hard time mixing it with just a rubber spatula. So I used my ever-reliable handheld mixer to make the job easier.

    Cookies with Pretzels and M&Ms dough with a rubber spatula and a handheld mixer

    Now it's time to add the caramel, M&M's, and pretzels.

    Candies, M&Ms and pretzels added to the cookie dough

    Carefully and thoroughly mix with a spoon.

    ready to bake Cookies with Pretzels and M&Ms cookie dough

    Roll into 1-inch balls and bake for 8-10 minutes or until golden brown.

    Pretty and delicious Cookies with Pretzels and M&Ms are ready to be devoured! 🙂

    freshly baked Cookies with Pretzels and M&Ms on a plate

    The recipe was fairly easy to make, although there was a bit too much of caramel candy in each cookie, so I suggest maybe cutting the caramel amount to half, but these cookies were still AMAZING!

    Look what happened when I added too much caramel candy in one small cookie.

    splattered caramel inside the Cookies with Pretzels and M&Ms

    Anyway, the pretzels gave the cookies a good crunch and now that I think of it, it's actually so much better than nuts.  First of all, pretzels are inexpensive, secondly, you get more for your price, and last of all pretzels are delicious!

    Hint: Allow the cookies to sit on the pan for about 10 minutes for the caramel to harden, or else the caramel will be everywhere!

    ⭐ Top Tip

    Don’t overbake! These cookies will look slightly underdone in the center when you pull them from the oven. That’s exactly what you want. They’ll continue to cook and firm up as they rest.

    For an extra gooey center, slightly underbake and let them sit for the full 10 minutes before moving.

    FAQ

    How do you keep cookies from being flat?

    To keep cookies from being flat, chill the dough before baking. Chilling helps solidify the fat (like butter), so the cookies spread less in the oven and hold their shape better. For best results, refrigerate the dough for at least 2 hours.

    What cookie was not invented until 1938?

    The chocolate chip cookie wasn’t invented until 1938. Ruth Wakefield accidentally created it when she added chunks of chocolate to cookie dough expecting them to melt— but instead, the pieces held their shape, giving us the first-ever chocolate chip cookie.

    What is the most popular cookie?

    The most popular cookie is the chocolate chip cookie. Loved for its soft center, crispy edges, and melty chocolate chips, it’s a go-to treat around the world for both kids and adults.

    More Recipes

    Let's make more cookies! Look down here:

    • Strawberry Cookies
    • Rice Krispies Cookies
    • Peppermint Oreo Cookies
    • Nutella Peanut Butter Cookies
    5 from 1 vote
    Print Pin Recipe

    Cookies with Pretzels and M&Ms

    These Cookies with Pretzels and M&Ms are soft, chewy, and full of sweet-salty crunch in every bite. Buttery dough wraps around gooey caramel and colorful M&Ms for a fun cookie everyone will love!
    Prep Time15 minutes mins
    Cook Time10 minutes mins
    Cool Time10 minutes mins
    Total Time35 minutes mins
    Course: Cookies, Desserts, Snacks
    Cuisine: American
    Servings: 24 cookies
    Calories: 231kcal
    Author: Lainey
    Prevent your screen from going dark

    Ingredients

    • 1 cup Butter softened
    • ½ cup White sugar
    • ½ cup Brown sugar
    • ½ teaspoon Salt
    • 1 teaspoon Baking soda
    • 1 teaspoon Vanilla extract
    • 2 Eggs
    • 2 ¼ cups All-purpose flour
    • 1 ¼ cups Pretzels lightly crushed
    • 1 cup M&Ms or vegan chocolate gems
    • 5 ounces Caramel candy cut into small pieces

    Instructions

    Make the Cookie Dough:

    • Preheat oven to 375°F (190°C). Grease cookie sheets or line with a silicone baking mat.
    • In a large bowl, cream together butter, white sugar, and brown sugar until smooth.
    • Add vanilla extract and eggs, then mix until fully combined.
    • Add all-purpose flour, baking soda, and salt. Stir until a soft dough forms.
    • Fold in caramel pieces, M&Ms, and crushed pretzels with a spoon.

    Bake the Cookies:

    • Roll dough into 1-inch balls and place on prepared cookie sheets about 2 inches apart.
    • Bake for 8–10 minutes, or until the edges are golden brown and the centers are just set.

    Cool and Serve:

    • Let cookies rest on the baking sheet for 10 minutes before transferring - this allows the caramel to firm up. Serve warm or let cool completely.
    Leave a Comment
    Serving: 1gCalories: 231kcalCarbohydrates: 31gProtein: 3gFat: 11gSaturated Fat: 6gPolyunsaturated Fat: 1gMonounsaturated Fat: 2gTrans Fat: 0.3gCholesterol: 36mgSodium: 425mgPotassium: 48mgFiber: 1gSugar: 14gVitamin A: 278IUVitamin C: 0.2mgCalcium: 29mgIron: 1mg

    Watch The Recipe Video!

    QR Code
    Did you make this recipe?Share it on instagram or tag @simplybakings or #simplybakings!

    Storytelling Time!

    I LOVE COOKIES! I think I started many of my cookie blog posts with that sentence!  Anyhow, I really do love cookies, and I have tried to deny it for many years.

    But I gave up this year and finally admitted that I am addicted to cookies. Does anybody know of a cookie anonymous meeting I can check into?!

    Cookies, Desserts, Snacks

    BEST Burger Cupcakes

    Jan 7, 2014 · 6 Comments

    hamburger cucpakes on a white plate

    Create these delightful Burger Cupcakes! This fun and imaginative recipe features no actual meat patties, making it vegetarian-friendly. With featured ingredients like vanilla cake, vibrant frosting, and playful toppings, these Hamburger Cupcakes are not only delicious but also easy to make, perfect for a creative baking adventure!

    Looking for more cupcake recipes? Try my Boston Cream Cupcakes or my Matcha Cupcakes!

    hamburger cupcakes with toothpicks on a white plate
    [feast_advanced_jump_to]

    Top Tips

    • Wait until the cupcakes are completely cooled before cutting them in half to prevent them from tearing or falling apart.
    • Prepare the frostings in advance and chill them. This way, they'll be ready to use as "catsup" and "hamburger sauce" when making another batch of hamburger cupcakes.
    • Similar to a real hamburger, insert a toothpick into the center of the hamburger cupcake to keep the "patty" and other toppings in place.

    Substitutions

    • Cake Mix: Instead of using a vanilla cake mix, you can make your own homemade vanilla cake batter from scratch using flour, sugar, baking powder, vanilla extract, eggs (or egg substitutes for a vegan option), and a plant-based milk of your choice.
    • Red and Yellow Food Coloring: If you prefer to avoid artificial food coloring, you can use natural alternatives. For red, you can use beet juice or pureed strawberries. For yellow, you can use turmeric powder dissolved in a small amount of water.
    • Sesame Seeds: If you don't have sesame seeds or prefer not to use them, you can omit them or replace them with other toppings such as chopped nuts (e.g., almonds or walnuts) or shredded coconut for texture.
    • Vanilla Frosting: You can use store-bought vanilla frosting or make your own homemade frosting using powdered sugar, vegan butter or coconut oil, vanilla extract, and a splash of plant-based milk. Adjust the sweetness and consistency to your liking.
    • Chocolate Frosting: Instead of chocolate frosting, you can use cocoa powder mixed with powdered sugar and vegan butter or coconut oil to create a chocolate-flavored frosting. Adjust the sweetness and thickness as needed.
    • Shredded Coconut: If you don't have shredded coconut or prefer a different texture, you can use crushed graham crackers or digestive biscuits to simulate the appearance of hamburger buns.
    hamburger cupcakes on a white plate

    Variations

    • Cheeseburger Cupcakes: Add a small square of yellow fondant or yellow frosting between the "patty" and "bun" layers to mimic cheese in a cheeseburger cupcake.
    • Bacon Burger Cupcakes: Create strips of crispy bacon using brown fondant or brown frosting and place them on top of the "patty" layer before adding the "bun."
    • Sundae Burger Cupcakes: Instead of traditional hamburger toppings, use colorful frosting, sprinkles, and a maraschino cherry on top to create a dessert "sundae" burger cupcake.
    • Double-Stack Burger Cupcakes: Make two layers of "patties" and "buns" for a double-decker burger cupcake.
    • Monster Burger Cupcakes: Create oversized "patties" and "buns" using larger cupcakes to make monster-sized burger cupcakes.
    • Burger Cupcake Bar: Set up a cupcake decorating station with various frosting colors, toppings like candy, sprinkles, and edible decorations, and let everyone customize their own burger cupcakes.

    Storage

    • Cool Completely: Allow the cupcakes to cool completely on a wire rack before storing them. This prevents condensation and ensures they don't become soggy.
    • Airtight Container: Store the cupcakes in an airtight container to maintain freshness and prevent them from drying out. Make sure the container is large enough to accommodate the cupcakes without squishing the frosting or toppings.
    • Refrigeration: If the cupcakes have perishable fillings or toppings (such as cream cheese frosting or fruit fillings), store them in the refrigerator. However, keep in mind that refrigeration can sometimes dry out cupcakes, so it's best to bring them to room temperature before serving.
    • Room Temperature: If the cupcakes have non-perishable fillings or toppings (such as buttercream frosting or fondant decorations), they can be stored at room temperature in a cool, dry place away from direct sunlight.

    Ingredients

    • yellow cake box mix
    • brownie box mix
    • sesame seeds
    • unsweetened shredded coconut
    • red frosting
    • yellow frosting
    • green food
    • red food coloring
    • yellow food coloring

    Instructions

    Bake the yellow cake box into cupcakes. These cupcakes will be used to resemble the "hamburger buns".

    super moist yellow cake mix in a box

    Follow the baking instructions in the yellow cake box mix and bake as required:

    putting yellow cake mix batter in cupcake pan

    Before popping the cupcakes into the oven, sprinkle a generous amount of sesame seeds, just as what you would see on top of a regular burger bun:

    sesame seeds on top of yellow cake mix batter

    Let the cupcakes cool down completely after baking and start working on the brownies. The brownies will resemble the "burger patties" in the hamburger 🙂

    With the dry ingredients, add in the eggs and oil:

    adding oil to the ingredients of brownies for hamburger cupcakes recipe

    Mix thoroughly until you see no lumps:

    mixing the ingredients for brownies to be used in hamburger cupcakes

    Place in a rectangular baking pan and bake as required:

    pouring brownie batter on baking pan

    After brownies are baked, cut into circles:

    cutting circle brownies using a cookie cutter

    Slice cupcakes into halves:

    cutting the cupcake in half for hamburger cupcakes

    Layer bottom cupcake, brownies,

    holding a circle brownie for hamburger cupcakes

    Get the shredded coconut and drop a few green food color and mix. This will resemble the lettuce in a hamburger:

    putting green food color on coconut shreds

    To make the hamburger sauce, make a buttercream frosting and color them red and orange to make the "catsup" and hamburger sauce:

    mixing the butter and cream cheese for hamburger cupcake frosting

    Drizzle generously the "hamburger sauce" on top:

    adding red and orange frosting to the hamburger cupcake

    Place the cupcake top to serve as the top of the hamburger bun, just like so:

    topping the hamburger cupcake

    Doesn't that look so fun?!? You can serve this on birthday parties, Thanksgiving parties, or a sweet "treat" on April Fool's day!

    assembled hamburger cupcakes on a white plates

    FAQs

    How to keep cupcakes from falling in the middle??

    Use a toothpick

    How to stop cupcakes from sinking in the middle??

    To prevent cupcakes from sinking in the middle, ensure you measure ingredients accurately and avoid overmixing the batter. Additionally, bake the cupcakes at the correct temperature and avoid opening the oven door too often during baking.

    How many burger cupcakes does this make?

    Approximately 12-18 cupcakes

    More fun cupcake recipes you can try:

    • 3 Ingredient Chocolate Cupcakes
    • Nutella Cupcakes
    • Ferrero Rocher Cupcakes
    • Halloween Chocolate Peanut Butter Cupcakes
    • S’mores Cupcakes
    burger cupcakes on a white platter
    5 from 1 vote
    Print Pin Recipe

    Burger Cupcakes

    Whip up these imaginative Burger Cupcakes that are meat-free and perfect for vegetarians! Packed with vanilla cake, colorful frosting, and playful toppings, they're not just delicious but also a breeze to make—a fun and tasty twist on classic cupcakes for a creative baking experience!
    Prep Time15 minutes mins
    Cook Time30 minutes mins
    Total Time45 minutes mins
    Course: Dessert
    Cuisine: Filipino
    Servings: 12 cupcakes (approximate)
    Calories: 8kcal
    Author: Lainey
    Prevent your screen from going dark

    Ingredients

    • 1 (13.25 oz) yellow cake box mix
    • 1 (18 oz) brownie box mix
    • Sesame seeds as needed
    • Unsweetened shredded coconut as needed
    • Red frosting as needed
    • Yellow frosting as needed
    • Green food coloring optional
    • Red food coloring optional
    • Yellow food coloring optional

    Instructions

    • Prepare the yellow cake mix according to the package instructions to make cupcakes.
    • Prepare and bake the brownie mix according to the package instructions.
    • Once the brownies are baked and cooled, cut them into circles to match the size of the cupcakes.
    • Slice the cupcakes horizontally to create top and bottom halves.
    • Assemble the Hamburger Cupcakes by layering the bottom cupcake half, a brownie circle (representing the "patty"), red frosting (for "ketchup"), sesame seeds (for "sesame seed bun"), shredded coconut (for "lettuce"), and yellow frosting (for "mustard"). Optionally, you can use green food coloring mixed with frosting for a "pickle" effect.
    • Place the top cupcake half on top to complete the hamburger look.
    Leave a Comment
    Serving: 1cupcakeCalories: 8kcalCarbohydrates: 2gProtein: 0.1gFat: 0.1gSaturated Fat: 0.1gPolyunsaturated Fat: 0.01gMonounsaturated Fat: 0.1gSodium: 10mgPotassium: 0.5mgFiber: 0.01gSugar: 1gCalcium: 2mgIron: 0.1mg

    Watch The Recipe Video!

    QR Code
    Did you make this recipe?Share it on instagram or tag @simplybakings or #simplybakings!

    One of my goals for this year was to try more fun desserts for my YouTube channel!  So I was searching around google and I came across a picture similar to this and thought to myself I have to try this!

    I had a little trouble with frosting the cupcakes because the piping bags I used, which were Wilton piping bags had holes!  On top of that, I accidentally picked up the wrong cake box mix so these cupcakes were very moist!  Honestly whenever I film, whatever can go wrong will go wrong.  When I took out the cupcakes out of the oven, I was a little disappointed because the cupcakes were too yellow, maybe I should have used a different cake box mix.

    I may have mentioned this before, but I am learning how to be a better food photographer.  After I took multiple pictures of the cupcake hamburgers, I decided it needs a little color!  I piped a red squiggle down the plate, but it was not uniformed so I just made the picture worse, haha.  Do you have any tips for garnishing the plate?

    Thanks for reading, let me know what you would like me to blog about!

    Cupcakes, Desserts

    Oreo Stuffed Cookies

    Jan 4, 2014 · 10 Comments

    stack of cookies on a white plate

    Take a bite of these heavenly, delicious Oreo Stuffed Cookies! They are mouthwatering and perfect for holiday parties, Christmas cookie exchanges, or even just an ordinary day when you crave a delicious Oreo cookie treat!

    Cookies are everyone's favorite snack, right? So Cinnabon Cookies, SunButter Cookies, and Peppermint Oreo Cookies are surely as delicious!

    delicious cookies on a white plate
    [feast_advanced_jump_to]

    What is Oreo Stuffed Cookies?

    Oreo Stuffed Cookies are indulgent treats that combine a classic cookie with soft, chewy Chocolate Chip cookie dough. When baked, the dough forms a golden shell around the Oreo, creating a delicious contrast between the crispy center and the gooey exterior.

    This dessert is popular for its rich flavor and playful twist on traditional cookies. The origin of the chocolate chip cookie recipe dates back to the early 2010s when they became a viral sensation through food bloggers and social media. While the exact creator is unknown, the trend likely started in the United States, where Oreos and chocolate chip cookies are both beloved treats.

    Home bakers and bakeries embraced the concept, experimenting with different flavors and variations, making it the Oreo flavor cookies we know today, just like these delicious Oreo stuffed chocolate chip cookies!

    Variations

    • Brownie – Rich, fudgy brownie dough encasing an Oreo for extra chocolate decadence
    • Peanut Butter – Peanut butter cookie dough for a sweet and salty twist
    • Double Stuf – Use Double Stuf Oreos for extra creaminess inside
    • Sea Salt – A sprinkle of flaky sea salt enhances the sweet-salty balance
    • Marshmallow – Add a marshmallow inside for a gooey surprise
    cooling the cookies on a wire rack

    Substitutions

    • Butter or margarine – Coconut oil (solid), vegan butter (for a dairy-free version), or unsweetened applesauce (for a lower-fat option, though the texture may be softer)
    • Brown sugar – Coconut sugar, date sugar, or a mix of white sugar with a teaspoon of molasses
    • Self-rising flour – All-purpose flour + 1 ½ teaspoons baking powder + ½ teaspoon salt
    • White sugar – Coconut sugar (for a natural alternative), maple syrup (reduce the liquid in the recipe slightly), or monk fruit sweetener (for a low-sugar option)

    Storage

    • Refrigerate or Freeze Dough: Make the dough a day ahead and store it in the refrigerator for up to 24 hours or freeze it for up to 3 months. Thaw before baking.
    • Store Baked Cookies Properly: Keep in an airtight container at room temperature for up to 5 days or refrigerate for up to 1 week.
    • Freezing Baked Cookies: Freeze in a sealed container for up to 3 months. Reheat in the microwave for 10-15 seconds to enjoy warm.

    Ingredients

    Listed below are all the ingredients you will need (omitting quantities):

    • butter or margarine
    • white sugar
    • brown sugar
    • large egg
    • vanilla extract
    • self-rising flour
    • white chocolate chips
    • Oreos

    See the recipe card for quantities.

    Instructions

    Preheat oven to 375°F and grease cookie sheets.

    Then in a large bowl of a stand mixer, beat together butter, white and brown granulated sugar, egg, and vanilla extract until creamy.

    mixing the sugar, butter and eggs using a handheld mixer

    Stir in the other one of the dry ingredients: self-rising flour. Then, mix until a soft dough forms.

    mixing the wet and dry ingredients using a handheld mixer

    Next, fold in your semi-sweet chocolate chips and mix well.

    adding the white chocolate chips

    Form 1-inch balls of large cookie scoop balls. Then, flatten one ball slightly, place an Oreo on top, and cover it with another scoop of dough.

    inserting the Oreo between 2 cookie dough balls

    Pinch the sides to seal it completely.

    sealed white chocolate oreo stuffed cookies

    Arrange on a prepared baking sheet with parchment paper, leaving space between cookies for spreading.

    Bake for 14-16 minutes or until golden brown. After baking, put them on a cooling rack, and serve.

    freshly baked cookies on parchment paper

    Enjoy your freshly baked Oreo-stuffed chocolate chip cookies with loved ones!

    Hint: Chill the dough for at least 15 minutes before baking for thicker, chewier cookies.

    ⭐ Top Tip

    • Serve warm with a scoop of vanilla ice cream for the ultimate dessert. Press extra chocolate chips on top of the cookie dough balls before baking for a bakery-style look.
    • For extra crunch, roll the dough balls in crushed Oreos before baking.

    FAQ

    What is the Oreo with a lot of stuff?

    The Mega Stuf Oreos, which have been around since 2013, offered up a whopping 11 grams of filling, nearly double that of a Double Stuf.

    What is the white stuff in the Oreo made of?

    In the center, between the two chocolate wafers, is a white filling made of sugar, high fructose corn syrup, soy lecithin, artificial flavor, and “palm and/or canola oil.

    When did most stuffed Oreos come out?

    Introduced in January 2019, an initially limited edition Oreo with approximately four times the amount of crème filling of a standard Oreo. After two limited runs, it was quietly brought back as a permanent product in late 2020.

    More Recipes

    Cookie lovers love cookie recipes, right? Go ahead and try:

    • Nutella Cookies
    • Snickerdoodles
    • Chocolate Oatmeal Cookies
    • Jello Cookies
    oreo cookies on a white plate
    5 from 2 votes
    Print Pin Recipe

    Oreo Stuffed Cookies

    Oreo Stuffed Cookies are soft, chewy cookies with a hidden Oreo center, combining gooey and crunchy textures for an indulgent treat.
    Prep Time10 minutes mins
    Cook Time16 minutes mins
    Total Time26 minutes mins
    Course: Cookies, Dessert, Snack
    Cuisine: American
    Servings: 12 -15 cookies
    Calories: 478kcal
    Author: Lainey
    Prevent your screen from going dark

    Ingredients

    • 1 cup butter or margarine softened
    • ¾ cup white sugar
    • ¾ cup packed brown sugar
    • 1 large egg
    • 1 teaspoon vanilla extract
    • 2 ¼ cups self-rising flour
    • 12 ounces white chocolate chips
    • Oreos

    Instructions

    • Preheat oven to 375°F and grease cookie sheets.
    • In a large bowl, beat together butter, white sugar, brown sugar, egg, and vanilla extract until creamy.
    • Stir in self-rising flour, mixing until a soft dough forms, then fold in white chocolate chips.
    • Scoop 1-inch balls of dough. Flatten one ball slightly, place an Oreo on top, and cover with another dough ball, sealing the edges completely.
    • Arrange on a baking sheet, leaving space between cookies for spreading.
    • Bake for 14-16 minutes or until golden brown.
    • Allow cookies to cool on the baking sheet for 5 minutes before transferring them to a wire rack to cool completely.
    Leave a Comment
    Serving: 1gCalories: 478kcalCarbohydrates: 58gProtein: 5gFat: 25gSaturated Fat: 15gPolyunsaturated Fat: 1gMonounsaturated Fat: 7gTrans Fat: 1gCholesterol: 60mgSodium: 730mgPotassium: 133mgFiber: 1gSugar: 30gVitamin A: 502IUVitamin C: 0.1mgCalcium: 78mgIron: 0.4mg

    Watch The Recipe Video!

    QR Code
    Did you make this recipe?Share it on instagram or tag @simplybakings or #simplybakings!

    Just check out those Oreos stuffed in the white chocolate chip cookie! I was very surprised that the Oreos didn't melt!  Why do you think it didn't melt?

    I just took these cookies out of the oven and placed them on the rack, *sigh* the smell of home-baked cookies!

    Cookies, Desserts, Snacks

    3D Gingerbread Cookies

    Dec 21, 2013 · 7 Comments

    Frosted 3D Gingerbread Cookies on a white plate

    Ever felt like giving up? Unfortunately, I've had those moments more than three times this week. It's all because of this recipe - 3D Gingerbread Cookies! Fun and festive, these cookies will be all you need to celebrate the holidays.

    If these cookies aren't enough, I've got Snickers Cookies and Nutella Cookies for you to try, too!

    3D Gingerbread Cookies formed into trees
    3D Tree Cookies
    3D Gingerbread Cookies formed into reindeers
    3D Reindeer Cookies
    3D Gingerbread Cookies formed into stars
    3D Star Cookies
    [feast_advanced_jump_to]

    Why You’ll Love This Recipe

    These Gingerbread Christmas cookies are beginner-friendly and make a great family activity with kids. The Gingerbread dough is easy to roll and cut. Your kids will have fun making Christmas trees. They can decorate the cookies with frosting and royal icing. You also don’t need fancy tools to make the 3D effect.

    They’re full of warm spices like ginger and cinnamon, giving that classic holiday smell and taste. Plus, ginger is great for digestion and can help reduce inflammation. This means you get flavor and a little wellness boost, too!

    Ingredients

    These are the 3D Gingerbread Cookies ingredients that you will need:

    • All-purpose flour
    • Ground cinnamon
    • Ground nutmeg
    • Ground ginger
    • Baking soda
    • Salt
    • Butter
    • Brown sugar
    • Molasses
    • Egg
    • Vanilla extract

    Instructions

    Make the Dough

    1. In a large bowl, whisk together all-purpose flour, ground cinnamon, ground nutmeg, ground ginger, baking soda, and salt. Set aside.

    2. In another large bowl, beat butter and brown sugar with an electric mixer until light and fluffy.

    3. Add molasses, egg, and vanilla extract. Mix until well combined.

    4. Wrap the dough in plastic wrap and refrigerate for 4–6 hours, or overnight for best results.

    Plastic wrapped cookie dough ball

    Bake the Cookies

    5. Preheat oven to 350°F (175°C).

    6. Cut dough in half and roll out one portion at a time to ¼-inch thickness on parchment paper.

    7. Bake for 8–10 minutes or until edges are browned.

    8. Immediately cut out shapes using your 3D cookie cutters while still warm.

    Cookie cutter shaping the cookie dough

    9. Transfer to wire racks and let cool completely before assembling or decorating.

    Gingerbread Cookies lined up in a cooling rack

    10. Enjoy!

    Gingerbread Cookies being decorated

    Substitutions and Variations

    • Ingredient Swap
      Swap butter with coconut oil for a dairy-free option.
      Try maple syrup or honey instead of molasses.
    • Variation
      For a spicier cookie, add a pinch of cloves or cardamom.
    • Mistake to Avoid
      Avoid overbaking the cookies! They should still be soft inside.
    • Storage Tips
      • These cookies stand up well to freezing for up to 2 months.
      • Store cooled cookies in an airtight container. Keep decorations separate until ready to serve.
    Frosted 3D Gingerbread Cookies on a white plate

    FAQs

    Do I need special cookie cutters for the 3D effect?

    Nope! You just need a basic gingerbread shape and to cut small slits before baking to fit the pieces together.

    Is this dough okay to make ahead?

    Yes, chill the dough overnight if needed—just let it soften slightly before rolling.

    Can I make these vegan?

    Yes! Use a flax egg and plant-based butter to make them fully vegan.

    Frosted 3D Gingerbread Cookies on a white plate
    4 from 1 vote
    Print Pin Recipe

    3D Gingerbread Cookies

    A classic holiday treat made easy to follow, make yourself a batch of 3D Gingerbread Cookies! It's a beautiful and creative way to enjoy a cookie treat. Crispy edges but soft center!
    Prep Time20 minutes mins
    Cook Time10 minutes mins
    Chilling Time4 hours hrs
    Total Time4 hours hrs 30 minutes mins
    Course: Dessert, Snack
    Cuisine: American
    Servings: 24 cookies
    Calories: 158kcal
    Author: Lainey
    Prevent your screen from going dark

    Ingredients

    • 3 cups All-purpose flour
    • 1 teaspoon Ground cinnamon
    • ¼ teaspoon Ground nutmeg
    • 2 teaspoons Ground ginger
    • 1 teaspoon Baking soda
    • ¼ teaspoon Salt
    • ¾ cup Butter softened
    • ¾ cup Brown sugar packed
    • ½ cup Molasses
    • 1 Egg
    • 1 teaspoon Vanilla extract

    Instructions

    Make the Dough

    • In a large bowl, whisk together all-purpose flour, ground cinnamon, ground nutmeg, ground ginger, baking soda, and salt. Set aside.
    • In another large bowl, beat butter and brown sugar with an electric mixer until light and fluffy.
    • Add molasses, egg, and vanilla extract. Mix until well combined.
    • Wrap the dough in plastic wrap and refrigerate for 4–6 hours, or overnight for best results.

    Bake the Cookies

    • Preheat oven to 350°F (175°C).
    • Cut dough in half and roll out one portion at a time to ¼-inch thickness on parchment paper.
    • Bake for 8–10 minutes or until edges are browned.
    • Immediately cut out shapes using your 3D cookie cutters while still warm.
    • Transfer to wire racks and let cool completely before assembling or decorating.
    • Enjoy!
    Leave a Comment

    Notes

    If you are not using this recipe for 3D cookies, cut out the cookies before you bake it in the oven.
    Serving: 1gCalories: 158kcalCarbohydrates: 24gProtein: 2gFat: 6gSaturated Fat: 4gPolyunsaturated Fat: 0.3gMonounsaturated Fat: 2gTrans Fat: 0.2gCholesterol: 22mgSodium: 123mgPotassium: 135mgFiber: 0.5gSugar: 12gVitamin A: 187IUVitamin C: 0.01mgCalcium: 26mgIron: 1mg

    Watch The Recipe Video!

    QR Code
    Did you make this recipe?Share it on instagram or tag @simplybakings or #simplybakings!

    You Might Also Like:

    • Cinnabon Cookies
    • Oreo Cheesecake Cookies
    • Nutella Peanut Butter Cookies

    Recipes for Every Moment

    Wanna to wow your guests for the holidays? These 3D Gingerbread Cookies double as dessert and table décor - super win-win!

    Storytelling Time!

    It actually took me at least three tries to get it to look this decent!

    On my first attempt, I cut out the cookies before I baked them. I wasn't able to get the cookies to stand because the pieces ended up combining. Mistake.

    In my second attempt, I spread out the pieces. I thought it would allow the cookies to stand. I spread it out more after I baked it, and it still fell.

    My third attempt, I underbaked it, and the pieces fell apart.

    Finally, my last attempt, I was able to get it to stay standing and look somewhat nice. Perfect!

    Desserts

    Hershey Kiss Cookies

    Dec 14, 2013 · 12 Comments

    freshly baked Hershey Kiss Cookies

    These Hershey Kiss Cookies are one of the best holiday cookie treats. This recipe uses Bisquick mix which makes this cookie recipe an easy one to bake! Hershey Kiss cookies are soft, crumbly, and loaded with the richness of chocolates!

    ss copy

    Tips and Procedures:

    • If you are planning to make a larger batch of cookies, just double the measurement of ingredients in the recipe box.
    • Use a stand mixer when kneading a larger batch of Hershey Kiss cookie dough.
    • If you love to give edible gifts during Christmas, you can place these cookies in a Christmas-themed box.

    How to Make these Hershey Kiss Cookies:

    These are the Hershey Kiss Cookies ingredients that you will need:

    • Hershey kisses
    • sweetened condensed milk
    • cookie butter
    • BISQUICK
    • vanilla extract
    • sugar

    Preheat oven to 375F, prepare ungreased cookie sheets.

    In a large bowl, beat sweetened condensed milk and cookie butter until smooth:

    Add vanilla extract and Bisquick then mix well:

    The dough should look like this:

    Shape into 1 inch balls and roll in sugar:

    Bake 6-8 minutes or until very lightly browned:

    Immediately after taking the cookies out of the oven, press Hershey kiss on each ball:

    These Hershey  Kiss Cookies are perfectly baked and look so festive, so right for the Christmas season!

    Frequently Asked Questions:

    Q: How do you store Hershey Kiss Cookies?

    A: After cooling them completely, keep them in an airtight container to keep them fresh longer.

    Q: How can I keep my cookies from cracking when I put the Hershey kisses on top?

    A: Place the Hershey Kisses on top gently, avoiding to press too hard so that the cookie won't break.

    Q: When is the best time to put the Hershey Kisses on top?

    A: Right after you take out the baked cookies from the oven, place the Hershey Kisses on top. The heat will melt the chocolates and it will be easier to press on the cookie while warm.


    Here are more delicious Christmas cookie recipes that you should try:

    • Christmas Tree Shortbread Cookies
    • Snickerdoodle Eggnog Cookies
    • Chocolate Chip Meringue Cookies
    • Brownie Meringue Cookies | 5 Ingredients ONLY
    • Choco Mint Blossom Cookies
    • No-Bake Cookie Dough Truffles
    • Chocolate Nutter Butters
    freshly baked Hershey Kiss Cookies
    5 from 1 vote
    Print Pin Recipe

    Hershey Kiss Cookies

    These Hershey Kiss Cookies are one of the best holiday cookie treats and using Bisquick mix, just mix, bake and decorate!
    Author: Lainey
    Prevent your screen from going dark

    Ingredients

    • about 48 hershey kisses
    • 1 can 14 oz sweetened condensed milk
    • ¾ cup cookie butter
    • 2 cups BISQUICK
    • 1 teaspoon vanilla extract
    • ¼ cup sugar

    Instructions

    • Preheat oven to 375F, prepare ungreased cookie sheets.
    • In a large bowl, beat sweetened condensed milk and cookie butter until smooth. Add vanilla extract and bisquicks, mix well. Shape into 1 inch balls and roll in sugar.
    • Bake 6-8 minutes or until very lightly browned.
    • Immediately after taking the cookies out of the oven, press Hershey kiss on each ball.
    Leave a Comment

    Watch The Recipe Video!

    QR Code
    Did you make this recipe?Share it on instagram or tag @simplybakings or #simplybakings!

    NEVER MISS A RECIPE!

    PINTEREST / FACEBOOK / INSTAGRAM / TWITTER

    If you’ve tried this or any other of my recipes, don’t forget to rate the recipe and to leave me a comment. I love hearing from you!

    Cookies, Desserts

    Christmas Nutter Butter Cookies

    Dec 12, 2013 · 2 Comments

    A plate of festive Christmas Nutter Butter Cookies

    Let's add some more cheer to your holiday parties, candy eyes! Indulge in these no-bake Christmas Nutter Butter Cookies! This beginner-friendly recipe is so satisfying and festive. The sandwich cookie recipe is also easy to follow, it's perfect for even the busiest mom or home bakers!

    If you enjoy easy and sweet cookie recipes, try my Hershey Kiss Cookies or Rice Krispies Cookies next for more fun holiday treats!

    A plate of festive Christmas Nutter Butter Cookies
    [feast_advanced_jump_to]

    Why You’ll Love This Recipe

    These milk chocolate cookies are beginner-friendly and dairy-free (depending on your choice of chocolate). You don’t need to bake anything, too—just dip, decorate, and chill.

    Each cookie gets a vanilla chip off-center, pressed together with a dab of melted chocolate at the end of each cookie. Let them rest on wire racks while you stir up some holiday spirit. I tell you, it's super easy to turn them into Santa cookies or reindeer faces!

    So whether you’re baking with kids or making edible gifts, these cookies come together in minutes and bring instant joy to your kitchen. You might even find yourself making extra for the naughty list crowd!

    Ingredients

    Listed below are all the ingredients you will need:

    • Nutter Butter sandwich cookies
    • chocolate candy melts
    • shortening
    • sprinkles

    See the recipe card for quantities.

    Instructions

    Melt and Prepare the Chocolate

    1. In a microwave-safe bowl, combine chocolate candy melts and shortening.

    2. Microwave in 30-second intervals, stirring between each, until the chocolate is fully melted and smooth.

    Dip and Decorate

    3. Dip each Nutter Butter cookie halfway into the melted chocolate.

    Nutter Butter cookies stacked on a plate

    4. Gently shake off any excess chocolate and lay the cookie flat on a sheet of wax paper.

    5. Immediately add red and green sprinkles on top of the melted chocolate before it sets.

    Sprinkles spread out on a white tray

    6. Repeat for all cookies.

    Chill and Serve

    7. Place the cookies in the refrigerator for about 15 minutes, or until the chocolate is fully set.

    8. Once hardened, transfer to a serving platter or pack them as gifts!

    Christmas Nutter Butter Cookies on a plate

    Substitutions & Variations

    • Ingredient Swap
      Swap Nutter Butters with almond butter cookies or gluten-free peanut cookies.
      You can also melt white chocolate in a pot for dipping or use semisweet chips if you prefer a richer flavor.
    • Variation
      Try different sprinkle colors instead of candy melts for other holidays.
    • Mistake to Avoid
      Don't overheat the chocolate—it can burn easily and lose its shine.
    • Storage Tips
      • These cookies can be stored in an airtight container at room temperature for up to 1 week.
      • They don’t freeze well in the fridge. The chocolate will lose its smooth texture.
      • Keep them cool and dry, and enjoy them fresh for the best results.
    A plate of festive Christmas Nutter Butter Cookies

    FAQs

    Can I use regular chocolate chips instead of candy melts?

    Yes! Just add a bit of shortening or coconut oil to make it easier to dip.

    How can I make these cookies look more festive?

    Use red and green sprinkles, mini M&Ms, or edible glitter for a fun holiday look.

    How do I store them for gift-giving?

    Place them in a sealed cookie tin with parchment paper between layers to keep them from sticking.

    Two Christmas Nutter Butter Cookies served
    No ratings yet
    Print Pin Recipe

    Christmas Nutter Butter Cookies

    These Christmas Nutter Butter Cookies are crunchy, chocolate-dipped, and cheerfully decorated with red and green sprinkles. They're quick to make, festive to serve, and perfect for edible gifting!
    Prep Time10 minutes mins
    Chilling Time15 minutes mins
    Total Time25 minutes mins
    Course: Cookies, Dessert, Snack
    Cuisine: American
    Servings: 12 -16 cookies
    Calories: 137kcal
    Author: Lainey
    Prevent your screen from going dark

    Ingredients

    • 12 –16 Nutter Butter sandwich cookies
    • 12 ounces chocolate candy melts milk, dark, or white
    • 1 tablespoon shortening to thin the chocolate
    • Red and green Christmas sprinkles
    • Wax paper for setting

    Instructions

    Melt and Prepare the Chocolate

    • In a microwave-safe bowl, combine chocolate candy melts and shortening.
    • Microwave in 30-second intervals, stirring between each, until the chocolate is fully melted and smooth.

    Dip and Decorate

    • Dip each Nutter Butter cookie halfway into the melted chocolate.
    • Gently shake off any excess chocolate and lay the cookie flat on a sheet of wax paper.
    • Immediately add red and green sprinkles on top of the melted chocolate before it sets.
    • Repeat for all cookies.

    Chill and Serve

    • Place the cookies in the refrigerator for about 15 minutes, or until the chocolate is fully set.
    • Once hardened, transfer to a serving platter or pack them as gifts!
    Leave a Comment

    Notes

    • Cookies will also set at room temperature in about 30 minutes if refrigeration isn't available.
    • Shortening helps thin the chocolate but may leave a mild aftertaste. You can substitute with flavorless melting wafers if desired.
    • Store cookies in an airtight container at room temperature for up to 5 days.
    Serving: 1gCalories: 137kcalCarbohydrates: 17gProtein: 1gFat: 7gSaturated Fat: 4gPolyunsaturated Fat: 1gMonounsaturated Fat: 1gTrans Fat: 0.1gSodium: 63mgSugar: 12gCalcium: 0.01mgIron: 0.001mg
    QR Code
    Did you make this recipe?Share it on instagram or tag @simplybakings or #simplybakings!

    You Might Also Like:

    • Snickers Cookies
    • Sweet Potato Cookies
    • Apple Pancake Cookies

    Recipes for Every Moment

    Throwing a last-minute Christmas party? These cute, crunchy no-bake Christmas Nutter Butter Cookies come to the rescue!

    Cookies, Desserts, Snacks

    Chocolate Pretzel Rods

    Dec 10, 2013 · 4 Comments

    Who doesn't love chocolate covered pretzels, sweet and salt for every bite?!  For this recipe, finding pretzel rods was a bit of a challenge and I came across it only by accident.  I was window shopping at my local cake supply store and there they were, all in one piece so I purchased some. Also for those of you who don't have a local cake shop around the corner, try Smart & Final, however the bag has a lot of broken pieces.

    Uncoated pretzels in a glass

    I kept this recipe simple and I used a five different kinds of sprinkles and some of the sprinkles tasted like peppermint and gingerbread men which I found really neat!  Do all sprinkles have a unique taste?

    colorful candy sprinkles

    I don't know what I was thinking, but I accidently burned the candy melts! Who does that?!  Well, that would be me ladies and gentlemen.  I microwaved the chocolate for three minutes and was a big mistake, normally you only warm it for about a minute (if it is a small batch of candy melts). Well, I discovered that the candy melts were ready after 30 seconds, it's just I didn't mix it thoroughly for the chocolates to melt.

    burned chocolate melt

    Tips and Tricks for Making This Chocolate Pretzel Rods Recipe: 

    • Are you having a party? Make this dessert you dessert table centerpiece! make it during weddings, birthdays, Christmas, or even on the 4th of July!
    • When melting the chocolate, do not set the stove at a very high temperature. The chocolate could easily burn.
    • If using a microwave in melting the chocolate, do it in short increments to avoid burning the chocolate.
    • You can also use a double boiler in melting the chocolate. Just make sure that the bowl of chocolates does not touch the boiling water. It will cause the chocolate not to melt properly.
    • If you do not like too sweet desserts, use semi-sweet chocolates to coat your pretzel rods.

    How to Make this Chocolate Pretzel Rods Recipe:

    Before starting, don't forget to prepare the ingredients ahead. It saves you a lot of time to lay them all out, plus, you know you are not missing an ingredient.

    Are you all set? Let's begin!

    Melt chocolate in a heatproof bowl according to directions or microwave every 30 seconds and mix in between. Add 1 tablespoon of shortening and mix well. The final consistency should be like this, smooth and glossy:

    properly melted chocolate

    Dip pretzel rods, add sprinkles:

    decorating the pretzels with candy sprinkles

    Allow the pretzels to sit on wax paper for 10 seconds before handling:

    letting the pretzels and chocolate set

    They looked so pretty, Simply Bakers! I am sure your holiday parties would be more fun with all these colorful and delicious pretzel rods!

    finished product of chocolate pretzel rods

    These pretzels tasted amazing, I hope you enjoy them too!

    Chocolate pretzel rods decorated with pretty candy sprinkles on a glass and a plate
     
    Chocolate Pretzel Rods step by step guide

    Frequently Asked Questions for Chocolate Pretzel Rods Recipe:

    Q: Can I do this a few days ahead?

    A: Yes, sure you can. You can decorate it ahead and keep in an airtight container.

    Q: How many servings would this recipe have?

    A: This recipe gives you a lot! Depending on how much chocolate you will be melting and also how many pretzel rods you want to coat.

    chocolate pretzel rods decorated with sprinkles
    No ratings yet
    Print Pin Recipe

    Chocolate Pretzel Rods

    A super easy Chocolate Pretzel Rods perfect for a party dessert which require no baking!
    Author: Lainey
    Prevent your screen from going dark

    Ingredients

    • assorted color candy melts
    • 1 tablespoon shortening
    • pretzel rods
    • sprinkles

    Instructions

    • Melt chocolate candy in a heatproof bowl according to directions or microwave every 30 seconds and mix in between.
    • Add 1 tablespoon of shortening and mix well.
    • Dip pretzel rods, add sprinkles, and allow the pretzels to sit on wax paper for 10 seconds before handling.
    Leave a Comment

    Watch The Recipe Video!

    QR Code
    Did you make this recipe?Share it on instagram or tag @simplybakings or #simplybakings!

    NEVER MISS A RECIPE!

    PINTEREST / FACEBOOK / INSTAGRAM / TWITTER

    If you’ve tried this or any other of my recipes, don’t forget to rate the recipe and to leave me a comment. I love hearing from you!

    Desserts

    Peanut Butter Reindeer Cookies Recipe

    Dec 3, 2013 · 4 Comments

    3 pieces of Reindeer Cookies on a white plate

    Fun, easy to make, and the best part is, these Peanut Butter Reindeer Cookies are no-bake! If you love chocolate no-bake desserts, this is the recipe for you. Kids and adults will surely love this cute holiday reindeer dessert!

    Looking for cookies like this? Try my Polar Bear Cookies or Christmas Tree Cookies!

    reindeer cookies on a white surface

    Putting these peanut butter reindeer cookies together was simple, and to make the Nutter Butters even better, try dipping the cookies in dark chocolate. So good! However, when placing the eyes on the cookie, just be careful not to let the eye flip because once it flips over and the white becomes dark, the cookies end up looking like a scary cookie instead of Christmas cookies.

    Try making this simple yet adorable holiday treat and satisfy your cravings for a sweet indulgence. Keep reading for tips and variations on this recipe. Enjoy!

    [feast_advanced_jump_to]

    Ingredients

    The following are the ingredients that you will need:

    • green sprinkles
    • red M&Ms
    • eyes
    • shortening
    • nutter butters
    • pretzels
    • dark chocolate candy melts
    • popsicle stick
    Peanut Butter reindeer cookies recipe ingredients

    See the recipe card for the quantities.

    Instructions

    Gather the ingredients for this Peanut Butter Reindeer Cookies recipe. Once the ingredients are all ready, let’s begin!

    Follow the instructions to melt the dark chocolate in a mixing bowl, and once it's melted, add the shortening and stir well:

    mixing melted chocolate and shortening

    Grab the cookie and open it up. Then, dip the popsicle stick in the chocolate mixture and place it between the cookies:

    sticking the popsicle stick in between the nutter butter cookies

    Close the cookies by pressing one against the other:

    adhering the two nutter butter cookies using melted chocolate

    Wait about 10 seconds and dip the cookie in the chocolate:

    dipping the cookie into the melted chocolate

    Grab the pretzel pieces and dip them in the chocolate:

    dipping the pretzel into the melted chocolate

    Place on the cookies the candy eyes, red M&M, and green sprinkles:

    decorating the reindeer cookies

    Let it sit for a couple of minutes before handling it:

    Letting the reindeer cookies adhere to the popsicle sticks

    There you have it, Simply Bakers! A no-bake Christmas Day dessert that looks so fun and easy to make!

    delicious and easy to do Peanut Butter reindeer cookies

    Substitutions

    • Chocolate Chips: Instead of regular chocolate chips, use dairy-free mini chocolate chips, chopped dark chocolate, or carob chips.
    • Pretzels: If you don't want to use pretzels for the reindeer antlers, you can substitute thin pretzel sticks, gluten-free mini pretzels, or even little bits of pretzel-shaped crackers.
    • Peanut Butter: If you want to avoid peanuts or want a different flavor, you might use almond butter, cashew butter, or sunflower seed butter instead.
    • Candy eyes: If you can't locate or don't want to use candy eyes, you can make the reindeer eyes out of micro chocolate chips, raisins, or small drops of icing.

    Variations

    • Coconut Nutter Butter Reindeer Cookies: Dip Nutter Butter cookies in melted chocolate and then roll them in shredded coconut.
    • Peanut Butter Cup Nutter Butter Reindeer Cookies: Create the reindeer's body by pressing little peanut butter cups onto Nutter Butter cookies.
    • Coating Options: To add flavor and sweetness, feel free to spread either caramel sauce, semi-sweet milk chocolate, Nutella, melted white chocolate, melted mint chocolate, strawberry jam, or raspberry jam over Nutter Butter cookies, then decorate with candy eyes and a red candy nose to create cute reindeer faces.

    Storage

    • Store these peanut butter reindeer cookies in an airtight container at room temperature in a cool, dry place away from direct sunlight and heat, for 5 to 7 days.
    • Keep any extra decorations separate to avoid them becoming soggy or losing their shape.
    • To keep the layers from sticking together, add a sheet of wax or parchment paper between each one.
    • You may refrigerate the cookies to extend their shelf life, especially if your kitchen is warm. Simply allow them to come to room temperature before serving for the best texture.
    • For long-term storage, place them in a single layer on a baking sheet and freeze until firm, then transfer to a freezer-safe container or resealable plastic bag. Before serving, allow it to thaw in the refrigerator or at room temperature.

    Top Tip

    After putting the two nutter butter cookies together, allow them to adhere to each other before handling them again. By letting it dry for some time, you will prevent the cookies from breaking apart.

    FAQs

    How long can I keep the cookies once they are decorated?

    You can keep them for a week or longer inside an airtight container and place them inside the chiller.

    What special items do you need to make reindeer cookies?

    The pretzel cookies are a must-have, as are the edible eyes and colorful sprinkles.

    What is FAQ?

    Lorem ipsum dolor sit amet, consectetur adipiscing elit, sed do eiusmod tempor incididunt ut labore et dolore magna aliqua. Ut enim ad minim veniam, quis nostrud exercitation ullamco laboris nisi ut aliquip ex ea commodo consequat.

    What is FAQ?

    Lorem ipsum dolor sit amet, consectetur adipiscing elit, sed do eiusmod tempor incididunt ut labore et dolore magna aliqua. Ut enim ad minim veniam, quis nostrud exercitation ullamco laboris nisi ut aliquip ex ea commodo consequat.

    Here are more delicious Christmas cookie recipes that you should try:

    • Christmas Tree Shortbread Cookies
    • Snickerdoodle Eggnog Cookies
    • Chocolate Chip Meringue Cookies
    • Brownie Meringue Cookies | 5 Ingredients ONLY
    • Choco Mint Blossom Cookies
    • No-Bake Cookie Dough Truffles
    • Chocolate Nutter Butters
    a pair of delicious Peanut Butter Reindeer Cookies
    5 from 2 votes
    Print Pin Recipe

    Peanut Butter Reindeer Cookies Recipe

    Here's a super easy cookie recipe loaded with the delicious flavors of Nutter butter, pretzels, and chocolate melt. They are super festive, and fun to make, and there's no oven required!
    Prep Time15 minutes mins
    Total Time15 minutes mins
    Course: Cookies
    Cuisine: American
    Calories: 975kcal
    Author: Lainey
    Prevent your screen from going dark

    Ingredients

    • green sprinkles
    • red M&Ms
    • eyes
    • 2 tablespoons shortening
    • nutter butters
    • pretzels
    • 12 oz dark chocolate candy melts
    • popsicle stick

    Instructions

    • Follow the instructions to melt the dark chocolate and once it's melted add the shortening and mix.
    • Grab the cookie and open it up. Then, dip the popsicle stick in the chocolate melt, place it between the cookies, and close the cookie. Wait about 10 seconds and dip the cookie in the chocolate.
    • Grab the pretzel(s) and dip in the chocolate and place on the cookie, place eyes, M&M and green sprinkle and let it sit for a couple of minutes before handling it.
    Leave a Comment
    Serving: 1gCalories: 975kcalCarbohydrates: 92gFat: 66gSaturated Fat: 44gPolyunsaturated Fat: 7gMonounsaturated Fat: 11gTrans Fat: 3gSodium: 154mgSugar: 92gCalcium: 0.3mgIron: 0.02mg

    Watch The Recipe Video!

    QR Code
    Did you make this recipe?Share it on instagram or tag @simplybakings or #simplybakings!

    Are you a Nutter Butter fan? I am, and one of my viewers commented on my YouTube channel and pointed out that the Nutter Butter Cookies are underrated, and I agree with her! I don't know when I grew fond of Nutter Butter Cookies, but I found them to be delicious and satisfying. Check this out!

    Cookies, Desserts

    Mini Apple Pie Pops

    Nov 26, 2013 · 4 Comments

    Mini apple pie pops with choco syrup on top

    Apple pie in any form is delicious, don't you agree?  Instead of making the usual apple pie, I thought making mini apple pies would be a better idea. Sealed in flaky pastry and baked on a stick, each of my Mini Apple Pie Pops is a sweet, snackable treat just for you!

    By the way, if you still want to eat store-bought pie crust, get a hold of my yummy Buko Pie and my Peach Mango Pie recipes. You can also make your own crust with my own Pie Crust recipe!

    A plate of delicious Apple pie pops
    [feast_advanced_jump_to]

    What are Mini Apple Pie Pops?

    Mini Apple Pie Pops are bite-sized apple pies on a stick, an American-inspired treat rather than a Filipino recipe. They became popular as a fun, portable dessert choice on social media, and a unique feature is the use of apple pie spice - a fragrant blend of cinnamon, nutmeg, and other warm spices that captures the classic comfort of a full-size apple pie.

    When is this Dish Typically Enjoyed?

    Mini Apple Pie Pops can be enjoyed anytime, but they’re especially popular during the fall and around Thanksgiving when apples are in season and warm, spiced desserts are in high demand. Thanks to their cute presentation and easy-to-serve format, they also appear at events like birthday parties, baby showers, and holiday celebrations throughout the year.

    Substitutions

    • Ground Allspice — A pinch of clove or a bit of pumpkin pie spice can replicate its warm flavor.
    • Nutmeg — Mace or extra cinnamon can stand in, though the taste will differ slightly.
    • Granny Smith Apples — Tart varieties like Honeycrisp, Pink Lady, or Braeburn apples provide a similar tang.
    • Egg Yolk — Replace with a tablespoon of milk or cream for sealing crust edges, or use a bit of melted butter if just for browning.
    • Pie Crusts — Puff pastry gives a flaky result, and cookie dough or phyllo sheets offer unique textures for a creative spin.
    Flaky crust of mini apple pie pops

    Recipe Variations

    • Streusel Topping - Sprinkle each pie pop with a simple butter-sugar-flour crumble before baking to create a crisp, bakery-style crust
    • Cheddar Twist - Mix shredded sharp cheddar cheese into the crust or filling to embrace the classic apple-and-cheese pairing
    • Mixed Fruit Filling - Combine apples with pears, peaches, or berries for a colorful medley that adds different textures and flavors
    • Glazed Apple Pops - Lightly brush each baked pop with a simple powdered sugar–milk glaze to add sweetness and a polished sheen

    Storage

    • Store pie pops in an airtight container at room temperature for up to two days, ensuring they remain crisp and protected from humidity.
    • Extend freshness by refrigerating in a sealed container for up to four days; warm them briefly in the oven or microwave before serving.
    • Arrange cooled pie pops in a single layer on a tray, freeze until solid, and then transfer to a freezer-safe bag or container for up to three months.
    • To revive crispness, bake frozen or chilled pops at 350°F (175°C) for 5–7 minutes, or until heated through.

    Ingredients

    Listed below are all the ingredients you will need (omitting quantities):

    • All-purpose flour
    • Ground allspice
    • Nutmeg
    • Cinnamon
    • Vanilla extract
    • Granny Smith apples
    • Egg yolk
    • Pie crusts (my own recipe here)

    See recipe card for quantities.

    All ingredients in separate white bowls

    Instructions

    Preheat the oven to 350°F (175°C) and lightly spray a baking pan with nonstick spray.

    Peel the apples carefully, as if shaving them, then dice into small pieces.

    Apples shaved and cut into dices

    In a bowl, mix apple slices with all-purpose flour.

    Apple dices mixed with all-purpose flour

    Stir in the blended allspice, nutmeg, and cinnamon.

    Brown spices added to a bowl of apple dices

    Pour in the vanilla extract and combine well.

    A spoon of vanilla extract added to the mix

    Stir the apple mixture well to coat evenly.

    Spatula stirring on a bowl of apple dices

    Roll out the pie crusts and use small round cookie cutters to cut circles for the top and bottom of each pie pop.

    Pie dough rolled and cut into circle pieces

    Place each pie dough on the baking sheet. No need for parchment paper, of course.

    Baking sheet filled with small pie dough

    Spoon a small amount (maybe a tbsp) of apple filling into the center of each pie crust circle.

    Apple filling added to each pie dough

    Press a lollipop stick into the filling. Cover with another pie crust circle and press the edges to seal.
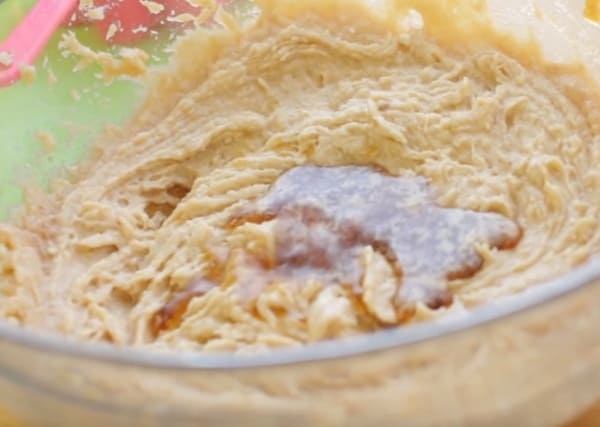
    Apple pops on baking sheet with a stick

    Brush the tops with egg yolk, then bake for 15-20 minutes or until golden brown.

    Egg yolk brushed around each apple pop

    Let them cool slightly before serving and drizzle with your favorite syrup - mine's chocolate of course! Then go ahead and enjoy your sweet, crispy apple pie pops!

    Mini apple pie pops drizzled with chocolate on a white plate.

    Hint: If using homemade pie crust, chill it for 30 minutes before rolling to prevent shrinking.

    ⭐ Top Tip

    For extra flavor and shine, brush the top with a mix of honey and water after baking. Add caramel drizzle or a dusting of powdered sugar for an extra treat!

    FAQ

    How do you soften apples before baking?

    Place the butter and a tablespoon of the water into a sauté pan and bring over medium heat until butter is melted. Add the sliced apples and stir to coat with the butter. Cook uncovered, stirring occasionally for 4-5 minutes to soften the apples. In a small bowl, stir together the cornstarch and water until combined.

    How to keep apples from getting mushy in pie?

    Some experts will tell you to par-cook apples before filling a pie by pouring boiling water over cut apples and soaking them for 10 minutes. Others say to roast them to reduce water content. Still, others say to let cut apples sit for 30-40 minutes to drain natural juices.

    Should I cook apples before making apple crumble?

    Cook the apples, with a bit of lemon juice. If you use ½ cooking and ½ eating apples, you can use less sugar.

    More Recipes

    Fond of more sweets? Here's some more random delicious sweets:

    • Sweet Potato Turon
    • Cookie Dough Bites
    • Fruit Popsicles
    • Ice Scramble
    Homemade apple pie pops cooling on a plate
    5 from 2 votes
    Print Pin Recipe

    Mini Apple Pie Pops

    Bite-sized apple pies on a stick, perfect for snacking or gifting!
    Prep Time15 minutes mins
    Cook Time20 minutes mins
    Total Time35 minutes mins
    Course: Dessert, Snack
    Cuisine: American
    Servings: 8 -10 pie pops
    Calories: 71kcal
    Prevent your screen from going dark

    Ingredients

    • ⅔ cup all-purpose flour
    • ¼ tsp ground allspice
    • ⅛ tsp nutmeg
    • ½ tsp cinnamon
    • 1 tsp vanilla extract
    • 2 Granny Smith apples peeled and sliced into small pieces
    • 1 egg yolk for brushing
    • Pie crusts store-bought or homemade
    • Lollipop sticks

    Instructions

    • Preheat the oven to 350°F (175°C) and lightly spray a baking pan with nonstick spray.
    • In a large bowl, combine apple slices, allspice, nutmeg, cinnamon, and vanilla extract. Stir well to coat the apples evenly.
    • Roll out your pie crusts and use a small round cutter or pie mold to cut circles for the base and top of each pie pop.

    Assemble the pops:

    • Place one pie crust circle on a baking sheet.
    • Spoon a small amount of apple filling into the center.
    • Press a lollipop stick into the filling.
    • Cover with another pie crust circle and press the edges to seal.
    • Brush with egg yolk for a golden crust.
    • Bake for 15-20 minutes, or until golden brown.
    • Let cool slightly and enjoy!
    Leave a Comment
    Serving: 1gCalories: 71kcalCarbohydrates: 15gProtein: 2gFat: 1gSaturated Fat: 0.3gPolyunsaturated Fat: 0.2gMonounsaturated Fat: 0.3gCholesterol: 24mgSodium: 2mgPotassium: 64mgFiber: 1gSugar: 5gVitamin A: 58IUVitamin C: 2mgCalcium: 9mgIron: 1mg
    QR Code
    Did you make this recipe?Share it on instagram or tag @simplybakings or #simplybakings!

    Desserts

    Mini Oreo Pumpkin Cheesecake

    Nov 26, 2013 · 14 Comments

    yummy mini oreo pumpkin cheesecake drizilled with caramel

    Celebrate Thanksgiving with my irresistible Mini Oreo Pumpkin Cheesecake! This tasty dessert combines the creamy richness of cheesecake, the warm spices of pumpkin, and the unbeatable crunch of Oreo cookies.

    Enjoy more of my Oreo and Thanksgiving desserts you can make: Chocolate Chip Cheesecake, Snickers Oreo Cheesecake, and Oreo Waffles.

    mini oreo pumpkin cheesecake with whipped cream
    [feast_advanced_jump_to]

    Substitution

    • Pumpkin Pie Spices: If you don’t have cinnamon, you can use pumpkin pie spices or pumpkin spice instead.
    • Graham Crust: You can use a graham cracker crust instead of the Oreo crust for a different flavor.
    • Heavy Cream: Add a dollop of whipped heavy cream on top of each cheesecake for extra richness.

    Variation

    • Chocolate Chips: Mix some chocolate chips into the cheesecake mixture for a chocolatey surprise.
    • Spiced Up: Add a pinch of salt and a bit more pumpkin pie spices or pumpkin spice to the mixture for more flavor.
    • Cupcake Liners: Use colorful cupcake liners in the muffin tin to make serving and cleanup easier.

    Storage

    Store any leftover cheesecakes in an airtight container in the refrigerator for up to 5 days. For longer storage, you can freeze the cheesecakes. Wrap each one in plastic wrap and then place them in a freezer-safe container. Thaw in the refrigerator before serving.

    Top Tips

    • For a more festive look, top with whipped cream and drizzle with caramel sauce before serving.
    • If you do not have crushed Oreos on hand, you can crush the whole Oreos and use a food processor.
    • When you can, always use a bain-marie or water bath when baking this Oreo Pumpkin Cheesecake recipe. It helps in making the cheesecake have a soft and creamy texture because it is the steam which makes the texture of the cheesecake softer after baking.

    Ingredients

    • cream cheese
    • sugar
    • egg
    • canned pumpkin
    • vanilla extract
    • cinnamon
    • oreos
    • butter

    Equipment

    • Non-Stick Mini Cheesecake Pan
    ingredients for oreo pumpkin cheesecake

    Instructions

    Once the ingredients are all ready and you have preheated your oven to 350 degrees F, let's begin!

    In a medium-sized bowl, add Oreo cookies, butter, and mash till it is crumbly:

    crushed oreos and butter mashed using a fork

    Place 1 tablespoon of oreo crumbs into the mini cheesecake pan:

    putting crushed oreos on the baking tin pan

    The Oreo crust should be properly pressed so it would not fall off when you take it off the pan. I used a gallon lid in doing this:

    pressing the oreo crust using a gallon lid

    For the oreo pumpkin cheesecake filling, beat cream cheese in a large bowl until it has no lumps. I used a stand mixer. Add sugar and continue mixing:

    mixing sugar and creamcheese

    Add egg, vanilla extract, pumpkin, and cinnamon and mix:

    adding egg, pumpkin puree and cinnamon powder to the creamcheese mixture

    Add cheesecake batter to the pan and fill to the top:

    ready to bake oreo pumpkin cheesecake

    When you bake it, put the baking pan over a pan bain-marie, or simply known as water bath. Make sure the bottom of the baking pan does not touch the water in the other pan:

    a well-used baking tray made of metal, likely aluminum

    Bake for 15-20 minutes and allow it to sit in room temperature for one hour before serving:

    freshly baked oreo pumpkin cheesecake

    Top with an Oreo and whipped topping and drizzle with caramel sauce. Yummy!

    delicious oreo pumpkin cheesecake topped with whipped cream and caramel sauce

    Frequently Asked Questions

    Can I use fresh pumpkin instead of canned pumpkin?

    Yes, you can use fresh pumpkin puree. Just make sure to cook and puree the pumpkin until smooth. Avoid using watery pumpkin puree as it may affect the texture of the cheesecake.

    How can I tell when the cheesecakes are done baking?

    The mini pumpkin cheesecakes are done when the centers are set and slightly jiggle when the pan is gently shaken. The edges may be slightly puffed.

    I want more texture in the Mini Oreo Pumpkin Cheesecake. Can I mix in some crushed Oreos in the batter?

    Yes, for sure! You can add a bit if crushed Oreos to the batter.


    mini pumpkin cheesecake with oreo crust
    5 from 4 votes
    Print Pin Recipe

    Mini Oreo Pumpkin Cheesecake

    A delicious dessert made with pumpkin puree and Oreos - Mini Oreo Pumpkin Cheesecake is perfect for your Fall and Thanksgiving party!
    Prep Time15 minutes mins
    Bake Time40 minutes mins
    Total Time55 minutes mins
    Course: Dessert
    Cuisine: American
    Servings: 12 mini cakes
    Calories: 144kcal
    Author: Lainey
    Prevent your screen from going dark

    Ingredients

    • 1 ½ (12 oz) cream cheese soften
    • 1 cup sugar
    • 1 egg
    • ½ cup canned pumpkin
    • 1 teaspoon vanilla extract
    • 1 teaspoon cinnamon
    • 1 cup crushed oreos
    • 1 tablespoon butter

    Instructions

    • Preheat oven to 350 degrees F.
    • In a medium sized bowl, add oreos, butter and mash till it is crumbly and place 1 tablespoon of crushed oreo into the mini cheesecake pan.
    • In a large bowl beat cream cheese until it has not lumps, add sugar and continue mixing. Add egg, vanilla extract, pumpkin, and cinnamon and mix. Add to the pan and fill to the top.*
    • Bake for 15-20 minutes and allow it to sit for one hour before serving.
    • Garnish with whipped cream.
    Leave a Comment

    Notes

    *For easy removal, it's important to use a nonstick mini cheesecake pan. To ensure even easier removal, spray the pan with cooking oil.
    Serving: 1cakeCalories: 144kcalCarbohydrates: 27gProtein: 1gFat: 4gSaturated Fat: 1gPolyunsaturated Fat: 1gMonounsaturated Fat: 2gTrans Fat: 0.05gCholesterol: 16mgSodium: 65mgPotassium: 59mgFiber: 1gSugar: 22gVitamin A: 1638IUVitamin C: 0.4mgCalcium: 10mgIron: 2mg

    Watch The Recipe Video!

    QR Code
    Did you make this recipe?Share it on instagram or tag @simplybakings or #simplybakings!

    Since Thanksgiving is around the corner and I'm not a big fan of pumpkin, I decided to put my favorite cookie and some pumpkin together to make Oreo Pumpkin Cheesecake!  I was pleasantly surprised by the texture and the taste of the cheesecake, I hope you will too!  What's your favorite cookie?

    Do you like Oreos?  Well, I love Oreos!  It is a cookie I can eat any time of the day including breakfast.  I don't know why, but I have always enjoyed having four Oreos and a cup full of soy milk.

    Cheesecake, Desserts, Thanksgiving Desserts

    Sugar Leaf Cookies Using Refrigerated Cookie Dough

    Nov 16, 2013 · 3 Comments

    autumn sugar leaf cookies

    These Sugar Leaf Cookies using Refrigerated Cookie Dough are fun and perfect to bake during Fall or Thanksgiving! All you need are 5 ingredients to make these easy and delicious leaf-shaped fall cookies!

    You will absolutely love more of my sugar cookie recipes: Cookie Dough Bites, SunButter Cookies 5 Ingredients ONLY Nut & Dairy free, DAIRY FREE Snickerdoodle Cookies!

    freshly baked fall sugar leaf cookies
    [feast_advanced_jump_to]

    Substitutions

    • If you’re looking to switch things up, you can use different doughs, like gingerbread or shortbread, for a different flavor profile.
    • You can also experiment with colors – why not make these cookies for Halloween, using purple, black, and orange? The possibilities are endless.

    Variations

    • If you don’t have all the food coloring on hand, don’t worry! You can mix red and yellow to create orange or use other colors to fit different holiday themes.
    • Feel like experimenting? Try using chocolate chips or layer with cookie sprinkles for added texture.
    • You can add 2-3 tablespoons of softened unsalted butter to the cookie dough for a richer taste. If the dough becomes too soft, chill it in the fridge before rolling and baking.
    • Add 1 teaspoon of vanilla extract and swap some of the powdered sugar for brown sugar to give the cookies a deeper flavor. Try using 2 tablespoons of brown sugar along with the vanilla for a richer, slightly caramel-like taste.

    Storage

    • To keep your cookies fresh, store them in an airtight container at room temperature for up to 5 days.
    • If you’d like to make them ahead of time, you can also freeze them. Simply freeze the dough after rolling and cutting it, and bake as needed!

    Top Tips

    • Use paste food coloring like what I did for brighter colored cookies. The paste food coloring also is easier to handle when mixing into the dough.
    • Before rolling out the dough in the wooden board, make sure to sprinkle all-purpose flour or flour cornstarch to prevent the dough from sticking into the wood board.
    • Decorating sugar leaf cookies is fun! You can drizzle edible glitters on top of each sugar leaf cookie for a more festive vibe.
    • Use maple leaf cookie cutter to achieve the Fall and Thanksgiving theme in your cookies.

    Ingredients

    These are the ingredients you will need:

    • refrigerated cookie dough
    • powdered sugar
    • red coloring
    • orange coloring
    • yellow coloring

    Instructions

    Before coloring the dough for the Sugar Leaf Cookies, don't forget to preheat oven to 350 F.

    Divide dough into 3 equal portions and color the sugar cookie dough:

    coloring the cookie dough with yellow food color

    I used these Americolor food colors for this Sugar leaf Cookies:

    Americolor food coloring for sugar leaf cookies

    Here they are! Ready to become edible and delicious Sugar Leaf Cookies! After coloring doughs, place them in separate bowls and secure with saran or plastic wrap. Chill for 30 minutes:

    colored sugar leaf cookie dough in small bowls

    Put each color side by side in order to form a bigger dough. Flatten the dough with a rolling pin and cut the dough with cookie cutters:

    putting together the colored cookie dough using the hands

    Use your imagination in combining the colors of the Sugar leaf Cookies:

    flattened colorful sugar leaf cookie dough on a wooden board

    You can find many designs of leaf cookie cutters in baking supply shops and even in grocery shops. These are what I used:

    cookie cutters used for the sugar leaf cookies

    Press onto the cookie dough and make as many Sugar Leaf cookies as you can with the colorful dough:

    cutting leaf shapes out of the colorful cookie dough

    Place them on parchment paper or baking sheet. These cute and colorful Sugar leaf Cookies are ready to be baked! Bake cookies in 350F.

    ready to bake leaf cookies

    After 8 minutes, check if the cookies are done and if so, take out from the oven and cool them completely in a wire rack. Let them cool before serving or decorating further with a light dusting of sugar powder:

    freshly baked sugar leaf cookies on a cookie rack

    These Sugar leaf Cookies are not just pretty but they are delicious! They are perfect to bake during the Fall season like when you are having a Fall theme party.

    Frequently Asked Questions

    What does refrigerating cookie dough do to cookies?

    Refrigerating cookie dough helps firm it up, making it easier to shape and roll, and enhances the flavor by allowing ingredients to meld. It also prevents the cookies from spreading too much while baking, giving them a better texture.

    Can you bake cookie dough straight out of the fridge?

    Yes, you can bake cookie dough straight from the fridge, though it might take a minute or two longer to bake. The dough stays firmer and results in thicker, chewier cookies.

    What happens if you refrigerate cookie dough too long?

    If you refrigerate cookie dough too long, it can become very hard and difficult to work with. Let it sit at room temperature for a few minutes to soften slightly before handling.

    More fun cookie recipes you can try:

    • Snickerdoodle Apple Cookies
    • Brownie Meringue Cookies | 5 Ingredients ONLY
    • Oreo Cheesecake Cookies
    tasty and crunchy sugar leaf cookies
    5 from 1 vote
    Print Pin Recipe

    Sugar Leaf Cookies Using Refrigerated Cookie Dough

    Make cute and colorful Thanksgiving cookies like these Sugar Leaf Cookies Using Refrigerated Cookie Dough with just 5 ingredients!
    Prep Time45 minutes mins
    Bake Time8 minutes mins
    Total Time53 minutes mins
    Servings: 25 - 30 cookies
    Calories: 6kcal
    Author: Lainey
    Prevent your screen from going dark

    Ingredients

    • 1 package refrigerated cookie dough 16 oz
    • ⅓ cup powdered sugar
    • Red food coloring 5-7 drops
    • Orange food coloring 5-7 drops
    • Yellow food coloring 5-7 drops

    Instructions

    • Preheat oven to 350°F (175°C).
    • Divide cookie dough into 3 equal parts and color each part with 5-7 drops of red, orange, and yellow food coloring.
    • Wrap each dough color in plastic wrap and refrigerate for 30 minutes.
    • Divide each colored dough into 1 cm balls. Roll the balls together to form one large ball.
    • Flatten the dough with a rolling pin and use cookie cutters to cut out shapes.
    • Bake for 5-8 minutes or until edges are lightly golden.
    Leave a Comment
    Serving: 1 cookieCalories: 6kcalCarbohydrates: 2gSodium: 0.03mgPotassium: 0.03mgSugar: 2gCalcium: 0.02mgIron: 0.001mg

    Watch The Recipe Video!

    QR Code
    Did you make this recipe?Share it on instagram or tag @simplybakings or #simplybakings!

    Have you ever tried coloring rolled sugar cookies? The first time I tried was three days ago and I found it to be interesting.  Personally, I don't like getting my hands dirty when I bake, but I thought it was be so cute to make leaf sugar cookies for fall!
    I took out my new gel food colorings and squirted some onto a chunk of refrigerated cookie dough and started kneading the cookie.  It was so hard, keep in mind that I love baking, but I'm learning as I go, so I wasn't sure if I was doing it right. Eventually the dough turned into the color I was trying to get, but when it was time to roll out the dough, I didn't do a very good job and the cookie actually reminded me of the cereal fruity pebbles. (Do you guys remember that cereal?)

    Anyway, below is my first batch of cookies.

    multi-colored sugar leaf cookies

    I love the color of the dough before it was placed into the oven, 2nd attempt. After it was baked in the oven - 2nd attempt.

    orange and yellow sugar leaf cookies


    Cookies, Desserts

    Mini Salted Caramel Cheesecake

    Nov 14, 2013 · 30 Comments

    creamy mini salted caramel cheesecakes with caramel glaze

    The perfect mini dessert—Mini Salted Caramel Cheesecake! It's creamy, cheesecakey goodness with gooey salted caramel sauce on top.

    Love Caramel?! I have a few recipes you would enjoy: These delicious Chocolate Caramel Cookies, Caramel Hot Chocolate (reminds of Starbucks Caramel Frapachinno, and these amazing Caramel Pretzel Cookies!

    mini salted caramel cheesecakes on a white plate
    [feast_advanced_jump_to]

    Substitutions

    • Swap the caramel for chocolate sauce if you’re a chocoholic.
    • Use crushed Oreos instead of graham cracker crumbs for a chocolatey base.
    • Opt for gluten-free graham crackers to make this recipe gluten-free.
    • For a deeper, more caramelized sweetness, substitute the white sugar with brown sugar. The molasses in brown sugar complements the caramel flavor and gives the cheesecake a richer taste. Use ½ cup of brown sugar instead of white and whisk it into the filling for a smooth finish.

    Variations

    • Add a layer of fresh or frozen berries on top of the crust before adding the cheesecake mixture for a fruity twist.
    • For the crust, you can easily make a gluten-free version by using gluten-free crushed graham crackers. Alternatively, you can grind your own crackers in a food processor for a finer texture. This will allow you to achieve the perfect consistency when mixed with butter for the crust.

    Storage

    • These cheesecakes can be stored in an airtight container in the fridge for up to 4 days.
    • For longer storage, you can freeze them! Just wrap each mini cheesecake individually in plastic wrap and place them in a freezer-safe bag. They’ll last for up to 3 months. To enjoy, simply thaw in the fridge for a few hours before serving.

    Top Tips

    • For a more festive look, top with whipped cream and of course, caramel sauce before serving.
    • Gently and firmly pack the graham crust for your mini Salted Caramel Cheesecake by using a gallon lid or anything in your kitchen that you can use.
    • If you’re using a regular muffin tin instead of mini cheesecake pans, line your muffin cups with paper liners for easy removal and cleanup. This is also a great option for serving, as the cheesecakes can be handled without a mess.

    Ingredients

    Ingredients you will need:

    • a pack and half of the cream cheese (12 oz)
    • granulated sugar
    • heavy whipping cream
    • egg
    • caramel
    • graham crackers
    • butter

    Instructions

    Once the ingredients are all ready and you have preheated your oven to 350 degrees F, let's begin!

    In a medium-sized bowl, place graham crackers and melted butter and mix with a fork, then place into mini cheesecake pans:

    pressing the graham crust with a gallon lid

    In a large bowl add cream cheese and beat using a mixer:

    mixing the cream cheese with a handheld mixer

    Add white sugar, heavy whipping cream, egg, caramel, and mix until well incorporated:

    adding vanilla and sugar to the cream cheese mixture

    The cheesecake mixture should look like this:

    mini salted caramel cheesecake batter

    Then add the cheesecake batter to the cheesecake pans or muffin tins with cupcake liners to the rim:

    ready to bake mini salted caramel cheesecake bites

    Bake for 15-17 minutes, remove from the oven and allow it to sit at room temperature for at least an hour. Serve with a drizzle of caramel sauce and coarse sea salt:

    ready to bake mini salted caramel cheesecake

    Frequently Asked Questions

    Should I use a bain-marie in baking this recipe?

    Yes, I used it when making this recipe. It gives a softer texture to your mini salted caramel cheesecake.

    How can I prevent the cheesecakes from cracking?

    To avoid cracking, don’t overbake them. Once the tops are set and slightly puffed, take them out of the oven and let them cool slowly.

    How do you remove mini cheesecakes?

    To remove mini cheesecakes, gently run a knife around the edges to loosen them, then carefully lift them out of the pan. If using paper liners, simply pull them out by the edges of the liner for easy removal.


    Here are more cheesecakes and Thanksgiving desserts you can make:

    • Chocolate Chip Cheesecake
    • Snickers Oreo Cheesecake
    • BEST Salted Caramel Bundt Cake
    mini salted caramel cheesecake on a white plate
    5 from 1 vote
    Print Pin Recipe

    Mini Salted Caramel Cheesecake

    A Mini Salted Caramel Cheesecake that is soft, creamy, delicious and addicting - a perfect treat for Salted Caramel lovers!
    Prep Time10 minutes mins
    Cook Time17 minutes mins
    Total Time27 minutes mins
    Course: Dessert
    Cuisine: American
    Servings: 16
    Calories: 65kcal
    Author: Lainey
    Prevent your screen from going dark

    Ingredients

    • 1½ packs (12 oz) cream cheese softened
    • ½ cup white sugar
    • ¼ cup heavy whipping cream
    • 1 egg
    • ⅛ cup caramel
    • ½ cup graham crackers crushed
    • 1 tablespoons butter

    Instructions

    • Preheat oven to 350 degrees F.
    • In a medium sized bowl, place graham crackers, butter and mix with fork, then place into mini cheesecake pans.
    • In a large bowl add cream cheese and beat until mixed. Add white sugar, heavy whipping cream, egg, caramel and mix until well incorporated. Then add to the cheesecake pans to the rim.
    • Bake for 15-17 minutes, sit for an hour, and serve.
    Leave a Comment

    Notes

    Cream cheese needs to be at room temperature before adding it to the mix because it will form little clumps which makes the batter clumpy.
     
    Serving: 1servingCalories: 65kcalCarbohydrates: 9gProtein: 1gFat: 3gSaturated Fat: 1gPolyunsaturated Fat: 0.2gMonounsaturated Fat: 1gTrans Fat: 0.03gCholesterol: 17mgSodium: 320mgPotassium: 17mgFiber: 0.1gSugar: 2gVitamin A: 93IUVitamin C: 0.03mgCalcium: 9mgIron: 0.2mg

    Watch The Recipe Video!

    QR Code
    Did you make this recipe?Share it on instagram or tag @simplybakings or #simplybakings!

    I like cheesecake, but I can only take three bites before I'm done. I wanted to try to make a salted caramel cheesecake recipe because I have become obsessed with salted caramel. In fact, every day for two weeks, I stopped by Starbucks and bought myself a Salted Caramel Frap. Anyway, I made my own caramel sauce recipe which I used to make this cheesecake which you can find here.

    I have made cheesecake many times in a regular-sized pan and it turned out great. However, making salted caramel mini cheesecakes was a bit of a challenge.  Some of the few challenges were cracking in the middle of the cheesecake, little cheesecakes sinking in the middle, and the cheesecake falling apart.

    I actually wanted to give up, but I told myself it was worth it!  I realized my first mistake was leaving it in the oven too long. Apparently, these MINI cheesecake bites only bake for 15-20 minutes and that is why it was cracking and sinking in the middle.  The cheesecake falling apart only happened because I didn't wait for an hour for it to solidify.  I also made a water bath, so that probably helped.  In the end, after many attempts at making the Mini Salted Caramel Cheesecake, the first bite was totally worth it!

    I partnered with my friends from YouTube Hani, Cobi, Barbara, and Sav to make a Thanksgiving Dinner.  So if you don't have a menu for Thanksgiving here is some healthy, but delicious food for you and your family!

    Cake, Cheesecake, Christmas Desserts, Desserts

    Rolled Butter Cookies Recipe

    Nov 12, 2013 · 3 Comments

    Rolled Butter Cookies on a white plate

    On the hunt for the perfect cut-out cookies? This Rolled Butter Cookies recipe is just what you need! These cookies are soft, buttery, and hold their shape beautifully — perfect for decorating. With simple ingredients and a quick bake time of under 10 minutes, you’ll have a delicious batch ready in no time!

    Want to make more of these tasty treats? My recipes for Banana Bread Cookies, Oatmeal Cookies, and Cinnabon Cookies are easy and fun to make!

    Rolled Butter Cookies on a white plate
    [feast_advanced_jump_to]

    What are Rolled Butter Cookies?

    Rolled Butter Cookies are soft, buttery cookies made by rolling out the dough and cutting it into fun shapes, or using a cookie press for easy designs. They’re not a Filipino recipe, but loved in many parts of the world. One unique ingredient is pure vanilla extract, which adds a deep, sweet flavor that pairs perfectly with the butter.

    These cookies are great for decorating with frosting, sprinkles, or even a drizzle of chocolate. They hold their shape well and are perfect for holidays, birthdays, and any special occasion that calls for sweet, buttery cut-outs.

    History of Rolled Butter Cookies

    Rolled Butter Cookies have been around for a long time and are believed to have started in Europe, especially in countries like Germany or Austria. Bakers created them to make shaped cookies for celebrations and family gatherings.

    What started as a classic original recipe using simple ingredients became a go-to cookie for holidays. Now, you can find these cookies in homes all over the world, especially during baking season.

    Substitutions

    • All-purpose flour – Use a 1:1 gluten-free baking flour blend for a gluten-free version.
    • Sugar – Substitute with coconut sugar for a caramel-like flavor, but note it will darken the cookies.
    • Butter – Use vegan butter or margarine for a dairy-free option.
    • Vanilla extract – Swap with almond extract or lemon extract for a flavor twist.
    • Eggs – Use flax eggs (1 tbsp flaxseed meal + 3 tbsp water per egg) for a vegan version.
    Rolled Butter Cookies flat on a baking tray

    Recipe Variations

    • Holiday sugar cookies – Add festive sprinkles or royal icing for themed celebrations.
    • Lemon butter cookies – Add 1 teaspoon lemon zest to the dough for a citrusy brightness.
    • Chocolate-dipped butter cookies – Dip half of each cookie in melted chocolate and chill until set.
    • Spiced sugar cookies – Add ½ teaspoon cinnamon or nutmeg to the dough for a warm, cozy flavor.

    Storage

    • These ingredients stand up well to freezing for up to 2 months.
    • Store baked cookies in an airtight container at room temperature for up to 5 days. You can also chill the dough in the refrigerator for up to 3 days before baking in batches.
    • Let cookies cool fully on a wire rack before storing to maintain crisp edges and soft centers.

    Ingredients

    Listed below are all the ingredients you will need:

    • All-purpose flour
    • White Sugar
    • Vanilla extract
    • Butter
    • Salt
    • Baking powder
    • Eggs

    See recipe card for quantities.

    All Rolled Butter Cookies ingredients in separate bowls

    Instructions

    Preheat oven to 350°F (175°C) and grease your cookie pan or line it with parchment paper.

    In a separate bowl, cream together softened butter and sugar using an electric mixer until light and fluffy.

    Mixing the butter, sugar and eggs in a bowl

    After the wet ingredients are thoroughly mixed in, add all-purpose flour, salt, and baking powder.

    Adding all the dry and wet ingredients

    The final sugar cookie dough should look like this.

    A bowl of good texture cookie dough

    Wrap the dough in plastic wrap and chill in the refrigerator for 3–4 hours, or best overnight.

    Cookie dough formed and wrapped in plastic

    Roll dough on a floured surface to about ¼ inch thickness.

    Flattened cookie dough with a rolling pin

    Cut into circles or desired shapes with cookie cutters or a cookie press.

    Rolled sugar cookies ready to be baked

    These looked so pretty and perfect, even on the inside!

    Rolled Butter Cookies on a white plate

    Hint: Melt the butter completely so that it will incorporate well with the cookie dough.

    ⭐ Top Tip

    Make sure to sift the powdered sugar before mixing it into your dough - this step is super important! If you skip it, the sugar tends to clump together, which can lead to uneven mixing and lumpy cookie dough.

    FAQ

    Can you roll out butter cookies?

    These classic butter cookies roll out nicely and have a beautifully tender, crisp texture. They're perfect for any kind of cut-out cookies, so don't relegate this recipe strictly to Christmas!

    What is the difference between a drop cookie and a rolled cookie?

    Rolled cookies can be cut by hand or by machine. Drop cookies, such as chocolate chip, are made from a soft batter that is dropped onto parchment-lined baking sheets.

    Do butter cookies harden as they cool?

    Cookies will continue to firm up as they cool on the baking sheet. Remove them from the oven just before the desired level of doneness, as they will continue to cook slightly during the cooling process.

    More Recipes

    Here are more delicious cookies that you should try:

    • Easy Sugar Cookies
    • Sugar Leaf Cookies
    • DAIRY FREE Snickerdoodle Cookies
    • Vanilla Cupcakes
    • 2 Ingredient Bread
    A plate of some Rolled Butter Cookies
    5 from 1 vote
    Print Pin Recipe

    Rolled Butter Cookies Recipe

    These Rolled Butter Cookies Recipe are perfectly soft, buttery, and made for cut-out shapes that hold up beautifully when baked!
    Prep Time15 minutes mins
    Cook Time10 minutes mins
    Chilling Time4 hours hrs
    Total Time4 hours hrs 25 minutes mins
    Course: Dessert, Snack
    Cuisine: American
    Servings: 24 cookies
    Calories: 119kcal
    Author: Lainey
    Prevent your screen from going dark

    Ingredients

    • 2 ½ cups All-purpose flour
    • 1 cup Sugar
    • ½ teaspoon Vanilla extract
    • ½ cup Butter softened
    • ½ teaspoon Salt
    • 1 teaspoon Baking powder
    • 2 Eggs

    Instructions

    Mix the Wet Ingredients:

    • Preheat the oven to 350°F (175°C). Grease a cookie sheet or line it with parchment paper.
    • In a large bowl, add softened butter and sugar. Mix with a handheld mixer until creamy.
    • Add eggs and vanilla extract. Continue mixing until well combined.

    Add the Dry Ingredients:

    • Add all-purpose flour, salt, and baking powder to the wet mixture. Mix until a soft dough forms.

    Chill the Dough:

    • Wrap the cookie dough in plastic wrap and refrigerate for 3–4 hours or overnight for best results.

    Cut and Bake:

    • Roll out the chilled dough on a lightly floured surface. Use cookie cutters to cut into desired shapes.
    • Place on the prepared baking sheet and bake for 8–10 minutes, or until the edges are just turning golden.
    • Let cool before decorating or serving.
    Leave a Comment
    Serving: 1gCalories: 119kcalCarbohydrates: 18gProtein: 2gFat: 4gSaturated Fat: 3gPolyunsaturated Fat: 0.3gMonounsaturated Fat: 1gTrans Fat: 0.2gCholesterol: 24mgSodium: 102mgPotassium: 20mgFiber: 0.4gSugar: 8gVitamin A: 138IUCalcium: 15mgIron: 1mg

    Watch The Recipe Video!

    QR Code
    Did you make this recipe?Share it on instagram or tag @simplybakings or #simplybakings!

    Storytelling Time!

    When I was making these cookies, I was excited to see the outcome.  I've seen so many of my friends make these cookies, and they look amazing!

    So when I made these, I was so happy that it came out the way I had planned, except I got a little distracted and lost track of time and let it sit in the oven too long, but it still turned out great!

    Cookies, Desserts

    Easy Filipino Style Caramel Sauce

    Nov 11, 2013 · 8 Comments

    Immerse yourself in the rich flavors of the Philippines with this Easy Filipino Style Caramel Sauce recipe! It transforms simple sugar into a silky, golden drizzle. Inspired by traditional Filipino culinary techniques, it delivers a touch of tropical magic to any dessert while satisfying your sweet cravings with its slow-cooked indulgence.

    I also love to make other delicious sauce like Blueberry Sauce for your yummy cheesecake or any kind of cake, like chiffon cake.

    Mason jar of hot caramel sauce
    [feast_advanced_jump_to]

    What is Easy Filipino Style Caramel Sauce?

    Easy Filipino Style Caramel Sauce is a luscious, golden sweet sauce made by carefully melting and transforming simple sugar into a silky, rich elixir. Rooted in culinary traditions of Filipino desserts, this easy recipe captures the essence of tropical sweetness and offers a versatile topping for desserts like leche flan, ice cream, pies, or even fresh fruit. Its smooth texture and deep flavor make it a delightful way to add a touch of indulgence to any treat.

    History of Easy Filipino Style Caramel Sauce

    The origins of this creme caramel can be traced back to the Spanish colonial era, when desserts like flan were introduced to the Philippines. Over time, local cooks embraced these recipes and added their own twist by perfecting the art of slow-caramelizing custard mixture into a silky, rich sauce.

    This method not only highlights the resourcefulness and creativity of Filipino cuisine but also evolved into a beloved staple, enhancing desserts like leche flan and beyond. Today, its simplicity and deep, comforting flavor continue to evoke a sense of tradition and home-cooked warmth in Filipino kitchens.

    Substitutions

    • Brown Sugar - Replace with white sugar plus 1 tablespoon of molasses per cup to mimic brown sugar’s moisture and depth, or try coconut sugar for a unique twist.
    • Half & Half - Mix equal parts whole milk and heavy cream, or use evaporated milk as a lighter alternative while retaining creaminess.
    • Butter - Swap with dairy-free butter, margarine, or coconut oil - keeping in mind that coconut oil may add a subtle coconut flavor.
    • Salt - Sea salt or kosher salt work well as direct substitutes; adjust the quantity to taste if using a different salt type.
    • Vanilla Extract - Use vanilla bean paste or imitation vanilla extract, or experiment with a dash of almond extract or a splash of rum for a different flavor nuance.
    delicious caramel sauce in mason jar

    Recipe Variations

    • Coconut Twist - Swap out half & half for coconut milk or coconut cream. This not only makes the sauce dairy-free but also infuses a delightful tropical note that complements Filipino flavors.
    • Spiced Caramel - Introduce warm spices like cinnamon, nutmeg, or even a hint of cardamom while cooking. This variation adds an aromatic complexity that works beautifully with dessert drizzles.
    • Salted Caramel Variation - Add a pinch of sea salt or kosher salt during the final stages to balance the sweetness and enhance the flavor profile.

    Storage

    • Cool Completely: Allow the sauce to cool at room temperature before storing to prevent condensation.
    • Airtight Container: Transfer into a clean, airtight jar or container to maintain freshness.
    • Refrigeration: Store in the refrigerator for up to 2 weeks. If the sauce thickens, gently reheat it in the microwave or on the stovetop over low heat, stirring occasionally.
    • Freezing: For longer storage, freeze in small portions. Thaw overnight in the refrigerator and warm gently before using.

    Ingredients

    Listed below are all the ingredients you will need:

    • Brown sugar
    • Half & half
    • Butter
    • Salt
    • Vanilla extract

    See recipe card for quantities.

    Instructions

    In a saucepan, add half & half, sugar, butter, salt, and mix.

    A pot of all ingredients into a pot

    Allow it to cook for 7-9 minutes or until the sauce thickens.

    boiling caramel sauce in a pot

    Turn off the stove and add vanilla to the saucepan.

    Filipino Caramel sauce in pot over fire

    Let it cool for about 10 to 15 minutes before pouring it into your favorite container.

    pouring cooked sauce in a mason jar

    Here I used my handy-dandy mason jars because I have lots of them on hand. This is a perfect Fall gift to your family and friends who love caramel homemade caramel sauce:

    Hint: When making this caramel sauce, do not turn on the stove on very high heat. It would burn the sugar and would make it bitter!

    ⭐ Top Tip

    Keep the heat at a medium-low level to avoid scorching the sugar while achieving the perfect caramelization. Caramel can go from golden to burnt in moments. Stay attentive and avoid stirring too much once it starts melting to prevent crystallization.

    If your recipe calls for water or cream, add it slowly and carefully to avoid splattering and potential burns. Once done, remove the pan from the heat immediately and allow the sauce to cool slightly; this helps it thicken to the perfect consistency for drizzling.
    FAQ

    How is caramel traditionally made?

    Traditionally, caramel is made by heating sugar at a particular temperature until it melts and gradually turns brown. Usually, this process begins around 320°F, when the sugar melts and becomes a clear molten liquid. After that, if the temperature increases, the caramel will begin turning into a darker shade of brown.

    What is the difference between caramel and carmel sauce?

    Carmel and caramel are not different spellings of the same word. Caramel is the correct spelling if you're talking about food or colors. Carmel is a misspelling when used in those contexts, but it is a word that can be used as a name for people or places.

    Can I use milk instead of heavy cream for caramel?

    After your sauce cools, add sea salt to it for a salted caramel sauce. You can use whole milk, almond milk, or evaporated milk in place of heavy cream.

    Can I use this recipe as a bread spread?

    This is definitely a delicious bread spread. Give it a go and you would always want a homemade caramel sauce on hand 🙂

    More Caramel Dishes to Try:

    • Caramel Salted Chocolate Cookies
    • Salted Caramel Bundt Cake
    • Mini Salted Caramel Cheesecake


    A cup of caramel sauce poured into a glass mug
    4.50 from 4 votes
    Print Pin Recipe

    Easy Filipino-Style Caramel Sauce

    Rich and smooth Filipino caramel sauce in just a few simple steps - perfect for drizzling on desserts!
    Prep Time5 minutes mins
    Cook Time9 minutes mins
    Total Time14 minutes mins
    Course: Dessert
    Cuisine: Filipino
    Calories: 2042kcal
    Author: Lainey
    Prevent your screen from going dark

    Ingredients

    • 1 cup packed brown sugar
    • 1 cup half & half
    • ½ cup butter
    • ⅛ teaspoon salt
    • 2 tablespoons vanilla extract

    Instructions

    • In a saucepan over medium heat, combine half & half, brown sugar, butter, and salt. Stir continuously.
    • Cook for 7-9 minutes until the sauce thickens.
    • Turn off the heat and stir in the vanilla extract.
    • Let the caramel cool slightly before using.
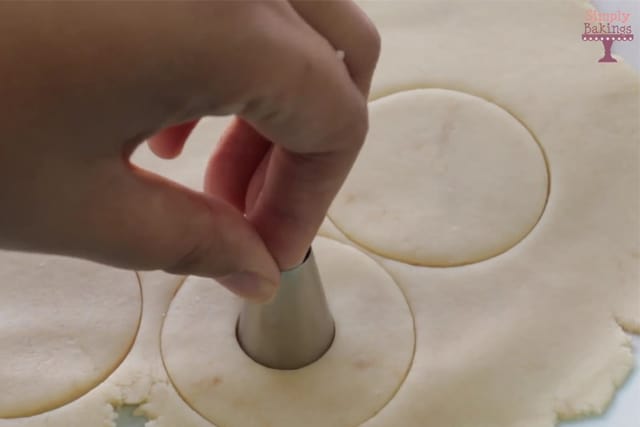
    Leave a Comment

    Notes

    to thicken the sauce add 1-2 tablespoons cornstarch
    Serving: 1gCalories: 2042kcalCarbohydrates: 230gProtein: 9gFat: 120gSaturated Fat: 75gPolyunsaturated Fat: 5gMonounsaturated Fat: 32gTrans Fat: 4gCholesterol: 329mgSodium: 1232mgPotassium: 678mgSugar: 227gVitamin A: 3693IUVitamin C: 2mgCalcium: 472mgIron: 2mg
    QR Code
    Did you make this recipe?Share it on instagram or tag @simplybakings or #simplybakings!

    Storytelling Time!

    I didn't always like caramel sauce. In fact, I was not a fan until I made my Twix Recipe! As I was melting the caramel for the Twix, I took a few pieces of candy and ate some, and I LIKED it! The next day, I stopped by Starbucks and ordered a Salted Caramel Frappe. I took my first sip and fell hard for salted caramel.

    How did I go through my whole life without salted caramel? It's DELICIOUS! I started looking through my recipe book finding ingredients with caramel and tweaking it according to my taste!

    5 Ingredients or Less, Desserts, No Bake Dessert Recipes

    Mini Pumpkin Spice Muffins

    Nov 3, 2013 · 2 Comments

    I love the holiday season, don't you?  All the baking that is happening, the Christmas lights come up, and family starts planning for Thanksgiving and Christmas!

    Around this time of the year, I start living in the kitchen because I am constantly baking bread, muffins, and cookies.  Since November was only a couple of days ago, I knew I had to bake something with pumpkin and pumpkin spice muffins came to mind! However, if you roll the muffins in butter then a cinnamon sugar mix it actually looks like donut holes and tastes like it as well because the texture of the muffins is so fluffy!  Enjoy!

    Mini pumpkin spice muffins on a white plate

    Tips and Tricks for Making This Mini Pumpkin Spice Muffins Recipe: 

    • Before adding in the dry ingredients, make sure to sift them in order to avoid lumps in your batter.
    • If you love frosting like me, you can whip some cream cheese frosting and top each mini pumpkin spice muffins.
    • Do you love chocolate chips? Add in mini chocolate chips to the batter before baking it and tadaaah! You now have mini pumpkin spice chocolate chip muffins 🙂

    How to Make this Mini Pumpkin Spice Muffins Recipe:

    Gather the ingredients for this Mini Pumpkin Spice Muffins:

    ingredients for mini pumpkin spice muffins recipe

    Once the ingredients are all ready, preheat oven to 350 degrees, oil mini muffin pans, and you're all set!

    Let's begin!

    In a large bowl add softened butter, sugar, and beat well:

    beaten sugar and butter for mini pumpkin spice muffins recipe

    Next add vanilla extract, egg, pumpkin puree, and mix:

    adding pumpkin puree, eggs and vanilla to butter and sugar

    Don't over mix batter or it will become rubbery:

    wet ingredients of mini pumpkin spice muffins

    Add baking powder, baking soda, allspice, ground cinnamon, salt, pink of pumpkin spice and mix:

    adding in the dry ingredients of mini pumpkin spice muffins

    The final batter should look like this. Make sure that there are no lumps:

    final batter of mini pumpkin spice muffins

    Place batter in a mini muffin pan and fill halfway and bake 350 degrees F for 12-15 minutes:

    ready to bake mini pumpkin spice muffins

    I am very sure your kitchen smells so delicious right now! Look at these beauties!

    freshly baked mini pumpkin spice muffins

    This is optional but I suggest that you REALLY do this lol!

    Melt ¼ cup butter in a bowl, in another bowl place ¼ cup granulated sugar and 1 teaspoon cinnamon and mix. Dip muffin in butter:

    dipping the muffins in melted butter

    Then dip again in sugar and cinnamon mix:

    dipping the muffin in cinnamon and sugar mixture

    Let's do the "break" test and taste it! These pumpkin muffins are so soft, delicious and not too sweet, which I love!

    freshly baked mini pumpkin spice muffins

    step by step guide for Mini Pumpkin spice muffins recipe

    Frequently Asked Questions for the Mini Pumpkin Spice Muffins Recipe:

    Q: Can I replace the sugar with honey or maple syrup?

    A: Yes, for sure! Just be careful in adding it. Add little portions at a time and

    Q: What can replace eggs as a vegan option?

    A: For this recipe, you can use egg replacers and make it vegan.

    Q: Can I replace the butter with canola oil?

    A: Yes, you can. Just use the same measurement of butter written in the recipe.

    freshly baked mini pumpkin spice muffins
    No ratings yet
    Print Pin Recipe

    Mini Pumpkin Spice Muffins

    Soft, delicious and filling Mini Pumpkin Spice Muffins you can make in your own kitchen!
    Author: Lainey
    Prevent your screen from going dark

    Ingredients

    • ½ teaspoon baking powder
    • ½ teaspoon baking soda
    • ½ teaspoon allspice
    • ½ teaspoon ground cinnamon
    • ¼ teaspoon salt
    • pinch of pumpkin spice
    • ¼ cup unsalted butter softened
    • ½ cup granulated sugar
    • 1 egg
    • ½ teaspoon vanilla extract
    • ½ cup pure pumpkin puree
    • 1 cup all purpose flour
    • ¼ cup unsalted butter melted
    • ¼ cup granulated sugar
    • 1 teaspoon ground cinnamon

    Instructions

    • Preheat oven to 350 degrees, oil mini muffin pans
    • In a large bowl add soften butter, sugar, and beat. Next add vanilla extract, egg, pumpkin puree, and mix. Don't over mix batter or it will become rubbery.
    • Add baking powder, baking soda, allspice, ground cinnamon, salt, pink of pumpkin spice and mix.
    • Place batter in mini muffin pan and fill halfway
    • Bake 350 degree F for 12-15 minutes.
    • Option melt ¼ cup butter in a bowl, in another bowl place ¼ cup granulated sugar and 1 teaspoon cinnamon and mix. Dip muffin in butter then sugar and cinnamon mix.
    Leave a Comment
    QR Code
    Did you make this recipe?Share it on instagram or tag @simplybakings or #simplybakings!

    NEVER MISS A RECIPE!

    PINTEREST / FACEBOOK / INSTAGRAM / TWITTER

    If you’ve tried this or any other of my recipes, don’t forget to rate the recipe and to leave me a comment. I love hearing from you!

    Breakfast & Brunch, Desserts, Thanksgiving Desserts

    Candy Corn Mousse

    Oct 30, 2013 · 8 Comments

    candy corn mousse in two small glasses

    Looking for a dessert that screams Halloween or fall vibes? This Candy Corn Mousse combines the classic flavors of cream cheese, vanilla, and whipped topping. It's the ultimate treat for your next celebration!
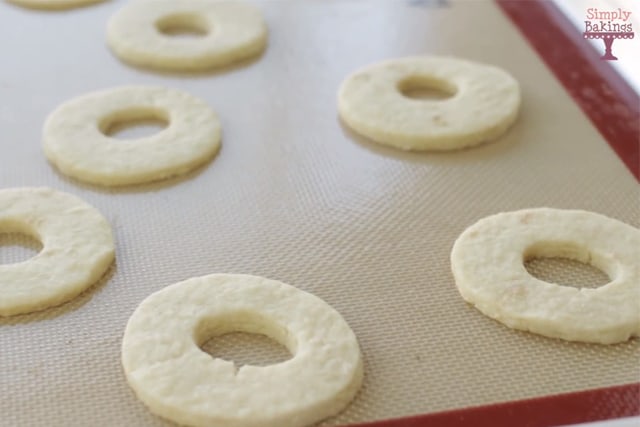
    Be sure to check out my other delicious candy corn creations: S'mores Candy Corn Cookies and Snickerdoodle Candy Corn Cookies.

    candy corn in a mini glass cup
    [feast_advanced_jump_to]

    What is Candy Corn Mousse?

    Candy Corn Mousse is a fun and colorful dessert that’s perfect for fall. It combines creamy ingredients like softened cream cheese, powdered sugar, and vanilla with whipped topping (Cool Whip) to create a light and fluffy treat. The mousse is made by mixing these ingredients and then splitting the mixture into three bowls.

    Two of the bowls are colored bright orange and yellow to resemble candy corn, a popular Halloween candy. After layering the colors in cups, the dessert is chilled for a little while to set. Finally, it’s topped with candy corn for a festive touch.

    This no-bake dessert is not only easy to make in just 30 minutes, but it also looks great and tastes delicious, making it a perfect addition to any fall celebration!

    Substitutions

    • Cream Cheese: Swap cream cheese with Neufchâtel, mascarpone, or dairy-free cream cheese for a lighter or vegan option.
    • Powdered Sugar: Use granulated sugar blended into powder, maple syrup, or a sugar-free sweetener like erythritol for a healthier alternative.
    • Milk: Replace milk with almond, oat, soy, or heavy cream for dairy-free or richer options.
    • Vanilla Extract: Substitute with almond extract, maple extract, or vanilla bean paste for a flavor variation.
    • Cool Whip: Try homemade whipped cream, coconut whipped cream, or a vegan store-bought whipped topping.
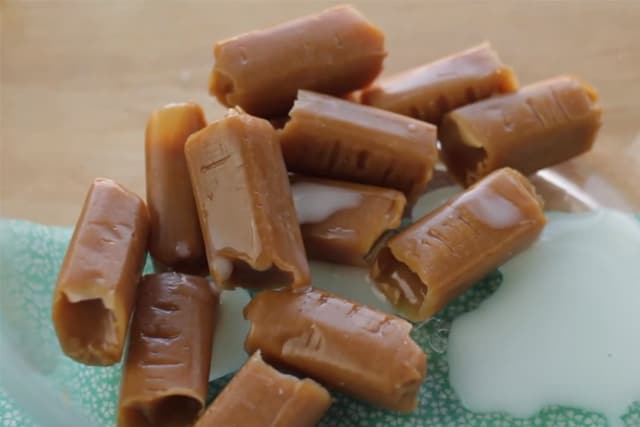
    • Food Coloring: Use turmeric for yellow, beet juice for orange, or omit for an all-white mousse.
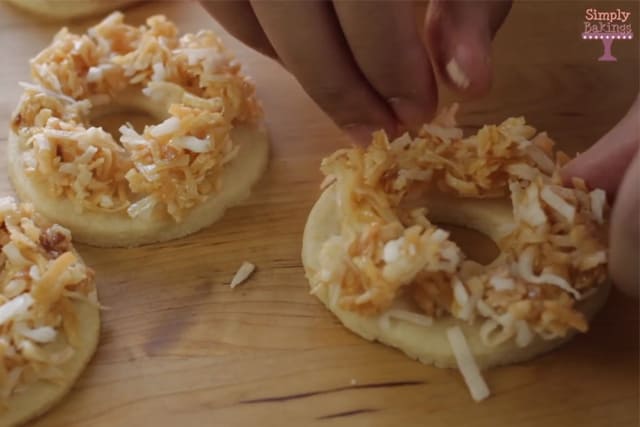
    • Candy Corn Garnish: Replace candy corn with mini marshmallows, white chocolate chips, sprinkles, or fresh fruit slices.

    Variations

    • Chocolate Twist: Add cocoa powder to one layer for a chocolatey surprise.
    • Fruit-Flavored Layers: Mix in a few drops of fruit extract (like orange or lemon) to complement the colors.
    • Vegan Version: Use dairy-free cream cheese, coconut whipped cream, and plant-based milk.

    Storage

    • Store leftover mousse in an airtight container in the refrigerator for up to 3 days.
    • For longer storage, freeze it in individual portions and thaw in the fridge before serving. Keep in mind that freezing may slightly alter the texture.

    Ingredients

    • cream cheese
    • powdered sugar
    • milk
    • vanilla extract
    • cool whip
    • orange food coloring
    • yellow food coloring
    • candy corn (for garnish)

    Instructions

    In a bowl beat the cream cheese, add the powdered sugar, milk, and vanilla extract, and mix.

    Fold in the cool whip and do not over-mix because it will become runny. If it does just place the bowl in the refrigerator for 10-15 minutes.

    beaten cream cheese

    Split the cream cheese mixture into three bowls and color one bowl orange and the other yellow. If you don't have orange food coloring mix the orange and red food coloring together.

    cream cheese mixture in two bowls

    Serve in clear glasses or jars to showcase the beautiful layers. To garnish, add candy corn.

    candy corn on top of cream cheese mixture

    Top Tips

    • Use a piping bag for clean, even layers.
    • Garnish with whipped cream and sprinkles for added flair.
    • Use gel food coloring for vibrant shades without affecting the mousse’s consistency.
    • Chill the mousse before serving for a firmer texture.

    FAQs

    What insect is candy corn made of?

    Candy corn does not contain any insect ingredients; however, some brands may use carmine, a color derived from cochineal insects, for coloring.

    What is the actual flavor of candy corn?

    Candy corn has a sweet, sugary flavor, often described as a mix of vanilla and honey.

    Can I make this mousse ahead of time?

    Yes! Prepare it a day in advance and store it in the fridge. Add the garnish just before serving.

    candy corn in a mini glass cup
    4.84 from 6 votes
    Print Pin Recipe

    Candy Corn Mousse

    This fun Candy Corn Mousse dessert is perfect for fall. It’s creamy and colorful, mixing cream cheese and vanilla with tasty candy corn. It looks great and tastes even better with bright orange and yellow colors!
    Prep Time15 minutes mins
    Chill Time15 minutes mins
    Total Time30 minutes mins
    Course: No-bake Desserts
    Cuisine: American
    Servings: 6 -8 servings
    Calories: 236kcal
    Author: Lainey
    Prevent your screen from going dark

    Ingredients

    • 8 oz cream cheese softened
    • ½ cup powdered sugar
    • ¼ cup milk
    • 1 teaspoon vanilla extract
    • 8 oz cool whip thawed
    • orange & yellow food coloring
    • candy corn for garnish

    Instructions

    • In a bowl beat the cream cheese, add the powdered sugar, milk, and vanilla extract, and mix.
    • Fold in the cool whip and do not over mix because it will become runny. If it does, just place the bowl in the refrigerator for 10-15 minutes.
    • Split the cream cheese batter into three bowls and color one bowl orange and the other yellow. If you don't have orange food coloring mix the orange and red food coloring together.
    • Serve in clear glasses or jars to showcase the beautiful layers. To garnish, add candy corn.
    Leave a Comment
    Serving: 1servingCalories: 236kcalCarbohydrates: 22gProtein: 4gFat: 15gSaturated Fat: 9gPolyunsaturated Fat: 1gMonounsaturated Fat: 4gCholesterol: 45mgSodium: 150mgPotassium: 107mgFiber: 0.2gSugar: 18gVitamin A: 590IUCalcium: 90mgIron: 0.1mg

    Watch The Recipe Video!

    QR Code
    Did you make this recipe?Share it on instagram or tag @simplybakings or #simplybakings!

    I honestly do not like candy corn. But when I first made this, I was thrilled with the results! Even though the mousse had the colors of candy corn, it did not taste like it. It actually reminded me of pudding!

    Desserts, No Bake Dessert Recipes

    Easy Chocolate Covered Pretzel Recipe

    Oct 30, 2013 · 3 Comments

    pumpkin chocolate covered pretzels on white plate

    This Easy Chocolate Covered Pretzel Recipe is easy to make and great to give as treats for kids!  Using only 4 ingredients, you can make this snack in under 10 minutes. 

    Here are more must-try Halloween desserts you can make: No-Bake Halloween Treats, Halloween Chocolate Peanut Butter Cupcakes, and Halloween Donuts.

    chocolate covered Pretzel Pumpkins


    [feast_advanced_jump_to]

    Substitutions

    • The best part about this recipe is how versatile it is! You can easily swap out the orange candy melts and green M&Ms for other colors depending on the occasion. For Christmas, try red and green candy melts. For Valentine’s Day, use pink and white. The possibilities are endless!
    • Subsititute candy melts with your favorite chocolate such as dark chocolate or white chocolate chips to make dark or white chocolate pretzels.

    Variations

    • Top your chocolate-covered pretzels with crushed nuts, shredded coconut, or crushed peppermint/candy cane, and use a fork to drizzle extra melted chocolate or white chocolate for added decoration and flavor.

    Storage

    • Store the melted chocolate-covered pretzels in an airtight container at room temperature or cellophane bags for gifts. They’ll stay fresh for up to one week.
    • To extend the life of your pretzels, you can freeze them. Place them in a single layer on a baking sheet, freeze for a couple of hours, and then transfer them to a freezer-safe bag or container. They’ll keep in the freezer for up to 3 months. Just thaw them at room temperature before serving.

    Top Tips

    • Give the pretzel pumpkins time to harden so the M and M's would really stick to the pretzel.
    • Make sure to use high-quality candy melts for a smooth, even coating on your pretzels. Cheaper brands may clump or not melt properly, which can make dipping more difficult.
    • If you love to add edible food glitters or sprinkles to this no-bake pretzel pumpkins, you can. It would give it a chic look yet still delicious!

    Ingredients

    Gather the ingredients for this Pretzel Pumpkins. Once the ingredients are all ready, let's begin!

    • bag of pretzel twists
    • bag of mini M&Ms (green M&Ms only)
    • orange candy melts*
    • shortening

    Instructions

    Pretzels, as it is, are so delicious to eat but wait till you get a taste of this fun, no-bake dessert that we are making!

    a bag of pretzels for the pretzel pumpkins recipe

    Green M & M's for the pumpkin leaves 😉

    green m & m's

    Of course, candy melts should be orange so it would resemble the pumpkin color 🙂

    orange candy melts for the pretzel pumpkins

    Before melting the orange candy melts, make sure you have prepared a plate lined with parchment paper so you can place the pretzels on the plate after coating them:

    a plate lined with parchment paper

    Follow the direction of the orange candy melts.  Add the 2 tablespoon shortening:

    shortening to help melt the candy melts

    You will know that the candy melts are ready to use as a coating for the pretzels when you get a consistency like this:

    melted orange candy melts

    Dip pretzels in the melted orange chocolate:

    coating the pretzels with the orange candy melts

    Place on wax paper and add the green M&Ms:

    adding the green M & M's on top of the pretzel pumpkins

    Let the pretzels sit for 15-20 minutes before taking them off the parchment paper so it would harden. Serve on a white plate with parchment paper or cookie trays:

    letting the pretzel pumpkins cool in a parchment paper

    FAQ

    How far in advance can chocolate-covered pretzels be made?

    You can make chocolate-covered pretzels up to two weeks in advance if stored in an airtight container. Just keep them in a cool, dry place.

    Why are my chocolate-covered pretzels not hardening?

    The chocolate may not harden if it's too warm or if moisture got into it. Try refrigerating the pretzels for 10-15 minutes to help them set faster.

    What is the best way to dip pretzel rods in chocolate?

    Hold the pretzel rod by one end and dip it into melted chocolate, using a spoon to help coat it evenly. Gently shake off any excess chocolate before placing it on a lined baking sheet to harden.


    easy no bake chocolate pumpkin pretzels
    5 from 1 vote
    Print Pin Recipe

    Easy Chocolate Covered Pretzel Recipe

    This Easy Chocolate Covered Pretzel Recipe is great as a Halloween treat as it is no bake, easy for kids to make and would be perfect as a bonding moment as a family!
    Prep Time10 minutes mins
    Cool Time20 minutes mins
    Total Time30 minutes mins
    Course: Snacks
    Cuisine: American
    Servings: 30 pretzels
    Calories: 77kcal
    Author: Lainey
    Prevent your screen from going dark

    Ingredients

    • 1 bag of pretzels about 30-35 pretzels
    • 1 bag of mini M&Ms use only the green M&Ms
    • 12 oz orange candy melts
    • 2 tablespoons shortening

    Instructions

    • Follow the directions on the package of orange candy melts for melting.
    • Add 2 tablespoons of shortening to the melted candy melts for a smoother texture.
    • Dip each pretzel into the melted chocolate and place it on a piece of wax paper.
    • Immediately add one green M&M on top of each dipped pretzel.
    • Let the pretzels sit for 15-20 minutes to allow the chocolate to harden.
    Leave a Comment

    Notes

    *if you don't have orange candy melts use 12 oz white chocolate and use orange food coloring to dye it.
    Serving: 1pretzelCalories: 77kcalCarbohydrates: 10gProtein: 1gFat: 4gSaturated Fat: 2gPolyunsaturated Fat: 0.3gMonounsaturated Fat: 0.4gTrans Fat: 0.1gCholesterol: 1mgSodium: 15mgPotassium: 11mgFiber: 0.4gSugar: 7gVitamin A: 16IUVitamin C: 0.1mgCalcium: 9mgIron: 0.2mg

    Watch The Recipe Video!

    QR Code
    Did you make this recipe?Share it on instagram or tag @simplybakings or #simplybakings!

    These candy pretzels were very simple to make!  When I shared the pumpkin pretzels with everyone, people were a little hesitant to pick one up, but after they tried it they grabbed a handful of them since they were so delicious! These Pretzel Pumpkins are a fun Halloween treat that is so easy to make and the ingredients are inexpensive and can be bought in many grocery stores! 

    5 Ingredients or Less, Desserts, No Bake Dessert Recipes

    Oatmeal Cookies

    Oct 17, 2013 · 6 Comments

    delicious fresh oatmeal cookies on a white plate

    Delicious, filling, and rich in chocolate taste Oatmeal Cookies that are perfect for breakfast or a snack after a powerful workout! Make these at home and enjoy this amazing and easy oatmeal cookie recipe!

    oatmeal cookies on a white plate

    I LOVE cookies, and sometimes when I want to bake something, I find myself reaching for my cookie ingredients!  Oatmeal cookies are on my top five cookies because sometimes I feel like cookies are really unhealthy and eating oatmeal cookies makes it not as unhealthy (because of the oats)  What's your favorite cookie?

    Tips and Procedures:

    • Always sift all the dry ingredients before starting the mixing process. It will prevent lumps in your cookies.
    • Adjust your cooking time depending on the size of your cookies. Smaller cookies tend to bake faster.
    • Store in an airtight container to keep it fresh.
    • Double or triple the ingredients listed if you need to make a bigger batch of cookies.

    How to Make Oatmeal Cookies:

    These are the ingredients that you will need:

    • butter
    • brown sugar
    • white sugar
    • eggs
    • vanilla extract
    • all-purpose flour
    • baking soda
    • salt
    • quick-cooking oats
    • raisins
    • chocolate chips

    Preheat oven to 325 degrees F.

    In a large bowl beat brown sugar, white sugar, and butter until light and fluffy:

    mixing the butter and sugar using a handheld mixer

    While mixing add the eggs and vanilla extract:

    adding eggs to the sugar and butter mixture

    In another bowl, add all-purpose flour, baking soda, salt, and quick oats and mix very well:

    mixing the wet and dry ingredients of the oatmeal cookie recipe

    Add the raisins:

    adding the raisins to the oatmeal cookie dough

    Then add the chocolate chips:

    adding chocolate chips to the oatmeal cookie dough

    Roll into 1-inch balls and bake for 12-15 minutes:

    ready to bake oatmeal cookies on a cookie sheet

    There you have it! A quick, energizing breakfast recipe that you can bake ahead of time!

    delicious freshly baked oatmeal cookies

    This oatmeal cookie has a tasty and interesting texture when you bite into it. It won't be a boring cookie after all 🙂

    freshly baked oatmeal cookies on a white plate

    Frequently Asked Questions for the Oatmeal Cookies Recipe:

    Q: Can I bake these ahead?

    A: Yes, you can bake these oatmeal cookies the night before or even days in advance. Just make sure to keep it in an airtight container to keep it fresh.

    Q: Can I use white sugar for this cookie recipe?

    A: If you don't have brown sugar available, you can use white sugar. It would be the same measurement as the brown sugar.

    Q: Can I double this cookie recipe if I need a bigger batch?

    A: Yes, for sure. Just double or triple the ingredients listed below.


    More breakfast and cookie recipes that you need to try!

    • Strawberry Greek Yogurt Cake
    • S'mores Cookies
    • Cassava Cake
    • No Bake Cookie Dough Truffles
    • Caramel Pretzel Cookies
    • Brownie Cookies
    • Green Tea Cookies
    • Dairy-Free Chocolate Chip Cookies
    • Vegan Pumpkin Pie
    • Pocky Cookies - 3 Ways
    • Caramel Salted Chocolate Cookies
    freshly baked oatmeal cookies
    No ratings yet
    Print Pin Recipe

    Oatmeal Cookies

    Here is a delicious, filling, and rich in chocolate taste Oatmeal Cookies that are perfect for breakfast or a snack after a powerful workout!
    Author: Lainey
    Prevent your screen from going dark

    Ingredients

    • ½ cup butter
    • 1 cup brown sugar
    • ½ cup white sugar
    • 2 eggs
    • 2 tsp vanilla extract
    • 1 ¼ cup all-purpose flour
    • ½ tsp baking soda
    • 1 tsp salt
    • 3 cups quick-cooking oats
    • 1 cup raisins
    • ⅛ cup chocolate chips

    Instructions

    • Preheat oven to 325 degrees F.
    • In a large bowl beat brown sugar, white sugar, and butter until light and fluffy. While mixing add the eggs and vanilla extract.
    • In another bowl add all purpose flour, baking soda, salt, quick oats and mix very well. Add the raisins and chocolate chips.
    • Roll into 1 inch balls and bake for 12-15 minutes
    Leave a Comment

    Watch The Recipe Video!

    QR Code
    Did you make this recipe?Share it on instagram or tag @simplybakings or #simplybakings!

    NEVER MISS A RECIPE!

    PINTEREST / FACEBOOK / INSTAGRAM / TWITTER

    If you’ve tried this or any other of my recipes, don’t forget to rate the recipe and to leave me a comment. I love hearing from you!

    Cookies, Desserts

    7-Up Biscuits

    Oct 9, 2013 · 3 Comments

    Using just 4 ingredients, these 7 Up Biscuits are the easiest biscuits you’ll ever make and they turn out perfect every time! It's great to eat for breakfast or for brunch!

    7 up biscuit bread

    I was wandering around Pinterest and I came upon this recipe, by someone who posted as a text message and I thought this is interesting, it's made out of 7-Up.  I'm not a big fan of biscuits, but this was really good!  I was pleasantly surprised at how fluffy and soft it was, this is a must try recipe!

    What is BISQUICK?

    Bisquick, it's a pre-mixed baking product, consisting of flour, baking powder, salt, and shortening.  Some uses of Bisquick is pancakes, muffins, and waffles to name a few.

    Tips and Tricks for Making This 7-Up Biscuits Recipe: 

    • Are you a rustic kitchen stuff lover? I am sure you have a cast iron skillet lying around your kitchen. You can use that for baking this delicious and easy 7-up biscuits recipe!
    • If you don't have 7-up where you are living, you can use any lemon-lime soda or club soda available. I am sure it would taste just as good!
    • Prevent the dough from sticking onto your hands by rubbing flour onto your palms or hands.

    How to Make this 7-Up Biscuits Recipe:

    Before starting off with the mixing process, make sure to preheat oven to 400F and spray your 8 x 8 baking sheet or pan with a non-stick baking spray. If you don't have a baking spray available, grease it with melted butter. That would do the trick just the same!

    Let's begin!

    In a bowl, add Bisquick and sour cream:

    bisquick and sour cream in a clear mixing bowl for 7up biscuits recipe

    Mix thoroughly until the sour cream is evenly combined with the Bisquick:

    mixing bisquick and 7 up with a fork in a clear bowl

    Next, add the 7-up and mix then set aside:

    adding 7-up in bisquick and sour cream mixture

    On a clean surface sprinkle flour and place the dough on the table:

    7-up biscuits dough on a floured wooden board

    Knead till the dough is not sticky:

    well-kneaded 7-up biscuits dough

    Cut the dough and form into 9 rolls:

    7-up dough balls

    Place on your greased baking pan and bake for 12-15 minutes:

    7-up biscuits dough ready to be baked

    Homemade biscuits are the best, I promise! This batch I made really didn't last that long, we ate it all in less than a day 🙂 It was that good!

    freshly baked 7-up biscuits in a clear baking dish

    It just has simple ingredients, all you really need to have is the will to knead it 😉 Well, for me, it was all worth it! You have delicious biscuits in just minutes!

    delicious and freshly baked 7-up biscuits on a white plate
    Frequently Asked Questions for the 7-Up Biscuits Recipe:

    Q: How do you know that the biscuits are done?

    A: When the biscuits have risen and the top is light brown, they are done. This recipe bakes so fast since our dough/rolls are not so thick.

    Q: What are other alternatives for sour cream?

    A: You can use greek yogurt or straight plain yogurt. You can also use buttermilk or creme fraiche. They are thinner than yogurt in consistency but works well as substitutes.

    Q: Which is best to use for this recipe - cold or room temperature 7-up?

    A: Both should work well with this recipe but I used room temperature 7-up.


    Here's more easy bread recipe you will enjoy:
    • 3 Ingredient Biscuits
    • Mini French Breakfast Bread
    • Monkey Bread
    • Chocolate Filled Croissant 

    Happy Baking!

    freshly baked 7-up biscuits on a white plate
    No ratings yet
    Print Pin Recipe

    7-Up Biscuits

    Soft and fluffy biscuits made with 7-up, this recipe is a must try! Enjoy!
    Prevent your screen from going dark

    Ingredients

    • 2 cups bisquick
    • ½ cup 7-up
    • ½ cup sour cream
    • ¼ cup melted butter

    Instructions

    • Preheat oven to 450 degrees F and grease 8x8 pan with butter
    • In a bowl add bisquick and sour cream then mix, next add the 7-up and mix and set aside.
    • On a clean surface sprinkle flour and place the dough on the table and knead till dough is not stick and form into 9 rolls and place on pan.
    • Bake for 12-15 minutes.
    Leave a Comment

    Watch The Recipe Video!

    QR Code
    Did you make this recipe?Share it on instagram or tag @simplybakings or #simplybakings!

    NEVER MISS A RECIPE!

    PINTEREST / FACEBOOK / INSTAGRAM / TWITTER

    If you’ve tried this or any other of my recipes, don’t forget to rate the recipe and to leave me a comment. I love hearing from you!

    5 Ingredients or Less, Bread, Breakfast & Brunch, Christmas Desserts

    Madeira Cake

    Oct 9, 2013 · Leave a Comment

    A classic English cake called Madeira Cake will be the easiest cake you will ever bake! Light-flavored, delicious, and filling cake glazed with a yummy sugar glaze and garnished with lemon slices! You can never go wrong with this classic Madeira cake!

    madeira cake with sugar glaze and topped with fresh lemon slices

    I have never heard of Madeira Cake until my friend Choppa from YouTube shared me this recipe.  It is actually quite delicious and kind of reminds me of sponge cake!

    Tips and Tricks for Making This Madeira Cake Recipe: 

    • Make this ahead for any party and just wrap in saran wrap or aluminum foil to keep the moisture of the cake.

    How to Make this Madeira Cake Recipe:

    Gather the ingredients for this Madeira Cake:

    • butter
    • sugar
    • lemon zest
    • ground cinnamon
    • eggs
    • self-raising flour
    • almond meal
    • lemon juice or orange juice
    • powdered sugar
    • lemon juice

    Once the ingredients are all ready, preheat your oven to 300 degrees F and grease desired pans. Then, let's begin!

    In a large bowl add the sugar, butter, lemon zest, cinnamon and beat it:

    mixing the dry ingredients of madeira cake with butter

    Add the eggs, flour, almond meal, lemon juice, and mix:

    mixing the ingredients of the madeira cake with a wooden ladle

    The final batter should look like this:

    final batter of the madeira cake

    Pour into pans and bake for 45 minutes:

    madeira cake batter in rectangular baking boxes

    Make the sugar lemon glaze with the powdered sugar and lemon juice and just mix well:

    making sugar glaze with lemon juice and powdered sugar

    Pour in the sugar glaze and decorate with fresh lemon slices:

    decorating the madeira cake with sugar glaze and fresh lemon slices

    There you go! A classic beauty that is perfect for any parties and occasion!

    madeira cake with sugar glaze and fresh lemon slices

    Frequently Asked Questions for the Madeira Cake Recipe:

    Q: How many servings would this recipe do?

    A: This delicious and easy cake recipe could make six to 8 slices, depending on how big your slices are.


    Here are more cake recipes that you can make:

    • Homemade Caramel Cake
    • Simple Lemon Cake
    • Lemon Brownies
    • Strawberry Greek Yogurt Cake
    delicious and moist madeira cake
    No ratings yet
    Print Pin Recipe

    Madeira Cake

    A classic English cake called Madeira Cake could be the easiest cake you will ever bake - moist, light-flavored and delicious!
    Author: Lainey
    Prevent your screen from going dark

    Ingredients

    • ¾ cup butter softened
    • ¾ cup sugar
    • 1 teaspoon lemon zest
    • ¼ teaspoon ground cinnamon
    • 3 eggs
    • ¾ cup self-raising flour
    • ½ cup almond meal
    • ¼ cup lemon juice or orange juice
    • 1 ½ cups powdered sugar
    • 1-2 tablespoon lemon juice

    Instructions

    • Preheat oven to 300 degree F and grease desired pans
    • In a large bowl add the sugar, butter, lemon zest, cinnamon and beat it. Add the eggs, flour, almond meal, lemon juice and mix.
    • Pour into pans and bake for 45 minutes
    Leave a Comment

    Watch The Recipe Video!

    QR Code
    Did you make this recipe?Share it on instagram or tag @simplybakings or #simplybakings!

    NEVER MISS A RECIPE!

    PINTEREST / FACEBOOK / INSTAGRAM / TWITTER

    If you’ve tried this or any other of my recipes, don’t forget to rate the recipe and to leave me a comment. I love hearing from you!

    Cake, Desserts

    Vanilla Bean Buttercream

    Sep 24, 2013 · 6 Comments

    Vanilla Bean Buttercream is so easy to make and goes well with every flavor of cake or cupcake! Make this at home and you will never buy it in any stores ever again!

    IMG_7566 copy 2

    Buttercream is my Everest!  I have always enjoyed watching people frost cupcakes because I didn't know how to frost very well.  However, I had to learn how to frost because, with this recipe, I had to make Minnie Mouse Cupcakes with my friend Jak from the Vegetarian Baker on YouTube.  I practiced on 30 cupcakes before I actually got the hang of it. Practice does make perfect, so for those of us who have trouble frosting but want to be great frosters, the secret is just practice.

    Top Tips

    • Use the finest ground powdered sugar to make the buttercream frosting silkier.
    • Always sift your powdered sugar before mixing it to the butter.
    • When you are using milk in your buttercream or cream itself, always add gradually because adding too much liquid will destroy the correct consistency of your frosting

    Ingredients

    • butter
    • powdered sugar
    • vanilla extract
    • salt
    • milk (optional)

    Instructions

    Use your favorite cupcake recipe and bake, as usual:

    Put in cupcake liners and bake, as instructed. After baking it, let it cool while you start making your favorite buttercream frosting.

    To make the Vanilla Bean Buttercream frosting, sift powdered sugar and set aside.

    Then, in a stand mixer, add the butter and beat until light and fluffy. Add powdered sugar, 1 cup at a time:

    Add vanilla extract and salt. If the frosting is stiff, add milk:

    After you have achieved your desired color for your buttercream frosting, place it in a piping bag. Go ahead and pipe your cooled cupcakes as desired:

    For this cupcake, I had a Minnie Mouse theme. I made cute fondant bows:

    For the ears of Minnie Mouse, I used mini Oreos, like so:

    FAQ

    Q: What is the best butter to use for butter icing?

    A: You can use either salted or unsalted butter for this recipe. It is best to use a high-quality butter that has a higher fat content and a lower water content so that it will produce the best buttercream frosting.

    Q: I made buttercream, but it melted too quickly. What should I do?

    A: Humidity has a lot to do with producing great buttercream. Usually, in areas where it is hot or humid, buttercream frosting does not hold its shape very well. After decorating, you should place it in the refrigerator and take it out when you are ready to serve.

    Q: What is the best consistency for buttercream frosting when using it for cakes? 

    A: It is best to use medium consistency when decorating cakes or making cake borders. This consistency allows you to form any shape or border.

    Q: Is powdered sugar the same with icing sugar?

    A: Yes, icing and powdered sugar are the same. You can use both in the buttercream frosting.


    More dessert recipes you would love to try:

    • Chocolate Chip Cheesecake
    • Vegan Chocolate Ice Cream
    • Mini Phyllo Tarts
    • No-Bake Nutella Cookies
    5 from 1 vote
    Print Pin Recipe

    Vanilla Bean Buttercream Frosting

    This will be the Best Vanilla Bean Buttercream Frosting you will ever make and you would never use store-bought again.
    Course: Dessert
    Author: Lainey
    Prevent your screen from going dark

    Ingredients

    • 1 cup butter
    • 3-4 cups powdered sugar
    • 1 teaspoon vanilla extract
    • ½ teaspoon salt
    • 1-2 tablespoon milk optional

    Instructions

    • Use your favorite cupcake recipe and bake as usual. Put in cupcake liners and bake, as instructed.
    • After baking it, let it cool while you start making your favorite buttercream frosting.
    • To make the Vanilla Bean Buttercream frosting, sift powdered sugar and set aside.
    • Then, in a stand mixer, add the butter and beat until light and fluffy.
    • Next, add powdered sugar, 1 cup at a time.
    • Add vanilla extract and salt. If the frosting is stiff, add milk.
    • After you have achieved your desired color for your buttercream frosting, place it in a piping bag. Then, go ahead and pipe your cooled cupcakes as desired.
    Leave a Comment

    Watch The Recipe Video!

    QR Code
    Did you make this recipe?Share it on instagram or tag @simplybakings or #simplybakings!

    NEVER MISS A RECIPE!

    PINTEREST / FACEBOOK / INSTAGRAM / TWITTER

    If you’ve tried this or any other of my recipes, don’t forget to rate the recipe and to leave me a comment. I love hearing from you!

    Desserts

    Vegan Maple Bacon Pancake Bites

    Sep 24, 2013 · 1 Comment

    maple vegan bacon donuts on a white plate

    These delicious bite-sized Vegan Maple Bacon Pancakes is a delicious treat for breakfast! They are delicious maple pancakes topped with vegan bacon bits that you'll almost taste like the real thing!

    Looking for more indulgent breakfast recipes? Try my Cereal Pancakes or my Vegan Chocolate Banana Cupcakes.

    3 vegan maple bacon pancake bites on a white plate
    [feast_advanced_jump_to]

    Top Tips

    • Allow the pancake batter sit for a minimum of 10 minutes to allow it to rise and achieve a fluffier texture.
    • Do not over mix. Having lumps are okay!

    Variations

    • Here is a similar donut maker we used and here is a similar hot dog maker we used. Or use a muffin maker.
    • Sprinkle donuts with fresh or frozen blueberries, bananas, or your favorite fruit.
    • Toppings: Customize toppings with vegan whipped cream, fruit compote, crushed nuts, or dairy-free chocolate chips for added flavor and texture.
    • Feel free to use premade vegan pancake mix.
    • Add a simple vanilla or chocolate glaze to give this recipe an extra boost of flavor.

    Substitutions

    • Bacon: There's so many different types of vegetarian bacons and Stripples (Veggie Bacon Strips (this contains eggs) is my favorite.
    • Maple Syrup: Substitute maple syrup with agave nectar, brown rice syrup, or date syrup for a vegan-friendly sweetener.
    • Flour: Substitute all-purpose flour with whole wheat flour, oat flour, almond flour, or a gluten-free flour blend for dietary preferences.
    • Baking Powder: Double check the baking powder used is labeled as vegan, as some brands may contain animal-derived ingredients.
    • Flavorings: Replace vanilla extract with almond extract or maple extract for different flavor profiles in the pancake batter.

    Storage

    • Room Temperature: Place cooled pancake bites in an airtight container or zip-top bag at room temperature for up to 2 days.
    • Refrigerator: For longer storage, refrigerate pancake bites in an airtight container for up to 5 days.
    • Freezer: To freeze, arrange cooled pancake bites in a single layer on a baking sheet and freeze until firm. Transfer to a freezer-safe bag or container and store for up to 3 months. Thaw overnight in the refrigerator or reheat in the microwave or oven before serving.
    • Layering: If stacking pancake bites, place parchment paper or wax paper between layers to prevent sticking.
    • Reheating: To reheat refrigerated or frozen pancake bites, microwave for a few seconds until warmed through or bake in a preheated oven at 350°F (175°C) for 5-10 minutes until heated.

    Ingredients

    • all purpose flour
    • white sugar
    • baking powder
    • salt
    • water
    • oil
    • vegan bacon

    Instructions

    Gather the ingredients for this Maple "Bacon" Pancake. Once the ingredients are all ready, let's begin!

    In a bowl stir together the dry ingredients, flour, sugar, baking powder, salt, and mix well:

    adding sugar to the flour

    Using a whisk add the water and the oil, mixing until just combined. Lumps are okay:

    adding water to the dry ingredients of maple bacon pancakes

    Add in the vegan chopped bacon bits and mix until just combined:

    adding in the vegan bacon bits to the pancake batter

    Spray your appliance of choice with some cooking spray, and cook until the pancake is golden brown, then transfer to a cooling rack to cool completely.

    inserting sticks to the maple pancake batter to the waffle maker

    And enjoy with a drizzle of maple syrup or dip your vegan bacon hotdog in some nutella.

    cooking maple pancakes in a waflle maker

    FAQ

    Can you make pancakes the night before and reheat them?

    Absolutely. The best way is to bake or even toast it.

    How to keep pancakes fresh overnight?

    For fresh pancakes the next day, simply let them cool down entirely before storing them in an airtight container in the fridge. They'll stay good for up to a week.

    Can you prep pancakes ahead of time?

    Absolutely, store the pancake batter overnight in plastic wrap in the fridge and cook when ready. Pancake batter is best cooked and eaten with in 24 hours.

    vegan donuts topped with vegan bacon on a white plate
    5 from 2 votes
    Print Pin Recipe

    Vegan Maple Bacon Pancake Bites

    This scrumptious Vegan Maple "Bacon" Pancakes recipe, made with only 6 ingredients, is the perfect choice for breakfast or a tasty snack!
    Prep Time10 minutes mins
    Cook Time10 minutes mins
    Total Time20 minutes mins
    Course: Breakfast
    Cuisine: American
    Servings: 12 mini donuts
    Calories: 121kcal
    Author: Lainey
    Prevent your screen from going dark

    Ingredients

    • 1 ¼ cup all purpose flour
    • 1 tablespoon white sugar
    • 2 teaspoon baking powder
    • ½ teaspoon salt
    • 1 cup water
    • 1 tablespoon oil

    Instructions

    • Prepare preferred appliance.
    • In a large bowl stir together the dry ingredients, flour, sugar, baking powder, salt, and mix well.
    • Using a whisk add the water and the oil, mixing until just combined. Lumps are okay!
    • Add in the vegan chopped bacon bits and mix until just combined.
    • Spray your appliance of choice with some cooking spray, and cook until the pancake is golden brown, then transfer to a cooling rack to cool completely.
    • And enjoy with a drizzle of maple syrup or dip your vegan bacon hotdog in some nutella.
    Leave a Comment
    Serving: 1gCalories: 121kcalCarbohydrates: 21gProtein: 3gFat: 3gSaturated Fat: 0.2gPolyunsaturated Fat: 1gMonounsaturated Fat: 2gTrans Fat: 0.01gSodium: 402mgPotassium: 28mgFiber: 1gSugar: 0.1gCalcium: 84mgIron: 1mg

    Watch The Recipe Video!

    QR Code
    Did you make this recipe?Share it on instagram or tag @simplybakings or #simplybakings!

    My friend Cobi, from Veggietutorial, introduced me to this extraordinary Maple "Bacon" Pancake recipe. It takes the flavors of Stripples a beloved vegetarian bacon my siblings and I enjoyed as kids. For our collaboration adventure, I prepared the pancake batter while she made the "bacon." Combining our efforts resulted in pancakes that were exponentially more delicious!

    PC: Cobi from Veggietutorial

    Breakfast & Brunch

    Mini Oreo Cupcakes

    Sep 24, 2013 · Leave a Comment

    These Mini Oreo Cupcakes are for those who are Oreo dessert lovers! With a combination of traditional yellow cake mix, eggs, milk, and mini Oreos, you have a fantastic cupcake ready to serve on any occasion! Watch the video tutorial to see how easily I whipped up these delicious Mini Oreo Cupcakes!
    .

    delicious mini oreo cupcakes with cream frosting and mini oreos on top

    Oreos.  You can make it in cheesecakes, cakes, shakes, you name it!  I used Oreos for the cupcakes in this recipe, and they were delicious! I actually used a cake mix to make this recipe because, to me, it tastes just as good and it saves me time.  I added 14 Oreos and omitted the egg yolk to give it that nice white fluffy look.  For the frosting, I used heavy whipping cream and whipped it till it got soft peaks.  The frosting looks weird, but it still tasted DELICIOUS!

    Tips and Tricks for Making This Mini Oreo Cupcakes Recipe: 

    • Before frosting, make sure the cupcakes are completely cooled to avoid the melting of the frosting.
    • Make the frostings ahead in one big batch and just chill it. Take them out from the chiller and frost your MIni Oreo cupcakes before serving.
    • You can add mini dark chocolate chips on top of the cream frosting for a bolder chocolate flavor!
    • If you don't have a piping tip to use when frosting, simply place the whipped cream into a piping bag and make a cut in the corner of the bag, and frost. Works perfectly every time!

    How to Make this Mini Oreo Cupcakes Recipe:

    Gather the ingredients for this Vegetarian Congee and once the ingredients are all ready, let's begin!

    • cake mix
    • Oreos
    • Milk
    • Egg whites

    Preheat oven to 350 degrees F and line the mini cupcake pan set aside.

    Here is the cake mix that I used, just the traditional Yellow cake mix:

    traditional yellow cake mix in a box for mini oreo cupcake recipe

    Follow the directions on the cake box on how to mix it. For this recipe, instead of using just water, I replaced it with milk because I wanted to get a milky chocolatey kind of cupcake:

    mixing the cake mix with milk

    After mixing the cake batter, you can now smash 14 Oreos. I used a ladle in crushing mine. But if you like using a food processor and if you are not a lazy dishwasher like me, you can use that instead 😉

    smashing the oreos inside a ziplock bag with a ladle

    Add the crushed Oreos into the batter and mix well:

    mixing the crushed oreos into the yellow cake mix batter

    at the bottom of each cupcake liner, place a mini Oreo and pour it into the cupcake pan. It would be a nice surprise in each bite!

    pouring the cake mix into the cupcake liners

    Bake 18-20 minutes or until a toothpick comes out clean when you poke into the cupcake:

    ready to bake mini oreo cupcakes

    This smells so divine after baking! But don't get too excited to eat them yet! Allow the cupcakes to cool completely as we still have to frost them.

    freshly baked mini oreo cupcakes

    I used heavy whipping cream as frosting and it tasted soooo good!

    frosted mini oreo cupcakes topped with Mini Oreos

    Frequently Asked Questions for the Mini Oreo Cupcakes Recipe:

    Q: How many hamburger cupcakes does this recipe make?

    A: This recipe makes 12 mini Oreo cupcakes.

    Q: Can we make this ahead and freeze it? 

    A: Yes, you can freeze the cupcakes and frost them when you are ready to serve.

    Q: How can you store these Mini Oreo cupcakes? 

    A: You can freeze the cupcakes if you are going to keep them for a week, or just store them in an airtight container and chill them if you are going to serve them within a few days.

    Q: Can I make this into a cake instead? 

    A: Yes, you can! Just use a cake pan instead of the cupcake pan.

    Q: How did you pipe the frosting? 

    A: I used a regular round piping tip.


    More fun cupcake recipes you can try:

    • 3 Ingredient Chocolate Cupcakes
    • Nutella Cupcakes
    • Ferrero Rocher Cupcakes
    • S’mores Cupcakes

    Here are also easy and delicious Oreo dessert recipes you can try:

    • No Bake OREO Cheesecake
    • No Bake Oreo Cookie
    • 3 Ingredient Oreo Fudge
    • Oreo Waffles
    No ratings yet
    Print Pin Recipe

    Mini Oreo Cupcakes

    This Mini Oreo Cupcakes are a great treat to those Oreo dessert lovers - a combination of traditional yellow cake mix, eggs, milk, and mini Oreos!
    Course: Dessert
    Author: Lainey
    Prevent your screen from going dark

    Ingredients

    • cake mix
    • 14 oreos

    Instructions

    • Preheat oven 350 degrees F and line mini cupcake pan set aside.
    • Follow directions of cake box, but replace water with milk.
    • Smash 14 oreos, then add to batter and mix.
    • Pour into cupcake pan and bake 18-20 minutes.
    Leave a Comment

    Watch The Recipe Video!

    QR Code
    Did you make this recipe?Share it on instagram or tag @simplybakings or #simplybakings!

    NEVER MISS A RECIPE!

    PINTEREST / FACEBOOK / INSTAGRAM / TWITTER

    If you’ve tried this or any other of my recipes, don’t forget to rate the recipe and to leave me a comment. I love hearing from you!

    Cupcakes, Desserts

    Easy No-bake Twix Bar

    Sep 24, 2013 · 2 Comments

    Homemade Twix Bars have a shortbread crust topped with caramel and chocolate, easy to make and very addicting!

    Pair this with my Sweet Potato Juice or Buko Pandan Drink for a tropical twist to this classic treat.

    Growing up I craved for the candy Twix Bar, however my parents did not want me eating candy so I probably ate it once a year.  

    So when I got to be of age, I bought myself Twix Bar whenever I could.  

    Until I tried making it and saw how much chocolate, caramel and unhealthy stuff went into it.  

    I now eat only half of the bar, I can't bring myself to finish the whole thing. However, if I had to choose my favorite candy bar, it would be the Twix Bar.

    close shot of twix bar coated in chocolate

    What is Twix Bar?

    The recipe for Twix Bars dates back to the mid-twentieth century, when the Mars Company introduced the candy bar to the market.

    Twix was inspired by the idea of blending two complementing flavors - caramel and chocolate - to produce a delectable delicacy.

    The candy bar was first debuted in the United Kingdom in 1967 as "Raider" and was later renamed "Twix" in other regions. The name "Twix" is thought to be a combination of the terms "twin" and "biscuits," referring to the bar's two crunchy graham cracker layers.

    Today, the Twix Bar is an iconic and cherished sweet delicacy eaten by people all across the world. Its delectable blend of creamy caramel, crisp graham crackers, and silky chocolate continues to satisfy sweet cravings and is frequently connected with happy childhood memories.

    Whether bought from a store or made at home, the Twix Bar remains a timeless classic that brings joy and comfort to dessert enthusiasts everywhere.

    homemade Twix bar snapped in half

    Making it Healthy and Guilt-Free:

    While the Twix Bar is a delicious treat, you can make a few healthy ingredient substitutions to create a more nutritious version of this classic candy. Here are some options:

    1. Date Caramel: Instead of using traditional caramel candies that are often high in processed sugars, opt for a healthier alternative like date caramel. Simply blend pitted dates with a little water or milk until you achieve a smooth, caramel-like consistency. Dates are a natural sweetener and provide added fiber and essential nutrients.
    2. Whole Wheat Graham Crackers: Choose whole wheat or whole grain graham crackers instead of the regular ones. Whole wheat options offer more fiber, vitamins, and minerals compared to refined versions, promoting better digestion and sustained energy levels.
    3. Dark Chocolate: Substitute the regular milk chocolate with dark chocolate that has a higher cocoa content (70% or more). Dark chocolate contains antioxidants and may have potential health benefits, such as improving heart health and cognitive function.
    4. Low-Fat Milk or Plant-Based Milk: Use low-fat milk or a plant-based milk like almond, soy, or oat milk to mix with the caramel. This swap reduces saturated fat and cholesterol, making the Twix Bars more heart-friendly.

    By incorporating these healthier ingredients, you can still enjoy the delightful taste of Twix Bars while adding some nutritional value to your indulgence. Remember to consume treats like these in moderation as part of a balanced diet.

    easy no bake homemade Twix bar on a white plate

    Tips and Procedures: 

    • Make this into a yummy food gift! Just pile them up and wrap in pretty food wraps and tie a ribbon around it!
    • If you experience difficulty in stirring the caramel when melting it, just add a little milk to loosen it a bit.
    • When a microwave is not available, you can melt the caramel and chocolate using a double boiler. Just make sure the water does not reach the bottom of the bowl because the caramel and chocolate will not melt properly.
    • Mix a bit of peanut butter to the caramel or do a separate layer of peanut butter coating for added flavor. You will have your homemade Peanut butter Twix! Yum!
    • When letting the Twix bar cool, lay them on a piece of parchment paper so it won't stick when you remove them afterward.
    • Serve these homemade Twix bars with ice cream! All sweet but so refreshing!

    How to Make this Twix Bar Recipe:

    Gather the ingredients for this Twix Bar recipe.

    Here are what you will need for this recipe:

    • caramel candies melted
    • graham crackers, assorted sizes
    • chocolate, melted
    • milk

    Once the ingredients are all ready, let's begin!

    Place the caramel candies in a medium bowl and pop in a microwave, then add milk to caramel and mix. The consistency should be like this:

    melted caramel in a bowl

    On a graham cracker, cover one side of the graham cracker with caramel and set aside till caramel hardens:

    graham coated with melted caramel

    In another cup or bowl melt the chocolate and dip the finished graham cracker and set aside in the refrigerator or in a cool location:

    graham coated with caramel and melted chocolate

    And we are done! This no-bake, super easy sweet treat is a perfect go-to during kids' parties, movie nights, and even just something to have on your cookie jars!

    easy no bake homemade Twix bar on a white plate

    Let's open it up and take a look at those gorgeous layers of caramel and chocolate!

    homemade Twix bar

    Frequently Asked Questions:

    How many servings would this recipe do?

    This delicious and easy no-bake Twix Bar recipe can make up to 6-8 pieces.

    Can I use sweetened chocolate?

    Yes you can. But obviously, that would make this dessert much sweeter than it already is. Dark chocolate is suggested for this recipe.

    What are the 3 main ingredients in Twix?

    The three main ingredients in Twix are crunchy biscuit, soft caramel, and creamy milk chocolate. This winning combination of textures and flavors has made Twix a beloved and iconic candy bar enjoyed by people worldwide.


    More delicious and simple sweet treats:

    • Caramel Hot Chocolate
    • Hot Fudge Chocolate Cake
    • Chocolate Chip Cream Cheese Cookies Only 5 Ingredients
    • Chocolate Chip Meringue Cookies
    • Delicious and Easy Mini Chocolate Cupcakes
    • Chocolate Candy
    homemade Twix bar snapped in half
    No ratings yet
    Print Pin Recipe

    Twix Bar

    This Twix Bar is a delicious, easy to make, 4-ingredient sweet treat perfect for a weekend gathering or just any other day!
    Prep Time15 minutes mins
    Cook Time5 minutes mins
    Total Time20 minutes mins
    Course: Dessert
    Cuisine: American, Dessert
    Servings: 6 Twix Bars
    Calories: 282kcal
    Author: Lainey
    Prevent your screen from going dark

    Ingredients

    • 10 caramel candies melted
    • 6-8 graham crackers assorted sizes
    • 1 ½ cups chocolate melted
    • 1 teaspoon milk

    Instructions

    • Melt caramel candies in microwave, then add milk to caramel and mix.
    • On a graham cracker, cover one side of the graham cracker with caramel and set aside till caramel hardens.
    • In another cup or bowl melt the chocolate and dip the finished graham cracker and set aside in the refrigerator or in a cool location.
    Leave a Comment
    Calories: 282kcalCarbohydrates: 37gProtein: 3gFat: 16gSaturated Fat: 9gPolyunsaturated Fat: 1gMonounsaturated Fat: 5gCholesterol: 0.1mgSodium: 100mgPotassium: 153mgFiber: 3gSugar: 26gVitamin A: 1IUCalcium: 23mgIron: 2mg

    Watch The Recipe Video!

    QR Code
    Did you make this recipe?Share it on instagram or tag @simplybakings or #simplybakings!

    PINTEREST / FACEBOOK / INSTAGRAM / TWITTER

    If you’ve tried this or any other of my recipes, don’t forget to rate the recipe and to leave me a comment. I love hearing from you!

    5 Ingredients or Less, Desserts, No Bake Dessert Recipes

    Pineapple Mango Smoothie

    Sep 24, 2013 · 6 Comments

    Pineapple mango smoothie made with six simple ingredients for a creamy texture that tastes like your favorite piña colada.

    Screen Shot 2013-10-30 at 6.59.17 PM

    Tips and Tricks for Making This Pineapple Mango Smoothie Recipe: 

    • If possible, use fresh fruits - fresh pineapple and fresh ripe mangoes. I promise, your smoothie will taste so much better when using fresh fruits.
    • For a more festive look, top with whipped cream and sliced fruits before serving.
    • In blending your ingredients, make sure to put the hardest ingredients to blend where the blade of the blender is located and put the softest on top.

    How to Make this Pineapple Mango Smoothie Recipe:

    Gather the ingredients for this Pineapple Mango Smoothie. Once the ingredients are all ready, let's begin!

    Prepare ½ cup of pineapple chunks and mango slices:

    pineapple chunks for pineapple mango smoothie

    Put ice in the blender and add in the pineapple and mango slices, sugar, and milk:

    adding in all ingredients of pineapple mango smoothie in a blender

    Covering your blender carefully, blend away!

    blending all the yummy ingredients

    That's basically it, Simply Bakers! Just literally dump in the ingredients and blend! Serve in your favorite glasses! 🙂

    Frequently Asked Questions for the Pineapple Mango Smoothie Recipe:

    Q: How many servings would this recipe do?

    A: This delicious and easy Pineapple Mango smoothie recipe could make 3 to 4 glasses, depending on how big your glasses are.

    Q: Can I use other sweeteners aside from brown sugar?

    A: Yes you can agave, honey, maple syrup. Just adjust the quantity of the sweetener according to your taste.

    delicious Pineapple Mango smoothie
    5 from 1 vote
    Print Pin Recipe

    Pineapple Mango Smoothie

    Grab this recipe of a delicious and refreshing summer tropical treat, Pineapple Mango Smoothie with just 6 ingredients!
    Course: Drinks
    Author: Lainey
    Prevent your screen from going dark

    Ingredients

    • 1 cup ice
    • ½ cup pineapple chunks
    • 1 mango
    • ½ cup water
    • ½ evaporated milk
    • ⅛ cup sugar

    Instructions

    • In a blender add ice, pineapple chunks, mango, evaporated milk, sugar and blend 2-3 minutes.
    • Serve.
    Leave a Comment

    Watch The Recipe Video!

    QR Code
    Did you make this recipe?Share it on instagram or tag @simplybakings or #simplybakings!

    During the summer in Southern California, it is really hot and you just want to drink something sweet and cold.  I had a can of pineapples and some Filipino Mangos and threw the in the blender with some other ingredients and it was very refreshing!!

    Breakfast & Brunch, Drinks, Vegan Filipino Recipes

    3-Ingredient Nutella Cookies Recipe

    Sep 24, 2013 · 3 Comments

    Nutella Cookies lined up on a plate

    Got egg, flour, and our favorite Nutella spread? Great! Just grab a large bowl and prepare the mixture. These Nutella Cookies are the easiest Nutella cookies you'll ever make! They are so good, rich in flavor, and take only a few minutes to bake with simple ingredients.

    I've loved Nutella desserts like Nutella Peanut Butter Cookies and Nutella Hot Chocolate for as long as I can remember.

    Nutella Cookies lined up on a plate
    [feast_advanced_jump_to]

    Why You'll Love This Recipe

    These cookies are foolproof and perfect for beginner bakers: one bowl, a few minutes of prep, minimal cleanup, rich, soft, and packed with chocolate flavor.

    Nutella lends sweetness as well as healthy fats from hazelnuts. It's not a vegan recipe. But you can swap out ingredients to make it vegan.

    Ingredients

    Listed below are all the ingredients you will need:

    • Egg
    • Nutella
    • All-purpose flour

    See the recipe card for quantities.

    Instructions

    Prepare the Oven

    1. Preheat the oven to 350°F (175°C).

    2. Lightly grease a baking sheet or line with parchment paper.

    Make the Dough

    3. In a bowl, add egg, Nutella, and all-purpose flour.

    Egg and Nutella in a glass bowl

    4. Mix until fully combined and a soft dough forms.

    Flour mixed well into the egg and Nutella

    Shape and Bake

    5. Roll the dough into balls and place them on the prepared baking sheet.

    6. Gently press each cookie with the bottom of a cup to flatten.

    Dough balls being pressed with a glass

    7. Bake for 10–12 minutes, or until set.

    Serve

    8. Remove from the oven and allow cookies to cool slightly before serving.

    Freshly baked Nutella cookies

    Substitutions & Variations

    • Ingredient Swap
      You can replace the egg with a flax egg for a dairy-free, egg-free option.
      Use a gluten-free all-purpose flour blend if needed. Results stay soft.
    • Variation
      Add chocolate chips or chopped hazelnuts for extra texture.
    • Mistake to Avoid
      Overbaking. The cookies should look soft when removed.
    • Storage Tips
      • These cookies freeze well for up to 1 month/
      • Keep baked cookies in an airtight container at room temperature for 2–3 days.

    FAQs

    How many servings would this recipe do?

    This delicious and easy Nutella cookie recipe could make up to 12-16 cookies.

    Can I use melted chocolate instead of  Nutella?

    Yes, you can. Whatever chocolate you have in your pantry or fridge, you can use it. You will just miss that delicious hazelnut flavor you get from Nutella.

    Will this recipe work if I put smooth peanut butter instead of Nutella?

    Yes, for sure, that would be equally delicious.

    Freshly baked Nutella cookies
    5 from 2 votes
    Print Pin Recipe

    3-Ingredient Nutella Cookies Recipe

    These Nutella cookies use just 3 ingredients and these are the easiest Nutella cookies - they are so good, rich in flavor, and takes only a few minutes to bake!
    Prep Time5 minutes mins
    Cook Time12 minutes mins
    Total Time17 minutes mins
    Course: Cookies, Dessert, Snacks
    Cuisine: Fusion (American-Filipino/Asian)
    Servings: 12 cookies
    Calories: 178kcal
    Author: Lainey
    Prevent your screen from going dark

    Ingredients

    • 1 large egg
    • 1 cup Nutella
    • 1 cup all-purpose flour

    Instructions

    Prepare the Oven

    • Preheat the oven to 350°F (175°C).
    • Lightly grease a baking sheet or line with parchment paper.

    Make the Dough

    • In a bowl, add egg, Nutella, and all-purpose flour.
    • Mix until fully combined and a soft dough forms.

    Shape and Bake

    • Roll the dough into balls and place them on the prepared baking sheet.
    • Gently press each cookie with the bottom of a cup to flatten.
    • Bake for 10–12 minutes, or until set.

    Serve

    • Remove from the oven and allow cookies to cool slightly before serving.
    Leave a Comment

    Notes

    • Cookies will be soft when warm and firm up as they cool.
    • Do not overbake to keep them fudgy and rich.
    • Store in an airtight container at room temperature for up to 3 days.
    Serving: 1gCalories: 178kcalCarbohydrates: 24gProtein: 3gFat: 8gSaturated Fat: 7gPolyunsaturated Fat: 0.1gMonounsaturated Fat: 0.1gTrans Fat: 0.002gCholesterol: 14mgSodium: 16mgPotassium: 118mgFiber: 2gSugar: 14gVitamin A: 21IUCalcium: 31mgIron: 2mg

    Watch The Recipe Video!

    QR Code
    Did you make this recipe?Share it on instagram or tag @simplybakings or #simplybakings!

    You Might Also Like:

    • 3 Ingredient Nutella Cookies
    • No-Bake Nutella Cookies
    • Nutella Peanut Butter Cookies
    • Nutella Stuffed Cookies

    Recipes for Every Moment

    Craving something chocolatey, but don't have a lot of time? These Nutella Cookies come together fast and satisfy instantly.

    Cookies, Desserts

    • « Go to Previous Page
    • Page 1
    • Interim pages omitted …
    • Page 14
    • Page 15
    • Page 16
    • Page 17
    • Go to Next Page »

    Primary Sidebar

    Lainey holding a muffin pan in her kitchen

    I'm Lainey, the driving force behind SimplyBakings.com, where I'm on a mission to redefine Filipino cooking through a plant-based lens.

    More about me →

    Popular

    • cookie dough bites
      Easiest Cookie Dough Bites Ever
    • delicious and soft oreo cheesecake cookies
      Soft Oreo Cheesecake Cookies
    • mini chocolate cupcakes in a white rectangular plate
      Delicious and Easy Mini Chocolate Cupcakes
    • Filipino Custard Cake drizzled with powdered sugar
      Filipino Custard Cake
    • no bake oreo cheesecake in a mason jar
      Foolproof 3 Ingredients No Bake Oreo Cheesecake
    • 3 brownies stacked
      Best and Easiest Brownies

    Footer

    Sign Up for My Email List

    Latest Posts

    • Foolproof Taro Recipe
    • Best Matcha Strawberry Popsicles
    • Classic Filipino Lentil Soup
    • BEST Kinamatisang Tofu

    Quick Links

    Kitchen Essentials

    About Lainey

    Contact

    • Facebook
    • Instagram
    • YouTube
    • Pinterest
    • TikTok

    © 2025 Auburn Digital Services LLC. All Rights Reserved | Privacy Policy

    Rate This Recipe

    Your vote:


    A rating is required
    A name is required
    An email is required