
• Skip to primary navigation
  • Skip to main content
  • Skip to primary sidebar
Simply Bakings logo
  • Home
  • Recipes Index
  • Filipino Recipes
  • About Me
  • Nav Social Menu

menu icon
go to homepage
search icon
Homepage link
  • Recipes
  • Filipino Recipes
  • About Me
    • Facebook
    • Instagram
    • Pinterest
    • YouTube
  • ×

    Easiest Apple Chips

    Easiest Apple Chips

    Nov 23, 2020 · Leave a Comment

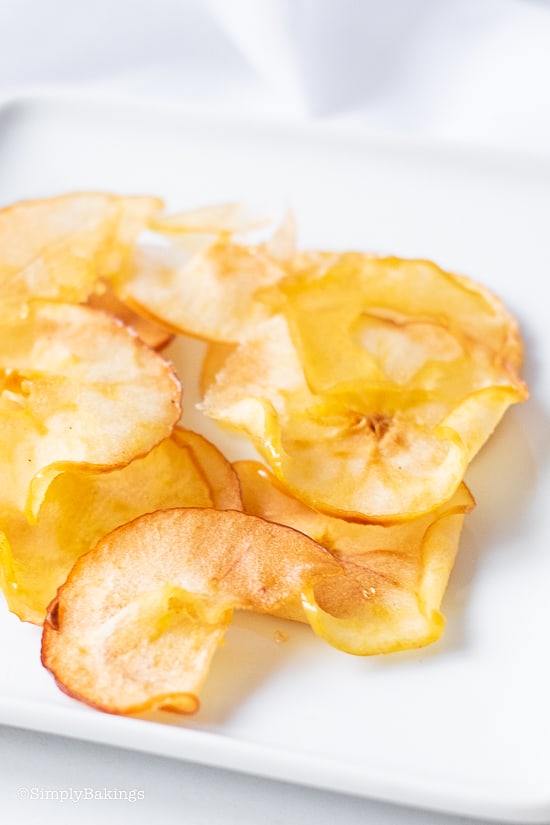
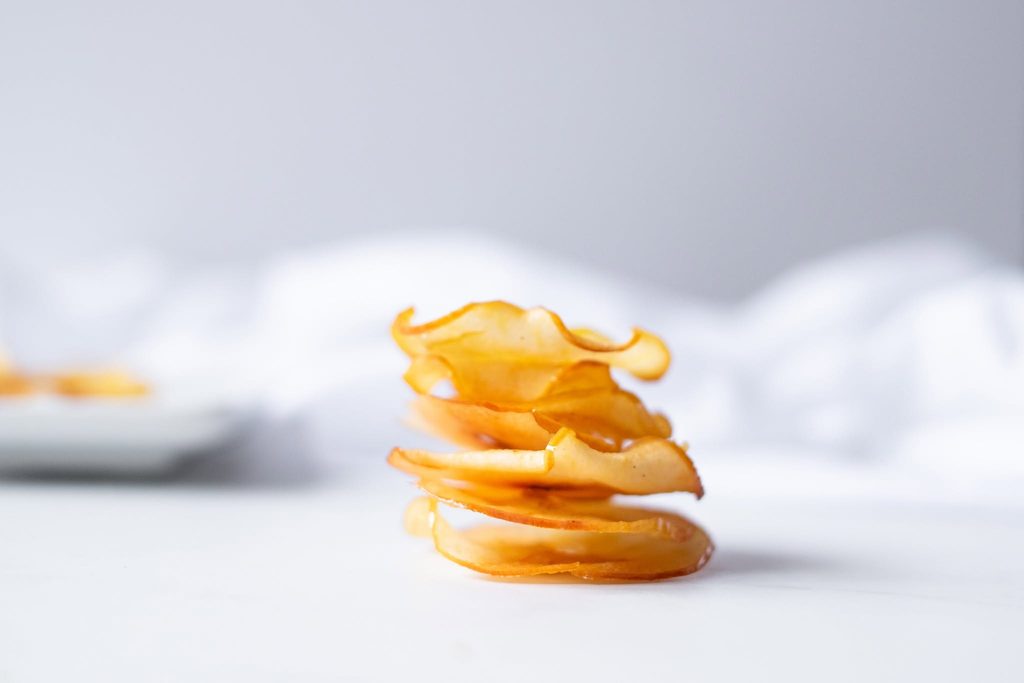
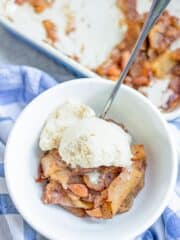
    Apple Chips on a white plate

    These Apple Chips are made with a few simple ingredients like apples, cinnamon, and sugar! They are crunchy with a slight chew and a great healthy snack.

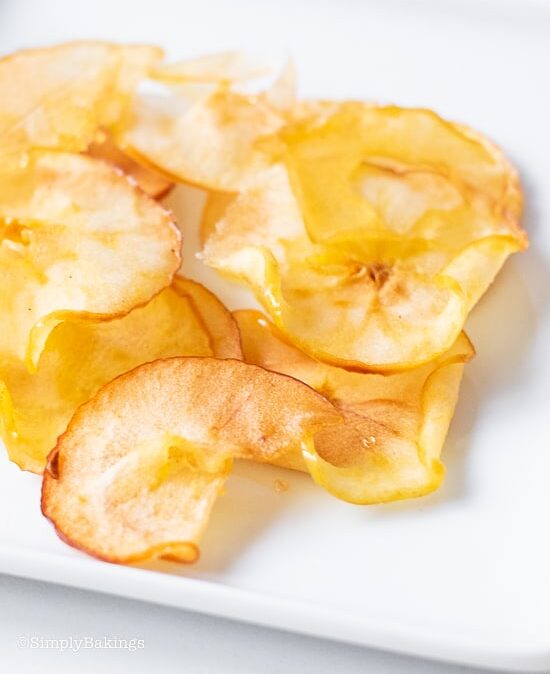
    apple chips on a white plate

    Tips & Variations:

    • The thinner the apples the better! If you slice the apple more than ⅛ inch thick, it will not be very crispy.
    • Keep in mind that the color of the final apple chip will vary based on the type of apple. Crisper apples tend to be lighter, while softer, sweeter apples tend to be darker.
    • Store baked apple chips in an airtight container at room temperature for up to 1 week.

    How to Make Apple Chips:

    Listed below are all the ingredients you will need:

    • apples, sliced thinly
    • cinnamon
    • sugar
    • water

    In a saucepan over high heat, add water, sugar, cinnamon and bring to a rolling boil.

    Next add apples and boil on low for 5-7 minutes, then remove and place on a parchment lined tray and bake at 350 for 15-20 minutes

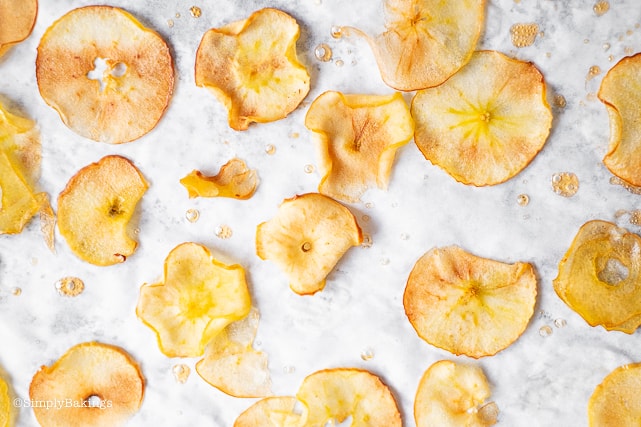
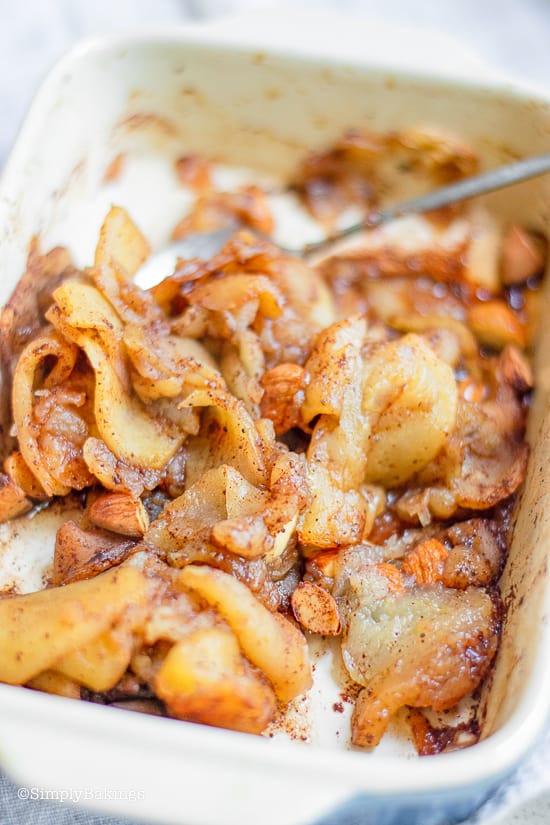
    Baked cinnamon apple chips on parchment paper

    Remove and allow to cool completely. Apples should be mostly crunchy with a slight chew. 

    Here are more delicious apple recipes:

    • Apple Pancake Cookies
    • Apple Pie Cookies
    • 5 Ingredient Apple Dessert
    • Apple Monkey Bread
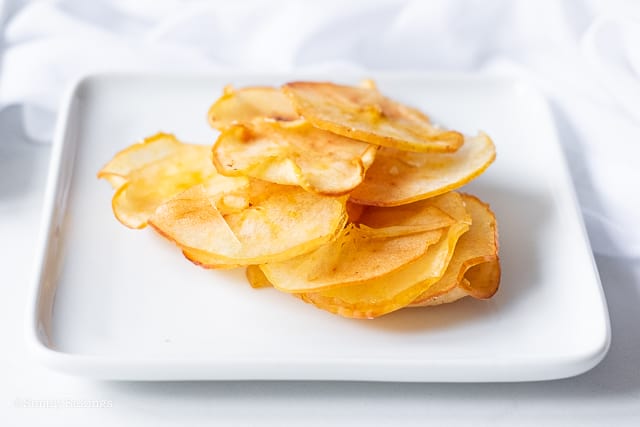
    cinnamon apple chips on a white plate
    No ratings yet
    Print Pin Recipe

    Apple Chips

    Try these Cinnamon Apple Chips that are made with a few simple ingredients. It's also a healthy snack your whole family will love!
    Prep Time13 hours hrs 17 minutes mins
    Cook Time27 minutes mins
    Course: Snack
    Cuisine: American
    Keyword: apple chips
    Servings: 2 cups, aprox.
    Author: Lainey
    Prevent your screen from going dark

    Ingredients

    • 2 cups of water
    • 1 teaspoon cinnamon
    • 2 cups of sugar
    • 2 large apples

    Instructions

    • In a saucepan over high heat, add water, sugar, cinnamon and bring to a rolling boil.
    • Next, add apples and boil on low for 5-7 minutes, then remove and place on a parchment lined tray and bake at 350 for 15-20 minutes
    • Remove and allow to cool completely. Apples should be mostly crunchy with a slight chew. 
    Leave a Comment
    QR Code
    Did you make this recipe?Share it on instagram or tag @simplybakings or #simplybakings!

    Desserts, Vegan Baking

    Teddy Bear Cookies Recipe

    Nov 19, 2020 · 3 Comments

    kawaii polar bear cookies on a white table

    Looking for cute, but easy cookies to make? Try making this Teddy Bear Cookie Recipe with your kids! With a simple sugar cookie base, white chocolate accents, and a touch of creativity using an edible marker, you’ll craft charming bear faces perfect for any occasion. Yum!

    Need more cookie ideas? Try some of my flavor favorites: Reindeer, Christmas Tree, Oreo Cheesecake, and Coconut Flour Chocolate Chip.

    kawaii teddy bear cookies on a white table

    What Are Teddy Bear Cookies?

    Teddy Bear Cookies are a delightful twist on traditional sugar cookies, featuring a cute bear face that’s almost too adorable to eat. Made with round cookie shapes and creative decorating techniques, these cookies are fun to bake and even more fun to share.

    Whether you're hosting a children's birthday party or simply want to surprise your family with a whimsical treat, these cookies are guaranteed to bring smiles. The recipe is beginner-friendly, making it an excellent choice for baking with kids or creating a memorable edible gift. Give this a try!

    Substitutions

    • Don't want to use an edible pen? Melted black or dark chocolate works to create the face of the bear.
    • Swap the red sanding sugar for sprinkles in your favorite color.
    • Use dark chocolate instead of white chocolate for a richer look and flavor.

    Variations

    • Chocolate Teddy Bear Cookies: Add 1–2 tablespoons of cocoa powder to your sugar cookie dough for a chocolatey twist. Use white sugar instead of red sanding sugar.
    • Gluten-Free and Vegan Alternatives: Opt for a gluten-free flour blend and vegan butter to cater to dietary preferences.
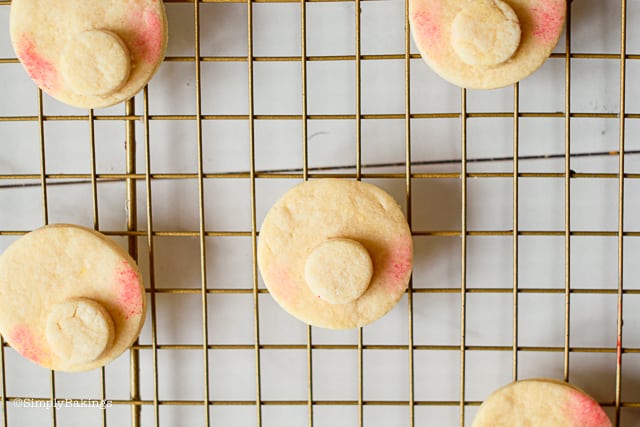
    teddy bear cookies on a wire rack

    Storage

    • Store your cookies in an airtight container at room temperature for up to one week.
    • For longer storage, put the baked cookies (undecorated) in the fridge or freezer for up to three months.

    Ingredients

    Listed below are all the ingredients you will need (omitting quantities):

    • round cookies (2-inch & ½-inch)
    • icing
    • white chocolate or white candy melts
    • edible marker pen
    • red sanding sugar

    Instructions

    Using your favorite sugar cookie recipe, cut out and bake 20 2-inch round cookies and 10 ½-inch round cookies. 

    Place one of the smaller cookies on top of the bigger cookie and press down slightly. This will be the snout. Bake as directed, then remove from the oven and allow it to cool.

    Then using your finger add the red sanding sugar to the cookies

    two round sugar cookies on a cookie rack cooling

    Once the cookies are fully cooled, attach the ears by pipping white chocolate on each side of the bear's head.

    Let set completely, then draw the face of the bear and eyes using an edible marker.

    cute polar bear cookies on a plate

    Top Tips

    • If you have icing and cookies left over, make sandwich cookies.
    • Feel free to flavor the icing to your taste by adding vanilla, peppermint, or chocolate extract.

    FAQ

    Can I make these cookies ahead of time?

    Yes! You can prepare and freeze the dough or bake the cookies in advance and decorate them later.

    Do I need special skills to decorate them?

    Not at all! The simple designs are easy to achieve with edible markers and basic tools.

    Are there Other Shapes I Can Try?

    Of course! Experiment with different animal shapes to create a cookie zoo.

    cute teddy bear cookies on a white surface
    5 from 3 votes
    Print Pin Recipe

    Teddy Bear Cookies Recipe

    Create these adorable Teddy Bear Cookies in no time! They're simple, fun, and irresistibly sweet!
    Prep Time15 minutes mins
    Bake Time25 minutes mins
    Total Time40 minutes mins
    Course: Cookies, Snack
    Cuisine: American
    Servings: 10 cookies
    Calories: 161kcal
    Author: Lainey
    Prevent your screen from going dark

    Ingredients

    • 20 2- inch round cookies
    • 10 ½- inch round cookies
    • 1 cup of icing
    • ¼ cup of white chocolate or white candy melts melted
    • edible marker pen
    • red sanding sugar crushed into dust

    Instructions

    • Using your favorite sugar cookie recipe, cut out and bake 20 2-inch round cookies and 10 ½-inch round cookies. 
    • Place one of the smaller cookies on top of the bigger cookie and press down slightly. This will be the snout.
    • Bake as directed, then remove from the oven and allow it to cool.
    • Using your finger add the red sanding sugar to cookies.
    • Once cookies are fully cooled, attach the ears by pipping white chocolate on each side of the bears head.
    • Let set completely, then draw the face of the bear and eyes using an edible marker.
    Leave a Comment
    Serving: 1cookieCalories: 161kcalCarbohydrates: 23gProtein: 1gFat: 7gSaturated Fat: 2gPolyunsaturated Fat: 3gMonounsaturated Fat: 2gCholesterol: 1mgSodium: 75mgPotassium: 28mgFiber: 0.1gSugar: 19gVitamin A: 8IUVitamin C: 0.02mgCalcium: 11mgIron: 0.3mg
    QR Code
    Did you make this recipe?Share it on instagram or tag @simplybakings or #simplybakings!

    Making sugar cookies is a fun and easy process! Start by creaming softened unsalted butter with brown sugar, creating a smooth and rich mixture. The addition of a single egg and fragrant vanilla extract brings the wet ingredients together, while a separate bowl holds the dry ingredients—flour, baking soda, cinnamon, and a pinch of salt—waiting to be sifted and stirred in gently.

    Chill the dough in the fridge until firm. Then, roll it out on a floured surface using a rolling pin. Cut out shapes with cookie cutters or a knife, and place them on baking sheets lined with parchment paper. Bake in a preheated oven until golden around the edges.

    Once the cookies come out of the oven, let them cool on a wire rack while that warm, buttery smell fills the air. You can leave some plain to keep it simple, or get creative and decorate them with colorful frosting, sprinkles, or M&M!

    Cookies, Desserts, Snacks

    Vegetarian Thai Yellow Curry Recipe

    Nov 17, 2020 · Leave a Comment

    Vegetarian Thai Yellow Curry in a plate

    My hearty and warm Vegetarian Thai Yellow Curry Recipe bursts with bold flavor. Made with tender potatoes, coconut cream, and fragrant Thai curry paste, every bite is rich, velvety, and very comforting.

    Love this curry? Try Thai Coconut Noodle Curry Soup or Curried Chickpea Wraps. Those, and Eggplant Chickpea Stew, are nice for more cozy, flavor-packed meals!

    Vegetarian Thai Yellow Curry in a plate
    [feast_advanced_jump_to]

    What is the Vegetarian Thai Yellow Curry Recipe?

    It's a rich and creamy vegan yellow curry made with red potatoes, chickpeas, and a flavorful curry paste. It’s not a Filipino recipe. But it’s loved by many for its comforting and spicy taste. You can finish it with thai basil and a splash of lime juice for freshness.

    Coconut cream adds a smooth finish, while the chickpeas bring in protein and fiber. One unique trick is using a bit of peanut butter or finishing with cold water to balance the heat. It’s a great plant-based meal that’s easy to enjoy with rice. Perfect for curry lovers who want something hearty and meat-free.

    History of the Vegetarian Thai Yellow Curry Recipe

    Thai Yellow Curry comes from Thailand and is one of the three main curry types—red, green, and yellow. It was influenced by Indian spices and introduced by traders long ago, with flavors like coriander and curry powder.

    The vegetarian version was later created for those who prefer plant-based meals. Thai cooks began using chickpeas and potatoes instead of meat, and added pantry favorites like soy sauce, fish sauce, or tamari for umami. Today, it’s a staple in Thai restaurants and homes around the world.

    Health Benefits of Chickpeas

    • High in protein, great for muscle building
    • Rich in fiber, which helps digestion
    • Supports heart health with good fats and nutrients
    • Helps control blood sugar levels
    • Keeps you full longer, perfect for healthy weight management

    Substitutions

    • Red potatoes – Use sweet potatoes or Yukon Golds for a different flavor.
    • Coconut cream – Swap with full-fat coconut milk for a lighter consistency. Stir in a splash of evaporated milk if you're out, but note the flavor change.
    • Chickpeas – Substitute with lentils, white beans, or extra-firm tofu.
    • Thai curry paste – Use red curry paste or green curry paste for a variation in spice and taste.
    • Olive oil – Replace with coconut oil for extra tropical flavor or a splash of soy sauce for depth.
    A bowl of Vegetarian Thai Yellow Curry

    Recipe Variations

    • Spicy curry – Add chili flakes, ginger, or sliced Thai bird’s eye chili for heat.
    • Veggie-packed curry – Add carrots, green beans, bamboo shoots, red bell pepper, or baby corn for more fiber and nutrients.
    • Noodle curry – Serve over rice noodles instead of rice for a fun twist.
    • Peanut curry – Stir in 1 tablespoon of peanut butter for added richness and depth.

    Storage

    • This curry stands up well to freezing for up to 2 months.
    • Store leftovers in an airtight container in the refrigerator for up to 4 days.
    • Reheat gently over medium heat, adding a splash of broth or coconut milk to loosen the sauce if needed.

    Ingredients

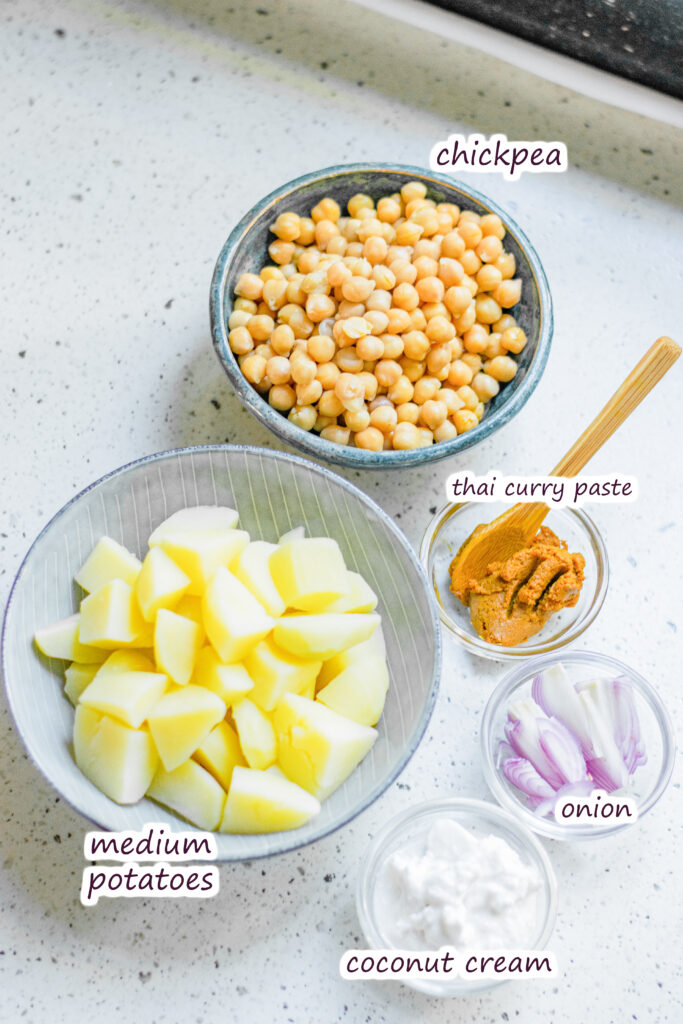
    Listed below are all the ingredients you will need:

    • potatoes
    • chickpeas
    • Thai curry paste
    • olive oil
    • garlic clove
    • onion
    • coconut cream
    • vegetable broth
    • salt

    See recipe card for quantities.

    All ingredients for the Vegetarian Thai Yellow Curry recipe
    Eatwithfingers

    Instructions

    Prepare the Potatoes:

    Fill a large pot with water and bring to a boil. Add quartered red potatoes and boil until fork-tender, about 10–12 minutes. Drain and set aside.

    Make the Curry Base:

    In a separate large pot, heat olive oil over medium heat.

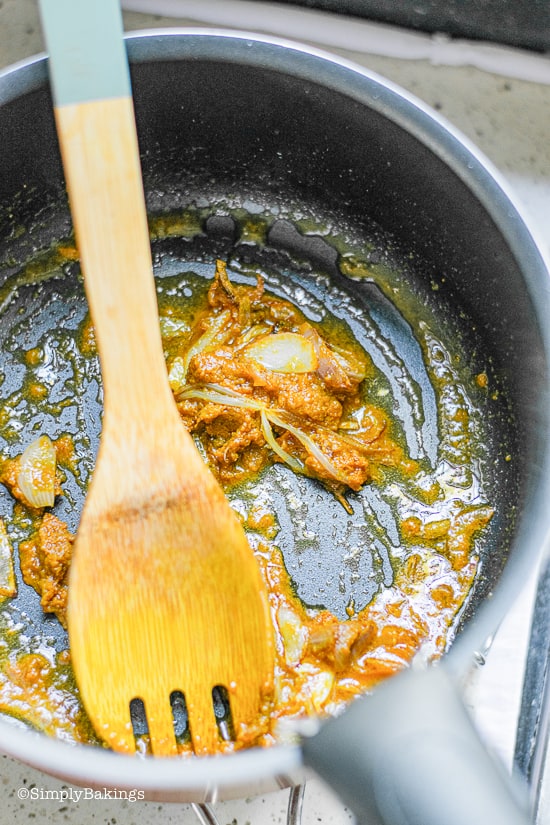
    Add sliced onions and minced garlic. Sauté until fragrant and tender, about 2–3 minutes.

    Add Thai curry paste and stir for 30 seconds to release its aroma.

    A pan with ingredients stirred in it

    Combine and Simmer:

    Pour in vegetable broth and coconut cream. Stir to combine.

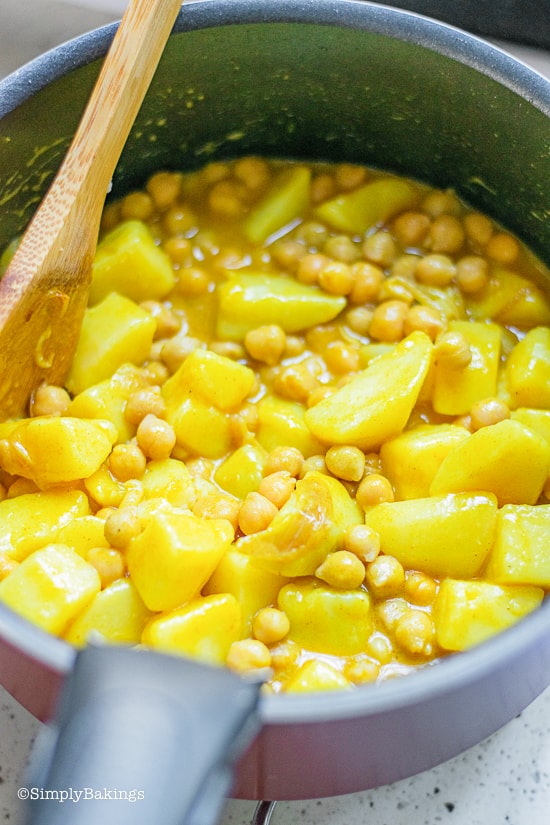
    Add chickpeas and boiled potatoes. Mix well.

    Reduce heat and let the curry simmer for 10–15 minutes until slightly thickened.

    Season with salt to taste.

    Chickpeas and potatoes in a pan

    Remove from heat and serve warm with steamed jasmine rice or brown rice!

    Vegetarian Thai Yellow Curry ready for serving

    Hint: To enhance flavor, sauté the curry paste briefly before adding liquid. It deepens the aroma and taste.

    ⭐ Top Tip

    Always cook your potatoes separately to ensure they don’t overcook in the curry and fall apart. Let the curry sit for 10 minutes before serving. This helps the flavors fully develop and meld together.

    FAQ

    What is the secret ingredient for curry?

    The secret ingredient for a flavorful curry is curry paste. It’s packed with spices, herbs, and aromatics that bring depth and heat to the dish. A small spoonful can transform any curry into something bold and tasty.

    What goes in a Thai yellow curry?

    Thai yellow curry usually has yellow curry paste, coconut cream, potatoes, onions, and sometimes chicken or chickpeas. It’s known for being milder and sweeter than red or green curry. The mix of spices like turmeric and cumin gives it that warm, golden color.

    How to make Thai red curry creamier?

    To make Thai red curry creamier, simply add more coconut cream or full-fat coconut milk. You can also stir in a bit of nut butter or simmer it longer to thicken the sauce. Always add creaminess at the end to keep the texture smooth and rich.

    More Soup or Stew Recipes

    • Thai Noodle Soup
    • Sour Soup
    • Macaroni Soup
    • Pho Soup
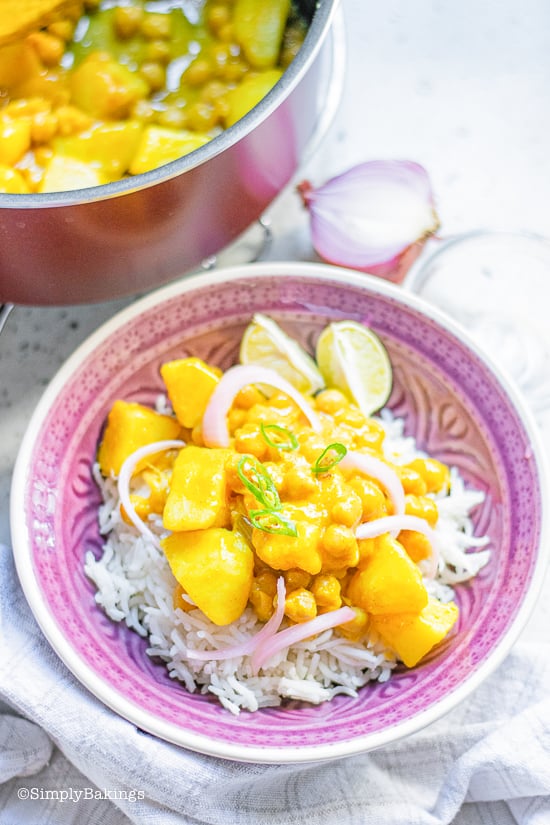
    Yellow Potato Curry over rice in a pink bowl
    No ratings yet
    Print Pin Recipe

    Vegetarian Thai Yellow Curry

    This Vegetarian Thai Yellow Curry is rich, creamy, and bursting with authentic Thai flavors. It’s a comforting, restaurant-style dish you can easily make at home. Serve it warm with rice!
    Prep Time5 minutes mins
    Cook Time30 minutes mins
    Total Time35 minutes mins
    Course: Main Course
    Cuisine: Thai
    Keyword: Thai Chickpea Curry
    Servings: 4 servings
    Calories: 397kcal
    Author: Lainey
    Prevent your screen from going dark

    Ingredients

    • 4 (500g) Red potatoes washed, peeled, and quartered
    • 1 tablespoon Olive oil
    • ¼ cup Onion sliced
    • 1 clove Garlic minced
    • 2 tablespoons Thai curry paste
    • 1 cup Vegetable broth
    • ½ cup Coconut cream
    • 1 ½ cups Chickpeas drained and rinsed
    • Salt to taste

    Instructions

    Prepare the Potatoes:

    • Fill a large pot with water and bring to a boil.
    • Add quartered red potatoes and boil until fork-tender, about 10–12 minutes. Drain and set aside.

    Make the Curry Base:

    • In a separate large pot, heat olive oil over medium heat.
    • Add sliced onions and minced garlic. Sauté until fragrant and tender, about 2–3 minutes.
    • Add Thai curry paste and stir for 30 seconds to release its aroma.

    Combine and Simmer:

    • Pour in vegetable broth and coconut cream. Stir to combine.
    • Add chickpeas and boiled potatoes. Mix well.
    • Reduce heat and let the curry simmer for 10–15 minutes until slightly thickened.
    • Season with salt to taste.

    Serve:

    • Remove from heat and serve warm with steamed jasmine rice or brown rice.
    Leave a Comment
    Serving: 1gCalories: 397kcalCarbohydrates: 55gProtein: 11gFat: 16gSaturated Fat: 10gPolyunsaturated Fat: 1gMonounsaturated Fat: 4gSodium: 45mgPotassium: 1263mgFiber: 10gSugar: 7gVitamin A: 1213IUVitamin C: 22mgCalcium: 69mgIron: 4mg
    QR Code
    Did you make this recipe?Share it on instagram or tag @simplybakings or #simplybakings!

    Main Entree, Rice, Noodles, Potatoes, Thanksgiving Sides, Vegetables

    Vegan Caramel Cookies

    Nov 14, 2020 · 1 Comment

    Vegan Caramel Cookies lined up in a tray

    Addicting and delicious, these are the decadent Vegan Caramel Cookies! It's made with simple ingredients from your pantry. And the best thing is it's vegan and healthy.

    Try making other cookies too, like Chocolate Hazelnut Cookies, Homemade Oreo Cookies, and Rocky Road Cookies. They are so delicious and so easy to make!

    Vegan Caramel Cookies with a cup of coffee
    [feast_advanced_jump_to]

    What are Vegan Caramel Cookies?

    Vegan Caramel Cookies are soft, chewy treats made without eggs or dairy, using plant-based ingredients like coconut milk or vegan butter. They’re sweet, buttery, and often have a rich caramel flavor made from natural sweeteners. This is not a Filipino recipe, but many Filipinos enjoy baking vegan sweets too.

    One unique ingredient is coconut cream, which gives the caramel a smooth, creamy texture without using animal products. These cookies are perfect for those looking for a dairy-free or egg-free dessert.

    History of Vegan Caramel Cookies

    Vegan Caramel Cookies became popular as more people started choosing plant-based diets. While regular caramel cookies have been around for a long time, the vegan version grew from the need to create dairy-free, egg-free options that still taste rich and sweet.

    The recipe often uses ingredients like coconut milk, maple syrup, or nut butters to mimic caramel. Today, these cookies are enjoyed by vegans and non-vegans alike for their chewy texture and sweet flavor.

    Substitutions

    • Coconut oil – Use vegan butter or avocado oil for a similar fat content.
    • Coconut cream – Use thick oat cream or soy cream if coconut flavor isn’t preferred.
    • Powdered sugar – Replace with a sifted blend of granulated sugar and cornstarch (DIY version).
    • Cocoa powder – Use Dutch-processed cocoa for a deeper chocolate flavor.
    • All-purpose flour – Substitute with a gluten-free 1:1 flour blend if needed.
    Vegan Caramel Cookies on a brown cloth

    Variations

    • Salted caramel cookies – Sprinkle a few flakes of sea salt over the caramel before sandwiching.
    • Peanut butter caramel cookies – Mix 1 tablespoon of peanut butter into the caramel for a nutty twist.
    • Plain vanilla cookie base – Skip the cocoa powder and increase flour slightly for a classic buttery cookie.
    • Mini sandwich cookies – Use a 1-inch cutter for bite-sized caramel-filled treats.

    Storage

    • These ingredients stand up well to freezing for up to 2 months.
    • Store assembled cookies in a single layer in an airtight container in the fridge for up to 5 days. Bring to room temperature before serving for best texture.

    Ingredients

    Listed below are all the ingredients you will need:

    • Powdered sugar
    • Cocoa powder
    • Vanilla extract
    • Coconut oil
    • Water
    • Salt
    • Baking soda
    • Cinnamon
    • All-purpose flour
    • Granulated sugar
    • Coconut cream

    See recipe card for quantities.

    All Vegan Caramel Cookie ingredients in separate bowls

    Instructions

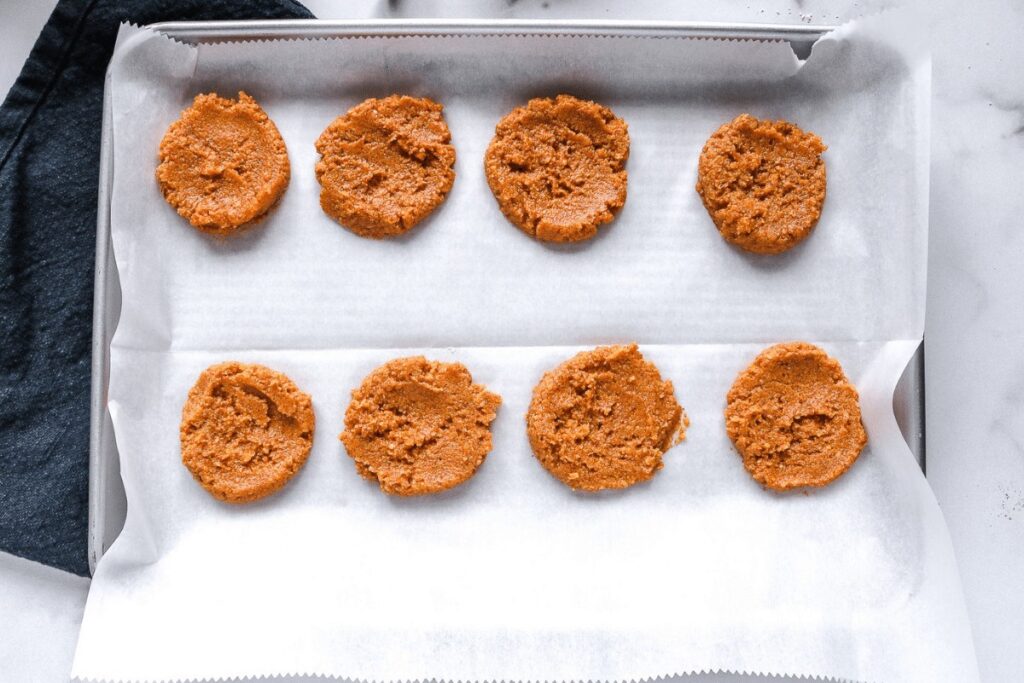
    Combine powdered sugar, cocoa powder, salt, and cinnamon in a large bowl. Add coconut oil, water, and vanilla extract. Mix until a smooth syrup forms without lumps.

    Mixing bowl with ingredients and spatula

    Add flour and baking soda. Mix in with a spatula until completely combined. Mix a couple extra times to bring everything together.

    White spatula mixing cookie dough

    Create a 1 inch thick disk out of the dough. Wrap it in plastic wrap and place in the fridge for 10-15 minutes.

    Preheat oven to 325° F and line baking trays with parchment.

    Remove dough from the fridge. Lightly flour both sides of disc. Between two sheets of baking parchment, roll dough to ¼ inch thick.

    Rolling pin spreading the cookie dough

    Use a 2 inch round cutter to cut out as many cookies as possible.

    Using a ½ inch - ¾ inch round cutter (or the wide opening of a piping nozzle), cut circles from the center of half the cookies. Use the tip of a knife to remove the excess dough.

    Cutting out cookie shapes on the dough

    Chill cut the dough in the fridge for 4-5 minutes before baking to prevent spreading.

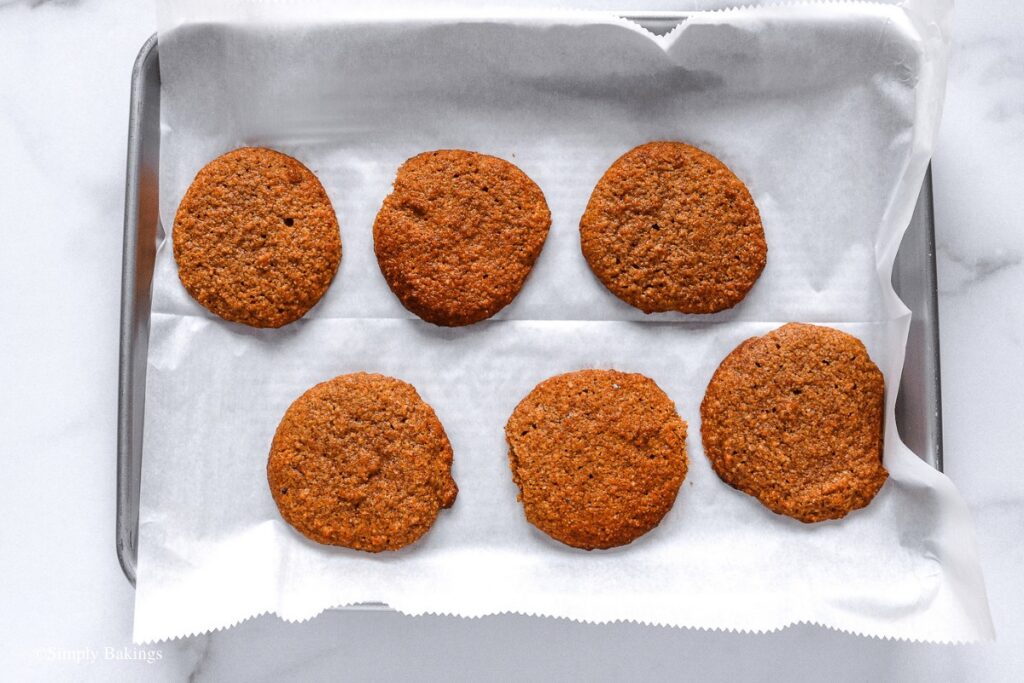
    Bake for 14-15 minutes, until dry to the touch. Allow to cool on the pan for 5 minutes before moving to a rack to cool completely.

    Cookie dough on sheet lined with parchment paper

    How to make the Caramel:

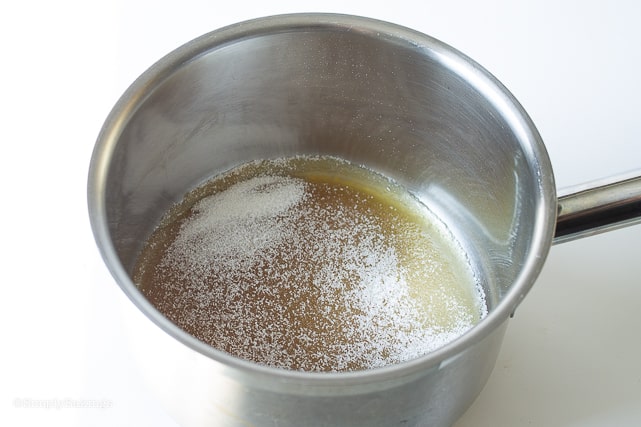
    In a medium saucepan with a heavy bottom, spread sugar in an evenly layer.  Melt over low heat without stirring. 

    Melting the sugar in a pan to make the sauce

    Once sugar is completely melted, stir slightly with a silicon spatula or metal spoon*** to get final crystals distributed. 

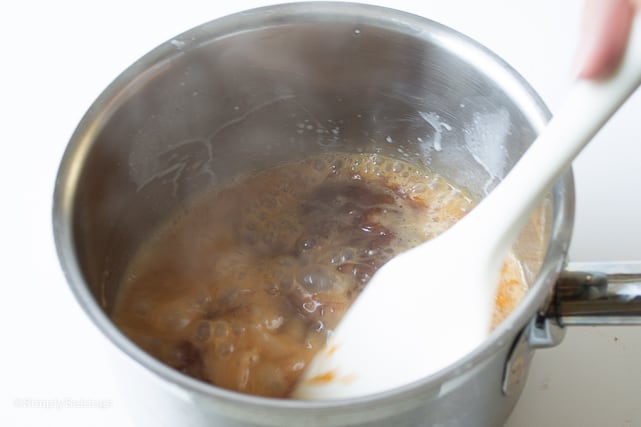
    Remove from heat (but leave the burner on) and stir in coconut oil. The mixture will bubble up and spit a little bit. The oil will not completely combine at this point, just stir until everything is smooth.

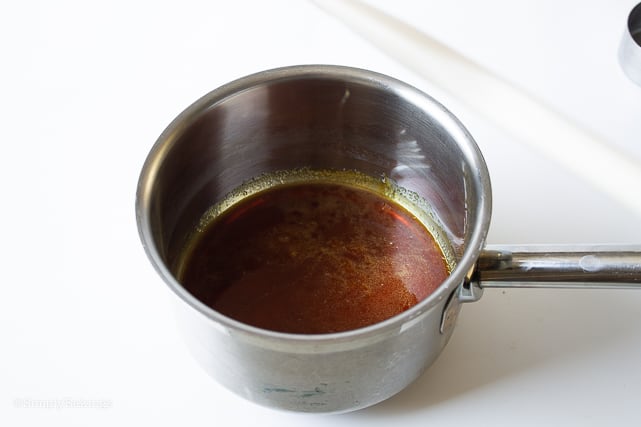
    Add coconut cream. Stir vigorously and return to heat. Continue stirring gently while heating until all the lumps are smooth and dissolved again. Stop stirring and continue heating until a candy or instant read thermometer reaches 250-255 °F.

    Saucepan filled with caramel mixture

    Remove from heat and wait for bubbling to settle. Once it has stopped bubbling, add vanilla and salt, stirring until combined. Pour into a glass container and set aside to cool completely.

    Making caramel with ingredients in a sauce pan

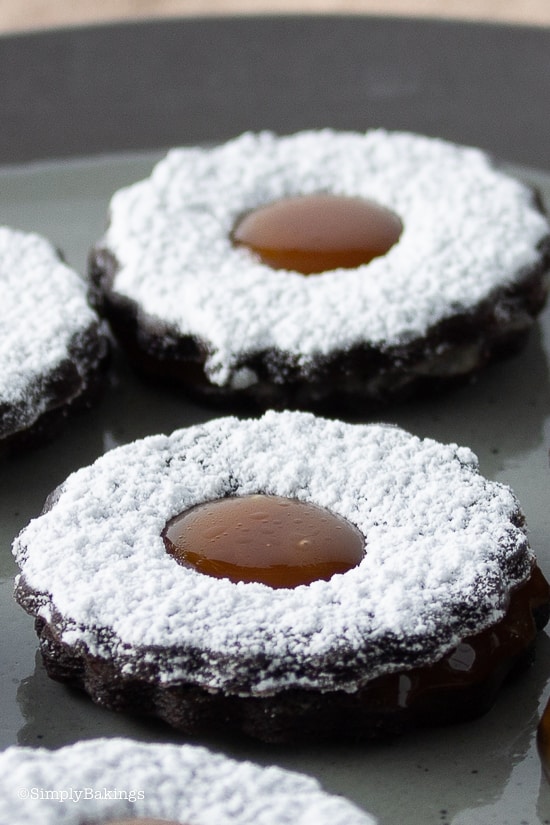
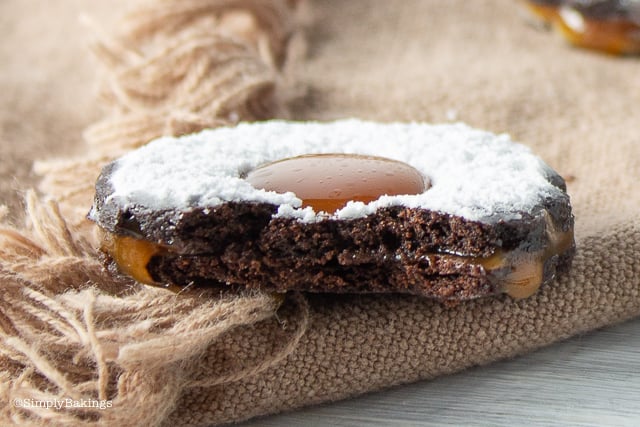
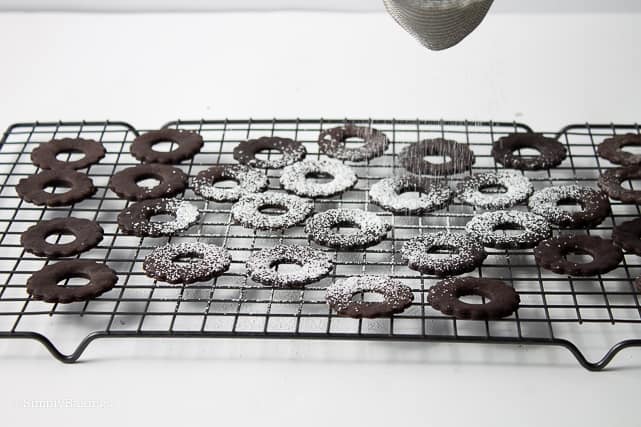
    Place the cut-out cookies (the top portion) on a cooling rack. Dust with powdered sugar.

    Powdered sugar sprinkled on the chocolate cookies

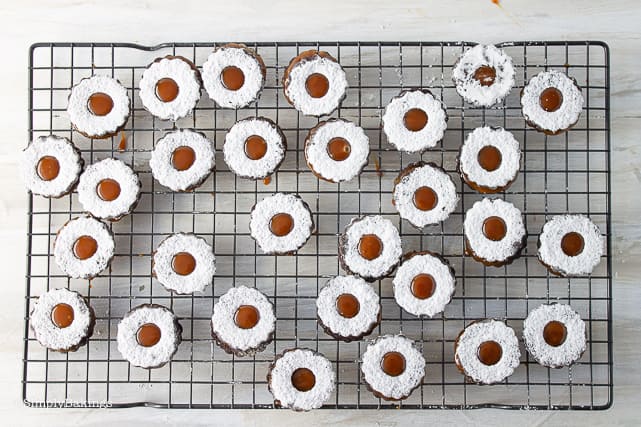
    Place ¾ - 1 tsp caramel on each of the complete round cookies (the bottom half). Handling gently by the edges, place a powdered cut-out on top of each caramel dollop, centering as much as possible.

    Fresh cookies cooling on a cookie rack

    Allow caramel to settle. Some dripping will occur (see note about firmer caramel if preferred).  Best eaten the same day, or can be stored in a single layer in an air-tight container at room temperature for a couple days.

    And here you go. Enjoy!

    Vegan Caramel Cookies lined up in a tray

    Hint: It's best to use a metal spatula because plastic will melt at 250-255° temperature and wood is more likely to cause recrystallization. 

    ⭐ Top Tip

    Do not use raw or coarse cane sugar, it will not melt evenly. You can gather the scraps of the cookie dough after rolling and cutting as well, but keep in mind the cookies will start to get a bit tough from overworking.

    FAQ

    Does caramel contain milk?

    Caramel is not dairy free. Caramel is typically made from milk or heavy cream. Caramel is not safe for those with a milk allergy.

    What can I put in cookies instead of eggs?

    You can whisk 1 teaspoon of vegetable oil, 2 tablespoons of water and 2 teaspoons of baking powder together to replace each egg in baked goods like cookies, brownies or quick breads. This substitution won't impact a recipes' flavor profile the way egg substitutions like mashed banana or flaxseed might.

    Can you use oil instead of butter in cookies?

    Yes! You can generally substitute vegetable oil for butter in most cookie recipes. I would also look for cookie recipes specifically designed for the use of vegetable oil (versus using butter).

    More Recipes

    Looking for more vegan cookies? Try these:

    • Vegan Mini Chocolate Chip Cookies
    • Vegan Sunbutter Cookies
    • Vegan Chocolate Chip Cookie Dough
    • Vegan Snickerdoodle Cookies
    Vegan Caramel Cookies on a baking tray
    5 from 1 vote
    Print Pin Recipe

    Vegan Caramel Cookies

    These Vegan Caramel Cookies are rich, chocolatey, and filled with gooey coconut caramel. Each bite offers a crisp cookie shell and a sweet, sticky center. They're the perfect plant-based treat!
    Prep Time40 minutes mins
    Cook Time15 minutes mins
    Total Time55 minutes mins
    Course: Dessert
    Cuisine: American
    Keyword: Vegan Chocolate Caramel Sandwich
    Servings: 16 -18 sandwich cookies
    Calories: 104kcal
    Author: Lainey
    Prevent your screen from going dark

    Ingredients

    For the Cookies:

    • ½ cup + 2 tablespoons Powdered sugar
    • ¼ cup Cocoa powder
    • 1 teaspoon Vanilla extract
    • ¼ cup Coconut oil
    • 3 tablespoons Water
    • ¼ teaspoon Salt
    • ¼ teaspoon Baking soda
    • ¼ teaspoon Cinnamon
    • ¾ cup + 2 tablespoons All-purpose flour

    For the Caramel:

    • ½ cup Granulated sugar
    • 1 tablespoon Coconut oil
    • 6 tablespoons Coconut cream
    • ¼ teaspoon Salt
    • 1 teaspoon Vanilla extract

    Instructions

    Make the Cookie Dough:

    • In a large bowl, combine powdered sugar, cocoa powder, salt, and cinnamon.
    • Add coconut oil, water, and vanilla extract. Mix until a smooth syrup forms with no lumps.
    • Add flour and baking soda. Mix with a spatula until fully combined and smooth.
    • Form the dough into a 1-inch-thick disk, wrap in plastic wrap, and refrigerate for 10–15 minutes.

    Cut and Bake the Cookies:

    • Preheat the oven to 325°F (165°C). Line baking trays with parchment paper.
    • Lightly flour both sides of the dough and roll between two sheets of parchment to ¼ inch thick.
    • Use a 2-inch round cutter to cut out cookies. Cut a ½–¾ inch center hole in half of the cookies using a piping tip or small round cutter.
    • Chill the cut dough on the trays in the fridge for 4–5 minutes before baking to prevent spreading.
    • Bake for 14–15 minutes, or until dry to the touch. Cool on the tray for 5 minutes, then transfer to a rack to cool completely.

    Make the Vegan Caramel:

    • In a heavy-bottomed saucepan over low heat, spread the sugar in an even layer and let it melt without stirring.
    • Once melted, swirl occasionally to prevent burning. Stir gently to dissolve any remaining crystals.
    • Remove from heat and stir in coconut oil (it will bubble).
    • Add coconut cream, stir vigorously, and return to heat. Cook until smooth, then let it reach 250–255°F without stirring.
    • Remove from heat, let the bubbling stop, then stir in vanilla and salt. Pour into a glass container and cool completely.

    Assemble the Cookies:

    • Place the cut-out cookie tops on a rack and dust with powdered sugar.
    • Spoon ¾ to 1 teaspoon of caramel onto the flat side of each full round cookie.
    • Gently press a powdered cut-out cookie on top to form a sandwich. Allow the caramel to settle.
    Leave a Comment
    Serving: 1gCalories: 104kcalCarbohydrates: 12gProtein: 1gFat: 6gSaturated Fat: 5gPolyunsaturated Fat: 0.1gMonounsaturated Fat: 0.4gSodium: 91mgPotassium: 46mgFiber: 1gSugar: 6gVitamin A: 0.1IUVitamin C: 0.2mgCalcium: 4mgIron: 1mg
    QR Code
    Did you make this recipe?Share it on instagram or tag @simplybakings or #simplybakings!

    Cookies, Vegan Baking

    Kalabasa Pasta (Filipino Squash Pasta)

    Nov 8, 2020 · 3 Comments

    kalabasa pasta in a white plate

    Are you ready to level up your pasta game? Here's a creamy and flavorful Kalabasa Pasta (Filipino Squash Pasta) made with a nutty squash sauce, cashews, and coconut milk. Perfect for a cozy, dairy-free meal!

    If you're interested in making more squash recipes, try my Filipino Kalabasa Ravioli, Kalabasa Pancakes, and Ginataang Kalabasa recipe too!

    pouring squash sauce over fettuccine pasta
    [feast_advanced_jump_to]

    What is Kalabasa Pasta?

    Kalabasa Pasta is a savory dish made using kalabasa, or Filipino squash, as the main ingredient. Kalabasa also known as kabocha squash in the Philippines, looks like a small pumpkin and is green with white / yellow spots. The inside of the kalabasa seems very similar to a pumpkin, but it’s a bit more on the yellow side. When fully ripe, the squash can be very sweet.

    History of Kalabasa Pasta?

    Kalabasa Pasta is a modern Filipino dish that blends local ingredients with Italian-inspired cooking. While kalabasa (Filipino squash) has long been a staple in traditional Filipino cuisine - commonly used in dishes like ginataang kalabasa (squash in coconut milk) and pinakbet (vegetable stew) - its use in pasta is a more recent innovation.

    The dish likely emerged as a healthier, budget-friendly alternative to creamy Western-style pasta. Filipinos have embraced kalabasa puree as a natural, nutrient-rich base for pasta sauces, replacing heavy cream while maintaining a smooth, slightly sweet flavor. With the rise of plant-based and vegetable-forward dishes in the Philippines, Kalabasa Pasta has gained popularity, especially among home cooks and health-conscious eaters.

    While not a traditional Filipino dish, Kalabasa Pasta reflects the Filipino love for adapting international flavors using local, affordable ingredients, making it a unique fusion recipe.

    When Is This Dish Typically Enjoyed?

    Kalabasa Pasta is enjoyed year-round, especially for everyday meals, during the holiday season, and on rainy days for its warm, comforting texture. It’s also popular among health-conscious eaters as a nutritious, plant-based pasta alternative.

    This nutritious squash is known for its sweet, earthy flavor and creamy texture, which makes it an excellent base for pasta.

    Kalabasa pasta recipe is a healthy, low-carb choice that is enjoyable and adaptable. It's a delicious way to get extra vegetables into your diet, whether you eat it alone or with bread. Are you ready to give it a try? Read on and find out more about this recipe below!

    Filipino-style squash pasta with sautéed garlic and sauce

    Health Benefits of Kalabasa (Filipino Squash)

    • Rich in Vitamin A – Supports good vision, skin health, and a strong immune system
    • High in Fiber – Aids digestion and promotes gut health
    • Boosts Immunity – Packed with antioxidants like beta-carotene and vitamin C
    • Heart-Healthy – Contains potassium, which helps regulate blood pressure
    • Low in Calories – A great option for weight management while keeping meals filling

    Substitutions

    • Kalabasa – Swap with butternut squash for a similar sweet and creamy texture
    • Coconut milk – Use almond milk or cashew cream for a lighter but still creamy sauce
    • Nutritional yeast – Replace with grated parmesan or a dairy-free cheese substitute for added flavor

    Recipe Variations

    • Meaty texture – Add crumbled vegetarian meat or vegan sausage slices for extra bite
    • Spicy Marinara – Blend kalabasa, crushed tomatoes, garlic, and red pepper flakes for a bold, zesty sauce
    • Curry Twist – Mix kalabasa, coconut milk, curry paste, and spices for a rich, fragrant pasta sauce

    Storage

    • Cool the kalabasa pasta sauce completely before keeping it in an airtight container.
    • Refrigerate for up to four days or freeze for up to three months for longer storage.
    • When ready to use, thaw in the refrigerator overnight and reheat on the stovetop, adding water if necessary to achieve the desired consistency.

    Ingredients

    Listed below are all the ingredients you will need (omitting quantities):

    • kalabasa (squash)
    • cashew nuts
    • red pimientos
    • white pepper powder
    • garlic powder
    • Himalayan salt
    • coconut milk
    • nutritional yeast
    • olive oil
    • garlic
    • dried oregano
    • dried basil
    • coconut milk
    • fettuccine pasta

    See recipe card for quantities.

    All ingredients in separate white bowls

    Instructions

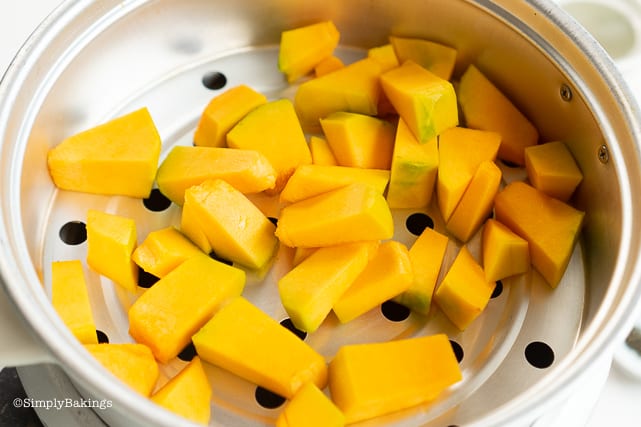
    Steam squash until soft, about 10-15 minutes, then set aside.

    Pieces of squash in a strainer

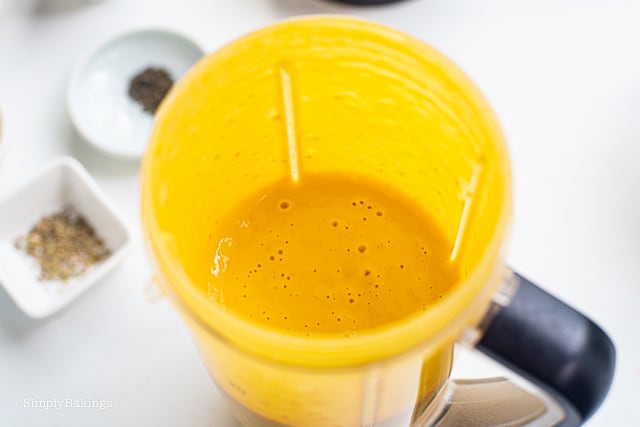
    In a blender, add squash, soaked cashew nuts, red pimientos, white pepper powder, garlic powder, Himalayan salt, 1 ¼ cup coconut milk, nutritional yeast and blend until creamy.

    Blending ingredients together in food processor

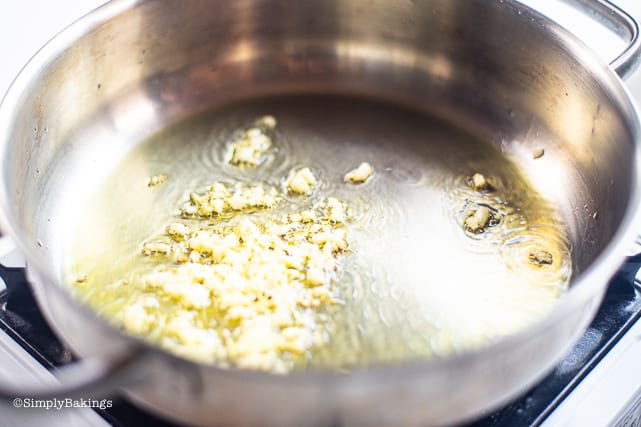
    Heat the oil in a large pan over low heat, then add garlic and sauté until lightly golden, 1 to 2 minutes.

    ginger sautéed and fried in oil on a pan

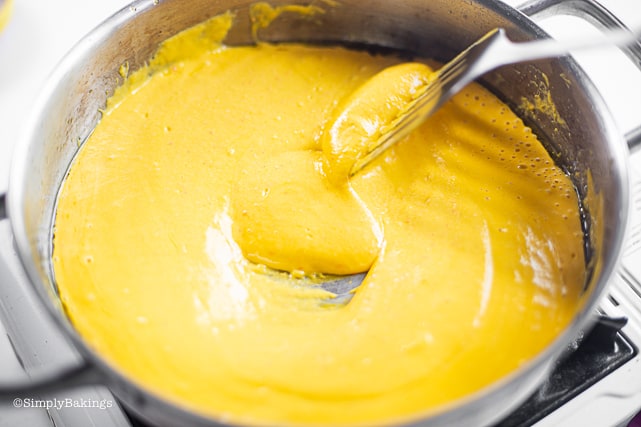
    Add sauce, oregano, basil, and the remaining ¼ cup of coconut milk, mix, then simmer for 5 minutes.

    kalabasa squash cooking in a sauce pan

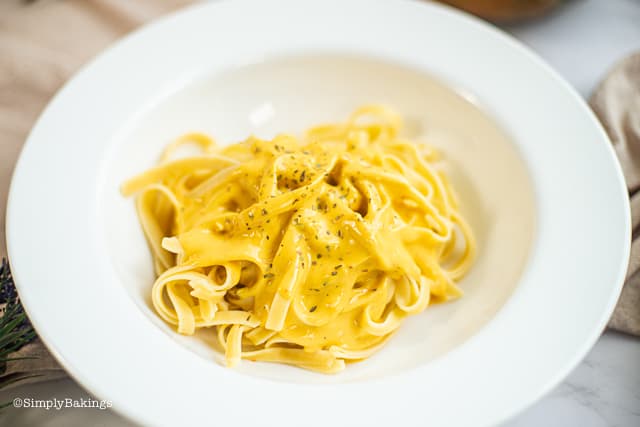
    Cook the pasta according to the package instructions. Drain and serve topped with the sauce.

    Smooth kalabasa sauce over hot pasta

    Hint: Roasting the Kalabasa enhances its natural sweetness, while steaming keeps it soft and easy to blend.

    ⭐ Top Tip

    • When adding the dried oregano and basil, rub it between your palms to release maximum flavor.
    • If you have the time, simmering the sauce for longer will add a deeper flavor.
    • To fix bitter sauce, add ⅛ teaspoon of baking soda or a ½ teaspoon of sugar to the sauce at a time (tasting between additions) until the acidity evaporates.

    FAQ

    Is kalabasa the same as pumpkin?

    Pumpkin and kalabasa are both squash. Kalabasa is available all year, but pumpkins are normally harvested in September. Pumpkins, which have a thicker and more lustrous orange skin, are often used as jack-o-lanterns at Halloween.

    What does squash pasta taste like?

    Squash pasta has a moderate sweet and earthy flavor, as well as a creamy texture that pairs well with savory sauces.

    Can I substitute squash for pumpkin??

    Yes, you can use squash instead of pumpkin in recipes because they have similar flavors and textures, but bear in mind that squash is somewhat sweeter and creamier than pumpkin.

    More Recipes

    Looking for more squash recipes? Try some of the fan favorites:

    • Ginataang Kalabasa
    • Pinakbet
    • Pumpkin Chili
    • Vegan Vegetable Soup
    Delicious Kalabasa Pasta topped with basil leaf
    5 from 2 votes
    Print Pin Recipe

    Kalabasa Pasta (Filipino Squash Pasta)

    This delicious and hearty Kalabasa Pasta (Filipino Squash Pasta) is made with kalabasa and pasta sauce - a great alternative to the traditional red sauce!
    Prep Time5 minutes mins
    Cook Time20 minutes mins
    Total Time25 minutes mins
    Course: Main Course, pasta dish
    Cuisine: Filipino
    Servings: 3 -4 servings
    Calories: 796kcal
    Author: Lainey
    Prevent your screen from going dark

    Ingredients

    For the Squash Sauce:

    • 1 ½ cups squash cut into wedge shapes
    • ½ cup cashew nuts soaked in water for 10 minutes
    • 1 whole red pimiento
    • ½ teaspoon white pepper powder
    • ½ teaspoon garlic powder
    • 1 teaspoon Himalayan salt
    • 1 ¼ cups coconut milk for blending
    • ⅛ cup nutritional yeast

    For the Pasta & Cooking:

    • 2 tablespoons olive oil
    • 3 cloves garlic minced
    • ¼ teaspoon dried oregano
    • ¼ teaspoon dried basil
    • ¼ cup coconut milk for simmering
    • 250 grams fettuccine pasta

    Instructions

    Prepare the Sauce:

    • Steam the squash until soft, about 10-15 minutes, then set aside.
    • Blend the sauce: In a blender, combine steamed squash, soaked cashew nuts, red pimiento, white pepper, garlic powder, Himalayan salt, 1 ¼ cups coconut milk, and nutritional yeast. Blend until smooth and creamy.

    Cook the Pasta & Assemble:

    • Heat olive oil in a large pan over low heat, then sauté garlic until fragrant and lightly golden, about 1-2 minutes.
    • Pour in the blended sauce, add oregano, basil, and the remaining ¼ cup coconut milk. Stir well and simmer for 5 minutes.
    • Cook pasta according to package instructions, then drain.
    • Toss the pasta in the sauce or serve the sauce on top.
    Leave a Comment
    Serving: 1servingCalories: 796kcalCarbohydrates: 81gProtein: 20gFat: 47gSaturated Fat: 25gPolyunsaturated Fat: 4gMonounsaturated Fat: 14gTrans Fat: 0.05gCholesterol: 70mgSodium: 818mgPotassium: 942mgFiber: 6gSugar: 5gVitamin A: 8080IUVitamin C: 40mgCalcium: 104mgIron: 8mg
    QR Code
    Did you make this recipe?Share it on instagram or tag @simplybakings or #simplybakings!

    Christmas Desserts, Main Entree, Rice, Noodles, Potatoes, Side Dishes, Thanksgiving Sides, Vegan Filipino Recipes, Vegetarian Filipino Recipes

    Mini Cherry Cheesecake

    Nov 5, 2020 · Leave a Comment

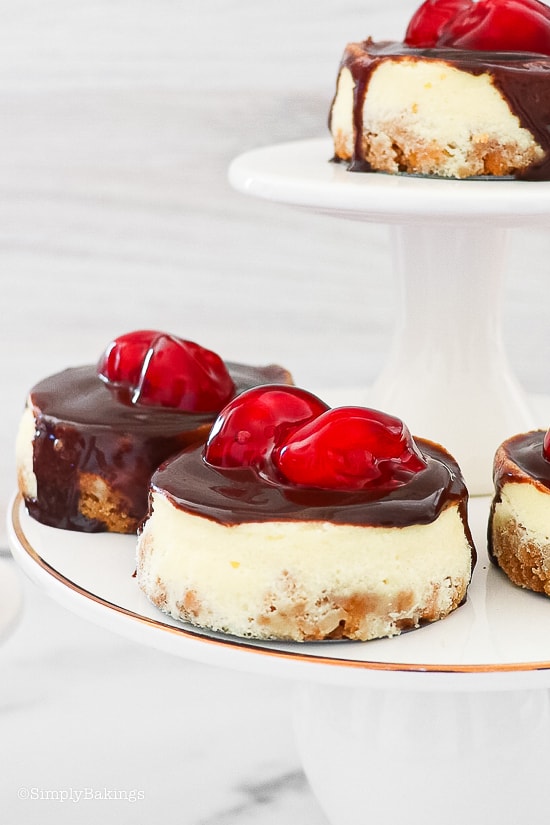
    mini cherry chessecakes on a cake stands

    This Mini Cherry Cheesecake has a sweet and buttery graham cracker crust, a smooth and creamy cheesecake, and is topped with chocolate ganache and cherry filling. It's easy to make, delicious, and the perfect dessert for any occasion!

    Looking for more fruit flavored cheesecakes? Try my Easy Ginger Lemon Cheesecake.

    cherry cheesecake on a cupcake stand

    Tips and Variations:

    • Completely cool the cheesecake before adding ganache and cherry filling.
    • Not necessary, but baking cheesecake in a water bath, helps with overbaking the cheesecake, and helps prevent cracks on the surface.
    • If you don't want to use cherry pie filling, feel free to use your favorite pie filling of choice.
    • Drizzle white chocolate right before serving the chilled cheesecake.
    Mini Cherry Cheesecake with Ganache dripping on the sides

    How to Make Mini Cherry Cheesecake:

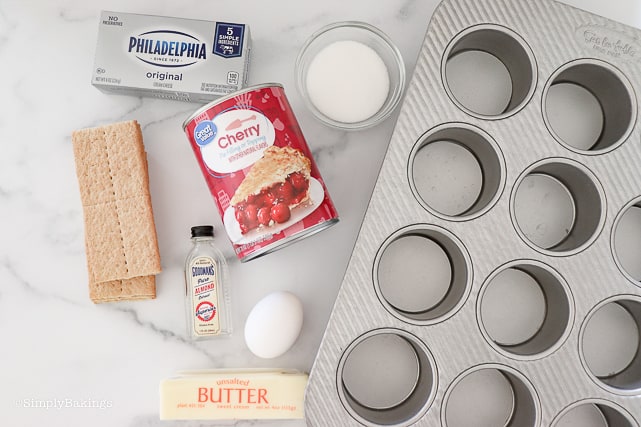
    Listed below are all the ingredients you will need:

    Crust:

    • graham cracker crumbs (1 sleeve of graham crackers)
    • melted butter
    • white sugar

    Cheesecake:

    • cream cheese
    • sugar
    • eggs
    • almond extract
    • cherry pie filling
    Mini Cherry Cheesecake ingredients with cheesecake pan

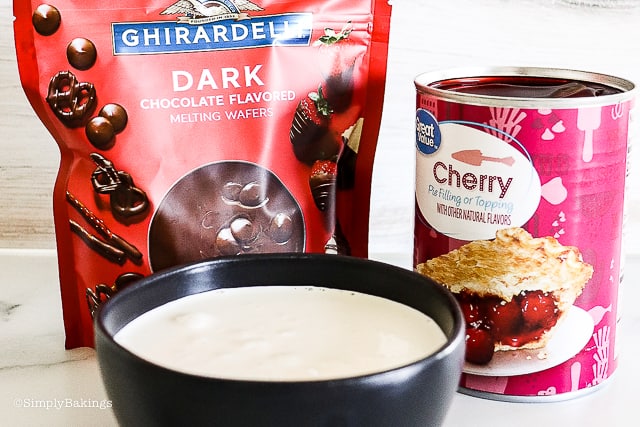
    Gache:

    • heavy cream
    • dark chocolate melting wafers
    ganache and cherry ingredients

    In a medium bowl, add the graham cracker crumbs, melted butter, and a sprinkle of white sugar. Then evenly divide among the 12 mini cheesecake cavities. Press the crust firmly into each cavity.

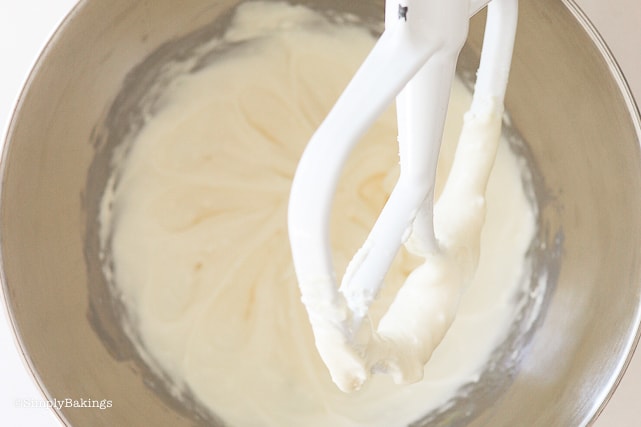
    In a large bowl, add cream cheese, sugar, eggs, and almond extract, and beat until smooth and fluffy:

    fluffy cream cheese in a mixing bowl

    Pour cheesecake mixture into individual cheesecake cavities, then bake at 350 degrees for 16-18 minutes or until the cheesecakes begin to brown. When the cheesecake is finished baking, allow the cheesecakes to cool on the counter:

    mini cheesecake on a foiled pan

    To make the Ganache:

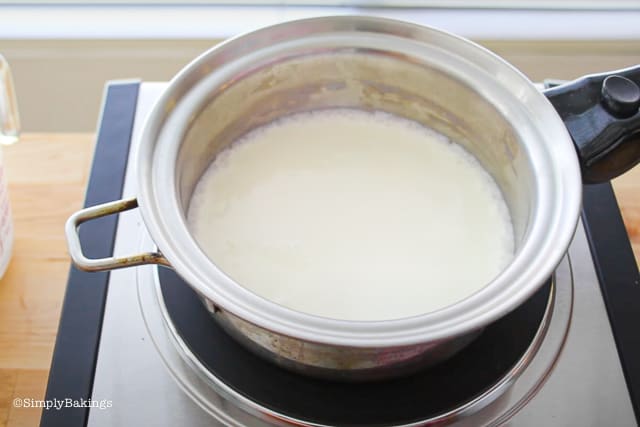
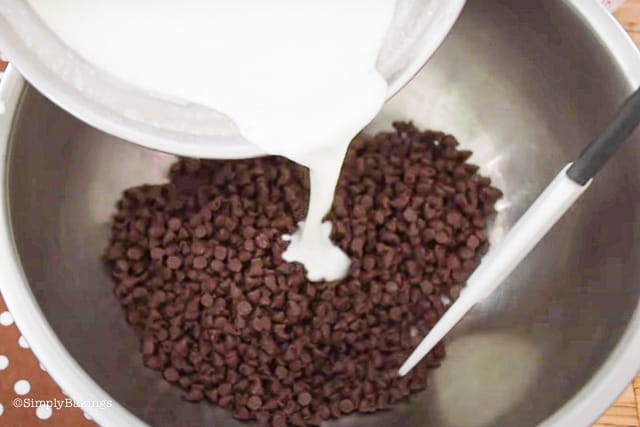
    In a large bowl, add the bittersweet chocolate. Then bring 1 cup of heavy cream to a simmer. Once it starts bubbling up a bit, remove it from the burner and pour it over the chocolate:

    heavy milk in a sauce pan cooking

    Whisk the chocolate until you see the velvety ganache form, be patient with it. Try not to whisk too vigorously, it can add air bubbles to the ganache:

    hot heavy whipping cream being added to a bowl of chocolate

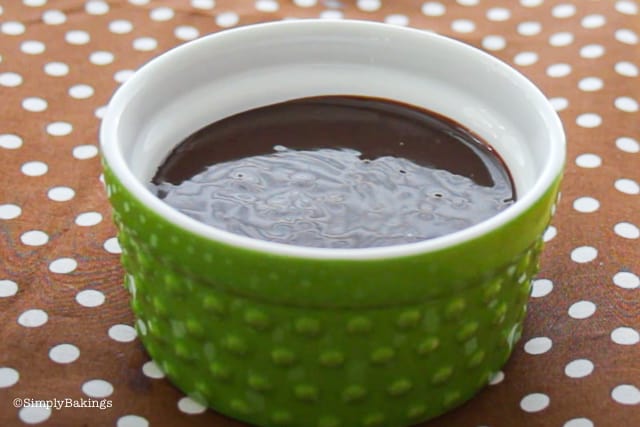
    Once the ganache forms, allow it to sit uncovered at room temperature for 10 minutes to thicken:

    cooled ganache in green bowl

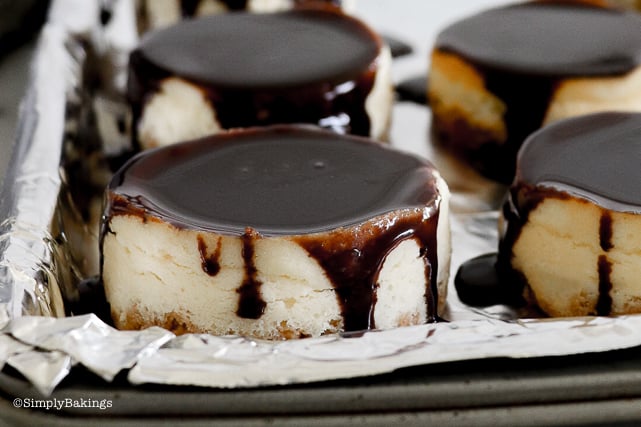
    Then drizzle ganache over the cheesecake:

    mini chocolate ganache on cheesecake

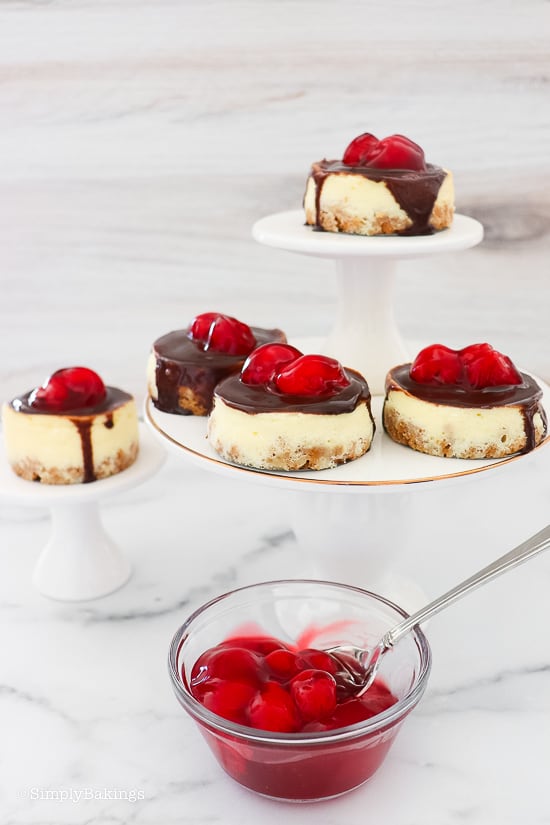
    And add 1 heaping spoonful of the cherry pie filling:

    cherry cheesecakes on cupcake stand with a bowl of cherries on the side

    I like to chill the cheesecake before serving it. Feel free to enjoy it your way!

    Looking for more cheesecake recipes? Try some of my favorites:

    • No Bake Oreo Cheesecake 
    • Chocolate Chip Cheesecake
    • Nutella Cheesecake 
    • Churr0 Cheesecake
    • Vegan Fruit Cheesecake
    mini cheeesecake with granche topped with cherries
    No ratings yet
    Print Pin Recipe

    Mini Cherry Cheesecake

    Mini Cherry Cheesecakes are the perfect bite size dessert for any party or holiday. A delicious graham crust with a creamy cheesecake and topped off with the classic cherry pie filling, it’s a dessert that everyone will love!
    Prep Time10 minutes mins
    Cook Time25 minutes mins
    Course: Dessert
    Cuisine: American
    Keyword: Mini Cheesecake, Mini Cherry Cheesecake
    Servings: 6 mini cheesecakes
    Author: Lainey
    Prevent your screen from going dark

    Ingredients

    Crust:

    • 1 cup graham cracker crumbs 1 sleeve of graham crackers
    • 3 tablespoons melted butter
    • Sprinkle of white sugar

    Cheesecake:

    • 2 blocks 16oz of cream cheese
    • ½ cup sugar
    • 2 eggs
    • ½ teaspoon almond extract
    • 1 can of cherry pie filling

    Ganache:

    • 1 cup heavy cream
    • 10 oz dark chocolate melting wafers

    Instructions

    How to Make the Crust:

    • In a medium bowl, add the graham cracker crumbs, melted butter, and a sprinkle of white sugar. Then evenly divide among the 12 mini cheesecake cavities. Press the crust firmly into each cavity.

    Cheesecake: 

    • In a large bowl, add cream cheese, sugar, eggs,  almond extract, and beat until smooth and fluffy.
    • Pour cheesecake mixture into individual cheesecake cavities, then bake at 350 degrees for 16-18 minutes or until the cheesecakes begin to brown. When the cheesecake is finished baking, allow the cheesecakes cool on the counter.

    To make the Ganache: 

    • In a large bowl, add the bittersweet chocolate. Then bring 1 cup of heavy cream to a simmer. Once it starts bubbling up a bit, remove from the burner and pour it over the chocolate.
    • Whisk the chocolate until you see the velvety ganache form, be patient with it. Try not to whisk too vigorously, it can add air bubbles to the ganache.
    • Once the ganache forms, allow it to sit uncovered at room temperature for 10 minutes to thicken. Then drizzle ganache over cheesecake. 
    • Add 1 heaping spoonful of the cherry pie filling and chill cheesecake before serving.
    Leave a Comment
    QR Code
    Did you make this recipe?Share it on instagram or tag @simplybakings or #simplybakings!

    Cheesecake, Desserts

    Elderberry Syrup Recipe

    Nov 1, 2020 · 2 Comments

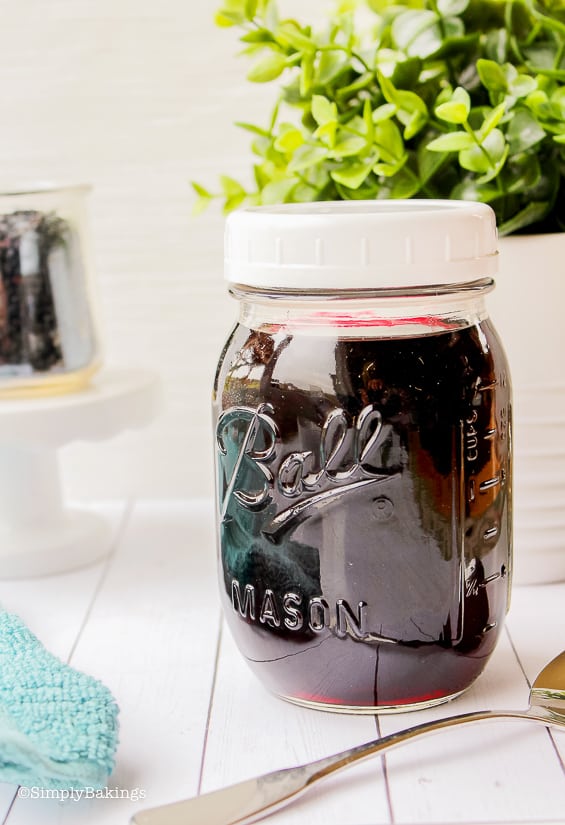
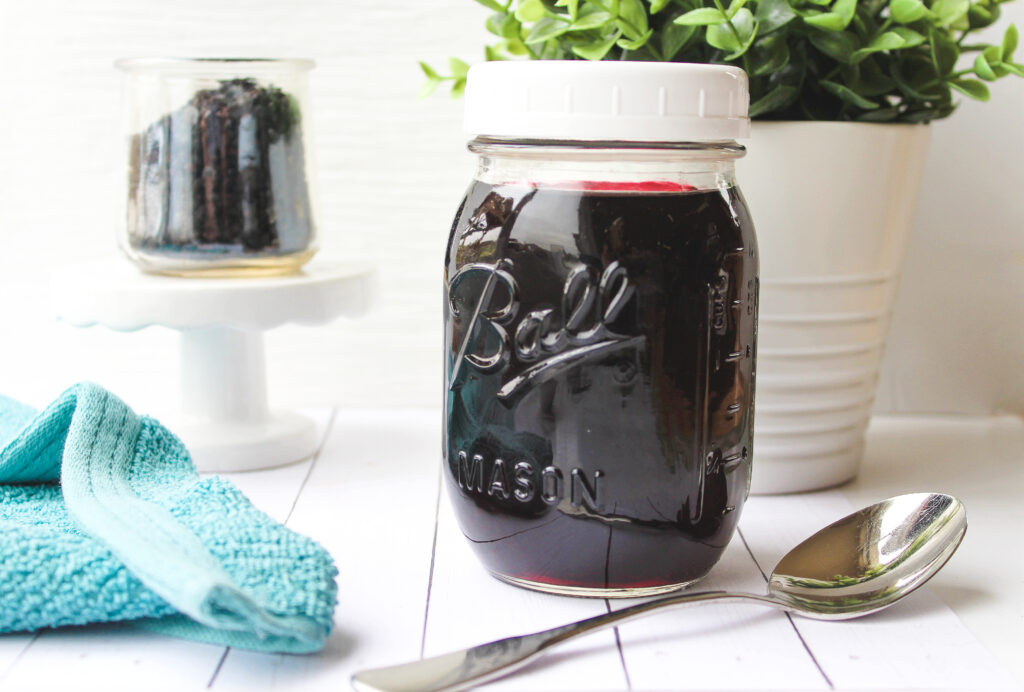
    Elderberry syrup in a mason jar

    Boost your immune system by making Elderberry Syrup! Made with just a few ingredients, this natural remedy may help prevent colds, cough and the flu.

    Need more immune system booster recipes? Try Ginger Tea, Malunggay Smoothie, or my Tropical Green Smoothie.

    elderberry syrup in a small white bowl

    What are elderberries?

    Elderberry (Sambucus) is a dark purple berry from the European elder tree that is used to make medicine.

    These types of berries are usually grown in Europe, but you can find similar berries grown by the American Rivers.

    Health benefits of elderberries:

    • Boost the immune system
    • Fight and protect against bacterial infections
    • Fight and protect against viral infections
    • Reduce the symptoms and duration of a cold or the flu
    • Helps clear sinus infections
    • Anti-inflammatory properties
    • Eases symptoms of allergies
    • High in antioxidants

    Tips and Variations:

    • Feel free to use 2 cinnamon sticks instead of ground cinnamon
    • To make it vegan, substitute glycerin or sugar instead of honey. Make sure to add the sugar before cooking it for 8 hours.
    • If you don't have cinnamon, ginger, and honey available, feel free to omit it. They only help make the syrup taste better.
    • Feel free to add more or less sweetener to this recipe as it's for taste only.

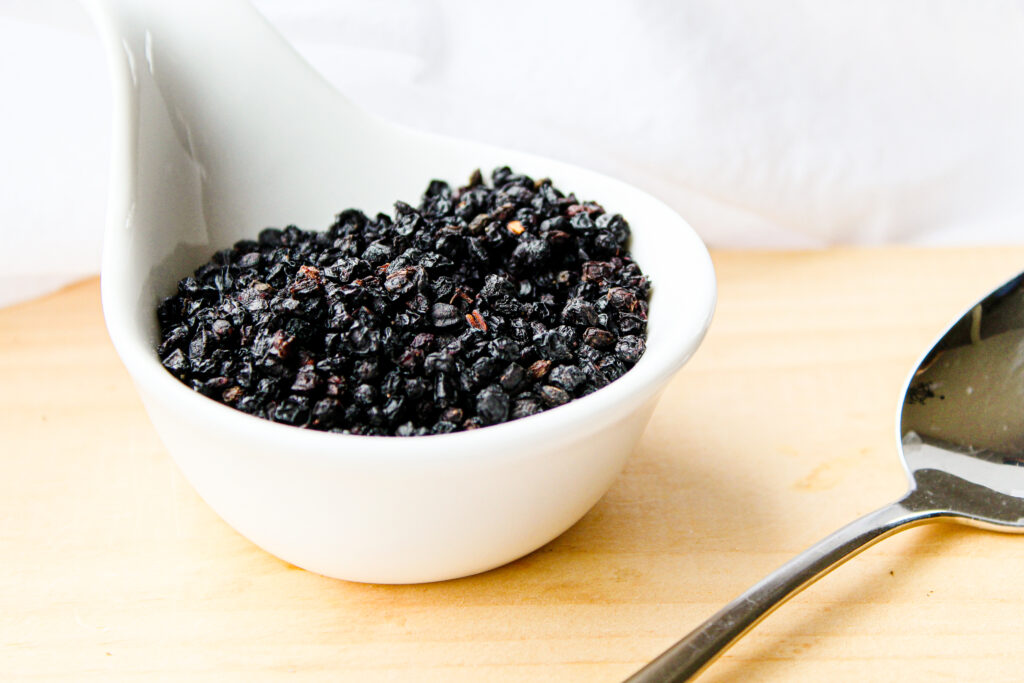
    dried elderberries in a white bowl

    How to Make Elderberry Syrup:

    Listed below are all the ingredients you will need:

    • organic dried elderberries
    • water (filtered is best) 
    • fresh ginger
    • cinnamon
    • raw honey

    elderberry syrup ingredients

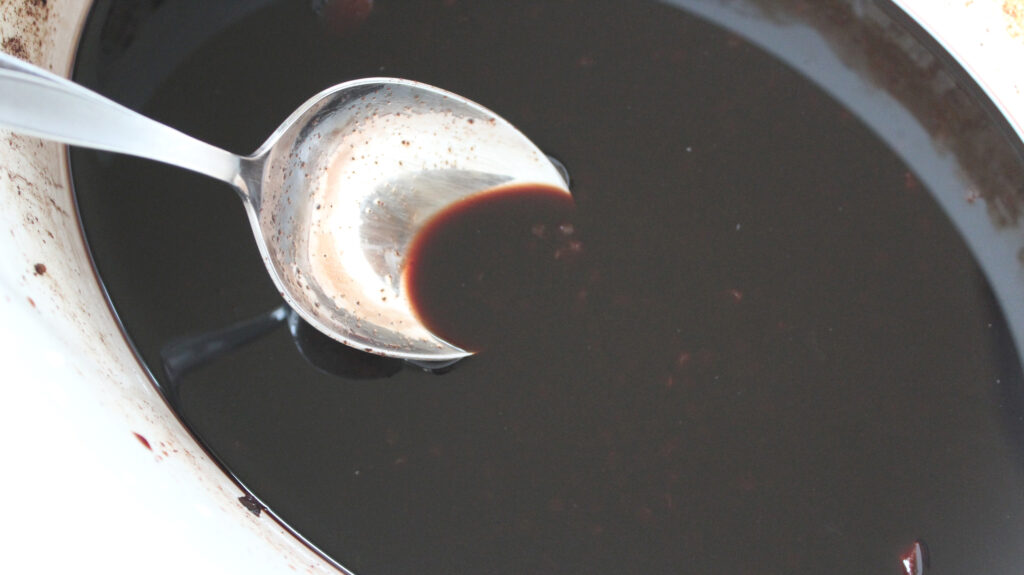
    In a slow cooker, add the dried elderberries, filtered water, ginger slices, cinnamon and cook on low for 8 hours.

    ladling out elderberry syrup from a slow cooker


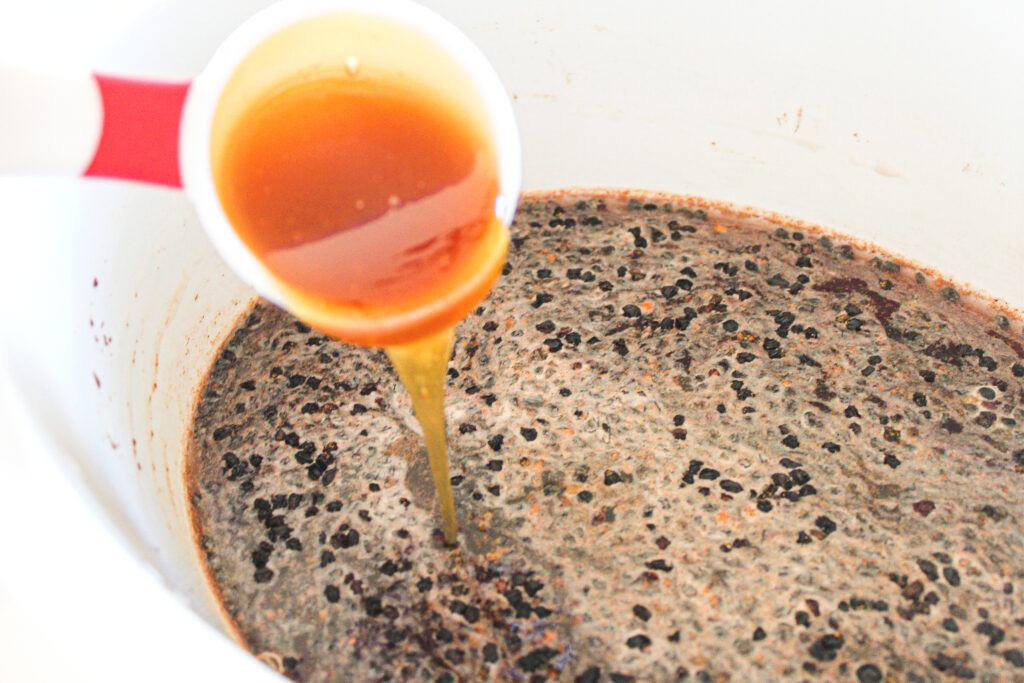
    Once it's finished cooking, strain the mixture through a fine mesh strainer into a medium bowl and once the liquid has cooled, and just slightly warm, add in the raw honey and stir until thoroughly mixed.  

    Adding raw honey to a bowl of elderberry syrup

    Pour into a glass jar and store in the refrigerator for up to 3 weeks.

    Elderberry syrup in a mason jar

    Frequently Asked Questions:

    Q: Where can I buy elderberries?

    A: Most health food markets carry dried elderberries, but it's usually more expensive. Here is my favorite one I order online.

    Q: How to use Elderberry Syrup?

    A: Keep in mind there's no standard dose for elderberry srup. To prevent colds or the flu in adults, take 1 tablespoon 3-4 times a day. If giving to children, consult with your pediatrician first.

    Q: Which is best to use dried or fresh elderberries?

    A: Dried elderberries are easily available, they store well, and will remain fresh until needed. But if you have access to fresh elderberries, feel free to use.

    ladling out elderberry syrup from a slow cooker
    No ratings yet
    Print Pin Recipe

    Elderberry Syrup Recipe

    Here's a Elderberry Syrup Recipe that takes no time at all!  Simply throw all the ingredients in the crockpot – when you are done you have super immune boosting syrup that will help fight colds and flu. 
    Prep Time5 minutes mins
    Cook Time1 hour hr
    Course: drink
    Cuisine: American
    Keyword: Elderberry Syrup
    Servings: 2 ½ cups
    Author: Lainey
    Prevent your screen from going dark

    Ingredients

    • ½ cup organic dried elderberries
    • 2 ¼ cups water filtered is best
    • 4 slices fresh ginger peeled and sliced into ⅛ inch thick
    • ½ teaspoon cinnamon
    • ¼ cup raw honey

    Instructions

    • In a slow cooker, add the dried elderberries, filtered water, ginger slices, cinnamon and cook on low for 8 hours.
    • Once it's finished cooking, strain the mixture through a fine mesh strainer into a medium bowl and once the liquid has cooled, and just slightly warm, add in the raw honey and stir until thoroughly mixed.  
    • Pour into a glass jar and store in the refrigerator for up to 3 weeks.
    Leave a Comment
    QR Code
    Did you make this recipe?Share it on instagram or tag @simplybakings or #simplybakings!

    Drinks

    Amazing Buko Pie (Filipino Coconut Pie)

    Oct 29, 2020 · 4 Comments

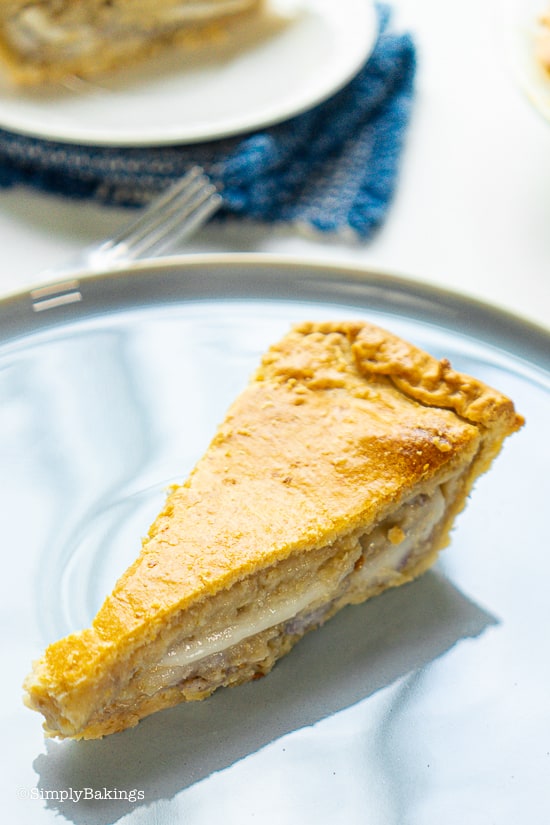
    Single slice of buko pie on a blue plate

    This Amazing Buko Pie, also known as young coconut pie in English, is a traditional Filipino dessert that resembles coconut cream pie made with young coconut meat with a creamy-custard filling!

    Out for more crowd-favorite Filipino desserts? Try making my Buko Pandan, Biko, and Cassava Cake!

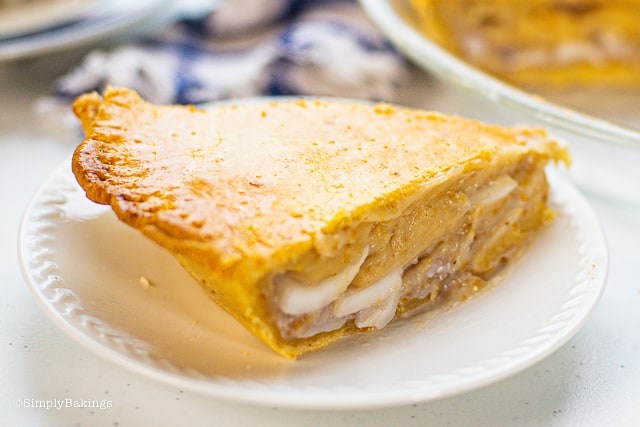
    sliced buko pie on a white plate
    [feast_advanced_jump_to]

    Did you know Buko Pie was inspired by the classic American Pie?

    A young lady who worked in the United States, returned to the Philippines, and tried to recreate the American Pie.  But since apples were not native to the Philippines, she and her family improvised and replaced the ingredient with "buko" or young coconuts. Hence, it was now known as the Buko Pie recipe.

    Health Benefits of Buko (Young Coconut)

    • Rich in Electrolytes: Buko water contains essential electrolytes like potassium, sodium, and magnesium, helping to keep the body hydrated and maintain electrolyte balance.
    • Boosts Immunity: High levels of lauric acid, found in young coconut, have antibacterial, antiviral, and antifungal properties that strengthen the immune system.
    • Supports Heart Health: Coconut water is low in cholesterol and rich in potassium, which can help regulate blood pressure and support cardiovascular health.Aids
    • Digestion: Buko meat is a good source of dietary fiber, promoting healthy digestion and preventing constipation.

    Substitutions

    • If you like a richer taste, replace the sugar with condensed milk.
    • If you can't find fresh young coconut meat, feel free to use frozen young coconut meat found at your local Asian market.
    • Using vegetable shortening is best because it helps the pie become flakey, however, if you are unable to find it, butter works.

    Variations

    • Vegan Version: Swap the egg wash with a mixture of plant-based milk and a pinch of sugar.
    • Gluten-Free Option: Use a gluten-free all-purpose flour blend for both the crust and filling.
    • Sweetened Coconut: For extra sweetness, use sweetened coconut meat instead of fresh.

    Storage

    To store your Buko Pie, wrap it tightly in plastic wrap or place it in an airtight container. It can be refrigerated for up to 3 days. Reheat slices in the oven at a low temperature to enjoy them warm.

    Top Tips

    • The pie can sit out for a day covered with foil and about 1 week in the fridge.  Keep in mind, it tastes best if eaten within 3 days.
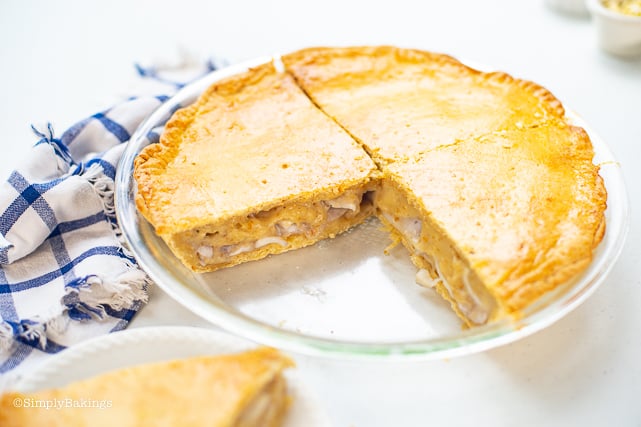
    cut buko pie in a pie pan

    Ingredients

    Listed below are all the ingredients you will need:

    Pie Crust: 

    • all-purpose flour
    • salt
    • brown sugar
    • egg
    • butter
    • non-dairy milk
    • vegetable shortening
    pie crust ingredients

    Filling:

    • non-dairy milk
    • brown sugar
    • vanilla
    • flaxseed
    • all-purpose flour
    • coconut meat
    buko pie filling

    Egg wash

    • water
    • egg

    Instructions

    How to make pie crust dough:

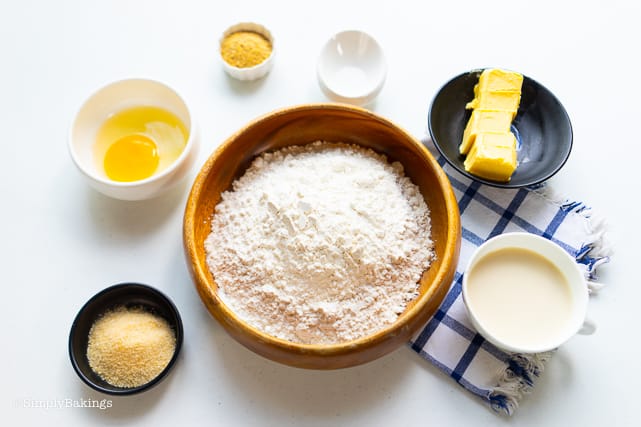
    In a large bowl, add 3 cups all-purpose flour,  salt, 2 tablespoons brown sugar, and mix. Then add egg and mix. 

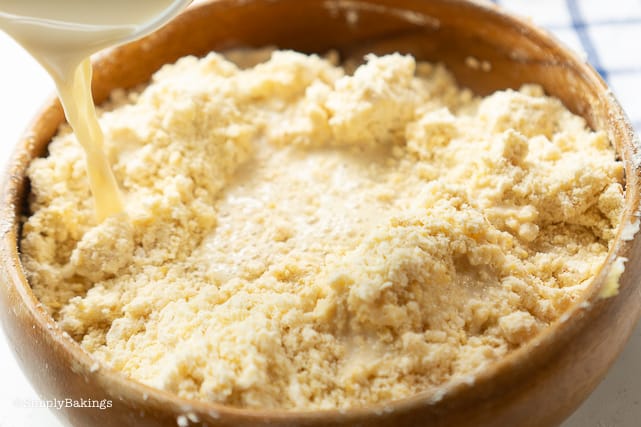
    Next, cut in butter and using a fork, mix until crumbly. Gradually pour in 2 cups non-dairy milk and mix until the flour mixture forms a dough. (Be careful not to overmix because it will cause the crust to be tough.)

    pie crust being mixed in a brown bowl

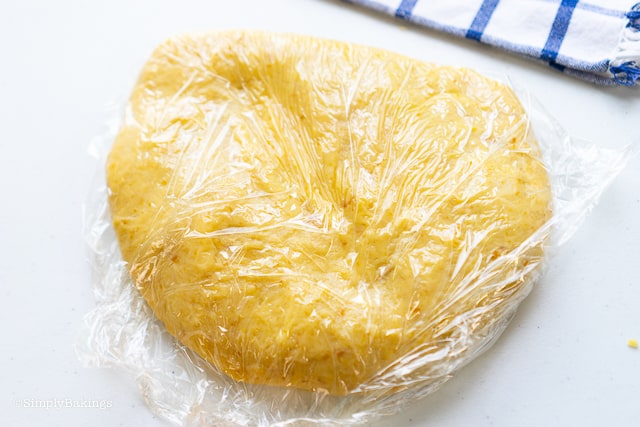
    Once firm and smooth, flatten the dough into a disk, wrap in plastic wrap and refrigerate for at least 1 hour before rolling it out.

    pie crust dough in a plastic wrap

    For the filling:

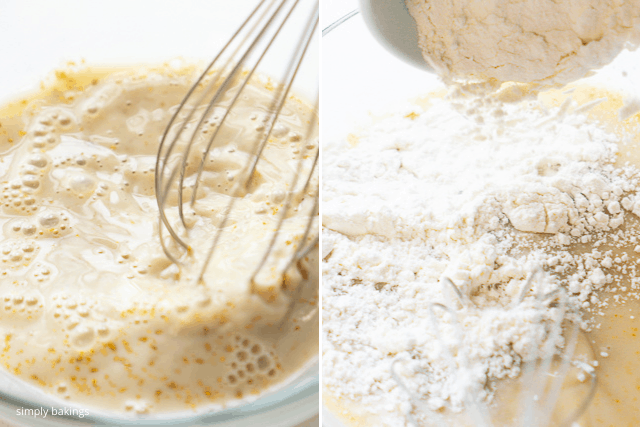
    In a bowl, add 1 cup of non-dairy milk, ½ cup brown sugar, vanilla extract, flaxseed, and mix until well combined.  Then next mix in 1 cup all-purpose flour.

    buko pie filling being mixed in a whisk

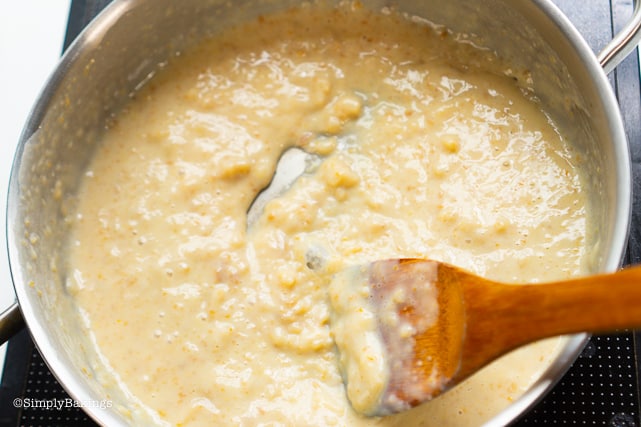
    In a nonstick pan over medium-low heat, add flour batter and slowly mix until batter thickens. Turn off and allow it to cool and set aside.

    buko pie filling being mixed in a sauce pan

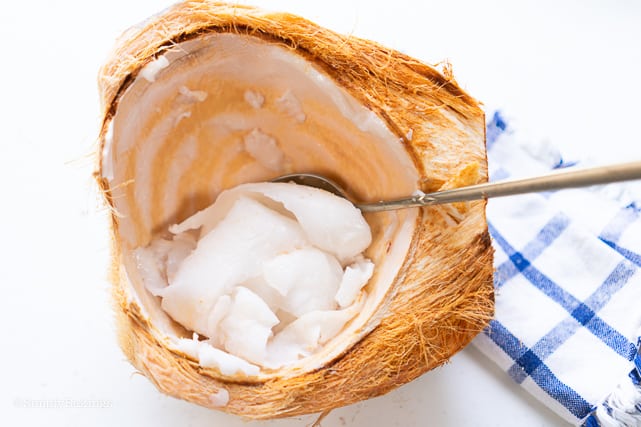
    If using fresh coconut, cut the coconut in half draining the coconut juice, and scoop out the coconut meat. 

    young coconut in a coconut scrapped with a spoon

    Pie Crust: 

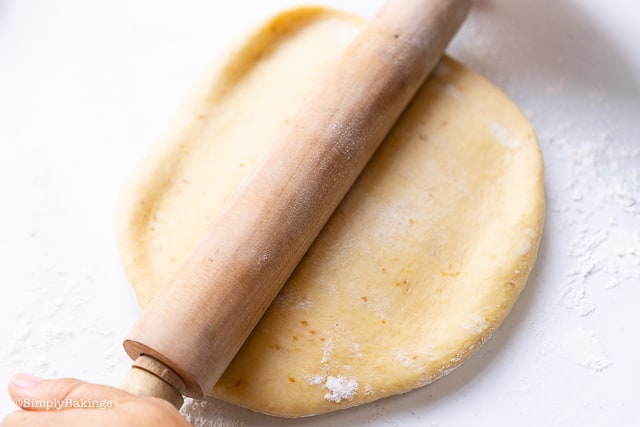
    Divide the dough in half, and wrap 1 dough with cling wrap and place back in the fridge.  Place the other dough on a clean and flat surface and using a rolling pin, roll out the pie dough to a circle to fit the pan, about ¼ of an inch thick. (If you have any extra, place it to the dough in the fridge)

    • If the dough sticks to the surface, sprinkle some flour to keep the dough from sticking
    pie crust dough being rolled by a rolling pin

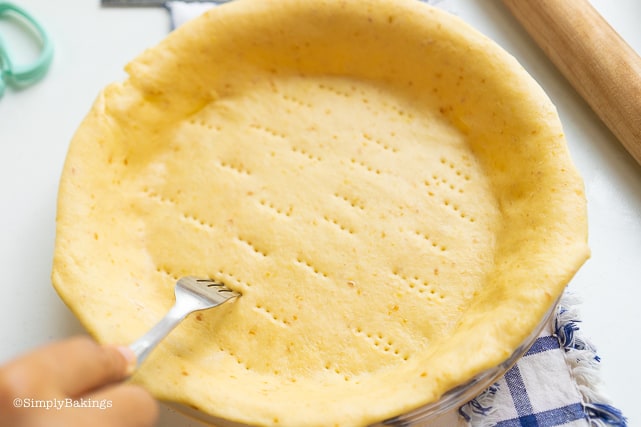
    Brush a 9-inch pie pan with vegetable shortening, then gently place the rolled out dough onto a 9-inch pie pan.  And using a fork, pierce holes all over the crust to prevent bubbles and air pockets throughout the crust.

    flakey pie crust being poked by a fork

    To assemble:

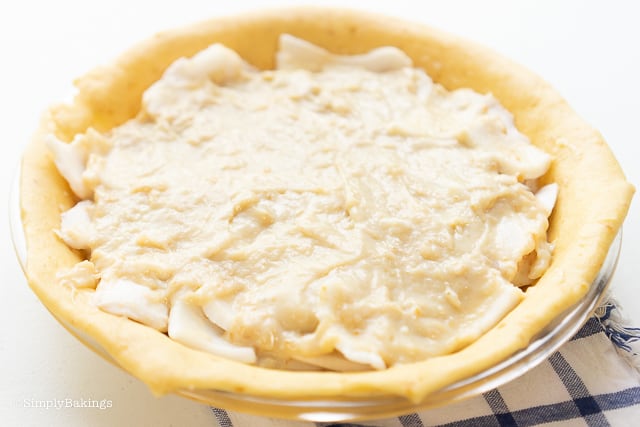
    Divide the filing & coconut meat into 3 parts. Add the first filling, followed by the coconut meat, repeat until all filling is layered. 

    filipino coconut pie being assembled

    Remove the 2nd remaining dough from the fridge and using a rolling pin, roll out the pie dough to a 10-inch circle, about ¼ of an inch thick, and place as the top crust of the pie. 

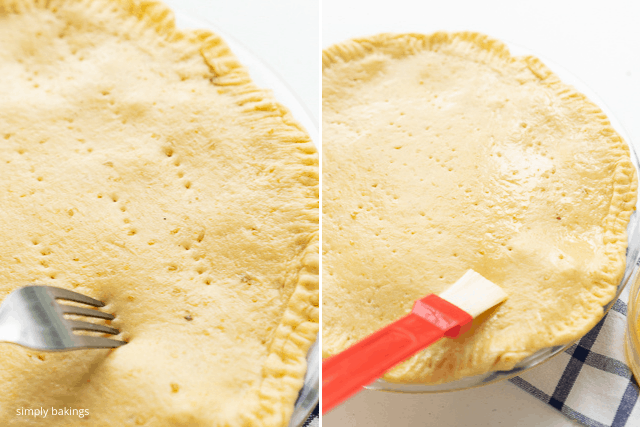
    Seal the edge of the dough using a fork or decorate as you please. Poke holes at the top of the dough, brush with egg wash, and bake in a preheated oven at 170F for 20-25 minutes.

    coconut pie being poked by a fork and brushed with egg wash

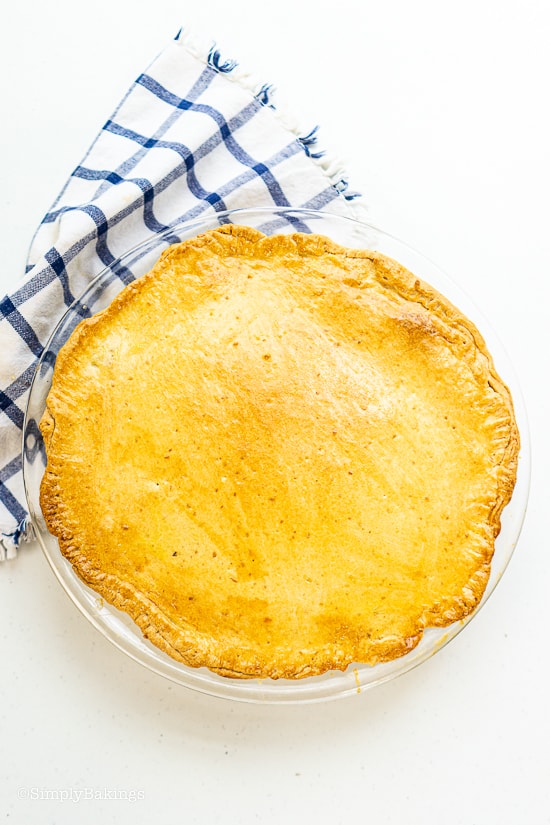
    Allow it to cool completely and serve.

    a whole pie of buko pie

    FAQ

    What is the best thickener for pie filling?

    The best thickener for pie filling depends on the type of pie, but cornstarch, tapioca, and flour are common options. Tapioca works well for fruit pies because it keeps the filling clear and not too heavy.

    What is the city of buko pie?

    Los Baños in the Philippines is known as the "City of Buko Pie." It’s famous for its coconut pies made with fresh buko (young coconut).

    How to stop pie crust from getting soggy?

    To stop pie crust from getting soggy, you can brush it with egg wash or melted butter before adding the filling. You can also pre-bake the crust slightly (called blind baking) to make it sturdier.

    More delicious Filipino Desserts to try:

    • Filipino Fruit Salad
    • Mango Float
    a slice of warm buko pie
    4.50 from 2 votes
    Print Pin Recipe

    Amazing Buko Pie (Filipino Coconut Pie)

    This Buko Pie is made with young coconut meat with a creamy filling, and a delicious buttery pastry crust. Perfect for a snack or dessert! 
    Prep Time1 hour hr
    Cook Time30 minutes mins
    Total Time1 hour hr 30 minutes mins
    Course: Dessert
    Cuisine: Filipino
    Servings: 1 9 inch pie
    Calories: 6736kcal
    Author: Lainey
    Prevent your screen from going dark

    Ingredients

    Pie Crust: 

    • 3 cups all-purpose flour
    • ½ teaspoon salt
    • 2 tablespoons brown sugar
    • 1 egg
    • 1 cup cold butter
    • 2 cups non-dairy milk
    • ¾ cup vegetable shortening

    Filling:

    • 1 cup nondairy milk
    • ½ cup brown sugar
    • ½ tablespoons vanilla
    • 2 tablespoons flaxseed
    • 1 cup all-purpose flour
    • 3 cups fresh coconut meat sliced into 2 inch strips

    Egg wash

    • 1 tablespoon water
    • 1 egg

    Instructions

    Pie crust dough:

    • In a bowl, add 3 cups all-purpose flour,  salt, 2 tablespoons brown sugar, and mix.
    • Then add egg and mix.  Next, cut in butter and using a fork, mix until crumbly.
    • Gradually add 2 cups non-dairy milk and mix until it forms a dough. (Be careful not to overmix because it will cause the crust to be tough.) Once it firm and smooth, flatten the dough into a disk, wrap in plastic wrap and refrigerate for at least 1 hour before rolling it out.

    For the filling:

    • In a bowl, add 1 cup of non-dairy milk, ½ cup brown sugar, vanilla extract, flaxseed, and mix until well combined. 
    • Next mix in 1 cup all-purpose flour.
    • In a nonstick pan over medium-low heat, add flour batter and slowly mix until batter thickens. Turn off and allow it to cool.
    • If using fresh coconut, cut the coconut in half draining the coconut juice, and scoop out the coconut meat. 

    Pie Crust: 

    • Divide the dough in half, and wrap 1 dough with cling wrap and place back in the fridge.  Place the other dough on a clean and flat surface and using a rolling pin, roll out the pie dough to a circle to fit the pan, about ¼ of an inch thick. (If you have any extra, add it to the dough to the fridge)
    • If the dough sticks to the surface, sprinkle some flour to keep the dough from sticking. 
    • Brush a 9-inch pie pan with vegetable shortening, then gently place the rolled out dough onto a 9-inch pie pan.
    • Using a fork, pierce holes all over the crust to prevent bubbles and air pockets throughout the crust

    To assemble:

    • Divide the filing & coconut meat into 3 parts. Add the first filling, followed by the coconut meat, repeat until all filling is layered. 
    • Remove the 2nd dough from the fridge and using a rolling pin, roll out the pie dough to a 10-inch circle, about ¼ of an inch thick, and place on top of the pie. 
    • Seal the edge of the dough using a fork or decorate as you please. Prick the top of the dough, brush with egg wash, and bake in a preheated oven at 170F for 20-25 minutes.
    • Allow it to cool completely and serve.
    Leave a Comment
    Serving: 1gCalories: 6736kcalCarbohydrates: 581gProtein: 97gFat: 454gSaturated Fat: 232gPolyunsaturated Fat: 69gMonounsaturated Fat: 123gTrans Fat: 28gCholesterol: 815mgSodium: 3210mgPotassium: 2914mgFiber: 43gSugar: 166gVitamin A: 8930IUVitamin C: 59mgCalcium: 1369mgIron: 36mg

    Watch The Recipe Video!

    QR Code
    Did you make this recipe?Share it on instagram or tag @simplybakings or #simplybakings!

    Filipino Desserts, Thanksgiving Desserts, Vegan Filipino Recipes

    Vegan Thai Noodle Soup

    Oct 29, 2020 · Leave a Comment

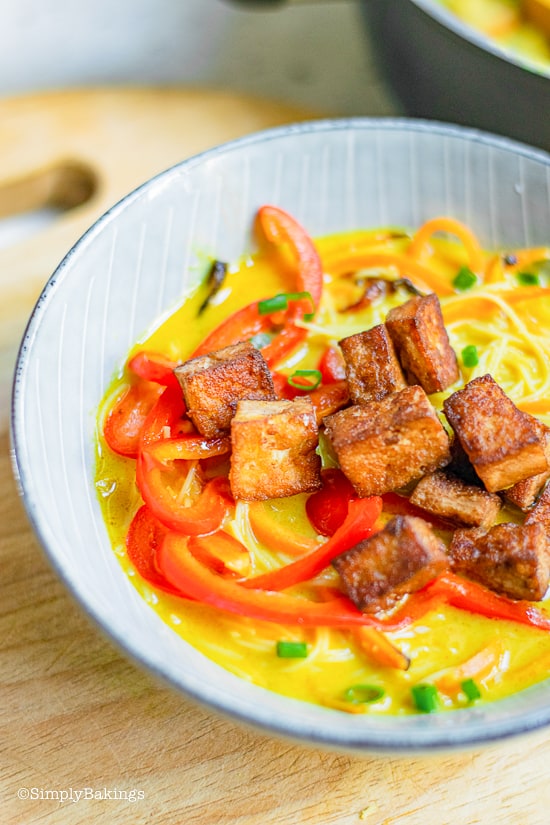
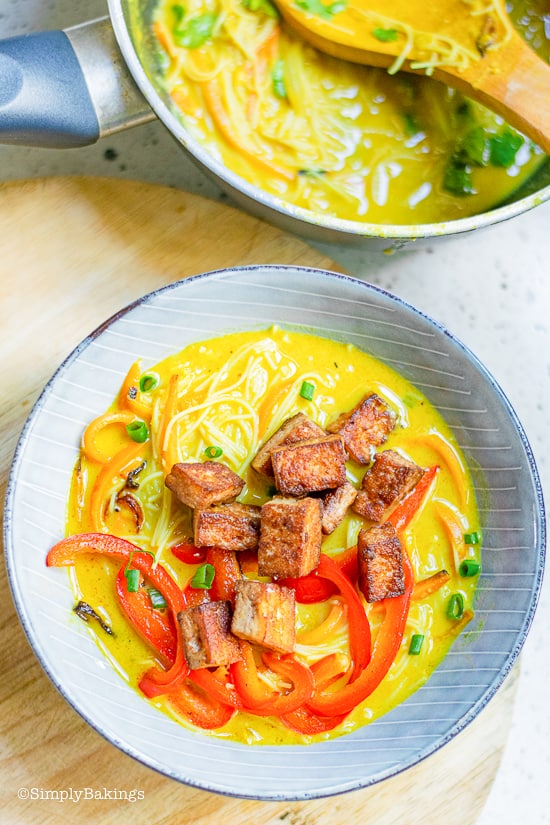
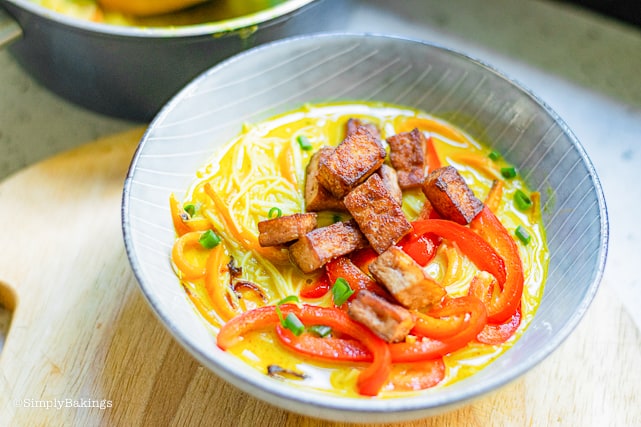
    vegan thai curry noodle soup in bowl garnished with fried tofu and red bell pepper

    Try this hearty and delicious Vegan Thai Noodle Soup for the perfect heartwarming soup for those cold nights!  

    If you like Asian flavors then you need to try my  Sour Cabbage Soup, Macaroni Soup,  Vegetable Soup, Vegan Chicken Rice Soup, or my Vegan Pho.

    thai noodle soup in blue bowl

    Tips & Variations:

    • Add some additional garnish like Thai Basil, bean sprouts, or even jalapenos for some spice.
    • Feel free to add more vegetables like bok choy.  Trim the bottom inch from the head of the bok choy, then cut each stalk in half lengthwise and stir fry the stalk for about 2 minutes in about 1 teaspoon of oil. Add bok choy when you add the rest of the vegetables.
    • Feel free to use light coconut milk for a lighter soup.
    • To make this gluten-free, use gluten-free noodles like sweet potato noodles.
    • Udon Noodles or ramen noodles also go well with this soup.
    • Store leftover soup in an airtight container in the refrigerator for up to 5 days. Separate noodles from the soup so the noodles don't expand.
    thai curry soup garnished with tofu and bell peppers

    How to Make Vegan Thai Noodle Soup:

    Listed below are all the ingredients you will need:

    • Tofu Marinade:
      • tofu
      • water
      • soy sauce
      • lemon
    • Noodles: 
      • rice noodle
      • water
    • Soup:
      • olive oil
      • carrots
      • red bell pepper
      • chickpeas
      • coconut cream
      • vegetable broth
      • yellow curry paste
      • onion
      • garlic cloves
      • cilantro

    Tofu:

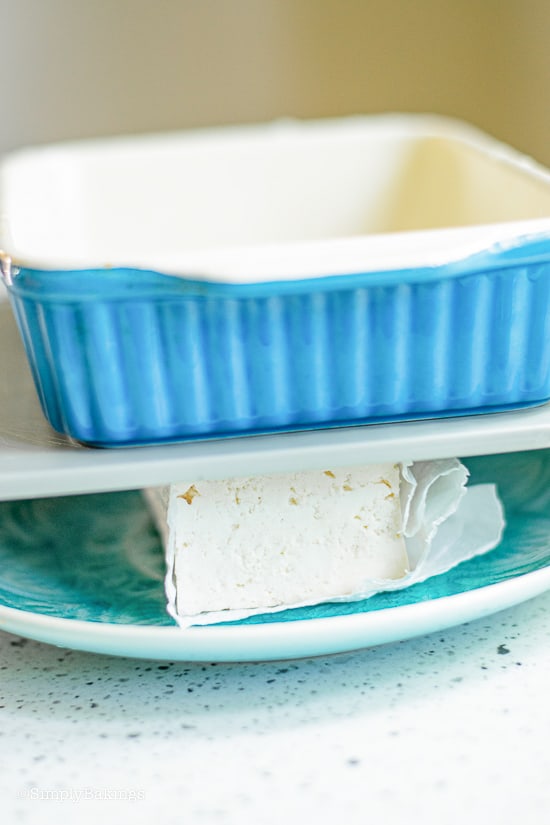
    Remove the water from the tofu by pressing the placing the tofu on a layer of paper towels and placing a heavy object on top of it.

    removing water from the tofu by placing heavy objects on top of tofu

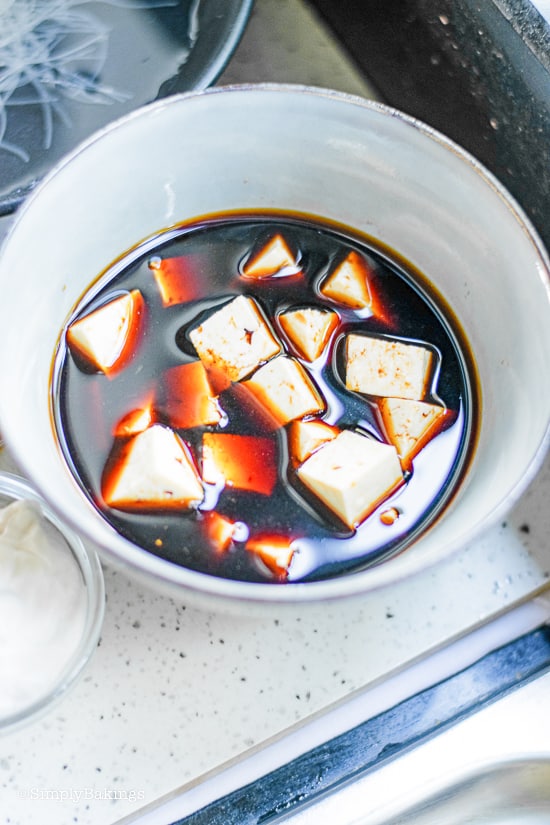
    Meanwhile, prepare the marinade by mixing the soy sauce, ½ to 1 cup of water (enough for the tofu to be immersed), and lemon juice in a bowl. After 10 minutes, cut the tofu into cubes and marinate for about 1 hour or best overnight:

    marinating tofu in soy sauce and water

    Rice Noodles:

    In a medium-sized bowl, add 1 cup of water and rice noodles and soak while preparing the soup, veggies, and tofu:

    noodles soaking in water

    Soup:

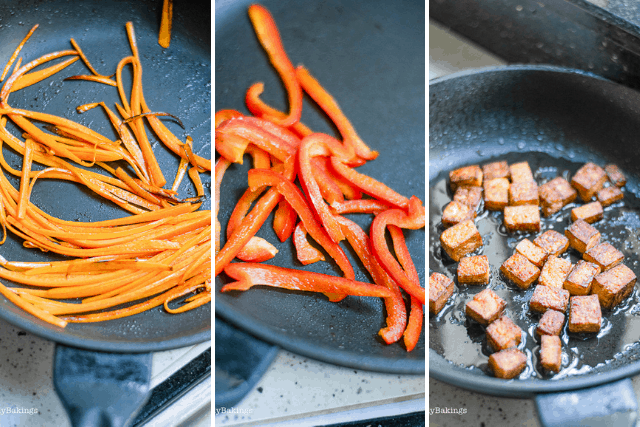
    Heat a non-stick skillet with 2 tablespoons of oil and stir fry carrots until tender.

    Remove the carrots from the skillet and set them aside. In the same skillet, add 1 tablespoon oil and stir-fry bell pepper until tender. Remove bell pepper and set aside.

    Again, in the same skillet, add 2 tablespoons of oil and fry tofu until crispy and golden brown on all sides:

    Frying vegetables and tofu in frying pan

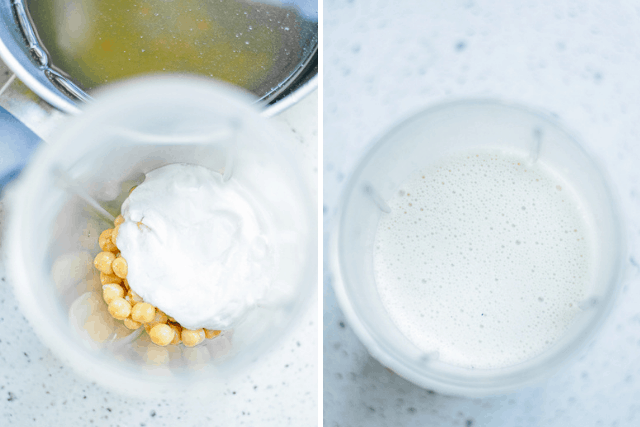
    In a blender, add chickpeas, coconut cream, and vegetable broth, and process until it’s smooth and creamy:

    blending coconut milk and beans into a cream

    Heat a non-stick medium saucepan on medium heat and cook onion and garlic until tender. Transfer chickpea mixture to the saucepan and bring to a boil, then add curry paste and stir.

    When the soup is boiling, stir in rice noodles and carrots and cook for about 2 minutes on low heat:

    coconut milk, curry paste, and noodles in a sauce pan

    Prepare 4 serving bowls and pour soup then top with bell pepper, cilantro, and crispy tofu:

    blue bowl full of curry noodle soup

    Best if served immediately. Enjoy!

    Thai curry soup in blue bowl garnished with fried tofu and vegetables
    No ratings yet
    Print Pin Recipe

    Vegan Thai Noodle Soup

    This easy  Vegan Thai Noodle Soup is comforting, creamy, nutritious, and is sure to become an all-time favorite! 
    Prep Time1 hour hr
    Cook Time15 minutes mins
    Course: Soup
    Cuisine: Thai
    Keyword: Thai Curry Noodle Soup, Thai Noodle Soup
    Servings: 4 servings
    Author: Lainey
    Prevent your screen from going dark

    Ingredients

    Tofu Marinade:

    • 1 block firm tofu
    • ½ to 1 cup water enough for the tofu to be immersed
    • ½ cup soy sauce
    • juice of 1 medium lemon
    • Noodles:
    • 100 g rice noodles
    • 1 cup water

    Soup:

    • 5 tablespoons olive oil divided
    • 2 medium carrots sliced
    • 1 medium red bell pepper sliced
    • 1 cup chickpea drained and washed
    • ½ coconut cream
    • 4 cups vegetable broth
    • 4 tablespoons yellow curry paste
    • 1 small onion chopped
    • 3 garlic cloves chopped
    • ½ cup cilantro loosely packed

    Instructions

    Tofu:

    • Remove the water from the tofu by pressing the placing the tofu on a layer of paper towels and placing a heavy object on top of it. (See method I used.)  Meanwhile prepare the marinade by mixing the soy sauce, water, and lemon juice in a bowl. After 10 minutes, cut tofu into cubes and marinate for about 1 hour or best overnight.

    Rice Noodles:

    • In a medium size bowl, add 1 cup water, rice noodles and soak while preparing the soup, veggies, and tofu. 

    Soup:

    • Heat a non-stick skillet with 2 tablespoons of oil and stir fry carrots until tender. Remove carrots from the skillet and set aside. In the same skillet, add 1 tablespoon oil and stir fry bell pepper until tender. Remove bell pepper and set aside. Again in the same skillet, add 2 tablespoons of oil and fry tofu until crispy and golden brown on all sides.
    • In a blender, add chickpeas, coconut cream,  vegetable broth and process until it’s smooth and creamy. 
    • Heat a non-stick medium saucepan on medium heat and cook onion and garlic until tender. Transfer chickpea mixture to the saucepan and bring to a boil, then add curry paste and stir.
    • When the soup is boiling stir in rice noodles and carrots and cook for about 2 minutes on low heat.
    • Prepare 4 serving bowls and pour soup and top with bell pepper, cilantro, and crispy tofu. Best if served immediately.
    Leave a Comment
    QR Code
    Did you make this recipe?Share it on instagram or tag @simplybakings or #simplybakings!

    Rice, Noodles, Potatoes, Soups and Salads

    Kamote Turon (Sweet Potato Spring Rolls)

    Oct 22, 2020 · 3 Comments

    sweet potato spring rolls with a banana leaf on a wooden board

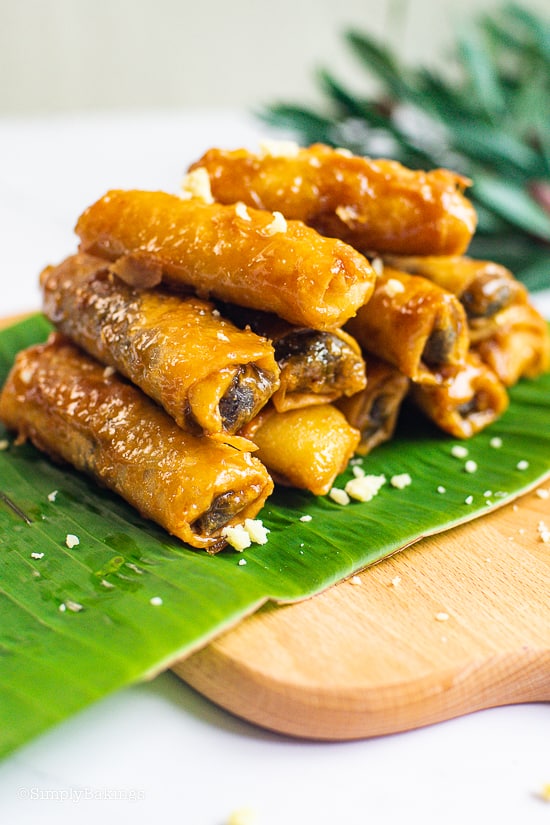
    These crunchy, sweet,  and delicious Kamote Turon will wow your Filipino family! This recipe adds a twist to the classic Filipino turon by using sweet potato (kamote) and optional ube for a vibrant filling. It's simple to make, vegan, and addicting!

    Looking for more Filipino Desserts? Try these Saba banana Turon, Ube Ice Candy, Buko Pandan, and Biko.

    sweet potato spring rolls on a wooden board with a banana leaf in between
    [feast_advanced_jump_to]

    What is Turon?

    Turon, for those who do not know what they are, is a type of banana wrapped in a spring roll pastry that is then deep-fried.

    It is popular street food in the Philippines that is more or less the same wherever you go ...except for these. It's prepared with, sweet potato, ube powder, and pineapple juice- it's amazing!

    What is Kamote?

    In English, it's sweet potato which grows abundantly in the Philippines even if you don't mean to grow it. It is also spelled Camote.

    Substitutions

    You can use any variety of sweet potato. Orange-fleshed sweet potatoes provide a richer color, while white ones give a milder flavor

    Variations

    • Bake the turon at 375°F (190°C) for 20-25 minutes until golden and crispy. Brush with oil for a better texture.
    • Feel free to experiment by adding shredded coconut, jackfruit slices, or even chocolate chips for an extra twist.

    Storage

    • If you have leftovers, store the fried turon in an airtight container in the fridge for up to 2 days. Reheat in an oven or air fryer at 350°F (175°C) for 5-7 minutes to restore the crispiness. Avoid microwaving, as it can make the wrapper soggy.
    • Freezing: You can freeze the kamote turon for up to 6 months in a freezer-safe container, before it's fried. Just make sure that you thaw them to room temperature before deep-frying

    Top Tips

    • Do not overcook the turon because if you overcook it, it will become a little bitter.
    • Use just enough water to seal the edges, avoiding over-moistening, which can cause tearing.
    • Ensure the oil is hot enough to fry the turon evenly without soaking up too much oil.
    • Stir the caramel sauce in one direction to prevent it from separating.
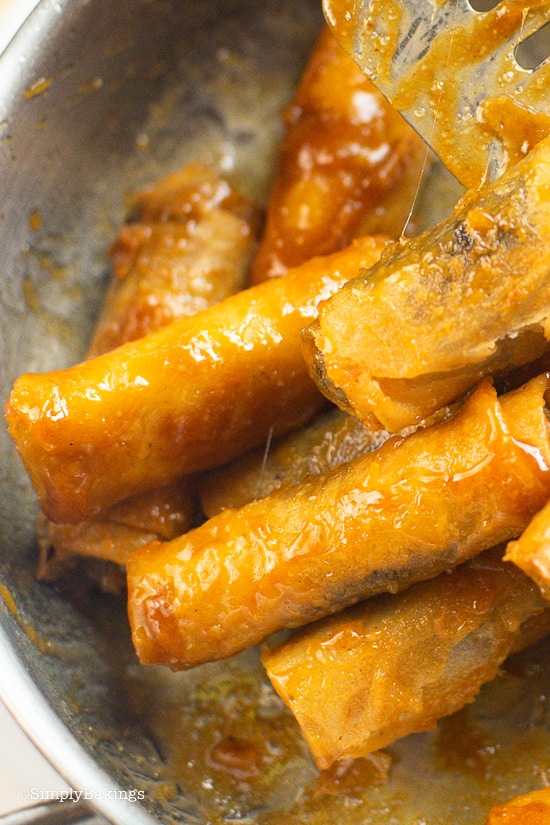
    delicious fried kamote turon coated with caramelized sauce

    Ingredients

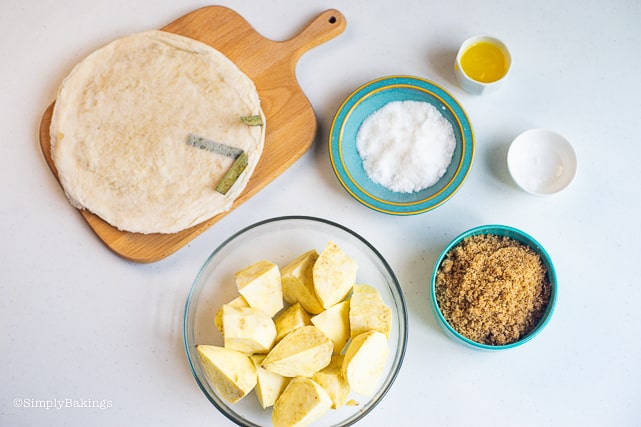
    Listed below are all the ingredients you will need:

    • water
    • sweet potatoes
    • ube powder
    • lumpia wrapper
    • coconut oil
    • butter
    • salt
    • brown sugar
    • pineapple juice
    ingredients for kamote turon

    Instructions

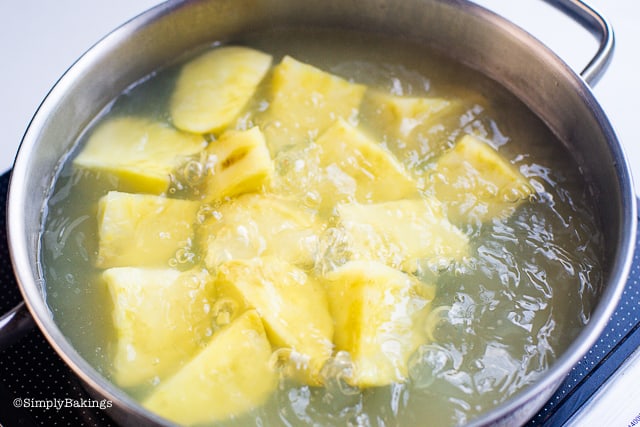
    Wash the sweet potatoes.  Then in a pot over medium-high heat, bring to boil 2 cups of water, add potatoes, and boil for 30-35 or until potatoes are tender.

    boiled sweet potatoes in a pot

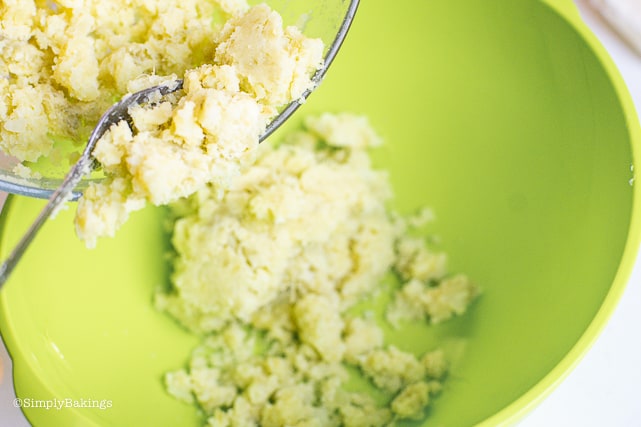
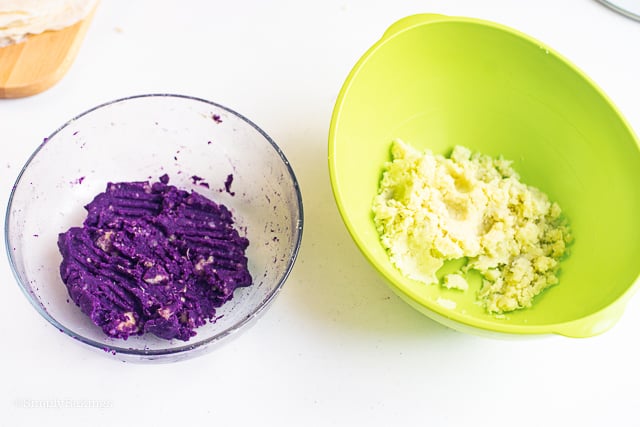
    Drain the water and place the potatoes in a bowl, and mash the potatoes with a fork or a potato masher, then divide the potatoes into two separate bowls. 

    mashed boiled sweet potatoes using a fork and placed in a yellow green bowl

    In one of the bowls, add ube powder and mix until well combined and set aside.

    a little amount of mashed potatoes in a yellow green bowl and a mixture of ube and mashed sweet potatoes in a glass bowl and

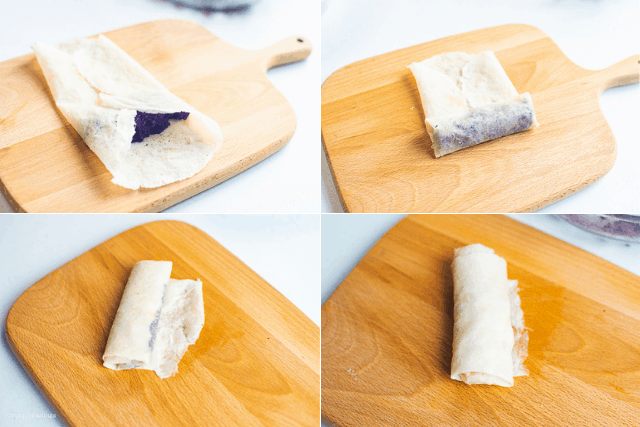
    Layout the lumpia wrapper and if using a square wrapper, lay it out with the corner pointed towards you.

    Then add two tablespoons of kamote ube in the lower middle section of the wrapper.

    ube kamote filling on a lumpia wrapper

    Fold left and right corners toward the center and continue to roll, then seal with water. Repeat until all the kamote ube filling and the plain filling is gone.

    kamote ube filling and the plain filling rolled in a lumpia wrapper

    Fill a large frying pan with oil and heat the oil over medium-high heat. Gently place the turon into the hot oil and fry until golden brown on all sides, about 3 to 5 minutes, then place the fried lumpia on paper towels to remove the excess oil.

    deep fried the kamote turon in a large frying pan

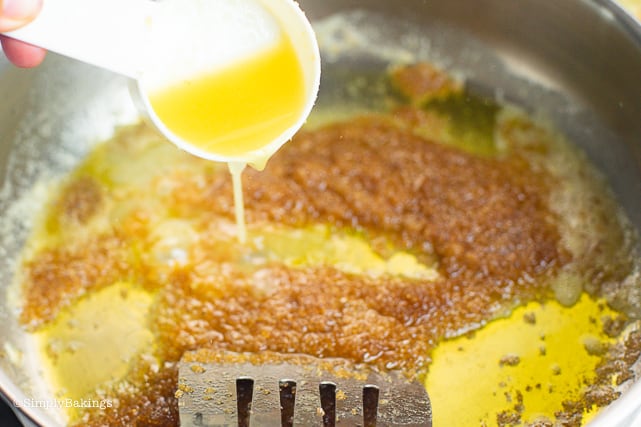
    In another pan over medium-low heat, add 2 tablespoons vegan butter and allow it to melt. Then add salt, brown sugar and cook until it’s caramelized.  Add pineapple juice mixing it by moving the spoon in one direction/motion. (note: Don’t mix in circles)

    caramelized sugar, salt, vegan butter and pineapple juice for the sauce

    Once the syrup has been incorporated, (You will know if it is ready if the thread drops slowly), add the fried turons and mix carefully until the sauce has covered the turon (the pan should be clean). 

    fried kamote ube spring rolls coated with the sweet sauce

    Place fried turon on a platter and allow it to cool completely, then serve.

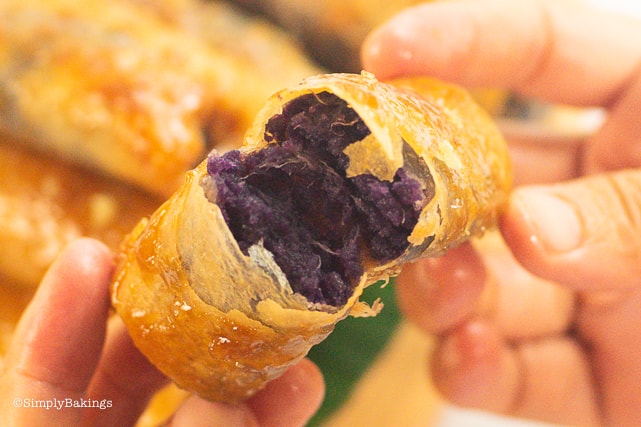
    kamote ube turon cut in halves

    FAQ

    What is the difference between turon and lumpia?

    Turon is a sweet Filipino snack or dessert, often filled with bananas or sweet potatoes and coated with sugar. Lumpia is savory and filled with meat or vegetables, making it more of an appetizer or main dish.

    How to make turon with sugar glaze?

    To make turon with sugar glaze, fry the wrapped turon in oil until crispy. Then, make a caramel sauce by melting butter, adding brown sugar, and pineapple juice, and coat the fried turon with the glaze before serving.

    What is kamote turon in english?

    Kamote Turon translates to "Sweet Potato Fried Spring Rolls" in English. It’s a dessert made with mashed sweet potatoes wrapped in a thin pastry wrapper and fried until golden and crispy.

    camote spring rolls with a banana leaf on a wooden board
    4.34 from 3 votes
    Print Pin Recipe

    Kamote Turon (Sweet Potato Spring Rolls)

    If you're craving a sweet and crispy dessert, Kamote Turon is perfect! This recipe adds a twist to the classic Filipino turon by using sweet potato (kamote) and optional ube for a vibrant filling. Enjoy this creative upgrade on a traditional snack!
    Prep Time30 minutes mins
    Cook Time10 minutes mins
    Total Time40 minutes mins
    Course: Dessert
    Cuisine: Filipino
    Keyword: Kamote Turon, sweet potato turon
    Servings: 4 -6 servings
    Calories: 1062kcal
    Author: Lainey
    Prevent your screen from going dark

    Ingredients

    • 2 cup water
    • 2 cups sweet potato wedges and peeled
    • 1 tablespoon ube powder
    • 25 large lumpia wrapper
    • 2 cups coconut oil
    • 2 tablespoons vegan butter
    • ⅛ teaspoon salt
    • ¼ cup brown sugar
    • 2 tablespoons pineapple juice

    Instructions

    Filling:

    • Wash the sweet potatoes.  Then in a pot over medium-high heat, bring to boil 2 cups of water, add potatoes, and boil for 30-35 or until potatoes are tender.
    • Drain the water and place the potatoes in a bowl, and mash the potatoes with a fork or a potato masher, then divide the potatoes into two separate bowls. 
    • In one of the bowls, add ube powder and mix until well combined and set aside.
    • Layout the lumpia wrapper and if using a square wrapper, lay it out with the corner pointed towards you.
    • Then add two tablespoons of kamote ube in the lower middle section of the wrapper.
    • Fold left and right corners toward the center and continue to roll, then seal with water. Repeat until all the kamote ube filling and the plain filling is gone.

    Frying the Turon:

    • Fill a large frying pan with oil and heat the oil over medium-high heat. Gently place the turon into the hot oil and fry until golden brown on all sides, about 3 to 5 minutes, then place the fried lumpia on paper towels to remove the access oil.
    • In another pan over medium-low heat, add 2 tablespoons vegan butter and allow it to melt. Then add salt, brown sugar and cook until it’s caramelized.  Add pineapple juice mixing it by moving the spoon in one direction/motion. (note: Don’t mix in circles)
    • Once the syrup has been incorporated, (You will know if it is ready if the thread drops slowly), add the fried turons and mix carefully  until the sauce has covered the turon (the pan should be clean). 
    • Place fried turon on a platter and allow it to cool completely, then serve.
    Leave a Comment
    Serving: 1gCalories: 1062kcalCarbohydrates: 29gProtein: 1gFat: 113gSaturated Fat: 91gPolyunsaturated Fat: 3gMonounsaturated Fat: 9gTrans Fat: 0.03gSodium: 164mgPotassium: 254mgFiber: 2gSugar: 17gVitamin A: 9702IUVitamin C: 2mgCalcium: 37mgIron: 1mg
    QR Code
    Did you make this recipe?Share it on instagram or tag @simplybakings or #simplybakings!

    Christmas Desserts, Filipino Desserts, Thanksgiving Desserts, Vegan Filipino Recipes

    Amazing Morning Biscuits

    Oct 18, 2020 · 8 Comments

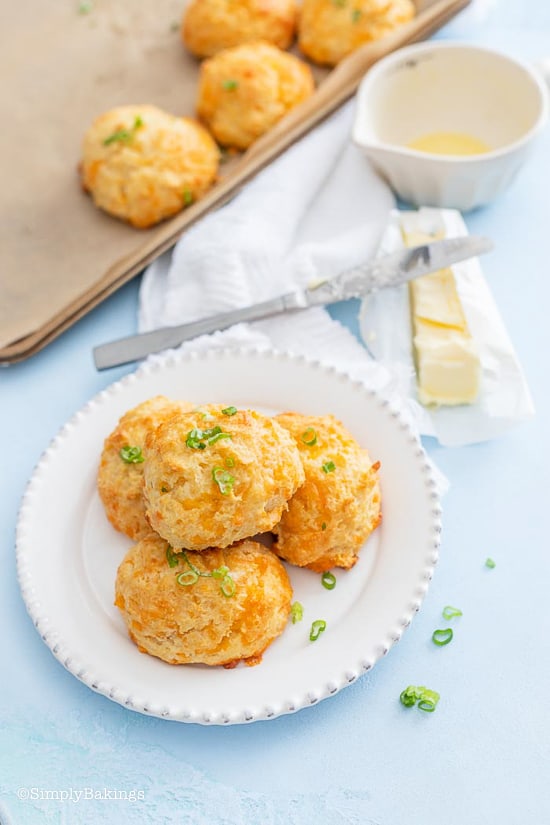
    morning biscuits on a white plate with butter on the side and more biscuits on a baking pan

    If you're looking for a delicious breakfast option, these buttery, soft, and amazing Morning Biscuits are a perfect choice. They are savory and so flaky that you won't be able to resist. Whether you're a seasoned cook or starting, this easy biscuit recipe is a great way to start your day off right!

    Looking for more breakfast recipes? Try my French Breakfast Bread, the Easiest Blueberry Scones Recipe Ever, or my Quick and Easy Coffee Cake.

    biscuits on a white plate with butter on the side and a pan of biscuits
    [feast_advanced_jump_to]

    What is a Morning Biscuit?

    A morning biscuit is a tasty and filling baked treat that's perfect for starting your day. It's like a small, round bread that you can eat in the morning. Morning biscuits can be savory or sweet, depending on what ingredients you use. They're often made with flour, milk, butter, and sometimes cheese or sugar.

    You can enjoy them on their own, or you can add toppings like jam, honey, or eggs to make them even more delicious!

    Although this isn't the healthiest of breakfasts, you gotta start somewhere, right? 😉

    cheddar biscuits on a white plate garnished with scallions

    Substitutions

    • All-purpose flour: Whole wheat flour, almond flour, or a gluten-free flour blend.
    • Granulated sugar: Brown sugar, coconut sugar, or honey.
    • Baking powder: Baking soda (use ¼ teaspoon baking soda for every teaspoon of baking powder) or self-rising flour (omit the baking powder and salt if using self-rising flour).
    • Salt: Sea salt or kosher salt.
    • Shredded cheddar cheese: Any other cheese you prefer, such as mozzarella, Colby, or Monterey Jack.
    • Egg: Flaxseed egg (1 tablespoon ground flaxseed mixed with 3 tablespoons water), mashed banana, or applesauce (¼ cup).
    • Milk: Almond milk, soy milk, or any other dairy-free milk.
    • Butter: Margarine or coconut oil (for dairy-free option).
    • Garlic powder: Minced fresh garlic or garlic paste.
    • Scallions: Chopped chives or diced onion.

    Variations

    Cheese Variations:

    • Parmesan and Herb Biscuits: Substitute shredded cheddar cheese with grated parmesan cheese and add dried herbs like parsley, thyme, or rosemary for extra flavor.
    • Pepper Jack Biscuits: Use shredded pepper jack cheese for a spicy kick.
    • Feta and Spinach Biscuits: Mix crumbled feta cheese and chopped spinach into the dough for a Mediterranean twist.

    Savory Herbs and Spices:

    • Rosemary and Garlic Biscuits: Add chopped fresh rosemary and minced garlic to the dough for a fragrant and savory biscuit.
    • Cheddar and Jalapeño Biscuits: Mix shredded cheddar cheese and diced jalapeños into the dough for a spicy twist.
    • Everything Bagel Biscuits: Sprinkle everything bagel seasoning on top of the biscuits before baking for a flavorful and crunchy crust.

    Storage

    • If you have any leftovers, store in an airtight container. These homemade biscuits will stay fresh for up to 3 days when stored and covered at room temperature. 
    • It can be placed in the freezer for up to 1 month. Just reheat using a microwave and warm for 30-45 seconds.
    breakfast biscuits on a white plate halved with butter and scallions

    Ingredients

    Listed below are all the ingredients you will need:

    • all-purpose flour
    • granulated sugar
    • baking powder
    • salt
    • shredded cheddar cheese
    • egg
    • whole milk
    • butter
    • garlic powder
    • scallions

    Instructions

    Preheat the oven to 375°F. Line two baking sheets with parchment paper and set them aside.

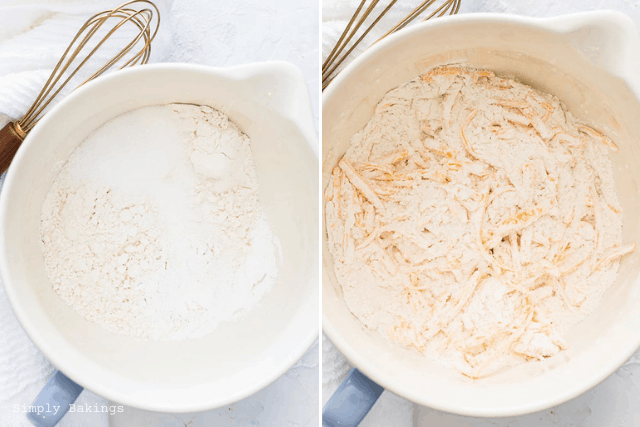
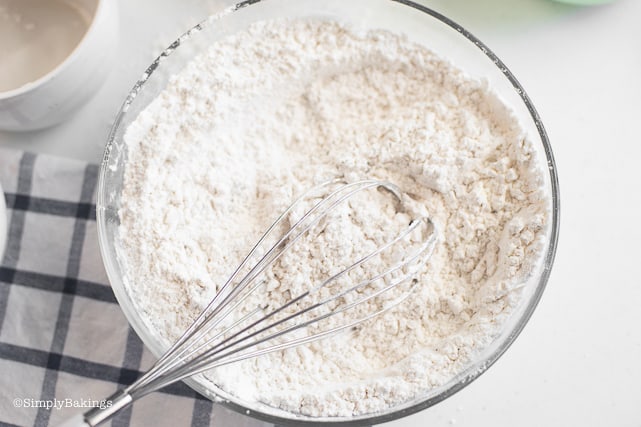
    In a large bowl, add the flour, sugar, baking powder, and ½ teaspoon salt. Then, whisk to combine.

    Next, add the shredded cheddar cheese and mix until coated in the flour. Set aside.

    mixing the dry ingredients with the cheese in a white bowl

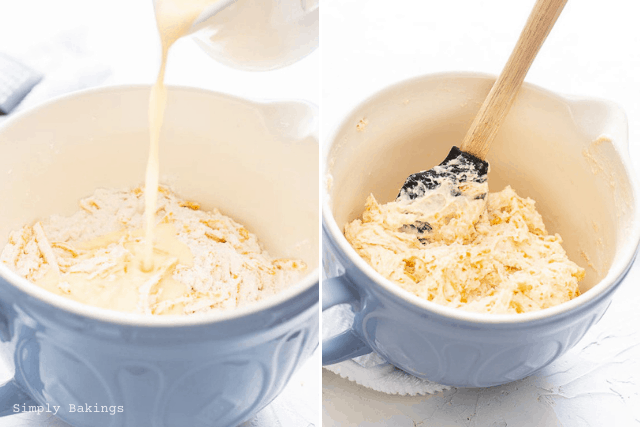
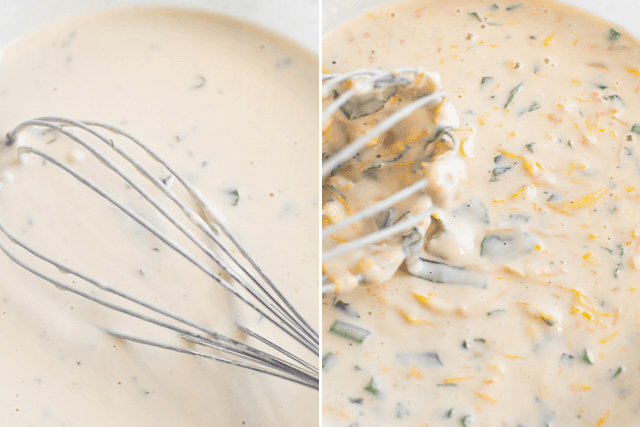
    In a small bowl, add the egg and lightly beat the egg. Then, add in the milk and ¼ cup of the cooled melted butter, and mix to combine.

    After that, add the wet mixture to the dry ingredients and stir until just combined, a few lumps are okay, but make sure there are no dry patches.

    pouring the liquid ingredients into the bowl and mixing it together

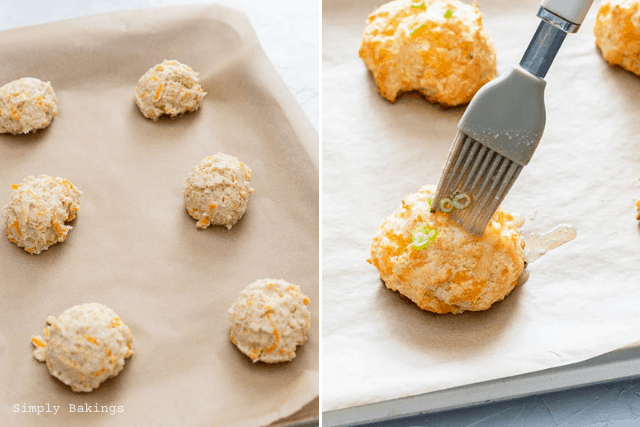
    Evenly dollop 12 portions of the biscuit mix on the baking sheet, about 3 inches apart. Each biscuit equals about ¼ cup of biscuit mix. I like to use a ¼ cup scooper for this.

    Bake in the preheated oven for 17-20 minutes until golden brown. While the biscuits are baking, mix a pinch of salt, garlic powder, and sliced scallions with the remaining melted butter.

    When the morning biscuits are done, immediately brush them all evenly with the butter topping.

    unbaked and baked biscuits on the pan

    Allow it to cool slightly on a wire rack, garnish with cheese and chives or scallions, and serve warm!

    baked biscuits on a white plate and pan garnished with scallions

    These also make great breakfast sandwiches or eat with your favorite jam or slather it with honey butter. Enjoy every bite!

    Top Tips

    • The key to flaky layers in the biscuit is to always use cold ingredients. So, particularly for this recipe, don't take out anything until you're ready to use that ingredient in the recipe (except for the melted butter).
    • The baking powder is what helps the biscuit layers puff up. So it's important to check the freshness of the baking powder.  To test, mix together ½ tablespoon and ¼ cup of hot water. If it's fresh, it will bubble strongly.
    • Be gentle with the dough. Do not over-knead the dough because the more you do, the more gluten will develop and the tougher your biscuit will be.

    More Breakfast Recipes:

    • Easy Smoothie Bowls
    • Tofu Scramble
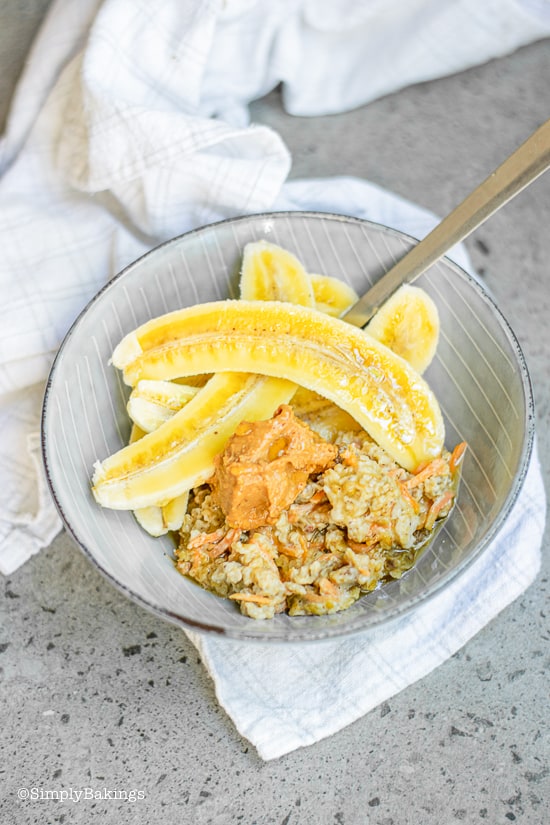
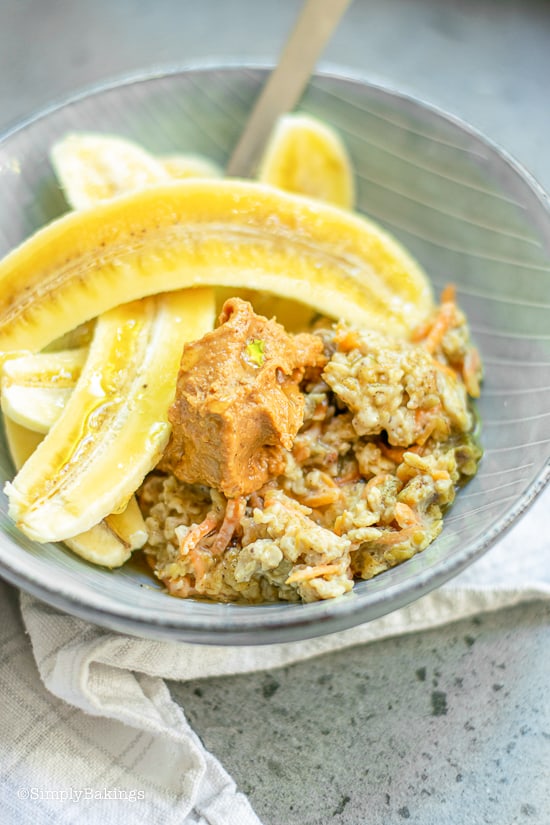
    • Carrot Cake Oatmeal

    Frequently Asked Questions

    Is a biscuit a cookie?

    In some countries, a biscuit refers to a savory baked bread often served with meals, while in others, it refers to a sweet, crispy or chewy cookie-like treat.

    Can I make this vegan?

    Unfortunately no. The results would come out differently, but I have a vegan breakfast biscuit that is amazing!

    Can I freeze the dough for later use?

    Yes, you can freeze the biscuit dough for later use. Shape the dough into individual portions and wrap them tightly in plastic wrap or aluminum foil. Thaw overnight in the refrigerator before baking.

    How can I prevent my biscuits from becoming too dense or tough?

    To ensure light and fluffy biscuits, handle the dough as little as possible and avoid overmixing. Additionally, make sure your baking powder is fresh, as this helps the biscuits rise properly.

    morning biscuits on a white plate on a blue table
    4.86 from 7 votes
    Print Pin Recipe

    Amazing Morning Biscuits

    Looking for a quick and delicious savory snack? These amazing morning biscuits are the perfect choice! They're soft, flaky, and packed with cheesy goodness, making them the ultimate comfort food!
    Prep Time5 minutes mins
    Cook Time20 minutes mins
    Total Time25 minutes mins
    Course: Breakfast
    Cuisine: American
    Servings: 12 biscuits
    Calories: 233kcal
    Author: Lainey
    Prevent your screen from going dark

    Ingredients

    • 1 ¾ cup all-purpose flour
    • 1 tablespoon granulated sugar
    • 1 tablespoon baking powder
    • ½ teaspoon kosher salt plus a pinch
    • 2 cups shredded cheddar
    • 1 large egg
    • 1 cup milk
    • ½ cup unsalted butter melted and cooled divided
    • ¼ teaspoon garlic powder
    • 2 tablespoons thinly sliced scallions

    Instructions

    • Preheat the oven to 375°F. Line two baking sheets with parchment paper, set aside.
    • In a large bowl, add the flour, sugar, baking powder, and ½ teaspoon salt. Then, whisk to combine.
    • Add in the shredded cheddar and mix until coated in the flour. Set aside.
    • In a small bowl, add the egg and lightly beat the egg. Add in the milk and ¼ cup of the cooled melted butter, mix to combine.
    • Add the wet mixture to the dry and stir until just combined, a few lumps is okay, but make sure there are no dry patches.
    • Evenly dollop 12 portions of the biscuit mix on the baking sheets, about 3 inches apart. Each biscuit equals about ¼ cup of biscuit mix. I like to use a ¼ cup scooper for this.
    • Bake in the preheated oven for 17-20 minutes until golden brown. While the biscuits are baking, mix a pinch of salt, the garlic powder, and sliced scallions with the remaining melted butter.
    • When the biscuits are done, immediately brush them all evenly with the butter topping. Let cool slightly on a wire rack, serve warm.
    Leave a Comment
    Serving: 1biscuitCalories: 233kcalCarbohydrates: 17gProtein: 8gFat: 15gSaturated Fat: 9gPolyunsaturated Fat: 1gMonounsaturated Fat: 4gTrans Fat: 0.3gCholesterol: 55mgSodium: 341mgPotassium: 76mgFiber: 1gSugar: 2gVitamin A: 488IUVitamin C: 0.2mgCalcium: 225mgIron: 1mg
    QR Code
    Did you make this recipe?Share it on instagram or tag @simplybakings or #simplybakings!

    Bread, Breakfast & Brunch, Snacks

    Pumpkin Pie in a Mason Jar

    Oct 16, 2020 · 2 Comments

    delicious pumpkin pie in mason jars topped with whipped cream

    Welcome fall season with this Pumpkin Pie in a Mason Jar recipe. It combines rich pumpkin puree, warm spices like cinnamon and pumpkin pie spice, and creamy evaporated milk. Baked in individual jars, it’s a fun, portable dessert topped with whipped cream, perfect for fall gatherings or cozy treats!

    Looking for more desserts to share for Thanksgiving? Try my Pumpkin Spice Latte Cupcakes or my Oreo Pumpkin Cheesecake!  

    pumpkin pie in mason jars topped with whipped cream
    [feast_advanced_jump_to]

    Substitutions

    • Dairy-free: Swap the evaporated milk with coconut milk or almond milk for a dairy-free version.
    • Sugar-free: Use a sugar substitute like stevia or monk fruit to make the dessert sugar-free.

    Variations

    • Serve it alongside a hearty fall meal like roasted meat or a savory soup. The spiced, creamy sweetness of the pumpkin pie complements warm, comforting dishes really well.
    • Add a graham cracker crust at the base of the mason jars to mimic a pie crust.
    • Toppings: candied pecans, chocolate shavings, and crushed graham crackers

    Storage

    • If you have leftovers (though I doubt you will!), simply cover the jars with their lids and store them in the fridge for up to 3 days.
    • When you’re ready to enjoy another jar, you can either eat it cold or warm it up in the microwave for about 30 seconds to 1 minute. Don’t forget to add fresh whipped cream after reheating!

    Top Tips

    • These pie jars can easily be made the day before serving. In fact, I think its flavor is best after being chilled overnight.
    • If traveling for Thanksgiving, add the jar lids and bring them with you. And right before you serve, add the whipped cream.
    • If you don't like the messy look of the mason jars, simply take a wet cotton swab or a paper towel and wipe down the inside of the pumpkin jars.
    • Overfilling the jars: Make sure to leave some space at the top of the jars to prevent the filling from overflowing during baking.
    • Skipping the cooling process: Let the jars cool completely before adding any toppings. If you add whipped cream while the jars are still hot, it will melt and lose its fluffy texture.
    delicious pumpkin pie in mason jars topped with whipped cream

    Ingredients

    Listed below are all the ingredients you will need:

    • brown sugar
    • white sugar
    • eggs
    • vanilla extract
    • pumpkin puree
    • pumpkin pie spice
    • ground cinnamon
    • salt
    • evaporated milk
    • half-pint jars
    • sugar
    • cinnamon
    • whipped cream 

    Instructions

    Preheat the oven to 350°F.

    In a large bowl, whisk together the sugars and large eggs.

    eggs, white sugar and brown sugar together in a large white bowl

    Next add vanilla extract, pumpkin puree, pumpkin pie spice, cinnamon,  salt, and mix until well combined. Then mix in the evaporated milk.

    added vanilla extract, pumpkin puree, pumpkin pie spice, cinnamon,  salt and evaporated milk in the mixture

    Pour the mixture into the jars, leaving a small amount of space at the top of each jar and place the jars in a small baking dish and place in the preheated oven.

    pumpie pie mixture poured in the mason jars and placed in a small baking dish

    Bake for 35 to 40 minutes or until the center, is set and a toothpick inserted into the center comes out clean. Top with whipped cream, cream cheese frosting or chocolate mousse. Enjoy!

    baked pumpkin pie in mason jars and topped with whipped cream

    FAQ

    Can I freeze Pumpkin Pie in a Mason Jar?

    Freezing is not recommended because the texture of the pumpkin filling may change. Stick to refrigerating for best results.

    What if I don’t have mason jars?

    You can use any oven-safe, small glass jars or ramekins as a substitute for mason jars.

    Can I use fresh pumpkin instead of canned?

    Yes! Just make sure to puree the fresh pumpkin until it’s smooth.

    Try more of my favorite pumpkin flavored recipes:

    • Pumpkin Whoppie Pie
    • Pumpkin Cinnamon Rolls
    • Pumpkin Chili 
    pumpkin pie in mason jars topped with whipped cream
    5 from 1 vote
    Print Pin Recipe

    Pumpkin Pie in a Mason Jar

    Pumpkin Pie in a Mason Jar is a fun, easy-to-make dessert perfect for fall. Individual servings baked in mason jars offer a charming twist on classic pumpkin pie. Top with whipped cream and cinnamon for a delicious treat that's ideal for parties or cozy nights in.
    Prep Time5 minutes mins
    Cook Time40 minutes mins
    Total Time44 minutes mins
    Course: Dessert
    Cuisine: American
    Keyword: pumpkin pie in mason jars, pumpkin pie jars
    Servings: 5 servings
    Calories: 377kcal
    Author: Lainey
    Prevent your screen from going dark

    Ingredients

    • 1 cup brown sugar
    • ¼ cup white sugar
    • 3 eggs
    • 1 teaspoon vanilla extract
    • 1 15- ounce can pumpkin puree
    • 1 teaspoon pumpkin pie spice
    • 1 teaspoon ground cinnamon
    • ½ teaspoon salt
    • 1 12- ounce can evaporated milk
    • 5 half-pint jars
    • 1 tablespoon sugar combined with ½ teaspoon cinnamon for topping optional
    • Whipped cream for topping optional

    Instructions

    • Preheat oven to 350 degrees.
    • In a large bowl, beat together the sugars and eggs. Then add vanilla extract, pumpkin puree, pumpkin pie spice, cinnamon,  salt, evaporated milk  and mix until well combined.
    • Mix in the evaporated milk and then pour the mixture into the jars, leaving a small amount of space at the top of each jar. You may have a small amount of pumpkin mixture leftover.
    • Pour the mixture into the jars, leaving a small amount of space at the top of each jar.
    • Place the jars in a small baking dish and place in the preheated oven and bake for 35 to 40 minutes or until the center, is set and a tooth pick inserted into the center comes out clean.
    • Allow the jars to cool completely, then top with whipped cream and cinnamon sugar before serving, if desired.
    Leave a Comment

    Notes

    • These pie jars can easily be made the day before serving. In fact, I think they taste best after being chilled overnight.
    Serving: 1jarCalories: 377kcalCarbohydrates: 68gProtein: 9gFat: 8gSaturated Fat: 4gPolyunsaturated Fat: 1gMonounsaturated Fat: 3gTrans Fat: 0.01gCholesterol: 120mgSodium: 824mgPotassium: 511mgFiber: 3gSugar: 53gVitamin A: 14439IUVitamin C: 5mgCalcium: 274mgIron: 2mg
    QR Code
    Did you make this recipe?Share it on instagram or tag @simplybakings or #simplybakings!

    With Thanksgiving around the corner, it's time for your favorite heart-warming foods, family and friends get together.

    But with what's happening in the world, Thanksgiving might not be the same for 2020.  My family already made the decision to cancel and just celebrate it separately. 🙁

    But for those of you who are still able to celebrate, here's a spin on the Thanksgiving classic Pumpkin Pie!

    It's perfect for individual servings, can be made ahead of time, and will wow your family and friends: Pumpkin Pie in jars!

    Desserts, Thanksgiving Desserts

    Roasted Green Beans and Potatoes

    Oct 11, 2020 · Leave a Comment

    Try these Perfectly Roasted Potatoes and Green Beans! A simple veggie blend of potatoes and green beans seasoned with delicious garlic and fresh herb blend then roasted to deliciousness!

    How to Easy Green Bean Potatoes:

    Listed below are all the ingredients you will need:

    • potatoes
    • green beans
    • olive oil
    • onion
    • garlic
    • rosemary
    • parsley
    • salt
    • pepper

    Preheat oven to 375 F and soak potatoes and green beans in cold water for about 10 minutes.

    In a small bowl, mix oil, onion, garlic, rosemary, parsley, salt, and pepper until well combined, set aside

    Next, drain potatoes and green beans then transfer potatoes in a baking dish and pour ⅔ of the oil mixture.  Coat potatoes with the oil mixture and bake for 30 minutes uncovered.

    With the remaining oil mixture, add it to the green beans and marinate while potatoes are in the oven.

    After 30 minutes, remove potatoes from the oven, add the green beans and mix until combined. Be careful not to burn yourself and bake for another 20 minutes uncovered.

    After 20 minutes or until potatoes are crispy, remove from oven and serve immediately.

    No ratings yet
    Print Pin Recipe

    Roasted Green Beans and Potatoes

    Prep Time10 minutes mins
    Cook Time50 minutes mins
    Servings: 4 servings
    Author: Lainey
    Prevent your screen from going dark

    Ingredients

    • 500 g potatoes* quartered
    • 500 g green bean trimmed
    • ¼ cup olive oil
    • 1 small onion chopped
    • 2 tablespoons garlic minced
    • 2 tablespoons dried rosemary
    • 1 tablespoon dried parsley
    • salt and pepper to taste

    Instructions

    • Preheat oven to 375 F
    • Soak potatoes and green beans in cold water for about 10 minutes. 
    • In a small bowl, mix oil, onion, garlic, rosemary, parsley, salt, and pepper until well combined, set aside. 
    • Next, drain potatoes and green beans then transfer potatoes in a baking dish and pour ⅔ of the oil mixture.  Coat potatoes with the oil mixture and bake for 30 minutes uncovered.
    • With the remaining oil mixture, add it to the green beans and marinate while potatoes are in the oven.
    • After 30 minutes, remove potatoes from the oven, add the green beans and mix until combined. Be careful not to burn yourself and bake for another 20 minutes uncovered.
    • After 20 minutes or until potatoes are crispy, remove from oven and serve immediately.
    Leave a Comment

    Notes

    *Preferably use red or Yukon Potatoes.  If you don’t have that available, use Russet Potatoes. 
    QR Code
    Did you make this recipe?Share it on instagram or tag @simplybakings or #simplybakings!

    Breakfast & Brunch, Rice, Noodles, Potatoes, Side Dishes, Thanksgiving Sides, Vegan Filipino Recipes, Vegetables, Vegetarian Filipino Recipes

    Easy Baked Cinnamon Apples

    Oct 8, 2020 · Leave a Comment

    These super easy Baked Cinnamon Apples are a great way to kick off the Fall season! With only a few ingredients on hand, you're ready to bake a simple, but delicious recipe!

    Can't get enough apples? My Apple Pancake Cookies and Apple Pie Cookies are a great afternoon snack! Or for my decadent treat try my 5 Ingredient Apple Dessert or Mini Apple Pie Pops!

    How to Easy Baked Cinnamon Apples:

    Listed below are all the ingredients you will need:

    • Granny Smith Apples
    • cinnamon powder
    • nutmeg powder
    • ginger powder
    • lemon
    • agave syrup
    • salt
    • almonds

    Preheat  your oven to 350 degrees F.Peel and core apples, then thinly slice apples and transfer to a baking dish:

    Add spices, lemon juice, agave syrup, salt, almonds to the baking dish, and toss until everything is combined, making sure to evenly spread the apples.

    Cover baking dish with a foil, then bake in the oven for 20 minutes. After 20 minutes, remove foil and bake for additional 15 minutes. Remove from the oven and allow it to cool down.

    You're going to love the smell of your house!!

    Honestly, it's best to wait to eat it, because you might burn your mouth, but if you can't wait, omg warm tender apples are so delicious with ice cream!

    No ratings yet
    Print Pin Recipe

    Easy Baked Cinnamon Apples

    Prep Time10 minutes mins
    Cook Time13 hours hrs 17 minutes mins
    Keyword: Baked Cinnamon Apples
    Servings: 2 servings
    Author: Lainey
    Prevent your screen from going dark

    Ingredients

    • 3 medium Granny Smith Apples peeled and cored
    • ¼ teaspoon cinnamon powder
    • ¼ teaspoon nutmeg powder
    • ¼ teaspoon ginger powder
    • juice of half a lemon
    • 2 tablespoons agave syrup
    • pinch of salt
    • 10 pieces almonds halved*

    Instructions

    • Preheat oven to 350 degrees F.
    • Peel and core apples, then thinly slice apples and transfer to baking dish.
    • Add spices, lemon juice, agave syrup, salt, almonds to a  9x6 inch baking dish, and toss until everything is combined, making sure to evenly spread the apples.
    • Cover baking dish with a foil, then bake in the oven for 20 minutes. After 20 minutes, remove foil and bake for additional 15 minutes.
    • Remove from the oven and allow it to cool down and serve with ice cream.
    Leave a Comment

    Notes

    *optional
    QR Code
    Did you make this recipe?Share it on instagram or tag @simplybakings or #simplybakings!


    Desserts, Thanksgiving Desserts, Vegan Baking

    One Pot Vegetarian Chili

    Oct 5, 2020 · 2 Comments

    tasty one pot vegetarian chili mac and cheese

    One Pot Vegetarian Chili made with kidney beans, pasta, and corn. This recipe is super flavorful, makes for a delicious vegetarian dinner and great for meal prep!

    This was inspired by my other heart warming recipes on this site: Vegan Pumpkin Chili, Vegan Chicken Afritada, Vegan Pho, and Macaroni Soup.

    vegan chili topped with vegan cheese in blue bowl
    [feast_advanced_jump_to]

    Ingredients

    Listed below are all the ingredients you will need:

    • olive oil
    • onion
    • garlic
    • chili powder
    • ground cumin
    • salt
    • vegetable broth
    • strozzapreti pasta
    • kidney beans
    • sweet corn
    • fresh cilantro
    • can diced tomatoes
    • tomato purée
    • agave syrup
    • vegan cheese
    list of one pot chili vegetarian pasta ingredients

    See recipe card for quantities.

    Instructions

    fried onion and garlic then added spices

    Heat a large pot with oil on medium heat and fry onion and garlic until tender then add chili powder, cayenne pepper, cumin powder, and salt.

    added remaining ingredients except agave and vegan cheese

    Add vegetable broth, pasta, kidney beans, corn, cilantro, and diced tomatoes.

    mixed the dish

    Mix until well combined. Bring to a boil then turn the heat to low and cook for 15 minutes.

    added vegan cheese and served

    Stir agave syrup and cook for another 5 or 10 minutes until pasta is al dente. Sprinkle vegan cheese and serve hot.

    cooked one pot vege pasta with chili

    Substitutions

    • Pinto Beans: You can use pinto beans instead of kidney beans in your chili for a different texture and taste.
    • Red Bell Pepper: Try using diced carrots or zucchini instead of red bell pepper to add some color and flavor to your bowl of chili.
    • Adobo Sauce: Make your chili taste even better by adding a tablespoon of adobo sauce from canned chipotle peppers.

    Variations

    • Gluten-Free Option: If you're gluten-free, you can switch the strozzapreti pasta for gluten-free pasta or quinoa instead.
    • Dairy-Free Twist: If you're avoiding dairy, you can leave off the cheese and try vegan sour cream or avocado slices instead.
    tasty vegetarian chili Pasta in a bowl

    Storage

    • Fridge: Allow the chili to cool to room temperature before transferring it to an airtight container. It will keep well in the fridge for up to 2 days.
    • Freezer: To freeze the chili, let it cool completely, then transfer it to freezer-safe containers or resealable bags. It will keep well in the freezer for up to 2-3 months.
    • Reheating: When ready to enjoy, simply reheat the chili on the stovetop over medium heat or in the microwave until warmed through.

    Top Tips

    • Adding garnishes like grated cheddar cheese, sour cream, sliced or diced avocado, tortilla chips (crumbled if desired), additional cilantro or lime wedges take the chili to the next level!
    • This recipe is very versatile, feel free to remove the pasta and add more beans like pinto or even black beans!

    FAQ

    Is chili healthy for a diet?

    Chili can be a healthy choice for a diet, especially if it's loaded with veggies, beans, and spices, providing fiber, protein, and essential nutrients.

    Is chili better stovetop or crockpot?

    Both methods have their perks; stovetop cooking is quicker, while the crockpot allows flavors to develop over time, resulting in a richer taste and tender texture.

    What gives chili the best flavor?

    The best flavor in chili comes from a combination of spices like chili powder, cumin, and paprika, along with ingredients like onions, garlic, and tomatoes, creating a deliciously complex and hearty dish.

    one pot vege Pasta chili in a bowl garnished with vegan cheese and ciliantro
    easy one pot vegetarian chili recipe
    5 from 2 votes
    Print Pin Recipe

    One Pot Vegetarian Chili

    This One Pot Vegetarian Chili recipe is quick and packed with **wholesome ingredients** like vegetables, beans, and spices. Try it out today and enjoy a delicious, comforting meal without the hassle.
    Prep Time5 minutes mins
    Cook Time20 minutes mins
    Total Time25 minutes mins
    Course: Main Course
    Cuisine: American, Filipino
    Servings: 6 servings
    Calories: 238kcal
    Author: Lainey
    Prevent your screen from going dark

    Ingredients

    • 2 tablespoons olive oil
    • 1 medium onion minced
    • 4 cloves garlic finely chopped
    • 1 tablespoon chili powder
    • 1 teaspoon cayenne pepper
    • 2 teaspoons cumin powder
    • 1 ½ teaspoons salt
    • 4 cups vegetable broth
    • 10 ounces strozzapreti pasta* uncooked
    • 1 (15) ounce kidney beans drained and rinsed
    • 1 cup sweet corn drained and rinsed
    • ¼ cup fresh cilantro chopped
    • 1 (14) ounces can diced tomatoes
    • 1 cup tomato purée
    • 3 tablespoons agave syrup
    • vegan cheese garnish

    Instructions

    • Heat a large pot with oil on medium heat and fry onion and garlic until tender.  Then add chili powder, cayenne pepper, cumin powder, and salt. 
    • Add vegetable broth, pasta, kidney beans, corn, cilantro, diced tomatoes, and tomato purée  and mix until well combined.
    • Bring to a boil then turn the heat to low and cook for 15 minutes.
    • Stir agave syrup and cook for another 5 or 10 minutes until pasta is al dente. Sprinkle vegan cheese and serve hot.
    Leave a Comment

    Notes

    *or use macaroni pasta
    Serving: 1gCalories: 238kcalCarbohydrates: 40gProtein: 9gFat: 6gSaturated Fat: 1gPolyunsaturated Fat: 1gMonounsaturated Fat: 4gTrans Fat: 0.002gSodium: 1533mgPotassium: 708mgFiber: 8gSugar: 14gVitamin A: 1227IUVitamin C: 16mgCalcium: 69mgIron: 4mg
    QR Code
    Did you make this recipe?Share it on instagram or tag @simplybakings or #simplybakings!

    Beans and Legumes, Main Entree, Rice, Noodles, Potatoes, Side Dishes, Thanksgiving Sides, Vegan Filipino Recipes, Vegetarian Filipino Recipes

    Keto Pumpkin Whoopie Pies with Cream Cheese Filling

    Oct 1, 2020 · 2 Comments

    birds eye view of 3 pumpkin whoopie pies in a white dish

    Soft and lightly spiced Keto Pumpkin Whoopie Pies with Cream Cheese Filling sandwiched together with a decadent, yet easy to make, pecan frosting! And it's keto-friendly!

    For more pumpkin recipes, try this Pumpkin Oreo Cheesecake and this No Yeast Pumpkin Cinnamon Rolls. Or Homemade Vegan Pumpkin Brownie.

    3 pumpkin whoopie pies in a white dish surrounded by a bowl of cream cheese and pecans

    A whoopie pie is either a cookie, pie,  or cake dessert — usually 2 round mound-shaped pieces of a flavored cake with a sweet and creamy filling sandwiched in between.

    [feast_advanced_jump_to]

    Ingredients

    Listed below are all the ingredients you will need:

    Whoopie Pies:

    • butter
    • Swerve Granular Sugar
    • eggs
    • vanilla extract
    • pumpkin puree
    • baking powder
    • baking soda
    • cinnamon
    • pumpkin spice
    • salt
    • almond flour
    Ingredients for pumpkin whoopie pies

    Pecan Filling:

    • butter
    • cream cheese
    • pecans
    • Swerve confectionary sugar
    • vanilla extract
    ingredients for pecan cream cheese frosting

    Instructions

    Whoopie Pies:

    Preheat oven to 350 degrees F and line pan with parchment paper or baking mat.

    mixed melted butter and sugar

    In a large bowl, add the melted butter, sugar, and mix until light and fluffy. 

    added the eggs and vanilla extract to butter liquid mixture

    Next, add in the eggs, vanilla extract and whisk until well combined.

    rest of the ingredients added to the same bowl

    In the same bowl, mix together the rest of your ingredients.

    mixed bowl for keto pumpkin pies

    Combine them well.

    pumpkin cookie dough flatten on baking sheet

    Using a small cookie scoop, scoop the cookie dough onto a baking sheet and flatten leaving at least 2 inches between each cookie.

    baked keto pumpkin whoopie pie

    Place into oven at 350 fahrenheit

    Pecan Filling:

    mixed butter and cream cheese

    To make the pecan filling, in a large bowl, beat butter and cream cheese until light and fluffy. Then add powdered sugar, vanilla extract and mix until it is smooth.

    crushed pecans added to mixture

    Finally, add the crushed pecans and mix until just combined.

    Assemble:

    To assemble, using a cookie scooper, place a dollop of the filling in the center of the flat side of one a cookie.

    Place a matching piece of the cake against the filling and push to spread the filling evenly between the two halves. Repeat until all of the pies have been filled.

    whoopie pies being filled with pecan frosting on a cookie sheet

    Enjoy within the next same day, or refrigerate any leftover whoopie pies.

    Substitutions

    • Try different spices like ginger or cloves for unique flavors.
    • Swap Swerve granular sugar with your preferred sweetener.
    • Use a hand mixer instead of an electric mixer for convenience.
    • Bake the whoopie pies in batches of 2-3 to save time.
    • Pipe the dough onto the baking sheet for uniform shapes.
    • Substitute butter with coconut oil and cream cheese with a dairy-free alternative for a dairy-free option.

    Variations

    • Feel free to get creative with your whoopie pie presentation by adding decorative touches such as sprinkles or chopped nuts on top.

    Storage

    Store leftover whoopie pies in an airtight container in the refrigerator. They'll stay fresh for 3-4 days. For longer storage, wrap them individually in plastic wrap and freeze them. Thaw in the refrigerator before enjoying again.

    3 whoopie pies in a white dish surrounded by cream cheese frosting and sprinkles of pecans

    Top Tips

    • For this recipe, use pure canned pumpkin and not pumpkin pie filling.
    • Baking time. I like to slightly underbake the cookies to keep them soft, moist, and a little bit dense. If they are overbaked they lose their texture.
    • Cream Cheese.  It's important to soften the cream cheese before making the cream cheese frosting. I found that it won't combine as smoothly and you'll get cream cheese chunks in the frosting. I learned this the hard way.
    • Make-ahead: Cakes and frosting can be made a day ahead and stored separately in an airtight container. Allow the frosting to warm slightly at room temperature before filling.

    FAQ

    Is canned pumpkin keto friendly?

    Yes, canned pumpkin is generally keto-friendly because it's low carb and high in fiber, but be sure to check the label for added sugars.

    Why do my whoopie pies come out flat?

    If your whoopie pies come out flat, it could be due to overmixing the batter, not using enough leavening agents, or the oven temperature being too high.

    Why do my whoopie pies crack?

    Whoopie pies may crack if the batter is too dry or if they're overbaked, causing them to lose moisture and become brittle. Try adjusting the moisture level in the batter and monitoring the baking time closely.

    delicious whoopie pies on a table with cream cheese filling
    5 from 3 votes
    Print Pin Recipe

    Keto Pumpkin Whoopie Pies with Cream Cheese Filling

    Soft and lightly spiced Keto Pumpkin Whoopie Pie sandwiched together with a decadent, yet easy to make, pecan frosting! And it's keto-friendly
    Prep Time10 minutes mins
    Bake Time15 minutes mins
    Total Time25 minutes mins
    Course: Cookies, Desserts
    Cuisine: American
    Keyword: keto whoopie pies
    Servings: 6 large whoopie pies
    Calories: 208kcal
    Author: Lainey
    Prevent your screen from going dark

    Ingredients

    Whoopie Pies:

    • ¼ cup butter melted
    • ¾ cup Swerve Granular Sugar
    • 2 eggs
    • 1 teaspoon vanilla extract
    • ½ cup pumpkin puree
    • ½ teaspoon baking powder
    • ½ teaspoon baking soda
    • 1 teaspoon of cinnamon
    • 1 teaspoon of pumpkin pie spice
    • ⅛ teaspoon of salt
    • 1 cup almond flour

    Filling:

    • 6 tablespoons of soft butter
    • 4 ounces cream cheese
    • 3 tablespoons crushed pecans
    • 1 cup of Swerve confectionary sugar
    • 1 tablespoon of vanilla extract

    Instructions

    Whoopie Pies:

    • Preheat oven to 350 degrees F and line pan with parchment paper or baking mat.
    • In a large bowl, add the melted butter, sugar, and mix until light and fluffy.  Next, add in the eggs, vanilla extract and mix until well combined.
    • In the same bowl, mix together pumpkin puree, baking powder, baking soda, cinnamon, pumpkin pie spice, salt, and  almond flour.
    • Using a small cookie scoop, scoop the the cookie dough onto cookie sheet and flatten leaving at least 2 inches between each cookie.
    • Bake for  10-12 minutes for small cookies and 12-15 minutes for medium size cookies . Cookie edges will be brown when cooked.
    • Allow the cookies to cool completely before adding the filling.

    Filling:

    • In a large bowl, beat butter and cream cheese until light and fluffy. Then add powdered sugar, vanilla extract and mix until it is smooth. Finally add the crushed pecans and mix until just combined.

    Assemble:

    • Using a cookie scooper, place a dollop of the filling in the center of the flat side of one a cookie. Place a matching piece of the cake against the filling and push to spread the filling evenly between the two halves. Repeat until all of the pies have been filled.
    Leave a Comment
    Calories: 208kcalCarbohydrates: 7gProtein: 8gFat: 18gSaturated Fat: 5gPolyunsaturated Fat: 1gMonounsaturated Fat: 2gTrans Fat: 0.01gCholesterol: 75mgSodium: 218mgPotassium: 102mgFiber: 3gSugar: 3gVitamin A: 3527IUVitamin C: 1mgCalcium: 102mgIron: 1mg
    QR Code
    Did you make this recipe?Share it on instagram or tag @simplybakings or #simplybakings!

    Cookies, Thanksgiving Desserts

    Filipino Vegan Fish Balls

    Sep 27, 2020 · 4 Comments

    fried fish balls dipped in Special Manong's Sauce

    Try these Vegan Fish Balls that are delicious, crunchy, and dipped in a spicy and sweet sauce that will take you back to the streets of the Philippines!

    Missing Filipino street food? Try my Vegan Isaw (barbecued oyster mushrooms), Ube Ice Candy (Purple Yams), or my Shakoy (Filipino Donuts)!

    vegan fried fish balls on a skewer coated with sweet & sour sauce

    What are fish balls?

    Fish Balls are popular street food in the Philippines that are usually sold on carts by street vendors who peddle around town. Dipped in a sauce full of bold and fragrant flavors that also can be enjoyed with other street food like kwek kwek.

    What are fish balls made of?

    It's usually made with fish paste, salt, egg whites, and corn starch. But manufacturers have changed the recipe to save money so it's made more with cheaper ingredients.

    Thankfully, it's super easy to make at home, so give them a try!

    Top Tips

    • Press Tofu for Best Texture: Press the tofu to remove excess moisture before using it in the recipe. This helps achieve a firmer texture, making the fish balls hold together better.
    Fried Fish balls in a green bowl

    Substitutions

    Tofu:

    • Tempeh: For a firmer texture and nutty flavor.
    • Chickpeas: For a similar texture and protein content.
    • Seitan: For a chewier, more meat-like texture.

    Nori (Seaweed) Sheets:

    • Dulse Flakes: For a similar sea-like flavor.
    • Wakame: Another type of seaweed that can be finely chopped and mixed in.
    • Kelp Granules: For a seaweed flavor with a different texture.

    Soy Sauce:

    • Tamari: For a gluten-free alternative.
    • Coconut Aminos: For a soy-free, slightly sweeter option.
    • Miso Paste: Diluted with water for a similar umami flavor.

    Breadcrumbs:

    • Panko: For a lighter, crispier texture.
    • Crushed Rice Crackers: For a gluten-free option with a crunchy texture.
    • Ground Oats: For a whole grain, slightly chewy texture.

    Cornstarch:

    • Arrowroot Powder: For a similar thickening effect.
    • Potato Starch: For a thicker, more substantial texture.
    • Tapioca Starch: For a slightly chewier texture.

    Nutritional Yeast:

    • Vegan Parmesan: For a similar cheesy, umami flavor.
    • Ground Cashews: For a nutty, slightly cheesy flavor.
    • Miso Paste: For an umami boost, though the texture will differ.

    Lemon Juice:

    • Lime Juice: For a similar tangy flavor with a slightly different citrus note.
    • Apple Cider Vinegar: For acidity with a subtle fruity flavor.
    • White Wine Vinegar: For a milder acidic flavor.

    Garlic Powder:

    • Fresh Garlic: Minced for a stronger, more pungent flavor.
    • Onion Powder: For a slightly different but complementary flavor.
    • Shallot Powder: For a milder, sweeter garlic-like flavor.

    Dulse Flakes:

    • Nori Sheets: Finely chopped for a similar sea-like flavor.
    • Kelp Granules: For a different type of seaweed flavor.
    • Wakame: For a similar flavor with a slightly different texture.

    Storage

    • Store vegan fish balls in an airtight container in the refrigerator for up to 3 days or freeze for up to 1 month. Thaw in the refrigerator before reheating and check for freshness before consuming. Reheat in a skillet over medium heat or in an oven at 350°F (175°C) until heated through and crispy. Avoid microwaving to maintain their texture.

    Ingredients

    Listed below are all the ingredients you will need:

    Fish Balls:

    • water
    • dried seaweed or nori seaweed
    • all-purpose flour
    • cornstarch
    • onion powder
    • black pepper
    • rock salt
    • brown sugar
    • carrots
    • green onions
    • squash
    • coconut oil
    ingredients for fish balls

    For the sauce:

    • water
    • sugar
    • soy sauce
    • salt
    • cornstarch
    • onion powder
    • garlic powder
    • garlic cloves
    • red onions
    Ingredients for fish sauce

    Instructions

    To make the fish balls:

    In a medium bowl, add 2 cups of water, and seaweed and soak until softened, about 10 minutes.  Next, remove the seaweed from the water, mince the seaweed, and place it back in the water.  If using nori seaweed, mince, then set aside.

    seaweed soaking in a glass cup on a white table

    In a large bowl, whisk flour, cornstarch, onion powder, black pepper, rock salt, and brown sugar until well combined.

    Whisked flour in a glass bowl on white table

    Next, gradually add soaked minced seaweed water to the bowl and mix. Then add carrots, green onions, and squash. 

    fish sauce batter with whisk in a bowl

    Heat a nonstick frying pan over medium heat and add coconut oil.

    Using a spoon, scoop and drop spoonfuls of the fishball batter into the pan and cook until it’s golden brown.

    dropping a spoonful of fish sauce batter in bubbling oil
    almost done fish balls cooking in deep fried oil

    Once it’s cooked, remove it from the saucepan, place it on a strainer to remove the excess oil, and place it on a plate and continue cooking until no more fish ball batter.

    cooked deep fried fish balls on strainer

    To make the sauce:

    In a medium bowl, add water, and sugar and mix until the sugar is dissolved. Then add soy sauce, salt, cornstarch, onion powder, and garlic powder, and mix until well combined making sure to remove any lumps.

    mixing salt in brown sauce

    In a saucepan, add sauce and over medium heat bring the sauce to a boil so the sauce can thicken.  Keep an eye on it, so the sauce does not burn.  Then add garlic and onions and simmer for a minute then turn off the heat.

    cooking the brown sauce to become thicker

    Then coat your fish balls and give them a try! You'll love them!

    fish balls on a skewer dipped in delicious fish ball sauce

    Frequently Asked Questions

    Why is it necessary to add seaweed?

    Seaweed gives the fishy taste of traditional fish balls.

    Looking for more vegan Filipino Recipes? Try these:

    • Ginataang Kalabasa
    • Grilled Eggplant with Coconut Milk
    • Vegan Kare-Kare
    • Pinakbet
    • Vegetarian Bicol Express
    fried vegan fish balls in a strainer
    5 from 3 votes
    Print Pin Recipe

    Filipino Vegan Fish Balls

    Vegan Fish Balls are the healthy version of Filipinos’ favorite street food: fish balls dipped in a spicy and sweet sauce! They are super easy to make, delicious and crunchy snacks that you will love and enjoy!
    Prep Time15 minutes mins
    Cook Time20 minutes mins
    Total Time35 minutes mins
    Course: Appetizer, Snack
    Cuisine: Filipino
    Keyword: vegan fish balls
    Servings: 4
    Calories: 1272kcal
    Author: Lainey
    Prevent your screen from going dark

    Ingredients

    Fish Balls:

    • 2 cups water
    • ½ cup dried seaweed or nori seaweed
    • 2 cups all-purpose flour
    • ¼ cup cornstarch
    • ½ teaspoon onion powder
    • ½ teaspoon black pepper
    • 1 tablespoon rock salt
    • 1½ tablespoons brown sugar
    • ½ cup grated carrots
    • 2 tablespoons green onions sliced
    • ½ cup grated kalabasa squash
    • 2 cups coconut oil for frying

    For the Sauce:

    • 2 cups water
    • 2 tablespoons sugar
    • 1 tablespoon soy sauce
    • 1 teaspoon salt
    • 1 tablespoon cornstarch
    • 1 teaspoon onion powder
    • ½ teaspoon garlic powder
    • 2 garlic cloves minced
    • ¼ cup red onions minced

    Instructions

    For the Fish Balls:

    • In a medium bowl, add 2 cups of water and soak the dried seaweed until softened, about 10 minutes. If using nori seaweed, mince it and set it aside.
    • Remove the softened seaweed from the water, mince it, and return it to the water.
    • In a large bowl, whisk together the 2 cups of flour, ¼ cup cornstarch, ½ teaspoon onion powder, ½ teaspoon black pepper, 1 tablespoon rock salt, and 1½ tablespoons brown sugar until well combined.
    • Gradually add the soaked minced seaweed water to the dry ingredients, mixing until smooth.
    • Stir in the ½ cup grated carrots, 2 tablespoons sliced green onions, and ½ cup grated kalabasa squash, mixing until well combined.
    • Heat a nonstick frying pan over medium heat and add 2 cups of coconut oil.
    • Using a spoon, scoop and drop spoonfuls of the fish ball batter into the hot oil, cooking until golden brown.
    • Once cooked, remove the fish balls from the pan, place them on a strainer to drain excess oil, then transfer them to a plate. Continue cooking until all the batter is used up.
    • Thread 5-6 fish balls onto a bamboo skewer and serve with the sauce.

    For the Sauce:

    • In a medium bowl, combine 2 cups of water and 2 tablespoons of sugar, stirring until the sugar is dissolved.
    • Add 1 tablespoon soy sauce, 1 teaspoon salt, 1 tablespoon cornstarch, 1 teaspoon onion powder, and ½ teaspoon garlic powder to the mixture, whisking until smooth and free of lumps.
    • Pour the sauce mixture into a saucepan and bring to a boil over medium heat, stirring frequently until the sauce thickens.
    • Add 2 minced garlic cloves and ¼ cup minced red onions, simmering for an additional minute before turning off the heat.
    • Allow the sauce to cool slightly before serving with the fish balls.
    Leave a Comment
    Serving: 1gCalories: 1272kcalCarbohydrates: 73gProtein: 8gFat: 110gSaturated Fat: 94gSodium: 2607mgPotassium: 230mgFiber: 3gSugar: 12gVitamin A: 2904IUVitamin C: 5mgCalcium: 45mgIron: 3mg
    QR Code
    Did you make this recipe?Share it on instagram or tag @simplybakings or #simplybakings!

    Appetizers, Side Dishes, Vegan Filipino Recipes, Vegetarian Filipino Recipes

    Pumpkin Spice Latte Cupcake Recipe

    Sep 24, 2020 · 1 Comment

    pumpkin spice cupcake on a cutting board

    These Pumpkin Spice Latte Cupcake Recipe are perfect for Fall and Thanksgiving! They're loaded with pumpkin, pumpkin pie spice and topped off Pumpkin Spice Coffee Creamer.

    Looking for more Pumpkin Dessert Recipes? Try these Vegan Pumpkin Brownies, Pumpkin Chocolate Chip Bread, Pumpkin Ice Cream, and Pumpkin Oatmeal.

    pumpkin spice cupcake with coffee frosting on a cutting board
    [feast_advanced_jump_to]

    Substitutions

    • Dairy-free option: Substitute the butter with a dairy-free margarine and the milk with almond or oat milk. Make sure your coffee creamer is dairy-free too!
    • Gluten-free variation: Use a gluten-free all-purpose flour blend instead of regular flour.
    • If you have pumpkin pie filling instead of puree, keep in mind that it’s pre-spiced and sweetened. Reduce the amount of spices and sugar in the recipe to balance the flavor.
    • Frosting: For a twist, swap the coffee frosting for cream cheese frosting or buttercream frosting. For simpler version, whip whipping cream with a little sugar until stiff peaks form. Use this as a light and airy topping, piped with a pastry bag.

    Variations

    • Extra espresso: For a more intense coffee flavor, you can increase the amount of espresso powder to 3 tablespoons.
    • Spiced icing: For an extra spicy kick, add a pinch of cinnamon, nutmeg or pumpkin pie spice to the icing.You can add cloves or a bit more ginger to enhance the depth of flavor. Just be careful not to overpower the overall taste of the cakes.

    Storage

    • If you have any leftovers (though we doubt it!), these Pumpkin Spice Latte Cupcakes can be stored in an airtight container at room temperature for up to 3 days.
    • If you want them to last longer, store them in the fridge for up to a week. Just be sure to bring them to room temperature before serving for the best flavor and texture.

    Top Tips

    • It's best to use canned pumpkin puree over the homemade recipe because it's consistent in flavor and texture, making it more foolproof.
    • Use an ice cream scooper to transfer cupcake batter to the baking cup for uniformed cupcakes.
    • Place a dish towel over the bowl of the stand mixer when adding granulated sugar. This prevents a sugar explosion.
    • Use a decorative tip with a pastry bag to pipe the frosting beautifully. For a professional touch, try adding a drizzle of caramel sauce or a sprinkle of light brown sugar on top of the frosted cupcakes.
    pumpkin latte cupcakes on a wooden board

    Ingredients

    Listed below are all the ingredients you will need:

    • butter
    • brown sugar
    • sugar
    • vanilla extract
    • eggs
    • can pumpkin puree
    • all-purpose flour
    • baking powder
    • pumpkin pie spice
    • ground cinnamon
    • baking soda
    • salt
    • milk
    • instant espresso powder

    For the Icing:

    • butter
    • powdered sugar
    • vanilla extract
    • pumpkin spice coffee creamer
    four pumpkin spice cupcakes on a cutting board

    Instructions

    Preheat oven to 350 degrees and line a cupcake pan with paper liners. In a large bowl, beat together the butter and sugars until light and fluffy, then add the vanilla. Add the eggs, one at a time, beating between each addition.  Then add the pumpkin and mix until well combined.

    mixed batter in a white bowl

    In a separate bowl, whisk together the flour, baking powder, pumpkin pie spice, cinnamon, baking soda, and salt.

    adding dry ingredients to batter in a white bowl

    Add ⅓ of the dry mixture to the pumpkin mixture and mix until combined. Add another ⅓ of the flour mixture and beat until combined.

    Pour in half the milk and mix again. Add the remaining flour and mix, then pour in the remaining milk and beat again until combined.  Next, pour the espresso powder into the batter and mix until combined.

    mixed ingredients in a white bowl

    Spoon an even amount of batter into each of the cupcake liners and bake in the preheated oven for 18 to 22 minutes, until a toothpick inserted into the cupcakes comes out clean. Allow the cupcakes to cool for a few minutes in the pan, then transfer them to a wire rack to cool completely.

    pumpkin spice cupcakes in a muffin tin and a cooling rack

    To make the coffee frosting, whip together the butter, powdered sugar, vanilla, and coffee creamer until stiff peaks form.

    coffee frosting in a white bowl

    Pipe the mixture on top of each cooled cupcake and sprinkle a small amount of pumpkin pie spice over the top of the cupcakes before serving.

    frosted pumpkin spice latte on a wire rack

    FAQ

    How can I make the espresso flavor stronger?

    For a bolder coffee flavor, you can add an extra tablespoon of instant espresso powder to the batter.

    Can I use fresh pumpkin puree?

    Absolutely! Fresh pumpkin puree can be substituted for canned, but make sure it’s well-drained so it doesn’t add too much moisture to the batter.

    Can I use regular coffee instead of espresso powder?

    While you can use regular brewed coffee, the flavor won’t be as concentrated. Instant espresso powder gives a much stronger coffee flavor without adding excess liquid.

    pumpkin spice latte cupcakes with coffee frosting on wooden table
    5 from 1 vote
    Print Pin Recipe

    Pumpkin Spice Latte Cupcake Recipe

    Perfectly spiced, rich with pumpkin flavor, and topped with a coffee-kissed icing, these pumpkin spiced cupcakes combine the best of both worlds: your favorite latte and a delicious dessert.
    Prep Time15 minutes mins
    Cook Time22 minutes mins
    Total Time37 minutes mins
    Course: Desserts
    Cuisine: American
    Servings: 24 cupcakes
    Calories: 247kcal
    Author: Lainey
    Prevent your screen from going dark

    Ingredients

    • 2 sticks 1 cup butter, softened to room temperature
    • 1 cup brown sugar packed
    • 1 cup sugar
    • 1 teaspoon vanilla extract
    • 4 eggs
    • 1 15- ounce can pumpkin puree
    • 3 cups flour
    • 2 teaspoon baking powder
    • 1 teaspoon pumpkin pie spice
    • ½ teaspoon ground cinnamon
    • ½ teaspoon baking soda
    • ¼ teaspoon salt
    • ¾ cup milk
    • 2 tablespoons instant espresso powder

    For the Icing:

    • 2 sticks 1 cup butter, softened to room temperature
    • 5 cups powdered sugar
    • ½ teaspoon vanilla extract
    • ¼ cup pumpkin spice coffee creamer

    Instructions

    • Preheat oven to 350 degrees and line a cupcake pan with paper liners
    • In a large bowl, beat together the butters and sugars until light and fluffy. Add the vanilla.
    • Add the eggs, one at a time, beating between each addition.
    • Add the pumpkin and mix until well combined.
    • In a separate bowl, whisk together the flour, baking powder, pumpkin pie spice, cinnamon, baking soda, and salt.
    • Add ⅓ of the dry mixture to the pumpkin mixture and mix until combined. Add another ⅓ of the flour mixture and mix. Pour in half the milk and mix again, and add the remaining flour and mix until combined. Pour in the remaining milk and beat until combined.
    • Pour the espresso powder into the batter and mix until combined.
    • Spoon an even amount of batter into each of the cupcake liners and bake in the preheated oven for 18 to 22 minutes, until a toothpick inserted into the cupcakes comes out clean.
    • Allow the cupcakes to cool for a few minutes in the pan, then transfer them to a wire cooling rack to cool completely.
    • To make the icing, beat together the butter, powdered sugar, vanilla, and coffee creamer until well combined. Pipe the mixture on top of each cooled cupcake and sprinkle a small amount of pumpkin pie spice over the top of the cupcakes before serving.
    Leave a Comment
    Serving: 1cupcakeCalories: 247kcalCarbohydrates: 57gProtein: 3gFat: 1gSaturated Fat: 0.4gPolyunsaturated Fat: 0.2gMonounsaturated Fat: 0.3gTrans Fat: 0.003gCholesterol: 28mgSodium: 101mgPotassium: 108mgFiber: 1gSugar: 43gVitamin A: 2997IUVitamin C: 1mgCalcium: 50mgIron: 1mg
    QR Code
    Did you make this recipe?Share it on instagram or tag @simplybakings or #simplybakings!

    Cupcakes, Thanksgiving Desserts

    Bean Sprouts Pho Recipe

    Sep 20, 2020 · 2 Comments

    vegan pho with mushrooms and basil in a bowl

    This Bean Sprouts Pho is a super comforting soup that is nutritious, heartwarming, and perfect for a cozy day! It features a rich, aromatic broth infused with plant-based ingredients like fragrant spices, fresh herbs, and hearty vegetables.

    Looking for my soup recipes? Try my Lemongrass Soup or my Thai Noodle Soup.

    pho in a white bowl
    [feast_advanced_jump_to]

    What are bean sprouts?

    a pile of bean sprouts

    Bean sprouts are young sprouts that grow from mung beans, typically harvested within a few days of germination. They are crunchy and slightly sweet with a mild flavor, making them a popular ingredient in various cuisines, particularly in Asian dishes.

    Are bean sprouts good for you?

    Yes! Bean sprouts are rich in nutrients like vitamins C and K, as well as folate, fiber, and antioxidants.

    Top Tip

    Don’t skip the garnishes. When ordering pho at a Vietnamese restaurant, it always comes with Thai basil, bean sprouts, lime, and chiles.  Even though they are only considered garnishes, I believe they are an essential part of the soup- so stir them in to get the rich authentic flavors!

    Substitutions

    • Broth: Use Mushroom Broth for a more savory taste
    • Noodles: Opt for rice noodles, which are typically vegan-friendly and gluten-free. Make sure to check the ingredients list to ensure they contain no animal products.
    • Aromatics and spices: Use a combination of aromatic vegetables like onions, garlic, ginger, and spices such as star anise, cloves, cinnamon, and coriander to infuse the

    Variations

    • Feel free to customize this vegan pho recipe by adding fried or baked tofu, some veggie meat, hoisin sauce, or even chili oil, chili sauce, or chili peppers for some spice!
    • If you want more of a fishy taste, add vegan fish sauce.
    • Condiments: Serve with vegan-friendly condiments such as hoisin sauce, sriracha, or chili garlic sauce on the side for added flavor.

    Storage

    • Broth can be stored in an airtight container in the refrigerator for up to 4 days or frozen for up to 3 months.
    vegan pho in a white bowl

    Ingredients

    Listed below are all the ingredients you will need:

    • cinnamon sticks
    • whole cloves
    • star anise
    • white onion
    • fresh ginger
    • vegetable stock or broth
    • water
    • soy sauce
    • rice noodles
    • vegetable oil or neutral-flavored oil of choice
    • shiitake mushrooms
    • salt

    Garnishes

    • mung bean sprouts
    • Thai basil 
    • cilantro
    • basil leaves
    • sprigs of fresh mint
    • green onions 
    • fresh jalapeño 
    • lime wedges
    pho ingredients in a white bowl

    Instructions

    Warm a medium soup pot or Dutch oven over medium heat. Add the cinnamon sticks, cloves, and star anise and toast until fragrant, stirring occasionally, about 3 to 4 minutes.

    pho seasonings in a dutch oven

    Add the onion, ginger, water, broth and soy sauce and raise the heat to high and bring the mixture to a boil. Then reduce the heat to maintain a gentle simmer for 30 minutes to give the flavors to meld. 

    vegan pho broth in a pot cooking

    In the meantime, prepare your rice noodles by cooking them according to package directions. Set them aside.

    pho noodles in a white bowl

    To prepare the shiitake mushrooms, I added them to the broth and cooked the mushrooms until they were tender. But feel free to cook this separately. 

    mushroom vegan pho broth cooking

    Once the broth is done cooking, strain out the onions, ginger, and spices. The easy way is to use a small metal sieve, but you can also strain the mixture through a colander into another large bowl. Don’t forget to leave the mushrooms in the broth.

    vegan pho broth in a white asian spoon

    Season it to taste with salt and then add the cooked noodles. I love eating pho with tons of vegetables so feel free to add steamed broccoli, steamed bok choy, or bean sprouts.

    vegan pho

    Frequently Asked Questions

    What are the bean sprouts in pho?

    The bean sprouts in pho are typically mung bean sprouts. These sprouts are the young shoots that grow from mung beans. They are crunchy, slightly sweet, and add a refreshing texture to the dish.

    Can I eat bean sprouts in pho while pregnant?

    Eating bean sprouts, including those in pho, while pregnant can carry some risks. Bean sprouts, especially if not properly cleaned or cooked, can potentially harbor harmful bacteria such as Salmonella or E. coli, which can cause foodborne illnesses. These illnesses can be particularly risky for pregnant women, as they may lead to complications such as dehydration or even miscarriage.

    Looking for more heartwarming soup? Try these!

    • Macaroni Soup
    • Pancit Molo
    • Vegetable Soup
    • Sour Vegetable Soup
    • Vegetable Stew
    bean sprouts pho in a bowl garnished with cilantro and mushrooms
    5 from 2 votes
    Print Pin Recipe

    Bean Sprouts Pho Recipe

    This Bean Sprouts Pho is a comforting, nutritious soup with a rich, aromatic plant-based broth. Packed with fragrant spices, fresh herbs, and hearty vegetables, it's perfect for a cozy day and sure to satisfy your cravings while nourishing your body.
    Prep Time5 minutes mins
    Cook Time30 minutes mins
    Total Time35 minutes mins
    Course: Appetizer, Soup
    Cuisine: Vietnamese
    Servings: 4 servings
    Calories: 236kcal
    Author: Lainey
    Prevent your screen from going dark

    Ingredients

    • 2 3 inch cinnamon sticks
    • 3 whole cloves
    • 2 star anise
    • 1 large white onion peeled and quartered
    • 4 inch piece of fresh ginger peeled and halved lengthwise
    • 4 cups vegetable stock or broth 32 ounces
    • 4 cups water
    • 2 tablespoons soy sauce
    • 6 ounces rice noodles
    • 1 tablespoon vegetable oil
    • 5 ounces shiitake mushrooms thinly sliced
    • salt to taste

    Garnishes

    • mung bean sprouts
    • sprigs of fresh Thai basil
    • cilantro
    • Sprigs of fresh mint
    • thinly sliced green onions mostly green parts
    • very thinly sliced fresh jalapeño omit if sensitive to spice
    • small wedges of lime

    Instructions

    • Warm a medium soup pot or Dutch oven over medium heat. Add the cinnamon sticks, cloves, and star anise and toast until fragrant, stirring occasionally, about 3 to 4 minutes. 
    • Add the onion, ginger, water, broth, and soy sauce and raise the heat to high and bring the mixture to a boil. Then reduce the heat to maintain a gentle simmer for 30 minutes to give the flavors to meld. 
    • In the meantime, prepare your rice noodles by cooking them according to package directions. Set them aside.
    • To prepare the shiitake mushrooms, I added it to the broth and cooked the mushrooms until they were tender. But feel free to cook this separately. 
    • Once the broth is done cooking, strain out the onions, ginger, and spices. The easy way is to use a small metal sieve, but you can also strain the mixture through a colander into another large bowl. Don’t forget to leave the mushrooms in the broth.
    • Season it to taste with salt and then add the cooked noodles. I love eating pho with tons of vegetables so feel free to add steamed broccoli or steamed bok choy.
    Leave a Comment
    Serving: 1gCalories: 236kcalCarbohydrates: 46gProtein: 4gFat: 4gSaturated Fat: 1gPolyunsaturated Fat: 2gMonounsaturated Fat: 1gTrans Fat: 0.02gSodium: 1539mgPotassium: 226mgFiber: 3gSugar: 4gVitamin A: 505IUVitamin C: 3mgCalcium: 38mgIron: 1mg
    QR Code
    Did you make this recipe?Share it on instagram or tag @simplybakings or #simplybakings!

    Soups and Salads

    Pumpkin Keto Brownies

    Sep 17, 2020 · 2 Comments

    pumpkin keto brownies on a wire rack

    Try these chewy and moist Pumpkin Keto Brownies for a delicious snack or dessert! This easy brownie recipe is the perfect dessert to usher in the Fall!

    Looking for more brownie recipes? Try my Brownie Heart Bites, Brownie Cookies, and Lemon Brownies recipe!

    pumpkin keto brownies on a wire rack
    [feast_advanced_jump_to]

    What are Pumpkin Keto Brownies?

    Pumpkin Keto Brownies are the ideal low-carb dessert to enjoy the warm flavors of autumn! They're made with almond flour, coconut oil, and creamy pumpkin puree, and the perfect amount of pumpkin pie spice adds a holiday twist.

    These brownies with Swerve brown sugar as the sweetener, remain keto-friendly, while Lily's baking chips give bursts of rich chocolate pleasure. A dollop of natural peanut butter makes the texture delightfully fudgy, resulting in a dessert that's both decadent and dairy-free.

    These keto pumpkin brownies are simple to make and irresistible as a quick snack or a sweet treat. Bake a batch and enjoy the warm taste of pumpkin and chocolate in each bite!

    pumpkin keto brownies on a gray wire rack

    Variations

    • Cream Cheese Swirl: Add dollops of full-fat cream cheese to the batter and swirl with a knife for a tangy, creamy finish.
    • Nutty Crunch: Add chopped low-carb nuts, such as pecans or almonds, to the batter for extra crunch and taste.
    • Double Chocolate Flavor: Stir in unsweetened cocoa powder to the batter and top with more sugar-free chocolate chips for an extra chocolatey flavor.

    Substitutions

    • Almond Flour: Replace with coconut flour, but only use ⅓ the amount because coconut flour is considerably more absorbent.
    • Pumpkin Pie Spice: Replace pumpkin pie spice with keto-friendly chai spice (e.g., cinnamon, ginger, cardamom, etc.) to give your brownies a warm and aromatic touch.
    • Coconut Oil: Replace with unsalted butter or ghee for a more flavorful, keto-friendly alternative.
    • Peanut Butter: For a variety of nutty flavors, try almond butter, sunflower seed butter, or tahini.
    • Lily’s Baking Chips: Replace with unsweetened dark chocolate chips or another sugar-free chocolate brand of your preference.
    • Swerve Brown Sugar: Use granular monk fruit sweetener with molasses or a keto-friendly brown sugar alternative, such as allulose.

    Storage

    • Pumpkin Keto Brownies can be stored in an airtight container at room temperature for up to three days or in the fridge for up to a week to keep them fresh and fudgy.
    • Individual pieces can be frozen for up to three months by wrapping them in plastic wrap and placing them in a freezer-safe bag.

    Ingredients

    Listed below are all the ingredients you will need:

    • almond flour
    • coconut oil
    • pumpkin puree
    • pumpkin pie spice
    • Swerve brown sugar (or regular brown sugar for vegans)
    • Lily’s baking chips
    • baking soda
    • baking powder
    • vanilla extract
    • salt
    • natural peanut butter (you can use almond butter if you want)

    Topping

    • Lily’s melted baking chips
    • walnuts
    • pumpkin pie spice (optional)
    pumpkin keto brownies ingredients

    Instructions

    Using an electric mixer, combine melted and cooled coconut oil with pumpkin puree, peanut butter, and vanilla extract in a mixing bowl. Mix until well combined:

    pumpkin keto brownies batter in a white bowl

    Combine all the dry ingredients (except chocolate chips) until mixed well. Add the dry ingredients to the wet ingredients and mix for 2 minutes until fully combined:

    adding the dry ingredients of pumpkin keto brownies in a white bowl

    Fold in the chocolate chips for the chocolate flavor:

    adding the chocolate chips into the mixture

    Pour the brownie batter evenly into an 8x8 baking pan and cook for 35-40 minutes. You want the brownie to cool completely before cutting it. It will be moist and fudgy:

    pumpkin brownies in a tray

    After the brownies are completely cooled, melt your chocolate (which will be on the thick side) and drizzle over the brownies:

    keto pumpkin brownies on a wire rack

    You can then add the walnuts and pumpkin pie spice if you want. Enjoy!

    Top Tips

    • To keep the brownies dense and fudgy, do not overmix the batter.
    • Make sure your ingredients, such as coconut oil and eggs, are at room temperature to enable a smoother blending, and use a toothpick to check the doneness.
    • Allow the brownies to cool completely before cutting into clean slices, and adjust the sweetness to your liking for a perfectly balanced treat.

    FAQ

    Is pumpkin ok on a keto diet?

    Yes, you can eat pumpkin in moderation on a keto diet. Pumpkin is a healthy low-carb food, making it keto-friendly.

    Can you substitute pumpkin for oil in brownies?

    Yes, you may substitute pumpkin for oil in brownies. You may replace most of the oil in a box of brownie mix with half a cup of pumpkin puree. You can substitute the same amount of pumpkin puree for the oil in the recipe.

    Is canned pumpkin keto-friendly?

    Yes! Canned pumpkin puree is basically just pureed pumpkin. It normally contains no sugar or other additives, making it particularly keto-friendly.

    More Recipes

    Looking for more keto recipes?

    • Keto Peanut Butter Cookies
    • Keto Blueberry Pancakes
    • Keto Mini Chocolate Pancakes
    • Keto Chocolate Chip Cookies
    a slice of Pumpkin Keto Brownies drizzled with melted chocolate on a cooling wire rack
    5 from 1 vote
    Print Pin Recipe

    Pumpkin Keto Brownies

    These Pumpkin Keto Brownies are thick, fudgy, and packed with fall flavors like pumpkin pie spice and sugar-free chocolate. They're quick and simple to make, making them the ideal low-carb treat for any occasion!
    Prep Time10 minutes mins
    Cook Time35 minutes mins
    Total Time45 minutes mins
    Course: Dessert, Snack
    Cuisine: American
    Keyword: keto & vegan pumpkin brownies
    Servings: 9 slices
    Calories: 545kcal
    Author: Lainey
    Prevent your screen from going dark

    Ingredients

    • 2 cups almond flour
    • ½ cup coconut oil melted
    • ½ cup pumpkin puree
    • 2 tablespoons pumpkin pie spice
    • 1 cup Swerve brown sugar or regular brown sugar for vegan
    • 1 cup Lily’s baking chips
    • 1 teaspoon baking soda
    • 1 teaspoon baking powder
    • 1 tablespoon vanilla extract
    • ½ teaspoon of salt
    • ¼ cup natural peanut butter you can use almond butter if you want

    Topping:

    • ½ cup Lily’s melted baking chips
    • 2 tablespoons crushed walnuts
    • pumpkin pie spice optional

    Instructions

    • Preheat oven to 350 degrees F and line an 8x8 pan with parchment paper
    • Using a hand mixer, combine melted and cooled coconut oil with pumpkin puree, peanut butter and vanilla extract. Mix until well combined.
    • Combine all the dry ingredients (except chocolate chips) until mixed well.
    • Add the dry ingredients to the wet ingredients and mix for 2 minutes until fully combined.
    • Fold in the chocolate chips.
    • Pour batter evenly into 8x8 pan and cook for 35-40 minutes. You want the brownie to cool completely before cutting it. It will be moist and fudgy.
    • After the brownies are completely cooled, melt your chocolate (which will be on the thick side) and drizzle over brownies. You can then add the walnuts and pumpkin pie spice if you want.
    • Serve and enjoy!
    Leave a Comment
    Serving: 1sliceCalories: 545kcalCarbohydrates: 52gProtein: 7gFat: 39gSaturated Fat: 18gPolyunsaturated Fat: 2gMonounsaturated Fat: 3gSodium: 308mgPotassium: 121mgFiber: 6gSugar: 26gVitamin A: 2122IUVitamin C: 1mgCalcium: 117mgIron: 3mg
    QR Code
    Did you make this recipe?Share it on instagram or tag @simplybakings or #simplybakings!

    Desserts, Thanksgiving Desserts, Vegan Baking

    Lemon Poppy Seed Muffins with Yogurt

    Sep 13, 2020 · 1 Comment

    blueberry lemon poppy seed muffins halved on a table

    Try these fluffy and delicious Lemon Poppy Seed Muffins with Yogurt! These bakery-style muffins that is bursting with fresh blueberries, lemon zest, and poppy seeds. It can be made in 30 minutes using 1 bowl only!

    Would you like to try more delicious and healthy muffin recipes? Check out my Vegan Banana Chocolate Muffins, Healthy Vegan Muffins, and Healthy Zucchini Muffins recipe! Give them a try too!

    blueberry lemon poppy seed muffins stacked on a pink plate
    [feast_advanced_jump_to]

    What is Lemon Poppy Seed Muffins with Yogurt?

    Lemon Poppy Seed Muffins with Yogurt are soft, zesty, and moist muffins that have a delicious lemon flavor, fresh taste of blueberries, and a slight crunch from poppy seeds. The addition of yogurt not only improves the texture but also adds a touch of creaminess, making these muffins ideal for breakfast, lunch, or an afternoon snack. These muffins are a delightful blend of sweet and spicy that's hard to refuse!

    Are you ready to bake a batch? Follow this simple Lemon Poppy Seed Muffins with Yogurt recipe for a delicious handmade treat that is guaranteed to impress! Make it to experience a taste of sunshine at any time of year!

    Variations

    • Creamy: Spoon a dollop of sweetened cream cheese into the center of each muffin before baking for a creamy treat.
    • Nutty: Fold add chopped almonds or walnuts to the batter for a delicious crunch and nutty richness.
    • Toppings: Drizzle a simple lemon glaze or sprinkle a shredded coconut on top for extra flavor and texture.

    Substitutions

    • Don't have fresh berries available? Use frozen berries, but no need to defrost them, just toss them in the batter.
    • Yogurt: Feel free to use your favorite yogurt even the flavored versions! And if you have extra sour cream available that works too!
    • Vegan: To make it vegan-friendly, substitute the yogurt with a plant-based option, use flaxseed instead of eggs, and use non-dairy milk.
    blueberry lemon poppy seed muffins on a pink and blue plate with fresh bluberries

    Storage

    • For longer storage, freeze baked muffins for up to 3 months.
    • Allow to thaw overnight in the refrigerator, then bring to room temperature or warm up in the microwave if desired. Glaze before serving.

    Ingredients

    Listed below are all the ingredients you will need:

    • sugar
    • vegetable oil
    • eggs
    • whole-milk yogurt
    • lemon juice
    • salt
    • lemon zest
    • poppy seeds
    • all-purpose flour
    • baking powder
    • baking soda
    • fresh blueberries
    ingredients for lemon poppy seed muffins with yogurt recipe

    Instructions

    Preheat oven to 375° F. Line 12 muffin tins with muffin/cupcake papers.

    In a large mixing bowl, whisk sugar, oil, and eggs until combined. Add yogurt and lemon juice and whisk until creamy.

    Then, whisk in salt, lemon zest, and poppy seeds until thoroughly distributed:

    blueberry lemon poppy seed muffins ingredients being mixed in a bowl

    Fold in flour, baking powder, and baking soda until just combined – a few lumps are ok, be careful not to over mix.

    Then, fold in blueberries onto the flour mixture using a spatula:

    lemon poppy seed muffins ingredients being mixed with fresh blueberries

    Scoop mixture into prepared muffin pan until just at the surface.

    Bake for 20-23 minutes until lightly golden on top and a cake tester comes out with just a couple crumbs:

    blueberry lemon poppy seed muffins in a muffin tin before and after baked

    Allow to cool in pan for 10 minutes before removing and transferring to cooling wire rack:

    freshly baked lemon poppy seed muffins with yogurt in a muffin tin

    Best served warm and delicious with butter and lemon curd! You may also drizzle these muffins with lemon glaze. Yum!

    lemon poppy seed muffins with yogurt served halves on a blue plate with fresh blueberries

    Top Tips

    • Don't overmix the batter to keep the muffins light and fluffy, . Simply combine the wet and dry ingredients.
    • Muffins are done if a toothpick inserted in the center comes out clean or with dry crumbs; if it comes out with wet batter, bake it for a bit longer.
    • Before removing the muffins, let them cool in the pan for a few minutes to keep them from crumbling.

    FAQ

    Are lemon poppy seed muffins healthy?

    Lemon poppy seed muffins can be a healthier option when made with whole grains, fiber, and reduced sugar and fat. While poppy seeds offer nutrition and potential health benefits, consuming too many can be unsafe, and some individuals may be allergic to them.

    How do I prevent muffins from becoming dense?

    Do not overmix the batter; for light, fluffy muffins, mix the dry and wet ingredients just until combined.

    Can I substitute the yogurt with another ingredient?

    Yes, you may replace yogurt with sour cream or a plant-based yogurt substitute to achieve the same moist texture and tangy flavor.

    delicious lemon poppy seed muffins with yogurt served on a pink plate
    5 from 1 vote
    Print Pin Recipe

    Lemon Poppy Seed Muffins with Yogurt

    These Lemon Poppy Seed Muffins, baked with creamy yogurt for added moisture and tang, will brighten up your morning! This simple recipe blends tangy citrus, fresh blueberries, and nutty poppy seeds to produce a deliciously soft and delectable dessert!
    Prep Time10 minutes mins
    Cook Time25 minutes mins
    Total Time35 minutes mins
    Course: Breakfast, Dessert, Snack
    Cuisine: American
    Keyword: blueberry lemon poppyseed muffins
    Servings: 12 muffins
    Calories: 218kcal
    Author: Lainey
    Prevent your screen from going dark

    Ingredients

    • ½ cup granulated sugar
    • 6 tablespoons vegetable oil
    • 2 large eggs
    • 1 cup plain whole milk yogurt
    • 2 tablespoon fresh lemon juice
    • ½ teaspoon salt
    • 1 ½ tablespoon grated lemon zest
    • 2 tablespoons poppy seeds
    • 2 ¼ cup all-purpose flour
    • 2 teaspoon baking powder
    • ½ teaspoon baking soda
    • 1 ¼ cup fresh blueberries washed and dried

    Instructions

    • Preheat oven to 375° F. Line 12 muffin tins with muffin/cupcake papers.
    • In a large mixing bowl, whisk sugar, oil, and eggs until combined.
    • Add yogurt and lemon juice and whisk until creamy.
    • Whisk in salt, lemon zest, and poppy seeds until thoroughly distributed.
    • Fold in flour, baking powder, and baking soda until just combined – a
      few lumps are ok, be careful not to over mix.
    • Fold in blueberries. Scoop mixture into prepared muffin tins until just at surface.
    • Bake for 20-23 minutes until lightly golden on top and a cake tester comes out with just a couple crumbs.
    • Allow to cool in pan for 10 minutes before removing and transferring to cooling rack.
    • Best served warm. Great with butter and lemon curd.
    Leave a Comment
    Serving: 1muffinCalories: 218kcalCarbohydrates: 30gProtein: 4gFat: 9gSaturated Fat: 2gPolyunsaturated Fat: 5gMonounsaturated Fat: 2gTrans Fat: 0.05gCholesterol: 30mgSodium: 234mgPotassium: 94mgFiber: 1gSugar: 11gVitamin A: 69IUVitamin C: 4mgCalcium: 95mgIron: 2mg
    QR Code
    Did you make this recipe?Share it on instagram or tag @simplybakings or #simplybakings!

    Breakfast & Brunch

    Easiest Cinnamon Crunch Popsicles

    Sep 10, 2020 · 1 Comment

    5 cinnamon crunch popsicles in a white bowl

    This is the ultimate Cinnamon Crunch Popsicle that will bring out the kid in you! Sweet, creamy, and made with only 4 ingredients- vanilla yogurt, milk, cinnamon, cinnamon toast crunch cereal.

    Looking for more popsicle recipes? Try my Refreshing Fruit Popsicles or my Piña Colada Mango Popsicles.

    3 cinnamon crunch popsicles in a white bowl
    [feast_advanced_jump_to]

    Top Tip

    To prevent ice crystals in popsicles, use whole milk Greek yogurt.  It has a lower water content than regular yogurt.  Full fat coconut milk from a can is another great option.

    Variations

    • Chocolate Drizzle: After unmolding the popsicles, drizzle melted chocolate over the top and sprinkle with cinnamon sugar for a decadent twist.
    • Sweetener: If you want the popsicles to be more sweeter, add couple teaspoons honey, maple syrup, agave nectar, brown rice syrup, brown sugar or granulated sugar as a sweetener.
    • Chai Spice: Replace the cinnamon with chai spice mix for a warm and aromatic flavor profile.
    • Vanilla Bean: Add vanilla bean paste or pure vanilla extract to the popsicle mixture for a classic vanilla flavor with a hint of warmth from the cinnamon.
    • Coffee Infusion: Infuse the popsicle mixture with brewed coffee or espresso for a caffeinated pick-me-up with a hint of cinnamon crunch.

    Substitutions

    • Cinnamon Crunch: If you don't have cinnamon cereal, you can use crushed graham crackers or granola mixed with cinnamon as a crunchy topping. Or use your any of your favorite cereals and omit the cinnamon.
    • Greek Yogurt: Replace the yogurt with coconut yogurt or another non-dairy yogurt for a dairy-free version.
    • Spices: Experiment with different spices such as nutmeg, ginger, or cardamom to add variety to the flavor profile.

    Storage

    • Freezer Storage: Once the popsicles are fully frozen, remove them from the molds and transfer them to an airtight container or freezer bag. Place them in the freezer to prevent freezer burn and maintain freshness.
    • Individual Wrapping: If desired, wrap each popsicle individually in wax paper or plastic wrap before placing them in the container or bag. This helps prevent them from sticking together.
    • Labeling: Label the container or bag with the date of preparation to keep track of their freshness. Popsicles can typically be stored in the freezer for up to 2-3 months.
    • Avoiding Odors: Store the popsicles away from strong-smelling foods in the freezer to prevent them from absorbing odors.
    • Thawing: When ready to enjoy, remove the desired number of popsicles from the freezer and let them thaw for a few minutes at room temperature before serving. Alternatively, run the molds under warm water for a few seconds to help release the popsicles.

    cinnamon crunch popsicles in a white bowl

    Ingredients

    Listed below are all the ingredients you will need:

    • vanilla yogurt
    • milk
    • cinnamon

    Instructions

    In a bowl, mix together the yogurt, milk, and cinnamon until smooth. Then, pour into popsicle molds leaving about ½ inch at the top. Sprinkle in cereal and place popsicle sticks:

    cinnamon crunch popsicles laying on a white surface

    Freeze at least 6 hours or best overnight. Serve and enjoy!

    Looking for more Ice Cream Flavors? Try My Lemon Ice Cream!

    FAQ

    How do you make homemade popsicles that aren't rock hard?

    Add cornstarch - Add 1 teaspoon of cornstarch can keep cream-based popsicles from becoming too icy and give them a creamier texture.

    How do you loosen homemade popsicles?

    Place the mold under warm or hot water for 10-30 seconds until the popsicles release easily

    What can I use instead of popsicle sticks for popsicles?

    Plastic spoons: Simply insert a plastic spoon into each popsicle mold before freezing.
    Wooden skewers: If you have wooden skewers on hand, trim them down to size and use them as sticks.
    Candy sticks: Use clean candy sticks or lollipop sticks as an alternative to traditional popsicle sticks.
    Cookie sticks: Insert clean cookie sticks or wafer sticks into the popsicle molds before freezing.
    Plastic cutlery handles: Remove the handle portion from plastic knives, forks, or spoons and use them as sticks for popsicles.

    cinnamon popsicles on a white bowl
    5 from 1 vote
    Print Pin Recipe

    Easiest Cinnamon Crunch Popsicles

    Enjoy these yummy popsicles with creamy sweetness, a tasty hint of cinnamon, and a satisfying crunch!
    Prep Time10 minutes mins
    Freeze Time6 hours hrs
    Total Time6 hours hrs 10 minutes mins
    Course: Dessert
    Cuisine: American
    Servings: 6 popsicles
    Calories: 49kcal
    Author: Lainey
    Prevent your screen from going dark

    Ingredients

    • 1 cup vanilla yogurt
    • ½ cup milk
    • 2 teaspoon cinnamon
    • cinnamon cereal for garnish

    Instructions

    • In a bowl, mix together the yogurt, milk, and cinnamon until smooth.
    • Pour into popsicle molds leaving about ½ inch at the top.
    • Sprinkle in cereal and place popsicle sticks
    • Freeze for at least 6 hours or overnight.
    Leave a Comment
    Serving: 1gCalories: 49kcalCarbohydrates: 7gProtein: 3gFat: 1gSaturated Fat: 1gPolyunsaturated Fat: 0.04gMonounsaturated Fat: 0.3gCholesterol: 4mgSodium: 35mgPotassium: 123mgFiber: 0.4gSugar: 7gVitamin A: 52IUVitamin C: 0.4mgCalcium: 102mgIron: 0.1mg
    QR Code
    Did you make this recipe?Share it on instagram or tag @simplybakings or #simplybakings!

    Desserts, Ice Cream

    Vegan Pumpkin Chili Recipe

    Sep 6, 2020 · 4 Comments

    vegan pumpkin chili in a blue bowl

    This vegan pumpkin chili recipe is filled with flavor, texture, and spice.  Combining easy canned ingredients- this quick one pot meal will warm you up during colder months.

    Looking for more cozy fall recipes? Try our Sour Cabbage Soup or Filipino Macaroni Salad to complement your Vegan Pumpkin Chili perfectly!

    vegan pumpkin chili in a blue bowl
    [feast_advanced_jump_to]

    Substitutions

    • Pumpkin Choices: If you don't have canned pumpkin puree, you can use fresh pumpkin puree as a substitute. Simply cook and blend the pumpkin until smooth.
    • Bean Swap - Pinto beans can be replaced with black beans or kidney beans depending on your preference or what you have in your pantry.
    • Gluten-Free Option - Use gluten-free tortilla chips or corn chips instead of regular ones to make this recipe gluten-free.
    • Vegetable Broth - If you don't have vegetable broth on hand, you can use water with a bouillon cube or chicken-style seasoning for flavor.
    vegetarian pumpkin chili in a blue bowl

    Storage

    • Storing Leftovers - Place any leftover vegan chili in an airtight container before storing it in the fridge. It will stay fresh for up to 3-4 days.
    • Freezing Tips - If you've made a large batch and want to save some for later, transfer the cooled chili to freezer-safe containers or zip-top bags. Label and date them, then store in the freezer for up to 3 months.
    • Reheating - When you're ready to enjoy the frozen chili, thaw it overnight in the fridge and then reheat it on the stovetop in a large pot or Dutch oven until heated through.

     Ingredients

    Listed below are all the ingredients you will need:

    • rice
    • olive oil
    • red onion
    • garlic cloves
    • red bell pepper
    • pumpkin pie spice (optional)
    • ground cumin
    • cayenne pepper
    • corn
    • red beans
    • chickpea
    • pumpkin purée
    • tomatoes
    • tomato purée
    • vegetable broth
    • lemon
    • salt
    • black pepper

    See recipe card for quantities.

    pumpkin chili ingredients

    Instructions

    Cook rice as instructed on the package.

    Heat a nonstick saucepan over medium heat and add oil. Fry onions, garlic, bell pepper, until tender, then add spices, and mix for about 30 seconds to bring the flavors out.

    pumpkin chili cooking in a saucepan

    Add in corn, red beans, chickpeas and mix until combined.

    Next add pumpkin purée, tomato purée, diced tomato, lemon juice, vegetable broth, and mix.

    pumpkin chili cooking with tomato sauce and pumpkin puree

    Allow it to cook for 10 minutes on low medium heat and add salt and pepper before removing from heat.

    pumpkin chili simmering in a saucepan

    Serve with rice and enjoy!

    ⭐ Top Tip

    This chili tastes even better the next day. Let it rest in the fridge overnight to give the flavors more time to deepen and come together.

    Frequently Asked Questions

    How do you eat vegan if you don't cook?

    You can enjoy a vegan diet without cooking by focusing on raw fruits, vegetables, nuts, seeds, and plant-based snacks or meals that require minimal or no cooking.

    Is vegetarian chili good for lowering cholesterol?

    Vegetarian chili can be a good choice for lowering cholesterol as it typically contains fiber-rich beans and vegetables which can help reduce cholesterol levels when part of a balanced diet.

    Can I add other vegetables to this chili?

    Absolutely! Feel free to add other vegetables to this chili to enhance the flavor and nutritional value. Bell peppers, zucchini, or carrots would be great additions.

    More stews & soup recipes you will enjoy:

    • Macaroni Soup
    • Pumpkin Soup
    • Vegetable Sour Soup
    • Jackfruit Stew
    vegetarian pumpkin chili in a blue bowl
    5 from 2 votes
    Print Pin Recipe

    Vegan Pumpkin Chili Recipe

    Mega flavorful and spiced pumpkin chili! This vegan (meatless) chili recipe comes together in about 30 minutes on the stove. Give it a try!!
    Prep Time10 minutes mins
    Cook Time15 minutes mins
    Total Time25 minutes mins
    Course: Vegan
    Cuisine: Fusion (American-Filipino/Asian)
    Keyword: vegan pumpkin chili
    Servings: 4 servings
    Calories: 292kcal
    Author: Lainey
    Prevent your screen from going dark

    Ingredients

    • 1 ½ cups rice
    • 3 tablespoons olive oil
    • 1 small red onion chopped
    • 4 garlic cloves chopped
    • 1 medium red bell pepper diced
    • ¼ teaspoon pumpkin pie spice
    • 1 teaspoon ground cumin
    • 1 tablespoon cayenne pepper
    • ½ can corn drained and rinsed
    • 1 can red beans drained and rinsed
    • 1 can chickpeas drained and rinsed
    • 1 can pumpkin purée
    • 1 can diced tomatoes
    • ⅓ cup tomato purée
    • ½ cup vegetable broth
    • juice of half a lemon
    • 2 teaspoons salt
    • 1 teaspoon black pepper

    Optional:

    • cilantro chopped
    • avocado sliced

    Instructions

    • Cook the rice according to package instructions. Set aside.
    • Heat olive oil in a large pan over medium heat.
    • Add the chopped onion, garlic, and red bell pepper. Cook for 4–5 minutes, stirring occasionally, until softened.
    • Stir in the pumpkin pie spice, cumin, and cayenne pepper. Cook for 30 seconds until fragrant.
    • Add the corn, red beans, and chickpeas. Stir until combined.
    • Pour in the pumpkin purée, diced tomatoes, tomato purée, vegetable broth, and lemon juice. Stir well.
    • Bring to a gentle simmer and cook for 10 minutes, stirring occasionally.
    • Season with salt and black pepper to taste.
    • Serve warm over rice and top with chopped cilantro and sliced avocado, if desired.
    Leave a Comment

    Notes

    Can be stored up to 4 days in the refrigerator
    Serving: 1gCalories: 292kcalCarbohydrates: 41gProtein: 9gFat: 12gSaturated Fat: 2gPolyunsaturated Fat: 2gMonounsaturated Fat: 8gSodium: 1281mgPotassium: 890mgFiber: 11gSugar: 10gVitamin A: 18206IUVitamin C: 58mgCalcium: 105mgIron: 6mg
    QR Code
    Did you make this recipe?Share it on instagram or tag @simplybakings or #simplybakings!

    Beans and Legumes, Main Entree, Side Dishes, Thanksgiving Sides, Vegan Filipino Recipes, Vegetarian Filipino Recipes

    No Yeast Pumpkin Cinnamon Rolls

    Sep 3, 2020 · 4 Comments

    pumpkin cinnamon rolls on a brown cutting board

    Who doesn’t love a warm, gooey cinnamon roll? Now, imagine enjoying these treats without the hassle of yeast. Enter the No Yeast Pumpkin Cinnamon Rolls—a quick, easy recipe that captures the rich flavors of fall in a soft, spiced roll. Perfect for a cozy dessert or breakfast without spending hours in the kitchen.

    Searching for more pumpkin-flavored treats? Try my Pumpkin Spice Muffins, unique Oreo Pumpkin Cheesecake, and fun Pumpkin Dump Cake.

    no yeast pumpkin cinnamon rolls with cream cheese
    [feast_advanced_jump_to]

    Substitutions

    • For a vegan version, substitute your favorite non-dairy milk and vegan butter sticks in place of the butter
    • Don't have pumpkin puree? Try apple sauce or mashed sweet potato.

    Variations

    • If you want a thicky and creamy glaze on the rolls, frost it when the rolls are cooled off.  If you want the melty glazed look and melted into the crevices of the rolls, add it when the rolls are warm.
    • Add chopped pecans, walnuts inside of the dough before rolling up.
    • Create your own pumpkin pie spice by mixing cinnamon, nutmeg, ginger, and cloves for a homemade blend that’s perfect for all your fall recipes.

    Storage

    • If you have any leftover cinnamon rolls (which is rare!), store them in an airtight container in the refrigerator. They’ll stay fresh for up to 3 days. To reheat, simply pop them in the microwave for about 20-30 seconds.
    • These rolls freeze beautifully. Once cooled, wrap each roll individually in plastic wrap, then store them in a freezer-safe bag. They’ll keep for up to 2 months. When you’re ready to enjoy one, thaw it in the fridge overnight and warm it up in the microwave or oven.

    Top Tips

    • Roll out the dough evenly to ensure all the cinnamon rolls bake at the same rate.
    • Make sure the pumpkin filling is spread evenly across the dough to get consistent flavor in every bite.
    • Keep the butter cold when mixing it into the flour to create a flaky, tender dough.
    no yeast pumpkin cinnamon with cream cheese on a cutting board

    Ingredients

    Listed below are all the ingredients you will need:

    Dough:

    • flour
    • butter
    • sugar
    • baking powder
    • salt
    • baking soda
    • milk

    For the Filling:

    • butter
    • brown sugar
    • pumpkin pie spice
    • ground cinnamon
    • pumpkin puree

    For the Glaze:

    • cream cheese
    • vanilla extract
    • powdered sugar
    • milk
    no yeast pumpkin cinnamon rolls on a brown cutting board

    Instructions

    Preheat oven to 375 degrees and grease an 11x9 pan with butter.

    Add the flour and butter to a large bowl and use a pastry blender, stand-mixer or fork to blend until the mixture resembles coarse sand. Stir in the sugar, baking powder, salt, and baking soda until combined.

    Add the milk and stir until a loose dough begins to form. Transfer the dough to a lightly floured surface and knead until a ball forms:

    mixing the flours for no yeast pumpkin cinnamon rolls

    Make the filling by whisking together the butter, brown sugar, pumpkin pie spice, and ground cinnamon until well combined. Add the pumpkin puree and stir until mixed:

    no yeast pumpkin cinnamon rolls filling being mixed

    Separate the dough into two equal balls. Roll out the first ball using a rolling pin until the dough is around ¼ inch thick.

    Spread half the butter mixture over the top of the dough and roll the dough into a log shape:

    no yeast pumpkin cinnamon dough rolls rolled out on a cutting board

    Use a sharp knife to cut the log into six equal pieces. Place each piece in the prepared baking dish, leaving space between each roll for the cinnamon rolls to spread as they bake.

    Repeat the process with the remaining dough.

    Place the cinnamon rolls in the preheated oven and bake for 25 to 30 minutes, until they are golden brown on top and cooked through:

    no yeast pumpkin cinnamon rolls on a pan unbaked

    While the cinnamon rolls are cooking, make the cream cheese icing or glaze by beating together the cream cheese, powdered sugar, vanilla, and milk. Add more milk if needed to thin the glaze:

    cream cheese glaze ingredients in a glass bowl

    When the cinnamon rolls are done baking, spread the cream cheese frosting over the top of each cinnamon roll before serving. Enjoy!

    hot no yeast pumpkin cinnamon rolls on a pan

    Frequently Asked Questions

    Why are my cinnamon rolls not light and fluffy?

    Your cinnamon rolls might not be light and fluffy if the dough was overmixed or not kneaded enough. Also, not enough baking powder or baking soda could cause them to be dense.

    How are cinnamon rolls different from sticky buns?

    Cinnamon rolls are topped with a glaze, while sticky buns are baked with a caramel-like sauce and often have nuts on the bottom, which becomes the top when flipped.

    Why do cinnamon rolls collapse after baking?

    Cinnamon rolls can collapse if they were underbaked or if the dough was too soft. Overhandling the dough can also cause them to lose their structure.

    baked no yeast cinnamon pumpkin rolls
    5 from 2 votes
    Print Pin Recipe

    No Yeast Pumpkin Cinnamon Rolls

    These No Yeast Pumpkin Cinnamon Rolls are the perfect fall treat. They’re quick, easy, and packed with all the flavors of the season. They’re sure to be a hit with everyone!
    Prep Time20 minutes mins
    Cook Time25 minutes mins
    Total Time45 minutes mins
    Course: Bread, Desserts
    Cuisine: American
    Servings: 12 rolls
    Calories: 292kcal
    Author: Lainey
    Prevent your screen from going dark

    Ingredients

    Dough:

    • 2 cups flour
    • ½ cup butter cut into small pieces
    • 2 tablespoons sugar
    • 3 teaspoons baking powder
    • ½ teaspoon salt
    • ¼ teaspoon baking soda
    • ⅔ cup milk

    For the Filling:

    • 2 tablespoons butter melted
    • ½ cup brown sugar
    • 1 teaspoon pumpkin pie spice
    • 1 teaspoon ground cinnamon
    • ¼ cup pumpkin puree

    For the Glaze:

    • 2 ounces cream cheese softened
    • ½ teaspoon vanilla extract
    • 1 ½ cups powdered sugar
    • 3 to 4 tablespoons milk

    Instructions

    • Preheat oven to 375 degrees and grease an 11x9 pan with butter.
    • Add the flour and butter to a large bowl and use a pastry blender or fork to blend until the mixture resembles coarse sand. Stir in the sugar, baking powder, salt, and baking soda until combined.
    • Add the milk and stir until a loose dough begins to form. Transfer the dough to a lightly floured surface and knead until a ball forms.
    • Make the filling by whisking together the butter, brown sugar, pumpkin pie spice, and ground cinnamon until well combined. Add the pumpkin puree and stir until mixed.
    • Separate the dough into two equal balls. Roll out the first ball until the dough is around ¼ inch thick.
    • Spread half the butter mixture over the top of the dough and roll the dough into a log shape. Use a sharp knife to cut the log into six equal pieces. Place each piece in the prepared pan, leaving space between each roll for the cinnamon rolls to spread as they bake.
    • Repeat the process with the remaining dough.
    • Place the cinnamon rolls in the preheated oven and bake for 25 to 30 minutes, until they are golden brown on top and cooked through.
    • While the cinnamon rolls are cooking, make the glaze by beating together the cream cheese, powdered sugar, vanilla, and milk. Add more milk if needed to thin the glaze.
    • When the cinnamon rolls are done baking, spread the glaze over the top of each cinnamon roll before serving.
    Leave a Comment
    Serving: 1rollCalories: 292kcalCarbohydrates: 44gProtein: 3gFat: 12gSaturated Fat: 7gPolyunsaturated Fat: 1gMonounsaturated Fat: 3gTrans Fat: 0.4gCholesterol: 32mgSodium: 327mgPotassium: 83mgFiber: 1gSugar: 27gVitamin A: 1181IUVitamin C: 0.3mgCalcium: 103mgIron: 1mg
    QR Code
    Did you make this recipe?Share it on instagram or tag @simplybakings or #simplybakings!

    Bread, Breakfast & Brunch, Thanksgiving Brunch

    Waffle Board

    Aug 27, 2020 · 1 Comment

    waffles, fruits, on a brown cutting board

    Ready to wow your family or guests with something colorful, fun, and super easy to make? This Waffle Board is like a breakfast party on a plate! Made with golden, crispy waffles, fresh fruits like strawberries, mangos, and blueberries, and drizzled with yummy sides like melted chocolate and peanut butter—brunch goals achieved!

    If you love easy and fruity breakfast ideas, check out these other delicious recipes: Chocolate Banana Pancakes and Keto Blueberry Pancakes.

    waffles, fruits, on a brown cutting board
    [feast_advanced_jump_to]

    What is a Waffle Board?

    This Waffle Board is all about mixing sweet, fruity, and cozy flavors into one eye-catching waffle breakfast board. Inspired by classic charcuterie boards, this trend took off on social media because it’s just so fun to customize! If you’ve got a Belgian waffle maker or store-bought waffles, you’re halfway there!

    Perfect for special occasions like birthdays, sleepovers, or even a casual Sunday brunch that the whole family is sure to adore. Since it doesn't require cooking beyond the waffles, it’s super beginner-friendly too.

    Substitutions

    • Waffles – Use savory waffles or whole grain waffles; make heart-shaped ones using a mold for Valentine's Day
    • Strawberries, blueberries, blackberries, raspberries – Sub with seasonal fruit like cherries, grapes, or other berries
    • Apples, bananas, mango, peaches – Try kiwi, pineapple, or melon instead
    • Syrup – Use maple syrup, honey, or agave
    • Peanut butter – Sub with nut butter, almond butter, or cookie butter
    • Yogurt – Use cream cheese, flavored yogurt, or vegan yogurt

    Variations

    • Savory – Add sausage links, cheese cubes, or scrambled eggs
    • Kid-friendly – Add sprinkles, chocolate chips, whipped cream, or mini marshmallows
    • Vegan – Use dairy-free waffles and toppings like coconut yogurt

    Storage

    • Countertop – Best to serve fresh, but fruit can sit for 1–2 hours
    • Refrigerator – Store fruits and toppings in single layer containers for 2 days
    • Freezer – Freeze leftover waffles and toast them when ready to eat again
    waffles and fruits on a cutting board with yogurt and almond butter

    Ingredients

    Listed below are the suggested ingredients you will need:

    Fruit ideas

    • Strawberries
    • Blueberries
    • Blackberries
    • Apples
    • Oranges
    • Bananas
    • Mangos
    • Peaches

    Sides Ideas

    • Syrup
    • Peanut butter
    • Nut butter
    • Melted Chocolate
    • Nutella
    • Yogurt
    • Chia Seeds
    • Flax Seeds
    • Cocoa Bits

    Instructions

    Place small dishes of sides like maple syrup, melted chocolate, and nut butter on your board first.

    Warm the peanut butter in the microwave for about 15 seconds so it drizzles easily.

    Toast or cook your waffles using a waffle maker and keep them warm on a rimmed baking sheet lined with a wire rack.

    Arrange the waffles, fruits, and toppings around the dishes.

    Serve immediately and enjoy your own fun breakfast charcuterie board!

    fresh waffles topped with yogurt and strawberries

    Top Tips

    • This waffle board can be customized however you want!  All you need is waffles, sides and fruit.
    • Make your own waffles using batter and a waffle maker
    • Keep the waffles in the oven until you’re ready to serve, they tend to get soggy when not eaten immediately.
    • Instead of waffles, pancakes are a great alternative for breakfast or brunch boards.

    FAQ

    Can I use frozen waffles for a waffle board?

    Yes, frozen waffles work great! Just toast them until they're golden and crispy before adding them to your board.

    How can I keep my fruit from turning brown on the board?

    A quick splash of lemon juice on apples or bananas helps prevent browning and keeps everything looking fresh.

    Can I make a waffle board ahead of time?

    You can prep the fruit and sides the night before, but it’s best to assemble the board right before serving to keep everything crisp and fresh.

    More delicious breakfast ideas to choose from:

    • Oreo Waffles
    • Oatmeal Pancakes
    waffles in wooden board with fruits
    5 from 1 vote
    Print Pin Recipe

    Waffle Board

    Build a colorful and tasty Waffle Board filled with fresh fruits, fluffy waffles, and sweet toppings like chocolate and syrup. Perfect for brunch or parties!
    Prep Time15 minutes mins
    Total Time15 minutes mins
    Course: Breakfast
    Cuisine: American
    Servings: 4 -6 servings
    Calories: 186kcal
    Author: Lainey
    Prevent your screen from going dark

    Ingredients

    Fruit ideas

    • Strawberries
    • Blueberries
    • Blackberries
    • Apples
    • Oranges
    • Bananas
    • Mangos
    • Peaches

    Sides Ideas

    • Syrup
    • Peanut butter
    • Nut butter
    • Melted Chocolate
    • Nutella
    • Yogurt
    • Waffles

    Instructions

    • Place your bowl of sides on the board first. Also, I have found that heating the peanut butter for about 15 seconds in the microwave makes it easier to drizzle on the waffles.
    • Finish by arranging the waffles and all the fruit on the board. Serve immediately!
    Leave a Comment
    Serving: 1servingCalories: 186kcalCarbohydrates: 37gProtein: 3gFat: 4gSaturated Fat: 2gPolyunsaturated Fat: 1gMonounsaturated Fat: 1gTrans Fat: 0.01gCholesterol: 1mgSodium: 43mgPotassium: 417mgFiber: 5gSugar: 28gVitamin A: 1230IUVitamin C: 45mgCalcium: 45mgIron: 1mg
    QR Code
    Did you make this recipe?Share it on instagram or tag @simplybakings or #simplybakings!

    Breakfast & Brunch, Thanksgiving Brunch

    Turmeric Oatmeal Recipe

    Aug 25, 2020 · 3 Comments

    vegan turmeric oatmeal with blueberries in a white bowl

    Don't be fooled by the color; this nutritious and delicious Turmeric Oatmeal recipe will satisfy your cravings and boost your immune system! It is super easy to make and perfect for a quick breakfast or dinner treat.

    This was inspired by my quinoa arroz caldo and spicy chia oatmeal recipe on this site, and it pairs well with homemade sweetened condensed milk and granola.

    vegan turmeric oatmeal in a white bowl

    Turmeric Oatmeal is an easy breakfast recipe that's both colorful and nutritious! Turmeric is loaded with health benefits like anti-inflammatory qualities and a rich, golden color, which makes it a superstar ingredient in a world where well-being is a key priority.

    Today, we're combining this golden spice with the goodness of pumpkin, raisins, oats, and vegan butter to make a dairy-free breakfast masterpiece that's both tasty and healthy.

    [feast_advanced_jump_to]
    vegan turmeric oatmeal in a white bowl

    Ingredients

    Listed below are all the ingredients you will need:

    • vegan butter
    • pumpkin
    • turmeric powder
    • cinnamon powder
    • nutmeg powder
    • oats
    •  water
    • raisins
    • agave syrup

    See the recipe card for quantities.

    Instructions

    Gather the ingredients for this easy turmeric oatmeal recipe. Once the ingredients are all ready, let’s begin!

    vegan turmeric oatmeal ingredients

    In a medium saucepan over medium-low heat, melt the butter, then add the spices and pumpkin and mix until well combined.

    shredded pumpkin in a suace pan

    Add oats, water, raisin, and agave syrup. Cook until it has a creamy consistency, then remove from heat and divide into 2 bowls.

    Creamy Turmeric oatmeal cooking in a black sauce pan

    Serve these turmeric oats with your favorite toppings and enjoy!

    vegan Turmeric oatmeal with blueberries in a white bowl

    Substitutions

    • Matcha Oatmeal: Use matcha powder instead of turmeric if you want your oatmeal to have a brilliant green touch.
    • Cinnamon Oatmeal: Instead of turmeric, use ground cinnamon to make a delicious and comforting cinnamon oatmeal.
    • Ginger Oatmeal: To give your oatmeal a little warmth and a spicy bite, replace ground ginger with turmeric.
    • Pumpkin Spice Oatmeal: Replace the turmeric with a pumpkin pie spice combination to embrace the fall flavors.

    Variations

    • Pumpkin: If you're unable to get shredded pumpkin, feel free to use ½ cup of puree pumpkin.
    • Turmeric: If you don't like ground turmeric, feel free to omit it. However, the benefits of turmeric are amazing!
    • Sweeteners: It's important to add a touch of sweetness to the oatmeal since pumpkin is very bland, so feel free to use honey, maple syrup, or your favorite sweetener.
    • Milk or Non-Dairy Alternatives: You may add a splash of dairy or non-dairy milk, such as almond milk, over your turmeric oatmeal before serving, which will create a creamier texture and increase the dish's richness.
    • Toppings: You may garnish fresh fruits like diced mango, sliced bananas, or a handful of fresh berries, such as strawberries, blueberries, or raspberries, to add antioxidants with cinnamon for a taste of paradise.
    • Coconut Paradise Oatmeal: To add tropical flavor and a creamy texture to your turmeric oatmeal, stir in a tablespoon of coconut flakes or coconut milk.
    • Nut Crunch Oatmeal: For a delightful crunch as well as an extra dose of protein and healthy fats, top your turmeric oatmeal with a generous sprinkle of chopped nuts like almonds, walnuts, or pecans.

    Storage

    • Cool the cooked turmeric oatmeal to room temperature, then transfer it to an airtight container.
    • Seal the container tightly and label the container with the preparation date for convenient reference.
    • Keep the turmeric oatmeal in the refrigerator for 3–4 days.
    • Simply reheat the desired portion in the microwave or on the stovetop, adding a splash of milk or water to alter the consistency if necessary before consuming.

    Top Tip

    • To save time, use an instant pot to make the oatmeal. Just mix together all the ingredients in the pot, set the vent to close, choose the pressure cook setting, and allow cook time for 10 minutes.

    FAQs

    Is the turmeric in oatmeal good for you?

    Yes, it is. Oatmeal helps prevent heart disease by lowering cholesterol, while turmeric has anti-inflammatory properties that can lessen inflammation and promote wellness in several ways. However, please keep in mind that turmeric's active compound is curcumin, and taking more than 8 grams of it per day for a long time is not recommended due to the risk of side effects. It is best to consult your doctor before consuming it, especially if you have underlying diseases or kidney stones.

    What does turmeric taste like?

    Turmeric has an earthy aroma with a hint of sweetness, as well as flavors of ginger and pepper. Some people compare the flavor of turmeric to mustard. It is often combined with other milder or sweeter spices to balance out its potent flavor.

    What happens to your gut if you eat oatmeal every day?

    Oatmeal's high fiber content and prebiotic properties may reduce disease risk, promote gut health, ease bowel motions, and keep you feeling fuller for longer.

    More oatmeal recipes:

    • Carrot Cake Oatmeal
    • Banana Oatmeal Pancakes
    • Oatmeal Cookies

    And if you're looking for more breakfast recipes:

    • Tofu Scramble
    • Chocolate Banana Pancakes
    • Vegan Corn Beef
    healthy and delicious Turmeric Oatmeal in a white bowl with a wooden spoon
    5 from 2 votes
    Print Pin Recipe

    Turmeric Oatmeal Recipe

    This simple and nutritious dish, turmeric oatmeal, is packed with anti-inflammatory effects and toasty flavors and is an excellent way to begin your day! Try this today and elevate your breakfast or dinner!
    Prep Time5 minutes mins
    Cook Time10 minutes mins
    Total Time15 minutes mins
    Course: Breakfast
    Cuisine: American, Filipino
    Servings: 2 servings
    Calories: 255kcal
    Author: Lainey
    Prevent your screen from going dark

    Ingredients

    • 1 tablespoon vegan butter
    • 1 cup pumpkin shredded*
    • ½ teaspoon turmeric powder
    • ¼ teaspoon cinnamon powder
    • ¼ teaspoon nutmeg powder
    • ½ cup oats
    • 1 cup water
    • ¼ cup raisins
    • 2 tablespoons agave syrup

    Instructions

    • In a medium saucepan over medium-low heat, melt the butter, then add spices and pumpkin and ix until well combined.
    • Add oats, water, raisin, and agave syrup. Cook until it is a creamy consistency, then remove from heat and divide into 2 bowls.
    • Serve with your favorite toppings.
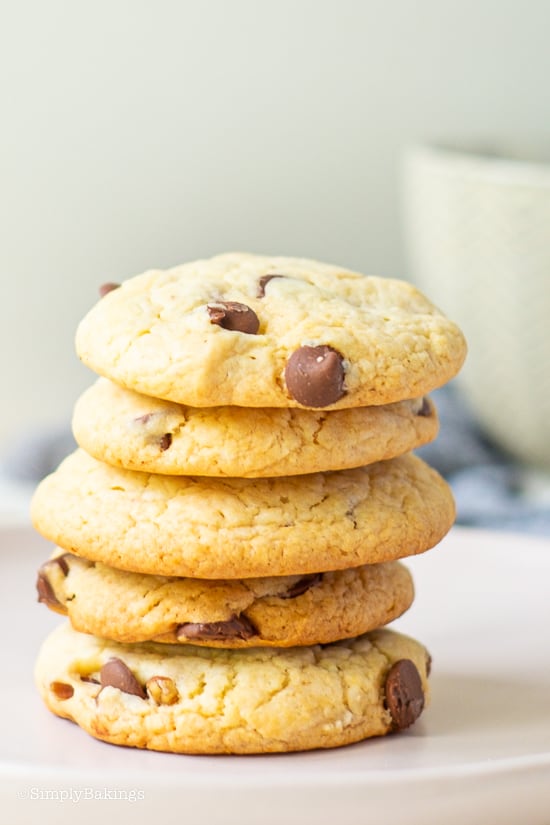
    Leave a Comment

    Notes

    *Feel free to use ¼ cup canned pumpkin. It will also change the color of the oatmeal to be more of the traditional pumpkin look.
    Serving: 1gCalories: 255kcalCarbohydrates: 48gProtein: 4gFat: 6gSaturated Fat: 2gPolyunsaturated Fat: 2gMonounsaturated Fat: 2gTrans Fat: 0.03gSodium: 59mgPotassium: 437mgFiber: 4gSugar: 16gVitamin A: 5206IUVitamin C: 10mgCalcium: 35mgIron: 2mg
    QR Code
    Did you make this recipe?Share it on instagram or tag @simplybakings or #simplybakings!

    Breakfast & Brunch, Vegan Baking

    Vegan Chocolate Banana Pancakes

    Aug 23, 2020 · Leave a Comment

    agave syrup being poured on vegan chocolate pancakes

    These easy Vegan Chocolate Banana Pancakes are made in the blender from wholesome ingredients! A healthy way to curb your morning cravings for chocolate!

    agave syrup being poured on vegan chocolate pancakes

    Tips and Variations:

    • If your pancakes are golden brown on the outside but not cooked on the inside, reduce the heat, so they will cook all the way through.
    • To make the BEST pancakes possible, don't over-mix the batter and don't overdo the heat. It's best to cook on low medium heat.
    • Feel free to add dairy-free chocolate chips. Add them while the pancakes are being cooked on the pan and don't add too much.  The key is less is more!

    vegan chocolate pancakes topped with bananas and almonds on a white plate

    How to Make Easy Gluten-Free & Vegan Chocolate Banana Pancakes:

    Listed below are all the ingredients you will need:

    • bananas
    • gluten-free flour blend
    • plant-based milk
    • cocoa powder
    • agave syrup
    • almond butter

    vegan chocolate banana pancakes ingredients

    In a blender, add all the ingredients and blend until everything until just combined. (Don't overmix!) Depending on the flour blend you may need to add a bit more milk. If it's on the liquidy side and not like pancake batter, place in the refrigerator for 10 minutes.

    vegan chocolate banana pancakes batter

    Pre-heat pan or pancake griddle and grease with coconut oil. Using ½ cup, scoop batter and pour into pan. Cook for about 2-4 minutes on one side, then flip the pancake and cook until golden brown or about 30 seconds.

    Chocolate Banana Pancakes-7

    Serve with your favorite toppings.
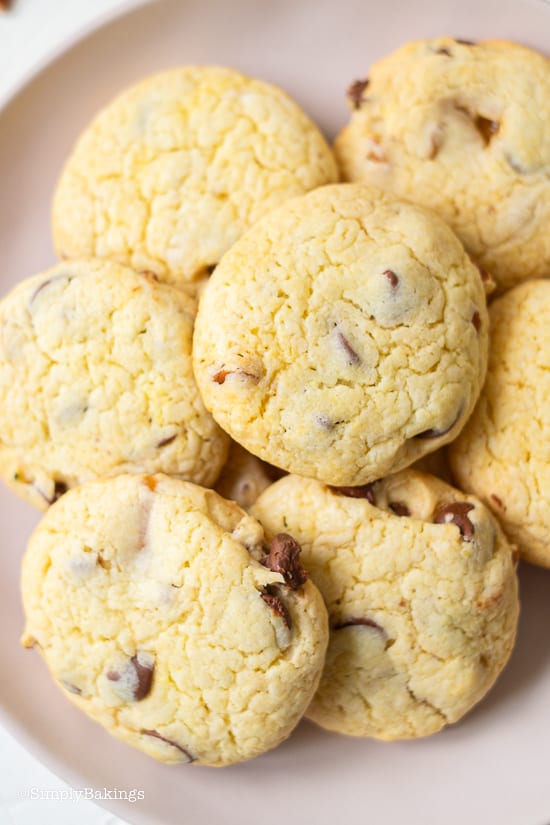
    gluten free chocolate banana pancakes on a white plate

    More delicious Pancake Recipes:

    • Banana Oatmeal Pancakes
    • Cereal Pancakes
    • Chocolate Cereal Pancakes
    • Blueberry Pancakes
    • Butter Pecan Pancakes

    vegan chocolate pancakes topped with bananas and almonds on a white plate
    No ratings yet
    Print Pin Recipe

    Chocolate Banana Pancakes

    Prep Time13 hours hrs 16 minutes mins
    Cook Time10 minutes mins
    Total Time51 minutes mins
    Keyword: gluten free vegan chocolate banana pancakes
    Servings: 7 pancakes
    Author: Lainey
    Prevent your screen from going dark

    Ingredients

    • 2 ripe bananas
    • 1 cup gluten free flour blend
    • 1 ½ cups plant based milk
    • ⅓ cup cocoa powder
    • ⅛ cup agave syrup
    • 1 tablespoon almond butter

    Instructions

    • In a blender, add all the ingredients and blend until everything until just combined. (Don't overmix!) Depending on the flour blend you may need to add a bit more milk. If it's on the liquidy side and not like pancake batter, place in the refrigerator for 10 minutes.
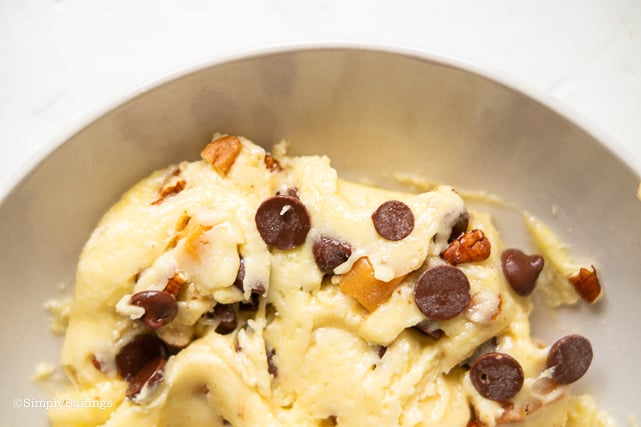
    • Pre-heat pan or pancake griddle and grease with coconut oil. Using ½ cup, scoop batter and pour into pan. Cook for about 2-4 minutes on one side, then flip the pancake and cook until golden brown or about 30 seconds.

    • Serve with your favorite toppings.
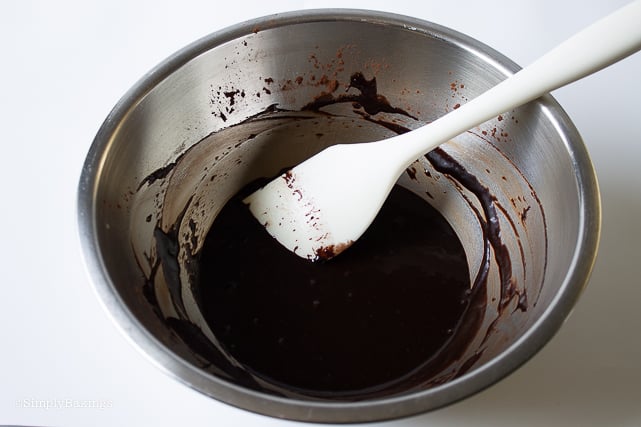
    Leave a Comment
    QR Code
    Did you make this recipe?Share it on instagram or tag @simplybakings or #simplybakings!

    Breakfast & Brunch, Vegan Baking

    How to Make Dried Mango Slices

    Aug 22, 2020 · 5 Comments

    dried mangos in a white cup

    If you're a mango lover, this recipe is for you! Every bite you take, delivers a soft and chewy texture packed with a burst of tropical flavor that'll have your taste buds doing a happy dance!

    Looking for more mango recipes? Try my Fresh Mango recipes like Mango Sago, Piña Colada Mango Popsicles, Pickled Mangoes, or my Mango Float.

    dried mangos in a white cup on a white table
    [feast_advanced_jump_to]

    What Types of Mangoes can be dehydrated?

    You can use ripe, fresh mangoes or frozen mangoes and any variety of mangoes can be dehydrated. Some popular types include Alphonso: known for its rich, creamy texture and intense sweetness and Kent: sweet and juicy with a smooth, non-fibrous texture.

    dried mangos in a mason jar

    Ingredients

    Listed below are all the ingredients you will need:

    • 2 mangos
    2 filipino mangos on a white table

    Instructions

    Peel the mangos and thinly slice them on a cutting board. If you want thicker slices, feel free to do so – just be aware that they will take longer to dehydrate. Then, arrange the sliced mangos on the dehydrator tray or sheet, set the dehydrator to the “Fruit” setting, and allow it to dehydrate until desired consistency. Refer to the recipe card for the prep time and total time.

    fresh mangos on a dehydrator

    So times will vary based on humidity levels. Mine took about 11 hours and sometimes it takes about 18 hours. Store in an airtight container in the fridge, or enjoy right away!

    dried mango on a white table

    Substitutions

    • Texture: For a chewy texture, use your sharp knife to slice the mangoes a bit thicker.
    • Air Fryer: Instead of a dehydrator, try an air fryer with the drying setting to dry the mango faster.
    • Tropical Flavor: Try other tropical fruits like pineapple or papaya instead of mango for a new flavor.

    Variations

    • Varieties: Try out various kinds of mangoes to find different tropical tastes and textures.
    • Dehydrated Strawberries: Make your snack mix more exciting by putting dried strawberries with the mango for more flavor and color.
    • Smaller Pieces: Cut the mango into smaller pieces for easy-to-eat snacks.

    Storage

    • Store the dried mangoes in a cool, dark place away from direct sunlight, as exposure to light can cause them to degrade faster. By following these storage guidelines, your dried mangoes can stay delicious and retain their quality for several months.

    Top Tip

    Keep your dried mango fresh for longer by using a vacuum seal them or putting them in airtight containers like mason jars in a cool, dark spot.

    If you're looking for more snacks, try these fan favorites:

    • Lengua de Gato
    • Mango Shake
    • Vegan Mango Ice Candy

    FAQ

    Are dried mangoes healthy?

    Dried mangoes can be a healthy snack option, offering natural sweetness and fiber.

    How long do dried mango slices last?

    Dried mango slices can last for several months if stored properly in an air-tight container.

    Why is mango so addictive?

    Mangoes are addictive due to their delicious tropical flavor and chewy texture, making them irresistible to many people.

    dehydrated mangos in a white cup
    4.88 from 8 votes
    Print Pin Recipe

    How to Make Dried Mango Slices

    Make flavorful Dried Mango Slices with just 2 ripe mangos. Dehydrate until crisp for an enjoyable snack, and savor the tropical sweetness anytime, anywhere!
    Prep Time5 minutes mins
    Cook Time11 hours hrs
    Total Time11 hours hrs 5 minutes mins
    Course: Dessert, Snack
    Cuisine: Filipino
    Keyword: dried mangos
    Servings: 2 mangos
    Calories: 124kcal
    Author: Lainey
    Prevent your screen from going dark

    Equipment

    • dehydrator

    Ingredients

    • 2 mangos

    Instructions

    • Peel the mangos and slice thinly. If you want thicker slices, feel free to do so – just be aware that they will take longer to dehydrate.
    • Arrange the mangos on the dehydrator sheet. If you are using the oven method, place on a parchment-lined tray.
    • Set the dehydrator to the “Fruit” setting and allow it to dehydrate until desired consistency. Times will vary based on humidity levels. Mine took about 11 hours and sometimes it takes about 18 hours.
    • If you are using an oven, set it as low as possible and dehydrate until very dry and crispy. Since the oven will be at a higher temperature this may only take 10-12 hours.
    • Check every 30 minutes after the 10-hour mark until you are happy with the level of dryness.
    • Store in an airtight container in the fridge, or enjoy right away.
    Leave a Comment
    Serving: 2mangosCalories: 124kcalCarbohydrates: 31gProtein: 2gFat: 1gSaturated Fat: 0.2gPolyunsaturated Fat: 0.1gMonounsaturated Fat: 0.3gSodium: 2mgPotassium: 348mgFiber: 3gSugar: 28gVitamin A: 2240IUVitamin C: 75mgCalcium: 23mgIron: 0.3mg
    QR Code
    Did you make this recipe?Share it on instagram or tag @simplybakings or #simplybakings!

    Filipino Desserts

    Black Rice Burritos

    Aug 16, 2020 · 6 Comments

    Black Rice Burrito sliced in half and served on a plate

    Forget store-bought salsa for a while. These easy Black Rice Burritos are flavorful and hearty - the perfect comfort food! Packed with a rich bean mixture, it's a wholesome twist on the classic. You can even top them with pico de gallo. Plus, no one will miss the meat and dairy. It's easy to make and delicious!

    If you love this, try my easy Okra recipe, or crispy Kangkong next for more plant-based food!

    Black Rice Burrito sliced in half and served on a plate
    [feast_advanced_jump_to]

    Why You’ll Love This Recipe

    This recipe is vegan, dairy-free, and beginner-friendly. This makes it perfect for anyone trying to eat more plants without losing the taste.

    It’s filled with fiber-rich black rice and chickpeas that keep you full longer and support healthy digestion. The balance of creamy vegan cheese, hearty beans, and fresh veggies makes each bite satisfying and flavorful.

    Plus, it’s a great way to use up leftovers in your fridge! You can boil some beans in a saucepan and toss in your favorite spices. Then wrap it up with warm tortillas. It's easy to mix and match your favorite fillings without overcomplicating the prep.

    Ingredients

    Listed below are all the ingredients you will need:

    • Wraps
    • Vegan cheese
    • Lentils
    • Chickpeas
    • Tomato
    • Corn
    • Onion
    • Black rice
    • Cumin powder
    • Agave syrup
    • Cayenne pepper
    • Olive oil
    • Green olives
    • Garlic

    See the recipe card for quantities.

    All ingredients for Black Rice Burittos in bowls

    Instructions

    Make the Filling

    1. In a nonstick pan over medium heat, add olive oil and sauté garlic and onions until tender.

    2. Add cumin powder and cayenne pepper. Cook for about 10 seconds to release their aroma.

    3. Add tomatoes and agave syrup. Stir and cook for about 1 minute until tomatoes soften.

    Cumin, cayenne, tomatoes and agave syrup in a pan

    4. Add vegan sliced cheese, lentils, chickpeas, corn, and black rice. Mix until everything is well combined and cook for about 3 minutes.

    5. Stir in the green olives and remove from heat.

    A pan filled with the Burrito filling ingredients

    Assemble the Burritos

    6. Warm the wraps in a dry pan or microwave.

    7. Fill each wrap with a generous scoop of the filling.

    8. Roll tightly into burritos.

    Serve

    9. Serve warm or enjoy cold.

    Slices of the Black Rice Burrito on a plate

    Substitutions & Variations

    • Ingredient Swap
      Use quinoa or brown rice instead of black rice for a different texture. Or try veggie meat or tofu for extra protein.
      For a sweet crunch, add corn cut fresh from the cob.
    • Variation
      For a much fresher bite, add shredded lettuce, guacamole, or whatever veggies you have left in the fridge!
      Sprinkle a bit of fresh cilantro and chili powder for a boost of flavor.
    • Mistake to Avoid
      It’s tempting, but don't overstuff the burritos! Too much filling makes them tear apart when rolling. It doesn't work even when you wrap them in aluminum foil.
    • Storage Tips
      • These ingredients freeze well for up to 1 month. Just wrap each burrito in plastic wrap and store in a freezer-safe container.
      • For fresh storage, keep the wet ingredients like tomato and onion separate from the wraps and fillings. They’ll stay good in the fridge for 2–3 days.
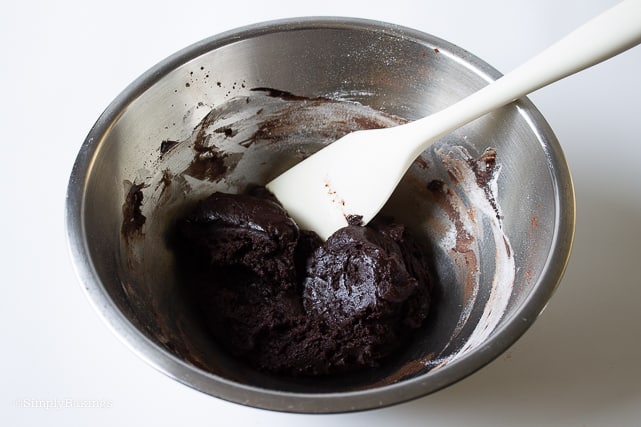
    Blue plate with yummy Black Rice Burrito on it

    FAQs

    Can I use regular white rice instead of black rice?

    Yes! White rice works fine, but black rice gives a nuttier flavor and more antioxidants.

    Can I make this burrito spicy?

    Absolutely! You just need to add more cayenne pepper or a dash of hot sauce to turn up the heat.

    What’s the best way to reheat frozen burritos?

    You can warm them in a toaster oven, microwave, or skillet until heated through.

    Black Rice Burritos on a serving plate
    5 from 3 votes
    Print Pin Recipe

    Black Rice Burritos

    This recipe is packed with fiber-rich black rice, protein-loaded lentils and chickpeas. Great for a quick lunch or a grab-and-go dinner!
    Prep Time5 minutes mins
    Cook Time5 minutes mins
    Total Time10 minutes mins
    Course: Main Course
    Cuisine: Fusion
    Servings: 4 burritos
    Calories: 517kcal
    Author: Lainey
    Prevent your screen from going dark

    Ingredients

    • 4 wraps
    • 4 vegan sliced cheese
    • ¼ cup lentils washed and drained
    • ¼ cup chickpeas washed and drained
    • ⅓ cup tomato chopped
    • ¼ cup corn
    • ⅛ cup onion chopped
    • 1 cup black rice cooked
    • 1 tablespoon cumin powder
    • ½ tablespoon agave syrup
    • 1 tablespoon cayenne pepper
    • 1 tablespoon olive oil
    • 12 green olives
    • 1 garlic clove chopped

    Instructions

    Make the Filling

    • In a nonstick pan over medium heat, add olive oil and sauté garlic and onions until tender.
    • Add cumin powder and cayenne pepper. Cook for about 10 seconds to release their aroma.
    • Add tomatoes and agave syrup. Stir and cook for about 1 minute until tomatoes soften.
    • Add vegan sliced cheese, lentils, chickpeas, corn, and black rice. Mix until everything is well combined and cook for about 3 minutes.
    • Stir in the green olives and remove from heat.

    Assemble the Burritos

    • Warm the wraps in a dry pan or microwave.
    • Fill each wrap with a generous scoop of the filling.
    • Roll tightly into burritos.

    Serve

    • Serve warm or enjoy cold.
    Leave a Comment

    Notes

    • Can be stored in the fridge for up to 2 days.
    • Can be frozen for up to 1 month. Wrap tightly in foil or plastic wrap for best results.
    Serving: 1gCalories: 517kcalCarbohydrates: 66gProtein: 11gFat: 24gSaturated Fat: 3gPolyunsaturated Fat: 6gMonounsaturated Fat: 13gTrans Fat: 0.05gSodium: 417mgPotassium: 382mgFiber: 8gSugar: 5gVitamin A: 697IUVitamin C: 4mgCalcium: 92mgIron: 4mg
    QR Code
    Did you make this recipe?Share it on instagram or tag @simplybakings or #simplybakings!

    You Might Also Like:

    • Collard Wraps
    • Curried Chickpea Wraps
    • Chickpea Buddha Bowl
    • Tofu Scramble Recipe – Filipino Style

    Recipes for Every Moment

    Need a hearty, healthy lunch? These Black Rice Burritos are filling, flavorful, and perfect for grab-and-go meals!

    Beans and Legumes

    Peach Upside Down Cake

    Aug 14, 2020 · 10 Comments

    Peach Upside Down Cake on a white stand

    Celebrate summer's bounty of peaches with a delicious Peach Upside Down Cake. This cake is both pretty, tasty and has a layer of thin, juicy peach slices on top of a soft and moist vanilla cake.

    Looking for more summer-inspired dessert recipes? Try my Pineapple Ice Cream, Strawberry Float, and Coconut Chia Ice Cream.

    Peach Upside Down Cake on a white stand
    [feast_advanced_jump_to]

    Substitutions

    • Other Fruits: You can replace peaches with nectarines, plums, or even try a pineapple upside-down cake for a different taste. These fruits also make a delicious layer at the bottom of the pan.
    • Flour Substitute: If you want a gluten-free cake, use a gluten-free flour blend instead of all-purpose flour. The cake will still have a great texture.
    • Oil Option: Instead of using butter, you can use vegetable oil in the cake batter. This can make the cake extra moist and tender.

    Variations

    • Flavor Boosters: Add a teaspoon of almond extract or some lemon zest to the cake batter for an extra burst of flavor. These little additions can make a big difference.

    Storage

    • Store any leftover cake in an airtight container in the refrigerator for up to 3 days. You can also put it in the freezer for up to 3 months. To serve, allow the cake to thaw in the refrigerator overnight and warm it slightly in the oven or microwave.

    Top Tips

    • Over-mixing the batter will result in a dense cake. Only mix until you no longer see dry ingredients.
    • Cool the peach upside-down cake for at least 10 minutes to ensure the cake doesn't fall apart when flipping it over. 
    Caramelized Peach Upside Down Cake

    Ingredients

    Topping:

    • unsalted butter
    • brown sugar
    • cinnamon
    • can peaches

    Cake:

    • flour
    • baking powder
    • salt
    • butter
    • sugar
    • vanilla extract
    • eggs
    • milk
    • cream of tartar
    one slice of a Peach Upside Down Cake and a dollop of ice cream

    Instructions

    Preheat oven to 350 F degrees.

    In a bowl, mix together the melted butter, brown sugar, and cinnamon, then pour the mixture into a 9-inch cake pan, then add the peaches:

    Mixing the butter, sugar, glaze, and adding the peaches for the peach upside down cake in a white bowl

    In a medium bowl, whisk together the flour, baking powder, and salt, and set aside.

    In another bowl, beat the butter and sugar until light and fluffy. Then beat in the vanilla and egg yolks until combined:

    Mixing the flour & eggs for the peach upside down cake in a white bowl

    Add half the flour mixture to the butter mixture and beat until combined. Add the milk and beat again. Pour the remaining flour mixture into the bowl and mix until combined:

    Mixing in the flour & milk for the peach upside down cake in a white bowl

    In a separate bowl, combine the egg whites and cream of tartar. Beat the mixture on high speed until stiff. Pour the mixture into the batter and fold in until just combined.

    Pour the batter over the peaches and spread evenly, being careful not to disturb the peaches:

    mixing the batter together and unbaked Peach Upside Down cake

    Bake in the preheated oven for 45 minutes, until a toothpick inserted into the center of the cake, comes out clean.

    Allow it to cool for at least 10 minutes, then run a knife around the edge of the pan to loosen the cake. Flip the pan over onto a serving plate. Serve warm or at room temperature:

    a slice of Peach Upside Down Cake

    Frequently Asked Questions

    Can I use fresh peaches instead of canned?

    If it's peach season, especially in August, use fresh, in-season peaches instead of canned. Yes, you can use fresh peaches. You'll need about 3-4 medium peaches, peeled, pitted, and sliced.

    What if I don't have cream of tartar?

    If you don't have cream of tartar, you can omit it, but the egg whites might not whip up as stiffly. Alternatively, you can use a bit of lemon juice or white vinegar as a substitute.

    When should you flip an upside-down cake?

    Flip it after cooling the cake for at least 10 minutes.

    caramelized peach upside down cake
    4.60 from 5 votes
    Print Pin Recipe

    Peach Upside Down Cake

    This Peach Upside Down Cake is perfect for anyone who loves fruit desserts and wants to try their hand at a classic, yet straightforward, baking recipe.
    Prep Time10 minutes mins
    Cook Time45 minutes mins
    Total Time55 minutes mins
    Course: cake
    Cuisine: American
    Servings: 1 (9 inch) cake
    Calories: 2497kcal
    Author: Lainey
    Prevent your screen from going dark

    Ingredients

    Ingredients for the Topping:

    • 4 tablespoons unsalted butter melted
    • ½ cup brown sugar packed
    • 1 teaspoon cinnamon
    • 1 (15 oz) can peaches drained and thinly sliced

    Ingredients for the Cake:

    • 1 ½ cups flour
    • 2 teaspoons baking powder
    • ¼ teaspoon salt
    • ½ cup unsalted butter softened
    • 1 cup sugar
    • 1 teaspoon vanilla extract
    • 2 eggs separated
    • ½ cup milk
    • ¼ teaspoon cream of tartar

    Instructions

    Preparing the Peach Layer:

    • Preheat oven to 350 F degrees.
    • In a bowl, mix together the melted butter, brown sugar, and cinnamon, then pour mixture in a 9-inch cake pan, then add the peaches.

    Preparing the Cake Batter:

    • In a medium bowl, whisk together the flour, baking powder, and salt, set aside.
    • In another bowl, beat the butter and sugar until light and fluffy. Then beat in the vanilla and egg yolks until combined.
    • Add half the flour mixture to the butter mixture and beat until combined. Add the milk and beat again. Pour the remaining flour mixture into the bowl and mix until combined.
    • In a separate bowl, combine the egg whites and cream of tartar. Beat the mixture on high speed until stiff. Pour the mixture into the batter and fold in until just combined.
    • Pour the batter over the peaches and spread evenly, being careful not to disturb the peaches.
    • Bake in the preheated oven for 45 minutes, until a toothpick inserted into the center of the cake comes out clean.
    • Allow to cool at least 10 minutes, then run a knife around the edge of the pan to loosen the cake. Flip the pan over onto a serving plate. Serve warm or at room temperature.
    Leave a Comment
    Serving: 1cakeCalories: 2497kcalCarbohydrates: 462gProtein: 35gFat: 60gSaturated Fat: 34gPolyunsaturated Fat: 4gMonounsaturated Fat: 16gTrans Fat: 2gCholesterol: 462mgSodium: 1644mgPotassium: 810mgFiber: 6gSugar: 314gVitamin A: 2078IUVitamin C: 0.1mgCalcium: 825mgIron: 12mg
    QR Code
    Did you make this recipe?Share it on instagram or tag @simplybakings or #simplybakings!

    Cake

    Carrot Cake Oatmeal

    Aug 11, 2020 · Leave a Comment

    Carrot Cake Oats in a gray bowl

    Creamy, wholesome, and delicious, this Carrot Cake Oatmeal will warm you to your toes! Full of health benefits to help lower your cholesterol. 

    carrot cake oatmeal in a gray bowl

    Benefits of eating oatmeal:

    • Great source of important vitamins, minerals, fiber, and antioxidants.
    • It helps with weight loss, lower blood sugar levels, and a reduced risk of heart disease.
    • Oats are rich in carbs and fiber, but also higher in protein and fat than most other grains.

    How to Make Carrot Cake Oatmeal:

    Listed below are all the ingredients you will need:

    • 1 cup carrot, shredded
    • 1 ¾ cups dairy-free milk
    • ¾ cups oats
    • ¼ cup raisin
    • 1 tablespoon vegan butter
    • 2 tablespoon agave syrup
    • ¼ teaspoon cinnamon powder
    • ¼ teaspoon nutmeg powder
    • ¼ teaspoon cardamom powder
    • pinch of cloves powder
    • Banana, peanut butter, almonds for garnish

    In a non-stick pot over medium heat, add butter and allow it to melt.  Then add the carrot and cook for about 30 seconds.

    Next mix in the spices, raisins oats, and cook until the carrot are tender.

    Pour milk, agave syrup and stir until you achieve a thick consistency, about 5-8 minutes. Remove from heat and transfer to 2 serving bowls.

    Garnish with almonds, peanut butter and banana before serving.

    Looking for more breakfast recipes? Try these ones:

    • Banana Oats Pancakes
    • Cereal Pancakes
    • Keto Blueberry Pancakes
    • Tofu Scramble
    • Homemade Granola

    Carrot Cake Oats in a gray bowl
    No ratings yet
    Print Pin Recipe

    Carrot Cake Oatmeal

    Author: Lainey
    Prevent your screen from going dark

    Ingredients

    • 1 cup carrot shredded
    • 1 ¾ cups dairy-free milk
    • ¾ cups oats
    • ¼ cups raisin
    • 1 tablespoon vegan butter
    • 2 tablespoon agave syrup
    • ¼ teaspoon cinnamon powder
    • ¼ teaspoon nutmeg powder
    • ¼ teaspoon cardamom powder
    • pinch of cloves powder
    • Banana peanut butter, almonds for garnish

    Instructions

    • In a non-stick pot over medium heat, add butter and allow it to melt.  Then add the carrot and cook for about 30 seconds.
    • Next mix in the spices, raisins oats and cook until the carrot are tender.
    • Pour milk, agave syrup and stir until you achieve a thick consistency, about 5-8 minutes. Remove from heat and transfer to 2 serving bowls.
    • Garnish with almonds, peanut butter and banana before serving.
    Leave a Comment
    QR Code
    Did you make this recipe?Share it on instagram or tag @simplybakings or #simplybakings!

    Breakfast & Brunch

    Vegan Bolognese

    Aug 9, 2020 · Leave a Comment

    This Vegan Bolognese is a rich and flavorful sauce for those 'meat lovers' in your family.  Once you try it, you’ll agree that it hits the spot every time!

    Vegan bolognese in a blue blue

    Tips and Variations:

    • Season with vegan cheese or nutritional yeast flakes to add more flavor.
    • Freeze the sauce up to one month in an airtight freezer container. It's best to freeze as individual servings for easy defrosting and reheating.
    • Use your favorite pasta – Feel free to use any pasta of choice, regular, gluten-free, or even grain-free pasta
    • Make it spicy by adding pepper flakes.

    How to Make Vegan Bolognese:

    Listed below are all the ingredients you will need:

    • 250 g mushrooms, chopped
    • 330 ml tomato sauce
    • 3 carrots, peeled and cut in ribbons
    • 1 small onion, finely chopped
    • 2 garlic cloves, finely chopped
    • 2 tablespoons olive oil
    • 1 tablespoon dried parsley
    • 1 tablespoon dried thyme
    • 1 tablespoon agave syrup
    • 3 servings of spaghetti
    • salt to taste
    Ingredients for vegan bolognese

    Cook 3 servings of spaghetti.

    Fill a saucepan with 2 cups of water and bring mushrooms to a boil for 5 minutes then drain, and set aside.

    cooked mushrooms for the vegan Bolognese

    Heat a nonstick skillet with oil on medium heat. Stir fry onion and garlic. Cook for about 1 minute then add carrots. Cook until tender.

    cooking the vegan bolognese starting with garlic onions and carrots

    Add parsley, thyme, agave syrup, and mushroom and cook for another 2 minutes.

    vegan Bolognese without the tomato sauce

    Pour tomato sauce in the skillet.

    vegan bolognese cooking in a sauce pan

    Cook until the sauce is a bit thick about 5 minutes then add salt to taste.

    Serve with spaghetti or any pasta of your choice.

    vegan bolognese in a blue bowl not mixed

    Love pasta? Here are more recipes you will like:

    • Filipino-Style Spaghetti
    • Pancit (Filipino Noodles)
    • Pancit Molo (Dumpling soup with Noodles)
    vegan bolognese in a blue bowl
    No ratings yet
    Print Pin Recipe

    Vegan Bolognese

    Prep Time10 minutes mins
    Cook Time15 minutes mins
    Total Time25 minutes mins
    Keyword: vegan bolognese
    Servings: 3 servings
    Author: Lainey
    Prevent your screen from going dark

    Ingredients

    • 250 g mushrooms chopped
    • 330 ml tomato sauce
    • 3 carrots peeled and cut in ribbons
    • 1 small onion finely chopped
    • 2 garlic cloves finely chopped
    • 2 tablespoons olive oil
    • 1 tablespoon dried parsley
    • 1 tablespoon dried thyme
    • 1 tablespoon agave syrup
    • 3 servings of spaghetti
    • salt to taste

    Instructions

    • Cook 3 servings of spaghetti.
    • Fill a saucepan with 2 cups of water and bring mushrooms to a boil for 5 minutes then drain and set aside.
    • Heat a non stick skillet with oil on medium heat. Stir fry onion and garlic. Cook for about 1 minute then add carrots. Cook until tender.
    • Add parsley, thyme, agave syrup and mushroom and cook for another 2 minutes. Pour tomato purée in the skillet. Cook until the sauce is a bit thick about 5 minutes then add salt to taste.
    • Serve with spaghetti or any pasta of your choice.
    Leave a Comment
    QR Code
    Did you make this recipe?Share it on instagram or tag @simplybakings or #simplybakings!

    Main Entree, Rice, Noodles, Potatoes, Vegan Filipino Recipes, Vegetarian Filipino Recipes

    Berry Coconut Popsicles

    Aug 6, 2020 · Leave a Comment

    Try these delicious Berry Coconut popsicles! Full of berries, yogurt, and honey that will satisfy your cravings for a refreshing and creamy treat! 

    ombre berry coconut popsicles on a copper tray

    Tips and Variations:

    • Feel free to mix the layers by blending all the ingredients together, then pour the mixture evenly into the popsicle molds.
    • If you don't have blueberries or don't have any available, feel free to substitute with the same amount of your favorite berry.
    • Replace the honey with maple syrup or agave.

    1 berry coconut popsicles on a copper tray

    How to Make Berry Coconut Popsicles:

    Listed below are all the ingredients you will need:

    • ½ cup of yogurt, separated 
    • 3-4 large strawberries *
    • 1 handful of blueberries *
    • 1 tablespoon of coconut cream or milk *
    • ¼ cup of unsweetened coconut shavings *
    • ¾ cup of heavy cream
    • ¼ cup + 1 tablespoon of honey

    Berry Coconut Popsicles Ingredients

    In a blender, add a third of the yogurt, strawberries and blend until creamy and smooth.  Pour the strawberry yogurt mixture into a bowl and set aside.

    In the same blender, add half of the remaining yogurt, blueberries and blend until creamy and smooth.  Set aside. 

    In another small bowl, mix together the remaining yogurt, a tablespoon of coconut cream, and the unsweetened coconut shavings.
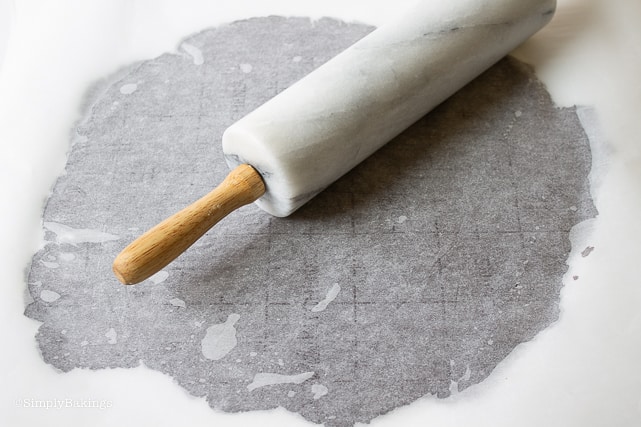
    Ingredients for Berry coconut popsicles in white bowls on a brown cutting board

    In a large bowl, whip the heavy cream until it is smooth and slightly thick, then mix in the honey.

    heavy cream for berry coconut popsicle in a white bowl

    Next, add ⅓ of the heavy cream to the strawberry yogurt mixture, ⅓ to the blueberry yogurt mixture, and ⅓ to the coconut yogurt mixture.  Carefully fold the heavy cream into each mixture until smooth.

    Evenly spoon equal amounts of blueberry, strawberry and coconut cream mixtures into the molds in layers according to your design.

    first layer of coconut berry popsicle in a mold

    Push a popsicle stick into each of them about half-way down.

    Coconut Berry popsicles in a popsicle mold


    Freeze for at least 4 hours or best overnight and best served cold

    berry coconut popsicles on a gold tray


    Ombre popsicles on a copper tray

    More Popsicles recipes:

    • Fruit Popsicles
    • Coconut Chia Popsicles
    • 3 Ingredient Nutella Popsicles
    • Mango Popsicles
    • 3 Ingredient Oreo Popsicles

    No ratings yet
    Print Pin Recipe

    Berry Coconut Popsicles

    Prep Time13 hours hrs 16 minutes mins
    Total Time13 hours hrs 16 minutes mins
    Keyword: Berry Coconut Popsicles
    Servings: 4 popsicles
    Author: Lainey
    Prevent your screen from going dark

    Ingredients

    • ½ cup of yogurt separated
    • 3-4 large strawberries *
    • 1 handful of blueberries *
    • 1 tablespoon of coconut cream or milk *
    • ¼ cup of unsweetened coconut shavings *
    • ¾ cup of heavy cream
    • ¼ cup + 1 tablespoon of honey
    •  

    Instructions

    • In a blender, add a third of the yogurt, strawberries and blend until creamy and smooth.  Pour the strawberry yogurt mixture into a bowl and set aside.
    • In the same blender, add half of the remaining yogurt, blueberries and blend until creamy and smooth.  Set aside. 
    • In another small bowl, mix together the remaining yogurt, a tablespoon of coconut cream, and the unsweetened coconut shavings.
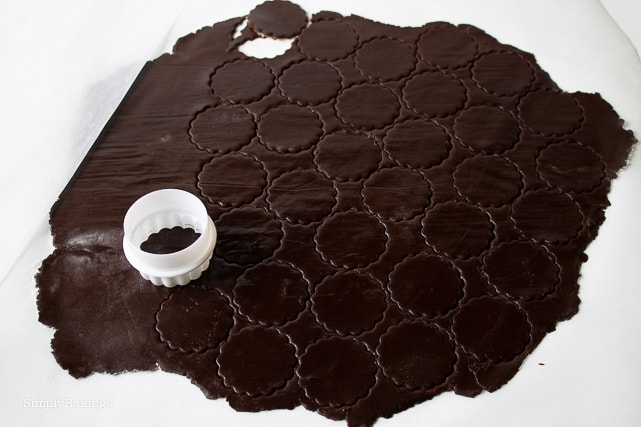
    • In a large bowl, whip the heavy cream until it is smooth and slightly thick, then mix in the honey.
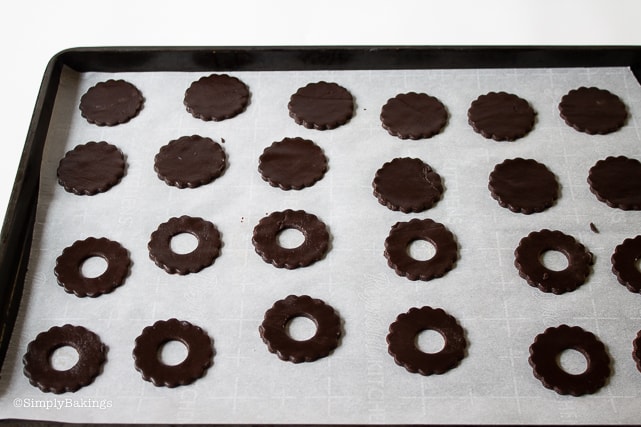
    • Next, add ⅓ of the heavy cream to the strawberry yogurt mixture, ⅓ to the blueberry yogurt mixture, and ⅓ to the coconut yogurt mixture.  Carefully fold the heavy cream into each mixture until smooth.
    • Evenly spoon equal amounts of blueberry, strawberry and coconut cream mixtures into the molds in layers according to your design.
    • Push a popsicle stick into each of them about half-way down.
    • Freeze for at least 4 hours or best overnight and best served cold.
    Leave a Comment

    Notes

    *add more or less depending on your taste
    QR Code
    Did you make this recipe?Share it on instagram or tag @simplybakings or #simplybakings!

    Ice Cream, Summer Desserts

    Whipped Mango Drink - Dalgona Inspired

    Aug 2, 2020 · 5 Comments

    This Whipped Mango Drink is easy to make and delicious! It's inspired by the popular TikTok's Dalgona Coffee and it's great for kids because there is no caffeine and uses only 5 ingredients only!

    Here's my version of the original Dalgona Coffee Recipe or my Strawberry Whipped Drink.

    dalgona whipped mango in a glass
    [feast_advanced_jump_to]

    What is Whipped Mango Drink?

    The Whipped Mango Drink is a Dalgona Inspired yummy beverage inspired by the trendy Dalgona coffee. Instead of coffee, it uses mango juice or puree as the base. On top, there's a fluffy whipped cream made by mixing equal parts heavy cream, sugar, and water until it's light and fluffy.

    This whipped cream is spooned over the mango base, making a frothy and delicious drink. It's a fun way to enjoy the sweet taste of mango!

    Health Benefits of Mango

    • Aids digestion
    • Promotes a healthy guy
    • Promotes eye health
    • Helps regulate cholesterol levels
    • Great for diabetics

    Top Tip

    • For the best flavor, pick mangoes that are ripe but not too soft.

    Substitutions

    • ½ cup of fresh mango: Instead of fresh mango, you can use one half of a diced mango. This will provide the same sweet and fruity flavor.
    • Water: You can use filtered water or coconut water as a substitute.
    • 4 - 5 tablespoons of heavy cream: Substitute with whipped coconut cream for a dairy-free option. Alternatively, use half-and-half or full-fat coconut milk for a creamier texture.
    • 1 teaspoon of sugar: Replace with honey, agave nectar, or maple syrup for a natural sweetener alternative.
    • 1 cup milk: Any type of milk can be used, such as almond milk, soy milk, or oat milk, depending on your dietary preferences.
    • Ice Cubes: If you don't have ice cubes, you can use frozen mango chunks or simply chill the drink in the refrigerator before serving.

    Variations

    • Coconut Mango Drink: Blend fresh mango with coconut water instead of regular water for a tropical twist.
    • Mango Lassi: Add a spoonful of yogurt to the mango base and blend it for a creamy and tangy variation.
    • Spicy Mango Drink: Blend fresh mango with a pinch of chili powder or a dash of hot sauce for a spicy kick.
    • Mango Banana Smoothie: Blend fresh mango with a ripe banana and milk for a creamy and naturally sweet smoothie.

    Storage

    • Drink it fresh; it's tastiest when enjoyed immediately. 😬
    Dalgona Mango in a glass cup

    Ingredients

    • fresh mango (one-half of a mango)
    • water
    • heavy cream sugar
    • milk
    • ice cubes
    Mango Dalgona Ingredients

    Instructions

    In a blender, add diced mango and water to cover ¾ of the mango.  Next, blend until smooth and creamy, and set aside.

    In a medium bowl, add heavy cream and on medium speed whip while slowly adding the sugar. Then mix until stiff peaks are formed.  (About 3-4 minutes)

    Next, add 3 tablespoons of the mango mixture and continue mixing for 1 minute, or until the mango mixture is fully incorporated. Be careful, not over-beat.

    Add ice and milk into a container and top with the whipped mango mixture.

    Dalgona Mango Coffee in a glass cup in a blue container

    More refreshing Filipino Drinks:

    • Mango Smoothie
    • Sago Gulaman
    • Calamansi Drinks
    • Cantaloupe Juice
    • Sweet Potato Juice
    • Mango Lemonade
    Whipped Mango Drink in a glass cup
    5 from 1 vote
    Print Pin Recipe

    Dalgona Whipped Mango

    Quench your thirst with our Whipped Mango Drink, inspired by the famous Dalgona Coffee from TikTok! It's a treat for kids, with no caffeine and just 5 easy-to-find ingredients. Simple to make and super tasty, it's a must-have for any mango fan!
    Prep Time6 minutes mins
    Total Time6 minutes mins
    Course: Dessert, drink
    Cuisine: American, Filipino, korean
    Servings: 1 person
    Calories: 415kcal
    Author: Lainey
    Prevent your screen from going dark

    Ingredients

    • ½ cup of fresh mango one half of a mango, diced
    • water
    • 4 - 5 tablespoons heavy cream
    • 1 teaspoon sugar
    • 1 cup milk
    • ice cubes

    Instructions

    • In a blender, add diced mango and add water to cover ¾ of the mango.  Next, blend until smooth and creamy, set aside.
    • In a medium bowl, add heavy cream and on medium speed whip while slowly adding the sugar. Then mix until stiff peaks are formed.  (About 3-4 minutes)
    • Next add 3 tablespoons of the mango mixture, and continue mixing for 1 minute or until the mango mixture is fully incorporated. Be careful, not over-beat.
    • Add ice, milk into a container and top with the whipped mango mixture.
    Leave a Comment

    Notes

    • For best results, chill the mixing bowl and then whisk in the freezer for 15 minutes.
    • You may have extra mango puree, use it for a smoothie.
    Serving: 1servingCalories: 415kcalCarbohydrates: 29gProtein: 10gFat: 30gSaturated Fat: 18gPolyunsaturated Fat: 1gMonounsaturated Fat: 7gCholesterol: 97mgSodium: 110mgPotassium: 562mgFiber: 1gSugar: 29gVitamin A: 2170IUVitamin C: 30mgCalcium: 349mgIron: 0.2mg
    QR Code
    Did you make this recipe?Share it on instagram or tag @simplybakings or #simplybakings!

    Breakfast & Brunch, Drinks

    Sago Gulaman Drink

    Jul 31, 2020 · 7 Comments

    a glass of sago gulaman drink

    Sago Gulaman Drink is a local Filipino sweet beverage made of tapioca pearls, water, brown sugar, gulaman, and vanilla. It's a delicious and refreshing drink that is super easy to make and perfect to serve on a hot summer day!

    Looking for more easy and delicious drink recipes? Try my Calamansi Drinks, Buko Salad Drink, and Buko Pandan Drink recipe!

    a glass of sago gulaman drink on a tan towel
    [feast_advanced_jump_to]

    What is Sago Gulaman Drink?

    Sago Gulaman Drink is a popular Filipino beverage recognized for its distinct textures and flavors. This traditional drink contains sago (tapioca pearls) and gulaman (agar-agar jelly) combined with arnibal, a sweet brown sugar syrup, resulting in a pleasantly sweet and satisfying refreshment.

    It is frequently served chilled especially in the Philippines during the hot summer months, providing a pleasant and delicious way to cool down.

    This Filipino sago't gulaman is a must-try if you enjoy delicious and refreshing drinks or are just curious to try something new. Try making this easy drink recipe at home today and savor the sweetness and delicious blend of flavors and textures to give your typical beverages a refreshing twist!

    3 glasses of sago gulaman drinks on a table with cloth

    Variations

    • Gulaman Flavors: gulaman bars are either colored or plain (transparent white). To change up the taste of the drink, use a different flavor gulaman.
    • Grass Jelly Drink: you can use grass jelly, which has a similar texture as gulaman, to provide a refreshing and herbal flavor.
    • Pandan Flavor: use pandan leaves or pandan extract to flavor your drink. Pandan's aroma and slightly nutty flavor gives the traditional drink a unique taste.

    Substitutions

    • Jelly: feel free to use plain jello, fruit-flavored jelly cubes, or gelatin powder if you can't find gulaman.
    • Sago Pearls: replace sago pearls with (boba pearls) tapioca pearls or soaked chia seeds, if desired.

    Storage Tips

    • Refrigerate the sago pearls, gulaman cubes, and syrup separately in sealed containers for up to 3 days.
    • Assemble the drink right before serving to ensure the optimum texture and freshness.
    sago gulaman drinks in 3 glass cups on a cloth with a small bowl of sago, brown sugar syrip, and long wooden spoon

    Ingredients

    Listed below are all the ingredients you will need:

    Gulaman 

    • 3  cups water
    • ¼  cup brown sugar
    • 1 pack 25g red gulaman, unflavored

    Sago

    • 4-5 cups water
    • ⅓ cup sago pearls
    • 1 tsp vanilla (optional)

    Juice

    • 1 cup brown sugar
    • 3 ⅓ cups water
    ingredients for the sago gulaman drink recipe

    Instructions

    How to Make Gulaman:

    In a pan over low heat, add 3 cups of water and 14 cups of brown sugar, then simmer, and stir until the sugar is dissolved:

    boiled the brown sugar and water mixture in a pan and stirred using a yellow green spatula

    Add unflavored gulaman powder and stir for 3-5 mins or until frothy:

    added the unflavored gulaman into the mixture then simmered

    Turn off the heat and pour into a glass container, and cool for 20 minutes. Gulaman should be solidified like jello. Then slice into small cubes (see pictures):

    sliced the solidified gulaman in a glass container into small cubes using a knife

    How to Make Sago:

    In a large pot over medium heat, add 4 cups of water (add 1 more cup if needed), and bring to a boil.  Add ⅓ cup sago pearls and cook until sago pearls are tender and translucent:

    boiled the sago pearls in a pot

    Using a strainer, separate the sago and hot water.  Then pour cold water on the sago to avoid sticking.  Set aside:

    separated the cooked sago  and hot water using a strainer

    Juice:

    In a pan over low heat, add 1 cup brown sugar and caramelized sugar, make sure to keep an eye and stir, so the sugar does not stick to the pan:

    caramelized the brown sugar in a pan and stirred using a wooden ladle

    Once it is caramelized, carefully pour in 3 ⅓ cups of water and stir until it is well combined.

    Make sure that the caramelized sugar does not burn because it will give a bitter flavor. Allow it to cool for  20 minutes:

    poured some water into the pan and mixed with the caramelized sugar using a wooden ladle

    How to Assemble the Sago Gulaman:

    In large glasses, add ice, gulaman, cooked sago, and juice mixture. 

    Best served cold and individual servings:

    assembled the ice, gulaman, cooked sago, and juice mixture

    Enjoy a refreshing and delicious Filipino drink in every sip!

    delicious Filipino Authentic Sago Gulaman!

    Top Tips

    Cook the sago pearls until they turn transparent, then rinse them using cold water to avoid sticking. Read the package instructions before cooking the gulaman and allow the gulaman to fully set before slicing it into cubes.

    FAQ

    What's the difference between gulaman and gelatin?

    Gulaman (known as agar or agar-agar in English) is a carbohydrate that comes from red algae (seaweed) while gelatin is a protein substance from collagen found in animal skin and bones.

    What is gulaman drink made of?

    Gulaman drink is typically made with tapioca pearls, gulaman, water, brown sugar, and vanilla.

    What is the English of palamig drink?

    Palamig or Samalamig, literally translates as "Coolers," in English. They are Filipino drinks typically made with sago or tapioca pearls, gulaman or jellies, and syrup.

    More Recipes

    Here are more refreshing Filipino drinks to try:

    • Cantaloupe Juice
    • Sweet Potato Juice
    • Mango Lemonade
    a glass of sago gulaman drink with ice cubes
    5 from 2 votes
    Print Pin Recipe

    Sago Gulaman Drink

    Enjoy a classic Filipino beverage prepared with sago pearls, jelly cubes, and sweet syrup with this easy-to-make and delicious sago gulaman drink! It is ideal for cooling off on a hot day and a perfect treat for a delightful blend of textures and flavors!
    Prep Time15 minutes mins
    Cook Time10 minutes mins
    Cool Time20 minutes mins
    Total Time45 minutes mins
    Course: Drinks
    Cuisine: Filipino
    Servings: 4
    Calories: 306kcal
    Author: Lainey
    Prevent your screen from going dark

    Ingredients

    Gulaman 

    • 3 cups water
    • ¼ cup brown sugar
    • 1 (25 g) red gulaman unflavored

    Sago

    • 4-5 cups water
    • ⅓ cup sago pearls
    • 1 tsp vanilla optional

    Juice

    • 1 cup brown sugar
    • 3 ⅓ cups water

    Instructions

    Gulaman:

    • In a pan over low heat, add 3 cups of water, and ¼ cup brown sugar, and stir dissolved.
    • Add unflavored gulaman and stir for  3-5 mins or until frothy.
    • Turn off the heat, pour into a glass container, cool for 20 mins, and slice into small cubes (see pictures).

    Sago:

    • In a large pot over medium heat, add 4 cups water (add 1 more cup if needed), and bring to a boil. 
    • Add ⅓ cup sago pearls and cook until sago pearls are tender and translucent. 
    • Using a strainer, separate the sago and hot water.  Then pour cold water on the sago to avoid sticking. 

    Juice:

    • In a pan over low heat, add 1 cup brown sugar and caramelized sugar, make sure to keep an eye and stir, so the sugar does not stick to the pan.
    • Once it is caramelized, carefully pour in  3 ⅓ cups water and stir until well combined. Make sure that the caramelized sugar does not burn because it will give a bitter flavor. Allow to cool for  20 minutes.

    Assembling the Sago Gulaman:

    • In large glasses, add ice, gulaman, cooked sago, and juice mixture. Best served cold and individual servings. 
    Leave a Comment
    Serving: 1glassCalories: 306kcalCarbohydrates: 78gProtein: 0.1gSodium: 67mgPotassium: 96mgFiber: 1gSugar: 67gVitamin C: 0.5mgCalcium: 77mgIron: 1mg
    QR Code
    Did you make this recipe?Share it on instagram or tag @simplybakings or #simplybakings!

    Drinks, Filipino Desserts, Vegan Filipino Recipes

    Easy Ice Candy from Philippines

    Jul 24, 2020 · 6 Comments

    5 ube ice candies in a bowl on top of a wooden board

    Try this Ice Candy —a Filipino take on ice pops that's both delicious and refreshing! This recipe features the unique flavors of purple yams, blended with creamy condensed milk and evaporated milk for a truly irresistible treat!

    Looking for more refreshing desserts? Try my Avocado Popsicles, Fruit Popsicles or Mango Ice Candy!

    ube ice candy in a bowl on a brown cutting board
    [feast_advanced_jump_to]

    History of Ice Candy

    We don't have exact records of how ice candy started, but we think it came from a mix of different cultures, people trying new things with food, and having yummy ingredients to use. So, ice candy is a tasty result of people's creativity and the yummy things they could find to make it!

    1. Innovation and Adaptation: Ice candy as it is known today likely emerged as a localized adaptation of frozen treats in the Philippines. With the abundance of tropical fruits, dairy products, and sweeteners in the region, Filipinos creatively combined these ingredients to create their unique version of frozen delicacies.
    2. Popularity and Variations: Ice candy gained popularity across the Philippines as a simple and affordable frozen treat, particularly favored during hot summer months. Its versatility allowed for various flavor combinations, with popular options including fruit flavors, chocolate, coffee, and even local delicacies like ube (purple yam).
    3. Cultural Significance: Ice candy holds cultural significance in Filipino society, often enjoyed during family gatherings, celebrations, and street food festivals. It is not only a refreshing dessert but also a nostalgic symbol of childhood for many Filipinos.
    4. Modernization and Commercialization: While traditionally made at home or sold by street vendors, ice candy has also become commercialized, with pre-packaged versions available in supermarkets and convenience stores. However, homemade ice candy remains cherished for its authenticity and customization options.
    ube ice candy in plastic wrap on a cutting board

    Substitutions

    • Purple Yams: If purple yams are not available, you can substitute them with other types of yams or sweet potatoes, such as orange sweet potatoes or white sweet potatoes. These alternatives will provide a similar starchy sweetness to your ice candy.
    • Condensed Milk: For a dairy-free option, you can use coconut condensed milk or almond condensed milk. Alternatively, you can make your own condensed milk substitute using coconut milk and sweeteners like sugar or maple syrup.
    • Evaporated Milk: To replace evaporated milk, you can use coconut milk or almond milk for a dairy-free version. You can also use soy milk or oat milk as alternatives.
    • Sweeteners: Instead of using traditional sugar, you can sweeten your ice candy with honey, maple syrup, agave nectar, or stevia for a lower-calorie option.

    Variations

    • Add fresh fruits shredded young coconut to this recipe.
    • Add-ins: Get creative with add-ins like chopped fruits, chocolate chips, nuts, or coconut flakes to customize your ice candy according to your preferences.
    ube ice candy in a pink bowl on a cutting board

    Top Tip

    • After adding the cassava flour make sure to continually stir it. Leaving it untouched while the stove is on will create lumps and won't taste great.

    Storage

    • Can be stored for 2-3 months in a freezer safe container.

    Ingredients

    Listed below are all the ingredients you will need:

    • ½ cup ube (purple yam), steamed
    • 8 cups water
    • ½ cup cassava flour
    • ⅓ cup organic sugar
    • ¾  cup condensed milk
    • 1 cup evaporated milk
    • 1 tablespoon ube flavoring
    ice candy ingredients on a table

    Instructions

    1. Bring a pot of water to a boil. Add the purple yams and cook for 25 to 30 minutes or until they are soft and tender.

    How to make Ube Ice Candy:

    In a bowl, add ube and 1 cup water and mix until there are no lumps, set aside.

    In another bowl, add 2 cups water and cassava flour and mix until well combined, set aside.

    In a pot over medium heat, add 5 cups water and bring to a rolling boil.  Add sugar and mix until sugar is dissolved.

    water and sugar with a spoon

    Next add cassava mixture and stir continuously.

    Add ube mixture, ube flavoring and stir until well combined. The mixture will turn purple. 

    Add condensed milk, evaporated milk and continue to mix until well combined.

    Allow to cool for  30 mins and transfer in popsicle molds or ice candy plastic

    pouring condensed milk in a pot with ube mixture

    If using ice candy bag:

    You will need a funnel and a ladle.

    Insert the tip of the funnel in the ice candy bag and ladle the mango mixture.  Make sure to leave at least 2 inches for tying.

    scooping the ice candy mixture into a funnel

    Twist the ice candy bag to seal the mixture and knot tightly.

    Repeat until there is no ube mixture left.

    Freshly made ice candy resting on a cutting board beside popsicle molds filled with unfrozen treats, ready to be enjoyed.

    If you don't have ice candy bags, but have popsicle molds:

    1. Evenly pour ube mixture into the popsicle molds.
    Freshly made ice candy popsicle molds filled with unfrozen treats, ready to be enjoyed.

    If you don't have ice candy molds, you can always use popsicle molds:

    ube popsicles on wooden board

    Hint: Always leave enough space in the ice candy bag. You will find it difficult to tye the knot if you put too much of the ice candy mixture.

    FAQ

    What is ice candy in the Philippines?

    Ice candy, or ice pops, is a popular summer snack in the Philippines made by freezing fruit juice in plastic bags. The juice is made from fruit pulp, water, sugar, and sometimes cream of tartar.

    How long does ice candy last?

    The shelf life of ice candy can vary depending on factors such as ingredients used, storage conditions, and whether it contains any perishable items like dairy. Typically, homemade ice candy can last in the freezer for about 2-3 months if properly stored in an airtight container to prevent freezer burn. However, it's best to consume it within 1-2 months for the best taste and texture. If your ice candy contains dairy, it's essential to keep it frozen at all times to prevent spoilage. Always check for any signs of freezer burn or off-flavors before consuming.

    What does cornstarch do in ice cream?

    Adding cornstarch to ice cream recipes can improve the texture, stability, and overall quality of the final product. However, it's important to use the right amount to avoid making the ice cream too thick or starchy.

    More Filipino recipes you will enjoy:

    • Avocado Ice Candy
    • Ube Ice Cream
    • Binignit
    5 ice candy in a bowl on a brown cutting board
    4.84 from 6 votes
    Print Pin Recipe

    Easy Ice Candy from Philippines

    This Ice Candy from Philippines is made with ube, creamy condensed milk and evaporated milk for a delicious treat you will enjoy!
    Prep Time10 minutes mins
    Cook Time30 minutes mins
    Freeze Time6 hours hrs
    Total Time6 hours hrs 40 minutes mins
    Course: Dessert, Snack
    Cuisine: Filipino
    Servings: 12 ice candies
    Calories: 147kcal
    Author: Lainey
    Prevent your screen from going dark

    Ingredients

    • ½ cup ube purple yam, steamed
    • 8 cups water
    • ½ cup cassava flour
    • ⅓ cup organic sugar
    • ¾ cup condensed milk
    • 1 cup evaporated milk
    • 1 tablespoon ube flavoring

    Instructions

    How to boil ube (purple yam):

    • Bring a pot of water to a boil. Add the purple yams and cook for 25 to 30 minutes or until they are soft and tender.

    How to make Ube Ice Candy:

    • In a bowl, add ube and 1 cup water and mix until there are no lumps, set aside.
    • In another bowl, add 2 cups water and cassava flour and mix until well combined, set aside.
    • In a pot over medium heat, add 5 cups water and bring to a rolling boil.  Add sugar and mix until sugar is dissolved.
    • Next add cassava mixture and stir continuously.
    • Add ube mixture, ube flavoring and stir until well combined. The mixture will turn purple. 
    • Add condensed milk, evaporated milk and continue to mix until well combined.
    • Allow to cool for  30 mins and transfer in popsicle molds or ice candy plastic

    If using a popsicle mold:

    • Evenly pour ube mixture into the popsicle molds.

    If using ice candy bag:

    • You will need a funnel and a ladle.
    • Insert the tip of the funnel in the ice candy bag and ladle the mango mixture.  Make sure to leave at least 2 inches for tying.
    • Twist the ice candy bag to seal the mixture and knot tightly.
    • Repeat until there is no ube mixture left.
    Leave a Comment
    Serving: 1gCalories: 147kcalCarbohydrates: 22gProtein: 5gFat: 4gSaturated Fat: 2gPolyunsaturated Fat: 0.2gMonounsaturated Fat: 1gCholesterol: 20mgSodium: 61mgPotassium: 169mgFiber: 0.1gSugar: 18gVitamin A: 101IUVitamin C: 1mgCalcium: 124mgIron: 1mg
    QR Code
    Did you make this recipe?Share it on instagram or tag @simplybakings or #simplybakings!

    Desserts, Filipino Desserts, Ice Cream, Vegetarian Filipino Recipes

    Old Fashioned Chocolate Covered Cherries Recipe

    Jul 23, 2020 · 3 Comments

    These Old Fashioned Chocolate covered cherries are the perfect blend of sweet and tart, wrapped up in a combination of juicy cherries encased in a sugary dough and dipped in rich chocolate that melts in your mouth.

    Try more kind of this recipe with yummy fruit and chocolate: Mini Fruit Cookies, White Chocolate Fruit Tart, and Chocolate Pretzel Rods.

    chocolate covered cherries in a white mug
    [feast_advanced_jump_to]

    Substitutions

    • If you don’t have shortening, use coconut oil.
    • If you don't have fresh cherries, you can use maraschino cherries from a jar instead. Just make sure to pat them dry to remove any juices before wrapping them in the dough.
    • For the chocolate coating, semi-sweet chocolate or dark chocolate work well, but you can also use chocolate candy melts or Ghirardelli wafers for an easy melt.

    Variations

    • If you want a thinner chocolate for dipping, add more coconut oil to the chocolate.
    • If dough is too sticky, add a few tablespoons of powdered sugar. If dough is too dry, add a few drops of milk until it a pliable consistency.
    • To make them extra special for Christmas or as gifts, drizzle some white chocolate on top or use a candy mold to shape them into festive candies.

    Storage

    • Store the chocolate covered cherries in an airtight container at room temperature for up to a week. If you live in a warmer climate, consider keeping them in the refrigerator to prevent the chocolate from melting.
    • For longer storage, you can freeze them for up to a month, although they may lose some of their texture.

    Top Tips

    • Make sure the cherries are dry before dipping in melted chocolate. Because the chocolate will seize up.
    • To ensure the chocolate doesn't burn or seize, melt chocolate and butter over very low heat.
    • Try not to get water in the bowl with the chocolate or on any of the utensils you’re using. It will cause your chocolate to seize up.
    • If you’re worried about excess chocolate making a mess, place the cherries on wax paper to harden.
    chocolate covered cherries halved on white plate

    Ingredients

    • fresh cherries
    • confectioners' sugar
    • butter
    • milk
    • almond extract
    • chocolate chips
    • chocolate bar (optional)
    • plain shortening (optional)
    ingredients for old fashioned chocolate covered cherries

    Instructions

    The sweet cherries I used for this recipe are fresh Northwest Cherries. Pick some up at your local grocery store.

    Remove pits from about 16-18 fresh cherries. Wash and set aside on paper towels to dry completely. You can leave the stems to help with dipping in chocolate:

    washed and pitted northwest cherries on a white paper towel

    Mix together confectioners' sugar, butter, milk and almond extract until it forms a smooth round ball with the consistency of play-doh.

    Pinch off about about ounce of the dough (about the same size of a cherry) and roll it into a small ball, then flatten it out and press your thumb in the center.

    Put a cherry inside the thumbprint and mold the dough up and around the stem until the entire cherry is covered:

    cherries covered in white chocolate

    Place cherries in freezer for about 10-15 minutes while you melt the chocolate. Melt all the chocolate chips and chocolate bar in a microwave safe bowl for 30 seconds, then microwave in 20 second increments until it begins to melt. Stir it often so it doesn’t burn. 

    Dip the cherries into the melted chocolate, using a spoon to roll them until completely covered chocolate:

    white chocolate covered cherry dipped in melted chocolate

    Place on wax or parchment paper to harden completely. You can place in refrigerator to speed up the hardening process. Enjoy!

    Northwest cherry growers in a white bowl covered with chocolate

    How to Freeze Cherries in 3 simple steps

    If you have extra cherries on hand and would like to freeze them for baking at a later date, here is how:

    1. Wash and pit all the cherries.
    2. Place cherries onto a parchment paper lined baking sheet and freeze flat for 12-24 hours. Or freeze directly in a bag, making sure it's evenly spaced out.
    3. After this initial freeze, transfer frozen cherries into a large plastic zip-top bag.

    Cherries should keep for 6 months as long as they are in an air-tight, freezer-safe bag.

    Frequently Asked Questions

    Do chocolate covered cherries go bad?

    Yes, chocolate covered cherries can go bad over time. They should be eaten within a week or kept in the fridge to last longer.

    What is the enzyme for chocolate covered cherries?

    The enzyme often used in chocolate covered cherries is called invertase.

    What is the gooey stuff in chocolate covered cherries?

    The gooey stuff is a sweet syrup made when the sugar inside the cherries melts. This happens because of the enzyme invertase.

    luscious chocolate covered cherries
    5 from 1 vote
    Print Pin Recipe

    Old Fashioned Chocolate Covered Cherries Recipe

    Make this classic Old Fashioned Chocolate Covered Cherries recipe in just 20 minutes. Perfect for any occasion, this easy dessert combines juicy cherries, sweet dough, and rich chocolate for an indulgent treat.
    Prep Time10 minutes mins
    Cook Time10 minutes mins
    Total Time20 minutes mins
    Course: Desserts
    Cuisine: American
    Keyword: chocolate covered cherries
    Servings: 14 -16 cherries
    Calories: 44kcal
    Author: Lainey
    Prevent your screen from going dark

    Ingredients

    • 14 fresh cherries washed and pitted
    • 2 cups confectioners sugar
    • 3 tablespoons butter
    • 1 tablespoon milk
    • 1 ¼ teaspoon almond extract
    • 1 bag chocolate chips
    • 1 chocolate bar optional
    • 1 teaspoon plain shortening optional

    Instructions

    • Remove pits from about 16-18 fresh cherries. Wash and set aside on paper towels to dry completely. You can leave the stems to help with dipping in chocolate.
    • Mix together confectioners sugar, butter, milk and almond extract until it forms a smooth round ball with the consistency of play-doh. If dough is too sticky, add a few tablespoons of powdered sugar. If dough is too dry, add a few drops of milk until it becomes a pliable consistency.
    • Pinch off about about ounce of the dough (about the same size of a cherry) and roll it into a small ball, then flatten it out and press your thumb in the center.
    • Put a cherry inside the thumbprint and mold the dough up and around the stem until the entire cherry is covered.
    • Place cherries in freezer for about 10-15 minutes while you melt the chocolate.
    • Melt all the chocolate chips and chocolate bar in a microwave safe bowl for 30 seconds, then microwave in 20 second increments until it begins to melt. Stir it often so it doesn’t burn. If chocolate is too thick you can add 1 teaspoon shortening to help it coat better. DO NOT ADD WATER. (You can substitute a package of chocolate almond bark for this enrobing process.)
    • Dip the cherries into the melted chocolate, using a spoon to roll them until completely covered chocolate.
    • Place on wax or parchment paper to harden completely. You can place in refrigerator to speed up the hardening process.
    Leave a Comment
    Serving: 1gCalories: 44kcalCarbohydrates: 20gProtein: 0.3gFat: 4gSaturated Fat: 2gPolyunsaturated Fat: 0.2gMonounsaturated Fat: 1gTrans Fat: 0.1gCholesterol: 7mgSodium: 20mgPotassium: 35mgFiber: 0.4gSugar: 2gVitamin A: 83IUVitamin C: 1mgCalcium: 5mgIron: 0.3mg
    QR Code
    Did you make this recipe?Share it on instagram or tag @simplybakings or #simplybakings!

    Desserts

    Mango Ice Candy

    Jul 20, 2020 · 6 Comments

    delicious Mango Ice Candy in a coconut shell

    This easy-to-make Mango Ice Candy is a healthy summer dessert with a fresh and delicious taste of mango in every bite! Its cooling, fresh, tropical flavor will always be a crowd favorite! 

    Looking for more ice candy recipes? Try my Avocado Ice Candy and Easy Ube Ice Candy recipe!

    frozen Mango Ice Candy in a coconut shell
    [feast_advanced_jump_to]

    What is Mango Ice Candy?

    Mango Ice Candy recipe is a popular dessert in the Philippines, and a quick and easy to make frozen treat. This best selling ice candy is made by blending ripe mangos, milk, cassava flour, sugar, and water. The smooth and sweet blended mango mixture is then put into little ice candy bags or popsicle molds and frozen until solid, providing a tasty and simple way to experience the tropical delight of mango flavor.

    Undeniably, it's a deliciously refreshing treat and ideal for sharing with family and friends. It is a popular summer cooler among both kids and adults, as it provides a cold and delicious way to beat the heat.

    Try and enjoy the delectable taste of Mango Ice Candy using just 5 simple ingredients. Make your own mango ice candy now and get a taste of the tropics, no matter where you are these hot summer days!

    yummy and refreshing Mango Ice Candy popsicles on a white plate

    Variations

    • You can add fresh fruits like avocado or shredded young coconut to this recipe.
    • Are you craving mango float but want it to be handy when eating? Add some crushed graham crackers to the mixture!

    Substitutions

    • Fruit - ripe mangoes can be substituted with other fruits such as strawberries, ripe bananas, or pineapple to make different flavors.
    • Flour - you may use tapioca starch, cornstarch, or arrowroot powder in place of cassava flour to get similar texture.
    • Sweetener - use agave syrup, maple syrup, or coconut sugar instead of organic sugar if it is unavailable.
    • Milk - replace nondairy milk with alternatives such as almond milk, coconut milk, oat milk, or soy milk to vary the flavor and creaminess.

    Storage Tips

    • Mango ice candy can be stored in the freezer for 1-2 months.
    • Lay them flat in the freezer to achieve even freezing and keep them from sticking together.
    • Keep them in an airtight container or sealed plastic bag to preserve their quality and avoid freezer burn.
    Mango Ice Candy and fresh mango cubes in a coconut shell

    Ingredients

    Listed below are all the ingredients you will need:

    • mango diced
    • water
    • cassava flour 
    • organic sugar
    • non-dairy milk
    Mango Ice Candy ingredients

    Instructions

    Set aside 2 tablespoons of diced mangoes. 

    Add the rest of the mangos to a food processor or a blender, and blend until smooth:

    smooth and blended mango for Mango Ice Candy

    In a pot over low heat, add water, and cassava flour and continuously stir so there will be no lumps:

    pouring water into the pan for the Mango Ice Candy recipe

    Add sugar and stir until it dissolves:

    adding sugar to the water and cassava flour mixture to be used for the Mango Ice Candy recipe

    Then add the non-dairy milk and continue stirring:

    adding non-dairy milk for the Mango Ice Candy

    Add the blended mangos and stir until mixture is smooth and everything is well combined:

    adding the pureed mango for the Mango Ice Candy

    There are 2 ways to make this: as a popsicle or ice candy.

    If using a popsicle mold:

    Evenly add diced mangoes, then pour in the mango mixture:

    adding mango cubes into the Popsicle mold to make Mango Ice Candy

    Cover with plastic wrap and insert a popsicle stick then freeze:

    ready to freeze popsicle Vegan Mango Ice Candy

    After freezing and taking it out of the mold, it will look like this!

    delicious Mango Ice Candy popsicles on a white plate

    If using an ice candy bag:

    You will need a funnel and a ladle. Insert the tip of the funnel into the ice candy bag and ladle the mango mixture:

    adding fresh mango into the plastic wrap to make Mango Ice Candy

    Make sure to leave at least 2 inches for tying:

    pouring in the Mango Ice Candy mixture using a funnel

    Twist the ice candy bag to seal the mixture and knot it tightly. Repeat until there is no mango mixture left:

    ready to freeze Mango Ice Candy

    Put in the freezer overnight or until frozen before serving:

    Enjoy a sweet and delicious frozen mango treat!

    Top Tips

    • After adding the cassava flour make sure to continually stir it. Leaving it untouched while the stove is on will create lumps and won't taste great.
    • Always leave enough space in the ice candy bag. You will have a hard time tying it if you put too much ice candy mixture.

    FAQ

    Do you think mango juice would work?

    You can use mango juice for this recipe. Just make sure to balance it out with the water requirement of this recipe. You can add it little by little to taste.

    Can I use honey instead of agave?

    Yes, sure you can! Honey is a natural and healthy sweetener just like agave so go for it.

    Do you know if this recipe works for standard popsicles?

    Definitely yes!

    Can I use cornstarch for this recipe?

    If you do not have cassava flour, cornstarch is an alternative.

    delicious Mango Ice Candy held by a hand

    More Recipes you would enjoy:

    • Vegan Chocolate Ice Cream
    • Cantaloupe Juice
    • Filipino Mango Ice Cream
    • Mango Lemonade
    • Papaya Banana Smoothies
    • Buko Pandan Ice Cream
    some mango ice candies in a wooden bowl with mango slices and ice cubes
    5 from 2 votes
    Print Pin Recipe

    Mango Ice Candy

    Learn how to make this healthy Mango Ice Candy with a fresh and delicious taste in every bite- just mix, freeze, and enjoy!
    Prep Time20 minutes mins
    Cook Time15 minutes mins
    Freezing6 hours hrs
    Total Time6 hours hrs 35 minutes mins
    Course: Dessert
    Cuisine: Filipino
    Servings: 8 servings
    Calories: 275kcal
    Author: Lainey
    Prevent your screen from going dark

    Ingredients

    • 2 cups diced mangoes
    • 5 cups water
    • ½ cup and 2 tablespoons cassava flour
    • ¼ cup organic sugar
    • 1 cup non dairy milk

    Instructions

    • Set aside 2 tablespoons of diced mangoes.
    • Add the rest of the mangos to a food processor or blender, and blend until smooth.
    • In a pot over low heat, add water, and cassava flour and continuously stir so there will be no lumps.
    • Add sugar and stir until it dissolves. Then, add non-dairy milk and continue stirring.
    • Add the blended mangos and stir until the mixture is smooth and everything is well combined.

    If using a popsicle mold:

    • Evenly add diced mangoes, then pour in the mango mixture. 
    • Cover with plastic wrap and insert a popsicle stick then freeze.

    If using ice candy bag:

    • You will need a funnel and a ladle.
    • Insert the tip of the funnel into the ice candy bag and ladle the mango mixture.  Make sure to leave at least 2 inches for tying.
    • Twist the ice candy bag to seal the mixture and knot it tightly. Repeat until there is no mango mixture left.
    • Freeze the ice candy overnight or until frozen before serving.
    Leave a Comment
    Calories: 275kcalCarbohydrates: 63gProtein: 4gFat: 1gSaturated Fat: 0.1gPolyunsaturated Fat: 0.4gMonounsaturated Fat: 0.1gSodium: 23mgPotassium: 45mgFiber: 4gSugar: 39gVitamin A: 6.342IUVitamin C: 12mgCalcium: 99mgIron: 4mg
    QR Code
    Did you make this recipe?Share it on instagram or tag @simplybakings or #simplybakings!

    Filipino Desserts, Ice Cream

    How to Make Ube Ice Cream

    Jul 17, 2020 · 4 Comments

    delicious and refreshing ube ice cream on a white plate

    How to make Ube Ice Cream with no ice cream machine or eggs or egg yolks needed? With five ingredients and a little mixing, you have homemade Ube ice cream that is fine in texture, creamy, and a healthier version of the store-bought ice cream!

    Looking for more Asian inspired ice creams? Try my Black Sesame Ice Cream, Pineapple Ice Cream or my Pandan Ice Cream recipes.

    delicious ube ice cream on a white plate
    [feast_advanced_jump_to]

    What is Ube Ice Cream?

    The Ube ice cream recipe, made from purple yam (ube), originated in the Filipino cuisine and became popular during the Spanish colonial period when dairy products were introduced.

    Initially a flavor for sorbetes (Filipino-style ice cream), it gained cultural significance and became a staple in desserts like halo-halo. Commercial production began in the mid-20th century, with brands like Magnolia making it widely available.

    The flavor gained global recognition in the late 20th century through Filipino diaspora communities and exploded in popularity in the 2010s due to its vibrant color and unique taste, amplified by social media.

    Ube ice cream is now celebrated as a symbol of Filipino heritage and enjoyed worldwide in traditional and innovative desserts.

    Health Benefits of Ube

    • Great source of antioxidants
    • Promotes healthy digestion and supports heart health by lowering cholesterol levels.
    • Strengthens the immune system and supports skin health.
    • Contains complex carbohydrates for sustained energy.
    • Helps maintain stable blood sugar levels, making it suitable for diabetic-friendly diets.

    Variations

    • Ube Macapuno - Features tender strips of macapuno (coconut sport) mixed in for added texture and flavor.
    • Ube Cheesecake - Swirls of cream cheese and graham cracker crumbs create a dessert inspired by ube cheesecake.
    • Ube Mochi - Ice cream encased in a soft, chewy mochi (sticky rice cake) shell.
    ube ice cream on a white plate with a small spoon

    Substitutions

    • All-purpose cream / heavy cream - Use coconut cream, cashew cream, or evaporated milk.
    • Ube - Replace with purple sweet potato or taro root.
    • Condensed milk - Try sweetened coconut cream, honey, maple syrup, or evaporated milk with sugar.
    • Coconut milk - Substitute with almond milk, soy milk, or evaporated milk.
    • Ube flavoring - Use vanilla extract with purple food coloring, taro extract, or ube jam.

    Storage

    • Refrigerator - Not recommended as ice cream will melt.
    • Freezer - Store in an airtight container in the freezer for up to 2 weeks.
    • Thawing - Let sit at room temperature for 5-10 minutes before scooping. Check for any ice crystals or changes in texture before serving!

    Ingredients

    Listed below are all the ingredients you will need (omitting quantities):

    • all-purpose cream or heavy whipping cream
    • ube (purple yams)
    • condensed milk
    • coconut milk
    • ube flavoring

    See recipe card for quantities.

    all ingredients in separate containers

    Instructions

    Prep time! In a saucepan over medium, heat up some water and place the sliced ube. Boil it for about 35 minutes or until tender.

    Then in a stand mixer, immersion blender or electric hand mixer, add all-purpose cream and mix until it becomes foamy about 2-3 minutes. If using heavy whipping cream, mix until stiff peak forms.

    whipping the cream in a container

    Next, whisk or fold in the boiled ube, sweetened condensed milk, 1 tablespoon ube flavoring, and coconut cream and mix until well combined.

    adding in the other ingredients

    Feel free to add a few more tablespoons ube powder or ube extract for a stronger taste.

    mixed ingredients of the ube ice cream

    Pour the ice cream mixture into a safe container, cover and freeze overnight and cover with parchment paper or plastic wrap.

    delicious ube ice cream and boiled ube on a plate

    Then serve chilled and enjoy the delicious ube ice cream without the need of an ice cream maker!

    scoops of ube ice cream on a white plate

    ⭐ Top Tip

    To enhance the ube flavor naturally, roast or steam the ube before boiling it. This brings out its sweetness and nutty aroma, making your ice cream more flavorful

    FAQ

    Is ube ice cream healthy?

    Recent studies have found that the purple variety contains exceptionally high levels of powerful antioxidants, which can improve overall health. However, this doesn't mean you should overindulge in ube-based desserts. While ube itself is nutritious, many ube-flavored treats also contain high amounts of sugar and fat.

    Is ube Japanese or Filipino?

    Ube is a purple yam that originated in the Philippines. Ube has a brown, bark-like exterior and vibrant purple flesh. Ube has a sweet, nutty flavor and aroma and is commonly used in desserts.

    Why is yam ice cream purple?

    Ube Ice Cream really is that purple - that's because it's made with ube powder and extract, which are made from purple yams.

    What does ube taste like?

    Ube ice cream tastes subtly sweet and creamy with a mellow, nutty, and vanilla-like flavor. Its taste is likened to a cross between pistachio, white chocolate, coconut and vanilla.


    More Ice Cream recipes

    • Filipino Mango Ice Cream
    • Buko Pandan Ice Cream
    • Cookie Butter Ice Cream
    • Oreo Ice Cream
    • Lemon Ice Cream
    • Mocha Ice Cream
    • Vegan Chocolate Ice Cream
    • Pineapple Ice Cream
    Three scoops of ice cream on a bowl
    5 from 3 votes
    Print Pin Recipe

    Ube Ice Cream

    Learn how to make this easy recipe of Ube Ice Cream using 5 ingredients only without an ice cream machine needed!
    Prep Time15 minutes mins
    Freeze Time6 hours hrs
    Total Time8 hours hrs 15 minutes mins
    Course: Dessert, Snack
    Cuisine: Filipino
    Servings: 4 servings
    Calories: 434kcal
    Author: Lainey
    Prevent your screen from going dark

    Ingredients

    Base Ingredients:

    • 1 cup all-purpose cream or heavy whipping cream
    • ½ cup ube boiled, peeled, and cut into wedges
    • ¼ cup condensed milk
    • ¼ cup coconut milk

    Flavoring:

    • 1-2 tablespoons ube flavoring

    Instructions

    Prepare the Ube:

    • In a pot over medium heat, bring water to a boil. Add the sliced ube and boil for about 35 minutes or until tender. Drain and let cool.

    Whip the Cream:

    • In a bowl or food processor, add the all-purpose cream. Beat until foamy, about 2-3 minutes.
    • If using heavy whipping cream, beat until stiff peaks form.

    Combine Ingredients:

    • Add the boiled ube, condensed milk, 1 tablespoon of ube flavoring, and coconut milk to the whipped cream.
    • Mix until well combined. If a stronger ube flavor is desired, add an additional tablespoon of ube flavoring.

    Freeze:

    • Transfer the mixture into a container. Cover with a lid, parchment paper, or plastic wrap to prevent ice crystals from forming.
    • Freeze overnight (6-8 hours)

    Serve:

    • Best served frozen. Scoop and enjoy!
    Leave a Comment
    Serving: 1gCalories: 434kcalCarbohydrates: 22gProtein: 5gFat: 37gSaturated Fat: 25gPolyunsaturated Fat: 1gMonounsaturated Fat: 9gCholesterol: 108mgSodium: 74mgPotassium: 255mgFiber: 0.2gSugar: 21gVitamin A: 1327IUVitamin C: 1mgCalcium: 156mgIron: 1mg
    QR Code
    Did you make this recipe?Share it on instagram or tag @simplybakings or #simplybakings!

    5 Ingredients or Less, Filipino Desserts, Ice Cream, Ube Recipes

    Strawberry Mango Lemonade Recipe

    Jul 15, 2020 · 3 Comments

    refreshing strawberry mango lemonade in a glass and pitcher

    Take a sip of this refreshing tropical 5 ingredient Strawberry Mango Lemonade Recipe - the perfect drink to beat a hot summer day! No blender needed – just mix, stir, and enjoy your new favorite beverage!

    Try these delicious drinks too: Refreshing Calamansi Juice, Fresh Fruit Cantaloupe Juice. and Strawberry Banana Smoothie.

    two glasses of sweet and refreshing strawberry mango lemonade
    [feast_advanced_jump_to]

    Health Benefits of Mango

    • Mango helps your stomach digest food better.
    • It makes your body’s defense system stronger.
    • Eating mangoes is good for your eyes and can help your skin stay clear.
    • Mangoes can also help lower the amount of bad stuff in your blood called cholesterol.

    Variations

    To make your lemonade look nicer and give it more good stuff for your body, you can add crushed mint leaves or garnish a lemon slice on top.

    two glasses of strawberry mango lemonade with ice cubes

    Substitutions

    • Freeze mango juice prior to making the recipe and use them to replace the ice cubes in the recipe.
    • If mango juice is unavailable, you can use fresh mango puree instead. Freeze mango chunks then blend. Make sure not to add too much as mango puree is sweeter than the regular mango juice.
    • If agave or honey is unavailable, you can use simple syrup instead.  Add little by little and adjust according to your liking.

    Storage

    • Keep your lemonade in a closed container in the fridge and drink it within 2-3 days. Make sure the lid is tight to keep the bubbles in.
    • If you want to save it for longer, freeze your lemonade in ice cube trays. Then you can use the lemonade cubes in other drinks whenever you want. Remember to keep your lemonade really cold when you serve it.

    Top Tip

    You can change how sweet your lemonade is by adding more or less sweetener, like agave syrup. Start with what the recipe says, but feel free to adjust it until your lemonade tastes just right to you.

    Ingredients

    Listed below are all the ingredients you will need:

    • sparkling water
    • mango juice
    • agave syrup
    • lemons
    • strawberries
    ingredients of strawberry mango lemonade recipe

    Instructions

    In a pitcher, mix together the sparkling water, mango juice, agave syrup, and lemon juice:

    mixed liquid ingredients of strawberry mango lemonade recipe in a pitcher

    Refrigerate until chilled. Serve with strawberry rings and ice cubes:

    two glasses with ice cubes and slices of strawberry for strawberry mango lemonade

    I love making this refreshing drink on hot summer days!

    delicious and refreshing glasses of strawberry mango lemonade

    Frequently Asked Questions

    What does strawberry lemonade taste like?

    Strawberry lemonade tastes sweet and tangy, like a mix of fresh strawberries and lemons. It's refreshing and perfect for hot days.

    Why is strawberry lemonade healthy?

    Strawberry lemonade can be healthy because it has vitamins from the strawberries and lemons, like Vitamin C. It also has antioxidants that help your body stay healthy.

    Is strawberry lemonade good for your teeth?

    This lemonade is not great for your teeth because the acid from the lemons and the sugar can cause tooth decay. It's best to drink it in moderation and brush your teeth afterward.

    strawberry mango lemonade in a glass and pitcher
    best for the summer strawberry mango lemonade drink in glasses
    5 from 3 votes
    Print Pin Recipe

    Strawberry Mango Lemonade Recipe

    Make this easy and nutritious, tropical Strawberry Mango Lemonade Recipe using just 5 ingredients - a sweet drink perfect for the hot, summer days!
    Prep Time5 minutes mins
    Chill Time30 minutes mins
    Total Time35 minutes mins
    Course: Drinks
    Cuisine: Filipino
    Servings: 4 servings
    Calories: 282kcal
    Author: Lainey
    Prevent your screen from going dark

    Ingredients

    • 2 ¼ cups sparkling water
    • ½ cup mango juice
    • 3 tablespoons agave syrup
    • juice of 2 lemons
    • 6 strawberries cut in rings

    Instructions

    • In a pitcher, mix together the sparkling water, mango juice, agave syrup, and lemon juice.
    • Refrigerate until chilled.
    • Serve with strawberry rings and ice cubes.
    Leave a Comment
    Serving: 1servingCalories: 282kcalCarbohydrates: 70gProtein: 1gFat: 1gSaturated Fat: 0.03gPolyunsaturated Fat: 0.1gMonounsaturated Fat: 0.1gSodium: 121mgPotassium: 153mgFiber: 2gSugar: 62gVitamin A: 877IUVitamin C: 72mgCalcium: 60mgIron: 1mg
    QR Code
    Did you make this recipe?Share it on instagram or tag @simplybakings or #simplybakings!

    Drinks

    • « Go to Previous Page
    • Page 1
    • Interim pages omitted …
    • Page 6
    • Page 7
    • Page 8
    • Page 9
    • Page 10
    • Interim pages omitted …
    • Page 17
    • Go to Next Page »

    Primary Sidebar

    Lainey holding a muffin pan in her kitchen

    I'm Lainey, the driving force behind SimplyBakings.com, where I'm on a mission to redefine Filipino cooking through a plant-based lens.

    More about me →

    Popular

    • cookie dough bites
      Easiest Cookie Dough Bites Ever
    • delicious and soft oreo cheesecake cookies
      Soft Oreo Cheesecake Cookies
    • mini chocolate cupcakes in a white rectangular plate
      Delicious and Easy Mini Chocolate Cupcakes
    • Filipino Custard Cake drizzled with powdered sugar
      Filipino Custard Cake
    • no bake oreo cheesecake in a mason jar
      Foolproof 3 Ingredients No Bake Oreo Cheesecake
    • 3 brownies stacked
      Best and Easiest Brownies

    Footer

    Sign Up for My Email List

    Latest Posts

    • Foolproof Taro Recipe
    • Best Matcha Strawberry Popsicles
    • Classic Filipino Lentil Soup
    • BEST Kinamatisang Tofu

    Quick Links

    Kitchen Essentials

    About Lainey

    Contact

    • Facebook
    • Instagram
    • YouTube
    • Pinterest
    • TikTok

    © 2025 Auburn Digital Services LLC. All Rights Reserved | Privacy Policy

    Rate This Recipe

    Your vote:


    A rating is required
    A name is required
    An email is required