
• Skip to primary navigation
  • Skip to main content
  • Skip to primary sidebar
Simply Bakings logo
  • Home
  • Recipes Index
  • Filipino Recipes
  • About Me
  • Nav Social Menu

menu icon
go to homepage
search icon
Homepage link
  • Recipes
  • Filipino Recipes
  • About Me
    • Facebook
    • Instagram
    • Pinterest
    • YouTube
  • ×

    Vegetarian Congee Recipe

    Vegetarian Congee Recipe

    Sep 12, 2019 · 2 Comments

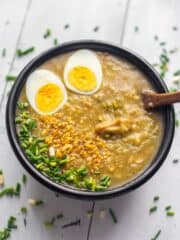
    tasty vegetarian congee in a black bowl with ladle topped with boiled egg, green onions and toasted garlic

    This Vegetarian Congee Recipe is a popular rice dish in the Philippines that is loved by everybody! It's heartwarming, delicious, and great to eat for breakfast or on those days you feel sick or cold!

    In search for more delicious Filipino Recipes to add to your meal plan? Try my best ever Tofu Sisig, Cassava Cake, Halo Halo, and Turon!
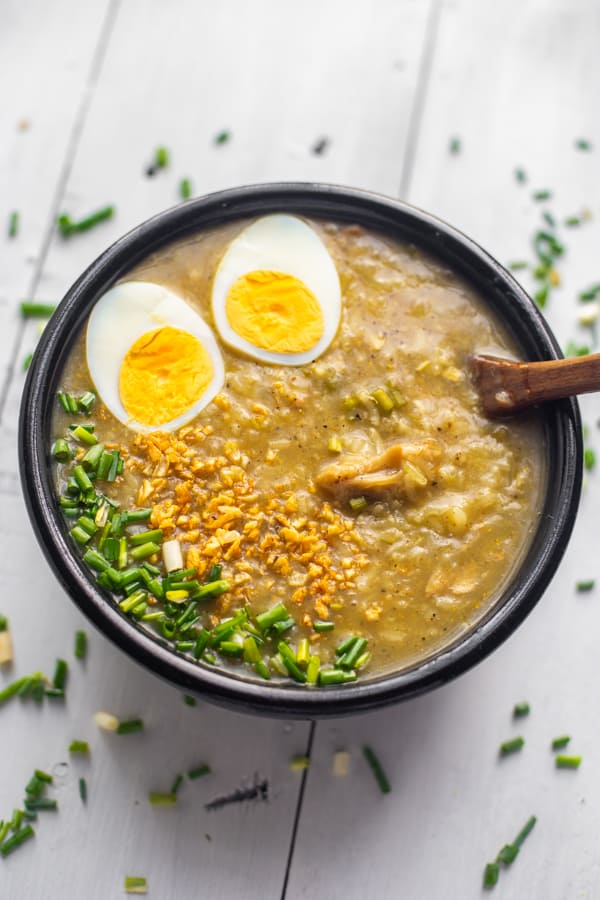
    delicious vegetarian porridge in a black bowl with boiled eggs, toasted garlic, and green onions
    [feast_advanced_jump_to]

    What is Congee

    Congee is a rice porridge dish popular in Asian countries and is commonly served to children who feel sick because it's so heartwarming- it is a comfort food.

    The consistency of Congee is sticky since many people use sticky rice grains.  Some people use regular rice, jasmine rice, or even brown rice, but I found using brown rice didn't get the sticky consistency as sticky rice.

    And what makes it tastier are the spices that are included in the ingredients such as garlic, onion, shallots, ginger, turmeric, soy sauce, sesame oil, and the list can go on.

    Most people add in chicken meat to Congee, but for vegan/vegetarians like me, we have many choices as a substitute to meat or you can just simply use mushrooms. My favorite kind of mushrooms to use in Congee are shitake mushrooms, but feel free to use what you have available.

    Read on below on what delicious meat substitute I added in!

    Substitutions

    • Soy Meat Protein: Replace with diced tofu, jackfruit, or tempeh for added fiber.
    • Sticky Rice: Swap with short-grain rice or quinoa for a slightly different texture. Use brown rice for a higher fiber content (adjust cooking time accordingly).
    • Turmeric Powder: Use a pinch of saffron or omit it entirely if unavailable.

    Variations

    • Instant Pot Congee: Reduce total time by using the high-pressure setting to cook your congee in about 12 minutes.
    • Toppings: Experiment with crispy fried shallots, toasted sesame seeds, or fresh herbs like cilantro.
    • Protein Boost: Add shredded chicken, shrimp, or mushrooms for non-vegetarian options.
    • Spicy Congee: Serve with a drizzle of chili oil and a sprinkle of white pepper for an extra kick.

    Storage

    • Fridge: Store leftover congee in an airtight container in the fridge for up to 3 days. Reheat gently on the stove or in the microwave with a splash of water to loosen the texture.
    • Freezer: Freeze congee in single-serving portions for easy reheating. Thaw in the fridge overnight before reheating.
    • Reheating Tips: Use medium-high heat on the stove or a microwave for 1-2 minutes, adding a few cups water to restore consistency.

    Top Tips

    • Giving time for the sticky rice to cook is always great when cooking congee. Having the sticky rice softened gives the congee a tastier sticky texture.
    • To save time in cooking the sticky rice, soak the rice in advance. Recommendations is at least an hour before starting to cook your vegetarian congee.
    • If you have fresh herbs like ginger or lemongrass, these are the best to use for the congee. But the powdered ones also works great!
    • When sautéing the spices like garlic, onion, and ginger, be careful not to burn them or your congee will turn bitter.
    • Feel free to use vegetable broth or vegetable stock with low sodium in place of water for more flavor.
    • If you can't find fresh shitake mushrooms, dried shiitake mushroom works just as well. Be sure to soak it for at least 15 minutes before using it.

    Ingredients

    Gather the ingredients for this Vegetarian Congee and once the ingredients are all ready, let's begin!

    • garlic
    • white onion
    • soy meat protein
    • ginger
    • water
    • fresh lemongrass
    • sticky rice
    • turmeric powder
    • salt
    • mushroom powder
    • Pinch of pepper
    • salt & pepper to taste

    Instructions

    Heat a nonstick pan or pot over medium heat and add oil. Add garlic and saute for 1 minute:
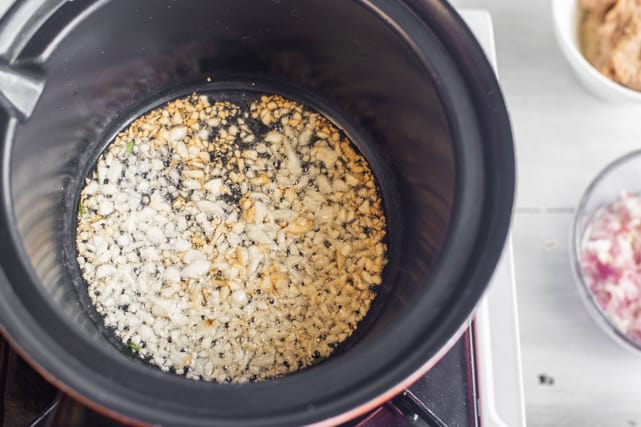
    sauteing minced garlic in a sauce pan for vegetarian congee recipe

    Saute the garlic it becomes browned and remove half and set aside:
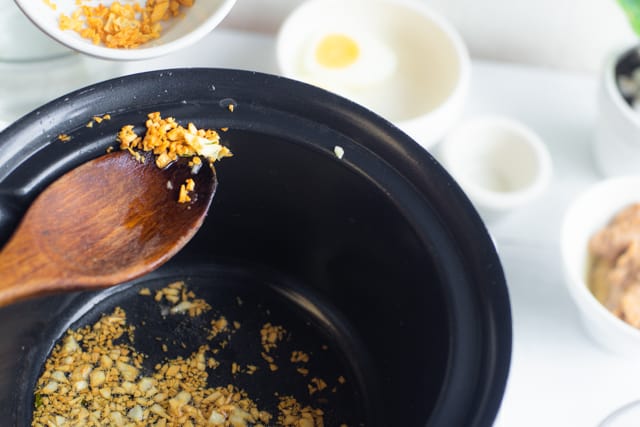
    golden brown garlic for vegetarian congee recipe

    Add onions and cook until translucent:
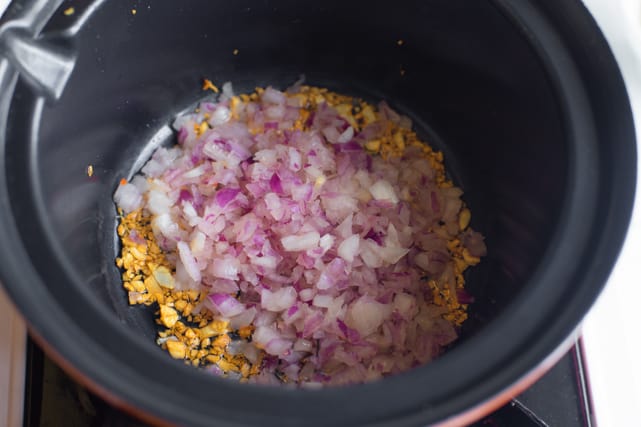
    sauteing onion with the garlic for vegetarian congee recipe

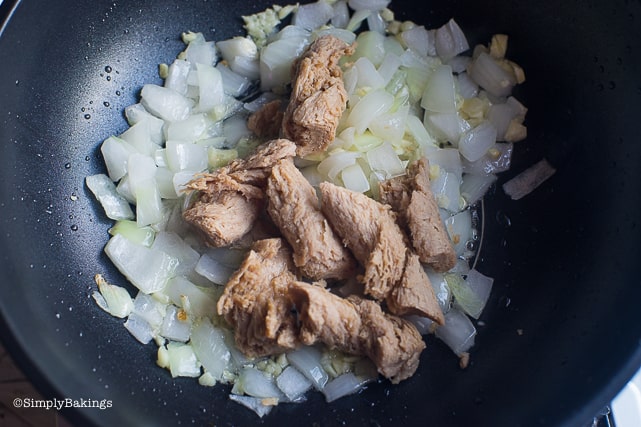
    Then add the soy protein and cook for about 2-3 minutes:
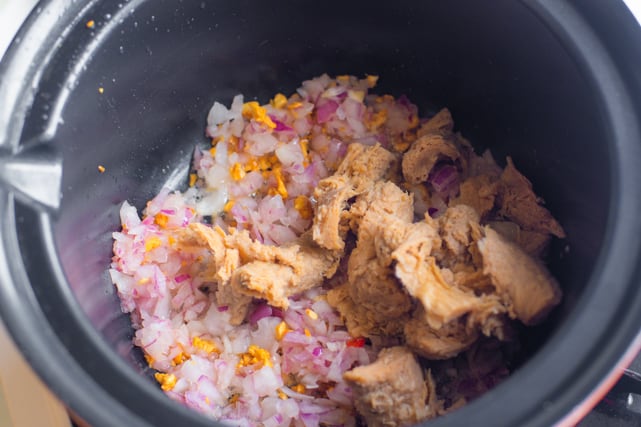
    adding soy protein to the sauteed onion and garlic for vegetarian congee recipe

    Add the ginger, water, and allow it to boil:

    adding ginger to the vegetarian congee ingredients

    Add the lemongrass to the simmering congee base:
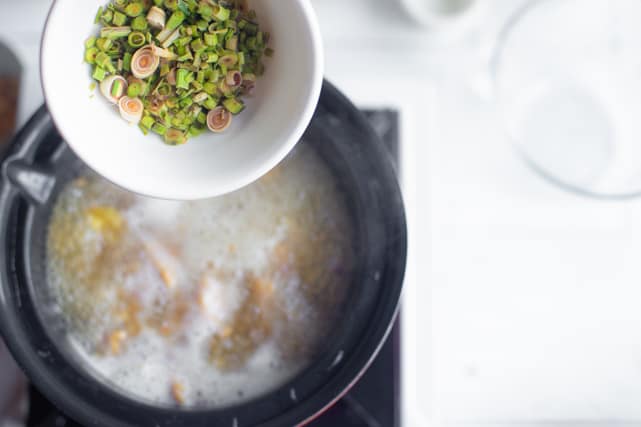
    adding lemongrass to the boiling congee

    After adding the lemongrass, add the sticky rice, and cover with the lid, and allow to cook for about 15-20 minutes stirring continuously:
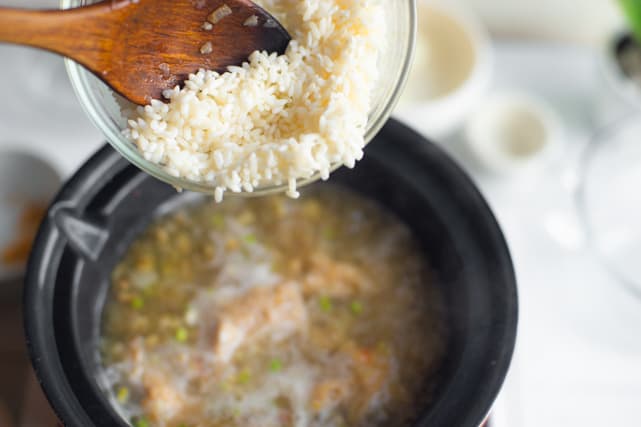
    adding in the sticky rice for the congee recipe

    Let it cook until the rice has softened and stir until it looks like this, you can now season the vegetarian congee:
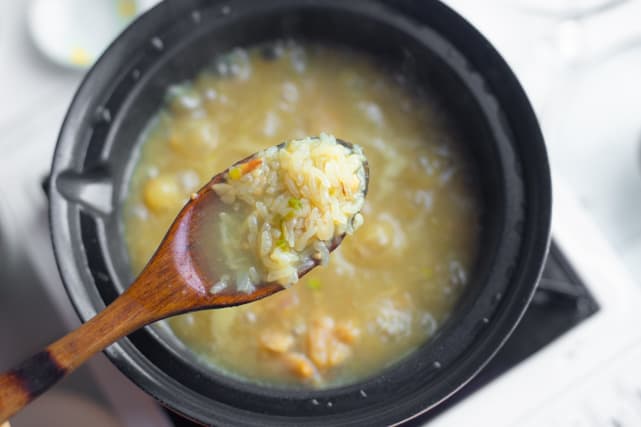
    cooked sticky rice in a ladle

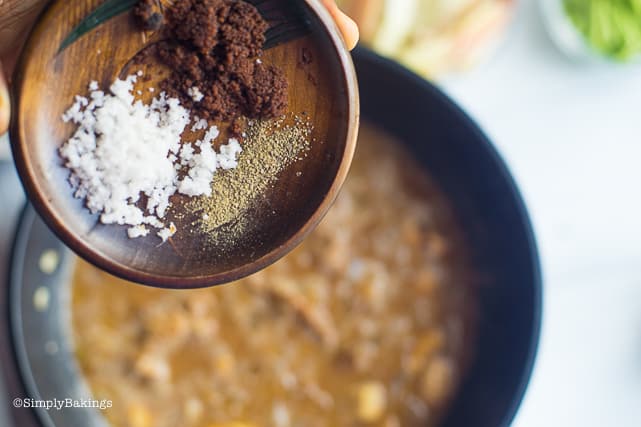
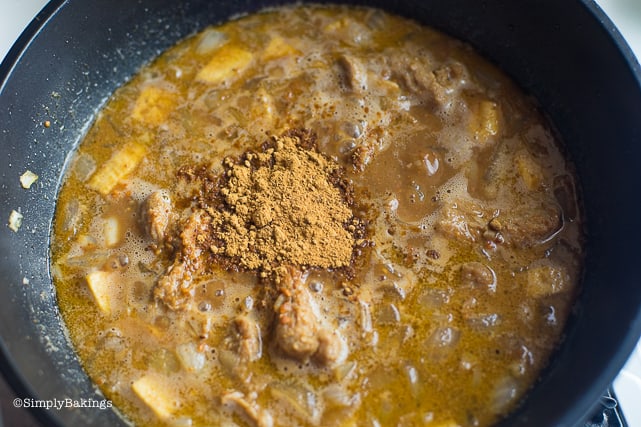
    Add the seasonings and cook for about 2 more minutes. First, add the turmeric powder:
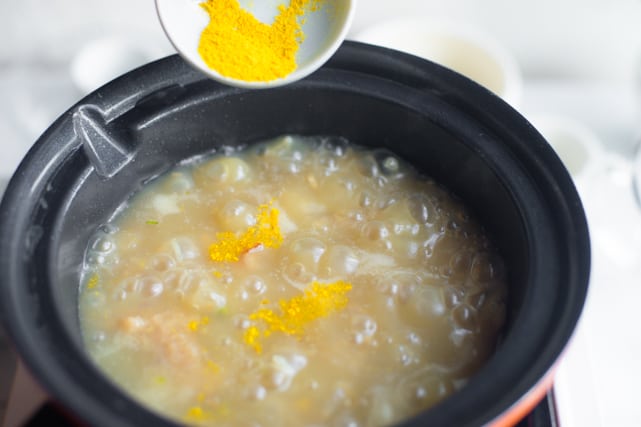
    adding turmeric powder to the simmering vegetarian congee

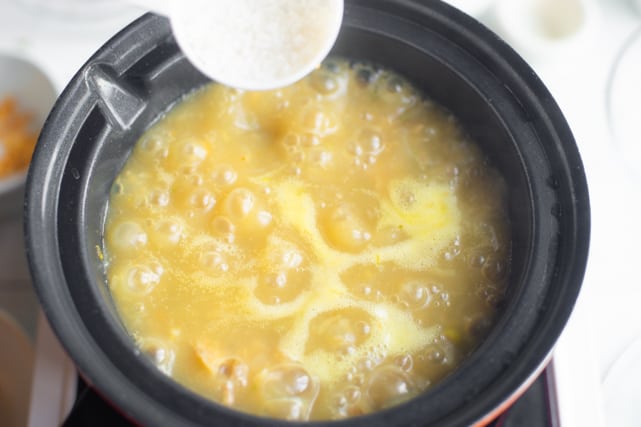
    Then add the salt:

    seasoning the vegetarian congee

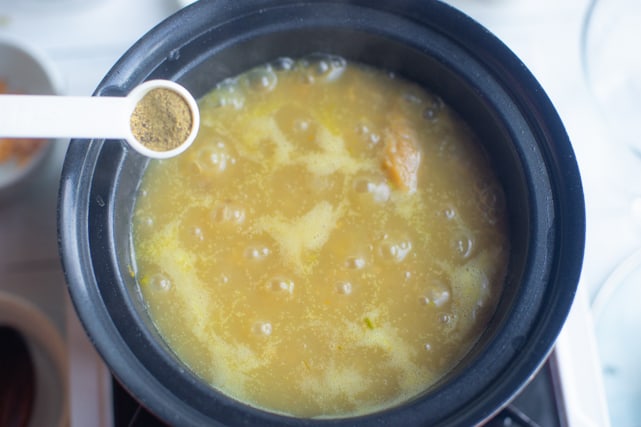
    Add in the pepper:

    seasoning the vegetarian congee with pepper

    Finally, add the mushroom powder and mix well:

    seasoning the vegetarian congee with mushroom powder

    Finally, garnish with the browned garlic, green onion, and boiled egg and serve hot.  Also, feel free to season with soy sauce. 
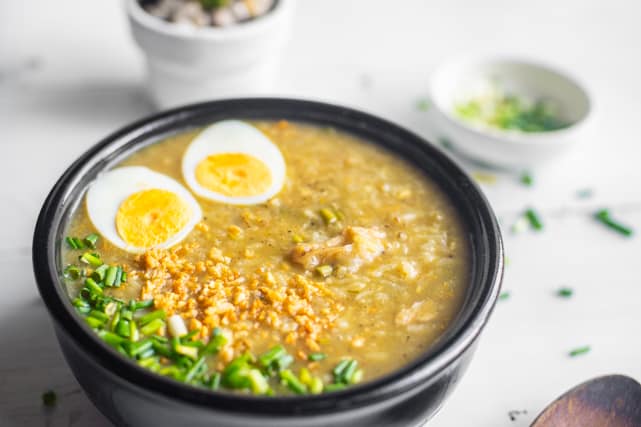
    cooked vegetarian congee topped with boiled eggs, toasted garlic bits, and green onions

    Frequently Asked Questions

    Is congee actually healthy?

    Yes, congee is healthy as it’s light, easy to digest, and provides a good source of energy from rice while being low in fat. Adding vegetables, spices like turmeric, and toppings like tofu or kale boosts its nutrients and fiber content.

    What is the secret to Great congee?

    The secret to great congee lies in using the right rice-to-water ratio, cooking on medium-high heat, and stirring often to achieve a creamy texture. Enhancing flavor with aromatics like ginger, garlic, and optional spices like white pepper makes it even better.

    What to eat with congee vegetarian?

    Pair vegetarian congee with sautéed kale, tangy kimchi, or a drizzle of chili oil for extra flavor. You can also enjoy it alongside steamed vegetables, crispy tofu, or pickled radish for a complete meal.


    Some of my favorite breakfast recipes to eat with Congee:
    • Strawberry Banana Smoothie
    • Shakoy
    • Ampalaya 
    congee topped with boiled eggs, spring onions, and fried garlic bits
    5 from 1 vote
    Print Pin Recipe

    Vegetarian Congee Recipe

    Filipinos love to eat this delicious and comforting vegetarian congee on cold, rainy days - topped with boiled eggs, crispy toasted garlic bits, and green onions!
    Prep Time10 minutes mins
    Cook Time20 minutes mins
    Total Time30 minutes mins
    Cuisine: Filipino
    Servings: 2 -3 servings
    Calories: 121kcal
    Author: Lainey
    Prevent your screen from going dark

    Ingredients

    • 4 cloves of garlic minced
    • 1 medium size white onion diced
    • 6 pcs soy meat protein pending on your choice of soy meat, you may need to soak it in hot water for 5 minutes
    • ½ tablespoon ginger minced
    • 4 cups of water*
    • 1 teaspoon of fresh lemongrass minced
    • 1 cup of sticky rice washed and drained
    • 1 teaspoon turmeric powder
    • 1 teaspoon salt
    • 1 teaspoon mushroom powder
    • pinch of pepper
    • salt & pepper to taste

    Instructions

    • Heat a nonstick pan over medium heat and add oil.  Add garlic and saute for 1 minute or until it becomes browned and remove half and set aside.
    • Add onions and cook until translucent, then add the soy protein and cook for about 2-3 minutes.
    • Add the ginger, water, and allow it to boil. 
    • Add the emongrass, sticky rice, and cover with the lid, and allow to cook for about 15-20 minutes stirring continuously or until the rice has softened.
    • Add the seasonings and cook for about 2 more minutes
    • Finally, garnish with the browned garlic, green onion, and boiled egg. 
    • Serve hot.
    Leave a Comment

    Notes
    *Feel free to use low sodium vegetable broth or vegetable stock for more flavor.
    Serving: 1servingCalories: 121kcalCarbohydrates: 27gProtein: 3gFat: 0.4gSaturated Fat: 0.1gPolyunsaturated Fat: 0.1gMonounsaturated Fat: 0.1gSodium: 1195mgPotassium: 149mgFiber: 2gSugar: 2gVitamin A: 2IUVitamin C: 6mgCalcium: 43mgIron: 1mg
    QR Code
    Did you make this recipe?Share it on instagram or tag @simplybakings or #simplybakings!

    Breakfast & Brunch, Christmas Desserts, Main Entree, Rice, Noodles, Potatoes, Side Dishes, Soups and Salads, Vegan Filipino Recipes, Vegetarian Filipino Recipes

    Pinakbet Without Meat

    Sep 6, 2019 · 6 Comments

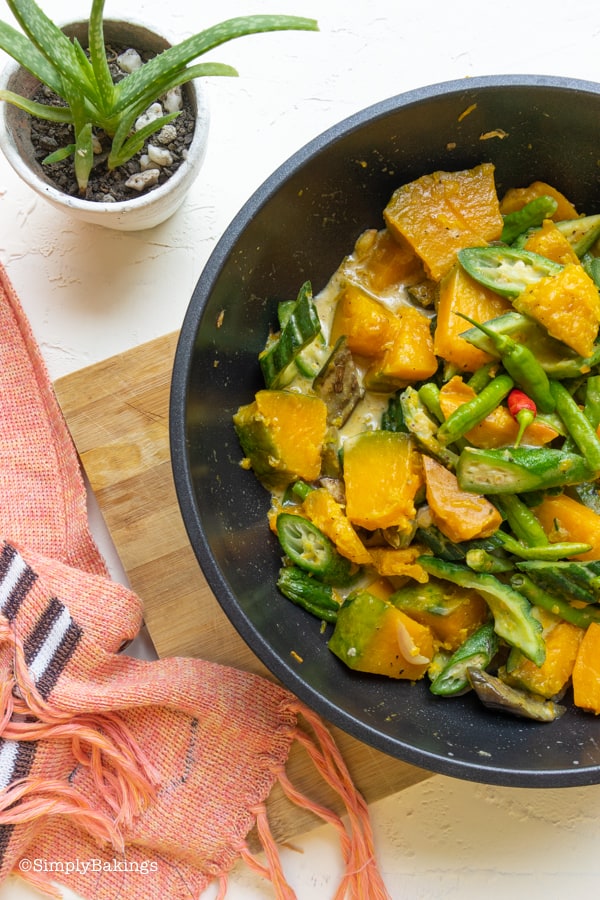
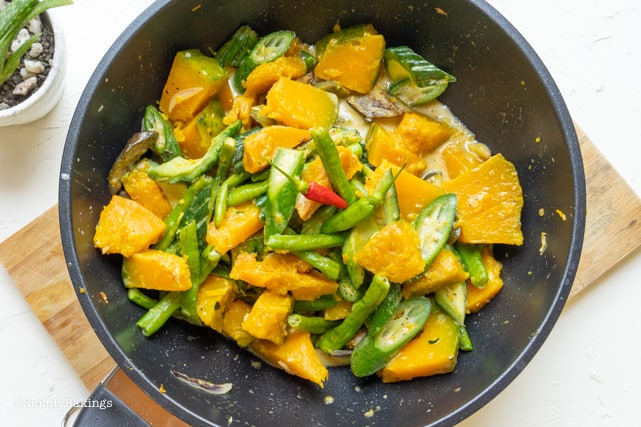
    cooked Pinakbet in a pan layed on top of a wooden board

    Here is a colorful, healthy, and easy to cook Filipino dish - Pinakbet Without Meat!  It's a Vegan Vegetarian recipe and such a crowd-pleaser wherever I go, and you can make this recipe without any meat or seafood and under 20 minutes! 

    This dish is delicious with Pancit Canton, Easy Misua Soup, Bola Bola (Filipino Veggie Meatballs), Fried Fish Balls, or Vegan Isaw!

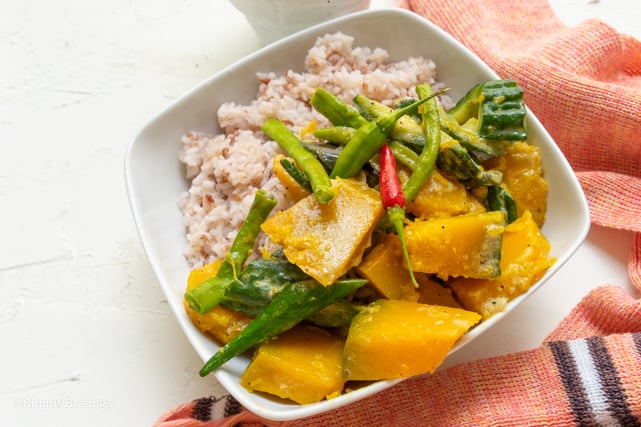
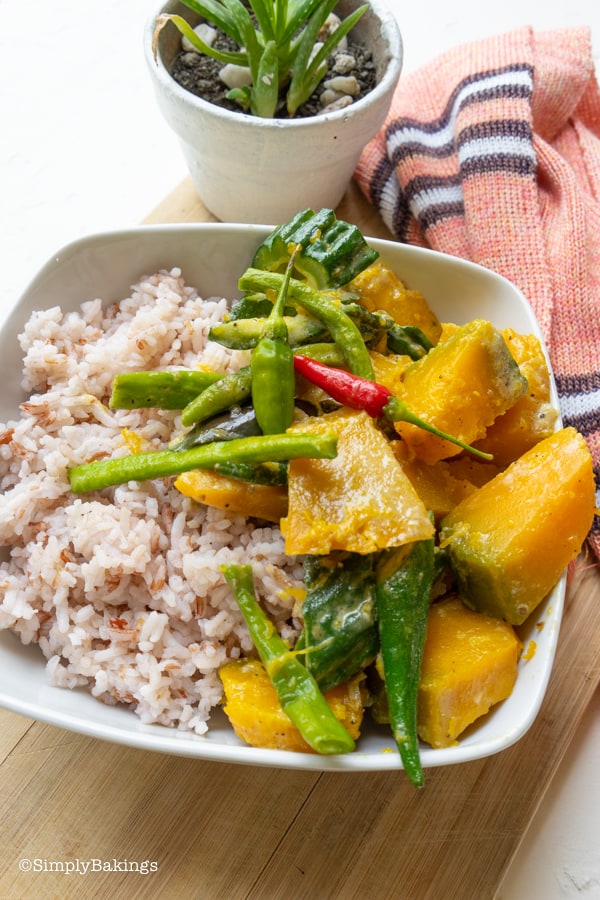
    Vegan Vegetarian Pinakbet over steamed brown rice

    [feast_advanced_jump_to]

    What is Pinakbet?

    Pinakbet (or pakbet) is a colorful Filipino vegetable dish full of healthy vegetables. In travel and food videos, I've noticed that people from Ilocos love eating veggies because they grow a lot of them on their farms.

    They have big fields where they plant and pick their own vegetables, which is why they make the famous Pinakbet. Over time, other places in the Philippines have also learned to cook this dish.

    Filipinos regularly use Kalabasa or squash, ampalaya or bitter gourd, also known as bitter melon, okra, and eggplants. The usual cooking of Pinakbet for Filipinos is to mix the vegetables with some ground pork meat, pork belly, or bagoong (fermented shrimp paste or fermented fish).

    Who invented Pinakbet?

    Pinakbet originated from the Ilocos Region of the Philippines. The word pinakbet is derived from the Ilocano word pinakebbet, which means “shrunk” or “shriveled”. 

    cooked Pinakbet recipe in a pan

    The original Ilocano pinakbet uses bagoong of fermented monamon, ginisang bagoong isda or alamang and variety of vegetables that are grown in the backyards or gardens of most Ilocano households.

    Substitutions

    • Use a Different Sauce: If you don’t have tamari soy sauce, regular soy sauce works fine. You can also use coconut aminos for a slightly sweeter flavor.
    • Change the Squash: If you can't find kalabasa (a type of squash), you can use butternut squash or pumpkin.

    Variations

    • Spice It Up: For a bit of heat, add some chopped chili peppers or a pinch of chili flakes.
    • Extra Flavor: Try adding a teaspoon of ginger for a different taste.
    • Add Tofu: For extra protein, you can add some tofu cubes. Cook them until they are golden before adding the vegetables.

    Storage

    Can be stored for up to 5 days in the refrigerator in an airtight container.

    Top Tips

    • Cut the vegetables in uniform sizes to ensure even cooking!
    • When mixing the vegetables, gently do so because cooked vegetables are softer.
    • Always add the hardest vegetable first - in this case, it is the kalabasa (squash). They take longer to soften compared to okra.
    • How do we know that our vegetables are cooked just enough? When a vegetable is at its darkest or brightest color, that's the time we can say it's cooked just right. For example, the ampalaya when raw is colored green, so when it is cooked just right, it would look super green.
    • When cooking the vegetables, pay attention to the texture and softness. Vegetables are delicious to eat when they still have a little crunch and "bite" in them.

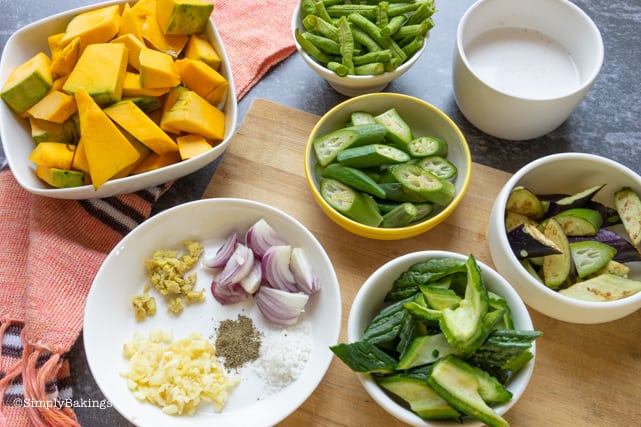
    Ingredients

    Here are the ingredients you will need:

    • red shallot
    • garlic cloves
    • kalabasa, also known as squash
    • string beans
    • ampalaya (bitter melon)
    • long eggplant
    • okra
    • coconut cream
    • tamari or soy sauce
    • salt
    • pepper
    healthy ingredients of Pinakbet recipe

    Instructions

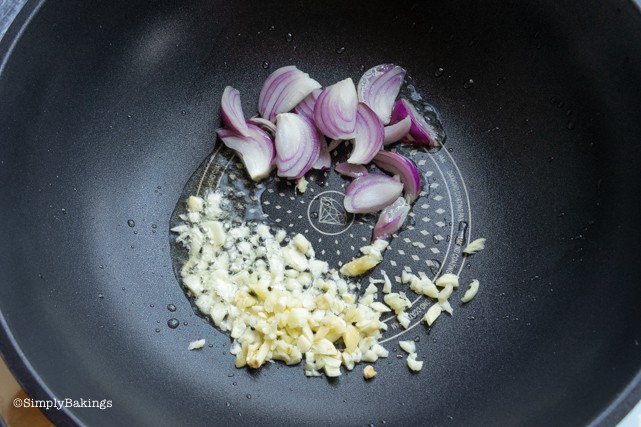
    Heat a nonstick pan over medium heat and add oil.  Add onions, garlic, and saute for 1 minute or until translucent:

    sauteeing onion and garlic in a pan for Pinakbet recipe

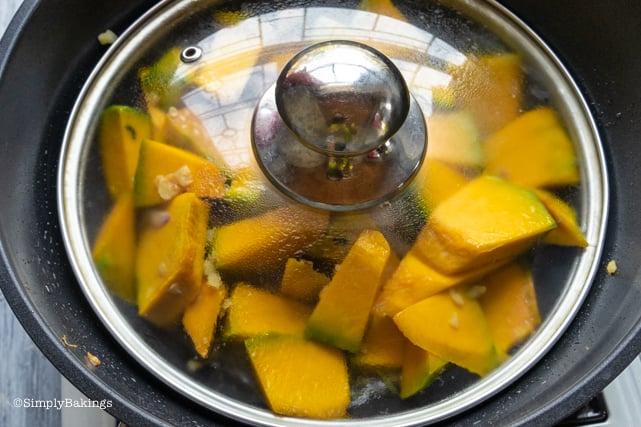
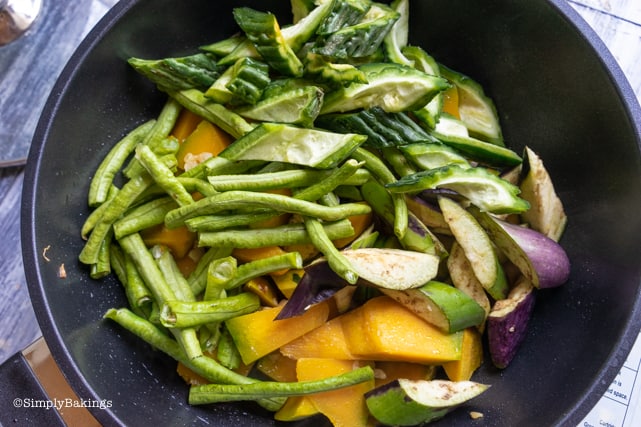
    Add the kalabasa, cover, and cook until for 5 minutes or until kalabasa is tender yet crisp:

    cooking the kalabasa or squash together with the onion and garlic in a pan with lid

    Next add the string beans, ampalaya (bitter melon), eggplant:

    adding ampalaya, string beans and eggplant to the sauteed kalabasa for Pinakbet recipe

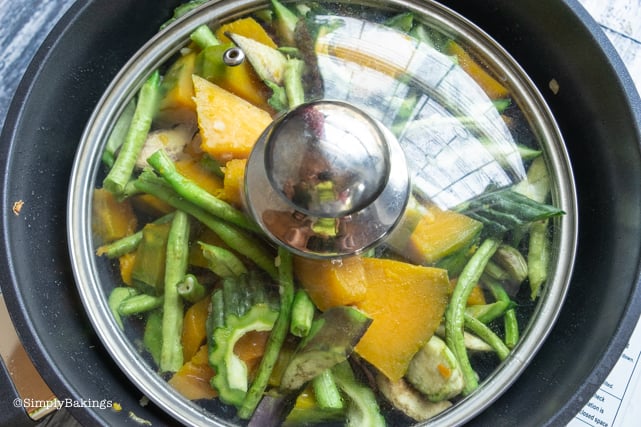
    and cover with the lid for 2 to 3 minutes or until they are semi tender:

    covering the pot with lid to tenderize the vegetables for Pinakbet recipe

    Add okra, cover with lid and continue cooking for about 1 minute:

    adding the ampalaya, okra and string beans to the ingredients of Pinakbet recipe

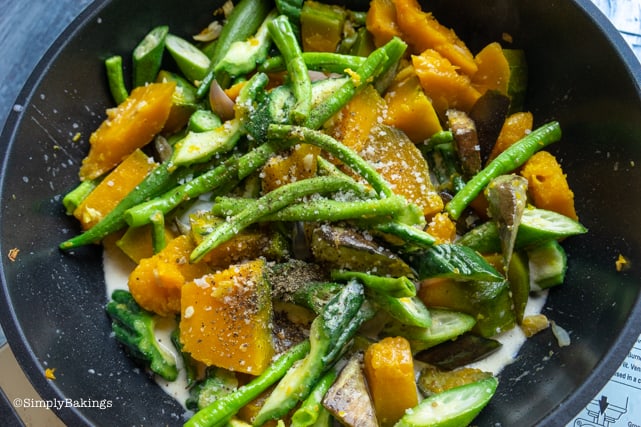
    Now, this is my favorite part (because I LOVE coconut cream)! Add coconut cream, tomatoes, soy sauce, salt and allow it to simmer for 2 to 3 minutes or until okra is cooked. It is important to NOT OVERMIX your vegetables (look up the reason in the Top Tips section 🙂 ).

    Season with salt, pepper and eat with rice:

    seasoning with salt and pepper

    There you have it! A very healthy meal packed with vitamins and minerals, all in one authentic Filipino vegetarian recipe!

    I promise you guys, it is best to eat Pinakbet with white rice ♥

    Simply Bakings Recommends

    Tap to view helpful kitchen picks for this recipe

    Cooking vegetable dishes like Pinakbet is even easier with a few simple pantry and kitchen essentials.

    • Stock pantry staples for everyday cooking
    • Use cookware that helps vegetables cook evenly
    • Store leftovers in airtight containers (use code LAINEY5)

    Disclosure: This box may contain affiliate links. We may earn a small commission at no extra cost to you.

    delicious and easy to cook Pinakbet over steamed red rice in a white plate

    Frequently Asked Questions

    What are the health benefits of Pinakbet?

    Pinakbet is packed with vegetables, providing essential vitamins, minerals, and fiber that support overall health and digestion. It's low in calories and fat, making it a nutritious and heart-friendly meal option.

    How do I decrease the bitterness of the ampalaya (bitter melon)?

    To decrease the bitterness of ampalaya (bitter melon), you can soak the slices in salted water for about 30 minutes before cooking. Rinse them well afterward to remove the excess salt.

    How do I prevent the eggplant from turning brown after slicing them?

    Soaking it in water and take it out when you are ready to mix it in


    pinakbet with no meat on a bowl
    4.67 from 3 votes
    Print Pin Recipe

    Pinakbet Without Meat

    Make Pinakbet without meat or seafood under 20 minutes - a healthy and easy to cook Filipino vegan vegetarian dish!
    Prep Time10 minutes mins
    Cook Time15 minutes mins
    Total Time25 minutes mins
    Course: Entree, Main Course
    Cuisine: Filipino
    Servings: 4
    Calories: 562kcal
    Author: Lainey
    Prevent your screen from going dark

    Ingredients

    Aromatics:

    • 1 small red shallot chopped
    • 3 garlic cloves minced

    Vegetables:

    • 1½ cups kalabasa about 7 ounces, chopped into medium-sized cubes
    • 1 cup string beans about 3½ ounces, cut into 2-inch pieces
    • 1 cup ampalaya bitter melon, about 3½ ounces, deseeded and sliced
    • 1 long eggplant cut into 4 parts
    • 4-5 okra sliced in half (or into three pieces if long)
    • 2 tomatoes quartered (optional)

    Sauce and Seasoning:

    • 1 cup coconut cream
    • 1 tablespoon tamari soy sauce or soy sauce
    • Salt and pepper to taste

    Instructions

    Sauté the Aromatics:

    • Heat a nonstick pan over medium heat and add a small amount of oil.
    • Add the chopped red shallot and minced garlic. Sauté for 1 minute or until the shallot is translucent.

    Cook the Kalabasa:

    • Add the chopped kalabasa to the pan. Cover and cook for 5 minutes, or until the kalabasa is tender yet crisp.

    Add the Vegetables:

    • Add the string beans, ampalaya (bitter melon), and eggplant. Cover with the lid and cook for 2 to 3 minutes, or until the vegetables are semi-tender.
    • Add the sliced okra, cover, and continue cooking for about 1 minute.

    Finish with Sauce and Seasoning:

    • Pour in the coconut cream and add the quartered tomatoes (if using), soy sauce, and salt. Allow the mixture to simmer for 2 to 3 minutes, or until the okra is fully cooked.
    • Season with additional salt and pepper to taste.

    Serve:

    • Serve hot with rice.
    Leave a Comment

    Notes
    **I measured this recipe in weight because it's easier to measure especially for a recipe like this. 
    Calories: 562kcalCarbohydrates: 46gProtein: 12gFat: 43gSaturated Fat: 37gSodium: 2857mgPotassium: 1961mgFiber: 17gSugar: 17gVitamin A: 3198IUVitamin C: 94mgCalcium: 138mgIron: 6mg
    QR Code
    Did you make this recipe?Share it on instagram or tag @simplybakings or #simplybakings!

    I love pinakbet and I loved it even before I knew what the dish was called. I usually called it Filipino Vegetable Medley! 🙂

    Anyways, there are so many variations of this recipe out there, like some people make it without coconut cream, but I believe the coconut cream elevates the recipe. I hope you enjoy it as much as I do!

    Main Entree, Side Dishes, Vegan Filipino Recipes, Vegetables, Vegetarian Filipino Recipes

    Ampalaya Recipe

    Aug 29, 2019 · 2 Comments

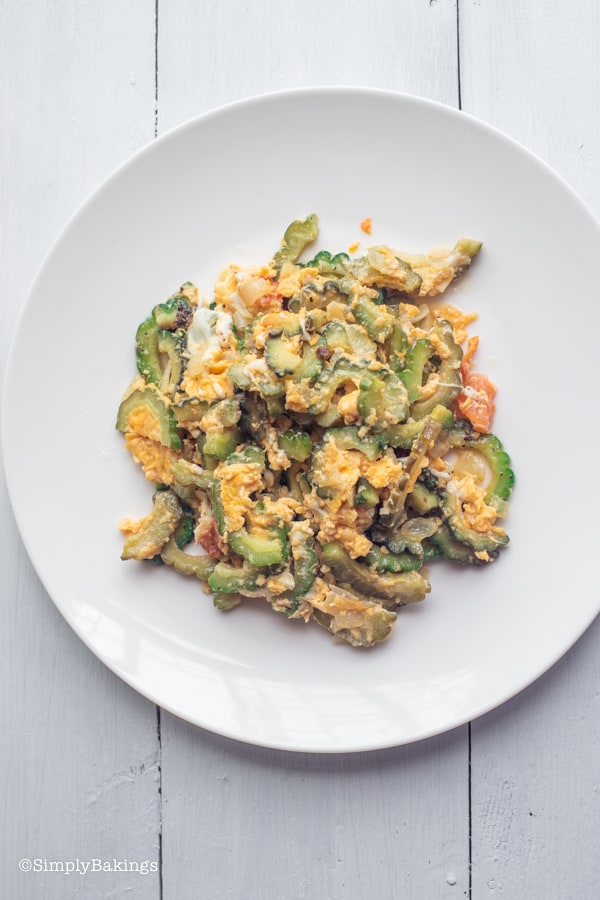
    stir-fried ampalaya with egg served on a white plate

    If you're up for a quick, easy, and budget-friendly breakfast dish, check out this stir-fry ampalaya recipe! This Filipino dish is full of nutrients, delicious, and perfect for a healthy vegetarian breakfast for the whole family!

    Looking for more ways to incorporate vegetables? Try my Filipino Chop Suey!, Porbidang Kangkong, and Eggplant Chickpea Stew recipe!

    cooked ampalaya with eggs on a white plate
    [feast_advanced_jump_to]

    What is Ampalaya Recipe?

    This ampalaya recipe, locally known as ginisang ampalaya, is a classic Filipino vegetable dish made of sauteed sliced ampalaya, tomatoes, scrambled eggs, and spices which make a healthy and delicious breakfast!

    This quick and easy stir-fried ampalaya is a staple breakfast dish in the Philippines. It balances the gourd's bitterness with savory and somewhat sweet flavors making it a popular option for a tasty and healthy meal.

    Try making this dish on your own for a nutritious breakfast for your family. Learn more about this recipe below!

    Health Benefits of Ampalaya (Bitter Melon)

    • Its juice acts as a blood purifier.
    • It has a high content of potassium, higher than that of bananas.
    • A great source of dietary fiber, zinc, manganese, phosphorus, B vitamins, folate, magnesium, calcium, and iron
    • It has a high amount of beta carotene which is twice as much in broccoli.

    Variations

    • Adding tofu bits to this dish is a great way to enhance its flavor and texture.
    • Add chili slices or red chili flakes while sautéing for a spicy kick.
    • After combining the eggs, sprinkle grated cheese over the dish to add a creamy and savory taste
    • Garnish this dish with finely sliced green onions for a fresh finish.

    Substitutions

    • Sliced zucchini can be used instead of ampalaya for a less bitter option.
    • For a vegan option with extra protein, use crumbled tofu for the eggs.
    • Use halved cherry tomatoes instead of regular tomatoes for an added boost of color and taste.

    Storage

    • To ensure freshness, store the leftover ampalaya dish in an airtight container and refrigerate for up to three days.
    • To reheat, gently warm in a pan over low heat, adding a splash of water or oil as needed to restore texture and taste.
    • Make sure to check for any signs of spoilage before reheating.

    Ingredients

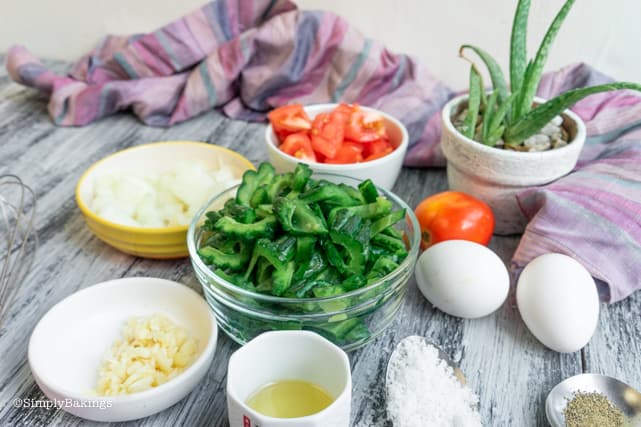
    Gather the following ingredients for this dish:

    • ampalaya (bitter melon)
    • coconut oil
    • small white onion 
    • garlic
    • tomatoes
    • eggs
    • salt
    • pinch of pepper
    ampalaya recipe ingredients

    Instructions

    Slice the ampalaya (bitter gourd) vertically into two pieces, remove the seeds/strings, and then slice into thin wedges. After slicing the ampalaya, soak it in a bowl with salt and water for at least 30 minutes to 1 hour (the longer the better).

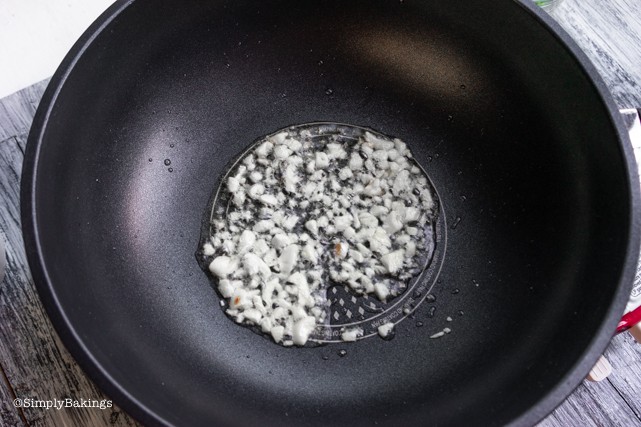
    Heat a nonstick pan over medium heat and add cooking oil.  Add onions, and garlic, and sauté for 1 minute or until fragrant:

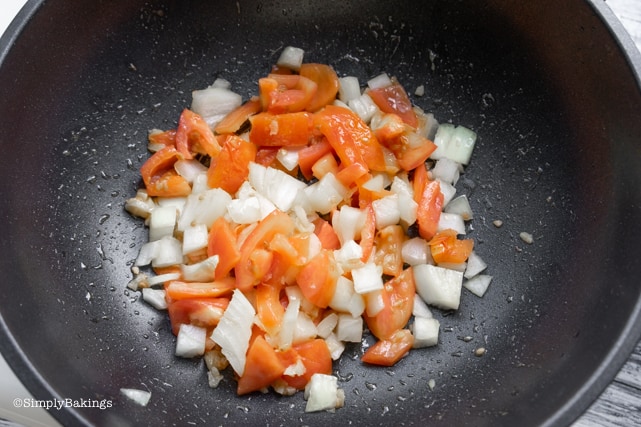
    sauteeing onion and garlic in a hot pan for ampalaya with eggs recipe

    Add tomatoes and cook until tender (about 5 minutes).

    Add ampalaya, cover, and simmer for about 3-5 minutes or until it softens. (The softening of the ampalaya will take an additional 5 minutes minimum):

    sauteeing tomatoes for ampalaya recipe

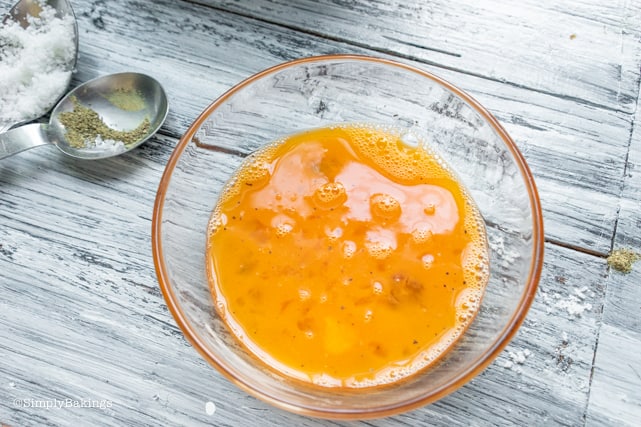
    In a small bowl, beat together the eggs, salt, and pepper then add it to the frying pan. 

    beaten eggs in a bowl for ampalaya recipe

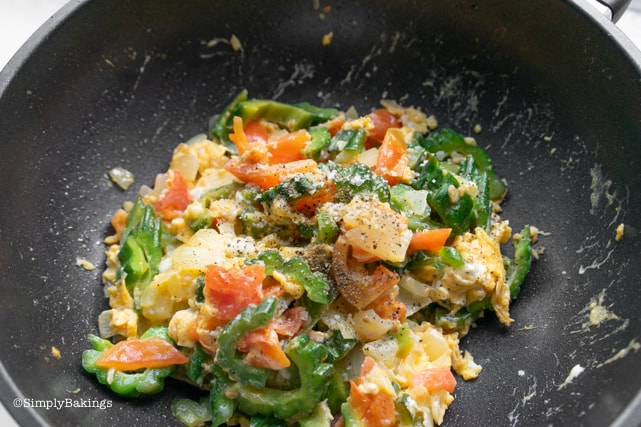
    Mix the eggs and ampalaya until well combined:

    adding beaten eggs to cooked ampalaya

    Allow it to simmer for about 1 minute:

    seasoning ampalaya with pepper

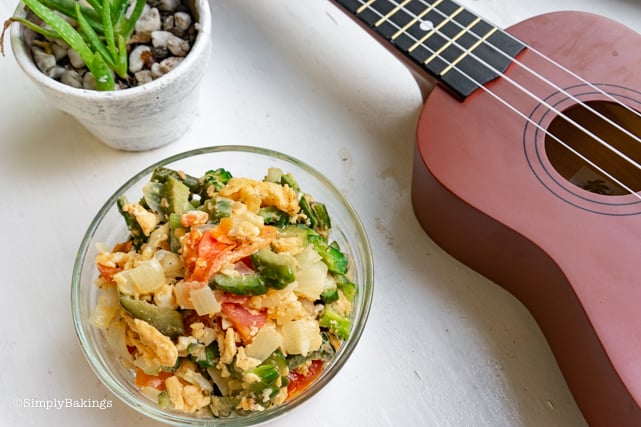
    Serve it warm with steamed rice or as its own:

    perfectly cooked ampalaya with egg in a clear bowl

    Enjoy a healthy and tasty dish!

    Top Tips

    • Soaking the ampalaya in salt and water will remove the bitter taste (although it might lose some of the health benefits).
    • There is also one trick that is quicker than soaking the ampalaya in salted water. After slicing the ampalaya in half, scrape off all the white pulp where the seeds are. They say that the white pulp causes the bitterness of ampalaya (Note: It is said that the bitterness is what makes the ampalaya healthy, so it's kind of hard to decide, lol)
    • Avoid overcooking the ampalaya as it brings out more of its bitterness.

    FAQ

    How do you remove bitterness from ampalaya?

    Soaking it in salt water for about 30 minutes to 1 hour will decrease or remove the bitterness.

    Can I slice the ampalaya ahead and chill it before cooking?

    Yes, you can. But they say that when fruits or vegetables are sliced and left uncooked for quite a time, the vitamins and minerals are less potent.

    Is it OK to eat ampalaya every day?

    Ampalaya can be a healthy addition to your diet but it is recommended to eat it in moderation. Otherwise, it may result in negative side effects such as diarrhea and abdominal pain.


    More Filipino Recipes

    If you like this Filipino dish you will enjoy these as well:

    • Tofu Sisig
    • Buko Pandan
    • Cassava Cake
    • Shakoy
    • Halo Halo
    • Turon
    healthy ampalaya recipe on a white plate
    5 from 1 vote
    Print Pin Recipe

    Ampalaya Recipe

    This is an easy ampalaya recipe made with sauteed ampalaya slices, tomatoes, and spices with scrambled eggs. It's popular Filipino dish perfect for a healthy and savory breakfast with the whole family!
    Prep Time10 minutes mins
    Cook Time15 minutes mins
    Soak Time30 minutes mins
    Total Time55 minutes mins
    Course: Breakfast
    Cuisine: Filipino
    Servings: 1 person
    Calories: 477kcal
    Author: Lainey
    Prevent your screen from going dark

    Ingredients

    • 1 cup ampalaya (bitter melon) sliced into thin wedges
    • 2 tablespoons coconut oil
    • 1 small white onion diced
    • 3 cloves garlic minced
    • 2 tomatoes cubed
    • 2 eggs beaten
    • ½ teaspoon salt
    • pinch of pepper

    Instructions

    • Vertically slice ampalaya into two pieces, remove the seeds/strings, then slice into thin wedges.
    • After slicing the ampalaya, soak it in a bowl with salt and water for at least 30 minutes to 1 hour. (The longer the better.) 
    • Heat a nonstick pan over medium heat and add oil.  Add onions, and garlic, and saute for 1 minute or until fragrant. 
    • Add tomatoes and cook until tender (about 5 minutes).
    • Add ampalaya, cover and simmer for about 3-5 minutes or until it softens. (The softening of the ampalaya will take an additional 5 minutes minimum) 
    • In a small bowl, beat together the eggs, salt, pepper then add it into the frying pan.
    • Mix the eggs and ampalaya until well combined. Allow it to simmer for about 1 minute then serve.
    Leave a Comment
    Serving: 1bowlCalories: 477kcalCarbohydrates: 27gProtein: 16gFat: 37gSaturated Fat: 26gPolyunsaturated Fat: 2gMonounsaturated Fat: 5gTrans Fat: 0.03gCholesterol: 327mgSodium: 1311mgPotassium: 1177mgFiber: 8gSugar: 12gVitamin A: 2965IUVitamin C: 123mgCalcium: 134mgIron: 3mg
    QR Code
    Did you make this recipe?Share it on instagram or tag @simplybakings or #simplybakings!

    Growing up ampalaya was a staple at my house, but I did not like eating it.  As a kid, my parents encouraged (more like forced) me to eat at least one bite -which I did because I was a good kid. haha.

    Now as an adult, I've learned to eat ampalaya for the health benefits and not so much for the taste. I found that cooking ampalaya with eggs makes it more bearable and I try to remember ampalaya has really awesome health benefits, so it's definitely worth it!

    Breakfast & Brunch, Side Dishes, Vegan Filipino Recipes, Vegetables, Vegetarian Filipino Recipes

    Vegan Sinigang Recipe

    Aug 23, 2019 · 5 Comments

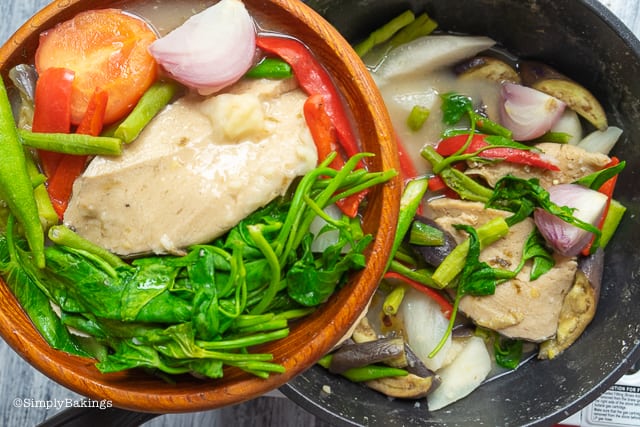
    best and delicious vegan Filipino sinigang served in a wooden bowl

    In 5 simple steps, make this heartwarming authentic Filipino vegan sinigang recipe! Some of the notable ingredients of this dish are kangkong, taro, and vegetarian fish/salmon which makes a healthy vegan soup for family lunch or dinner!

    Looking for more comfort soup? Try my Sotanghon at Upo Soup, Sour Cabbage Soup, and Vegan Misua Soup recipe and enjoy!

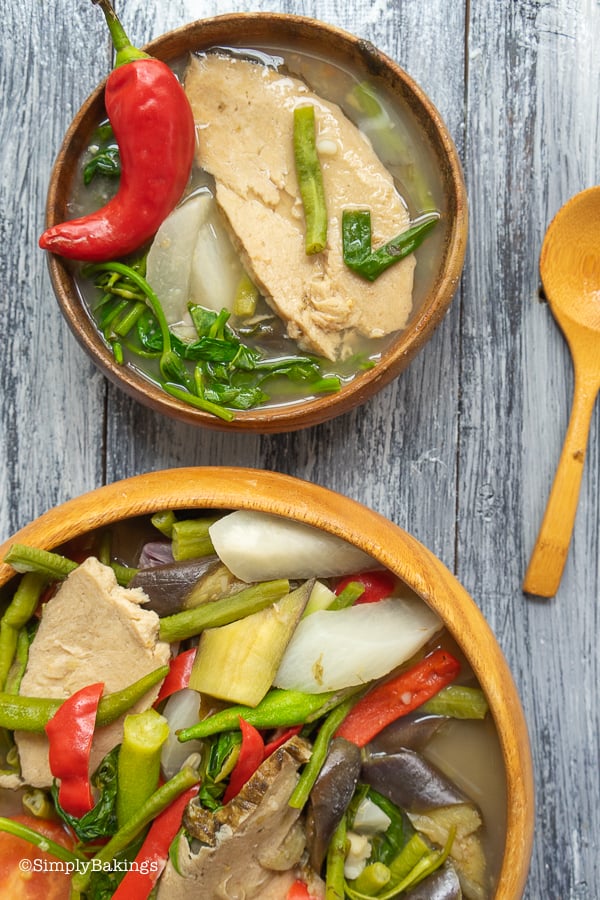
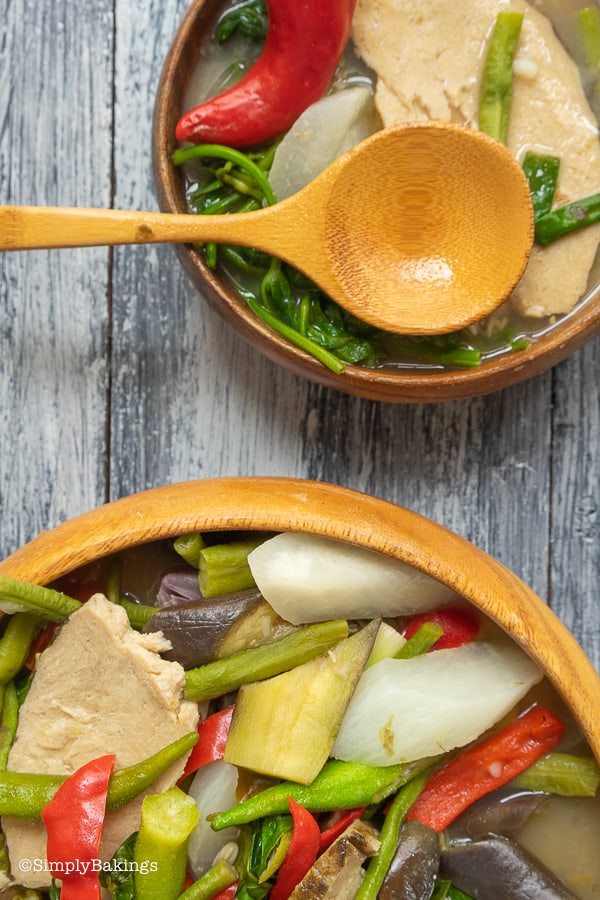
    overhead shot of the best and delicious vegetable sinigang soup in wooden bowls beside a wooden ladle
    [feast_advanced_jump_to]

    What is Sinigang?

    Sinigang is a popular Filipino sour soup and a favorite comfort food in the Philippines. Many Filipinos love it because the tamarind broth is very soothing and tasty, especially with all the vegetables in it. People in the Philippines often cook sinigang every day. They might make it with pork belly, beef, fish (usually bangus or milkfish), shrimp, or chicken.

    Different Ways to Cook Sinigang

    Different regions in the Philippines have their own ways of cooking sinigang and making the soup taste sour. Some use tamarind paste or pulp, batuan, santol, kamias, green mango (a native fruit found in many areas of the Philippines), and calamansi as souring agents.

    Almost all citrus fruits, even lemons, can be used in this delicious dish. Filipinos are creative with cooking, especially in the early times before instant sinigang mixes were available.

    two bowls of vegetarian sinigang with a wooden ladle

    Health Benefits of Taro

    • Rich in dietary fiber for digestive health
    • High in potassium, great for heart health
    • Provides essential vitamins like A and C
    • Contains antioxidants for overall well-being
    • Supports healthy skin with vitamin E

    Variations

    • If you love to add a little healthy fat to this sinigang dish, pour in some pure coconut milk and it will give your vegan sinigang a slightly sweet taste!
    • You may add some seaweeds such as nori or wakame for a hint of oceanic taste like in traditional fish sinigang.
    • Try adding herbs like lemongrass or basil for an aromatic boost to this dish.

    Substitutions

    • Tangy Flavor: Mix lime or lemon juice with a little of vinegar if batuan fruit or tamarind is unavailable.
    • Broth: Replace the water with a rich vegetable broth to add depth of flavor to the soup.
    • Protein: Substitute vegetarian soy salmon with tempeh, tofu, seitan, or chickpeas for a variety of textures and protein.
    • Vegetables: Use kale, zucchini, or bok choy instead of the typical sinigang vegetables to provide a unique and fresh twist.
    vegetarian sinigang with vegetarian salmon in a wooden bowl and a pan

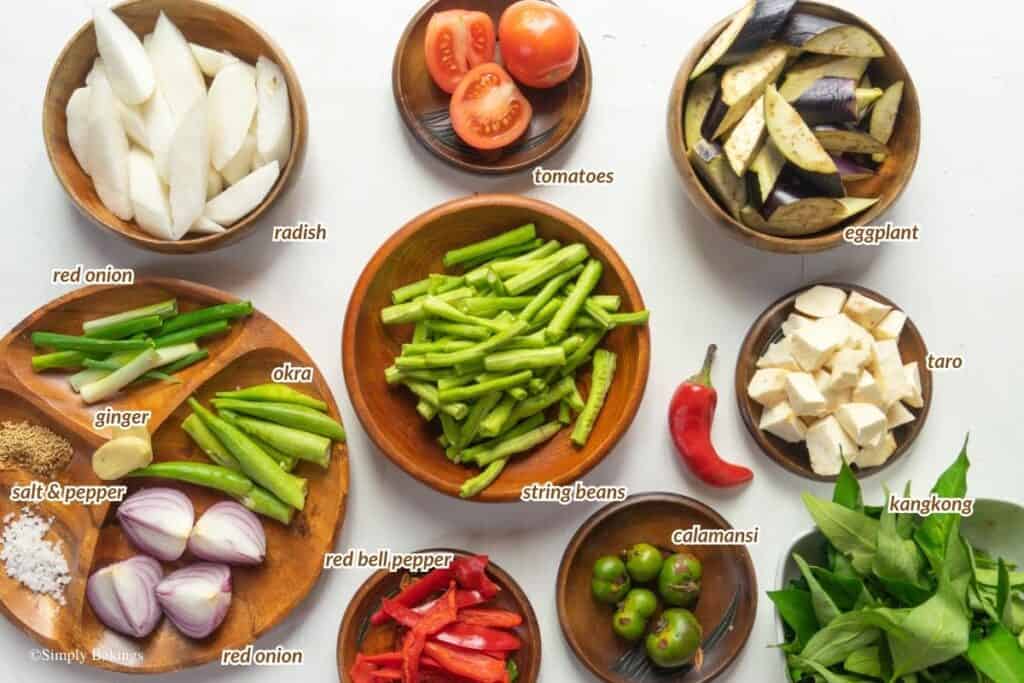
    Ingredients

    • water
    • taro
    • daikon radishes or labanos
    • string beans or sitaw
    • eggplants
    • batuan fruit or tamarind
    • red tomato
    • red onion
    • ginger
    • bell pepper
    • okras
    • green onions
    • vegetarian soy salmon
    • kangkong or spinach
    • mushroom powder, optional
    • salt & pepper to taste
    ingredients for vegan sinigang recipe

    Instructions

    Gather the ingredients for this vegan sinigang recipe and once the ingredients are all ready, let's begin!

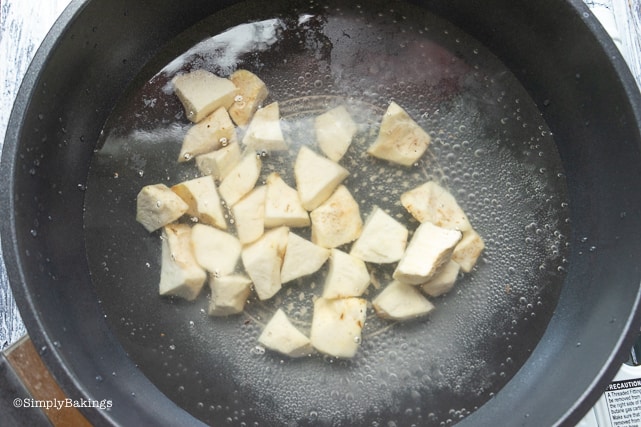
    In a large pot, boil 4 cups of water on medium heat. Once it’s boiling, add the taro and wait about 8-10 minutes for it to soften:

    boiled the taro until soft in a large pot

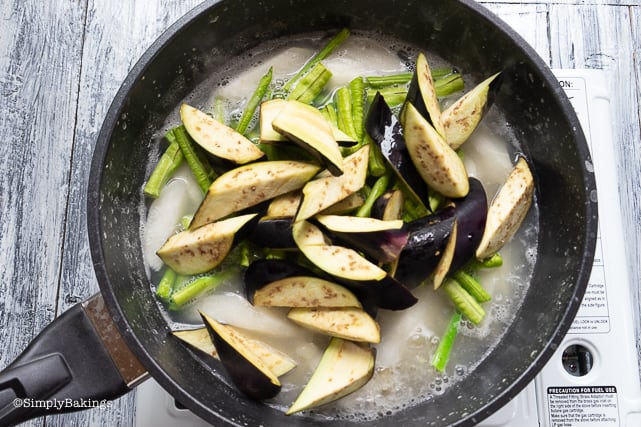
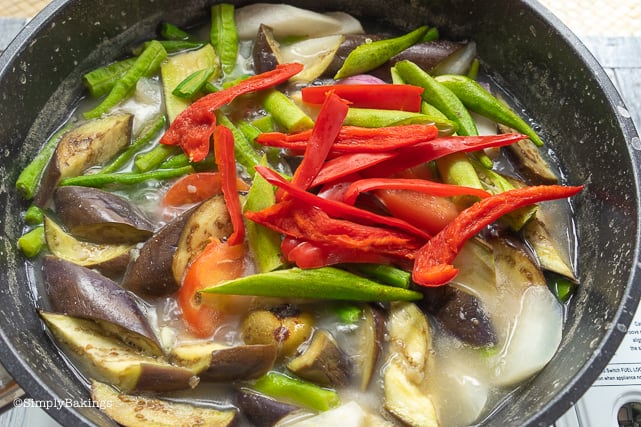
    Next, add the radish and allow it to boil for 2 more minutes. Add the string beans, eggplants and lower the heat, and cover with the lid to allow it to simmer for 2 minutes:

    adding the string beans and eggplant slices to the softened taro

    Next, add batuan or tamarind, tomatoes, onions, bell peppers and ginger, cover with the lid and simmer for 2 more minutes:

    adding the batuan, ginger, okra and red bell peppers to the cooked vegetables for vegetarian sinigang

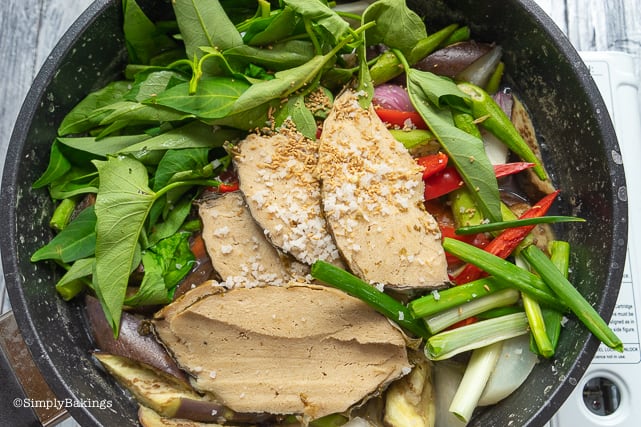
    Next, add the okra and vegetarian salmon fish and make any final seasoning adjustments with salt and black pepper or mushroom seasoning, if needed. Cover with lid for 3 minutes:

    adding the vegetarian soy salmon and the mushroom powder

    Finally, add the kangkong and green onions. This dish is best when served hot and eaten with rice (especially in the Philippines wherein every meal, there has to be rice):

    cooked vegan sinigang in a pot

    There you have it! A very nutritious and vegetarian version of the authentic Filipino dish, Sinigang!

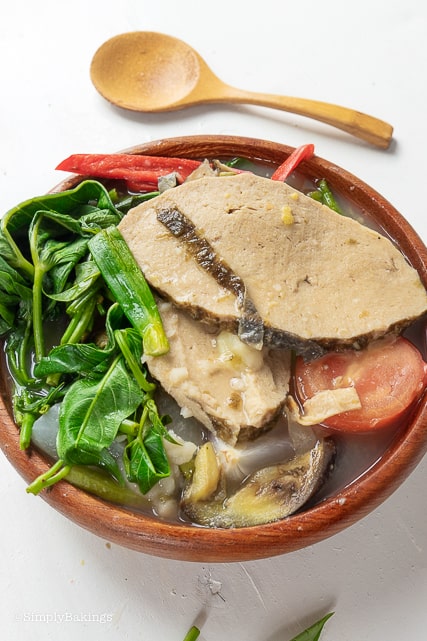
    a bowl of vegan sinigang with vegetarian salmon, red pepper and tomato slices

    Top Tips

    • To test the doneness of the taro, poke the taro with a fork and if it's tender- it's ready.
    • Always slice and prepare your vegetables ahead so that your cooking time would be stress-free.
    • Slicing ahead the eggplant would make its flesh turn brown in color. To avoid that, soak the eggplant slices in water after slicing and just take it out when you are ready to cook it.
    • Do not overcook the vegetables, especially the soft ones like the kangkong. When you see that the vegetable is at its darkest or brightest color, that means it is perfectly cooked.

    FAQ

    What is kangkong and where can I get it?

    Kangkong, also known as water spinach, is a leafy green vegetable commonly used in Asian cuisines. It resembles spinach but has a milder flavor and is often used in stir-fries and soups. You can find it in Asian grocery stores or well-stocked local markets.

    What is batuan or tamarind and where can I get it?

    In a nutshell, it gives the sourness of the soup. It's difficult to find batuan in the states, but tamarind can be found at your local Asian Market.  In some specialty stores, I've seen tamarind, but it's a bit more pricy. 

    Where can I find mushroom powder?

    You can find it at your local Asian market or Trader Joes.

    Where can I buy vegetarian fish/salmon?

    Most Asian Markets sell them or your local grocery specialty store.  I've been fortunate enough to find them easily. I live in California. 🙂


    More Filipino Recipes

    • Buko Pandan
    • Cassava Cake
    • Shakoy
    • Halo Halo
    • Turon
    • Vegan Kare-Kare – Delicious & Easy
    • Tofu Sisig

    Happy cooking!

    a bowl of vegan sinigang with vegetarian salmon, leafy vegetable, tomato and red bell pepper slices
    5 from 2 votes
    Print Pin Recipe

    Vegan Sinigang Recipe

    One of the most popular Filipino comfort foods is sinigang and I made a vegan version of it using vegetarian soy salmon. This vegan sinigang recipe is so healthy, delicious, and easy-to-cook for lunch or dinner!
    Prep Time15 minutes mins
    Cook Time20 minutes mins
    Total Time35 minutes mins
    Course: Soup
    Cuisine: Filipino
    Servings: 4
    Calories: 133kcal
    Author: Lainey
    Prevent your screen from going dark

    Ingredients

    • 4 cups water
    • 1 cup taro cut into 1-inch cubes
    • 2 radishes sliced into 2-inch wedges
    • 3 string beans sliced into 3-inch pieces
    • 2 eggplants cut into 2-inch wedges
    • 3-4 batuan fruit or tamarind
    • 2 medium-sized red tomatoes cut in half
    • 1 small red onion cut into 4 pieces
    • 1 large bell pepper sliced into strips
    • 1- inch piece of ginger peeled and cut in half
    • 3 okras
    • 4 pieces vegetarian soy salmon
    • Salt & pepper to taste
    • 1 pinch mushroom powder optional
    • 2-3 cups kangkong or spinach
    • 2 green onions sliced into 1-inch pieces (roots removed)

    Instructions

    Start with the Base:

    • Boil 4 cups of water in a large pot over medium heat.
    • Add the taro cubes and cook for 8-10 minutes until softened.

    Layer the Vegetables:

    • Add the radish wedges and continue boiling for 2 more minutes.
    • Add the string beans and eggplant wedges. Lower the heat, cover the pot, and let it simmer for 2 minutes.

    Enhance the Flavor:

    • Add the batuan or tamarind, tomatoes, onion pieces, bell pepper strips, and ginger. Cover and simmer for another 2 minutes.

    Finish with Protein and Greens:

    • Add the okra and vegetarian soy salmon. Adjust the seasoning with salt, pepper, and mushroom powder (if using). Cover and cook for 3 minutes.
    • Stir in the kangkong or spinach and green onions. Let the greens wilt slightly.

    Serve:

    • Serve hot and enjoy your flavorful vegetable stew!
    Leave a Comment
    Serving: 1bowlCalories: 133kcalCarbohydrates: 30gProtein: 5gFat: 1gSaturated Fat: 0.2gPolyunsaturated Fat: 0.3gMonounsaturated Fat: 0.1gSodium: 64mgPotassium: 1081mgFiber: 11gSugar: 13gVitamin A: 3379IUVitamin C: 73mgCalcium: 86mgIron: 2mg
    QR Code
    Did you make this recipe?Share it on instagram or tag @simplybakings or #simplybakings!

    I grew up eating this vegetarian sinigang every day, even in California's hot summers! This dish broth was made with fish, which I occasionally ate since I wasn't vegetarian. Sinigang is definitely a must-try Filipino dish!

    Soups and Salads, Vegan Filipino Recipes, Vegetarian Filipino Recipes

    Vegan Pancit

    Aug 15, 2019 · 4 Comments

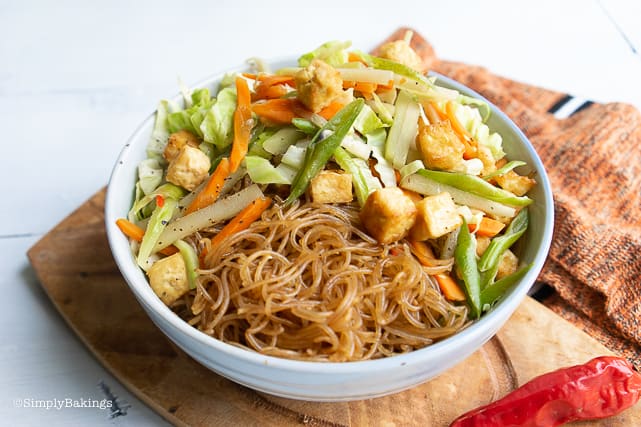
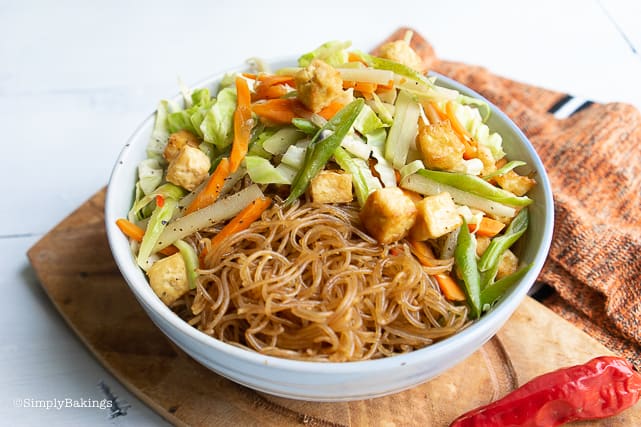
    Filipino veggie pancit bihon

    Vegan Pancit is a plant-based version of the popular Filipino pancit served almost every day because of it's quick, easy, and crowd-pleasing taste! It features the healthy goodness of tofu, beans, bihon and oh-so-good Lauriat sauce. Try this healthy recipe for your next parties or gatherings!

    Love Filipino Noodles? Try my delicious and easy Palabok, heartwarming Misua Soup, and my delicious Bam.i recipe!

    pancit bihon with fried tofu and vegetables
    [feast_advanced_jump_to]

    What is Vegan Pancit?

    Pancit is an all-time favorite and a staple in every Filipino gathering. is also known to be one of the comfort noodle dish of Filipinos. It is “believed” to symbolize a long life when it is prepared for birthday parties in a Filipino home.

    Filipinos eat pancit dishes as is, with other viands, and surprisingly with rice! Filipinos love to eat carbohydrates with other carbohydrates. 🙂

    This iconic food for special occasions in Filipino homes is believed to have been cooked first by Chinese traders in the Philippines a long time ago. Then, during the Spanish era, this dish which mainly consisted of rice noodles was the first food to be sold for take-out.

    It was sold in roadside small make-shift restaurants, famously known as carenderia in the Philipines. Since then, Pancit Bihon has never left the Filipino tradition of food and festivities.

    In this vegan pancit recipe, I used fried tofu as an alternative to meat along with vegetables slices and spices for a healthy option. Read more below of the tips and cooking steps. Enjoy!

    pancit bihon in a white bowl

    Health Benefits of Pancit Bihon

    • Packed with essential nutrients like carbohydrates, protein, and dietary fiber.
    • Contains minimal fat, making it a heart-healthy option.
    • Provides vitamins B and E, as well as minerals like iron, magnesium, and phosphorus.
    • Rice noodles are gluten-free, accommodating those with gluten sensitivities.

    Variations

    • Savory Taste: Experiment with different stir-fry sauces like oyster sauce, fish sauce, or even a touch of hoisin sauce for a unique twist.
    • Spicy Kick: Add chili flakes, chopped chilies, or sriracha for a spicy kick.
    • Zesty Flavor: Squeeze fresh kalamansi, lime, or lemon juice over the cooked pancit for a tangy, citrusy flavor.
    • Mushroom Medley: Add a mix of button, oyster, and shiitake mushrooms to provide a rich umami taste.

    Substitutions

    • Plant-based Protein: If you're not a fan of tofu, consider adding tempeh or seitan.
    • Noodles: Replace bihon (thin rice noodles) with wheat or glass noodles for a different texture.
    • Soy Sauce: For a gluten-free option, try tamari or coconut aminos.
    • Broth: For added taste, use vegetable or mushroom broth in place of water.

    Storage

    • Store leftovers in an airtight container in the refrigerator.
    • You can keep this in the fridge for two days at most. As it is made with soft rice noodles, it cannot be kept too long in the fridge.
    freshly cooked pancit bihon on a white dish

    Ingredients

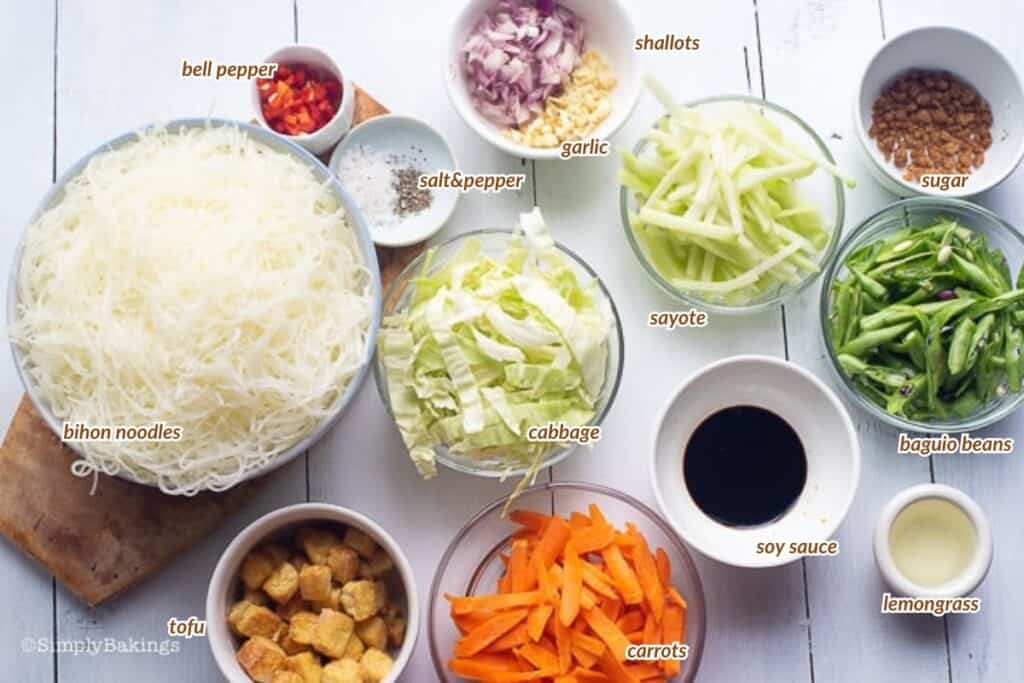
    Here is the quick look of the ingredients for vegan pancit:

    • extra firm tofu
    • pancit bihon noodles
    • garlic
    • red shallots
    • water
    • lauriat soy sauce
    • dark brown sugar
    • baguio beans
    • carrots
    • sayote
    • red or green pepper
    • cabbage
    • soy sauce
    • stir fry seasoning
    • salt & pepper
    pancit bihon ingredients

    Instructions

    In a large bowl, add room temperature water and soak the pancit bihon for about 15 minutes or until it softens, then drain the water using a colander. Set that aside.

    Pre-heat a nonstick pan or wok with some vegetable oil and fry tofu and season with salt and black pepper (while tofu is frying in the pan) then set aside. (see here how to fry tofu)

    In the same pan, add oil and heat for a few minutes, then add the garlic, onions and cook until fragrant:

    sauteed garlic and onions in oil

    Then add 1 ½ cup water:

    adding water to the sauteed garlic and onion in a pan

    After 2 minutes, add ¼ cup lauriat soy sauce and season with more salt and pepper. Add dark brown sugar and allow it to boil:

    adding soy sauce and garlic for pancit bihon recipe

    Put some msg-free seasoning to the sauce:

    adding msg-free seasoning for the pancit bihon recipe

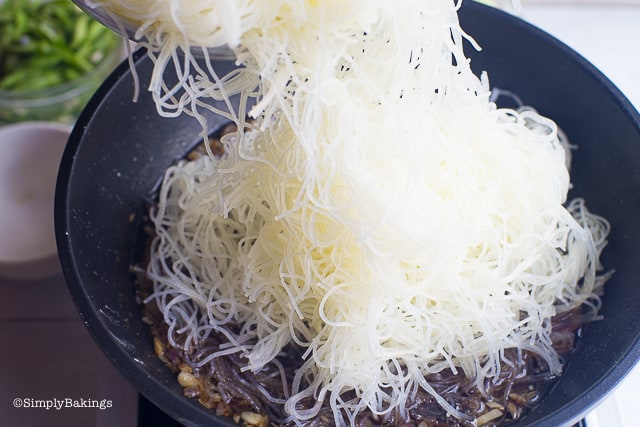
    Once it’s boiling, add the pancit bihon and mix until the sauce is absorbed:

    adding the soft rice noodles for the pancit bihon recipe

     Once it’s absorbed, transfer the pancit bihon in a bowl and set aside:

    mixing the pancit bihon noodles with the sauce using a chopstick

    In the same pan, add 2 tbsp of water, baguio beans, carrots, sayote, red or green peppers, and stir fry the veggies for about 3 minutes:

    cooking the vegetables in the pan for the pancit bihon recipe

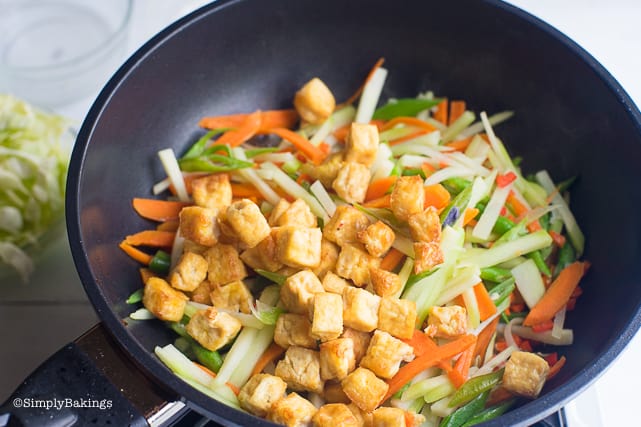
    Next mix in the cabbage and cover with a lid until veggies are well cooked. Add fried tofu:

    adding the fried tofu to the sauteed vegetables

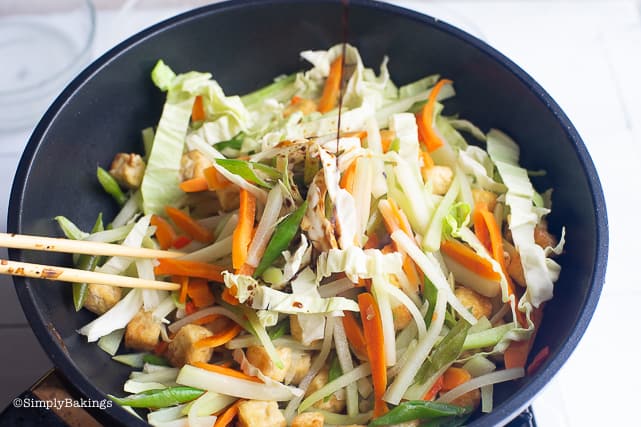
    Add 1 teaspoon soy sauce, season with  salt, pepper:

    pouring in soy sauce to the sauteed vegetables and fried tofu

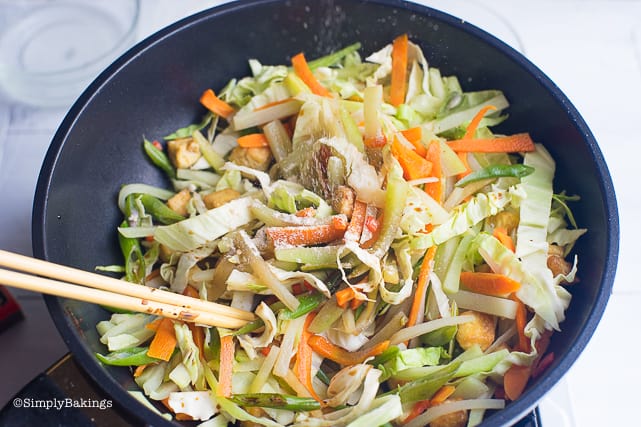
    Now it's time to add the msg free stirfry seasoning/MSG free mushroom powder or chicken broth powder to add flavor:

    adding the stir-fry seasoning to the vegetables and fried tofu

    Finally, mix in the pancit bihon and serve hot. Top it with calamansi juice or lemon wedges for that sour kick. Yum!

    freshly cooked pancit bihon with vegetables

    Top Tips

    • Use extra-firm tofu in this vegan Filipino dish. You will love that crunch and delicious texture with the veggies and rice noodles.
    • Don't soak the pancit bihon noodles more than 15 minutes. Soaking it longer would make the noodles soggy.

    FAQ

    Where can I get mushroom powder? 

    Mushroom powder is available at health food stores, Asian markets, and online shops such as Amazon.

    Can I use a regular brand soy sauce instead of lauriat soy sauce?

    Yes, but the Lauriat brand has a better taste compared to all soy sauces. (This is just my opinion. 🙂

    What are baguio beans and where can I buy it?

    Baguio beans also known as green beans are commonly grown in Baguio, a cold place in the Philippines. You can get them in Asian grocery stores and markets.


    More Filipino Recipes

    My favorite Filipino recipes that you might love too. Check these out!

    • Tofu Sisig
    • Buko Pandan
    • Cassava Cake
    • Shakoy
    • Halo Halo
    • Turon
    a bowl of healthy and delicious vegan pancit bihon
    5 from 3 votes
    Print Pin Recipe

    Vegan Pancit

    Here's a Filipino all-time favorite vegan pancit, a filling meal with fried tofu and vegetables all in one bowl! This is perfect dish to serve on any gatherings or occasion!
    Prep Time15 minutes mins
    Cook Time20 minutes mins
    Total Time35 minutes mins
    Course: Entree
    Cuisine: Filipino
    Servings: 3 servings
    Calories: 313kcal
    Author: Lainey
    Prevent your screen from going dark

    Ingredients

    • 1 block extra firm tofu cubed and fried
    • 400 grams pancit bihon noodles
    • 3-4 cloves garlic minced
    • 2 red shallots
    • 1 ½ cup water
    • ¼ cup lauriat soy sauce
    • 1 tablespoon dark brown sugar
    • 2 tablespoons water
    • 1 cup baguio beans sliced
    • 1 cup carrots thinly sliced
    • 1 cup sayote thinly sliced
    • ½ red or green pepper chopped
    • 1 cup cabbage sliced
    • 1 teaspoon soy sauce
    • ½ teaspoon stir fry seasoning optional
    • salt & pepper to taste

    Instructions

    • In a large bowl, add room temperature water and soak pancit bihon for about 15 minutes or until it softens, then drain the water using a colander. 
    • Pre-heat a nonstick pan with some vegetable oil and fry tofu and season with salt and pepper (while tofu is frying in the pan) then set aside.
    • In the same pan, add oil and heat for a few minutes, then add the garlic, onions and cook until fragrant.  Then add 1 ½ cup water.
    • After 2 minutes, add ¼ cup lauriat soy sauce and season with more salt and pepper. Add dark brown sugar and allow it to boil.
    • Once it’s boiling, add the pancit bihon and mix until the sauce is absorbed.  Once it’s absorbed, transfer the pancit bihon in a bowl and set aside. 
    • In the same pan, add 2 tablespoons of water, baguio beans, carrots, sayote, red or green peppers, and stir fry the veggies for about 3 minutes.  Next mix in the cabbage and cover with a lid until vegies are well cooked
    • Add fried tofu. 
    • Add 1 teaspoon soy sauce, season with  salt, pepper and msg free stir fry seasoning/MSG free mushroom powder or broth powder to add flavor .
    • Finally, mix in the pancit bihon and serve hot.
    Leave a Comment
    Serving: 1servingCalories: 313kcalCarbohydrates: 56gProtein: 16gFat: 3gSaturated Fat: 1gPolyunsaturated Fat: 2gMonounsaturated Fat: 1gSodium: 1348mgPotassium: 688mgFiber: 7gSugar: 12gVitamin A: 8040IUVitamin C: 47mgCalcium: 128mgIron: 4mg
    QR Code
    Did you make this recipe?Share it on instagram or tag @simplybakings or #simplybakings!

    Christmas Desserts, Main Entree, Rice, Noodles, Potatoes, Side Dishes, Summer Desserts, Thanksgiving Sides, Vegan Filipino Recipes, Vegetarian Filipino Recipes

    Vegan Kare Kare

    Jul 18, 2019 · 6 Comments

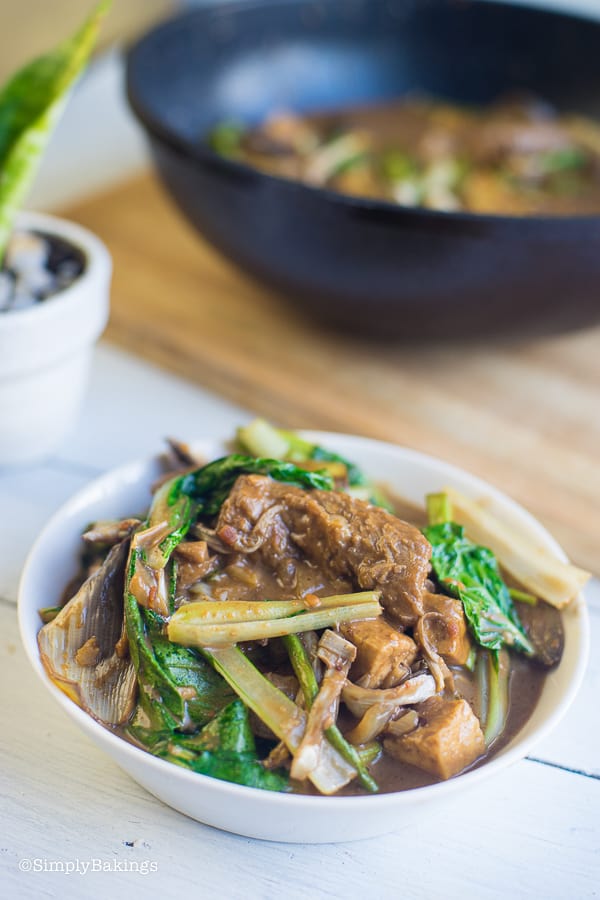
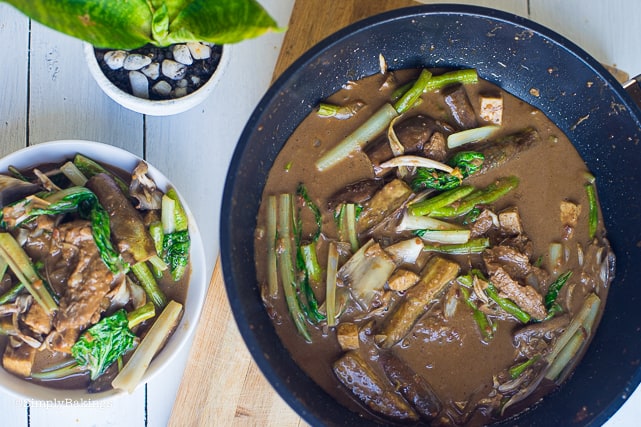
    vegan kare kare in a white bowl

    This Vegan Kare Kare recipe is just like the authentic, a meatless rendition of the classic dish. Indulge in the rich, creamy peanut sauce reminiscent of the traditional recipe, offering a delightful alternative for both vegans and meat lovers alike.

    Looking for more Filipino Cuisine? Try my Porbidang Kangkong or my Homemade Ramen Soup.

    Vegan Kare Kare in white bowl

    What is Kare-Kare?

    Kare-Kare is a popular Filipino dish believed to have originated in Pampanga, a place in the Philippines which is considered the Culinary Capital of the country because of its many original dishes. Because this is a dish that has been present 200 years ago, there are many twists and versions to this authentic Filipino dish.  I'm sharing you one version and hopefully soon, I'll be sharing with you another way of making Kare-Kare.

    [feast_advanced_jump_to]

    The different versions of Kare-Kare

    Kare-Kare mainly consists of

    • oxtail
    • beef
    • peanut sauce
    • healthy vegetables like banana heart or blossoms
      • bok choy or commonly known as pechay
      • and green string beans

    Kare-Kare is usually eaten with shrimp paste, be it spicy or just the regular shrimp paste and a bowl of steamed rice.

    Did you know?

    It was believed that Kare-Kare was always present in feasts and was usually served to elite guests of special gatherings. Studies show the word Kare-Kare was derived from the Indian term "curry".

    Some culinary researchers also say that this delicious and unique peanut stew was brought in the Philippines by the Japanese during the pre-colonial period.

    As a vegetarian it's difficult to find vegan vegetarian Filipino dishes- luckily for you here's a vegan vegetarian version of this delicious and easy to cook Filipino dish!

    delicious and easy to cook vegan kare kare in a white bowl and saucepan

    Top Tips

    • If you can't find annatto oil but only have annatto seeds or atsuete seeds, make your own annatto oil by just putting enough oil in a saucepan and place the seeds. Let it "simmer" for a few minutes until the orange-red tint of the seeds come out. You can store the oil for several months.
    • To prevent the vegetable ingredients of Vegan Kare-Kare from turning brown, soak it in a bowl of water after slicing them.
    • I love adding freshly squeezed calmansi to this dish- feel free to do it as well.

    Variations

    • To give an instant orange-red color to your vegan Kare-Kare, use annatto oil when sautéing the ingredients.
    • Shrimp paste are a popular pair when eating Kare-Kare but vegan shrimp paste is also available in the market today. It is made of fermented bean paste so you won't miss out the complete experience of eating authentic Kare-Kare.
    • If you can't find bok choy at your local Asian grocery market, feel free to use baby bok choy.  Something to note, baby bok choy is slightly bitter than regular bok choy.  (Just in case you decide to eat it fresh)

    Substitutions

    • If you cannot find fresh banana blossoms, canned works too. 

    Peanut Sauce Alternatives:

    • Almond Butter: Almond butter can provide a similar creamy texture and nutty flavor to peanut butter. It's a great alternative for those with peanut allergies or if you simply prefer almonds over peanuts.
    • Cashew Butter: Cashew butter offers a creamy consistency and a slightly sweet flavor, which can work well as a substitute for peanut butter in kare kare sauce.
    • Sunflower Seed Butter: Made from ground sunflower seeds, this butter has a nutty flavor and can be used as a peanut butter alternative. It's a good option for those with nut allergies.
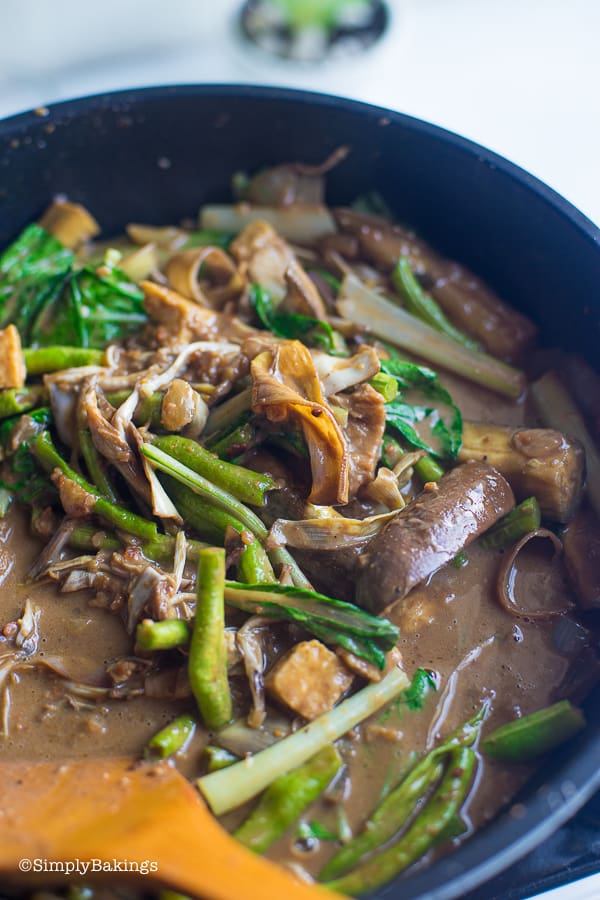
    close up shot of vegan kare kare

    Storage

    1. Cooling Down: Allow the vegan kare kare to cool down to room temperature before storing it. Placing hot food directly in the fridge can raise its internal temperature and affect other perishable items.
    2. Airtight Containers: Transfer the kare kare into airtight containers. Make sure they're made of food-safe material and are clean. Glass or plastic containers with tight-fitting lids work well.
    3. Portioning: If you've made a large batch, consider dividing it into smaller portions before storing. This makes it easier to reheat only what you need at a given time, minimizing waste.
    4. Refrigeration: Place the containers of vegan kare kare in the refrigerator promptly after it has cooled down.
    5. Consume Within Timeframe: While vegan kare kare can typically last for 3-4 days in the refrigerator, it's best to consume it within 2-3 days to enjoy it at its freshest. The exact timeframe may vary based on the ingredients used and how they were prepared.
    6. Reheating: When ready to eat, reheat the vegan kare kare thoroughly. You can do this on the stove over low to medium heat or in the microwave. Stirring occasionally can help ensure even heating.
    7. Check for Spoilage: Before reheating and consuming leftover vegan kare kare, always inspect it for any signs of spoilage such as an off smell, unusual texture, or mold growth. If you notice any of these signs, it's safest to discard the food.

    Ingredients

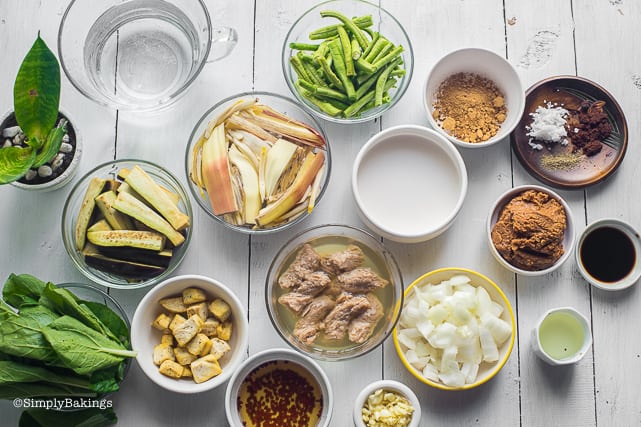
    Gather the ingredients for this Vegan Kare-Kare and once the ingredients are all ready, let's begin!

    • tofu
    • coconut oil
    • yellow onion
    • garlic cloves
    • soy meat protein or seitan
    • soy sauce
    • water
    • annatto powder
    • peanut butter
    • dark brown sugar
    • banana blossom bud
    • eggplants
    • string beans or long beans
    • fresh coconut milk or canned coconut milk
    • bok choy sliced into halves
    • salt
    • pepper
    ingredients of vegan kare kare

    Instructions

    Cut the tofu into 1 inch cubes, then deep fry until golden brown. Set aside.

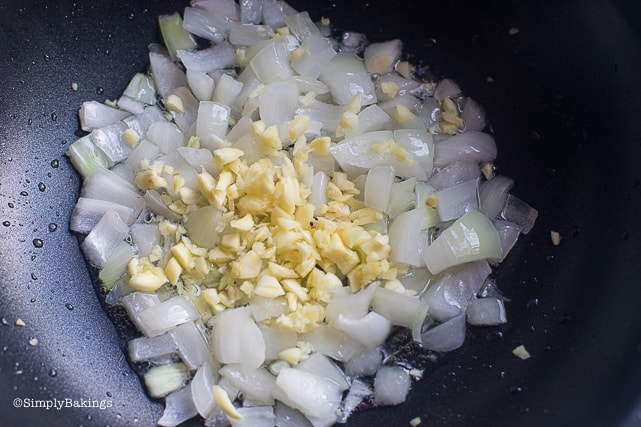
    In a large pot, heat the oil over medium high heat.  Saute onions and garlic until it becomes translucent:

    sauteed garlic and onions for vegan kare kare recipe

    Add the soy protein meat or seitan and cook on both sides until it turns a darker brown:

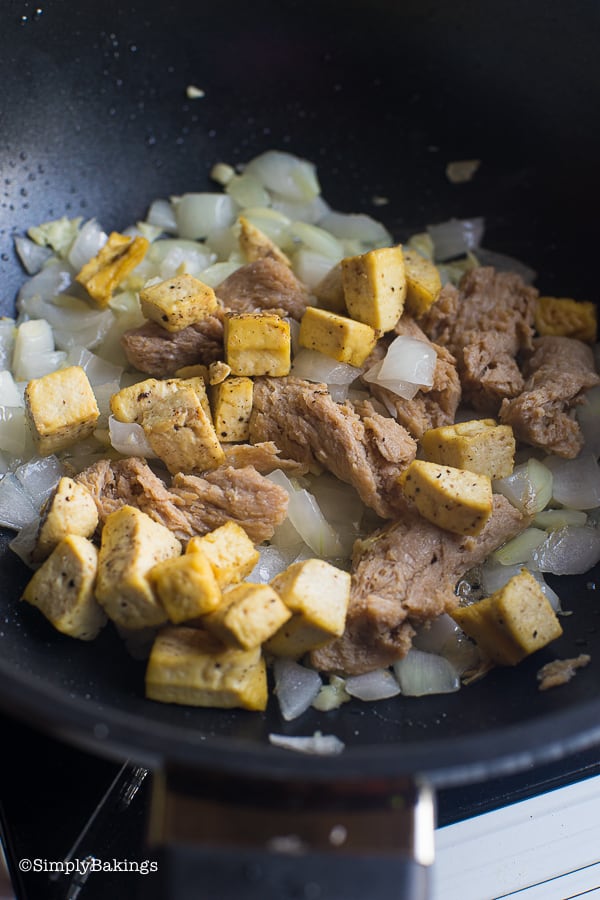
    garlic, onions, and seitan for vegan kare kare recipe

    Mix in the tofu:

    sauteed tofu, seitan, garlic and onions for vegan kare kare recipe

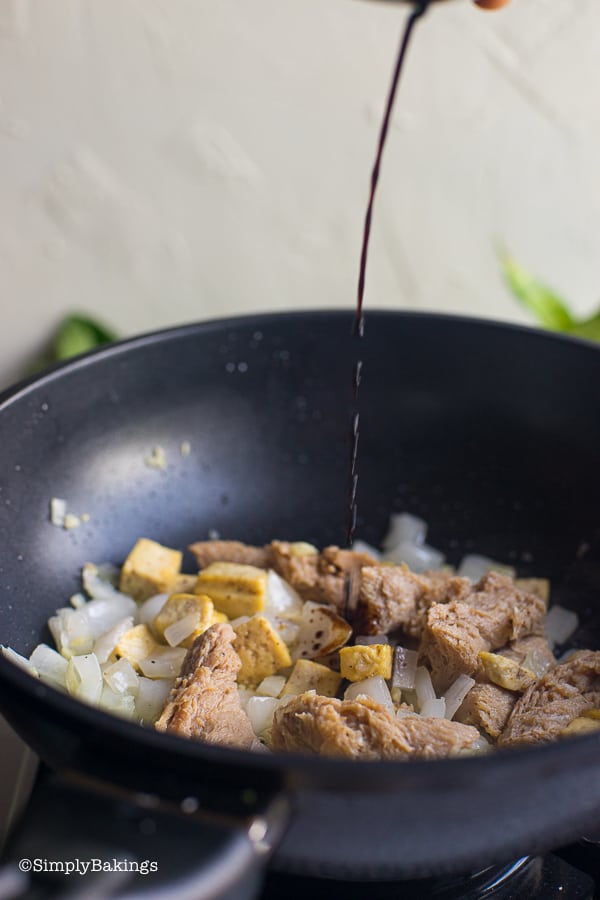
    Add the soy sauce and let it sit for about 2-3 minutes:

    adding soy soauce to the sauteed tofu and seitan for vegan kare kare recipe

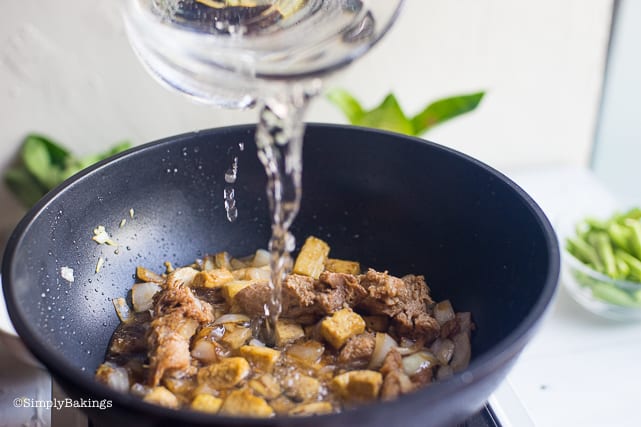
    Then mix in the water and cover the pan with a lid until it boils:

    adding water to the ingredients of vegan kare kare recipe

    Add brown sugar, salt, and pepper. Mix well and check the thickness of the sauce and if it's too thick add water gradually:

    adding salt, sugar, and pepper to the vegan kare kare stew

    Then mix in the peanut butter and allow it to simmer by turning down the heat to low and putting a lid:

    adding peanut butter to the vegan kare kare

    Add in the annatto powder, bean paste, and mix well:

    adding annatto powder and bean paste to the vegan kare kare

    Add banana blossom bud cover the pan until it softens it will be about 8-10 mins:

    adding banana blossom and covering the vegan kare kare to boil

    Add eggplant and string beans and cover for 3 to 5 minutes:

    adding string beans and eggplants to the vegan kare kare

    Cover for a few minutes just enough for the vegetables to be cooked:

    covering the pan to cook the vegetables for the vegan kare kare

    Add the coconut milk, bok choy, season with salt and pepper:

    adding in coconut milk to the vegan kare kare

    Gently mix and cover with the lid for 3 minutes:

    adding in bokcoi to the vegan kare kare

    That's it Simply Bakers! Wasn't it easy? This vegan Kare-Kare might seem complicated to cook because of the long list of ingredients, but once you look past that it's very easy.

    Frequently Asked Questions

    What is Banana Blossoms?

    Banana blossoms are also known as banana heart. It is actually the flower of a banana trunk, which is edible and good to use in any vegetable soup or dish. Filipinos have a lot of recipes using banana blossoms.

    What is atsuete also known as annatto seeds or annatto powder? Where can I buy it?

    Atsuete seeds are orange-red seeds that are commonly used in cooking to give a natural orangey red color to any dish. The annatto powder is derived from these seeds, then packed and sold mostly in Asian grocery stores.

    What is meat protein or seitan and where can I buy it?

    Meat protein or seitan is a popular vegan protein source made from wheat gluten and water. It is cooked before being eaten and is widely used by vegans in their day to day dishes. Seitan is sold in vegan grocery stores or even regular grocery stores that has a vegan section.

    I don't have Annatto powder, can I use atsuete instead?

    Yes, if you can't get annatto powder you can use atsuete, but remove the seeds and soak it. 

    I don't have string beans, can I use green beans instead?

    Yes, string beans and green beans are actually the same things!

    Try these Filipino Desserts that go well with this dish:

    • Buko Pandan
    • Cassava Cake
    • Shakoy
    • Halo Halo
    • Turon

    Happy Cooking!

    vegan kare kare in a bowl on a wooden table
    5 from 1 vote
    Print Pin Recipe

    Vegan Kare-Kare

    This Kare Kare is packed with colorful veggies, completely cholesterol-free, and guilt-free too!
    Prep Time15 minutes mins
    Cook Time25 minutes mins
    Total Time40 minutes mins
    Course: Entree, Main Course
    Cuisine: Filipino
    Servings: 4 servings
    Calories: 467kcal
    Author: Lainey
    Prevent your screen from going dark

    Ingredients

    • 250 grams extra firm tofu
    • 1 tablespoon coconut oil
    • 1 small yellow onion peeled and chopped
    • 4 cloves garlic peeled, crushed and minced
    • 7 pieces soy meat protein or seitan *
    • 1 teaspoon soy sauce
    • 2-3 cups of water
    • 1 tablespoon annatto powder
    • 3 tablespoon peanut butter
    • 1 tablespoon dark brown sugar
    • 1-2 fresh banana blossom buds**
    • 2 medium eggplants cut into 3 inch wedge shapes
    • 5 string beans cut into 2-3 inches
    • 1 cup coconut milk
    • 1 stalk bok choy sliced into halves separate the bok choy leaves and stems
    • pinch salt
    • pinch pepper

    Instructions

    • Cut the tofu into 1 inch cubes, then deep fry until golden brown. Set aside.

    Making the Kare Kare:

    • In a large pot, heat the oil over medium heat.  Add onions and  minced garlic until it becomes transparent.
    • Add the soy protein meat or seitan and cook on both sides until it turns a darker brown. 
    • Mix in the tofu, soy sauce and let it sit for about 2-3 minutes. Then mix in the water and cover the pan with a lid until it boils.
    • Add the annatto powder, bean paste and mix.  Then mix in the peanut butter and allow it to simmer by turning down the heat to low and putting a lid.
    • Add brown sugar and mix well. Check the thickness of the sauce and if it's too thick add water gradually.
    • Add banana blossom bud cover the pan until it softens it will be about 8-10 mins.
    • Add eggplant and string beans and cover for 3 to 5 mins.
    • Add the coconut milk, bok choy, season with salt and pepper and cover with the lid for 3 minutes.
    • Best served with steamed white rice.
    Leave a Comment

    Notes
    * If using magic meat or any dried soy protein, follow directions to rehydrate. 
    **If you cannot find fresh banana blossom, canned works too. 
    Serving: 1gCalories: 467kcalCarbohydrates: 55gProtein: 18gFat: 22gSaturated Fat: 15gPolyunsaturated Fat: 2gMonounsaturated Fat: 4gSodium: 157mgPotassium: 311mgFiber: 5gSugar: 14gVitamin A: 1IUVitamin C: 16mgCalcium: 157mgIron: 6mg
    QR Code
    Did you make this recipe?Share it on instagram or tag @simplybakings or #simplybakings!

    Main Entree, Side Dishes, Thanksgiving Main Dishes, Vegan Filipino Recipes, Vegetables, Vegetarian Filipino Recipes

    Tofu Sisig Recipe

    Jul 8, 2019 · 9 Comments

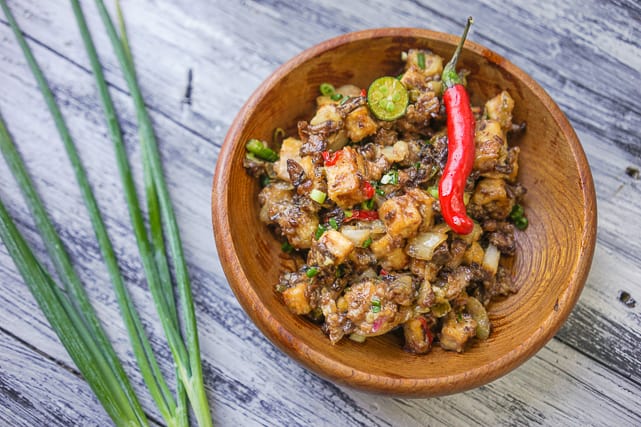
    delicious and healthy tofu sisig in a wooden bowl

    Tofu Sisig is a tasty Filipino dish that’s made with fried tofu, chopped chili peppers, and mushrooms. It’s vegan and has a nice spicy kick, packed with flavors you’re sure to enjoy!

    Looking for more tofu dishes? Try my Chicken Afritada (made with tofu of course), Bicol Express, Filipino Tofu in Coconut Milk or my personal favorite Tofu Poke or Vegan Kung Pao Tofu!

    tofu sisig in a wooden bowl wit red chili and leeks

    [feast_advanced_jump_to]

    Where did Sisig come from?

    The region Pampanga in Luzon. Sisig has been a Filipino dish way back 1732 with the name derived from "sisigan" which in Kapampangan means "to make it sour". During those years, sisig mainly consists of pig ears, snout, belly, and pig cheeks. They cook it three times - boiled, grilled, and finally sautéed with garlic, onion, and lastly drizzled with calamansi juice just before serving.

    The popular Filipino dish was frequently given to those suffering from a hangover or from a night of alcoholic overindulgence. It was believed that it prevents vomiting because of its salty and sour flavor, all in one amazing dish.

    But as times have gone by, more and more versions of the famous Filipino sisig has been made. Vegetarians, like me, also developed a delicious vegetarian counterpart, which is what I am sharing with you now. The main ingredient is tofu, also known as fermented bean curd. This is a healthier version of the classic meat sisig but nonetheless, tastes so good without the cholesterol guilt

    Health Benefits of Tofu

    • High in plant-based protein for muscle growth and repair
    • Rich in calcium, iron, and magnesium for strong bones and overall health
    • Low in calories and fat, aiding in weight management
    • Contains antioxidants that protect cells from damage
    • Can help reduce the risk of chronic diseases
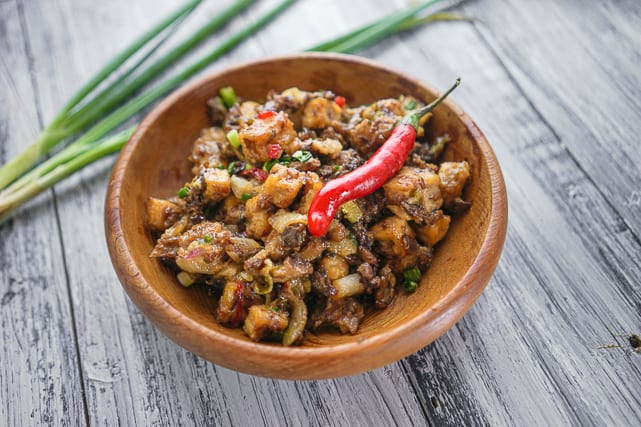
    a bowl of tofu sisig with red chili on top

    Substitutions

    • Vegetable oil is a good alternative to coconut oil because it's tasteless and has a high heating point.
    • Replace soy sauce with vegan oyster sauce for richer flavor.
    • Feel free to experiment with different types of mushrooms. Portobello, button, and enoki mushrooms can add unique textures and flavors.

    Variations

    • Take the sisig to the next level by drizzling Philippine lime or calamansi juice (instead of lemon juice) right before serving.
    • For a milder spice version, reduce the amount of chili peppers or use bell peppers instead.

    Storage

    • Store any leftovers in an airtight container in the refrigerator. Tofu Sisig can last up to 3 days when stored properly.
    • Reheat in a pan over medium heat until warmed through. You may need to add a splash of water or more vegan mayonnaise to keep it creamy.

    Top Tips

    • To make your tofu crust extra crispy, coat it with cornstarch before frying.
    • Frying Tip: Frying tofu is a bit challenging when the excess water isn't removed. To do this, use the "press" method where you cover the block of tofu with paper towels. Then, find anything in your kitchen that is heavy enough but not too heavy to break the tofu. Place it above the tofu for about 15- 30 minutes. This process will help remove the excess water and the oil splatters when frying the tofu.
    • Impress guests (or yourself) with your cooking skills, by making this into a sizzling sisig. Simply use a sizzling plate and serve.

    Ingredients

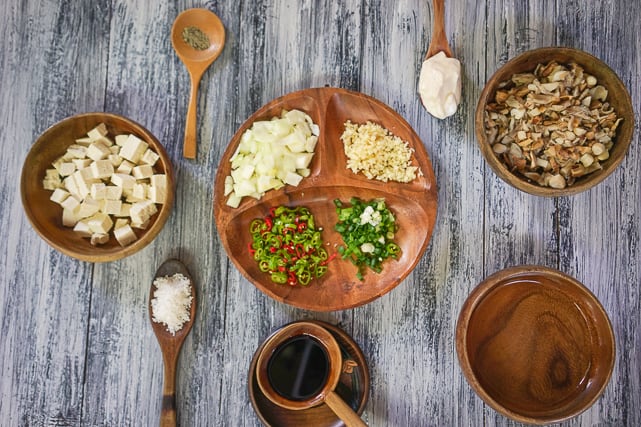
    Here is the quick look of the ingredients for Tofu Sisig:

    • refined coconut cooking oil  or vegetable oil
    • vegan mayonnaise
    • mushrooms
    • soy sauce
    • extra-firm tofu
    • salt
    • white onion
    • garlic
    • red or green chili peppers
    • shallots
    • lime juice
    • brown sugar
    • pepper
    • spring onions

    Instructions

    Once the ingredients are all ready, let's begin!

    ingredients for tofu sisig

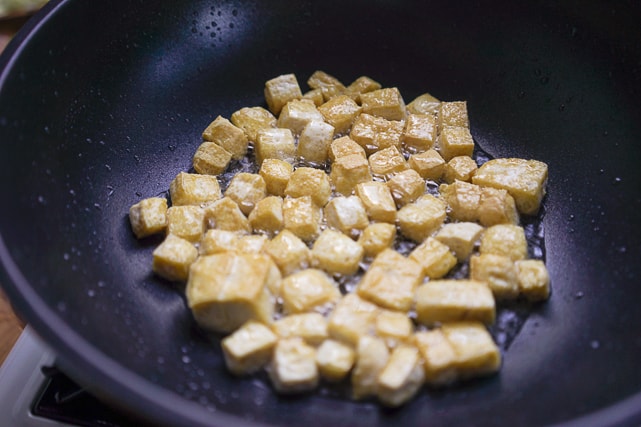
    Heat a nonstick pan or skillet over medium heat, add ½ cup of vegetable oil until it heats up, fry your tofu until all its sides turn golden brown:

    frying tofu cubes for tofu sisig recipe

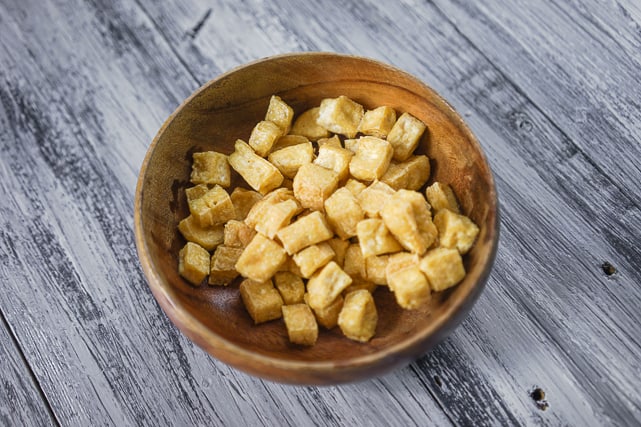
    Set aside the tofu cubes:

    golden brown tofu cubes set aside in a wooden bowl

    On the same pan, lower heat. Sauté shallots and minced cloves garlic until fragrant or when onions turn translucent:

    sauteed garlic, onions, and mushroom for tofu sisig recipe

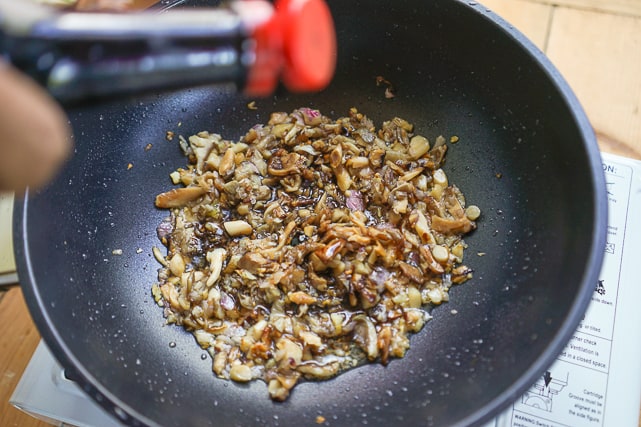
    On medium heat, sauté mushrooms, and add soy sauce. Allow to cook for another 5 to 10 minutes until the mushrooms become tender:

    adding soy sauce to the spices and mushroom

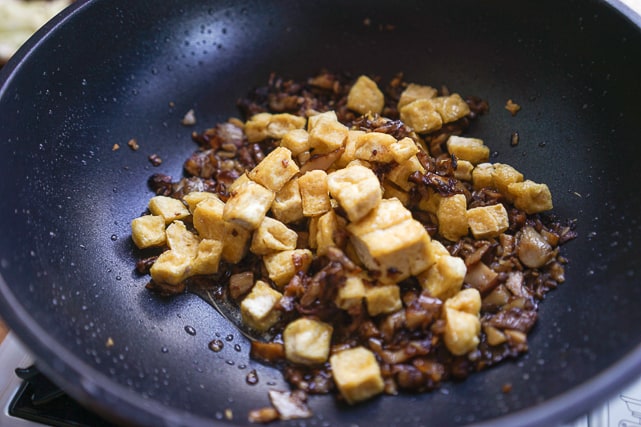
    After the mushrooms have tenderized, you can now toss in the fried tofu. Mix well:

    adding tofu cubes to the sauteed spices

    Add chili pepper, sauté for a minute. (Can add additional chili pepper if you want it to be spicier):

    adding sliced chili or green and red peppers to the tofu sisig

    Season with salt and pepper:

    adding salt and pepper to the tofu sisig

    Add mayonnaise and sauté for a minute or two:

    adding mayonnaise to the tofu sisig

    Add brown sugar to taste:

    adding dark brown sugar to the tofu sisig

    Now it's time to make it look more sumptuous! Garnish it with lime juice and chopped spring onions or leeks:

    healthy and delicious tofu sisig on a sizzling plate

    Serve hot. This Tofu sisig is best enjoyed with steamed white rice or brown rice. You can even eat this together with quinoa and other healthy grains. 

    Frequently Asked Questions

    Is extra-firm tofu already pressed?

    Extra-firm tofu is not always pre-pressed. You usually need to press it yourself to remove extra water.

    What not to mix with tofu?

    Don't mix tofu with acidic ingredients like citrus juice or vinegar before cooking. It can make the tofu crumbly and break apart.

    When should you not eat tofu?

    You should not eat tofu if it smells bad or is past its expiration date. Also, avoid tofu if you have a soy allergy.

    Here are some great desserts that pair well with this recipe:

    • Buko Pandan
    • Cassava Cake
    • Shakoy
    • Halo Halo
    • Turon

    Happy Cooking!


    nutritious and delicious tofu sisig in a wooden bowl
    5 from 4 votes
    Print Pin Recipe

    Tofu Sisig Recipe

    Try this delicious and vegan Filipino Tofu Sisig Recipe that will please all types of eaters!
    Prep Time10 minutes mins
    Cook Time20 minutes mins
    Total Time30 minutes mins
    Course: Entree, Main Course
    Cuisine: Filipino
    Servings: 4
    Calories: 679kcal
    Author: Lainey
    Prevent your screen from going dark

    Ingredients

    • ½ cup refined coconut cooking oil
    • 1 block extra-firm tofu pressed, drained, and cut into small cubes
    • 2 tablespoons shallots
    • 1 clove garlic minced
    • 1 cup mushrooms diced into small pieces (I used a variety with shitake and oyster mushrooms)
    • 2 tablespoons soy sauce
    • 1-2 pieces red or green chili peppers chopped (depending on how spicy you want it)
    • ½ cup white onion chopped
    • 1 teaspoon salt
    • ½ tsp pepper
    • 1 cup vegan mayonnaise
    • 1 teaspoon brown sugar
    • 1 tablespoon freshly squeezed lime juice
    • 1 tablespoon green onions

    Instructions

    • Heat a pan over medium heat and add and oil for 5-8 minutes. The oil needs to be hot enough to fry the tofu.
    • Slowly add the tofu and fry until all sides are golden brown, set aside.
    • In the same pan, lower the heat to low and sauté shallots and garlic until fragrant or when the shallots turn translucent.
    • Add mushrooms, soy sauce, and allow it to cook for about 5 minutes or until the mushrooms become tender.
    • Add the fried tofu, chili pepper and sauté for a minute and feel free to add additional chili pepper for more spice.
    • Add white onions, salt, pepper, then add mayonnaise and sauté for 2 minutes.
    • Add brown sugar and mix until combined.
    • Garnish with lime juice, green onions, and serve with steamed rice.
    Leave a Comment
    Serving: 1gCalories: 679kcalCarbohydrates: 12gProtein: 9gFat: 65gSaturated Fat: 28gSodium: 1470mgPotassium: 311mgFiber: 1gSugar: 4gVitamin A: 22IUVitamin C: 5mgCalcium: 45mgIron: 2mg
    QR Code
    Did you make this recipe?Share it on instagram or tag @simplybakings or #simplybakings!

    Main Entree, Side Dishes, Thanksgiving Main Dishes, Vegan Filipino Recipes, Vegetarian Filipino Recipes, Vegetarian Meat

    BEST Nutella Stuffed Cookies Recipe

    Jun 4, 2019 · Leave a Comment

    Nutella Stuffed Cookies stacked on top of another

    If you like opening presents, you'll love this cookie recipe. Nutella stuffed cookies are not just yummy. They pack a fun chocolate-hazelnut spread surprise in every bite! It's easy to make, uses simple ingredients, and doesn't take much time. It's the perfect snack for beginners, bakers, and chocolate lovers.

    You can tell I love to explore homemade cookies with my healthy oat cookies or assorted candy mix cookies!

    Nutella Stuffed Cookies stacked on top of another
    [feast_advanced_jump_to]

    Why You’ll Love This Recipe

    This Nutella cookies recipe has everything you want in a dessert! It has a soft chewy texture outside with a chocolate chip filled crust. Then an even softer inside filled with the star of the show, Nutella!

    And the best part is it's easy to make. The ingredients are easy to find and can be healthy, too, because we use vegan and vegetarian substitutes here.

    Ingredients

    Listed below are all the ingredients you will need:

    • butter
    • white sugar
    • brown sugar
    • eggs
    • vanilla extract
    • salt
    • baking soda
    • hot water
    • all-purpose flour
    • chocolate chips
    • nutella

    See the recipe card for quantities.

    Instructions

    Prepare the Cookie Dough

    1. Preheat the oven to 350°F (175°C) and line a baking sheet with parchment paper.

    2. Add the softened butter, white sugar, and brown sugar to a large mixing bowl.

    3. Beat until light and fluffy.

    4. Add the eggs and vanilla extract.

    5. Mix until smooth and well combined.

    Medium bowl filled with ingredients

    Prepare the Dry Ingredients

    6. In a separate bowl, combine the salt and all-purpose flour.

    7. In a small bowl, stir the baking soda into the hot water until combined.

    8. Pour the baking soda mixture into the wet ingredients and mix well.

    9. Gradually add the dry ingredients to the wet ingredients.

    10. Mix just until a cookie dough forms.

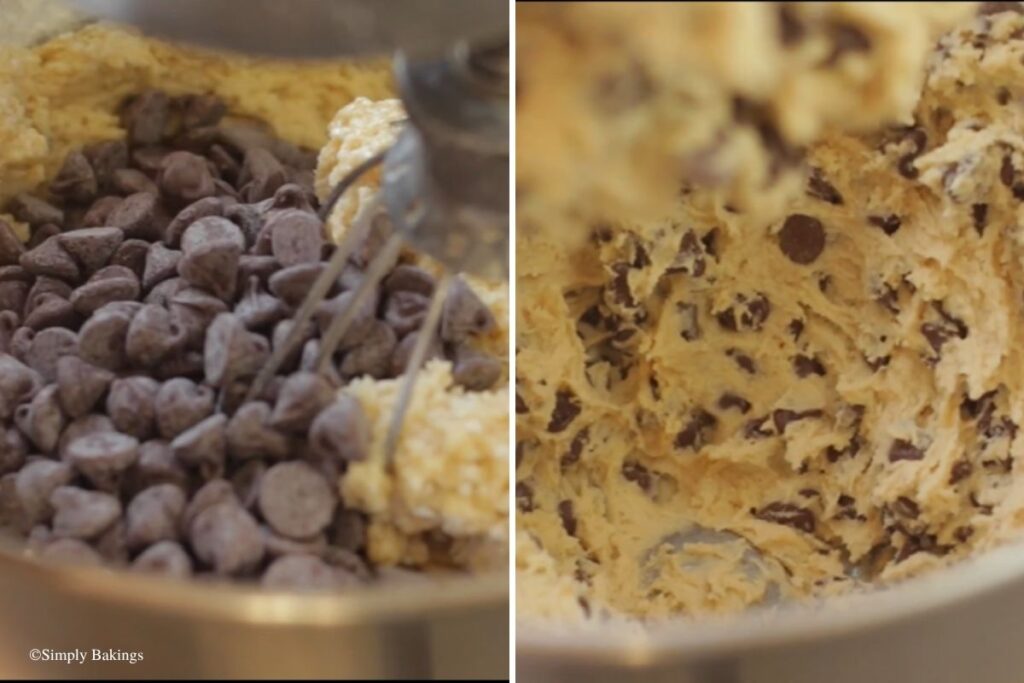
    11. Fold in the chocolate chips.

    Chocolate chips added into the dough

    Stuff the Cookies

    12. Take a portion of cookie dough and flatten it slightly.

    13. Place a small spoonful of Nutella in the center.

    14. Place another small portion of cookie dough on top.

    15. Carefully pinch the edges together until the Nutella is completely enclosed.

    16. Gently shape the dough into a cookie.

    Nutella stuffed into rolled cookie dough

    Bake

    17. Arrange the stuffed cookies on the prepared baking sheet, leaving space between each cookie.

    18. Bake for about 10–12 minutes, or until the edges are set and lightly golden.

    19. Allow the cookies to cool on the baking sheet for several minutes before transferring them to a wire rack.

    Serve

    20. Serve warm for a soft cookie with an extra-gooey Nutella center.

    freshly baked nutella stuffed cookies in a baking tray

    Substitutions & Variations

    • Ingredient Swap
      Use plant-based butter.
    • Variation
      Peanut butter can work in place of Nutella, too, but it will change the taste.
    • Mistake to Avoid
      When sealing the cookie dough around the Nutella, make sure not to leave gaps.
    • Storage Tips
      • Store cooled cookies in an airtight container at room temperature for about 3–5 days.
      • Both baked cookies and cookie dough freeze well for up to 2–3 months when tightly wrapped. Let baked cookies thaw at room temperature, or warm them briefly before serving for a softer Nutella center.

    FAQs

    Can I use melted chocolate instead of  Nutella?

    Yes you can. Whatever chocolate you have in your pantry or fridge, you can use it.

    Will this recipe work if I put smooth peanut butter instead of Nutella?

    Yes, for sure, that would be equally delicious.

    How do I know the cookies are done baking?

    Check the texture. The centers should seem slightly soft. The edges should look lightly golden.

    freshly baked nutella stuffed cookies on a parchment paper
    No ratings yet
    Print Pin Recipe

    BEST Nutella Stuffed Cookies Recipe

    These are soft, buttery chocolate chip cookies with a creamy Nutella center. They are an easy, indulgent treat with plenty of chocolate and a gooey surprise in every bite.
    Prep Time25 minutes mins
    Cook Time12 minutes mins
    Total Time37 minutes mins
    Course: Cookies, Desserts, Snack
    Cuisine: Fusion (American-Filipino)
    Servings: 20 cookies
    Calories: 408kcal
    Author: Lainey
    Prevent your screen from going dark

    Ingredients

    • 1 cup butter softened
    • ½ cup white sugar
    • ½ cup brown sugar
    • 2 eggs
    • 2 teaspoons vanilla extract
    • ½ teaspoon salt
    • 1 teaspoon baking soda
    • 2 teaspoons hot water
    • 3 cups all-purpose flour
    • 2 cups chocolate chips
    • 1–1½ cups Nutella

    Instructions

    Prepare the Cookie Dough

    • Preheat the oven to 350°F (175°C) and line a baking sheet with parchment paper.
    • Add the softened butter, white sugar, and brown sugar to a large mixing bowl.
    • Beat until light and fluffy.
    • Add the eggs and vanilla extract.
    • Mix until smooth and well combined.

    Prepare the Dry Ingredients

    • In a separate bowl, combine the salt and all-purpose flour.
    • In a small bowl, stir the baking soda into the hot water until combined.
    • Pour the baking soda mixture into the wet ingredients and mix well.
    • Gradually add the dry ingredients to the wet ingredients.
    • Mix just until a cookie dough forms.
    • Fold in the chocolate chips.

    Stuff the Cookies

    • Take a portion of cookie dough and flatten it slightly.
    • Place a small spoonful of Nutella in the center.
    • Place another small portion of cookie dough on top.
    • Carefully pinch the edges together until the Nutella is completely enclosed.
    • Gently shape the dough into a cookie.

    Bake

    • Arrange the stuffed cookies on the prepared baking sheet, leaving space between each cookie.
    • Bake for about 10–12 minutes, or until the edges are set and lightly golden.
    • Allow the cookies to cool on the baking sheet for several minutes before transferring them to a wire rack.

    Serve

    • Serve warm for a soft cookie with an extra-gooey Nutella center.
    Leave a Comment
    Serving: 1gCalories: 408kcalCarbohydrates: 50gProtein: 4gFat: 22gSaturated Fat: 16gPolyunsaturated Fat: 1gMonounsaturated Fat: 3gTrans Fat: 0.4gCholesterol: 41mgSodium: 432mgPotassium: 180mgFiber: 2gSugar: 28gVitamin A: 308IUCalcium: 50mgIron: 2mg
    QR Code
    Did you make this recipe?Share it on instagram or tag @simplybakings or #simplybakings!

    You Might Also Like:

    • Rolled Sugar Cookies
    • Espresso Brownie Cookies
    • Snowball Lemon Drop Cookies

    Recipes for Every Moment

    Craving a yummy chocolate snack? These Nutella stuffed cookies turn an easy recipe into something special with a fun surprise inside. Enjoy an extra-indulgent treat with a yummy center!

    Cookies, Desserts, Snacks

    NO BAKE Banana Strawberry Pie

    May 15, 2019 · 6 Comments

    no bake strawberry banana pie with whipped topping

    Try this easy No-bake Banana Strawberry Pie recipe for a delicious, creamy, and healthy dessert! Enjoy the goodness of bananas, oreo crust, fresh strawberries, and vanilla pudding in every bite.

    For more yummy no-bake dessert ideas, check out our Oreo Cheesecake and Nutella Cheesecake recipes that are just as easy and delicious!

    no bake strawberry banana pie topped with whipping cream topping
    [feast_advanced_jump_to]

    What is NO BAKE Banana Strawberry Pie?

    No-Bake Banana Strawberry Pie is a simple and delicious dessert made without the need for an oven. It features a pre-made Oreo crust layered with fresh bananas, a creamy vanilla pudding, a whipped topping mixture, and juicy chopped strawberries.

    This pie is frozen to set, making it a refreshing treat perfect for warm days. The combination of chocolatey crust, smooth pudding, and fresh fruit creates an irresistible flavor that’s easy to prepare and enjoy.

    Substitutions

    • Swap some whipped toppings for cream cheese to make it a little richer and add a tangy flavor.
    • Instead of buying a crust, you can make one by crushing graham crackers and mixing them with melted butter and a pinch of salt.

    Variations

    • If you want something lighter, use Cool Whip instead of whipped topping, or whip up your cream from scratch for a fresh taste.
    • Try using different flavors of Jello or pudding mix, like vanilla or strawberry, to create your awesome dessert.

    Storage

    • Store the pie in the refrigerator if you plan to eat it within 3-4 days. Cover it with plastic wrap or a lid to prevent it from absorbing odors.
    • If you want to keep the pie for a longer period, you can freeze it. Wrap the pie tightly in plastic wrap and then in aluminum foil or place it in an airtight container. It can be stored in the freezer for up to 2 months.
    • Freezing may slightly change the texture of the whipped topping and strawberries, so it's best enjoyed fresh if possible.

    Ingredients

    Listed below are the ingredients you will need:

    • oreo pie crust
    • milk
    • Instant Jell-O pudding
    • whipped topping
    • fresh banana
    • strawberries
    • chocolate syrup
    ingredients for no bake strawberry banana pie recipe

    Instructions

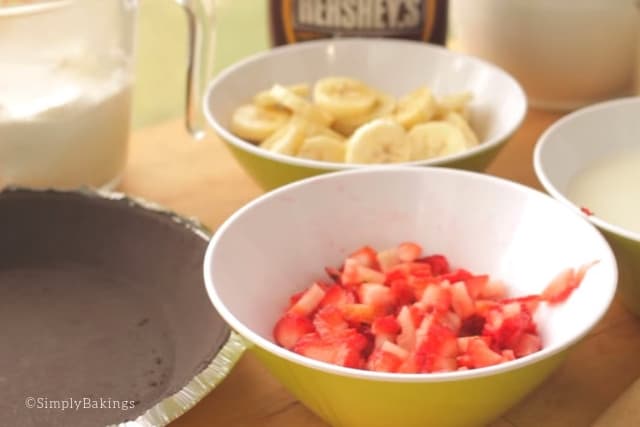
    Gather the ingredients for this easy pie recipe. Once the ingredients are all ready, let's begin!

    On your pre-made Oreo pie crust, arrange the banana slices as the bottom layer, then set aside. I made two layers of bananas because I love bananas so much!

    adding layers of fresh bananas to the oreo pie crust

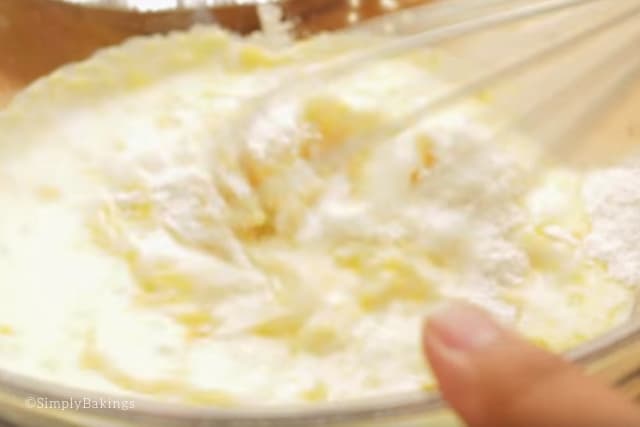
    In a large bowl, mix the milk and the instant Jell-O pudding until it thickens:

    instant jello pudding and milk mixture

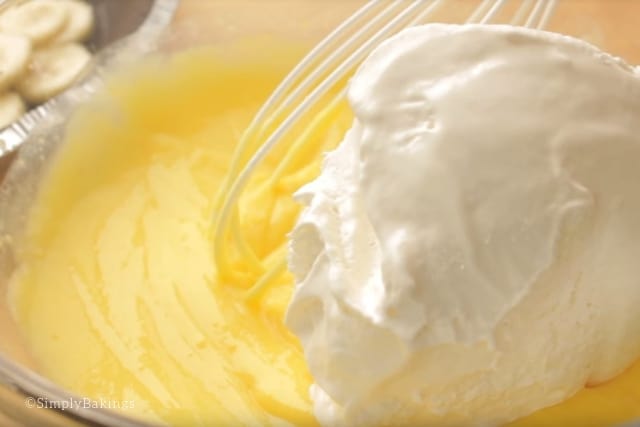
    Now it's time to add the whipped topping and whisk well:

    adding whipped topping to the jello and milk mixture

    After mixing it well, add the chopped strawberries and mix, mix, mix:

    mixing in fresh strawberries to the pudding and cream mixture

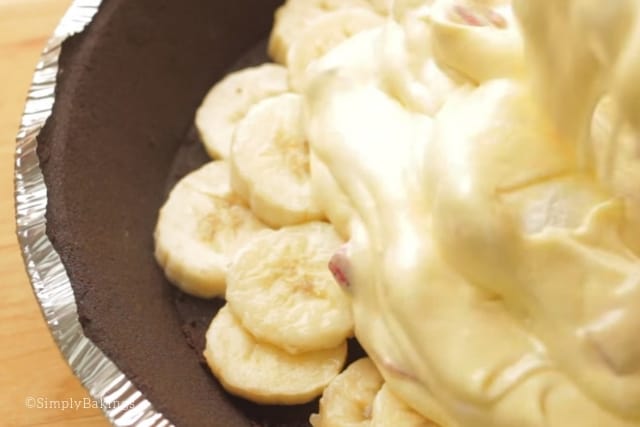
    Pour this mixture onto your pre-made Oreo pie crust with bananas and freeze it overnight for the best results.:

    At this time, I was already so excited to grab a bite, lol!

    pouring in the pie mixture to the oreo crust with bananas

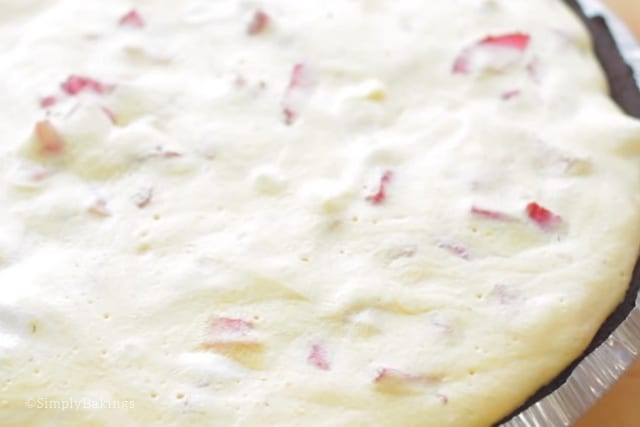
    Tadaaaaa! Another no-bake delicious and easy dessert just for you, guys!

    frozen strawberry banana pie

    Add some more creaminess by topping it with whipped cream before serving. Yum!

    no bake strawberry banana pie topped with whipping cream topping

    Top Tips

    • Make the top of your pie level by using a spoon or a spatula.
    • For a more festive look, top with whipped cream before serving.
    • Add fresh strawberry slices on top of the pie for a tasty look and extra flavor.

    FAQ

    What to put on bananas to keep from browning in banana pudding?

    To prevent bananas from browning, toss them in lemon juice or a mixture of lemon juice and water. This acidic solution slows down the oxidation process that causes browning.

    Will my fruit pie thicken as it cools?

    Yes, the filling of your fruit pie will thicken as it cools due to the setting of the pudding and the absorption of moisture by the crust. Allowing it to chill properly enhances the texture.

    What causes a cream pie to get watery?

    A cream pie can become watery due to excess moisture from the filling or insufficient thickening agents. Overmixing the whipped topping or not allowing the pie to set properly can also contribute to this issue.

    no bake strawberry banana pie in oreo crust
    4 from 3 votes
    Print Pin Recipe

    NO BAKE Banana Strawberry Pie

    Layers of no-bake goodness with bananas, oreo crust, fresh strawberries, and vanilla pudding!
    Prep Time10 minutes mins
    Freeze Time8 hours hrs
    Total Time8 hours hrs 10 minutes mins
    Course: No-bake Desserts, Pie, Snack
    Cuisine: American
    Servings: 8 servings
    Calories: 268kcal
    Author: Lainey
    Prevent your screen from going dark

    Ingredients

    • 1 oreo pre-made pie crust
    • 1½ cups milk
    • 1 package instant Jell-O Pudding
    • 10 ounces whipped topping
    • 1 fresh banana sliced
    • 1 cup strawberries chopped
    • chocolate syrup to drizzle

    Instructions

    • On your oreo pre-made pie crust, arrange the sliced bananas as the bottom layer. Set aside.
    • In a large bowl, mix the milk and the instant Jell-O pudding until it thickens.
    • Add the whipped topping and mix well.
    • Add the chopped strawberries and mix.
    • Pour this mixture onto your pre-made Oreo pie crust with bananas.
    • Make it level using a spoon or a spatula.
    • Freeze it overnight for best results.
    • Top with whipped cream before serving.
    Leave a Comment
    Serving: 143gCalories: 268kcalCarbohydrates: 37gProtein: 4gFat: 12gSaturated Fat: 7gPolyunsaturated Fat: 1gMonounsaturated Fat: 3gCholesterol: 6mgSodium: 206mgPotassium: 208mgFiber: 1gSugar: 23gVitamin A: 112IUVitamin C: 12mgCalcium: 90mgIron: 1mg

    Watch The Recipe Video!

    QR Code
    Did you make this recipe?Share it on instagram or tag @simplybakings or #simplybakings!

    Desserts, No Bake Dessert Recipes, Pie, Snacks

    2 Ingredient Bread

    May 15, 2019 · 12 Comments

    An open slice of the 2 ingredient bread

    Forget pizza and kneading a dough ball for a second - try this easy 2 Ingredient Bread recipe for a quick and delicious breakfast, snack or even soup dish! It's great for picnics, potlucks, or any gathering. Pair this with your favorite drink and enjoy!

    Bread like French Breakfast Bread and Filipino Spanish Bread are so delicious, aren't they? And now we can make one at home!

    [feast_advanced_jump_to]

    What is Two Ingredient Bread?

    The concept of Two-Ingredient Bread has its roots in simplicity and practicality, evolving from traditional quick bread recipes. Its history isn't tied to a specific origin but rather stems from the broader category of "no-yeast breads" that have been around for centuries.

    In many cultures, bread made without yeast - such as soda bread in Ireland or flatbreads in the Middle East - was born out of necessity. Self-rising flour, a key ingredient, was invented in the 1840s by Henry Jones, a British baker, to simplify bread-making for sailors.

    The modern version of 2-ingredient flatbreads likely gained popularity in the early 2000s as part of the growing trend toward minimalist cooking. It became especially prominent during the COVID-19 pandemic, when home bakers sought easy, accessible recipes with fewer ingredients due to shortages and convenience. Yogurt was a natural choice for its tangy flavor and ability to act as a binder and leavening aid when combined with self-rising flour.

    Today, Two-Ingredient Bread remains a favorite for its ease, versatility, and suitability for quick baking without specialized skills or tools.

    Variations

    • Banana Yogurt Bread - Replace half the yogurt with mashed banana; add cinnamon.
    • Lemon Poppy Seed Bread - Add lemon zest and poppy seeds; glaze with lemon icing.
    • Cheddar Cheese Bread - Mix in shredded cheddar and paprika.
    • Olive and Sundried Tomato Bread - Add chopped olives and sundried tomatoes; sprinkle with Parmesan.
    • High-Protein - Add unflavored protein powder to the dough.

    Substitutions

    Ice Cream Substitutes:

    • Frozen Yogurt: Use equal portions of frozen yogurt for a lighter texture.
    • Whipped Cream + Sweetener: Mix 1 cup of whipped cream with 2 tablespoons of sugar as a substitute.
    • Mashed Bananas + Sweetener: Combine 1 cup of mashed bananas with 2 tablespoons of sugar for a healthier option.
    • Coconut Cream + Sweetener: Use 1 cup of coconut cream with 2 tablespoons of sugar for a dairy-free alternative.

    Self Raising Flour Substitutes:

    • All-Purpose Flour + Baking Powder + Salt:
      • For every 1 cup of self-rising flour, mix:
        • 1 cup all-purpose flour
        • 1 ½ teaspoons baking powder
        • ¼ teaspoon salt.
    • Whole Wheat Flour +Baking Powder + Salt: Same ratio as above for a whole-grain option.
    • Gluten-Free Flour Blend +Baking Powder + Salt: For those avoiding gluten, use a gluten-free flour blend with the same ratio.

    Storage

    • Room Temperature - Airtight container, up to 2 days.
    • Fridge - Airtight container, up to 5 days.
    • Freezer - Wrapped and in a freezer-safe bag, up to 3 months. Thaw at room temperature or reheat before serving.

    Ingredients

    Listed below are all the ingredients you will need (omitting quantities):

    • ice cream
    • self-rising flour

    See recipe card for quantities.

    Instructions

    Soften the ice cream in a few minutes and add it to a large bowl. Do a mashing motion with a spatula and mix it a little bit to get a liquid consistency.

    self-rising flour and ice cream for 2 ingredient bread recipe

    You want your ice cream to look like this.

    softening the ice cream for 2 ingredient bread recipe

    Add in the self-rising flour and mix using a wooden spoon until it is well combined.

    ice cream in liquid state

    The bread batter should have minimal lumps and the ice cream should be evenly distributed.

    adding in the self-rising flour to the softened ice cream

    Once you're done mixing, pour the mixture into a pre-greased pan or nonstick pan. Bake this at 350 degrees Fahrenheit for about 35 to 40 minutes.

    final batter of 2 ingredient bread

    Check by inserting a toothpick and when it comes out clean, then it is perfectly baked. Let it cool before slicing and serving!

    freshly baked 2 ingredient bread in a loaf pan

    Hint: Pre-heating the oven would make your baking faster and easier.

    ⭐ Top Tip

    • Have the ice cream softened to make it easier for you to mix the self-rising flour.
    • Always preheat your oven. For this recipe, you have to get the temperature to 350 degrees Fahrenheit.

    FAQ

    Is 2 ingredient dough healthy?

    Two-ingredient dough is packed with protein thanks to the yogurt, and is free of the preservatives and artificial ingredients found in many prebaked crusts and prepared doughs.

    What are the only two essential ingredients necessary to make bread?

    Bread is a staple food prepared from a dough of flour (usually wheat) and water, usually by baking. Throughout recorded history and around the world, it has been an important part of many cultures' diet.

    What are 2 quick breads?

    Muffins, coffeecakes, scones, and pancakes are examples of quick breads, that like their name implies, can be prepared quickly in a kitchen.

    More Recipes

    • Malunggay Bread
    • Ensaymada
    • Monkey Bread
    freshly baked 2 ingredient bread in a loaf pan
    5 from 2 votes
    Print Pin Recipe

    2 Ingredient Bread

    This easy-breezy 2 ingredient Bread perfect for potlucks and parties, would make you look like a baking pro!
    Prep Time10 minutes mins
    Cook Time40 minutes mins
    Total Time50 minutes mins
    Course: Bread
    Calories: 1223kcal
    Author: Lainey
    Prevent your screen from going dark

    Ingredients

    • 2 cups ice cream your choice of flavor
    • 1 ½ cups self-rising flour

    Instructions

    • Prepare the Ice Cream: Let the ice cream soften at room temperature for a few minutes. Transfer it to a bowl and mash it slightly to achieve a liquid-like consistency.
    • Mix the Batter: Add the self-rising flour to the softened ice cream. Mix until the batter is smooth and well-combined.
    • Prepare the Pan: Grease a loaf pan or use a nonstick pan. Pour the batter into the prepared pan and spread it evenly.
    • Bake: Preheat your oven to 350°F (175°C).
    • Bake the bread for 35-40 minutes.
    • Check for doneness by inserting a toothpick into the center. If it comes out clean, the bread is ready.
    • Cool and Serve: Let the bread cool in the pan for a few minutes, then transfer it to a wire rack to cool completely.
    • Slice and serve. Enjoy!
    Leave a Comment

    Notes
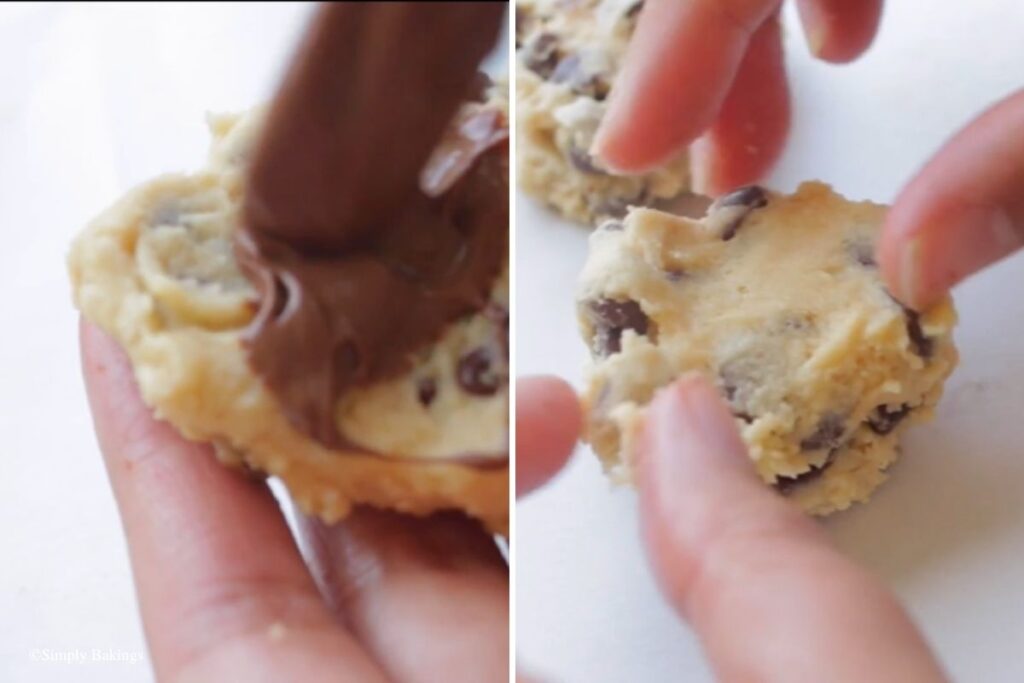
    I used chocolate ice cream
    Serving: 1gCalories: 1223kcalCarbohydrates: 198gProtein: 32gFat: 32gSaturated Fat: 18gPolyunsaturated Fat: 3gMonounsaturated Fat: 8gCholesterol: 116mgSodium: 215mgPotassium: 713mgFiber: 6gSugar: 57gVitamin A: 1115IUVitamin C: 2mgCalcium: 366mgIron: 2mg

    Watch The Recipe Video!

    QR Code
    Did you make this recipe?Share it on instagram or tag @simplybakings or #simplybakings!

    Desserts

    Rocky Road Popsicles - 5 Ingredients ONLY

    May 15, 2019 · 2 Comments

    rocky road popsicles

    These Rocky Road Popsicles are rich, chocolatey, and packed with crunchy bites in every frozen bite, all made with just 5 simple ingredients. They’re an easy no bake dessert perfect for hot days, after school treats, or whenever you’re craving something sweet and refreshing.

    Looking for more popsicles? Try my 3 Ingredient Nutella Popsicles or my Chocolate Avocado Popsicles.

    Why You’ll Love These Rocky Road Popsicles

    If you love rocky road ice cream, you’re going to love these homemade popsicles. They’re creamy, fudgy, and loaded with texture from mini marshmallows and crunchy nuts. The best part is you only need 5 ingredients and a few minutes to prep.

    These popsicles are:

    • made with 5 simple ingredients
    • freezer-friendly
    • no baking required
    • rich and chocolatey
    • kid-friendly and easy to make ahead

    Storage Tips

    • Store the popsicles in the freezer in their molds or transfer them to a freezer-safe container once frozen.
    • They keep well for up to 2 months.

    Ingredients

    • chocolate milk
    • 2 (3.9 oz) boxes instant dark chocolate pudding mix
    • mini chocolate chips
    • miniature marshmallows
    • almonds
    ingredients of rocky road popsicle recipe

    Instructions

    In a large bowl, add in the chocolate milk, instant Jell-O pudding, and mix until well-combined:

    mixing the dry ingredients of rocky road popsicle recipe

    Then, add the mini chocolate chips, miniature marshmallows, and chopped almonds:

    mixing in the marshmallows and almonds in the wet ingredients

    Look how rich, thick and creamy that mixture is! This is already dessert for me BUT...

    final mixture of rocky road popsicles recipe

    Spoon the mixture into popsicle molds, leaving a little room at the top. Add the sticks and freeze for at least 6 hours or overnight.

    rocky road popsicles in container

    Run warm water over the outside of the mold for a few seconds, then gently pull the popsicles out. Enjoy immediately.

    Tips for the Best Rocky Road Popsicles

    • Let the pudding thicken slightly before adding the mix ins so everything stays evenly mixed.
    • Chop nuts into small pieces so they’re easier to bite once frozen.
    • Freeze overnight for the firmest texture.
    • Run warm water over the mold for easier release.

    FAQ

    Can I make these without popsicle molds?

    Yes. Small paper cups work great. Cover with foil and insert popsicle sticks through the center.

    What nuts work best?

    Walnuts, peanuts, pecans, or almonds all work.

    Can I use dairy-free milk?

    Yes. Almond milk, oat milk, or coconut milk can work. The texture may be slightly softer depending on which milk you use.

    rocky road popsicle
    5 from 1 vote
    Print Pin Recipe

    Rocky Road Popsicles - 5 Ingredients ONLY

    Creamy, chocolatey Rocky Road Popsicles made with marshmallows, almonds, and chocolate chips for the ultimate frozen summer treat, with just 5 simple ingredients.
    Prep Time15 minutes mins
    Freeze Time8 hours hrs
    Total Time8 hours hrs 15 minutes mins
    Course: Dessert
    Cuisine: Fusion (American-Filipino/Asian)
    Servings: 10 popsicles
    Calories: 174kcal
    Author: Lainey
    Prevent your screen from going dark

    Ingredients

    • 4 cups chocolate milk
    • 2 (3.9 oz) boxes instant dark chocolate pudding mix
    • 1 cup mini chocolate chips
    • 1 ½ miniature marshmallows
    • ½ chopped almonds

    Instructions

    • In a large mixing bowl, whisk together the chocolate milk and instant dark chocolate pudding mix until smooth and creamy.
    • Fold in the mini chocolate chips, mini marshmallows, and chopped almonds.
    • Spoon evenly into 10 popsicle molds, filling each almost to the top.
    • Insert popsicle sticks & freeze overnight until firm.
    • To remove, run warm water over the outside of the mold for a few seconds, then gently pull the popsicles out.
    Leave a Comment

    Notes
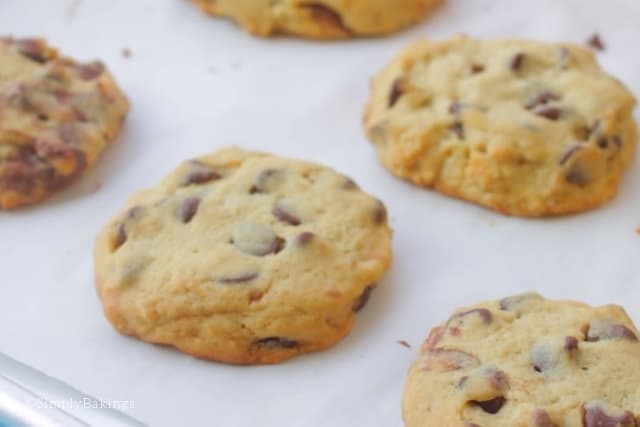
    • Each mold gets about 3 oz.
    • If your mix feels thick, tap the mold on the counter to help it settle.
    • Leave a little space at the top since the mixture expands slightly as it freezes.
    Serving: 11Calories: 174kcalCarbohydrates: 23gProtein: 4gFat: 8gSaturated Fat: 5gPolyunsaturated Fat: 0.1gMonounsaturated Fat: 1gTrans Fat: 0.03gCholesterol: 15mgSodium: 75mgPotassium: 167mgFiber: 1gSugar: 21gVitamin A: 138IUVitamin C: 1mgCalcium: 133mgIron: 0.5mg

    Watch The Recipe Video!

    QR Code
    Did you make this recipe?Share it on instagram or tag @simplybakings or #simplybakings!

    Ice Cream, Summer Desserts

    BEST White Chocolate Cranberry Chip Cookies

    May 15, 2019 · Leave a Comment

    I like dreamy cookies like these easy white chocolate cranberry chip cookies! They're soft, chewy, and packed with white chocolate and tart cranberries. It's perfect for beginners, holiday cookie trays, and gifting. Anyone who likes sweet and fruity cookies will surely enjoy this. Every bite has a festive flavor!

    If you need more fun cookies, try my Snickers cookies and brownie cookies!

    White Chocolate Cranberry Chip Cookies on a plate
    [feast_advanced_jump_to]

    Why You’ll Love This Recipe

    I personally love how soft these white chocolate cranberry cookies are. You can taste the sweet white chocolate and chewy cranberries in every bite.

    The recipe is beginner-friendly and uses simple baking ingredients. You don't need fancy equipment to make it. If you don't have a cookie scoop, use a spoon to take some dough from the large bowl.

    It's also vegetarian, but not vegan. You can make a dairy-free version with plant-based butter and dairy-free white chocolate chips. Dried cranberries add fruity flavor while providing small amounts of fiber and beneficial plant antioxidants. Their tartness also helps balance the sweetness of the white chocolate.

    Ingredients

    Listed below are all the ingredients you will need:

    • all-purpose flour
    • baking soda
    • sea salt
    • butter
    • light brown sugar
    • eggs
    • vanilla extract
    • dried cranberries
    • white chocolate chips or chunks

    See the recipe card for quantities.

    Instructions

    Prepare the Wet Ingredients

    1. In a large mixing bowl, add the softened butter, brown sugar, and white sugar.

    2. Beat with a handheld mixer until light and fluffy.

    Sugar and butter whipped together

    3. Add the egg and vanilla extract.

    4. Then mix everything until well combined.

    Prepare the Dry Ingredients

    5. In a separate bowl, add the flour, cornstarch, baking soda, and salt.

    6. Mix well until evenly combined.

    Make and Chill the Dough

    7. Add the dry ingredients to the wet ingredients.

    8. Mix just until combined. Don't overmix.

    9. Add the dried cranberries and white chocolate chips.

    10. Mix until evenly incorporated into the dough.

    Chips and cranberries added to mixture

    11. Cover the cookie dough, then refrigerate for at least 1 hour.

    Bake the Cookies

    12. Preheat the oven to 350°F.

    13. Scoop some chilled cookie dough onto cookie sheets. Make sure to leave some space between each cookie.

    14. Bake the mini cookies for 8-10 minutes.

    15. Don't overbake if you want the cookies soft and chewy.

    Cool and Serve

    16. After baking, let the cookies cool on a wire rack for a few minutes.

    17. Serve and enjoy!

    White Chocolate Cranberry Chip Cookies on a plate

    Substitutions & Variations

    • Ingredient Swap
      Swap dried cranberries with dried cherries.
    • Variation
      For a creamy contrast, keep the white chocolate chips.
    • Mistake to Avoid
      Don't overbake the cookies! I bake the mini cookies for 8-10 minutes at 350°F. If you want crispy more than chewy, bake them a little longer.

    • Storage Tips
      • Store cookies in an airtight container at room temperature for about 4-5 days.
      • Baked cookies also freeze well for up to 2 months when tightly wrapped and stored in a freezer-safe container. You can freeze portioned cookie dough for up to 2 months, then bake when needed.
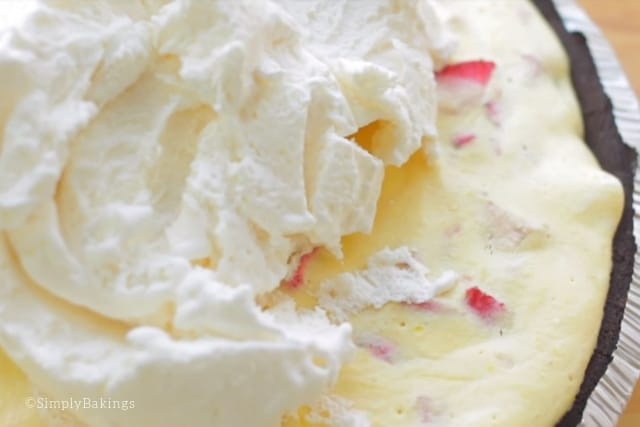
    Holding a freshly baked White Chocolate Cranberry Chip Cookie

    FAQs

    Can I freeze this cookie dough a few days before baking?

    Sure, you can. Just make sure to thaw it before baking.

    Can I use fresh cranberries instead of the dried ones?

    Yes, fresh cranberries work for your white chocolate chip cookies. Just take note to add ¼ cup of cranberries. They'll shrink in size after baking.

    Can I add other mix-ins in the recipe?

    Of course! But make sure to keep it moderate. I like adding pecans to mine sometimes since it pairs well with cranberries.

    sweet and salty cranberry chip cookies in a cooling rack
    No ratings yet
    Print Pin Recipe

    BEST White Chocolate Cranberry Chip Cookies

    Soft, chewy, and filled with dried cranberries and white chocolate! These cookies are an easy and festive cookie perfect for holidays, cookie exchanges, and homemade gifts.
    Prep Time1 hour hr 15 minutes mins
    Cook Time10 minutes mins
    Total Time1 hour hr 25 minutes mins
    Course: Cookies, Dessert, Snack
    Cuisine: Fusion (American-Filipino)
    Servings: 30 mini cookies
    Calories: 146kcal
    Author: Lainey
    Prevent your screen from going dark

    Ingredients

    • ¾ cup unsalted butter softened
    • ½ cup brown sugar
    • ½ cup white sugar
    • 1 large egg
    • 1 tablespoon vanilla extract
    • 2 cups all-purpose flour
    • 2 teaspoons cornstarch
    • 1 teaspoon baking soda
    • ⅛ teaspoon salt
    • 1 cup dried cranberries
    • 1 cup white chocolate chips

    Instructions

    Prepare the Wet Ingredients

    • In a large mixing bowl, add the softened butter, brown sugar, and white sugar.
    • Beat with a handheld mixer until light and fluffy.
    • Add the egg and vanilla extract.
    • Then mix everything until well combined.

    Prepare the Dry Ingredients

    • In a separate bowl, add the flour, cornstarch, baking soda, and salt.
    • Mix well until evenly combined.

    Make and Chill the Dough

    • Add the dry ingredients to the wet ingredients.
    • Mix just until combined. Don't overmix.
    • Add the dried cranberries and white chocolate chips.
    • Mix until evenly incorporated into the dough.
    • Cover the cookie dough, then refrigerate for at least 1 hour.

    Bake the Cookies

    • Preheat the oven to 350°F.
    • Scoop some chilled cookie dough onto cookie sheets. Make sure to leave some space between each cookie.
    • Bake the mini cookies for 8-10 minutes.
    • Don't overbake if you want the cookies soft and chewy.

    Cool and Serve

    • After baking, let the cookies cool on a wire rack for a few minutes.
    • Serve and enjoy!
    Leave a Comment
    Serving: 1gCalories: 146kcalCarbohydrates: 20gProtein: 1gFat: 7gSaturated Fat: 4gPolyunsaturated Fat: 0.3gMonounsaturated Fat: 2gTrans Fat: 0.2gCholesterol: 19mgSodium: 209mgPotassium: 37mgFiber: 0.5gSugar: 10gVitamin A: 152IUVitamin C: 0.04mgCalcium: 19mgIron: 0.5mg
    QR Code
    Did you make this recipe?Share it on instagram or tag @simplybakings or #simplybakings!

    You Might Also Like:

    • Hershey Kiss Cookies
    • Chocolate Chip Cookies
    • Homemade Oreo Cookies

    Recipes for Every Moment

    Need an easy homemade treat for a last-minute gift? These white chocolate cranberry chip cookies are soft, festive, beginner-friendly, and easy to make ahead.

    Desserts

    Matcha Milkshake

    May 15, 2019 · 2 Comments

    Matcha Milkshake in a tall glass with a straw

    Matcha lovers love this, Matcha Milkshake! This delicious and healthy drink only uses 4 full ingredients: non-dairy milk, teaspoons of matcha, scoops of ice cream. This is perfect for non-coffee drinkers. So satisfyingly quick to blend!

    Into special drinks like this? We also have Rice Coffee and Cantaloupe Juice recipes.

    Matcha Milkshake in a tall glass with a straw
    [feast_advanced_jump_to]

    Why You’ll Love This Recipe

    This creamy milkshake takes just a few minutes to make. It’s creamy, sweet, and packed with the earthy flavor of the matcha. Great for a warm day or a midday energy boost.

    It can be made dairy-free by using vegan ice cream and almond milk. Matcha milk or matcha desserts are full of antioxidants and give you a gentle energy lift. No worries of jitters from drinks like coffee!

    Fun fact about me: I always like the sweeter side, so I always add more ice cream. Yeah, I know much about sugar-loading, lol!

    Ingredients

    Listed below are all the ingredients you will need:

    • Matcha green tea powder
    • Almond milk
    • Vanilla ice cream
    • Ice cubes

    See the recipe card for quantities.

    Instructions

    1. In a blender, add ice cubes, vanilla ice cream or sorbet, almond milk, and matcha green tea powder.

    Blender with all the ingredients of the recipe

    2. Blend until smooth and creamy.

    Milkshake being blended in the blender

    3. Taste and adjust the matcha or sweetness level as needed.

    Blades of the blender mixing ingredients together

    4. Pour into your favorite glass and serve immediately. Enjoy!

    Matcha Milkshake in a tall glass with a straw

    Substitutions and Variations

    • Ingredient Swap
      Use vegan coconut ice cream instead for a more tropical flavor.
      You can swap almond milk with soy milk for a more creamy blend.
    • Variation
      Adjust the amount of Matcha powder if you want a lighter or stronger taste.
      Add chunks of a strawberry or a few bananas for a fruitier twist.
      Pour in some vanilla extract for extra flavor.
    • Mistake to Avoid
      Don’t skip blending long enough—ice chunks will ruin the texture.
      Always use hard ice cream, not melted.
    • Storage Tips
      • This milkshake doesn’t freeze well, so don't put it in the freezer. Enjoy it fresh for the best flavor and texture.
      • If needed, store in the fridge for 1 day. But re-blend or shake again before serving.

    FAQs

    Can I use organic matcha powder for this recipe?

    Using an organic variety of matcha green tea powder would be awesome! Go ahead and use it for this recipe.

    I want it to be more creamy and rich in flavor. Can I add in cashew butter?

    That is a delicious idea. Sure you can add that.

    Can I use organic matcha powder for this recipe?

    Using an organic variety of matcha green tea powder would be awesome! Go ahead and use it for this recipe.

    Matcha Milkshake in a tall glass with a straw
    5 from 2 votes
    Print Pin Recipe

    Matcha Milkshake

    Matcha Milkshake is a cool, creamy blend of green tea and sweet vanilla. Made with just four ingredients, it’s a refreshing treat ready in minutes!
    Prep Time5 minutes mins
    Total Time5 minutes mins
    Course: Dessert, Drinks
    Cuisine: Japanese
    Servings: 2 milkshakes
    Calories: 297kcal
    Author: Lainey
    Prevent your screen from going dark

    Ingredients

    • 1 to 2 teaspoons Matcha green tea powder
    • ½ to 1 cup almond milk
    • 4 to 5 large scoops vanilla ice cream or non-dairy sorbet for vegan option
    • 1 cup ice cubes

    Instructions

    • In a blender, add ice cubes, vanilla ice cream or sorbet, almond milk, and matcha green tea powder.
    • Blend until smooth and creamy.
    • Taste and adjust the matcha or sweetness level as needed.
    • Pour into your favorite glass and serve immediately. Enjoy!
    Leave a Comment
    Serving: 1gCalories: 297kcalCarbohydrates: 32gProtein: 6gFat: 16gSaturated Fat: 9gPolyunsaturated Fat: 1gMonounsaturated Fat: 5gCholesterol: 58mgSodium: 274mgPotassium: 263mgFiber: 1gSugar: 28gVitamin A: 656IUVitamin C: 1mgCalcium: 323mgIron: 0.5mg

    Watch The Recipe Video!

    QR Code
    Did you make this recipe?Share it on instagram or tag @simplybakings or #simplybakings!

    You Might Also Like:

    • Mocha Ice Cream | 5 Ingredients ONLY
    • 2 Ingredient Bread
    • Green Tea Cookies

    Recipes for Every Moment

    Need to cool down FAST because it's scorching hot outside? This Matcha Milkshake is icy and creamy - just what your afternoon needs.

    5 Ingredients or Less, Desserts, Drinks

    Keto Peanut Butter Cookies - 4 Ingredients ONLY

    Apr 26, 2019 · 13 Comments

    freshly baked keto peanut butter cookies

    These quick and easy 4-ingredient Keto Peanut Butter Cookies are chewy and delicious! It's also addictive, and low-carb and you won't even miss the real thing!

    a plate full of delicious keto peanut butter cookies

    This is my second keto-friendly dessert recipe to share, and I'm really excited for you to try it.  I was thrilled when I only used one bowl to mix everything, and it only had 4 ingredients. (Score!!)

    Technically, the vanilla extract is optional, but I decided to add it to the cookies to enhance the flavor.

    Tips and Procedures:

    • If you and your friends are on a ketogenic diet, you can bake several batches of keto peanut butter cookies and have a keto cookie party! Sounds fun!
    • This keto cookie is so easy to mix but if you feel it's easier to mix the ingredients using a stand mixer, you can do so, especially if you are making several batches of cookies
    • If you do not have powdered stevia, you can use liquid stevia. Just make sure to add a little quantity at a time to make sure you get the right sweetness in your cookies.

    How to Make this Keto Peanut Butter Cookies Recipe:

    Before starting off with the mixing process, make sure to preheat the oven to 350F and prepare a cookie sheet by lining it with parchment paper or a baking mat.

    Let's begin!

    Here are the ingredients you need to make these delicious Keto Peanut Butter Cookies:

    • peanut butter
    • sweetener
    • egg
    • vanilla extract
    ingredients for keto peanut butter

    In a large bowl, mix the peanut butter, sweetener, egg, and vanilla extract until well combined. (If it's very dry, you may add 1 tablespoon of milk):

    egg, peanut butter, vanilla and sweetener in a clear bowl for keto peanut butter cookies recipe

    Using a cookie scooper, scoop the cookies on the baking mat:

    scooping out the keto peanut butter cookie dough onto a baking sheet

    Then, using a fork, press down on each of the cookie dough balls to create the crisscross pattern of the classic peanut butter cookies:

    doing a crisscross pattern onto the keto peanut butter cookies using a fork

    Bake for 11–13 minutes and allow the cookies to cook for about 3–4 minutes (if you don't allow the cookies to cool, they will fall apart):

    ready to bake keto peanut butter cookies

    Then transfer over to a cookie rack to finish cooling:

    freshly baked keato peanut butter cookies on a cooling rack

    Please let me know how you guys liked the cookies, I would love to see pictures!

    keto peanut butter cookie with a bite

    Frequently Asked Questions:

    Q: What is the best sweetener to use for this keto peanut butter cookie?

    A: The best sweetener that comes out of the list is erythritol. For a more organic approach, stevia is the best for me.

    Q: Can I make the cookie dough in advance, like a day before baking them?

    A: Yes, you can mix the ingredients ahead of time and chill them. Once you are ready to bake them, let them stay at room temperature for at least 20 minutes before popping them into the oven.


    More Cookie recipes that are easy to make:

    • Keto Coconut Chocolate Chip Cookies
    • 5 Ingredient Sunbutter Cookies
    • Gluten-Free Chocolate Chip Cookies
    • Vegan Snickerdoodle Cookies

    Happy Baking!

    freshly baked keto peanut butter cookies
    4.67 from 3 votes
    Print Pin Recipe

    Keto Peanut Butter Cookies

    Try these Keto Peanut Butter Cookies for a tasty treat that will satisfy your sweet cravings without breaking your keto diet. These cookies have the right blend of nutty and sweet flavors perfect for a quick and yummy dessert or snack!
    Prep Time10 minutes mins
    Cook Time13 minutes mins
    Cool Time4 minutes mins
    Total Time27 minutes mins
    Course: Dessert
    Servings: 24 mini cookies
    Calories: 68kcal
    Author: Lainey
    Prevent your screen from going dark

    Ingredients

    • 1 cup creamy peanut butter
    • ½ cup keto friendly sweetener - I used Erythritol
    • 1 large egg
    • 1 ½ teaspoon vanilla extract
    • 1 tablespoon of milk* optional

    Instructions

    • Preheat oven to 350 degrees F and prepare a cookie sheet by lining it with parchment paper or a baking mat.
    • In a large bowl mix the peanut butter, sweetener, egg, vanilla extract until well combined. (If it's very dry, you may add 1 tablespoon of milk)
    • Using a cookie scooper, scoop the cookies on the baking mat and then using a fork, press down on each of the cookie dough balls to create the crisscross pattern of the classic peanut butter cookies.
    • Bake for 11-13 minutes and allow the cookies to cool for about 3-4 minutes (if you don't allow the cookies to cool, it will fall apart) and then transfer over to a cookie rack to finish cooling.
    Leave a Comment

    Notes

    *I used almond milk
    Serving: 1cookieCalories: 68kcalCarbohydrates: 7gProtein: 3gFat: 6gSaturated Fat: 1gPolyunsaturated Fat: 1gMonounsaturated Fat: 3gTrans Fat: 0.001gCholesterol: 7mgSodium: 50mgPotassium: 64mgFiber: 1gSugar: 1gVitamin A: 10IUCalcium: 7mgIron: 0.2mg

    Watch The Recipe Video!

    QR Code
    Did you make this recipe?Share it on instagram or tag @simplybakings or #simplybakings!

    NEVER MISS A RECIPE!

    PINTEREST / FACEBOOK / INSTAGRAM / TWITTER

    If you’ve tried this or any other of my recipes, don’t forget to rate the recipe and leave me a comment. I love hearing from you!

    5 Ingredients or Less, Cookies

    Healthy Vegan Muffins

    Apr 5, 2019 · 7 Comments

    These Healthy Vegan Muffins are perfect for those relaxing Sunday mornings. Easy to whip up, it's crumbly and it even doesn't taste vegan.

    freshly baked healthy vegan muffins on a checkered cloth and white plate

    Tips and Tricks for Making This Healthy Vegan Muffins Recipe: 

    • Coating the berries in flour before mixing it to the batter will prevent them from sinking into the bottom of the muffin pan. Seeing berries on the muffin surface makes it more enticing, right? 🙂
    • To prevent air bubbles inside your healthy vegan muffins, tap it gently on your tabletop or kitchen counter to "release" the air that may have formed inside while mixing the batter.
    • Are you a tangy dessert lover? You can add in a bit of lemon zest to the blueberry and cranberry batter of this healthy vegan muffin. It's definitely a delicious and healthy addition!
    freshly baked healthy vegan muffins in three different variants - cranberries, blueberries and chocolate chips

    How to Make this Healthy Vegan Muffins Recipe:

    Before starting off with the mixing process, make sure to preheat oven to 400F and line your muffins pan with cupcake liners.

    Let's begin!

    Now here are the ingredients you will need for the Healthy Vegan Muffins:

    ingredients of healthy vegan muffin recipe

    In a large bowl, whisk together the flour, sugar, baking powder and salt:

    flour, sugar, baking powder and salt in a clear bowl for healthy vegan muffin recipe

    Make a well in the center and add the milk, oil:

    a well of wet ingredients on top of the dry ingredients in a clear bowl

    Stir until just combined. It's important not to overmix:

    final batter of the healthy vegan muffin recipe

    If making 3 different flavors of muffins, divide the batter into 3 bowls and then add the blueberries in one bowl, chocolate chips in bowl #2, and dried cranberries in bowl #3:

    three variants of healthy vegan muffins - cranberries, chocolate chips and blueberries

    Fold the berries into each bowl of batter and be careful, not to- do not overmix. (Batter will be thick)

    mixed in cranberries, blueberries and chocolate chips to the healthy vegan muffin batter

    Using a mini cookie scooper add the batter in the baking cups and bake for 8 minutes or when the toothpick comes out crumb-free:

    scooping the batter onto the muffin liners

    Serve and enjoy!

    close up shot of a cranberry vegan muffin

    Frequently Asked Questions for the Healthy Vegan Muffins Recipe:

    Q: Can I use coconut oil instead of the regular oil used in baking?

    A: Sure, you can use coconut oil instead. It makes this recipe more vegan.

    Q: Can I add nuts to this recipe?

    A: Yes, adding nuts if you are not allergic to them adds more texture to this recipe.

    Q: I have frozen berries on my freezer. Do they need to be thawed before folding them into the batter?

    A: Using frozen berries in baking is definitely a YES.  You don't have to thaw it before folding them into the muffin batter. It won't affect the taste of the final baked product.

    Q: How long is the shelf life of this healthy vegan muffin?

    A: You can safely eat this when left in room temperature for a day. If you want to keep it longer, it could stay up to a week in the fridge, that is, if you won't be tempted to eat them all 🙂

    Q: Can I make this into banana muffins?

    A: Sure you can! If you have very ripe bananas on hand, you can add those sweet mashed bananas and you have a delicious and healthy vegan banana muffin! You can also adjust/decrease the sugar since the bananas already have a natural sweet taste to it.


    More delicious breakfast recipes you might like:

    • Banana Muffins
    • Blueberry Scones
    • French Breakfast Bread
    • Smoothie Bowls

    Happy Baking!

    5 muffins on a blue checkered cloth with blueberries scattered
    4.75 from 4 votes
    Print Pin Recipe

    Healthy Vegan Muffins

    A quick & easy healthy vegan muffin for any age!
    Author: Lainey
    Prevent your screen from going dark

    Ingredients

    • 3 cups all purpose flour
    • ¾ cups of organic cane sugar
    • 2 teaspoons baking powder
    • 1 teaspoon salt
    • 1 ½ cups dairy free milk
    • ½ cup oil
    • ¾ cups blueberries
    • ¾ cup mini dairy free chocolate chips
    • ¾ cups dried cranberries

    Instructions

    • Preheat oven to 400F and line your muffins pan with cupcake liners
    • In a large bowl, whisk together the flour, sugar, baking powder and salt.
    • Make a well in the center and add the milk, oil, and stir until just combined. It's important not to overmix.
    • If making 3 different flavors of muffins, divide the batter into 3 bowls and then add the blueberries in one bowl, chocolate chips in bowl 2, and dried cranberries in bowl 3 and then fold- do not overmix. (Batter will be thick)
    • Using a mini cookie scooper add the batter in the baking cups and bake for 8 minutes or when the toothpick comes out crumb0free
    Leave a Comment
    QR Code
    Did you make this recipe?Share it on instagram or tag @simplybakings or #simplybakings!

    NEVER MISS A RECIPE!

    PINTEREST / FACEBOOK / INSTAGRAM / TWITTER

    If you’ve tried this or any other of my recipes, don’t forget to rate the recipe and to leave me a comment. I love hearing from you!

    Breakfast & Brunch, Christmas Desserts, Vegan Baking

    Best Vegan Fruit Cheesecake

    Mar 27, 2019 · 1 Comment

    This smooth and creamy Vegan Fruit Cheesecake is the perfect addition to any potluck or last minute get together.  It's delicious and tastes just like real cheesecake!

    a slice of vegan fruit cheesecake on a white plate with two slices of kiwi

    I used to bake a similar cheesecake cake all. the. time. My sister and I were avid bakers in our late teens and at that time we were into vegan baking.  She made this delicious vegan cheesecake using siliken tofu and it was delicious! Maybe someday in the future, I'll invite her over to share the recipe.

    For now, enjoy this delicious cheesecake using vegan cream cheese as the base layer.

    a slice of gluten free and dairy free fruit cheesecake on a white plate with two kiwi slices

    Tips and Procedures:

    • Are you having a party? Make this recipe into vegan fruit cheesecake bites!
    • Keep your fruit toppings looking fresh! Before arranging them on top of the cheesecake, soak them in lemon juice for a few minutes. The lemon's acidity will maintain its vibrant color, thus not making it brownish after a few hours.

    How to Make this Best Vegan Fruit Cheesecake:

    Listed below are all the ingredients you will need:

    • Graham Crust
    • vegan cream cheese
    • organic cane sugar
    • fresh lemon juice
    • vanilla extract
    • salt

    Assorted Fruits:

    • Sliced Strawberries
    • Blueberries
    • Kiwi
    • Mango

    Before starting, don't forget to preheat the oven to 350 degrees F and prepare the ingredients ahead. It saves you a lot of time to lay them all out, plus, you know you are not missing an ingredient.

    Here are the ingredients you will need: ready-made Graham Crust, vegan cream cheese, organic cane sugar, fresh lemon juice, vanilla extract, salt, assorted Fruits (sliced strawberries, blueberries, kiwi, and mango.

    ingredients for vegan fruit cheesecake recipe

    In a large bowl, add the cream cheese and sugar:

    cream cheese and sugar in a large bowl fro vegan fruit cheesecake recipe

    Beat until light and fluffy:

    well-beaten mixture of cream cheese and sugar for vegan fruit cheesecake recipe

    Then add lemon juice, vanilla extract, and salt:

    cream cheese and sugar mixture with vanilla, salt and lemon juice

    Continue mixing until well combined. Now it's ready to be added to the graham pie crust:

    cream cheese mixture on a large bowl beside graham pie crust

    Add the cream cheese mixture into the prepared graham crust and bake for 30 minutes:

    ready to bake cheesecake for vegan fruit cheesecake recipe

    Allow to cook for about 20 minutes, then place in the fridge for about 3-4 hours or best overnight:

    freshly baked cheesecake base for vegan fruit cheesecake recipe

    Once the tart has set, add assorted fruit and decorate:

    a layer of sliced strawberry for vegan fruit cheesecake recipe

    Isn't that a pretty Vegan Fruit Cheesecake?!? True enough, I never wanted to slice it. But I did. Well, I couldn't stop myself, it tasted very good!

    pretty summer dessert - vegan fruit cheesecake

    Take a slice and indulge!

    a slice of vegan fruit cheesecake on a white plate with a fork

    This best Vegan Fruit Cheesecake is a perfect summer potluck dessert. The vibrant colors of the fresh fruits scream summer and one big bonus is when you make this, everyone would say you are a dessert pro!

    vegan fruit cheesecake beside a white plate with two kiwi slices and a fork

    Frequently Asked Questions:

    Q: Can I do this a few days ahead?

    A: Yes, sure you can. You can opt to decorate it ahead or decorate it with fresh fruits just before serving.

    Q: How many servings would this recipe have?

    A: You can have six to eight regular slices of vegan fruit cheesecake.

    Q: Will the cheesecake melt in room temperature?

    A: Yes. This vegan fruit cheesecake should be chilled and taken out from the fridge just a few minutes before serving. The cheesecake could hold up its shape for about 20-30 minutes of exposure to room temperature.


    More Vegan Desserts you will enjoy:

    • Mini Chocolate Chips
    • Vegan Blondies
    • Coffee Cake
    • 2 Ingredient Chocolate Ice Cream
    5 from 2 votes
    Print Pin Recipe

    Vegan Fruit Cheesecake

    Delicious Vegan Fruit Cheesecake that is refreshing to eat during hot summers.
    Prep Time4 hours hrs
    Cook Time30 minutes mins
    Servings: 8 slices
    Author: Lainey
    Prevent your screen from going dark

    Ingredients

    • 1 ready-made Graham Crust
    • 2 8oz vegan cream cheese
    • ¾ cups organic cane sugar
    • 2 tablespoons fresh lemon juice
    • 1 teaspoon vanilla extract
    • ¼ teaspoon salt
    • Assorted Fruit
    • Sliced Strawberries
    • Blueberries
    • Kiwi
    • Mango

    Instructions

    • Preheat oven to 350F
    • In a large bowl, add the cream cheese, sugar and beat until light and fluffy. Then add lemon juice, vanilla extract, salt and continue mixing until well combined.
    • Add the cream cheese mixture into the prepared graham crust and bake for 30 minutes.
    • Allow to cook for about 20 minutes, then place in the fridge for about 3-4 hours or best overnight.
    • Once the tart has set, add assorted fruit and decorate.
    Leave a Comment

    Watch The Recipe Video!

    QR Code
    Did you make this recipe?Share it on instagram or tag @simplybakings or #simplybakings!

    NEVER MISS A RECIPE!

    PINTEREST / FACEBOOK / INSTAGRAM / TWITTER

    If you’ve tried this or any other of my recipes, don’t forget to rate the recipe and to leave me a comment. I love hearing from you!

    Cheesecake, Desserts, Vegan Baking

    Best Coconut Flour Chocolate Chip Cookies

    Mar 21, 2019 · 12 Comments

    A pile of delicious cookies on a plate

    These coconut flour chocolate chip cookies are soft, chewy, and packed with chocolate chips in every bite. If you’re looking for the best coconut flour chocolate chip cookies recipe, this easy homemade version is naturally gluten free, rich, buttery, and stays soft for days.

    Looking for more gluten free cookies? Try my Peanut Butter Chocolate Chip Cookies or my gluten free Mini Chocolate Chip Cookies.

    Cookies piled on top of one another
    [feast_advanced_jump_to]

    What are Coconut Flour Chocolate Chip Cookies?

    The history of nut-free Coconut Flour Chocolate Chip Cookies ties into the rise of gluten-free and alternative baking trends, which began gaining popularity in the early 2000s. Coconut flour emerged as a byproduct of the growing demand for coconut products, such as coconut oil and milk, especially among those seeking healthier or paleo-friendly options.

    As gluten-free diets became more mainstream, bakers started experimenting with coconut flour due to its high fiber content and mild sweetness. Chocolate chip cookies, an iconic American dessert created in the 1930s by Ruth Wakefield, became a natural choice for adaptation. The result was a modern twist: a cookie that retained the comforting flavors of chocolate chip cookies but was suitable for those avoiding gluten or seeking lower-carb alternatives.

    Today, Coconut Flour Chocolate Chip Cookies are a staple in many gluten-free kitchens, celebrated for their unique texture and wholesome ingredients.

    A cookie held up and bit on one side

    Substitutions

    • Coconut Flour - Substitute coconut flour with almond flour (4x the amount).
    • Baking Soda - Use baking powder (2x the amount).
    • Butter - Replace with coconut oil, vegan butter, or ghee (equal amounts).
    • Coconut Sugar - Swap for brown sugar, granulated sugar, maple syrup, or honey (adjust liquids).
    • Eggs - Use flax eggs, chia eggs, applesauce, or mashed bananas (¼ cup per egg).
    • Vanilla Extract - Replace with almond extract, coconut extract, or maple syrup (adjust for flavor strength).
    • Chocolate Chips - Substitute with regular chocolate chips, dark chocolate chips, cacao nibs, or carob chips.
    • Salt - Use sea salt, Himalayan salt, or omit if using salted butter.

    Storage

    • Room Temperature: Store cookies in an airtight container for up to 3 days.
    • Refrigerator: Place in an airtight container in the fridge for up to 1 week to maintain freshness.
    • Freezer: Freeze cookies in a freezer-safe container or zip-top bag for up to 3 months.

    Ingredients

    Listed below are all the ingredients you will need (omitting quantities):

    • coconut flour
    • baking soda
    • salt (optional)
    • unsalted butter
    • coconut sugar
    • eggs
    • vanilla extract
    • mini vegan chocolate chips

    See recipe card for quantities.

    all ingredients in separate bowls

    Instructions

    Preheat the oven to 350°F (175°C) before starting. Then in a bowl, whisk together coconut flour, baking soda, and salt until well combined. Set aside.

    In another bowl, beat together the butter and sugar using an electric hand mixer or stand mixer until light and fluffy.

    making the cookie dough in a bowl

    Add eggs and vanilla extract to the mixed batter.

    Mix well until combined.

    Whisking ingredients with a mixer

    Add the dry ingredients and mix.

    Then stir in the chocolate chips!

    Chocolate chips mixed into cookie dough

    Using a cookie scoop, place the cookie dough on a baking pan lined with parchment paper.

    Making small pieces of dough with scooper

    Flatten the dough so it would bake evenly. Bake for 10-12 minutes.

    Small pieces of cookie dough flattened on pan

    Take out from the oven and cool on a cooling rack.

    Freshly baked cookies transferred to cooling rack

    Transfer to a plate. Then serve!

    Cookies on cooling rack and plate

    ⭐ Top Tip

    I used a small cookie scooper to create bite-size keto cookies. But if you want to make larger cookies, add about 5-7 minutes of baking time. If you don't, your cookies will taste grainy.

    FAQ

    What is the secret to baking with coconut flour?

    Use a 1:4 ratio when substituting coconut flour with all-purpose flour. This means that for every 1 cup of regular flour, you only use ¼ cup of coconut flour. Following this ratio will help make your low-carb baked goods come out the way you hope.

    Why are my coconut flour cookies dry?

    No one enjoys eating dry bread, cakes, or cookies, but if you've made these baked goods with coconut flour, chances are you've encountered some dry baked goods. That's because coconut flour can dry out baked goods. This can be solved by adding pureed fruit such as apple sauce for half of the liquid or fat.

    Is coconut flour or almond flour better for cookies?

    Almond flour is particularly well-suited for recipes that require a light and airy texture, such as cakes and muffins. Coconut flour works best in recipes that require moisture and density, such as brownies and dense bread.

    More Cookie Recipes

    • Caramel Salted Chocolate Cookies
    • Choco Mint Blossom Cookies
    • Mint Chocolate Chip Cookies
    • Peanut Butter and Jelly Cookies
    A set of cookies on a plate
    4.34 from 3 votes
    Print Pin Recipe

    Best Coconut Flour Chocolate Chip Cookies

    My Coconut Flour Chocolate Chip Cookies are soft, chewy, and naturally gluten-free. It comes together quickly and is perfect for satisfying your sweet tooth!
    Prep Time10 minutes mins
    Cook Time12 minutes mins
    Total Time22 minutes mins
    Course: Cookies, Dessert
    Cuisine: American
    Servings: 12 cookies
    Calories: 164kcal
    Author: Lainey
    Prevent your screen from going dark

    Ingredients

    Dry Ingredients:

    • ½ cup coconut flour
    • ½ teaspoon baking soda
    • ¼ teaspoon salt optional

    Wet Ingredients:

    • ½ cup unsalted butter softened
    • ½ cup coconut sugar
    • 3 eggs
    • 1 teaspoon vanilla extract

    Mix-ins:

    • ½ cup mini vegan chocolate chips

    Instructions

    • Preheat your oven to 350°F (175°C). Line a cookie sheet with parchment paper or use a silicone baking mat.
    • In a medium bowl, whisk together the coconut flour, baking soda, and salt until evenly combined. Set aside.
    • In a large bowl, beat the softened butter and coconut sugar together until light and fluffy. Add the eggs and vanilla extract, then mix until fully combined.
    • Gradually add the dry ingredients to the wet ingredients and mix until a dough forms.
    • Fold in the mini vegan chocolate chips.
    • Using a small cookie scooper or spoon, scoop the dough onto the prepared baking sheet. Flatten each cookie slightly with your hand or the back of a spoon.
    • Bake the cookies for 10-12 minutes, or until the edges are lightly golden.
    • Allow the cookies to cool on the cookie sheet for a few minutes before transferring them to a wire rack to cool completely.
    • Serve and enjoy!
    Leave a Comment
    Serving: 1gCalories: 164kcalCarbohydrates: 14gProtein: 3gFat: 11gSaturated Fat: 7gPolyunsaturated Fat: 0.5gMonounsaturated Fat: 2gTrans Fat: 0.3gCholesterol: 62mgSodium: 139mgPotassium: 17mgFiber: 2gSugar: 9gVitamin A: 313IUVitamin C: 0.05mgCalcium: 17mgIron: 0.4mg

    Watch The Recipe Video!

    QR Code
    Did you make this recipe?Share it on instagram or tag @simplybakings or #simplybakings!

    This recipe was my first time baking with coconut flour and I loved it! 

    The texture of the cookies is chewy and a bit on the cakey side, but I love cakey cookies.  I gave some to one of my friends, and she told me it tasted like store-bought cookies! (Score!)

    Christmas Desserts, Cookies

    Foolproof Blondies (Eggless)

    Mar 8, 2019 · 21 Comments

    slices of vegan blondies on a parchment paper

    These foolproof Eggless Blondies are crispy around the edges and chewy in the center. It's a simple and delicious recipe that everyone will love!

    Need more vegan desserts? Try easy Vegan Chocolate Cake, Sweet Potato Oatmeal Muffins, or my gluten-free Chocolate Chip Cookies!

    sliced vegan blondies on parchment paper
    [feast_advanced_jump_to]

    What do blondies taste like?

    Blondies are similar to brownies but have a vanilla and brown sugar flavor profile rather than the chocolatey richness of brownies. They're chewy and moist, with a slightly caramelized taste from the brown sugar. Overall, they're deliciously sweet and satisfying, perfect for anyone who loves baked goods but prefers a lighter, less intense taste compared to brownies.

    Top Tip

    • Sinking in the middle: If your blondies sink in the middle whilst baking, it's due to overmixing the batter. The key point is don't overmix.
    sliced vegan blondies on parchment paper

    Substitutions

    • Sweeteners: Use granulated monk fruit sweetener or Swerve instead of brown sugar. Monk fruit is preferably, as Swerve can sometimes develop a bitter taste after baking.
    • Nuts: Feel free to omit the nuts or use peanuts or pecans.
    • Use Carob Chips instead of vegan chocolate chips.

    Variations 

    • Extra Goey: To make the blondies even gooier add 1 tablespoon of molasses.
    • Spice: Change up the flavors by replacing the cinnamon with pumpkin spice.
    • For added texture, incorporate chocolate chunks for a richer chocolate experience.

    Storage

    • Storage: After the blondies have cooled down completely store in an airtight container for up to 3 days at room temperature or 1 week in the fridge.
    close-up view of dairy-free vegan blondies

    Ingredients

    • vegan butter
    • brown sugar
    • vanilla extract
    • all-purpose flour
    • baking powder
    • ground cinnamon
    • salt
    • dairy-free chocolate chips
    • chopped walnuts
    ingredients for vegan blondies recipe

    Before gathering the ingredients, preheat the oven to 350F and line an 8x8 inch square baking pan with parchment paper.

    In a large bowl, put together the vegan butter, brown sugar, and vanilla extract:

    vegan butter, brown sugar and vanilla extract in a clear mixing bowl

    Beat until light and fluffy then set aside:

    mixed vegan butter, brown sugar and vanilla extract in a clear bowl for vegan blondies recipe

    In a medium bowl, whisk together the flour, cinnamon, baking powder, salt until combined:

    mixed all-purpose, ground cinnamon, and salt in a clear mixing bowl for vegan blondies recipe

    Then add the dry ingredients into the wet ingredients and mix. Once everything is incorporated add the chocolate chips and walnuts:

    mixing carob chocolate chips and walnuts to the vegan blondies batter

    The batter will be thick, just like so:

    mixed batter of vegan blondies recipe

    Add to the baking pan and spread out evenly: 

    Now you are ready to pop this in the oven and bake for 15-17 minutes:

    ready to bake vegan blondies batter in a baking dish

    Cool completely and cut into pieces, then serve:?

    slices of freshly baked vegan blondies on parchment paper

    Hint: Do not leave the blondies in the oven too long, it will overbake. Once they become golden around the edges remove them from the oven or insert a toothpick in the center at the 15-minute mark and if it's clean remove them from the oven.

    Frequently Asked Questions

    How come my blondies didn't rise?

    Don't expect much rise in the batter with this recipe, so don't be deceived. Check for doneness around the 15-minute mark by inserting a toothpick.

    Why are my blondies still raw in the middle?

    Check if you're baking them for the right amount of time.
    Ensure your oven is at the correct temperature.
    Use the correct pan size as specified in the recipe.
    Measure your ingredients accurately.
    Place the oven rack in the center for even baking.

    Why are my blondies cakey?

    You overbaked them, don't bake them more than 17 minutes.

    What is the difference between a Brownie and a Blondie?

    The chocolate. Blondies are made without cocoa powder while brownies are.

    Here are 3 fan favorite vegan desserts:

    • Coffee Cake
    • Chocolate Ice Cream
    • 5 Ingredient Sunbutter Cookies
    slices of vegan blondies on a parchment paper
    4.67 from 6 votes
    Print Pin Recipe

    Foolproof Blondies (Eggless)

    A simple and delicious vegan dessert which is crisp on the outside, chewy in the center and filled with chocolate flavor! These dairy-free blondies are perfect for healthy breakfast or snacks!
    Prep Time10 minutes mins
    Bake Time15 minutes mins
    Total Time25 minutes mins
    Course: Dessert, Snack
    Cuisine: American
    Servings: 16 blondies
    Calories: 151kcal
    Author: Lainey
    Prevent your screen from going dark

    Ingredients

    • 6 tablespoons vegan butter
    • ¾ cups brown sugar
    • 2 teaspoons vanilla extract
    • 1 cup all-purpose flour
    • ½ teaspoon ground cinnamon
    • ¾ teaspoon baking powder
    • ¼ teaspoon salt
    • ⅓ cup dairy-free chocolate chips
    • ⅓ cup chopped walnuts

    Instructions

    • Preheat oven to 350F and line an 8x8 inch square pan with parchment paper.
    • In a large bowl, beat the vegan butter, brown sugar, vanilla extract until light and fluffy, set aside.
    • In a medium bowl, whisk together the flour, cinnamon, baking powder, salt until combined.
    • Then add the dry ingredients into the wet ingredients and mix.
    • Once everything is incorporated add the chocolate chips and walnuts, the batter will be thick.
    • Add to the baking pan, and bake for 15-17 minutes, then cool completely and cut into 16 pieces, then serve.*
    Leave a Comment

    Notes

    *Don't expect much rise in the batter with this recipe, so don't be deceived. Check for doneness around the 15-minute mark by inserting a toothpick.
    Serving: 1gCalories: 151kcalCarbohydrates: 19gProtein: 2gFat: 8gSaturated Fat: 2gTrans Fat: 1gSodium: 93mgPotassium: 46mgFiber: 1gSugar: 12gVitamin A: 202IUVitamin C: 1mgCalcium: 31mgIron: 1mg

    Watch The Recipe Video!

    QR Code
    Did you make this recipe?Share it on instagram or tag @simplybakings or #simplybakings!

    I love baking vegan treats like this vegan blondie recipe because I can taste the batter and not be nervous about eating raw eggs.

    I've been eating vegan desserts since I was a little girl- not on purpose, my family preferred eating healthy, avoiding eggs and butter if possible. Only as an adult, I allow myself the luxuries of butter and eggs in my house. (Although my husband would rather not have me cook or bake with eggs. haha oh well.)

    Something to note, I used carob chips to make the vegan blondies, however, if you don't use high-quality carob chips, it's not going to taste good as using vegan semisweet chocolate chips.  (Trader Joe's has delicious vegan semisweet chocolate chips and it's affordable).

    Cookies, Vegan Baking

    Lemon Brownies with Lemon Glaze

    Feb 28, 2019 · 6 Comments

    Lemon Brownies on a small plate

    Not just for blondies, of course, these Lemon Brownies with Lemon Glaze are a citrus lover’s dream - soft, chewy, and bursting with bright lemon flavor! Topped with a sweet and tangy lemon glaze, every bite melts in your mouth, delivering the perfect balance of zing and sweetness. Best of all, they’re incredibly easy to make, so you can whip up a batch anytime a lemon craving strikes!

    Craving more bright and zesty lemon recipes? Try my Funfetti Lemon Cake Cookies, Simple Lemon Cake, or Lemon Ice Cream!

    A plate of brownies with lemon slices
    [feast_advanced_jump_to]

    What are Lemon Brownies with Lemon Glaze?

    This classic American dessert, lemon brownies with lemon glaze, is a chewy, citrusy twist on classic brownies, featuring a dense, fudgy texture without chocolate! Packed with fresh lemon juice and zest, these treats offer a perfect balance of sweetness and tang. Topped with a zesty lemon glaze, they deliver an extra burst of citrus flavor, making them an irresistible dessert for lemon lovers!

    Easy to make and refreshingly bright, they’re perfect for any occasion! Give these delicious brownies a try!

    History of Lemon Brownies with Lemon Glaze

    Lemon blondie is a modern take on traditional brownies, swapping chocolate for bright citrus flavors. While the exact origin is unclear, they likely evolved from lemon bars popularized in the 1960s.

    Home bakers began experimenting with dense, chewy lemon-based treats, inspired by the texture of brownies but craving a tangy alternative. The rise of food blogs and social media in the early 2000s helped lemon brownies gain popularity, with bakers sharing their variations online.

    Today, they are a beloved treat worldwide, especially favored in warm seasons for their refreshing, zesty flavor. It is typically enjoyed during the spring and summer months when citrus flavors are most refreshing.

    They make a perfect dessert for picnics, brunches, tea parties, and warm-weather gatherings. Their bright and tangy taste also makes them a favorite for Easter, Mother’s Day, and bridal showers. Read on to learn more about this easy lemon brownie with lemon glaze recipe!

    Substitutions

    • Unsalted butter - ½ cup coconut oil (for a dairy-free option) or ½ cup applesauce (for a lower-fat version)
    • Cane sugar - ¾ cup coconut sugar (for a less refined option) or ½ cup honey or maple syrup (reduce other liquids slightly)
    • All-purpose flour - ¾ cup gluten-free all-purpose flour (for a GF version) or ¾ cup almond flour (for a nutty, lower-carb option)
    • Powdered sugar - blended coconut sugar (for a refined sugar-free version) or monk fruit sweetener (powdered) for a lower-sugar option.
    two slices of freshly baked Lemon Brownies with Lemon Glaze

    Recipe Variations

    • Orange Lemon Brownies – Swap half of the lemon juice with freshly squeezed orange juice for a milder, sweeter citrus flavor.
    • Berry Lemon Brownies – Fold in ½ cup of fresh or freeze-dried raspberries, blueberries, or blackberries for a fruity burst.
    • Coconut Lemon Brownies – Add ½ cup shredded coconut to the batter and sprinkle some on top of the glaze for a tropical touch.

    Storage

    • Store the brownies in an airtight container at room temperature for up to 3 days, or refrigerate for up to 1 week. Then, thaw at room temperature or in the fridge before serving.
    • For longer storage, freeze unglazed or glazed brownies in a freezer-safe container for up to 3 months, placing parchment paper between layers if glazed.

    Ingredients

    Listed below are all the ingredients you will need:

    • Unsalted butter
    • Cane sugar
    • All-purpose flour
    • Salt
    • Eggs
    • Fresh lemon juice
    • Lemon zest
    • Powdered sugar

    See recipe card for quantities.

    All ingredients of Lemon Brownies with Lemon Glaze in separate white bowls

    Instructions

    Preheat the oven to 350 degrees F.  Grease an 8-inch square baking dish and add parchment paper for easy removal.

    Beat the butter, sugar, and salt in a large bowl until well combined.

    butter, sugar, and salt in a large bowl

    Mix together the eggs, 3 tablespoons of lemon juice, and 2 tablespoons of lemon zest in a separate bowl.

    lemon zest, eggs, and lemon extract in a bowl

    Add the wet ingredients to the flour mixture.

    adding the wet ingredients to the flour mixture in a mixing bowl

    Beat on medium speed until smooth, about 2 minutes until you achieve a smooth batter. You may use a stand mixer.

    smooth batter of lemon brownies recipe in a clear bowl

    Pour batter into the prepared baking dish.

    lemon brownies batter in a baking dish leveled with a rubber spatula

    Bake in the preheated oven until a toothpick inserted in the center comes out clean, 23 to 25 minutes.

    freshly baked lemon brownies in a baking dish

    Mix together the powdered sugar, lemon juice, and lemon zest.

    pouring lemon juice to powdered sugar to make lemon glaze

    Mix well until it forms a thick glaze consistency.

    homemade lemon glaze for lemon brownies recipe

    Add to cooled brownies and allow to sit for 10 minutes so the glaze will harden.

    freshly baked lemon brownies topped with homemade lemon glaze

    And here you go - a tart lemony dessert!

    Lemon brownie with glaze and lemon slice.

    Hint: Use fresh lemon juice and zest for the best flavor - zest adds extra citrusy goodness! 🍋✨

    ⭐ Top Tips

    • If you are like me, who always forgets to take out the butter from the chiller before baking, slice the unsalted butter into cubes. It will help soften it quickly and will be ready for baking in a few minutes.
    • If you do not have a non-stick baking pan, it is best to line your baking pan with parchment paper. It is so much easier to take out your lemon brownies after baking.
    • Before pouring the lemon glaze into your lemon brownies, wait for a good ten to fifteen minutes. Cooling the lemon brownies will prevent the glaze from being too watery, and the glaze adheres better to a cooler surface.

    FAQ

    What makes a brownie cakey vs fudgy?

    Fudgy brownies typically contain more melted chocolate, chocolate chips or cocoa powder, which gives a richer flavour and denser consistency. Cakey brownies, on the other hand, typically contain more flour and less fat compared to fudgy brownies.

    What effect does egg have in brownies?

    Most brownie recipes call for two... They give brownies a lighter, drier, and more cake-like texture.

    What are the two types of brownies and what causes them to be different?

    Cakey brownies are lighter and more cake-like in texture. They are taller and contain more flour and leavening agent, and less fat than the other two brownie types.

    Can bottled lemon juice be used instead of freshly squeezed lemon juice?

    For sure, it would work perfectly fine. But if you have fresh lemons available, go ahead and use them. But I recommend fresh lemons because fresh is always best!

    More Lemon Flavored Desserts:

    • Lemon Cake
    • Snowball Lemon Drop Cookies
    • 3 Ingredient Lemon Ice Cream
    • Easy Lemon Sheet Cake
    • Funfetti Lemon Cake Mix Cookies
    two lemon brownies with lemon glaze on a small light blue plate
    5 from 5 votes
    Print Pin Recipe

    Lemon Brownies with Lemon Glaze

    Soft and zesty Lemon Brownies with Lemon Glaze - a citrusy twist on a classic treat!
    Prep Time10 minutes mins
    Cook Time25 minutes mins
    Total Time35 minutes mins
    Course: Dessert
    Cuisine: American
    Servings: 9 -12 brownies
    Calories: 247kcal
    Author: Lainey
    Prevent your screen from going dark

    Ingredients

    For the Lemon Brownies:

    • ½ cup unsalted butter softened
    • ¾ cup cane sugar or granulated sugar
    • ¾ cup all-purpose flour sifted
    • ½ teaspoon salt
    • 2 pieces eggs
    • 3 tablespoons fresh lemon juice
    • 2 teaspoons lemon zest

    For the Lemon Glaze:

    • 1 cup powdered sugar sifted
    • 3 tablespoons fresh lemon juice
    • 2 teaspoons lemon zest

    Instructions

    • Preheat the oven to 350°F (175°C).
    • Grease an 8-inch square baking dish and line it with parchment paper for easy removal.

    Make the Brownies:

    • In a large mixing bowl, beat together butter, sugar, flour, and salt until well combined.
    • In a separate bowl, whisk eggs, lemon juice, and lemon zest.
    • Combine the wet and dry ingredients and mix on medium speed until smooth (about 2 minutes).
    • Pour the batter into the prepared baking dish and spread evenly.
    • Bake for 23-25 minutes or until a toothpick inserted in the center comes out clean.
    • Let the brownies cool completely before adding the glaze.

    Make the Lemon Glaze:

    • In a small bowl, whisk together powdered sugar, lemon juice, and lemon zest until smooth and thick.
    • Spread the glaze over the cooled brownies and let it set for 10 minutes before slicing.
    Leave a Comment
    Serving: 1gCalories: 247kcalCarbohydrates: 39gProtein: 1gFat: 10gSaturated Fat: 7gPolyunsaturated Fat: 0.4gMonounsaturated Fat: 3gTrans Fat: 0.4gCholesterol: 28mgSodium: 132mgPotassium: 27mgFiber: 0.4gSugar: 30gVitamin A: 317IUVitamin C: 5mgCalcium: 7mgIron: 1mg

    Watch The Recipe Video!

    QR Code
    Did you make this recipe?Share it on instagram or tag @simplybakings or #simplybakings!

    Storytelling Time!

    Is it weird that I don't like to buy lemons? Let me explain. All my life, if I wanted to use lemons in a recipe, I only had to walk into my backyard and pick a lemon.  And if I purchased a lemon, my mom or dad would mention we had lemons in the backyard - and that is why I don't like buying lemons.

    Anyways, these lemons came from my parents' backyard.  They were juicy and sour- just the way I like them. I hope you enjoy the recipe!

    PS: What fruits do your bakers have in your backyard? Feel free to share!

    Desserts, Filipino Desserts, Summer Desserts

    Foolproof Caramel Cake Recipe

    Feb 22, 2019 · 2 Comments

    a slice of foolproof caramel cake on a white plate

    Craving a dessert that’s rich, buttery, and irresistibly sweet? This Foolproof Caramel Cake Recipe is everything you need! With soft, moist cake layers, a luscious homemade caramel sauce, and a smooth buttercream frosting, this cake is pure indulgence.

    Looking for more salted caramel recipes? Try my Salted Caramel Bundt Cake, Mini Salted Caramel Cheesecake, and Caramel Salted Chocolate Cookies.

    a slice of foolproof caramel cake
    [feast_advanced_jump_to]

    What is a Foolproof Caramel Cake Recipe?

    This Foolproof Caramel Cake Recipe is a mouthwatering dessert that combines a soft, fluffy cake with a rich salted caramel frosting, making it perfect for any celebration. Not only is this cake easy to prepare, but it’s also incredibly satisfying, featuring layers of buttery goodness and a luscious caramel sauce that takes its flavor to the next level.

    The recipe uses simple, everyday ingredients like unsalted butter, sugar, eggs, and buttermilk, resulting in a batter that’s both reliable and delicious. Once baked, the cake is topped with creamy buttercream frosting and a generous drizzle of homemade caramel sauce, making it the ultimate centerpiece for any dessert spread.

    Caramel cakes have their origins in the Southern United States, known for rich, flavorful desserts with indulgent toppings. This "foolproof" recipe ensures success for everyone, even beginners, making it easy to create a gorgeous and delicious dessert. Perfect for birthdays, holidays, or satisfying a sweet tooth, this cake never disappoints!

    easy homemade caramel cake

    Substitutions

    • Unsalted Butter: Substitute with coconut oil or margarine (use the same amount).
    • Granulated Sugar: Use coconut sugar or a sugar substitute like stevia (adjust quantity as per the substitute's conversion chart).
    • Brown Sugar: Substitute with coconut sugar or a mix of granulated sugar with molasses (1 cup granulated sugar + 1 tablespoon molasses).
    • Eggs: Use flaxseed meal (1 tablespoon flaxseed meal + 2.5 tablespoons water per egg) or applesauce (¼ cup per egg).
    • Vanilla Extract: Substitute with almond extract or omit if unavailable.
    • Baking Soda: Use baking powder (triple the amount) or cream of tartar (½ teaspoon baking soda + 1 teaspoon cream of tartar).
    • Cake Flour: Substitute with all-purpose flour (use the same amount) mixed with cornstarch (1 cup all-purpose flour - 2 tablespoons + 2 tablespoons cornstarch).
    • Buttermilk: Use milk mixed with vinegar or lemon juice (1 cup milk + 1 tablespoon vinegar/lemon juice, let sit for 5 minutes).
    • Salted Butter: Use unsalted butter plus a pinch of salt (same amount).
    • Agave Syrup: Use honey or maple syrup (same amount).
    • Powdered Sugar: Use granulated sugar blended until fine (adjust for sweetness).
    • Unsalted Butter (Frosting): Substitute with coconut oil or margarine (use the same amount).

    Variations

    • Caramel Cream Cheese Cake: Replace the buttercream frosting with cream cheese frosting for a tangy twist. After leveling the cooled cakes with a serrated knife, spread a generous layer of cream cheese frosting on the first cake layer. Pour additional caramel icing over the top for a rich finish.
    • Chocolate Caramel Cake: Add cocoa powder to the cake batter for a chocolate version. Use caramel icing instead of buttercream. Or add homemade chocolate syrup.
    • Caramel Pecan Cake: Fold chopped pecans into the batter for added texture. Top with a caramel icing and sprinkle with toasted pecans.
    a slice of foolproof caramel cake

    Storage

    • Room Temperature (1-2 days): Store in an airtight container. Keep in a cool, dry place away from heat and sunlight. Best for short-term storage when planning to eat soon.
    • Refrigerator (Up to 5 days): Place the cake in an airtight container or cover it tightly with plastic wrap. Keep it in the fridge to maintain freshness. Let it sit at room temperature for 20-30 minutes before serving for the best texture.
    • Freezer (Up to 3 months): Wrap individual slices or whole cake layers in plastic wrap. Place the wrapped cake in a freezer-safe bag or airtight container. Label with the date for easy tracking. Thaw overnight in the fridge, then bring to room temperature before serving.

    Ingredients

    For the Cake:

    • unsalted butter
    • granulated sugar
    • brown sugar
    • eggs
    • vanilla extract
    • baking soda
    • salt
    • baking powder
    • cake flour
    • buttermilk

    For the Caramel Sauce:

    • salted butter
    • brown sugar
    • vanilla extract
    • agave
    • salt

    For the Frosting:

    • powdered sugar
    • unsalted butter
    • salt
    ingredients for homemade caramel cake

    Instructions

    Before starting, don't forget to preheat the oven to 350 degrees F and prepare cookie sheets using parchment paper or a baking mat. Also, prepare the ingredients to be used. It helps to set them nicely and all measure according to your needs.

    mixing unsalted butter and sugar for homemade caramel cake recipe

    Add two large eggs and the vanilla extract and mix in a mixing bowl using a stand mixer:

    adding and mixing two large eggs to the butter and sugar mixture for homemade caramel cake recipe

    Now, carefully add the dry ingredients to the wet ingredients. This step would be a mess if you do not slowly incorporate the dry ingredients, so just be extra careful 🙂

    adding the dry ingredients to the wet ingredients for homemade caramel cake recipe

    As the mixture will thicken, add in the buttermilk:

    adding buttermilk to the homemade caramel cake batter

    Your homemade caramel cake batter should look like this after mixing. This is now ready to pop in the oven:

    final homemade caramel cake batter

    Place the batter in two round pans so it makes two layers of homemade caramel cakes. Spread it out evenly up to the sides of the pan:

    two baking pans of homemade caramel cake batter

    Now it's time to make the caramel sauce while that is baking.

    In a pan, put together the butter, vanilla extract, and brown sugar. Cook this until it thickens.

    When your caramel looks thick like this, add the milk to make the sauce thicker. It would become like a honey texture:

    making caramel sauce for homemade caramel cake

    While waiting for the cake and the caramel sauce to cool down, make the buttercream frosting.

    Mix the butter and the powdered sugar in a large bowl. You can either use a standing mixer or a handheld mixer. I prefer using a handheld mixer because I feel I can control its motion and it's very comfortable for me to use.

    putting powdered sugar to the butter for buttercream frosting

    Mix it very well until it gets to a consistency of smooth ice cream:

    ready to use buttercream frosting for homemade caramel cake

    After the cake has cooled down, flatten them by cutting the "dome":

    cutting the dome of the homemade caramel cake

    Now spread the buttercream frosting and add caramel sauce on top:

    frosting the first layer of homemade caramel cake with butter frosting and caramel sauce

    Put the other cake layer on top and you can crumb-coat it. This is a very important step before finally frosting it:

    crumb coating the homemade caramel cake

    Tadaaa! A delicious homemade caramel cake. This smells so yummy and so filling!

    a slice of homemade caramel cake on a white plate with a fork

    Top Tips

    • Crumb coating your homemade caramel cake is a step you should not skip. It helps to achieve a smooth-looking frosting on your cake.
    • I used agave for this recipe's caramel sauce instead of corn syrup. It is much healthier to use but corn syrup makes your caramel sauce much glossier.

    FAQ

    Can I use ready-made caramel sauce for this recipe?

    Yes sure, you can use store-bought or ready-to-use caramel sauce for this homemade caramel cake.

    Can I use this recipe to make cupcakes?

    Yes, you can make cupcakes out of this recipe. Just adjust the baking time and the temperature since cupcakes are baked separately from each other and are in smaller portions, so they bake more quickly than cakes.

    How do you thicken caramel for a cake?

    To thicken caramel for a cake, you can simmer it for a longer period to allow more moisture to evaporate, which concentrates the sugars and thickens the mixture. Alternatively, adding a small amount of cornstarch mixed with water can help achieve the desired consistency.

    sliced caramel cake on a white plate
    4.67 from 3 votes
    Print Pin Recipe

    Foolproof Caramel Cake Recipe

    This irresistibly easy homemade Foolproof Caramel Cake Recipe is perfectly topped with a luscious salted caramel frosting to satisfy all your cravings. You’re going to love every bite!
    Prep Time25 minutes mins
    Cook Time25 minutes mins
    Chill Time10 minutes mins
    Total Time1 hour hr
    Course: Desserts
    Cuisine: American
    Servings: 12 slices
    Calories: 575kcal
    Author: Lainey
    Prevent your screen from going dark

    Ingredients

    For the Cake:

    • ½ cup unsalted butter softened
    • 1 cup granulated sugar
    • ½ cup brown sugar
    • 2 large eggs
    • 1 teaspoon vanilla extract
    • ½ teaspoon baking soda
    • ½ teaspoon salt
    • 1 ½ teaspoons baking powder
    • 2 ⅓ cups cake flour
    • 1 cup buttermilk

    For the Caramel Sauce:

    • ½ cup salted butter
    • ½ cup brown sugar
    • 1 tablespoon vanilla extract
    • 2 tablespoons agave
    • A pinch of salt

    For the Frosting:

    • 2 cups powdered sugar sifted
    • ¾ cup unsalted butter
    • ½ teaspoon salt

    Instructions

    Preparing the Cake Batter

    • Preheat your oven to 350°F (175°C).
    • Grease and line two round cake pans with parchment paper.
    • In a bowl, cream together the butter, granulated sugar, and brown sugar until light and fluffy.
    • Add the eggs one at a time, mixing well after each addition.
    • Stir in the vanilla extract.
    • In a separate bowl, whisk together the dry ingredients: baking soda, salt, baking powder, and cake flour.
    • Gradually add the dry ingredients to the wet mixture, alternating with buttermilk. Mix until just combined.

    Baking the Cake Layers

    • Divide the batter evenly between the prepared pans.
    • Smooth the tops with a spatula.
    • Bake for 25-30 minutes or until a toothpick inserted in the center comes out clean.
    • Allow the cakes to cool in the pans for 10 minutes, then transfer them to a wire rack to cool completely.

    Making the Caramel Sauce

    • In a saucepan over medium heat, melt the butter.
    • Stir in the brown sugar and vanilla extract.
    • Add the agave syrup and a pinch of salt.
    • Simmer for 5-7 minutes until thickened.
    • Let the caramel cool slightly before using.

    Preparing the Buttercream Frosting

    • In a large bowl, beat the butter until creamy.
    • Gradually add the sifted powdered sugar and salt.
    • Mix until smooth and fluffy.

    Assembling and Frosting the Cake

    • Level the cooled cakes by cutting off any domed tops.
    • Spread a layer of buttercream on the first cake layer.
    • Drizzle caramel sauce over the frosting.
    • Place the second cake layer on top and apply a thin crumb coat of frosting.
    • Chill the cake for 10 minutes, then apply the final layer of frosting.
    • Drizzle more caramel sauce over the top for a stunning finish.
    Leave a Comment
    Serving: 1sliceCalories: 575kcalCarbohydrates: 76gProtein: 5gFat: 29gSaturated Fat: 18gPolyunsaturated Fat: 1gMonounsaturated Fat: 7gTrans Fat: 1gCholesterol: 101mgSodium: 394mgPotassium: 97mgFiber: 1gSugar: 58gVitamin A: 900IUVitamin C: 1mgCalcium: 84mgIron: 1mg

    Watch The Recipe Video!

    QR Code
    Did you make this recipe?Share it on instagram or tag @simplybakings or #simplybakings!

    What I love about this cake is that I used brown sugar to sweeten it, and the flavor is very subtle. Of course, the salted caramel frosting stands out like a champ.

    I love baking and decorating cakes, but I am not a pro.   I always enjoyed watching others decorate cakes and even took classes at Michael's to learn how to do it. Check out how ugly my cakes were, keep in mind these were the times before Pinterest so I had to come up with my ideas and these were before all the nice filters and when I was slender. lol

    two cakes

    My sister said the one with the vines and flowers looked like a Grandma decorated it. 😩

    a girl holding a cake and a cake with flower designs

    For this class, I had to create a cake with written text and I couldn't think of anything except for what I wrote. 😅

    Anyway, this Caramel Cake took me 3 days to finish, but I have to mention I spent about 3 hours working on it each day. I hope you guys enjoy this recipe and please tag me if you recreate this cake. 😄

    Cake

    Old Fashioned Banana Pudding Recipe with Condensed Milk

    Feb 14, 2019 · 6 Comments

    Old Fashioned Banana Pudding in glass bowl

    Try this Old Fashioned Banana Pudding Recipe with Condensed Milk made quickly using condensed milk, instant vanilla pudding mix, and whipped topping. This is very refreshing to eat on a warm day and great to bring for potluck. No egg needed!

    Craving more delicious ways to enjoy bananas? Check out these delightful recipes: No Bake Banana Pie, Banana Cake, Mini Banana Muffins, and Vegan Banana Pancakes.

    banana pudding with vanilla wafers in a small glass bowl
    [feast_advanced_jump_to]

    Substitutions

    • Cool whip: you can use heavy whipping cream as an alternative. Just make sure it is creamed well and has a fluffy texture before folding it in the pudding mixture. It won't be as creamy if you use runny whipping cream.

    Variations

    • Do you love super-creamy desserts? Add in some cream cheese for added flavor. I am sure it would taste so good and extra creamy.
    • Add ripe mangoes for a real tropical taste in the dessert!
    • For a delightful twist, top your banana pudding with a meringue made from whipped egg whites. Bake until golden for a beautiful and airy layer that complements the creamy pudding.
    • To enhance the banana flavor in your pudding, consider adding a few drops of banana extract, which will intensify the overall taste without altering the texture.

    Storage

    • Refrigerator: Store the banana pudding in an airtight container in the refrigerator for up to 3-4 days.
    • Freezer: You can freeze the pudding mixture without bananas in an airtight container for up to 2 months.
    • Serving Suggestions: To maintain freshness, layer the pudding and bananas separately if you anticipate leftovers.
    bowl of creamy banana pudding with vanilla wafers

    Ingredients

    Gather the ingredients first before starting. In this way, you can save so much time and energy by not walking to and fro from your kitchen counter to your pantry or fridge 🙂

    • instant vanilla pudding mix
    • milk
    • sweetened condensed milk
    • vanilla extract
    • frozen whipped topping
    • vanilla wafers or cookies
    • bananas
    seven ingredients for banana pudding recipe

    Instructions

    In a large bowl, add the cold milk and the instant pudding mix:

    instant pudding mix and cold milk in a bowl for banana pudding recipe

    Whisk the vanilla pudding and milk for about 2 minutes or until stiff peaks form:

    mixing the cold milk and banana pudding mix with a hand mixer

    Stir in the condensed milk, vanilla extract, and continue mixing until combined:

    mixing the pudding mixture with condensed milk and vanilla extract for banana pudding recipe

    We are almost done with the pudding mixture! I am so excited!

    The last ingredient you are going to add is the whipped cream topping. Fold it in until it is well combined:

    whipped cream and banana pudding mixture in a bowl for banana pudding recipe

    Do you see the visible whipped topping lumps in my mixture? I love biting into them each time I eat desserts like this. That is why I left a few of the lumps but if you like it extra smooth, you can continue folding it gently until you achieve the consistency that you like. Set the bowl aside:

    ready to use banana pudding mixture for banana pudding recipe

    Slice the bananas thinly. I like using the bananas with the brown specks on the banana skin or peel because it is way sweeter than those which have a perfect yellow peel. Are you wondering why I dip the banana slices in lemon juice? I do that so that the bananas even after chilling it do not turn brown. The discoloration isn't too pretty for a dessert 🙂

    dipping sliced bananas into lemon juice for banana pudding recipe

    Then layer wafers, bananas and pudding mixture in a 9x13 inch pan or baking dish. There isn't a "rule" in layering the wafers and bananas so you can just dump them in however you like:

    layering vanilla wafers and sliced bananas in a glass container for banana pudding recipe

    Add the pudding mixture to the banana-wafer layer you have made. Make sure to cover everything so that everyone who takes a slice of this delicious banana pudding will get a share of the pudding mixture:

    putting the pudding mixture on top of the banana and vanilla wafers layer for banana pudding recipe

    Add the last half whipped topping to the top layer and decorate with wafers or bananas:

    delicious side view of the banana pudding from scratch recipe

    I decorated mine by simply placing the left-over sliced bananas alternately with the vanilla wafers. Then on top, I kind of draw squares and then placed a vanilla wafer on each square, just to make it a look a bit fancy.

    Chill until serving:

    old fashioned banana pudding in glass pan

    That's it, Simply Bakers! A very easy and quick banana dessert you can make from scratch! Perfect if you are craving for something sweet and don't want to do the grocery shopping! Enjoy it with family and friends! I am sure they will love this!

    Top Tips

    • For any banana dessert that you are making, it is best to use bananas that are on the over-ripe stage as it is much sweeter and gives out that delicious aroma. You can tell when a banana is very sweet and perfect to use for desserts like this banana pudding recipe when the banana peel or skin already has brown spots or specks.
    • Brownish and dark bananas in a no-bake dessert don't look pretty when served. To avoid this, dip them in lemon juice or calamansi juice (if you are in a tropical country like the Philippines), before using it or mixing it with other ingredients. The high level of ascorbic acid or Vitamin C in lemons and calamansi prevent any fruit from browning, plus it also has a low level of acidity which helps in maintaining the natural color of fruits when dipped into the juice.

    Frequently Asked Questions

    How do you keep bananas from turning brown and banana pudding?

    Like how I do it each time I use bananas for dessert, I dip the bananas first in lemon juice, or if you have a lot of calamansi (like in the Philippines, they grow them in backyards), you can use that also. It works just as good.

    What can you substitute for vanilla wafers in banana pudding?

    You can substitute vanilla wafers with Nilla wafers, graham crackers, shortbread cookies, or even crushed digestive biscuits for a similar texture and flavor.

    What is a substitute for vanilla extract in banana pudding?

    A good substitute for vanilla extract is almond extract, though you should use it sparingly as it has a stronger flavor; alternatively, you can use vanilla bean paste or a splash of maple syrup for a different twist.

    Is banana pudding healthy?

    Banana pudding, especially the classic southern dessert recipe, can be both tasty and somewhat nutritious. It offers protein from whipped topping or meringue, fiber from bananas, and quick energy from its carbs. However, it’s high in sugar, and cholesterol may rise if egg yolks are used. Enjoy it as an occasional treat within a balanced diet.


    Banana pudding on a marble table with cookies
    3.67 from 3 votes
    Print Pin Recipe

    Old Fashioned Banana Pudding Recipe with Condensed Milk

    Try this delicious Old Fashioned Banana Pudding made with condensed milk for a delightful dessert! With layers of creamy pudding, bananas, and vanilla wafers, it's sure to impress your guests.
    Prep Time15 minutes mins
    Total Time15 minutes mins
    Course: Dessert
    Cuisine: American
    Servings: 8 servings
    Calories: 140kcal
    Author: Lainey
    Prevent your screen from going dark

    Ingredients

    • 1 5 ounce package instant vanilla pudding mix
    • 2 cups cold milk
    • ¼ cup sweetened condensed milk
    • 2 teaspoons vanilla extract
    • 2 12 ounce container frozen whipped topping thawed
    • 1 11 ounce package vanilla wafers
    • 5 small bananas

    Instructions

    • In a large mixing bowl, beat the vanilla pudding and milk for about 2 minutes.
    • Add the condensed milk, vanilla extract, and continue mixing until combined.
    • Fold in 1 and a half container of whipped topping. Then layer wafers, bananas and pudding mixture in a 9x13 inch pan. Add the last half whipped topping to the top layer and decorate with wafers or bananas.
    • Chill until serving.
    Leave a Comment
    Serving: 1servingCalories: 140kcalCarbohydrates: 26gProtein: 4gFat: 3gSaturated Fat: 2gPolyunsaturated Fat: 0.2gMonounsaturated Fat: 1gTrans Fat: 0.001gCholesterol: 11mgSodium: 40mgPotassium: 393mgFiber: 2gSugar: 18gVitamin A: 172IUVitamin C: 7mgCalcium: 106mgIron: 0.2mg

    Watch The Recipe Video!

    QR Code
    Did you make this recipe?Share it on instagram or tag @simplybakings or #simplybakings!

    I enjoy making desserts like this because it's a hit whenever I bring it to church potlucks or parties.  My best Banana Pudding recipe only requires 7 ingredients and it can be made in under 15 minutes.

    Desserts, No Bake Dessert Recipes, Summer Desserts

    Easiest Blueberry Scones Recipe Ever

    Feb 6, 2019 · 18 Comments

    a slice of blueberry scones on a cooling rack

    Learn how to make my Blueberry Scones recipe using fresh berries! A delicious treat for breakfast, brunch, or even an afternoon treat. It's best eaten fresh from the oven and smothered with butter or jam. Yum!

    Love blueberries? Try my Blueberry Lemon Poppy Seed Muffins or my Keto Blueberry Pancakes!

    blueberry scones on a cooling rack

    Hi Simply Bakers, in all the years I've been baking on YouTube, I have never made a scone recipe!! I've eaten a good amount of scones in my lifetime, but I never got around to baking some until now.

    blueberry scones on a plate and parchment paper with fresh blueberries on a green container

    These Fresh Blueberry Scones are wonderful and fresh out of the oven. As I was taking photos of the scones, I was popping them in my mouth and enjoying the crumbly texture and sweetness of the blueberries.  Since I didn't add a lot of sugar, the sweetness and tartness of the blueberries were able to shine.

    In addition, I added a lemon glaze to drizzle over the scones, and I'm so glad I did. I think lemons and blueberries are a great combination; I can foresee making a lemon-blueberry scone in the near future. I didn't show you how to make the glaze in the video, but you can find the glaze recipe in my Lemon Cake post.

    blueberry scones on a plate and parchment paper garnished with fresh blueberries

    What is the secret to making the perfect scones?

    Pop the stick of butter in your freezer for about 30 minutes before grating it. In that way, handling the butter would be easy and would result in even sizes of the grated butter.

    Tips and Procedures: 

    • It is important to sift the powdered sugar to make the glaze to avoid a lumpy glaze. Smooth glazes are the best!
    • Use fresh lemons and fresh lemon zest for the best results when making the glaze. It tastes so much better!
    • Coat the fresh blueberries with flour first before mixing them in the dough to prevent the blueberries from settling at the bottom. This is especially true for more runny batters.
    • Have you tried "scooped" scones? You can do that with this recipe. Just scoop the dough using an ice cream scoop and bake, instead of slicing it.
    blueberry scones on a parchment paper and garnished with fresh blueberries

    How to Make this Blueberry Scone Recipe:

    Listed below are all the ingredients you will need:

    • egg
    • sour cream
    • all-purpose flour
    • granulated sugar
    • salt
    • baking soda
    • baking powder
    • unsalted butter
    • frozen or fresh blueberries

    Before starting the mixing and kneading process, don't forget to preheat the oven to 400 F and move the rack to the center. The blueberry scone dough is a bit dense so it needs the right temperature for it to be baked properly. Now, let's begin!

    Here are the ingredients you will need to make these easy, delicious Blueberry Scones!

    Ingredients for Easy and Delicious Blueberry Scones Recipe

    In a medium-sized bowl add the eggs and sour cream:

    eggs and sour cream in a mixing bowl with rubber spatula

    Mix until it's well combined. Set aside:

    mixing eggs and sour cream with wire whisk for blueberry scones recipe

    In a large bowl whisk together the flour, granulated sugar, salt, baking powder, and baking soda. Mix well until all the ingredients are thoroughly combined:

    dry ingredients for the blueberry scones recipe

    Now, here is the tedious part. Using a grater, grate the frozen unsalted butter into the bowl:

    grating frozen unsalted butter for the blueberry scones recipe

    After grating the whole stick of unsalted butter, mix with a fork till just combined:

    mixing dry ingredients and grated unsalted butter for the blueberry scones recipe

    It's time to mix the wet batter with the dry ingredients. Mix until it's well combined and there are no lumps:

    mixing wet and dry ingredients for the blueberry scones recipe

    Add the fresh blueberries and knead the dough until everything is mixed in:

    Don't worry about crushing some of the fresh blueberries. It would still taste good 🙂

    kneading the blueberry scone dough and added in fresh blueberries

    Lay the dough on a floured surface and create a circle like a pizza 🙂 (check the youtube video). Then slice into 9 pieces with a pastry cutter (or you can make the slices thinner if you want to have more scones):

    slicing the round blueberry scone dough with a pastry cutter

    Place on a mat or baking sheet lined with parchment paper:

    As you can see, I added a bit of organic white sugar on top of the scones. I did not add much sugar when I was making the dough and I decided to add just a bit of sweetness to it.

    raw blueberry scone slices on parchment paper sprinkled with raw organic white sugar

    Bake for 15-17 minutes and there you have it! Easy, delicious homemade blueberry scones! Your kitchen will smell amazing!

    freshly baked blueberry scones on a baking tray

    The magic doesn't stop there, this step is optional, but lemon and blueberry go well together so it is best to drizzle lemon glaze. It would take your blueberry scones over the top! Yum!

    freshly baked blueberry scones on a cooling rack drizzled with delicious lemon glaze

    Frequently Asked Questions:

    Would frozen blueberries work as well?

    Yes! It works perfectly fine.

    Can you refrigerate and bake the dough later?

    Yes, you can. Making it ahead of time and just chilling it when you need it will save you a lot of prep time. The dough can be stored for up to 3 days in the refrigerator in an airtight container.

    Can this be made with other kinds of flour?

    That would be possible but maybe it has a different texture like when you use whole wheat flour, it would result may be in a drier blueberry scone.

    What other alternatives can I use for the eggs?

    Unfortunately, for this recipe eggs are important.

    Step by Step Video:


    Looking for more sweet breakfast ideas? Check out some of my favorites:

    • Best Maple Walnut Scones
    • Mini French Breakfast Bread
    • Banana Oatmeal Pancakes
    • Oreo Waffles
    • Butter Pecan Pancakes
    Blueberry Scones on parchment paper with fresh blueberries
    4.84 from 6 votes
    Print Pin Recipe

    Easiest Blueberry Scones Recipe Ever

    Prep Time10 minutes mins
    Cook Time20 minutes mins
    Course: Dessert
    Cuisine: American
    Servings: 8
    Calories: 281kcal
    Author: Lainey
    Prevent your screen from going dark

    Ingredients

    • 1 egg large
    • ½ cup sour cream
    • 2 cups all-purpose flour
    • ¼ cup granulated sugar
    • ½ teaspoon salt
    • ¼ teaspoon baking soda
    • 1 teaspoon baking powder
    • ½ cup unsalted butter frozen
    • ½ cup blueberries frozen or fresh

    Instructions

    • Preheat oven to 400 F and move the rack to the center.
    • In a medium size bowl add the eggs, sour cream and mix until it's well combined, set aside.
    • In a large bowl whisk together the flour, granulated sugar, salt, baking powder, and baking soda.
    • Using a grater, grate the butter into the bowl and then mix with a fork untill just combined.
    • Add the wet ingredients into the dry ingredients and mix until combined.
    • Add the fresh blueberries and knead the dough until everything is mixed in.
    • Lay the dough on a floured surface and create a circle (check the youtube video). Then slice into 9 pieces and place on a mat lined with parchment paper.
    • Bake for 15-17 minutes and drizzle glaze*
    Leave a Comment

    Notes

    *My favorite glaze
    Serving: 1gCalories: 281kcalCarbohydrates: 32gProtein: 4gFat: 15gSaturated Fat: 9gTrans Fat: 1gCholesterol: 58mgSodium: 254mgPotassium: 72mgFiber: 1gSugar: 8gVitamin A: 479IUVitamin C: 1mgCalcium: 57mgIron: 2mg

    Watch The Recipe Video!

    QR Code
    Did you make this recipe?Share it on instagram or tag @simplybakings or #simplybakings!

    NEVER MISS A RECIPE!

    PINTEREST / FACEBOOK / INSTAGRAM / TWITTER

    If you’ve tried this or any other of my recipes, don’t forget to rate the recipe and leave me a comment. I love hearing from you!

    Breakfast & Brunch, Christmas Desserts, Desserts, Thanksgiving Brunch

    Simple & Easy Lemon Cake

    Jan 31, 2019 · 16 Comments

    a slice of lemon cake glazed with lemon

    This Simple & Easy Lemon Cake recipe is delicious, tangy, and so easy to make from scratch. Every bite of this lemon cake is bursting with fresh lemon flavor and the easy lemon glaze on top will have you hooked after just one bite. 

    Try more of my Lemon Desserts that are quick & delicious: Lemon Brownies, Lemon Ice Cream, Snowball Lemon Cookies, and Lemon Sheet Cake.

    baked lemon cake topped with powdered sugar
    [feast_advanced_jump_to]

    Substitutions

    Frosting: You can use lemon buttercream frosting, lemon cream cheese frosting, or just the whipped cream frosting. I think all of those, including the classic lemon glaze, would go perfectly with this simple lemon cake.

    a slice of lemon cake glazed with lemon

    Variations

    • Lemon-Blueberry Cake: Fold 1 cup of fresh blueberries into the batter before baking.
    • Gluten-Free Option: Substitute all-purpose flour with a 1:1 gluten-free baking mix.
    • Bundt Cake Style: Double the recipe and bake in a bundt pan for 45–50 minutes.
    • Lemon Cupcakes: Just change the round baking pan into cupcake tins or any oven-safe cupcake molds.
    • If you add lemon curd to the cake batter, it will make the cake extra moist and add more lemon flavor. You could also swirl the curd into the batter before baking for a marbled effect or use it as a filling between cake layers for a tangy surprise.

    Storage

    • At Room Temperature: Store the cake in an airtight container for up to 2 days.
    • Refrigerate: For longer storage, refrigerate in a sealed container for up to 5 days. Bring to room temperature before serving.
    • Freeze: Wrap individual slices in plastic wrap and store in a freezer-safe bag for up to 3 months. Thaw in the fridge or at room temperature.

    Top Tips

    • If you love lemons double the lemon zest in the recipe- it takes this lemon round cake recipe to another level of zestiness.
    • It is important to sift the powdered sugar to make the best consistency for the glaze- I forgot to sift the powdered sugar so the glaze was lumpy, but to cover it up I added more powdered sugar on top.
    • If you did not sift your powdered sugar and have already poured the lemon juice on it, just go ahead and mix it well. After mixing it, strain the mixture to get rid of the powdered sugar lumps.
    • Use fresh lemons and fresh lemon zest for the best results.

    Ingredients

    Gather the ingredients - organic cane sugar, unsalted butter, large eggs, vanilla extract, lemon juice, lemon zest, sour cream, all-purpose flour, baking powder, baking soda, and sifted powdered sugar.

    Simple and easy Lemon cake recipe ingredients

    Instructions

    Before starting to mix the ingredient, line an 8x8 inch pan with parchment paper, then preheat your oven to 350 degrees F.

    To make the cake, in a large mixing bowl, add the softened unsalted butter and organic sugar. Using a stand mixer, combine it until light and fluffy:

    organic granulated sugar and cubed softened butter in a glass bowl for simple lemon cake recipe

    Next, add the eggs to the butter and sugar mixture. It is best to add the eggs one at a time:

    adding eggs to the mixed butter and sugar mixture for simple lemon cake recipe

    Adding the eggs one at a time will ensure that they are all well-blended and your cake batter will come out smooth, just like so:

    mixed ingredients for simple lemon cake recipe

    Add the vanilla extract, fresh lemon juice, and fresh lemon zest to the mixture. Mix well and set the bowl aside:

    mixing lemon zest and vanilla to simple lemon cake batter

    In another medium-sized bowl, add the dry ingredients - all-purpose flour, baking soda, and baking powder (others would add a bit of salt here too). Whisk until well-combined:

    dry ingredients of simple lemon cake recipe

    Add the dry ingredients mixture to the wet ingredients mixture:

    mixing dry ingredients and wet ingredients of the simple lemon cake recipe with a handheld mixer

    Mix until well-combined, then add the sour cream:

    adding sour cream to the simple lemon cake batter

    Pour the flour mixture into cake pans and bake for 25-30 minutes:

    simple lemon cake recipe batter on a baking pan leveled by a rubber spatula

    After checking if the cake is ready, take it out of the oven and allow the cake to cool in a wire rack for about 15 minutes before pouring the lemon glaze on top:

    freshly baked simple lemon cake in a baking pan

    While waiting for the cake to cool, go ahead and make the glaze. I promise it is so easy to whip up!

    Basically, it is just mixing sifted powdered sugar and lemon juice:

    making lemon glaze by mixing lemon juice and sifted powdered sugar

    Mix it slowly and blend well until smooth and runny:

    smooth lemon glaze for simple lemon cake recipe

    Now, you are ready to pour the glaze on your cake! I warn you Simply Bakers, this step is so satisfying to do that you just want to pour some more glaze 🙂

    pouring lemon glaze on top of simple lemon cake

    You can garnish it with lemon slices for a fun look. Here is an up-close shot of a very delicious but so simple to make Lemon Cake!

    a slice of freshly baked simple lemon cake topped with glaze and a slice of lemon

    You can make this cake from scratch and with just a bit of creativeness in the presentation, this will surely be a crowd-pleaser and a conversation-starter!

    sliced lemon cake on a white plate with lemon wedge topping

    FAQ

    Is lemon extract or lemon juice better for cake?

    Lemon juice gives a natural, fresh taste and also helps the cake rise when used with baking soda. Lemon extract has a stronger flavor, so it’s great if you want an extra punch of lemon without adding extra liquid.

    Why doesn't my lemon cake taste like lemon?

    If your lemon cake doesn’t taste lemony enough, you might need to add more fresh lemon juice or zest. Using fresh lemons instead of bottled juice can make a big difference in flavor. It just tastes way better if you use fresh ingredients.

    What happens when you add lemon juice to cake batter?

    Lemon juice adds a bright, tangy flavor to the cake and helps make it tender. It also reacts with baking soda or baking powder to help the cake rise.

    I have made a lemon cake before and it had a bitter aftertaste. What could have I done wrong with the recipe?

    I think you have not missed an important part of the recipe. It's just that when you were zesting the lemon rind, you included the white flesh, which makes the lemon peel or rind bitter. Just be gentle when zesting and make sure to get the "yellow" part.


    tasty slice of glazed lemon cake
    5 from 2 votes
    Print Pin Recipe

    Simple & Easy Lemon Cake

    This Simple & Easy Lemon Cake is a perfect treat for anyone who loves a mix of sweet and sour flavors. It’s soft, fluffy, and topped with a tasty lemon glaze, making it a dessert you’ll want to make again and again.
    Prep Time15 minutes mins
    Cook Time25 minutes mins
    Cool Time15 minutes mins
    Total Time55 minutes mins
    Course: cake, Desserts
    Cuisine: American, Dessert
    Servings: 8 - 10 servings
    Calories: 334kcal
    Author: Lainey
    Prevent your screen from going dark

    Ingredients

    Cake:

    • ¾ cup organic cane sugar granulated sugar
    • ½ cup unsalted butter softened
    • 3 eggs
    • 1 teaspoon vanilla extract
    • 2 tablespoons lemon juice
    • 1-2 tablespoons lemon zest
    • ⅓ cup sour cream
    • 1 ½ cups all-purpose flour
    • ¼ teaspoon baking powder
    • ¼ teaspoon baking soda

    For the Lemon Glaze:

    • 2-3 tablespoons lemon juice
    • ½ cup powdered sugar sifted

    Instructions

    • Line an 8 or 9-inch pan with parchment paper, then preheat your oven to 350 degrees F.
    • To make the cake, in a large bowl, add the softened unsalted butter and organic sugar. Mix it until light and fluffy.
    • Next, add the eggs to the butter and sugar mixture. It is advised to add the eggs one at a time to ensure that they are all well-blended.
    • Add in the vanilla extract, fresh lemon juice, and fresh lemon zest to the mixture. Mix well and set the bowl aside.
    • In another medium-sized bowl, add the dry ingredients - all-purpose flour, baking soda, and baking powder. Whisk until well-combined.
    • Add the dry ingredients mixture to the wet ingredients mixture. Mix until well-combined, then add the sour cream.
    • Pour into pan and bake for 25-30 minutes. You can check your cake if it is done by sticking in a toothpick or a cake tester (if you have them). Once it comes out dry, your cake is ready.
    •  Allow the cake to cool for about 15 minutes.
    Leave a Comment
    Serving: 1sliceCalories: 334kcalCarbohydrates: 45gProtein: 5gFat: 15gSaturated Fat: 9gPolyunsaturated Fat: 1gMonounsaturated Fat: 4gTrans Fat: 0.5gCholesterol: 98mgSodium: 76mgPotassium: 73mgFiber: 1gSugar: 27gVitamin A: 504IUVitamin C: 4mgCalcium: 35mgIron: 1mg

    Watch The Recipe Video!

    QR Code
    Did you make this recipe?Share it on instagram or tag @simplybakings or #simplybakings!

    Hi, Simply Bakers! Happy New Year and I'm back and excited to share with you a delicious and simple moist lemon cake recipe you will love! This took me a total time of 55 minutes. My hubby enjoyed the cake so much- he ate ¼ of the lemon cake as soon as he came home from work and we both finished the cake in 2 days.

    The lemons I used for this recipe are Meyer Lemons from my parents' garden.  It's rare that I purchase lemons from the store because, growing up, if I wanted lemons, I would pick them from the garden. Now that I've moved away from my parents, I usually stock up and freeze them since I can't get them fresh anymore.

    However, for this recipe, I made sure I used fresh lemons.  Also, did you know that Meyer Lemons are not actually true lemons?  They are a hybrid of lemons and mandarins, which I didn't know! They are also highly nutritious, offering fiber, protein, potassium, calcium, and a substantial amount of vitamin C.

    Cake, Desserts

    BEST Vegan Coffee Cake

    Oct 4, 2018 · 7 Comments

    single slice of coffee cake on white plate

    This perfect Vegan Coffee Cake is rich, and crumbly, and will be the star at your next brunch! 

    vegan coffee cake

    I have fond memories of coffee cake!  There's a local shop restaurant in my hometown that sells coffee cake and it's AMAZING.  I still remember the day my sister brought me there and made me try their coffee cake. At that time in my life, I was picky about what kind of cakes I eat, just because I was in sports and needed to be in tip-top shape.  But she insisted and I never looked back. (Thank you, sister!!!!)

    dairy free vegan coffee cake

    I remember eating there at least once a month with my high school friends, sometimes just ordering the coffee cake. There's something about brown sugar and cinnamon that get's you addicted. Am I right?

    Anyways, I'm taking my baking to the next level and decided to make vegan coffee cake.  This recipe tastes absolutely the same as the coffee cake I used to eat.  Give it a try and let me know in the comments how it goes for you!

    vegan coffee cake

    If you like this recipe, try these ones too:

    Vegan Chocolate Cake

    Foolproof Vegan Blondies

    3 Ingredient Biscuits

    Watch the complete tutorial in the video below:

    single slice of coffee cake on white plate
    No ratings yet
    Print Pin Recipe

    Coffee Cake - Vegan & Dairy Free

    This perfect Vegan Coffee Cake is rich, crumbly, and will be the star at your next brunch! 
    Author: Lainey
    Prevent your screen from going dark

    Ingredients

    Crumb Topping

    • 1 ¼ cups all-purpose flour
    • ⅓ cup brown sugar
    • ⅓ cup cane sugar
    • 2 tsp ground cinnamon
    • ¼ tsp salt
    • ½ cup vegan butter

    Cake Wet Ingredients:

    • ½ cup almond milk
    • ½ cup canola oil
    • 1 tsp apple cider vinegar
    • 1 tsp pure vanilla extract

    Cake Dry Ingredients:

    • 1 ¼ cups all-purpose flour
    • ½ cup sugar
    • 1 tsp baking soda
    • ½ tsp baking powder
    • ¼ tsp salt

    Instructions

    • Line an 8x8 inch pan with parchment paper, then preheat your oven to 325 degrees F.
    • To make the crumb topping, in a large bowl mix together the all-purpose flour, brown sugar, cane sugar, ground cinnamon, salt, and vegan butter.  Mix until crumbly and set the bowl aside.
    • To make the cake, in a medium-sized bowl, mix the almond milk, canola oil, apple cider vinegar, and vanilla extract until combined. Set this bowl aside
    • In a large bowl, whisk together the all-purpose flour, sugar, baking soda, baking powder, salt.  Next, add the wet ingredients into the dry ingredients and mix until combined. Don't overmix!
    • Pour into pan and bake for 35-40 minutes. Allow the cake to cool for at least 15 minutes.
    • Enjoy with a cup of coffee or hot chocolate.
    Leave a Comment

    Watch The Recipe Video!

    QR Code
    Did you make this recipe?Share it on instagram or tag @simplybakings or #simplybakings!

    Breakfast & Brunch, Christmas Desserts, Vegan Baking

    Vegan 5 Ingredient Banana Oat Pancakes

    Sep 28, 2018 · 23 Comments

    A plate of Vegan 5 Ingredient Banana Oatmeal Pancakes

    Vegan 5 Ingredient Banana Oat Pancakes are vegan, wholesome, and so easy to make! With just a few pantry staples, you’ll have soft, fluffy pancakes ready in minutes. Rolled oats and banana slices make it a healthy breakfast. Top with vegan butter and maple syrup for a simple, satisfying start to your day!

    Who doesn't love fluffy pancakes? Kalabasa Pancakes, Ube Pancakes, and Butter Pecan Pancakes are just some! Now we’re adding more new recipes like this to the mix.

    Vegan 5 Ingredient Banana Oatmeal Pancakes with maple syrup
    [feast_advanced_jump_to]

    What are the Vegan 5 Ingredient Banana Oat Pancakes?

    These pancakes are soft, fluffy, and made without eggs or dairy. They are not a traditional Filipino recipe. But many Filipinos love them for breakfast or merienda.

    The main ingredient is ripe banana. It gives natural sweetness. Oats make this recipe filling and healthy. It's a simple, plant-based dish that’s perfect for all ages. You can also turn oats into oat flour using a food processor for a smoother batter.

    Add a splash of vanilla extract or honey if you want more flavor. Both work great with banana and oats. You can also mix in a scoop of protein powder to make it more filling.

    History of Vegan 5 Ingredient Banana Oat Pancakes

    This recipe became popular in health-focused kitchens, especially in the US. Home cooks wanted a quick pancake recipe with fewer ingredients. Many were looking for a plant-based, nutritious breakfast.

    Over time, this version with banana and oats spread online. It’s now a go-to dish for anyone craving a fast and nourishing meal.

    Substitutions

    • Soy milk – Use almond milk, oat milk, or any plant-based milk.
    • Oatmeal – Use certified gluten-free oats if needed.
    • Bananas – Swap with ½ cup applesauce for a banana-free version.
    • Baking powder – Use ¼ teaspoon baking soda + ½ teaspoon lemon juice as a substitute.
    Vegan 5 Ingredient Banana Oat Pancakes on a plate

    Variations

    • Blueberry oat pancakes – Fold in fresh or frozen blueberries before cooking.
    • Chocolate banana pancakes – Add 1 tablespoon cocoa powder or sprinkle in dark chocolate chips.
    • Spiced pancakes – Add ½ teaspoon cinnamon or pumpkin spice for extra warmth.
    • Mini pancakes – Make silver-dollar-sized pancakes for kids or snacks.

    Storage

    • These pancakes don’t freeze well for more than 1 month. Store leftovers in an airtight container. Keep them in the fridge for up to 2 days.
    • Reheat over medium-high heat. Add a little coconut oil to bring back the crisp edges.

    Ingredients

    Listed below are all the ingredients you will need:

    • Ripe bananas
    • Oatmeal
    • Baking powder
    • Salt
    • Soy milk
    • Vegan butter (for greasing the pan)
    • Maple syrup (for serving)

    See recipe card for quantities.

    Instructions

    Make the Batter

    Toss ripe bananas in a food processor or high-speed blender.

    A couple of banana slices in a blender

    Pour in the oatmeal, baking powder, pinch of salt, and soy milk.

    Blend until smooth. The batter should have a pancake-like texture. If it’s too thick, add a splash of milk. If it’s too thin, let it rest for a few minutes to thicken.

    Blender filled with all ingredients of the recipe

    The batter will resemble a regular pancake batter when it's finished blending. If there are still chunks, keep blending until it's smooth.

    Pouring the pancake batter out of a blender

    Cook the Pancakes

    Preheat a non-stick or lightly greased pan over medium-low heat. Scoop ¼ cup of batter onto the pan for each pancake.

    Cook for 2–4 minutes until bubbles form and edges begin to firm. Flip and cook for 30 seconds to 1 minute, or until golden brown.

    Then serve warm with maple syrup and a pat of vegan butter, if desired.

    Vegan 5 Ingredient Banana Oatmeal Pancakes with maple syrup

    Hint: Use very ripe bananas for the sweetest flavor and smoothest batter texture. The more spotty and soft, the better!

    ⭐ Top Tip

    Blend the batter just until smooth. Don’t overdo it, or the oats may turn gummy. Let the batter sit for 2 minutes before cooking.

    This helps it thicken and makes flipping easier. Try doubling the batch if you want to meal prep for a few days.

    FAQ

    Are banana and oat pancakes healthy?

    Yes, they are! Bananas are rich in potassium and natural sweetness. Oats are high in fiber and good for heart health. Together, they make a filling, nutrient-packed breakfast.

    Why put oats in pancakes?

    Oats add fiber, texture, and a nutty taste to pancakes. They help keep you full longer and support digestion. Plus, they're a great gluten-free option when using certified oats.

    What do I need to make four pancakes?

    You’ll need 2 ripe bananas, 1 cup oatmeal, 1 teaspoon baking powder, ¼ teaspoon salt, and ¾ cup soy milk. Blend everything and cook in a pan - easy and delicious!

    More Breakfast Recipes

    • Butter Pecan Pancakes
    • Easy Homemade Granola
    • Tofu Scramble 
    • Coffee Cake
    • Blueberry Pancakes
    Vegan 5 Ingredient Banana Oat Pancakes on a white plate
    4 from 5 votes
    Print Pin Recipe

    Vegan 5 Ingredient Banana Oat Pancakes

    These Vegan 5 Ingredient Banana Oat Pancakes are healthy, and made with just five simple ingredients! Naturally sweet from ripe bananas and oats. Prepare a filling vegan breakfast.
    Prep Time5 minutes mins
    Cook Time4 minutes mins
    Total Time9 minutes mins
    Course: Breakfast
    Cuisine: American, Vegan
    Servings: 4 pancakes
    Calories: 146kcal
    Author: Lainey
    Prevent your screen from going dark

    Ingredients

    • 2 ripe bananas
    • 1 cup oatmeal**
    • 1 teaspoon baking powder
    • ¼ teaspoon salt
    • ¾ cup soy milk
    • vegan butter (for greasing the pan)
    • maple syrup (for serving)

    Instructions

    Make the Batter:

    • In a high-speed blender, combine bananas, oatmeal, baking powder, salt, and soy milk.
    • Blend until the batter is smooth and reaches pancake consistency.

    Cook the Pancakes:

    • Preheat a non-stick or lightly greased pan over medium-low heat.
    • Scoop ¼ cup of batter onto the pan for each pancake.
    • Cook for about 2–4 minutes on one side until bubbles form and edges begin to firm.
    • Flip and cook the other side until golden brown (about 30 seconds to 1 minute).

    Serve:

    • Serve warm with maple syrup and a dollop of vegan butter, if desired.
    Leave a Comment

    Notes

    **If using a regular blender, blend the oats until it becomes flour-like, then add the rest of the ingredients.
    Serving: 1gCalories: 146kcalCarbohydrates: 29gProtein: 5gFat: 2gSaturated Fat: 0.4gPolyunsaturated Fat: 1gMonounsaturated Fat: 1gSodium: 275mgPotassium: 344mgFiber: 4gSugar: 9gVitamin A: 212IUVitamin C: 8mgCalcium: 134mgIron: 1mg
    QR Code
    Did you make this recipe?Share it on instagram or tag @simplybakings or #simplybakings!

    Storytelling Time!

    I love pancakes! I grew up eating pancakes every other Saturday right before we went to church!  My grandma always made them, and she made them very thin and crispy- almost like crepes.

    Many years later, I started making pancakes myself, but I usually made them dairy-free because I was trying to remove eggs and dairy milk from my diet (I was challenged by a book I read, but more on that in another post).

    After trying many different kinds of pancake recipes, I found adding bananas made the pancakes even better!! Okay, I have to admit I LOVE bananas!! I eat them almost every day in smoothies, ice cream, bread, you name it. 😄

    5 Ingredients or Less, Breakfast & Brunch, No Bake Dessert Recipes, Pancakes, Vegan Baking

    Mocha Nice Cream

    Jun 21, 2018 · 12 Comments

    Mocha Nice Cream in a small dessert glass

    Mocha Nice Cream is a creamy, dreamy frozen treat made without dairy or refined sugar. It’s a vegan ice cream that’s perfect for coffee lovers, healthy eaters, and anyone who wants dessert in minutes. Just blend and enjoy - no ice cream maker needed!

    Love frozen treats? Be sure to try our Black Sesame Ice Cream and Filipino Mango Ice Cream - they’re just as easy and packed with flavor!

    Mocha Nice Cream served in a cup
    [feast_advanced_jump_to]

    Why You’ll Love This Recipe

    It’s vegan, dairy-free, gluten-free, and super beginner-friendly. No fancy tools or churning needed—just a blender and a few simple ingredients.

    Frozen bananas make it naturally sweet and creamy. Coconut milk adds richness, and instant espresso powder or instant coffee gives it a bold mocha kick. Add a splash of vanilla extract or soy milk for even more flavor.

    Bonus: Bananas are a great source of potassium and fiber, helping with heart health and digestion. Plus, they’re easy to peel, freeze in a single layer on a baking sheet, and store in a freezer-safe container. And try using a strong blender like a Vitamix to get that perfect consistency.

    Ingredients

    Listed below are all the ingredients you will need:

    • Raw cashews
    • Coconut milk
    • Frozen bananas
    • Nut butter
    • Instant coffee
    • Dairy-free chocolate chips or cacao nibs (optional)

    See the recipe card for quantities.

    Instructions

    Make the Cashew Base:

    1. In a high-speed blender or food processor, add the cashews and pulse until finely ground.

    Cashews in a blender ready to be crushed

    2. Add the coconut milk and blend until smooth and creamy.

    Add Remaining Ingredients:

    3. Add the frozen banana slices, nut butter, and instant coffee to the blender.

    4. Blend again until the mixture is smooth and creamy, scraping down the sides as needed.

    All other ingredients of the recipe added to the blender

    Serve:

    5. Scoop the mocha nice cream into a bowl and top with dairy-free chocolate chips or cacao nibs (optional).

    Mocha Nice Cream in a bowl with a scooper

    6. Serve immediately for a soft-serve texture, or freeze for 1–2 hours for a firmer consistency.

    Mocha Nice Cream served in a cup

    Substitutions & Variations

    • Ingredient Swap
      No coconut milk? Use almond or oat milk.
      Don’t like coffee? Skip it or add cocoa powder for a chocolate-only twist.
    • Variation
      Swap nut butter with tahini or sunflower seed butter for a nut-free version.
      Swirl in some peanut butter, maple syrup, or fresh berries for tasty chunks.
    • Mistake to Avoid
      Don’t skip soaking the cashews if you don’t have a high-speed blender—it helps with creaminess.
    • Storage Tips
      • This nice cream holds up in the freezer for about 1–2 weeks.
      • Let it soften for a few minutes before scooping.
      • Store in an airtight container with parchment paper pressed on top to avoid ice crystals.
    Mocha Nice Cream topped with chocolate chips

    FAQs

    Do I need an ice cream machine?

    Nope! Just a blender or food processor will do the trick.

    Can I use fresh bananas?

    No, only frozen bananas will give the creamy texture you want.

    Is this sweetened with sugar?

    No added sugar! It’s naturally sweetened by the bananas.

    banana ice cream sprinkled with chocolate chips
    4.75 from 4 votes
    Print Pin Recipe

    Mocha Nice Cream

    This Mocha Nice Cream is rich, creamy, and packed with bold coffee-chocolate flavor - all using just 5 ingredients! It’s vegan-friendly recipes and requires no ice cream maker for a perfect frozen treat!
    Prep Time10 minutes mins
    Total Time10 minutes mins
    Course: Dessert
    Cuisine: Vegan
    Servings: 2 -3 servings
    Calories: 463kcal
    Author: Lainey
    Prevent your screen from going dark

    Ingredients

    • ½ cup raw cashews
    • ½ cup coconut milk full fat for creamier texture
    • 3 frozen bananas sliced
    • 2 tablespoons nut butter e.g. almond, peanut, or cashew
    • 1 tablespoon instant coffee

    Optional topping:

    • Dairy-free chocolate chips or cacao nibs for garnish

    Instructions

    Make the Cashew Base:

    • In a high-speed blender or food processor, add the cashews and pulse until finely ground.
    • Add the coconut milk and blend until smooth and creamy.

    Add Remaining Ingredients:

    • Add the frozen banana slices, nut butter, and instant coffee to the blender.
    • Blend again until the mixture is smooth and creamy, scraping down the sides as needed.

    Serve:

    • Scoop the mocha nice cream into a bowl and top with dairy-free chocolate chips or cacao nibs (optional).
    • Serve immediately for a soft-serve texture, or freeze for 1–2 hours for a firmer consistency.
    Leave a Comment
    Serving: 1gCalories: 463kcalCarbohydrates: 55gProtein: 9gFat: 27gSaturated Fat: 13gPolyunsaturated Fat: 3gMonounsaturated Fat: 8gSodium: 15mgPotassium: 1111mgFiber: 6gSugar: 24gVitamin A: 1685IUVitamin C: 19mgCalcium: 42mgIron: 5mg

    Watch The Recipe Video!

    QR Code
    Did you make this recipe?Share it on instagram or tag @simplybakings or #simplybakings!

    You Might Also Like:

    If you like this recipe, try my other dairy-free recipes:

    • Vegan Chocolate Ice Cream
    • Vegan Chocolate Cake
    • Vegan Pancakes

    Recipes for Every Moment

    Feeling snacky on a hot afternoon but want something healthy? This Mocha Nice Cream is cool, creamy, and takes just minutes to make—no guilt, just joy!

    5 Ingredients or Less, Ice Cream

    Ultimate SunButter Cookie Recipe

    Dec 29, 2017 · 24 Comments

    SunButter cookies in a blue bowl

    Nut-free and dairy-free, these SunButter cookies bring you a wonderful snack! It takes only 5 ingredients to make. The steps are simple, too. They're perfect for those looking for an easy allergy-friendly cookie recipe.

    SunButter cookies in a blue bowl
    [feast_advanced_jump_to]

    Listed below are all the ingredients you will need:

    • brown sugar
    • sunbutter
    • alternative milk
    • all-purpose flour
    • baking soda

    See the recipe card for quantities.

    Instructions

    Prepare the Baking Sheet

    First, preheat the oven to 350°F. Line a baking sheet with parchment paper or a baking mat.

    Mix the SunButter and Sugar

    Next, add the brown sugar and SunButter to a large bowl. Mix until well combined.

    Sugar and butter mixture in a bowl

    Add the Milk

    Then, pour in the alternative milk. Mix again until smooth and combined.

    Finish the Dough

    Next, add the all-purpose flour and baking soda. Mix just until a soft cookie dough forms.

    Scoop the Cookies

    Then, use a cookie scoop to portion the dough onto the prepared baking sheet.

    Batter on ice cream scoop

    Leave a little space between each cookie.

    Bake

    Bake for 9-12 minutes. Remove the cookies from the oven while they are still slightly soft.

    Cool and Serve

    Lastly, let the cookies cool on the pan for about 2 minutes. Transfer them to a cooling rack and let them cool completely.

    SunButter Cookies on a pan

    Storage

    • Keep cooled in an airtight container at room temperature for 3-5 days. For longer storage, freeze them in a freezer-safe container for up to 2-3 months. Let frozen cookies thaw at room temperature before serving.

    FAQs

    Can I make SunButter Cookies without almond milk?

    Yes. You can use soy milk, oat milk, or another milk that works for your dietary needs.

    Why can SunButter cookies turn green?

    Sunflower seeds contain natural compounds that can react with baking soda. This may give the inside of the cookies a green tint after baking or cooling. It is a harmless reaction and does not mean the cookies have spoiled.

    Can I add chocolate chips?

    Yes! Chocolate chips are an easy addition. You can also try vanilla, cinnamon, banana, or shredded coconut.

    Are these SunButter Cookies vegan?

    They can be vegan when made with plant-based milk and vegan-friendly sugar. Always check ingredient labels if you follow a strict vegan diet.

    Vegan SunButter Cookies in a bowl
    SunButter cookies at the table
    5 from 2 votes
    Print Pin Recipe

    SunButter Cookie Recipe

    These SunButter Cookies are soft, chewy, and incredibly easy to make. Made with sunflower seed butter, they are peanut-free, dairy-free when made with plant-based milk, and perfect for a quick homemade treat.
    Prep Time10 minutes mins
    Cook Time11 minutes mins
    Cool Time10 minutes mins
    Total Time31 minutes mins
    Course: Dessert, Snack
    Cuisine: Fusion (American-Filipino)
    Servings: 12 cookies
    Calories: 223kcal
    Author: Lainey
    Prevent your screen from going dark

    Ingredients

    • 1 cup brown sugar
    • 1 cup SunButter
    • ¼ cup alternative milk
    • ⅔ cups all-purpose flour
    • 1 teaspoon baking soda

    Instructions

    Prepare the Oven

    • First, preheat the oven to 350°F. Line a baking sheet with parchment paper, foil, or a baking mat.

    Mix the SunButter and Sugar

    • Add the brown sugar and SunButter to a large bowl. Mix until well combined.

    Add the Milk

    • Next, pour in the alternative milk. Mix with a fork until everything is well combined.

    Make the Cookie Dough

    • Then, add the flour and baking soda. Mix with a fork, then switch to a wooden spoon as the dough gets thicker.

    Scoop the Cookies

    • Next, use a cookie scoop to place the dough onto the prepared baking sheet. Leave some space between each cookie.

    Make the Criss-Cross Pattern

    • Then, gently flatten each cookie with a fork. Press in opposite directions to make the classic criss-cross pattern.

    Bake the Cookies

    • Bake at 350°F for 9 to 11 minutes. Remove the baking sheet from the oven when the cookies are done.

    Cool the Cookies

    • Let the cookies rest on the hot baking sheet for about 2 minutes. Lastly, transfer them to a cooling rack and let them cool completely.
    Leave a Comment

    Notes

    • I used almond milk in this recipe, but feel free to use soy milk or whatever you have available.
    • If you want to change up the recipe, try adding chocolate chips, vanilla extract, banana, cinnamon or coconut shreds.
    Serving: 1 cookieCalories: 223kcalCarbohydrates: 29gProtein: 5gFat: 11gSaturated Fat: 1gPolyunsaturated Fat: 0.03gMonounsaturated Fat: 0.04gCholesterol: 1mgSodium: 99mgPotassium: 55mgFiber: 0.2gSugar: 18gVitamin A: 20IUVitamin C: 1mgCalcium: 49mgIron: 1mg

    Watch The Recipe Video!

    QR Code
    Did you make this recipe?Share it on instagram or tag @simplybakings or #simplybakings!

    You Might Also Like:

    • 3 Ingredient Healthy Oat Cookies
    • Chocolate Chip Cookies (Gluten Free & Dairy Free)
    • Foolproof Blondies

    5 Ingredients or Less, Cookies, Snacks, Vegan Baking, Vegan Desserts

    Vegan Chocolate Cake

    Dec 1, 2017 · 4 Comments

    Eggless Chocolate Cake

    Do you have a go-to Vegan Chocolate Cake recipe? Here's one you would want in your recipe book as a staple. It's eggless, moist, and only uses 6 ingredients! A delicious alternative to the usual chocolate cake!

    Looking for more delicious vegan dessert recipes? Try my No-Bake Vegan Chocolate Cake Recipe, Fool-Proof Vegan Banana Chocolate Muffins, or my Easy Vegan Blondies!

    Eggless Chocolate Cake

    Everyone needs a vegan chocolate cake recipe in their recipe box!  I have at least two and I am so happy that I have come up with another one!  One reason why I love baking vegan cakes is that the cake batter can be eaten before it's baked because it's dairy-free!

    This recipe is super simple to make. You can also add nuts like Marcona almonds, chopped pecans, and the like (if you are not allergic to them), or one teaspoon of vanilla extract for a more decadent taste.

    Furthermore, what's neat is that instead of eggs, I used egg replacers in this recipe, as you can see in the video. But if you are not vegan, you can always use eggs, like in the usual chocolate cake recipes.

    How to Make Vegan Chocolate Cake:

    First, always preheat your oven. Then start mixing the ingredients. Add the dry ingredients and then the wet ingredients (including the flax egg):

    Baking tip: If you want to enhance the chocolate flavor, add coffee granules.

    Vegan chocolate cake ingredients

    After mixing all the ingredients, here is what the batter should look like:

    Vegan chocolate cake batter

    Pour the cake batter into a 9x11-inch pan. You can also use two smaller cake tins for baking the cake and simply dividing the cake batter into two. You will now have two layers of your vegan chocolate cake. It would be pretty if you stack them together and put any frosting of your choice:

    vegan chocolate cake batter

    This would also taste great with chocolate icing or you can sprinkle confectioner's sugar!

    piece of vegan chocolate cake

    Making this cake was all worth it! I suggest making this cake during family gatherings or give as a delicious and healthy birthday cake gift to a vegan friend (or even non-vegans, they'll love this!). If you are feeling more adventurous, you can also have it frosted with a vegan chocolate frosting. Doesn't that "sound" delicious?!?

    Watch the video below where I walk you through every step of the Vegan Chocolate Cake recipe! 

    I hope you all enjoy this Vegan Chocolate Cake recipe and post a comment on how it turned out for you! If you love everything vegan, I have more recipes that you can try making!

    • Fool Proof Vegan Peanut Butter Blondies
    • Mocha Ice Cream
    • Best Vegan Banana Oatmeal Pancake

    Other questions you may have:

    Instead of oil, can I use vegan butter? No.

    How long is the baked shelf life of the vegan chocolate cake? 2-3 days if refrigerated.

    Eggless Chocolate Cake
    5 from 1 vote
    Print Pin Recipe

    Vegan Chocolate Cake

    Course: Dessert
    Author: Lainey
    Prevent your screen from going dark

    Ingredients

    • 1 package of devil's food cake mix*
    • 1 tablespoon instant coffee granules optional
    • 1 ½ teaspoon ground cinnamon
    • 1 ¾ cup water
    • ⅓ cup vegetable oil
    • 3 egg replacers

    Instructions

    • Preheat oven to 350F. Spray 9x13 inch baking pan
    • Mix together the cake mix, coffee granules, cinnamon, water, vegetable oil, and egg replacers until well combined.
    • Pour the cake batter into the baking pan and bake for 25 to 30 minutes. Cool completely and sprinkle with confectioner's sugar (powdered sugar) or cocoa powder for garnish.
    Leave a Comment

    Notes

    *this was made unintentionally vegan
    QR Code
    Did you make this recipe?Share it on instagram or tag @simplybakings or #simplybakings!

    5 Ingredients or Less, Cake, Vegan Baking

    Vegan Pumpkin Pie Recipe Without Coconut Milk

    Nov 3, 2017 · 25 Comments

    Vegan pumpkin pie on a brown table

    This Vegan Pumpkin Pie Recipe Without Coconut Milk is an easy and beautiful dessert to make for Thanksgiving.  Using the classic pumpkin pie spice, cinnamon spice, and pumpkin puree, to make the traditional pumpkin pie in vegan form. 

    Looking for more dessert inspiration? Try our BEST Vanilla Chai White Chocolate Chip Cookies or perhaps our Easy Baked Cinnamon Apples. If you're craving more cozy fall flavors, our Vegan Pumpkin Spice Latte is a must-try!

    Vegan pumpkin pie on a brown table
    [feast_advanced_jump_to]

    Variations

    Here are some creative twists to tailor your Vegan Pumpkin Pie to different tastes.

    • Blend It Up - For a smoother texture, blend the pumpkin mixture in a blender before pouring it into the pie crust.
    • Ginger Twist - Add a teaspoon of ground ginger to the filling to give your easy vegan pumpkin pie recipe a spicy kick.
    • Sweet Potato Swap - Replace canned pumpkin with mashed sweet potatoes for a unique twist on classic pumpkin pie.
    • Spice Enhancement - Sprinkle a dash of nutmeg and cloves over the whip cream topping for an extra layer of flavor.

    Substitutions

    • Sucanat - instead of sucanat, you can use brown sugar or coconut sugar.
    • Maple Syrup - swap maple syrup with agave nectar or honey for a different sweetness.
    • Cornstarch - use arrowroot powder or tapioca starch instead of cornstarch.
    • Non-Dairy Milk - replace vanilla soy milk with almond milk or oat milk for a varied dairy-free option.
    • Pie Crust - opt for a gluten-free pie crust or a nut-based crust to cater to gluten-free diets.

    Storage

    • Chill Before Serving - After baking, let the pie chill in the fridge for at least 2 hours to set properly before serving.
    • Leftover Love - Store any leftover pumpkin pie in an airtight container in the fridge for up to 3 days.
    • Whip Cream Storage - If you've used whip cream as a topping, it's best to store the pie in the fridge to keep the cream fresh.
    • Freezing Option - For longer storage, you can freeze the baked pie. Wrap it tightly in plastic wrap and aluminum foil before placing it in the freezer.

     Ingredients

    Listed below are all the ingredients you will need:

    • sucanat
    • pumpkin pie spice
    • cinnamon
    • salt
    • cornstarch
    • maple syrup
    • non dairy milk
    • pureed pumpkin
    • pie crust

    See recipe card for quantities.

    Instructions

    Preparation: Before mixing the ingredients for the Vegan Pumpkin Pie Without Coconut Milk recipe, preheat the oven to 350F and lightly grease the pie pan.

    In a large bowl, add the sugar, pumpkin pie spice, cinnamon, salt, cornstarch, syrup, non-dairy milk, and pumpkin:

    mixed ingredients with pumpkin pie filling for vegan pumpkin pie recipe

    Using a handheld mixer, mix until well combined:

    mixed ingredients for vegan pumpkin pie recipe

    Prepare vegan pie crust or use a pre-made pie crust:

    crust dough for vegan pumpkin pie recipe
    designing the crust of vegan pumpkin pie recipe using a thumb

    Place the crust on a greased baking dish and decorate the edge of your pie by simply pushing it with your thumb, like so:

    Poke holes at the bottom of the crust using a fork:

    poking vegan pumpkin pie crust using a fork

    Pour the pumpkin batter into the pie crust:

    pouring vegan pumpkin pie batter to crust

    For a Thanksgiving-themed or Fall-themed dessert, you can use your extra pie crust as a decorative topping by simply shaping a leaf using a leaf cookie cutter:

    cutting dough with a leaf cookie cutter and the ready to bake vegan pumpkin pie

    Bake for 1 hour and allow to cool completely:

    a whole layer of dairy free vegan pumpkin pie on a clear baking dish

    Slice before serving. Enjoy!

    a slice of baked vegan pumpkin pie

    ⭐ Top Tips

    • Always grease your pie dish before putting in the crust to make sure your pie won't stick after baking.
    • Feel free to use pumpkin pie filling if you do not have fresh pumpkins on hand.
    • When making your own pie crust, make sure to mix the crust dough on a floured surface. It helps a lot to prevent your dough from sticking to the surface.
    • If you love cold desserts, you can put them in the fridge after cooling them completely
    • Getting tired of mixing your batter with a wire whisk or hand mixer? You can just dump all ingredients in a food processor and mix away!

    Frequently Asked Questions

    What can you substitute for canned milk in pumpkin pie?

    You can substitute canned milk in pumpkin pie with full-fat coconut milk for a creamy and dairy-free alternative.

    What is better for pumpkin pie sweetened condensed milk or evaporated milk?

    For pumpkin pie, sweetened condensed milk adds extra sweetness, while evaporated milk provides a richer, creamier texture. It ultimately depends on your preference for sweetness versus richness.

    How do you thicken a pumpkin pie without cornstarch?

    To thicken a pumpkin pie without cornstarch, you can use tapioca flour or arrowroot powder as a substitute.

    More Thanksgiving Dessert Recipes:

    • Salted Caramel Cheesecake
    • Oreo Pumpkin Cheesecake
    • Apple Pie Cookies
    • Apple Monkey Bread
    vegan pumpkin pie on a brown table
    5 from 5 votes
    Print Pin Recipe

    Vegan Pumpkin Pie Without Coconut Milk

    Whether you're vegan, lactose intolerant, or simply looking for a dairy-free dessert, this pie is a perfect choice. Made without coconut milk!
    Prep Time10 minutes mins
    Bake Time1 hour hr
    Total Time1 hour hr 10 minutes mins
    Course: Dessert
    Cuisine: American
    Servings: 1 - 9 inch pie
    Calories: 1041kcal
    Prevent your screen from going dark

    Ingredients

    • ½ cup sucanat
    • 1 teaspoon pumpkin pie spice
    • ½ teaspoon cinnamon
    • ½ teaspoon salt
    • 3 tablespoons cornstarch
    • ½ cup maple syrup
    • 1 cup non dairy milk I used vanilla soy milk
    • 1 (15) oz can pureed pumpkin
    • pie crust

    Instructions

    • Preheat oven to 350F and lightly grease pie pan.
    • In a large bowl, add the sucanet, pumpkin pie spice, cinnamon, salt, cornstarch, syrup, non dairy milk and pumpkin. Using a handheld mixer, mix until well combined.
    • Prepare vegan pie crust or use a pre made pie crust and poke holes using a fork. Then pour the pumpkin batter into the pie crust.
    • Bake* for 1 hour, then allow the pie to cool completely before serving. Cooling is crucial for stabilizing the filling. If necessary, refrigerate the pie to speed up the cooling process.
    Leave a Comment

    Notes

    *Some individuals found that their pies required additional baking time, so don't hesitate to extend the baking time by at least 15-20 minutes. Different ovens may vary in baking duration.
    Serving: 1gCalories: 1041kcalCarbohydrates: 241gProtein: 7gFat: 5gSaturated Fat: 1gPolyunsaturated Fat: 3gMonounsaturated Fat: 1gSodium: 1302mgPotassium: 743mgFiber: 2gSugar: 202gVitamin A: 936IUVitamin C: 18mgCalcium: 543mgIron: 2mg

    Watch The Recipe Video!

    QR Code
    Did you make this recipe?Share it on instagram or tag @simplybakings or #simplybakings!

    Desserts, Thanksgiving Desserts, Vegan Baking

    Greek Yogurt Pumpkin Bread

    Oct 27, 2017 · 2 Comments

    Three slices of Greek Yogurt Pumpkin Bread on a plate

    There's something about Greek Yogurt Pumpkin Bread that's just perfect for a snack or breakfast. It's moist, spiced, and flavorful. The mix of chocolate chips and pumpkin brings such comfort to snackers and fall lovers.

    Loving pumpkin bread recipes and banana bread? Cinnamon Roll bites and Filipino Spanish Bread are also very comforting snacks, too!

    Three slices of Greek Yogurt Pumpkin Bread on a plate
    [feast_advanced_jump_to]

    Why You’ll Love This Recipe

    This healthy pumpkin bread recipe is beginner-friendly and easy to bake. No fancy tools are needed. You just need a medium bowl, the dry and wet ingredients, and an oven!

    It’s made with Greek yogurt, which adds good nutrition, like protein and carbohydrates. Also, it keeps it moist. Pumpkin is packed with vitamins and fiber, so you get a tasty slice with extra benefits.

    Even with chocolate chips, this quick bread recipe feels lighter than many desserts. It’s a sweet treat you can enjoy any time of the day.

    Ingredients

    Listed below are all the ingredients you will need:

    • Brown sugar
    • Pumpkin
    • Egg whites
    • Vegetable oil
    • Canola oil
    • Greek yogurt
    • Flour
    • Baking soda
    • Salt
    • Cinnamon
    • Dark chocolate chips

    See the recipe card for quantities.

    Instructions

    Prepare the Oven and Pans

    1. Preheat oven to 350°F (175°C).

    2. Lightly grease or line two standard loaf pans.

    Mix the Ingredients

    3. In a large bowl, combine brown sugar, pumpkin purée, egg whites, oil, and Greek yogurt. Mix until smooth and fully combined. Set aside.

    Sugar and wet ingredients in a mixing bowl

    4. In another large bowl, whisk together flour, baking soda, salt, and cinnamon.

    5. Add the dry ingredients into the wet mixture and stir until just combined.

    Wet and dry ingredients mixed together

    6. Fold in the dark chocolate chips.

    Bake and Serve

    7. Divide the batter evenly between the two loaf pans.

    Bread batter poured into glass pan for baking

    8. Bake for 35–45 minutes, or until a skewer inserted in the center comes out clean.

    9. Allow to cool in the pans for 10–15 minutes before transferring to a wire rack to cool completely.

    10. Slice, then serve!

    Three slices of Greek Yogurt Pumpkin Bread on a plate

    Substitutions and Variations

    • Ingredient Swap
      Replace all-purpose flour with oat flour or white whole wheat flour.
    • Variation
      Use coconut sugar instead of brown sugar if you'd like a deeper flavor.
      Feel free to add whatever you fancy, like honey or frosting!
    • Mistake to Avoid
      Don't overmix the batter - your bread will turn dense!
    • Storage Tips
      • This bread works well in a freezer for up to 2 months. Store in slices for easy grab-and-go snacks.
      • In the fridge, keep leftovers in an airtight container for up to 4 days.

    FAQs

    Can I replace the canned pumpkin puree with actual pumpkin?

    Yes, you can replace it with the actual pumpkin. It is always best to use fresh ingredients when you have them on hand.

    Aside from the chocolate chips, can I mix in nuts to the bread?

    For sure, you can add in any nuts you like. That would give the bread a different texture which would make it more delicious to eat.

    Will this bread last for a week when refrigerated?

    It would last for 3 days to a week when carefully chilled. Make sure you keep it in a covered container to avoid contamination just in case you have raw meat or fish in the fridge.

    Three slices of Greek Yogurt Pumpkin Bread on a plate
    5 from 2 votes
    Print Pin Recipe

    Greek Yogurt Pumpkin Bread

    Greek Yogurt Pumpkin Bread is moist and warmly spiced. It’s a comforting loaf ideal for fall mornings or cozy desserts!
    Prep Time10 minutes mins
    Cook Time45 minutes mins
    Total Time55 minutes mins
    Course: Bread, Breakfast, Dessert, Snack
    Cuisine: American
    Servings: 2 loaf pans
    Calories: 2344kcal
    Author: Lainey
    Prevent your screen from going dark

    Ingredients

    • 1 ½ cups brown sugar
    • 1 15-ounce can pumpkin purée
    • 4 egg whites
    • ½ cup vegetable oil or canola oil
    • ½ cup Greek yogurt
    • 3 cups flour
    • 1 teaspoon baking soda
    • 1 ½ teaspoons salt
    • 2 teaspoons cinnamon
    • 1 cup dark chocolate chips

    Instructions

    Prepare the Oven and Pans

    • Preheat oven to 350°F (175°C).
    • Lightly grease or line two standard loaf pans.

    Mix the Ingredients

    • In a large bowl, combine brown sugar, pumpkin purée, egg whites, oil, and Greek yogurt. Mix until smooth and fully combined. Set aside.
    • In another large bowl, whisk together flour, baking soda, salt, and cinnamon.
    • Add the dry ingredients into the wet mixture and stir until just combined.
    • Fold in the dark chocolate chips.

    Bake and Serve

    • Divide the batter evenly between the two loaf pans.
    • Bake for 35–45 minutes, or until a skewer inserted in the center comes out clean.
    • Allow to cool in the pans for 10–15 minutes before transferring to a wire rack to cool completely.
    • Slice, then serve!
    Leave a Comment
    Serving: 1gCalories: 2344kcalCarbohydrates: 360gProtein: 39gFat: 85gSaturated Fat: 35gPolyunsaturated Fat: 32gMonounsaturated Fat: 13gTrans Fat: 0.4gCholesterol: 3mgSodium: 2555mgPotassium: 1168mgFiber: 10gSugar: 193gVitamin A: 95IUVitamin C: 1mgCalcium: 519mgIron: 11mg
    QR Code
    Did you make this recipe?Share it on instagram or tag @simplybakings or #simplybakings!

    You Might Also Like:

    • Mini Pumpkin Spice Muffins
    • Vegan Pumpkin Pie
    • Oreo Pumpkin Cheesecake
    • Pumpkin Ice Cream
    • Pumpkin Dump Cake

    Recipes for Every Moment

    Kids asking for a snack, and you’re wondering what to serve? This Greek Yogurt Pumpkin Bread is wholesome, filling, and sweet enough to keep them happy.

    Bread, Breakfast & Brunch, Thanksgiving Desserts

    Coffee Mint Cookies

    Oct 23, 2017 · 5 Comments

    mint coffee cookies in a red cup

    If you're looking for a cookie that gives you energy and makes you smile, then you’re going to love Coffee Mint Cookies! These cookies are packed with bold coffee flavor, rich dark chocolate, and cool mint chocolate chips. Every bite is a little pick-me-up—perfect for whenever you need a sweet and energizing treat.

    If you like these cookies, you’ll also enjoy these tasty treats: Brownie Cookies and Choco Mint Blossom Cookies.

    coffee mint cookies in a red bowl
    [feast_advanced_jump_to]

    What are Coffee Mint Cookies?

    Coffee Mint Cookies are a delicious twist on the classic chocolate chip cookie. With the deep, rich flavor of coffee and a refreshing burst of mint, these cookies are a favorite for coffee lovers and mint fans alike. Cookies with coffee aren't just about taste—they're also a mood booster!

    This recipe became popular during the rise of coffee-flavored desserts and continues to be loved for its energy-boosting ingredients and indulgent chocolatey taste. It’s perfect any time of the year, but feels extra cozy during the colder months.

    Substitutions

    • brown sugar - Use muscovado sugar or more white sugar with molasses.
    • mint chocolate chips - Use regular chocolate chips + a drop of peppermint extract.
    • instant coffee granules - Espresso powder or brewed coffee (reduce wet ingredients slightly).

    Variations

    • Extra Minty - Add ½ tsp of peppermint extract.
    • Peppermint Mocha Cookies - Add cocoa powder to the dough for more chocolate flavor.
    • Vegan - Use plant-based butter, flax eggs, and dairy-free chocolate chips.
    freshly baked choco mint cookies on a wire rack

    Storage

    • Countertop - Store in an airtight container for 3-4 days.
    • Refrigerator - Keeps fresh up to 7 days.
    • Freezer (Dough) - Freeze dough balls for up to 2 months.
    • Freezer (Baked) - Store baked cookies in freezer for 2-3 months.

    Ingredients

    Gather the ingredients for these Coffee Mint Cookies, and once the ingredients are all ready, let's begin!

    • flour
    • salt
    • baking soda
    • butter
    • white sugar
    • brown sugar
    • eggs
    • vanilla extract
    • mint chocolate chips
    • dark chocolate chips
    • instant coffee granules

    Instructions

    Before starting the mixing of ingredients, preheat the oven to 350°F and prepare cookie baking sheets by using a cookie mat or parchment paper.

    In a medium-size bowl, mix the flour, salt, and baking soda, then set aside. After that, cream the butter and sugar in a large bowl by mixing them well:

    creaming butter and sugar in a bowl using a handheld mixer

    Then add the egg, vanilla extract, and whisk until well combined:

    mixing eggs, vanilla extract to the butter and sugar mixture for the coffee mint cookies

    Add half of the flour mixture using a spatula or wooden spoon to mix, then add the rest of the flour and mix until combined:

    adding in the dry ingredients to the wet ingredients of the coffee mint cookies

    Then stir in mint chocolate chips, chocolate chips, and coffee granules:

    adding in the coffee granules and chocolate chips to the coffee mint cookie dough

    Mix those well into the cookie dough until you get an even distribution of chocolate chips in the dough:

    coffee mint cookies dough in a clear glass bowl

    Using a tablespoon or cookie scooper, scoop the cookies onto the mat and bake for 10-11 minutes:

    placing coffee mint cookie dough on a baking mat

    At this point, your kitchen should smell so delicious!

    freshly baked coffee mint cookies on a baking sheet

    Remove the cookies from the oven and cool on a cookie wire rack:

    cooling the coffee mint cookies on a wire rack

    Wasn't that so easy to follow?  Make your very own Coffee Mint Cookies at home and make a huge batch ahead for the holidays!

    delicious coffee mint cookies inside a red bowl

    Top Tips

    • Before mixing the dry ingredients like all-purpose flour, baking soda, and granulated sugar, sift them individually. This easy but very important step would make your cookies nice and evenly textured. It wouldn't be fun biting into a lump of flour in between 🙂
    • After baking your Coffee Mint Cookies, store them in an airtight container so you can enjoy them for several days - that is if you did not eat the whole batch in one sitting.
    • If you don't have chocolate chips and have a chocolate bar instead, simply chop it in small bits and you have equally delicious chocolate to go in your Coffee Mint Cookies!
    • You can add peppermint candies to this cookie dough if you are a fan of peppermint candies. That would add some color to these cookies, too!

    FAQ

    Can I use brewed coffee instead of instant granules?

    Yes, but reduce the other liquids in the recipe slightly to keep the dough from getting too wet.

    Does mint taste good with coffee?

    Yes, mint and coffee make a great combo! The cool, refreshing flavor of mint balances the bold, rich taste of coffee, creating a delicious and energizing blend—especially when paired with chocolate.

    Can I increase the quantity of coffee granules?

    If you want the coffee flavor to be very noticeable, yes you can add more, but also remember to increase the amount of sugar to avoid a bitter-tasting cookie.


    Here are more delicious cookie recipes that you should try:

    • Best Chocolate Chip Cookies
    • Brownie Meringue Cookies | 5 Ingredients ONLY
    • Nutella Stuffed Cookies
    coffee mint cookies in a red cup
    3.75 from 4 votes
    Print Pin Recipe

    Coffee Mint Cookies

    Bake up a mood-boosting treat with these Coffee Mint Cookies! Made with mint chips, dark chocolate, and coffee, they’re sweet, soft, and full of energy!
    Prep Time10 minutes mins
    Bake Time10 minutes mins
    Total Time20 minutes mins
    Course: Cookies
    Cuisine: American
    Servings: 24 cookies
    Calories: 222kcal
    Author: Lainey
    Prevent your screen from going dark

    Ingredients

    • 3 cups flour
    • 1 teaspoon salt
    • 1 teaspoon baking soda
    • 1 cup unsalted butter softened
    • ¼ cup white sugar
    • 1 cup brown sugar
    • 2 eggs
    • 1 teaspoon vanilla extract
    • 1 cup mint chocolate chips
    • 1 cup dark chocolate chips
    • ¼ cup instant coffee granules

    Instructions

    • Preheat oven to 350F and prepare cookie sheets by using a cookie mat or parchment paper.
    • In a medium size bowl, mix together the flour, salt, baking soda then set aside.
    • In a large bowl, cream the butter and sugar, then add the egg, vanilla extract, and mix untiled well combined.
    • Add half of the flour mixture using a spatula or wooden spoon to mix, then add the rest of the flour and mix until combined. Then stir in mint chocolate chips, chocolate chips and coffee granules.
    • Using a cookie sccoper, scoop the cookies on the mat and bake for 10-11 minutes
    • Remove the cookies from the oven and cool on a cookie rack.
    Leave a Comment
    Serving: 1cookieCalories: 222kcalCarbohydrates: 29gProtein: 3gFat: 11gSaturated Fat: 7gPolyunsaturated Fat: 0.4gMonounsaturated Fat: 2gTrans Fat: 0.3gCholesterol: 34mgSodium: 256mgPotassium: 171mgFiber: 1gSugar: 12gVitamin A: 257IUVitamin C: 0.04mgCalcium: 41mgIron: 1mg

    Watch The Recipe Video!

    QR Code
    Did you make this recipe?Share it on instagram or tag @simplybakings or #simplybakings!

    Cookies, Desserts

    Chocolate Chip Cheesecake

    Oct 20, 2017 · 4 Comments

    Hey Simply Bakers,

    Learn how to make chocolate chip cheesecake using a special ingredient you never thought to use when making cheesecake! 😁
    I hope you guys enjoy this recipe! Also it's been two months since I've been gone. Check out my blog post to learn what happen.
    --------https://simplybakings.com/where-have-i-been/ ------

    Anyways, thanks for coming by my blog and checking out the recipe.  I can't believe it's been two months since I've uploaded my last video!!!  And for those of you who don't know this, that is really bad in the online space. Two months is basically equivalent to 2 years being gone. Yikes! Anyways here's a little secret, I actually filmed this video back in February!  I totally forgot I had this in my que, but when watching the video I totally remembered exactly how this chocolate chip cheesecake tasted.  I hope you guys try this recipe and please let me know how it goes for you!

    xxLainey

    chocolate chip cheesecake on a green cake tray

    Tips and Tricks for Making This Chocolate Chip Cheesecake Recipe: 

    • If you love a lot of textures in your cheesecake, add in half a cup of crushed chocolate chip cookies to the batter before baking it. To make it easier to make crushed chocolate chip cookies, you can use a food processor.
    • For a beautiful crust, make sure to press firmly when flattening the crust of this cheesecake. It helps the cheesecake hold its shape when sliced.
    • When chilling it, cover with aluminum foil to prevent water or any dirt from spoiling your Chocolate Chip Cheesecake.
    • If you love Oreos, you can use crushed Oreos instead of cake mix for the cheesecake crust.

    How to Make this Chocolate Chip Cheesecake Recipe:

    Gather the ingredients for this Chocolate Chip Cheesecake.

    Here are all the ingredients you will need for this recipe:

    • chocolate cake mix
    • vegetable oil
    • cream cheese
    •  granulated sugar
    • vanilla extract
    • sour cream
    • eggs
    • chocolate chips
    • all-purpose flour

    Once the ingredients are all ready, let's begin!

    First, preheat oven to 350F, prepare 10-inch springform pan by greasing it and set aside.

    In a medium-sized bowl, add the cake mix and oil and mix until crumbly:

    mixing cake mix and oil in a glass bowl

    Then press onto a bottom of the springform pan:

    pressing the cake crust using the fingers

    Bake at 350F for 25 minutes. Remove from oven then increase the temperature to 450F:

    ready to bake cheesecake crust

    In a large bowl, add the cream cheese and beat until smooth. Next add the sugar, vanilla extract, sour cream, and continue mixing. Slowly add the eggs and mix until well incorporated. Next, in a small bowl, mix the chocolate chips with the all-purpose flour, then add it into the cream cheese mixture:

    mixing the wet ingredients and the mini chocolate chips

    Add the cream cheese mixture in the springform pan:

    adding the cream cheese mixture onto the baked crust

    Bake at 450F for 7 minutes, then drop down the temperature 250F for 60-65 minutes:

    ready to bake chocolate chip cheesecake

    Cool completely and best served chilled:

    best and delicious chocolate chip cheesecake

    Frequently Asked Questions for the Chocolate Chip Cheesecake Recipe:

    Q: Do we have a substitute for granulated sugar?

    A: I think you can use brown sugar or coconut sugar for this recipe, though I have not tried using those for this recipe.

    Q: Can these be made into cookie cheesecake bars?

    A: Absolutely! Just use a rectangular pan and slice as bars after.

    Q: Can this cake be made days before serving and frozen?

    A: Yes, you can do that. Just make sure to thaw it properly before serving it.

    best and delicious chocolate chip cheesecake
    5 from 1 vote
    Print Pin Recipe

    Chocolate Chip Cheesecake

    A delicious, over the top chocolate chip cheesecake perfect for any potluck gatherings and parties!
    Course: Dessert
    Author: Lainey
    Prevent your screen from going dark

    Ingredients

    • 1 package chocolate cake mix
    • ⅓ cup vegetable oil
    • 3 8oz packages cream cheese, softened
    • 1 ½ cups granulated sugar
    • 1 ½ teaspoon vanilla extract
    • 1 cup sour cream
    • 4 eggs
    • 1 cup chocolate chips
    • 1 teaspoon all purpose flour

    Instructions

    • Preheat oven to 350F, prepare 10-inch springform pan by greasing it and set aside.
    • In a medium size bowl add the cake mix and oil and mix until crumbly. Then press onto a bottom of the springform pan. Bake at 350F for 25 minutes. Remove from oven then increase the temperature to 450F.
    • In a large bowl, add the cream cheese and beat until smooth. Next add the sugar, vanilla extract, sour cream, and continue mixing. Slowly add the eggs and mix until well incorporated. Next in a small bowl, mix the chocolate chips with the all purpose flour, then add it into the cream cheese mixture.
    • Add the cream cheese mixture in the springform pan and bake at 450F for 7 minutes, then drop down the temperature 250F for 60-65 minutes.
    • Cool completely and best served chilled.
    Leave a Comment
    QR Code
    Did you make this recipe?Share it on instagram or tag @simplybakings or #simplybakings!

    NEVER MISS A RECIPE!

    PINTEREST / FACEBOOK / INSTAGRAM / TWITTER

    If you’ve tried this or any other of my recipes, don’t forget to rate the recipe and to leave me a comment. I love hearing from you!

    Cheesecake

    Fool Proof Vegan Peanut Butter Blondies

    Jul 24, 2017 · 1 Comment

    Dairy Free Peanut Butter Blondies

    Here's a foolproof Vegan Peanut Butter Blondies recipe that is so easy to make and will surely be a big hit! Loaded with crunchy peanuts, creamy peanut butter, and all that goodness of non-dairy milk, this will surely be one of your delicious vegan dessert favorites!

    Dairy Free Peanut Butter Blondies

    Tips and Procedures: 

    • You can add a bit of coconut oil to this recipe if you need that extra healthy content.
    • If you do not have a regular peanut butter variant, you can use creamy peanut butter instead. Just adjust the non-dairy milk measurement to make it lighter and easier to mix.
    • Here are alternatives to peanut butter if you are not into it: Use cashew butter, almond butter, or nut butter.
    • If you want it to be gluten-free, substitute the all-purpose flour with gluten-free flour.

    How to Make this Fool Proof Vegan Peanut Butter Blondies Recipe:

    Here is a quick look at the ingredients for the Fool Proof Vegan Peanut Butter Blondies:

    • brown sugar
    • oil
    • peanut butter
    • vanilla extract
    • nondairy milk
    • baking powder
    • salt
    • all-purpose flour
    • peanuts for garnishing (I used salted, but unsalted is fine)

    To save time, preheat the oven to 350F and prepare an 8x8-inch pan, and cover it with parchment paper.

    Let's begin!

    In a mixing bowl add the sugar, oil, and peanut butter, and mix until well combined:

    mixing the peanut butter in a bowl

    Add the vanilla extract, and non-dairy milk and mix until just combined:

    adding non-dairy milk to the peanut butter mixture

    Add the baking powder, salt, and all-purpose flour to the wet ingredients:

    adding in flour to the wet ingredients

    Mix the ingredients using a fork. If it's too thick, use your hands to mix:

    mixing the wet ingredients and the dry ingredients

    Transfer dough into the pan and spread using a spatula:

    leveling the peanut butter blondies with a rubber s[spatula

    Then add the peanuts and gently press into the dough. Bake for 23 minutes or until the sides turn light brown:

    garnishing the vegan peanut butter blondies with whole peanuts

    Allow it to cool completely before slicing it. Serve and enjoy!

    slicing the fool-proof vegan peanut butter blondies using a bread knife

    Here are some great chocolate cake recipes you will surely love:

    • Healthy Vegan Muffins
    • Best Vegan Fruit Cheesecake
    • BEST Vegan Coffee Cake
    • BEST Vegan Banana Oatmeal Pancakes – 5 Ingredients ONLY
    • Vegan Pumpkin Pie
    • Vegan Chocolate Cake
    •  

    Frequently Asked Questions for the Fool Proof Vegan Peanut Butter Blondies Recipe:

    Q: Can I replace the all-purpose flour with other flour variants?

    A: Yes. You can use gluten-free flour, almond flour or coconut flour would do.

    5 from 1 vote
    Print Pin Recipe

    Fool Proof Vegan Peanut Butter Blondies

    A perfect vegan, Fool-proof peanut butter Blondie recipe that is soft, gooey, and loaded with crunchy peanuts!
    Servings: 9 large squares
    Author: Lainey
    Prevent your screen from going dark

    Ingredients

    • 1 cup brown sugar*
    • ⅓ cup oil
    • ¾ cup peanut butter
    • 2 teaspoons vanilla extract
    • ¼ cup nondairy milk
    • ½ teaspoon baking powder
    • ½ teaspoon salt
    • 1 cup all purpose flour
    • ⅓ cup peanuts I used salted, but unsalted is fine

    Instructions

    • Preheat oven to 350F. In a 8x8 inch pan, cover with parchment paper.
    • In a mixing bowl add the sugar, oil, peanut butter and mix until well combined.
    • Add the vanilla extract, nondairy milk and mix until just combined.
    • Add the baking powder, salt, all purpose flour and mix using the fork. If it's too thick, use your hands to mix.
    • Transfer dough into the pan and spread using a spatula.
    • Then add the peanuts and gentle press into the dough.
    • Bake for 23 minutes or until the sides turn light brown.
    • Allow it to cool completely and serve.
    Leave a Comment

    Notes

    *For a healthier alternative use Sucanat Sugar, Coconut Sugar or Truvia Brown Sugar
    QR Code
    Did you make this recipe?Share it on instagram or tag @simplybakings or #simplybakings!

    NEVER MISS A RECIPE!

    PINTEREST / FACEBOOK / INSTAGRAM / TWITTER

    If you’ve tried this or any other of my recipes, don’t forget to rate the recipe and to leave me a comment. I love hearing from you!

    Desserts, Vegan Baking

    Dairy Free Cookie Dough Recipe

    Jul 17, 2017 · 4 Comments

    dairy free chocolate chip cookies

    A dairy free version of the classic cookie dough recipe! Delicious, healthy, and dairy free chocolate chip cookies which you can eat in two ways. You can either eat it after blending all the ingredients or bake them! 

    This was inspired by my Vegan Blondies – Easy and Delicious, Fool Proof Vegan Peanut Butter Blondies, and Best Coconut Flour Chocolate Chip Cookies recipes.

    dairy free chocolate chip cookies in small green bowls

    Dairy-Free Cookie Dough is a yummy treat that you can enjoy anytime, no matter the season. It's creamy and doesn't have any dairy in it, which makes it perfect for parties and get-togethers.

    Whether you're trying to beat the heat in summer or celebrating a special holiday, this recipe is great for everyone, especially if you have dietary needs or preferences.

    [feast_advanced_jump_to]

    Ingredients

    Here is the quick look of the ingredients for Dairy Free Chocolate Chip Cookies:

    • garbanzo beans, rinsed
    • sugar
    • peanut butter or almond butter
    • vanilla extract
    • baking soda
    • salt
    • chocolate chips

    See recipe card for quantities.

    Instructions

    Raw Cookie Dough (Edible):

    putting ingredients in a blender

    In a blender add all the ingredients except for the dairy free chocolate chips.

    blending the ingredients of the Dairy free chocolate chip cookies

    Blend thoroughly.

    adding in the mini chocolate chips to the wet ingredients

    Place cookie dough in a bowl, then add chocolate chips.

    ready to serve dairy free chocolate chip cookies

    Place in a nice mini bowl and serve.

    freshly made dairy free chocolate chip cookies

    Baked Cookie Dough

    ready to bake dairy free chocolate chip cookies

    Follow exact directions as mentioned above. Then preheat oven to 350F and prepare baking sheet.

    freshly baked dairy free chocolate chip cookies

    Place the cookie dough on the baking sheet and bake for 13-15 minutes.

    close up shot of dairy free chocolate chip cookies

    It's as easy as that!

    A very rich, dairy-free chocolate chip cookie that is low in carbohydrates but full of so much goodness!

    Substitutions

    • Sugar Swap: Instead of regular sugar, try using brown sugar for a richer taste.
    • Flour Alternatives: You can use almond flour, oat flour, or gluten-free flour if you can't have gluten.
    • Dairy-Free Options: Use coconut oil instead of peanut butter for a hint of coconut flavor that goes great with chocolate chips.

    Variations

    • Microwave Method: If you want a quick way, heat the garbanzo beans in the microwave for a bit before blending them in a microwave-safe bowl.
    • Flavor Enhancements: Try different nut butters like almond butter to make your cookie dough taste even better. Serve with non-dairy milk or vegan ice cream for a completely dairy-free dessert.
    • Shaping Options: Use a cookie scoop to make small cookie dough balls, or use a rubber spatula to mix in the chocolate chips and shape the dough into bites. Chill them in the fridge for a firmer texture.

    Storage

    If you happen to have any leftovers (though it's unlikely!), you can store the cookie dough in an airtight container in the refrigerator for up to one week.

    Alternatively, you can put the cookie dough in the fridge for future use. Simply portion it into individual servings, place them in a freezer-safe container or bag, and store them in the freezer for up to three months.

    Top Tip

    • Eat this in two ways, by baking it or eat it after blending it!
    • Make it a day before and chill or freeze the dough. Simply thaw it before serving or before baking.

    FAQ

    What is vegan cookie dough made of?

    Vegan cookie dough is made of garbanzo beans, sugar, peanut butter or almond butter, vanilla extract, baking soda, salt, and dairy-free chocolate chips blended together for a creamy and dairy-free treat, as seen in this Dairy-Free Cookie Dough Recipe.

    Are vegan cookies healthy?

    Vegan cookies can be a healthier option compared to traditional cookies, especially if made with wholesome ingredients like chickpeas, nut butter, and natural sweeteners in moderation, as showcased in this recipe.

    What is a substitute for eggs in edible cookie dough?

    A common substitute for eggs in edible cookie dough is garbanzo bean liquid, also known as aquafaba, which helps bind the ingredients together while maintaining a vegan-friendly and dairy-free recipe, as demonstrated in this Dairy-Free Cookie Dough Recipe.

    dairy free chocolate chip cookies
    5 from 2 votes
    Print Pin Recipe

    Dairy Free Cookie Dough Recipe

    Everyone would love this Dairy Free Cookie Dough Recipe - a very easy recipe with just a few ingredients!
    Prep Time15 minutes mins
    Bake Time15 minutes mins
    Total Time30 minutes mins
    Course: Dessert
    Cuisine: American, Filipino
    Servings: 4 servings
    Calories: 340kcal
    Author: Lainey
    Prevent your screen from going dark

    Ingredients

    • 1 can garbanzo beans rinsed
    • ½ cup sugar*
    • ⅓ cup peanut butter or almond butter
    • 1 teaspoon vanilla extract
    • 1 teaspoon baking soda
    • 1 teaspoon salt
    • ½ cup chocolate chips

    Instructions

    • In a blender add all the ingredients except for the chocolate chips. Blend thoroughly.
    • Place cookie dough in a bowl, then add chocolate chips and serve.

    To Bake

    • To bake follow exact directions as mentioned above. Then preheat oven to 350F and prepare baking sheet.
    • Add cookie dough to sheet and bake for 13-15 minutes.
    • Allow to cool on a cookie rack and serve.
    Leave a Comment

    Notes

    *you can use stevia or coconut sugar for a healthier alternative
    Serving: 1gCalories: 340kcalCarbohydrates: 44gProtein: 5gFat: 18gSaturated Fat: 6gPolyunsaturated Fat: 3gMonounsaturated Fat: 5gSodium: 948mgPotassium: 188mgFiber: 1gSugar: 40gVitamin A: 0.1IUVitamin C: 0.003mgCalcium: 27mgIron: 0.4mg

    Watch The Recipe Video!

    QR Code
    Did you make this recipe?Share it on instagram or tag @simplybakings or #simplybakings!

    Cookies, Desserts, No Bake Dessert Recipes, Vegan Baking

    2 Ingredient Vegan Ice Cream

    Apr 4, 2017 · 6 Comments

    scoops of vegan ice cream in a glass cup with dried shredded coconuts topping

    Here's a rich, creamy, and delicious 2 ingredient vegan ice cream for the chocolate lovers! This is super easy to make, dairy-free, and no ice cream maker required. You just need full-fat coconut milk and vegan chocolate to enjoy this healthy dessert!

    Looking for more 2-ingredient recipes? Try my 2 Ingredient Nestle Crunch Candy, Donut & Muffins | 2 Ingredients ONLY, and 2 Ingredient Bread recipes!

    2-ingredient vegan Ice Cream in a glass topped with dried shredded coconuts
    [feast_advanced_jump_to]

    What is 2 ingredient Vegan Ice Cream?

    2 Ingredient Vegan Ice Cream is a super simple yet amazingly tasty dessert made with full-fat coconut milk and vegan chocolate. This creamy treat mixes the rich, velvety texture of coconut milk with the delicious flavor of vegan chocolate, making it both delightful and dairy-free. Simply combine the two simple ingredients, chill, then freeze to deliciousness!

    This easy homemade ice cream recipe is a must-try for all ice cream lovers, and it's a healthy dessert to make on hot summer days or whenever you want something sweet. Try this recipe today for a scoop of vegan delight!

    Variations

    • Mint Flavor - combine fresh mint leaves or mint extract with vegan chocolate to add a refreshing twist.
    • Nutty Taste - to add a rich and nutty flavor, stir in some creamy peanut butter into the mixture.
    • Fruity - Add in some fresh or frozen berries with the vegan chocolate chunks for a fruity and chocolatey treat.

    Substitutions

    • Dairy-free Milk - you may use other plant-based milk for this recipe such as almond milk, cashew milk, oatmeal milk, and soy milk instead of coconut milk.
    • Vegan Chocolate - dark chocolate nibs, carob chips, and cacao nibs can be used in this recipe
    Vegan Chocolate Ice Cream dairy free topped with  dried shredded coconuts in a margarita glass

    Storage Tips

    • Store the vegan ice cream in an airtight container to prevent ice crystals from forming and to keep its creamy consistency.
    • Before closing the ice cream container, place a sheet of plastic wrap or parchment paper directly on the ice cream's surface to reduce air exposure.
    • Allow the ice cream to soften for a few minutes at room temperature before scooping to make serving easier.
    • Consume within 1-2 weeks for the best texture and flavor.

    Ingredients

    • full-fat coconut milk
    • vegan chocolate

    Instructions

    In a saucepan, add the coconut milk and bring to a light boil. This step is critical as you do not want your coconut milk to boil too much as it would turn into coconut oil:

    coconut milk boiled in a saucepan

    While waiting for the coconut milk to boil lightly, place your vegan chocolate chips in a large mixing bowl and pour in the coconut milk that has been boiled lightly:

     chocolate chips and milk in a bowl

    Mix for about three to four minutes, stirring constantly to get rid of chocolate lumps. It is important to get that smooth and shiny chocolate liquid to achieve a smooth ice cream texture:

    chocolate chips and coconut milk mixture in a bowl

    After diligently stirring the mixture, it should look like this: dark-colored chocolate that is shiny and smooth:

    chocolate mixture in a bowl

    Now it's ready to be frozen! Cover it with cling wrap and freeze it for 3-4 hours but for best results, freeze it overnight:

    frozen vegan chocolate ice cream in a glass bowl

    I was so excited to scoop it out because it looked very creamy and smooth. So when I took my first bite, I was right! 🙂

    You guys gotta give it a try and let me know how you liked it!

    scooping frozen vegan chocolate ice cream

    Adding a sprinkle of dried shredded coconuts makes this vegan chocolate ice cream over the top!

    vegan chocolate ice cream in a margarita glass with  dried shredded coconuts toppings

    Anyways, I hope guys enjoy this no churn coconut milk ice cream recipe and let me know in the comments if you want to see more vegan recipes, especially vegan ice cream recipes!

    Top Tips

    • You can also run the mixture through a sifter to make sure that chocolate lumps won't be included.
    • Watch over the coconut milk carefully when boiling it. Boiling it too much turns it into coconut oil which you won't be needing in your ice cream recipe.
    • If you have options for chocolate chips that are quick-melt, go ahead and buy those. You will have an easier task in melting those chocolate lumps.

    FAQ

    I love having vanilla extract in desserts. Can I add some to this recipe?

    Yes, you can add vanilla extract. It would enhance the sweet aroma of the chocolate and for sure it would enhance this recipe even more.

    They say adding salt enhances the sweetness of any dessert. Is it okay if I add a bit of salt to this ice cream?

    That is a great idea! Yes, that's true. Adding salt to any sweet food brings out the natural sweetness even more and making it more delicious.

    I want my ice cream to have different textures when I eat them. Can I add nuts?

    Definitely you can add any kind of nuts you love.

    More Ice Cream Recipes

    I have similar recipes if you're looking for more ideas. Try these:

    • 5 Ingredient Mocha Ice Cream
    • 3 Ingredient Nutella Popsicles
    • Pumpkin Ice Cream
    delicious 2 ingredient vegan ice cream topped with coconut flakes
    5 from 2 votes
    Print Pin Recipe

    2 Ingredient Vegan Ice Cream

    Enjoy this delicious dairy-free ice cream recipe made from vegan chocolate and full-fat coconut milk. This simple dessert will satisfy your sweet cravings while staying healthy!
    Prep Time15 minutes mins
    Freeze6 hours hrs
    Total Time6 hours hrs 15 minutes mins
    Course: Dessert
    Cuisine: American, Filipino
    Servings: 4 servings
    Calories: 902kcal
    Author: Lainey
    Prevent your screen from going dark

    Ingredients

    • 1 (15 oz) can of full-fat coconut milk
    • 3 cups vegan chocolate

    Instructions

    • Pour the coconut milk into a saucepan and heat it until it starts to gently boil.
    • Place the vegan chocolate in a large bowl.
    • Carefully pour the hot coconut milk over the chocolate in the bowl.
    • Stir the mixture continuously for about 3 to 4 minutes until the chocolate melts completely and the mixture becomes dark and smooth.
    • Cover the bowl with cling wrap.
    • Put the bowl in the freezer overnight for the best results.
    • When ready to serve, scoop the chocolate ice cream into bowls and add your favorite toppings. Enjoy!
    Leave a Comment
    Serving: 1servingCalories: 902kcalCarbohydrates: 85gProtein: 11gFat: 69gSaturated Fat: 49gPolyunsaturated Fat: 0.3gMonounsaturated Fat: 1gSodium: 15mgPotassium: 249mgFiber: 9gSugar: 63gVitamin C: 1mgCalcium: 196mgIron: 13mg

    Watch The Recipe Video!

    QR Code
    Did you make this recipe?Share it on instagram or tag @simplybakings or #simplybakings!

    I actually really love vegan chocolate ice cream. I also think I am lactose intolerant (so I would always look for dairy-free food) and have been for quite a while, so eating any vegan foods really helps.

    A little background about myself, I've been a vegetarian for 11 years now, by choice too. My husband has been vegetarian all his life and is now leaning on a vegan diet, so he really enjoys any vegan desserts I make. I was actually working on a recipe for chocolate truffles and instead, I messed up and accidentally came up with this recipe!  (I'm so glad I messed up, lol). My family loved this ice cream and didn't believe me it was vegan. 🙂

    5 Ingredients or Less, Ice Cream, No Bake Dessert Recipes, Vegan Baking

    How To Make Shakoy

    Mar 16, 2017 · 34 Comments

    Filipino twisted fried donuts on a plate

    Shakoy is a Filipino donut that is twisted, fried, and coated in sugar! Soft and fluffy- the aroma of these delightful Filipino donuts will remind you of the donuts sold at your local neighborhood bakery!

    Looking for more Filipino desserts? Try Suman Malagkit (Sweet Rice wrapped in banana leaves), Ube Bibingka, or Buko Pie (Young Coconut Pie)! 

    Filipino twisted fried donuts on a round plate

    Learn how to make shakoy using very few ingredients- 7 ingredients to be exact! When I was preparing to share this recipe with you guys, I considered using frozen bread dough.  Then I decided why not make it from scratch, so I did and it was the best decision I made.

    Here is a little tidbit about me, I LOVE baking bread. The feel of dough on my hand and kneading it just makes me so happy!! Am I alone on this? (I hope not)

    Shakoy is basically a sugar-covered donut, but as I mentioned in the video, Filipinos don't eat it for breakfast we usually eat it as a dessert or a snack.

    a cut part of Shakoy held by the two fingers

    So when I was in middle school and we had breakfasts at school, someone brought in donuts and I was really surprised because I grew up eating donuts as desserts. Anyways, these are delicious and it's a must-try. Let me know if you guys make it! Happy Baking.

    Tips & Procedures:

    • Proofing the yeast: Warm water to about 105-115 degrees F or warm in the microwave for about 10 seconds. Then add yeast and sugar and mix.
    • Adding flour when kneading: Dust the dough sparingly, it will make the dough dry.
    • Begin frying with one Shakoy to test the heat of the oil. If it's too hot, it will burn the dough before being cooked through. If it's too low, the donuts will absorb the oil. I found the optimal temperature to be 350 degrees F.

    How to Make Shakoy:

    Listed below are all the ingredients you will need:

    • water
    • yeast
    • sugar 
    • all-purpose flour
    • salt
    • cooking oil

    In a cup add the warm water, yeast, and white sugar.  It takes about 30 seconds to 1 minute for the yeast to activate. If it doesn't bubble up like the picture below, the yeast is dead or the water is too hot.

    I found that microwaving the water for 15 seconds is the right temperature for the yeast to activate:

    yeast being activated

    In a large bowl, add the flour and salt and whisk until combined.

    Next, add the yeast water and mix.  You might need to start using your hands and dust all-purpose flour if the dough is too sticky:

    bread being mixed with oil and water

    Allow the dough to rise for an hour.  You can see on the right how much the dough has doubled after an hour:

    dough growth

    This is my favorite part, punching the dough to release the air. Next, knead the dough for 5 more minutes. Feel free to watch the step by step video which gives you an accurate way to make the Shakoy:

    dough being punched

    After you've torn a piece of the dough, roll it into a long stick, twist it, allow it to rise for one more hour.  You will notice the dough has doubled in size again:

    shakoy rising

    Heat the oil and fry the shakoy until it's golden brown.  My suggestion is to fry one shakoy first to check if the temperature of the oil is too hot:

    frying shakoy in oil

    Roll the shakoy in white or granulated sugar and serve immediately!

    coating shakoy with sugar

    Frequently Asked Questions:

    Can Shakoy be frozen?

    Yes, they freeze great. The best way to freeze is as soon as they cool to room temperature after frying. (Don't add the sugar)

    How do I reheat my Shakoy?

    If it's already fried, it's best to toast them in a toaster oven for about 3-5 minutes.


    a pile of shakoy on a round plate
    4.80 from 5 votes
    Print Pin Recipe

    How To Make Shakoy

    A delicious and easy to make Filipino twisted fried donut that is coated in sugar! It’s an all-time favorite snack and an affordable sweet treat! 
    Prep Time1 hour hr 30 minutes mins
    Cook Time15 minutes mins
    Course: Dessert
    Cuisine: Filipino
    Keyword: filipino twisted donut, shakoy
    Servings: 12
    Calories: 240kcal
    Author: Lainey
    Prevent your screen from going dark

    Ingredients

    • ½ cup warm water
    • ¾ teaspoons yeast
    • pinch sugar to activate the yeast
    • 1 ½ cups all purpose flour
    • ½ teaspoon salt
    • ¼ cup sugar
    • 1 cup oil for frying

    Instructions

    • In a cup add the warm water, yeast and pinch of sugar to active the yeast and allow it to sit for 5 minutes.
    • In a large bowl add the flour, salt, and whisk until well combined.
    • Add the yeast water and mix until elastic, smooth, and form into ball. Add all purpose flour if dough is sticky.
    • Grease bowl and place the dough in the bowl and cover with plastic wrap and allow it to sit for at least 1 hour or double in size. Make sure to keep it away from any breeze and in a warm place.
    • After an hour, punch the dough and allow it to sit for 5 minutes. Place dough on floured surface and knead for 5 minutes.
    • Break into 1-2 inch balls and form into long sticks about 1 foot, then twist.
    • Cover and set aside for 1 hour, then prepare to fry using 1 cup of oil and the fire on medium high.
    • Fry on both sides until light brown, about 30 seconds. Then place on paper towels to dry the oil and immediatly onto the sugar and coat.
    • Best served immediately.
    Leave a Comment
    Serving: 1gCalories: 240kcalCarbohydrates: 16gProtein: 2gFat: 19gSaturated Fat: 1gTrans Fat: 1gSodium: 98mgPotassium: 24mgFiber: 1gSugar: 4gVitamin C: 1mgCalcium: 3mgIron: 1mg

    Watch The Recipe Video!

    QR Code
    Did you make this recipe?Share it on instagram or tag @simplybakings or #simplybakings!

    If you need more guidance, check out my video below!

    Bread, Breakfast & Brunch, Christmas Desserts, Filipino Desserts, No Bake Dessert Recipes, Summer Desserts, Vegan Filipino Recipes, Vegetarian Filipino Recipes

    How to Make Oreo Popsicles

    Mar 7, 2017 · 7 Comments

    Oreo popsicles on white plate

    Learn how to make Oreo Popsicles using just 3 simple ingredients for a creamy and delicious frozen dessert! Its a yummy treat for Oreo lovers, and it hits the spot when the weather heats up!

    Craving for more delicious Oreo treats? Try my Oreo Cheesecake Bites, No Bake Oreo Pie, and Oreo Pumpkin Cheesecake recipes!

    3 ingredient Oreo popsicles on white plate
    [feast_advanced_jump_to]

    What is an Oreo Popsicle?

    Oreo Popsicle is a delectable 3-ingredient popsicle recipe that blends the classic flavors of instant vanilla pudding, milk, and crushed Oreos to make a frozen treat suitable for any occasion. Whether you're cooling off on a hot summer day or simply satisfying your sweet craving, these homemade Oreo popsicles will not disappoint.

    There is no possible way to mess it up, I promise, 'cause this Oreo popsicle recipe is foolproof! Also, what's really cool about this recipe is that you don't need a popsicle mold; you just need a cup and a stick.

    Best of all, with only a few easy ingredients, you can make a batch in no time. Read on to learn how to make these delectable popsicles at home!

    Variation

    • Banana Oreo Popsicles: Blend the vanilla pudding and milk with a ripe banana for a fresh and creamy twist.
    • Mint Oreo Popsicles: Mix a few drops of mint essence into the vanilla pudding and milk mixture for an extra burst of minty flavor that will leave you feeling cool.
    • Peanut Butter Oreo Popsicles: Stir a few teaspoons of creamy peanut butter to the vanilla pudding and milk for a nutty treat.
    • Strawberry Oreo Popsicles: Blend fresh strawberries into the vanilla pudding to give it a fruity touch.

    Substitution

    • Cookies: If crushed Oreos aren't available, feel free to use crushed chocolate chip cookies or Graham crackers.
    • Pudding: Replace the instant vanilla pudding with chocolate pudding for a rich, chocolatey, and delicious treat, or with instant butterscotch pudding for a caramel-like flavor.
    • Dairy-free Milk: Replace regular milk with almond milk or coconut milk for a dairy-free option.

    Storage Tips

    • Wrap each Oreo popsicle in a plastic wrapper before placing it in an airtight container. Stack the popsicles with parchment paper between each layer to prevent sticking.
    • Label the container with the date and store it in the freezer's coldest section to maintain a consistent temperature.
    • Consume your popsicles within two to three weeks for the best quality.

    Ingredients

    Listed below are all the ingredients you will need:

    • instant vanilla pudding
    • milk
    • Oreos
    ingredients for the Oreo Popscicles recipe: Jello, Oreos, and Milk

    For the pudding recipe, you're going to need a 3.7-ounce package.  If you want to make this dairy-free, make sure to get a dairy-free pudding and use coconut crème.

    Instructions

    In a large bowl, add the instant vanilla pudding, 2 cups of milk, and cream together until the pudding thickens, which is about 2 minutes:

    Pouring milk over jello pudding

    Set aside 6 whole oreos. With the rest of the Oreos, break them into bite-size pieces, or you can crush them into chunks. I like to keep the oreo bite size because I love having a little texture in the oreo pudding pops:

    6 whole oreos on a white plate

    Add the chunks of Oreo to the pudding and mix thoroughly, making sure that all the Oreos are covered with the pudding mixture:

    Pouring crushed oreos into the batter in a bowl

    Check out how creamy the batter looks; this is what you're going for:

    oreos and jello pudding mixed using a whisk

    Using a food processor or blender, blend until fine crumbs form. Place about 2 teaspoons of Oreo crumbs into the small cups:

    crushed oreos in a cup

    Add the pudding, and finish it off with more crushed Oreo crumbs. You can then insert the small popsicle sticks and freeze them overnight:

    Oreo popsicles on paper cups with wood sticks

    That's pretty much it! You can probably make this with your kids or let your friend, who has no idea how to make it, do it for you. 🙂

    I hope you enjoy the recipe!

    Top Tips

    • It is best to use high-quality instant vanilla pudding and whole milk to achieve a richer, creamier texture.
    • Before you add the crushed Oreos, make sure the pudding is smooth and well-blended.
    • Use those cups that are non-stick. You would like to avoid chipped-off Oreo popsicles, though I know they would just melt when you ate them. 😉
    • If you do not have store-bought Oreo crumbs on hand and do not have a food processor, you can place the Oreos in a zip-lock bag and just slightly pound the Oreos with a rolling pin until they are finely crushed. You can even do a rolling motion if that's easier for you.

    Frequently Asked Questions

    How many servings would this recipe make?

    This delicious and easy 3-ingredient Oreo Popsicle recipe could make eight to ten slices, depending on the size of your popsicle mold.

    Can I add fruits or raisins to this recipe?

    Yes, you can. Although it would give out a slight difference in taste and texture, I am sure it would still turn out delicious.

    Is adding cream cheese to this recipe possible?

    Yes, you can. Although it would give out a slight difference in taste and texture, I am sure it would still turn out delicious.

    More Oreo Recipes

    If you love easy recipes using Oreos, check out my other Oreo-themed recipe:

    • 5 ingredient Cheesecake Oreo Cookies
    • No Bake Oreo Cheesecake
    • Oreo Milkshake
    • 4 Ingredient Oreo Ice Cream
    • No Bake Oreo Cookie (single serving)
    delicious oreo popsicles with oreo crumbs
    5 from 2 votes
    Print Pin Recipe

    How to Make Oreo Popsicles

    Wonder no more as to how to make Oreo popsicles! Here's a super simple 3-ingredient Oreo Popsicle recipe that hits the spot when the weather heats up. Give this yummy frozen treat a try!
    Prep Time15 minutes mins
    Freeze Time6 hours hrs
    Total Time6 hours hrs 15 minutes mins
    Course: Dessert
    Cuisine: Filipino
    Servings: 5 popsicles
    Calories: 160kcal
    Author: Lainey
    Prevent your screen from going dark

    Equipment

    • Large Bowl
    • Whisk
    • processor or blender
    • small cups
    • small popsicle sticks

    Ingredients

    • 1 (4.6) oz instant vanilla pudding
    • 2 cups milk
    • 17 Oreos

    Instructions

    • In a large bowl, add the instant vanilla pudding, milk, and cream together until the pudding thickens, which takes about 2 minutes.
    • Set aside 6 Oreos. With the rest of the Oreos, break them into bite-size pieces, then add them to the pudding.
    • Using the food processor or blender, blend until fine crumbs form, and then place about 2 teaspoons of Oreo crumbs into the small cups.
    • Add the pudding, and finish it off with more crushed Oreo crumbs. Insert the small popsicle sticks and freeze overnight.
    Leave a Comment
    Serving: 1gCalories: 160kcalCarbohydrates: 26gProtein: 3gFat: 5gSaturated Fat: 2gPolyunsaturated Fat: 1gMonounsaturated Fat: 2gTrans Fat: 0.01gCholesterol: 6mgSodium: 159mgPotassium: 123mgFiber: 1gSugar: 18gVitamin A: 79IUCalcium: 65mgIron: 2mg

    Watch The Recipe Video!

    QR Code
    Did you make this recipe?Share it on instagram or tag @simplybakings or #simplybakings!

    Every time I see a 3 ingredient recipe, I'm always down to make it. Especially if the recipe has oreos! I have always loved Oreos cookies and when I found out it was vegan, I knew in my heart Oreos and I was meant to be. Lol!

    5 Ingredients or Less, Desserts, Ice Cream, No Bake Dessert Recipes

    DAIRY FREE Snickerdoodle Cookies

    Feb 9, 2017 · 14 Comments

    vegan snickerdoodle cookies

    Dairy Free Snickerdoodles recipe with no special ingredients. Just the classic cinnamon-rolled sugar cookies; fluffy, chewy, and tender. 

    vegan and dairy free snickerdoodle cookies on a plate

    Tips on How to Make DAIRY FREE Snickerdoodle Cookies

    • Preheating the oven before working on the cookie dough ingredients will save you a lot of time and saves half of your waiting time.
    • Instead of using refined sugar, you can substitute it with brown sugar.
    • When mixing butter and sugar, always make sure that it is fluffy and light, more like a buttery spread. Mixing it well will give you soft, nicely textured snickerdoodle cookies.
    • You can place these delicious cookies in a small box and give them to vegan friends as a gift.

    How to Make DAIRY FREE Snickerdoodle Cookies:

    Before starting to mix the ingredients together, preheat the oven to 350F and prepare cookie sheets using a baking mat or parchment paper. After all of that's set, you can now begin!

    In a large bowl, cream together the vegan butter and sugar:

    vegan butter and granulated sugar for dairy free snickerdoodle cookies recipe

    It should turn out light and fluffy:

    vegan butter and granulated sugar mixture for dairy free snickerdoodle cookie recipe

    Add the almond milk or your choice of dairy-free milk  and mix until combined:

    vegan butter - sugar mixture with almond milk and vanilla for dairy free snickerdoodle cookie recipe

    Next add the baking soda, salt, cream of tartar, cornstarch, all-purpose flour and mix well:

    mixture with dry ingredients for dairy free vegan snickerdoodle cookie recipe

    The dough should then look like this:

    mixing vegan dairy free snickerdoodle cookie dough on a mixing bowl

    Chill the dough for at least 2 hours or best overnight. Use a ziplock bag in storing your dough for easier handling:

    chilled cookie dough for vegan dairy free snickerdoodle recipe

    Using a mini cookie scooper, scoop the dough:

    scooping the cookie dough of the vegan dairy free snickerdoodle cookie recipe

    Coat the dough balls with the cinnamon sugar mixture:

    coating the vegan dairy free snickerdoodle cookie dough ball into cinnamon-sugar mixture

    To make the cinnamon sugar mixture, mix together the ground cinnamon and granulated sugar.

    After coating the dough balls with the cinnamon-sugar mixture, place them on a non-stick cookie sheet:

    vegan dairy free snickerdoodle cookie dough balls on a baking mat

    Bake for 10 minutes, remove and cool on cookie rack:

    freshly baked vegan dairy free snickerdoodle cookies on a baking tray

    You can see all of my cookie recipes in the Cookie Recipe section of my Recipe Index. But if you're looking vegan cookies check out these yummy cookie recipes:

    • Healthy Oat Cookies
    • Sunbutter Cookies
    • Mini Chocolate Chip Cookies

    Happy baking!

    vegan snickerdoodle cookies
    5 from 1 vote
    Print Pin Recipe

    DAIRY FREE Snickerdoodle Cookies

    Author: Lainey
    Prevent your screen from going dark

    Ingredients

    • 1 cup non hydrogenated margarine softened (vegan butter)
    • 1 ¼ cups sugar
    • 2 tablespoons almond milk
    • ½ teaspoon baking soda
    • ¼ teaspoon salt
    • 1 teaspoon cream of tartar
    • ¼ cup cornstarch
    • 1 ⅔ cups all purpose flour
    • ⅓ cup granulated sugar
    • 1 teaspoon ground cinnamon

    Instructions

    • In a large bowl cream together the vegan butter and sugar until it's light and fluffy. Next add the almond milk or your choice of dairy free milk and mix until combined.
    • Next add the baking soda, salt, cream of tartar, cornstarch, all purpose flour and mix well. Chill the dough for at least 2 hours or best over night.
    • Preheat oven to 350F and prepare cookie sheets using a baking mat or parchment paper.
    • To make the cinnamon sugar mixture, mix together the cinnamon and granulated sugar.
    • Using a mini cookie scooper, scoop the cough dough into the cinnamon sugar mixture and roll into a ball, then place on cookie sheet.
    • Bake for 10 minutes, remove and cool on cookie rack.
    Leave a Comment

    Watch The Recipe Video!

    QR Code
    Did you make this recipe?Share it on instagram or tag @simplybakings or #simplybakings!

    NEVER MISS A RECIPE!

    PINTEREST / FACEBOOK / INSTAGRAM / TWITTER

    If you’ve tried this or any other of my recipes, don’t forget to rate the recipe and to leave me a comment. I love hearing from you!

    Cookies, Vegan Baking

    Cookies Made with Pocky

    Feb 2, 2017 · 2 Comments

    pocky

    Pocky sticks are a beloved snack that originated in Japan—and I love them so much, I just had to turn them into cookies! This easy and fun Pocky cookie recipe features three delicious flavors: orange Pocky cookies, chocolate coconut Pocky cookies, and the classic chocolate Pocky cookies. I was so excited to try this recipe, and it definitely didn’t disappoint—each cookie is bursting with flavor and crunch!

    If you're in the mood for more creative cookie ideas, don't miss these equally fun recipes: Strawberry Cookies, Peppermint Oreo Cookies, and Rice Krispies Cookies—all simple, sweet, and made for sharing!

    [feast_advanced_jump_to]

    Why You'll Love This Recipe

    These Pocky cookies are not just fun and flavorful—they're also dairy-free, and totally beginner-friendly. Whether you're baking for yourself or sharing with friends, this recipe is easy to follow and doesn't require any fancy equipment. It’s a great way to enjoy something unique while keeping your ingredient list simple and plant-based.

    One of the standout ingredients in these cookies is coconut, which adds natural sweetness and a delightful chewy texture. Coconut is also rich in healthy fats that support brain function and can help keep you feeling full longer. So while these cookies taste indulgent, you can feel good knowing there’s a little wellness boost in every bite!

    Plus, with three flavors to choose from—orange, chocolate coconut, and classic chocolate—you’ll never get bored. It’s the perfect recipe for experimenting, gifting, or just treating yourself to something different.

    Ingredients

    Gather the ingredients for this Pocky Cookies - 3 Ways and once the ingredients are all ready, let's begin!

    • unsalted butter, softened
    • cream cheese, softened
    • brown sugar
    • granulated sugar
    • 1egg
    • vanilla extract
    • all-purpose flour
    • baking soda
    • salt
    • pocky sticks

    Instructions

    Preheat oven to 350F, prepare cookie sheets using parchment paper or a silicone baking mat.

    In a large bowl, cream together the unsalted butter and cream cheese until no lumps are found:

    creaming the unsalted butter and cream cheese in a bowl using a handheld mixer

    Next add the brown sugar, granulated sugar, egg, vanilla extract, and mix until light and fluffy. Set this bowl aside:

    adding sugar, vanilla and eggs to the butter mixture for pocky cookies recipe

    In a medium-size bowl, whisk together the all-purpose flour, baking soda, and salt:

    dry ingredients of pocky cookies 3 ways recipe

    Add the dry ingredients into the wet ingredients and mix until well combined:

    adding the dry ingredients to the wet ingredients of pocky cookies

    This is how the dough should look like after mixing well:

    well-mixed cookie dough of pocky cookies recipe

    Separate the cookie dough into 3 small bowls, add the pocky sticks, and mix:

    orange, coconut chocolate and chocolate flavors of pocky sticks in separate bowls

    Using a cookie scooper, place onto the baking mat and bake for 8-9 minutes:

    ready to bake pocky cookies on a cookie sheet

    Here they are! Freshly baked Pocky cookies!

    freshly baked pocky cookies with a bite and held by hand

    It's so exciting to taste all the flavors!

    freshly baked pocky cookies on a papaer lace mat

    These pocky cookies are delicious and unique - it will always be a conversation starter to any party or gathering!

    pocky cookies on a green plate with a paper lace mat

    Substitutions

    • Pocky Sticks – Can’t find Pocky? You can use any chocolate-dipped biscuit sticks or even vegan pretzel sticks coated in dark chocolate as a fun alternative.
    • All-Purpose Flour – For a healthier twist, use whole wheat flour or a 1:1 gluten-free flour blend if you need a gluten-free option.
    • Vegan Butter – Swap with coconut oil or margarine if that’s what you have on hand. Just chill the dough longer for firmer cookies.
    • Brown Sugar – You can replace this with coconut sugar for a deeper, caramel-like flavor or use maple syrup (reduce other liquids slightly).
    • Coconut Flakes – If you’re not a fan of coconut, try crushed nuts (like almonds or pecans) or rolled oats for texture.

    Variations

    • Strawberry Pocky Delight – Swap in Strawberry Pocky sticks and fold in some freeze-dried strawberries for a fruity, pink cookie.
    • Nutty Crunch Version – Add chopped cashews or pistachios along with the Pocky for extra crunch and flavor.
    • Gluten-Free Version – Use a certified gluten-free flour blend and check that your Pocky alternative is also gluten-free.

    FAQs

    Q: Is pocky made in Japan?

    A: Yes, these snacks originated in Japan and was created by Ezaki Glico.

    Q: Will the cookies stay crispy is stored in an airtight container?

    A: Yes, they will stay crispy when stored properly in an airtight container.

    Q: How many cookies can I make from this recipe?

    A: I made 40 pieces of small pocky cookies using this recipe.


    freshly baked pocky cookies with a bite
    No ratings yet
    Print Pin Recipe

    Cookies Made with Pocky

    Pocky cookies - 3 ways is a unique snack made out of Pocky sticks that's so easy and exciting to make!
    Servings: 40 small cookies
    Author: Lainey
    Prevent your screen from going dark

    Ingredients

    • ½ cup butter softened
    • 4 oz cream cheese softened
    • ½ cup brown sugar
    • ½ cup granulated sugar
    • 1 egg
    • ½ teaspoon vanilla extract
    • 1 ¼ cups all purpose flour
    • ½ teaspoon baking soda
    • ¼ teaspoon salt
    • pocky sticks

    Instructions

    • Preheat oven to 350F, prepare cookie sheets using parchment paper or a silicon baking mat.
    • In a large bowl cream together the butter and cream cheese until no lumps are found. Next add the brown sugar, granulated sugar, egg, vanilla extract, and mix until light and fluffy. Set this bowl aside.
    • In a medium size bowl, whisk together the all purpose flour, baking soda, and salt. Add the dry ingredients into the wet ingredients and mix until well combined.
    • Separate the cookie dough into 3 bowls, add the pocky sticks, and mix.
    • Using a cookie scooper, place onto the baking mat and bake for 8-9 minutes.
    • Serve
    Leave a Comment

    Notes

    I used about ¼ cup of pocky sticks for each batter.

    Watch The Recipe Video!

    QR Code
    Did you make this recipe?Share it on instagram or tag @simplybakings or #simplybakings!

    NEVER MISS A RECIPE!

    PINTEREST / FACEBOOK / INSTAGRAM / TWITTER

    If you’ve tried this or any other of my recipes, don’t forget to rate the recipe and to leave me a comment. I love hearing from you!

    Cookies

    Baked Caramel Apple Dessert

    Jan 26, 2017 · 4 Comments

    baled caramel apples on a plate and wooden board

    Craving a warm dessert straight from the oven that’s quick and packed with cozy fall flavor? This Baked Caramel Apple Dessert is made with tart Granny Smith apples, gooey caramel sauce, and melty chocolate—all baked in a simple baking dish. It’s like your favorite caramel apples and apple pie had a baby, but way easier to make.

    Try more of my Apple dishes to make: Apple Cookies and Apple Pie Cookies.

    baked caramel apple dessert
    [feast_advanced_jump_to]

    What is Baked Caramel Apple Dessert?

    This cozy and quick apples recipe is a shortcut to dessert heaven! Instead of making a full apple pie, we bake halved Granny Smith apples stuffed with sweet caramel candies and chocolate chips.

    When baked apples get soft and their juices start bubbling, they soak up all the goodness around them. The melted caramel, a touch of cinnamon, and a little extra drizzle of chocolate make this dish a total crowd-pleaser.

    Whether you’re celebrating fall or just want something sweet in a pinch, this is a fun twist on classic caramel apples—and no stick required!

    Substitutions

    • granny smith apples – Try Honeycrisp apples, Pink Lady, or Gala for a sweeter bite
    • dark chocolate chips – Use milk chocolate, white chocolate, or chocolate chunks
    • caramel candies – Use homemade caramel sauce, store-bought drizzle, or maple syrup for a natural sweetener
    • cinnamon & sugar – Use cinnamon apple spice, pumpkin spice, or just cinnamon
    • dairy-free – Try vegan chocolate and coconut-based caramel sauce

    Variations

    • Crunchy Topping – Add oat and brown sugar crisp topping before baking
    • Nutty – Sprinkle chopped pecans, walnuts, or almonds
    • Savory-Sweet – Add a pinch of sea salt for salted caramel vibes
    • Pastry Style – Wrap each apple half in pie crust or pastry dough for mini apple pies
    apple dessert with chocolate and caramel filling

    Storage & Leftovers

    • Countertop – Eat within 2–4 hours for best texture
    • Fridge – Store leftovers in a bowl with a lid for up to 2 days
    • Freezer – Not ideal—baked apples can turn mushy
    • Reheat – Warm in the oven or microwave until soft and melty

    Ingredients

    • granny smith apples
    • dark chocolate chips
    • caramel candies
    • cinnamon
    • granulated sugar
    baked caramel apple dessert  ingredients

    Instructions

    All you have to do is cut the apples in half and then you're going to core it. If you have an apple corer, that would make this step easier. As for me, I only have a spoon nearby so that's what I used:

    Taking out apple cores

    Add some chocolate chips and the caramel. Now you could add much more if you want it on the sweeter side:

    Apples with chocolate chips and caramel candy

    Then you're going to transfer this onto a baking sheet lined with parchment paper or a baking mat. Now it's ready to go into the oven (I garnished it with a little bit more of my chocolate chips because we can never have enough):

    baked caramel apple dessert  filled with chocolate and caramel on a baking mat

    Here's an up-close shot of the Apple Dessert:

    baked caramel apple dessert with chocolate and caramel filling

    When baking fruit, it just brings out even more sweetness and will bring the fruit's flavor to a new level of deliciousness.

    Top Tip

    Bonus: It tastes amazing with a scoop of vanilla ice cream on top!

    FAQ

    Do you need to cook apples before baking?

    Nope, you don’t need to cook apples before baking. Just core and fill them, then pop them straight into the oven—they’ll soften as they bake.

    How long does it take for apples to soften in the oven?

    It usually takes about 15 to 20 minutes at 350°F (175°C) for apples to become soft and tender in the oven.

    How to do baked apples in the oven?

    Just cut the apples in half, remove the core, fill them with goodies like caramel and chocolate, place them in a baking dish, and bake at 350°F for about 20 minutes. That’s it!

    chocolate caramel filled apples
    5 from 2 votes
    Print Pin Recipe

    Baked Caramel Apple Dessert

    Bake up a cozy treat with this Baked Caramel Apple Dessert—tart apples stuffed with caramel and chocolate, baked to sweet perfection!
    Prep Time5 minutes mins
    Bake Time20 minutes mins
    Total Time25 minutes mins
    Course: Desserts
    Cuisine: American
    Servings: 2 servings
    Calories: 231kcal
    Author: Lainey
    Prevent your screen from going dark

    Ingredients

    • 2 Granny Smith Apples
    • ¼ cup dark chocolate chips
    • 8-10 pieces caramel candies
    • ¼ teaspoon cinnamon and ¼ granulated sugar mixed

    Instructions

    • Cut the apples in half and then you're going to core it.
    • Add some chocolate chips and the caramel.
    • Transfer this onto a baking sheet lined with parchment paper or a baking mat.
    • Bake until thoroughly cooked.
    • Optional: Add a little bit of chocolate chips and cinnamon-sugar mixture if you want it on the sweeter side.
    Leave a Comment
    Serving: 1servingCalories: 231kcalCarbohydrates: 41gProtein: 2gFat: 8gSaturated Fat: 7gPolyunsaturated Fat: 0.3gMonounsaturated Fat: 0.2gCholesterol: 1mgSodium: 36mgPotassium: 346mgFiber: 5gSugar: 29gVitamin A: 102IUVitamin C: 8mgCalcium: 85mgIron: 1mg

    Watch The Recipe Video!

    QR Code
    Did you make this recipe?Share it on instagram or tag @simplybakings or #simplybakings!

    5 Ingredients or Less, Desserts, Thanksgiving Desserts

    • « Go to Previous Page
    • Page 1
    • Interim pages omitted …
    • Page 9
    • Page 10
    • Page 11
    • Page 12
    • Page 13
    • Interim pages omitted …
    • Page 18
    • Go to Next Page »

    Primary Sidebar

    Lainey holding a muffin pan in her kitchen

    I'm Lainey, the driving force behind SimplyBakings.com, where I'm on a mission to redefine Filipino cooking through a plant-based lens.

    More about me →

    Popular

    • cookie dough bites
      Easiest Cookie Dough Bites Ever
    • delicious and soft oreo cheesecake cookies
      Soft Oreo Cheesecake Cookies
    • mini chocolate cupcakes in a white rectangular plate
      Delicious and Easy Mini Chocolate Cupcakes
    • Filipino Custard Cake drizzled with powdered sugar
      Filipino Custard Cake
    • no bake oreo cheesecake in a mason jar
      Foolproof 3 Ingredients No Bake Oreo Cheesecake
    • 3 brownies stacked
      Best and Easiest Brownies

    Footer

    Sign Up for My Email List

    Latest Posts

    • BEST Spicy Balsamic Tofu with Green Peas
    • How to Make Chili Garlic for Siomai
    • BEST Ginataang Papaya
    • Classic Monggo With Kalabasa

    Quick Links

    Kitchen Essentials

    About Lainey

    Contact

    • Facebook
    • Instagram
    • YouTube
    • Pinterest
    • TikTok

    © 2025 Auburn Digital Services LLC. All Rights Reserved | Privacy Policy

    Rate This Recipe

    Your vote:


    A rating is required
    A name is required
    An email is required