

• Skip to primary navigation
  • Skip to main content
  • Skip to primary sidebar
Simply Bakings logo
  • Home
  • Recipes Index
  • Filipino Recipes
  • About Me
  • Nav Social Menu

menu icon
go to homepage
search icon
Homepage link
  • Recipes
  • Filipino Recipes
  • About Me
    • Facebook
    • Instagram
    • Pinterest
    • YouTube
  • ×

    Chocolate Filled Croissant

    Chocolate Filled Croissant

    Nov 20, 2016 · 1 Comment

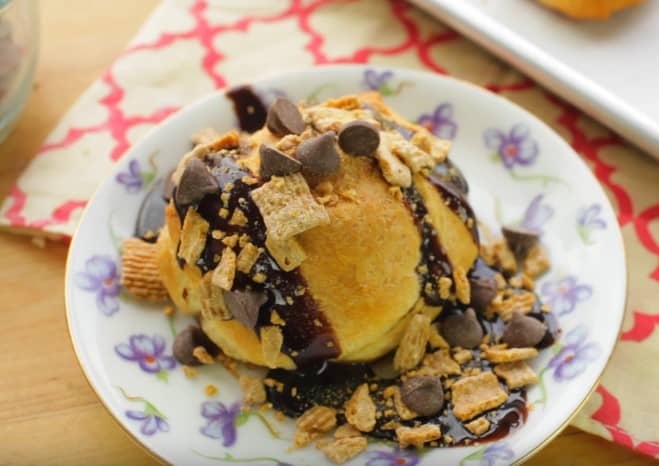
    A serving of Chocolate Filled Croissant

    This quick and easy Chocolate Filled Croissants is made with crescent rolls and melted chocolate. No bread flour, butter, or instant yeast necessary. It's perfect for first-time bakers who crave something sweet. This is the best shortcut version of the recipe you need!

    Get your pastry sheet ready for my Vanilla Donuts and Cinnamon Roll bites, too!

    Chocolate Filled Croissant served on the table
    [feast_advanced_jump_to]

    Why You’ll Love This Recipe

    This puff pastry recipe is beginner-friendly and needs only a few simple dry ingredients. Chocolate croissants are great for busy days. We don't always have the time to deal with croissant dough and stand mixer recipes.

    This chocolate croissant recipe can be adapted to fit dairy-free diets. Just swap the chocolate chips with dairy-free chocolate. Chocolate batons also work for a traditional pain au chocolat style. Using dark chocolate adds a richer flavor and contains antioxidants that help support heart health.

    People bake it for family, friends, or just for themselves. These easy chocolate croissants bring a warm and satisfying sensation every time. I promise you, you can find it more delicious than store-bought puff pastry!

    Ingredients

    Listed below are all the ingredients you will need:

    • Golden Grahams cereal
    • Chocolate chips
    • Hot fudge sauce
    • Large marshmallows
    • Refrigerated crescent rolls

    See recipe card for quantities.

    All ingredients for Chocolate Filled Croissant recipe

    Instructions

    1. Preheat the oven to 375°F (190°C). Line a baking sheet with parchment paper.

    2. Unroll the crescent dough and separate into individual triangles.

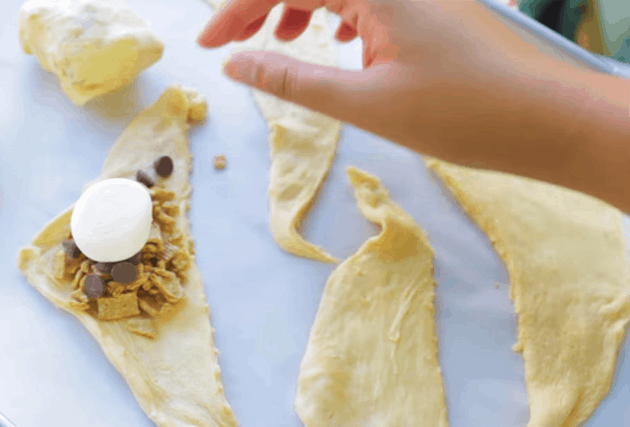
    3. On the wide end of each triangle, add a spoonful of crushed graham cereal, a few chocolate chips, and one marshmallow.

    Assembling all ingredients for the croissants

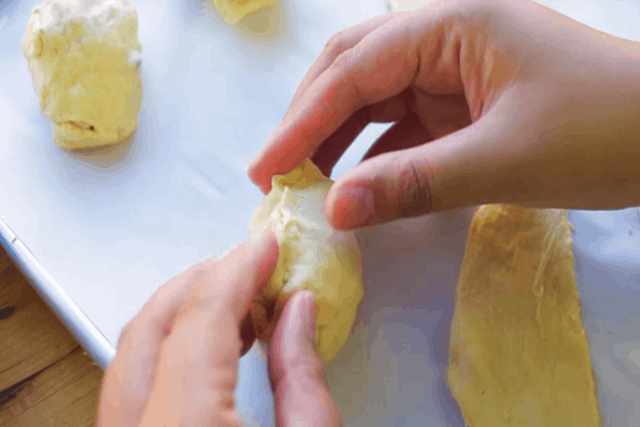
    4. Roll tightly, tucking in the sides and edges well to prevent any filling from leaking during baking.

    Sealing up the croissants on the baking tray

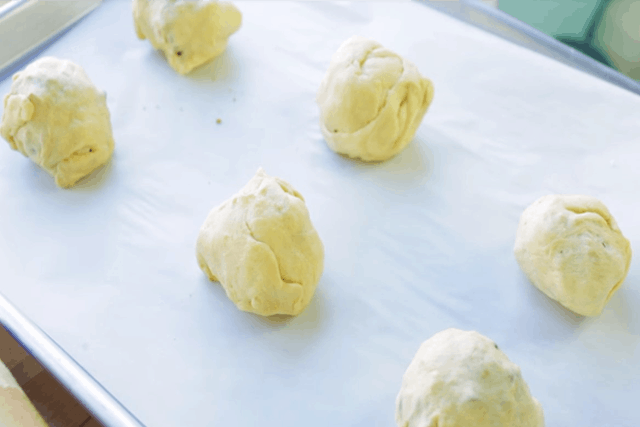
    5. Arrange the croissants on the prepared baking sheet.

    Ready to bake Chocolate Filled Croissants

    6. Bake for 12–15 minutes, or until golden brown and puffed up.

    7. Remove from the oven and let cool slightly.

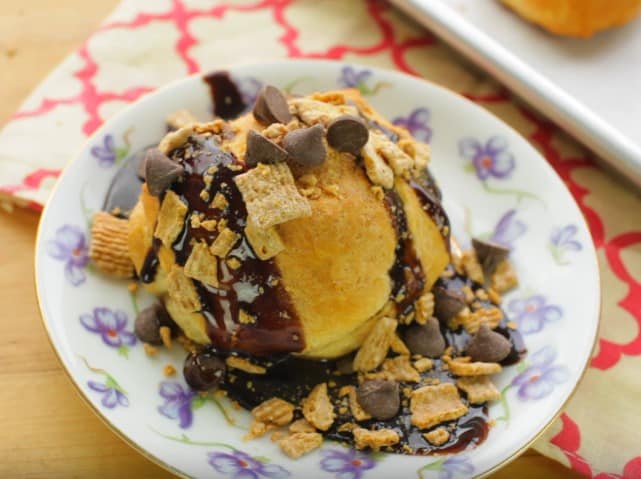
    8. Drizzle with hot fudge sauce and sprinkle more crushed cereal and chocolate chips on top before serving!

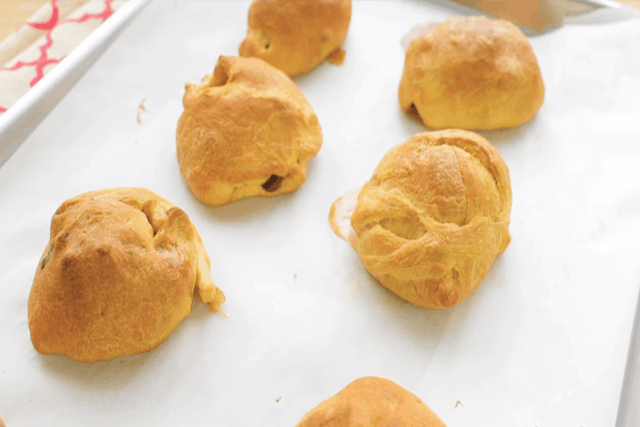
    Freshly baked Chocolate Filled Croissants on a tray

    Substitutions & Variations

    • Ingredient Swap
      Swap chocolate chips with Nutella, peanut butter, almond paste, or caramel.
    • Variation
      Wrap cheese or ham inside for a savory version.
    • Mistake to Avoid
      If you want to use egg wash, you can. Just avoid brushing too much.
    • Storage Tips
      • Room Temp: Wrap leftover dough in plastic wrap. Store in an airtight container for up to 2 days.
      • Reheat: Warm in a toaster oven or microwave for a few seconds. Place them on a sheet of parchment paper on a mat to keep bottoms crisp.
      • Freezer-Friendly: Freeze unbaked croissants on a piece of parchment. Bake directly from frozen, adding 3–5 minutes.
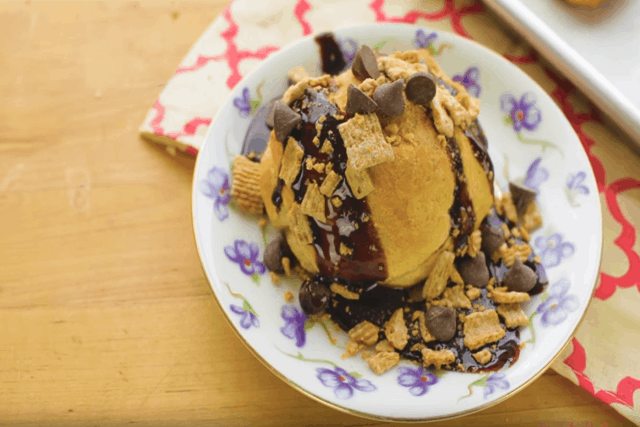
    Plate with a serving of Chocolate Filled Croissant

    FAQs

    Can I use sprinkle it with bread crumbs instead of Graham crackers?

    Yes, you can replace it if you don't have Graham crackers available.

    Can I assemble this a day before baking?

    For sure, you can. It would save you a lot of time and you have less hassle on the day of the occasion itself. Just chill it and pop it in the oven when you need it.

    Can I make these ahead of time?

    Yes, assemble them and store in the fridge for a few hours before baking. Bake fresh for the best texture.

    No ratings yet
    Print Pin Recipe

    Chocolate Filled Croissant

    Get a dessert twist on the usual croissants! This Chocolate Filled Croissant recipe brings you the gooey, crunchy, and perfectly golden bread. It's a fun treat that comes together in minutes!
    Prep Time10 minutes mins
    Cook Time15 minutes mins
    Total Time25 minutes mins
    Course: Bread, Dessert
    Cuisine: French
    Servings: 8 pieces
    Calories: 271kcal
    Author: Lainey
    Prevent your screen from going dark

    Ingredients

    • 1 ½ cups Golden Grahams cereal crushed
    • 1 cup chocolate chips
    • ⅓ cup hot fudge sauce
    • 8 large marshmallows
    • 1 8-count package refrigerated crescent rolls

    Instructions

    • Preheat the oven to 375°F (190°C). Line a baking sheet with parchment paper.
    • Unroll the crescent dough and separate into individual triangles.
    • On the wide end of each triangle, add a spoonful of crushed graham cereal, a few chocolate chips, and one marshmallow.
    • Roll tightly, tucking in the sides and edges well to prevent any filling from leaking during baking.
    • Arrange the croissants on the prepared baking sheet.
    • Bake for 12–15 minutes, or until golden brown and puffed up.
    • Remove from the oven and let cool slightly.
    • Drizzle with hot fudge sauce and sprinkle more crushed cereal and chocolate chips on top before serving.
    Leave a Comment
    Serving: 1gCalories: 271kcalCarbohydrates: 49gProtein: 2gFat: 8gSaturated Fat: 5gPolyunsaturated Fat: 0.3gMonounsaturated Fat: 1gCholesterol: 0.1mgSodium: 130mgPotassium: 110mgFiber: 1gSugar: 33gVitamin A: 94IUVitamin C: 1mgCalcium: 23mgIron: 2mg
    QR Code
    Did you make this recipe?Share it on instagram or tag @simplybakings or #simplybakings!

    You Might Also Like:

    More chocolate dishes to try:

    • Chocolate Flourless Cake (5 Ingredients Only)
    • Homemade Twix Candy Bar
    • 4 Ingredient Oreo Bark

    Recipes for Every Moment

    Kids home from school and asking for a snack? This Chocolate Filled Croissant is fast and fun - guaranteed to make them smile!


    5 Ingredients or Less, Bread, Breakfast & Brunch, Pastry

    Pretzel Cake for Beginners

    Nov 15, 2016 · 7 Comments

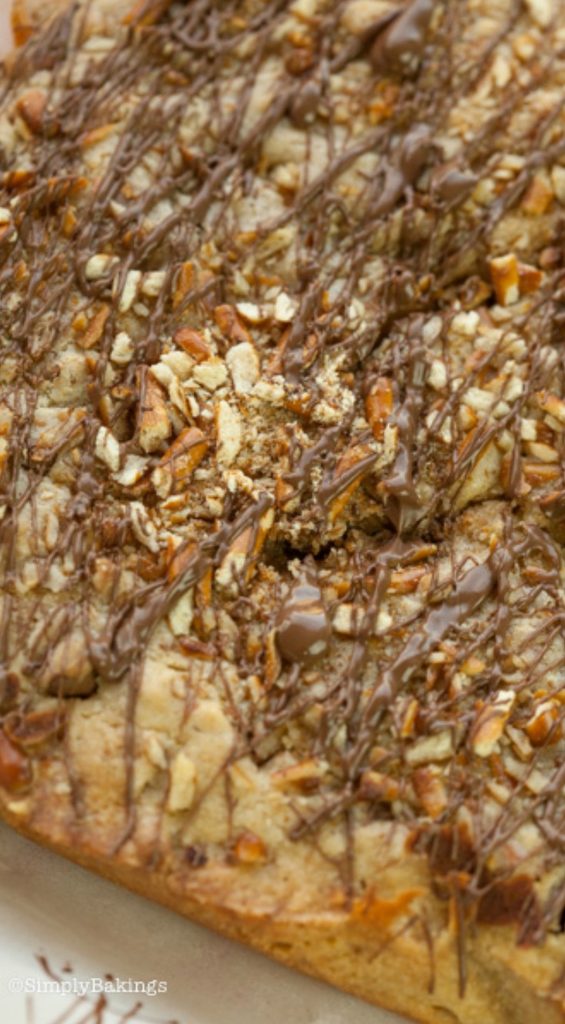
    easy pretzel cake

    Hey, guys! Thanksgiving is really drawing fast, and I am really EXCITED to see different kinds of desserts all over the Internet. Honestly, I want to try making them all, but oh, I just can't have them all 🙂 For this week, I'm gonna share with you this unique taste of Pretzel Cake for beginners!

    So I chose this recipe to share with you that's perfect for Thanksgiving. This cake will satisfy your craving of the sweet and savory taste. A very good flavor combo that is not at all boring because of the sweet and a bit of saltiness in it. Enjoy making this Pretzel Cake for Beginners and you will get a "Wow!" for it! Happy baking!

    Pretzel cake for beginners

    Tips and Tricks for Making This Pretzel Cake for Beginners Recipe: 

    • Make the top of your pie level by using a spoon or a spatula.
    • To know if your Pretzel cake is done baking, insert a toothpick in the center. If the toothpick comes out clean, then it is baked all the way through.
    • When making the batter, do not overmix. It makes your cake rubbery if you do so.

    How to Make this Pretzel Cake for Beginners Recipe:

    Gather the ingredients for this Pretzel Cake for Beginners.

    Here are what you will need for this recipe:

    •  unsalted butter, melted
    • granulated sugar
    • brown sugar
    • vanilla extract
    • eggs
    • all-purpose flour**
    • alt
    • crushed pretzels
    • chocolate chips

    THE TOPPING

    • vegetable oil
    • chocolate chips
    • rushed pretzels

    Once the ingredients are all ready, let's begin!

    Preheat oven to 350 F and line an 8x8 inch baking with parchment paper and coat with oil or cooking spray.

    slicing the pretzel cake for beginners

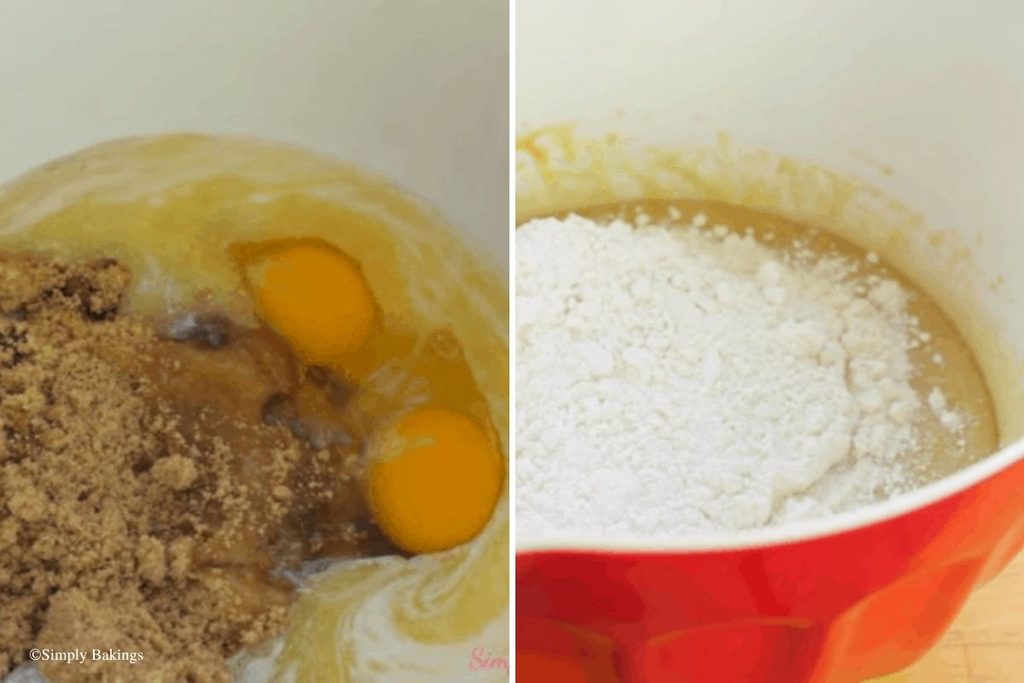
    In a large bowl, add the butter, granulated sugar, brown sugar, vanilla extract, eggs, and mix until light and fluffy:

    adding eggs, brown sugar, and milk to a bowl for pretzel cake recipe

    Next add the flour, salt and mix until combined:

    mixing flour and salt for pretzel cake recipe

    Add the ½ cup crushed pretzels, ½ cup chocolate chips and mix until combined:

    adding crushed pretzels and mini chocolate chips to the pretzel cake batter

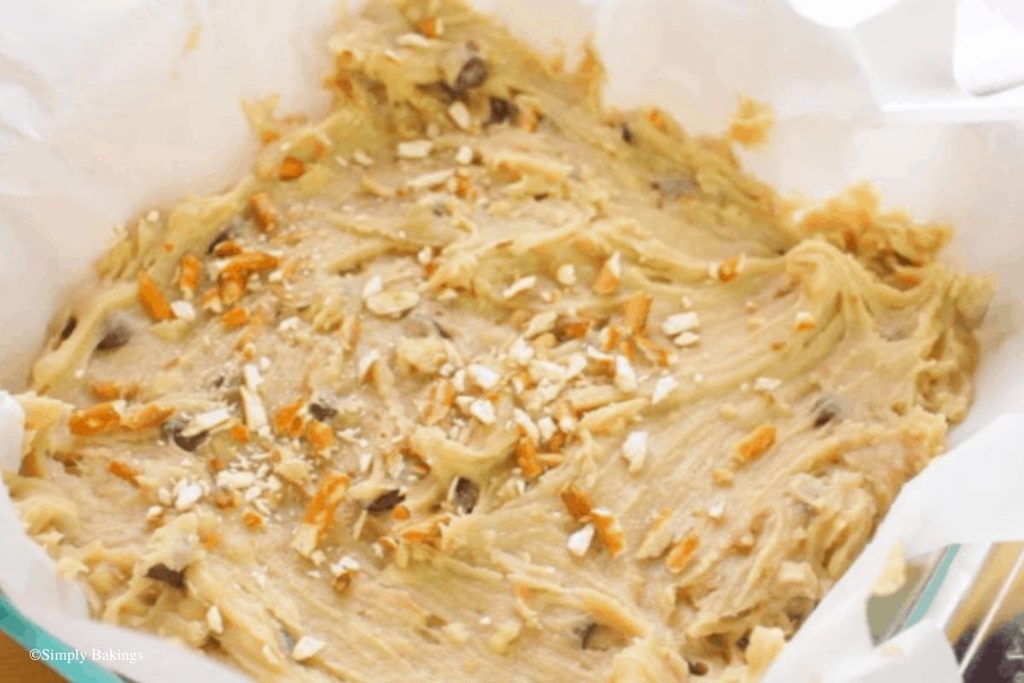
    Pour the batter into the baking pan that you have lined with parchment paper and bake for 35-45 minutes:

    ready to bake pretzel cake in a baking dish lined with parchment paper

    To make the topping, mix the vegetable oil and chocolate chips and microwave for about 20-30 seconds. Using a spoon mix until melted:

    melted chocolate with vegetable oil for drizzling

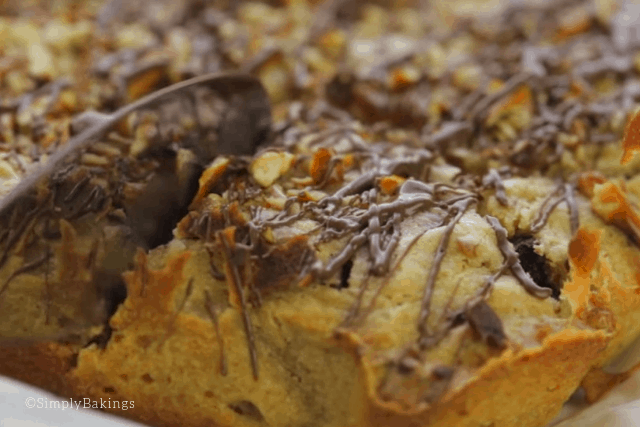
    Drizzle over the cake and then garnish with the crushed pretzels:

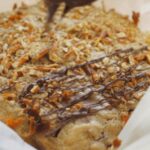
    drizzling melted chocolate over pretzel cake

    Doesn't that look delicious?!? Feel free to slice in and have your piece of cake 🙂

    Pretzel cake for beginners

    Frequently Asked Questions for the Pretzel Cake for Beginners Recipe:

    Q: How many servings would this recipe do?

    A: This delicious and easy Pretzel cake for beginners recipe could make 12-16 slices, depending on how big your slices are.

    Q: Can I use any kind of chocolate for the drizzle?

    A: Yes you can. Any kind or level of chocolate sweetness will do for the Pretzel cake drizzle.

    easy pretzel cake
    No ratings yet
    Print Pin Recipe

    Pretzel Cake for Beginners

    A delicious and easy to make cake perfect for parties and gatherings - Pretzel cake for beginners!
    Author: Lainey
    Prevent your screen from going dark

    Ingredients

    • 1 cup unsalted butter melted
    • ½ cup granulated sugar
    • 1 cup brown sugar
    • 1 ½ teaspoons vanilla extract
    • 2 eggs
    • 2 cups all purpose flour**
    • 1 teaspoon salt
    • ½ cup crushed pretzels
    • ½ cup chocolate chips
    • THE TOPPING
    • 2 teaspoons vegetable oil
    • ½ cup chocolate chips
    • ½ cup crushed pretzels

    Instructions

    • Preheat oven to 350 F and line a 8x8 inch baking with parchment paper and coat with oil or cooking spray.
    • In a large bowl, add the butter, granulated sugar, brown sugar, vanilla extract, eggs and mix until light and fluffy. Next add the flour, salt and mix until combined.
    • Add the ½ cup crushed pretzels, ½ cup chocolate chips and mix until combined.
    • Pour the batter into the baking pan and bake for 35-45 minutes. Insert toothpick in the center to test if it's baked all the way through.
    • To make the topping, mix the vegetable oil and chocolate chips and microwave for about 20-30 seconds. Using a spoon mix until melted.
    • Drizzle over the cake and then garnish with the crushed pretzels.
    Leave a Comment

    Notes

    **it's 2 cups of all purpose flour for the recipe. I voiced the wrong measurements. 🙂

    Watch The Recipe Video!

    QR Code
    Did you make this recipe?Share it on instagram or tag @simplybakings or #simplybakings!

    NEVER MISS A RECIPE!

    PINTEREST / FACEBOOK / INSTAGRAM / TWITTER

    If you’ve tried this or any other of my recipes, don’t forget to rate the recipe and to leave me a comment. I love hearing from you!

    Cake, Desserts

    Snickerdoodle Apple Cookies

    Nov 14, 2016 · 6 Comments

    snickerdoodle-apple-cookies1

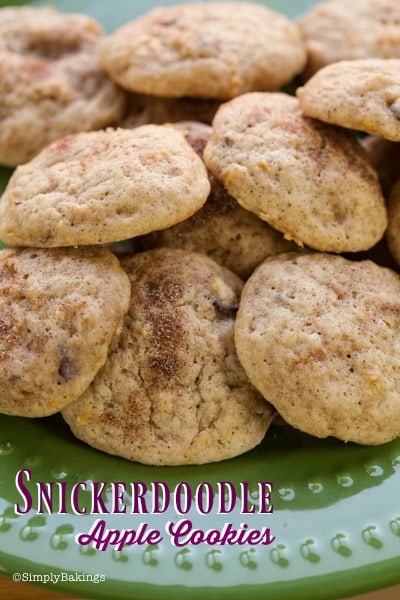
    These Snickerdoodles Apple Cookies have tons of cinnamon flavor, a chewy center, and slightly crisp golden edges. Adding the shredded apples gives the cookie a fall flavor without losing the classic Snickerdoodle taste.

    Adding more snickerdoodle dessert recipes to your belt? Bake my Snickerdoodle Candy Corn Cookies, DAIRY FREE Snickerdoodle Cookies, and Snickerdoodle Eggnog Cookies.

    apple snickerdoodle cookies on a green plate
    [feast_advanced_jump_to]

    Substitutions

    • To make these cookies gluten-free, substitute the all-purpose flour with a 1:1 gluten-free flour blend.
    • Swap the butter for a plant-based alternative and use flax eggs (1 tablespoon flaxseed meal + 3 tablespoons water for each egg) to make the cookies vegan.
    • Use Granny Smith apples or Honeycrisp apples if you want to add a slightly tart flavor, which can be a nice contrast to the sweet dough.
    • Replace the shredded apple with a few tablespoons of apple butter to intensify the apple flavor and make a smoother dough.

    Variations

    • Add a pinch of nutmeg or allspice for an even cozier flavor. You can also mix in some chopped nuts, like pecans or walnuts, for added texture and flavor.
    • You can reduce the sugar in the dough or the cinnamon-sugar coating for a less sweet version. Likewise, if you love cinnamon, feel free to increase the amount in both the dough and the coating!
    • Try to experiment and add in white chocolate chips!

    Storage

    • Keep the cookies in an airtight container at room temperature for up to 4 days. This will help maintain their soft and chewy texture.
    • If you want to save some for later, place the cooled cookies in a freezer-safe bag or container in the fridge. They’ll stay fresh for up to 3 months. Simply thaw them at room temperature or warm them in the microwave for a few seconds before enjoying.

    Top Tips

    • If you do not have the cream of tartar, you can replace it with 2 teaspoons of baking powder.
    • For a chewier texture, chill the dough for at least 30 minutes before baking. This helps the cookies hold their shape and keeps them from spreading too much.
    • Sift, sift, sift! This applies to all dry ingredients to avoid lumps in your cookie dough.
    • To avoid sticking, use a silicone baking mat instead of parchment paper. It's reusable and prevents cookies from sticking to the pan.
    • For a fun presentation, press an indention into each cookie before baking, which you can fill with a small amount of apple pie filling.

    Ingredients

    Listed below are all the ingredients you will need:

    • salt
    • cinnamon
    • cream of tartar
    • baking soda
    • all purpose flour
    • unsalted butter
    • granulated sugar
    • eggs
    • vanilla extract
    • red apple
    • sugar
    • cinnamon

    Instructions

    First, preheat the oven to 350 F. Line the baking sheet with parchment paper or a baking mat, and set aside.

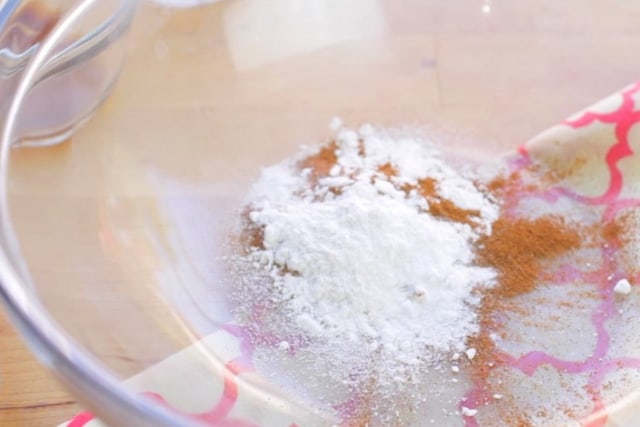
    In a medium bowl, whisk together the salt, cinnamon, cream of tartar, baking soda, and all-purpose flour and set aside:

    cinnamon powder, salt, cream of tartar, baking soda in a clear mixing bowl for snickerdoodle apple recipe

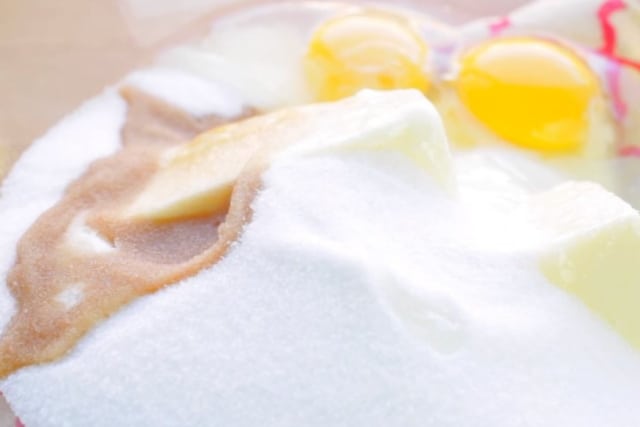
    In a large bowl, add the butter, sugar, eggs, and vanilla extract and beat together until light and fluffy:

    butter, vanilla extract, white granulated sugar and eggs in a mixing bowl for  apple snickerdoodle cookies recipe

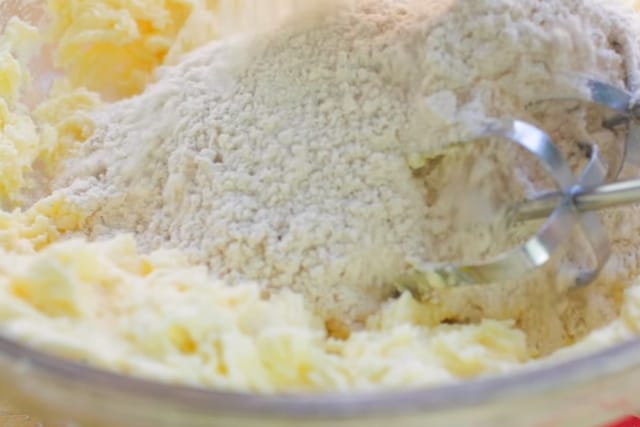
    Gradually add the dry ingredients to the wet ingredients and mix until combined. For easy mixing, use a hand or stand mixer:

    flour mixture mixed with a hand mixer

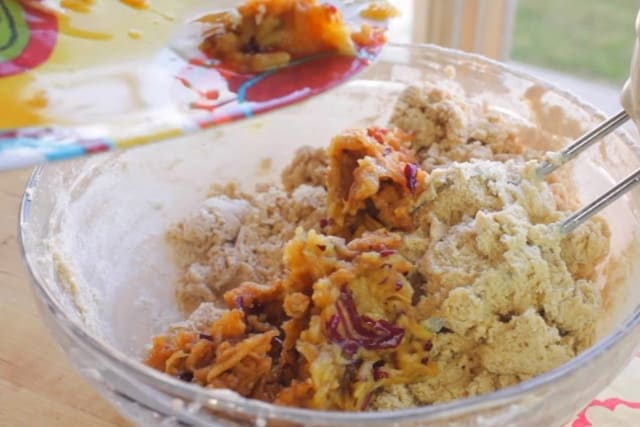
    Add the shredded apples and continue mixing:

    mixing red apples to the cookie dough mixture on a clear bowl

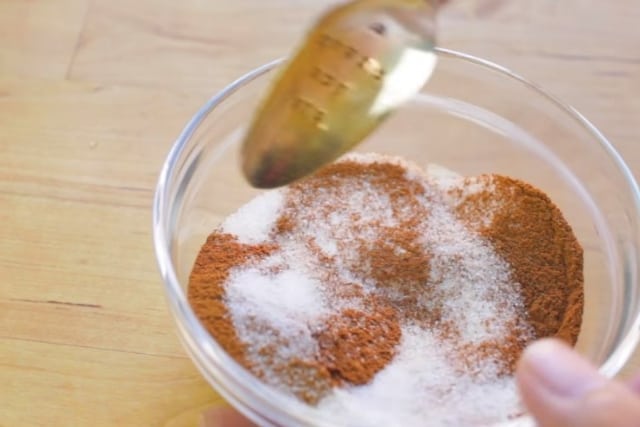
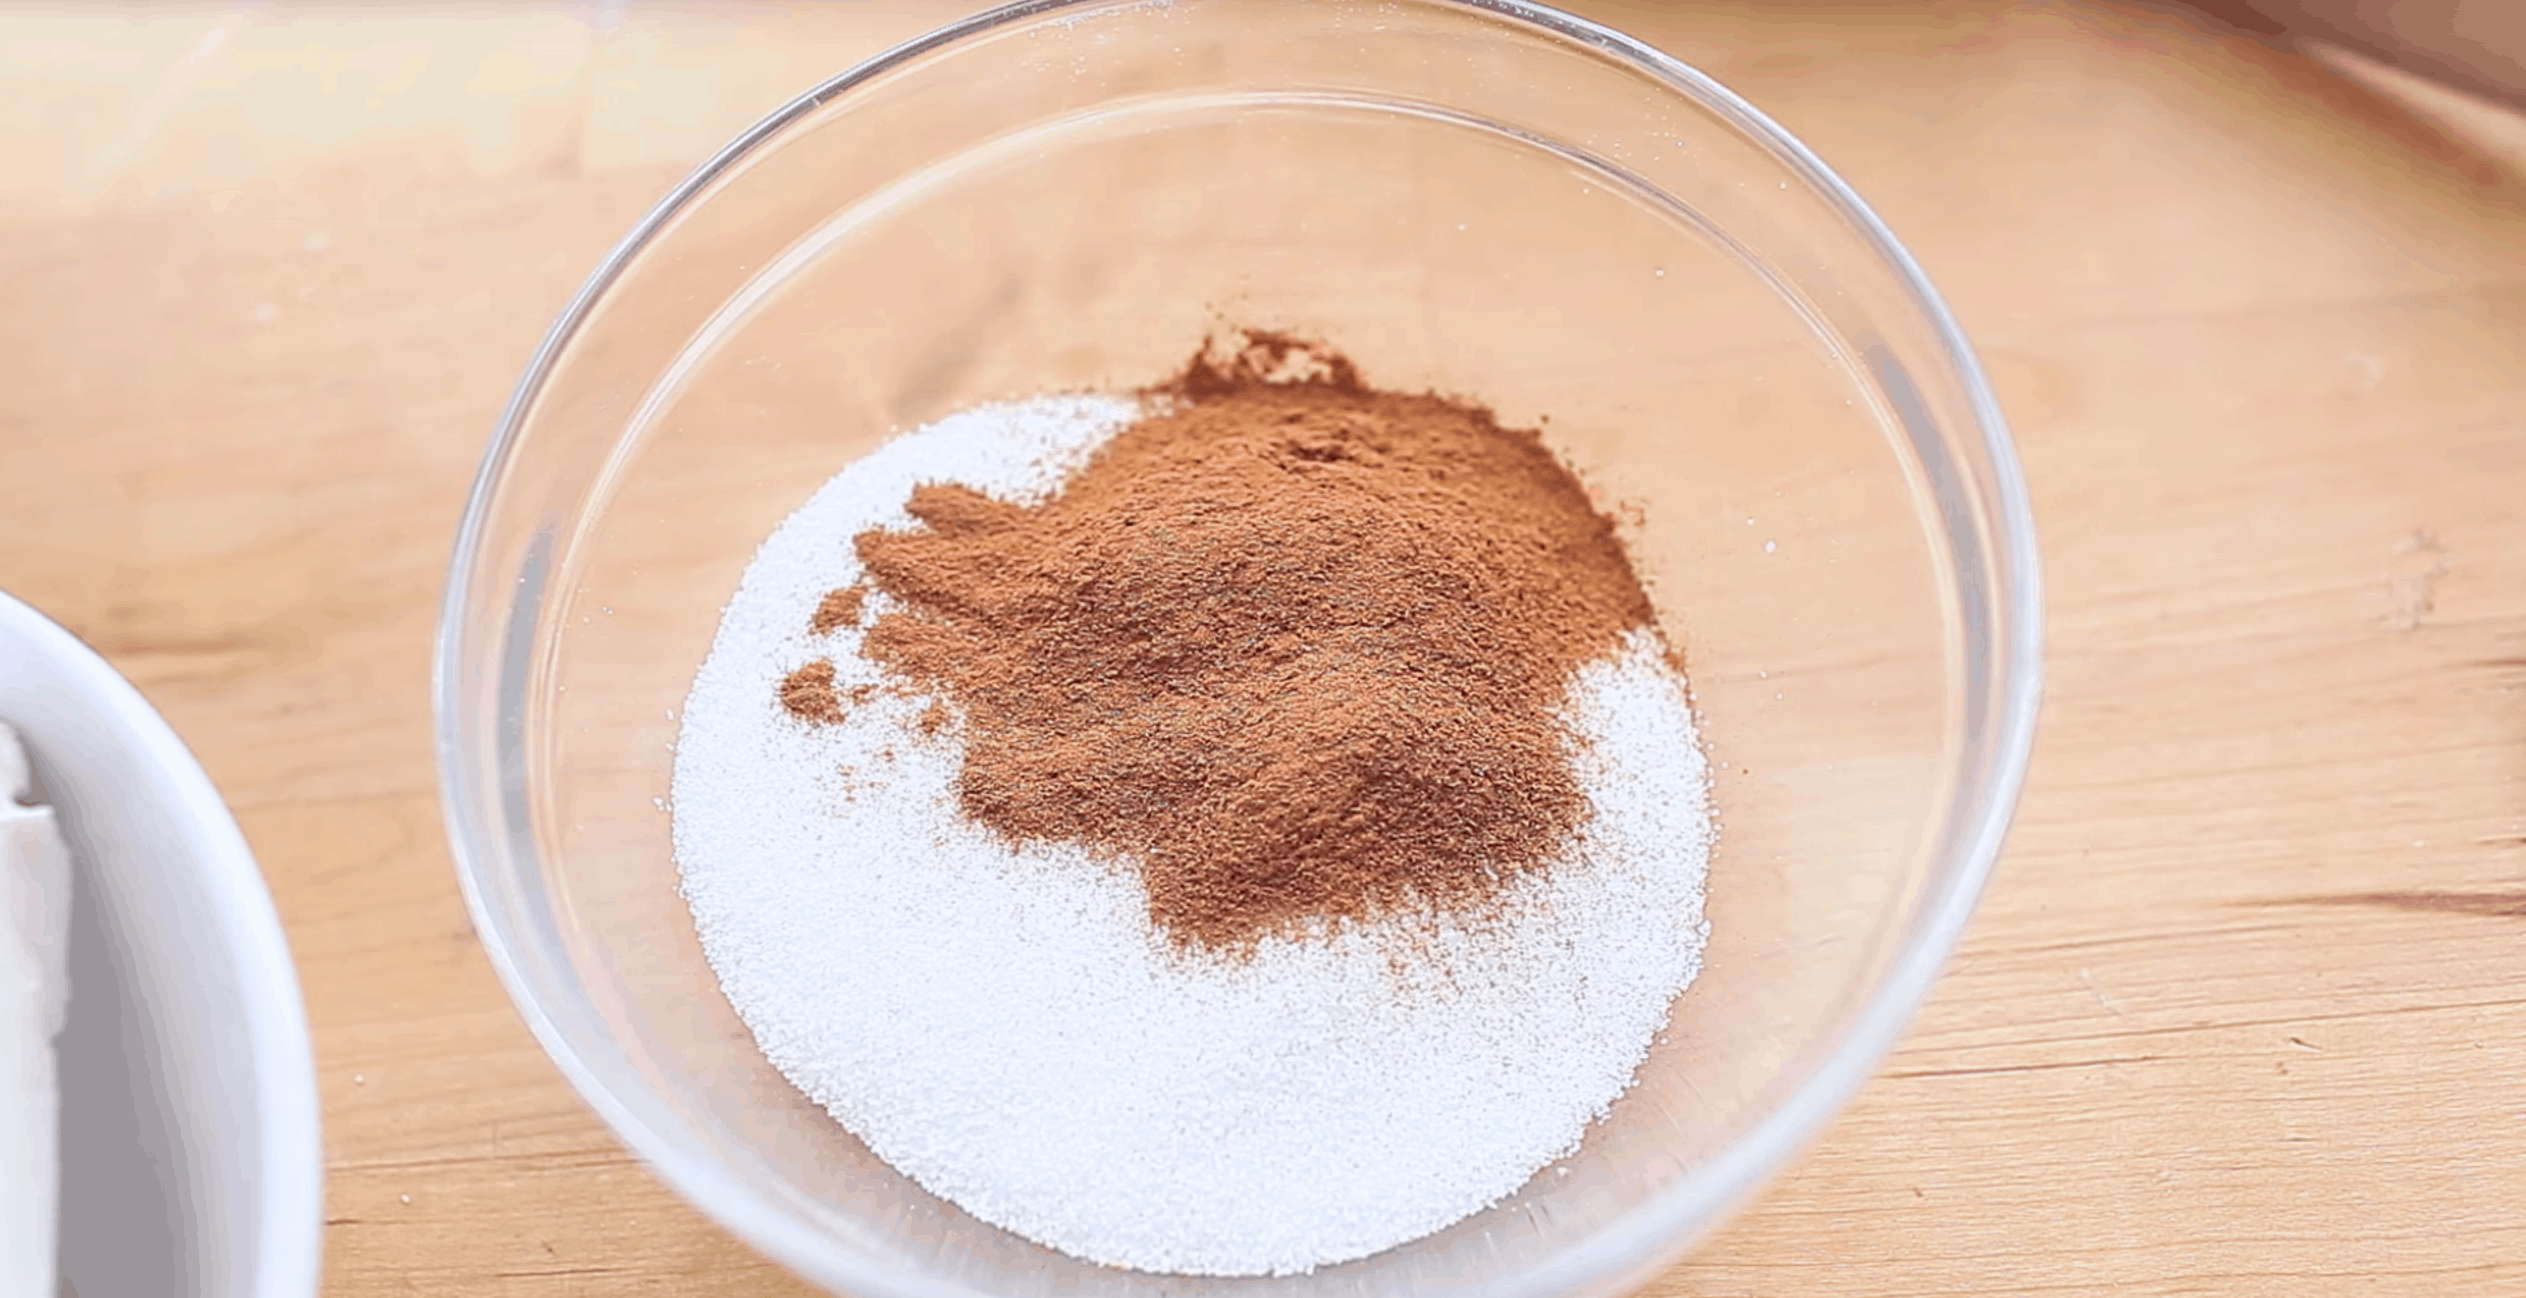
    Mix the ¼ cup sugar and cinnamon together:

    mixing cinnamon and white granulated sugar in a small mixing bowl

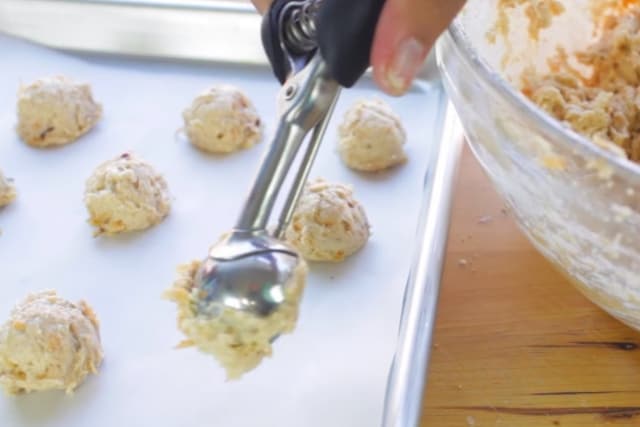
    Using a cookie scooper, scoop the cookies onto the cookie sheet:

    scooping apple snickerdoodle cookie dough onto a baking sheet using an ice cream scoop

    Sprinkle the cinnamon-sugar mixture onto the cookie dough balls:

    putting cinnamon-sugar mixture over snickerdoodle apple cookie dough before baking

    Bake for 9-12 minutes and then transfer it to the cookie rack to cool completely:

    freshly baked snickerdoodle apple cookies on a baking sheet

    Yum! can you smell the sweet aroma of cinnamon?!? Make this at home and feel free to tag me in your photos!

    snickerdoodle apple cookies on a green plate

    FAQ

    Why do they call them snickerdoodles?

    Snickerdoodles get their name from a German word "Schneckennudeln," which means a type of cinnamon-sugar pastry.

    Why do my snickerdoodles come out puffy?

    Snickerdoodles can turn out puffy if there's too much flour or if the dough hasn't been chilled before baking.

    Why are my snickerdoodles so flat?

    Snickerdoodles may turn out flat if there's not enough flour, or if the butter is too warm when you mix the dough.

    More cookie recipes below:

    • Cinnabon Cookies
    • Nutella Cookies
    • Fruity Pebble Marshmallow Cookies
    • 3 Ingredient Macaroon Cookies
    tasty and chewy apple snickerdoodle cookies
    5 from 1 vote
    Print Pin Recipe

    Snickerdoodle Apple Cookies

    Try Snickerdoodle Apple Cookies! They’re soft and chewy, filled with warm cinnamon, sweet sugar, and fresh shredded apples. These tasty cookies are great for any occasion. Bake some today and enjoy a delicious treat!
    Prep Time15 minutes mins
    Bake Time12 minutes mins
    Total Time27 minutes mins
    Course: Cookies
    Servings: 20 cookies
    Calories: 192kcal
    Prevent your screen from going dark

    Ingredients

    • 1 teaspoon salt
    • 2 teaspoons cinnamon
    • 1 teaspoon cream of tartar
    • 1 teaspoon baking soda
    • 3 cups all purpose flour
    • 1 cup 2 sticks unsalted butter, softened
    • 1 ½ cups granulated sugar
    • 2 eggs
    • 2 teaspoons vanilla extract
    • 1 large red apple shredded
    • ¼ cup sugar
    • 2 teaspoons cinnamon

    Instructions

    • Preheat oven to 350 F. Line baking sheet with parchment paper or baking mat and set aside.
    • In a medium size bowl, whisk together the salt, cinnamon, cream of tartar, baking soda, all purpose flour. Set aside.
    • In a large bowl, add the butter, sugar, eggs, vanilla extract and beat together until light and fluffy.
    • Gradually add the dry ingredients into the wet ingredients and mix until combined. Add the shredded apples and continue mixing.
    • Mix the ¼ cup sugar and cinnamon together.
    • Using a cookie scooper, scoop the cookies onto the cookie sheet and then sprinkle the cinnamon sugar mixture onto the cookie dough.
    • Bake for 9-12 minutes and then transfer it to the cookie rack to cool completely.
    Leave a Comment
    Serving: 1cookieCalories: 192kcalCarbohydrates: 28gProtein: 2gFat: 8gSaturated Fat: 5gPolyunsaturated Fat: 0.4gMonounsaturated Fat: 2gTrans Fat: 0.3gCholesterol: 34mgSodium: 149mgPotassium: 55mgFiber: 1gSugar: 15gVitamin A: 261IUVitamin C: 0.4mgCalcium: 11mgIron: 1mg

    Watch The Recipe Video!

    QR Code
    Did you make this recipe?Share it on instagram or tag @simplybakings or #simplybakings!

    This Snickerdoodle Apple Cookie recipe is one of my best ideas yet! Why, you may ask? It's because adding apples to the classic snickerdoodle cookies gave the cookies the fall-like flavor I was looking for!  You gotta try it, it's delicious. (I know I always say that, but it's true!)

    I'm thinking since Snickerdoodle Apple Cookies was such a hit, I'm going to try other flavors using the base recipe of a snickerdoodle cookie. Who's with me?

    If you guys do try this recipe, make sure to tag me on IG or FB, I absolutely love seeing all your recreations of my recipes!

    Christmas Desserts, Cookies, Thanksgiving Desserts

    Easy Strawberry Shortcake Cookies

    Nov 7, 2016 · 6 Comments

    strawberry cookies

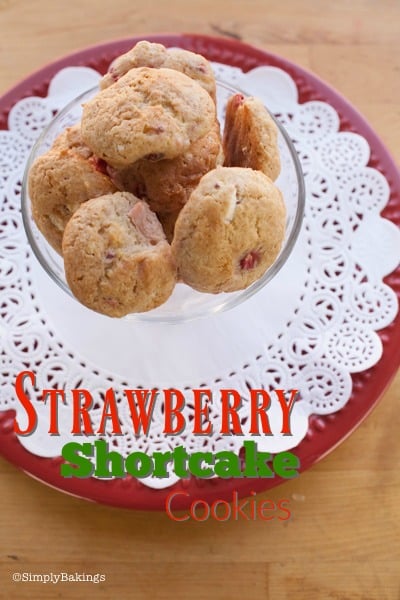
    Learn how to make this Easy Strawberry Shortcake Cookies made with fresh strawberries and cream cheese!  It's filled with yummy goodness and is the perfect addition to your next summer barbecue. 

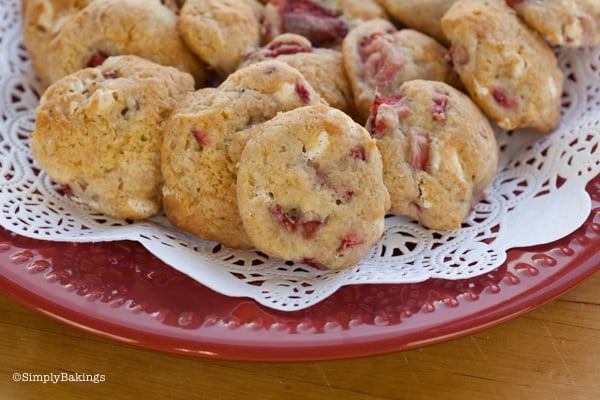
    Easy Strawberry Shortcake Cookies on a red plate

    Hi Simply Bakers, welcome back!

    I hope you guys enjoy this delicious cookie recipe- it's soft and chewy and definitely on the sweet side.  Let me know in the comments what kind of fruit cookie you want to see next!

    Tips and Procedures:

    • Coating the sliced strawberries with flour before adding it to the dough will prevent the sliced strawberries from sinking at the bottom of each cookie
    • Why do we need to squeeze lemon juice on the strawberry slices? This prevents the strawberries from discoloration because of the lemon's acidity
    • If you don't have flat baking sheets or baking pans, you can also use muffin tins in baking. Just make sure you spray it well with baking spray or oil your muffin pans generously
    • Place your cookie dough evenly on your baking sheets. This will also give them enough space from each cookie as they bake

    How to Make Easy Strawberry Shortcake Cookies:

    Listed below are all the ingredients you will need:

    • fresh strawberries
    • lemon juice
    • cream cheese
    • unsalted butter
    • vanilla extract
    • granulated sugar
    • egg
    • all purpose flour
    • baking powder
    • salt
    • white chocolate chips

    Preheat oven to 350F and line cookie sheets with parchment paper or a baking mat.

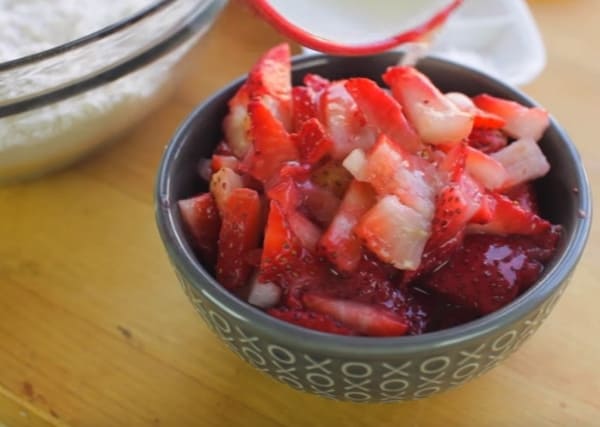
    Squeeze lemon juice over the chopped strawberries and set aside:

    pouring lemon juice on sliced strawberries for strawberry shortcake cookie recipe
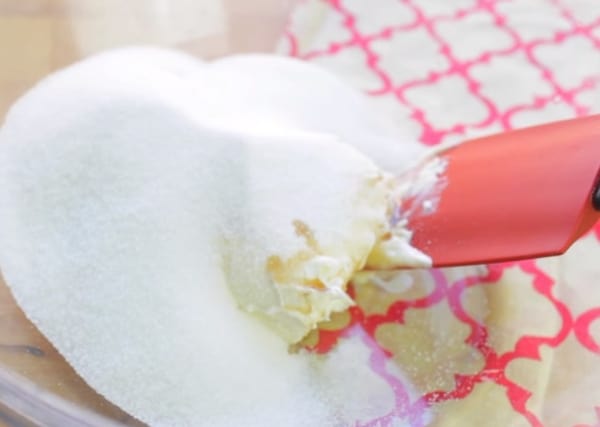
    granulated sugar, butter, vanilla extract, and red spatula in a bowl for strawberry shortcake cookie recipe

    In a large bowl, cream together the cream cheese, butter, vanilla extract, and granulated sugar:

    mixed ingredients for strawberry shortcake cookie recipe

    Mix ingredients thoroughly using a hand mixer until it becomes pasty and no lumps are visible:

    mixed ingredients with egg in a mixing bowl for strawberry shortcake cookie recipe

    Next, add egg and mix until well combined then set aside:

    wet ingredients mixed with flour in a mixing bowl for strawberry shortcake cookie recipe

    In a medium-size bowl, whisk the flour, baking powder, and salt. Gradually add the flour mixture to the wet mixture:

    strawberry shortcake cookie dough

    Mix until well combined:

    strawberry shortcake cookie dough with white chocolate

    Add white chocolate chips and continue mixing:

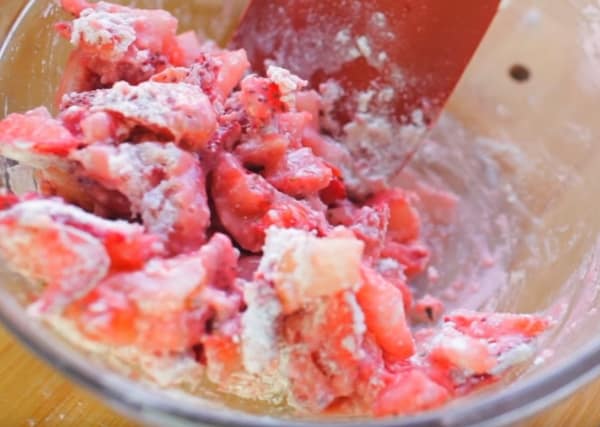
    In a small bowl, mix 2 tablespoons of flour with the strawberries:

    sliced strawberries coated with flour for strawberry shortcake cookie recipe

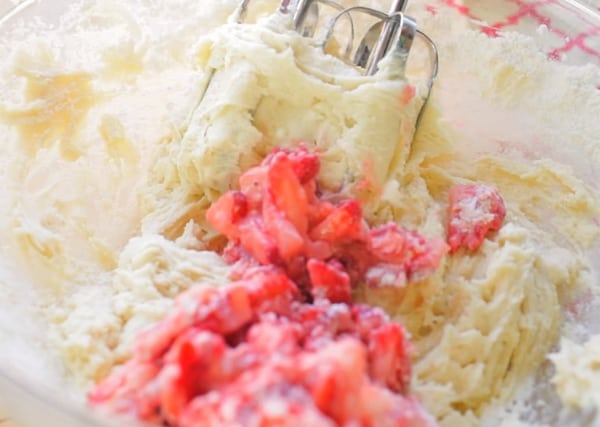
    Add to the cookie batter and mix until just combined:

    mixing strawberries and dough for strawberry shortcake cookie recipe

    Using a cookie scooper, scoop the cookies onto the prepared baking sheet and bake for 13-15 minutes or until golden brown:

    scooping strawberry shortcake cookie dough onto baking sheet

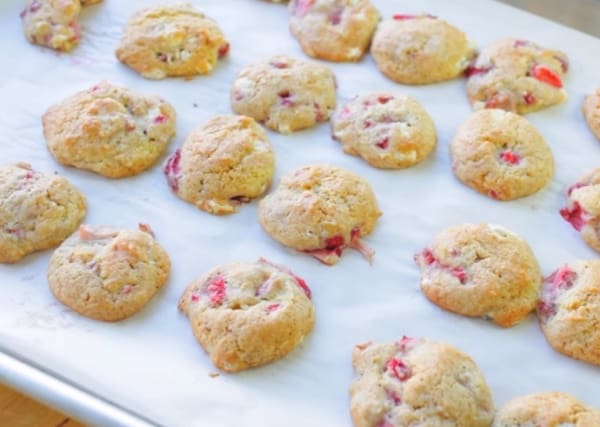
    IMMEDIATELY transfer cookies to a cookie rack and cool completely:

    baked strawberry shortcake cookies

    Look how pretty they are! The strawberry slices are visible in each cookie - the step where we coated the strawberry slices with flour helped a lot.

    You can even make these cookies prettier by adding a drizzle of chocolate ganache on top or just sprinkle it with sanding sugar and your strawberry shortcake cookies are off to the next level!

    strawberry shortbread cookies on a plate

    The full recipe is below, plus a step-by-step video if you’d like more guidance. Enjoy!


    Looking for more strawberry desserts?

    • No Bake Strawberry Float
    • Strawberry Poke Cake
    • White Chocolate Strawberry Pie
    • White Chocolate Strawberry Cupcakes

    Happy baking!

    strawberry cookies
    5 from 1 vote
    Print Pin Recipe

    Easy Strawberry Shortcake Cookies

    Prep Time15 minutes mins
    Cook Time15 minutes mins
    Total Time30 minutes mins
    Servings: 3 dozen
    Author: Lainey
    Prevent your screen from going dark

    Ingredients

    • ¾ cups chopped fresh strawberries
    • 2 tablespoons lemon juice
    • 4 oz cream cheese softened
    • ¼ cup unsalted butter softened
    • 1 teaspoon vanilla extract
    • ¾ cups granulated sugar
    • 1 egg
    • 1 ¼ cup all purpose flour
    • ½ teaspoon baking powder
    • ⅛ teaspoon salt
    • 6 oz white chocolate chips
    • 2 tablespoons all purpose flour

    Instructions

    • Preheat oven to 350F and line cookie sheets with parchment paper or baking mat.
    • Squeeze lemon juice over the chopped strawberries and set aside.
    • In a large bowl, cream together the cream cheese, butter, vanilla extract and granulated sugar. Next add egg and mix until well combined then set aside.
    • In a medium size bowl, whisk the flour, baking powder and salt. Gradually add the flour mixture to the wet mixture and mix until well combined.
    • Add white chocolate chips and continue mixing.
    • In a small bowl mix 2 tablespoons of flour with the strawberries, then add to the cookie batter and mix until just combined.
    • Using a cookie scooper, scoop the cookies onto the cookie sheet and bake for 13-15 minutes or until golden brown.
    • IMMEDIATELY transfer cookies to a cookie rack and cool completely.
    Leave a Comment

    Watch The Recipe Video!

    QR Code
    Did you make this recipe?Share it on instagram or tag @simplybakings or #simplybakings!

    Cookies

    Nutella Cheesecake No BAKE

    Nov 4, 2016 · 3 Comments

    nutella cheesecake no bake

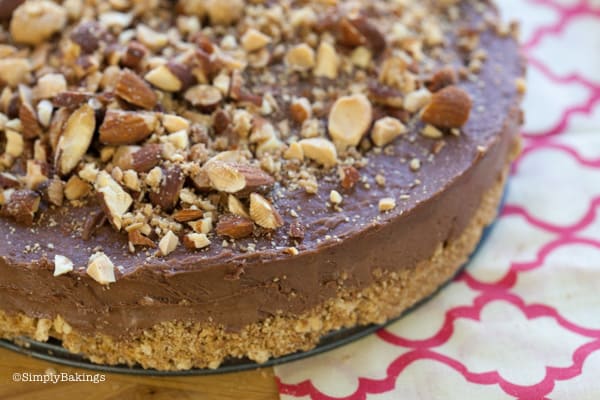
    A DELICIOUS Nutella Cheesecake NO BAKE recipe which will WOW all your guests at your next party! Why? Because it's NO BAKE, it has NUTELLA and its cheesecake! Enjoy!

    Nutella Cheesecake No BAKE

    For a step-by-step tutorial of this recipe you can watch my video tutorial below. SUBSCRIBE TO MY YOUTUBE CHANNEL and never miss a recipe! (It’s free!) and new video posts on FRIDAYS!

    nutella cheesecake no bake
    No ratings yet
    Print Pin Recipe

    Nutella Cheesecake No BAKE

    Prevent your screen from going dark

    Ingredients

    • CRUST
    • 15 graham crackers crushed
    • 1 tablespoon nutella
    • 6 tablespoons unsalted butter melted
    • FILLING
    • 2 8 oz packages of cream cheese, room temperature
    • ½ cup powdered sugar sited
    • 1 ½ cups nutella
    • ¾ cups chopped almonds
    Leave a Comment

    Watch The Recipe Video!

    QR Code
    Did you make this recipe?Share it on instagram or tag @simplybakings or #simplybakings!

    Cheesecake, Desserts

    4 Ingredient Puff Pastry Twists

    Oct 28, 2016 · 4 Comments

    4 ingredient desserts

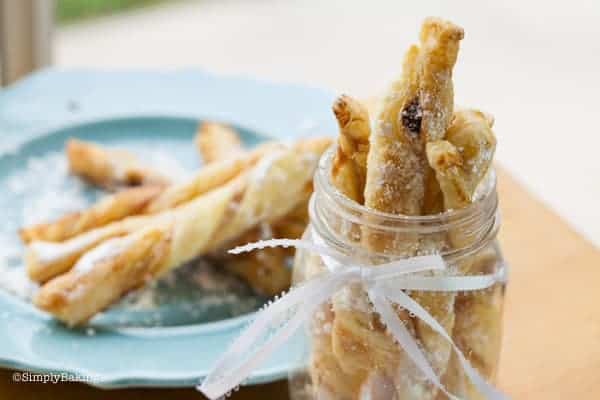
    These 4 Ingredient Puff Pastry Twists are flavored with chocolate and strawberry jam for a crowd-pleasing party dessert.  They are really easy to make and disappear in a flash!

    4 ingredient puff pastry twist sprinkled

    Tips and Tricks for Making This Puff Pastry Twists Recipe: 

    • When twisting the puff pastries, make sure to secure the ends so they won't loosen up while baking, which would result in a not-so-pretty twist.
    • Use or brush just the right amount of jam on your puff pastries. It tends to ooze out and be messy when you brush too much of the jam.

    How to Make Puff Pastry Twists:

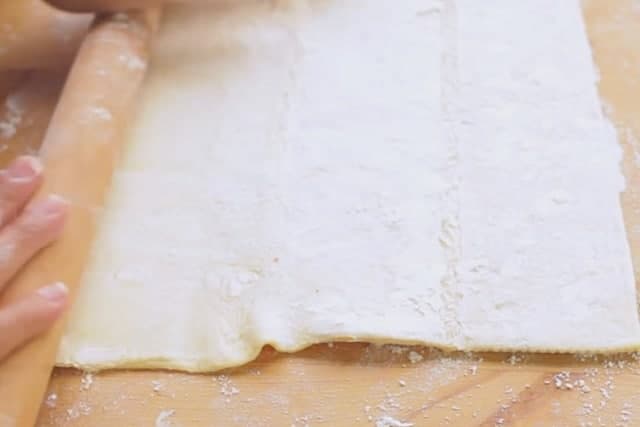
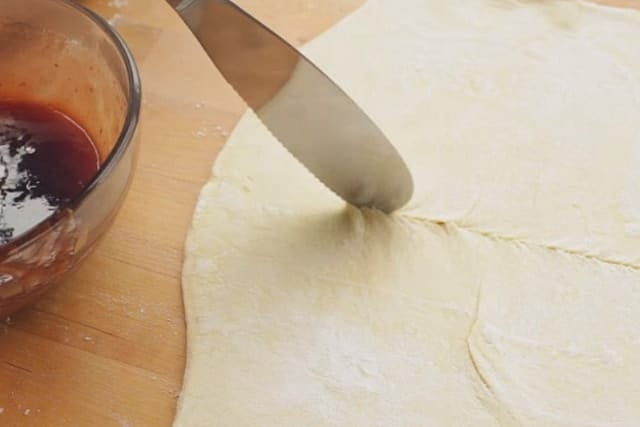
    Preheat oven to 400F and prepare baking sheets using parchment paper or a baking mat. Defrost puff pastry (takes about 40 minutes to an hour). Sprinkle flour on the table then roll out puff pastry to about 1-2 inches bigger:

    rolling pin on pastry puff

    Slice puff pastry in half, making a rectangle:

    cutting pastry puff and strawberry jam in bowl

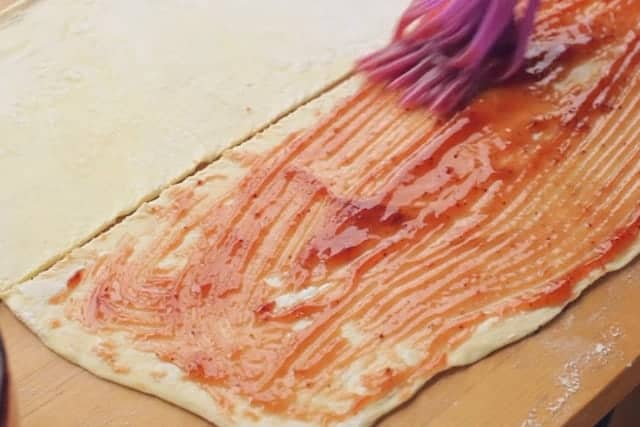
    Meanwhile, melt strawberry jam in the microwave for about 30-45 seconds to make it easier to spread on the puff pastry. Once ready, spread jam on one side using a pastry brush:

    strawberry jam brushed on pastry sheet

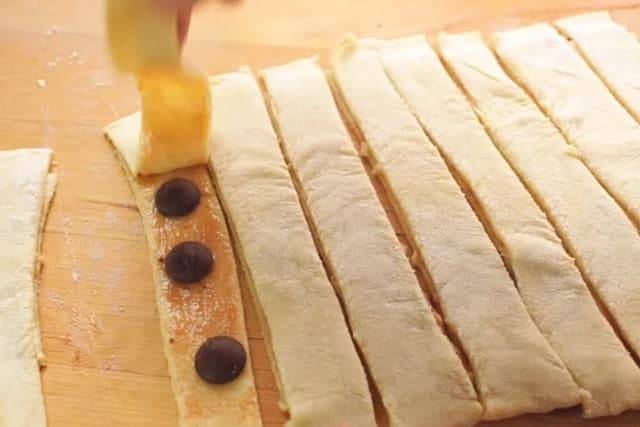
    If adding chocolate chips, add now, then cover with the other half of the puff pastry:

    chocolate chips and puff pastry

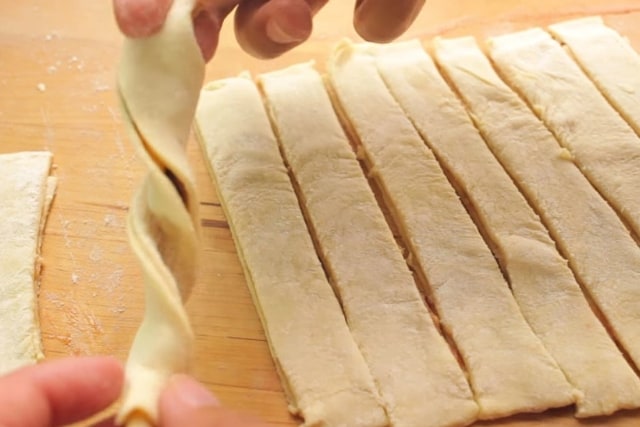
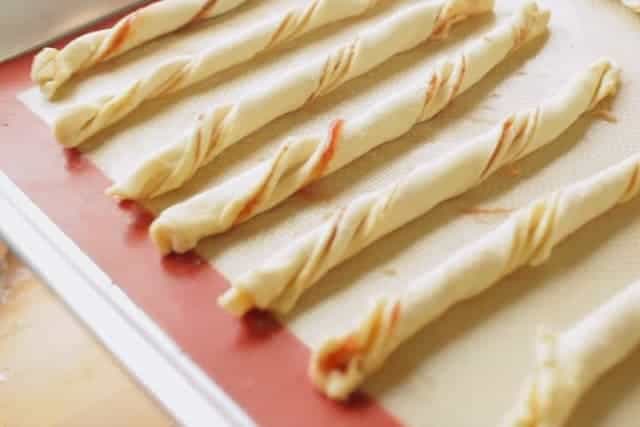
    After placing all the chocolate chips, twist the puff pastries to seal it:

    twisted pastry puffs

    Place on baking sheet and bake for 15 minutes:

    twisted pastry puffs on a baking mat

    Allow to cool for 2 minutes, and it should look like this:

    baked puff pastry twists

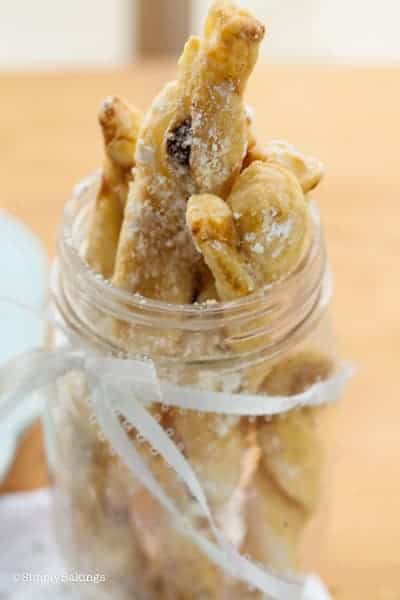
    If you have a sweet tooth like me, you can sprinkle powdered sugar:

    4 ingredient puff pastry twist sprinkled with powdered sugar

    I'm such a visual learner and need videos and sometimes pictures to learn how to make a recipe.  Please enjoy the video and don't forget to share with a friend who loves puff pastry recipes! Happy Baking!


    Frequently Asked Questions for Puff Pastry Twists Recipe:

    Q: Can I make these ahead and freeze it before baking?

    A: Yes, you can. Doing so will save you a lot of time. Just pop them in the oven when you are about to eat them.

    Q: I want to shape them in circles instead of twists. Can I use a cookie cutter to shape the puff pastry?

    A: Using a cookie cutter is the best way to cut it in circles. Do the same steps like brushing jam and adding in chocolate chips then secure the edges tightly before popping them in the oven.

    Q: How many servings does this recipe make?

    A: When I baked these, it came up to 15 puff pastry twists. You can serve about two to three persons.


    Watch my Puff Pastry Twists STEP by STEP video:

    If you like this recipe, try these ones too:


    I have more 4 ingredient recipes on my blog you might enjoy trying:

    • 4 Ingredient Oreo Ice Cream
    • 4 Ingredient Nutella Cookies
    • 4 Ingredient Mini Granola Bars
     
     
    4 ingredient desserts
    No ratings yet
    Print Pin Recipe

    4 Ingredient Puff Pastry Twists

    Prevent your screen from going dark

    Ingredients

    • 1 package puff pastry
    • flour for dusting
    • ¼ cup seedless strawberry jam
    • 10-20 chocolate chips
    • powdered sugar*

    Instructions

    • Preheat oven to 400F, prepare baking sheets using parchment paper or baking mat.
    • Defrost puff pastry (takes about 40 minutes to an hour). Sprinkle flour on table then roll out puff pastry to about 1-2 inches bigger.
    • Slice puff pastry in half, making a rectangle.
    • Melt strawberry jam in the microwave for about 30-45 seconds to make it easier to spread on the puff pastry. Spread jam on one side using a pastry brush. If adding chocolate chips, add now then cover with the other half the puff pastry.
    • Cut (shown on video), then twist. Place on baking sheet and bake for 15 minutes.
    • Allow to cool for 2 minutes, then sprinkle powdered sugar.
    Leave a Comment

    Notes

    *optional

    Watch The Recipe Video!

    QR Code
    Did you make this recipe?Share it on instagram or tag @simplybakings or #simplybakings!

    5 Ingredients or Less, Desserts

    Easy No Bake Halloween Treats

    Oct 21, 2016 · 4 Comments

    3 easy halloween no bake treats

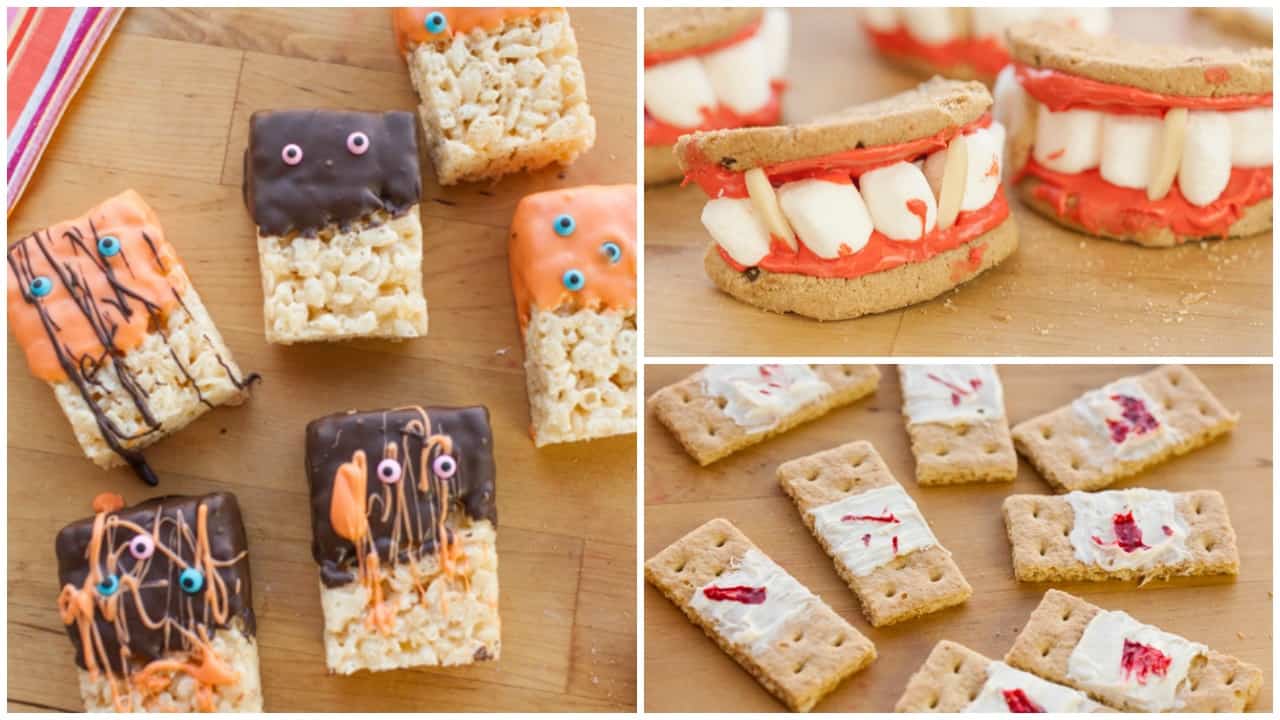
    Trick or Treat! Here are 3 Easy No Bake Halloween Treats that are not scary, but KID-friendly! Each recipe uses only 5 ingredients or less and you can make them without using an oven in under 15 minutes!

    Check more of my easy halloween desserts here: Halloween Donuts, Candy Corn Mousse, and my famous Dirt Pudding!

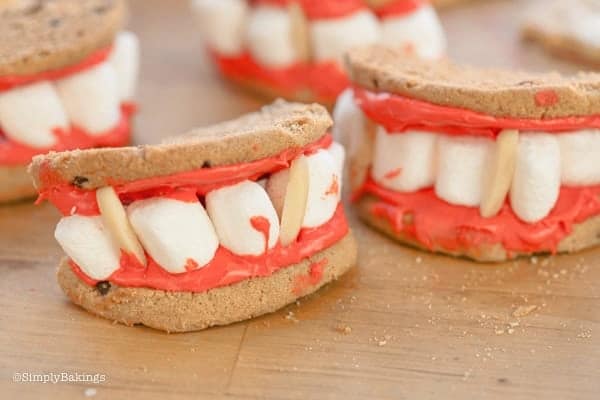
    draculla's dentures
    [feast_advanced_jump_to]

    Substitutions

    • Replace slivered almonds with pumpkin seeds or sunflower seeds for a nut-free option.
    • Substitute white chocolate melts for the chocolate candy melts for a spooky twist.
    • Nut-Free: Use pretzel sticks instead of nuts for Dracula's fangs.
    • Add peanut butter to the frosting or candy melts for extra flavor.
    • Use vanilla wafers or any other favorite cookie instead of graham crackers for the Band-aids. Any will do as long as it is rectangular and resembles the size of a band-aid.
    • You can use dark brown food color instead of red to resemble like dried blood. Scary, isn't it?!?

    Variations

    • Extra Spooky: Add black licorice pieces to the Rice Krispies to resemble spider legs. Use sprinkles to make the treats more festive and fun.
    • Add some cream cheese to the frosting for a tangy flavor and creamier texture.

    Storage

    • These no-bake treats can be stored in an airtight container at room temperature for up to three days.
    • If you need to keep them longer, place them in the refrigerator, but be sure to let them come to room temperature before serving to ensure the best texture and flavor.

    Top Tips

    • Serve these treats with some spooky punch or a warm cup of apple cider to keep the Halloween spirit alive.
    • Pair with popcorn balls, caramel apples, or a selection of Halloween-themed candies for a full treat spread.
    Rice Krispies Halloween treat

    Ingredients

    Dracula's Dentures:

    • Any type of cookie
    • Red-orange frosting
    • Marshmallows
    • Slivered almonds or any slivered nuts

    Ghost Rice Krispies:

    • Rice Krispies
    • Chocolate candy melts and orange candy melts
    • Edible eyeballs

    Edible Band aids:

    • Graham crackers
    • White frosting
    • Red food color

    Instructions

    Dracula's Dentures:

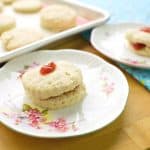
    You will need any type of cookie (or any biscuit will do), red frosting, mini marshmallows, and slivered almonds. Let's begin!

    Cookie with red frosting

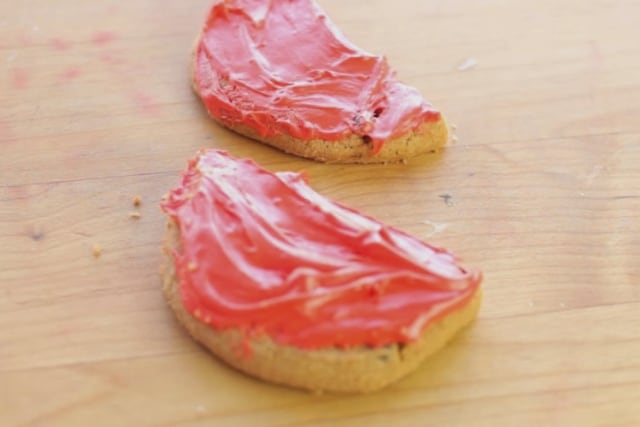
    Cut the cookie in half, then put some red frosting on each half, the uglier, the better:

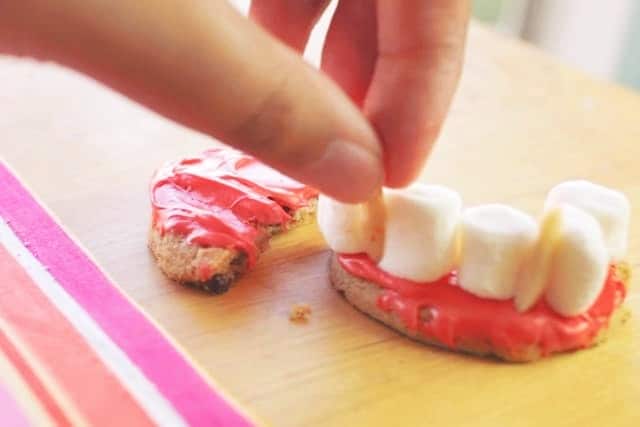
    Now it's time to place the marshmallows and slivered almonds on one cookie (The slivered almonds imitate Dracula's fangs):

    Draculla's denture assembly

    Lastly, put the other cookie half on top of the other cookie half. You're all set! A super-duper easy No-Bake Halloween treat for your kids!

    Ghost Rice Krispies:

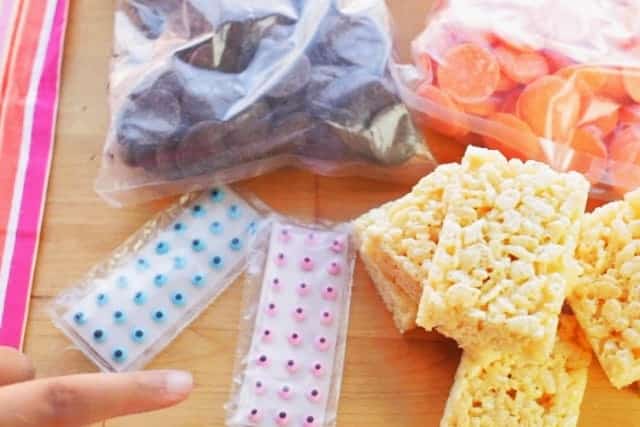
    All you need are rice krispies, candy melts, and some edible eyeballs:

    candy melts, edible eye balls, and rice krispies

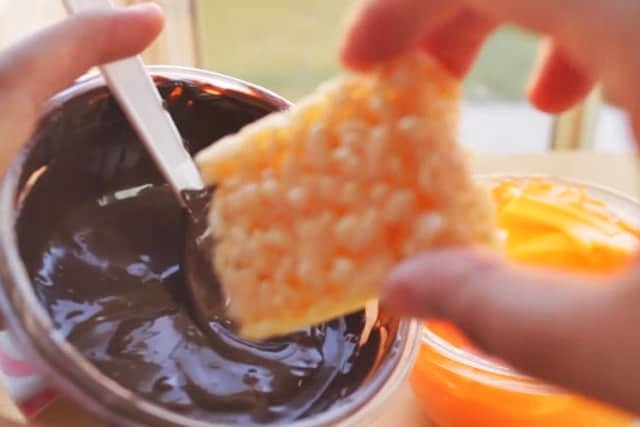
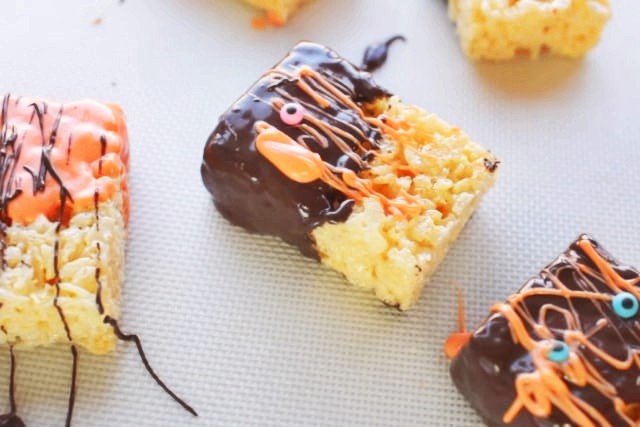
    Put the candy melts in two separate bowls and melt them in a microwave. The chocolate one took 30 seconds to melt and the orange one took about 45 seconds. Once they are melted, dip each rice Krispies on the candy melts:

    rice krispies dipped in candy melts

    To make it look more spooky, drizzle with candy melts (brown on orange and orange on brown candy melts):

    drizzling candy melts

    Here's my favorite part! Add the edible eyeballs or candy eyes. You can also experiment on the eyeball color combination to make it look scarier:

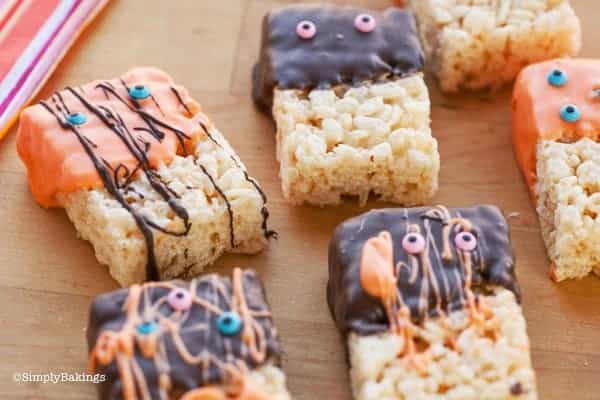
    Tadaaah! It won't take so much time to make these fun Halloween rice krispies treat, plus it is also filling!

    rice krispies with eyeballs

    Edible Band aids:

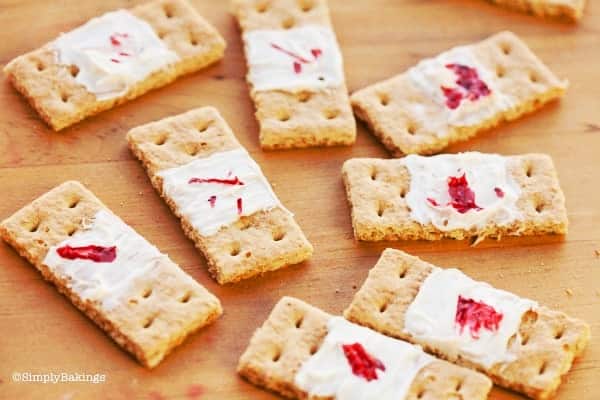
    Edible bandaid made of graham crackers

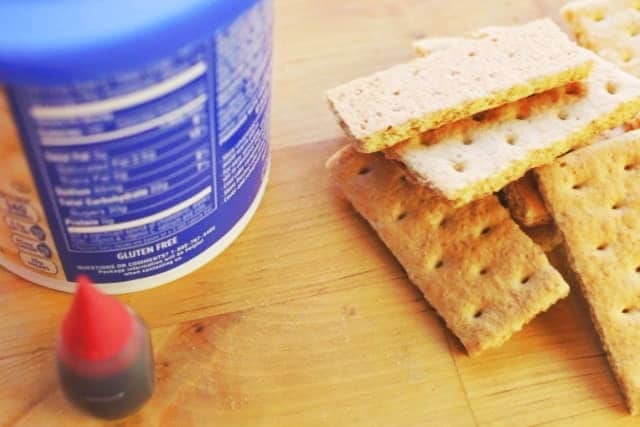
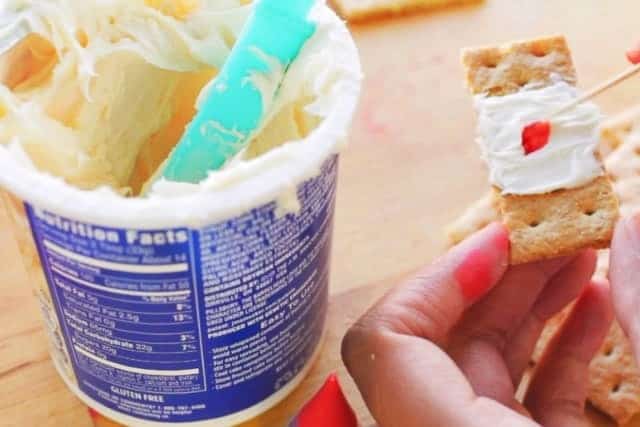
    With just 3 ingredients - white frosting, red food color, and graham crackers - you can make these edible band-aids which are perfect for a quick, less than 5 ingredients Halloween treat!

    red food color, white frosting, and graham crackers for edible band aid recipe

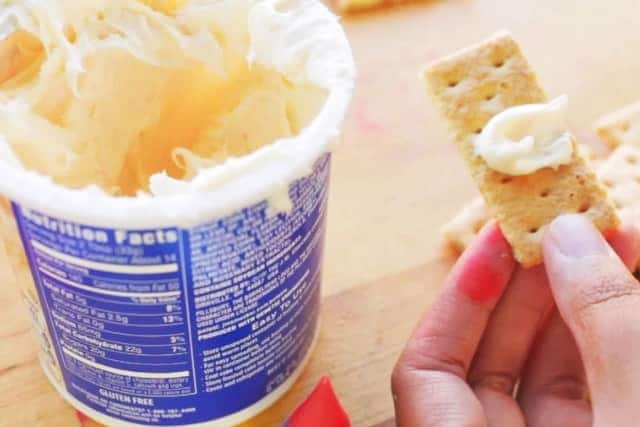
    Start by putting some white frosting to the graham crackers to resemble the cottony part of a band-aid:

    putting frosting on graham crackers

    Dip a toothpick in the red food color (the red food color resembles blood), and place it on the white frosting. You can put as much so as to make it look grosser:

    putting red color on white frosting

    You have just finished another easy no bake Halloween treat! 🙂

    Frequently Asked Questions

    What to do if you don't have candy on Halloween?

    If you don't have candy on Halloween, you can make these no-bake Halloween treats like Dracula's Dentures, spooky Rice Krispies, and gory Band-aids to hand out. They're fun, festive, and easy to make!

    How can I make the treats more festive?

    Adding edible glitter, sprinkles, or Halloween-themed decorations can make these treats even more festive and fun.

    How can I melt the chocolate for dipping if I don't have a microwave?

    In a large bowl, put hot water. You can use newly boiled water to ensure that the temperature is high enough to melt the candies or chips. Put the bowl with the candy melt or chips then stir it until it melts. The high temperate of the water outside the bowl is enough to melt the candies or chocolate chips.

    easy three no bake halloween treats
    4.67 from 3 votes
    Print Pin Recipe

    Easy No Bake Halloween Treats

    Get ready for a spooktacular Halloween with these easy no-bake treats! From Dracula's Dentures to spooky Rice Krispies and gory Band-aids, these recipes are perfect for kids and adults. Quick to make and fun to eat, they’ll be a hit at any Halloween party!
    Prep Time15 minutes mins
    Total Time15 minutes mins
    Course: Desserts, Snacks
    Cuisine: American
    Servings: 4 each treat
    Calories: 150kcal
    Author: Lainey
    Prevent your screen from going dark

    Ingredients

    Dracula's Dentures:

    • Any type of cookie
    • Red-orange frosting
    • Marshmallows
    • Slivered almonds or any slivered nuts

    Rice Krispies:

    • Rice Krispies
    • Chocolate candy melts and Orange Candy Melts
    • Edible Eyeballs

    Band-aids:

    • Graham crackers
    • White frosting
    • Red food color

    Instructions

    Dracula's Dentures:

    • Cut each cookie in half.
    • Put red-orange frosting on each half.
    • Place the marshmallows on one half and the slivered almonds, or any slivered nuts in between the marshmallows so they would resemble the Draculla's fangs.
    • Place the other half of the cookie on top.

    Rice Krispies:

    • Melt both the candy melts in a microwave - 30 seconds for the chocolate one and 45 seconds for the orange one.
    • Dip each of the Rice Krispies to the melted candy melts.
    • Drizzle some melted chocolate melts on each Rice Krispies.
    • Put the edible eyeballs on each Rice Krispies. You can play with how you design it to make it look more spooky.

    Band-aids:

    • Cut the graham crackers in rectangular portions to resemble the size of a band-aid.
    • Place some white frosting on top of each graham.
    • Dip a toothpick on a red food color and place it above the white frosting to make it look like there's "blood" on it.
    Leave a Comment
    Serving: 1gCalories: 150kcalCarbohydrates: 24gProtein: 2gFat: 6gSaturated Fat: 2.5gSodium: 100mgFiber: 1gSugar: 15g

    Watch The Recipe Video!

    QR Code
    Did you make this recipe?Share it on instagram or tag @simplybakings or #simplybakings!

    I remember Halloween used to be all about pumpkins, witches, and monsters. People wanted quick and easy treats for their trick-or-treaters, and that's how no-bake Halloween desserts were born!

    Creative ideas kept coming! Donut holes became monster faces, cupcakes were topped with witches' hats, and fudge and cake got spooky decorations. Best of all, no oven was needed! Just a microwave and some quick 30-second intervals.

    5 Ingredients or Less, Desserts

    Reese's Puff Treats

    Oct 14, 2016 · 7 Comments

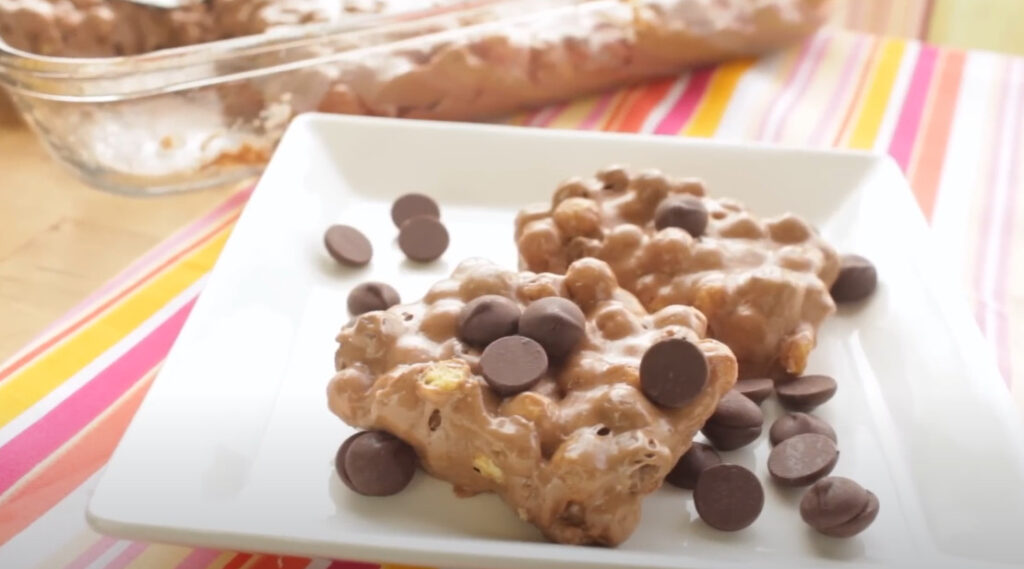
    a plate of delicious no-bake Reese's puff treats

    Using only 4 ingredients, these Reese's Puff Treats take a classic no-bake dessert to the next level with puffs cereal! Easy to make, especially when you're craving something sweet! 

    I love no-bake recipes, and if you do too, you will love my popular Cookie Dough Bites, 4-Ingredient Twix Bar, or my 3-Ingredient Oreo Cheesecake!

    reese puff treats with chocolate chips on top
    [feast_advanced_jump_to]

    What are Reese's Puff Treats?

    If you love the combination of chocolate and peanut butter, you're going to love these Reese’s Puff Treats! This no-bake dessert is crunchy, gooey, and packed with delicious flavors. This recipe is great for anyone who enjoys the sweet and salty mix of peanut butter and chocolate.

    One of the best things about these Reese’s Puff Treats is how easy they are to make. There’s no need to turn on the oven—just melt, mix, and cool. With only four key ingredients, you don’t have to worry about complicated steps. Plus, you can customize the recipe by swapping out ingredients to create different flavors.

    Substitutions

    • Reese’s Puffs Cereal - You can swap this with Rice Krispies for a different crunchy texture or use a mix of different cereal bars for variety.
    • Dark Chocolate - Replace with milk chocolate for a sweeter taste, or try melted chocolate with a splash of vanilla extract for extra flavor.
    • Butter - Use creamy peanut butter for a stronger peanut butter flavor, or substitute with coconut oil for a dairy-free option.
    • Large Marshmallows - Swap with mini-marshmallows, which melt faster and mix more easily into the cereal mixture.
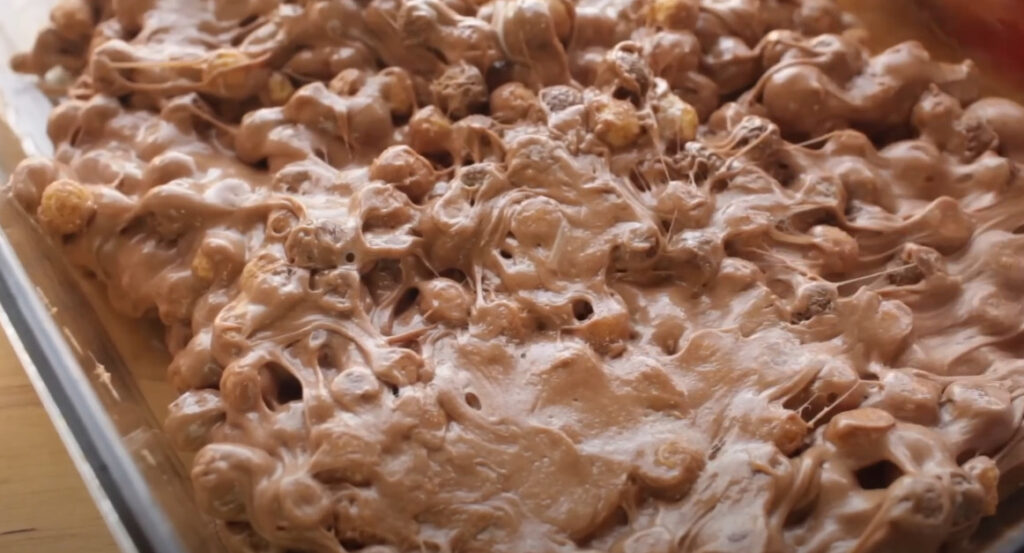
    puff cereal coated with chocolate marshmallow

    Variations

    • Peanut Butter Lover’s Treats – Add 2 tablespoons of creamy peanut butter to the melted marshmallow mixture for an extra peanut butter flavor. You can also mix in chopped Reese’s Cups for even more chocolate and peanut butter goodness.
    • Chocolate Drizzle Crunch – After spreading the cereal mixture into the baking dish, drizzle melted chocolate over the top. Let it set before cutting into bars for a rich, chocolatey twist. You can use milk chocolate or dark chocolate, depending on your preference.

    Storage

    • Store in an airtight container at room temperature for up to 5 days.
    • For longer storage, freeze in a sealed bag for up to a month.

    Ingredients

    • butter
    • marshmallows
    • chocolate chips (dark)
    • cereal puffs

    Instructions

    Prepare your 9x13 inch pan by oiling it down as well as the spoons or spatula you will be using. You may use a non-stick cooking spray.

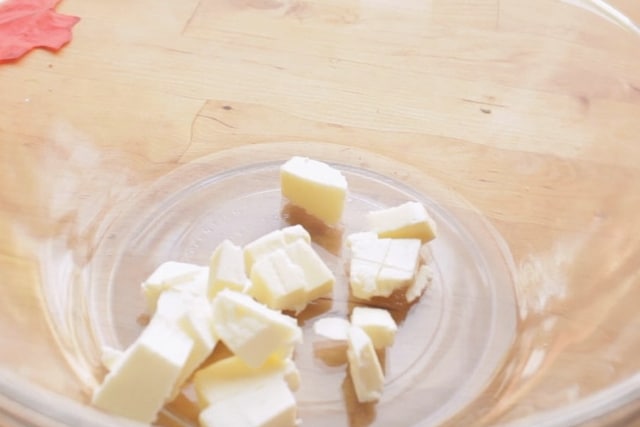
    In a large bowl, add the butter and spread it around the bowl, making sure to grease it:

    Butter in a mixing bowl

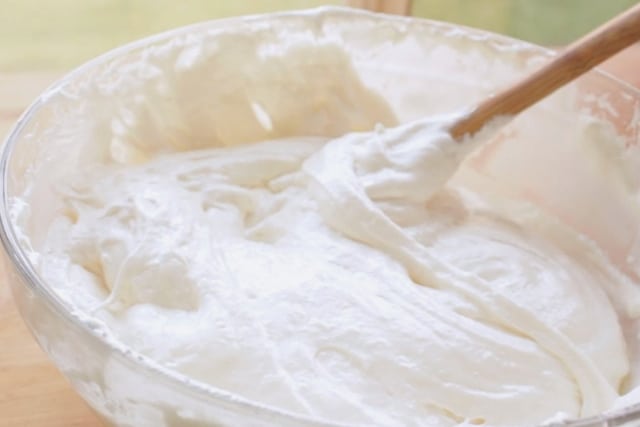
    Add the marshmallows and microwave for 2 minutes on high. Mix until smooth:

    melted marshmallows in a mixing bowl

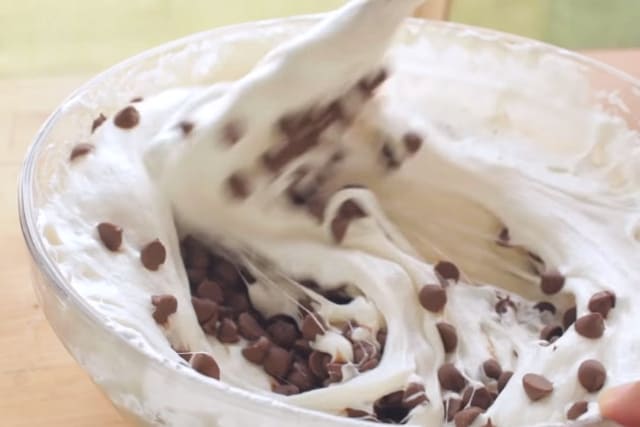
    Add the dark chocolate into the melted marshmallow mixture and mix until the dark chocolate is melted, and feel free to microwave to help melt the chocolate:

    melted marshmallows and chocolate chips

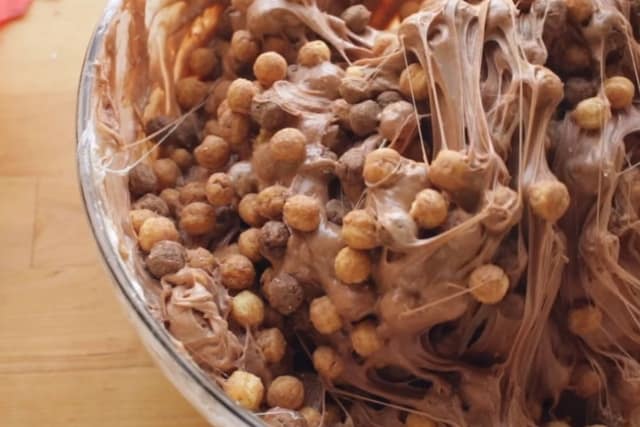
    Gradually add the cereal until it's barely sticking together:

    rice cereals mixed with marshmallows and chocolate chips

    Pour into the pan and spread evenly using the oiled spatula or spoon. Cool completely and serve:

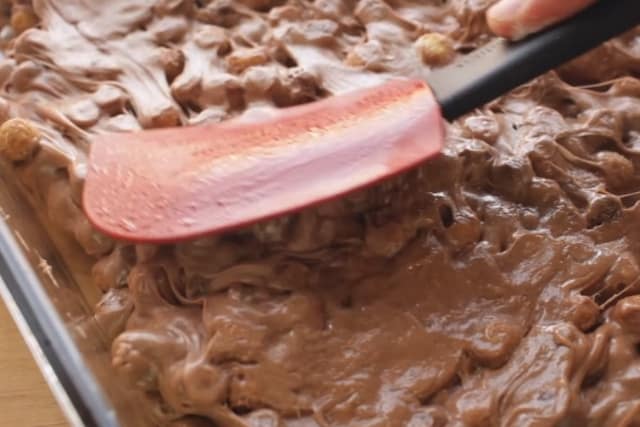
    marshmallow treat flattened with a rubber spatula

    Top Tips

    • Keep your hands and spatula greased – This prevents sticking.
    • Melt the chocolate gradually – Overheating can make it grainy.
    • Balance the cereal amount – Too much will make them crumbly.
    • For easy prep, line your baking dish with parchment paper to prevent sticking. If you prefer a stovetop method, melt everything over low heat in a large pot or saucepan, stirring constantly to avoid burning.

    FAQ

    How do I keep them from being too hard?

    Don’t overpack the cereal, and ensure the marshmallows are fully melted and mixed.

    How long do Reese’s Puff Treats last?

    Stored in an airtight container, they last up to 5 days at room temperature or 1 month in the freezer.

    Can I make these treats dairy-free?

    Yes! Use dairy-free butter and dark chocolate.

    plate of delicious no-bake Reese's puff treats
    4.25 from 4 votes
    Print Pin Recipe

    Reese's Puff Treats

    Whip up some delicious Reese's Puff Treats for a fun snack! They're easy to make and perfect for sharing with friends and family. A sweet treat everyone will love!
    Prep Time10 minutes mins
    Cook Time5 minutes mins
    Cool Time5 minutes mins
    Total Time20 minutes mins
    Course: Desserts, No-bake Desserts
    Cuisine: American
    Servings: 12 servings
    Calories: 256kcal
    Author: Lainey
    Prevent your screen from going dark

    Ingredients

    • ¼ cup butter cubed
    • 2 bags of large marshmallows
    • 1 package dark chocolate 11oz*
    • 6-8 cups cereal puffs

    Instructions

    • Prepare your 9x13 inch pan by oiling it down as well as the spoons or spatula you will be using.
    • In a large bowl add the butter and spread it around the bowl making sure to grease it.
    • Add the marshmallows and microwave for 2 minutes on high. Mix until smooth.
    • Add the dark chocolate and mix until the dark chocolate is melted and feel free to microwave to help melt the chocolate
    • Gradually add the cereal until it's barely sticking together. Pour into pan and spread evenly using the oiled spatula or spoon. Cool completely and serve.
    Leave a Comment

    Notes

    *if you can't find any 11oz bags anything close to it works.
    Serving: 1servingCalories: 256kcalCarbohydrates: 31gProtein: 3gFat: 14gSaturated Fat: 11gPolyunsaturated Fat: 1gMonounsaturated Fat: 1gTrans Fat: 0.2gCholesterol: 10mgSodium: 162mgPotassium: 229mgFiber: 2gSugar: 16gVitamin A: 454IUVitamin C: 4mgCalcium: 154mgIron: 3mg

    Watch The Recipe Video!

    QR Code
    Did you make this recipe?Share it on instagram or tag @simplybakings or #simplybakings!

    Here's an easy 4-ingredient marshmallow treat you will love!! Why?! Because it has chocolate for one, AND you can make this in under 20 minutes or less! I think the longest part of this recipe is allowing the marshmallow treat to cool completely!  I also mentioned in the video that I got distracted, and this treat ended up being too marshmallowy. So, gradually add the cereal puffs to get the consistency you would like.

    Also, what's neat about this easy 4-ingredient marshmallow treat is that you can replace the cereal with any other cereal!  Rice cereal works very well, and that marshmallow cereal- I'm pretty sure you guys know which brand I'm talking about 🙂

    5 Ingredients or Less, Desserts, No Bake Dessert Recipes

    Hawaii Adventure

    Oct 11, 2016 · Leave a Comment

    man and woman in a jeep

    Another Chapter Begins: Our Couple Travel Adventures Start Here!
    Marte + Lainey’s Honeymoon in Hawaii 🌴💍

    On August 11, 2016, Marte and I tied the knot (more on that in another post 😉), and to kick off this new chapter together, we headed to Hawaii for our honeymoon—1 week in Maui and 1 week in Kauai. Our couple travel adventures officially began!

    First Stop: Kauai 🌺

    Kauai reminded me so much of the Philippines—the tropical vibes, the laid-back rhythm of the island, and yes... the rain. It pretty much rained every day we were there, but somehow it added to the charm.

    We visited a beautiful beach where a bunch of movies were filmed, including Pirates of the Caribbean. I can’t remember the others at the moment (LOL), but it felt surreal being there!

    Let’s Talk Snacks 🍌🥥

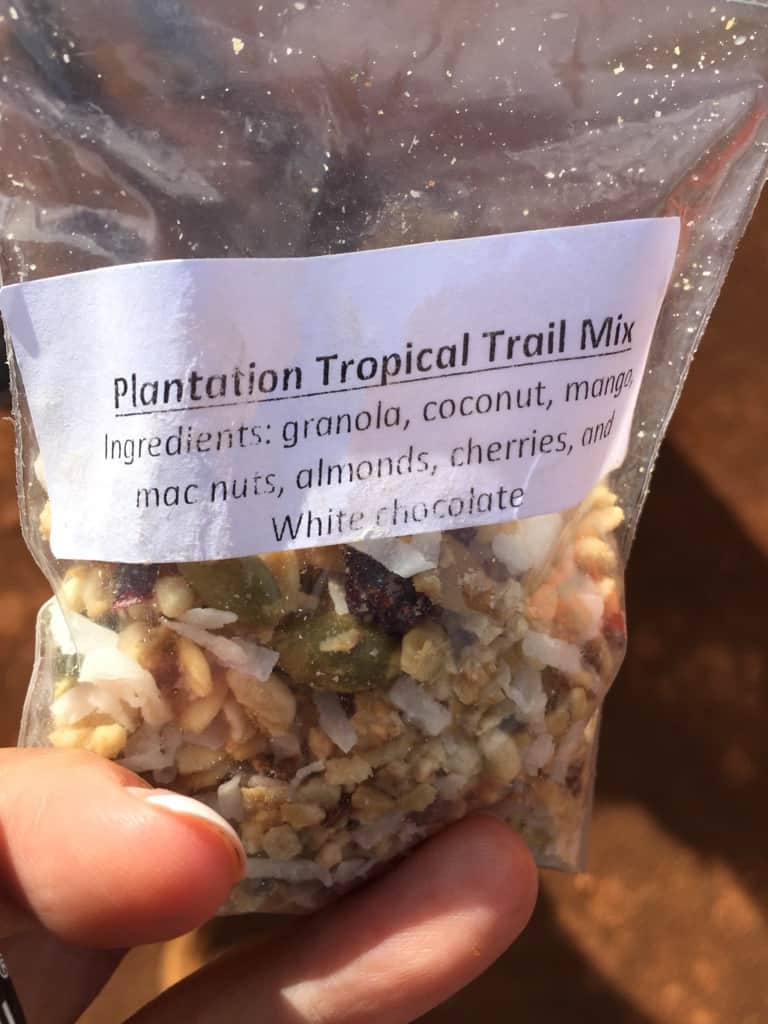
    During one of our tours, they served banana bread and a tropical trail mix that was absolutely delicious. It was the kind of snack you wish you could bring home. I asked if they sold it, and while they didn’t, they were kind enough to give me the extras. Win! 😂

    Kipu Ranch Adventure 🚜🌄

    One of the highlights of the trip was our visit to Kipu Ranch in Lihue. It’s only about 5 minutes from Nawiliwili Harbor—super convenient for cruise ship travelers from lines like Norwegian, Princess, Carnival, and Royal Caribbean.

    And get this—they’re ranked the #1 ATV tour in Hawaii!

    We booked their early bird special and spent 3 hours ATV’ing across the island. It was bumpy, and I had to take Dramamine (I get dizzy easily 😅), but it was totally worth it.

    Our tour guide mentioned something that stuck with me: most locals don’t even get to explore the island the way we did. In a way, visitors end up seeing more of Kauai than the people who live there. I felt incredibly lucky to experience that.

    The guides were also super friendly, patient, and focused on safety—which made the whole experience even better.

    We learned so much about Kauai, got to see breathtaking views, and made unforgettable memories together. It was the perfect way to start our marriage. Can’t wait to go back someday. 💛

    granola in a bag
    private beach in hawaii
    man and woman in a jeep
    man and woman in beach

    Behind the Scenes

    Pumpkin Sheet Cake With Cake Mix

    Oct 7, 2016 · 4 Comments

    Pumpkin Sheet cake in a cup

    Fall baking just got easier with this Pumpkin Sheet Cake with Cake Mix! Soft, moist, and packed with warm spices, this one-bowl recipe is perfect for beginners. Bake it for a cozy night in or a holiday gathering - it's a must-try!

    Want more pumpkin or fall desserts? I suggest you also try Apple Cider Popsicles, Pumpkin Cinnamon Rolls and White Chocolate Cranberry Cookies!

    pumpkin cake
    [feast_advanced_jump_to]

    What is a Pumpkin Sheet Cake with Cake Mix?

    Pumpkin Sheet Cake with Cake Mix is a quick and flavorful dessert made with a boxed cake mix, canned pumpkin, eggs, oil, and warm spices. Baked in a sheet pan, it's perfect for gatherings and is often topped with creamy cream cheese frosting for a delicious fall treat.

    History of Pumpkin Sheet Cake with Cake Mix

    This cake recipe is a modern take on classic pumpkin desserts, combining convenience with warm fall flavors. While pumpkin cakes have been around for centuries, early American settlers used pumpkin in breads and puddings. The rise of boxed cake mixes in the 1950s and 1960s made baking easier, leading to creative recipes like this one.

    Over time, this simple recipe became a fall favorite, often topped with cream cheese frosting for a rich, tangy finish. Its ease and nostalgic charm make it a go-to dessert for home bakers, perfect for holiday gatherings or cozy autumn nights.

    When is this Dish Typically Enjoyed?

    Pumpkin Cake recipes are typically enjoyed during the fall season, especially from September through November, when pumpkin-flavored treats are most popular. It’s a favorite for Halloween parties, Thanksgiving dinners, and autumn gatherings, bringing warm spices and seasonal flavors to the table.

    Substitutions

    • Pumpkin Purée – Swap with 2 cups of mashed sweet potatoes or butternut squash.
    • Evaporated Milk – Substitute with 1 ½ cups whole milk, half-and-half, or coconut milk for a dairy-free option.
    • Pumpkin Spice – Replace with 1 teaspoon cinnamon, ½ teaspoon nutmeg, and ½ teaspoon ginger.
    • Yellow Cake Mix – Swap with a box of spice cake mix or vanilla cake mix with 1 teaspoon cinnamon.
    • Chopped Pecans – Use walnuts, almonds, hazelnuts, or 1 ½ cups rolled oats for a nut-free option.
    pumpkin cake

    Recipe Variations

    • Dairy-Free Option – Substitute evaporated milk with coconut milk and butter with melted coconut oil.
    • Vegan Pumpkin Cake – Use flax eggs (1 tbsp ground flaxseed + 3 tbsp water per egg) and coconut oil instead of butter.
    • Gluten-Free Pumpkin Cake – Replace cake mix with a gluten-free yellow cake mix and check all other ingredients for gluten.
    • Maple Pumpkin Cake – Swap sugar for ¾ cup maple syrup for a natural, deep flavor.

    Storage

    Room Temperature: Store in an airtight container at room temperature for up to 2 days if unfrosted.

    Refrigerator: Keep in an airtight container in the refrigerator for up to 5 days, especially if frosted with cream cheese frosting.

    Freezer: Freeze the cake (without frosting) in a well-wrapped, airtight container for up to 3 months. Thaw in the refrigerator before frosting and serving.

    Ingredients

    Listed below are all the ingredients you will need:

    • Pumpkin puree
    • Sugar
    • Eggs
    • Evaporated milk
    • Cinnamon
    • Pumpkin spice
    • Yellow cake mix
    • Chopped pecans
    • Butter

    See recipe card for quantities.

    Instructions

    Preheat oven to 350°F (175°C) and grease a 9x13-inch baking pan. In a large bowl, whisk together pumpkin puree, sugar, eggs, evaporated milk, cinnamon, and pumpkin spice until smooth. Use electric mixer if you have.

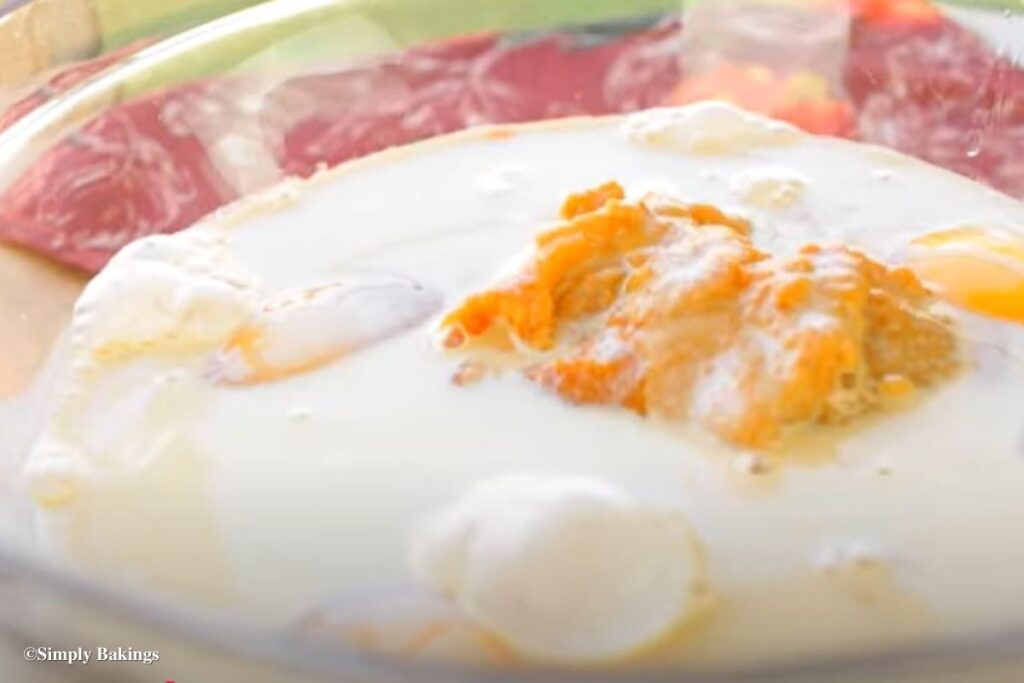
    All ingredients in a large bowl

    Pour the batter into the prepared baking pan or half sheet pan.

    Poured Pumpkin cake mix into tray

    Evenly sprinkle the yellow cake mix powder over the pumpkin mixture.

    Pumpkin batter covered with cake mix

    Mix in the chopped pecans.

    Chopped pecans scattered on cake mix

    Drizzle melted unsalted butter over the top, making sure all the dry ingredients are moistened. Then bake it for 1 hour.

    Butter poured on top of the cake mix

    Let cool completely before slicing. Then serve with whipped cream or vanilla ice cream.

    Pumpkin sheet cake in a red cup

    Hint: For an extra moist cake, don’t overmix the batter - stir just until combined to keep the texture light and fluffy.

    ⭐ Top Tip

    For a richer flavor, try using spice cake mix instead of yellow cake mix, and toast the pecans before adding them for extra crunch and depth. To keep the cake light and moist, replace half the melted butter with unsweetened applesauce and avoid overmixing the batter.

    FAQ

    How many cups of batter for a 12x18 pan?

    This pan will use 14 cups of batter, approximately 10 cups of icing to frost and decorate a 2 layer cake. Bake in a 325-degree oven for 45-50 minutes.

    Can you use pumpkin instead of oil in cake mix?

    For measurements, pumpkin follows the same guidelines as tofu - ⅓ cup of pumpkin for every ½ cup oil. Just keep in mind that your baked goods may end up with a slightly different color - and possibly a pumpkin-y flavor - if you use this option.

    Can I substitute pumpkin for oil in cake mix?

    Use pumpkin in your favorite breakfast, lunch, dinner, and dessert recipe – you can even sub it in for ingredients like eggs, oil, and butter.

    More Recipes

    Craving more Pumpkin? Give these a try:

    • Pumpkin Ice Cream
    • Pumpkin Hand Pie using Air Fryer
    • Pretzel Pumpkins
    • Cinnamon Streusel Pumpkin Bread
    • Pumpkin Blondies
    5 from 2 votes
    Print Pin Recipe

    Pumpkin Sheet Cake with Cake Mix

    A moist, spiced Pumpkin Sheet Cake with Cake Mix, topped with creamy frosting - easy and perfect for fall!
    Prep Time10 minutes mins
    Cook Time1 hour hr
    Total Time1 hour hr 10 minutes mins
    Course: cake, Dessert
    Cuisine: American
    Servings: 12 servings
    Calories: 490kcal
    Prevent your screen from going dark

    Ingredients

    • 2 cups pumpkin puree 15oz
    • 1 cup sugar
    • 3 eggs
    • 1 can Evaporated milk 12oz
    • 2 teaspoons cinnamon
    • 2 teaspoons pumpkin spice
    • 1 box Yellow cake mix 15oz
    • 1 ½ cups Chopped pecans
    • ¾ cups melted butter

    Instructions

    • Preheat oven to 350°F (175°C) and grease a 9x13-inch baking pan.
    • In a large bowl, whisk together pumpkin puree, sugar, eggs, evaporated milk, cinnamon, and pumpkin spice until smooth. Pour into the prepared baking pan.
    • Evenly sprinkle the yellow cake mix over the pumpkin mixture, followed by the chopped pecans.
    • Drizzle melted butter over the top, making sure all the dry ingredients are moistened.
    • Bake for 1 hour, or until a toothpick inserted in the center comes out clean.
    • Let cool completely before slicing.
    • Serve with whipped cream or vanilla ice cream.
    Leave a Comment
    Serving: 1gCalories: 490kcalCarbohydrates: 61gProtein: 7gFat: 26gSaturated Fat: 11gPolyunsaturated Fat: 4gMonounsaturated Fat: 10gTrans Fat: 1gCholesterol: 80mgSodium: 454mgPotassium: 272mgFiber: 3gSugar: 40gVitamin A: 6849IUVitamin C: 3mgCalcium: 203mgIron: 2mg
    QR Code
    Did you make this recipe?Share it on instagram or tag @simplybakings or #simplybakings!


    Cake, Desserts, Thanksgiving Desserts

    Pumpkin Cinnamon Pull-Apart Bread

    Sep 30, 2016 · 3 Comments

    A green plate with a slice of Pumpkin Cinnamon Pull-Apart Bread

    Pumpkin Cinnamon Pull-Apart Bread is an easy fall-inspired treat made with biscuit dough and a sweet pumpkin-cinnamon mix. It's perfect for beginner bakers, snack lovers, and anyone craving cozy autumn flavors without the fuss.

    Loving this bread will make you want to try my quick and easy Cinnamon Roll bites or Ensaymada!

    Pumpkin Cinnamon Pull-Apart Bread on a plate
    [feast_advanced_jump_to]

    Why You’ll Love This Recipe

    Because we use simple, store-bought biscuit dough, this recipe is beginner-friendly. No active dry yeast or rising time required - just mix, layer, and bake the Pumpkin Pull-Apart Bread.

    It’s vegetarian and can be made dairy-free with plant-based butter. The recipe only needs a small bowl and a large bowl.

    Also, maybe a small saucepan for the glaze if you want that extra sweetness. Bakers also add a dash of ginger, nutmeg, and salt to bring out the best in the pumpkin flavor.

    Pumpkin puree is not just yummy on pumpkin bread. It’s rich in vitamin A, supporting your healthy eyes and skin. A dessert that’s secretly good for you? Yes, please!

    Ingredients

    Listed below are all the ingredients you will need:

    • Pumpkin puree
    • Granulated sugar
    • Vanilla extract
    • Ground cinnamon
    • Large egg
    • Refrigerated biscuit dough
    • Oil or nonstick spray (for greasing the loaf pan)

    See the recipe card for quantities.

    Instructions

    Prepare the Oven and Pan

    Preheat oven to 350°F (175°C).

    Lightly grease or spray a loaf pan with oil or nonstick spray.

    Make the Pumpkin Mixture

    In a medium bowl, combine the pumpkin puree, granulated sugar, vanilla extract, ground cinnamon, and egg.

    Mix well until smooth. Set aside.

    Mixing bowl with all ingredients combined

    Assemble the Bread

    Open the can of refrigerated biscuit dough. Slice each biscuit in half horizontally to create thinner rounds.

    Dip each biscuit piece into the pumpkin mixture, coating both sides.

    Layer the coated dough pieces vertically into the prepared loaf pan until all are used.

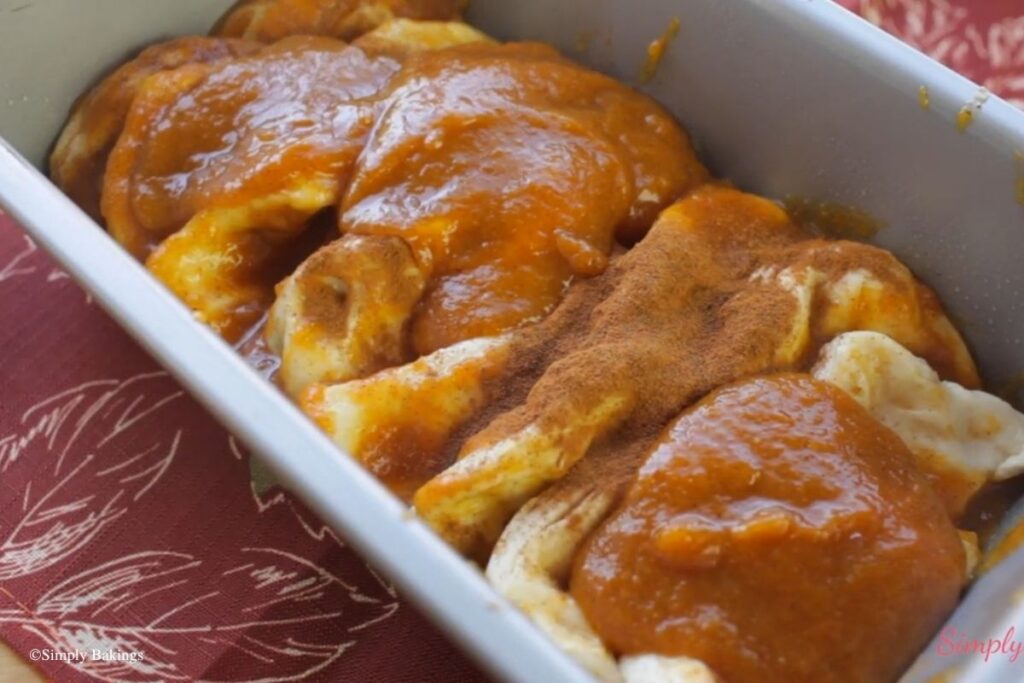
    Soft layers of Pumpkin Cinnamon Pull-Apart Bread in a pan

    Bake and Cool

    Bake for 25–30 minutes, or until the top is golden brown and the center is cooked through.

    Cooling Pumpkin Cinnamon Pull-Apart Bread in a loaf pan

    Remove from the oven and let the bread cool completely in the pan before serving!

    A green plate with a slice of Pumpkin Cinnamon Pull-Apart Bread

    Substitutions & Variations

    • Ingredient Swap
      No pumpkin puree? Swap with mashed sweet potato or banana.
    • Variation
      You can also use crescent roll dough instead of biscuit dough.
      Add chopped pecans, chocolate chips, or a layer of cream cheese filling for extra texture.
    • Mistake to Avoid
      Don’t underbake! The center pieces need to be fully cooked or they’ll be too doughy.
      Bake until golden, then cover with foil if the top browns too fast.
    • Storage Tips
      • Store leftovers in an airtight container at room temperature for up to 2 days.
      • For longer storage, place the bread in the refrigerator for up to 5 days. Reheat in the oven for 1–2 minutes to restore that cozy texture.
      • Freeze for up to 1 month. Wrap in plastic wrap and reheat with a quick drizzle of glaze or a fresh sprinkle of cinnamon sugar.

    FAQs

    Can I use fresh pumpkin instead of canned puree?

    Yes! Just steam and mash it until smooth. Make sure it's not watery.

    Can I make this gluten-free?

    Yes, but you’ll need a gluten-free biscuit dough alternative. Check your local store for options.

    Does it taste very sweet?

    It’s lightly sweet, not overly sugary—great with coffee or tea.

    Can I prep this ahead?

    Yes, assemble the bread and refrigerate overnight. Bake fresh the next day.


    5 from 1 vote
    Print Pin Recipe

    Pumpkin Cinnamon Pull-Apart Bread

    Pumpkin Cinnamon Pull-Apart Bread is sweet, spiced, and wonderfully soft. Made with canned biscuit dough and a cozy pumpkin filling, it's an easy and fun dessert to serve warm for breakfast or dessert during fall or the holidays!
    Prep Time10 minutes mins
    Cook Time30 minutes mins
    Total Time40 minutes mins
    Course: Breakfast, Dessert
    Cuisine: American
    Servings: 6 -8 loaves
    Calories: 88kcal
    Author: Lainey
    Prevent your screen from going dark

    Ingredients

    • ¾ cup pumpkin puree
    • ½ cup granulated sugar
    • 1 teaspoon vanilla extract
    • 1 teaspoon ground cinnamon
    • 1 large egg
    • 1 can refrigerated biscuit dough
    • Oil or nonstick spray for greasing the loaf pan

    Instructions

    Prepare the Oven and Pan:

    • Preheat oven to 350°F (175°C).
    • Lightly grease or spray a loaf pan with oil or nonstick spray.

    Make the Pumpkin Mixture:

    • In a medium bowl, combine the pumpkin puree, granulated sugar, vanilla extract, ground cinnamon, and egg.
    • Mix well until smooth. Set aside.

    Assemble the Bread:

    • Open the can of refrigerated biscuit dough and slice each biscuit in half horizontally to create thinner rounds.
    • Dip each biscuit piece into the pumpkin mixture, coating both sides.
    • Layer the coated dough pieces vertically into the prepared loaf pan until all are used.

    Bake and Cool:

    • Bake for 25–30 minutes, or until the top is golden brown and the center is cooked through.
    • Remove from the oven and let the bread cool completely in the pan before serving.
    Leave a Comment
    Serving: 1gCalories: 88kcalCarbohydrates: 19gProtein: 1gFat: 1gSaturated Fat: 0.3gPolyunsaturated Fat: 0.1gMonounsaturated Fat: 0.3gTrans Fat: 0.003gCholesterol: 27mgSodium: 12mgPotassium: 76mgFiber: 1gSugar: 18gVitamin A: 4807IUVitamin C: 1mgCalcium: 16mgIron: 1mg
    QR Code
    Did you make this recipe?Share it on instagram or tag @simplybakings or #simplybakings!

    You Might Also Like:

    Looking for more delicious Pumpkin recipes for the holiday? Check out these recipes:

    • Mini Pumpkin Spice Muffins
    • Pumpkin Chocolate Cake
    • Oreo Pumpkin Cheesecake
    • Pumpkin Dump Cake

    Recipes for Every Moment

    Rainy afternoon, and you're craving something cozy? This Pumpkin Cinnamon Pull-Apart Bread is warm and perfect with a mug of tea or coffee.

    Bread, Breakfast & Brunch, Thanksgiving Desserts

    Addicting Butter Pecan Pancakes

    Sep 19, 2016 · 10 Comments

    pecan pancakes

    Experience the irresistible delight of Butter Pecan Pancakes, the ultimate breakfast indulgence! Whip up a batch in your own kitchen and prepare for everyone to sing its praises!

    Looking for more pancake dishes? Try my Fluffy Matcha Soufflé Pancakes, Corn Pancakes, Ube Pancakes, or my Japanese Souffle Pancakes.

    pecan pancakes on a red plate

    This recipe is typically a hit during the fall and Thanksgiving season, thanks to its comforting flavors. What makes it even better is its simplicity, as it relies on pre-made mixes. So, don't hesitate—give it a try!

    [feast_advanced_jump_to]

    How to Make this Butter Pecan Pancakes Recipe:

    Listed below are all the ingredients you need:

    • pancake mix (favorite brand)
    • butter pecan cake mix
    • butter
    • egg
    • pecans
    • honey or maple syrup

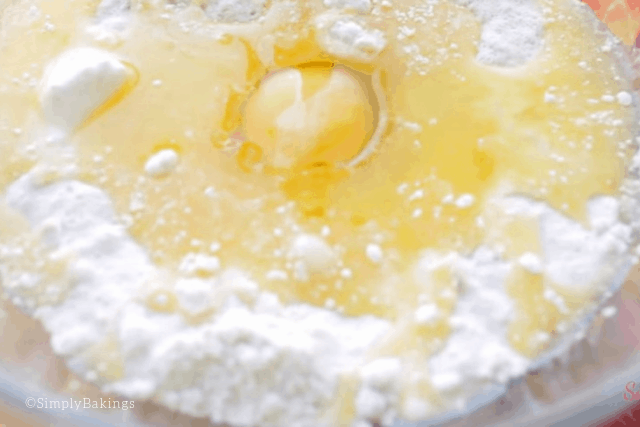
    In a large mixing bowl, mix together the pancake mix and butter pecan cake mix. Next, add the butter and egg and mix well:

    dry ingredients mixed in with eggs for the butter pecan pancakes recipe

    Now you can add the chopped pecans and stir until you don't see any flour:

    ready to cook butter pecan pancake batter

    On a medium-heat frying pan or griddle, pour the pancake mix and fry until golden brown:

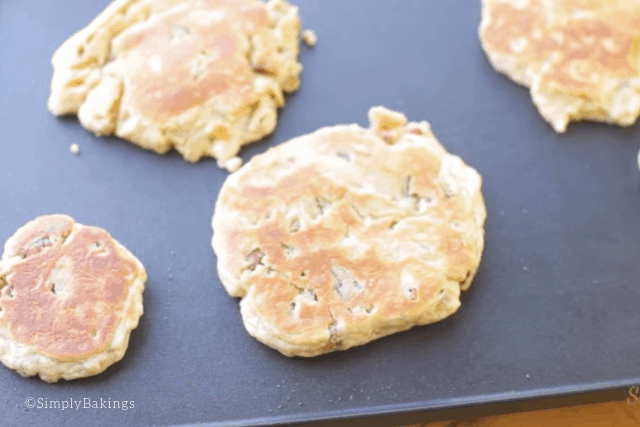
    perfectly cooked butter pecan pancakes on a hot griddle

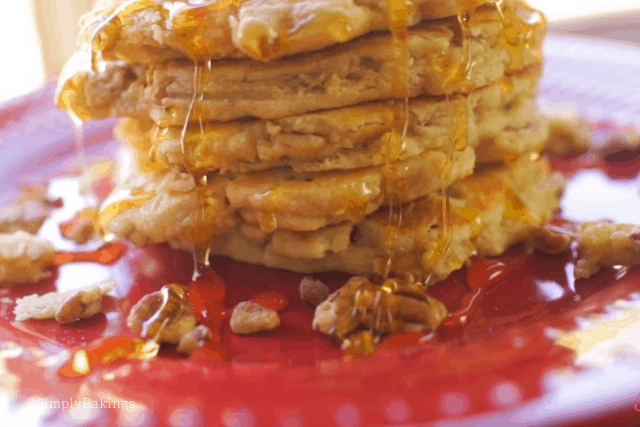
    Now pour that delicious honey on top! Isn't that lovely and delicious?!?

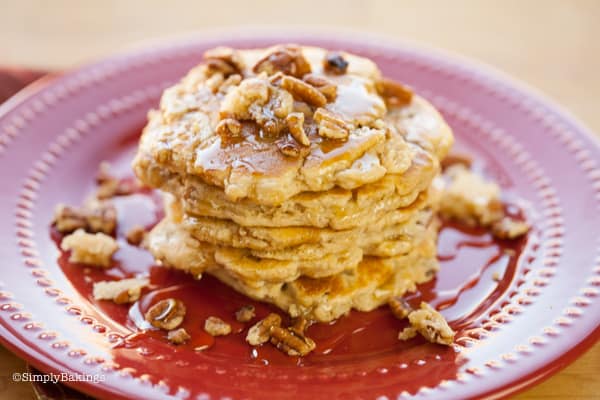
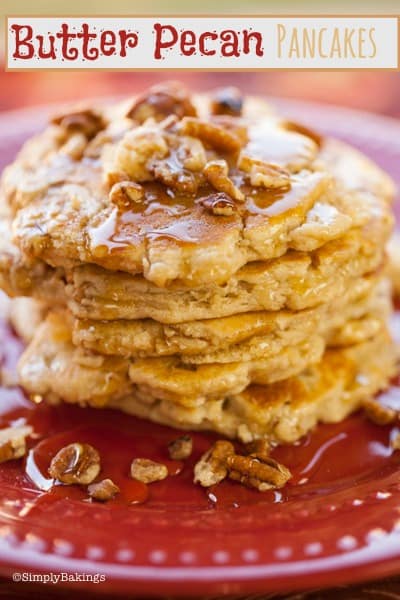
    stack of butter pecan pancakes glazed with maple syrup

    You would love to have a stack of these delicious and easy-to-make Butter Pecan Pancakes with a cup of latte. Enjoy! 

    pecan pancakes on a red plate topped with chopped pecans

    Variations

    • This recipe is very adaptable, you can add bananas, cinnamon, nutmeg, or vanilla extract to the pancake batter.
    • If you want a sweeter pancake, add brown sugar or even coffee creamer to sweeten the pancakes.

    Substitutions

    • Use buttermilk pancake mix for more of a fluffy pancake.

    Storage

    • Freeze leftover pancakes for up to 6 months in an airtight container.

    Pro Tip

    • Browned butter will enhance the flavor of the pancakes. Simply melt over the stove in a saucepan for about 3-5 minutes or until the butter turns golden brown.

    Frequently Asked Questions

    What causes pancakes to be fluffy?

    Bubbles of gas are caught in the batter as it cooks and this is what makes the pancake fluffy.

    Which is better, salted or unsalted butter for pancakes?

    Unsalted butter is better for cooking pancakes because it allows you to control the amount of salt.

    pecan butter pancakes on a red plate garnished with pecans and honey
    4 from 4 votes
    Print Pin Recipe

    Addicting Butter Pecan Pancakes

    A perfect breakfast recipe should be quick and equally delicious just like this Butter Pecan Pancakes!
    Prep Time5 minutes mins
    Cook Time20 minutes mins
    Total Time25 minutes mins
    Course: Breakfast, Dessert
    Cuisine: Fusion (American-Filipino)
    Servings: 8 pancakes
    Calories: 159kcal
    Author: Lainey (Elaine)
    Prevent your screen from going dark

    Ingredients

    • 1 cup pancake mix
    • ½ cup butter pecan cake mix
    • 1 large egg
    • ½ cup milk or water
    • 2 tablespoons butter melted and slightly cooled
    • ½ cup chopped pecans
    • 1-2 tablespoons additional milk or water if needed
    • Butter or cooking oil for greasing the pan
    • Maple syrup or honey for serving

    Instructions

    Prepare the Batter

    • Add the pancake mix and butter pecan cake mix to a large bowl.
    • Stir the dry ingredients until evenly combined.
    • Add the egg, milk or water, and melted butter.
    • Mix gently until just combined.
    • Fold in the chopped pecans.
    • Add 1–2 tablespoons of extra milk or water if the batter is too thick.
    • Let the batter rest for 5 minutes.

    Cook the Pancakes

    • Heat a lightly greased frying pan or griddle over medium-low heat.
    • Pour about ¼ cup of batter onto the hot pan for each pancake.
    • Cook until bubbles form on the surface and the edges begin to set.
    • Flip the pancake carefully and cook the other side until golden brown.
    • Repeat with the remaining batter, greasing the pan as needed.

    Serve

    • Transfer the pancakes to a serving plate.
    • Top with extra chopped pecans, if desired.
    • Serve warm with maple syrup or honey.
    Leave a Comment
    Serving: 1gCalories: 159kcalCarbohydrates: 14gProtein: 3gFat: 10gSaturated Fat: 3gPolyunsaturated Fat: 2gMonounsaturated Fat: 4gTrans Fat: 0.2gCholesterol: 41mgSodium: 182mgPotassium: 97mgFiber: 1gSugar: 5gVitamin A: 186IUVitamin C: 0.2mgCalcium: 83mgIron: 1mg

    Watch The Recipe Video!

    QR Code
    Did you make this recipe?Share it on instagram or tag @simplybakings or #simplybakings!

    Breakfast & Brunch, Christmas Desserts

    Pumpkin Bread With Cinnamon Streusel Topping

    Sep 16, 2016 · 1 Comment

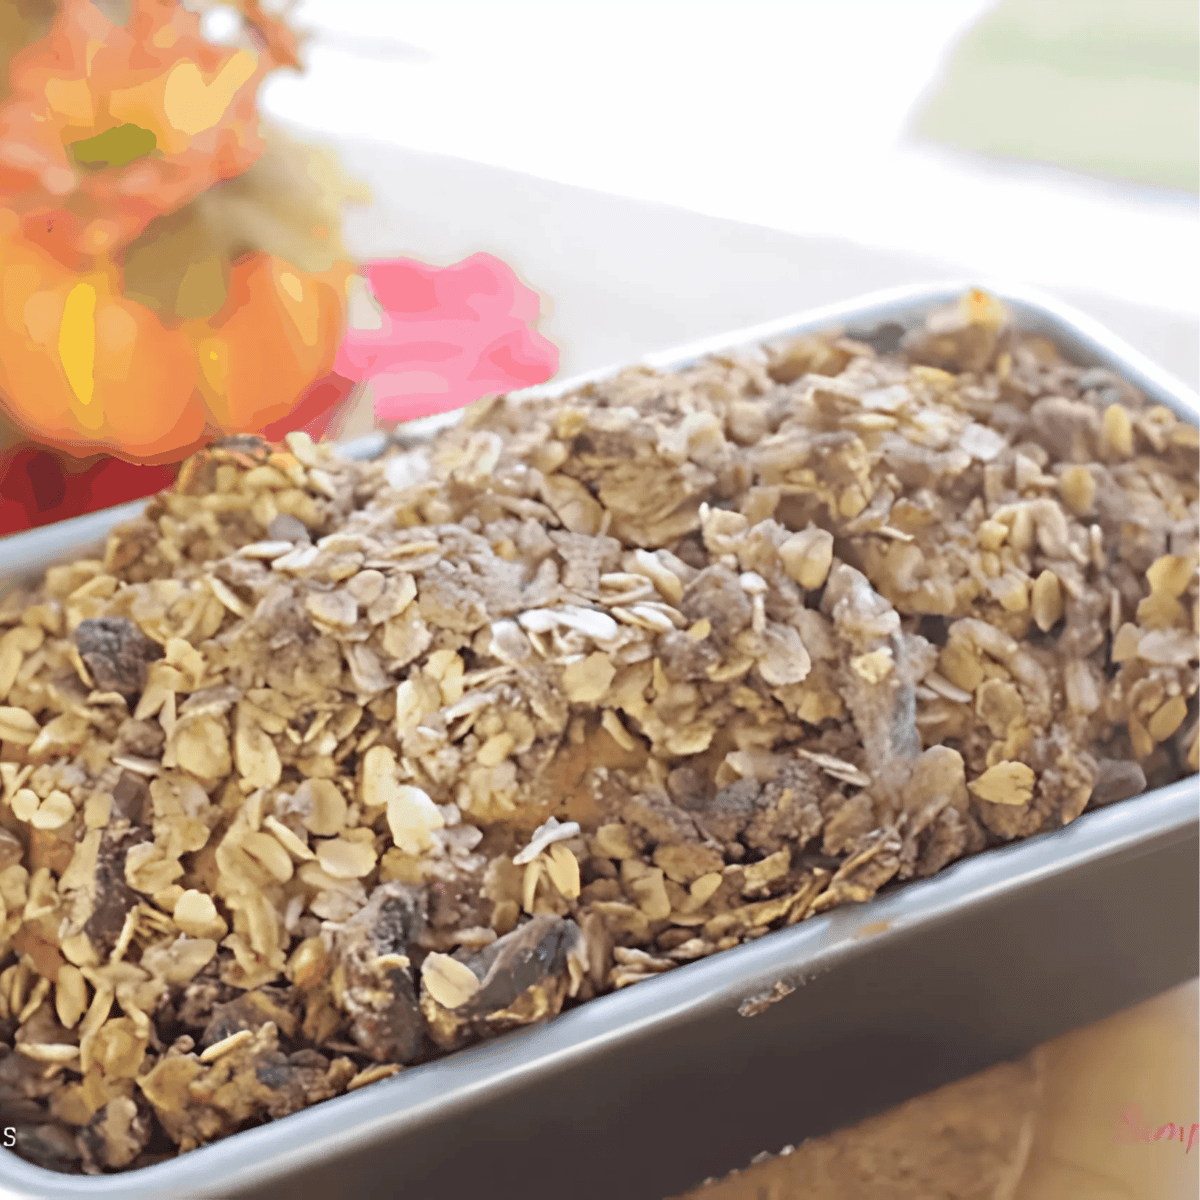
    homemade pumpkin bread

    Moist and delicious Pumpkin Bread With Cinnamon Streusel Topping that is easy to make and paired with butter and hot chocolate- this will warm you from the inside out. 

    Looking for more cozy pumpkin recipes and fall bakes? Check these out Mini Pumpkin Spice Muffins and Pumpkin Chocolate Chip Bread.

    pumpkin bread with cinnamon streusel topping
    [feast_advanced_jump_to]

    What is Pumpkin Bread With Cinnamon Streusel Topping?

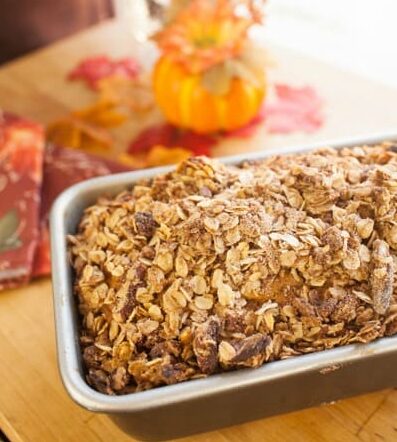
    This easy pumpkin bread recipe is a classic fall favorite with a twist: a cinnamon streusel topping made from oats, pecans, and brown sugar.

    The soft and tender pumpkin bread batter is flavored with cinnamon and sweetened with a mix of granulated and light brown sugar. It's the perfect thing to bake during pumpkin season, especially if you're looking for new recipes to try.

    Just imagine the smell in your kitchen—warm spices, sweet pumpkin, and buttery crumb topping. Total autumn vibes!

    While many people use pumpkin pie filling by accident, this recipe calls for pure pumpkin puree to control the sweetness and spices. You’ll love how simple this bake is—no mixer needed, just a few bowls and a loaf pan!

    Substitutions

    • pumpkin puree – sub with mashed sweet potatoes or butternut squash
    • milk – any room temperature plant-based milk like almond, oat, or soy milk
    • vegetable oil – try canola oil, coconut oil, melted butter, or applesauce
    • all-purpose flour – sub with whole wheat flour, a gluten-free blend, or spelt flour
    • pecans – swap with walnuts or skip for a nut-free version

    Variations

    • Extra Spiced – add ginger, cloves, or a dash of pumpkin pie spice
    • Walnut Streusel – swap pecans for walnuts in the topping
    • Chocolate Chip – mix ½ cup chocolate chips into the batter

    Storage & Leftovers

    • Countertop – wrap in plastic wrap or store in an airtight container for up to 3 days
    • Fridge – keeps well for up to a week
    • Freezer – wrap in aluminum foil, place in a freezer bag, and freeze up to 3 months
    • Sliced Freezing – pre-slice and wrap each slice in parchment paper before freezing for grab-and-go snacks
    pumpkin bread in loaf pan

    Ingredients

    • eggs
    • sugar
    • brown sugar
    • pumpkin puree
    • milk
    • vegetable oil
    • all-purpose flour
    • baking soda
    • cinnamon
    • salt

    Cinnamon Streusel Topping:

    • old-fashioned oats
    • pecans
    • flour
    • cinnamon
    • brown sugar
    • butter

    Instructions

    Before we begin mixing the ingredients for the best Cinnamon Streusel Pumpkin Bread, preheat oven to 350F and oil loaf pan. Now we are ready! Let's begin!

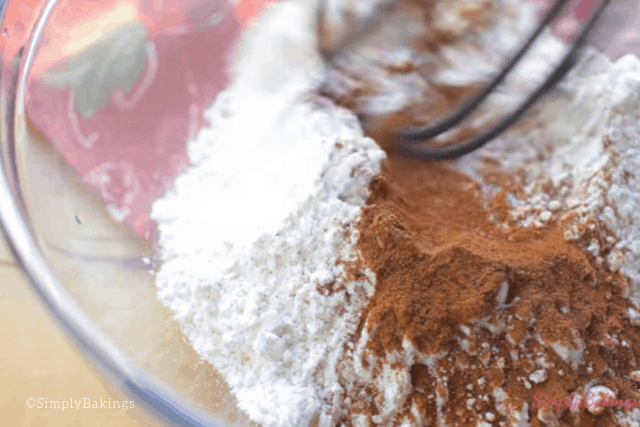
    In a medium size bowl, add the all purpose flour, baking soda, cinnamon, salt and whisk together. Set the mixture aside:

    mixing dry ingredients for streusel pumpkin bread recipe

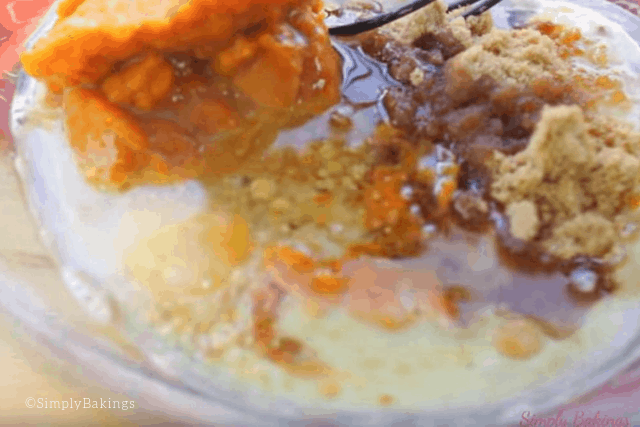
    In a large bowl mix the eggs, granulated sugar, brown sugar, pumpkin puree, vegetable oil, milk until well combined:

    mixing wet ingredients for streusel pumpkin bread

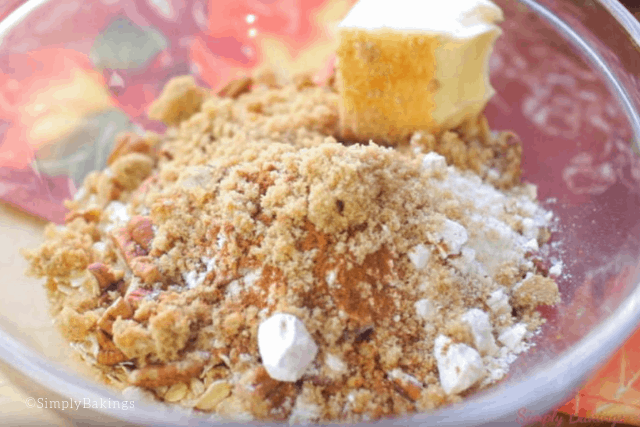
    In a separate bowl, mix together the rolled oats, chopped pecans, flour, cinnamon, brown sugar, and butter and sprinkle onto the pumpkin mixture:

    mixing oats, brown sugar, flour and butter for streusel pumpkin bread recipe

    Using a pastry cutter, mix it well until all the ingredients are incorporated well especially the butter, and it should look like this:

    mixed oats, flour, and cinnamon and butter for streusel pumpkin bread recipe

    Add the dry ingredients into wet ingredients and mix well:

    mixing wet and dry ingredients for streusel pumpkin bread recipe

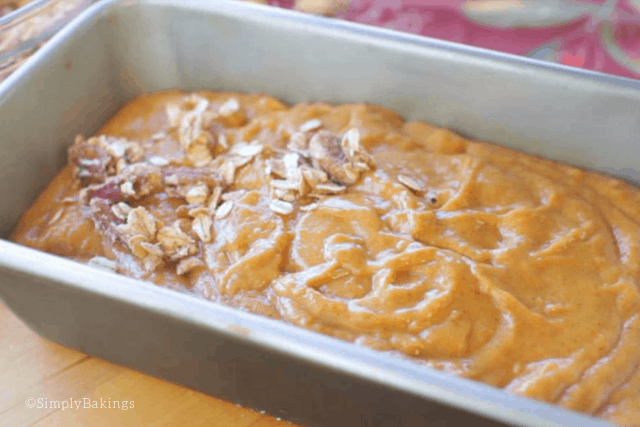
    When the batter is mixed well and is already smooth (without flour lumps), you can now pour into the loaf pan and bake for 1 hour or until toothpick comes out clean:

    ready to bake streusel pumpkin bread in a loaf pan

    Top Tips

    • There are spices you can add to this streusel pumpkin bread recipe like ground nutmeg, pumpkin spice, and many others.
    • If you love incorporating fruits to your bread, you can add mashed ripe bananas and you now have streusel pumpkin banana bread.
    • You can also add cream cheese to this best streusel pumpkin bread recipe. Just pour the cream cheese when you have filled the loaf pan halfway then cover with the rest of the batter.

    FAQ

    What are the active ingredients in pumpkin?

    Pumpkin is rich in beta-carotene (vitamin A), fiber, potassium, and antioxidants, which support eye health, digestion, and the immune system.

    Why does my pumpkin bread taste bland?

    It may need more spices like cinnamon, ginger, or cloves. Using fresh, high-quality pumpkin puree and not overmixing the batter can also enhance the flavor.

    How to intensify pumpkin flavor?

    Boost the flavor by adding extra pumpkin pie spice, cinnamon, nutmeg, or a splash of vanilla. Roasting the pumpkin puree before using also deepens the taste.

    More pumpkin-flavored desserts to try:

    • Oreo Pumpkin Cheesecake
    • Pumpkin Ice Cream
    • Pumpkin Dump Cake


    baked Pumpkin Bread With Cinnamon Streusel Topping
    No ratings yet
    Print Pin Recipe

    Pumpkin Bread With Cinnamon Streusel Topping

    Warm up with a slice of Pumpkin Bread With Cinnamon Streusel Topping—soft, spiced bread with a sweet crunchy crumb topping that screams fall flavors!
    Prep Time15 minutes mins
    Bake Time1 hour hr
    Total Time1 hour hr 15 minutes mins
    Course: Bread
    Cuisine: American
    Servings: 8 -10 slices
    Calories: 529kcal
    Author: Lainey
    Prevent your screen from going dark

    Ingredients

    • 2 eggs
    • ¾ cups sugar
    • ½ cup brown sugar
    • 1 ½ cups pumpkin puree
    • ¼ cup milk
    • ½ cup vegetable oil
    • 1 ¾ cups all-purpose flour
    • 1 teaspoon baking soda
    • 2 teaspoons cinnamon
    • ¾ teaspoon salt

    Cinnamon Streusel Topping:

    • 1 cup old fashioned oats
    • ½ cup chopped pecans
    • 2 tablespoons flour
    • 1 teaspoon cinnamon
    • 3 tablespoons brown sugar
    • 3 tablespoons butter

    Instructions

    • Preheat oven to 350F and oil loaf pan.
    • In a medium size bowl, add the all purpose flour, baking soda, cinnamon, salt and whisk together, set bowl aside.
    • In a large bowl mix the eggs, granulated sugar, brown sugar, pumpkin puree, vegetable oil, milk until well combined.
    • Add the dry ingredients into wet ingredients, mix well and then pour into the loaf pan.
    • In a another bowl, mix together the rolled oats, chopped pecans, flour, cinnamon, brown sugar, and butter and sprinkle onto the pumpkin mixture.
    • Bake for 1 hour or until toothpick comes out clean.
    Leave a Comment
    Serving: 1sliceCalories: 529kcalCarbohydrates: 71gProtein: 7gFat: 25gSaturated Fat: 6gPolyunsaturated Fat: 10gMonounsaturated Fat: 8gTrans Fat: 0.3gCholesterol: 53mgSodium: 416mgPotassium: 246mgFiber: 4gSugar: 39gVitamin A: 7358IUVitamin C: 2mgCalcium: 66mgIron: 3mg

    Watch The Recipe Video!

    QR Code
    Did you make this recipe?Share it on instagram or tag @simplybakings or #simplybakings!


    Bread, Breakfast & Brunch, Desserts, Thanksgiving Desserts

    Mini Chocolate Chip Cookies | VEGAN & GLUTEN FREE

    Sep 12, 2016 · 2 Comments

    gluten free cookies

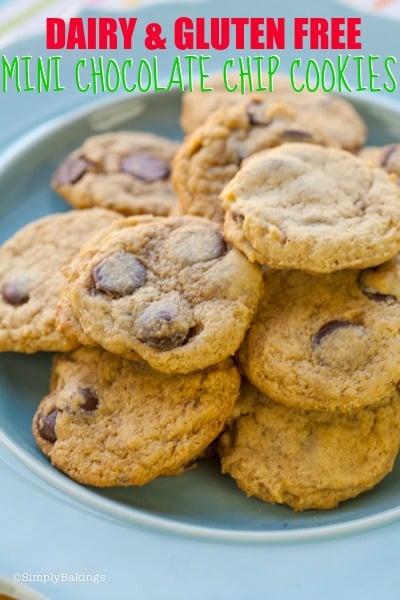
    One of the cookie recipes that is everybody's favorite is Mini Chocolate Chip Cookies. I gave the regular Mini Chocolate Chip Cookies a twist and here it is! Vegan and gluten-free cookie recipe you wouldn't want to miss this awesome cookie recipe!

    gluten free, dairy free, vegan delicious mini chocolate chip cookies on a plate

    Tips and Procedures: 

    • If you love a strong chocolate flavor, you can use the bittersweet variant of mini chocolate chips.
    • To make this a truly vegan cookie recipe, find carob or the vegan mini chocolate chips in vegan groceries.

    How to Make this Mini Chocolate Chip Cookies | VEGAN & GLUTEN FREE:

    Here is a quick look at the ingredients for Mini Chocolate Chip Cookies:

    • gluten-free flour blend
    • baking soda
    • salt
    • vegan butter
    • brown sugar
    • granulated sugar
    • applesauce
    • flaxseed
    • vanilla extract
    • vegan carob, or chocolate chips

    After gathering the ingredients, preheat the oven to 350F and prepare cookie sheets using parchment paper or a baking mat.

    Now, let's begin!

    dairy and gluten free mini chocolate chip cookies

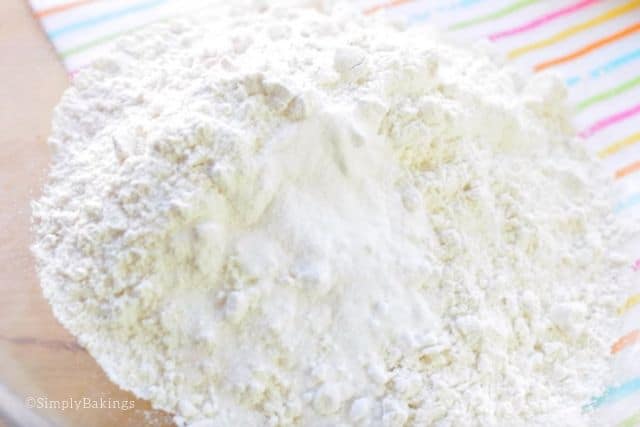
    In a large bowl whisk together the flour, baking soda, and salt and set aside:

    dry ingredients of mini chocolate chip cookies recipe

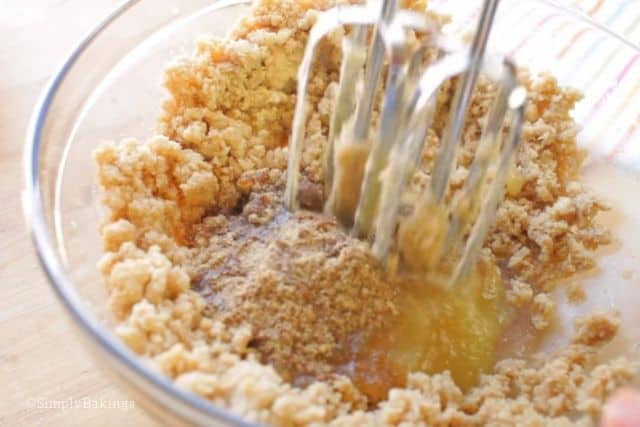
    In a medium-sized bowl, add the butter, brown sugar, and granulated sugar and mix until light and fluffy:

    mixing the ingredients for mini chocolate chip cookies

    Next add the applesauce, flaxseed, and vanilla extract, and continue mixing until well combined:

    adding the wet ingredients to the dry ingredients for mini chocolate chip cookies

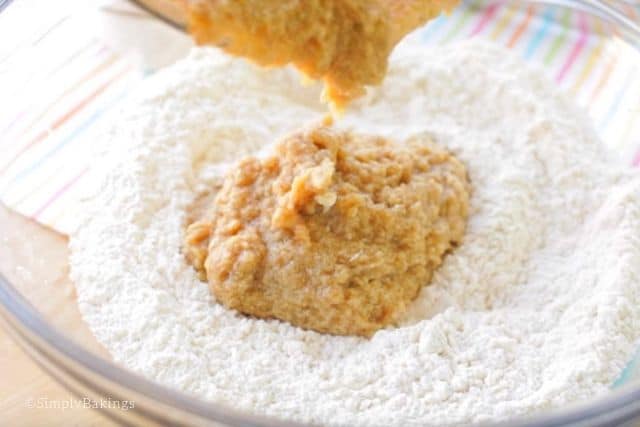
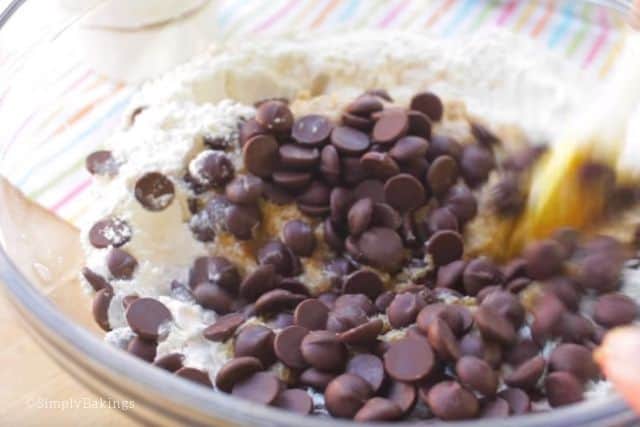
    Take the flour mixture and make a well in the center, then add the wet ingredients and chocolate chips and mix until cookie dough forms:

    adding the carob or vegan chocolate chips to the cookie mixture

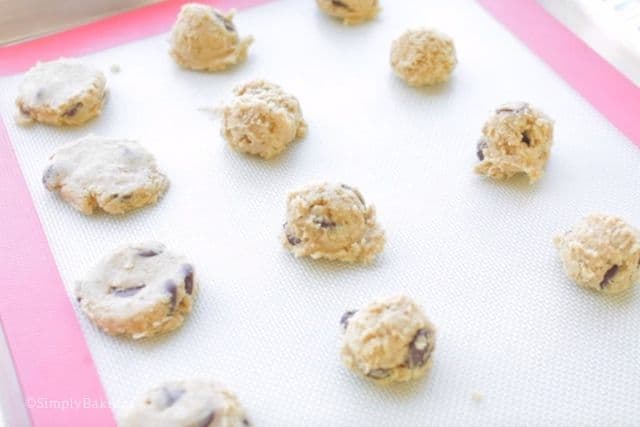
    Using a small cookie scooper, scoop the cookies onto the baking mat and bake only for 7-8 minutes:

    ready to bake vegan mini chocolate chip cookies

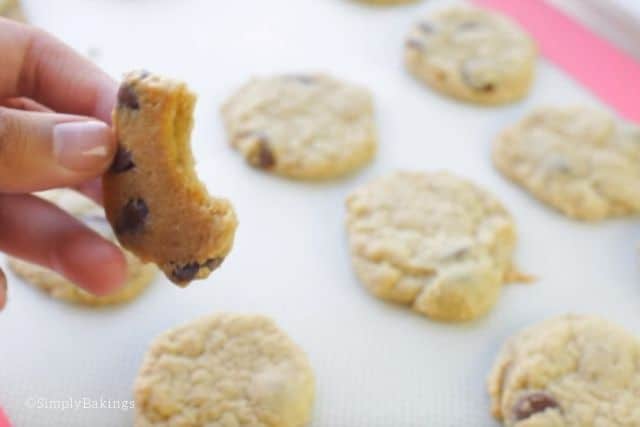
    Remove from oven and transfer cookies to a cookie rack to allow to cool. I didn't have the patience to wait so I took a bite. 😉

    holding a cookie with a bite

    Happy baking!

    vegan and gluten free mini chocolate chip cookies step by step guide

    Here are more cookie recipes you will surely love:

    • Keto Coconut Chocolate Chip Cookies
    • 5 Ingredient Sunbutter Cookies
    • Gluten-Free Chocolate Chip Cookies
    • Vegan Snickerdoodle Cookies

    Happy Baking!

    Frequently Asked Questions:

    Q: Can I freeze this cookie dough a few days before baking?

    A: Sure, you can. Just make sure to thaw it before baking.

    Q: How many cookies did this recipe make?

    A: I have made about 24 cookies using this recipe.

    Q: Can I mix dried fruits into this cookie batter?

    A: Yes you can add the dried fruit of your choice.

    freshly baked vegan and dairy free chocolate chip cookies
    No ratings yet
    Print Pin Recipe

    Mini Chocolate Chip Cookies | VEGAN & GLUTEN FREE

    An easy, quick to bake Mini Chocolate Chip Cookies that is vegan and gluten-free - you wouldn't want to miss this awesome cookie recipe!
    Servings: 3 dozen mini cookies
    Author: Lainey
    Prevent your screen from going dark

    Ingredients

    • 2 cups gluten-free flour blend
    • 1 teaspoon baking soda
    • ½ teaspoon salt
    • ½ cup vegan butter
    • ¾ cup brown sugar
    • ½ cup granulated sugar
    • ⅓ cup applesauce
    • 2 tablespoons flaxseed
    • 2 teaspoon vanilla extract
    • 1 ½ cups vegan carob, or chocolate chips

    Instructions

    • Preheat oven to 350F and prepare cookie sheets using parchment paper or baking mat.
    • In a large bowl whisk together the flour, baking soda, salt and set aside.
    • In a medium size bowl add the butter, brown sugar, granulated sugar and mix until light and fluffy. Next add the applesauce, flaxseed, vanilla extract, and continue mixing until well combined.
    • Take the flour mixture and make a well in the center, then add the wet ingredients, chocolate chips and mix until cookie dough forms.
    • Using a small cookie scooper, scoop the cookies on the baking mat and bake only for 7-8 minutes. Remove from oven and transfer cookies to cookie rack to allow to cool.
    Leave a Comment
    QR Code
    Did you make this recipe?Share it on instagram or tag @simplybakings or #simplybakings!

    NEVER MISS A RECIPE!

    PINTEREST / FACEBOOK / INSTAGRAM / TWITTER

    If you’ve tried this or any other of my recipes, don’t forget to rate the recipe and to leave me a comment. I love hearing from you!

    Cookies, Desserts, Vegan Baking

    Funfetti Lemon Cake Mix Cookies

    Sep 1, 2016 · 2 Comments

    What comes to your mind when you hear the word "funfetti? For me, it means celebration and merry-making! And I love that <3

    Here's a cookie that'll make your parties more enjoyable and will give you a "summer" feel in your mouth. Happy baking! xx

    funfetti lemon cake mix cookies on a yellow bowl

    Funfetti Lemon Cake Mix Cookies on yellow bowl

    Tips and Tricks for Making This Funfetti Lemon Cake Mix Cookies Recipe: 

    • Feeling adventurous? Add in some white chocolate chips to the batter or dark chocolate chips will do!
    • There are several cake mixes you can make into fun cookie flavors like this. Some are yellow cake mix, strawberry cake mix, chocolate fudge cake mix,  and devil's food cake mix. Choose your favorite!

    How to Make this Funfetti Lemon Cake Mix Cookies Recipe:

    Gather the ingredients for this Funfetti Lemon Cake Mix Cookies. Before starting mixing the ingredients, don't forget to preheat your oven to 350F.

    Here are what you will need for this recipe:

    • vegetable oil
    • eggs
    • box of cake mix (18.25 oz)**

    Once the ingredients are all ready, let's begin!

    In a large bowl, add a ⅓ cup of vegetable oil and 2 eggs and mix:

    mixing oil and eggs in a glass bowl using a handheld mixer

    Next, add your cake mix (I used Funfetti, I love it!) to the wet ingredients:

    mixing the funfetti cake mix to the wet ingredients

    Mix well until it looks like cookie dough. Set the mixture aside:

    funfetti cake mix cookie dough

    In another bowl, mix another batch of cookie dough. You can change the flavor of the cake mix which you think compliments well with the other cake mix flavor:

    mixing lemon cake mix to eggs and oil mixture

    For the second mixture, I used the lemon flavor:

    lemon cake mix cookie dough

    After that, take a scoop of the first cookie dough flavor and place it on a silicone mat then place the other cookie dough flavor on one side so that the two cookie dough flavors slightly combine, just like so, and bake them for 13-15 minutes:

    putting lemon cake mix cookie dough beside funfetti cake mix cookie dough

    When it's done, take it out from the oven and let cool in a cooling rack. Enjoy your cookies!

    Funfetti Lemon Cake Mix Cookies

    Here is a step by step photo of how easy it is to bake these Funfetti Lemon Cake Mix Cookies!

    Funfetti Lemon Cake Mix Cookies step by step guide

    Frequently Asked Questions for the Funfetti Lemon Cake Mix Cookies Recipe:

    Q: How many servings would this recipe do?

    A: This delicious and easy Funfetti Lemon Cake Mix Cookie recipe could make up to 16 pieces of cookie slices, depending on how big your portions are.

    Q: Will this recipe work with other cake mix flavors?

    A: Yes it will work. It just won't be the same cookie name 😉

    Q: Can I mix this ahead and refrigerate before baking?

    A: Yes, you can. Just place in room temperature for about 15-20 minutes before baking.

    No ratings yet
    Print Pin Recipe

    Funfetti Lemon Cake Mix Cookies

    Author: Lainey
    Prevent your screen from going dark

    Ingredients

    • ⅓ cup vegetable oil
    • 2 eggs
    • 1 box of cake mix 18.25 oz**

    Instructions

    • Preheat your oven to 350F
    • In a large bowl, add a ⅓ cup of vegetable oil and 2 eggs.
    • Mix it until it's well combined.
    • Next, add your cake mix (I used Funfetti, I love it!) to the wet ingredients until it looks like a cookie dough.
    • Set the mixture aside.
    • In another bowl, mix another batch of cookie dough. You can change the flavor of the cake mix which you think compliments well with the other cake mix flavor.
    • After that, take a scoop of the first cookie dough flavor and place it on a silicone mat. Place the other cookie dough flavor on one side so that the two cookie dough flavors slightly combine.
    • Bake them for 13-15 minutes.
    • When it's done, take it out from the oven and let cool in a cooling rack.
    • Enjoy your cookies!
    Leave a Comment

    Notes

    **This recipe makes 1 cake box mix cookies
    QR Code
    Did you make this recipe?Share it on instagram or tag @simplybakings or #simplybakings!

    NEVER MISS A RECIPE!

    PINTEREST / FACEBOOK / INSTAGRAM / TWITTER

    If you’ve tried this or any other of my recipes, don’t forget to rate the recipe and to leave me a comment. I love hearing from you!

    Cookies, Desserts

    Leftover Candy Cookies

    Aug 24, 2016 · 4 Comments

    Leftover Candy Cookies on a plate

    This Leftover Candy Cookies recipe will turn your favorite candies into amazing cookies with a delightful mix of flavors in every bite! It's a delicious way to make the most of your extra treats that will surely please kids and adults alike!

    Need a twist from your regular cookies? Try my Sugar Cookies, Rice Krispies Cookies, and Oreo Cheesecake Cookies recipe!

    Leftover Candy Cookies served on a blue plate
    [feast_advanced_jump_to]

    What are Leftover Candy Cookies?

    Leftover Candy Cookies are soft, chewy cookies made with a delicious mix of leftover candies and a classic cookie dough. This easy cookie recipe is a fun and easy way to repurpose your extra candy bars, chocolate candies, peanut butter cups, chocolate bars such as Hershey's or Kit Kats, or any other candies you have in your pantry.

    These leftover candy cookies can be enjoyed as a snack or dessert. They are inspired by classic favorites cookies—but with a unique twist! Instead of using just one type of candy, many kinds of candies are mixed, making each batch unique with different flavors and textures.

    People usually enjoy making these cookies after the holidays to use up leftover candies and minimize waste. It is also a fun baking activity for families because the kids can help add their favorite sweets.

    Learn more about this leftover candy cookies recipe below and give this a try!

    Substitutions

    • Butter - Use unsalted butter, coconut oil, or margarine as alternatives.
    • Granulated Sugar - Swap with coconut sugar, maple syrup, or honey.
    • Egg - Replace with flax eggs, chia eggs, or applesauce.
    • Peanut Butter - Substitute with almond butter, or sunflower butter.
    Chocolate cookies filled with candies

    Variations

    • Mint Chocolate – Mix in chopped Andes mints, mint M&Ms, and a touch of peppermint extract.
    • S’mores – Add mini marshmallows, graham cracker chunks, and chocolate pieces for a gooey treat.
    • Spiced Chocolate – Use chocolate-covered cinnamon candies with a pinch of cinnamon and nutmeg for a spiced flavored cookie.
    • Nutty Mix - Add nuts such as macadamia nuts, peanuts, or almonds in the cookie batter before baking. Nuts add extra delicious texture in every bite!

    Storage

    • Store these leftover candy cookies in an airtight container at room temperature for up to 1 week.
    • You may put the baked cookies in the freezer for up to 3 months, then thaw at room temperature before serving.
    • For freezing cookie dough, scoop into balls, freeze, and bake directly from frozen, adding 1-2 minutes to baking time.

    Ingredients

    Listed below are all the ingredients you will need:

    • Butter
    • Granulated sugar
    • Brown sugar
    • Eggs
    • Creamy peanut butter
    • Vanilla extract
    • All-purpose flour
    • Baking powder
    • Baking soda
    • Mixed candies

    See the recipe card for quantities.

    Instructions

    In a large bowl, add butter, granulated sugar, and brown sugar. Then, mix them until well-combined.

    creaming butter and brown sugar in a blue mixing bowl

    After that, add eggs, vanilla extract, and peanut butter into the bowl. Then, continue mixing.

    adding eggs, vanilla and peanut butter to the butter and sugar mixture

    In a stand mixer or with an electric mixer, whisk together flour, baking powder, and baking soda.

    Then, gradually mix into the peanut butter mixture, and fold in the mixed candies until evenly distributed.

    colorful assorted candy mix candy cookies dough in a blue bowl

    Get a medium cookie scoop. Then, place each of your cookie dough balls on your cookie sheet and bake these cookies at 350F for about 10 minutes.

    ready to bake assorted candy mix cookies on a cookie sheet

    When done baking, put the freshly baked cookies on a cooling rack.

    Finally, when cooled down enough, break one in half and enjoy the unique flavor of these delicious leftover candy cookies!

    a hand holding a freshly baked assorted candy mix cookies

    It is so easy to bake and all you need is a mixing skill!

    Hint: Use a mix of chocolate, caramel, peanut butter cups, or candy-coated chocolates for fun textures.

    ⭐ Top Tip

    Before mixing in the dry ingredients for the leftover candy cookies, don't forget to sift them very well. Sifting will prevent lumps in your cookies.

    FAQ

    What to do with out-of-date cookies?

    If your cookies are no longer crispy, pop them in the oven to refresh them, or crush them to use in dessert recipes.

    What are the best candies for cookies?

    You'll find some of the best candy to put in cookies with your kid's leftover nosh, or you can buy some new nosh. Anything that is chocolate or peanut butter based is a great option. Reese's Peanut Butter Cups, Snickers, M&M's, Butterfingers, caramel candies, and Rolo's. But you don't have to stop there!

    Will this recipe work if I put crunchy peanut butter instead of the smooth variety?

    Yes, for sure, that would be equally delicious.

    More Recipes

    Here are more cookie recipes you will enjoy making:

    • Chocolate Chip Cookies
    • Sunbutter Cookies
    • Caramel Pretzel Cookies
    • Nutella Stuffed Cookies
    deliciously baked leftover candy cookies in a blue plate
    5 from 3 votes
    Print Pin Recipe

    Leftover Candy Cookies

    These Leftover Candy Cookies give a delicious surprise in every bite - chocolatey, sweet, deliciously textured cookies, and perfect treats for your kids!
    Prep Time10 minutes mins
    Cook Time10 minutes mins
    Total Time20 minutes mins
    Course: Dessert, Snack
    Cuisine: American
    Servings: 24 cookies
    Calories: 229kcal
    Author: Lainey
    Prevent your screen from going dark

    Ingredients

    • 1 cup butter softened
    • ½ cup granulated sugar
    • ½ cup brown sugar
    • 2 eggs
    • 1 cup creamy peanut butter
    • 2 teaspoons vanilla extract
    • 3 cups all-purpose flour
    • 1 teaspoon baking powder
    • 1 teaspoon baking soda
    • 1 ½ cups mixed candy (chocolate bars, M&Ms, caramel, etc.)

    Instructions

    • Preheat oven to 350°F (175°C) and line a baking sheet with parchment paper.
    • In a large bowl, cream together butter, granulated sugar, and brown sugar until fluffy.
    • Add eggs, vanilla extract, and peanut butter; mix until well combined.
    • In a separate bowl, whisk together flour, baking powder, and baking soda.
    • Gradually mix the dry ingredients into the wet ingredients. Fold in the mixed candy pieces.
    • Scoop the dough onto the prepared baking sheet, spacing them about 2 inches apart.
    • Bake for 10-12 minutes, or until the edges are lightly golden.
    • Let cool on the baking sheet for 5 minutes, then transfer to a wire rack to cool completely.
    Leave a Comment
    Serving: 1cookieCalories: 229kcalCarbohydrates: 23gProtein: 5gFat: 14gSaturated Fat: 6gPolyunsaturated Fat: 2gMonounsaturated Fat: 5gTrans Fat: 0.3gCholesterol: 34mgSodium: 177mgPotassium: 91mgFiber: 1gSugar: 10gVitamin A: 256IUCalcium: 26mgIron: 1mg

    Watch The Recipe Video!

    QR Code
    Did you make this recipe?Share it on instagram or tag @simplybakings or #simplybakings!

    Christmas Desserts, Cookies, Snacks

    Brownie Meringue Cookies | 5 Ingredients ONLY

    Aug 19, 2016 · 14 Comments

    Brownie Meringue Cookies

    These 5 Ingredient Brownie Meringue Cookies are incredibly light and made from sugar and whipped egg whites! The cookies will melt in your mouth and leave you wanting to eat more!

    brownie meringue cookes

    Whenever I heard the word meringue in a recipe, I stayed away because it scared me!  I thought meringue recipes would be hard, complicated, messy, but as per usual, I was wrong.  I made this recipe once and it was perfect.  I gotta say, I was quite surprised by the texture of the cookie.  It's as if I am biting into air... Don't believe me, give it a try!

    How to Make Brownie Meringue Cookies:

    In a medium-sized bowl, add the unsweetened cocoa powder, sifted powdered sugar, and salt:

    sifted flour, unsweetened cocoa powder, and salt

    Whisk it until well-combined:

    mixed ingredients with whisk

    In another bowl, add 2 egg whites and vanilla extract:

    egg whites in bowl with electric beater

    Whip it until soft peaks form, just like this:

    beaten egg whites forming soft peaks

    Gradually add the powdered sugar mixture and fold it in the meringue mixture:

    mixed meringue cookies ingredients

    Add the chocolate chunks to the mixture and mix well:

    mixture with chocolate chunks

    Quick Tip:  This cookie batter is sticky, so to prevent the batter from sticking to your fingers, dip your fingers in a bit of oil (any kind) before pressing it into your cookie batter.

    Scoop the mixture on your cookie sheet, flatten cookies for them to bake evenly and bake for 15 minutes at 350F:

    brownie meringue cookies in a baking mat

    Serve.

    how to make Brownie Meringue Cookies

    Enjoy your delicious cookies!

    Brownie Meringue Cookies

    The recipe is below, plus a full video to completely guide you through the baking process.  Happy Baking!

    These are wonderful to be eaten with a tarty dessert like Lemon Ice Cream or this Pineapple Ice Cream. Enjoy!

    brownie meringue cookies on white plate
    5 from 2 votes
    Print Pin Recipe

    Brownie Meringue Cookies | 5 Ingredients ONLY

    Prevent your screen from going dark

    Ingredients

    • ½ cup unsweetened cocoa powder
    • 1 cup powdered sugar sifted
    • ⅛ teaspoon salt
    • 2 large egg whites
    • ¼ teaspoon vanilla extract
    • 3 tablespoons of chocolate chunks*

    Instructions

    • In a medium-sized bowl, add the unsweetened cocoa powder, sifted powdered sugar, and salt. Whisk it until well-combined.
    • In another bowl, add 2 egg whites and vanilla extract. Whip it until soft peaks form. Gradually add the powdered sugar mixture and fold it in the meringue mixture.
    • Add the chocolate chunks to the mixture and mix well.
    • Scoop the mixture on your cookie sheet and bake for 15 minutes at 350F.
    • Enjoy your delicious cookies!
    Leave a Comment

    Notes

    *optional

    Watch The Recipe Video!

    QR Code
    Did you make this recipe?Share it on instagram or tag @simplybakings or #simplybakings!

    5 Ingredients or Less, Cookies, Desserts

    Amazing Fruity Pebble Cookies

    Aug 15, 2016 · Leave a Comment

    fruity pebble cookies on a white plate

    These Fruity Pebble Cookies are soft in texture, fluffy, and studded with a bright, fun burst of breakfast cereal.  They're easy to make, delicious, and creative. Fans of fruity pebbles will love them!

    Looking for more cookie recipes? Try my Chewy Oreo Cheesecake Cookies, Cookie Dough Ball Cookies, or my White Chocolate Chips Cranberry Cookies!

    fruity pebbles cereal

    Tips and Procedures: 

    • Sift the dry ingredients before measuring them out. This is an easy but very important step that would make your cookies nice and evenly textured.
    • It's best to use room temperature eggs when baking.
    • To add more flavor, use vanilla extract or vanilla bean paste.
    • Spoon and level your flour. Compact flour can possibly cause your cookies not to spread.
    • If using a stand mixer, use the paddle attachment to mix the cookies.
    • Substitutions: Instead of chocolate chunks, you can add cocoa pebbles cereals.
    • Storage: Store in an airtight container for up to a week.
    Fruity Pebbles Cereal Cookies

    Ingredients You Will Need:

    • all-purpose flour
    • baking soda
    • salt
    • unsalted butter
    • brown sugar
    • granulated sugar
    • large eggs
    • almonds
    • chocolate chunks
    • fruity pebbles

    How to Make this Fruity Pebble Cookies:

    Preheat oven to 375F and prepare your cookie sheet by placing a silicone mat or parchment paper.

    Then in a large bowl, add brown sugar, granulated sugar, and butter, and using a hand mixer, beat it, until it is well combined.

    brown sugar, granulated sugar, and butter mixture for fruity pebble marshmallow cookies recipe

    To the mixture, add eggs and mix well making sure to scrape the sides of the bowl using a rubber spatula:

    added two eggs to sugar and butter mixture for fruity pebble marshmallow cookies recipe

    In another bowl, add flour, baking soda, salt, almonds, chocolate chunks, and some fruity pebble cereal. Mix well until combined:

    added the fruity pebbles, chocolate chips and marshmallows to the mixture

    Then add the flour mixture to the wet ingredients, mixing until just combined:

    cookie dough for fruity pebble marshmallow cookies recipe

    The cookie dough should look like this, well-incorporated and ready to be baked:

    Scoop your cookie dough and place it on your baking sheet:

    scooping out fruity pebble marshmallow cookie onto the baking tray

    Bake for about 10 minutes at 375F:

    ready to bake fruity pebble marshmallow cookies

    Allow it to cool completely by placing the cookies on a cooling rack and enjoy your freshly baked Fruity Pebblew Cookies in your kitchen with a glass of milk.

    freshly baked fruity pebble marshmallow cookies on a baking mat

    Munch on this addicting cookie! You'll love them!

    close-up shot of the fruity pebble marshmallow cookies

    More Cereal-Themed Dishes that are Easy to Make:

    • Rice Krispies Cookies
    • 4 Ingredient Marshmallow Treats
    • Lucky Charms Cheesecake

    Happy Baking!

    fruity pebble cookies on a white plate
    No ratings yet
    Print Pin Recipe

    Fruity Pebble Cookies

    These Fruity Pebble Cookies are soft, fluffy, and studded with a bright, fun burst of breakfast cereal.  Easy to make and fun to look at!
    Prep Time10 minutes mins
    Cook Time10 minutes mins
    Total Time20 minutes mins
    Course: Dessert
    Cuisine: American
    Servings: 24 cookies
    Calories: 3683kcal
    Author: Lainey
    Prevent your screen from going dark

    Ingredients

    • 1 cup brown sugar packed
    • ½ cup granulated sugar
    • ½ cup unsalted butter softened
    • 2 large eggs
    • 2 cups all purpose flour
    • 1 teaspoon baking soda
    • ½ teaspoon salt
    • ¼ cup chopped almonds
    • 1 cup chocolate chunks
    • 1 cup fruity pebbles marshmallow cereal

    Instructions

    • Preheat oven to 375F and prepare your baking pans lined with parchment paper ora silicone mat.
    • In a large bowl, add brown sugar, granulated sugar, and butter. Mix these until they are well-combined.
    • To the mixture, add eggs and mix well. After that, add flour, baking soda, salt, almonds, chocolate chunks, and some fruity pebble cereal. Mix well until combined.
    • Scoop your cookie dough and place on your baking sheet and bake for about 10 minutes. Remove from the oven and cool cookies on a cookie rack.
    Leave a Comment
    Serving: 1gCalories: 3683kcalCarbohydrates: 644gProtein: 61gFat: 100gSaturated Fat: 46gPolyunsaturated Fat: 9gMonounsaturated Fat: 35gTrans Fat: 0.2gCholesterol: 351mgSodium: 2805mgPotassium: 2101mgFiber: 25gSugar: 398gVitamin A: 1759IUVitamin C: 9mgCalcium: 618mgIron: 30mg

    Watch The Recipe Video!

    QR Code
    Did you make this recipe?Share it on instagram or tag @simplybakings or #simplybakings!

    NEVER MISS A RECIPE!

    PINTEREST / FACEBOOK / INSTAGRAM / TWITTER

    If you’ve tried this or any other of my recipes, don’t forget to rate the recipe and leave me a comment. I love hearing from you!

    Christmas Desserts, Cookies, Desserts

    Healthy Oat Cookies | 3 Ingredients ONLY

    Aug 9, 2016 · 4 Comments

    how to make healthy cookies

    These 3 Ingredient Healthy Oat Cookies are rich in fiber, vitamins, and minerals!  Simple yet delicious and great to munch on for breakfast or as a snack! 

    Healthy oat cookies in a bowl

    I'll let you on a little secret... I accidentally created this recipe. One morning, I was trying to figure out a recipe that I messed up on and this recipe happened.  And to be honest bakers, that's how a lot of my recipes happened. (hehe)

    I hope you guys enjoy this recipe.

    oat cookies in a pink bowl

    How to Make Healthy Oat Cookies:

    In a large bowl, add 2 bananas and mash it. Make sure to use bananas that are very ripe. They taste so much better when baked and are easier to mash:

    mashing bananas in a bowl

    After mashing it, it should look like this:

    mashed bananas

    Gradually add quick oats to the mashed bananas:

    mashed bananas and quick oats

    Then add raisins to the mixture. Though this is optional, you can also add some cinnamon for that extra flavor:

    mixed ingredients and raisins

    Scoop the cookie dough into your silicone mat or parchment paper:

    scooping mixed ingredients

    Bake for about 15 minutes until they are slightly brown on the edges:

    baked healthy oats

    For a step-by-step tutorial of my Healthy Oat Cookies watch my video tutorial below:

    More healthy breakfast options you may enjoy:

    Easy Smoothie Bowls

    Vegan Pancakes 

    Coffee Cake

    5 from 1 vote
    Print Pin Recipe

    Healthy Oat Cookies | 3 Ingredients ONLY

    Prevent your screen from going dark

    Ingredients

    • 2 bananas mashed
    • 1 cup quick oats
    • ⅓ cup raisins

    Instructions

    • Preheat your oven to 350F.
    • In a large bowl, add 2 bananas and mash it. Make sure you use bananas that are very ripe. They taste so much better when baked and are easier to mash.
    • Gradually add quick oats to the mashed bananas.
    • Then add raisins to the mixture. You can also add some cinnamon for that extra flavor.
    • Scoop the cookie dough into your silicone mat or parchment paper.
    • Bake for about 15 minutes until they're done.
    Leave a Comment
    QR Code
    Did you make this recipe?Share it on instagram or tag @simplybakings or #simplybakings!

    5 Ingredients or Less, Breakfast & Brunch

    How to Make a Smoothie Bowl Thick (2 Easy Smoothie Bowls)

    Jul 29, 2016 · 4 Comments

    yummy strawberry and blueberry smoothie breakfast bowls

    Make your smoothie bowl thick with this Blueberry and Strawberry Smoothie Bowl recipes. Only requires 5 ingredients and manages to be both healthy and delicious. It’s a great breakfast option and only takes 5 minutes to make!

    Tips and tricks on this recipe can also be applied to my favorite 3 Ingredient Mango Smoothie, Pineapple Mango Smoothie, and Strawberry Banana Smoothie.

    smoothie bowls
    [feast_advanced_jump_to]

    Ingredients

    These are the ingredients you need for that perfect smoothie bowl:

    • frozen strawberries and blueberries
    • vanilla yogurt
    • almond butter
    • almond milk
    • assorted toppings (such as coconut flakes, chia seeds, or honey)

    See recipe card for quantities.

    How to Make Strawberry Smoothie Bowl

    fruits in a blender
    blending smoothie ingredients

    In your blender, add in the frozen strawberries, vanilla yogurt, almond butter, and almond milk.

    Give it a good blend until all the ingredients are evenly combined.

    strawberry smoothie in a bowl
    strawberry smoothie with bananas, coconut and cocoa nibs

    After blending, pour your smoothie mixture in a bowl and start adding your favorite smoothie toppings.

    For this strawberry smoothie, I topped it with sliced bananas, desiccated coconut, and cocoa nibs. It tasted so delicious and refreshing!

    How to Make Blueberry Smoothie Bowl

    healthy smoothie ingredients in a blender
    mixed smoothie in a blender

    In your blender, add in the frozen blueberries, vanilla yogurt, almond butter, and almond milk.

    Give it a good blend until all the ingredients are evenly combined.

    blueberry smoothie in a bowl with shredded coconut
    blueberry smoothie in a bowl with toppings

    After blending, pour your smoothie mixture in a bowl and start adding your favorite smoothie toppings:

    For this blueberry smoothie, I topped it with shredded coconut, chia seeds, and pumpkin seeds. You can use any of your favorite smoothie bowl toppings!

    This smoothie bowl is so nutritious and perfect for a pre-workout or post-workout meal!

    Substitutions

    • Protein Powder: If you're looking to boost the protein content of your smoothie bowl, consider adding a scoop of protein powder. Opt for your favorite flavor, like vanilla or chocolate, and mix it in with the other ingredients.
    • Liquid: Instead of almond milk, try using coconut milk, oat milk, or any other non-dairy milk of your choice.
    • Frozen Bananas: If you're out of frozen berries, frozen bananas, mango, pineapple, and kiwi can serve as a great alternative for thick smoothie bowl.
    • Peanut Butter: Swap almond butter for peanut butter for a nutty twist.
    • Oats: For added fiber and texture, blend in a handful of oats into your fruit smoothies.
    • Sweetener: Instead of maple syrup, you can use honey or agave syrup to add natural sweetness to your smoothie bowl.

    Variations

    • Strawberry Banana Smoothie Bowl: Blend frozen strawberries, banana slices, Greek yogurt, and a splash of non-dairy milk until smooth. Top with fresh strawberries, banana slices, and a sprinkle of granola for extra crunch.
    • Berry Smoothie Bowl: Mix frozen berries (like raspberries, blackberries, and blueberries) with coconut milk and a scoop of protein powder until creamy. Add fresh berries, hemp seeds, and a drizzle of honey for more flavor.
    • Acai Smoothie Bowl: Blend frozen acai packets with banana, coconut milk, and spinach until smooth. Serve topped with granola, sliced banana, and Greek yogurt for a satisfying meal or snack.
    • Dragon Fruit Smoothie Bowl: Blend frozen dragon fruit chunks with pineapple, mango, and coconut water until creamy. Garnish with fresh fruit, cacao nibs, and shredded coconut for a tropical delight.
    • Chocolate Smoothie Bowl: Combine frozen banana, cacao powder, almond milk, and protein powder until thick and smooth. Finish with cacao nibs, chopped nuts, and a drizzle of nut butter for a decadent treat.

    Storage

    If you happen to have leftovers (which is rare because these bowls are so delicious!), you can store them in an airtight container in the refrigerator for up to 24 hours. Just give it a good stir before enjoying the next day.

    Top Tip

    For the smoothest and most delicious smoothie bowls, use frozen fruit that's really frozen. This keeps your bowl thick and rich without needing extra ice.

    And don't hesitate to try different toppings for added flavor and texture. From nuts and seeds to fresh fruit and granola, you can make each bowl uniquely yours!

    Frequently Asked Questions

    How do you make a smoothie if you don't have a blender?

    When you don't have a blender, you can mash the fruits in a bowl using fork, spoon or potato masher.

    How do you thicken a smoothie bowl?

    Key trick is using more ice. You may use frozen fruits or add nut butter to make it thicker.

    Do you need a special blender to make smoothie bowls?

    A regular blender like vitamix should do the trick. Just remember to give it a 30-second break after each use to let it rest.

    yummy strawberry and blueberry smoothie breakfast bowls
    5 from 3 votes
    Print Pin Recipe

    How to Make a Smoothie Bowl Thick (2 Easy Smoothie Bowls)

    Make your breakfast brighter with these two smoothie bowl recipes featuring strawberries and blueberries!
    Prep Time5 minutes mins
    Blend Time2 minutes mins
    Total Time7 minutes mins
    Course: Breakfast
    Cuisine: American
    Servings: 2 cups
    Calories: 241kcal
    Prevent your screen from going dark

    Equipment

    • 1 Blender

    Ingredients

    Strawberry Smoothie Bowl

    • 1 cup frozen strawberries
    • 3 tablespoons  vanilla yogurt
    • 1 tablespoon almond butter
    • ¾ cup almond milk
    • assorted toppings

    Blueberry Smoothie Bowl

    • 1 cup frozen blueberries
    • 3 tablespoons vanilla yogurt
    • 1 tablespoon almond butter
    • ¾ cups almond milk
    • assorted toppings

    Instructions

    • Combine all the ingredients in a blender (per recipe).
    • Blend for 2 minutes or until all the ingredients are smooth.
    • Pour into a bowl and garnish with your favorite toppings.
    Leave a Comment

    Notes

    *If using a highs speed blender, it will only take 1 minute to blend.
    Serving: 1gCalories: 241kcalCarbohydrates: 28gProtein: 8gFat: 12gSaturated Fat: 1gPolyunsaturated Fat: 4gMonounsaturated Fat: 7gCholesterol: 3mgSodium: 286mgPotassium: 418mgFiber: 5gSugar: 20gVitamin A: 75IUVitamin C: 50mgCalcium: 399mgIron: 1mg

    Watch The Recipe Video!

    QR Code
    Did you make this recipe?Share it on instagram or tag @simplybakings or #simplybakings!

    Hi guys Lainey here! Today I'm sharing with you another NO BAKE, but healthy recipe! A smoothie Bowl!! Honestly if I can make it, anybody can...it's that easy!

     I'm pretty sure everyone has the fruit base which is some kind of frozen fruit, yogurt, milk, and a nut butter!! Pop it in the blender and blend till it's nice and smooth, but make sure it's not liquidy. Garnish the smoothie bowls with your choice of nut, fruit or anything and that's it!

    5 Ingredients or Less, Breakfast & Brunch

    BEST No Bake Banana Pie

    Jul 23, 2016 · 4 Comments

    No Bake banana Pie

    no bake banana pie
    No Bake banana Pie

    For a step-by-step tutorial of this recipe you can watch my video tutorial below. SUBSCRIBE TO MY YOUTUBE CHANNEL and never miss a recipe! (It’s free!) and new video posts on FRIDAYS !

    Watch the step by step video:


    No Bake banana Pie
    5 from 2 votes
    Print Pin Recipe

    BEST No Bake Banana Pie

    Prevent your screen from going dark

    Ingredients

    • 1 cup milk
    • 1 small box banana cream pudding JELLO Box
    • 1 4oz cream cheese
    • ¾ cups sweetened condensed milk
    • 1 cup whipped topping
    • 2 bananas
    • 1 bag Vanilla Wafers Cookies
    Leave a Comment
    QR Code
    Did you make this recipe?Share it on instagram or tag @simplybakings or #simplybakings!


    No Bake Dessert Recipes

    3 Ingredient Lemon Ice Cream (No Churning Required)

    Jul 12, 2016 · 12 Comments

    lemon ice cream in a pretty blue container

    Delight in the magic of our tarty 3 Ingredient Lemon Ice Cream—it's a flavor-packed, made from just sweetened condensed milk, sour cream, and zesty lemon! Perfect for any gathering, this treat will win hearts with its simplicity and rich taste.

    Looking for more fruit flavor ice cream? Try my 2 Ingredient Pineapple Ice Cream or my Mango Ice Cream.

    lemon ice cream in a green cup with polka dots
    [feast_advanced_jump_to]

    Top Tips

    • Make your ingredients are well chilled before mixing. This helps the ice cream freeze faster and results in a smoother texture.
    • Garnish with lemon zest right before serving.

    Substitution

    • Lemon Juice: Use lime juice, calamansi juice, or orange juice for a different citrus flavor, or try a lemon extract for a stronger lemon taste.
    • Heavy Whipping Cream: Use heaving whipping cream instead of the sour cream. Make sure to whip it until stiff peaks form.

    Variations

    • If you don't have fresh lemons, feel free to use lemon extract.
    • Berry Swirl: Add a swirl of raspberry or blueberry sauce into the ice cream for a fruity burst.
    • Coconut Lemon: Mix in shredded coconut or coconut flakes for a tropical twist to the lemon flavor.
    • Graham Cracker Crumbs: Fold in crushed graham crackers for a refreshing lemon pie-inspired ice cream.
    sour cream ice cream in a small green cup

    Storage

    • Airtight Container: Transfer the ice cream into a clean, airtight container with a lid to prevent air exposure, which can cause ice crystals and affect the texture.
    • Freezer Placement: Place the sealed container in the coldest part of your freezer, away from the door, to maintain a consistent temperature and prevent thawing and refreezing.
    • Avoid Frost Build-Up: Press a piece of parchment paper or plastic wrap directly onto the surface of the ice cream before sealing the container to minimize frost build-up.
    • Use within Timeframe: Consume the Lemon Ice Cream within 2-3 weeks for the best taste and texture. Over time, ice cream can lose its quality and develop freezer burn if stored for too long.

    Ingredients

    • sweetened condensed milk
    • sour cream
    • lemon
    lemon ice cream ingredients on a brown table

    Instructions

    Place the condensed milk, sour cream, and the lemon pulp in a blender. It is important that you take off the seeds of the lemon so your ice cream won't taste bitter:

    Lemon ice cream ingredients in a blender

    Blend all ingredients until smooth:

    blending ingredients

    After you achieve that smooth texture, pour the mixture in a glass loaf pan or any container that you want to use for the ice cream:

    pouring ice cream mixture in a pan

    Cover your pan with cling wrap before placing it in the freezer:

    ice cream mixture covered with cling wrap

    Now it's ready! It turned out so creamy, more like a frozen yogurt but so creamy:

    scooping lemon ice cream

    How did you guys like it? Let me know in the comments!

    lemon ice cream in a cup

    Frequently Asked Questions

    Does this lemon ice cream curdle?

    It might curdle if you mix lemon juice too quickly into dairy. To avoid this, add lemon juice slowly while stirring gently. Using fresh lemon juice and not overmixing helps keep the ice cream smooth.

    Can I substitute the sour cream?

    Certainly, you can substitute heavy whipping cream for the fat component in the recipe. However, you'll need to whip the cream until stiff peaks form before adding the sweetened condensed milk and lemon.

    How do I avoid freezer burns?

    Once it's in the freezer, give it a quick stir every 30 minutes for 15 seconds, and keep doing this for up to 3 hours.

    Lemon ice cream in a pretty blue container
    5 from 2 votes
    Print Pin Recipe

    3 Ingredient Lemon Ice Cream (No Churning Required)

    Simple to make, incredibly delicious, and utterly addictive, this 3-Ingredient Lemon Ice Cream is a must-try if you're looking for something lemony and refreshing!
    Prep Time5 minutes mins
    Chill Time6 hours hrs
    Total Time6 hours hrs 5 minutes mins
    Course: Dessert
    Cuisine: Filipino
    Servings: 2.5 cups
    Calories: 728kcal
    Prevent your screen from going dark

    Ingredients

    • 1 ⅛ cup sweetened condensed milk
    • 1 ½ cup sour cream
    • 1 lemon peeled, sliced, and seeds removed

    Instructions

    • In a blender add the sweetened condensed milk, sour cream, lemon and blend until creamy and smooth.
    • Pour into a loaf pan and freeze for at least 6 hours or best overnight.
    • Serve with mint and garnish with lemon zest.
    Leave a Comment
    Serving: 1gCalories: 728kcalCarbohydrates: 85gProtein: 15gFat: 39gSaturated Fat: 22gPolyunsaturated Fat: 2gMonounsaturated Fat: 10gCholesterol: 128mgSodium: 219mgPotassium: 743mgFiber: 1gSugar: 81gVitamin A: 1237IUVitamin C: 28mgCalcium: 542mgIron: 1mg

    Watch The Recipe Video!

    QR Code
    Did you make this recipe?Share it on instagram or tag @simplybakings or #simplybakings!

    Hi guys!! I'm always down to try new ways to make ice cream and I found this one on Pinterest!  It used an ingredient I've never used in ice cream which is sour cream!   I gotta tell you the flavor was different but good!  My sister described it as creamy, sour, with an aftertaste of lemon. (duh, it's lemon ice cream sister, lol) She also suggested adding honey which I think adding honey is always a plus!

    5 Ingredients or Less, Ice Cream

    No Bake Strawberry Float

    Jul 7, 2016 · 4 Comments

    no bake dessert

    No Bake Strawberry Float is the perfect cake to eat on a hot summer day. It's refreshing, easy to make, and only requires 5 ingredients are needed- whipping cream, powdered sugar, vanilla, strawberries, and graham crackers!

    Looking for more Strawberry Recipes? Try Strawberry Poke Cake or my Strawberry Cookies.

    NO BAKE STRAWBERRY FLOAT CAKE on a white plate
    [feast_advanced_jump_to]

    Top Tip

    • Sift the powdered sugar before adding it to your mixture. This helps remove lumps, making sure it dissolves more quickly and evenly.

    Substitutions

    • Whipping Cream: Use coconut cream for a dairy-free option.
    • Strawberries: Feel free to use strawberry sauce or strawberry puree. Remember to reduce the amount of powdered sugar in the recipe, as both the sauce and puree are typically quite sweet.
    • Powdered Sugar: Substitute with a natural sweetener like honey, maple syrup, or a sugar substitute for a low-calorie version.
    • Vanilla Extract: Use almond extract or any other flavor extract you prefer.
    • Strawberries: Replace with other berries like blueberries, raspberries, or a mix of fruits.
    • Graham Crackers: Substitute with gluten-free graham crackers or digestive biscuits.

    Variations

    • Vanilla Extract: Feel free to completely omit it from the recipe, but it does provide a nice flavor profile.
    • Mixed Berry Float: Use a combination of strawberries, blueberries, raspberries, and blackberries.
    • Tropical Float: Substitute strawberries with mangoes, pineapples, and papayas.
    • Chocolate Strawberry Float: Add a layer of chocolate ganache or sprinkle chocolate chips between layers.
    • Peach Float: Use fresh or canned peaches instead of strawberries.
    • Nutty Float: Add crushed nuts like almonds or pistachios for a crunchy texture.

    Storage

    • Refrigerator: Store the dessert in an airtight container in the refrigerator for up to 3 days.
    • Freezer: If you need to keep it longer, you can freeze it. Ensure it's covered tightly with plastic wrap and foil, and it will last for up to 1 month. Thaw in the refrigerator before serving.
    • Sift the powdered sugar before adding it. It usually has lumps which take a longer time to dissolve
    • You can make it a bit more fancy by drizzling some strawberry syrup

    Ingredients

    • heavy whipping cream
    • powdered sugar
    • vanilla extract
    • strawberries 
    • graham crackers or digestive biscuits

    Instructions

    In a mixing bowl, mix the whipping cream, vanilla extract, and powdered sugar until soft peaks form:

    wet and dry ingredients in a mixer

    The mixture should look like this - the texture should be fluffy, soft, and easy to spread:

    whipped cream mixture

    In a 9x13 inch pan, add the whipped cream mixture to the bottom of the pan:

    whipped cream spread on a pan

    Cover with graham crackers:

    graham crackers and whipped cream

    Add another layer of the whipped cream mixture on top of the graham crackers:

    whipped cream spread

    I prepared these much strawberries which I cut in halves and graham crackers to create all the delicious layers:

    strawberries and graham crackers

    On top of the second layer of whipped cream, place the fresh strawberries:

    no bake strawberry float

    Add again another layer of graham crackers:

    graham crackers and strawberries

    Then add another layer of whipped cream:

    whipped cream and graham crackers

    Make as many layers of graham crackers, whipping cream, and strawberries as you like, making sure to end with strawberries on top. Decorate as your heart desires, but before you eat it, I suggest placing it in the fridge for several hours because it is best served chilled:

    no bake strawberry float

    Also, when freezing desserts or any food, don't forget to cover it with cling wrap, saran wrap, or foil:

    covered strawberry float

    After an hour serve the strawberry float with a scoop strawberry ice cream or a scoop of vanilla ice cream on the side.

    strawberry float on white plate

    FAQs

    Can I use Cool Whip or Whipping Cream?

    You sure can, just omit the powdered sugar.

    Can I use frozen strawberries instead of fresh ones?

    Yes you can.

    How long does this dessert need to chill in the refrigerator before serving?

    Chill for least 30 minutes in the freezer.

    For more strawberry recipes, try these:

    • White Chocolate Strawberry Cupcake
    • White Chocolate Strawberry Pie
    • Strawberry Cheesecake
    strawberry float on a white plate
    5 from 1 vote
    Print Pin Recipe

    No Bake Strawberry Float

    The No Bake Strawberry Float is an ideal dessert for hot summer days. It's refreshing, simple to prepare, and requires only five ingredients: whipping cream, powdered sugar, vanilla, strawberries, and graham crackers.
    Prep Time10 minutes mins
    Chill Time1 hour hr
    Course: Dessert
    Cuisine: Filipino
    Servings: 8 servings
    Calories: 465kcal
    Author: Lainey
    Prevent your screen from going dark

    Ingredients

    • 4 cups heavy whipping cream
    • ½ cup powdered sugar sifted
    • 2 teaspoons vanilla extract
    • 1 pound strawberries sliced
    • 20 (10 oz) graham crackers

    Instructions

    • In a mixing bowl, mix the whipping cream, vanilla extract, powdered sugar until soft peaks form.
    • In a 9x13 inch pan, add the whipped cream mixture to the bottom of the pan and cover with graham crackers.
    • Make as many layers of graham crackers, whipping cream, and strawberries, making sure to end with strawberries on top.
    • Decorate as you please and best served chilled!
    Leave a Comment
    Serving: 1servingCalories: 465kcalCarbohydrates: 17gProtein: 4gFat: 43gSaturated Fat: 27gPolyunsaturated Fat: 2gMonounsaturated Fat: 11gCholesterol: 134mgSodium: 49mgPotassium: 206mgFiber: 1gSugar: 14gVitamin A: 1756IUVitamin C: 34mgCalcium: 90mgIron: 0.5mg

    Watch The Recipe Video!

    QR Code
    Did you make this recipe?Share it on instagram or tag @simplybakings or #simplybakings!

    Strawberries are one of my favorite fruits to add to any desserts- especially during the hot summers of California.  I can usually get strawberries for 2lbs for $0.99, but I find the best strawberries are found at your local farmer's market.

    At my old job, we had a customer who would bring fresh strawberries to us and they were so juicy and delicious.  So during my break, I would eat strawberries mixed with whipped cream in a bowl, so simple but it always satisfied my cravings.

    I hope you enjoy the recipe!

    5 Ingredients or Less, Cake, No Bake Dessert Recipes

    Golden Oreo Pie Recipe

    Jul 5, 2016 · 3 Comments

    no bake golden oreo pie

    Only 5 simple ingredients needed to make this Golden Oreo Pie recipe!  It's velvety, tasty, and perfect for a potluck or a summer dessert at a bbq!  

    For more Oreo Recipes, try this No Bake Oreo Cheesecake and this Snickers Oreo Cheesecake. Or this fan favorite Oreo Ice Cream and Oreo Cheesecake Cookies. 

    a slice of no bake golden oreo pie
    [feast_advanced_jump_to]

    Substitutions

    • You can make this pie with other Oreo variants because I know they have a lot - strawberry shortcake, rocky road, pumpkin spice, red velvet, creamy peanut butter, and the list goes on!
    • If you’re dairy-free, opt for a dairy-free ice cream and whipped topping alternative.

    Variations

    • Golden Oreo Cheesecake: Transform this pie into a golden oreo cheesecake by adding a cream cheese mixture to the layers. Mix softened cream cheese with sugar, vanilla extract, and heavy whipping cream until smooth. Spread this mixture on top of the oreo pie crust, followed by a layer of ice cream.
    • Baked Cheesecakes: If you love the texture of baked desserts, turn this no-bake pie into a baked version by creating an Oreo cheesecake. Press the oreo crust mixture into a springform pan and bake cheesecakes for about 10–12 minutes. Let it cool before adding the ice cream and whipped cream layers.

    Storage

    • If you have any leftovers (though it’s hard to imagine!), cover the pie with plastic wrap or aluminum foil and store it in the freezer. It should last for up to a week.
    • For the best texture, store the pie in the freezer for 2–3 hours before serving. If it’s been in the freezer longer, let it sit at room temperature for about 10 minutes before slicing.

    Top Tips

    • You can easily make a golden oreo cookie crust by crushing Oreos and stirring in some melted butter. Press the mixture into a 9-inch pie dish or springform pan. If you're feeling adventurous, try using regular Oreos or even graham crackers for the crust.
    • To make spreading the ice cream easier, let it sit out for about 5–10 minutes. If it gets too melty, just pop it back in the freezer for a few minutes to firm up again.
    • Here's another way to crush Oreos into a fine crumb! Put needed quantity in a plastic bag and pound with a rolling pin.

    Ingredients

    Here are the ingredients you will need - golden oreo cookies, ready-made pie crust, cool whip (shown later in the steps), and ice cream:

    pie crust, golden oreos and ice cream

    Instructions

    Add the oreo ice cream into the pie plate and flatten it out using a rubber spatula:

    flattening golden oreos and ice cream

    Fold the cool whip on top of the ice cream:

    adding cool whip to oreo ice cream

    Flatten out the cool whip just like what we did to the oreo ice cream:

    flattening out cool whip

    I wanted to make it prettier so I went on and garnished the pie with Oreos on top:

    garnishing golden oreos to pie

    To add a bit of extra flavor and to make the presentation more festive, you can put some whipped cream on top.

    It is advisable to add this just before serving as it melts easily:

    adding whipped cream

    There you go, Simply Bakers! It is very easy, requires just 5 ingredients and with just a few easy steps, you now have a delectable dessert!

    no bake oreo ice cream

    FAQ

    What flavor is the golden Oreo?

    Golden Oreos have a vanilla-flavored cookie. They taste more like a classic vanilla wafer.

    Do Golden Oreos have less cream?

    No, Golden Oreos have the same amount of cream as regular Oreos. The difference is just the flavor of the cookie.

    Are Golden Oreo vegan?

    Yes, Golden Oreos are generally considered vegan, but they may contain traces of milk due to cross-contamination. Always check the packaging for the latest ingredient information.


    a creamy slice of golden oreo pie
    5 from 1 vote
    Print Pin Recipe

    Golden Oreo Pie Recipe

    A creamy and delicious no-bake golden oreo pie dessert that is made with 5 ingredients only! It's super easy to make and perfect for picnics or summer parties!
    Prep Time10 minutes mins
    Freeze Time30 minutes mins
    Total Time40 minutes mins
    Course: Desserts
    Cuisine: American
    Servings: 8 servings
    Calories: 183kcal
    Author: Lainey
    Prevent your screen from going dark

    Ingredients

    • 1 pre-made graham cracker pie crust
    • 11 Oreos
    • 1 (8 oz) whipped topping (Cool Whip)
    • Ice cream any flavor you prefer
    • Whipped cream optional for garnish

    Instructions

    • Scoop the ice cream into the graham cracker pie crust and flatten it out using a rubber spatula.
    • Spread the whipped topping (Cool Whip) over the ice cream layer and flatten it out evenly.
    • Garnish the top with crushed Oreos and whipped cream, if desired.
    • Serve immediately and enjoy!
    Leave a Comment

    Notes

    optional
    Serving: 1servingCalories: 183kcalCarbohydrates: 25gProtein: 2gFat: 8gSaturated Fat: 2gPolyunsaturated Fat: 1gMonounsaturated Fat: 5gTrans Fat: 0.01gCholesterol: 0.003mgSodium: 164mgPotassium: 63mgFiber: 1gSugar: 11gVitamin A: 1IUCalcium: 10mgIron: 3mg

    Watch The Recipe Video!

    QR Code
    Did you make this recipe?Share it on instagram or tag @simplybakings or #simplybakings!

    5 Ingredients or Less, Ice Cream

    How Do I Make Ice Cream with Condensed Milk? (Here's How)

    Jun 25, 2016 · 3 Comments

    How to Make Ice Cream with Condensed Milk? Make it with this simple trio without an ice cream maker: sweetened condensed milk, heavy cream, your favorite cookies, for heavenly ice cream everyone will think you spent hours making it!

    Looking for more easy ice cream made with condensed milk? Try my Addicting Cookie Butter Ice Cream!

    Three ice cream flavors: Oreo, White Oreo, and Tim Tams.
    [feast_advanced_jump_to]

    Top Tips

    • To prevent ice crystals, mix the frozen mixture with a spatula every hour for 2 hours.
    • You can use a loaf pan to freeze the ice cream, just remember to cover it with plastic wrap.
    • Don't mix in the condensed milk, fold it because it helps retain the air bubbles you created when whipping the heavy whipping cream.

    Variations

    • Classic Vanilla: Use vanilla-flavored cookies and vanilla extract for a timeless treat.
    • Fresh Fruit: Add dried or fresh fruits like strawberries, berries (raspberries or blueberries) bananas, or peaches to the ice cream base for a refreshing twist.
    • Nutty Indulgence: Mix in chopped nuts such as almonds, pecans, or walnuts for a crunchy texture and rich flavor.
    • Mint Chocolate Chip: Stir in mint extract and chocolate chips for a refreshing and indulgent combination.
    • Coffee Lover's Bliss: Dissolve instant coffee granules in warm milk before adding to the ice cream base for a rich coffee flavor.
    • Peanut Butter Paradise: Swirl in creamy peanut butter for a decadent and satisfying treat.
    • Coconut Dream: Add shredded coconut to the ice cream base for a tropical twist.

    Substitutions

    • As this recipe is straightforward, no substitutions are recommended for heavy whipping cream or sweetened condensed milk.
    three different kinds of ice cream flavors on the table, white and chocolate oreos and timtams.

    Storage

    • Jazz up your ice cream before you serve it! Top with hot fudge, chocolate ganache, fresh fruits, or any fruity syrup
    • Don't forget to add salt like I did, lol! You won't believe how a little pinch of salt makes a LOT of difference in the ice cream's taste!
    • Avoid mixing the whipped cream vigorously when adding the other ingredients to it. The correct way is slowly folding them in until well combined.

    Ingredients

    • heavy whipping cream
    • condensed milk
    • favorite cookies

    Instructions

    In a large bowl, add heavy whipping cream and using a whisk attachment, whip until stiff peaks form, about 3 minutes on high.
    (You can use a hand mixer, but be prepared to spend some time standing.)

    whipped heavy cream in a stand mixer with a red spatula

    It should look like this:

    Add the condensed milk onto the whipped cream:

    condensed milk and whipped cream mixture mixed together.

    Slowly fold in the condensed milk until well combined:

    Separate the condensed milk and whipped cream mixture into 3 bowls since we are making 3 different ice cream flavors:

    whipped heavy cream mixture in 3 different bowls

    Now here is the exciting part - adding in your desired flavors!

    In this recipe, I used 2 kinds of Oreos and TimTam. Add the cookie chunks them mix thoroughly:

    white oreo and whipped cream mixture
    whipped cream and chocolate oreo mixture
    whipped cream and timtam mixture

    Finally, pour the ice cream into individual cups and place in the freezer for at least 6 hours:

    ice cream transferred to a cup

    I was so excited to taste this. Believe me, those 2 hours of waiting for it to become frozen was an agony, lol!

    3 flavors of ice cream in a white container ready to be frozen.

    FAQs

    Can I use condensed milk instead of heavy cream in ice cream?

    In no-churn ice cream, sweetened condensed milk serves as the base, while whipped cream adds the light, creamy texture.

    Why use condensed milk in ice cream?

    Creamy Texture: Sweetened condensed milk contributes to a smooth and creamy consistency in the ice cream.
    Sweetness: The natural sweetness of condensed milk eliminates the need for additional sugar in the recipe.
    No-Churn Option: Condensed milk is commonly used in no-churn ice cream recipes, making it easier to prepare without an ice cream maker.
    Binding Agent: Condensed milk helps bind the ingredients together, ensuring a cohesive mixture that freezes well.

    More Ice Cream Recipes That Are Easy to Make:

    • Lemon Ice Cream
    • Vegan Chocolate Ice Cream
    • 4 Ingredient Oreo Ice Cream
    • Mocha Ice Cream
    • 2 Ingredient Pineapple Ice Cream
    3 ingredient ice creams with 3 different cookie flavors on a table.
    5 from 2 votes
    Print Pin Recipe

    How Do I Make Ice Cream with Condensed Milk? (Here's How)

    Try this ice cream in a snap with just three magical ingredients: rich sweetened condensed milk, your go-to cookies, and heavy whipping cream
    Prep Time10 minutes mins
    Freeze Time6 hours hrs
    Total Time6 hours hrs 10 minutes mins
    Course: Dessert, Snacks
    Cuisine: American, Filipino
    Servings: 4 cups
    Calories: 1864kcal
    Author: Lainey
    Prevent your screen from going dark

    Ingredients

    • 2 cups heavy whipping cream
    • ¼ cup condensed milk
    • 3-6 cookie chunks *

    Instructions

    • In a stand mixer, add heavy whipping cream and mix until stiff peaks form, about 3-4 minutes. (You can use a hand mixer, but be prepared to spend some time standing.)
    • Gradually fold in the sweetened condensed milk until well combined.
    • If making more than one cookie flavor of ice cream, separate into bowls and then add the cookie chunks.
    • Place the cookies in a container** with lid and freeze for at least 6 hours.
    Leave a Comment

    Notes

    *your choice of cookies
    **You can use a loaf pan to freeze the ice cream, just remember to cover it with plastic wrap.
    Serving: 1gCalories: 1864kcalCarbohydrates: 55gProtein: 20gFat: 179gSaturated Fat: 114gPolyunsaturated Fat: 8gMonounsaturated Fat: 45gCholesterol: 564mgSodium: 226mgPotassium: 736mgSugar: 56gVitamin A: 7201IUVitamin C: 5mgCalcium: 531mgIron: 1mg

    Watch The Recipe Video!

    QR Code
    Did you make this recipe?Share it on instagram or tag @simplybakings or #simplybakings!

    5 Ingredients or Less, Desserts, Ice Cream

    Filipino Mango Smoothie

    Jun 19, 2016 · 2 Comments

    filipino mango smoothie

    A super easy mango smoothie that uses just 3 ingredients! This Filipino Mango Smoothie is the perfect tropical treat for sunny days! It’s made with sweet frozen mangoes, creamy coconut milk, and a sprinkle of chia seeds for extra goodness.

    If you love fruity and refreshing recipes like this, you’ll also enjoy these: Papaya Banana Smoothie, Jackfruit Smoothie, and Filipino Avocado Smoothie.

    tropical mango smoothie in a glass
    [feast_advanced_jump_to]

    What is Filipino Mango Smoothie?

    This Filipino Mango Smoothie is a creamy, cool drink made from ripe, juicy Philippine mangoes. It's a popular refreshment sold by street vendors and in homes across the country, especially during mango season.

    Filipino mangoes, especially carabao and Ataulfo mangoes, are known for being super sweet and flavorful—perfect for making smoothies, fruit shakes, or even mango ice cream and mango lassi.

    Blended with coconut milk or other types of nut milk, this smoothie makes a healthy, refreshing treat for kids and adults alike.

    Filipino Mango Health Benefits

    • Rich in healthy fats for energy
    • Great for people avoiding dairy
    • Naturally low fat compared to cream
    • Contains fiber, calcium, and potassium

    Substitutions

    • frozen mango – use fresh mangoes, mango pulp, or even chopped mangoes with lots of ice
    • coconut milk – swap with almond milk, soy milk, cashew milk, whole milk, or any kind of milk
    • chia seeds – replace with flaxseeds, cashews, or leave out
    • sweetener – use honey, maple syrup, coconut sugar, brown sugar, jaggery, palm sugar, or even vanilla extract

    Variations

    • Dessert-Style – add a scoop of vanilla ice cream or mango ice cream
    • Mango Lassi Inspired – mix in some Greek yogurt and a pinch of saffron
    • Extra Garnish – top with crushed pistachios or cashews

    Storage & Leftovers

    • Refrigerator – Store in a jar or blender jar up to 1 day; shake before serving
    • Freezer – Pour into ice cube trays and re-blend later
    • Meal Prep – Peel and dice mangoes, freeze in bags for quick blending

    Ingredients

    These are the ingredients that you will need:

    • frozen mango
    • high-quality coconut milk
    • chia seeds
    • sweetener
    ingredients of the mango smoothie

    Instructions

    In a blender jar, add the frozen mango:

    frozen mango cubes in a blender

    Pour in the coconut milk:

    adding coconut milk in a blender

    Now, it's time to add the chia seeds and sweetener:

    adding chia seeds in the blender

    Blend well until you get the consistency you like:

    blednign the ingredients of mango smoothie

    You're done! Pour into serving glasses. You now have a mango smoothie packed with loads of nutrients from the super food which are the chia seeds!

    vegan smoothie

    Top Tips

    • Always use frozen mango for this recipe. You won't have to add ice cubes and your mango smoothie would really taste just like the fruit itself.
    • Fresh ingredients are always best to use. If you can get fresh coconut milk, use it instead of the canned ones that we buy in the grocery stores.
    • If you enjoy a colder smoothie, you can add ice cubes but not too much or it will make the smoothie watered down.
    • You can freeze this smoothie and make it into a Mango Chia ice cream.

    FAQ

    What is the famous Filipino mango?

    The most famous Filipino mango is the Carabao mango, also known as Philippine mango. It's known worldwide for being super sweet, smooth, and juicy—perfect for shakes, smoothies, and desserts.

    What fruit mixes well with mango?

    Mango pairs well with fruits like pineapple, banana, papaya, strawberries, and even coconut. These tropical combos bring out mango’s sweetness and make a tasty fruit shake or smoothie.

    What should you put in a mango smoothie?

    For a delicious mango smoothie, blend mango flesh, a kind of milk (like plant-based milk or dairy), a natural sweetener like honey or coconut sugar, and add-ons like chia seeds, ice, or even a scoop of ice cream if you want it extra creamy.


    Here are more yummy smoothie recipes you will love:
    • Cantaloupe Smoothie
    • Pineapple Mango Smoothie
    • Guyabano Smoothie
    • Malunggay Pineapple Smoothie
    filipino mango smoothie
    4.50 from 2 votes
    Print Pin Recipe

    Filipino Mango Smoothie

    Have a glass of this yummy, nutritious filipino mango smoothie blended with creamy coconut milk - a tropical smoothie treat for a hot, sunny day!
    Prep Time5 minutes mins
    Total Time5 minutes mins
    Course: smoothies
    Cuisine: Filipino
    Servings: 1 serving
    Calories: 435kcal
    Author: Lainey
    Prevent your screen from going dark

    Ingredients

    • ¾ cups frozen mango
    • ½ cup high quality coconut milk
    • 1 tablespoon chia seeds
    • **1-2 tablespoons sweetener

    Instructions

    • In a blender, add the frozen mango, coconut milk, chia seeds, sweetener and blend.
    Leave a Comment
    Serving: 1gCalories: 435kcalCarbohydrates: 41gProtein: 7gFat: 28gSaturated Fat: 22gPolyunsaturated Fat: 3gMonounsaturated Fat: 1gTrans Fat: 0.02gSodium: 100mgPotassium: 297mgFiber: 7gSugar: 24gVitamin A: 6IUVitamin C: 1mgCalcium: 96mgIron: 5mg

    Watch The Recipe Video!

    QR Code
    Did you make this recipe?Share it on instagram or tag @simplybakings or #simplybakings!

    Drinks

    Vegan Strawberry Banana Smoothie

    Jun 10, 2016 · 6 Comments

    mason jars of the delicious smoothie

    Let's freshen up with my simple Vegan Strawberry Banana Smoothie! This is a quick breakfast option that delivers fiber and nutrition by delighting your taste buds. Made with frozen bananas, fresh strawberries and apples that will cool you down on those warm summer mornings.

    Wanna know what goes perfectly with this recipe? My Oreo Waffles Recipe or my Banana Oatmeal Pancake!

    strawberry banana smoothie in glasses
    [feast_advanced_jump_to]

    What is Vegan Strawberry Banana Smoothie?

    A Vegan Strawberry Banana Smoothie is a dairy-free, nutrient-packed beverage made by blending ripe strawberries and bananas with plant-based ingredients like almond milk, coconut water, or another non-dairy liquid. This refreshing drink is popular among those following a vegan lifestyle and anyone looking for a healthy, naturally sweet way to start the day or refuel after a workout.

    History of Vegan Strawberry Banana Smoothie

    Originating from the mid-20th century health food movement, the Smoothie recipe quickly became a favorite as home blenders made it easy to mix fresh fruits. Its naturally sweet, creamy blend transitioned to a dairy-free delight with the rise of plant-based diets, and today it remains a popular choice for health enthusiasts and vegans alike.

    Substitutions

    • Frozen bananas - Use fresh bananas with a handful of extra ice for a similar chill and thickness.
    • Ice - Frozen fruit chunks (like berries or peaches) – chill the smoothie while enhancing flavor
    • Dairy-free milk - Choose your favorite non-dairy milk - unsweetened almond milk, oat milk, coconut milk, soy milk, or cashew milk - when you purchase your ingredients.
    mason jars of the delicious smoothie

    Recipe Variations

    • Green Boost - Add a handful of spinach or kale for extra vitamins and minerals without altering the fruity flavor too much
    • Spiced Variation - Mix in a dash of ginger, turmeric, or a few mint leaves for an invigorating flavor profile
    • Protein-Packed - Blend in a scoop of plant-based protein powder or a tablespoon of hemp, chia, or flax seeds to turn it into a satisfying post-workout snack

    Storage

    Refrigerate Immediately: If you plan to enjoy your smoothie within 24 hours, store it in an airtight container in the refrigerator. Give it a good shake or stir before drinking, as natural separation may occur.

    Freeze for Later: For longer storage, pour your smoothie into a freezer-safe container, leaving a little space for expansion. It can be kept in the freezer for up to 2 months. When ready to drink, thaw it overnight in the refrigerator and give it a quick blend or stir for a smooth consistency.

    Pre-Portion Ingredients: Consider assembling and freezing individual smoothie packs with your fruits and greens. This way, you can simply add your preferred dairy-free milk and blend fresh whenever you’re in the mood for a nutritious treat.

    Opt for Quality Containers: Using glass jars or BPA-free containers can help preserve the flavor and maintain the freshness of your smoothie without any unwanted aftertaste.

    Ingredients

    Listed below are all the ingredients you will need:

    • Banana
    • Apple
    • Frozen bananas
    • Ice
    • Dairy-free milk

    See recipe card for quantities.

    All ingredients in separate white bowls

    Instructions

    Put all the ingredients together in a blender.

    smoothie ingredients in a blender

    Pour in the almond milk or your chosen non-dairy milk.

    Milk poured into a blender

    Blend away until smooth.

    blender filled with pink smoothie

    Pour into individual glasses. Then garnish with fresh strawberries before serving. Enjoy!

    pouring blended smoothie in glasses

    Hint: For a fun twist, consider adding blueberries, raspberries, or kiwi, or even tossing in mango chunks for a tropical burst of flavor!

    ⭐ Top Tip

    • Smoothies are often taken in the morning, so you can add all the good things you need for breakfast - plain yogurt, oatmeal, oatmeal protein, and even vegetables! My favorite vegetable to add is kale because it's nutritional benefits and the fact you cannot taste it in a smoothie.
    • You can also add nuts like cashews, pine nuts, peanuts, or even healthy seeds like chia and sunflower seeds.
    • To amp up the flavor, a splash of vanilla extract is a great addition, and if you like extra sweetness, a drizzle of maple syrup or agave syrup can do the trick. Some recipes even suggest a spoonful of greek yogurt for extra creaminess, though for a truly vegan version, opt for a dairy-free alternative.

    FAQ

    How healthy is a strawberry banana smoothie?

    A 12-ounce serving of strawberry banana smoothie contains 188 to 210 calories, putting it into the range of an ideal snack.

    What is a non dairy thickener for smoothies?

    Nut butter, seed butter or peanut butter can also be added to the blender to thicken a smoothie and add a nutty taste. I love adding nut butter to banana smoothies or chocolate smoothies. If you're not sure what nut butter is, my top 2 favorites are almond butter and cashew butter.

    What can I use to make a smoothie thicker?

    Frozen ingredients are the key to creating a thick smoothie. Using fibrous, thick-fleshed fruit and vegetables can also help the texture. Adding chia seeds, avocado, yogurt, and protein powder are other thickening options.

    More Recipes

    If you’re as passionate about smoothies as I am, you’re in for a treat! Explore our collection:

    • Guyabano Smoothie
    • Taro Smoothie
    • Coconut Smoothie
    • Malunggay Pineapple Smoothie
    • Papaya Banana Smoothies
    Vegan Strawberry Banana Smoothie in three glasses
    5 from 2 votes
    Print Pin Recipe

    Vegan Strawberry Banana Smoothie

    A refreshing and naturally sweet smoothie packed with fruity flavors!
    Prep Time5 minutes mins
    Total Time5 minutes mins
    Course: Breakfast, Drinks
    Cuisine: Vegan
    Servings: 2 large servings
    Calories: 126kcal
    Author: Lainey
    Prevent your screen from going dark

    Ingredients

    • 1 medium size banana
    • 1 medium size apple cut and cored
    • 10 small frozen bananas
    • 1 cup ice
    • ½ cup dairy-free milk

    Instructions

    • In a blender, combine the banana, apple, frozen strawberries, ice, and dairy-free milk.
    • Blend until smooth and creamy.
    • Pour into glasses, garnish with fresh strawberries, and serve immediately.
    Leave a Comment

    Notes

    *you may need to add up 1 cup
    Serving: 1gCalories: 126kcalCarbohydrates: 28gProtein: 3gFat: 2gSaturated Fat: 0.2gPolyunsaturated Fat: 1gMonounsaturated Fat: 0.3gSodium: 37mgPotassium: 392mgFiber: 4gSugar: 18gVitamin A: 319IUVitamin C: 14mgCalcium: 95mgIron: 1mg

    Watch The Recipe Video!

    QR Code
    Did you make this recipe?Share it on instagram or tag @simplybakings or #simplybakings!

    Breakfast & Brunch, Drinks, Vegan Baking

    NO BAKE White Chocolate Cookies

    Jun 7, 2016 · 4 Comments

    No bake white chocolate cookies

    Try this no-bake, gooey, and delicious white chocolate cookie recipe using 5 ingredients only! They are perfect for a chocolaty snack or dessert on any occasion. Enjoy!

    white chocolate cookies on a mint-colored plate

    Tips and Procedures: 

    • To make these no-bake white chocolate cookies last long, keep them in an airtight container and keep them frozen.
    • For a more festive look, you can add colorful dried berries like cranberries, dried and sweetened citrus rinds, or whatever is available in your pantry. Just make sure it won't be a contrast to the taste of the recipe.
    • For a unique chocolatey taste, you can add just a little bit of cocoa powder.

    How to Make this NO BAKE White Chocolate Cookies Recipe:

    Listed below are all the ingredients you will need:

    • rice krispies cereal
    • cookie butter or peanut butter
    • mini marshmallows
    • white chocolate candy melts
    • mini chocolate chips

    Prepare a cookie sheet lined with parchment paper.

    In a large bowl add the Rice Krispies, and cookie butter, and mix until well combined.

    mixing rice krispies and cookie butter in a clear bowl

    Next, add the mini marshmallows and  melted white chocolate melt and mix:

    adding in mallows and melted white chocolate to rice krispies mix

    Then add the mini chocolate chips and mix until well combined:

    adding in mini chocolate chips to cookie mixture

    The cookie dough should look like this:

    ready to freeze no bake white chocolate cookie dough

    Using a cookie scooper scoop, scoop the cookies on the cookie sheets and then place them in the refrigerator for 1 hour to harden:

    scooping out white chocolate cookie dough onto parchment paper using a cookie scooper

    Here they are, Simply Bakers! Delicious, no hassle, and no baked white chocolate cookies!

    ready to serve no bake white chocolate cookies on a cookie sheet lined with wax paper

    Serve immediately after taking out from the freezer:

    no bake cookies on a mint-colored plate

    Enjoy!

    Frequently Asked Questions:

    Q: How many servings would this recipe do?

    A: This delicious and easy no-bake cookie recipe could make 12 to 16 cookies, depending on how big your portions are.

    Q: I am not a fan of marshmallows. Can I add in nuts instead?

    A: Yes you can but make sure not to add too much or else, your cookie will fall apart.

    Q: How long do these cookies last?

    A: As long as this is frozen and well-kept in a container, this can last up to a week or more.

    4.50 from 2 votes
    Print Pin Recipe

    NO BAKE White Chocolate Cookies

    These no-bake, gooey, and delicious white chocolate cookies just use 5 ingredients!
    Author: Lainey
    Prevent your screen from going dark

    Ingredients

    • 1 ½ cups rice krispies cereal
    • 1 ¾ cups 15oz jar cookie butter or peanut butter
    • 1 ½ cups mini marshmallows
    • 16 oz white chocolate candy melts melted
    • ½ cup mini chocolate chips

    Instructions

    • Prepare cookie sheet lined with parchment paper.
    • In a large bowl add the rice krispies, cookie butter and mix until well combined.
    • Next add the mini marshmallows and mix.
    • Add the melted white chocolate mix and then add the mini chocolate chips and mix until well combined.
    • Using a cookie scooper scoop, scoop the cookies on the cookie sheets and then place in the refrigerator for 1 hour to harden.
    • Serve immediately .
    Leave a Comment

    Watch The Recipe Video!

    QR Code
    Did you make this recipe?Share it on instagram or tag @simplybakings or #simplybakings!

    NEVER MISS A RECIPE!

    PINTEREST / FACEBOOK / INSTAGRAM / TWITTER

    If you’ve tried this or any other of my recipes, don’t forget to rate the recipe and to leave me a comment. I love hearing from you!

    Cookies, Desserts, No Bake Dessert Recipes

    M&M Milkshake Recipe

    Jun 3, 2016 · 1 Comment

    two m&m milkshake jars

    Looking for a colorful, sweet, and totally fun drink to cool you down? This M&M Milkshake Recipe is here to save the day! With creamy ice cream, a hint of peanut butter, and crunchy M&Ms, it’s a milkshake party in a glass.

    If you love sweet drinks like this, don’t miss out on my Filipino Green Mango Shake or my Oreo Milkshake—both are equally easy and delicious!

    m&m milkshake with straw
    [feast_advanced_jump_to]

    What is M&M Milkshake Recipe?

    The M&M Milkshake is a fun twist on the classic American milkshake. It combines ice cream, milk, candy, and a dash of peanut butter for a creamy, crunchy, and colorful treat.

    Originally a diner favorite, milkshakes have become an anytime dessert, especially when made with nostalgic candies like M&Ms. This version adds a little extra flair by decorating the rim with candy melts and extra sweets—hello dessert goals!

    Substitutions

    • Candy melts – Use white chocolate chips, regular chocolate chips, or even Nutella as a rim coating.
    • Assorted candy – Swap in chopped nuts, sprinkles, crushed cookies, or mini marshmallows.
    • Ice cream – Vanilla works best, but chocolate, peanut butter, or cookies & cream would be amazing too.
    • Peanut butter – Almond butter, cashew butter, or sunflower seed butter for nut-free options.
    • Milk – Oat milk, almond milk, soy milk, or lactose-free milk all work well.

    Variations

    • Spicy – Add a pinch of cayenne or cinnamon for a sweet heat twist.
    • Minty – Use mint chocolate chip ice cream and top with crushed mint candies.
    • Extra chocolatey – Drizzle in chocolate syrup or add cocoa powder to the blend.
    • Vegan – Use dairy-free ice cream, plant-based milk, and skip candy melts or use vegan chocolate.
    two M&M shake on a wooden table

    Storage

    • Fridge – Best consumed fresh, but can be stored for 1-2 hours in the fridge (will melt).
    • Freezer – Pour leftovers into popsicle molds and freeze for a fun frozen treat.
    • Make ahead – You can prep the decorated cup a few hours early and keep it in the freezer until ready to use.

    Ingredients

    • candy melts
    • assorted candy
    • ice cream
    • peanut butter
    • milk

    Instructions

    Melt a handful of m&m candy melts (or milk chocolate chips) using a microwave-safe bowl or a small food processor with a heating option, if available.

    melted chocolate in a bowl

    Dip the rim of a mason jar or milkshake glass into the melted chocolate. Let any extra drip off, then allow it to sit for 2 minutes. Tip for home cooks: If you add candy too soon, it may slide off because the chocolate is too wet!

    dipping mason jar rim to melted chocolate

    Press a handful of M&Ms or assorted candy around the rim. Place the cup in the freezer for a short break while you prep the shake.

    pressing m&ms on chocolate rimmed mason jar

    In a blender or hand blender, combine your favorite ice cream (vanilla or cookie dough is amazing!), a tablespoon of M&Ms, peanut butter, and whole milk. Blend for about 10 seconds, just enough to create a creamy, chocolaty texture—this is key to a good shake! Avoid overblending to keep it thick and indulgent.

    M&Ms, peanut butter, and whole milk. ice cream in a blender

    Pour the M&M’s milkshake into your decorated glass, drizzle with chocolate sauce if you like, and top with more candy or whipped cream.

    two milkshakes in mason jars

    Top Tips

    Don't overblend the milkshake—keeping it slightly thick adds that classic diner-style texture and helps hold up toppings!

    FAQ

    What is the key to a good milkshake?

    The key to a great milkshake is using high-quality ice cream and the right milk-to-ice cream ratio—you want it thick but still sippable! Don’t overblend it, and serve it super cold for that classic milkshake texture.

    What goes well in milkshakes?

    So many fun add-ins! Things like cookies, candy, chocolate syrup, peanut butter, fruit, and even coffee go really well in milkshakes. Toppings like whipped cream, sprinkles, or crushed candy make it extra special too!

    What kind of ice cream works best?

    Vanilla is classic, but any flavor you love will work!

    two milkshakes in mason jars
    5 from 2 votes
    Print Pin Recipe

    M&M Milkshake Recipe

    Whip up a super fun M&M Milkshake recipe in just 15 minutes! This simple recipe makes one big, delicious serving. Ready for a sweet treat? Get the recipe here!
    Prep Time15 minutes mins
    Total Time15 minutes mins
    Course: Drinks
    Cuisine: American
    Servings: 1 large serving
    Calories: 666kcal
    Author: Lainey
    Prevent your screen from going dark

    Ingredients

    • ½ cup candy melts
    • assorted candy
    • 1-2 cups ice cream
    • 1 tablespoon peanut butter
    • ⅓ cup milk

    Instructions

    • Melt the candy melts (or chocolate chips if using as a substitute) in a microwave-safe bowl until smooth.
    • Dip the rim of your cup or mason jar into the melted candy. Gently tap off the excess and let it sit for about 2 minutes so it can firm up slightly. Decorate the rim with assorted candy, gently pressing it into the chocolate. Then place the cup in the freezer to set while you make the milkshake.
    • In a blender, add the ice cream, 1 tablespoon of candy, peanut butter, and milk. Blend for about 10 seconds, just until everything is mixed. You want it thick—not completely liquid.
    • Pour the milkshake into your decorated cup, add extra toppings if desired, and serve immediately!
    Leave a Comment
    Serving: 1servingCalories: 666kcalCarbohydrates: 69gProtein: 11gFat: 39gSaturated Fat: 25gPolyunsaturated Fat: 3gMonounsaturated Fat: 9gCholesterol: 68mgSodium: 256mgPotassium: 475mgFiber: 2gSugar: 64gVitamin A: 687IUVitamin C: 1mgCalcium: 277mgIron: 0.4mg

    Watch The Recipe Video!

    QR Code
    Did you make this recipe?Share it on instagram or tag @simplybakings or #simplybakings!

    Drinks

    Monkey Bread with Cream Cheese

    May 27, 2016 · 10 Comments

    monkey bread stuffed with cheese cake

    Breakfast is not to be missed, and this Monkey Bread stuffed with Cream Cheese recipe is such a good one to keep on hand! It's addicting and great to serve with a cup of hot cocoa. Yum!

    Cream Cheese Stuffed Monkey Bread on a green plate

    Tips and Procedures: 

    • Are you baking this for summer? Replace the glaze with any ready to use a strawberry glaze or orange glaze and yum! This bread is so versatile, it can be served in any season!
    • Keep your fruit toppings looking fresh! Before arranging them on top of the cheesecake, soak them in lemon juice for a few minutes. The lemon's acidity will maintain its vibrant color, thus not making it brownish after a few hours.

    How to Make this Cream Cheese Stuffed Monkey Bread:

    Listed below are all the ingredients you will need:

    • walnuts
    • granulated sugar
    • cinnamon
    • cream cheese
    • refrigerated biscuits

    Glaze:

    • butter
    • brown sugar

    Preheat oven to 350F and spray the bundt pan with nonstick spray,

    Sprinkle about a ½ cup of the walnuts and set aside:

    walnuts on a spring form pan for cream cheese stuffed monkey bread

    In a small bowl mix together the granulated sugar and cinnamon:

    cinnamon and sugar in a clear bowl for cream cheese stuffed monkey bread recipe

    Then cut the cream cheese into 20 equal cubes:

    cutting butter into cubes for cream cheese stuffed monkey bread recipe

    To assemble it, first, grab the biscuit dough and flatten, add a teaspoon of the cinnamon sugar mixture, add the cubed cream cheese and carefully wrap and seal the dough around the cream cheese and then place in the bundt pan:

    stuffing cream cheese into dough

    Repeat the process until 1 whole package of refrigerated biscuit dough is finished:

    layering the stuffed dough bites onto the spring form pan

    Sprinkle the cinnamon sugar:

    sprinkling the cinnamon and sugar to the dough

    To make the glaze, in a saucepan melt the butter and brown sugar over low heat stirring well:

    glaze ingredients for the cream cheese stuffed monkey bread

    Then pour it onto the refrigerated biscuit dough. To make the 2nd layer, just repeat the process steps above:

    pouring the glaze onto the layers of cream cheese stuffed dough

    Bake for 40-45 minutes. Remove from oven and then wait about 5 minutes:

    freshly baked cream cheese stuffed monkey bread

    This bread definitely would make your whole house smell so delicious! The waiting part is over now 🙂

    Then flip over onto a plate. Doesn't that look so delicious?!? No wonder this recipe is one of my favorites!

    freshly baked cream cheese stuffed monkey bread on a green plate

    Happy Baking!

    Frequently Asked Questions:

    Q: Can I bake this in a skillet?

    A: Yes, sure you can. It would be perfectly baked even when you use a shallow pan like a skillet.

    Q: I love baking with pumpkin puree. Can I add it to this bread recipe?

    A: Definitely yes! Include the puree when pouring the glaze and you already have delicious Fall bread.


    More Breakfast Dishes that are Easy to Make:

    • French Breakfast Bread
    • Toaster Pastries
    • 5 Ingredient Pancakes
    • Blueberry Scones
    • Vegan Muffins
    Monkey Bread Cream Cheese
    4.50 from 2 votes
    Print Pin Recipe

    Monkey Bread with Cream Cheese

    Here's a unique twist to the classic monkey bread.
    Author: Lainey
    Prevent your screen from going dark

    Ingredients

    • 1 ½ cups coarsely chopped walnuts
    • ½ cup granulated sugar
    • 3 teaspoons cinnamon
    • 1 8oz package cream cheese
    • 2 cans refrigerated biscuits
    • Glaze
    • ½ cup butter
    • 1 cup packed brown sugar

    Instructions

    • Preheat oven to 350F and spray the bundt pan with nonstick spray, sprinkle about ½ cup of the walnuts and set aside
    • In a small bowl mix together the granulated sugar and cinnamon and yes. Then cut the cream cheese into 20 equal cubes. To assemble it, first grab the biscuit dough and flatten, add a teaspoon of the cinnamon sugar mixture, add the cubed cream cheese and carefully wrap and seal the dough around the cream cheese and then place in the bundt pan.
    • After 1 whole package of refrigerated biscuit dough is finished, sprinkle the cinnamon sugar.
    • To make the glaze, in a saucepan melt the butter and brown sugar over low heat stirring well. Then pour it on to the refrigerated biscuit dough.
    • To make the 2nd layer, just repeat the process steps above.
    • Bake for 40-45 minutes. Remove from oven and then wait about 5 minutes then flip over onto a plate
    Leave a Comment

    Watch The Recipe Video!

    QR Code
    Did you make this recipe?Share it on instagram or tag @simplybakings or #simplybakings!

    NEVER MISS A RECIPE!

    PINTEREST / FACEBOOK / INSTAGRAM / TWITTER

    If you’ve tried this or any other of my recipes, don’t forget to rate the recipe and to leave me a comment. I love hearing from you!

    Bread, Breakfast & Brunch, Cake, Christmas Desserts, Desserts

    3 Ingredient Vegan Biscuits

    May 19, 2016 · 5 Comments

    Biscuits on the baking tray and plate

    You won't believe how flaky, buttery, and easy my 3-Ingredient Vegan Biscuits are - they're ready in under 30 minutes with minimal effort and pantry staples!

    The best part about 3-ingredient recipes like Chocolate Cupcakes, Nutella Cookies and No Bake Oreo Cheesecake is their simplicity - they’re quick to make, effortless to prepare, and perfect for any occasion!

    Biscuits on the baking tray and plate
    [feast_advanced_jump_to]

    What are 3 Ingredient Vegan Biscuits?

    These buttermilk biscuits are simple, dairy-free leftover biscuits made with just flour, plant-based butter, and non-dairy milk. They are light, flaky, and buttery, without the need for eggs or traditional butter. These biscuits come together quickly, requiring minimal prep and baking time, making them perfect for breakfast, brunch, or a side for soups and stews. With their soft, fluffy texture and rich flavor, they prove that delicious homemade biscuits don’t need a long ingredient list. They’re a quick and delicious way to enjoy homemade biscuits with protein and fiber from plant-based ingredients.

    History of 3 Ingredient Vegan Biscuits

    This vegan biscuit recipe evolved from classic Southern biscuits, which were originally made with flour, fat, and liquid. As plant-based diets grew in popularity, bakers swapped dairy ingredients for cold vegan butter and non-dairy milk, creating a simple, vegan-friendly version.

    With the rise of minimalist cooking, these biscuits became a go-to for quick, flaky, and buttery treats without the need for eggs or dairy. Today, they remain a favorite for vegans and home bakers, proving that delicious biscuits don’t need a long ingredient list!

    Substitutions

    • Self-Rising Flour - Mix 1 cup all-purpose flour + 1 ½ teaspoons baking powder + ¼ teaspoon salt for every 1 cup of self-rising flour.
    • Coconut Oil - Swap with vegan butter for a richer flavor, olive oil for a neutral taste, or applesauce for a softer, low-fat option.
    • Coconut Milk - Use almond milk for a light texture, soy milk for added richness, or oat milk for a creamy, neutral flavor.

    Recipe Variations

    • Garlic Herb Biscuits – A savory twist with garlic powder and fresh herbs (rosemary, thyme, or parsley), making them great as a side dish or with vegan butter.
    • Sweet Cinnamon Sugar Biscuits – Lightly sweet and spiced with coconut sugar and cinnamon, best served with maple syrup or fruit preserves.
    • Spiced Pumpkin Biscuits – A cozy fall-inspired variation with pumpkin purée and pumpkin spice, best enjoyed with cinnamon drizzle or vegan butter.
    • Maple Pecan Biscuits – Nutty and slightly sweet, featuring maple syrup and chopped pecans, best served warm with vegan butter.

    Storage

    Room Temperature (Short-Term Storage): Store biscuits in an airtight container at room temperature for up to 2 days. Keep in a cool, dry place away from direct sunlight to maintain freshness.

    Refrigerator (Extended Freshness): Place biscuits in an airtight container or wrap them in foil / plastic wrap. Store in the fridge for up to 5 days and reheat before serving.

    Freezer (Long-Term Storage): Wrap individual biscuits in plastic wrap or parchment paper, then place them in a freezer-safe bag or container. Freeze for up to 3 months and thaw at room temperature before reheating.

    Reheating Tips:

    • Oven: Warm at 350°F (175°C) for 5-10 minutes for a crispy texture.
    • Microwave: Heat for 10-15 seconds for a soft, warm biscuit.
    • Toaster Oven: Reheat for a few minutes for a slightly crispier bite.

    Ingredients

    Listed below are all the ingredients you will need.

    • Self-Rising Flour
    • Coconut Oil
    • Coconut Milk

    See recipe card for quantities.

    Instructions

    Preheat the oven to 400°F (200°C) and line a baking sheet with parchment paper. In a large mixing bowl, combine the gluten-free flour and coconut oil, mixing until it forms a crumbly texture.

    mixing bowl of coconut oil and flour

    Gradually add the coconut milk into the mixture. Stir with a fork or pastry cutter until a soft dough forms.

    pastry mixer combining the ingredients

    Make sure not to overmix because the vegan buttermilk would result in a rubbery texture.

    mixture of the ingredients in a bowl

    On a mixing board, sprinkle some flour on the lightly floured surface to prevent biscuit dough from sticking.

    Biscuit batter sprinkled with flour

    Knead it with a rolling pin.

    kneading the biscuit dough

    Cut out the dough individually using a cookie cutter or biscuit cutter. I used a round one here but you can always use different shapes of cookie cutters.

    cutting round shapes from dough

    Transfer it to a baking tray or parchment paper. Then bake it in an oven at 400F for 10 minutes.

    biscuit dough in a baking mat

    Stack two flaky layers of dough to create a taller, fluffier result. Let them cool for a few minutes, then enjoy warm with fruit jam, vegan butter, or maple syrup!

    Round dough bits on a baking tray

    Hint: For extra flaky, tall biscuits, freeze the dough for 10 minutes before baking - this helps create light, buttery layers.

    ⭐ Top Tip

    • Before you start mixing the flour with the other ingredients, make sure you have sifted it to ensure that no lumps are included
    • When adding the wet ingredient to your flour, use the "well technique". make a small "well" in the middle of the flour/dry ingredients then gradually add your liquid ingredients
    • Before you use your rolling pin to flatten the dough, dust it with a bit of flour to prevent your dough from sticking to it. You can repeat this process as needed.
    • Your cookie cutter needs to be dusted with flour, too! As it comes to contact with the sticky dough, it tends to gather some dough on its edges so it's best to clean and dust it as needed

    FAQ

    What Pillsbury biscuits are vegan?

    Pillsbury Grands! Southern Homestyle Original Biscuits are animal-free, for example, and so is the brand's Southern Homestyle Buttermilk Refrigerated Biscuit Dough variety (surprisingly, there's no actual buttermilk in this flavor - go figure).

    Can you use almond milk instead of milk for biscuits?

    Almond milk can be used 1:1 in place of 2% milk and whole milk when baking. When using it in place of whole milk, confections may bake a little faster, as there is more water in almond milk than dairy milk. This water evaporates causing the baked good to rise and set more quickly.

    What can I use if I don't have milk?

    Nut-based milk alternatives, such as almond, pistachio, or other nut milks, offer a delicious and versatile option for those seeking milk substitutes.

    More Recipes

    Who doesn't love these kinds of recipes? Here's some more I like to make for a quick snack!

    • 2 Ingredient Muffin
    • 2 Ingredient Donut
    • 3 Ingredient Cupcakes
    • 3 Ingredient Healthy Oat Cookies
    White plates with vegan biscuits
    5 from 4 votes
    Print Pin Recipe

    3 Ingredient Vegan Biscuits

    Prep Time10 minutes mins
    Cook Time10 minutes mins
    Total Time20 minutes mins
    Course: Breakfast, Snack
    Cuisine: American
    Servings: 8 biscuits
    Calories: 211kcal
    Author: Lainey
    Prevent your screen from going dark

    Ingredients

    • 2 cups self rising flour
    • ¼ cup coconut oil
    • ¾ cup coconut milk

    Instructions

    • Preheat the oven to 400°F (200°C) and line a baking sheet with parchment paper.
    • In a large bowl, combine self-rising flour and coconut oil, mixing until it forms a crumbly texture.
    • Gradually add the coconut milk, stirring with a fork or pastry cutter until a soft dough forms.
    • Lightly flour a surface and knead the dough gently until smooth. Roll out to about ½-inch thick.
    • Use a cookie cutter to cut out individual biscuits and place them on the prepared baking sheet.
    • Bake for 10-12 minutes, or until the biscuits are lightly golden on top.
    • Let cool for a few minutes and serve warm with your favorite fruit jam, vegan butter, or maple syrup.
    Leave a Comment
    Serving: 1gCalories: 211kcalCarbohydrates: 23gProtein: 4gFat: 12gSaturated Fat: 10gPolyunsaturated Fat: 0.4gMonounsaturated Fat: 1gSodium: 3mgPotassium: 78mgFiber: 1gSugar: 0.1gVitamin A: 1IUVitamin C: 0.2mgCalcium: 9mgIron: 1mg

    Watch The Recipe Video!

    QR Code
    Did you make this recipe?Share it on instagram or tag @simplybakings or #simplybakings!

    5 Ingredients or Less, Bread, Breakfast & Brunch, Vegan Baking

    Chocolate Chip Meringue Cookies

    May 16, 2016 · 2 Comments

    This super light, airy but crisp Chocolate Chip Meringue Cookies is one of my favorite kinds of cookies to make during Christmas! In every bite, you can hear the crispiness but in between, there is a moist and marshmallow-like softness. Yum!

    Chocolate Chip Meringue Cookies on a white plate and cooling rack

    Tips and Procedures: 

    • Before mixing the dry ingredients like all-purpose flour, baking soda, and granulated sugar, sift them individually. This easy but very important step would make your cookies nice and evenly textured. It wouldn't be fun biting into a lump of flour in between 🙂
    • After baking your Chocolate Chip Meringue Cookies, store them in an airtight container so you can enjoy them for several days - that is if you did not eat the whole batch in one sitting.
    • If you don't have chocolate chips and have a chocolate bar instead, simply chop it in small bits and you have equally delicious chocolate to go in that croissant dinner roll!
    freshly baked Meringue Cookies on a white plate

    How to Make this Chocolate Chip Meringue Cookies Recipe:

    Gather the ingredients for this Chocolate Chip Meringue Cookies and once the ingredients are all ready, let's begin!

    • cream of tartar
    • salt
    • egg whites
    • granulated sugar
    • unsweetened cocoa powder
    • mini chocolate chips

    Preheat oven to 300F and prepare baking sheet using parchment paper or a baking mat.

    In a mixing stand, add the cream of tartar, salt, and egg whites and beat it at high speed until soft peaks form. Then gradually add the granulated sugar 1 tablespoon at a time, while the mixer is on high speed. Now once stiff peaks form, turn off the mixer and then sift the unsweetened cocoa powder in the bowl:

    whipping the egg whites for the chocolate chip meringue cookies

    Next, you are going to fold this in and then fold in the mini chips:

    adding the unsweetened cocoa powder to the whipped egg whites

    After mixing well, you will get a light brown colored smooth mixture, like so:

    mixed egg whites and unsweetened cocoa powder in a mixing bowl

    Using a piping bag, pipe the cookies onto parchment paper:

    piping the chocolate chip meringue cookies on a cookie sheet lined with parchment paper

    Bake for 40-45 minutes, then remove from pan and cool on a cookie rack.

    freshly baked chocolate chip meringue cookies on a parchment paper

    I was so excited to take a bite! This cookie is crispy on the outside but soft and has a marshmallow taste on the inside! I could eat a few more of these cookies!

    holding a half-eaten chocolate chip meringue cookie

    Frequently Asked Questions for the Chocolate Chip Meringue Cookies Recipe:

    Q: Should these cookies be refrigerated?

    A: Yes, you can keep this in the fridge but make sure to store them in an airtight container.

    Q: Are chocolate chip meringue cookies supposed to be chewy?

    A: Yes, because of the egg whites and combination of sugar, it does have a slightly chewy texture to it.

    Q: How do you know when meringue cookies are done baking??

    A: Like other cookies, you can insert a toothpick in the center and when it comes out clean, then it is perfectly baked.

    Q: Can you overbeat the meringue?

    A: Overbeating the egg whites could cause a failure in baking these chocolate chip meringue cookies. When you see stiff peaks, you can stop whipping or beating it.


    Here are more delicious cookie recipes that you should try:

    • 3 Ingredient No-Bake Cheesecake
    • Apple Pancake Cookies
    • Best Chocolate Chip Cookies
    • Brownie Cookies
    • Brownie Meringue Cookies | 5 Ingredients ONLY
    freshly baked chocolate chip meringue cookies
    5 from 1 vote
    Print Pin Recipe

    Chocolate Chip Meringue Cookies

    A super light and airy but crisp Chocolate Chip Meringue Cookies is the cookie to make everytime you crave for a unique but perfect choice for birthday and Christmas parties!
    Author: Lainey
    Prevent your screen from going dark

    Ingredients

    • ¼ teaspoon cream of tartar
    • ¼ teaspoon salt
    • 3 egg whites
    • 1 cup granulated sugar
    • 3 tablespoons unsweetened cocoa powder
    • 3 tablespoons mini chocolate chips

    Instructions

    • Preheat oven to 300F and prepare baking sheet using parchment paper or baking mat.
    • In a mixing stand, add the cream of tartar, salt, and egg whites and beat it at high speed until soft peaks form. Then gradually add the granulated sugar 1 tablespoon at a time, while the mixer is on high speed. Now once stiff peaks form, turn off the mixer and then sift the unsweetened cocoa powder in the bowl.
    • Next, you are going to fold this in and then fold in the mini chips.
    • Using a piping bag, pipe the cookies onto parchment paper.
    • Bake for 40-45 minutes, then remove from pan and cool on a cookie rack.
    Leave a Comment

    Watch The Recipe Video!

    QR Code
    Did you make this recipe?Share it on instagram or tag @simplybakings or #simplybakings!

    NEVER MISS A RECIPE!

    PINTEREST / FACEBOOK / INSTAGRAM / TWITTER

    If you’ve tried this or any other of my recipes, don’t forget to rate the recipe and to leave me a comment. I love hearing from you!

    Cookies, Desserts

    Churro Cheesecake

    May 13, 2016 · 6 Comments

    churro cheesecake on a plate

    This Churro Cheesecake recipe is delicious and creamy. It is made with crescent rolls and a cream cheese mixture that's so tasty and rich in flavor! You will be amazed at how easily this dessert is prepared.

    Churro cheesecake on a plate

    Tips on How to Make Churro Cheesecake:

    • For an extra delicious and pretty flair, you can top it with berries that are in season.
    • Mix the cream cheese and mix just enough to get a fluffy and smooth texture. Over-beating it will make it flop and won't give you enough yield.
    • If you love thick cheesecakes, you can add another layer using the same steps. Just make sure not to make it too thick since it would take a longer time to bake. Also, when adding another layer of the cheesecake, extend the baking time.
    • To check if the Churro cheesecake is ready to take out from the oven, insert a toothpick and when it comes out clean, then it is ready to be taken out.

    How to Make Churro Cheesecake:

    These are the ingredients that you will need:

    • Crescent dinner rolls
    • cream cheese
    • vanilla extract
    • egg
    • sugar

    Topping

    • sugar
    • ground cinnamon

    Preheat oven to 350F and prepare 9x13 inch pan.

    In a large bowl add the softened cream cheese. I like to mix this first before I add anything else because I’ve noticed there’s no lumps in the batter:

    mixing the cream cheese using a handheld mixer

    Next add the vanilla extract, egg, sugar, and mix until it’s well combined:

    mixing the cream cheese, sugar and vanilla

    The cream cheese mixture will have this consistency. Once everything is mixed, set this bowl aside:

    cream cheese mixture for the churro cheesecake

    In a 9x13 inch pan, take 1 can of the crescent and place it on the bottom of the pan, this will be the crust and make sure there’s no cracks:

    crescent roll cheesecake crust

    Next add the cream cheese batter and spread it evenly on the pan:

    Make sure to evenly spread the cream cheese mixture:

    first layer of the churro cheesecake

    To add the top crust layer, I found spreading the crescent on parchment paper first, and then slowly transferring to the cream cheese mixture made it easier and had a cleaner look.

    For the topping, I just mixed sugar and cinnamon:

    mixing the cinnamon powder and the sugar

    Before putting it in the oven, sprinkle with cinnamon and sugar mixture:

    topping the churro cheesecake with cinnamon sugar

    Bake for 30-35 minutes and then remove from the oven and cool completely. Serve chilled.

    a slice of churro cheesecake on a plate

    It looks like this dessert is complicated and hard to make but no, it's so easy and it is so delicious!

    churro cheesecake on a plate

    Frequently Asked Questions for the Churro Cheesecake Recipe:

    Q: Can I do this a few days ahead?

    A: Yes, sure you can. Just make sure to cover it tightly so it won't be ruined by any liquid.

    Q: How many servings would this recipe have?

    A: You can have 10 to 12 regular slices of Churro cheesecake.

    Q: Will the cheesecake melt in room temperature?

    A: No. Since this churro cheesecake is baked already, it won't melt when placed in room temperature. But when serving, it tastes best when it is chilled.

    Q: Can this cake be made days before serving and frozen?

    A: Yes, you can do that. Just make sure to thaw it properly before serving it.


    Here are more baked dessert recipes you will surely love!
    • Oreo Waffles
    • Strawberry Stuffed Cheesecake
    • Nutella Cheesecake NO BAKE
    • Homemade Caramel Cake

    Delicious Smoothie and Ice Cream Desserts to go with Churro Cheesecake:

    • Pineapple Mango Smoothie
    • Cookie Butter Ice Cream
    • Mocha Ice Cream | 5 Ingredients Only
    • Strawberry Banana Smoothie
    how to make churro cheesecake
    5 from 1 vote
    Print Pin Recipe

    Churro Cheesecake

    This Churro Cheesecake recipe is delicious and creamy - it is made with crescent rolls and cream cheese mixture that's so tasty and rich in flavor!
    Author: Lainey
    Prevent your screen from going dark

    Ingredients

    • 2 Cans 8oz each Crescent dinner rolls
    • 2 8oz each cream cheese, softened
    • 1 teaspoon vanilla extract
    • 1 egg
    • ½ cup sugar

    Topping

    • ½ cup sugar
    • 1 tablespoon ground cinnamon

    Instructions

    • Preheat oven to 350F and prepare 9x13 inch pan.
    • In a large bowl add the softened cream cheese. I liked to mix this first before I add anything else because I’ve noticed there’s no lumps in the batter. Next add the vanilla extract, egg, sugar, and mix until it’s well combined.
    • Once everything is mixed, set this bowl aside and in a 9x13 inch pan, take 1 can of the crescent and place it on the bottom of the pan, this will be the crust and make sure there’s no cracks.
    • Next add the cream cheese batter and spread it evenly on the pan. To add the top crust layer, I found spreading the crescent on parchment paper first, and then slowly transferring to the cream cheese mixture made it easier and had a cleaner look.
    • Bake for 30-35 minutes and then remove from the oven and cool completely. Serve chilled
    Leave a Comment

    Watch The Recipe Video!

    QR Code
    Did you make this recipe?Share it on instagram or tag @simplybakings or #simplybakings!

    NEVER MISS A RECIPE!

    PINTEREST / FACEBOOK / INSTAGRAM / TWITTER

    If you’ve tried this or any other of my recipes, don’t forget to rate the recipe and to leave me a comment. I love hearing from you!

    Cheesecake, Desserts

    Banana Bread Cookies

    May 9, 2016 · 21 Comments

    banana bread cookies

    This is a cookie version of the ever-famous Banana bread, the Banana Bread Cookies! They are perfect for dunking into hot milk or coffee, whichever you like to drink with!

    Banana Bread Cookies

    Tips and Procedures: 

    • Before baking this cookie, make sure you have refrigerated the dough for at least 30 minutes or longer. It improves the texture of the cookies and makes the cookie dough so much easier to scoop out.
    • If you love a bit of texture in your cookies, don't hesitate to add oatmeal to this recipe. Just make sure that the kind of oatmeal you use is baked or cooked very quickly since the baking time of this cookie is just under ten minutes or ten minutes at the most.
    • When spacing the cookie dough on your baking mat, make sure to give at least 2 inches of space apart for each dough. This would allow the cookies to spread and they won't stick together after baking.

    How to Make this Banana Bread Cookies Recipe:

    After gathering all the ingredients and tools you will need, you are now ready to make these soft and chewy and of course, delicious Banana Bread cookies!

    Let's begin!

    In a large bowl, add the butter, granulated sugar, vanilla extract, and grab your whisk and mix it all together until it is light and fluffy:

    sugar, butter and vanilla extract in one bowl

    You can now add the eggs and make sure to mix very well:

    added eggs to the mixture of butter, sugar and vanilla

    After that has been thoroughly mixed, add in the cup of mashed bananas and mix it again very well:

    adding the mashed bananas to the mixture

    The mixture of wet ingredients should look like this and there should be no huge banana lumps. Set the bowl aside:

    final mixture of wet ingredients for the banana bread cookies recipe

    In another bowl, combine all the dry ingredients: baking powder, salt, baking soda, cinnamon, and all-purpose flour, and mix very well:

    mixing the wet and dry ingredients of the banana bread cookies

    After mixing, pour it onto the wet ingredients and mix until everything is well-combined:

    mixed wet and dry ingredients for the banana bread cookies recipe

    Tadaaah! Now here is what the batter of your banana bread cookies should look like.

    Don't bake them yet! Chill them for at them 30 minutes - the longer the better 🙂 

    scooping banana bread cookies batter using a cookie scooper

    Now that you are ready to bake them, grab your handy-dandy cookie scooper, or ice cream scooper if that's what you have, and use it to scoop the banana bread cookie dough, just like so.

    Then, place the dough on the mat and bake 400°F for eight to ten minutes:

    banana bread cookie dough on a baking mat

    I know your kitchen would smell so yummy by this time!

    freshly baked banana bread cookies

    Look at those delicious banana bread cookies!!! They are the best for snacks, a go-to quick pre or post-workout treat, or even breakfast with a cup of coffee! Hands down, these are one of my favorite cookies!

    Banana Bread Cookies on a white plate

    Frequently Asked Questions:

    Q: How many servings would this recipe do?

    A: This delicious and easy banana bread cookie recipe could make up to 12-16 cookies.

    Q: Can I use bananas that have already dark skin for this recipe?

    A: Yes, definitely! Those are the best to use when baking since it is already very ripe and it would smell so good after baking.

    banana bread cookies
    4.60 from 5 votes
    Print Pin Recipe

    Banana Bread Cookies

    Amazingly soft and chewy Banana Bread Cookies which are perfect for snacks, breakfast or movie nights!
    Prep Time10 minutes mins
    Cook Time10 minutes mins
    Chill Time30 minutes mins
    Total Time50 minutes mins
    Course: Cookies, Snacks
    Author: Lainey
    Prevent your screen from going dark

    Ingredients

    • ⅔ cups butter
    • 1 ¼ cups sugar
    • 1 teaspoon vanilla extract
    • 2 eggs
    • 1 cup banana mashed (2 ½ medium sized bananas)
    • 2 ¼ cup flour
    • 2 teaspoons baking powder
    • ¼ teaspoon baking soda
    • ½ teaspoon salt
    • ½ teaspoon cinnamon

    Instructions

    • In a large bowl, add the butter, granulated sugar, vanilla extract and grab your whisk and mix it all together until it is light and fluffy.
    • You can now add the eggs and make sure to mix very well.
    • After that has been thoroughly mixed, add in the cup of mashed bananas and mix it again very well. Set the bowl aside.
    • In another bowl, combine all the dry ingredients: baking powder, salt, baking soda, cinnamon, and all-purpose flour and mix very well. After mixing, pour it onto the wet ingredients and mix until everything is well-combined.
    • Chill them for at them 30 minutes - the longer the better.
    • Scoop the banana bread cookies dough.
    • Place the dough on the mat.
    • Bake at 400°F for eight to ten minutes. Cool before serving.
    Leave a Comment
    QR Code
    Did you make this recipe?Share it on instagram or tag @simplybakings or #simplybakings!

    NEVER MISS A RECIPE!

    PINTEREST / FACEBOOK / INSTAGRAM / TWITTER

    If you’ve tried this or any other of my recipes, don’t forget to rate the recipe and to leave me a comment. I love hearing from you!

    Breakfast & Brunch, Cookies, Desserts

    Easy No Bake Snickers Cheesecake

    May 6, 2016 · 8 Comments

    This Easy No Bake Snickers Cheesecake is rich, creamy, and loaded with chunks of Snickers, peanut butter, and cream cheese in every bite. It’s an easy make ahead dessert with no oven required, perfect for parties, holidays, or anytime you’re craving something sweet.

    Looking for more indulgent dessert recipes? Try our NO BAKE Banana Strawberry Pie or Ube Tarts for more sweet treats to satisfy your cravings!

    [feast_advanced_jump_to]

    Substitutions

    • Graham Cracker Crust - Crushed Oreo cookies or digestive biscuits can replace graham cracker crumbs for the base.
    • Whipped Cream - Cool Whip or double cream can be used in place of whipped cream for the topping.

    Storage

    • Refrigerator - Store the cheesecake in the fridge in an airtight container or covered springform pan to maintain its freshness.
    • Leftovers - If you have any leftovers, store them in the fridge and consume within 2-3 days for the best taste and texture.

    Ingredients

    Here is the quick look of the ingredients for Snickers Bites Cheesecake:

    • cream cheese
    • powdered sugar
    • chunky peanut butter
    • whipped topping
    • Snickers bite-sized
    • pre made graham cracker pie crust

    See recipe card for quantities.

    ingredients of the snickers bites cheesecake recipe

    Now that we have all the ingredients ready, let's begin!

    Instructions

    In a large bowl, add the cream cheese and mix until it’s fluffy. When you get the fluffy consistency that we want, you can now add the powdered sugar, peanut butter, and mix until it’s well combined:

    adding powdered sugar and crunchy peanut butter to the fluffy cream cheese mixture

    Then add the whipped topping and the snickers and mix with a spatula. Then pour it into the graham cracker crust. Make sure to level off the cheesecake mixture using a spatula or any kitchen tool that has a flat end:

    placing the cheesecake mixture into the pre-made graham pie crust

    Refrigerate at least 4 hours or best overnight. Decorate the cheesecake as you please and serve chilled.

    no bake snickers bites cheesecake

    ⭐ Top Tip

    • Decorate and Drizzle: Stir in chopped peanuts for extra texture, drizzle with carnation caramel or dulce de leche, and melt white or milk chocolate in the microwave for a decorative finish.

    Frequently Asked Questions

    Does no-bake cheesecake get firm?

    Yes, no-bake cheesecake does get firm after chilling in the refrigerator for several hours.

    Why is my no-bake cheesecake not firming up?

    If your no-bake cheesecake isn't firming up, it might need more chilling time or you may need to check if the ingredients were mixed thoroughly.

    Which is better baked cheesecake or no-bake?

    Both baked and no-bake cheesecakes have their own unique textures and flavors, so it really depends on personal preference.

    Here are more cheesecake recipes you will surely love:

    • Best Vegan Fruit Cheesecake
    • Chocolate Chip Cheesecake
    • No-Bake OREO Cheesecake
    • Nutella Cheesecake No BAKE
    • Churro Cheesecake
    no bake snickers bites cheesecake
    5 from 4 votes
    Print Pin Recipe

    Easy No Bake Snickers Cheesecake

    This Easy No Bake Snickers Cheesecake is creamy, chocolatey, and packed with peanut butter and Snickers in every bite. It’s an easy no-bake dessert that’s perfect for making ahead for parties, holidays, or whenever a dessert craving hits.
    Prep Time15 minutes mins
    Chill Time4 hours hrs
    Course: Dessert, Desserts
    Cuisine: Fusion (American-Filipino/Asian)
    Servings: 8 servings
    Calories: 399kcal
    Author: Lainey
    Prevent your screen from going dark

    Ingredients

    • 1 (8 oz) cream cheese softened
    • 1 cup powdered sugar sifted
    • ½ cup chunky peanut butter
    • 1 (8 oz) whipped topping
    • 1 ½ cups Snickers Bite sized
    • 1 graham cracker pie crust

    Instructions

    • In a large mixing bowl, beat the softened cream cheese until smooth and fluffy.
    • Add the powdered sugar and peanut butter. Mix until fully combined and creamy.
    • Fold in the whipped topping until smooth.
    • Gently fold in the chopped Snickers bars with a spatula.
    • Spoon the cheesecake filling into the graham cracker crust and smooth the top.
    • Cover and refrigerate for at least 4 hours, or overnight for best results.
    • Before serving, top with extra chopped Snickers or a drizzle of caramel if desired. Slice and serve chilled.
    Leave a Comment
    Serving: 1gCalories: 399kcalCarbohydrates: 49gProtein: 7gFat: 20gSaturated Fat: 5gPolyunsaturated Fat: 3gMonounsaturated Fat: 10gTrans Fat: 0.1gCholesterol: 4mgSodium: 246mgPotassium: 236mgFiber: 2gSugar: 34gVitamin A: 47IUVitamin C: 0.1mgCalcium: 40mgIron: 1mg

    Watch The Recipe Video!

    QR Code
    Did you make this recipe?Share it on instagram or tag @simplybakings or #simplybakings!

    Cheesecake, No Bake Dessert Recipes

    No Bake Oreo Cookie

    May 2, 2016 · 2 Comments

    oreo cookie

    Here is a no-bake Oreo cookie recipe that uses just a few ingredients!  If you are craving an Oreo dessert, this is the perfect go-to dessert. You don't need to turn on your oven. Just a quick mixing and waiting for the microwave timer to beep, and you have a delicious and satisfying Oreo dessert!

    No bake Oreo Cookies in a white cup

    Tips and Procedures: 

    • Before mixing the dry ingredients, make sure you have sifted them carefully, especially the all-purpose flour and the sugars. This will eliminate lumps that do not taste so good 😉
    • In making desserts like this, make sure you check the butter you are using. Unsalted butter is always the best choice.
    • Choose fresh eggs. The fresher the egg, the easier it is to separate the yolk from the egg white.
    • If you love an extra chocolate treat, drizzle it with chocolate sauce or hot fudge after taking it out from the microwave.
    No Bake oreo cookie in a white cup

    How to Make this No-Bake Oreo Cookie Recipe:

    Gather the ingredients for this No-Bake Oreo Cookie and once the ingredients are all ready, let's begin!

    • unsalted butter, softened
    • brown sugar
    • granulated sugar
    • vanilla extract
    • egg yolk
    • all-purpose flour
    • salt
    • crushed oreo (4 Oreos)

    In a bowl or mug add the softened butter, brown sugar, and granulated sugar, and mix until it’s well combined:

    combining sugars with melted butter in a small white bowl

    Next add the egg yolk, and vanilla extract, and mix:

    adding egg to the butter and sugar mixture

    Then add the all-purpose flour, pinch of salt, and mix:

    adding all purpose flour to the eggs, sugar and butter mixture

    Add the Oreos, mix, and then place in the microwave on high for about 1 ½ minutes:

    adding in the crushed Oreos to the cookie mixture

    Yum! This really smells good and I was so excited to take a spoon and taste it!

    freshly microwaved No Bake oreo cookie in a small bowl

    Frequently Asked Questions for the No Bake Oreo Cookie Recipe:

    Q: Can I use gluten-free flour for this recipe?

    A: Yes sure you can use the gluten-free flour and add the rest of the ingredients as listed.

    Q: Can I refrigerate this after cooking?

    A: Yes, you can pop this in the fridge. It tastes also delicious when it is chilled.

    Q: What is the yield of this recipe?

    A: This recipe makes only one serving but you can certainly double or triple the quantity of the ingredients if you are making a bigger batch.


    Try more No-Bake and Oreo dessert recipes:

    • No Bake Oreo Pie
    • 3 Ingredient No Bake Oreo Cheesecake
    • 3 Ingredient No Bake Cheesecake
    • No Bake Strawberry Float
    no bake Oreo Cookies in a small white bowl
    No ratings yet
    Print Pin Recipe

    No Bake Oreo Cookie

    This no-bake Oreo cookie which uses just a few ingredients is the perfect go-to dessert for Oreo lovers and for those who want a quick but sumptuous dessert!
    Servings: 1 serving
    Author: Lainey
    Prevent your screen from going dark

    Ingredients

    • 1 tablespoon unsalted butter softened
    • 1 tablespoon brown sugar
    • 1 tablespoon granulated sugar
    • ½ teaspoon vanilla extract
    • 1 egg yolk
    • 3 tablespoons all purpose flour
    • Pinch salt
    • 2-3 tablespoons crushed oreo 4 oreos

    Instructions

    • In a bowl or mug add the softened butter, brown sugar, granulated sugar and mix until it’s well combined. Next add the egg yolk, vanilla extract, and mix! Then add the all purpose flour, pinch of salt and mix.
    • Add the oreos, mix and then place in the microwave on high for about 1 ½ .
    Leave a Comment

    Watch The Recipe Video!

    QR Code
    Did you make this recipe?Share it on instagram or tag @simplybakings or #simplybakings!

    NEVER MISS A RECIPE!

    PINTEREST / FACEBOOK / INSTAGRAM / TWITTER

    If you’ve tried this or any other of my recipes, don’t forget to rate the recipe and leave me a comment. I love hearing from you!

    Cookies, Desserts

    Strawberry Poke Cake with Pudding

    Apr 22, 2016 · 6 Comments

    strawberry poke cake

    This irresistible allure of a Strawberry Poke Cake with pudding is so refreshing and despite its modest appearance in pictures, this addictive recipe is bound to leave everyone craving for seconds.

    Looking for more summer desserts? Try my Mini Fruit Pizza or Snicker Bites Cheesecake.

    a slice of Strawberry Poke Cake on a white plate
    [feast_advanced_jump_to]

    Top Tips

    • Poke Holes Strategically: Use the end of a wooden spoon or a fork to poke holes evenly across the cake, ensuring that the pudding can seep into the cake effectively.
    • I prefer using cooking spray to grease the pan for effortless removal.

    Variations

    • Opt for a strawberry cake mix to enhance the strawberry flavor.
      • When utilizing strawberry cake mix, opt for vanilla pudding to fill the poked holes.
    • Add vanilla extract to enhance the cake with a rich vanilla flavor.
    • Mixed Berry Poke Cake: Use a combination of strawberries, blueberries, raspberries, and blackberries for a vibrant and flavorful twist.
    • Chocolate Covered Strawberry Poke Cake: Drizzle melted chocolate over the cake after adding the pudding for a decadent twist on the classic strawberry dessert.
    • Coconut Strawberry Poke Cake: Sprinkle shredded coconut over the cake after adding the pudding for a tropical flavor boost.
    • Almond Strawberry Poke Cake: Add almond extract to the cake batter and top the cake with sliced almonds for a nutty complement to the sweet strawberries.
    • Strawberry Cheesecake Poke Cake: Swirl strawberry jam into the cream cheese frosting before spreading it over the cake for a decadent cheesecake-inspired dessert.

    Substitutions

    • Boxed Cake Mix: If you prefer homemade, you can substitute the cake mix with your favorite from-scratch cake recipe.
      • Use white cake mix, yellow cake mix, or chocolate cake mix instead. This recipe is very versatile.
    • Substitute whipped topping with heavy whipping cream whipped in a stand mixer using a whisk attachment to achieve a creamy frosting texture.
    • Pudding Mix: Instead of using instant pudding mix, you can make a homemade pudding using cornstarch, milk, sugar, and strawberry extract.
    • Strawberries: While fresh strawberries are ideal, you can also use frozen strawberries that have been thawed and drained or canned strawberries in syrup (just adjust the sweetness accordingly).
    • Whipped Topping: If you prefer not to use whipped topping, you can make homemade whipped cream using heavy cream and powdered sugar, or substitute with stabilized whipped cream.
    • Garnishes: Instead of strawberries, you can use other fruits like raspberries, blueberries, or a combination of berries. Additionally, you can garnish with chocolate shavings, toasted coconut, or chopped nuts for added texture and flavor.
    • Cake Base: Instead of a traditional cake base, you can use angel food cake, pound cake, or even brownies for a different flavor profile.
    • Liquid: Instead of water, you can use milk or buttermilk for a richer cake texture.

    Storage

    • Refrigerator: Since the cake contains pudding and whipped topping, it should be stored in the refrigerator. Cover the cake with plastic wrap or transfer it to an airtight container to prevent it from drying out or absorbing odors from the refrigerator. Properly stored, the cake can last for 3-4 days in the refrigerator.
    • Serve Chilled: For the best taste and texture, serve the cake chilled directly from the refrigerator. This helps maintain the integrity of the pudding and whipped topping layers.

    Ingredients

    • lemon cake mix
    • water
    • lemonade
    • strawberry flavored Jello (pudding mix)
    • whipped topping (like cool whip)
    • strawberries

    Instructions

    Before starting, don't forget to preheat oven to 350 degrees F and prepare the ingredients ahead. It saves you a lot of time to lay them all out, plus, you know you are not missing an ingredient.

    After that, go ahead and prepare a 9x13 inch pan by greasing it.

    Follow the instructions provided on the cake mix box:

    mixing the ingredients of strawberry poke cake

    Then place it in the oven for 30-35 minutes. Remove from the oven and allow it to cool completely.

    Using a fork, poke holes all over the cake and set aside.

    poking the cake with a fork

    In a saucepan, add the water, lemonade, and bring to a rolling boil. Next, add the strawberry jello and mix until well combined. Allow this to cool completely.

    boiling strawberry jello in a saucepan

    Once the jello mixture has cooled, pour over the cake and then set aside to allow the cake soak in the jello

    pouring out the cooked strawberry jello on the cake

    Add strawberries, whipped topping and decorate!

    topping the cake with fresh strawberries and whipped topping

    Cover the whole top of the cake with whipped topping:

    ready to be chilled strawberry poke cake

    Refrigerate and chill your delicious Strawberry Poke Cake. And after a few hours of patiently waiting, here it is!

    chilled strawberry poke cake

    FAQ

    Can you add instant pudding mix to cake mix?

    Yes, you can add instant pudding mix to cake mix. Adding pudding mix to cake batter can result in a moister and denser cake with a richer flavor. Just be sure to follow the instructions on both the cake mix and pudding mix packages, and adjust any additional ingredients or baking times accordingly.

    What does pudding do in baking?

    Pudding adds moisture, richness, and flavor to baked goods, resulting in a softer texture and enhancing the overall taste of the dessert.

    Can I do this a few days ahead?

    Yes, sure you can. You can opt to decorate it ahead or decorate it with fresh sliced strawberries just before serving.

    Is jello the same with gelatin?

    Yes, Jello is a brand name for flavored gelatin, so they are essentially the same thing.

    strawberry poke cake
    5 from 3 votes
    Print Pin Recipe

    Strawberry Poke Cake with Pudding

    Savor the creative and delicious flavors of this Strawberry Poke Cake, an ideal addition to potlucks and parties! Indulge in its irresistible charm, featuring creamy pudding and a promise of leaving everyone craving for more.
    Prep Time10 minutes mins
    Bake Time35 minutes mins
    Total Time45 minutes mins
    Course: Dessert
    Cuisine: American
    Servings: 12 servings
    Calories: 130kcal
    Author: Lainey
    Prevent your screen from going dark

    Ingredients

    • 1 (15.25) ox lemon cake mix Follow the instructions provided on the cake mix box.

    Pudding Mixture

    • 1 cup water
    • 1 cup strawberry lemonade *
    • 1 (3) oz strawberry jello or vanilla pudding

    Assembly

    • 1 (8) oz whipped topping
    • 1 (8) oz strawberries sliced

    Instructions

    • Preheat oven to 350F and prepare 9x13 inch pan by greasing it.
    • Follow the instructions provided on the cake mix box, then remove from the oven and allow it to cool completely.
    • Using a fork, poke holes all over the cake and set aside.
    • In a saucepan, add the water, lemonade, and bring to a rolling boil. Next add the strawberry jello and mix until well combined. Allow this to cool completely.
    • Once the jello mixture has cooled, pour over the cake and then set aside to allow the cake soak in the jello.
    • For decoration, garnish with fresh strawberries and whipped topping. For optimal flavor, refrigerate to chill before serving.
    Leave a Comment

    Notes

    *feel free to use lemonade
    Serving: 1gCalories: 130kcalCarbohydrates: 32gProtein: 0.2gFat: 0.2gSaturated Fat: 0.1gMonounsaturated Fat: 0.02gCholesterol: 0.02mgSodium: 39mgPotassium: 3mgFiber: 0.03gSugar: 30gVitamin A: 1IUVitamin C: 1mgCalcium: 10mgIron: 0.02mg

    Watch The Recipe Video!

    QR Code
    Did you make this recipe?Share it on instagram or tag @simplybakings or #simplybakings!

    Cake, Desserts

    Mexican Fried Ice Cream Dessert

    Apr 20, 2016 · 4 Comments

    Mexican Fried Ice Cream Dessert in a glass bowl

    A fried ice cream recipe that requires no deep-frying? Yes, that is possible with Mexican Fried Ice Cream Dessert! With just a few ingredients found in your pantry and freezer, treat yourself. Serve your guests this delicious and easy-to-make dessert this summer or at any party at home!

    If you enjoy fun and sweet desserts, try our Cinnamon Roll Bites or creamy Easy Banana Pudding Ice Cream next.

    Serving of Mexican Fried Ice Cream Dessert
    [feast_advanced_jump_to]

    Why You’ll Love This Recipe

    Getting ready for a Cinco de Mayo party or any party? This recipe is beginner-friendly and doesn’t require frying. It’s quick, simple, and perfect for making with kids.

    You can make it dairy-free or vegan by swapping ice cream and butter with plant-based versions. It’s flexible and customizable to your needs.

    Mix the whipped cream well until it really shows soft peaks. I promise, your ice cream mixture would taste so much better if your whipped cream is creamed very well.

    Ingredients

    Listed below are all the ingredients you will need:

    • Unsalted butter
    • Brown sugar
    • Corn flakes
    • Vanilla ice cream
    • Heavy whipping cream
    • Powdered sugar
    • Vanilla extract
    • Ground cinnamon

    See the recipe card for quantities.

    Instructions

    Prepare the Crust:

    1. Place cornflakes in a large ziplock bag. Crush lightly using a rolling pin or your hands. But make sure to keep some texture.

    2. In a large mixing bowl, combine the melted butter and brown sugar. Stir until sugar is dissolved.

    3. Add the crushed cornflakes into the bowl and mix until well coated. Set aside.

    Layer the Dessert:

    4. Let the vanilla ice cream sit out for about 15 minutes to soften.

    5. In a 9x13-inch baking pan or baking sheet, press half of the cornflake mixture into the bottom to create a crust.

    6. Using a small ice cream scoop or spoon, scoop the softened ice cream onto the crust.

    Putting ice cream on top of the cornflakes

    7. Gently spread each ice cream ball evenly over the crust without pressing too hard.

    8. Sprinkle the remaining cornflake mixture evenly over the top.

    9. Place the dessert in the freezer to firm up while you make the whipped cream.

    Make the Whipped Cream:

    10. In a clean bowl, beat together the heavy whipping cream, powdered sugar, and vanilla extract until soft peaks form.

    Making the whipped cream using a mixer

    Finish and Freeze:

    11. Remove the dessert from the freezer and spread the whipped cream over the top layer.

    12. Sprinkle with ground cinnamon for garnish.

    Sprinkling cinammon over the fried ice cream

    13. Return the pan to the freezer and freeze for at least 2 hours, or until fully set.

    14. Serve and enjoy!

    Mexican Fried Ice Cream Dessert serving on the table

    Substitutions and Variations

    • Ingredient Swap
      Swap vanilla ice cream with chocolate, strawberry, or even vegan coconut ice cream.
      Use honey instead of sugar or top with fresh fruit for a lighter twist.
    • Variation
      Add a drizzle of caramel or chocolate sauce for more flavor.
      Feel free to add your favorite chocolate chips, chocolate syrup/caramel sauce, or cherries.
    • Mistake to Avoid
      Avoid letting the cornflake mixture sit too long in the large bowl, or it will lose its crunch.
    • Storage Tips
      • This dessert stands up well to freezing for 2 weeks, but is best enjoyed fresh.
    Mexican Fried Ice Cream Dessert in a glass bowl

    FAQs

    Does this recipe actually require frying?

    No, the corn flakes give the fried effect without oil.

    Do I have to soften the ice cream?

    Yes, it makes spreading and layering much easier.

    Can I make this ahead for parties?

    Yes, just freeze it overnight and garnish before serving.

    Mexican Fried Ice Cream ready to be served
    No ratings yet
    Print Pin Recipe

    Mexican Fried Ice Cream Dessert

    Make Mexican Fried Ice Cream Dessert without deep-frying and with just a few ingredients. Enjoy the delicious and easy to make dessert, perfect for summer or any party you have at home!
    Prep Time25 minutes mins
    Freezing Time2 hours hrs
    Total Time2 hours hrs 25 minutes mins
    Course: Dessert, Snack
    Cuisine: American, Mexican
    Servings: 12 -16 servings
    Calories: 690kcal
    Author: Lainey
    Prevent your screen from going dark

    Ingredients

    • ¾ cup unsalted butter melted
    • 1½ cups brown sugar
    • 6 cups corn flakes
    • ½ gallon vanilla ice cream softened
    • 1½ cups heavy whipping cream
    • 2 tablespoons powdered sugar
    • 1 teaspoon vanilla extract
    • Ground cinnamon for garnish

    Instructions

    Prepare the Crust:

    • Place corn flakes in a large ziplock bag and crush lightly using a rolling pin or your hands — not too fine; keep some texture.
    • In a large mixing bowl, combine the melted butter and brown sugar. Stir until sugar is dissolved.
    • Add the crushed corn flakes into the bowl and mix until well coated. Set aside.

    Layer the Dessert:

    • Let the vanilla ice cream sit out for about 15 minutes to soften.
    • In a 9x13-inch baking pan, press half of the corn flake mixture into the bottom to create a crust.
    • Using a small ice cream scooper or spoon, scoop the softened ice cream onto the crust.
    • Gently spread the ice cream evenly over the crust without pressing too hard.
    • Sprinkle the remaining corn flake mixture evenly over the top.
    • Place the dessert in the freezer to firm up while you make the whipped cream.

    Make the Whipped Cream:

    • In a clean bowl, beat together the heavy whipping cream, powdered sugar, and vanilla extract until soft peaks form.

    Finish and Freeze:

    • Remove the dessert from the freezer and spread the whipped cream over the top layer.
    • Sprinkle with ground cinnamon for garnish.
    • Return the pan to the freezer and freeze for at least 2 hours, or until fully set.
    • Serve and enjoy!
    Leave a Comment
    Serving: 1gCalories: 690kcalCarbohydrates: 78gProtein: 8gFat: 40gSaturated Fat: 25gPolyunsaturated Fat: 2gMonounsaturated Fat: 10gTrans Fat: 0.5gCholesterol: 134mgSodium: 246mgPotassium: 406mgFiber: 2gSugar: 64gVitamin A: 1706IUVitamin C: 4mgCalcium: 249mgIron: 4mg
    QR Code
    Did you make this recipe?Share it on instagram or tag @simplybakings or #simplybakings!

    You Might Also Like:

    • 5 Ingredient Mocha Ice Cream
    • 3 Ingredient Nutella Popsicles
    • Pumpkin Ice Cream

    Recipes for Every Moment

    Got guests coming, and you need an awesome dessert? This Mexican Fried Ice Cream Dessert is all the creaminess and crunchiness you'll need!

    Desserts, Ice Cream, Snacks

    How to Make Chocolate Cookies in Microwave

    Apr 18, 2016 · 3 Comments

    brownie cookies

    Craving something sweet right now? Let me show you how to make Chocolate Cookies in the Microwave—yep, no oven needed! This super quick and easy treat uses simple ingredients like cocoa powder, brownie chunks, and white chocolate chips for a rich, gooey cookie you can enjoy in just minutes!

    Want more microwave dessert ideas? Try these sweet favorites from Simply Bakings: Graham Cracker Mug Cake, Brownie Mug Cake, or Protein Mug Cake.

    microwave chocolate cookie in a mug
    [feast_advanced_jump_to]

    What is this recipe about?

    This microwave chocolate cookie recipe is a game-changer for anyone who wants a warm, gooey treat fast. It’s designed for one serving, making it perfect for late-night cravings or when you just want a small, sweet bite.

    Mug cookies have become super popular in the last few years thanks to their simplicity, and this one levels up with brownie chunks and white chocolate chips. It’s a single-serve dessert that's ready in less than 2 minutes!

    Substitutions

    • unsalted butter (1 tbsp) – use melted butter, vegan butter, or coconut oil
    • egg yolk – substitute with egg whites, applesauce, or Greek yogurt
    • unsweetened cocoa powder – use carob powder or chocolate protein powder
    • brownie pieces – crushed cookies or chocolate chips
    • white chocolate chips – swap with semisweet chocolate chips, dark chocolate, or chopped chocolate bar
    no bake double chocolate brownie cookies on a white mug

    Variations

    • With oats – add a tbsp of quick-cooking oats for texture
    • Nutty twist – mix in a cup of peanut butter or chopped nuts
    • Dessert-style – top with a scoop of ice cream
    • Double chocolate chip – mix in both cocoa powder and semisweet chocolate chips

    Storage

    • Eat Immediately – Best when fresh and warm
    • Countertop – Can sit covered for up to 4 hours
    • Fridge – Store for up to 2 days, reheat in the microwave for 10–15 seconds
    • Freezing – Not recommended due to single-serve nature

    Ingredients

    • unsalted butter
    • brown sugar
    • white sugar
    • egg yolk
    • vanilla extract
    • all-purpose flour
    • unsweetened cocoa powder
    • salt
    • brownie pieces
    • white chocolate chips

    Instructions

    In a mixing bowl or mug, grease the side with butter before starting to mix the ingredients.

    After greasing the bowl or mug, add the brown and white sugar and mix until light and fluffy:

    mixing butter and sugar on a white mug

    Add the egg yolk, vanilla extract and mix until well combined:

    adding egg and vanilla to the sugar and butter mixture

    Add the all-purpose flour, unsweetened cocoa powder, salt and continue mixing:

    adding unsweetened cocoa butter and all purpose flour to the wet ingredients

    Finally, add the brownie pieces and microwave for 1 minute and 20 seconds on high:

    final mixture of the no bake double chocolate brownie cookie

    Add chocolate chips on top and serve immediately:

    freshly cooked no bake double chocolate brownie cookie in a white mug

    Yes, hurry to take your spoon and have a bite! Yum!

    Top Tips

    • If you want to keep this cookie longer, you can use a mug or bowl with a lid, or simply transfer it to an airtight container and place in the chiller.
    • Do not overmix the ingredients to maintain its soft and chewy texture.
    • You can mix in your favorite nuts like macadamia nuts, almonds, or even chocolate chunks. I am sure those will be delicious additions to this recipe.

    FAQ

    Do I need parchment paper for this recipe?

    Nope! Just use a safe bowl or mug—no paper is needed.

    How do I know when it’s done?

    It is done if the top will look set and slightly firm to the touch. Start with 1 minute and check in 10-second intervals.

    Can you cook cookie dough in the microwave?

    Yes, you can cook cookie dough in the microwave! Just make sure it’s in a microwave-safe bowl and cook in short intervals until set—usually around 1 to 2 minutes for this recipe.

    getting a piece of chocolate cookie in a mug using a spoon
    5 from 1 vote
    Print Pin Recipe

    How to Make Chocolate Cookies in Microwave

    Craving sweets? Make this Chocolate Cookie in the Microwave in under 2 mins! It's a quick and easy single serve chocolate chip cookie made with pantry ingredients—perfect for your sweet tooth!
    Prep Time4 minutes mins
    Cook Time2 minutes mins
    Total Time6 minutes mins
    Course: Cookies, Desserts, No-bake Desserts
    Cuisine: American
    Servings: 1 serving
    Calories: 361kcal
    Author: Lainey
    Prevent your screen from going dark

    Ingredients

    • 1 tablespoon unsalted butter softened
    • 1 tablespoon brown sugar
    • 1 tablespoon white sugar
    • 1 egg yolk
    • ½ teaspoon vanilla extract
    • 2 tablespoons all purpose flour
    • 1 tablespoon unsweetened cocoa powder
    • pinch salt
    • 2 tablespoons brownie pieces
    • 10-15 white chocolate chips

    Instructions

    • In a bowl or mug, grease the side with butter, then add the brown and white sugar and mix until light and fluffy. Add the egg yolk, vanilla extract and mix until well combined.
    • Add the all purpose flour, unsweetened cocoa powder, salt and continue mixing. Finally add the brownie pieces and microwave for 1 minute and 20 seconds on high.
    • Add chocolate chips and serve immediately.
    Leave a Comment
    Serving: 1servingCalories: 361kcalCarbohydrates: 40gProtein: 6gFat: 20gSaturated Fat: 11gPolyunsaturated Fat: 1gMonounsaturated Fat: 6gTrans Fat: 0.5gCholesterol: 227mgSodium: 412mgPotassium: 163mgFiber: 2gSugar: 18gVitamin A: 612IUVitamin C: 0.1mgCalcium: 65mgIron: 2mg

    Watch The Recipe Video!

    QR Code
    Did you make this recipe?Share it on instagram or tag @simplybakings or #simplybakings!

    Cookies, No Bake Dessert Recipes

    Bibingka

    Apr 15, 2016 · 10 Comments

    filipino binbingka

    Bibingka is a moist, rich cake served at family get-togethers or parties.  It's a holiday favorite in the Philippines traditionally eaten during the Christmas season. Some of the notable ingredients are coconut milk, rice flour, butter, and sugar.

    Bibingka slices, A Filipino Dessert on a green plate

    Tips on How to Make Bibingka

    • Do you love cheese on your desserts? If so, this delicious Bibingka recipe would taste great when topped with grated cheese! You can top it with cheese before putting it in the oven or before serving it.
    • Do you know that Filipinos bake their bibingka on a baking dish lined with banana leaves? Not only it is economical to use as a liner, but it also adds a delicious aroma to the bibingka
    • If you are not using a non-stick baking dish, you can line it with parchment paper to prevent the bibingka from sticking to the pan
    • For bibingka, you can use various toppings like white cheese, cheddar cheese, slices of salted egg, or sweetened shredded coconut
    • If an oven is not available, you can use a traditional oven which uses coals on top (usually found and used in the Philippines)
    • Always sift the dry ingredients before measuring to avoid lumps in your bibingka mixture
    Filipino dessert Bibingka slices on a green plate

    How to Make Bibingka:

    Before starting to mix the ingredients for the Bibingka, preheat the oven to 350F and grease the 13x9 inch pan.

    Here are the ingredients for the Bibingka recipe. The ingredients might make this recipe complicated to make but truly, it is very easy to whip up.

    ingredients for bibingka recipe

    In a large bowl mix together the cream cheese and sugar until creamy:

    mixed ingredients of bibingka recipe mixed with a hand beater on a clear bowl

    Add the eggs, vanilla extract, cream of coconut, butter, and evaporated milk, and mix:

    eggs, vanilla, milk and mixed ingredients for bibingka recipe

    You should mix it well until the batter looks like this:

    bibingka batter on a clear bowl

    Then add the crushed pineapples, sweet rice flour, and baking powder until it’s well incorporated:

    mixing flour to bibingka batter using a hand mixer

    The final batter should be smooth and without lumps from the sweet rice flour:

    ready to bake bibingka batter in a clear bowl

    Pour into pan, Sprinkle with brown sugar and bake it for 50 minutes to 1 hour.**

    bibingka batter on a clear baking dish

    Allow to completely before serving:

    baked bibingka

    Here is an up-close shot of the bibingka slice. It looks and is really very delicious!

    a slice of bibingka

    If you are serving it to a crowd, place it on a colorful and festive plate 🙂

    filipino bibingka slices on a green plate

    Frequently Asked Questions for Bibingka recipe:

    Q: Can I make this recipe using any kind of milk?

    A: Yes, you can. Any milk will do as a substitute for this recipe.

    Q: Can I use cassava flour instead?

    A: Cassava flour is often used for desserts like cassava cake. Using cassava flour in this recipe would result in a glutinous bibingka. Bibingka usually has a cake-like texture after baking.

    Q: Can I use a steamer instead of an oven?

    A: Yes you can. It will not affect the taste, but it might have a slightly different texture as compared to baking bibingka in an oven. Usually, steaming desserts would result in a softer texture.

    Q: Can someone tell the origin of the bibingka dessert?

    A: Bibingka is famous in the Philippines and it is a traditional dessert for them, especially during the holidays.


    I’ve got the full recipe below, plus a video if you’d like more guidance. Enjoy!


    More Filipino Desserts that are Easy to Make:

    • Buko Pandan
    • Cassava Cake
    • Shakoy
    • Chocolate Chip Cheesecake
    • Turon

    Happy Baking!

    how to make bibingka
    5 from 1 vote
    Print Pin Recipe

    Bibingka

    Prevent your screen from going dark

    Ingredients

    • one 8-oz. package cream cheese
    • 1 ¼ cups granulated sugar
    • 3 eggs
    • 1 tablespoon vanilla
    • 1 stick ½ cup melted butter
    • one 15-oz. can cream of coconut
    • 1 cup evaporated milk
    • one 8-oz. can crushed pineapple
    • 1 lb. 3 ½ cups sweet rice flour
    • 1 tablespoon baking powder
    • 1-2 tablespoons brown sugar
    • grated cheese*

    Instructions

    • Preheat oven to 350F, grease 13x9 inch pan
    • In a large bowl mix together the cream cheese and sugar until creamy.
    • Add the eggs, vanilla extract, cream of coconut, butter, evaporated milk and mix
    • Then add the crushed pineapples, sweet rice flour, baking powder until it’s well incorporated.
    • Pour into pan, Sprinkle with brown sugar and bake it for 50 minutes to 1 hour.**
    • Allow to completely and serve.
    Leave a Comment

    Notes

    *optional
    **45 minutes into baking, add cheese.

    Watch The Recipe Video!

    QR Code
    Did you make this recipe?Share it on instagram or tag @simplybakings or #simplybakings!

    NEVER MISS A RECIPE!

    PINTEREST / FACEBOOK / INSTAGRAM / TWITTER

    If you’ve tried this or any other of my recipes, don’t forget to rate the recipe and to leave me a comment. I love hearing from you!

    Cake, Desserts, Filipino Desserts, Vegan Filipino Recipes

    • « Go to Previous Page
    • Page 1
    • Interim pages omitted …
    • Page 10
    • Page 11
    • Page 12
    • Page 13
    • Page 14
    • Interim pages omitted …
    • Page 17
    • Go to Next Page »

    Primary Sidebar

    Lainey holding a muffin pan in her kitchen

    I'm Lainey, the driving force behind SimplyBakings.com, where I'm on a mission to redefine Filipino cooking through a plant-based lens.

    More about me →

    Popular

    • cookie dough bites
      Easiest Cookie Dough Bites Ever
    • delicious and soft oreo cheesecake cookies
      Soft Oreo Cheesecake Cookies
    • mini chocolate cupcakes in a white rectangular plate
      Delicious and Easy Mini Chocolate Cupcakes
    • Filipino Custard Cake drizzled with powdered sugar
      Filipino Custard Cake
    • no bake oreo cheesecake in a mason jar
      Foolproof 3 Ingredients No Bake Oreo Cheesecake
    • 3 brownies stacked
      Best and Easiest Brownies

    Footer

    Sign Up for My Email List

    Latest Posts

    • Foolproof Taro Recipe
    • Best Matcha Strawberry Popsicles
    • Classic Filipino Lentil Soup
    • BEST Kinamatisang Tofu

    Quick Links

    Kitchen Essentials

    About Lainey

    Contact

    • Facebook
    • Instagram
    • YouTube
    • Pinterest
    • TikTok

    © 2025 Auburn Digital Services LLC. All Rights Reserved | Privacy Policy

    Rate This Recipe

    Your vote:


    A rating is required
    A name is required
    An email is required