
• Skip to primary navigation
  • Skip to main content
  • Skip to primary sidebar
Simply Bakings logo
  • Home
  • Recipes Index
  • Filipino Recipes
  • About Me
  • Nav Social Menu

menu icon
go to homepage
search icon
Homepage link
  • Recipes
  • Filipino Recipes
  • About Me
    • Facebook
    • Instagram
    • Pinterest
    • YouTube
  • ×

    How Do I Make Ice Cream with Condensed Milk? (Here's How)

    How Do I Make Ice Cream with Condensed Milk? (Here's How)

    Jun 25, 2016 · 3 Comments

    How to Make Ice Cream with Condensed Milk? Make it with this simple trio without an ice cream maker: sweetened condensed milk, heavy cream, your favorite cookies, for heavenly ice cream everyone will think you spent hours making it!

    Looking for more easy ice cream made with condensed milk? Try my Addicting Cookie Butter Ice Cream!
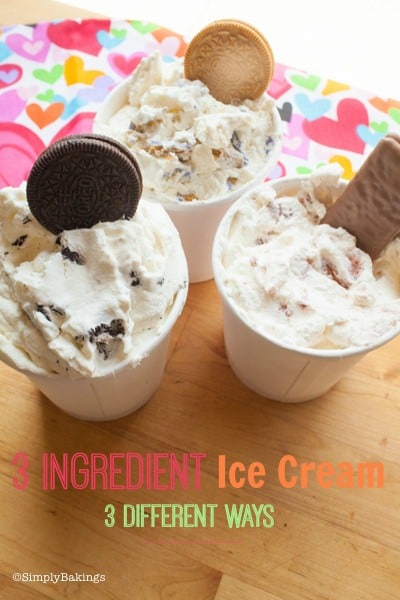
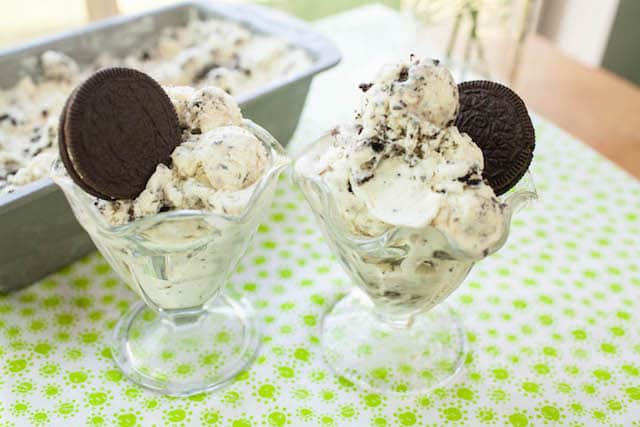
    Three ice cream flavors: Oreo, White Oreo, and Tim Tams.
    [feast_advanced_jump_to]

    Top Tips

    • To prevent ice crystals, mix the frozen mixture with a spatula every hour for 2 hours.
    • You can use a loaf pan to freeze the ice cream, just remember to cover it with plastic wrap.
    • Don't mix in the condensed milk, fold it because it helps retain the air bubbles you created when whipping the heavy whipping cream.

    Variations

    • Classic Vanilla: Use vanilla-flavored cookies and vanilla extract for a timeless treat.
    • Fresh Fruit: Add dried or fresh fruits like strawberries, berries (raspberries or blueberries) bananas, or peaches to the ice cream base for a refreshing twist.
    • Nutty Indulgence: Mix in chopped nuts such as almonds, pecans, or walnuts for a crunchy texture and rich flavor.
    • Mint Chocolate Chip: Stir in mint extract and chocolate chips for a refreshing and indulgent combination.
    • Coffee Lover's Bliss: Dissolve instant coffee granules in warm milk before adding to the ice cream base for a rich coffee flavor.
    • Peanut Butter Paradise: Swirl in creamy peanut butter for a decadent and satisfying treat.
    • Coconut Dream: Add shredded coconut to the ice cream base for a tropical twist.

    Substitutions

    • As this recipe is straightforward, no substitutions are recommended for heavy whipping cream or sweetened condensed milk.
    three different kinds of ice cream flavors on the table, white and chocolate oreos and timtams.

    Storage

    • Jazz up your ice cream before you serve it! Top with hot fudge, chocolate ganache, fresh fruits, or any fruity syrup
    • Don't forget to add salt like I did, lol! You won't believe how a little pinch of salt makes a LOT of difference in the ice cream's taste!
    • Avoid mixing the whipped cream vigorously when adding the other ingredients to it. The correct way is slowly folding them in until well combined.

    Ingredients

    • heavy whipping cream
    • condensed milk
    • favorite cookies

    Instructions

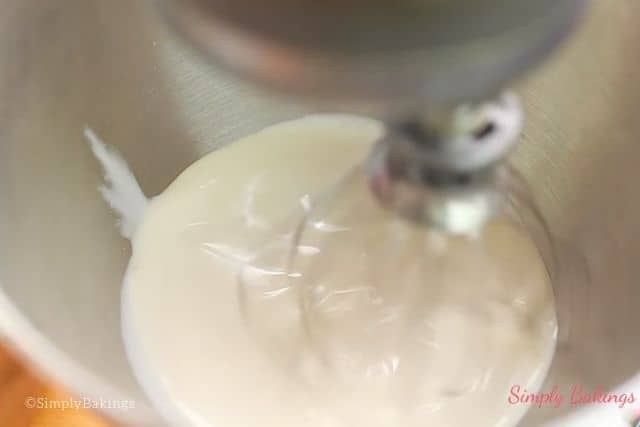
    In a large bowl, add heavy whipping cream and using a whisk attachment, whip until stiff peaks form, about 3 minutes on high.
    (You can use a hand mixer, but be prepared to spend some time standing.)

    whipped heavy cream in a stand mixer with a red spatula

    It should look like this:

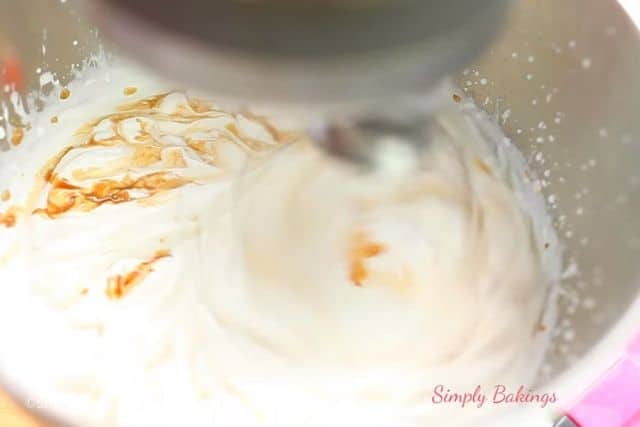
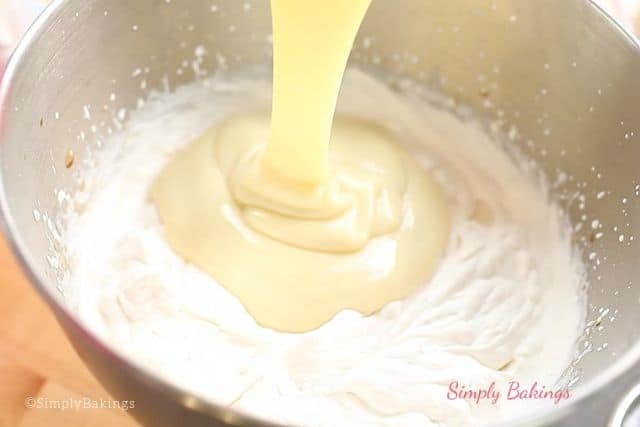
    Add the condensed milk onto the whipped cream:
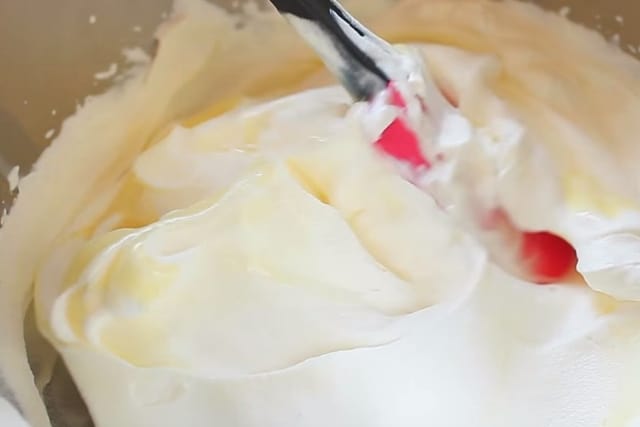
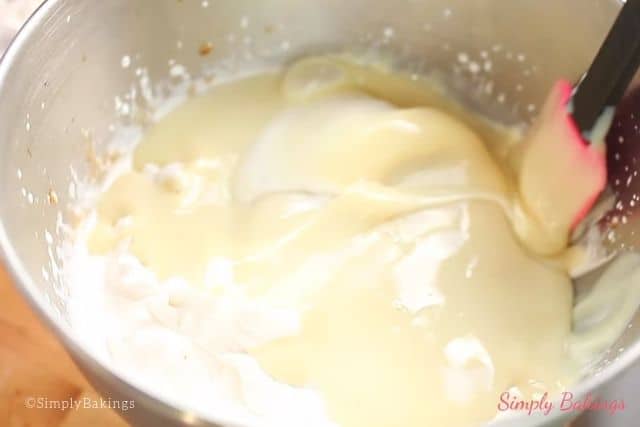
    condensed milk and whipped cream mixture mixed together.

    Slowly fold in the condensed milk until well combined:

    Separate the condensed milk and whipped cream mixture into 3 bowls since we are making 3 different ice cream flavors:
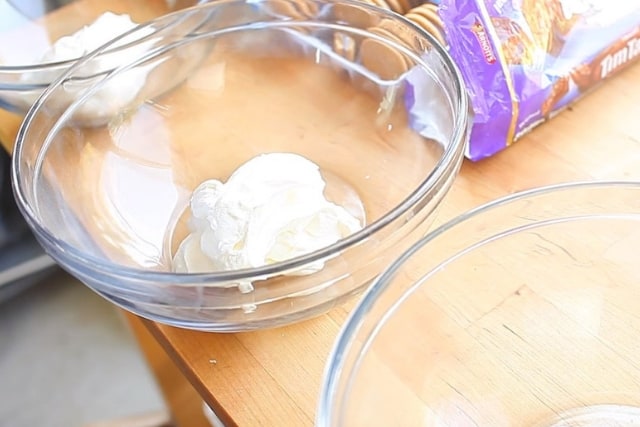
    whipped heavy cream mixture in 3 different bowls

    Now here is the exciting part - adding in your desired flavors!

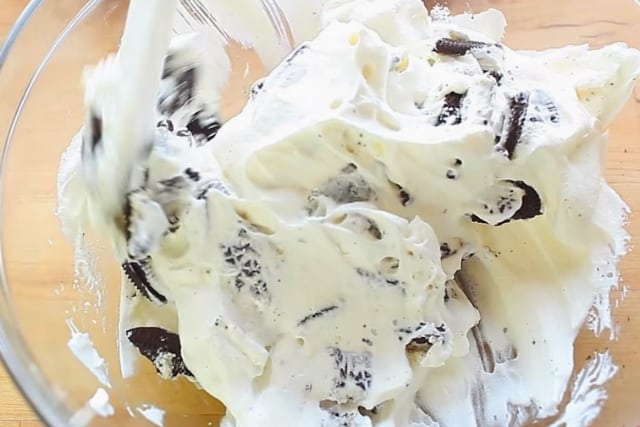
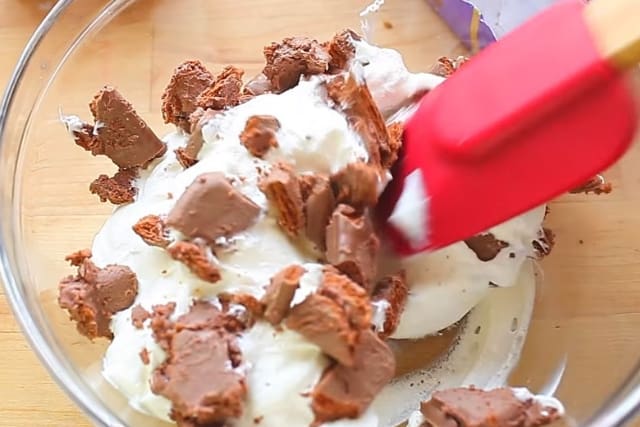
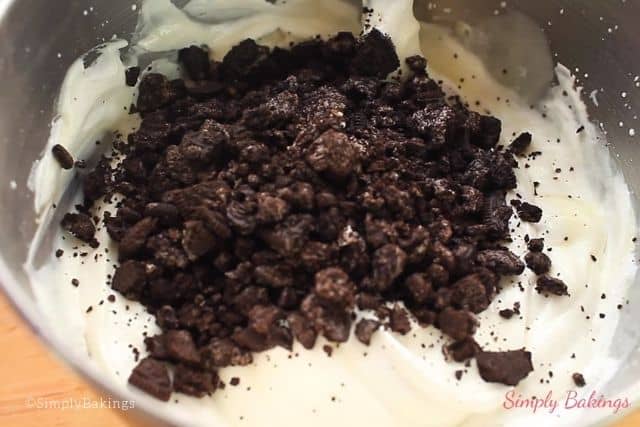
    In this recipe, I used 2 kinds of Oreos and TimTam. Add the cookie chunks them mix thoroughly:
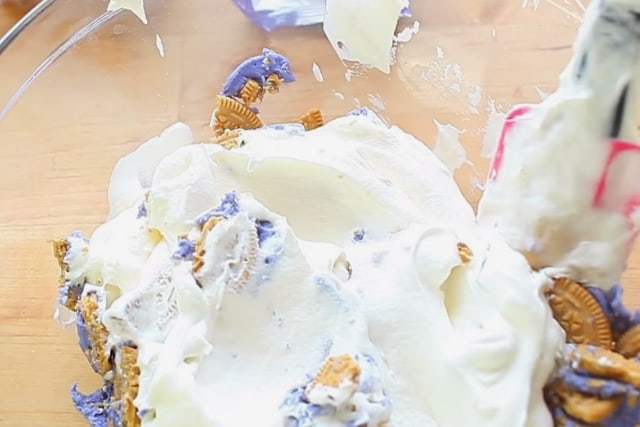
    white oreo and whipped cream mixture
    whipped cream and chocolate oreo mixture
    whipped cream and timtam mixture

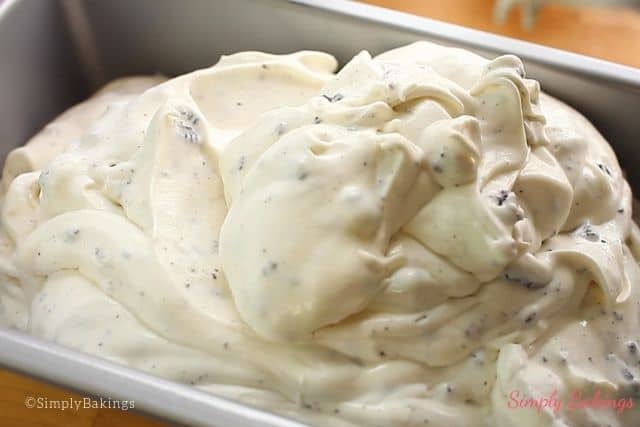
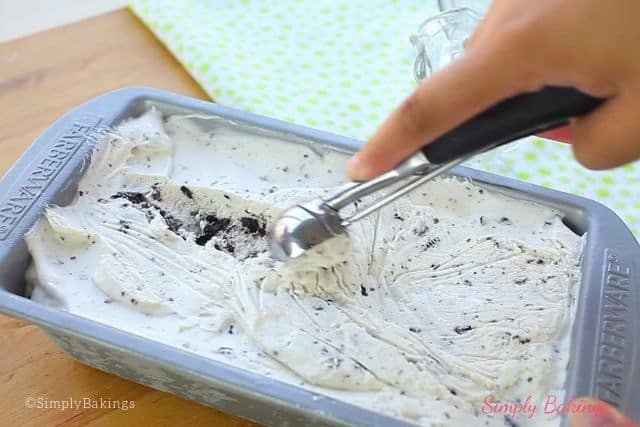
    Finally, pour the ice cream into individual cups and place in the freezer for at least 6 hours:
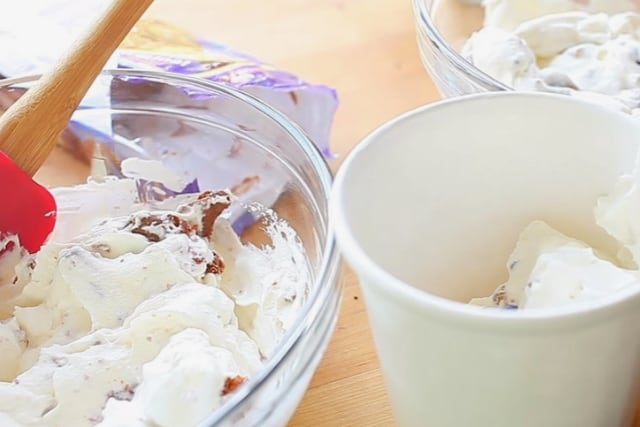
    ice cream transferred to a cup

    I was so excited to taste this. Believe me, those 2 hours of waiting for it to become frozen was an agony, lol!
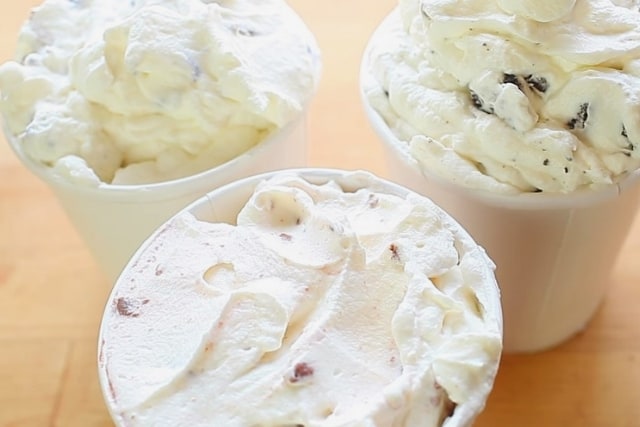
    3 flavors of ice cream in a white container ready to be frozen.

    FAQs

    Can I use condensed milk instead of heavy cream in ice cream?

    In no-churn ice cream, sweetened condensed milk serves as the base, while whipped cream adds the light, creamy texture.

    Why use condensed milk in ice cream?

    Creamy Texture: Sweetened condensed milk contributes to a smooth and creamy consistency in the ice cream.
    Sweetness: The natural sweetness of condensed milk eliminates the need for additional sugar in the recipe.
    No-Churn Option: Condensed milk is commonly used in no-churn ice cream recipes, making it easier to prepare without an ice cream maker.
    Binding Agent: Condensed milk helps bind the ingredients together, ensuring a cohesive mixture that freezes well.

    More Ice Cream Recipes That Are Easy to Make:

    • Lemon Ice Cream
    • Vegan Chocolate Ice Cream
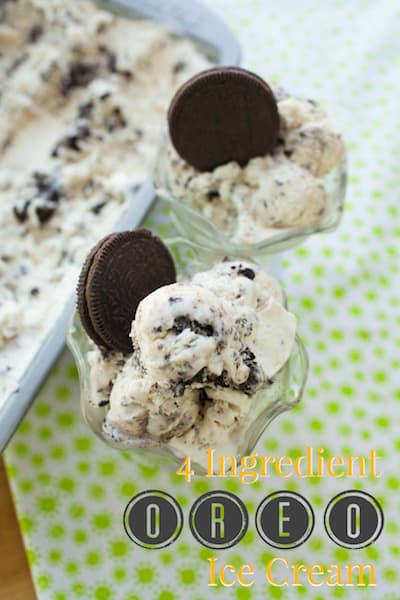
    • 4 Ingredient Oreo Ice Cream
    • Mocha Ice Cream
    • 2 Ingredient Pineapple Ice Cream
    3 ingredient ice creams with 3 different cookie flavors on a table.
    5 from 2 votes
    Print Pin Recipe

    How Do I Make Ice Cream with Condensed Milk? (Here's How)

    Try this ice cream in a snap with just three magical ingredients: rich sweetened condensed milk, your go-to cookies, and heavy whipping cream
    Prep Time10 minutes mins
    Freeze Time6 hours hrs
    Total Time6 hours hrs 10 minutes mins
    Course: Dessert, Snacks
    Cuisine: American, Filipino
    Servings: 4 cups
    Calories: 1864kcal
    Author: Lainey
    Prevent your screen from going dark

    Ingredients

    • 2 cups heavy whipping cream
    • ¼ cup condensed milk
    • 3-6 cookie chunks *

    Instructions

    • In a stand mixer, add heavy whipping cream and mix until stiff peaks form, about 3-4 minutes. (You can use a hand mixer, but be prepared to spend some time standing.)
    • Gradually fold in the sweetened condensed milk until well combined.
    • If making more than one cookie flavor of ice cream, separate into bowls and then add the cookie chunks.
    • Place the cookies in a container** with lid and freeze for at least 6 hours.
    Leave a Comment

    Notes

    *your choice of cookies
    **You can use a loaf pan to freeze the ice cream, just remember to cover it with plastic wrap.
    Serving: 1gCalories: 1864kcalCarbohydrates: 55gProtein: 20gFat: 179gSaturated Fat: 114gPolyunsaturated Fat: 8gMonounsaturated Fat: 45gCholesterol: 564mgSodium: 226mgPotassium: 736mgSugar: 56gVitamin A: 7201IUVitamin C: 5mgCalcium: 531mgIron: 1mg

    Watch The Recipe Video!
    QR Code
    Did you make this recipe?Share it on instagram or tag @simplybakings or #simplybakings!

    5 Ingredients or Less, Desserts, Ice Cream

    Filipino Mango Smoothie

    Jun 19, 2016 · 2 Comments

    filipino mango smoothie

    A super easy mango smoothie that uses just 3 ingredients! This Filipino Mango Smoothie is the perfect tropical treat for sunny days! It’s made with sweet frozen mangoes, creamy coconut milk, and a sprinkle of chia seeds for extra goodness.

    If you love fruity and refreshing recipes like this, you’ll also enjoy these: Papaya Banana Smoothie, Jackfruit Smoothie, and Filipino Avocado Smoothie.

    tropical mango smoothie in a glass
    [feast_advanced_jump_to]

    What is Filipino Mango Smoothie?

    This Filipino Mango Smoothie is a creamy, cool drink made from ripe, juicy Philippine mangoes. It's a popular refreshment sold by street vendors and in homes across the country, especially during mango season.

    Filipino mangoes, especially carabao and Ataulfo mangoes, are known for being super sweet and flavorful—perfect for making smoothies, fruit shakes, or even mango ice cream and mango lassi.

    Blended with coconut milk or other types of nut milk, this smoothie makes a healthy, refreshing treat for kids and adults alike.

    Filipino Mango Health Benefits

    • Rich in healthy fats for energy
    • Great for people avoiding dairy
    • Naturally low fat compared to cream
    • Contains fiber, calcium, and potassium

    Substitutions

    • frozen mango – use fresh mangoes, mango pulp, or even chopped mangoes with lots of ice
    • coconut milk – swap with almond milk, soy milk, cashew milk, whole milk, or any kind of milk
    • chia seeds – replace with flaxseeds, cashews, or leave out
    • sweetener – use honey, maple syrup, coconut sugar, brown sugar, jaggery, palm sugar, or even vanilla extract

    Variations

    • Dessert-Style – add a scoop of vanilla ice cream or mango ice cream
    • Mango Lassi Inspired – mix in some Greek yogurt and a pinch of saffron
    • Extra Garnish – top with crushed pistachios or cashews

    Storage & Leftovers

    • Refrigerator – Store in a jar or blender jar up to 1 day; shake before serving
    • Freezer – Pour into ice cube trays and re-blend later
    • Meal Prep – Peel and dice mangoes, freeze in bags for quick blending

    Ingredients

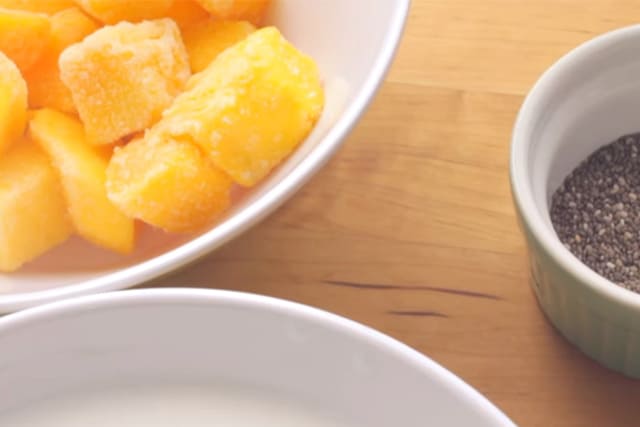
    These are the ingredients that you will need:

    • frozen mango
    • high-quality coconut milk
    • chia seeds
    • sweetener
    ingredients of the mango smoothie

    Instructions

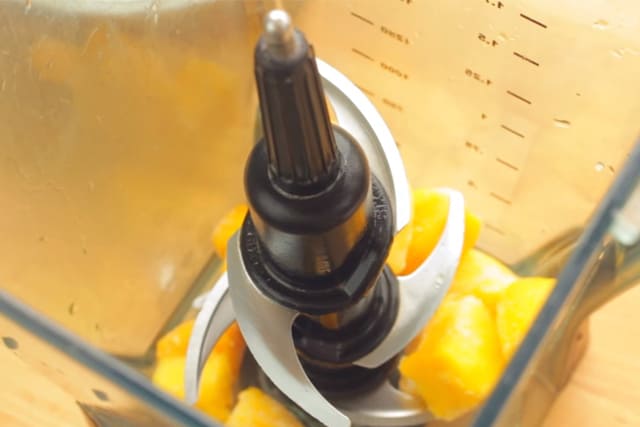
    In a blender jar, add the frozen mango:

    frozen mango cubes in a blender

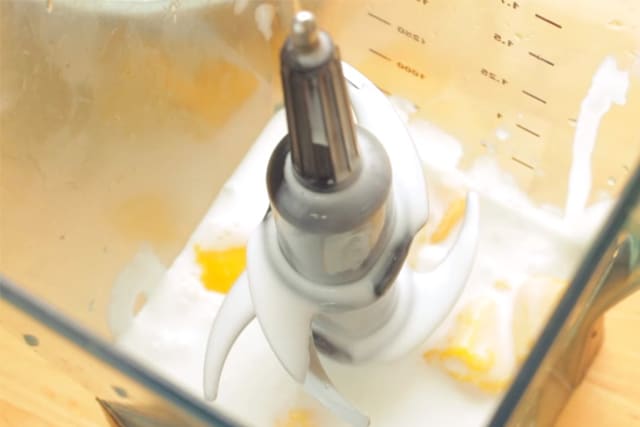
    Pour in the coconut milk:

    adding coconut milk in a blender

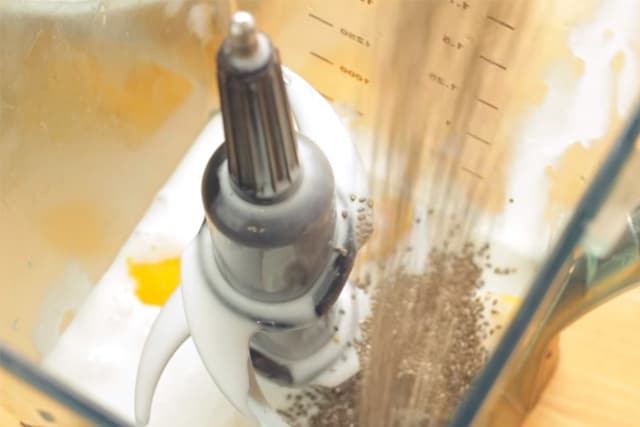
    Now, it's time to add the chia seeds and sweetener:

    adding chia seeds in the blender

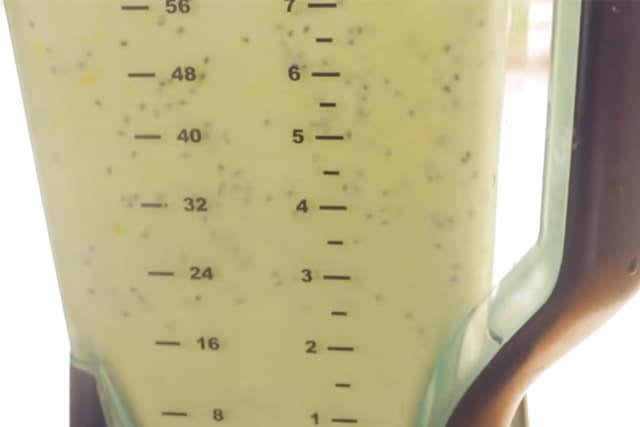
    Blend well until you get the consistency you like:

    blednign the ingredients of mango smoothie

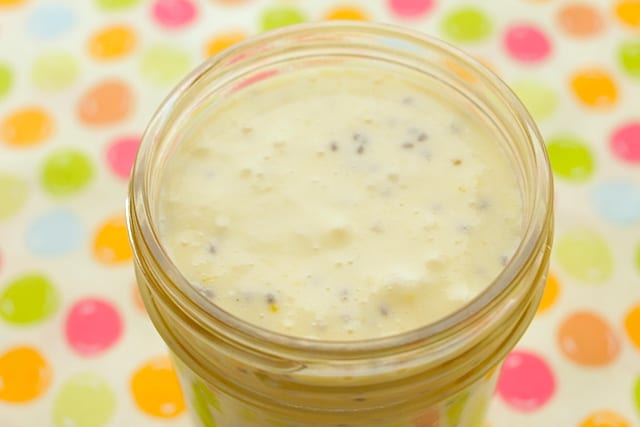
    You're done! Pour into serving glasses. You now have a mango smoothie packed with loads of nutrients from the super food which are the chia seeds!

    vegan smoothie

    Top Tips

    • Always use frozen mango for this recipe. You won't have to add ice cubes and your mango smoothie would really taste just like the fruit itself.
    • Fresh ingredients are always best to use. If you can get fresh coconut milk, use it instead of the canned ones that we buy in the grocery stores.
    • If you enjoy a colder smoothie, you can add ice cubes but not too much or it will make the smoothie watered down.
    • You can freeze this smoothie and make it into a Mango Chia ice cream.

    FAQ

    What is the famous Filipino mango?

    The most famous Filipino mango is the Carabao mango, also known as Philippine mango. It's known worldwide for being super sweet, smooth, and juicy—perfect for shakes, smoothies, and desserts.

    What fruit mixes well with mango?

    Mango pairs well with fruits like pineapple, banana, papaya, strawberries, and even coconut. These tropical combos bring out mango’s sweetness and make a tasty fruit shake or smoothie.

    What should you put in a mango smoothie?

    For a delicious mango smoothie, blend mango flesh, a kind of milk (like plant-based milk or dairy), a natural sweetener like honey or coconut sugar, and add-ons like chia seeds, ice, or even a scoop of ice cream if you want it extra creamy.


    Here are more yummy smoothie recipes you will love:
    • Cantaloupe Smoothie
    • Pineapple Mango Smoothie
    • Guyabano Smoothie
    • Malunggay Pineapple Smoothie
    filipino mango smoothie
    4.50 from 2 votes
    Print Pin Recipe

    Filipino Mango Smoothie

    Have a glass of this yummy, nutritious filipino mango smoothie blended with creamy coconut milk - a tropical smoothie treat for a hot, sunny day!
    Prep Time5 minutes mins
    Total Time5 minutes mins
    Course: smoothies
    Cuisine: Filipino
    Servings: 1 serving
    Calories: 435kcal
    Author: Lainey
    Prevent your screen from going dark

    Ingredients

    • ¾ cups frozen mango
    • ½ cup high quality coconut milk
    • 1 tablespoon chia seeds
    • **1-2 tablespoons sweetener

    Instructions

    • In a blender, add the frozen mango, coconut milk, chia seeds, sweetener and blend.
    Leave a Comment
    Serving: 1gCalories: 435kcalCarbohydrates: 41gProtein: 7gFat: 28gSaturated Fat: 22gPolyunsaturated Fat: 3gMonounsaturated Fat: 1gTrans Fat: 0.02gSodium: 100mgPotassium: 297mgFiber: 7gSugar: 24gVitamin A: 6IUVitamin C: 1mgCalcium: 96mgIron: 5mg

    Watch The Recipe Video!
    QR Code
    Did you make this recipe?Share it on instagram or tag @simplybakings or #simplybakings!

    Drinks

    Vegan Strawberry Banana Smoothie

    Jun 10, 2016 · 6 Comments

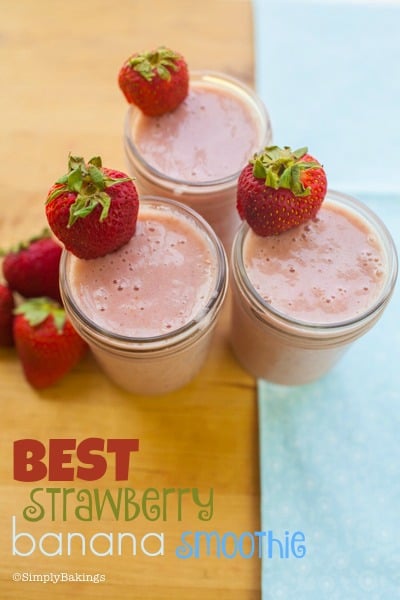
    Mason jars of the creamy smoothie with evaporated milk

    Let's freshen up with my simple Vegan Strawberry Banana Smoothie! This is a quick breakfast option that delivers fiber and nutrition by delighting your taste buds. Made with frozen bananas, fresh strawberries and apples that will cool you down on those warm summer mornings.

    Wanna know what goes perfectly with this recipe? My Oreo Waffles Recipe or my Banana Oatmeal Pancake!

    strawberry banana smoothie in glasses
    [feast_advanced_jump_to]

    What is Vegan Strawberry Banana Smoothie?

    A Vegan Strawberry Banana Smoothie is a dairy-free, nutrient-packed beverage made by blending ripe strawberries and bananas with plant-based ingredients like almond milk, coconut water, or another non-dairy liquid. This refreshing drink is popular among those following a vegan lifestyle and anyone looking for a healthy, naturally sweet way to start the day or refuel after a workout.

    History of Vegan Strawberry Banana Smoothie

    Originating from the mid-20th century health food movement, the Smoothie recipe quickly became a favorite as home blenders made it easy to mix fresh fruits. Its naturally sweet, creamy blend transitioned to a dairy-free delight with the rise of plant-based diets, and today it remains a popular choice for health enthusiasts and vegans alike.

    Substitutions

    • Frozen bananas - Use fresh bananas with a handful of extra ice for a similar chill and thickness.
    • Ice - Frozen fruit chunks (like berries or peaches) – chill the smoothie while enhancing flavor
    • Dairy-free milk - Choose your favorite non-dairy milk - unsweetened almond milk, oat milk, coconut milk, soy milk, or cashew milk - when you purchase your ingredients.
    mason jars of the delicious smoothie

    Recipe Variations

    • Green Boost - Add a handful of spinach or kale for extra vitamins and minerals without altering the fruity flavor too much
    • Spiced Variation - Mix in a dash of ginger, turmeric, or a few mint leaves for an invigorating flavor profile
    • Protein-Packed - Blend in a scoop of plant-based protein powder or a tablespoon of hemp, chia, or flax seeds to turn it into a satisfying post-workout snack

    Storage

    Refrigerate Immediately: If you plan to enjoy your smoothie within 24 hours, store it in an airtight container in the refrigerator. Give it a good shake or stir before drinking, as natural separation may occur.

    Freeze for Later: For longer storage, pour your smoothie into a freezer-safe container, leaving a little space for expansion. It can be kept in the freezer for up to 2 months. When ready to drink, thaw it overnight in the refrigerator and give it a quick blend or stir for a smooth consistency.

    Pre-Portion Ingredients: Consider assembling and freezing individual smoothie packs with your fruits and greens. This way, you can simply add your preferred dairy-free milk and blend fresh whenever you’re in the mood for a nutritious treat.

    Opt for Quality Containers: Using glass jars or BPA-free containers can help preserve the flavor and maintain the freshness of your smoothie without any unwanted aftertaste.

    Ingredients

    Listed below are all the ingredients you will need:

    • Banana
    • Apple
    • Frozen bananas
    • Ice
    • Dairy-free milk

    See recipe card for quantities.

    All ingredients in separate white bowls

    Instructions

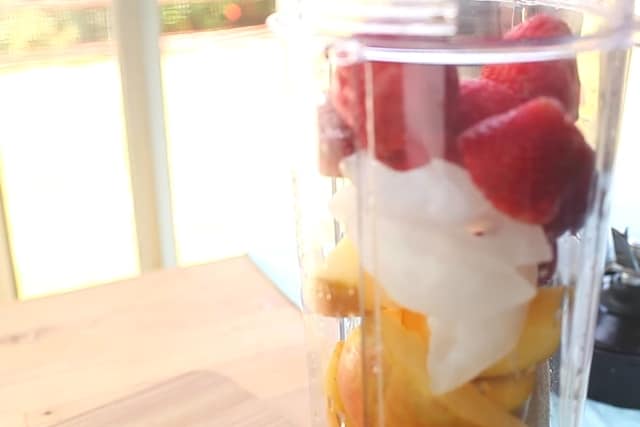
    Put all the ingredients together in a blender.

    smoothie ingredients in a blender

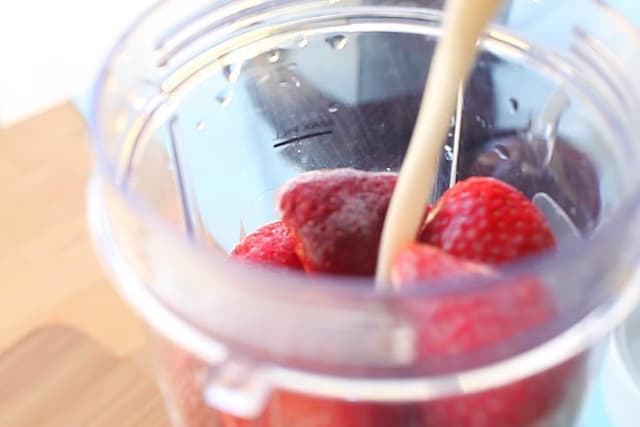
    Pour in the almond milk or your chosen non-dairy milk.

    Milk poured into a blender

    Blend away until smooth.

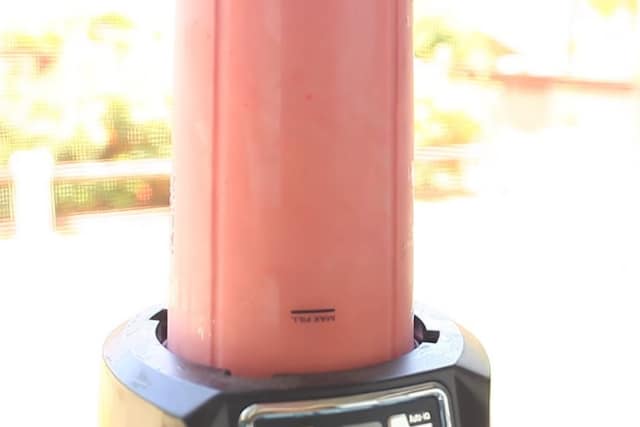
    blender filled with pink smoothie

    Pour into individual glasses. Then garnish with fresh strawberries before serving. Enjoy!

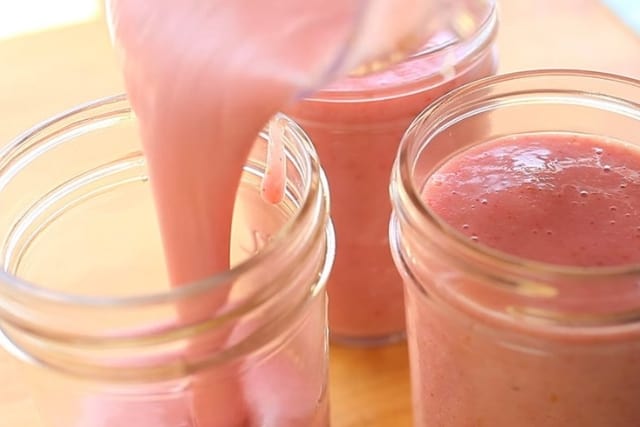
    pouring blended smoothie in glasses

    Hint: For a fun twist, consider adding blueberries, raspberries, or kiwi, or even tossing in mango chunks for a tropical burst of flavor!

    ⭐ Top Tip

    • Smoothies are often taken in the morning, so you can add all the good things you need for breakfast - plain yogurt, oatmeal, oatmeal protein, and even vegetables! My favorite vegetable to add is kale because it's nutritional benefits and the fact you cannot taste it in a smoothie.
    • You can also add nuts like cashews, pine nuts, peanuts, or even healthy seeds like chia and sunflower seeds.
    • To amp up the flavor, a splash of vanilla extract is a great addition, and if you like extra sweetness, a drizzle of maple syrup or agave syrup can do the trick. Some recipes even suggest a spoonful of greek yogurt for extra creaminess, though for a truly vegan version, opt for a dairy-free alternative.

    FAQ

    How healthy is a strawberry banana smoothie?

    A 12-ounce serving of strawberry banana smoothie contains 188 to 210 calories, putting it into the range of an ideal snack.

    What is a non dairy thickener for smoothies?

    Nut butter, seed butter or peanut butter can also be added to the blender to thicken a smoothie and add a nutty taste. I love adding nut butter to banana smoothies or chocolate smoothies. If you're not sure what nut butter is, my top 2 favorites are almond butter and cashew butter.

    What can I use to make a smoothie thicker?

    Frozen ingredients are the key to creating a thick smoothie. Using fibrous, thick-fleshed fruit and vegetables can also help the texture. Adding chia seeds, avocado, yogurt, and protein powder are other thickening options.

    More Recipes

    If you’re as passionate about smoothies as I am, you’re in for a treat! Explore our collection:

    • Guyabano Smoothie
    • Taro Smoothie
    • Coconut Smoothie
    • Malunggay Pineapple Smoothie
    • Papaya Banana Smoothies
    Vegan Strawberry Banana Smoothie in three glasses
    5 from 2 votes
    Print Pin Recipe

    Vegan Strawberry Banana Smoothie

    A refreshing and naturally sweet smoothie packed with fruity flavors!
    Prep Time5 minutes mins
    Total Time5 minutes mins
    Course: Breakfast, Drinks
    Cuisine: Vegan
    Servings: 2 large servings
    Calories: 126kcal
    Author: Lainey
    Prevent your screen from going dark

    Ingredients

    • 1 medium size banana
    • 1 medium size apple cut and cored
    • 10 small frozen bananas
    • 1 cup ice
    • ½ cup dairy-free milk

    Instructions

    • In a blender, combine the banana, apple, frozen strawberries, ice, and dairy-free milk.
    • Blend until smooth and creamy.
    • Pour into glasses, garnish with fresh strawberries, and serve immediately.
    Leave a Comment

    Notes

    *you may need to add up 1 cup
    Serving: 1gCalories: 126kcalCarbohydrates: 28gProtein: 3gFat: 2gSaturated Fat: 0.2gPolyunsaturated Fat: 1gMonounsaturated Fat: 0.3gSodium: 37mgPotassium: 392mgFiber: 4gSugar: 18gVitamin A: 319IUVitamin C: 14mgCalcium: 95mgIron: 1mg

    Watch The Recipe Video!

    QR Code
    Did you make this recipe?Share it on instagram or tag @simplybakings or #simplybakings!

    Breakfast & Brunch, Drinks, Vegan Baking

    NO BAKE White Chocolate Cookies

    Jun 7, 2016 · 4 Comments

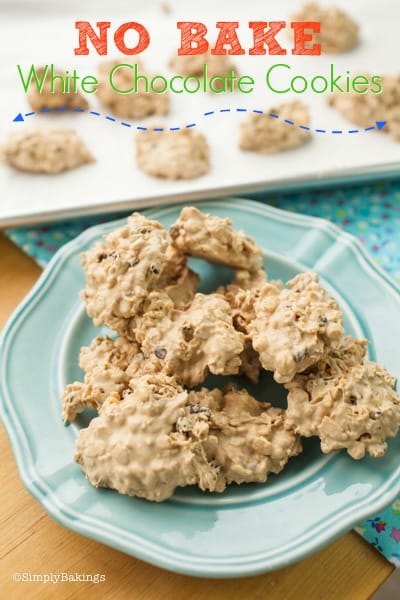
    No bake white chocolate cookies

    Try this no-bake, gooey, and delicious white chocolate cookie recipe using 5 ingredients only! They are perfect for a chocolaty snack or dessert on any occasion. Enjoy!

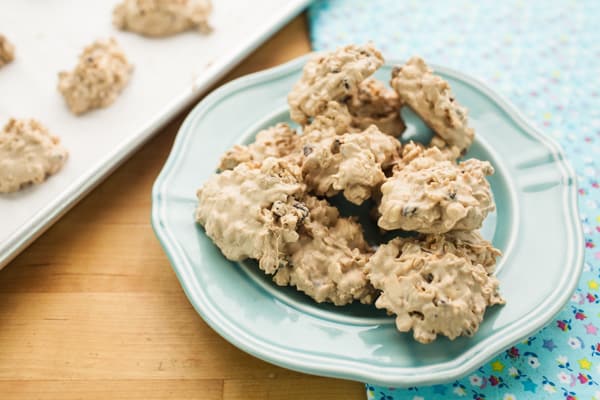
    white chocolate cookies on a mint-colored plate

    Tips and Procedures: 

    • To make these no-bake white chocolate cookies last long, keep them in an airtight container and keep them frozen.
    • For a more festive look, you can add colorful dried berries like cranberries, dried and sweetened citrus rinds, or whatever is available in your pantry. Just make sure it won't be a contrast to the taste of the recipe.
    • For a unique chocolatey taste, you can add just a little bit of cocoa powder.

    How to Make this NO BAKE White Chocolate Cookies Recipe:

    Listed below are all the ingredients you will need:

    • rice krispies cereal
    • cookie butter or peanut butter
    • mini marshmallows
    • white chocolate candy melts
    • mini chocolate chips

    Prepare a cookie sheet lined with parchment paper.

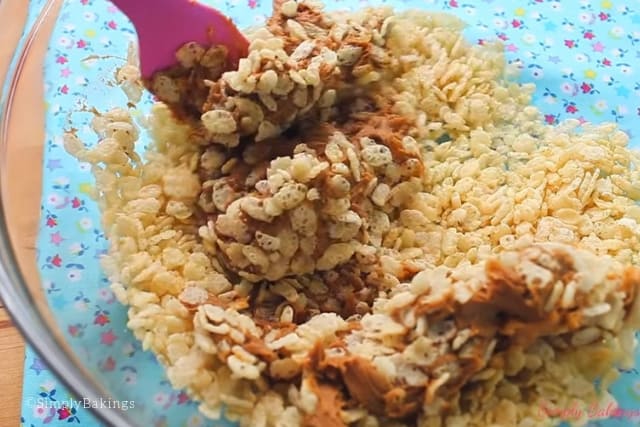
    In a large bowl add the Rice Krispies, and cookie butter, and mix until well combined.

    mixing rice krispies and cookie butter in a clear bowl

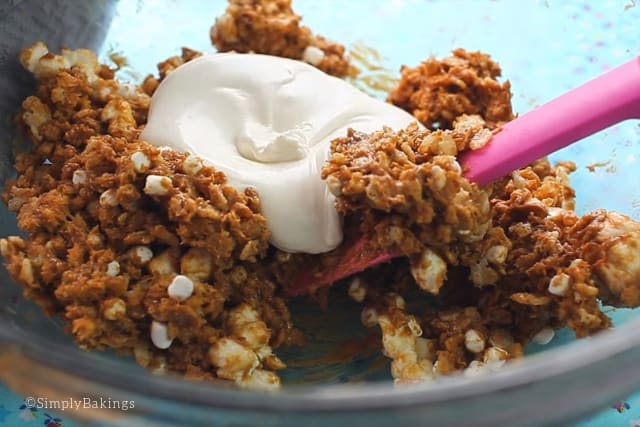
    Next, add the mini marshmallows and  melted white chocolate melt and mix:

    adding in mallows and melted white chocolate to rice krispies mix

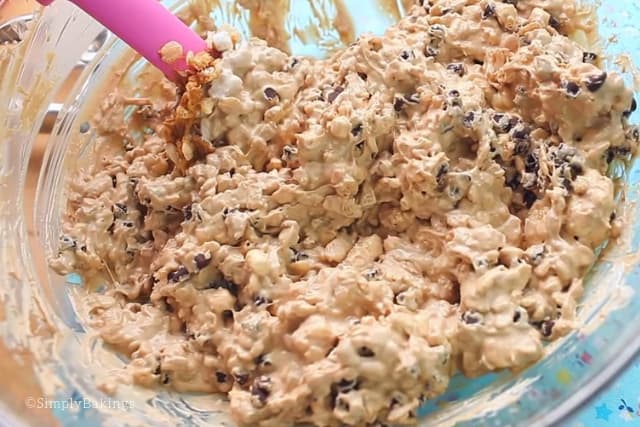
    Then add the mini chocolate chips and mix until well combined:

    adding in mini chocolate chips to cookie mixture

    The cookie dough should look like this:

    ready to freeze no bake white chocolate cookie dough

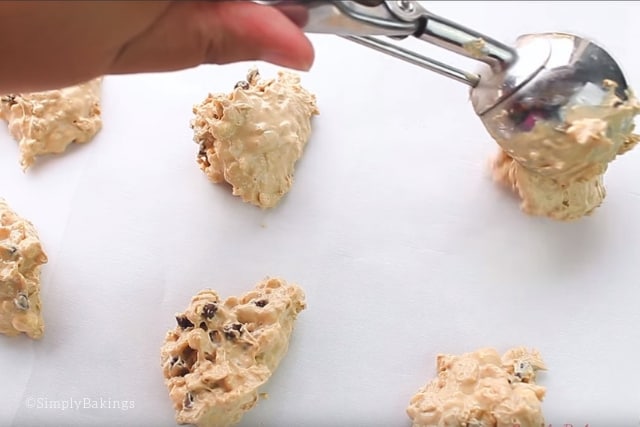
    Using a cookie scooper scoop, scoop the cookies on the cookie sheets and then place them in the refrigerator for 1 hour to harden:

    scooping out white chocolate cookie dough onto parchment paper using a cookie scooper

    Here they are, Simply Bakers! Delicious, no hassle, and no baked white chocolate cookies!

    ready to serve no bake white chocolate cookies on a cookie sheet lined with wax paper

    Serve immediately after taking out from the freezer:

    no bake cookies on a mint-colored plate

    Enjoy!

    Frequently Asked Questions:

    Q: How many servings would this recipe do?

    A: This delicious and easy no-bake cookie recipe could make 12 to 16 cookies, depending on how big your portions are.

    Q: I am not a fan of marshmallows. Can I add in nuts instead?

    A: Yes you can but make sure not to add too much or else, your cookie will fall apart.

    Q: How long do these cookies last?

    A: As long as this is frozen and well-kept in a container, this can last up to a week or more.

    4.50 from 2 votes
    Print Pin Recipe

    NO BAKE White Chocolate Cookies

    These no-bake, gooey, and delicious white chocolate cookies just use 5 ingredients!
    Author: Lainey
    Prevent your screen from going dark

    Ingredients

    • 1 ½ cups rice krispies cereal
    • 1 ¾ cups 15oz jar cookie butter or peanut butter
    • 1 ½ cups mini marshmallows
    • 16 oz white chocolate candy melts melted
    • ½ cup mini chocolate chips

    Instructions

    • Prepare cookie sheet lined with parchment paper.
    • In a large bowl add the rice krispies, cookie butter and mix until well combined.
    • Next add the mini marshmallows and mix.
    • Add the melted white chocolate mix and then add the mini chocolate chips and mix until well combined.
    • Using a cookie scooper scoop, scoop the cookies on the cookie sheets and then place in the refrigerator for 1 hour to harden.
    • Serve immediately .
    Leave a Comment

    Watch The Recipe Video!

    QR Code
    Did you make this recipe?Share it on instagram or tag @simplybakings or #simplybakings!

    NEVER MISS A RECIPE!

    PINTEREST / FACEBOOK / INSTAGRAM / TWITTER

    If you’ve tried this or any other of my recipes, don’t forget to rate the recipe and to leave me a comment. I love hearing from you!

    Cookies, Desserts, No Bake Dessert Recipes

    M&M Milkshake Recipe

    Jun 3, 2016 · 1 Comment

    two m&m milkshake jars

    Looking for a colorful, sweet, and totally fun drink to cool you down? This M&M Milkshake Recipe is here to save the day! With creamy ice cream, a hint of peanut butter, and crunchy M&Ms, it’s a milkshake party in a glass.

    If you love sweet drinks like this, don’t miss out on my Filipino Green Mango Shake or my Oreo Milkshake—both are equally easy and delicious!

    m&m milkshake with straw
    [feast_advanced_jump_to]

    What is M&M Milkshake Recipe?

    The M&M Milkshake is a fun twist on the classic American milkshake. It combines ice cream, milk, candy, and a dash of peanut butter for a creamy, crunchy, and colorful treat.

    Originally a diner favorite, milkshakes have become an anytime dessert, especially when made with nostalgic candies like M&Ms. This version adds a little extra flair by decorating the rim with candy melts and extra sweets—hello dessert goals!

    Substitutions

    • Candy melts – Use white chocolate chips, regular chocolate chips, or even Nutella as a rim coating.
    • Assorted candy – Swap in chopped nuts, sprinkles, crushed cookies, or mini marshmallows.
    • Ice cream – Vanilla works best, but chocolate, peanut butter, or cookies & cream would be amazing too.
    • Peanut butter – Almond butter, cashew butter, or sunflower seed butter for nut-free options.
    • Milk – Oat milk, almond milk, soy milk, or lactose-free milk all work well.

    Variations

    • Spicy – Add a pinch of cayenne or cinnamon for a sweet heat twist.
    • Minty – Use mint chocolate chip ice cream and top with crushed mint candies.
    • Extra chocolatey – Drizzle in chocolate syrup or add cocoa powder to the blend.
    • Vegan – Use dairy-free ice cream, plant-based milk, and skip candy melts or use vegan chocolate.
    two M&M shake on a wooden table

    Storage

    • Fridge – Best consumed fresh, but can be stored for 1-2 hours in the fridge (will melt).
    • Freezer – Pour leftovers into popsicle molds and freeze for a fun frozen treat.
    • Make ahead – You can prep the decorated cup a few hours early and keep it in the freezer until ready to use.

    Ingredients

    • candy melts
    • assorted candy
    • ice cream
    • peanut butter
    • milk

    Instructions

    Melt a handful of m&m candy melts (or milk chocolate chips) using a microwave-safe bowl or a small food processor with a heating option, if available.

    melted chocolate in a bowl

    Dip the rim of a mason jar or milkshake glass into the melted chocolate. Let any extra drip off, then allow it to sit for 2 minutes. Tip for home cooks: If you add candy too soon, it may slide off because the chocolate is too wet!

    dipping mason jar rim to melted chocolate

    Press a handful of M&Ms or assorted candy around the rim. Place the cup in the freezer for a short break while you prep the shake.

    pressing m&ms on chocolate rimmed mason jar

    In a blender or hand blender, combine your favorite ice cream (vanilla or cookie dough is amazing!), a tablespoon of M&Ms, peanut butter, and whole milk. Blend for about 10 seconds, just enough to create a creamy, chocolaty texture—this is key to a good shake! Avoid overblending to keep it thick and indulgent.

    M&Ms, peanut butter, and whole milk. ice cream in a blender

    Pour the M&M’s milkshake into your decorated glass, drizzle with chocolate sauce if you like, and top with more candy or whipped cream.

    two milkshakes in mason jars

    Top Tips

    Don't overblend the milkshake—keeping it slightly thick adds that classic diner-style texture and helps hold up toppings!

    FAQ

    What is the key to a good milkshake?

    The key to a great milkshake is using high-quality ice cream and the right milk-to-ice cream ratio—you want it thick but still sippable! Don’t overblend it, and serve it super cold for that classic milkshake texture.

    What goes well in milkshakes?

    So many fun add-ins! Things like cookies, candy, chocolate syrup, peanut butter, fruit, and even coffee go really well in milkshakes. Toppings like whipped cream, sprinkles, or crushed candy make it extra special too!

    What kind of ice cream works best?

    Vanilla is classic, but any flavor you love will work!

    two milkshakes in mason jars
    5 from 2 votes
    Print Pin Recipe

    M&M Milkshake Recipe

    Whip up a super fun M&M Milkshake recipe in just 15 minutes! This simple recipe makes one big, delicious serving. Ready for a sweet treat? Get the recipe here!
    Prep Time15 minutes mins
    Total Time15 minutes mins
    Course: Drinks
    Cuisine: American
    Servings: 1 large serving
    Calories: 666kcal
    Author: Lainey
    Prevent your screen from going dark

    Ingredients

    • ½ cup candy melts
    • assorted candy
    • 1-2 cups ice cream
    • 1 tablespoon peanut butter
    • ⅓ cup milk

    Instructions

    • Melt the candy melts (or chocolate chips if using as a substitute) in a microwave-safe bowl until smooth.
    • Dip the rim of your cup or mason jar into the melted candy. Gently tap off the excess and let it sit for about 2 minutes so it can firm up slightly. Decorate the rim with assorted candy, gently pressing it into the chocolate. Then place the cup in the freezer to set while you make the milkshake.
    • In a blender, add the ice cream, 1 tablespoon of candy, peanut butter, and milk. Blend for about 10 seconds, just until everything is mixed. You want it thick—not completely liquid.
    • Pour the milkshake into your decorated cup, add extra toppings if desired, and serve immediately!
    Leave a Comment
    Serving: 1servingCalories: 666kcalCarbohydrates: 69gProtein: 11gFat: 39gSaturated Fat: 25gPolyunsaturated Fat: 3gMonounsaturated Fat: 9gCholesterol: 68mgSodium: 256mgPotassium: 475mgFiber: 2gSugar: 64gVitamin A: 687IUVitamin C: 1mgCalcium: 277mgIron: 0.4mg

    Watch The Recipe Video!
    QR Code
    Did you make this recipe?Share it on instagram or tag @simplybakings or #simplybakings!

    Drinks

    Monkey Bread with Cream Cheese

    May 27, 2016 · 10 Comments

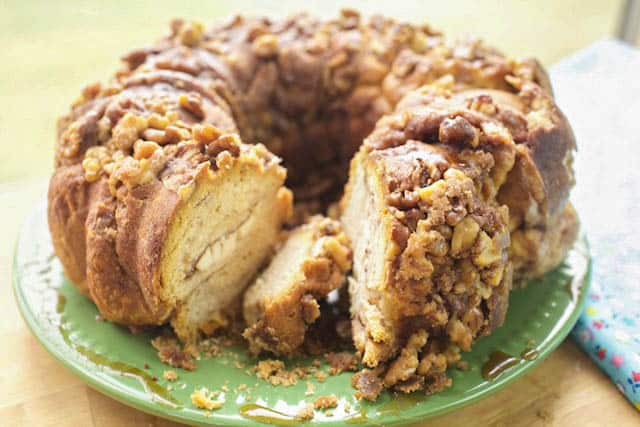
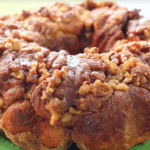
    monkey bread stuffed with cheese cake

    Breakfast is not to be missed, and this Monkey Bread stuffed with Cream Cheese recipe is such a good one to keep on hand! It's addicting and great to serve with a cup of hot cocoa. Yum!

    Cream Cheese Stuffed Monkey Bread on a green plate

    Tips and Procedures: 

    • Are you baking this for summer? Replace the glaze with any ready to use a strawberry glaze or orange glaze and yum! This bread is so versatile, it can be served in any season!
    • Keep your fruit toppings looking fresh! Before arranging them on top of the cheesecake, soak them in lemon juice for a few minutes. The lemon's acidity will maintain its vibrant color, thus not making it brownish after a few hours.

    How to Make this Cream Cheese Stuffed Monkey Bread:

    Listed below are all the ingredients you will need:

    • walnuts
    • granulated sugar
    • cinnamon
    • cream cheese
    • refrigerated biscuits

    Glaze:

    • butter
    • brown sugar

    Preheat oven to 350F and spray the bundt pan with nonstick spray,

    Sprinkle about a ½ cup of the walnuts and set aside:

    walnuts on a spring form pan for cream cheese stuffed monkey bread

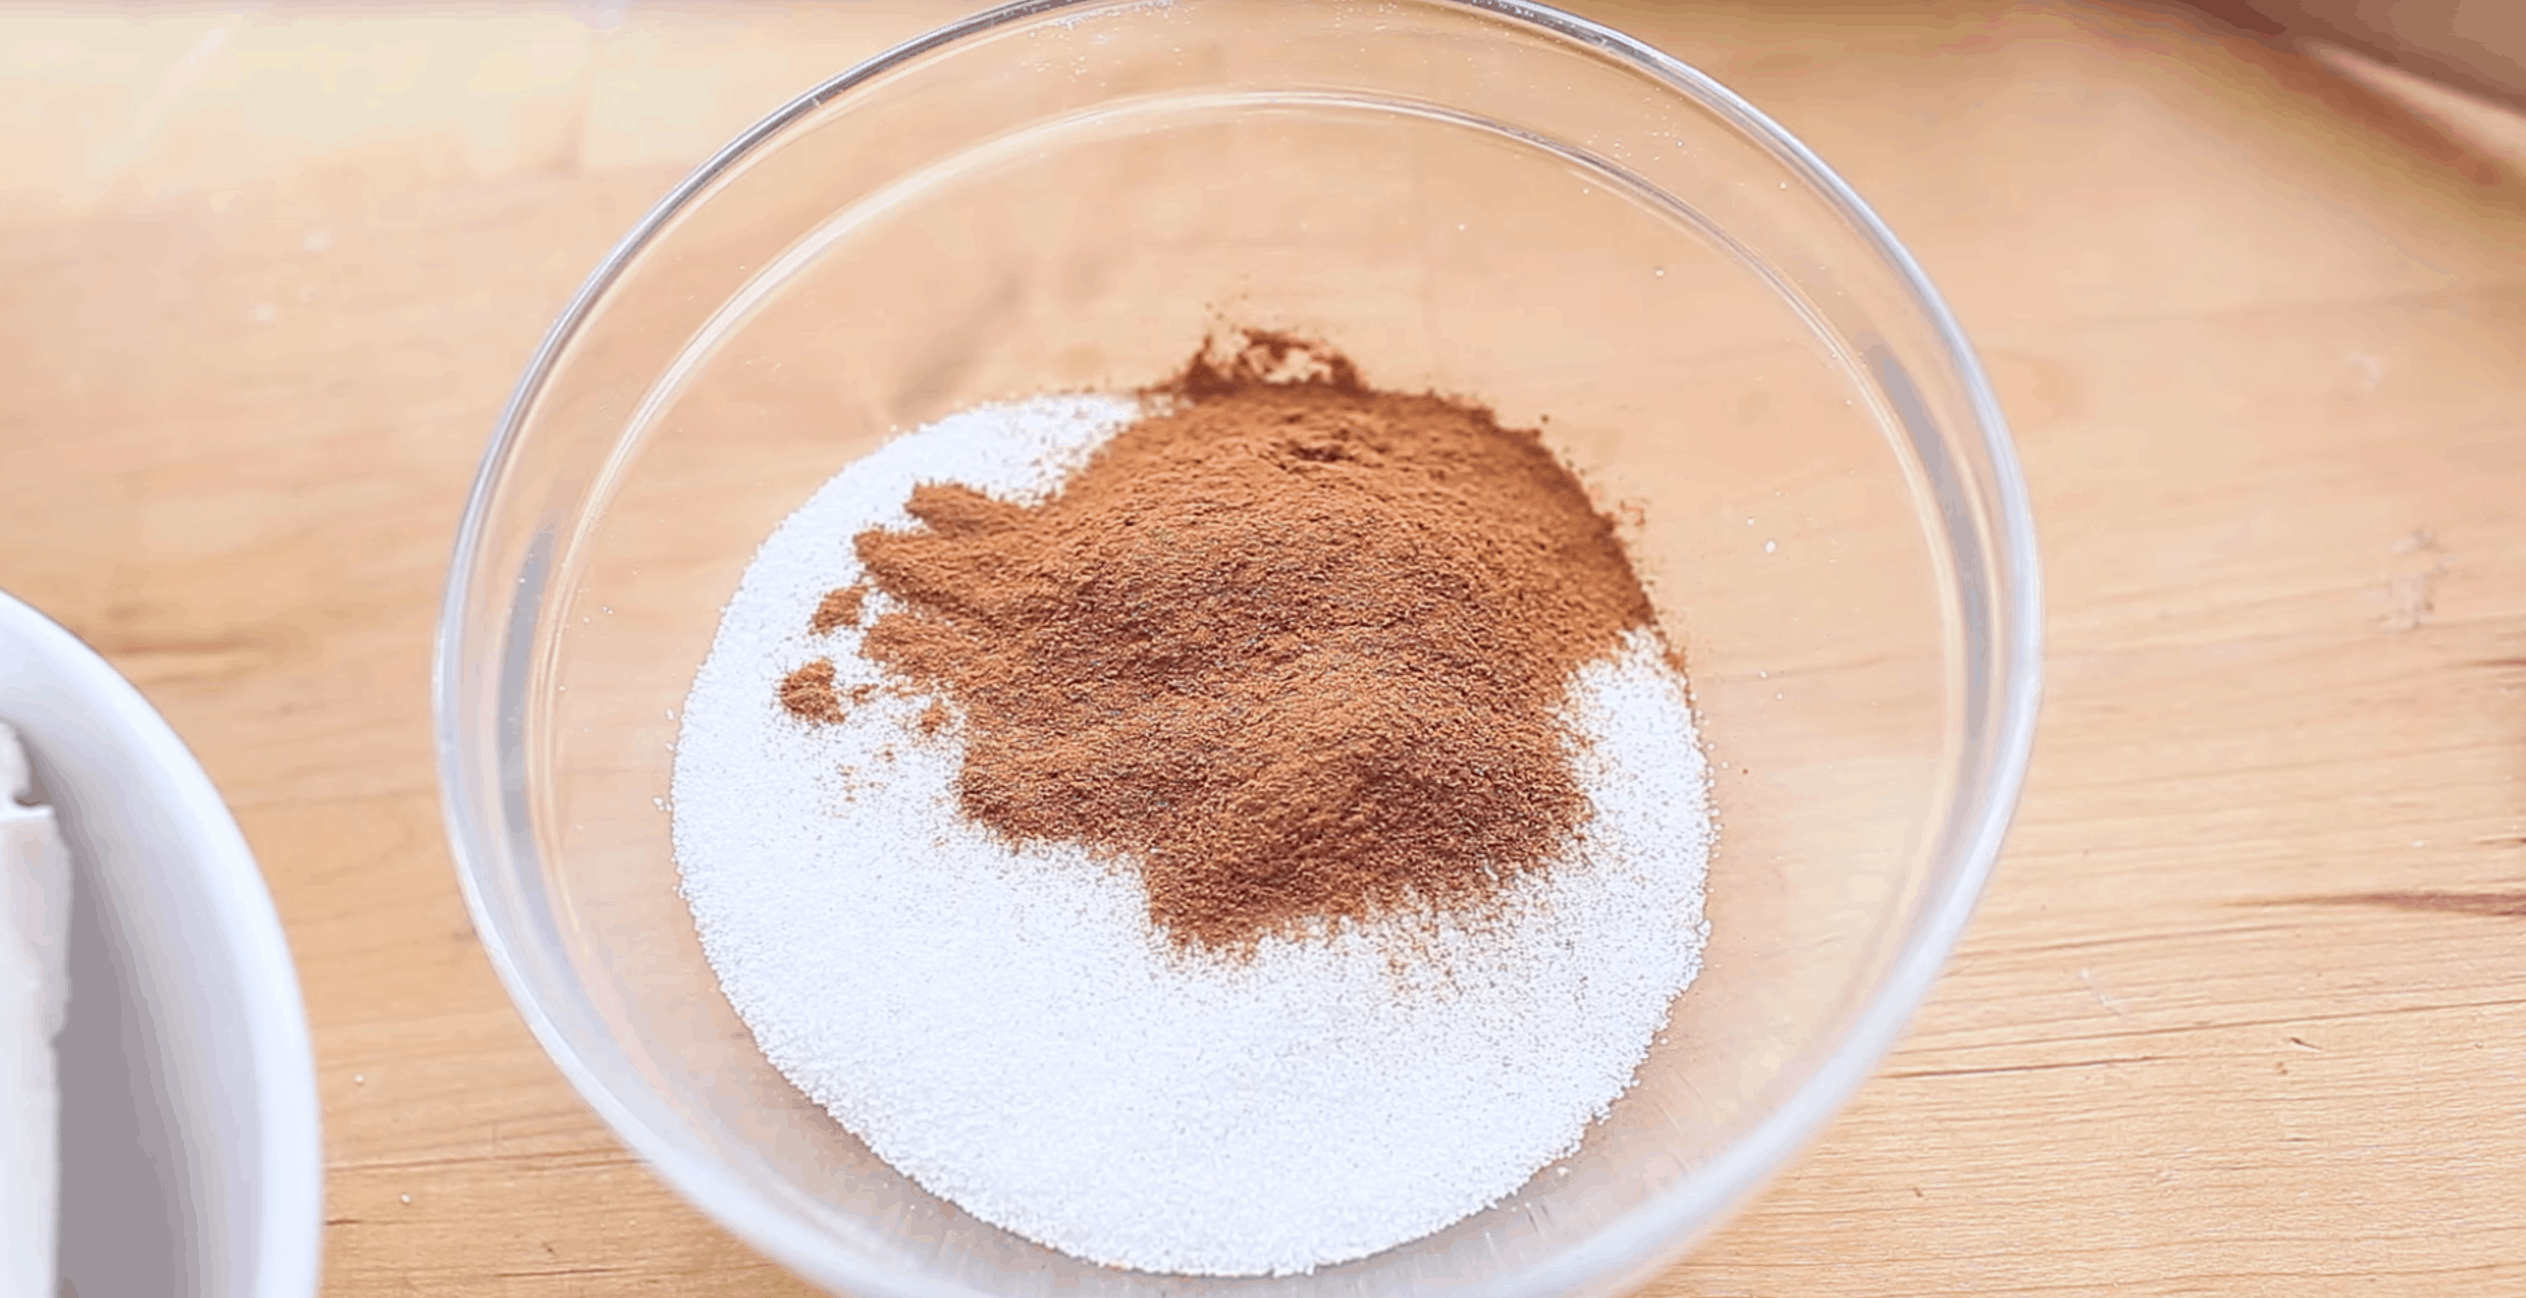
    In a small bowl mix together the granulated sugar and cinnamon:

    cinnamon and sugar in a clear bowl for cream cheese stuffed monkey bread recipe

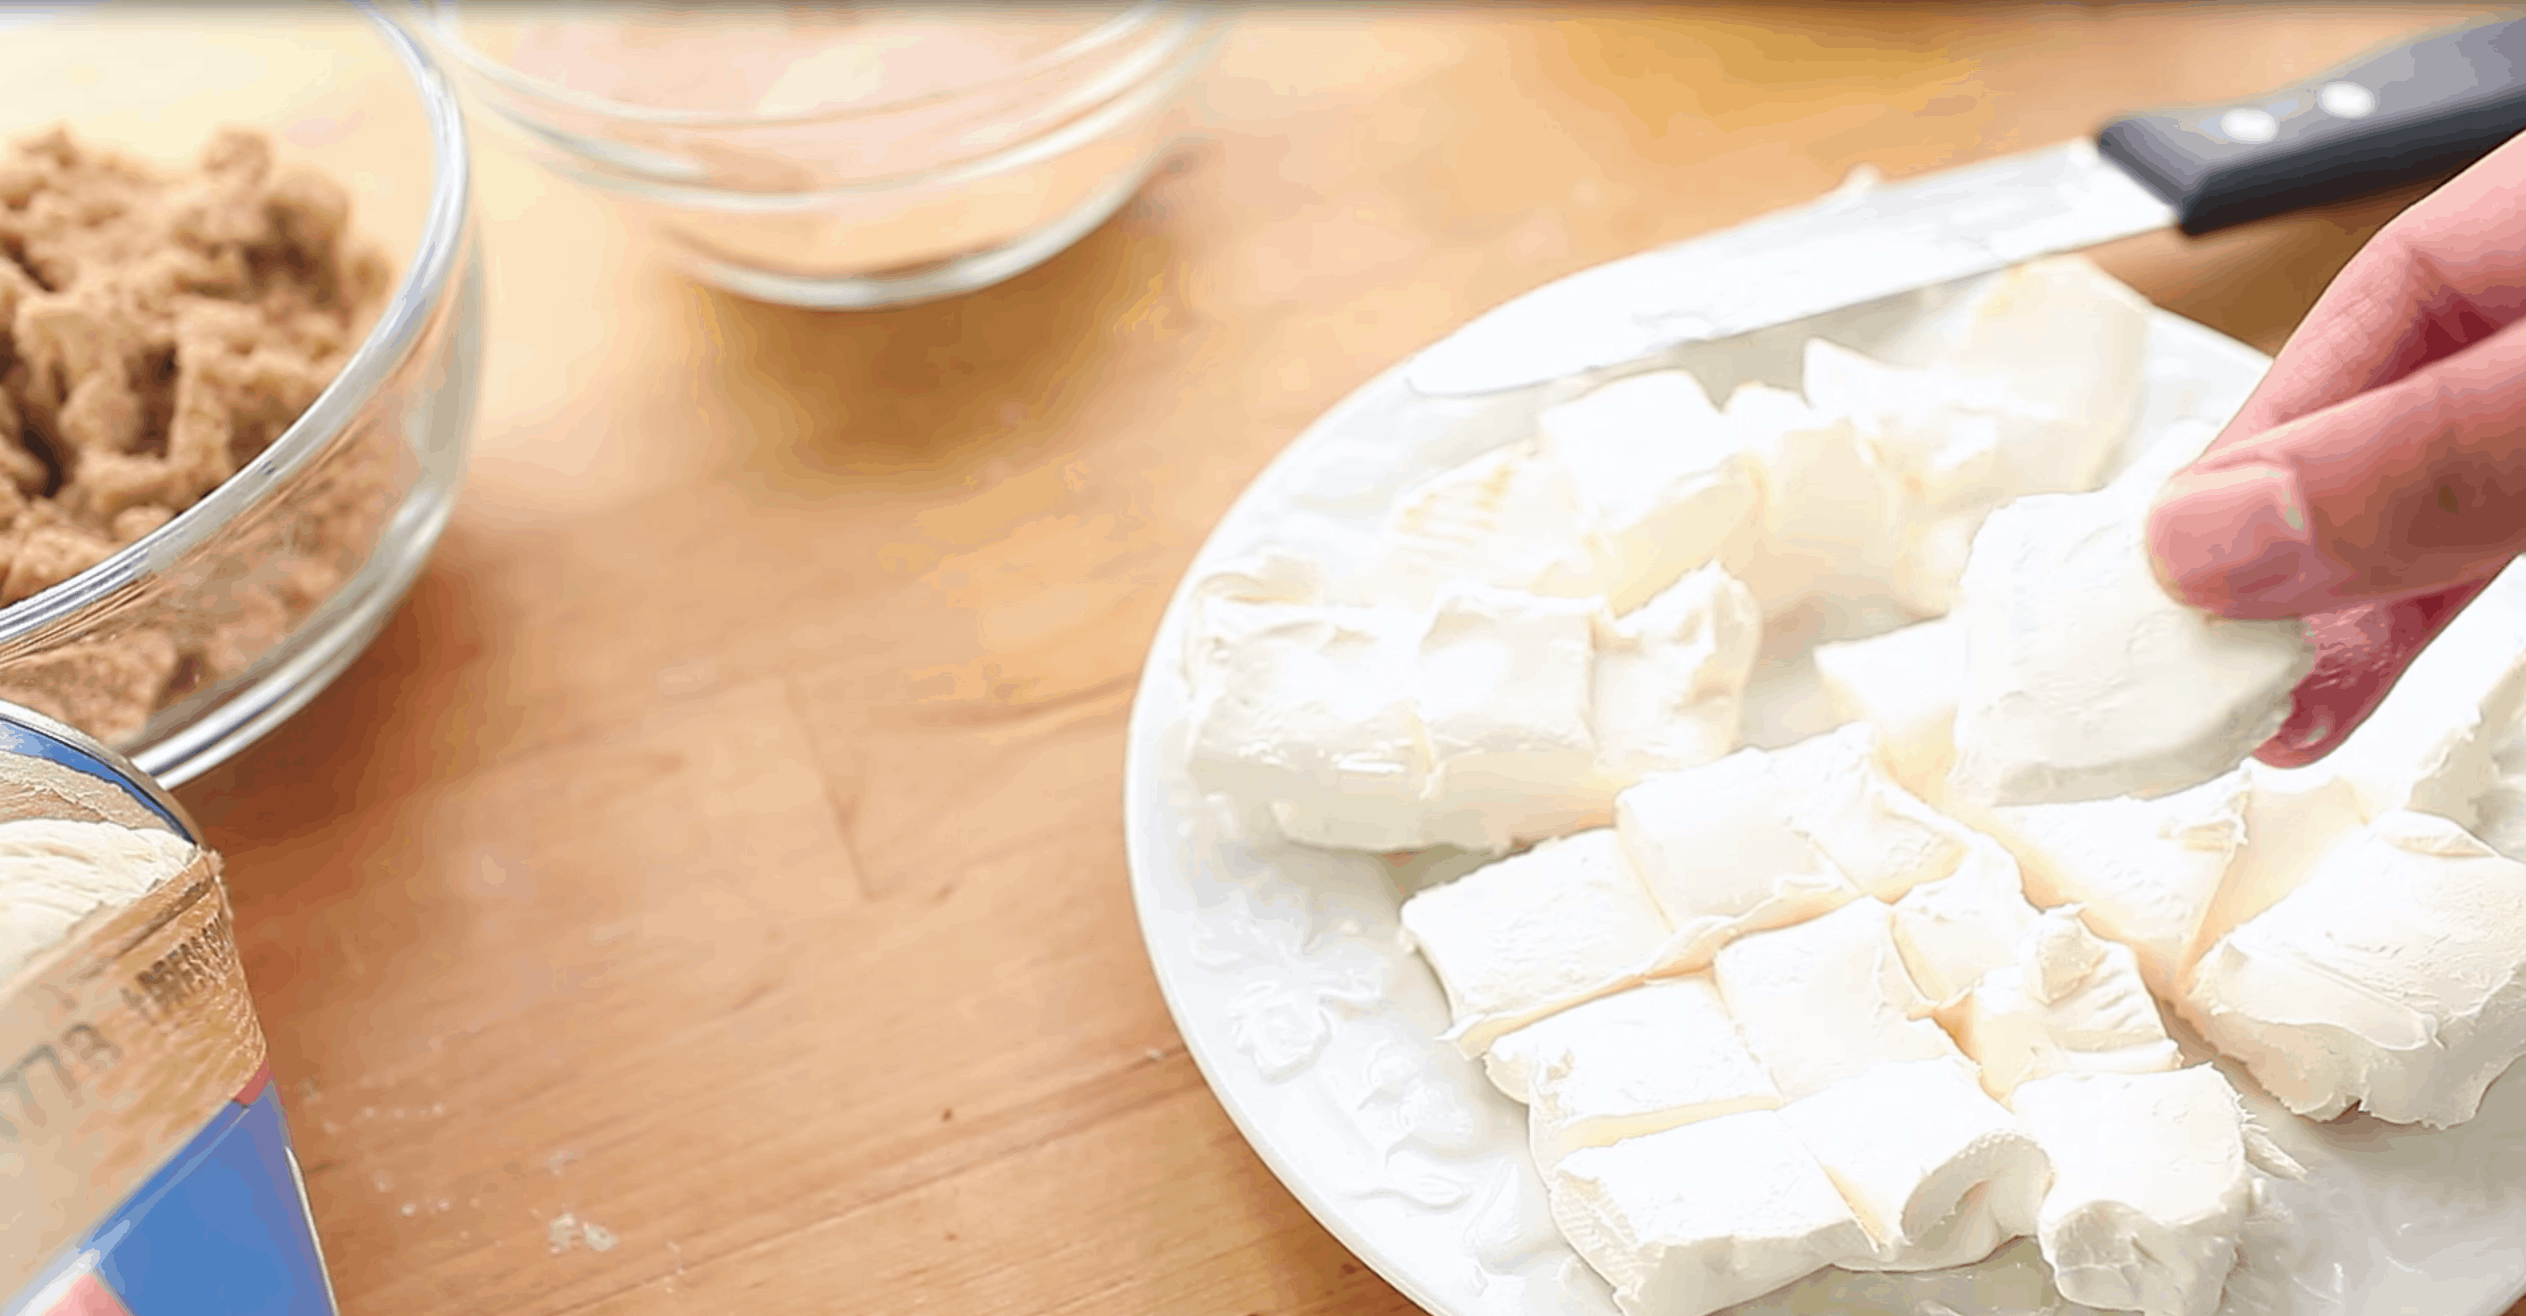
    Then cut the cream cheese into 20 equal cubes:

    cutting butter into cubes for cream cheese stuffed monkey bread recipe

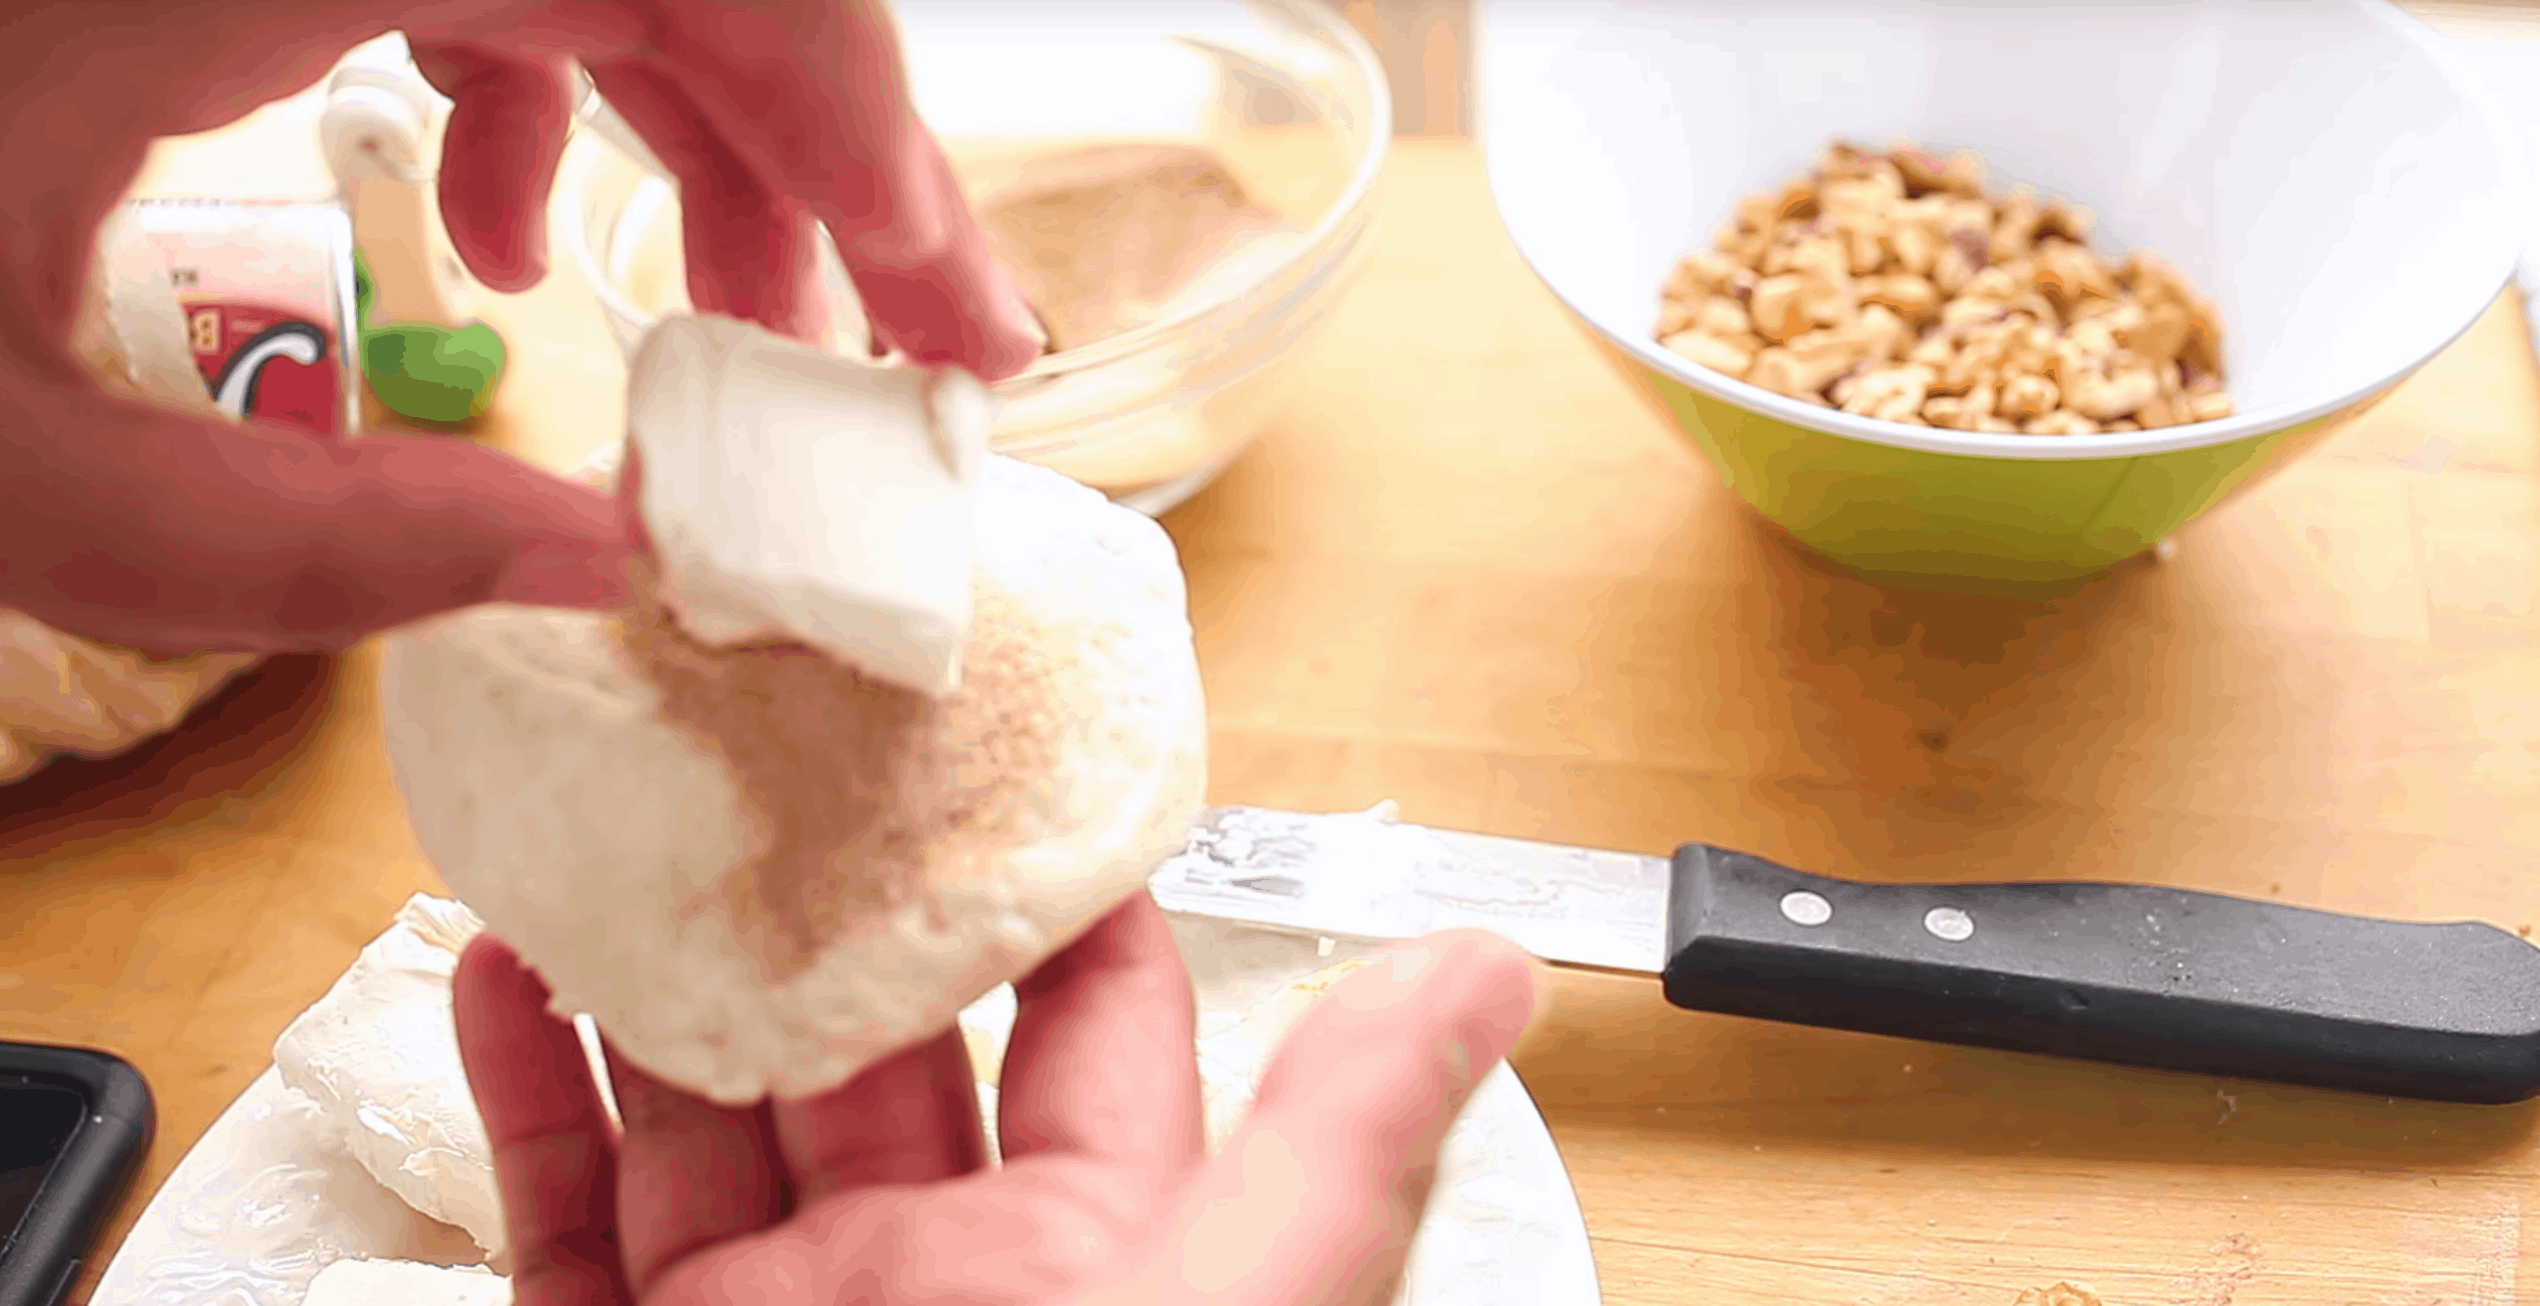
    To assemble it, first, grab the biscuit dough and flatten, add a teaspoon of the cinnamon sugar mixture, add the cubed cream cheese and carefully wrap and seal the dough around the cream cheese and then place in the bundt pan:

    stuffing cream cheese into dough

    Repeat the process until 1 whole package of refrigerated biscuit dough is finished:

    layering the stuffed dough bites onto the spring form pan

    Sprinkle the cinnamon sugar:

    sprinkling the cinnamon and sugar to the dough

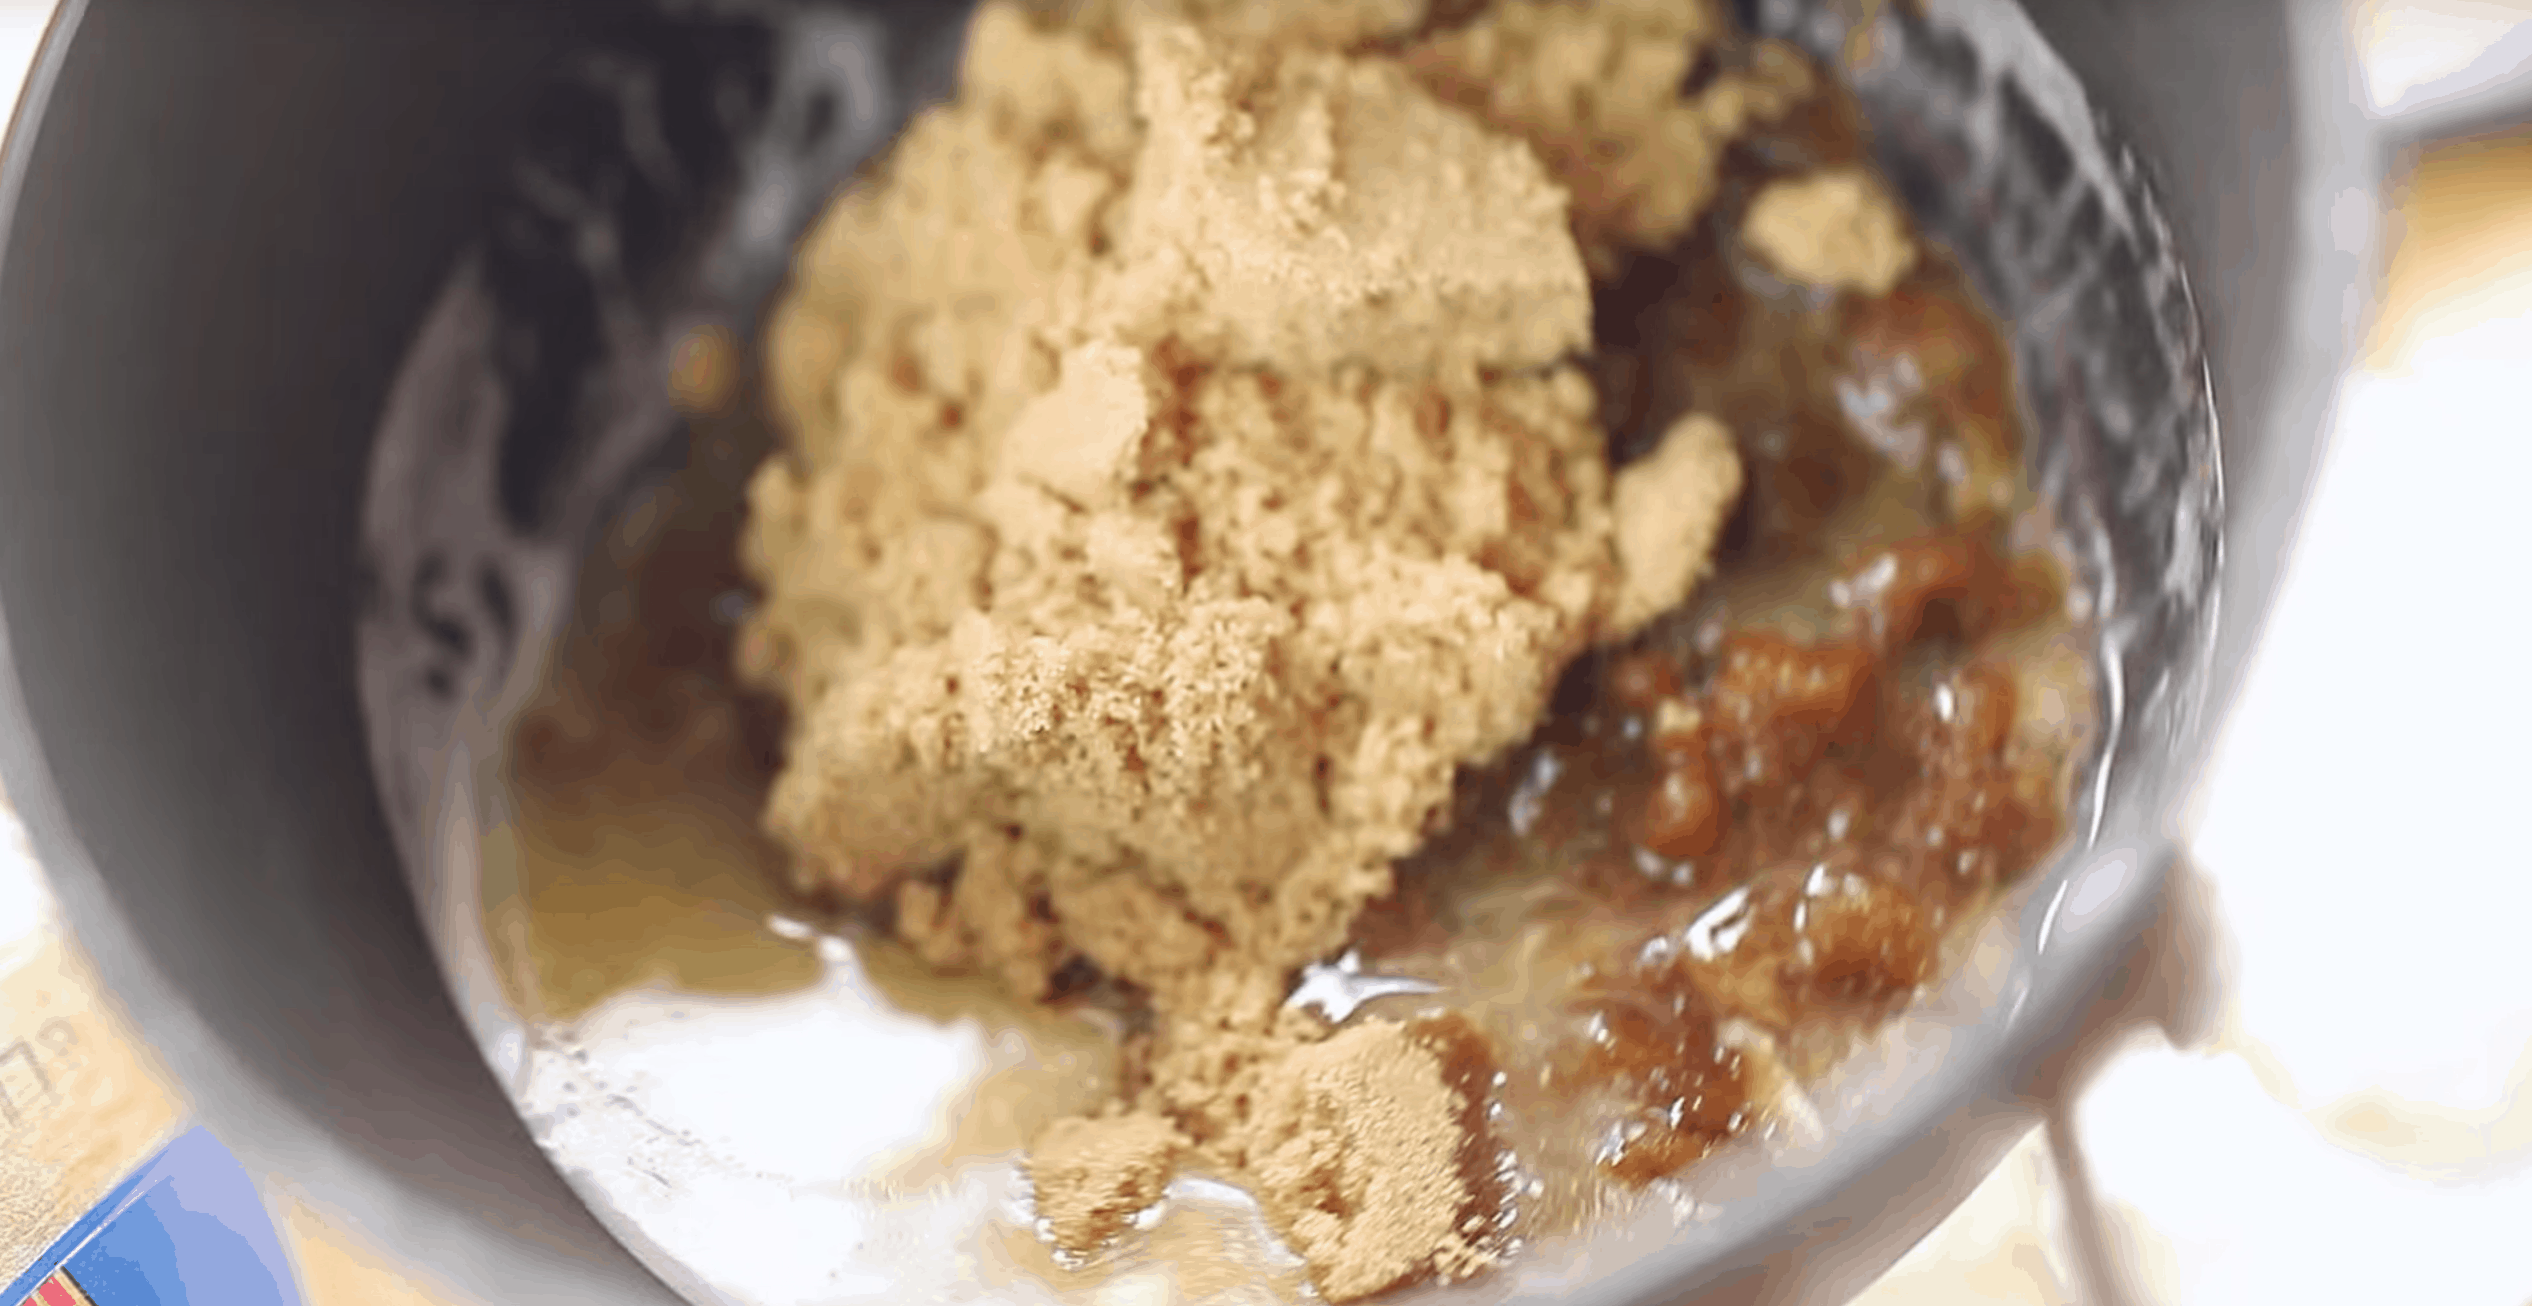
    To make the glaze, in a saucepan melt the butter and brown sugar over low heat stirring well:

    glaze ingredients for the cream cheese stuffed monkey bread

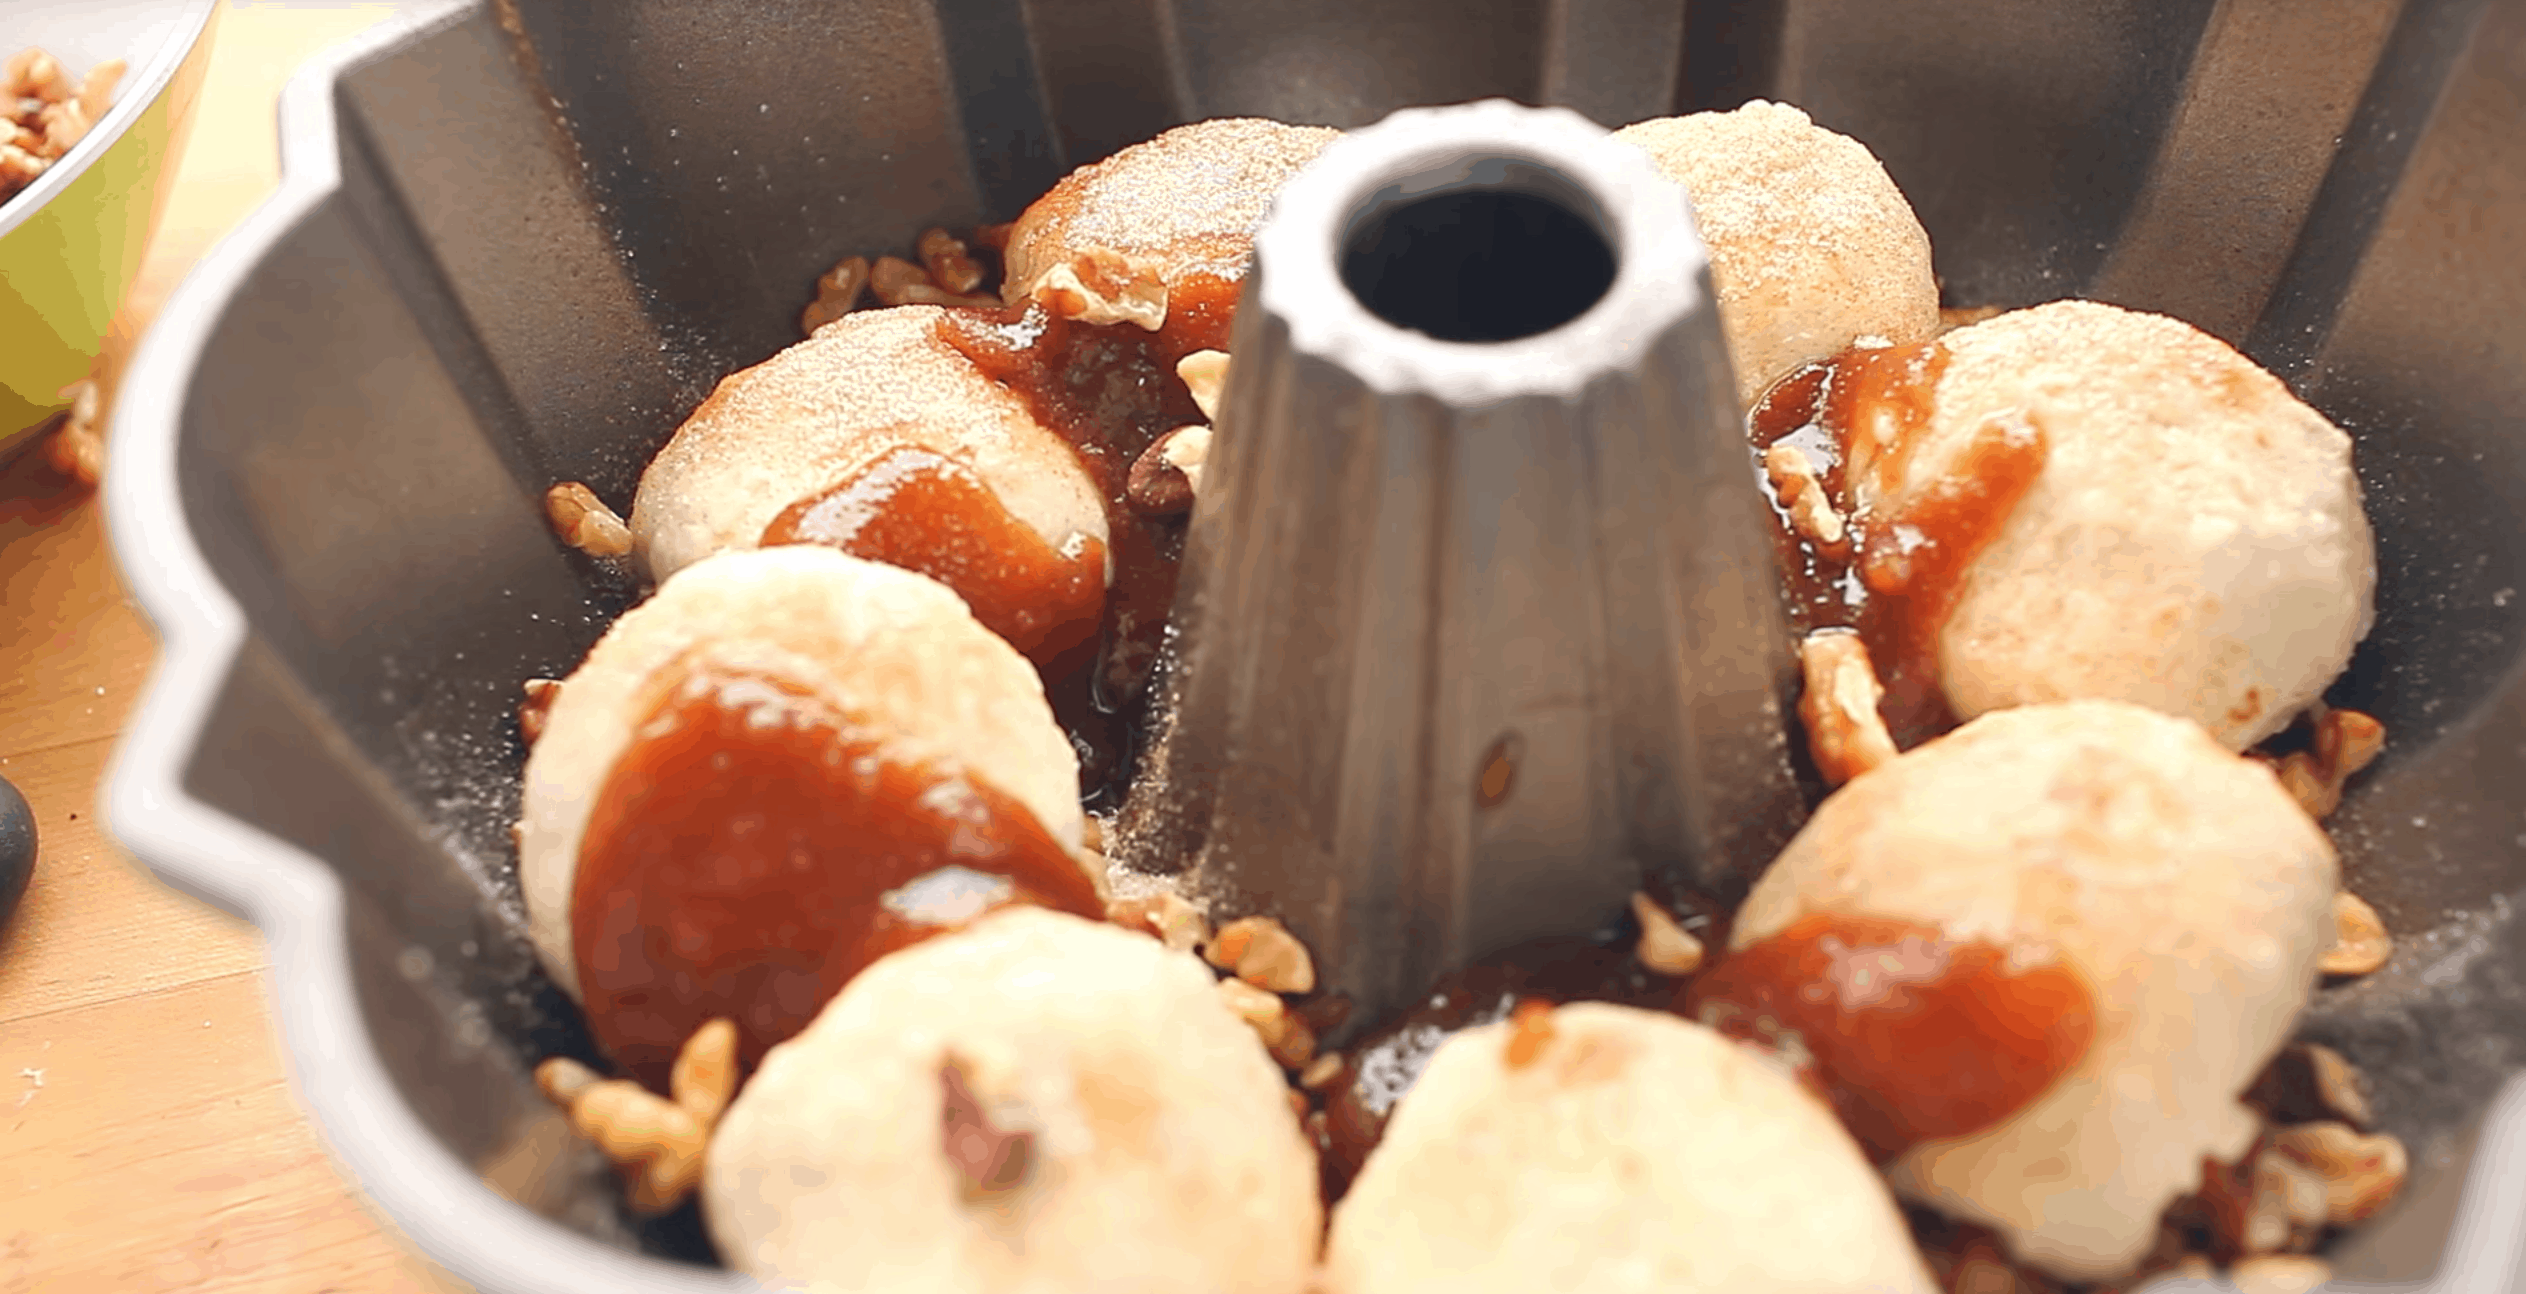
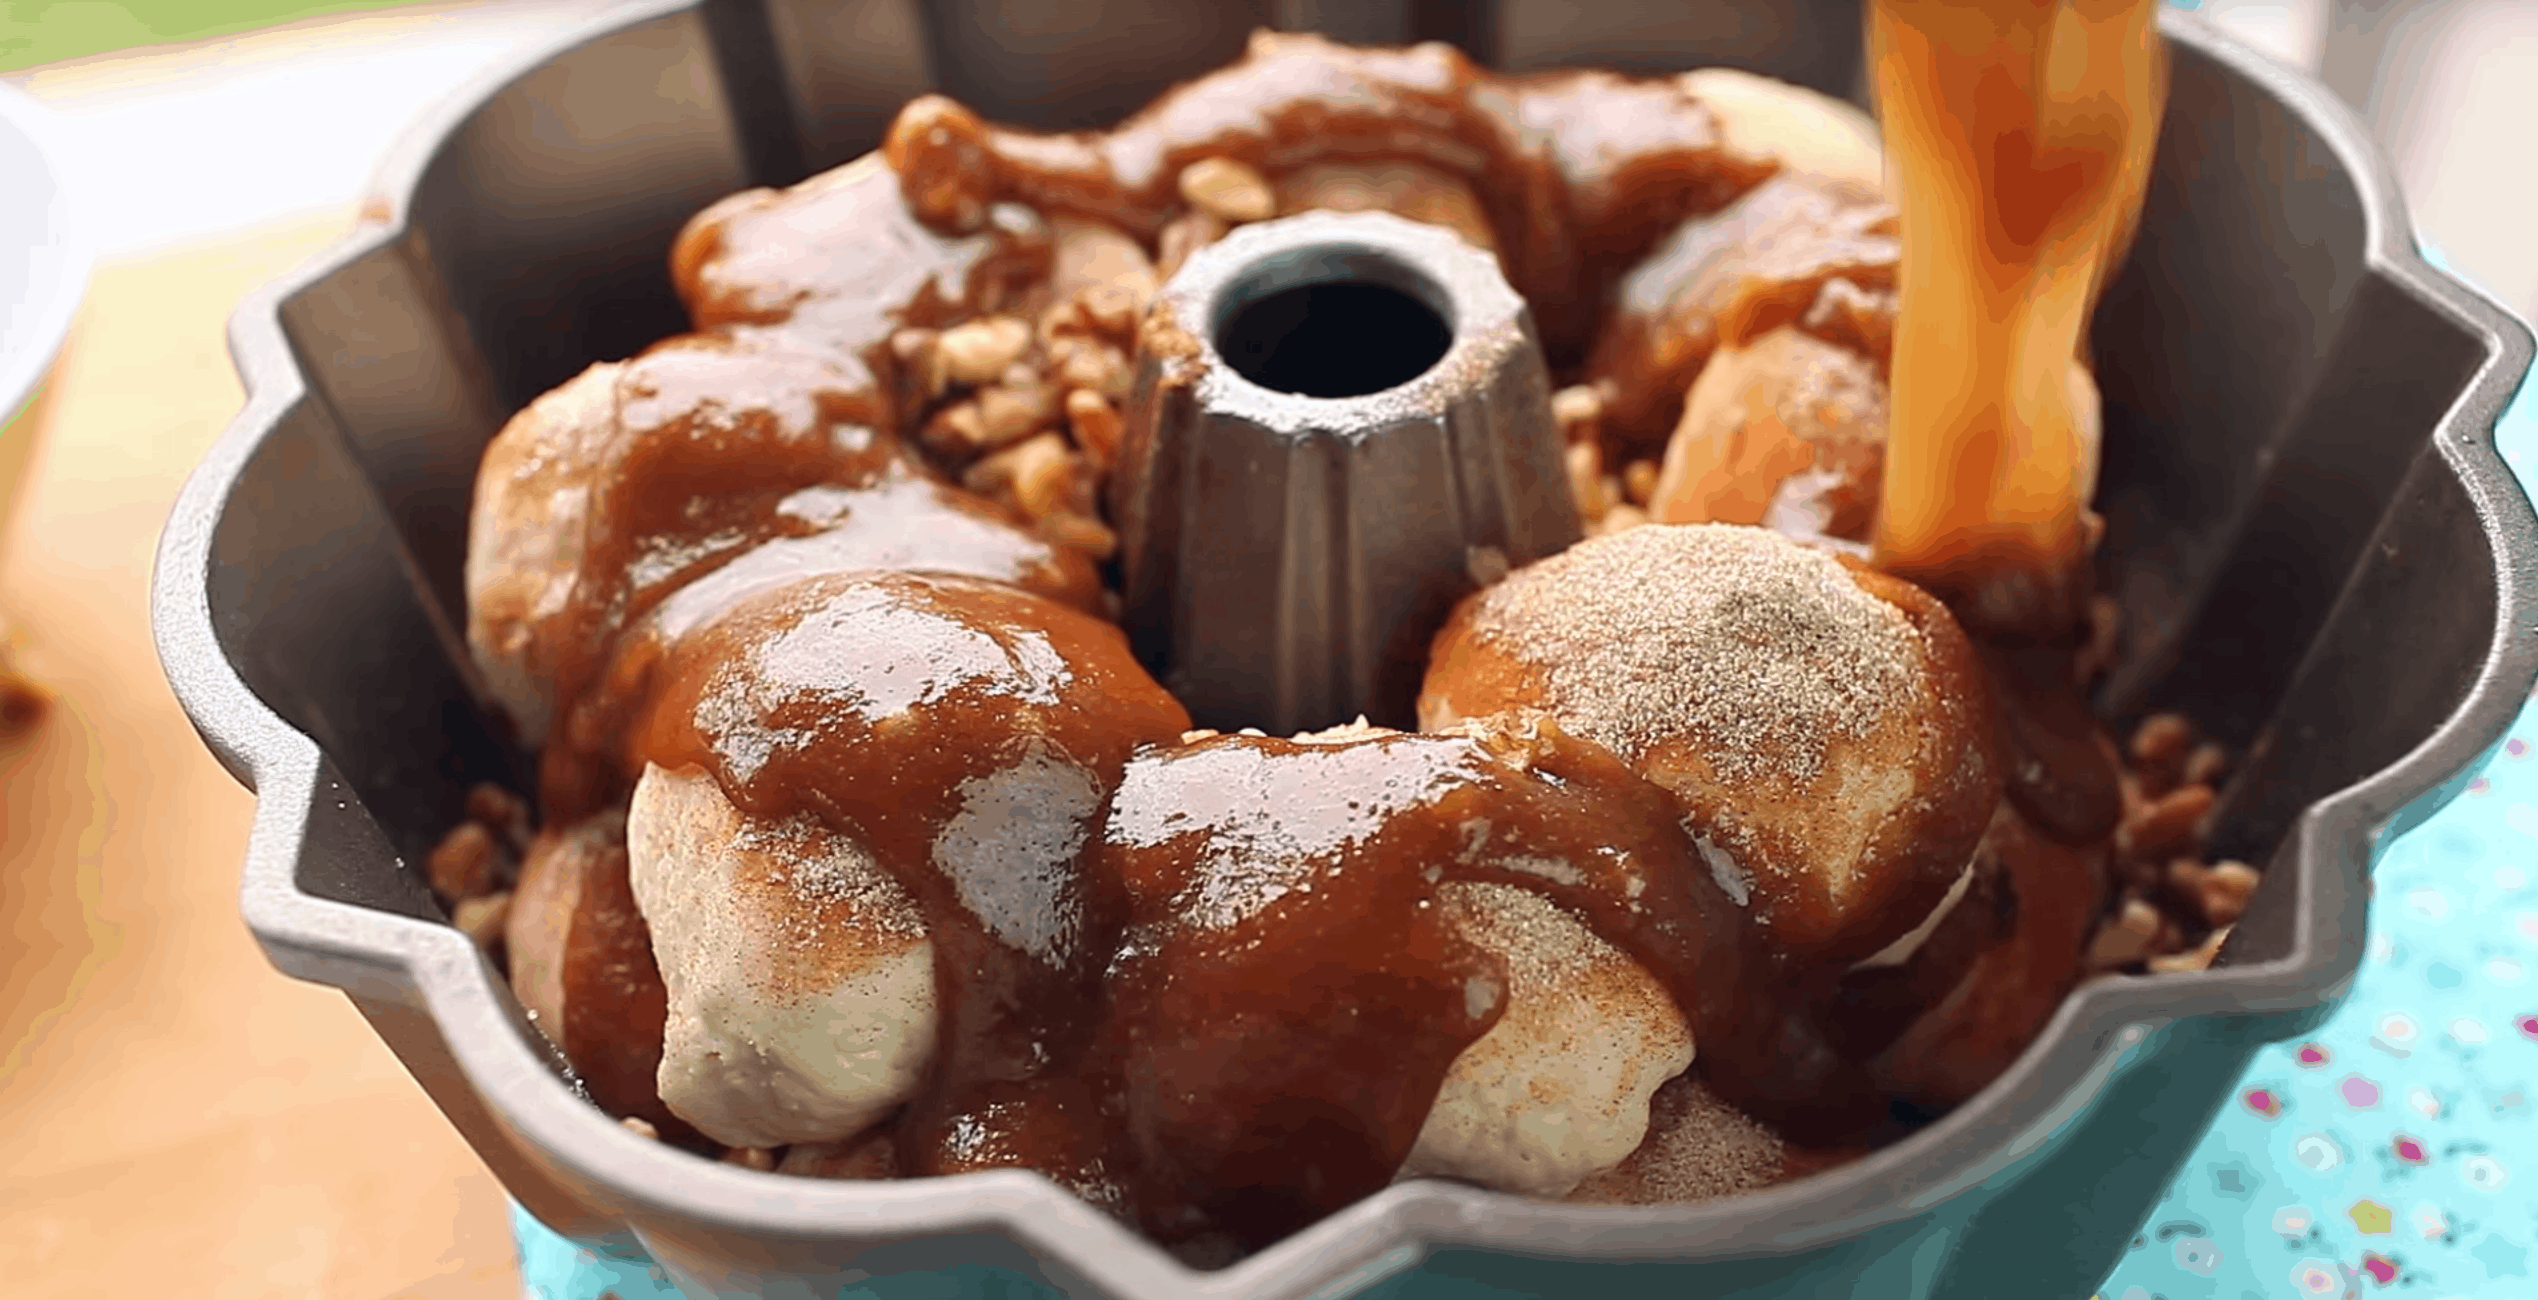
    Then pour it onto the refrigerated biscuit dough. To make the 2nd layer, just repeat the process steps above:

    pouring the glaze onto the layers of cream cheese stuffed dough

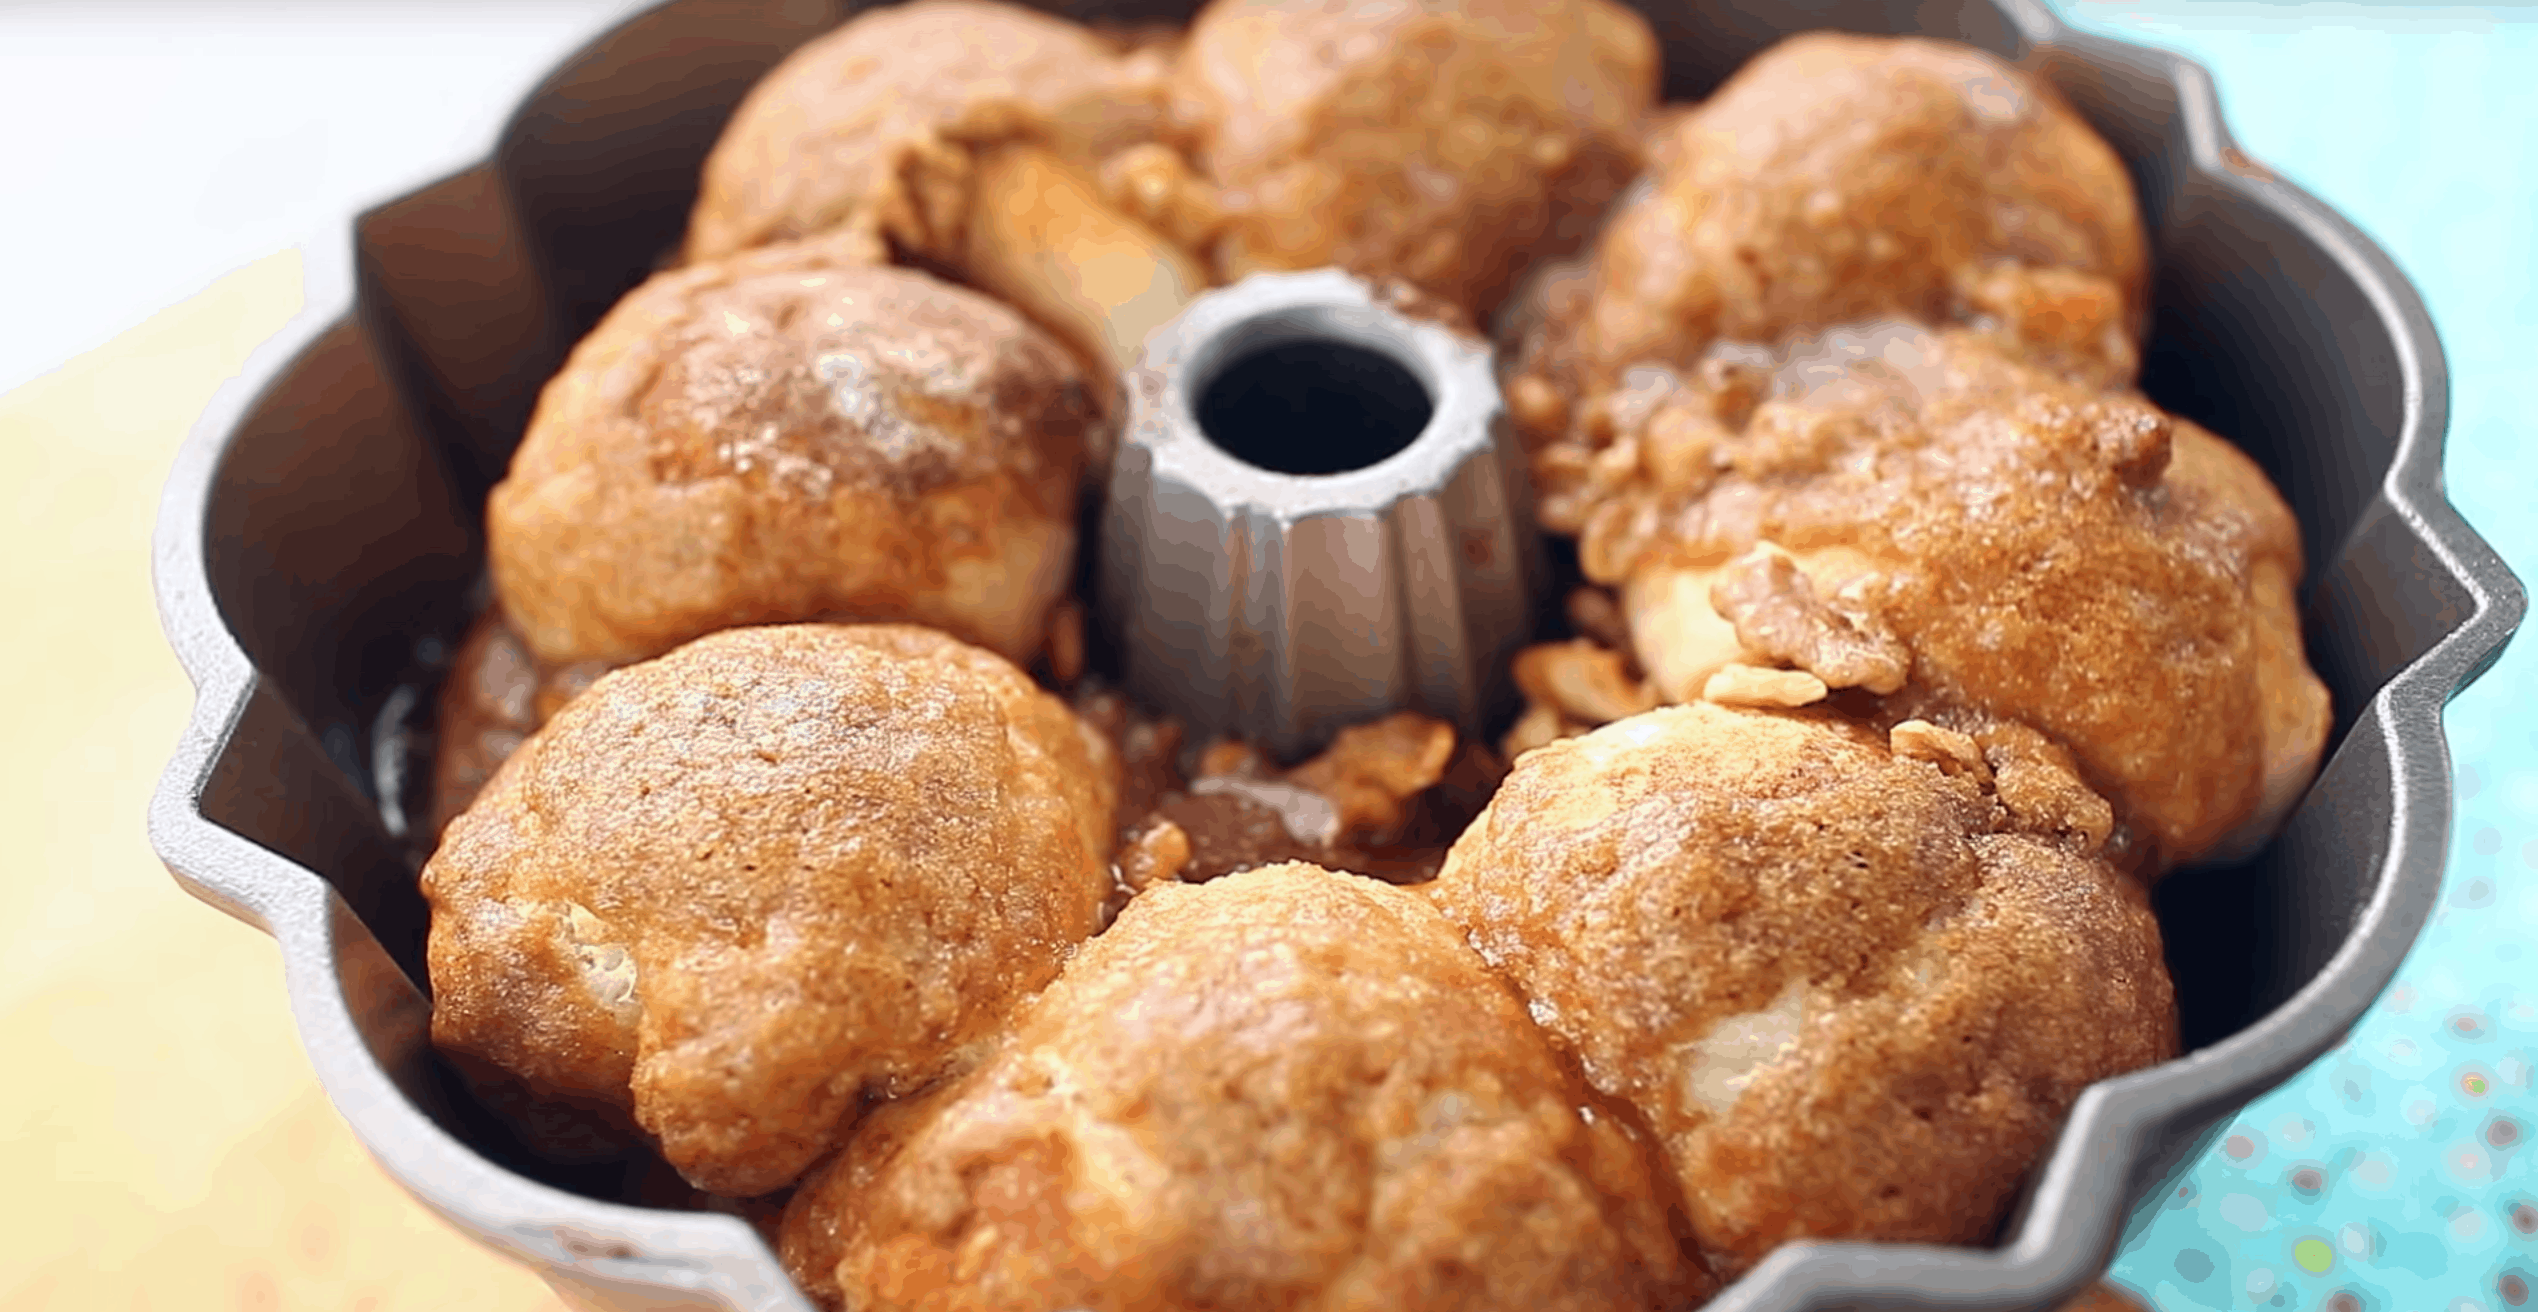
    Bake for 40-45 minutes. Remove from oven and then wait about 5 minutes:

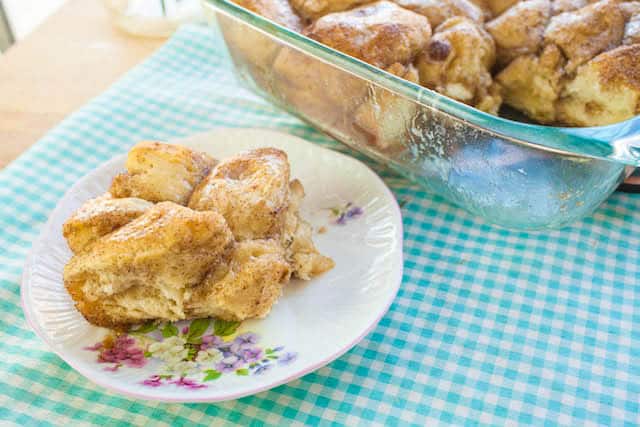
    freshly baked cream cheese stuffed monkey bread

    This bread definitely would make your whole house smell so delicious! The waiting part is over now 🙂

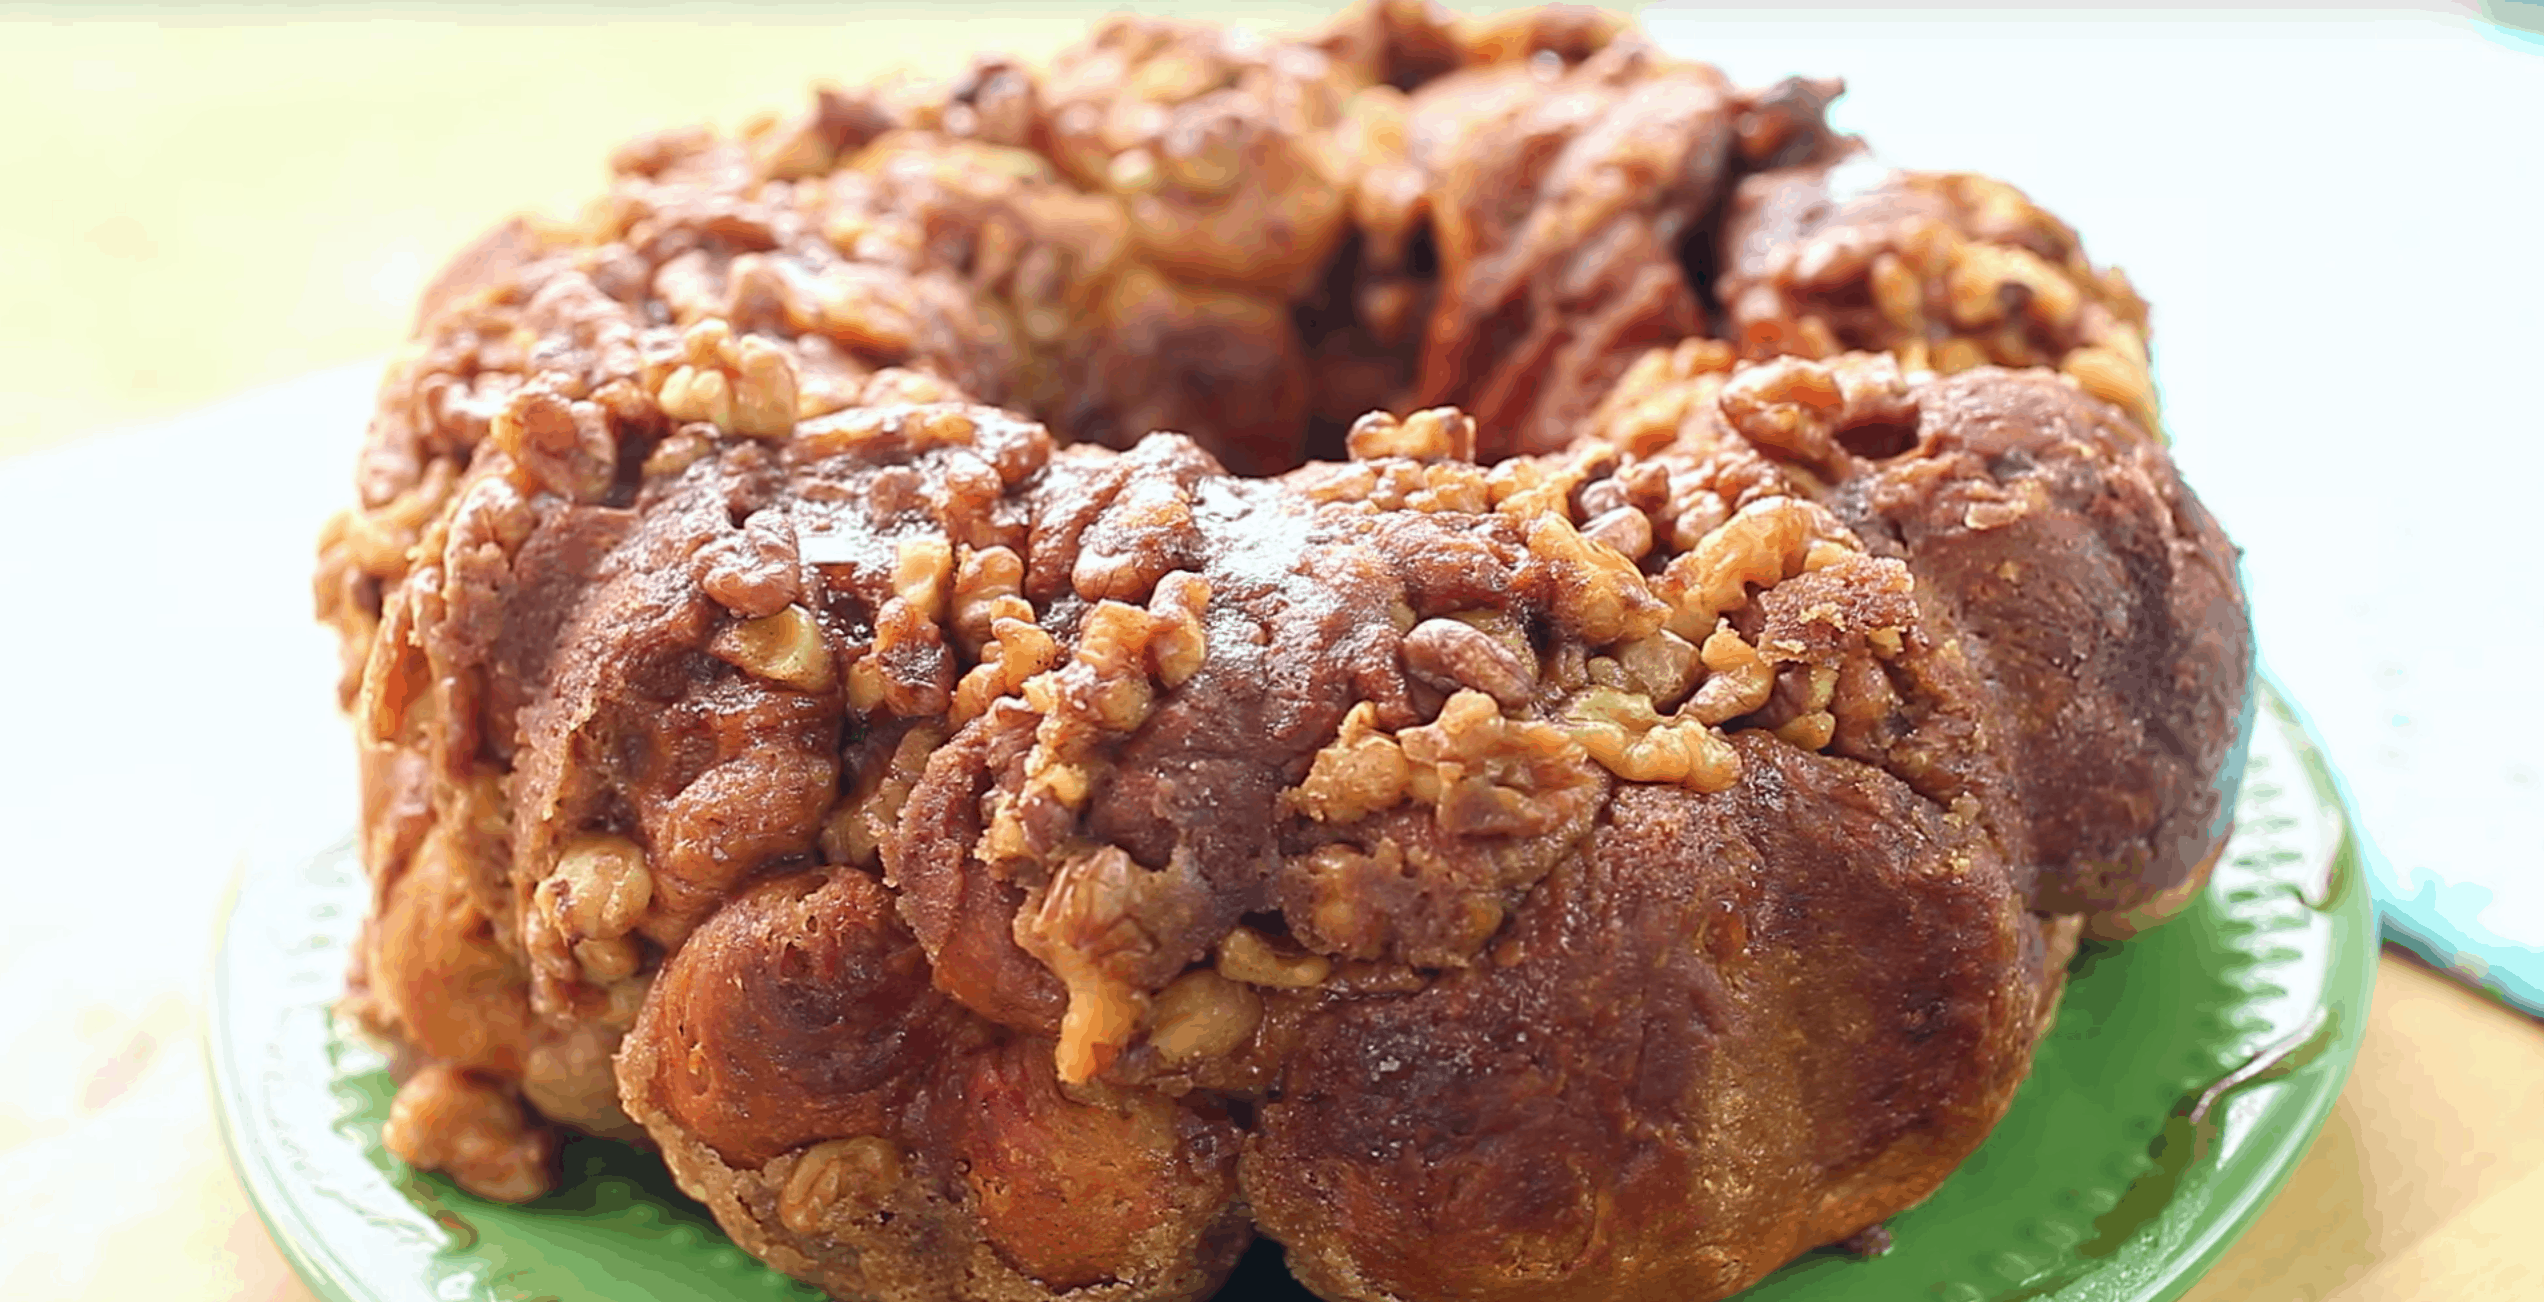
    Then flip over onto a plate. Doesn't that look so delicious?!? No wonder this recipe is one of my favorites!

    freshly baked cream cheese stuffed monkey bread on a green plate

    Happy Baking!

    Frequently Asked Questions:

    Q: Can I bake this in a skillet?

    A: Yes, sure you can. It would be perfectly baked even when you use a shallow pan like a skillet.

    Q: I love baking with pumpkin puree. Can I add it to this bread recipe?

    A: Definitely yes! Include the puree when pouring the glaze and you already have delicious Fall bread.


    More Breakfast Dishes that are Easy to Make:

    • French Breakfast Bread
    • Toaster Pastries
    • 5 Ingredient Pancakes
    • Blueberry Scones
    • Vegan Muffins
    Monkey Bread Cream Cheese
    4.50 from 2 votes
    Print Pin Recipe

    Monkey Bread with Cream Cheese

    Here's a unique twist to the classic monkey bread.
    Author: Lainey
    Prevent your screen from going dark

    Ingredients

    • 1 ½ cups coarsely chopped walnuts
    • ½ cup granulated sugar
    • 3 teaspoons cinnamon
    • 1 8oz package cream cheese
    • 2 cans refrigerated biscuits
    • Glaze
    • ½ cup butter
    • 1 cup packed brown sugar

    Instructions

    • Preheat oven to 350F and spray the bundt pan with nonstick spray, sprinkle about ½ cup of the walnuts and set aside
    • In a small bowl mix together the granulated sugar and cinnamon and yes. Then cut the cream cheese into 20 equal cubes. To assemble it, first grab the biscuit dough and flatten, add a teaspoon of the cinnamon sugar mixture, add the cubed cream cheese and carefully wrap and seal the dough around the cream cheese and then place in the bundt pan.
    • After 1 whole package of refrigerated biscuit dough is finished, sprinkle the cinnamon sugar.
    • To make the glaze, in a saucepan melt the butter and brown sugar over low heat stirring well. Then pour it on to the refrigerated biscuit dough.
    • To make the 2nd layer, just repeat the process steps above.
    • Bake for 40-45 minutes. Remove from oven and then wait about 5 minutes then flip over onto a plate
    Leave a Comment

    Watch The Recipe Video!
    QR Code
    Did you make this recipe?Share it on instagram or tag @simplybakings or #simplybakings!

    NEVER MISS A RECIPE!

    PINTEREST / FACEBOOK / INSTAGRAM / TWITTER

    If you’ve tried this or any other of my recipes, don’t forget to rate the recipe and to leave me a comment. I love hearing from you!

    Bread, Breakfast & Brunch, Cake, Christmas Desserts, Desserts

    3 Ingredient Vegan Biscuits

    May 19, 2016 · 5 Comments

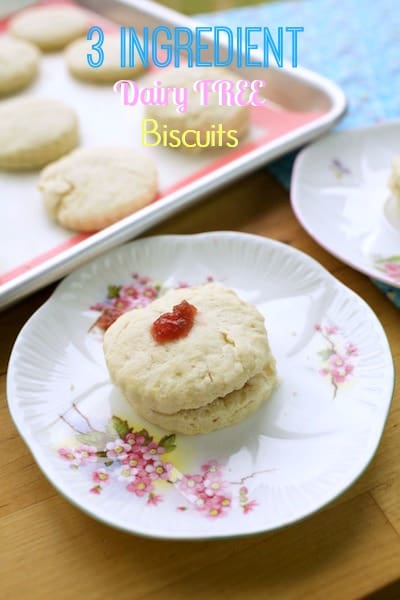
    Biscuits on the baking tray and plate

    You won't believe how flaky, buttery, and easy my 3-Ingredient Vegan Biscuits are - they're ready in under 30 minutes with minimal effort and pantry staples!

    The best part about 3-ingredient recipes like Chocolate Cupcakes, Nutella Cookies and No Bake Oreo Cheesecake is their simplicity - they’re quick to make, effortless to prepare, and perfect for any occasion!

    Biscuits on the baking tray and plate
    [feast_advanced_jump_to]

    What are 3 Ingredient Vegan Biscuits?

    These buttermilk biscuits are simple, dairy-free leftover biscuits made with just flour, plant-based butter, and non-dairy milk. They are light, flaky, and buttery, without the need for eggs or traditional butter. These biscuits come together quickly, requiring minimal prep and baking time, making them perfect for breakfast, brunch, or a side for soups and stews. With their soft, fluffy texture and rich flavor, they prove that delicious homemade biscuits don’t need a long ingredient list. They’re a quick and delicious way to enjoy homemade biscuits with protein and fiber from plant-based ingredients.

    History of 3 Ingredient Vegan Biscuits

    This vegan biscuit recipe evolved from classic Southern biscuits, which were originally made with flour, fat, and liquid. As plant-based diets grew in popularity, bakers swapped dairy ingredients for cold vegan butter and non-dairy milk, creating a simple, vegan-friendly version.

    With the rise of minimalist cooking, these biscuits became a go-to for quick, flaky, and buttery treats without the need for eggs or dairy. Today, they remain a favorite for vegans and home bakers, proving that delicious biscuits don’t need a long ingredient list!

    Substitutions

    • Self-Rising Flour - Mix 1 cup all-purpose flour + 1 ½ teaspoons baking powder + ¼ teaspoon salt for every 1 cup of self-rising flour.
    • Coconut Oil - Swap with vegan butter for a richer flavor, olive oil for a neutral taste, or applesauce for a softer, low-fat option.
    • Coconut Milk - Use almond milk for a light texture, soy milk for added richness, or oat milk for a creamy, neutral flavor.

    Recipe Variations

    • Garlic Herb Biscuits – A savory twist with garlic powder and fresh herbs (rosemary, thyme, or parsley), making them great as a side dish or with vegan butter.
    • Sweet Cinnamon Sugar Biscuits – Lightly sweet and spiced with coconut sugar and cinnamon, best served with maple syrup or fruit preserves.
    • Spiced Pumpkin Biscuits – A cozy fall-inspired variation with pumpkin purée and pumpkin spice, best enjoyed with cinnamon drizzle or vegan butter.
    • Maple Pecan Biscuits – Nutty and slightly sweet, featuring maple syrup and chopped pecans, best served warm with vegan butter.

    Storage

    Room Temperature (Short-Term Storage): Store biscuits in an airtight container at room temperature for up to 2 days. Keep in a cool, dry place away from direct sunlight to maintain freshness.

    Refrigerator (Extended Freshness): Place biscuits in an airtight container or wrap them in foil / plastic wrap. Store in the fridge for up to 5 days and reheat before serving.

    Freezer (Long-Term Storage): Wrap individual biscuits in plastic wrap or parchment paper, then place them in a freezer-safe bag or container. Freeze for up to 3 months and thaw at room temperature before reheating.

    Reheating Tips:

    • Oven: Warm at 350°F (175°C) for 5-10 minutes for a crispy texture.
    • Microwave: Heat for 10-15 seconds for a soft, warm biscuit.
    • Toaster Oven: Reheat for a few minutes for a slightly crispier bite.

    Ingredients

    Listed below are all the ingredients you will need.

    • Self-Rising Flour
    • Coconut Oil
    • Coconut Milk

    See recipe card for quantities.

    Instructions

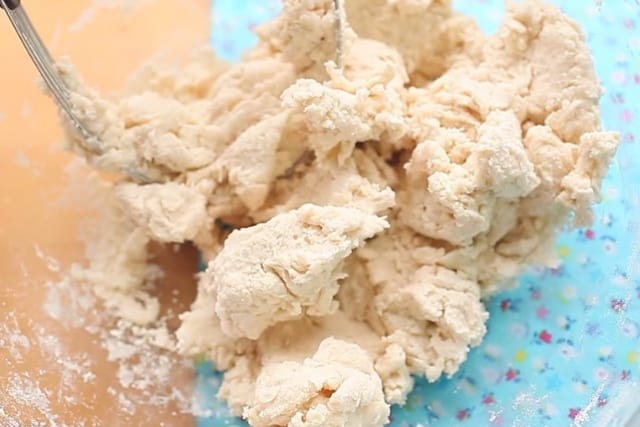
    Preheat the oven to 400°F (200°C) and line a baking sheet with parchment paper. In a large mixing bowl, combine the gluten-free flour and coconut oil, mixing until it forms a crumbly texture.

    mixing bowl of coconut oil and flour

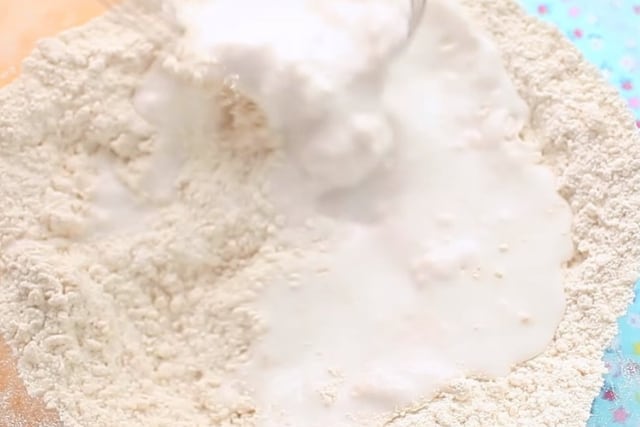
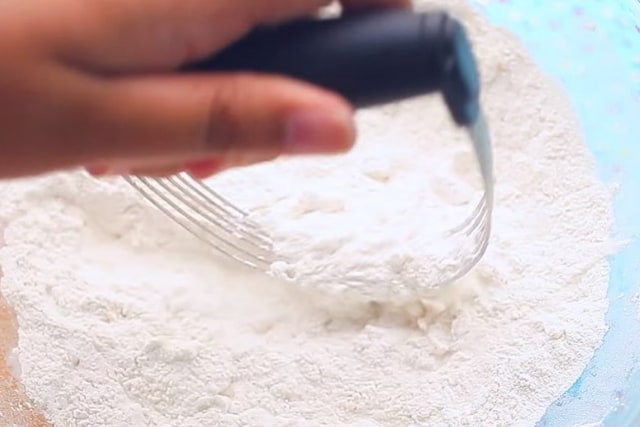
    Gradually add the coconut milk into the mixture. Stir with a fork or pastry cutter until a soft dough forms.

    pastry mixer combining the ingredients

    Make sure not to overmix because the vegan buttermilk would result in a rubbery texture.

    mixture of the ingredients in a bowl

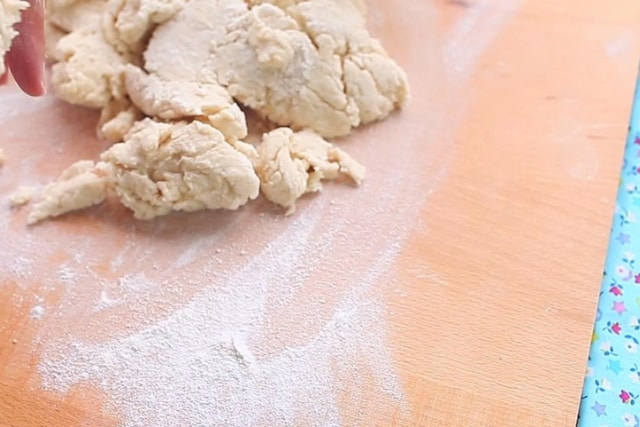
    On a mixing board, sprinkle some flour on the lightly floured surface to prevent biscuit dough from sticking.

    Biscuit batter sprinkled with flour

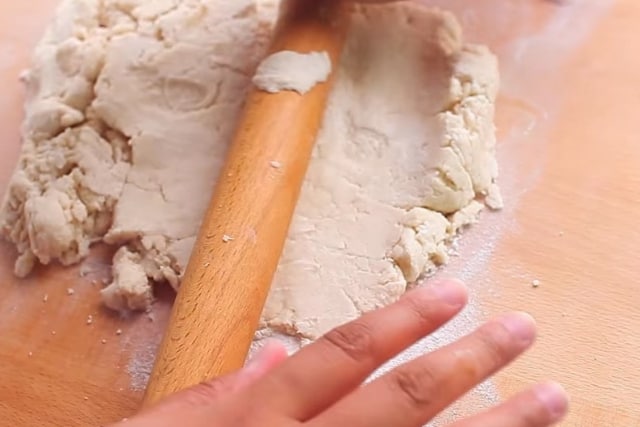
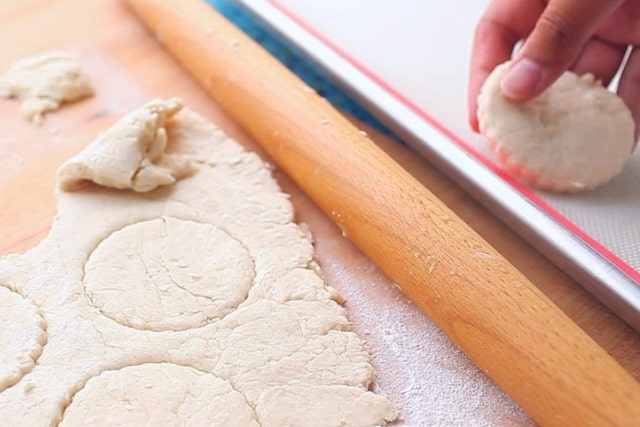
    Knead it with a rolling pin.

    kneading the biscuit dough

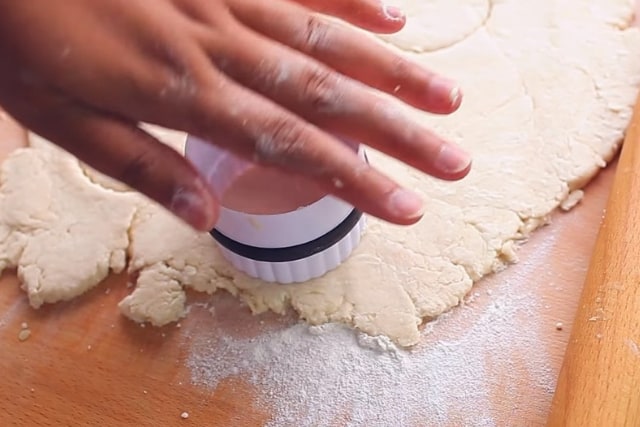
    Cut out the dough individually using a cookie cutter or biscuit cutter. I used a round one here but you can always use different shapes of cookie cutters.

    cutting round shapes from dough

    Transfer it to a baking tray or parchment paper. Then bake it in an oven at 400F for 10 minutes.

    biscuit dough in a baking mat

    Stack two flaky layers of dough to create a taller, fluffier result. Let them cool for a few minutes, then enjoy warm with fruit jam, vegan butter, or maple syrup!

    Round dough bits on a baking tray

    Hint: For extra flaky, tall biscuits, freeze the dough for 10 minutes before baking - this helps create light, buttery layers.

    ⭐ Top Tip

    • Before you start mixing the flour with the other ingredients, make sure you have sifted it to ensure that no lumps are included
    • When adding the wet ingredient to your flour, use the "well technique". make a small "well" in the middle of the flour/dry ingredients then gradually add your liquid ingredients
    • Before you use your rolling pin to flatten the dough, dust it with a bit of flour to prevent your dough from sticking to it. You can repeat this process as needed.
    • Your cookie cutter needs to be dusted with flour, too! As it comes to contact with the sticky dough, it tends to gather some dough on its edges so it's best to clean and dust it as needed

    FAQ

    What Pillsbury biscuits are vegan?

    Pillsbury Grands! Southern Homestyle Original Biscuits are animal-free, for example, and so is the brand's Southern Homestyle Buttermilk Refrigerated Biscuit Dough variety (surprisingly, there's no actual buttermilk in this flavor - go figure).

    Can you use almond milk instead of milk for biscuits?

    Almond milk can be used 1:1 in place of 2% milk and whole milk when baking. When using it in place of whole milk, confections may bake a little faster, as there is more water in almond milk than dairy milk. This water evaporates causing the baked good to rise and set more quickly.

    What can I use if I don't have milk?

    Nut-based milk alternatives, such as almond, pistachio, or other nut milks, offer a delicious and versatile option for those seeking milk substitutes.

    More Recipes

    Who doesn't love these kinds of recipes? Here's some more I like to make for a quick snack!

    • 2 Ingredient Muffin
    • 2 Ingredient Donut
    • 3 Ingredient Cupcakes
    • 3 Ingredient Healthy Oat Cookies
    White plates with vegan biscuits
    5 from 4 votes
    Print Pin Recipe

    3 Ingredient Vegan Biscuits

    Prep Time10 minutes mins
    Cook Time10 minutes mins
    Total Time20 minutes mins
    Course: Breakfast, Snack
    Cuisine: American
    Servings: 8 biscuits
    Calories: 211kcal
    Author: Lainey
    Prevent your screen from going dark

    Ingredients

    • 2 cups self rising flour
    • ¼ cup coconut oil
    • ¾ cup coconut milk

    Instructions

    • Preheat the oven to 400°F (200°C) and line a baking sheet with parchment paper.
    • In a large bowl, combine self-rising flour and coconut oil, mixing until it forms a crumbly texture.
    • Gradually add the coconut milk, stirring with a fork or pastry cutter until a soft dough forms.
    • Lightly flour a surface and knead the dough gently until smooth. Roll out to about ½-inch thick.
    • Use a cookie cutter to cut out individual biscuits and place them on the prepared baking sheet.
    • Bake for 10-12 minutes, or until the biscuits are lightly golden on top.
    • Let cool for a few minutes and serve warm with your favorite fruit jam, vegan butter, or maple syrup.
    Leave a Comment
    Serving: 1gCalories: 211kcalCarbohydrates: 23gProtein: 4gFat: 12gSaturated Fat: 10gPolyunsaturated Fat: 0.4gMonounsaturated Fat: 1gSodium: 3mgPotassium: 78mgFiber: 1gSugar: 0.1gVitamin A: 1IUVitamin C: 0.2mgCalcium: 9mgIron: 1mg

    Watch The Recipe Video!
    QR Code
    Did you make this recipe?Share it on instagram or tag @simplybakings or #simplybakings!

    5 Ingredients or Less, Bread, Breakfast & Brunch, Vegan Baking

    Chocolate Chip Meringue Cookies

    May 16, 2016 · 2 Comments

    This super light, airy but crisp Chocolate Chip Meringue Cookies is one of my favorite kinds of cookies to make during Christmas! In every bite, you can hear the crispiness but in between, there is a moist and marshmallow-like softness. Yum!

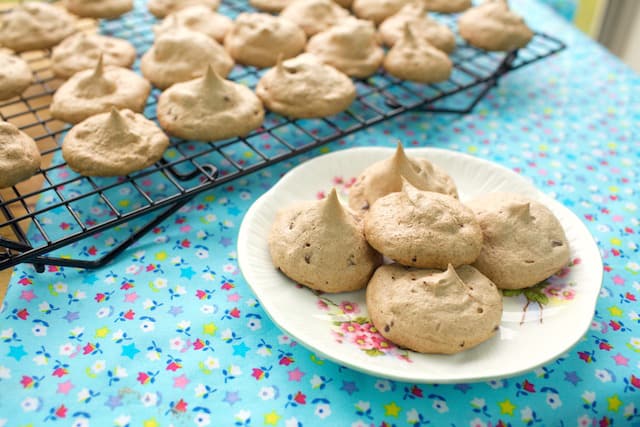
    Chocolate Chip Meringue Cookies on a white plate and cooling rack

    Tips and Procedures: 

    • Before mixing the dry ingredients like all-purpose flour, baking soda, and granulated sugar, sift them individually. This easy but very important step would make your cookies nice and evenly textured. It wouldn't be fun biting into a lump of flour in between 🙂
    • After baking your Chocolate Chip Meringue Cookies, store them in an airtight container so you can enjoy them for several days - that is if you did not eat the whole batch in one sitting.
    • If you don't have chocolate chips and have a chocolate bar instead, simply chop it in small bits and you have equally delicious chocolate to go in that croissant dinner roll!
    freshly baked Meringue Cookies on a white plate

    How to Make this Chocolate Chip Meringue Cookies Recipe:

    Gather the ingredients for this Chocolate Chip Meringue Cookies and once the ingredients are all ready, let's begin!

    • cream of tartar
    • salt
    • egg whites
    • granulated sugar
    • unsweetened cocoa powder
    • mini chocolate chips

    Preheat oven to 300F and prepare baking sheet using parchment paper or a baking mat.

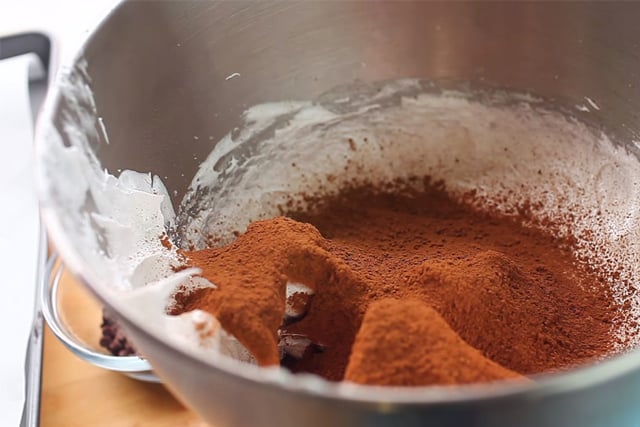
    In a mixing stand, add the cream of tartar, salt, and egg whites and beat it at high speed until soft peaks form. Then gradually add the granulated sugar 1 tablespoon at a time, while the mixer is on high speed. Now once stiff peaks form, turn off the mixer and then sift the unsweetened cocoa powder in the bowl:

    whipping the egg whites for the chocolate chip meringue cookies

    Next, you are going to fold this in and then fold in the mini chips:

    adding the unsweetened cocoa powder to the whipped egg whites

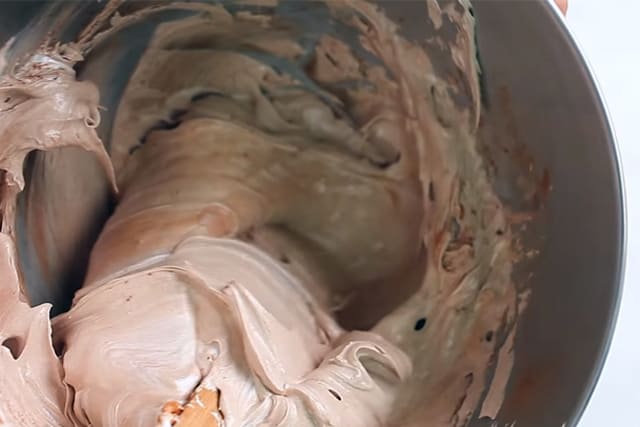
    After mixing well, you will get a light brown colored smooth mixture, like so:

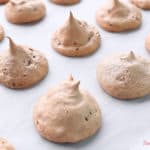
    mixed egg whites and unsweetened cocoa powder in a mixing bowl

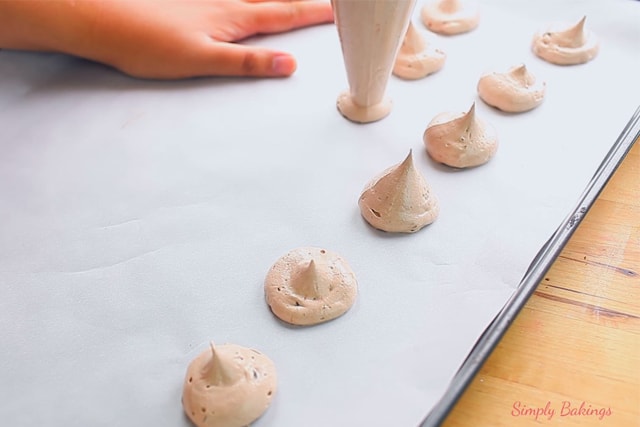
    Using a piping bag, pipe the cookies onto parchment paper:

    piping the chocolate chip meringue cookies on a cookie sheet lined with parchment paper

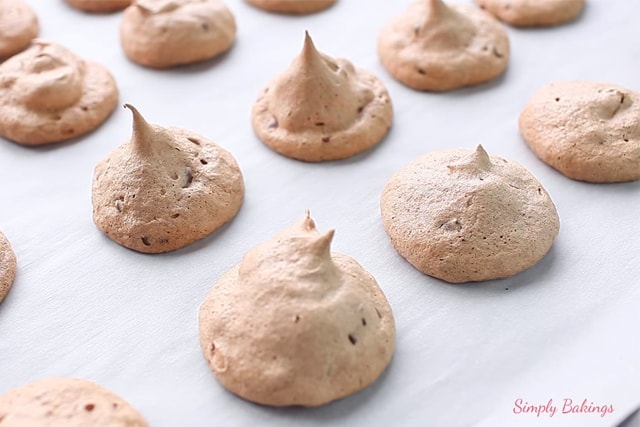
    Bake for 40-45 minutes, then remove from pan and cool on a cookie rack.

    freshly baked chocolate chip meringue cookies on a parchment paper

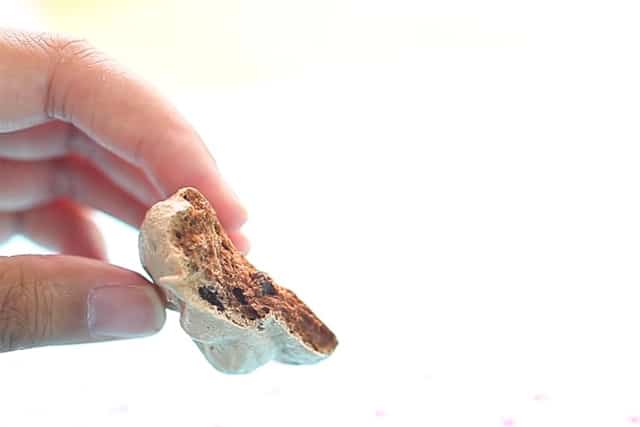
    I was so excited to take a bite! This cookie is crispy on the outside but soft and has a marshmallow taste on the inside! I could eat a few more of these cookies!

    holding a half-eaten chocolate chip meringue cookie

    Frequently Asked Questions for the Chocolate Chip Meringue Cookies Recipe:

    Q: Should these cookies be refrigerated?

    A: Yes, you can keep this in the fridge but make sure to store them in an airtight container.

    Q: Are chocolate chip meringue cookies supposed to be chewy?

    A: Yes, because of the egg whites and combination of sugar, it does have a slightly chewy texture to it.

    Q: How do you know when meringue cookies are done baking??

    A: Like other cookies, you can insert a toothpick in the center and when it comes out clean, then it is perfectly baked.

    Q: Can you overbeat the meringue?

    A: Overbeating the egg whites could cause a failure in baking these chocolate chip meringue cookies. When you see stiff peaks, you can stop whipping or beating it.


    Here are more delicious cookie recipes that you should try:

    • 3 Ingredient No-Bake Cheesecake
    • Apple Pancake Cookies
    • Best Chocolate Chip Cookies
    • Brownie Cookies
    • Brownie Meringue Cookies | 5 Ingredients ONLY
    freshly baked chocolate chip meringue cookies
    5 from 1 vote
    Print Pin Recipe

    Chocolate Chip Meringue Cookies

    A super light and airy but crisp Chocolate Chip Meringue Cookies is the cookie to make everytime you crave for a unique but perfect choice for birthday and Christmas parties!
    Author: Lainey
    Prevent your screen from going dark

    Ingredients

    • ¼ teaspoon cream of tartar
    • ¼ teaspoon salt
    • 3 egg whites
    • 1 cup granulated sugar
    • 3 tablespoons unsweetened cocoa powder
    • 3 tablespoons mini chocolate chips

    Instructions

    • Preheat oven to 300F and prepare baking sheet using parchment paper or baking mat.
    • In a mixing stand, add the cream of tartar, salt, and egg whites and beat it at high speed until soft peaks form. Then gradually add the granulated sugar 1 tablespoon at a time, while the mixer is on high speed. Now once stiff peaks form, turn off the mixer and then sift the unsweetened cocoa powder in the bowl.
    • Next, you are going to fold this in and then fold in the mini chips.
    • Using a piping bag, pipe the cookies onto parchment paper.
    • Bake for 40-45 minutes, then remove from pan and cool on a cookie rack.
    Leave a Comment

    Watch The Recipe Video!
    QR Code
    Did you make this recipe?Share it on instagram or tag @simplybakings or #simplybakings!

    NEVER MISS A RECIPE!

    PINTEREST / FACEBOOK / INSTAGRAM / TWITTER

    If you’ve tried this or any other of my recipes, don’t forget to rate the recipe and to leave me a comment. I love hearing from you!

    Cookies, Desserts

    BEST Churro Cheesecake Recipe with Crescent Rolls

    May 13, 2016 · 8 Comments

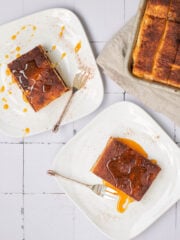
    - A white plate with a churro cheesecake slice.
    - A white plate with a churro cheesecake slice.

    This easy churro cheesecake uses crescent rolls for flaky, buttery layers baked around a creamy vanilla cheesecake filling. In just a few simple steps, you’ll learn how to layer, bake, and top this treat with a sweet, crunchy cinnamon-sugar crust that tastes just like a warm churro. Made with basic pantry staples and minimal prep time, it’s a foolproof crowd-pleaser for parties, potlucks, or anytime a sweet craving hits.

    [feast_advanced_jump_to]

    Why You’ll Love This Recipe

    You'll love how easily this buttery crust dessert is prepared! You only need seven basic ingredients and a few simple steps. Like Pillsbury crescent roll dough, this dessert saves time when making and is perfect for beginner bakers. The creamy filling and buttery crust create delicious textures in every bite.

    It's quite healthy, too. The tangy cream cheese filling provides some calcium, while cinnamon contains natural antioxidants. It's a sweet treat best enjoyed in moderation.

    Ingredients

    Listed below are all the ingredients you will need:

    • crescent dinner rolls
    • cream cheese
    • vanilla extract
    • egg
    • sugar
    • ground cinnamon

    See the recipe card for quantities.

    Instructions

    Prepare the Cheesecake Filling

    Preheat the oven to 350°F (175°C) and lightly grease a 9×13-inch baking pan. Next, beat the cream cheese in a large bowl until smooth and free of lumps.

    Then, add the vanilla extract, egg, and ½ cup sugar. Mix until everything is smooth and well combined.

    Electric whisk mixing ingredients in a bowl

    Assemble the Churro Cheesecake

    Open one can of crescent rolls and spread the dough evenly across the bottom of the prepared pan. Press the seams together to close any gaps.

    Next, pour the cream cheese mixture over the bottom crust. Spread it evenly with a spatula.

    Roll out the second can of crescent dough on parchment paper and press the seams together. Then, carefully place it over the cream cheese filling.

    Bake and Top

    Bake for 30–35 minutes, or until the top crust is golden brown and the filling is set. Then, remove the cheesecake from the oven.

    Cheesecake batter spread inside baking pan

    While the cheesecake cools, combine ½ cup sugar and 1 tablespoon ground cinnamon in a small bowl. Stir until evenly mixed.

    Allow the cheesecake to cool completely, about 2 hours. Then, sprinkle the cinnamon-sugar mixture evenly over the top.

    Chill and Serve

    Next, refrigerate the cheesecake until chilled for the best texture. Lastly, cut it into 12 slices and serve.

    - A white plate with a churro cheesecake slice.

    Substitutions & Variations

    • Ingredient Swap
      Replace crescent dinner rolls with crescent dough sheets.
    • Variation
      For extra sweetness, serve it with fresh strawberries or a drizzle of dulce de leche.
    • Mistake to Avoid
      Don't use cold cream cheese when preparing the filling. It can make lumps that are difficult to remove. Let it soften to room temperature first, then mix until smooth.
    • Storage Tips
      • Store leftovers in an airtight container in the fridge for up to 4 days. For longer storage, wrap individual slices tightly and freeze for up to 2 months.
      • Thaw overnight in the refrigerator before serving. The crescent roll crust may become softer after freezing.
    - A slice of churro cheesecake served at the table

    FAQs

    Can I make this recipe a few days ahead?

    Of course, you can! Just make sure to cover it tightly so it won't be ruined.

    Will the cheesecake melt at room temperature?

    No. Since this churro cheesecake is already baked, it won't melt when placed in room temperature. But when serving, it tastes best when it is chilled.

    How do I know when my churro cheesecake is done?

    The cheesecake is ready when the crescent roll crust turns golden brown and the filling looks set. The center may still have a slight jiggle. Let it cool completely before slicing.

    Churro cheesecake in a white plate
    5 from 3 votes
    Print Pin Recipe

    Churro Cheesecake Recipe with Crescent Rolls

    This churro cheesecake recipe with crescent rolls is creamy, buttery, and topped with sweet cinnamon sugar. Made with ready-made crescent dough and a rich cream cheese filling!
    Prep Time15 minutes mins
    Cook Time35 minutes mins
    Cool Time2 hours hrs
    Total Time2 hours hrs 50 minutes mins
    Course: Dessert, Snack
    Cuisine: Fusion (American-Filipino)
    Servings: 12 slices
    Calories: 878kcal
    Author: Lainey
    Prevent your screen from going dark

    Ingredients

    • 2 (8 oz) packages cream cheese softened
    • 1 large egg
    • 1 teaspoon vanilla extract
    • ½ cup sugar
    • 2 (8 oz) cans crescent dinner rolls

    Topping

    • ½ cup sugar
    • 1 tablespoon ground cinnamon

    Instructions

    Prepare the Cheesecake Filling

    • Preheat the oven to 350°F (175°C) and lightly grease a 9×13-inch baking pan. Next, beat the softened cream cheese in a large bowl until smooth and free of lumps.
    • Then, add the vanilla extract, egg, and ½ cup sugar. Mix until everything is smooth and well combined.

    Assemble the Churro Cheesecake

    • Open one can of crescent rolls and spread the dough evenly across the bottom of the prepared pan. Press the seams together to close any gaps.
    • Next, pour the cream cheese mixture over the bottom crust. Spread it evenly with a spatula.
    • Roll out the second can of crescent dough on parchment paper and press the seams together. Then, carefully place it over the cream cheese filling.

    Bake and Top

    • Bake for 30–35 minutes, or until the top crust is golden brown and the filling is set. Then, remove the cheesecake from the oven.
    • While the cheesecake cools, combine ½ cup sugar and 1 tablespoon ground cinnamon in a small bowl. Stir until evenly mixed.
    • Allow the cheesecake to cool completely, about 2 hours. Then, sprinkle the cinnamon-sugar mixture evenly over the top.

    Chill and Serve

    • Next, refrigerate the cheesecake until chilled for the best texture. Lastly, cut it into 12 slices and serve.
    Leave a Comment
    Serving: 1 sliceCalories: 878kcalCarbohydrates: 207gProtein: 6gFat: 6gSaturated Fat: 2gPolyunsaturated Fat: 1gMonounsaturated Fat: 2gTrans Fat: 0.02gCholesterol: 166mgSodium: 88mgPotassium: 108mgFiber: 4gSugar: 201gVitamin A: 288IUVitamin C: 0.3mgCalcium: 109mgIron: 2mg

    Watch The Recipe Video!

    QR Code
    Did you make this recipe?Share it on instagram or tag @simplybakings or #simplybakings!

    You Might Also Like:

    • Oreo Waffles
    • Nutella Cheesecake
    • Strawberry Stuffed Cheesecake

    Recipes for Every Moment

    Hosting a party and need a golden brown dessert without long prep? This easy churro cheesecake with crescent rolls is creamy, sweet, and perfect for sharing. Make ahead, chill, and serve anytime!

    Cheesecake, Desserts, Snacks

    Banana Bread Cookies

    May 9, 2016 · 22 Comments

    banana bread cookies

    This is a cookie version of the ever-famous Banana bread, the Banana Bread Cookies! They are perfect for dunking into hot milk or coffee, whichever you like to drink with!

    Banana Bread Cookies

    Tips and Procedures: 

    • Before baking this cookie, make sure you have refrigerated the dough for at least 30 minutes or longer. It improves the texture of the cookies and makes the cookie dough so much easier to scoop out.
    • If you love a bit of texture in your cookies, don't hesitate to add oatmeal to this recipe. Just make sure that the kind of oatmeal you use is baked or cooked very quickly since the baking time of this cookie is just under ten minutes or ten minutes at the most.
    • When spacing the cookie dough on your baking mat, make sure to give at least 2 inches of space apart for each dough. This would allow the cookies to spread and they won't stick together after baking.

    How to Make this Banana Bread Cookies Recipe:

    After gathering all the ingredients and tools you will need, you are now ready to make these soft and chewy and of course, delicious Banana Bread cookies!

    Let's begin!

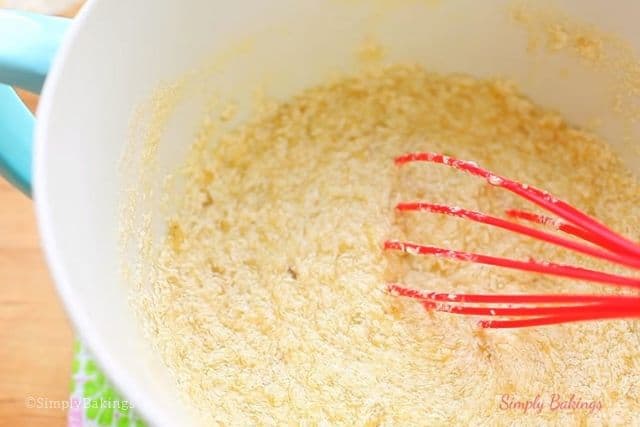
    In a large bowl, add the butter, granulated sugar, vanilla extract, and grab your whisk and mix it all together until it is light and fluffy:

    sugar, butter and vanilla extract in one bowl

    You can now add the eggs and make sure to mix very well:

    added eggs to the mixture of butter, sugar and vanilla

    After that has been thoroughly mixed, add in the cup of mashed bananas and mix it again very well:

    adding the mashed bananas to the mixture

    The mixture of wet ingredients should look like this and there should be no huge banana lumps. Set the bowl aside:

    final mixture of wet ingredients for the banana bread cookies recipe

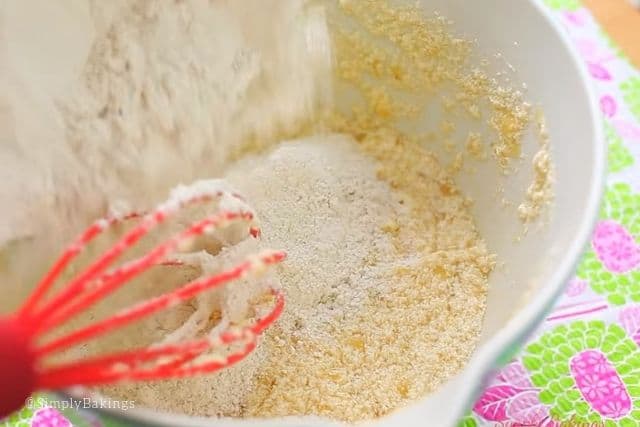
    In another bowl, combine all the dry ingredients: baking powder, salt, baking soda, cinnamon, and all-purpose flour, and mix very well:

    mixing the wet and dry ingredients of the banana bread cookies

    After mixing, pour it onto the wet ingredients and mix until everything is well-combined:

    mixed wet and dry ingredients for the banana bread cookies recipe

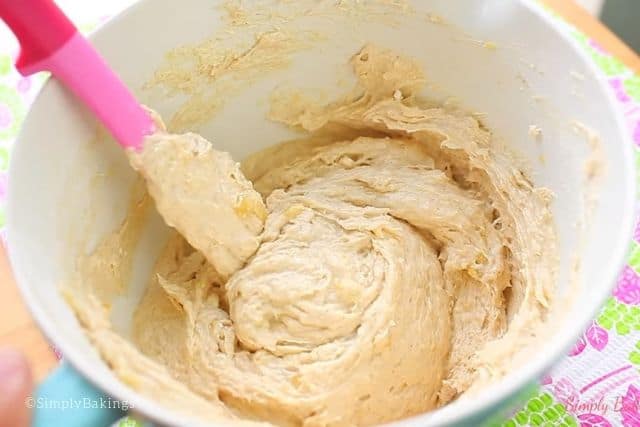
    Tadaaah! Now here is what the batter of your banana bread cookies should look like.

    Don't bake them yet! Chill them for at them 30 minutes - the longer the better 🙂 

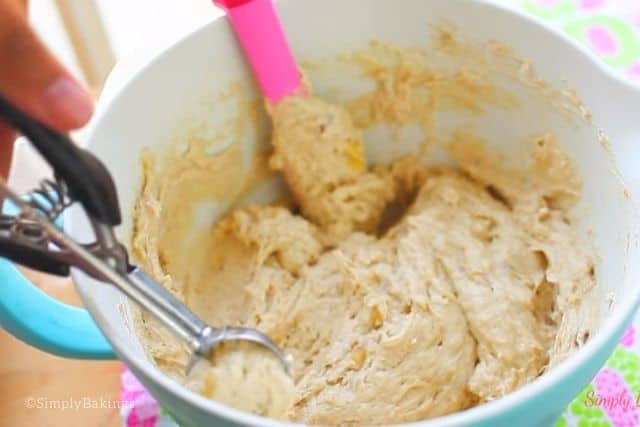
    scooping banana bread cookies batter using a cookie scooper

    Now that you are ready to bake them, grab your handy-dandy cookie scooper, or ice cream scooper if that's what you have, and use it to scoop the banana bread cookie dough, just like so.

    Then, place the dough on the mat and bake 400°F for eight to ten minutes:

    banana bread cookie dough on a baking mat

    I know your kitchen would smell so yummy by this time!

    freshly baked banana bread cookies

    Look at those delicious banana bread cookies!!! They are the best for snacks, a go-to quick pre or post-workout treat, or even breakfast with a cup of coffee! Hands down, these are one of my favorite cookies!

    Banana Bread Cookies on a white plate

    Frequently Asked Questions:

    Q: How many servings would this recipe do?

    A: This delicious and easy banana bread cookie recipe could make up to 12-16 cookies.

    Q: Can I use bananas that have already dark skin for this recipe?

    A: Yes, definitely! Those are the best to use when baking since it is already very ripe and it would smell so good after baking.

    banana bread cookies
    4.60 from 5 votes
    Print Pin Recipe

    Banana Bread Cookies

    Amazingly soft and chewy Banana Bread Cookies which are perfect for snacks, breakfast or movie nights!
    Prep Time10 minutes mins
    Cook Time10 minutes mins
    Chill Time30 minutes mins
    Total Time50 minutes mins
    Course: Cookies, Snacks
    Author: Lainey
    Prevent your screen from going dark

    Ingredients

    • ⅔ cups butter
    • 1 ¼ cups sugar
    • 1 teaspoon vanilla extract
    • 2 eggs
    • 1 cup banana mashed (2 ½ medium sized bananas)
    • 2 ¼ cup flour
    • 2 teaspoons baking powder
    • ¼ teaspoon baking soda
    • ½ teaspoon salt
    • ½ teaspoon cinnamon

    Instructions

    • In a large bowl, add the butter, granulated sugar, vanilla extract and grab your whisk and mix it all together until it is light and fluffy.
    • You can now add the eggs and make sure to mix very well.
    • After that has been thoroughly mixed, add in the cup of mashed bananas and mix it again very well. Set the bowl aside.
    • In another bowl, combine all the dry ingredients: baking powder, salt, baking soda, cinnamon, and all-purpose flour and mix very well. After mixing, pour it onto the wet ingredients and mix until everything is well-combined.
    • Chill them for at them 30 minutes - the longer the better.
    • Scoop the banana bread cookies dough.
    • Place the dough on the mat.
    • Bake at 400°F for eight to ten minutes. Cool before serving.
    Leave a Comment
    QR Code
    Did you make this recipe?Share it on instagram or tag @simplybakings or #simplybakings!

    NEVER MISS A RECIPE!

    PINTEREST / FACEBOOK / INSTAGRAM / TWITTER

    If you’ve tried this or any other of my recipes, don’t forget to rate the recipe and to leave me a comment. I love hearing from you!

    Breakfast & Brunch, Cookies, Desserts

    Easy No Bake Snickers Cheesecake

    May 6, 2016 · 8 Comments

    This Easy No Bake Snickers Cheesecake is rich, creamy, and loaded with chunks of Snickers, peanut butter, and cream cheese in every bite. It’s an easy make ahead dessert with no oven required, perfect for parties, holidays, or anytime you’re craving something sweet.

    Looking for more indulgent dessert recipes? Try our NO BAKE Banana Strawberry Pie or Ube Tarts for more sweet treats to satisfy your cravings!

    [feast_advanced_jump_to]

    Substitutions

    • Graham Cracker Crust - Crushed Oreo cookies or digestive biscuits can replace graham cracker crumbs for the base.
    • Whipped Cream - Cool Whip or double cream can be used in place of whipped cream for the topping.

    Storage

    • Refrigerator - Store the cheesecake in the fridge in an airtight container or covered springform pan to maintain its freshness.
    • Leftovers - If you have any leftovers, store them in the fridge and consume within 2-3 days for the best taste and texture.

    Ingredients

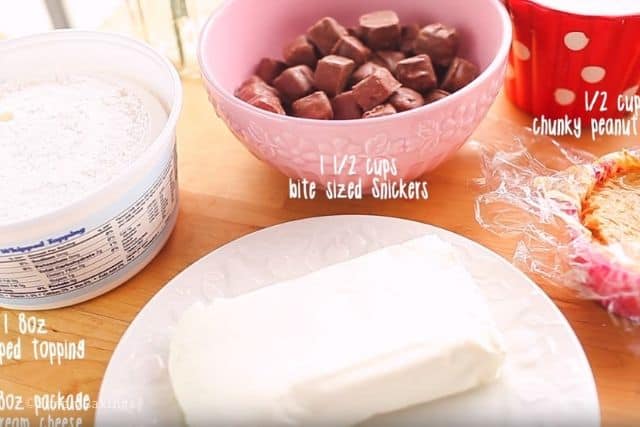
    Here is the quick look of the ingredients for Snickers Bites Cheesecake:

    • cream cheese
    • powdered sugar
    • chunky peanut butter
    • whipped topping
    • Snickers bite-sized
    • pre made graham cracker pie crust

    See recipe card for quantities.

    ingredients of the snickers bites cheesecake recipe

    Now that we have all the ingredients ready, let's begin!

    Instructions

    In a large bowl, add the cream cheese and mix until it’s fluffy. When you get the fluffy consistency that we want, you can now add the powdered sugar, peanut butter, and mix until it’s well combined:

    adding powdered sugar and crunchy peanut butter to the fluffy cream cheese mixture

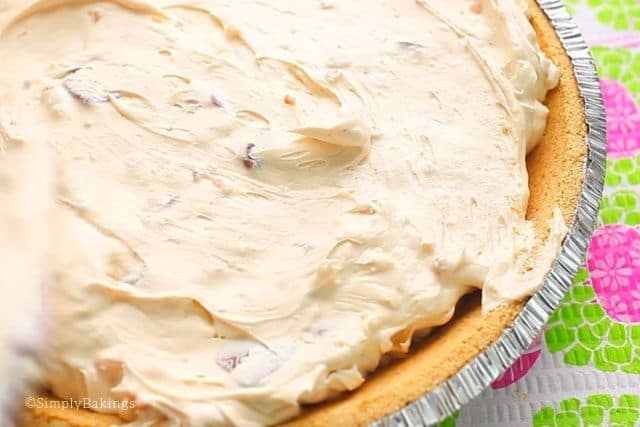
    Then add the whipped topping and the snickers and mix with a spatula. Then pour it into the graham cracker crust. Make sure to level off the cheesecake mixture using a spatula or any kitchen tool that has a flat end:

    placing the cheesecake mixture into the pre-made graham pie crust

    Refrigerate at least 4 hours or best overnight. Decorate the cheesecake as you please and serve chilled.

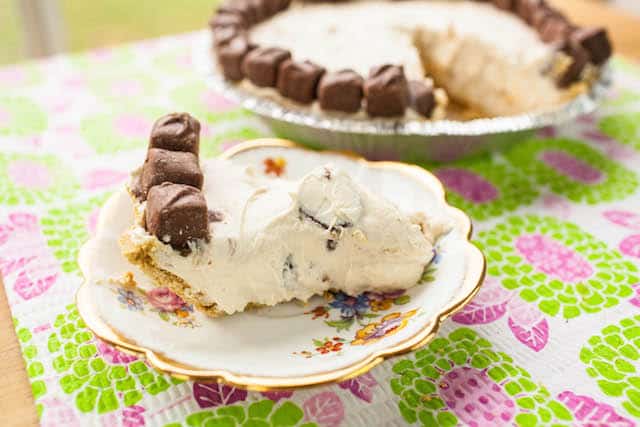
    no bake snickers bites cheesecake

    ⭐ Top Tip

    • Decorate and Drizzle: Stir in chopped peanuts for extra texture, drizzle with carnation caramel or dulce de leche, and melt white or milk chocolate in the microwave for a decorative finish.

    Frequently Asked Questions

    Does no-bake cheesecake get firm?

    Yes, no-bake cheesecake does get firm after chilling in the refrigerator for several hours.

    Why is my no-bake cheesecake not firming up?

    If your no-bake cheesecake isn't firming up, it might need more chilling time or you may need to check if the ingredients were mixed thoroughly.

    Which is better baked cheesecake or no-bake?

    Both baked and no-bake cheesecakes have their own unique textures and flavors, so it really depends on personal preference.

    Here are more cheesecake recipes you will surely love:

    • Best Vegan Fruit Cheesecake
    • Chocolate Chip Cheesecake
    • No-Bake OREO Cheesecake
    • Nutella Cheesecake No BAKE
    • Churro Cheesecake
    no bake snickers bites cheesecake
    5 from 4 votes
    Print Pin Recipe

    Easy No Bake Snickers Cheesecake

    This Easy No Bake Snickers Cheesecake is creamy, chocolatey, and packed with peanut butter and Snickers in every bite. It’s an easy no-bake dessert that’s perfect for making ahead for parties, holidays, or whenever a dessert craving hits.
    Prep Time15 minutes mins
    Chill Time4 hours hrs
    Course: Dessert, Desserts
    Cuisine: Fusion (American-Filipino/Asian)
    Servings: 8 servings
    Calories: 399kcal
    Author: Lainey
    Prevent your screen from going dark

    Ingredients

    • 1 (8 oz) cream cheese softened
    • 1 cup powdered sugar sifted
    • ½ cup chunky peanut butter
    • 1 (8 oz) whipped topping
    • 1 ½ cups Snickers Bite sized
    • 1 graham cracker pie crust

    Instructions

    • In a large mixing bowl, beat the softened cream cheese until smooth and fluffy.
    • Add the powdered sugar and peanut butter. Mix until fully combined and creamy.
    • Fold in the whipped topping until smooth.
    • Gently fold in the chopped Snickers bars with a spatula.
    • Spoon the cheesecake filling into the graham cracker crust and smooth the top.
    • Cover and refrigerate for at least 4 hours, or overnight for best results.
    • Before serving, top with extra chopped Snickers or a drizzle of caramel if desired. Slice and serve chilled.
    Leave a Comment
    Serving: 1gCalories: 399kcalCarbohydrates: 49gProtein: 7gFat: 20gSaturated Fat: 5gPolyunsaturated Fat: 3gMonounsaturated Fat: 10gTrans Fat: 0.1gCholesterol: 4mgSodium: 246mgPotassium: 236mgFiber: 2gSugar: 34gVitamin A: 47IUVitamin C: 0.1mgCalcium: 40mgIron: 1mg

    Watch The Recipe Video!
    QR Code
    Did you make this recipe?Share it on instagram or tag @simplybakings or #simplybakings!

    Cheesecake, No Bake Dessert Recipes

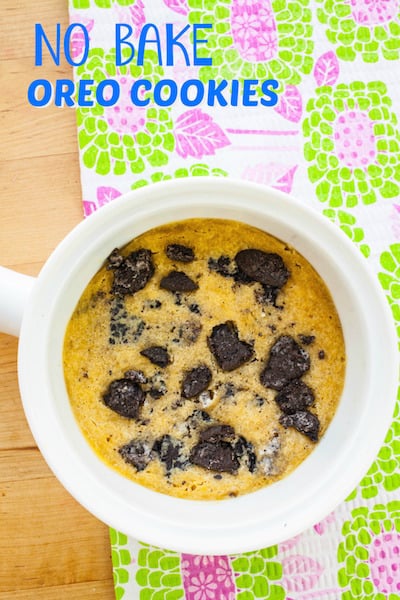
    No Bake Oreo Cookie

    May 2, 2016 · 2 Comments

    oreo cookie

    Here is a no-bake Oreo cookie recipe that uses just a few ingredients!  If you are craving an Oreo dessert, this is the perfect go-to dessert. You don't need to turn on your oven. Just a quick mixing and waiting for the microwave timer to beep, and you have a delicious and satisfying Oreo dessert!

    No bake Oreo Cookies in a white cup

    Tips and Procedures: 

    • Before mixing the dry ingredients, make sure you have sifted them carefully, especially the all-purpose flour and the sugars. This will eliminate lumps that do not taste so good 😉
    • In making desserts like this, make sure you check the butter you are using. Unsalted butter is always the best choice.
    • Choose fresh eggs. The fresher the egg, the easier it is to separate the yolk from the egg white.
    • If you love an extra chocolate treat, drizzle it with chocolate sauce or hot fudge after taking it out from the microwave.
    No Bake oreo cookie in a white cup

    How to Make this No-Bake Oreo Cookie Recipe:

    Gather the ingredients for this No-Bake Oreo Cookie and once the ingredients are all ready, let's begin!

    • unsalted butter, softened
    • brown sugar
    • granulated sugar
    • vanilla extract
    • egg yolk
    • all-purpose flour
    • salt
    • crushed oreo (4 Oreos)

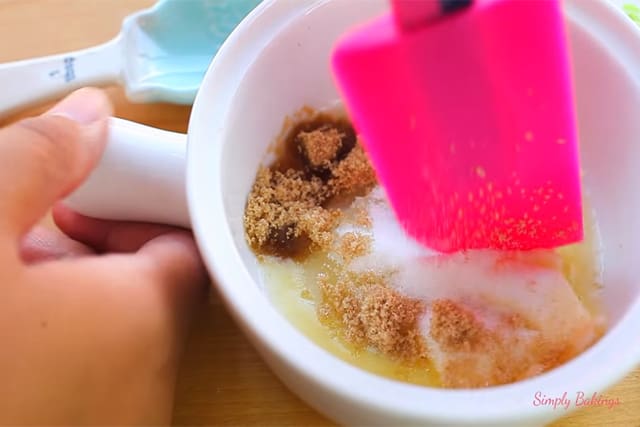
    In a bowl or mug add the softened butter, brown sugar, and granulated sugar, and mix until it’s well combined:

    combining sugars with melted butter in a small white bowl

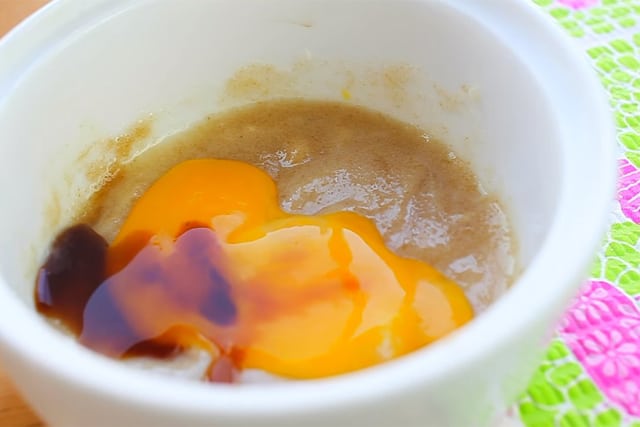
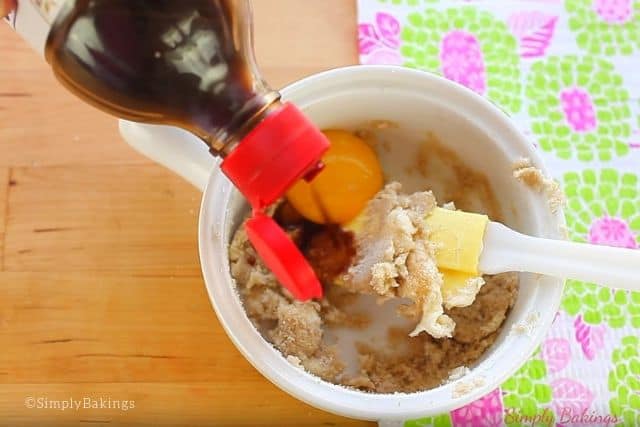
    Next add the egg yolk, and vanilla extract, and mix:

    adding egg to the butter and sugar mixture

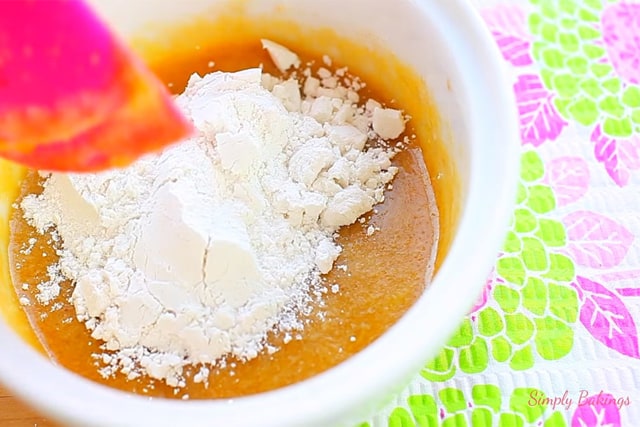
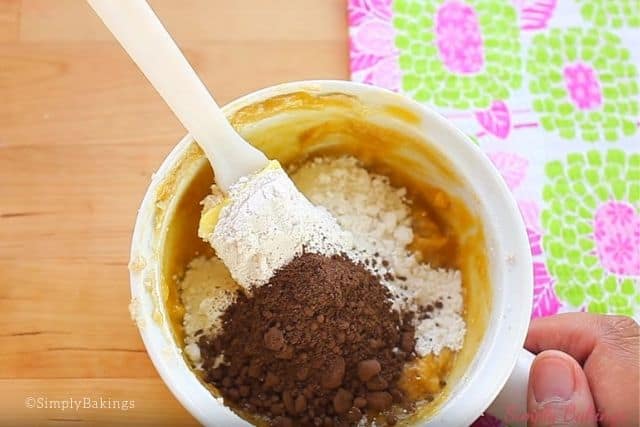
    Then add the all-purpose flour, pinch of salt, and mix:

    adding all purpose flour to the eggs, sugar and butter mixture

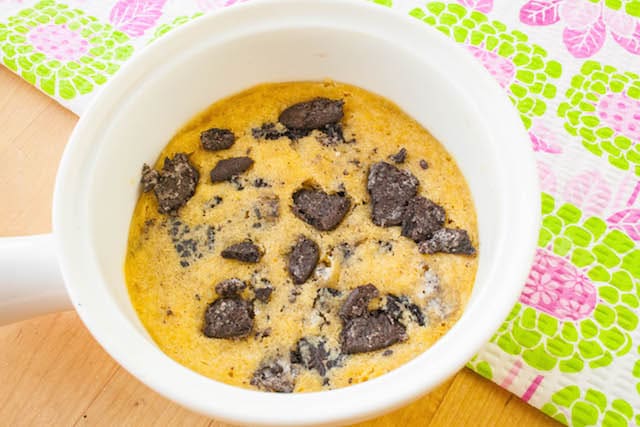
    Add the Oreos, mix, and then place in the microwave on high for about 1 ½ minutes:

    adding in the crushed Oreos to the cookie mixture

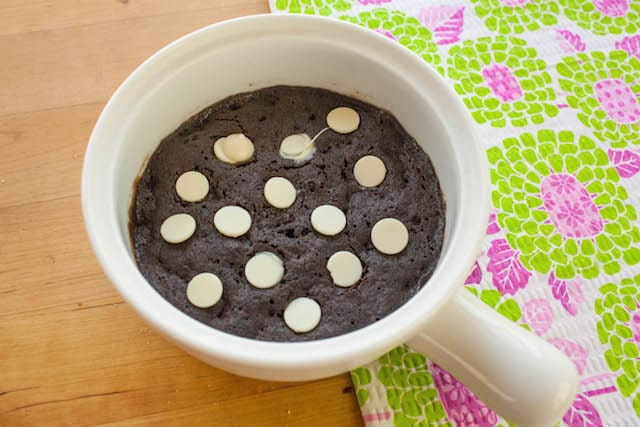
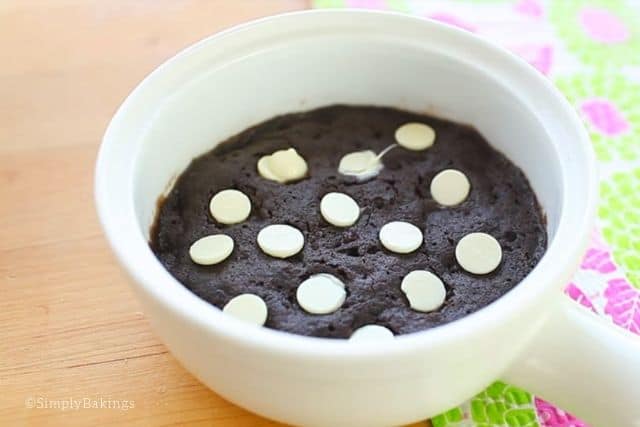
    Yum! This really smells good and I was so excited to take a spoon and taste it!

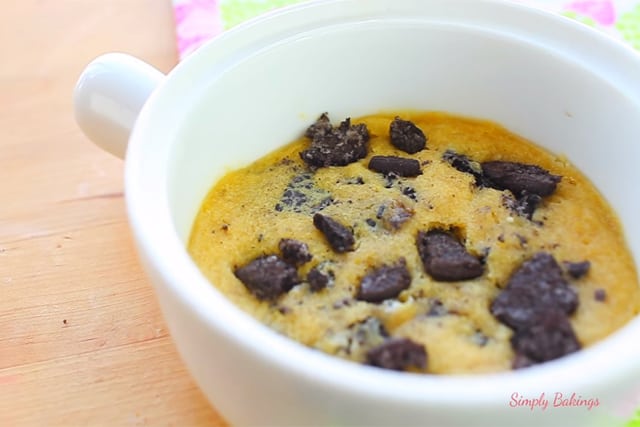
    freshly microwaved No Bake oreo cookie in a small bowl

    Frequently Asked Questions for the No Bake Oreo Cookie Recipe:

    Q: Can I use gluten-free flour for this recipe?

    A: Yes sure you can use the gluten-free flour and add the rest of the ingredients as listed.

    Q: Can I refrigerate this after cooking?

    A: Yes, you can pop this in the fridge. It tastes also delicious when it is chilled.

    Q: What is the yield of this recipe?

    A: This recipe makes only one serving but you can certainly double or triple the quantity of the ingredients if you are making a bigger batch.


    Try more No-Bake and Oreo dessert recipes:

    • No Bake Oreo Pie
    • 3 Ingredient No Bake Oreo Cheesecake
    • 3 Ingredient No Bake Cheesecake
    • No Bake Strawberry Float
    no bake Oreo Cookies in a small white bowl
    No ratings yet
    Print Pin Recipe

    No Bake Oreo Cookie

    This no-bake Oreo cookie which uses just a few ingredients is the perfect go-to dessert for Oreo lovers and for those who want a quick but sumptuous dessert!
    Servings: 1 serving
    Author: Lainey
    Prevent your screen from going dark

    Ingredients

    • 1 tablespoon unsalted butter softened
    • 1 tablespoon brown sugar
    • 1 tablespoon granulated sugar
    • ½ teaspoon vanilla extract
    • 1 egg yolk
    • 3 tablespoons all purpose flour
    • Pinch salt
    • 2-3 tablespoons crushed oreo 4 oreos

    Instructions

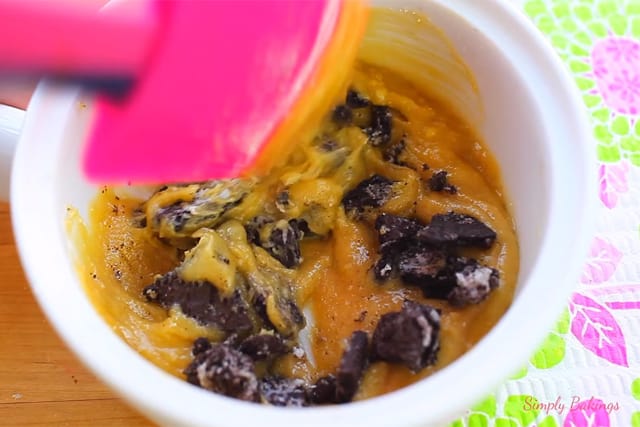
    • In a bowl or mug add the softened butter, brown sugar, granulated sugar and mix until it’s well combined. Next add the egg yolk, vanilla extract, and mix! Then add the all purpose flour, pinch of salt and mix.
    • Add the oreos, mix and then place in the microwave on high for about 1 ½ .
    Leave a Comment

    Watch The Recipe Video!
    QR Code
    Did you make this recipe?Share it on instagram or tag @simplybakings or #simplybakings!

    NEVER MISS A RECIPE!

    PINTEREST / FACEBOOK / INSTAGRAM / TWITTER

    If you’ve tried this or any other of my recipes, don’t forget to rate the recipe and leave me a comment. I love hearing from you!

    Cookies, Desserts

    Strawberry Poke Cake with Pudding

    Apr 22, 2016 · 6 Comments

    strawberry poke cake

    This irresistible allure of a Strawberry Poke Cake with pudding is so refreshing and despite its modest appearance in pictures, this addictive recipe is bound to leave everyone craving for seconds.

    Looking for more summer desserts? Try my Mini Fruit Pizza or Snicker Bites Cheesecake.

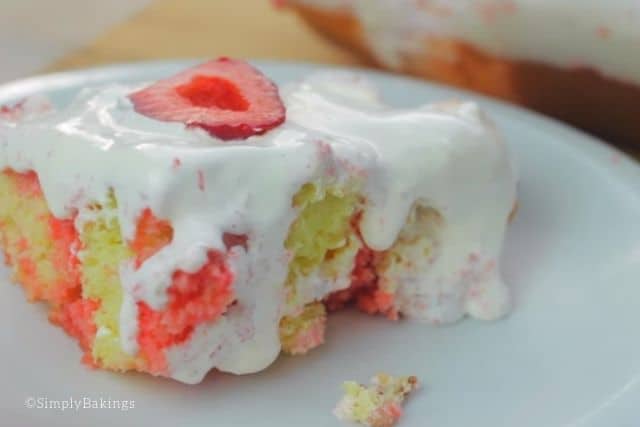
    a slice of Strawberry Poke Cake on a white plate
    [feast_advanced_jump_to]

    Top Tips

    • Poke Holes Strategically: Use the end of a wooden spoon or a fork to poke holes evenly across the cake, ensuring that the pudding can seep into the cake effectively.
    • I prefer using cooking spray to grease the pan for effortless removal.

    Variations

    • Opt for a strawberry cake mix to enhance the strawberry flavor.
      • When utilizing strawberry cake mix, opt for vanilla pudding to fill the poked holes.
    • Add vanilla extract to enhance the cake with a rich vanilla flavor.
    • Mixed Berry Poke Cake: Use a combination of strawberries, blueberries, raspberries, and blackberries for a vibrant and flavorful twist.
    • Chocolate Covered Strawberry Poke Cake: Drizzle melted chocolate over the cake after adding the pudding for a decadent twist on the classic strawberry dessert.
    • Coconut Strawberry Poke Cake: Sprinkle shredded coconut over the cake after adding the pudding for a tropical flavor boost.
    • Almond Strawberry Poke Cake: Add almond extract to the cake batter and top the cake with sliced almonds for a nutty complement to the sweet strawberries.
    • Strawberry Cheesecake Poke Cake: Swirl strawberry jam into the cream cheese frosting before spreading it over the cake for a decadent cheesecake-inspired dessert.

    Substitutions

    • Boxed Cake Mix: If you prefer homemade, you can substitute the cake mix with your favorite from-scratch cake recipe.
      • Use white cake mix, yellow cake mix, or chocolate cake mix instead. This recipe is very versatile.
    • Substitute whipped topping with heavy whipping cream whipped in a stand mixer using a whisk attachment to achieve a creamy frosting texture.
    • Pudding Mix: Instead of using instant pudding mix, you can make a homemade pudding using cornstarch, milk, sugar, and strawberry extract.
    • Strawberries: While fresh strawberries are ideal, you can also use frozen strawberries that have been thawed and drained or canned strawberries in syrup (just adjust the sweetness accordingly).
    • Whipped Topping: If you prefer not to use whipped topping, you can make homemade whipped cream using heavy cream and powdered sugar, or substitute with stabilized whipped cream.
    • Garnishes: Instead of strawberries, you can use other fruits like raspberries, blueberries, or a combination of berries. Additionally, you can garnish with chocolate shavings, toasted coconut, or chopped nuts for added texture and flavor.
    • Cake Base: Instead of a traditional cake base, you can use angel food cake, pound cake, or even brownies for a different flavor profile.
    • Liquid: Instead of water, you can use milk or buttermilk for a richer cake texture.

    Storage

    • Refrigerator: Since the cake contains pudding and whipped topping, it should be stored in the refrigerator. Cover the cake with plastic wrap or transfer it to an airtight container to prevent it from drying out or absorbing odors from the refrigerator. Properly stored, the cake can last for 3-4 days in the refrigerator.
    • Serve Chilled: For the best taste and texture, serve the cake chilled directly from the refrigerator. This helps maintain the integrity of the pudding and whipped topping layers.

    Ingredients

    • lemon cake mix
    • water
    • lemonade
    • strawberry flavored Jello (pudding mix)
    • whipped topping (like cool whip)
    • strawberries

    Instructions

    Before starting, don't forget to preheat oven to 350 degrees F and prepare the ingredients ahead. It saves you a lot of time to lay them all out, plus, you know you are not missing an ingredient.

    After that, go ahead and prepare a 9x13 inch pan by greasing it.

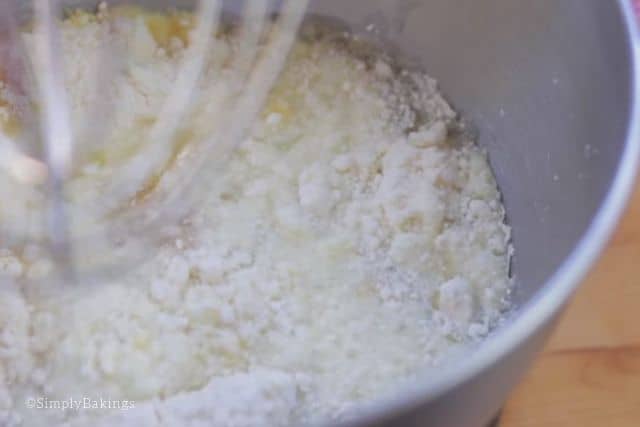
    Follow the instructions provided on the cake mix box:

    mixing the ingredients of strawberry poke cake

    Then place it in the oven for 30-35 minutes. Remove from the oven and allow it to cool completely.

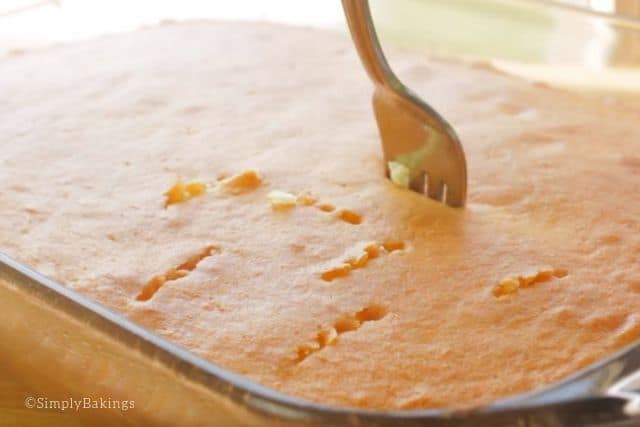
    Using a fork, poke holes all over the cake and set aside.

    poking the cake with a fork

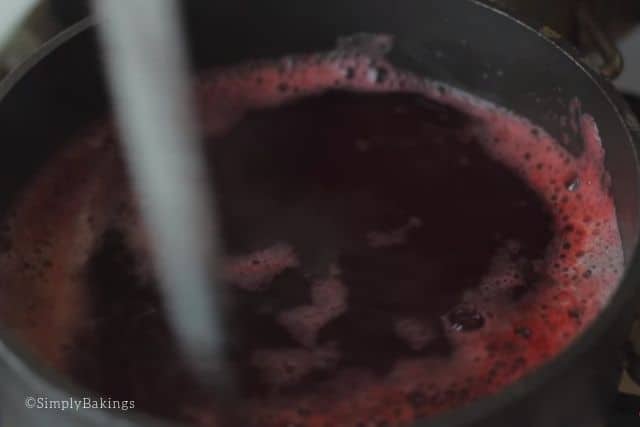
    In a saucepan, add the water, lemonade, and bring to a rolling boil. Next, add the strawberry jello and mix until well combined. Allow this to cool completely.

    boiling strawberry jello in a saucepan

    Once the jello mixture has cooled, pour over the cake and then set aside to allow the cake soak in the jello

    pouring out the cooked strawberry jello on the cake

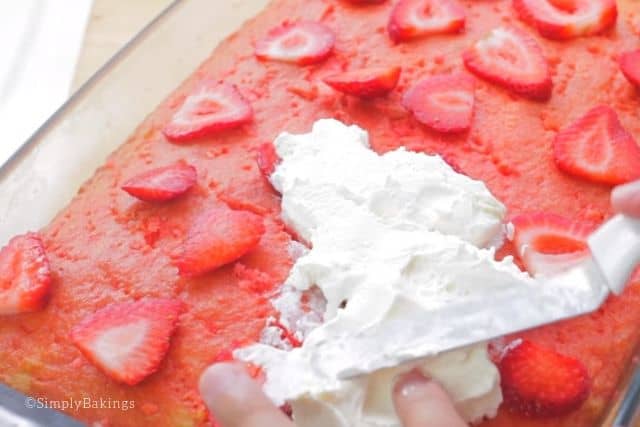
    Add strawberries, whipped topping and decorate!

    topping the cake with fresh strawberries and whipped topping

    Cover the whole top of the cake with whipped topping:

    ready to be chilled strawberry poke cake

    Refrigerate and chill your delicious Strawberry Poke Cake. And after a few hours of patiently waiting, here it is!

    chilled strawberry poke cake

    FAQ

    Can you add instant pudding mix to cake mix?

    Yes, you can add instant pudding mix to cake mix. Adding pudding mix to cake batter can result in a moister and denser cake with a richer flavor. Just be sure to follow the instructions on both the cake mix and pudding mix packages, and adjust any additional ingredients or baking times accordingly.

    What does pudding do in baking?

    Pudding adds moisture, richness, and flavor to baked goods, resulting in a softer texture and enhancing the overall taste of the dessert.

    Can I do this a few days ahead?

    Yes, sure you can. You can opt to decorate it ahead or decorate it with fresh sliced strawberries just before serving.

    Is jello the same with gelatin?

    Yes, Jello is a brand name for flavored gelatin, so they are essentially the same thing.

    strawberry poke cake
    5 from 3 votes
    Print Pin Recipe

    Strawberry Poke Cake with Pudding

    Savor the creative and delicious flavors of this Strawberry Poke Cake, an ideal addition to potlucks and parties! Indulge in its irresistible charm, featuring creamy pudding and a promise of leaving everyone craving for more.
    Prep Time10 minutes mins
    Bake Time35 minutes mins
    Total Time45 minutes mins
    Course: Dessert
    Cuisine: American
    Servings: 12 servings
    Calories: 130kcal
    Author: Lainey
    Prevent your screen from going dark

    Ingredients

    • 1 (15.25) ox lemon cake mix Follow the instructions provided on the cake mix box.

    Pudding Mixture

    • 1 cup water
    • 1 cup strawberry lemonade *
    • 1 (3) oz strawberry jello or vanilla pudding

    Assembly

    • 1 (8) oz whipped topping
    • 1 (8) oz strawberries sliced

    Instructions

    • Preheat oven to 350F and prepare 9x13 inch pan by greasing it.
    • Follow the instructions provided on the cake mix box, then remove from the oven and allow it to cool completely.
    • Using a fork, poke holes all over the cake and set aside.
    • In a saucepan, add the water, lemonade, and bring to a rolling boil. Next add the strawberry jello and mix until well combined. Allow this to cool completely.
    • Once the jello mixture has cooled, pour over the cake and then set aside to allow the cake soak in the jello.
    • For decoration, garnish with fresh strawberries and whipped topping. For optimal flavor, refrigerate to chill before serving.
    Leave a Comment

    Notes

    *feel free to use lemonade
    Serving: 1gCalories: 130kcalCarbohydrates: 32gProtein: 0.2gFat: 0.2gSaturated Fat: 0.1gMonounsaturated Fat: 0.02gCholesterol: 0.02mgSodium: 39mgPotassium: 3mgFiber: 0.03gSugar: 30gVitamin A: 1IUVitamin C: 1mgCalcium: 10mgIron: 0.02mg

    Watch The Recipe Video!
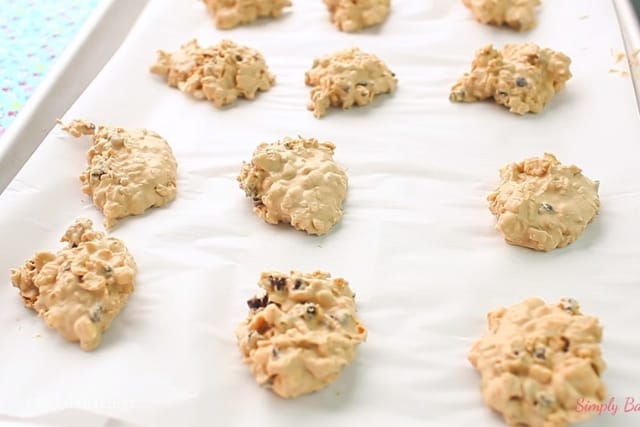
    QR Code
    Did you make this recipe?Share it on instagram or tag @simplybakings or #simplybakings!

    Cake, Desserts

    Mexican Fried Ice Cream Dessert

    Apr 20, 2016 · 4 Comments

    Mexican Fried Ice Cream Dessert in a glass bowl

    A fried ice cream recipe that requires no deep-frying? Yes, that is possible with Mexican Fried Ice Cream Dessert! With just a few ingredients found in your pantry and freezer, treat yourself. Serve your guests this delicious and easy-to-make dessert this summer or at any party at home!

    If you enjoy fun and sweet desserts, try our Cinnamon Roll Bites or creamy Easy Banana Pudding Ice Cream next.

    Serving of Mexican Fried Ice Cream Dessert
    [feast_advanced_jump_to]

    Why You’ll Love This Recipe

    Getting ready for a Cinco de Mayo party or any party? This recipe is beginner-friendly and doesn’t require frying. It’s quick, simple, and perfect for making with kids.

    You can make it dairy-free or vegan by swapping ice cream and butter with plant-based versions. It’s flexible and customizable to your needs.

    Mix the whipped cream well until it really shows soft peaks. I promise, your ice cream mixture would taste so much better if your whipped cream is creamed very well.

    Ingredients

    Listed below are all the ingredients you will need:

    • Unsalted butter
    • Brown sugar
    • Corn flakes
    • Vanilla ice cream
    • Heavy whipping cream
    • Powdered sugar
    • Vanilla extract
    • Ground cinnamon

    See the recipe card for quantities.

    Instructions

    Prepare the Crust:

    1. Place cornflakes in a large ziplock bag. Crush lightly using a rolling pin or your hands. But make sure to keep some texture.

    2. In a large mixing bowl, combine the melted butter and brown sugar. Stir until sugar is dissolved.

    3. Add the crushed cornflakes into the bowl and mix until well coated. Set aside.

    Layer the Dessert:

    4. Let the vanilla ice cream sit out for about 15 minutes to soften.

    5. In a 9x13-inch baking pan or baking sheet, press half of the cornflake mixture into the bottom to create a crust.

    6. Using a small ice cream scoop or spoon, scoop the softened ice cream onto the crust.

    Putting ice cream on top of the cornflakes

    7. Gently spread each ice cream ball evenly over the crust without pressing too hard.

    8. Sprinkle the remaining cornflake mixture evenly over the top.

    9. Place the dessert in the freezer to firm up while you make the whipped cream.

    Make the Whipped Cream:

    10. In a clean bowl, beat together the heavy whipping cream, powdered sugar, and vanilla extract until soft peaks form.

    Making the whipped cream using a mixer

    Finish and Freeze:

    11. Remove the dessert from the freezer and spread the whipped cream over the top layer.

    12. Sprinkle with ground cinnamon for garnish.

    Sprinkling cinammon over the fried ice cream

    13. Return the pan to the freezer and freeze for at least 2 hours, or until fully set.

    14. Serve and enjoy!

    Mexican Fried Ice Cream Dessert serving on the table

    Substitutions and Variations

    • Ingredient Swap
      Swap vanilla ice cream with chocolate, strawberry, or even vegan coconut ice cream.
      Use honey instead of sugar or top with fresh fruit for a lighter twist.
    • Variation
      Add a drizzle of caramel or chocolate sauce for more flavor.
      Feel free to add your favorite chocolate chips, chocolate syrup/caramel sauce, or cherries.
    • Mistake to Avoid
      Avoid letting the cornflake mixture sit too long in the large bowl, or it will lose its crunch.
    • Storage Tips
      • This dessert stands up well to freezing for 2 weeks, but is best enjoyed fresh.
    Mexican Fried Ice Cream Dessert in a glass bowl

    FAQs

    Does this recipe actually require frying?

    No, the corn flakes give the fried effect without oil.

    Do I have to soften the ice cream?

    Yes, it makes spreading and layering much easier.

    Can I make this ahead for parties?

    Yes, just freeze it overnight and garnish before serving.

    Mexican Fried Ice Cream ready to be served
    No ratings yet
    Print Pin Recipe

    Mexican Fried Ice Cream Dessert

    Make Mexican Fried Ice Cream Dessert without deep-frying and with just a few ingredients. Enjoy the delicious and easy to make dessert, perfect for summer or any party you have at home!
    Prep Time25 minutes mins
    Freezing Time2 hours hrs
    Total Time2 hours hrs 25 minutes mins
    Course: Dessert, Snack
    Cuisine: American, Mexican
    Servings: 12 -16 servings
    Calories: 690kcal
    Author: Lainey
    Prevent your screen from going dark

    Ingredients

    • ¾ cup unsalted butter melted
    • 1½ cups brown sugar
    • 6 cups corn flakes
    • ½ gallon vanilla ice cream softened
    • 1½ cups heavy whipping cream
    • 2 tablespoons powdered sugar
    • 1 teaspoon vanilla extract
    • Ground cinnamon for garnish

    Instructions

    Prepare the Crust:

    • Place corn flakes in a large ziplock bag and crush lightly using a rolling pin or your hands — not too fine; keep some texture.
    • In a large mixing bowl, combine the melted butter and brown sugar. Stir until sugar is dissolved.
    • Add the crushed corn flakes into the bowl and mix until well coated. Set aside.

    Layer the Dessert:

    • Let the vanilla ice cream sit out for about 15 minutes to soften.
    • In a 9x13-inch baking pan, press half of the corn flake mixture into the bottom to create a crust.
    • Using a small ice cream scooper or spoon, scoop the softened ice cream onto the crust.
    • Gently spread the ice cream evenly over the crust without pressing too hard.
    • Sprinkle the remaining corn flake mixture evenly over the top.
    • Place the dessert in the freezer to firm up while you make the whipped cream.

    Make the Whipped Cream:

    • In a clean bowl, beat together the heavy whipping cream, powdered sugar, and vanilla extract until soft peaks form.

    Finish and Freeze:

    • Remove the dessert from the freezer and spread the whipped cream over the top layer.
    • Sprinkle with ground cinnamon for garnish.
    • Return the pan to the freezer and freeze for at least 2 hours, or until fully set.
    • Serve and enjoy!
    Leave a Comment
    Serving: 1gCalories: 690kcalCarbohydrates: 78gProtein: 8gFat: 40gSaturated Fat: 25gPolyunsaturated Fat: 2gMonounsaturated Fat: 10gTrans Fat: 0.5gCholesterol: 134mgSodium: 246mgPotassium: 406mgFiber: 2gSugar: 64gVitamin A: 1706IUVitamin C: 4mgCalcium: 249mgIron: 4mg
    QR Code
    Did you make this recipe?Share it on instagram or tag @simplybakings or #simplybakings!

    You Might Also Like:

    • 5 Ingredient Mocha Ice Cream
    • 3 Ingredient Nutella Popsicles
    • Pumpkin Ice Cream

    Recipes for Every Moment

    Got guests coming, and you need an awesome dessert? This Mexican Fried Ice Cream Dessert is all the creaminess and crunchiness you'll need!

    Desserts, Ice Cream, Snacks

    How to Make Chocolate Cookies in Microwave

    Apr 18, 2016 · 3 Comments

    brownie cookies

    Craving something sweet right now? Let me show you how to make Chocolate Cookies in the Microwave—yep, no oven needed! This super quick and easy treat uses simple ingredients like cocoa powder, brownie chunks, and white chocolate chips for a rich, gooey cookie you can enjoy in just minutes!

    Want more microwave dessert ideas? Try these sweet favorites from Simply Bakings: Graham Cracker Mug Cake, Brownie Mug Cake, or Protein Mug Cake.

    microwave chocolate cookie in a mug
    [feast_advanced_jump_to]

    What is this recipe about?

    This microwave chocolate cookie recipe is a game-changer for anyone who wants a warm, gooey treat fast. It’s designed for one serving, making it perfect for late-night cravings or when you just want a small, sweet bite.

    Mug cookies have become super popular in the last few years thanks to their simplicity, and this one levels up with brownie chunks and white chocolate chips. It’s a single-serve dessert that's ready in less than 2 minutes!

    Substitutions

    • unsalted butter (1 tbsp) – use melted butter, vegan butter, or coconut oil
    • egg yolk – substitute with egg whites, applesauce, or Greek yogurt
    • unsweetened cocoa powder – use carob powder or chocolate protein powder
    • brownie pieces – crushed cookies or chocolate chips
    • white chocolate chips – swap with semisweet chocolate chips, dark chocolate, or chopped chocolate bar
    no bake double chocolate brownie cookies on a white mug

    Variations

    • With oats – add a tbsp of quick-cooking oats for texture
    • Nutty twist – mix in a cup of peanut butter or chopped nuts
    • Dessert-style – top with a scoop of ice cream
    • Double chocolate chip – mix in both cocoa powder and semisweet chocolate chips

    Storage

    • Eat Immediately – Best when fresh and warm
    • Countertop – Can sit covered for up to 4 hours
    • Fridge – Store for up to 2 days, reheat in the microwave for 10–15 seconds
    • Freezing – Not recommended due to single-serve nature

    Ingredients

    • unsalted butter
    • brown sugar
    • white sugar
    • egg yolk
    • vanilla extract
    • all-purpose flour
    • unsweetened cocoa powder
    • salt
    • brownie pieces
    • white chocolate chips

    Instructions

    In a mixing bowl or mug, grease the side with butter before starting to mix the ingredients.

    After greasing the bowl or mug, add the brown and white sugar and mix until light and fluffy:

    mixing butter and sugar on a white mug

    Add the egg yolk, vanilla extract and mix until well combined:

    adding egg and vanilla to the sugar and butter mixture

    Add the all-purpose flour, unsweetened cocoa powder, salt and continue mixing:

    adding unsweetened cocoa butter and all purpose flour to the wet ingredients

    Finally, add the brownie pieces and microwave for 1 minute and 20 seconds on high:

    final mixture of the no bake double chocolate brownie cookie

    Add chocolate chips on top and serve immediately:

    freshly cooked no bake double chocolate brownie cookie in a white mug

    Yes, hurry to take your spoon and have a bite! Yum!

    Top Tips

    • If you want to keep this cookie longer, you can use a mug or bowl with a lid, or simply transfer it to an airtight container and place in the chiller.
    • Do not overmix the ingredients to maintain its soft and chewy texture.
    • You can mix in your favorite nuts like macadamia nuts, almonds, or even chocolate chunks. I am sure those will be delicious additions to this recipe.

    FAQ

    Do I need parchment paper for this recipe?

    Nope! Just use a safe bowl or mug—no paper is needed.

    How do I know when it’s done?

    It is done if the top will look set and slightly firm to the touch. Start with 1 minute and check in 10-second intervals.

    Can you cook cookie dough in the microwave?

    Yes, you can cook cookie dough in the microwave! Just make sure it’s in a microwave-safe bowl and cook in short intervals until set—usually around 1 to 2 minutes for this recipe.

    getting a piece of chocolate cookie in a mug using a spoon
    5 from 1 vote
    Print Pin Recipe

    How to Make Chocolate Cookies in Microwave

    Craving sweets? Make this Chocolate Cookie in the Microwave in under 2 mins! It's a quick and easy single serve chocolate chip cookie made with pantry ingredients—perfect for your sweet tooth!
    Prep Time4 minutes mins
    Cook Time2 minutes mins
    Total Time6 minutes mins
    Course: Cookies, Desserts, No-bake Desserts
    Cuisine: American
    Servings: 1 serving
    Calories: 361kcal
    Author: Lainey
    Prevent your screen from going dark

    Ingredients

    • 1 tablespoon unsalted butter softened
    • 1 tablespoon brown sugar
    • 1 tablespoon white sugar
    • 1 egg yolk
    • ½ teaspoon vanilla extract
    • 2 tablespoons all purpose flour
    • 1 tablespoon unsweetened cocoa powder
    • pinch salt
    • 2 tablespoons brownie pieces
    • 10-15 white chocolate chips

    Instructions

    • In a bowl or mug, grease the side with butter, then add the brown and white sugar and mix until light and fluffy. Add the egg yolk, vanilla extract and mix until well combined.
    • Add the all purpose flour, unsweetened cocoa powder, salt and continue mixing. Finally add the brownie pieces and microwave for 1 minute and 20 seconds on high.
    • Add chocolate chips and serve immediately.
    Leave a Comment
    Serving: 1servingCalories: 361kcalCarbohydrates: 40gProtein: 6gFat: 20gSaturated Fat: 11gPolyunsaturated Fat: 1gMonounsaturated Fat: 6gTrans Fat: 0.5gCholesterol: 227mgSodium: 412mgPotassium: 163mgFiber: 2gSugar: 18gVitamin A: 612IUVitamin C: 0.1mgCalcium: 65mgIron: 2mg

    Watch The Recipe Video!
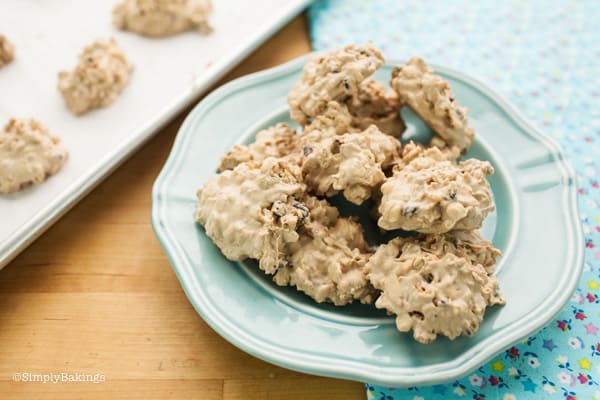
    QR Code
    Did you make this recipe?Share it on instagram or tag @simplybakings or #simplybakings!

    Cookies, No Bake Dessert Recipes

    Easy Baked Bibingka Recipe

    Apr 15, 2016 · 15 Comments

    Slices of warm bibingka served on a vibrant green plate.

    This easy baked bibingka recipe brings you the ultimate warm, fluffy treat, baked right in a pan with creamy cream cheese and sweet pineapple for a perfect sweet-savory bite every time.

    bibingka slices, A Filipino dessert on a green plate
    [feast_advanced_jump_to]

    What Is the Bibingka Recipe?

    Bibingka is a traditional Filipino rice cake made with rice flour, coconut milk, sugar, and eggs. Traditionally baked in banana leaves over coals to impart a subtle smoky aroma, it has a signature sweet-and-salty taste, best enjoyed topped with melted cheese, egg slices, and grated cheese.

    Growing up in the United States, I loved hearing stories about my grandma making bibingka the traditional way back home. Baking it over hot coals in clay pots, wrapped in banana leaves and topped with salted egg.

    Filipino dessert Bibingka slices on a green plate

    I wasn’t able to recreate that particular old-school setup in my own kitchen, but missing her classic recipe inspired me to put my own modern spin on it. By redefining her traditional dish with my own version, I get to honor those family roots while creating a cozy new tradition of my own.

    Ingredients

    Listed below are all the ingredients you will need for your bibingka recipe:

    • package cream cheese
    • granulated sugar
    • eggs
    • vanilla
    • canned cream of coconut
    • canned crushed pineapple
    • coconut milk
    • glutinous rice flour
    • baking powder
    • brown sugar
    • grated cheese
    • butter
    bibingka ingredients: vanilla, cream cheese, evaporated milk, coconut milk, baking powder, crushed pineapple, eggs, butter, granulated sugar, glutinous rice

    Instructions

    Before mixing the ingredients for the bibingka recipe, preheat the oven to 350°F and grease the 13x9-inch pan.

    In a large bowl, mix the cream cheese and sugar until it's creamy.

    mixed ingredients of bibingka recipe mixed with a hand beater on a clear bowl

    Add the eggs, vanilla extract, cream of coconut, butter, and evaporated milk, and mix.

    eggs, vanilla, milk and mixed ingredients for bibingka recipe

    You should mix it well until the batter looks like this.

    bibingka batter on a clear bowl

    Then add the crushed pineapples, sweet rice flour, and baking powder until it’s well incorporated.

    mixing flour to bibingka batter using a hand mixer

    The final batter should be smooth and without lumps from the sweet rice flour.

    ready to bake bibingka batter in a clear bowl

    Pour into a pan, sprinkle with brown sugar, and bake for 50 minutes to 1 hour.

    bibingka batter on a clear baking dish

    Allow to cool completely before serving.

    baked bibingka

    Here is an up-close shot of the bibingka slice. Soft, fluffy, and every bit as delicious as it looks!

    a slice of bibingka

    Substitutions & Variations

    You don't need traditional clay pots to make this classic Filipino dessert at home. If banana leaves aren't available, line your pan with aluminum foil brushed with butter to prevent sticking. For a smooth batter and faster prep time, make sure all wet ingredients like coconut milk, butter, and eggs are at room temperature before mixing.

    Texture: Swap regular rice flour for glutinous rice flour to create a chewier Royal Bibingka style.

    Toppings: Replace salted duck eggs with cheddar cheese, or finish with a drizzle of condensed milk.

    Flavor: Stir a splash of pandan extract or ube halaya into your liquid mix for extra color and flavor.

    Storage Tips

    To keep your classic bibingka fresh and tasty, let the baked rice cakes cool completely before placing them in an airtight container lined with greaseproof paper to keep them moist.

    If you’re going to reheat them later, gently whisk a thin layer of melted butter on top before placing them back in the molds to keep the mixture soft, tasty, and as light as it was when you first baked it.

    FAQ

    Where did bibingka originate?

    Bibingka originated in the Philippines, where it is a traditional native rice cake (kakanin). While early pre-colonial versions were simple mixtures of ground rice and water cooked in clay pots, some culinary historians note linguistic and trade ties to Southeast Asia and China.

    What's the secret to the best bibingka?

    The secret to the best bibingka is a mix of authentic banana leaf lining, rich coconut milk, and the perfect balance of sweet and salty toppings like salted egg and cheese, baked until smoky and soft.

    Can I use rice flour instead of glutinous rice flour for bibingka?

    Yes, you can use regular rice flour instead of glutinous rice flour for bibingka, but the texture and leavening requirements will change.

    How to make bibingka without an oven?

    To make soft and fluffy bibingka without an oven, you can cook the batter in a covered frying pan or skillet on your stovetop over low heat. Line your pan with banana leaves for that classic aroma and to keep the bottom from burning.

    How many days does bibingka last?

    Bibingka lasts for 2 to 3 days at room temperature when wrapped well. Because it contains coconut milk, dairy, and eggs, it spoils fast if left out too long

    Slices of warm bibingka served on a vibrant green plate.
    5 from 6 votes
    Print Pin Recipe

    Easy Baked Bibingka Recipe

    This quick and easy bibingka recipe is made with creamy cream cheese, sweet crushed pineapple, and baked right in a greased pan. The perfect sweet-savory combo every time! 
    Prep Time15 minutes mins
    Baking Time1 hour hr
    Total Time1 hour hr 15 minutes mins
    Course: Desserts
    Cuisine: Filipino
    Servings: 8 people
    Calories: 545kcal
    Author: Lainey
    Prevent your screen from going dark

    Ingredients

    • 1 (8-oz) package of cream cheese
    • 1 cups granulated sugar
    • 3 eggs
    • 1 tablespoon vanilla
    • ½ cup melted butter
    • 1 (15-oz) cream of coconut
    • 1 cup evaporated milk
    • 1 (8-oz) crushed pineapple
    • 3 ½ cups sweet rice flour
    • 1 tablespoon baking powder
    • 1-2 tablespoons brown sugar
    • grated cheese

    Instructions

    • Preheat the oven to 350°F, and grease a 13x9-inch pan.
    • In a large bowl, mix the cream cheese and sugar until creamy.
    • Add the eggs, vanilla extract, cream of coconut, butter, and evaporated milk, and mix.
    • Then add the crushed pineapples, sweet rice flour and baking powder until it’s well incorporated.
    • Pour into the pan, sprinkle with brown sugar, and bake it for 50 minutes to 1 hour.
    • Allow to cool completely and serve.
    Leave a Comment
    Serving: 8gCalories: 545kcalCarbohydrates: 88gProtein: 9gFat: 17gSaturated Fat: 10gPolyunsaturated Fat: 1gMonounsaturated Fat: 5gTrans Fat: 0.5gCholesterol: 102mgSodium: 312mgPotassium: 183mgFiber: 2gSugar: 31gVitamin A: 535IUVitamin C: 1mgCalcium: 193mgIron: 1mg

    Watch The Recipe Video!
    QR Code
    Did you make this recipe?Share it on instagram or tag @simplybakings or #simplybakings!

    You Might Also Like:

    • Buko Pandan
    • Shakoy
    • Turon

    Cake, Christmas Desserts, Desserts, Filipino Desserts, Vegan Filipino Recipes

    Best Oreo Ice Cream Recipe

    Apr 13, 2016 · 2 Comments

    2 oreo ice cream in sundae containers

    Enjoy the ultimate Best Oreo Ice Cream Recipe that's super easy to make! With just 4 ingredients—heavy whipping cream, condensed milk, vanilla extract, and crushed Oreos—and no ice cream maker needed, this treat will impress anyone you share this with.

    Looking for more ice cream recipes? Easiest 3 Ingredient Ice Cream or my Ice Cream Sandwich Cookies.

    4 ingredient oreo ice cream in sundae glasses
    [feast_advanced_jump_to]

    How come this recipe doesn't use eggs?

    This recipe skips using eggs because it's a no-churn method. Eggs are often used in ice cream for creaminess, but here, heavy cream and condensed milk do the job without needing eggs or an ice cream maker, making it easier to whip up your own homemade ice cream.

    Top Tips

    • Make sure the the whipped cream is fluffy with soft peaks before adding the condensed milk.
    • Gently fold in the condensed milk without over mixing to maintain whipped cream's texture.

    Substitution

    • Heavy Whipping Cream: Use coconut cream if you want it dairy-free, or try whipped topping for convenience. (Note: You will need an ice cream maker if you choose not to use heavy whipping cream.)
    • Condensed Milk: Swap with sweetened condensed coconut milk for a vegan choice, or go lighter with evaporated milk. (Note: You will need an ice cream maker if you choose not to use condensed milk.)
    • Vanilla Extract: Try almond or mint extract for a different flavor twist.Crushed
    • Oreos: Use crushed chocolate sandwich cookies or chocolate chips for a similar texture and taste.

    Variations

    • Mint Chocolate Chip: Add a few drops of mint extract and mini chocolate chips to the ice cream mixture for a refreshing twist.
    • Peanut Butter Swirl: Swirl in some creamy peanut butter during the freezing process for a delicious peanut butter and chocolate combo.
    • Cookies and Cream: Reserve some crushed Oreos and swirl them into the ice cream just before it finishes freezing for extra cookie crunch.
    • Double Chocolate: Mix in cocoa powder or chocolate syrup to the ice cream base for an extra chocolatey flavor.
    oreo ice cream topped with Oreo biscuits

    Storage

    • Container: Transfer the ice cream to a freezer-safe container with a tight-fitting lid. This helps prevent freezer burn and keeps the ice cream fresh.
    • Cover: Press a piece of plastic wrap directly onto the surface of the ice cream before sealing the container. This creates a barrier that reduces ice crystal formation.
    • Freezing: Place the container in the coldest part of your freezer, typically towards the back. Ensure the temperature is set below freezing (0°F or -18°C) to keep the ice cream solid.
    • Use Within Timeframe: Homemade ice cream is best consumed within 1-2 weeks for optimal taste and texture. Over time, ice cream can develop freezer burn and lose its quality.

    Ingredients

    • heavy whipping cream
    • sweetened condensed milk
    • vanilla extract
    • crushed Oreos cookies

    Instructions

    In a stand mixer or a large bowl, add the heavy whipping cream and mix until it has stiff peaks. You can also use a hand mixer:

    mixing the whipping cream using a stand mixer

    While mixing the whipped cream, you can add in the vanilla extract and continue mixing:

    adding in the vanilla extract to the whipped cream

    Next, add in the condensed milk:

    adding in the condensed milk to the whipped cream

    Fold (do not mix) in the condensed milk using a spatula or a spoon. This technique helps give the light and airy texture of ice cream:

    folding in the condensed milk to the soft whipped cream

    Then fold in the Oreos and I crushed the Oreos using a spoon:

    adding the crushed oreos to the whipped cream and condensed milk mixture

    In a loaf pan, pour the ice cream and level off until the brim of the loaf pan. Cover with plastic wrap and place it in the freezer overnight:

    ready to freeze 4 ingredient oreo ice cream

    Allow the ice cream to sit for about 5 minutes on the container for easy scooping.

    scooping the 4 ingredient oreo ice cream

    Frequently Asked Questions

    How do I avoid freezer burn in my ice cream?

    Stir the ice cream batter every 30 minutes for the next 2-3 hours.

    Can I use an ice cream maker?

    Absolutely! Follow the instructions for your ice cream maker, which typically involves churning the mixture until it reaches a creamy consistency. Usually this helps avoid freezer burns in your ice cream.

    Is cookies and cream ice cream the same as Oreo ice cream?

    Yes. Cookies and cream ice cream is pretty much the same as Oreo ice cream. Both have a vanilla ice cream base with chunks of chocolate sandwich cookies, like Oreos. While cookies and cream can use any brand of chocolate sandwich cookies, most recipes use Oreos. So, people often use the terms "cookies and cream ice cream" and "Oreo ice cream" to mean the same thing.

    I don't have oreos, can I use any kind of cookie?

    Absolutely! You can use any kind of chocolate sandwich cookie if you don't have Oreos. They will work just as well and still give you that delicious cookies and cream flavor.

    delicious and easy to make 4 ingredient oreo ice cream
    5 from 1 vote
    Print Pin Recipe

    Best Oreo Ice Cream Recipe

    Dig into the most amazing Oreo Ice Cream you’ll ever make! With only 4 simple ingredients—heavy whipping cream, condensed milk, vanilla extract, and crushed Oreos—you don’t even need an ice cream maker. Your guests will be blown away by how delicious and easy it is!
    Prep Time10 minutes mins
    Freeze Time6 hours hrs
    Total Time6 hours hrs 10 minutes mins
    Course: Dessert
    Cuisine: Filipino
    Servings: 6 Cups
    Calories: 402kcal
    Author: Lainey
    Prevent your screen from going dark

    Ingredients

    • 2 cups heavy whipping cream
    • 1 14 (oz) can sweetened condensed milk
    • 1 teaspoon vanilla extract
    • 14 crushed oreos cookies

    Instructions

    • In a kitchen aid mixer, add the heavy whipping cream and mix until it has sift peaks.
    • Next fold in the condensed milk and this technique help gives the light and airy texture of ice cream.
    • Then fold in the oreos and I crushed the oreos using a spoon.
    • In a loaf pan, pour the ice cream and then cover with plastic wrap and place in the freezer for 6 hours or best overnight.
    Leave a Comment
    Serving: 1gCalories: 402kcalCarbohydrates: 22gProtein: 4gFat: 34gSaturated Fat: 20gPolyunsaturated Fat: 2gMonounsaturated Fat: 10gTrans Fat: 0.01gCholesterol: 90mgSodium: 130mgPotassium: 142mgFiber: 1gSugar: 14gVitamin A: 1167IUVitamin C: 0.5mgCalcium: 59mgIron: 3mg

    Watch The Recipe Video!

    QR Code
    Did you make this recipe?Share it on instagram or tag @simplybakings or #simplybakings!

    This is one of my favorite ice cream recipes because it's a no-churn ice cream, resulting in a wonderfully creamy texture. If you give it a try, please tag me on Facebook or Pinterest!

    5 Ingredients or Less, Desserts, Ice Cream

    Cream Cheese Chocolate Chip Cookies

    Apr 11, 2016 · 14 Comments

    chocolate chip cookies

    These Cream Cheese Chocolate Chip Cookies are a unique variation of the usual chocolate chip cookies because of the cream cheese. It is soft yet has a delicious "bite" to it because of the chocolate chips. With just a few easy steps, you can now make your own Cream Cheese Chocolate Chip cookies like a pro!

    cream cheese chocolate chip cookies on a blue plate

    Tips and Tricks for Making This Cream Cheese Chocolate Chip Cookies Recipe: 

    • Before mixing the dry ingredients, make sure you have sifted them carefully, especially the all-purpose flour and the sugars. This will eliminate lumps that do not taste so good 😉
    • In making cookies like this, make sure to check the butter you are using. Unsalted butter is always the best choice.
    • To make the mixing process of the butter and sugar easier, make sure you have the butter at room temperature for at least 15-20 minutes after taking it out from the chiller - or longer if you have frozen butter.
    • Keep these cookies for days by putting them in an airtight container.

    How to Make this Cream Cheese Chocolate Chip Cookies Recipe:

    Gather the ingredients for this Cream Cheese Chocolate Chip Cookies and once the ingredients are all ready, let's begin!

    • butter, softened
    • white sugar
    • brown sugar
    • cream cheese, softened
    • vanilla extract
    • egg
    • all-purpose flour
    • baking soda
    • salt
    • chocolate chips

    Preheat oven to 350F and prepare a cookie sheet by using a baking mat or parchment paper.

    In a large bowl add the softened butter and cream cheese and you are going to mix until it’s well combined:

    mixing cream cheese and butter in a glass bowl using a handheld mixer

    Add the sugars and continue mixing. Then add the vanilla extract and egg and continue mixing until it's well combined, set aside:

    adding egg and vanilla extract to the butter and cream cheese mixture

    In another bowl whisk together the flour, baking soda, and salt:

    adding and mixing the dry ingredients to the dry ingredients of the cream cheese chocolate chips cookies

    Slowly add the dry ingredients to the wet ingredients and continue mixing. Add the chocolate chips and continue mixing:

    mixing in the chocolate chips to the cookie dough

    Bake for about 13 minutes if making large cookies:

    ready to bake cookie dough on a cookie sheet

    Remove from oven and continue baking for 2 minutes on the mat:

    freshly baked cream cheese chocolate chip cookies on a cookie sheet

    Serve and enjoy!

    cream cheese chocolate chip cookies on a blue plate

    Frequently Asked Questions for SunButter Cookies Recipe:

    Q: Can I add white chocolate chips to this recipe?

    A: Yes, that is absolutely a delicious idea! If you are not into counting calories, add a scoop 🙂


    Q: Can greek yogurt be a substitute for cream cheese?

    A: Greek yogurt may give a slightly sour taste to the cookie so I won't recommend replacing the cream cheese with it.


    Q: Should I use parchment paper in baking these Cream Cheese Chocolate Chip Cookies?

    A: If you are using a non-stick cookie sheet, it won't be necessary.


    I have more cookie recipes similar to this recipe you also might like:

    • 3 Ingredient Healthy Oat Cookies
    • Chocolate Chip Cookies | Gluten Free. Dairy Free
    • Fool Proof Blondies
    • Nutella Stuffed Cookies
    • Coffee Mint Cookies
    cream cheese chocolate chip cookies on a blue plate
    No ratings yet
    Print Pin Recipe

    Cream Cheese Cookies

    This Cream Cheese Chocolate Chip Cookies Recipe is quick and easy to make and has a unique twist to the usual chocolate chip cookie recipe!
    Author: Lainey
    Prevent your screen from going dark

    Ingredients

    • 1 cup butter softened
    • 1 cup white sugar
    • 1 cup brown sugar
    • 1 8 oz cream cheese softened
    • 1 teaspoon vanilla extract
    • 1 egg
    • 2 ½ cups all purpose flour
    • 1 teaspoon baking soda
    • ¼ teaspoon salt
    • Bag chocolate chips

    Instructions

    • Preheat oven to 350F and prepare cookie sheet by using a baking mat or parchment paper.
    • In a large bowl add the soften butter and cream cheese and you are going to mix until it’s well combined. Add the sugars and continue mixing. Then add the vanilla extract and egg and continue mixing until it's well combined, set aside.
    • In another bowl whisk together the flour, baking soda and salt. Slowly add the dry ingredients into the wet ingredients and continue mixing. Add the chocolate chips and continue mixing.
    • Bake for about 13 minutes if making large cookies.
    • Remove from oven and continue baking for 2 minutes on mat and enjoy.
    Leave a Comment
    QR Code
    Did you make this recipe?Share it on instagram or tag @simplybakings or #simplybakings!

    NEVER MISS A RECIPE!

    PINTEREST / FACEBOOK / INSTAGRAM / TWITTER

    If you’ve tried this or any other of my recipes, don’t forget to rate the recipe and to leave me a comment. I love hearing from you!

    Cookies, Desserts

    Easiest Ever Cinnamon Roll Bites

    Apr 8, 2016 · 19 Comments

    cinnamon rolls in a glass container on a cloth

    Ooey, gooey, easiest ever Cinnamon Roll Bites that give you the great taste of cinnamon rolls, but without the work! It's perfect for breakfast, dessert, or even a snack!

    Need more breakfast ideas? Try my Breakfast French Bread or my Easy Coffee Cake.

    cinnamon roll bites in a pyrex

    What are Cinnamon Roll Bites?

    This easy Cinnamon Roll Bites recipe is made with slices of refrigerated biscuit dough coated with cinnamon sugar mixture then baked to delicious and drizzled with a sweet glaze. In this easy breakfast recipe, store-bought biscuit dough can do that you don't have to use flour or yeast.

    This cinnamon roll bite recipe is one of the easy cinnamon rolls recipes that you can try aside from cinnamon roll cake, cinnamon roll waffles, cinnamon roll cheesecake, and cinnamon buns. They are perfect treats for cinnamon lovers and great for breakfast or snacks with family. Give this a try!

    Tips and Procedures:

    • The quickest way to soften frozen or chilled butter is to pop it in the microwave. Remove the wrapper if it has a foil lining, then warm it for about 20 seconds, and then it's ready to use!
    • Feel free to use homemade or store-bought biscuit dough in this recipe.
    • Sift, sift, sift! This step is important to do when using powdered sugar for glazes! It makes mixing a lot easier and your glaze smoother.
    • Feel free to use brown sugar or granulated sugar in this cinnamon roll bite recipe.
    • You may stuff your dough with cream cheese before baking if you like.
    • These can be made into mini cinnamon rolls if you desire a bite-sized bread or dessert.
    • You may use maple syrup or icing as sweeteners in this cinnamon roll recipe.
    • Can be stored for up to 2 days at room temperature and longer in the refrigerator.

    How to Make Quick & Easy Cinnamon Roll Bites:

    Ingredients you will need:

    • refrigerated biscuits
    • butter
    • sugar
    • cinnamon

    Glaze

    • butter
    • milk
    • pure vanilla extract
    • powdered sugar

    Before starting, don't forget to preheat the oven to 350F and grease an 8×8 inch pan. Doing this step always before mixing the ingredients would save you tons of time and would make baking more enjoyable.

    Cut the dough into 4 and then set aside when finished:

    cutting the dough for Quick & Easy Cinnamon Roll Bites recipe

    Next mix the sugar and cinnamon together:

    cinnamon sugar mixture for Quick & Easy Cinnamon Roll Bites Recipe

    Then dip the dough in the sugar/cinnamon mixture until it’s coated:

    dipping the dough in the cinnamon sugar mixture for Quick & Easy Cinnamon Roll Bites Recipe

    Place the dough in an 8x8 inch pan which is greased making sure the dough is very close to each other:

    assembling the dough bites in a baking dish for Quick & Easy Cinnamon Roll Bites Recipe

    After assembling all the dough in the baking dish, drizzle the butter over the dough then pop it into the oven for 20-25 minutes:

    Pouring melted butter over the dough

    Once the dough finished baking, remove it from the oven and immediately pour the glaze over.

    Now, here's how to make the glaze:

    In a large bowl mix the melted butter, milk, vanilla extract until it’s well combined.

    Next, add the powdered sugar and It’s very important to sift the powdered sugar to achieve a smooth glaze:

    adding powdered sugar to the mixture of melted butter, milk and vanilla for Quick & Easy Cinnamon Roll Bites glaze

    Pour the glaze over and put it back in the oven for about 10 minutes:

    pouring the mixed glaze to the freshly baked Cinnamon Roll Bites

    By this time, your kitchen would smell so good!

    Take a portion and enjoy these super easy Cinnamon Roll Bites! It is best enjoyed with a cup of black coffee or soda if you are not afraid to sugar-load 🙂

    Quick and Easy cinnamon roll bites on a white plate

    Simply Bakings Recommends

    Making these easy cinnamon roll bites? Explore flavorful spices for your next baking day and handy storage containers for keeping leftover treats fresh.

    Explore spices and flavorings Shop airtight containers (Code: LAINEY5)

    Disclosure: This section contains affiliate links. If you purchase through them, Simply Bakings may earn a small commission at no extra cost to you.

    Frequently Asked Questions:

    I will be hosting a party. Can I assemble the cookie dough ahead?

    Yes! Cover it with cling wrap and chill until you are ready to bake them. Do not pour the melted butter, but pour it when you are about to bake them.

    Can I use salted butter for this recipe?

    No, you need to use unsalted butter. The salted butter would affect the taste and would make your cinnamon roll bites salty, even with the sweet glaze on top.

    Can you freeze cinnamon bites?

    Yes, store them in an airtight container or wrap them tightly with plastic wrap on a plate before freezing for 8 hours or up to 6 weeks.


    Step by Step Video:

    If you like this recipe, you're going to enjoy these ones too:

    • Monkey Bread
    • Oreo Waffles
    • Pull Apart Pumpkin Bread
    delicious cinnamon roll bites in a pyrex
    4.69 from 16 votes
    Print Pin Recipe

    Easiest Ever Cinnamon Roll Bites

    Here’s a delicious, quick and easy Cinnamon Roll Bites recipe that you will love! It’s perfect for breakfasts, brunch or even afternoon snacks!
    Prep Time10 minutes mins
    Cook Time35 minutes mins
    Total Time45 minutes mins
    Course: Breakfast
    Cuisine: American
    Servings: 4 servings
    Calories: 627kcal
    Author: Lainey
    Prevent your screen from going dark

    Ingredients

    • 1 can refrigerated biscuits refrigerated
    • ⅓ cup sugar
    • 1 tablespoon cinnamon
    • 3 tablespoons butter melted

    Glaze

    • 1 cup powdered sugar sifted
    • 2 tablespoons butter melted
    • 1 teaspoon vanilla extract
    • 2 tablespoons milk

    Instructions

    • Preheat oven to 350F and grease 8x8 inch pan.
    • Cut each of the dough into 4 and then set aside when finished.
    • Next in a medium bowl, mix the sugar and cinnamon together, and then dip the dough in the sugar/cinnamon mixture until it’s coated.
    • Place the dough in the pan making sure the dough is very close to each other.
    • Drizzle the butter over the dough then pop it into the oven for 20-25 minutes.

    Making the Glaze:

    • In a large bowl mix the melted butter, vanilla extract until it’s well combined.
    • Next add the powdered sugar.
    • Once it's finished baking, remove from the oven and immediately pour the glaze over an the cinnamon roll bites and allow it to finish baking for about 10 more minutes.
    • Allow it to cool completely and serve!
    Leave a Comment
    Serving: 1gCalories: 627kcalCarbohydrates: 106gProtein: 8gFat: 20gSaturated Fat: 3gCholesterol: 4mgSodium: 1112mgPotassium: 305mgFiber: 3gSugar: 51gVitamin A: 51IUVitamin C: 1mgCalcium: 107mgIron: 4mg

    Watch The Recipe Video!
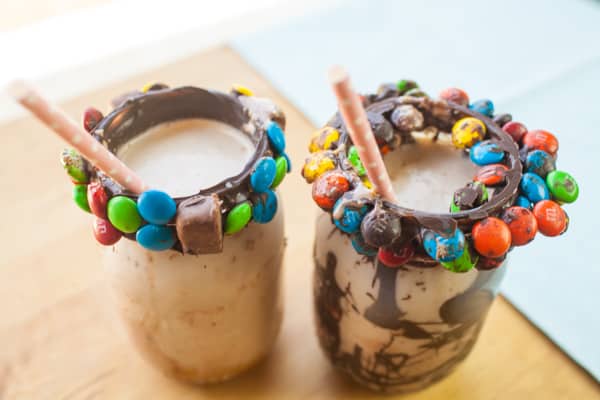
    QR Code
    Did you make this recipe?Share it on instagram or tag @simplybakings or #simplybakings!

    Bread, Breakfast & Brunch, Christmas Desserts, Desserts

    BEST Pineapple Yogurt Ice Cream

    Apr 6, 2016 · 6 Comments

    Pineapple Yogurt Ice Cream in bowls

    Best pineapple yogurt ice cream is a refreshing 2-ingredient tropical treat made with frozen pineapple chunks and smooth vanilla Greek yogurt. It turns into a velvety soft-serve texture that is perfectly sweet, pleasantly tangy, and so easy to make.

    Pineapple Yogurt Ice Cream in bowls

    Ready for a refreshing tropical treat? Scroll down to the recipe card below, grab your blender, and whip up your own batch of yogurt ice cream today!

    [feast_advanced_jump_to]

    Listed below are all the ingredients you will need:

    • frozen pineapple chunks
    • vanilla Greek yogurt

    See the recipe card for quantities.

    All ingredients for Pineapple Yogurt Ice Cream in bowls

    Instructions

    Blend the Ingredients

    Add the frozen pineapple chunks to a blender. Then, add the vanilla Greek yogurt.

    Blend until smooth and creamy. Stop and scrape down the sides if needed, then blend again.

    Serve

    Serve immediately for a soft-serve texture. For firmer ice cream, transfer to a freezer-safe container and freeze for 1–2 hours.

    Then, scoop the ice cream into serving bowls. Serve cold and enjoy!

    Ingredients mixed in the blender

    Storage Tips

    • Store leftovers in an airtight container for up to 1–2 weeks. Keep it away from heat and serve in a cup or large bowl later.

    FAQs

    Why is my ice cream not creamy?

    Your pineapple may not be frozen enough, or your yogurt may be too thin. Use fully frozen pineapple chunks and thick Greek yogurt. Stop and scrape down the blender as needed. Do the same if you're using a food processor or ice cream maker instead.

    If using plain yogurt, choose a thick variety. One of the important things to remember is that the yogurt's thickness affects the final texture.

    Can I use canned pineapple instead of frozen pineapple?

    Yes, but drain the pineapple juice first and freeze the pineapple chunks until solid. This helps create a thicker, creamier texture. For the best flavor, choose fresh pineapple packed in juice rather than heavy syrup. Cover the chunks in a freezer-safe container before freezing.

    Can I add sweeteners?

    Yes! A little vanilla extract can give your ice cream a richer flavor. You can also add honey or sugar if you prefer a sweeter treat. But these are optional additions.

    Can I serve this with other food?

    Absolutely! This recipe pairs well with a slice of sweet bread. For extra nutrition, serve it with your favorite fruit. I love adding mango to mine. It's also a refreshing dessert minutes after a filling meal.

    What other fruit goes well with pineapple?

    Pineapple pairs exceptionally well with tropical fruits, citrus fruits, and creamy fruits because its vibrant acidity and juicy sweetness can either enhance similar tropical notes or provide a sharp contrast to richer flavors.

    Pineapple Yogurt Ice Cream at the table
    Pineapple Yogurt Ice Cream served
    4.75 from 4 votes
    Print Pin Recipe

    BEST Pineapple Yogurt Ice Cream

    Satisfy your sweet cravings with the best pineapple yogurt ice cream, a creamy, refreshing, no-churn tropical dessert made with frozen pineapple and vanilla Greek yogurt!
    Prep Time5 minutes mins
    Cook Time0 minutes mins
    Freeze Time2 hours hrs
    Total Time2 hours hrs 5 minutes mins
    Course: Dessert, Snack
    Cuisine: Fusion (American-Filipino)
    Servings: 2 servings
    Calories: 160kcal
    Author: Lainey
    Prevent your screen from going dark

    Ingredients

    • 3 tablespoons vanilla Greek yogurt*
    • 2 cups frozen pineapple chunks

    Instructions

    Blend the Ingredients

    • Add the frozen pineapple chunks to a blender. Then, add the vanilla Greek yogurt.
    • Blend until smooth and creamy. Stop and scrape down the sides if needed, then blend again.

    Serve

    • Serve immediately for a soft-serve texture. For firmer ice cream, transfer to a freezer-safe container and freeze for 1–2 hours.
    • Then, scoop the ice cream into serving bowls. Serve cold and enjoy!
    Leave a Comment

    Notes

    *Veganize the recipe by using non-dairy yogurt.
    Serving: 1gCalories: 160kcalCarbohydrates: 40gProtein: 3gFat: 0.3gSaturated Fat: 0.02gPolyunsaturated Fat: 0.1gMonounsaturated Fat: 0.04gCholesterol: 1mgSodium: 9mgPotassium: 313mgFiber: 3gSugar: 36gVitamin A: 118IUVitamin C: 22mgCalcium: 38mgIron: 1mg

    Watch The Recipe Video!

    QR Code
    Did you make this recipe?Share it on instagram or tag @simplybakings or #simplybakings!

    You Might Also Like:

    • Cookie Butter Ice Cream Recipe
    • Matcha Milkshake (4 Ingredients Only)
    • Mocha Nice Cream (5 Ingredients Only)

    5 Ingredients or Less, Desserts, Ice Cream, No Bake Dessert Recipes, Snacks, Summer Desserts

    Chocolate Cake Mix Cookies with White Chocolate Chips

    Apr 4, 2016 · 6 Comments

    A batch of Chocolate Cake Mix Cookies with White Chocolate Chips

    Get yourself two dozen fudgy and soft treats. These Chocolate Cake Mix Cookies with White Chocolate Chips are full of everyone's favorite textures. It's sure to solve your cravings for a delicious and filling chocolate chip cookie!

    Don't miss our Brownie Meringue Cookies and fun-to-make Cookie Dough Bites!

    A batch of Chocolate Cake Mix Cookies with White Chocolate Chips
    [feast_advanced_jump_to]

    Why You’ll Love This Recipe

    This recipe is beginner-friendly and requires minimal ingredients. It's a great way to bake something impressive without needing special tools or fancy skills. Plus, it’s kid-approved!

    Even better - it’s easy to tweak for your dietary needs! You can make it dairy-free by swapping in vegan butter and chocolate chips. It’s also a fantastic last-minute dessert for potlucks or late-night cravings.

    Instant coffee enhances the chocolate flavor while giving a subtle energy boost. You'll enjoy the perfect mix of dark and white chocolate in every chewy bite!

    Ingredients

    Listed below are all the ingredients you will need:

    • Butter
    • Egg
    • Oil
    • Vanilla extract
    • Instant coffee (optional)
    • Chocolate cake mix
    • Chocolate chips
    • White chocolate chips

    See the recipe card for quantities.

    Instructions

    1. Preheat oven to 350°F (175°C) and line your baking sheet with parchment paper or a silicone baking mat.

    2. In a large bowl, cream the softened butter using a hand mixer until light and whipped.

    3. Add the egg and mix until combined.

    Butter and egg whipped together in a bowl

    4. Stir in the oil, vanilla extract, and the instant coffee mixture (if using), and mix until smooth.

    5. Add the chocolate cake mix and continue mixing until a thick dough forms. A spatula may be helpful here!

    Chocolate cake mix in the bowl added and mixed

    6. Fold in the chocolate chips and white chocolate chips until evenly distributed.

    Chocolate chips folded into the cookie batter

    7. Using a cookie scoop, scoop dough onto the baking mat, spacing the cookies about 2 inches apart.

    8. Bake for 13 to 15 minutes, or until edges are set but centers are still soft.

    9. Cool on the baking sheet for 5 minutes, then transfer to a wire rack to finish cooling.

    10. Best served warm with a glass of plant milk or coffee!

    Chocolate Cake Mix Cookies with White Chocolate Chips on the baking tray

    Substitutions and Variations

    • Ingredient Swap
      Aside from butter, use vegan margarine.
      Swap coconut oil for vegetable oil
    • Variation
      Not fond of white chocolate? Peanut butter chips or chopped walnuts will do.
    • Mistake to Avoid
      Don't overmix the dough! It makes the cookies dry and dense.
    • Storage Tips
      • Room Temperature: Store in an airtight container for up to 4 days.
      • Freezer: Freeze baked cookies for up to 2 months. Thaw at room temp before serving.
      • Dough: Freeze scooped dough balls and bake straight from frozen, adding 1–2 minutes to the bake time.
    Baking tray filled with Chocolate Cake Mix Cookies with White Chocolate Chips

    FAQs

    Can I use any cake mix flavor?

    Yes! While chocolate works best for that rich flavor, you can try red velvet or vanilla for a fun twist.

    Do I need to chill the dough?

    Nope! This recipe is designed to skip that step, making it perfect for quick baking sessions.

    Can I make these cookies vegan?

    Yes! Use a vegan cake mix, plant-based butter, and egg replacer like flax egg or applesauce.

    White plate of Chocolate Cake Mix Cookies with White Chocolate Chips
    No ratings yet
    Print Pin Recipe

    Chocolate Cake Mix Cookies with White Chocolate Chips

    Soft, fudgy, and satisfyingly chocolatey - these easy Chocolate Cake Mix Cookies with White Chocolate Chips are made with a shortcut cake mix base. Perfect for when the craving hits!
    Prep Time10 minutes mins
    Cook Time15 minutes mins
    Total Time25 minutes mins
    Course: Cookies, Dessert
    Cuisine: American
    Servings: 24 cookies
    Calories: 199kcal
    Author: Lainey
    Prevent your screen from going dark

    Ingredients

    • ½ cup butter softened
    • 1 egg
    • 1 tablespoon oil
    • 1 teaspoon vanilla extract
    • 2 tablespoons instant coffee mixed with water optional
    • 1 box chocolate cake mix
    • 1 cup chocolate chips
    • 1 cup white chocolate chips

    Instructions

    • Preheat oven to 350°F (175°C) and line your baking sheet with parchment paper or a silicone baking mat.
    • In a large bowl, cream the softened butter using a hand mixer until light and whipped.
    • Add the egg and mix until combined.
    • Stir in the oil, vanilla extract, and the instant coffee mixture (if using), and mix until smooth.
    • Add the chocolate cake mix and continue mixing until a thick dough forms. A spatula may be helpful here!
    • Fold in the chocolate chips and white chocolate chips until evenly distributed.
    • Using a cookie scoop, scoop dough onto the baking mat, spacing the cookies about 2 inches apart.
    • Bake for 13 to 15 minutes, or until edges are set but centers are still soft.
    • Cool on the baking sheet for 5 minutes, then transfer to a wire rack to finish cooling.
    • Best served warm with a glass of plant milk or coffee!
    Leave a Comment
    Serving: 1gCalories: 199kcalCarbohydrates: 23gProtein: 2gFat: 12gSaturated Fat: 6gPolyunsaturated Fat: 1gMonounsaturated Fat: 3gTrans Fat: 0.2gCholesterol: 19mgSodium: 188mgPotassium: 121mgFiber: 0.4gSugar: 16gVitamin A: 131IUVitamin C: 0.04mgCalcium: 50mgIron: 1mg

    Watch The Recipe Video!
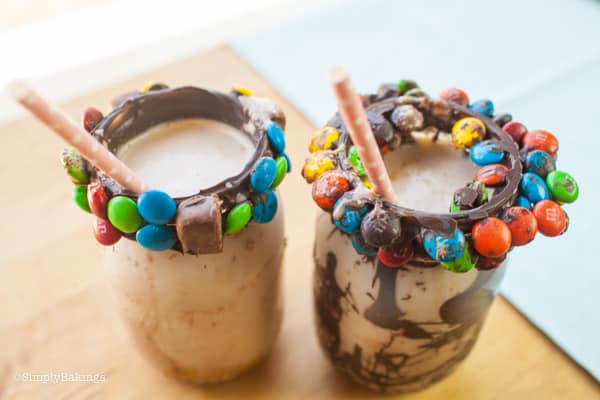
    QR Code
    Did you make this recipe?Share it on instagram or tag @simplybakings or #simplybakings!

    You Might Also Like:

    • Jello Cookies
    • Snickers Cookies
    • Sweet Potato Cookies

    Recipes for Every Moment

    Sweet tooth kicking in with so little time for waiting? Quick Chocolate Cake Mix Cookies with White Chocolate Chips deliver rich, chewy goodness in under 30 minutes!

    Cookies, Desserts

    Vanilla Custard Cake Recipe

    Apr 1, 2016 · 9 Comments

    Vanilla Custard Cake on a plate
    Vanilla Custard Cake at the table

    Capture creamy goodness in this layered dessert. This easy vanilla custard cake recipe turns one simple batter into delicious layers! You'll get a soft cake layer and creamy vanilla custard in one slice. Anyone who wants something impressive without making separate fillings or layers will enjoy this fun dessert!

    For more comforting flavors, have some Nutella mug cake or s’mores cupcakes next!

    [feast_advanced_jump_to]

    Why You’ll Love This Recipe

    You'll definitely love the texture! The cake is soft, and the custard is creamy. Also, the recipe is beginner-friendly. With just simple ingredients, you can make a batter that separates into both. After baking, check with a toothpick.

    The light vanilla flavor makes it easy to serve for many occasions. Enjoy it plain or with powdered sugar, berries, or fresh fruit!

    Ingredients

    Listed below are all the ingredients you will need:

    • unsalted butter
    • milk
    • eggs
    • powdered sugar
    • water
    • flour
    • vanilla extract

    See the recipe card for quantities.

    Instructions

    Make the Batter

    Preheat your oven to 350°F and lightly grease an 8x8-inch baking pan. 

    In a large bowl, beat the egg whites until stiff peaks form, then set them aside.

    In a separate bowl, mix the egg yolks and powdered sugar until smooth and well combined.

    Whip mixing the ingredients together

    Then add the water and melted butter. Mix again until combined.

    Next, pour in the lukewarm milk and vanilla extract. Add the flour and mix until the batter is smooth.

    After that, gently fold the whipped egg whites into the thin batter. Do not overmix; it is completely fine if a few small, fluffy pieces of egg white remain visible. 

    Pour and Bake

    Pour the batter into the prepared pan. Bake for 45–55 minutes, or until the top is lightly golden and the center is mostly set.

    Vanilla custard cake batter ready to bake
    Cool and Serve

    Let the cake cool completely in the pan before slicing. For the best results, chill the cake in the refrigerator after it cools to achieve an even firmer, richer custard texture

    Custard cake fresh from the oven

    Substitutions & Variations

    • Ingredient Swap
      Use whole milk for the richest custard texture.
    • Variation
      Add a small amount of almond extract or honey along with the vanilla for extra flavor.
    • Mistake to Avoid
      Don't completely mix away the whipped egg whites. Fold them gently into the batter so some fluffy pieces remain. This helps the cake form its signature layers.

    Storage Tips

    • Store the cake in an airtight container in the refrigerator for up to 3 days.
    • Freezing may change its creamy texture. This is because the custard layer is delicate. For the best results, enjoy it fresh or refrigerated.
    Vanilla Custard Cake at the table

    FAQs

    Why is this cake recipe called magic cake?

    It's because of the different custard and cake layers. One batter separates into different layers while it bakes. The finished cake has a light cake layer and creamy custard-like layers underneath.

    Do I need to beat the egg whites separately?

    Yes. Whipping the egg whites until stiff peaks form helps create the fluffy top layer. Fold them gently into the batter instead of mixing aggressively.

    Why is my magic cake batter so thin?

    A thin batter is normal for this recipe. The extra moisture helps create the custard layers as the cake bakes.

    custard cake in a green plate
    5 from 4 votes
    Print Pin Recipe

    Vanilla Custard Cake Recipe

    This vanilla custard cake is soft, moist, and filled with rich vanilla custard flavor. It uses simple ingredients and comes together easily in one delicious dessert.
    Prep Time20 minutes mins
    Cook Time55 minutes mins
    Total Time1 hour hr 15 minutes mins
    Course: cake, Dessert, Snack
    Cuisine: Fusion (European-Filipino)
    Servings: 9 servings
    Calories: 268kcal
    Author: Lainey
    Prevent your screen from going dark

    Ingredients

    • 4 eggs separated
    • 1 ¼ cups powdered sugar sifted
    • 1 tablespoon water
    • ½ cup unsalted butter melted
    • 2 cups milk lukewarm
    • 1 teaspoon vanilla extract
    • 1 cup flour

    Instructions

    Make the Batter

    • First, lightly grease an 8x8-inch baking pan. Then preheat the oven to 350°F.
    • Add the egg whites to a large bowl.
    • Beat until stiff peaks form, then set aside.
    • Next, add the egg yolks and powdered sugar to another large bowl. Mix until smooth and well combined.
    • Then add the water and melted butter. Mix again until combined.
    • Next, pour in the lukewarm milk and vanilla extract. Add the flour and mix until the batter is smooth.
    • After that, gently fold the whipped egg whites into the thin batter. A few small fluffy pieces of egg white are fine.

    Pour and Bake

    • Pour the batter into the prepared pan.
    • Bake for 45–55 minutes, or until the top is lightly golden and the center is mostly set.

    Cool and Serve

    • Lastly, let the cake cool completely before slicing. Chill it for an even firmer custard texture if desired.
    Leave a Comment
    Serving: 1 sliceCalories: 268kcalCarbohydrates: 30gProtein: 6gFat: 14gSaturated Fat: 8gPolyunsaturated Fat: 1gMonounsaturated Fat: 4gTrans Fat: 0.4gCholesterol: 106mgSodium: 50mgPotassium: 127mgFiber: 0.4gSugar: 19gVitamin A: 509IUCalcium: 83mgIron: 1mg

    Watch The Recipe Video!
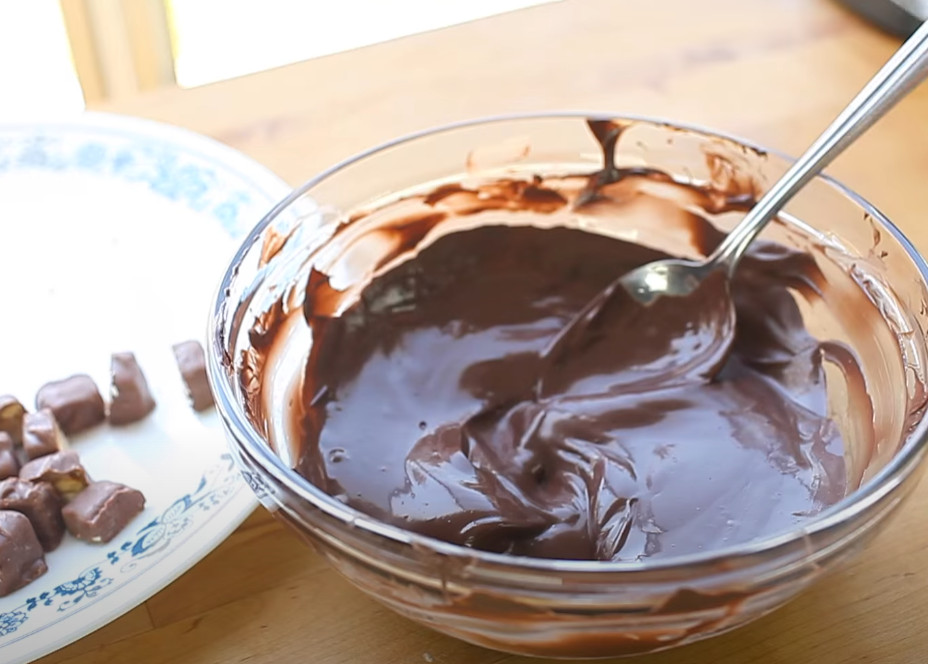
    QR Code
    Did you make this recipe?Share it on instagram or tag @simplybakings or #simplybakings!

    You Might Also Like:

    • Lucky Charms Cheesecake
    • Reese’s Peanut Butter Cake
    • Stuffed Filipino Potato Cakes

    Recipes for Every Moment

    Craving something creamy but don't want to prepare separate custard and cake layers? This Vanilla Custard Cake recipe gives you both from one simple batter!

    Cake, Desserts

    4 Ingredient Granola Bars

    Mar 28, 2016 · 4 Comments

    granola bars in cupcake liners

    My 4 Ingredient Granola Bars recipe is just the right snack if you're pressed for time! Quick as it is to make these, surely they will be a crowd-pleaser, and much healthier, too.

    Need more quick and healthy snacks? My other recipes, Twix Bars, Lemon Bars and Oreo Peanut Butter Bark are also great choices!

    A sheet of delicious homemade bars
    [feast_advanced_jump_to]

    What are 4 Ingredient Granola Bars?

    4-Ingredient Granola Bars are simple, homemade snack bars made with just four basic ingredients. Those ingredients are typical oats, a binding agent (such as nut butter), a sweetener (like honey or maple syrup), and a mix-in (like chocolate chips, dried fruit, or nuts). They are easy to prepare, often requiring no baking, and provide a balanced combination of fiber, protein, and natural sweetness.

    These bars are a healthier, customizable alternative to store-bought granola bars and are popular among those looking for quick, nutritious snacks. They can be stored in the refrigerator or freezer for convenient grab-and-go energy.

    History of 4 Ingredient Granola Bars

    The history of homemade Granola Bars is rooted in the evolution of granola, which dates back to the late 19th century. Granola, originally developed as a health food, was first introduced by Dr. James Caleb Jackson in the 1860s and later popularized by John Harvey Kellogg in the early 1900s. The concept of turning granola into a portable bar emerged in the 1970s when health-conscious consumers sought convenient, nutritious snacks.

    As homemade snack trends grew in the early 2000s, minimal-ingredient recipes gained popularity, leading to the rise of 4-Ingredient Granola Bars. It's the simple, customizable alternative to processed store-bought bars. These bars align with the clean eating movement, emphasizing whole, natural ingredients like oats, nut butter, honey (or maple syrup), and mix-ins. Today, they remain a staple in healthy eating, loved for their ease of preparation and versatility.

    Substitutions

    • Quick-cooking oats - Use rolled oats for a chewier texture. Blend rolled oats slightly to mimic quick oats if needed.
    • Peanut butter - Almond butter or cashew butter offers a milder taste. Sunflower seed butter is a great nut-free alternative.
    • Almonds - Walnuts and pecans add a rich, nutty flavor. Sunflower seeds work as a nut-free option.
    • Honey - Maple syrup is a vegan-friendly alternative. Agave syrup is slightly sweeter and thinner.
    • Mini chocolate chips - Dark chocolate chunks for a richer flavor. Cacao nibs for a less sweet, antioxidant-rich option. Carob chips for a naturally caffeine-free substitute.
    • Miniature marshmallows - Chopped dried dates provide a chewy, natural sweetness. Coconut flakes add a mild sweetness and texture. Vegan marshmallows work for a plant-based alternative.
    • Dried cranberries - Raisins add a softer chew and mild sweetness. Dried cherries provide a slightly tart, fruity flavor. Chopped dried apricots offer a chewy, tropical touch.
    granola bars in cupcake liners

    Recipe Variations

    • Classic Chewy Granola Bars - Melt peanut butter and honey, stir in quick oats, then fold in mini chocolate chips. Press into a pan, chill, and slice. Soft, chewy, and kid-friendly.
    • Nut-Free Granola Bars - Mix sunflower seed butter and agave syrup, stir in quick oats and pumpkin seeds. Press into a dish, chill, and cut. Perfect for nut-free diets.
    • Chocolate Lover’s Granola Bars - Melt peanut butter and maple syrup, stir in oats, cocoa powder, and dark chocolate chunks. Press, chill, and slice. Rich and fudgy.
    • Superfood Granola Bars - Combine tahini and honey, mix with oats, chia seeds, and hemp seeds. Press, refrigerate, and slice. Packed with nutrients and fiber.

    Storage

    Refrigerator Storage: Store granola bars in an airtight container with parchment paper between layers to prevent sticking. Keep in the fridge for up to 1 week to maintain freshness and firmness.

    Freezer Storage: Wrap each bar individually in plastic wrap or parchment paper, then store them in a ziplock bag or airtight container. Freeze for up to 3 months. Let bars sit at room temperature for 5-10 minutes before eating if frozen.

    Room Temperature (Short-Term): If made without perishable ingredients (like dairy-based chocolate or fresh fruit), bars can be stored in an airtight container at room temperature for up to 3 days. Keep in a cool, dry place away from direct sunlight to prevent melting or softening.

    Ingredients

    Listed below are all the ingredients you will need:

    • Quick-cooking oats
    • Peanut butter
    • Almonds
    • Honey
    • Mini chocolate chips (optional)
    • Miniature marshmallows (optional)
    • Dried cranberries (optional)

    See recipe card for quantities.

    Instructions

    Before starting the mixing process, line an 8x8 inch pan with parchment paper. In a large bowl, combine the oats, peanut butter, honey, and almonds. Then mix!

    honey, almonds and peanut butter in a large bowl

    Add in the rest of the ingredients and mix well.

    adding in chocolate chips and mini marshmallows

    When everything is almost mixed, choose to make 3 flavors. Split the granola into 3 bowls, and then add the rest of the ingredients, or just make one huge mixture of everything.

    thoroughly mixed granola bar ingredients

    Using a ladle, press the granola into the pan to make it. After that, cover and refrigerate for 2 hours.

    pressing the granola bar with a wooden ladle

    And there you go: a quick and easy, healthy, go-to breakfast recipe from scratch!

    slicing the granola bars into smaller portions

    Put them in individual cupcake liners if you want to have a more festive look or just serve them as is after slicing.

    ready to serve granola bars in cupcake liners

    Hint: Press down firmly! Use the back of a spoon or a flat-bottomed glass to really compact the mixture before chilling. This prevents crumbling when you slice them!

    ⭐ Top Tip

    For easy mixing, warm your nut butter and sweetener slightly before stirring them with oats. Line your pan with parchment paper for easy removal and mess-free slicing.

    After pressing the mixture into the pan, chill for at least an hour to prevent crumbling. Use quick oats for chewy bars and rolled oats for a crunchier bite.

    If bars fall apart, add more sweetener or nut butter for better binding. Slice with a serrated knife for clean, even cuts. These simple tricks will give you perfect granola bars every time!

    FAQ

    Are granola bars filling?

    You can eat it like cereal, sprinkle it on top of yogurt, toss it in trail mix, or bake it into snack bars. Because it's made with oats, it's a great source of fiber that can keep you full for a long time.

    Are MadeGood bars actually healthy?

    Thoughtfully made to be allergy-friendly, these vegan bars are certified organic, non-GMO, and nut-free, making them a favorite in schools and offices alike. Each bar is packed with a full serving of hidden vegetables that provide essential nutrients, including vitamins A, B6, C, D, E, and Thiamin.

    Why are granola bars bad for you?

    Still, research suggests that they may interfere with blood sugar control and could negatively affect your beneficial gut bacteria ( 10 , 11 ). What's more, many granola bars are highly processed and include ingredients like added sugars, vegetable oils, preservatives, and artificial flavors.

    Can I use any other sweetener aside from honey?

    Yes you can. There are many options in the groceries now like coconut sugar, agave, or just the traditional corn syrup.

    More Recipes

    People who love bits for dessert, you might like these recipes:

    • Ube Hopia
    • Cookie Dough Bites
    • Cinnamon Roll Bites
    • Ube Ice Candy
    • Mochi Donuts
    • Pina Colada Cupcakes
    slices of granola bars
    5 from 2 votes
    Print Pin Recipe

    4 Ingredient Granola Bars

    A quick and easy, healthy, go-to breakfast recipe that you can make from scratch with just 4 ingredients!
    Prep Time10 minutes mins
    Chilling Time2 hours hrs 10 minutes mins
    Total Time2 hours hrs 20 minutes mins
    Course: Breakfast, Snack
    Cuisine: American
    Servings: 8 bars
    Calories: 387kcal
    Author: Lainey
    Prevent your screen from going dark

    Ingredients

    • 2 cups quick-cooking oats
    • 1 cup peanut butter
    • ½ cup sliced almonds
    • ¼ to ⅓ cup honey

    Optional Add-Ins:

    • ½ cup mini chocolate chips
    • ½ cup miniature marshmallows
    • ½ cup dried cranberries

    Instructions

    • Line an 8x8-inch pan with parchment paper.
    • In a large bowl, mix oats, peanut butter, honey, and almonds until well combined.
    • If adding variations, divide the mixture into separate bowls and mix in chocolate chips, marshmallows, or cranberries.
    • Press the mixture firmly into the pan, cover, and refrigerate for at least 2 hours (or overnight for best results).
    • Slice into bars or bite-sized pieces and enjoy!
    Leave a Comment
    Serving: 1gCalories: 387kcalCarbohydrates: 40gProtein: 10gFat: 23gSaturated Fat: 5gPolyunsaturated Fat: 5gMonounsaturated Fat: 10gTrans Fat: 0.02gCholesterol: 2mgSodium: 178mgPotassium: 269mgFiber: 4gSugar: 27gVitamin A: 278IUVitamin C: 0.1mgCalcium: 92mgIron: 4mg
    QR Code
    Did you make this recipe?Share it on instagram or tag @simplybakings or #simplybakings!

    5 Ingredients or Less, Breakfast & Brunch

    BEST Banana Cake

    Mar 27, 2016 · 4 Comments

    banana cake

    Are you fond of eating or baking banana cakes? Here's one recipe for the BEST Banana Cake I want to share with you guys! Hope you enjoy it and make it your recipe staple! 🙂

    BEST Banana Cake

    Tips and Procedures: 

    • Choose bananas that are very ripe. Look for dark skin with black or brown spots on them. Those bananas are best for baking.
    • For a more festive look, top with whipped cream before serving.
    • Don't forget to sift the vanilla cake mix before adding it in. Flour lumps wouldn't be fun to eat 😉

    How to Make this BEST Banana Cake Recipe:

    • vanilla cake mix
    • water
    • oil
    • eggs
    • bananas mashed (1 heaping cup)
    • baking soda

    Before starting the mixing process, preheat the oven to 350F and spray a 13x9-inch pan with nonstick cooking spray.

    Now you are ready. Gather all the ingredients and let's begin!

    ingredients of banana cake recipe

    In a large bowl add vanilla cake mix, water, oil, eggs, and mix until well combined:

    mixing the eggs and oil to the dry ingredients using a handheld mixer

    Add the mashed bananas, and baking soda, and mix very well:

    adding in the mashed bananas

    The final banana cake batter should look like this:

    ready to bake banana cake batter

    Add the batter to the pan and bake for 35 to 40 minutes:

    banana cake batter in a baking dish

    Freshly baked banana bread, everyone!

    freshly baked banana cake

    Guys, this cake is the easiest I have made and it is so delicious both in smell and taste!

    banana cake slices topped with whipped cream

    Cut them into smaller slices if you are serving them at a party or a bigger crowd:

    BEST Banana Cake ever

    Enjoy!

    Frequently Asked Questions:

    Q: How many servings would this recipe do?

    A: This banana cake recipe would make about 30 to 40 cake bites/slices, depending on how big the servings are.

    Q: Can I add in banana extract or banana flavoring?

    A: Yes you can. But I tell you, if you put enough ripe bananas, you won't need to add in more banana flavoring. Natural is always best 😉

    Q: Can I use any brand of vanilla cake mix?

    A: Yes, you can use any brand, whatever is available in your area or any of your favorite cake mix brands.

    4 from 1 vote
    Print Pin Recipe

    BEST Banana Cake

    This is absolutely the BEST and EASIEST Banana Cake recipe you will ever have -  moist, loaded with ripe bananas and truly a super duper easy cake to bake!
    Author: Lainey
    Prevent your screen from going dark

    Ingredients

    • 1 package 15 oz vanilla cake mix
    • 1 cup water
    • ⅓ cup oil
    • 3 eggs
    • 2 bananas mashed (1 heaping cup)
    • 1 teaspoon baking soda

    Instructions

    • Preheat oven to 350F and spray 13x9 inch pan with nonstick cooking spray.
    • In a large bowl add vanilla cake mix, water, oil, eggs, and mix until well combined. Add the mashed bananas, baking soda, and mix.
    • Add the batter into the pan and bake for 35 to 40 minutes.
    Leave a Comment

    Watch The Recipe Video!
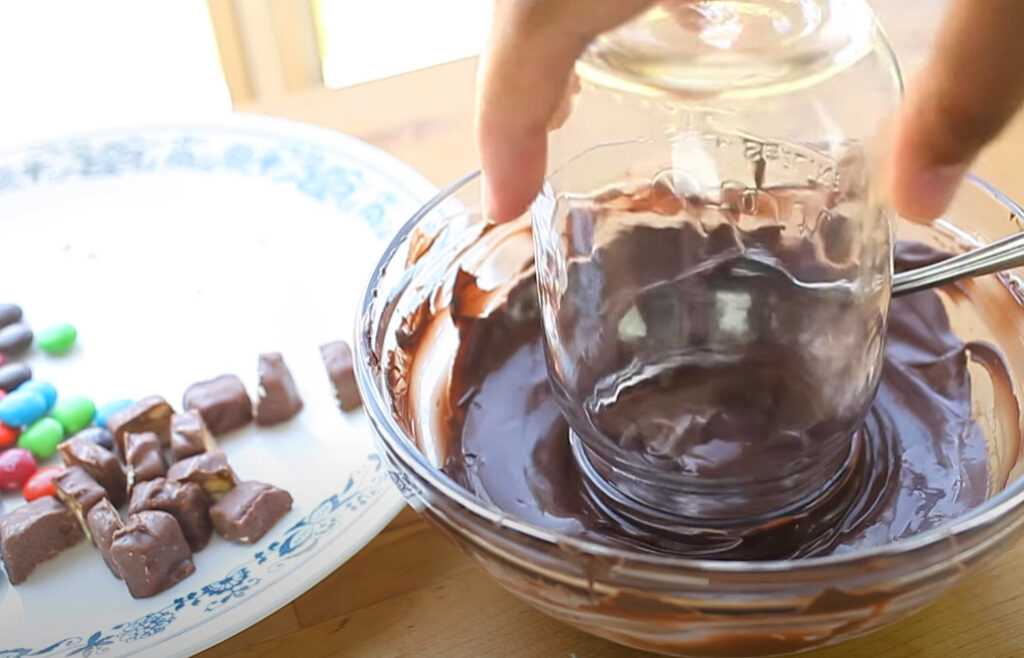
    QR Code
    Did you make this recipe?Share it on instagram or tag @simplybakings or #simplybakings!

    NEVER MISS A RECIPE!

    PINTEREST / FACEBOOK / INSTAGRAM / TWITTER

    If you’ve tried this or any other of my recipes, don’t forget to rate the recipe and to leave me a comment. I love hearing from you!

    Breakfast & Brunch, Cake, Desserts

    Cinnamon Twists

    Mar 18, 2016 · Leave a Comment

    5 ingredients or less

    These delightful Cinnamon Twists are perfect for a brunch, lunch or snacks. Your friends and family cannot only eat one piece, but they'll also keep coming back for more!

    4-ingredient cinnamon twists on a white plate

    Tips and Tricks for Making This Cinnamon Twists Recipe: 

    • When baking these, make sure to use a non-stick baking tray or spray your tray with a non-stick cooking spray.
    • if you do not like the idea of directly dipping the puff pastry into the melted butter, you can use a pastry brush instead. Just make sure to coat the pastry evenly to ensure that the sugar-cinnamon mixture will stick onto them.
    • If your puff pastry is frozen, make sure to thaw it by leaving it in room temperature for at least one hour. This would make it easier to slice and to twist.

    How to Make this Cinnamon Twists Recipe:

    Before we start assembling the cinnamon twists, make sure you have preheated your oven to 400F and line cookie sheet with a baking mat or parchment paper.

    Gather all the ingredients. Now, let's begin!

    In a large plate or bowl, mix brown sugar and cinnamon until well combined:

    ingredients for easy cinnamon twists recipe

    Then take one piece of bread dough, dip it in the melted butter, and remove the excess butter by tapping it in the sides of the bowl:

    dipping the puff pastry into the melted butter

    Place it in the cinnamon-sugar mix, and coat the bread dough until it is covered with cinnamon sugar:

    covering the puff pastry twist with cinnamon and sugar mixture
     
    Fold in half and twist, then place on a baking sheet:
    twisting the puff pastry and placed on a baking mat
     
    Bake for 10-12 minutes:
    ready to bake cinnamon twists
     
    Remove from oven and allow it to cool and sprinkle powdered sugar. That's how easy it is, Simply Bakers! Cut, dip, twist, and bake!
     
    freshly baked cinnamon twists with powdered sugar

    Frequently Asked Questions for the Cinnamon Twists Recipe:

    Q: How many servings would this recipe do?

    A: This delicious and easy cinnamon twist recipe could make seven to ten pieces, depending on how thick or thin your slices are.

    Q: I don't have an oven. Can I deep-fry this instead?

    A: I haven't tried it with this recipe but I think that should work, provided that the pastry is thawed and soft.


    Looking for more recipes similar to this? Try these:

    • Quick & Easy Cinnamon Roll Bites
    • Shakoy (Filipino Donut)
    • Healthy Vegan Muffins
    • Pretzel Bites
    • Cinnamon Coffee Cake

    Happy Baking!

    freshly baked cinnamon twists
    5 from 1 vote
    Print Pin Recipe

    Cinnamon Twists

    A delicious, soft, and chewy cinnamon twists treat and always a party favorite!
    Author: Lainey
    Prevent your screen from going dark

    Ingredients

    • 2 tablespoons melted butter
    • 1 can refrigerated bread dough
    • ½ cup brown sugar packed
    • 1 tablespoon cinnamon
    • powdered sugar optional

    Instructions

    • Preheat oven to 400F and line cookie sheet with baking mat or parchment paper.
    • In a large plate or bowl, mix brown sugar and cinnamon until well combined.
    • Then take one piece of bread dough, dip it in the melted butter, and remove the access butter, place it in the cinnamon sugar mix, and coat the bread dough until it is covered with cinnamon sugar. Fold in half and twist, then place on baking sheet.
    • Bake for 10-12 minutes.
    • Remove from oven and allow it to cool and sprinkle powdered sugar
    Leave a Comment

    Watch The Recipe Video!

    QR Code
    Did you make this recipe?Share it on instagram or tag @simplybakings or #simplybakings!

    NEVER MISS A RECIPE!

    PINTEREST / FACEBOOK / INSTAGRAM / TWITTER

    If you’ve tried this or any other of my recipes, don’t forget to rate the recipe and to leave me a comment. I love hearing from you!

    Bread, Breakfast & Brunch, Desserts

    Toaster Pastries

    Mar 11, 2016 · 2 Comments

    toaster pastries

    Hi everyone, it’s Lainey and welcome back to Simply Bakings! Today I'm sharing another delicious recipe with you sponsored by Crisco Scratch Academy. I'll tell you more about the Scratch Academy later but in the meantime, I’m going to share with you how to make 3 flavors of mini Toaster Pastries!

    toaster pastries

    The Crisco Scratch Academy is a virtual baking school to help and inspire at home baking using traditional pie and baking recipes! Whether you’re an experienced baker or making a pie crust for the very first time, check out the Crisco Heritage Kitchen site (www.Crisco.com/heritage-kitchen/) to discover new takes on traditional pie classics, baking tips, or find inspiration for your next baking adventure.

     Don’t forget to visit www.Crisco.com/heritage-kitchen/ to find more baking inspiration!

    freshly baked toaster pastries in 3 flavors

    Tips and Tricks for Making This Toaster Pastries Recipe: 

    • Make sure not to overfill your toaster pastry. Put just enough of each flavor.
    • For a more festive look, you can pour white sugar glaze and put some colorful sprinkles on top. I am sure kids will love it!
    • If you have time to wait and refrigerate your pastry crust, do it. This will improve the texture of the crust.

    How to Make this Toaster Pastries Recipe:

    Gather the ingredients for this Toaster pastries recipe and once the ingredients are all ready, let's begin!

    Here's how to make the pastry crust:

    In a large mixing bowl add the flour, shortening, sugar, salt and use a pastry cutter to blend it together until crumbly. Then in a small bowl mix the water and egg. Add it into the flour mixture and mix until it’s well combined:

    mixing butter to the flour for toaster pastries recipe

    Split the dough in half and chill both halves in the refrigerator until ready to use:

    cutting the toaster pastries dough in two portions

    However since we are going to use it immediately, sprinkle some flour over your working space.

    Roll out the pastry crust to about ⅛ inch thick and cut it into the sizes you want for the toaster pastries.:

    flattening out the dough using a rolling pin

    I’m going to use a ruler and a pizza cutter to help me keep my lines straight. (dimensions will be in the description box):

    cutting the dough with a pizza cutter and measuring it with a ruler

    Remember every pastry crust you slice,  make a matching one to cover it. Don't forget to brush egg wash over the pastry crust before using it, just like so:

    brushing egg wash to the pastry crust and poking holes on them

    To make the Chocolate Chip Flavor:

    As I have mentioned above which is brush egg wash on the toaster pastries and poke the top pastry crust using a fork a couple of times.

    Then for the chocolate chip filling, in a large bowl, mix together the butter, sugar, and eggs until light and fluffy. 

    mixing ingredients for the chocolate chip filling

    Then add the salt,  all-purpose flour, and chocolate chips and mix until just combined:

    adding chocolate chips and flour

    Take about 1 tablespoon of chocolate chip dough and flatten it,  place it on the bottom of the pastry crust, and take the top pastry crust and cover it.  Don’t forget to use a fork to press around the edges of the toaster pastries:

    putting chocolate chip filling to individual pastry crusts

    To make the S'mores flavor:

    Brush egg wash on the toaster pastries to give it a nice golden color and poke the top pastry crust a couple of times to allow the heat to release so it won’t explode.

    Spread some marshmallow creme on the bottom toaster pastry, next add some chocolate spread: 

    putting the s'mores filling

    Then sprinkle graham cracker pieces.  Be careful not to add too much because sometimes less is more:

    sprinkling crushed graham to the smores filling

    covering the pastry crust and sealing it using a fork

    To make the Cranberry flavor:

    1. Repeat process as above.

    putting cranberry jam on each pastry crust

    Now bake the toaster pastry at 350F for about 17‐20 minutes.

    toaster pastries on a blue plate

    freshly baked toaster pastries

    Frequently Asked Questions for the Toaster Pastries Recipe:

    Q: How many servings would this recipe do?

    A: This delicious and easy toaster pastry recipe could make six up to 10 pieces, depending on how big your slices are.

    Q: Do I need to poke the pastry crust? Will it not make the filling come out during baking?

    A: Yes, that step is necessary. It prevents the pastry from "exploding" while baking. Also, you have to poke holes that are not so big so the filling would just be intact while baking.

    freshly baked toaster pastries on a blue plate
    No ratings yet
    Print Pin Recipe

    Toaster Pastries

    Make 3 delicious flavors of toaster pastries at home with this easy recipe!
    Author: Lainey
    Prevent your screen from going dark

    Ingredients

    In making the pastry crust:

    • 4 cups Pillsbury BEST All Purpose Flour
    • 1 ¾ cups Crisco Shortening Baking Sticks
    • 2 tablespoons white sugar
    • 1 ½ teaspoon salt
    • ½ cup water
    • 1 egg

    Now to make the 3 flavors:

    For the S’mores Flavor:

    • 1 cup marshmallow creme
    • ½ cup chocolate spread
    • ½ cup graham cracker pieces
    • egg wash

    For the Chocolate flavor:

    • 1 stick ½ cup butter, softened
    • ¾ cup brown sugar
    • 1 large egg
    • ¼ tsp salt
    • 1 cup plus ¼ cup Pillsbury BEST All Purpose Flour
    • 1 cup mini chocolate chips

    For the Cranberry Flavor:

    • 1 jar of Cranberry Jam

    Instructions

    Here's how to make the pastry crust:

    • In a large mixing bowl add the flour, shortening, sugar, salt and use a pastry cutter to blend it together until crumbly.
    • In a small bowl mix the water and egg. Add it into the flour mixture and mix until it’s well combined.
    • Split the dough in half and chill both halves in the refrigerator until ready to use. However since we are going to use it immediately, sprinkle some flour over your working space.
    • Roll out the pastry crust to about ⅛ inch thick and cut it into the sizes you want for the toaster pastries.  I’m going to use a ruler and a pizza cutter to help me keep my lines straight. (dimensions will be in the description box)
    • Remember every pastry crust you slice,  make a matching one to cover it.

    To make the S'mores flavor:

    • Brush  egg wash on the toaster pastries to give it a nice golden color and poke the top pastry crust a couple of times to allow the heat to release so it won’t explode.
    • Spread some marshmallow creme on the bottom toaster pastry, next add some chocolate spread, then sprinkle graham cracker pieces.  Be careful not to add too much because sometimes less is more.  
    • Then take the top pastry crust and place on the bottom.  Using a fork to press around the edges of the toaster pastries to seal it.

    To make the Chocolate Chip Flavor:

    • So do exactly what I mentioned above which is brush egg wash on the toaster pastries and poke the top pastry crust a couple of times.
    • In a large bowl mix together the butter, sugar, and eggs until light and fluffy. Then add the salt,  all-purpose flour, and chocolate chips and mix until just combined.
    • Take about 1 tablespoon of chocolate chip dough and flatten it,  place it on the bottom of the pastry crust, and take the top pastry crust and cover it.  Don’t forget to use a fork to press around the edges of the toaster pastries.

    To make the Cranberry flavor:

    • Repeat process as above.
    • Now bake the toaster pastry at 350F for about 17‐20 minutes.
    Leave a Comment

    Watch The Recipe Video!
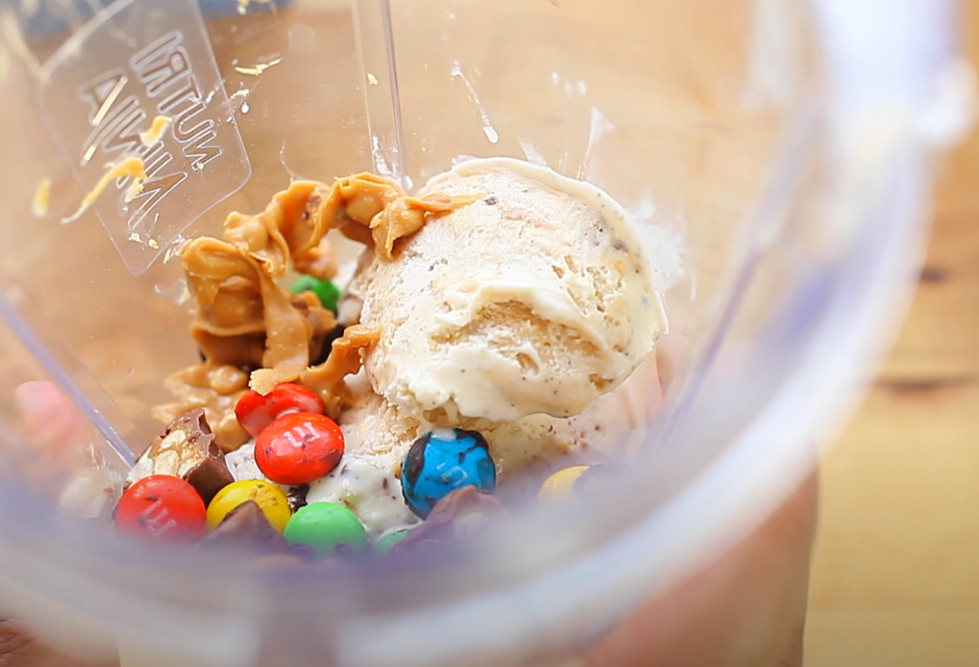
    QR Code
    Did you make this recipe?Share it on instagram or tag @simplybakings or #simplybakings!

    NEVER MISS A RECIPE!

    PINTEREST / FACEBOOK / INSTAGRAM / TWITTER

    If you’ve tried this or any other of my recipes, don’t forget to rate the recipe and to leave me a comment. I love hearing from you!

    Breakfast & Brunch, Desserts

    Chocolate Rice Krispies without Marshmallows

    Mar 4, 2016 · 3 Comments

    sliced chocolate rice krispies

    If you're craving a quick and easy chocolatey treat but want to skip the marshmallows, this Chocolate Rice Krispies Without Marshmallows recipe is just what you need. With only two simple ingredients, you’ll have a crunchy, rich, and homemade rice krispies in no time!

    Craving for more chocolatey treats? Try my best ever Chocolate Chip Cookies, Caramel Salted Chocolate Cookies, and this 3 Ingredient Chocolate Cupcakes.

    sliced chocolate rice krispies
    [feast_advanced_jump_to]

    What are Chocolate Rice Krispies without Marshmallows

    Traditional Rice Krispie treats use melted marshmallows to bind the cereal together. However, this version skips the marshmallows entirely and relies on melted chocolate to hold everything together, resulting in a crispy, rich, and intensely chocolatey bite.

    With just two simple ingredients, these chocolate rice krispie treats are incredibly easy to make and requires no baking at all. Whether you’re looking for a quick snack, a homemade dessert, or a fun treat to share with family and friends, this recipe has you covered.

    Plus, it’s completely customizable, so you can switch up the chocolate type, add nuts or dried fruit, or even drizzle caramel on top for an extra indulgence.

    The best part? It’s a great alternative for those who prefer a treat without marshmallows, offering a slightly more refined texture and deep, rich chocolate flavor.

    Substitutions

    • Rice Krispies alternatives – Use puffed rice cereal or crispy rice cereal for the same crunchy texture.
    • Sweetener options – Instead of shortening, try using coconut oil or honey or maple syrup for a naturally sweet touch.
    • Dairy-free chocolate – Vegan chocolate chips ensure the recipe stays gluten-free and dairy-free.

    Variations

    • Chocolate Peanut Butter Rice Krispie Treats – Stir in melted peanut butter for a richer flavor.
    • Nut-Free Version – Use tahini or sunflower seed butter instead of nut-based spreads.
    • Extra Crunch – Add chopped nuts, coconut flakes, or freeze-dried fruit, sunflower seeds or a little extra crispy rice cereal to the cereal mixture.
    • Vanilla Infusion – A splash of vanilla extract enhances the overall depth of flavor.

    Storage

    • At room temperature: Store in an airtight container for up to 1 week.
    • In the fridge: Keeps fresh for up to 2 weeks.
    • In the freezer: Freeze for up to 3 months and thaw before eating.

    Ingredients

    After gathering your ingredients, let's begin!

    • dark chocolate chips
    • rice krispies
    • butter-flavored shortening (optional, for smoother melting)

    Instructions

    Line an 8x8-inch pan with parchment paper and lightly spray with oil. Sprinkle the Rice Krispies evenly across the pan.

    On low heat, melt the chocolate chips in a saucepan, stirring continuously. If needed, add shortening to help achieve a smooth texture.

    Pour the melted chocolate over the Rice Krispies, making sure it spreads evenly. Place in the refrigerator for at least 30 minutes before slicing and serving.

    Top Tips

    • Use high-quality chocolate for better taste and texture.
    • Stir constantly to prevent burning while melting the chocolate.
    • Add extra Rice Krispies if you prefer a crunchier bite.

    FAQ

    Is it cheaper to make Rice Krispies or buy them?

    Making Rice Krispies at home can save money, especially if you buy ingredients like chocolate chips and rice krispies in bulk. However, prices may differ depending on local grocery costs and ongoing sales, so it’s a good idea to compare prices before shopping.

    Why is there a shortage of Rice Krispies?

    Rice Krispies shortages may arise from supply chain disruptions, heightened demand, or ingredient shortages. Production delays and shifts in consumer preferences can also contribute to the problem.

    What can I use instead of Rice Krispies?

    Try puffed rice cereal, cornflakes, or crushed granola.

    sliced chocolate rice krispies
    4.80 from 5 votes
    Print Pin Recipe

    Chocolate Rice Krispies without Marshmallows

    A quick and easy homemade chocolate rice krispies without marshmallows. Perfect for a sweet treat or a simple dessert.
    Prep Time5 minutes mins
    Cook Time5 minutes mins
    Chill Time30 minutes mins
    Total Time40 minutes mins
    Course: Desserts
    Cuisine: American
    Servings: 12 servings
    Calories: 174kcal
    Prevent your screen from going dark

    Ingredients

    • 2 cups dark chocolate chips
    • ¼ cup rice krispies the more the better
    • 1-2 tablespoons butter flavored shortening optional

    Instructions

    • In a 8x8 inch pan cover with parchment paper and spray it lightly with some oil. Add the rice krispies and spread out, then set aside.
    • On low heat in a saucepan, add the dark chocolate chips and mix until nice and smooth. It should not take more than 4-5 minutes. If the chocolate does not get smooth, add some shortening to help thin it out.
    • Pour the chocolate into the pan and spread out the chocolate. Place in the refrigerator for at least 30 minutes. Serve.
    Leave a Comment
    Serving: 1pieceCalories: 174kcalCarbohydrates: 17gProtein: 2gFat: 10gSaturated Fat: 9gPolyunsaturated Fat: 0.4gMonounsaturated Fat: 1gTrans Fat: 0.1gCholesterol: 0.3mgSodium: 35mgPotassium: 191mgFiber: 1gSugar: 10gVitamin A: 42IUVitamin C: 1mgCalcium: 91mgIron: 1mg

    Watch The Recipe Video!
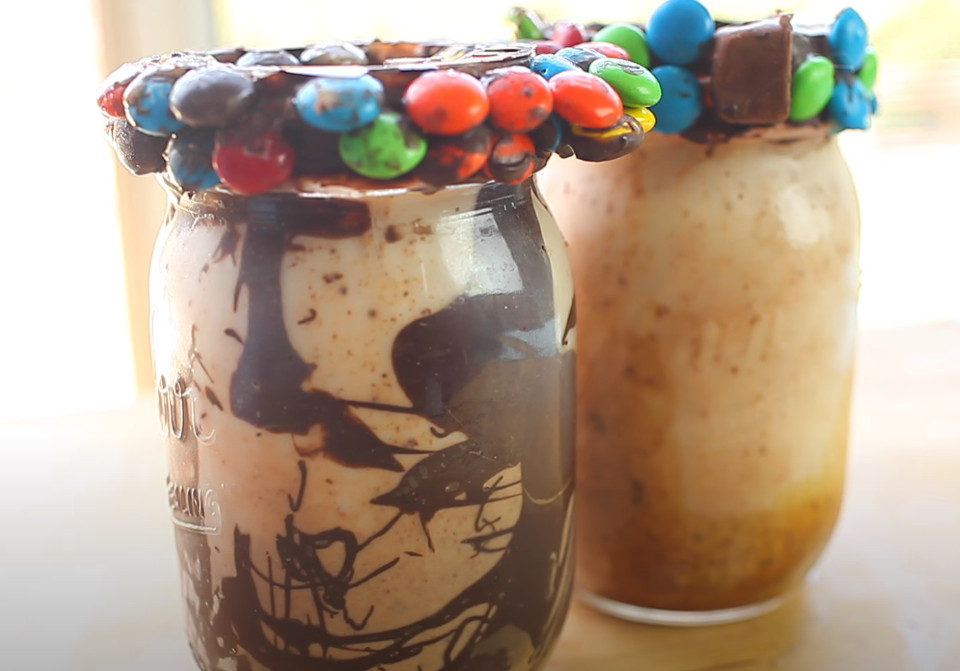
    QR Code
    Did you make this recipe?Share it on instagram or tag @simplybakings or #simplybakings!

    Desserts

    Mocha Cinnamon Cake

    Feb 12, 2016 · 6 Comments

    mocha cake slice
    a slice of mocha cinnamon cake
    freshly baked mocha cinnamon cake frosted with whipped cream

    Tips and Tricks for Making This Mocha Cinnamon Cake Recipe: 

    • Make the top of your cake level by using a spoon or a spatula before popping it in the oven. You can also gently tap the baking pan on your kitchen counter or table to let some excess air out of the batter.
    • For a more festive look, top with whipped cream or your favorite cake frosting before serving.

    How to Make this Mocha Cinnamon Cake Recipe:

    Gather the ingredients for this Mocha Cinnamon Cake. Before you start to mix the ingredients don't forget to preheat oven to 350F and oil 9-inch pan.

    Once the ingredients are all ready, let's begin!

    eggs, butter and sugar for mocha cinnamon cake recipe

    You will need sugar, eggs, butter, and flour:

    You will also need cinnamon, salt, coffee powder, chopped pecans, and mini chocolate chips:

    cinnamon, salt and coffee powder for the mocha cinnamon cake recipe

    In a large bowl add the sugar, butter, eggs, and mix for about 3 minutes or until it’s light and fluffy:

    beating the eggs with a handheld mixer
    adding in the dry ingredients to the butter and sugar mixture

    Next add the cinnamon, instant coffee granules, salt, all-purpose flour, and mix until well combined:

    The batter should look like this, fine and smooth:

    mocha cinnamon cake batter

    Finally add chocolate chips, chopped pecans, and mix:

    adding in the chopped pecans and mini chocolate chips to the batter of mocha cinnamon cake

    Transfer the batter into the pan and bake for about 35-40 minutes or use a toothpick to check if it’s finished:

    ready to be baked mocha cinnamon cake

    Allow the cake to cool for about an hour, then I took my knife and ran it around the edges of the side so it’s easier to release the cake:

    releasing a freshly baked mocha cinnamon cake from the baking pan using a bread knife

    Decorate the top of the cake with your favorite frosting or whipped cream and add some sprinkles! What a lovely sight to see!

    delicious and easy to make mocha cinnamon cake layer with slices

    Frequently Asked Questions for the Mocha Cinnamon Cake Recipe:

    Q: How many servings would this recipe do?

    A: This delicious and easy mocha cinnamon cake recipe could make six to 8 slices, depending on how big your slices are.

    Q: Can I use other kinds of nuts?

    A: Yes, you can. You may also add in some bits of chocolate or caramel candies in the batter, that is if you have a sweet tooth.

    mocha cake slice
    5 from 1 vote
    Print Pin Recipe

    Mocha Cinnamon Cake

    Mocha Cinnamon Cake, delicious and easy to make - it's perfect for breakfast, brunch or snacks!
    Author: Lainey
    Prevent your screen from going dark

    Ingredients

    • 1 ¾ cups sugar
    • 1 cup butter melted
    • 4 eggs
    • 1 teaspoons cinnamon
    • 2 teaspoons instant coffee granules
    • ¼ teaspoon salt
    • 1 cup all purpose flour
    • ¾ cup chocolate chips
    • ½ cup chopped pecans

    Instructions

    • Preheat oven to 350F and oil 9-inch pan.
    • In a large bowl add the sugar, butter, eggs, and mix for about 3 minutes or until it’s light and fluffy.
    • Next add the cinnamon, instant coffee granules, salt, all purpose flour and mix until well combined. Finally add chocolate chips, chopped pecans and mix.
    • Transfer the batter into the pan and bake for about 35-40 minutes or use a toothpick to check if it’s finished.
    • Allow the cake to cool for about an hour, then I took my knife and ran it around the edges of the side so it’s easier to release the cake.
    Leave a Comment

    Watch The Recipe Video!
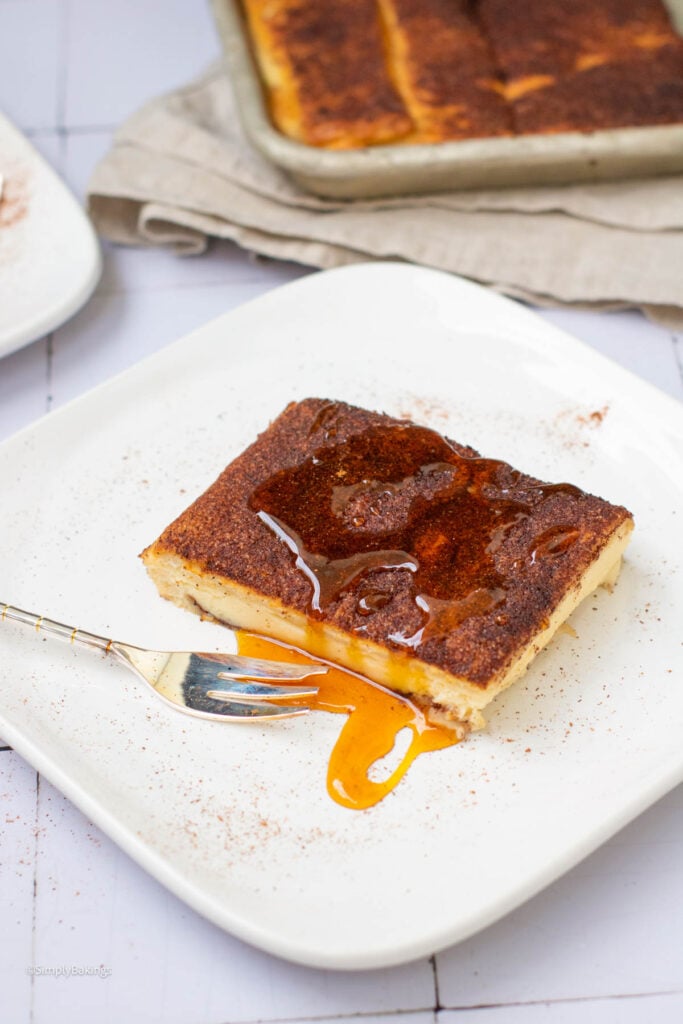
    QR Code
    Did you make this recipe?Share it on instagram or tag @simplybakings or #simplybakings!

    NEVER MISS A RECIPE!

    PINTEREST / FACEBOOK / INSTAGRAM / TWITTER

    If you’ve tried this or any other of my recipes, don’t forget to rate the recipe and to leave me a comment. I love hearing from you!

    Cake, Desserts

    Strawberry Stuffed Cheesecake Bites

    Feb 5, 2016 · 6 Comments

    delicious no bake strawberry dessert

    Try this easy Strawberry Stuffed Cheesecake Bites recipe—the perfect no-bake treat! With fresh and juicy strawberries and creamy cheesecake filling, you are in for a pretty and delicious, quick treat!

    Would you love to try more strawberry recipes? Try my Strawberry Poke Cake, Strawberry Cookies, and White Chocolate Strawberry Pie recipe!

    Strawberry Stuffed Cheesecake on a cake stand
    [feast_advanced_jump_to]

    What are Strawberry Stuffed Cheesecake Bites?

    Strawberry Stuffed Cheesecake Bites are a delicious no-bake dessert that combines the sweetness of fresh, fresh strawberries with the creamy richness of cheesecake. Each strawberry is hollowed out and filled with a smooth mix of cream cheese, powdered sugar, and vanilla extract, resulting in a perfectly balanced bite-sized dessert.

    These simple yet beautiful strawberry cheesecake bites with cream cheese filling and a sprinkle of graham cracker crumbs make a classic cheesecake finish. They are quick to create and require few ingredients, making them excellent for parties, gatherings, or an evening indulgence at home!

    Health Benefits of Strawberry

    • Vitamin C-rich, which boosts immunity and improves skin health.
    • Low in calories and high in fiber, which promotes digestion.
    • Improve heart health by lowering cholesterol and blood pressure.
    • Low in carbohydrates making them an excellent addition to a healthy diet.

    Variations

    • Nutty Toppings: Crushed nuts such as almonds, pecans, or pistachios can be sprinkled on top to add texture and flavor.
    • Chocolaty Bites: Dip the stuffed strawberries in melted chocolate and allow them to set or just drizzle melted chocolate over them for added luxury.
    • Berry Medley: Mix in some finely chopped raspberries or blueberries into the cheesecake filling to make berry mix bites
    • Caramel Drizzle: For a finishing touch of rich sweetness, drizzle the graham cracker crumbs and stuffed strawberries with caramel sauce.

    Substitutions

    • Strawberries: For more variety, you may use hollowed-out raspberries, blackberries, or small apple slices.
    • Powdered Sugar: To make a refined-sugar-free version, replace powdered sugar with natural sweeteners such as honey or maple syrup.
    • Cream Cheese: Mascarpone can be used in place of cream cheese for a little sweeter, creamier filling, or Greek yogurt for a lighter, tangier option.
    • Graham Cracker Crumbs: Substitute crushed Oreos, digestive biscuits, or oats for the graham cracker crumbs for a different topping.

    Storage

    • Strawberry Stuffed Cheesecake Bites can be kept in the refrigerator for up to two days in an airtight container to preserve their freshness.
    • To avoid soggy strawberries, assemble right before serving for the best results.

    Ingredients

    These are the ingredients that you will need:

    • large strawberries
    • cream cheese
    • sifted powdered sugar
    • vanilla extract
    • graham cracker crumbs
    ingredients for no bake strawberry stuffed cheesecake

    Instructions

    Beat cream cheese until whipped in a bowl using an electric mixer. Then, combine cream cheese, powdered sugar, and vanilla extract and mix again:

    mixing cream cheese and sugar

    Place the cream cheese mixture in a piping bag or ziplock bag:

    pastry bag with cream cheese filling

    Cut around the strawberry and remove the center using a paring knife. Then, pipe and fill the center of strawberries with cream cheese mixture:

    filling the center of strawberries with cream cheese mixture

    Add some crushed graham crackers over the cheesecake stuffed strawberries and serve. You can also chill this for at least 30 minutes before serving:

    adding some crushed graham crackers on top of each strawberry

    With just 5 ingredients and a short prep time, you can now enjoy these delicious mini strawberry cheesecakes. Yum!

    Top Tips

    • Choose large, firm strawberries to keep the cheesecake filling from turning mushy.
    • Using a melon baller or spoon, gently hollow out the strawberries, leaving enough fruit to support the filling.
    • Chill the cheesecake filling for 10-15 minutes to make it simpler to insert into the strawberries.

    FAQ

    Can you freeze strawberry-stuffed cheesecake bites?

    Yes, definitely! You can eat them frozen or you can thaw and blend them again before serving. But I prefer eating these just in a chilled state.

    Can I make strawberry-stuffed cheesecake bites the night before?

    Yes, you can. Just make sure to store it properly and chill it.

    How do you make a strawberry-stuffed cheesecake bites dairy-free?

    I believe there is a dairy-free cream cheese. Use that as a substitute for regular cream cheese.


    More Strawberry Desserts

    Here  are  more strawberry  desserts  you  will  love:

    • No Bake Strawberry Float
    • NO BAKE Banana Strawberry Pie
    • Easy Strawberry Shortcake Cookies
    • Strawberry Bundt Shortcake
    • Strawberry Pocky Cake
    • Strawberry Greek Yogurt Cake

    Let me know in the comments below if you have tried these recipes or tag me on Pinterest or Facebook. Thank you for visiting my blog!

    delicious Strawberry Stuffed Cheesecake Bites on a cake stand
    5 from 4 votes
    Print Pin Recipe

    Strawberry Stuffed Cheesecake Bites

    These pretty, simple, and no-bake Strawberry Stuffed Cheesecake Bites are the perfect no-bake treat! They are deliciously made with fresh, juicy strawberries and creamy cheesecake filling!
    Prep Time15 minutes mins
    Chill Time30 minutes mins
    Total Time45 minutes mins
    Course: Dessert, Snacks
    Cuisine: American
    Servings: 12 pieces
    Calories: 30kcal
    Author: Lainey
    Prevent your screen from going dark

    Ingredients

    • 1 lb large strawberries
    • 1 8oz package cream cheese, softened
    • ¼ cup sifted powdered sugar
    • 1 teaspoons vanilla extract
    • ¼ cup graham cracker crumbs

    Instructions

    • Beat cream cheese until whipped.
    • Add powdered sugar.
    • Add vanilla extract & mix.
    • Place the cream cheese mixer in a pastry bag or ziplog bag.
    • Cut around the strawberry and remove the center.
    • Add some crushed graham cracker.
    • Fill the center of strawberries with cream cheese mixture.
    • Serve.
    Leave a Comment
    Serving: 1pieceCalories: 30kcalCarbohydrates: 7gProtein: 0.4gFat: 0.3gSaturated Fat: 0.1gPolyunsaturated Fat: 0.1gMonounsaturated Fat: 0.1gCholesterol: 0.1mgSodium: 12mgPotassium: 62mgFiber: 1gSugar: 5gVitamin A: 6IUVitamin C: 22mgCalcium: 8mgIron: 0.2mg

    Watch The Recipe Video!
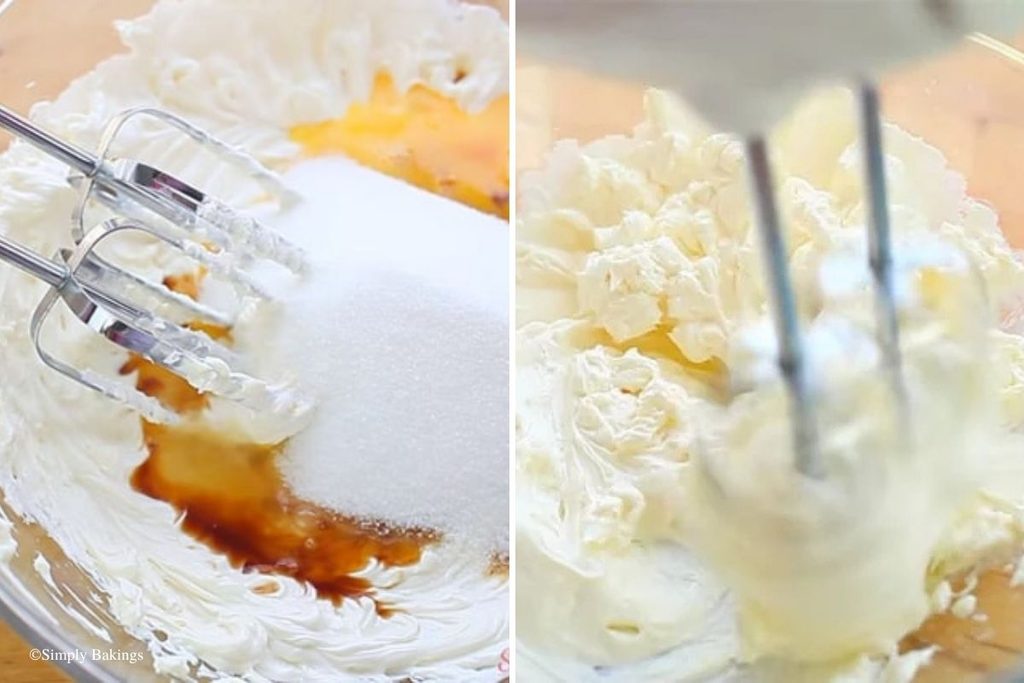
    QR Code
    Did you make this recipe?Share it on instagram or tag @simplybakings or #simplybakings!

    Cheesecake, Desserts

    Cinnamon Sugar Pretzel Bites Recipe

    Feb 1, 2016 · 2 Comments

    Soft, sweet, and totally addictive—these Cinnamon Sugar Pretzel Bites are the perfect bite-sized treat! Golden on the outside and pillowy inside, they’re tossed in a generous cinnamon-sugar coating that makes every bite irresistible. Whether you’re planning a cozy movie night or need a quick party snack, this easy recipe brings bakery-style pretzels right into your kitchen!

    Love this kind of recipe? Here are 3 more sweet snack recipes you might enjoy: Chocolate Filled Bread, French Breakfast Bread, and Buttermilk Chocolate Bread.

    freshly baked easy and delicious pretzel bites
    [feast_advanced_jump_to]

    Why You'll Love This Recipe

    You’ll love this recipe because it’s incredibly easy to make—even if you’ve never baked pretzels before. The dough is simple and forgiving, making it perfect for beginners. These cinnamon sugar pretzel bites turn out soft and chewy on the inside, with a golden, slightly crisp exterior. Each piece is coated in a sweet cinnamon-sugar mix that makes them totally addictive. They’re bite-sized and perfect for sharing (if you can resist eating them all yourself!). Kids will love helping in the kitchen, and the leftovers—if there are any—freeze well and reheat beautifully. Plus, they taste just like those warm, sweet pretzel bites from the mall, only fresher and better!

    The Story Behind [Dish/Topic]

    I created these cinnamon sugar pretzel bites on a quiet weekend, craving something sweet and nostalgic—like those mall pretzels I used to love. After a few tweaks, this version became a go-to treat in our kitchen. Now it’s one of our favorite recipes to bake, especially when we want something warm, cozy, and fun to share.

    Ingredients

    Listed below are all the ingredients you will need:

    • dough
    • warm water
    • dry yeast
    • brown sugar
    • all purpose flour
    • vegetable oil
    • dipping mixture
    • baking soda
    • butter
    • cinnamon
    • sugar

    See the recipe card for quantities.

    yeast mixture for pretzel bites recipe

    Instructions

    In a measuring cup add warm water, a packet of dry yeast, and brown sugar. Mix & wait for 5 minutes for the yeast to activate:

    In a large bowl add yeast mixture and 2 ½ cups of flour:

    mixing the wet and dry ingredients of pretzel bites recipe

    Mix until the dough is formed.

    Now, these following steps are very important:

    Knead for 5-10 min. Then in a large bowl, add ½ tablespoon oil to coat the inside of the bowl. Coat dough with the oil from the bowl

    At this point, it is waiting time:

    Cover bowl with saran wrap or plastic wrap tightly (or bread towel):

    kneaded dough of pretzel dough bites

    Transfer onto a table and add the rest of ½ cup flour if sticky:

    risen pretzel bites dough on a wooden table

    Once the dough is doubled in size punch the dough down to release the air

    double-sized dough of pretzel bites inside a clear bowl

    Cut the dough into 3-4 pieces and roll the dough into a long line and cut into small pieces for the bite-sized pretzels:

    pretzel dough cut into bite-size pieces

    In a small bowl add warm water and baking soda and mix. Dip dough into the mixture (do not soak):

    dipping pretzel dough bits into warm water and baking soda mixture

    Transfer into baking pan and bake for 450 F for 8-10 min:

    ready to bake pretzel dough bites on a baking mat

    Here are your freshly baked, soft and delicious pretzel bites!

    golden brown freshly baked pretzel bites

    Remove and dip in the cinnamon sugar mixture or simply drizzle on top and mix gently until all the pretzel bites are coated with the cinnamon-sugar mixture:

    drizzling cinnamon and sugar mixture onto freshly baked pretzel bites

    If you do not want to make the pretzel bites a bit sweeter, you can leave them as is, just like so:

    freshly baked pretzel bites in a bowl

    Substitutions & Variations

    • Ingredient Swap
      • All-purpose flour → Use bread flour for a chewier texture, or gluten-free 1:1 flour for a GF version.
      • Butter → Swap with vegan butter or coconut oil to keep it dairy-free.
      • Milk (if used in dough or coating) → Try almond milk or oat milk as a plant-based alternative.
      • White sugar → Use coconut sugar or brown sugar for a deeper, caramel-like sweetness.
      • Cinnamon → Out of cinnamon? Try pumpkin spice or apple pie spice for a seasonal twist.
    • Variation
      • Chocolate-Dipped Pretzel Bites – Dip the cooled bites in melted dark or white chocolate for an extra indulgent treat.
      • Stuffed Pretzel Bites – Tuck in a small piece of vegan chocolate or cream cheese before baking for a surprise center.
      • Savory Pretzel Bites – Skip the cinnamon sugar and sprinkle with garlic powder, nutritional yeast, or everything bagel seasoning instead
    • Mistake to Avoid
      • One common mistake is not letting the dough rise enough. Skipping or rushing this step can lead to dense, chewy bites instead of light and fluffy ones. Also, make sure the baking soda water is hot, not lukewarm—this helps give the pretzels their signature chewy texture and golden color. And don’t wait too long to coat the bites in cinnamon sugar—they need to be warm for the sugar to stick properly!
    • Storage Tips
      • Store leftover pretzel bites in an airtight container at room temperature for up to 2 days. To keep them soft, you can add a small piece of bread to the container. For longer storage, place them in the freezer for up to 1 month. Reheat in the oven or air fryer at 300°F (150°C) for a few minutes until warm and soft again—just like fresh!

    FAQ

    Q: Can I freeze the dough after rising and bake it after a few days?

    A: Yes, sure you can. Freezing the dough won't affect the taste nor the texture of the pretzel bites.

    Q: Can I do this a few days ahead?

    A: Yes, sure you can. After baking, cool them completely and store in an airtight container.

    Q: What are the usual dippings that could be used for pretzel bites?

    A: There are endless possibilities for pretzel bites dippings. Some popular dipping is mustard, spicy cheese dipping, cream cheese dippings, and the list goes on.

    Q: What is the purpose of the baking soda and warm water mixture to the pretzels?

    A: The mixture is often called baking soda bath. It will give the pretzel a nice golden brown color after baking.


    fresh pretzel bites sprinkled with cinnamon sugar in a bowl
    No ratings yet
    Print Pin Recipe

    Cinnamon Sugar Pretzel Bites

    Delicious Pretzel Bites to satisfy your cravings.
    Course: Snacks
    Author: Lainey
    Prevent your screen from going dark

    Ingredients

    • Dough
    • 1 ½ cups warm water
    • 1 packet active dry yeast
    • 1 tablespoon brown sugar
    • 3 cups all purpose flour
    • ½ tablespoon vegetable oil
    • Dipping mixture
    • 2 cups warm water
    • 2 tablespoons baking soda
    • Optional dessert style
    • 1 teaspoon of butter
    • 1 tablespoon cinnamon
    • 1 tablespoon sugar

    Instructions

    • In a measuring cup add warm water, packet of dry yeast, and brown sugar
    • Mix & wait for 5 miniutes for yeast to activate
    • In a large bowl add yeast mixture and 2 ½ cups of flour and mix until dough formed
    • Transfer onto a table and add the rest of ½ cup flour if sticky
    • Knead for 5-10 min
    • In a large bowl add ½ tablespoon oil to coat the inside of the bowl
    • Coat dough with the oil from the bowl
    • Cover bowl with saran warp tightly (or bread towel)
    • Tip: Keep in dough in a place where the dough will get warm air like; cupboard put it under a light for faster rising, or on top of your stove oven.
    • Once the dough is doubled in size punch the dough down to release the air
    • Cut the dough into 3-4 pieces
    • Roll the dough into a long line and cut into small pieces for the bite-sized pretzels
    • In a small bowl add warm water and baking soda and mix
    • Dip dough into the mixture (do not soak)
    • Transfer into baking pan and bake for 450 F for 8-10 min
    • Remove and dip in the cinnamon sugar mixture.
    Leave a Comment

    Notes

    Optional (dessert style)
    Add the butter when bread still warm and mix until melted
    Sprinkle the cinnamon and sugar and toss.
    QR Code
    Did you make this recipe?Share it on instagram or tag @simplybakings or #simplybakings!

    NEVER MISS A RECIPE!

    PINTEREST / FACEBOOK / INSTAGRAM / TWITTER

    If you’ve tried this or any other of my recipes, don’t forget to rate the recipe and to leave me a comment. I love hearing from you!

    Bread, Christmas Desserts

    3 Ingredient Oreo Fudge

    Jan 29, 2016 · 4 Comments

    sliced oreo fudge

    sliced Oreo Fudge on  parchment paper

    Tips and Tricks for Making This 3 Ingredient Oreo Fudge Recipe: 

    • When crushing the Oreos, do not make it so fine. You would love to have a bute of the Oreos when eating the fudge.
    • Serve this with vanilla or strawberry flavored ice cream. Ah, that would be a lovely treat on a hot summer day!

    How to Make this 3 Ingredient Oreo Fudge Recipe:

    Gather the ingredients for this 3 Ingredient Oreo Fudge. Once the ingredients are all ready, let's begin!

    • Crushed Oreos
    • white chocolate (high quality)
    • Sweetened condensed milk

    white chocolate, oreos and sweetened condensed milk

    In a medium-size saucepan, add the white chocolate, sweetened condensed milk and melt the chocolate until it’s smooth. If you are not using high quality white chocolate, stirring the chocolate mix constantly is key because you might burn the chocolate:

    pouring the sweetened condensed milk to the chocolate

    Once it’s completely melted and smooth, add the crushed Oreos setting aside a few to garnish later:

    adding and mixing in the Oreos to the milk and chocolate mixture

    In an 8x8 inch pan covered with parchment paper, quickly add the batter, smooth out with the spatula:

    laying the oreo fudge on a dish

    Now it's time to add the rest of the Oreos by pressing into the fudge. After that, place this in the refrigerator for at least 1 hour:

    adding oreos on top for garnish

    How easy was that!!! You now have a delicious treat with just 3 ingredients and it's no-bake! Cut and serve immediately.

    chilled oreo fudge treats

    Frequently Asked Questions for the 3 Ingredient Oreo Fudge Recipe:

    Q: How many servings would this recipe do?

    A: This delicious and easy pie recipe could make 16-20 slices, depending on how big your slices are.

    Q: Can I add in sweetened strawberries to the ingredients?

    A: Yes you can. But obviously, that would make this dessert much sweeter than it already is.

    sliced oreo fudge
    No ratings yet
    Print Pin Recipe

    3 Ingredient Oreo Fudge

    A delicious, sweet treat, 3 Ingredient Oreo Fudge dessert that you can whip up in minutes for any occasion!
    Servings: 12
    Author: Lainey
    Prevent your screen from going dark

    Ingredients

    • 3 cups crushed oreos
    • 12 oz white chocolate high quality
    • 1 14 oz can sweetened condensed milk

    Instructions

    • In a medium size saucepan Add the white chocolate, sweetened condensed milk and melt the chocolate until it’s smooth. If you are not using high quality white chocolate, stirring the chocolate mix constantly is key because you might burn the chocolate.
    • Once it’s completely melted and smooth, add the crushed oreos setting aside a few to garnish later.
    • In a 8x8 inch pan covered with parchment paper, quickly add the batter, smooth out with the spatula and then add the rest of the oreos by pressing into the fudge.
    • Place this in the refrigerator for at least 1 hour.
    • Cut and serve immediately.
    Leave a Comment

    Watch The Recipe Video!
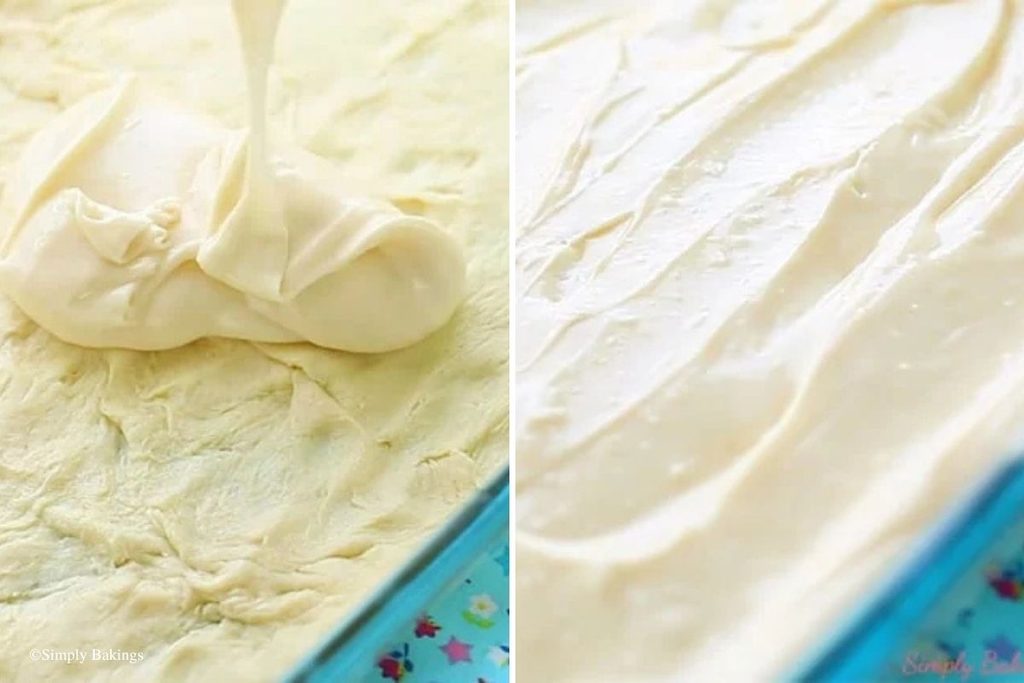
    QR Code
    Did you make this recipe?Share it on instagram or tag @simplybakings or #simplybakings!

    NEVER MISS A RECIPE!

    PINTEREST / FACEBOOK / INSTAGRAM / TWITTER

    If you’ve tried this or any other of my recipes, don’t forget to rate the recipe and to leave me a comment. I love hearing from you!

    Desserts

    Easy Cupcake Recipe with Few Ingredients

    Jan 22, 2016 · 17 Comments

    yummy chocolate cupcake with few ingredients

    Try this super Easy Cupcake Recipe with just a few ingredients: eggs, flour, and your favorite chocolate! Perfect for a quick treat—simply mix, melt, and bake. In under 30 minutes, you'll have 6 deliciously simple cupcakes ready to enjoy.

    Looking for more yummy cupcakes? Try my Red Velvet Cupcakes, Lemon Cupcakes, or my Addicting Pina Colada Cupcakes!

    3 ingredient cupcake on a serving plate
    [feast_advanced_jump_to]

    Substitutions

    • Salt: Add a pinch of salt to balance the sweetness.
    • Vanilla Extract: Use 1 tsp of vanilla extract for a rich flavor.
    • Baking Powder: Add ½ tsp of baking powder to make the cupcakes fluffier.

    Variations

    • Vanilla Cupcakes: Replace the chocolate with ½ cup of flour and add 1 tsp of vanilla extract to create a simple vanilla cupcake recipe.
    • Cookies and Cream: Crush some cookies and fold them into the batter for a cookies and cream twist.
    • Birthday Parties: Add colorful sprinkles to the batter for a festive touch, perfect for birthday parties.
    • Buttercream Frostings: Top your cupcakes with vanilla buttercream frosting for a classic finish.
    3 ingredient cupcake and fork

    Storage

    • Room Temperature: Store cupcakes in an airtight container at room temperature for up to 3 days.
    • Fridge: Keep them in the fridge for up to a week. Let them sit at room temperature before serving.
    • Freezer: Freeze cupcakes in an airtight container for up to 3 months. To serve, thaw them at room temperature.

    Top Tips

    • A stand mixer can help you mix the batter more evenly.
    • It is important that before measuring your all-purpose flour, you sift it in a fine flour sieve to avoid lumps in your cupcake.
    • Always remember that spraying your cupcake liners is a must. This is helpful, especially in recipes where no oil or any fat/shortening is added. The cooking spray prevents your baked goods from sticking to the liners.
    • When melting chocolate, be careful not to put your stove on very high heat. It will burn your chocolates and it will also cause them to curdle.

    Ingredients

    • eggs
    • chocolate chip
    • all-purpose flour

    See the recipe card for quantities.

    eggs, all-purpose flour and chocolate chips

    Instructions

    Preheat oven to 350 F, line 6 cupcake tins with paper liners and spray with oil. This is an important step that you don't want to miss because as we have not added any oil/shortening as an ingredient, there is a tendency that the cupcake will stick to the paper cups even after baking:

    spraying the cupcake liners

    In a large bowl add 3 eggs and whisk it well. You can either do it with a wire whisk or a hand mixer:

    whisking the eggs in a bowl

    Add the all-purpose flour and mix until you see no lumps:

    egg and flour in a bowl

    The consistency has to be slightly runny, just like this. Set this bowl aside.

    egg and flour mixture

    In a saucepan, add the chocolate and melt the chocolate until it is nice and smooth (If you are a novice baker, I strongly suggest to using a double boiler to prevent burning):

    chocolate chips in a saucepan

    Stir it consistently so you won't burn the chocolate. If it still has big lumps of chocolate, continue stirring it:

    slightly melted chocolate chips

    Once the texture is nice and smooth, you can now add the egg mixture to the chocolate and mix very well:

    chocolate chips and egg mixture

    You can see that it will turn out glossy and smooth:

    chocolate cupcake batter in a saucepan

    Take your cupcake pan that is lined with 6 cupcake liners and add the batter into the liners:

    cupcake batter in a baking pan

    Don't worry if your cupcake liners do not look neat after adding the batter. It will hold up its shape and will turn out pretty once it is baked.

    After baking for 15-18 minutes, insert a toothpick into the center of a cupcake; if it comes out clean, they're done. Let it rest in the counter or wire rack in room temperature. Here is your 3-ingredient chocolate cupcakes, smelling so delicious and chocolatey!

    baked chocolate cupcakes

    Frequently Asked Questions

    How to make the perfect cupcake?

    To make the perfect cupcake, ensure your ingredients are at room temperature, mix until just combined, and avoid overbaking by checking with a toothpick.

    Can I double the recipe?

    Absolutely! Simply double all the ingredients to make 12 cupcakes. Adjust the baking time slightly as needed.

    What is the perfect size scoop for cupcakes?

    The perfect size scoop for cupcakes is usually a ¼ cup or a standard ice cream scoop to fill the liners about two-thirds full.


    sweet chocolate cupcake with fork
    4.09 from 12 votes
    Print Pin Recipe

    Easy Cupcake Recipe with Few Ingredients

    Whip up these super easy cupcakes with just 3 main ingredients: eggs, flour, and your favorite chocolate! Perfect for quick treats, simply mix, melt, and bake. In under 30 minutes, you’ll have 6 deliciously simple cupcakes ready to enjoy.
    Prep Time10 minutes mins
    Bake Time18 minutes mins
    Total Time28 minutes mins
    Course: Dessert, Desserts
    Cuisine: American, Filipino
    Servings: 6 cupcakes
    Calories: 50kcal
    Prevent your screen from going dark

    Ingredients

    • 3 eggs
    • ¼ cup all purpose flour
    • 1 cup of milk chocolate or dark chocolate

    Instructions

    • Preheat oven to 350 F, line 6 cupcake tins with liners and spray with oil.
    • In a large bowl add 3 eggs and whisk it well. Next add the all purpose flour and mix until you see no lumps. Set this bowl aside.
    • In a saucepan, melt the chocolate until it is smooth, being careful not to burn it. If you are a novice baker, consider using a double boiler to prevent burning.
    • Once it’s nice and smooth add the egg mixture to the chocolate and mix very well.
    • Then take your cupcake pan that is lined with 6 cupcake lines and make sure to spray it and add the batter into the liners.
    • Bake for 15-18 minutes.
    Leave a Comment
    Serving: 1servingCalories: 50kcalCarbohydrates: 4gProtein: 3gFat: 2gSaturated Fat: 1gPolyunsaturated Fat: 0.4gMonounsaturated Fat: 1gTrans Fat: 0.01gCholesterol: 82mgSodium: 31mgPotassium: 36mgFiber: 0.1gSugar: 0.1gVitamin A: 119IUCalcium: 13mgIron: 1mg

    Watch The Recipe Video!
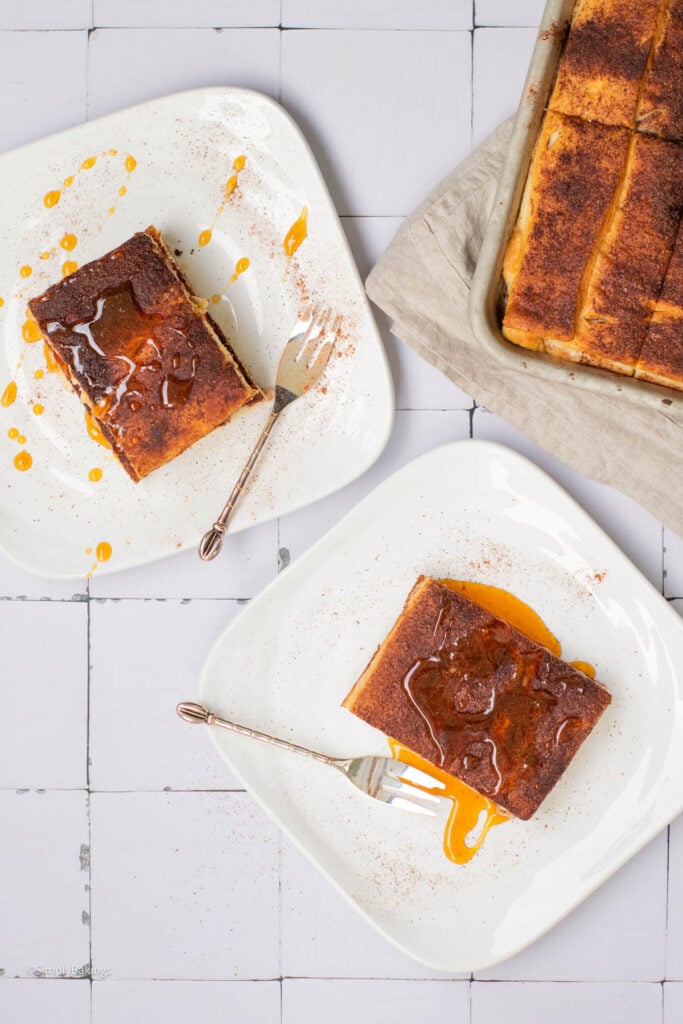
    QR Code
    Did you make this recipe?Share it on instagram or tag @simplybakings or #simplybakings!

    I was so excited to take a spoon and taste it and it was perfect! The cupcake texture was moist and it was not too sweet since we did not add any granulated sugar. Perfect to have with a cup of brewed coffee!

    You Might Also Like

    • Biscoff Milkshake
    • Cantaloupe Smoothie
    • Buko Salad Drink
    • Jackfruit Smoothie

    5 Ingredients or Less, Cupcakes, Desserts

    Espresso Brownie Cookies

    Jan 19, 2016 · 6 Comments

    A batch of Espresso Brownie Cookies on a baking tray

    Rich and fudgy, Espresso Brownie Cookies combine the deep flavors of espresso with the chewy texture of a brownie and the crisp edges of a cookie. Perfect for coffee lovers, these indulgent treats deliver a bold chocolatey bite with a hint of caffeine in every bite!

    Cookies have become such a great part of the snack world that we have different kinds like Oreo Cheesecake cookies, Peanut Butter cookies, and even Vegan Shortbread cookies. Feel free to check out these cookie treats, too!

    A batch of Espresso Brownie Cookies on a baking tray
    [feast_advanced_jump_to]

    What are Espresso Brownies Cookies?

    Espresso Brownie Cookies are a rich and indulgent treat that combines the chewy, fudgy texture of a brownie with the crisp edges of a cookie. Made with espresso powder or brewed espresso, these cookies enhance the deep chocolate flavor. Perfect for coffee lovers, they offer a balanced mix of bittersweet chocolate and bold espresso in every bite.

    The recipe likely emerged in the early 2000s as part of the trend of coffee-infused desserts, inspired by the well-known pairing of chocolate and espresso. With the rise of specialty coffee culture, bakers began experimenting with espresso in brownies and cookies, leading to this delicious hybrid.

    Today, espresso brownie cookies remain a popular choice for those who love the rich, complex flavors of chocolate and coffee in one indulgent treat. Give this a try!

    Variations

    • Mocha Brownie Cookies – Mix in a small amount of cocoa powder and espresso for a balanced coffee-chocolate flavor
    • Extra Bold Espresso Cookies – Double the espresso powder for a stronger coffee kick
    • Chewy Oatmeal Espresso Cookies – Add rolled oats for extra texture and a hearty bite
    • Almond Espresso Cookies – Use almond extract and slivered almonds for a nutty depth
    Two hands holding up a cookie and breaking it apart

    Substitutions

    • Eggs – Flax eggs (3 tbsp flaxseed meal + 9 tbsp water), mashed banana (¾ cup), unsweetened applesauce (¾ cup), or silken tofu (6 tbsp blended)
    • All-purpose flour – Gluten-free flour blend, almond flour (for a denser texture), or oat flour (for a slightly chewier cookie)
    • Semisweet chocolate chips – Dark chocolate chunks, chopped chocolate bars, or sugar-free chocolate chips for a low-sugar option
    • Unsalted butter – Coconut oil, vegan butter, mashed avocado (for a healthier twist), or Greek yogurt (for moisture)

    Storage

    • Room Temperature: Store cookies in an airtight container at room temperature for up to 5 days. Place a slice of bread inside the container to keep them soft.
    • Refrigeration: Keep in an airtight container in the refrigerator for up to 7 days. Let them come to room temperature before serving.
    • Freezing Baked Cookies: Store in a freezer-safe bag for up to 3 months. Thaw at room temperature or microwave for 10-15 seconds to enjoy warm.
    • Freezing Dough: Scoop the dough onto a baking sheet, freeze until solid, then transfer to a freezer-safe bag for up to 3 months. Bake directly from frozen, adding 2-3 extra minutes to the baking time.

    Ingredients

    Listed below are all the ingredients you will need:

    • eggs
    • sugar
    • instant coffee granules
    • all-purpose flour
    • baking powder
    • salt
    • semisweet chocolate chips
    • unsalted butter
    • chocolate chips

    See the recipe card for quantities.

    Instructions

    Set the oven to 350°F (175°C) and line a baking sheet with parchment paper or a silicone baking mat.

    In a large bowl, whisk together the eggs, sugar, and instant coffee granules until well combined.

    Eggs, sugar and coffee granules in a big bowl

    In a double boiler (or microwave in 20-second intervals), melt the 1 ⅓ cups chocolate chips and butter until smooth.

    Melting the chocolate chips and butter together

    Sift in the flour, baking powder, and salt, then mix until just combined.

    A silver bowl of all wet and dry ingredients blended

    Gently stir in the remaining chocolate chips for extra chocolatey bites.

    Adding more chocolate chips into the bowl

    Use a cookie scoop or spoon to place evenly sized portions onto the prepared baking sheet.

    Tiny scooper filled with batter to spread on baking tray

    Spread in a rack to cool down.

    Espresso Brownie Cookies arranged on a cooling rack

    Serve and enjoy!

    Yummy brownie cookies on a green plate

    Hint: Add a shot of espresso or a pinch of high-quality espresso powder for a bold coffee kick.

    ⭐ Top Tip

    • Quality Ingredients: Use premium cocoa and dark chocolate to create a robust chocolate base, and opt for freshly brewed espresso or freshly ground espresso powder for the best aroma.
    • Balance is Key: Adjust the sweetness slightly to counterbalance the bitterness of the espresso - consider adding a touch of extra sugar or a drizzle of caramel.
    • Chill the Dough: Let the cookie dough rest in the fridge for at least 30 minutes. This helps to set the flavors and prevents the cookies from spreading too much during baking.
    • Don’t Overbake: Aim for a slightly underbaked center to keep the cookies fudgy and soft - remember, they’ll continue to firm up as they cool.
    • Mix-In Variations: For added texture and flavor, consider folding in chocolate chunks or even a sprinkle of sea salt on top just before baking.

    FAQ

    What is the best temperature to bake brownies?

    The baking temperature depends not only on the mold but also on the oven you use: In a convection oven, you should bake your brownie at 320/355°F (160/180°C). In a deck oven, the recommended temperature is 355/390°F (180/200°C).

    What does espresso powder do to cookies?

    Espresso chocolate chip cookies are just brown butter chocolate chip cookies with espresso powder mixed into the batter, but damn they are good. The espresso deepens the chocolate flavor without overpowering the buttery, chewy cookie crumb.

    How long does it take for brownies to be done?

    Typically, brownies bake at around 350 degrees for 25-35 minutes, but Brown's version goes like this: Bake at 300 degrees F for 15 minutes, then remove the pan from the oven to cool for another 15 minutes.

    More Recipes

    Get more cookie recipes over here!

    • Brownie Meringue cookies
    • Strawberry Shortcake cookies
    • Sweet Potato cookies
    espresso brownie cookies on a green plate
    5 from 3 votes
    Print Pin Recipe

    Espresso Brownie Cookies

    These espresso brownie cookies are made with the delicious blend of rich chocolate and bold coffee flavors, creating a fudgy, chewy cookie with a crackly top! They're perfect cookie treats for chocolate and coffee lovers!
    Prep Time10 minutes mins
    Cook Time17 minutes mins
    Total Time27 minutes mins
    Course: Cookies, Dessert
    Cuisine: American
    Servings: 12 -16 cookies
    Calories: 330kcal
    Author: Lainey
    Prevent your screen from going dark

    Ingredients

    Wet Ingredients:

    • 3 eggs
    • 1 cup sugar
    • 2 teaspoons instant coffee granules

    Dry Ingredients:

    • ¾ cup all-purpose flour
    • ⅓ teaspoon baking powder
    • ¼ teaspoon salt

    Chocolate Mixture:

    • 1 ⅓ cups semisweet chocolate chips
    • ½ cup 1 stick unsalted butter, sliced

    Mix-Ins:

    • ½ cup chocolate chips

    Instructions

    Preheat the Oven:

    • Set the oven to 350°F (175°C) and line a baking sheet with parchment paper or a silicone baking mat.

    Mix the Wet Ingredients:

    • In a large bowl, whisk together the eggs, sugar, and instant coffee granules until well combined.

    Melt the Chocolate & Butter:

    • In a double boiler (or microwave in 20-second intervals), melt the 1 ⅓ cups chocolate chips and butter until smooth. Stir well and let it cool slightly.

    Combine the Mixtures:

    • Pour the melted chocolate mixture into the wet ingredients and mix until well combined.

    Add the Dry Ingredients:

    • Sift in the flour, baking powder, and salt, then mix until just combined.

    Fold in the Chocolate Chips:

    • Gently stir in the remaining ½ cup chocolate chips for extra chocolatey bites.

    Scoop the Dough:

    • Use a cookie scoop or spoon to place evenly sized portions onto the prepared baking sheet.

    Bake the Cookie Dough:

    • Regular-sized cookies: Bake for 12-14 minutes.
    • Larger cookies: Bake for 15-17 minutes until the tops are crackly but the centers are still slightly soft.

    Cool & Serve:

    • Let the cookies cool on the baking sheet for 5 minutes, then transfer to a wire rack to cool completely.
    Leave a Comment
    Serving: 1gCalories: 330kcalCarbohydrates: 38gProtein: 4gFat: 19gSaturated Fat: 11gPolyunsaturated Fat: 1gMonounsaturated Fat: 5gTrans Fat: 0.3gCholesterol: 62mgSodium: 79mgPotassium: 167mgFiber: 2gSugar: 28gVitamin A: 306IUCalcium: 34mgIron: 2mg
    QR Code
    Did you make this recipe?Share it on instagram or tag @simplybakings or #simplybakings!

    Cookies, Desserts, Snacks

    Peanut Butter Crunch Cookies Recipe

    Jan 19, 2016 · 3 Comments

    peanut butter crunch cookies in a red plate

    All the colors of Christmas are here in this cookie! A delicious, festive, and easy-to-make Peanut Butter Crunch Cookies just right for Christmas parties. It's so easy to mix and bake, and most of the ingredients are present in your cupboard.

    Love peanut butter cookies? Check out these Peanut Butter Swirl Cookies for a classic take, or try my Shamrock Sugar Cookies to complete your holiday dessert table!

    peanut butter crunch cookies in a red plate
    [feast_advanced_jump_to]

    What is Peanut Butter Crunch Cookies Recipe?

    The Peanut Butter Crunch Cookies Recipe is a fun twist on the traditional peanut butter cookie recipe. Instead of being super soft and smooth, these cookies have a satisfying crunch thanks to the addition of crisp rice cereal and oats.

    Think chewy peanut butter cookie meets crispy cookie bar! They’re packed with peanut butter chips, chocolate chips, and festive sprinkles—perfect for parties, cookie exchanges, or just an afternoon treat.

    And yes, they're freezer-friendly so you can always have some ready to bake!

    Substitutions

    • old-fashioned rolled oats – quick oats are okay, though the texture will differ
    • crisp rice cereal – sub with crushed cornflakes or puffed quinoa
    • chocolate chips – white, dark, or chopped crunch candy bars can be used
    • peanut butter chips – chopped Skippy, Jif, or natural peanut butter chunks work
    • Christmas sprinkles – use rainbow sprinkles or omit altogether

    Variations

    • Extra crunchy – use crunchy peanut butter and add chopped peanuts
    • Fruity – mix in dried cranberries or raisins
    • Vegan – swap butter with vegan butter and use flax egg
    • Mini cookies – roll into smaller inch balls for bite-sized treats

    Storage & Leftovers

    • Countertop – store in an airtight container for 5 days
    • Fridge – keeps fresh for up to 10 days
    • Freezer (baked) – freeze in a sealed bag for up to 2 months
    • Freezer (dough) – freeze inch balls of dough and bake straight from the freezer
    delicious and fudgy Peanut Butter Sprinkle Cookies

    Ingredients

    • butter
    • brown sugar
    • granulated sugar
    • egg
    • vanilla extract
    • all-purpose flour
    • baking powder
    • baking soda
    • cornstarch
    • salt
    • old-fashioned rolled oats
    • rice cereal
    • chocolate chips
    • peanut butter chips
    • christmas sprinkles

    Instructions

    Preheat the oven to 350°F before starting the mixing process.

    In a large bowl, mix together the butter, sugars until light and fluffy. Then add the egg and vanilla extract until combined, set aside:

    mixing the sugar and butter for the Peanut Butter Sprinkle cookies

    In another large bowl, whisk together the flour, baking powder, baking soda, cornstarch, salt, and rolled oats:

    mixing the oats, flour, baking soda suing a red whisk

    Add the dry ingredients to the wet ingredients and mix until combined:

    mixing the wet ingredients and the dry ingredients of the Peanut Butter Sprinkle cookies

    Then add the rice cereal, chocolate chips, peanut butter chips, and sprinkles and mix:

    adding in the rice cereal to the Peanut Butter Sprinkle Cookie dough

    Cover with plastic wrap and refrigerate for at least one hour. After an hour of waiting, scoop the cookie dough onto a nonstick cookie sheet or a baking mat, like so, and bake for 14-16 minutes:

    ready to bake Peanut Butter Sprinkle cookies on a baking sheet with parchment paper

    Transfer to a cookie rack and allow it to cool for about 2 minutes before serving.

    freshly baked Peanut Butter Sprinkle cookies on a red plate

    Doesn't that look a lot like Christmas?!? I love these cookies, Simply Bakers!


    Top Tips

    • I like to scoop my cookie dough and freeze them for about 15 minutes before baking. This allows the butter to chill up that way when they bake, they don't spread as much and you're left with a thicker chewier cookie.
    • Before mixing the dry ingredients like the cake mix, sift them carefully. This easy but very important step would make your cookies nice and evenly textured, without the lumps.
    • If you love gift-giving, you can bake dozens and wrap them in decorative bags to give as gifts.

    FAQ

    What ingredient makes cookies crispy?

    Using more granulated sugar and less brown sugar helps make cookies crispy. Also, baking longer at a lower temperature can add to the crispiness.

    Can crunchy peanut butter be used for cookies?

    Yes, crunchy peanut butter works great in cookies! It adds texture and little peanut bits for extra crunch in every bite.

    What is the secret to a crunchy cookie?

    The secret is in the sugar and the bake time—use more white sugar, a bit less moisture, and bake a little longer to get that golden, crunchy edge.

    Try more delicious cookie recipes:

    • Funfetti Lemon Cake Mix Cookies
    • Christmas Cake Mix Cookie Bars
    • Brownie Meringue Cookies | 5 Ingredients ONLY
    • Chocolate Chip Meringue Cookies
    • 3 Ingredient Nutella Cookies
    • Rocky Road Cookies
    Peanut Butter Crunch Cookies on a red plate
    5 from 1 vote
    Print Pin Recipe

    Peanut Butter Crunch Cookies Recipe

    A delicious, festive and easy to make Peanut Butter Crunch Cookies just right for Christmas parties - so appealing to the eyes and it's so easy to mix and bake!
    Prep Time15 minutes mins
    Cook Time16 minutes mins
    Chill Time1 hour hr
    Total Time1 hour hr 31 minutes mins
    Course: Cookies
    Cuisine: American
    Servings: 12 -16 large cookies
    Calories: 186kcal
    Author: Lainey
    Prevent your screen from going dark

    Ingredients

    • 1 ½ sticks butter 12 tablespoons, softened
    • ⅔ cup brown sugar
    • ⅓ cup granulated sugar
    • 1 egg
    • 1 ½ teaspoons vanilla extract
    • 1 cup all purpose flour
    • ½ teaspoon baking powder
    • ½ teaspoon baking soda
    • 1 teaspoon cornstarch
    • ½ teaspoon salt
    • 1 cup old fashioned rolled oats
    • 1 cup rice cereal
    • ½ cup chocolate chips
    • ½ cup peanut butter chips
    • Christmas sprinkles

    Instructions

    • In a large bowl, mix together the butter, sugars until light and fluffy. Then add the egg and vanilla extract until combined, set aside.
    • In another bowl whisk together the flour, baking powder, baking soda, cornstarch, salt, and rolled oats.
    • Add the dry ingredients into the wet ingredients and mix until combined.
    • Then add the rice cereal, chocolate chips, peanut butter chips, and sprinkles and mix.
    • Cover with plastic wrap and refrigerate at least one hour.
    • Preheat oven to 350F and bake for 14-16 minutes.
    • Transfer to cookie rack and allow to cool for about 2 minutes. Serve
    Leave a Comment
    Serving: 1cookieCalories: 186kcalCarbohydrates: 37gProtein: 3gFat: 3gSaturated Fat: 2gPolyunsaturated Fat: 0.3gMonounsaturated Fat: 0.3gTrans Fat: 0.02gCholesterol: 14mgSodium: 189mgPotassium: 84mgFiber: 1gSugar: 22gVitamin A: 61IUVitamin C: 0.5mgCalcium: 41mgIron: 2mg

    Watch The Recipe Video!
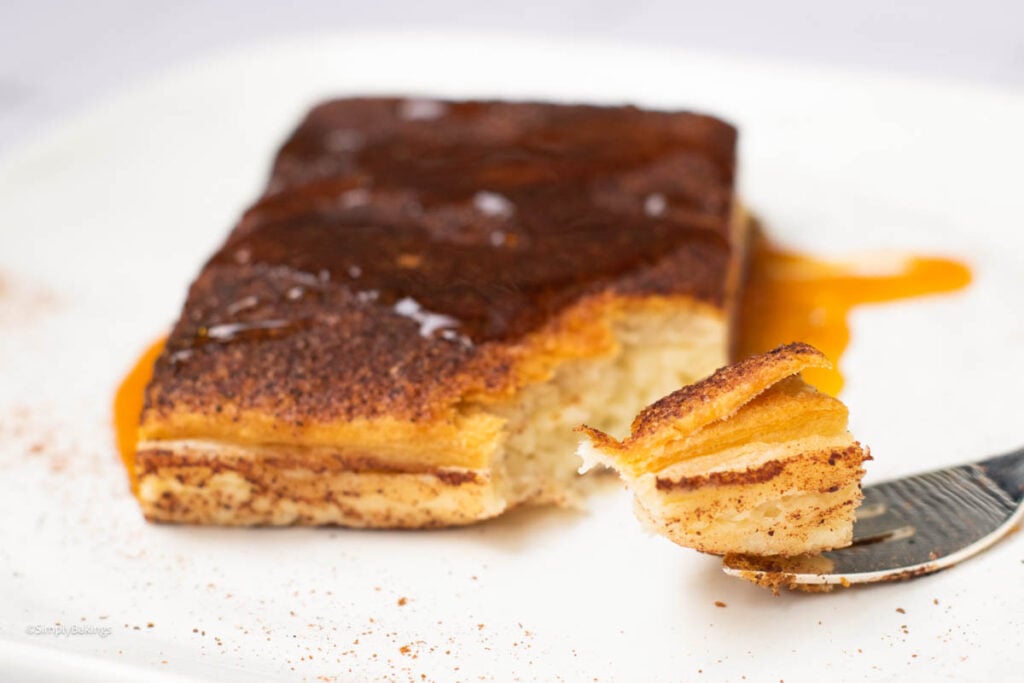
    QR Code
    Did you make this recipe?Share it on instagram or tag @simplybakings or #simplybakings!

    Christmas Desserts, Cookies, Desserts

    New Year's Cake Pops

    Jan 18, 2016 · 4 Comments

    If you're attending a New Year's Eve gathering, or if you're celebrating any other exciting occasion, these New Year's Cake Pops is a MUST on your party menu! 

    Happy New Year!! We are currently 18 days into the year and have you kept your goals?

    Pink new Years Cake pops with edible glitter

    Tips and Tricks for Making This New Year's Cake Pops Recipe: 

    • Make the top of your pie level by using a spoon or a spatula.
    • For a more festive look, top with whipped cream before serving.
    • In choosing the chocolates to be melted, you can either use the regular dark brown chocolate or the light-colored ones like pink, green and other pretty colors.
    • If you only have white chocolate on hand and do not want to buy, you can use that and just add a few drops of your desired food color.
    • Make sure to really mix it and don't melt it more than a minute to avoid burning it.
    • When tapping the excess chocolate from the cake pops, tap it on your hand gently and not directly on the brim of the bowl. It would definitely knock off the cake pops from the stick and you wouldn't want that 😉

    How to Make this New Year's Cake Pops Recipe:

    Gather the ingredients for this New Year's Cake Pops. Once the ingredients are all ready, let's begin!

    Use a day or two-day-old cake and crumble it. Add about two tablespoons of frosting to make the cake crumbs stick together:

    mixing in the cream and cake crumble

    Form into balls and lay them on parchment paper and let them sit there while you melt the chocolates:

    forming the cake mixture into a ball

    Melt the chocolate and take your sticks. Coat the end part of the stick before attaching it onto the cake balls:

    coating the tip of the stick with melted chocolate

    Push the stick in the center of each cake pop and let it sit for another minute to harden the chocolate:

    attaching the cake ball to the stick


    Coat the cake pops with the melted and gently tap the excess melted chocolate:

    coating the cake pop with melted chocolate

    Sprinkle any candy sprinkles you have on hand:

    adding white sprinkles to the cake pop

    Aren't they pretty?!? They make such pretty table centerpieces or dessert buffet highlights. I am sure your New Year's day guests will love them!

    pretty cake pops in a glass
    Frequently Asked Questions for the New Year's Cake Pops Recipe:

    Q: Can the cake balls be frozen?

    A: Yes, for sure. You can make these ahead to avoid taking too much time on making your New Year's day dessert. Just thaw in room temperature at least 30 minutes before serving them.

    Q: Can I add in condensed milk into the cake crumbs to make it stick?

    A: Yes you can. But obviously, that would make this dessert much sweeter than it already is. Using frostings which are not too sweet might be better.

    Q: How many cake balls can you make with this recipe?

    A: I made about 15-20 cake pops. It would depend on how big your cake pops would be.


    • Ice Cream Cone Cake Pops
    • Strawberry Poke Cake
    • Mocha Cinnamon Cake
    • Hot Fudge Chocolate Cake
    • Milk Chocolate Cake


    pretty New Year cake pops
    5 from 1 vote
    Print Pin Recipe

    New Year's Cake Pops

    A very easy New Year dessert you can whip up in minutes and using just a few ingredients - new Year's Cake Pops with edible glitter!
    Author: Lainey
    Prevent your screen from going dark

    Ingredients

    • Cake 2 day old cake works best
    • 1-2 tablespoons frosting
    • Candy Melts
    • Edible Glitter

    Instructions

    • Use a day or two-day-old cake for this recipe.
    • Add about two tablespoons of frosting to make the cake crumbs stick together.
    • Lay them on parchment paper and let them sit there while you melt the chocolates.
    • You can either use the regular dark brown chocolate or the light-colored ones like pink, green and other pretty colors. Make sure to really mix it and don't melt it more than a minute to avoid burning it.
    • Take your sticks and coat the end part of the stick before attaching it onto the cake balls.
    • Let it sit for another minute to harden the chocolate.
    • Coat the cake pops with the melted and gently tap the excess melted chocolate.
    Leave a Comment

    Watch The Recipe Video!
    QR Code
    Did you make this recipe?Share it on instagram or tag @simplybakings or #simplybakings!

    NEVER MISS A RECIPE!

    PINTEREST / FACEBOOK / INSTAGRAM / TWITTER

    If you’ve tried this or any other of my recipes, don’t forget to rate the recipe and to leave me a comment. I love hearing from you!

    Cake

    4 Cookie Flavors 1 Cookie Dough

    Jan 13, 2016 · 2 Comments

    delicious cookies four flavor in one cookie dough

    Using just one dough mix, you can make four flavors of delicious cookies! Just add in melted chocolate, white chocolate chips, cranberries, and crushed candy cane and mix! You get all yummy flavors that are perfect for Christmas time!

    4 cookie flavors on a white plate

    During the Holidays it may get hectic! With all the gift buying, family visiting, and decoration going on it seems there is no time to make delicious food for your loved ones! Don't fret because here's a great recipe that makes a lot of great flavors in no time! Happy baking to all of you and Happy Holidays! xx

    Tips and Procedures: 

    • I like to scoop my cookie dough and freeze them for about 15 minutes before baking. This allows the butter to chill up that way when they bake, they don't spread as much and you're left with a thicker, chewier cookie.
    • Before mixing the dry ingredients like the cake mix, sift them carefully. This easy but very important step would make your cookies nice and evenly textured, without the flour lumps.
    • If you love gift-giving, you can bake dozens and wrap them in decorative bags to give as gifts. It is also best to include all flavors in each gift bag.
    • Store these cookies in an airtight container to prolong their shelf life.
    • If you have frozen butter, let it thaw at room temperature, or if you are in a hurry, you can wrap it in a warm damp cloth (with the package on) so it will soften quicker.

    How to Make this 4 Cookie Flavors 1 Cookie Dough Recipe:

    Gather the ingredients for this 4 Cookie Flavors 1 Cookie Dough and once the ingredients are all ready, let's begin!

    BASIC COOKIE DOUGH

    • butter
    • shortening
    •  white sugar
    • brown sugar
    • eggs
    • vanilla extract
    • all-purpose flour
    • baking soda
    • salt

    MARBLE COOKIES

    • basic sugar cookie dough
    • chocolate chips, melted
    • chocolate chips

    WHITE CHOCOLATE CRANBERRY COOKIES

    • basic sugar cookie dough
    •  white chocolate chips
    • dried cranberries

    CANDY CANE COOKIES

    • basic sugar cookie dough
    • rushed candy cane (1 candy cane)

    Preheat oven to 350 F and prepare cookie sheet using a baking mat or parchment paper. Gather also the ingredients before starting the mixing process.

    ingredients for 4 cookies in one dough recipe

    In a large bowl, add softened butter and mix. After the butter is mixed well add the white sugar, and brown sugar and mix until light and fluffy. Add the eggs and mix, vanilla extract and mix:

    mixing the butter and egg using a stand mixer

    Divide dough into four bowls (for the different flavors).

    For the basic cookie dough, roll a little amount of dough to form a small round dough:

    forming the sugar cookie dough into a ball

    Coat it with granulated sugar:

    coating the sugar cookie with sugar

    For the Marble cookies, mix the basic cookie dough with melted chocolate:

    adding in the melted chocolate to the basic cookie dough

    Mix well until you get this marble-like distribution of chocolate in your cookie dough:

    thoroughly mixed marble cookies in a glass bowl

    For the white chocolate cranberry cookies, add the white chocolate chips and dried cranberries into the basic cookie dough:

    adding in cranberries and white chocolate chips to the basic cookie dough

    Mix well until nicely incorporated:

    mixed cranberry cookie dough in a glass bowl

    Then last but not least, make the Candy cane cookies. Add the crushed candy cane into the basic cookie dough:

    adding in crushed candy cane to the basic cookie dough

    Mix well until nicely incorporated:

    mixed candy cane cookie dough

    Scoop from each cookie dough mix and arrange them on a nonstick baking mat or nonstick cookie sheet, like so. Bake them for  10-12 minutes:

    ready to bake cookies on a baking sheet

    Tadaaah! Four delicious cookies using just one dough! isn't that a perfect Christmas idea, Simple Bakers?!?

    freshly baked cookies four flavors in one cookie dough

    Frequently Asked Questions for the 4 Cookie Flavors 1 Cookie Dough Recipe:

    Q: Can I substitute the flour with gluten-free flour in this recipe?

    A: Yes sure you can replace it if you want this recipe to be gluten-free.

    Q: I am vegan. Where can I buy vegan chocolate?

    A: You can buy vegan chocolate chips and chocolate bars in vegan groceries and vegan specialty stores near you.

    Q: Can I make the dough the night before and bake it in the morning?

    A: For sure you can prepare the dough the night before. Just place it in a container and chill.

    Q: Can I add nuts to the sugar cookie dough?

    A: That would be a delicious addition. Go ahead and add in your favorite nuts.


    Try more delicious cookie recipes:

    • Funfetti Lemon Cake Mix Cookies
    • Christmas Cake Mix Cookie Bars
    • Brownie Meringue Cookies | 5 Ingredients ONLY
    • Chocolate Chip Meringue Cookies
    • 3 Ingredient Nutella Cookies
    • Rocky Road Cookies
    delicious cookies with 4 flavors on a white plate
    No ratings yet
    Print Pin Recipe

    4 Cookie Flavors 1 Cookie Dough

    Using just one dough, you can make 4 flavors of delicious cookies - just add in melted chocolate, white chocolate chips, cranberries, and crushed candy cane and mix!
    Servings: 2 dozen
    Author: Lainey
    Prevent your screen from going dark

    Ingredients

    • BASIC COOKIE DOUGH
    • 1 ½ cups butter softened
    • ⅔ cups shortening
    • 2 ½ cups white sugar
    • ½ cup brown sugar packed
    • 4 eggs
    • 4 teaspoons vanilla extract
    • 4 ¾ cups all purpose flour
    • 2 teaspoon baking soda
    • 1 teaspoon salt
    • MARBLE COOKIES
    • 2 cups basic sugar cookie dough
    • ¾ cups chocolate chips melted
    • ½ cup chocolate chips
    • WHITE CHOCOLATE CRANBERRY COOKIES
    • 2 cups basic sugar cookie dough
    • ½ cup white chocolate chips
    • ½ cup dried cranberries
    • CANDY CANE COOKIES
    • 2 cups basic sugar cookie dough
    • 4 tablespoons crushed candy cane 1 candy cane

    Instructions

    • Preheat oven for 350 F and prepare cookie sheet using baking mat or parchment paper
    • In a large bowl add softened butter and mix. After the butter is mixed well add the white sugar, brown sugar and mix until light and fluffy
    • Add the eggs and mix, vanilla extract and mix
    • Divide dough into four bowls (for the different flavors)
    Leave a Comment

    Notes

    Different Flavors!
    Chocolate Marble Cookie
    Add melted chocolate into dough and mix
    Add chocolate chips and mix
    Cranberry White Chocolate
    Add white chocolate chips and the Cranberries mix until combined
    Candy Cane Cookie
    Crush the candy cane into small pieces
    Add into dough and mix
    Sugar Cookies
    Bowl of granulated sugar
    Roll the dough into a ball and roll the dough into the sugar
    Place cookies on cookie sheet

    Watch The Recipe Video!

    QR Code
    Did you make this recipe?Share it on instagram or tag @simplybakings or #simplybakings!

    NEVER MISS A RECIPE!

    PINTEREST / FACEBOOK / INSTAGRAM / TWITTER

    If you’ve tried this or any other of my recipes, don’t forget to rate the recipe and to leave me a comment. I love hearing from you!

    Cookies

    Nutella Pie Crust

    Jan 11, 2016 · 8 Comments

    tasty Nutella Pie Crust in pieces

    With just 3 ingredients and minimal effort, you can have these delicious Nutella Pie Crust! Slather, cover, cut, and bake - making these Nutella Pie Crust is as simple as that!

    More fun cookie recipes you can try: Cookie Dough Bites, Brownie Meringue Cookies | 5 Ingredients ONLY, and Oreo Cheesecake Cookies.

    Nutella Pie Crust pieces on a red cake stand
    [feast_advanced_jump_to]

    Substitutions

    • Nutella Substitute: If you don't have Nutella, try using a jar of chocolate spread or even cream cheese mixed with a bit of sugar for a different taste.
    • Oreo Cookie Variation: Instead of pie crust, use an Oreo cookie crust. Crush Oreo cookies in a food processor, mix with melted unsalted butter, and use this mixture as your base.
    • Healthier Option: Use whole wheat pie dough for added fiber and nutrition.
    • Alternative Crusts: Try using a puff pastry or pie dough for different textures and flavors.

    Variations

    • Add Nuts: To add some crunch, sprinkle chopped hazelnuts over the Nutella before adding the top pie crust.
    • Flavor Enhancements: Mix a pinch of salt or a dash of vanilla into the sugar before rolling the cookies in it. It adds a nice touch.
    • Make it Fancy: Instead of simple cookies, make Nutella hand pies by cutting the pie dough into 2-inch circles, adding a spoonful of Nutella, and folding them over. Crimp the edges with a fork, brush with cold butter, and bake until golden brown.
    • Decorative Touches: After baking, pipe some whipped cream or drizzle melted chocolate over the cookies for a pretty garnish.

    Storage

    • If you have any leftovers (which is unlikely!), you can store these Nutella Pie Crust cookies in an airtight container at room temperature for up to 3 days.
    • For longer storage, place them in an airtight container and freeze for up to 1 month. To enjoy, simply thaw at room temperature or warm them slightly in the oven.

    Top Tips

    • If you love gift-giving, you can bake dozens and wrap them in decorative bags to give as gifts. It is also best to include all flavors in each gift bag.
    • Sift your granulated sugar to avoid having the sugar lumps in your Nutella Pie Crust piece.
    • If your pie crust dough is too soft to handle, refrigerate it for 10-15 minutes before rolling it out. This will make it easier to work with.

    Ingredients

    Gather the ingredients and once the ingredients are all ready, let's begin!

    • pie crust
    • nutella
    • granulated sugar

    Instructions

    Preheat the oven to 350F, and prepare a cookie sheet using parchment paper or a baking mat.

    Roll out the pie crust and spread out the Nutella:

    spreading nutella on pie crust using a bread knife

    Spread the Nutella evenly until all of the pie crust are coated with Nutella, like so:

    generous spread of Nutella on pie crust

    Spread the second pie crust on top as this will "seal" the piece:

    covering the pie crust with another pie crust

    Use a cookie cutter to cut the rectangular nutella pie crust pieces out:

    cutting cookie rectangles using a cookie cutter

    Roll pieces in sugar then place on the baking sheet:

    ready to bake Nutella Pie Crust pieces coated with granulated sugar

    Bake in the preheated oven for 10 minutes (In Image: This is 350F.):

    freshly baked 3 ingredient Nutella Pie Crust pieces

    Allow to cool for 2 minutes then cover the pieces with sugar. Serve and enjoy!

    holding a nutella crust piece with a bite

    Frequently Asked Questions

    Q: How many servings would this recipe do?

    This delicious Nutella Pie Crust recipe could make 16-24 pieces.

    Q: Can I use melted chocolate instead of  Nutella?

    Yes you can. Whatever chocolate you have in your pantry or fridge, you can use it.

    Q: Can I substitute Nutella with peanut butter?

    Yes, for sure, you can do that if that is your preference.


    nutella pie crust pieces in red tray
    5 from 4 votes
    Print Pin Recipe

    Nutella Pie Crust

    This Nutella Pie Crust so amazing and with so little time, you can have dessert - no mixing required! Just spread, cover, cut, and bake!
    Prep Time10 minutes mins
    Cook Time10 minutes mins
    Total Time18 minutes mins
    Course: Cookies
    Cuisine: American
    Servings: 12 pieces
    Calories: 264kcal
    Author: Lainey
    Prevent your screen from going dark

    Equipment

    • Cookie Cutter

    Ingredients

    • 1 pie crust
    • 1 cup Nutella
    • 1 cup granulated sugar

    Instructions

    • Preheat oven to 350F, prepare cookie sheet using parchment paper or baking mat.
    • Roll out the pie crust and spread out the Nutella.
    • Spread the second pie crust on top, use a cookie cutter to cut cookies out
    • Roll cookies in sugar then place on baking sheet
    • Bake in the preheated oven for 10 minutes
    • Allow to cool for 2 minutes then cover the cookies with sugar. Serve.
    Leave a Comment
    Calories: 264kcalCarbohydrates: 39gProtein: 2gFat: 11gSaturated Fat: 8gPolyunsaturated Fat: 0.5gMonounsaturated Fat: 2gSodium: 68mgPotassium: 116mgFiber: 2gSugar: 30gVitamin A: 1IUCalcium: 30mgIron: 1mg

    Watch The Recipe Video!
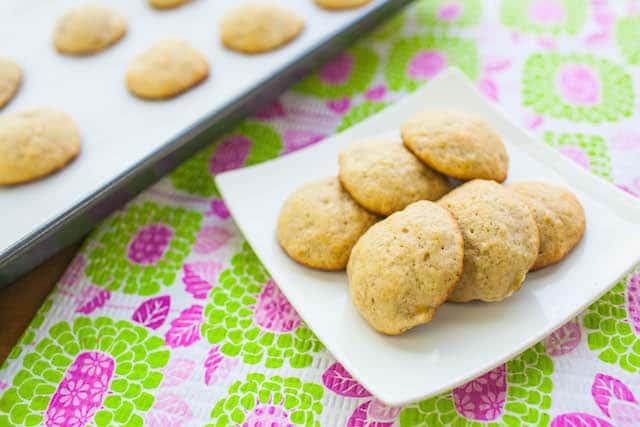
    QR Code
    Did you make this recipe?Share it on instagram or tag @simplybakings or #simplybakings!

    I always get excited whenever I share a Nutella recipe especially if it's an EASY one! Using only 3 ingredients you can make your own easy Nutella Pie Crust! I hope you guys enjoy it!

    5 Ingredients or Less, Cookies, Desserts

    BEST Homemade Chocolate Cake Mix

    Jan 8, 2016 · 17 Comments

    Homemade cake mix in a pouch
    homemade chocolate cake mix in a ziplock bag

    Best Homemade Chocolate Cake Mix turns basic pantry staples into a ready-to-use dry blend for effortless dessert preparation. When you're ready for a sweet treat, simply whisk in your wet ingredients to bake a soft, rich, and fluffy chocolate cake.

    Any chocolate dish is a great gift, so add mini chocolate cupcakes or vegan chocolate cake to your list!

    [feast_advanced_jump_to]

    Why You’ll Love This Recipe

    This homemade chocolate cake mix recipe takes only a moment to prepare. It needs only a few simple ingredients, too. And anytime you have sudden cravings, you can bake your homemade cake mix.

    The natural cocoa powder ingredient gives the cake its deep chocolate flavor. It also naturally contains plant compounds called flavanols, along with minerals such as iron and magnesium, which help support energy levels, healthy circulation, and muscle function.

    Ingredients

    Listed below are all the ingredients you will need:

    • all-purpose flour
    • white sugar
    • cocoa powder
    • baking powder
    • baking soda
    • salt
    • milk
    • vegetable oil
    • eggs
    • coffee
    • vanilla extract

    See the recipe card for quantities.

    All ingredients for homemade cake mix in bowls

    Instructions

    Make and Store

    First, add the flour, sugar, unsweetened cocoa powder, baking powder, baking soda, and salt to a mixing bowl. Mix for a few seconds using a stand mixer if available until evenly combined.

    Next, transfer the dry mixture to an airtight container or resealable bag. Keep it sealed until you are ready to bake.

    Dry ingredients mixed and packed

    Prepare the Pans

    When ready to bake, preheat the oven to 350°F.

    Then grease two 8-inch round pans. Line each with parchment paper.

    Mix the Ingredients

    Next, whisk the milk, vegetable oil, eggs, coffee, and vanilla extract in a large bowl.

    Then, add the prepared dry cake mix. Stir gently with a wooden spoon until just combined.

    Dry ingredients mixed into wet ingredients

    Fill and Bake

    After that, divide the batter evenly between the two prepared pans. Bake at 350°F for about 30 minutes.

    Insert a toothpick near the center to check for doneness. It should come out clean or with a few moist crumbs.

    Baking pan filled with batter

    Remove and Cool

    When ready, remove the cakes from the oven. Let them cool in the pans for about 10 minutes.

    Then, gently run a knife around the edges of each cake. Carefully turn the cakes onto a cooling rack.

    Homemade chocolate cake on wire rack

    Lastly, let them cool for about 1 hour before frosting, decorating, or serving with hot coffee!

    Substitutions & Variations

    • Ingredient Swap
      Substitute coffee with water or imitation coffee.
    • Variation
      If you want a vegan cake mix, use plant-based substitutes for egg and milk.
    • Mistake to Avoid
      Don't overmix the batter after adding the dry cake mix. Stir only until everything is combined.

    Storage Tips

    • Store the homemade chocolate cake mix in an airtight container or jar in a cool, dry pantry for up to 2 to 3 months.
    • A baked, unfrosted cake can also be wrapped well and frozen for 2-3 months.

    FAQs

    How much cake can this homemade cake mix make?

    The batter is enough for two 8-inch round cake pans. This batch will make one 2-layer chocolate cake. After it's cooled, you can decorate it with your favorite chocolate frosting.

    Why do we add coffee to the mix?

    Coffee makes the cocoa flavor taste richer and more intense. But it won't be enough to make the cake taste strongly like hot coffee. Make sure to let it cool to room temperature before adding to the wet ingredients.

    Can I make the dry cake mix ahead of time?

    Yes, of course! Just store the dry mix in a jar or airtight container until you're ready to bake.

    What type of cocoa powder should I use?

    Use natural cocoa powder. Unsweetened cocoa powder or Hershey's works well, too. Avoid sweetened ones since they change the flavor of the cake.

    Homemade chocolate cake mix in a Ziplock bag
    4.75 from 8 votes
    Print Pin Recipe

    BEST Homemade Chocolate Cake Mix

    This recipe combines simple pantry ingredients for an easy make-ahead baking staple. Add the wet ingredients when you're ready and bake a soft, rich, chocolatey two-layer cake.
    Prep Time10 minutes mins
    Cook Time30 minutes mins
    Cool Time1 hour hr 10 minutes mins
    Total Time1 hour hr 50 minutes mins
    Course: cake, Dessert, Snack
    Cuisine: Fusion (American-Filipino)
    Servings: 2 8-inch round pans
    Calories: 1874kcal
    Author: Lainey
    Prevent your screen from going dark

    Ingredients

    • 1 ¾ cups all purpose flour
    • 2 cups sugar
    • ¾ cup cocoa powder
    • 1 ½ teaspoons baking powder
    • 1 ½ teaspoons baking soda
    • 1 teaspoon salt
    • 1 cup milk
    • ½ cup vegetable oil
    • 2 eggs
    • 1 cup coffee
    • 2 teaspoons vanilla extract

    Instructions

    Make and Store

    • First, add the flour, sugar, cocoa powder, baking powder, baking soda, and salt to a bowl.
    • Mix for a few seconds until evenly combined.
    • Next, transfer the dry mixture to an airtight container or resealable bag.
    • Keep it sealed until you are ready to bake.

    Prepare the Pans

    • When ready to bake, preheat the oven to 350°F.
    • Then grease two 8-inch round pans.
    • Line each pan with parchment paper.

    Mix the Ingredients

    • Next, whisk the milk, vegetable oil, eggs, coffee, and vanilla extract in a large bowl.
    • Then, add the prepared dry cake mix.
    • Stir gently with a wooden spoon until just combined.

    Fill and Bake

    • After that, divide the batter evenly between the two prepared pans.
    • Bake at 350°F for about 30 minutes.
    • Insert a toothpick near the center to check for doneness. It should come out clean or with a few moist crumbs.

    Remove and Cool

    • When ready, remove the cakes from the oven.
    • Let them cool in the pans for about 10 minutes.
    • Then, gently run a knife around the edges of each cake.
    • Carefully turn the cakes onto a cooling rack.
    • Lastly, let them cool for about 1 hour before frosting, decorating, or serving!
    Leave a Comment
    Serving: 1gCalories: 1874kcalCarbohydrates: 309gProtein: 27gFat: 69gSaturated Fat: 15gPolyunsaturated Fat: 33gMonounsaturated Fat: 16gTrans Fat: 0.4gCholesterol: 178mgSodium: 2424mgPotassium: 920mgFiber: 15gSugar: 207gVitamin A: 435IUCalcium: 414mgIron: 11mg

    Watch The Recipe Video!
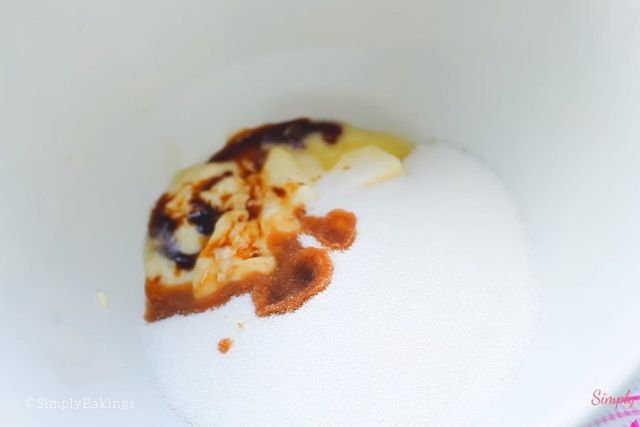
    QR Code
    Did you make this recipe?Share it on instagram or tag @simplybakings or #simplybakings!

    You Might Also Like:

    • Filipino Hot Chocolate
    • Banana Chocolate Pound Cake
    • Best Coconut Flour Chocolate Chip Cookies

    Recipes for Every Moment

    Craving a homemade chocolate cake, but don't want to measure dry ingredients from scratch every single time? Keep a batch of this homemade chocolate cake mix in your pantry for instant dessert prep!

    Cake, Desserts

    Strawberry White Chocolate Pie

    Dec 11, 2015 · 3 Comments

    white chocolate strawberry pie

    This Strawberry White Chocolate Pie has a smooth and creamy base of white chocolate filling nestled in a golden, flaky crust, topped off with a delightful homemade strawberry sauce. Addicting and so easy to make!

    Looking for more desserts? Try my Mini Apple Pie Pops or Chocolate Chip Cheesecake.

    White Chocolate Strawberry Pie on a white plate
    [feast_advanced_jump_to]

    Top Tips

    • If you forget to immediately add the white chocolate chips to the pie crust, you can simply melt them in the microwave in 15-second increments, stirring in between.
    • To save time, refrigerate your unbaked pie dough until you're ready to use it. Simply wrap the pie tightly in plastic wrap and then aluminum foil to prevent freezer burn. Label it with the date.
      • Thawing: When ready to eat, thaw the frozen pie in the refrigerator overnight. Avoid thawing at room temperature to prevent potential bacterial growth.

    Variations

    • Pie Crusts: Swap out the traditional pie crust and use Graham Cracker Crumbs Crust or Oreo Cookie Crust.
    • Mixed Berry Compote: Instead of just strawberries, make a mixed berry compote using raspberries, blueberries, and strawberries for a burst of different flavors.
    • Chocolate Drizzle: Drizzle melted dark chocolate over the top of the pie for an extra decadent touch.
    • Whipped Cream Topping: Serve the pie with a dollop of whipped cream or cool whip on top for added creaminess.
    • Before serving, sprinkle powdered sugar on top for an extra touch of sweetness.

    Substitutions

    • Fresh Fruit: If strawberries aren't available or in season, you can substitute them with other fresh fruits like raspberries, blueberries, or sliced bananas.
    • Frozen Fruit: If fresh fruit isn't available, you can use frozen strawberries or a mixed berry blend. Just thaw them before using and drain any excess liquid.
    • Vegan Options: To make the pie vegan, use dairy-free white chocolate chips and coconut milk or a plant-based cream alternative for the filling. Also, ensure any pie crust used is vegan-friendly.

    Storage

    • Refrigeration: Place the baked pie in an airtight container or cover it tightly with plastic wrap. Refrigerate it promptly after cooling to room temperature.
      • Shelf Life: Consume the pie within 2-3 days for optimal freshness. The strawberries and cream filling may start to lose their quality over time.
    delicious mini White Chocolate Strawberry Pie

    Ingredients

    Pie Crust

    • all purpose flour
    • salt
    • granulated sugar
    • shortening
    • water
    • egg
    pie crust ingredients

    Filling

    • frozen or fresh strawberries
    • white sugar
    • cornstarch
    • water
    • white chocolate chips
    White Chocolate Strawberry Pie ingredients

    Instructions

    Preheat oven to 425F, grease muffin tins. In a large mixing bowl, mix together flour, shortening, sugar, and salt. Using a pastry cutter blending it all together until crumbly.

    In a small bowl, mix the water and egg, then blend into the flour mixture. Chill in the refrigerator until ready to use.

    Grab a 4 inch round cookie cutter or a bowl. Roll out the pie crust to about 1⁄4 to 1⁄2 inch thick and cut into circles using the cookie cutter or bowl. Place the pie crusts in the greased muffins tins and bake for 8­ -10 minutes and once you remove it from the oven immediately at the white chocolate chips.

    homemade pie crust dough in a bowl

    To make the Strawberry Filling, place some white chocolate chips in the pie crusts. Add the strawberries and sugar in a saucepan over a medium low fire. Bring it to a boil and stir frequently.

    In a small bowl, whisk together water and cornstarch, then gradually stir in the cornstarch mixture into boiling strawberry mixture. Reduce the heat and simmer until it’s thickened which takes about 10 minutes.

    strawberries in a small pot with cornstarch mixture

    Pour mixture into the muffin tins. Chill and then serve with whip cream.

    pie crust with white chocolate

    FAQs

    What is a substitute for white chocolate?

    You can use vanilla-flavored candy coating. You can also switch out the white chocolate for milk chocolate, dark chocolate, or your favorite flavor of chocolate.

    Why do you add the white chocolate to the base layer?

    It prevents the crust from becoming soggy and adds a chocolatey flavor to the pie.

    Looking for more easy dishes? Try some of my favorite recipes:

    • Monkey Bread with Cream Cheese
    • Cookie Butter Cookies
    • Microwave Graham Cracker Mug Cake
    MIni strawberry white chocolate pie on a plate
    5 from 1 vote
    Print Pin Recipe

    White Chocolate Strawberry Pie

    Try our simple homemade Strawberry White Chocolate Pie for a delicious treat that blends fresh strawberries with creamy white chocolate, making it perfect for any dessert lover!
    Prep Time15 minutes mins
    Bake Time10 minutes mins
    Total Time25 minutes mins
    Course: Dessert
    Cuisine: American, Filipino
    Servings: 6 mini pies
    Calories: 6219kcal
    Prevent your screen from going dark

    Equipment

    • 1 regular size muffin tin

    Ingredients

    Pie Crust

    • 4 cups all purpose flour
    • 1 ½ teaspoon salt
    • 2 tablespoons granulated sugar
    • 1 ¾ cups shortening
    • ½ cup water
    • 1 large egg

    FILLING:

    • 4 cups frozen or fresh strawberries
    • ¾ cups white sugar
    • 3 tablespoons cornstarch
    • ¾ cup water
    • ¼ cup white chocolate chips

    Instructions

    Pie Crust

    • Preheat oven to 425F, grease muffin tins.
    • In a large mixing bowl, mix together flour, shortening, sugar, and salt. Using a pastry cutter blending it all together until crumbly.
    • In a small bowl, mix the water and egg, then blend into the flour mixture. Chill in the refrigerator until ready to use.
    • Roll out the pie crust to about 1⁄4 to 1⁄2 inch thickness, then cut it into circles using a cookie cutter or bowl. Place the pie crusts in the greased muffin tins and bake for 8 to 10 minutes. As soon as you remove them from the oven, sprinkle with white chocolate chips.
    • Place the pie crusts in the greased muffins tins and bake for 8­ -10 minutes and

    Strawberry Filling

    • Add the strawberries and sugar in a saucepan over a medium low fire. Bring it to a boil and stir frequently.
    • In a small bowl, whisk together water and cornstarch, then gradually stir in the cornstarch mixture into boiling strawberry mixture. Reduce the heat and simmer until it’s thickened which takes about 10 minutes.
    • Pour mixture into the muffin tins. Chill and then serve with whip cream.
    Leave a Comment
    Serving: 1gCalories: 6219kcalCarbohydrates: 632gProtein: 64gFat: 384gSaturated Fat: 101gPolyunsaturated Fat: 105gMonounsaturated Fat: 154gTrans Fat: 47gCholesterol: 173mgSodium: 10514mgPotassium: 1608mgFiber: 25gSugar: 80gVitamin A: 320IUVitamin C: 339mgCalcium: 297mgIron: 27mg

    Watch The Recipe Video!
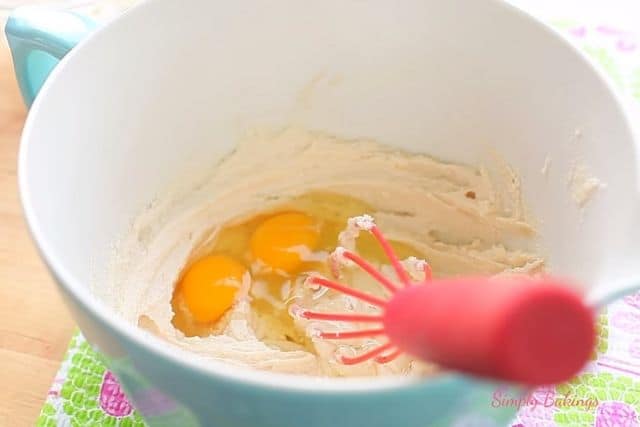
    QR Code
    Did you make this recipe?Share it on instagram or tag @simplybakings or #simplybakings!

    I LOVE pie, especially when it's homemade! So I'm super excited because Christmas is around the conner and I will be sharing with a delicious recipe sponsored by Crisco Scratch Academy!  The recipe I will be sharing is Mini White Chocolate Strawberry Pie Recipe! Strawberries and white chocolate is the one of the most delicious combinations especially when it’s paired with an excellent pie crust recipe! If you decide to make it, please tag me on Facebook or Instagram!

    Desserts

    How to Make Rocky Road Cookies

    Dec 10, 2015 · 11 Comments

    rocky road cookies on red plate

    These rocky road cookies are chewy, decadent, and so easy to make! Because of the almonds, these are called Rocky Road cookies.  If you want hot chocolate cookies, omit the almonds and now have hot chocolate cookies!

    Looking for more cookies? Try my Nutella Stuffed Cookies!

    rocky road cookies on a red plate
    [feast_advanced_jump_to]

    Substitutions

    • Butter: Margarine or vegetable oil
    • Flour: Oat flour or almond flour
    • Brown Sugar: Granulated sugar mixed with molasses
    • Soda: Baking powder
    • Crunchy Nut: Peanuts or pecans

    Storage

    If you happen to have any leftovers (which is rare!), store them in an airtight container at room temperature for up to 3 days. For longer storage, you can freeze the cookies for up to 1 month. Simply thaw them at room temperature when ready to enjoy.

    Ingredients

    Listed below are all the ingredients you will need:

    • powdered sugar
    • salt
    • unsweetened cocoa powder
    • egg whites
    • vanilla extract
    • semi-sweet chocolate chips
    • chopped almonds
    • mini marshmallows

    See recipe card for quantities.

    Instructions

    mixing the dry ingredients for the rocky road cookies

    Preheat oven to 350F and prepare a baking sheet before mixing. In a large bowl whisk together powdered sugar, salt, and unsweetened cocoa powder.

    mixed ingredients of the rocky road cookies using a red wire whisk

    To that same bowl add egg whites, vanilla. Mix until well combined.

    adding the almonds, marshmallows and chocolate chips to the cookie mixture

    Once everything is mixed, stir in the Chocolate chips, sliced almonds, and marshmallows.

    putting marshmallows on top of each cookie

    Using a small cookie scooper, scoop the cookie dough on a baking sheet or parchment paper. Top with several marshmallows and bake for 10-12 minutes.

    freshly baked Rocky road cookies on parchment paper

    The marshmallows will be slightly browned, as you can see here.

    delicious and fudgy Rocky road cookies on a red plate

    Allow the cookies to sit for a couple of minutes and then transfer to a wire racks and cool completely before serving.

    Hint: Sift your dry ingredients before mixing to avoid having lumps in your Rocky Road cookies.

    Frequently Asked Questions

    What flavoring is Rocky Road?

    Rocky Road flavor typically combines chocolate, nuts, and marshmallows.

    Why do they call it Rocky Road?

    It's called Rocky Road because the combination of ingredients resembles a rough, rocky path.

    How to make chewy vs crunchy cookies?

    To make chewy cookies, use more brown sugar and less flour; for crunchy cookies, use more flour and less sugar.

    More fun cookie recipes you can try:

    • Cookie Dough Bites
    • Brownie Meringue Cookies | 5 Ingredients ONLY
    • Oreo Cheesecake Cookies
    • 3 Ingredient Nutella Cookies
    • No-Bake Nutella Cookies
    • Nutella Cookies
    Rocky Road Cookies in on a Red Plate
    4.84 from 6 votes
    Print Pin Recipe

    How to Make Rocky Road Cookies

    These chocolate marshmallow cookies are rich, chewy, and packed with melty chocolate in every bite. With crisp edges, soft centers, crunchy almonds, and gooey toasted marshmallows on top, they’re an easy dessert that feels extra special fresh from the oven.
    Prep Time10 minutes mins
    Bake Time12 minutes mins
    Total Time22 minutes mins
    Course: Dessert
    Cuisine: American
    Servings: 20 cookies
    Calories: 232kcal
    Author: Lainey
    Prevent your screen from going dark

    Ingredients

    • 3 cups powdered sugar
    • ¼ teaspoon salt
    • ⅔ cups unsweetened cocoa powder
    • 3 egg whites
    • 1 tablespoon vanilla extract
    • 2 cups semi sweet chocolate chips
    • ¾ cups chopped almonds
    • 1 cup mini marshmallows
    • ½ - 1 cup extra mini marshmallows for topping

    Instructions

    • Preheat oven to 350°F. Line a baking sheet with parchment paper.
    • In a large bowl, whisk together the powdered sugar, salt, and cocoa powder until combined.
    • Add the egg whites and vanilla extract. Stir until a thick batter forms.
    • Fold in the chocolate chips, chopped almonds, and 1 cup mini marshmallows until evenly combined.
    • Using a small cookie scoop or spoon, drop the dough onto the prepared baking sheet, leaving space between each cookie.
    • Top each cookie with a few extra mini marshmallows.
    • Bake for 10–12 minutes, until the marshmallows are lightly golden and the tops are shiny.
    • Let the cookies rest on the baking sheet for 2–3 minutes, then transfer to a wire rack to cool completely.
    Leave a Comment
    Serving: 1gCalories: 232kcalCarbohydrates: 34gProtein: 3gFat: 10gSaturated Fat: 4gPolyunsaturated Fat: 1gMonounsaturated Fat: 4gTrans Fat: 0.02gCholesterol: 1mgSodium: 43mgPotassium: 194mgFiber: 3gSugar: 27gVitamin A: 9IUCalcium: 30mgIron: 2mg

    Watch The Recipe Video!
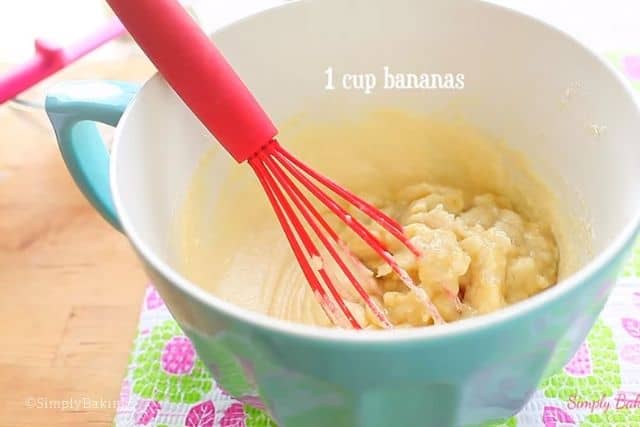
    QR Code
    Did you make this recipe?Share it on instagram or tag @simplybakings or #simplybakings!
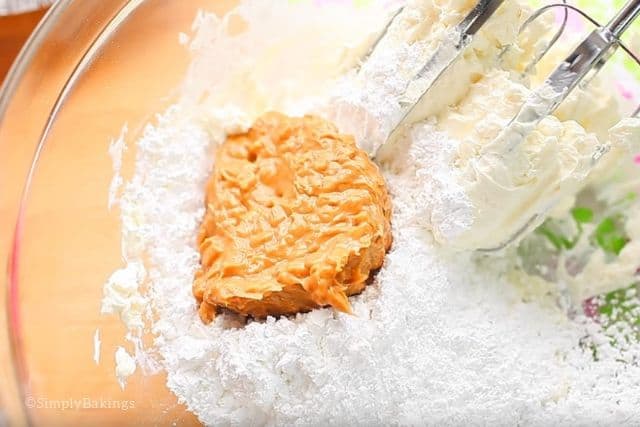
    Christmas Desserts, Cookies

    • « Go to Previous Page
    • Page 1
    • Interim pages omitted …
    • Page 11
    • Page 12
    • Page 13
    • Page 14
    • Page 15
    • Interim pages omitted …
    • Page 18
    • Go to Next Page »

    Primary Sidebar

    Lainey holding a muffin pan in her kitchen

    I'm Lainey, the driving force behind SimplyBakings.com, where I'm on a mission to redefine Filipino cooking through a plant-based lens.

    More about me →

    Popular

    • cookie dough bites
      Easiest Cookie Dough Bites Ever
    • delicious and soft oreo cheesecake cookies
      Soft Oreo Cheesecake Cookies
    • mini chocolate cupcakes in a white rectangular plate
      Delicious and Easy Mini Chocolate Cupcakes
    • Filipino Custard Cake drizzled with powdered sugar
      Filipino Custard Cake
    • no bake oreo cheesecake in a mason jar
      Foolproof 3 Ingredients No Bake Oreo Cheesecake
    • Three Filipino brownies stacked together
      Perfected Filipino Brownies

    Footer

    Sign Up for My Email List

    Latest Posts

    • Foolproof Patola Tofu Soup
    • BEST Filipino Sawsawan
    • Classic Kamote Tops Recipe
    • Classic Kutsinta Recipe

    Quick Links

    Kitchen Essentials

    About Lainey

    Contact

    • Facebook
    • Instagram
    • YouTube
    • Pinterest
    • TikTok

    © 2025 Auburn Digital Services LLC. All Rights Reserved | Privacy Policy

    Rate This Recipe

    Your vote:


    A rating is required
    A name is required
    An email is required