
• Skip to primary navigation
  • Skip to main content
  • Skip to primary sidebar
Simply Bakings logo
  • Home
  • Recipes Index
  • Filipino Recipes
  • About Me
  • Nav Social Menu

menu icon
go to homepage
search icon
Homepage link
  • Recipes
  • Filipino Recipes
  • About Me
    • Facebook
    • Instagram
    • Pinterest
    • YouTube
  • ×

    Best EVER Pear Crostata Recipe

    Best EVER Pear Crostata Recipe

    Oct 15, 2025 · 10 Comments

    Flaky Pear Crostata with sliced pears in the center

    This Pear Crostata combines juicy, sweet pears with crunchy walnuts in a flaky crust. The ripe pears in this delectable dessert add a soft, melt-in-your-mouth texture that makes each bite extra special!

    Looking for more fruit recipes? Try my Berry Fruit Tart or my Fruit Cheesecake.

    A freshly baked Pear Crostata beside a small bowl of walnuts
    [feast_advanced_jump_to]

    Why You’ll Love This Recipe

    This recipe is beginner-friendly and doesn’t require fancy tools. The dough is simple, and the filling comes together in minutes.

    It’s dairy-free optional (just swap the butter), and can be made vegan with one tweak. Skip the egg wash.

    Pears are rich in fiber and vitamin C, making this treat a little healthier than your average pastry.

    Ingredients

    Listed below are all the ingredients you will need:

    • All-purpose flour
    • Sugar
    • Salt
    • Cold Unsalted butter
    • Ice water
    • Pears
    • Brown sugar
    • Lemon juice
    • Ground cinnamon
    • Ground nutmeg
    • Walnuts
    • Vanilla extract
    • Egg
    • Turbinado sugar (optional)

    See recipe card for quantities.
    Pear Crostata ingredients in separate bowls

    Instructions

    Prepare the Crust:

    1. In a food processor, combine the flour, sugar, and salt. Then, pulse a few times to mix.

    2. Next, add the cold butter cubes and pulse until the mixture resembles coarse crumbs.

    3. Gradually add ice water, 1 tablespoon at a time, pulsing until the dough just comes together. The dough should hold together when you press it between your fingers.

    Wrapped dough on a gray countertop

    4. Then turn the dough out onto a lightly floured surface. Form it into a disk. Wrap in plastic wrap and refrigerate for at least 30 minutes.

    Prepare the Filling:

    5. In a large bowl, toss the sliced pears with the brown sugar, lemon juice, cinnamon, nutmeg, chopped walnuts, flour, and vanilla extract. Then, mix until the pears are well coated.

    Assemble the Crostata:

    6. Preheat your oven to 400°F (200°C) and line a baking sheet with parchment paper.

    7. On a lightly floured surface, roll out the chilled dough into a 12-inch circle, about ⅛ inch thick. Then, transfer the dough to the prepared baking sheet.

    Rolling pin used to flatten the chilled dough on a brown parchment paper to be transferred to the baking sheet

    8. Arrange the pear mixture in the center of the dough, leaving about a 2-inch border around the edges.

    9. Gently fold the edges of the dough over the pears, pleating as you go, to create a rustic, free-form tart. The center will remain exposed.

    10. Brush the dough edges with the beaten egg and sprinkle with turbinado sugar if using.

    Unbaked pear crostata on parchment paper

    11. Bake in the preheated oven for 35-40 minutes, or until the crust is golden brown and the pears are tender.

    12. Allow the crostata to cool on the baking sheet for a few minutes before transferring it to a wire rack to cool completely.

    13. Serve warm or at room temperature, with a scoop of vanilla ice cream or a dollop of whipped cream if desired.

    14. Enjoy the delicious taste of this pear crostata in every bite!

    Pie server lifting out a slice of Pear Crostata

    Substitutions & Variations

    • Ingredient Swap
      No pears? Try apples, peaches, or even berries.
    • Variation
      Use coconut oil instead of butter for a vegan option.
    • Mistake to Avoid
      Avoid overloading the center, or it may leak.
    • Storage Tips
      • This crostata freezes well for up to 1 month. Let it cool fully, then wrap it tightly.
      • For fridge storage, keep it in an airtight container for up to 3 days. Reheat in the oven for a crisp crust.
    Fresh Pear Crostata served on the table

    FAQ

    What are the three different types of galettes?

    Three common types include the Galette Breton, Galette de Rois, and Fruit Galette.

    What is another name for a crostata?

    In France, a fruit galette (crostata in Italian) is a rustic tart - no tart pan or ring, just a rolled-out round of dough topped with a mound of fresh fruit then baked to golden crust perfection. I've written about galettes before, but it's always fun to revisit an old friend.

    What kind of pear is best for tarts?

    Anjou pears are especially great for baking because they can withstand high temperatures. We love using them for pies and tarts. Bosc pears are oblong with an elegant, elongated neck and long curved stems.

    A slice of Pear Crostata cut out and taken out
    5 from 9 votes
    Print Pin Recipe

    Pear Crostata

    Want something cozy and rustic? Try this irresistible pear crostata made with sweet, juicy pears with crunchy walnuts in a flaky, golden crust!
    Prep Time20 minutes mins
    Cook Time40 minutes mins
    Cool Time10 minutes mins
    Total Time1 hour hr 10 minutes mins
    Course: Dessert, Pie
    Cuisine: Italian
    Servings: 6 servings
    Calories: 375kcal
    Author: Lainey
    Prevent your screen from going dark

    Ingredients

    For the Crust:

    • 1 ¼ cups all-purpose flour
    • ½ tablespoon sugar
    • ¼ teaspoon salt
    • ½ cup (1 stick) cold unsalted butter cut into small cubes
    • 3-4 tablespoons ice water

    For the Filling:

    • 3 ripe pears peeled, cored, and thinly sliced
    • ¼ cup brown sugar
    • 1 tablespoon lemon juice
    • ½ teaspoon ground cinnamon
    • ¼ teaspoon ground nutmeg
    • ¼ cup walnuts** coarsely chopped
    • 1 tablespoon all-purpose flour
    • 1 teaspoon vanilla extract

    For Assembly:

    • 1 egg beaten (for egg wash)
    • 1 tablespoon turbinado sugar optional, for sprinkling

    Instructions

    Prepare the Crust

    • In a food processor, combine the flour, sugar, and salt. Pulse a few times to mix.
    • Add the cold butter cubes and pulse until the mixture resembles coarse crumbs.
    • Gradually add ice water, 1 tablespoon at a time, pulsing until the dough just comes together. The dough should hold together when you press it between your fingers.
    • Turn the dough out onto a lightly floured surface and form it into a disk. Wrap in plastic wrap and refrigerate for at least 30 minutes.

    Prepare the Filling

    • In a large bowl, toss the sliced pears with the brown sugar, lemon juice, cinnamon, nutmeg, chopped walnuts, flour, and vanilla extract. Mix until the pears are well coated.

    Assemble the Crostata

    • Preheat your oven to 400°F (200°C). Line a baking sheet with parchment paper.
    • On a lightly floured surface, roll out the chilled dough into a 12-inch circle, about ⅛ inch thick.
    • Transfer the dough to the prepared baking sheet.
    • Arrange the pear mixture in the center of the dough, leaving about a 2-inch border around the edges.
    • Gently fold the edges of the dough over the pears, pleating as you go, to create a rustic, free-form tart. The center will remain exposed.

    Bake the Crostata

    • Brush the dough edges with the beaten egg and sprinkle with turbinado sugar if using.
    • Bake in the preheated oven for 35-40 minutes, or until the crust is golden brown and the pears are tender.

    Cool and Serve

    • Allow the crostata to cool on the baking sheet for a few minutes before transferring it to a wire rack to cool completely.
    • Serve warm or at room temperature, with a scoop of vanilla ice cream or a dollop of whipped cream if desired.
    Leave a Comment
    Serving: 1gCalories: 375kcalCarbohydrates: 23gProtein: 10gFat: 28gSaturated Fat: 14gCholesterol: 55mgSodium: 400mgFiber: 2gSugar: 2g

    Watch The Recipe Video!

    QR Code
    Did you make this recipe?Share it on instagram or tag @simplybakings or #simplybakings!

    You Might Also Like:

    Pies are delicious like cakes, right? If you like cakes, try the following:

    • Cassava Cake
    • Simple Lemon Cake
    • Quick and Easy Coffee Cake
    • No-Bake Vegan Chocolate Cake

    Recipes for Every Moment

    Hosting last-minute guests and need a warm, homemade dessert? Our Pear Crostata looks fancy, tastes amazing, and takes less effort than a pie!

    Desserts, New Recipes on the Blog, Pie, Snacks, Thanksgiving Desserts

    Lemon Herb Tempeh Marinade

    Oct 8, 2025 · 18 Comments

    This Lemon Herb Tempeh Marinade adds bright, savory flavor to tempeh with a blend of fresh herbs, garlic, lemon, and seasonings. It’s easy to make, packed with flavor, and perfect for grilling, roasting, or meal prep.

    Don't forget to try my Ginataang Kalabasa and my Huli Huli Cauliflower - both perfect for bold vegan dinners too!

    Serving Tempeh Marinade at the table
    [feast_advanced_jump_to]

    Why You’ll Love This Recipe

    This recipe is 100% vegan, gluten-free, dairy-free, and made with pantry-friendly ingredients. It’s great for quick grilling or lunches.

    Tempeh is a great source of plant-based protein. It’s rich in soybeans and has a dense, chewy texture. The lime juice in the marinade enhances taste and helps absorb iron.

    Even if you’re new to cooking tempeh, this recipe is beginner-friendly. Just soak, skewer, and cook your marinated tempeh in a grill, oven, or even the air fryer.

    Ingredients

    Listed below are all the ingredients you will need:

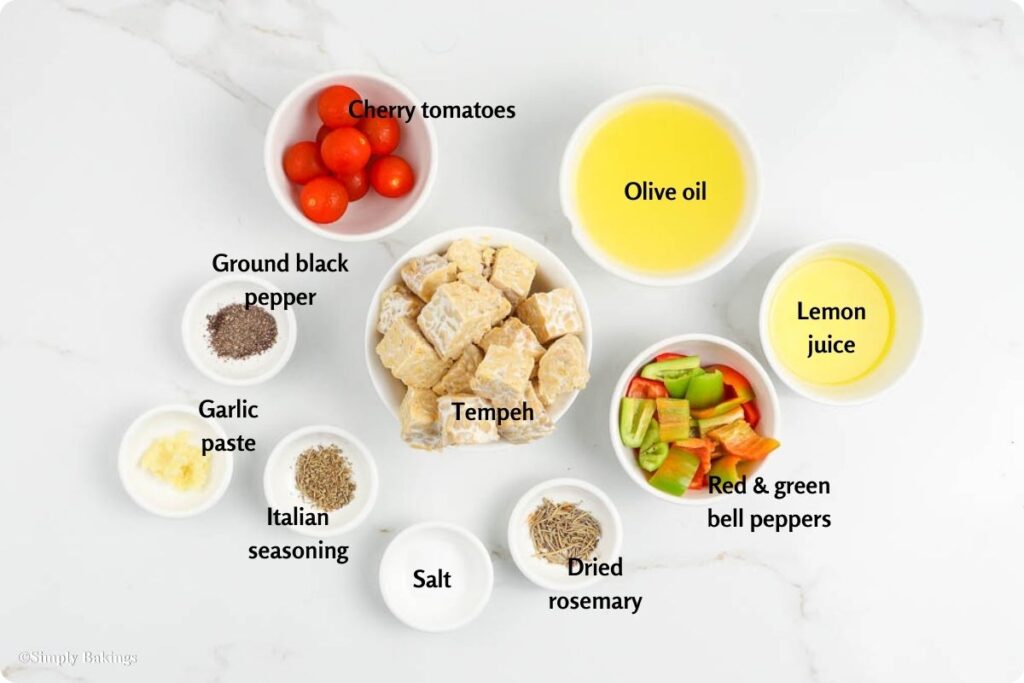
    • Tempeh
    • Bell peppers (red or green)
    • Cherry tomatoes
    • Olive oil
    • Lemon juice
    • Salt
    • Black pepper
    • Italian seasoning
    • Dried rosemary
    • Garlic paste

    See the recipe card for quantities.

    All ingredients for the Tempeh Marinade recipe

    Instructions

    Prepare the Marinade:

    1. In a mason jar or container with a lid, combine all the marinade ingredients.

    2. Shake vigorously to emulsify. (Alternatively, whisk in a bowl until well combined.)

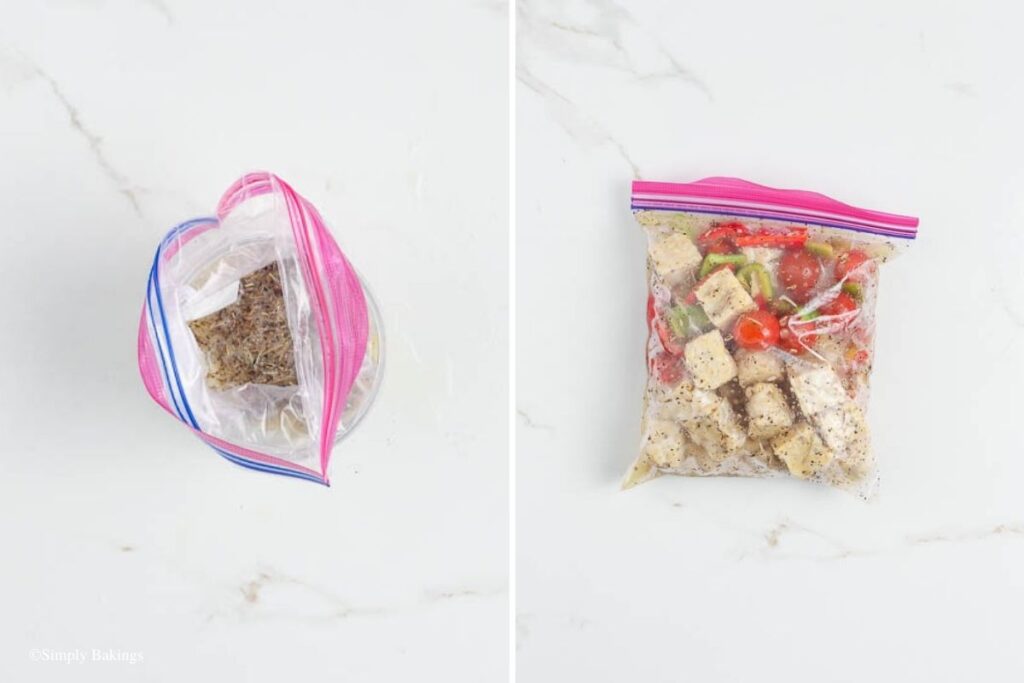
    Ziploc bag filled with veggies and tempeh

    Marinate the Ingredients:

    3. Pour the marinade into a food-safe container or resealable bag.

    4. Add the tempeh, bell peppers, and cherry tomatoes, making sure everything is well-coated.

    5. Marinate in the refrigerator for at least 2 hours or overnight for deeper flavor.

    Assemble the Skewers:

    6. Thread the marinated ingredients onto bamboo or steel skewers in the following pattern: Bell pepper → Tempeh → Bell pepper → Tempeh → Bell pepper → Tempeh → Cherry tomato

    Barbeque sticks with the tempeh and veggies

    7. Repeat the pattern until the skewer is full. Continue with the remaining ingredients.

    Grill and Serve:

    8. Preheat a grill or grill pan to medium heat.

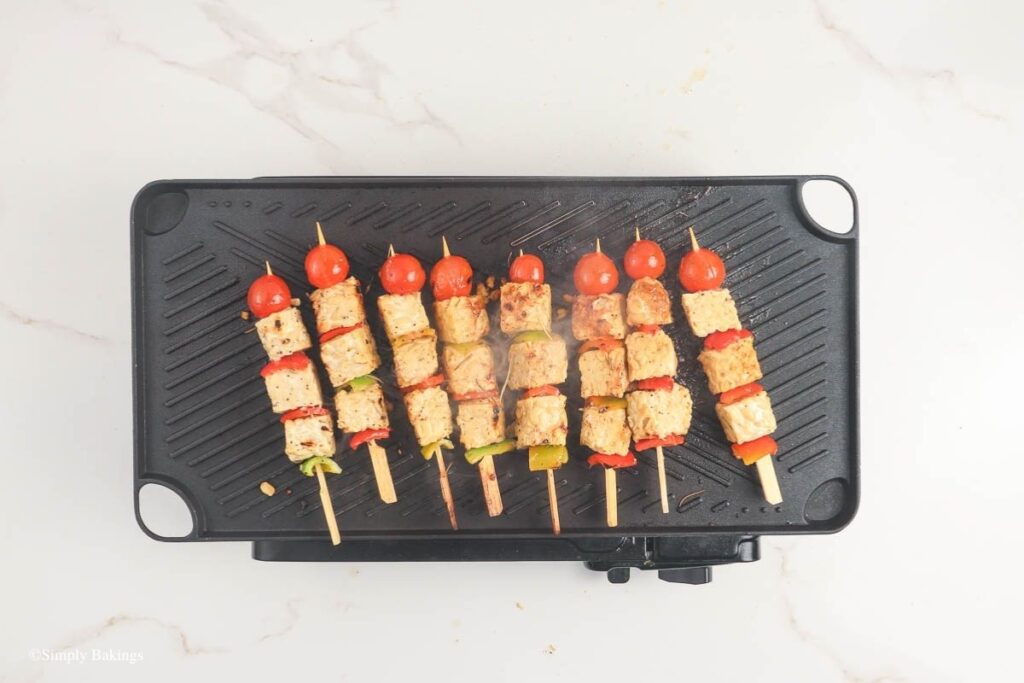
    9. Grill the skewers for 5–10 minutes, turning occasionally, until grill marks appear and veggies are tender.

    Tempeh Marinade skewers on the grill

    10. Brush the skewers with the leftover marinade while grilling to keep them moist and flavorful.

    11. Serve hot and enjoy!

    Tempeh Marinade arranged on a plate

    Substitutions & Variations

    • Ingredient Swap
      Use tofu, mushrooms, or zucchini if you don't have tempeh.
      Don’t have Italian seasoning? Mix basil, oregano, and thyme.
      Swap tamari or soy sauces if needed for a gluten-free option.
    • Variation
      Instead of cherry tomatoes, try pineapple chunks for a sweet twist.
      Slice tempeh into thin strips to mimic tempeh bacon.
      Add a dash of liquid smoke and maple syrup or honey for smoky-sweet flavour.
    • Mistake to Avoid
      Don’t skip the marinating time. Tempeh needs at least 2 hours to soak up all the flavor.
    • Storage Tips
      • This marinade doesn’t freeze well due to the lime juice and fresh garlic. Best used fresh or within 3 days in the fridge.
      • If you’re prepping kebabs ahead, store the veggies and marinated tempeh separately and assemble later.
    Veggies beside the Tempeh Marinade

    FAQs

    What is tempeh and how do I use it?

    Tempeh is a fermented soy product with a nutty flavor. You can slice or cube it, marinate, and grill or pan-fry.

    How long should I marinate?

    At least 2 hours, but overnight is best for full flavor.

    Do I need to steam tempeh before marinating?

    Steaming helps reduce bitterness and improves absorption of the marinade—so it’s highly recommended.

    Delicious Tempeh Marinade in a white dish
    5 from 10 votes
    Print Pin Recipe

    Lemon Herb Tempeh Marinade

    Every bite in this Tempeh Marinade is filled with herbs, and garlic.It's grilled to perfection, making it a vibrant, plant-based dish perfect for barbecues or dinner.
    Prep Time10 minutes mins
    Cook Time15 minutes mins
    Total Time25 minutes mins
    Course: Main Course, Side Dish
    Cuisine: Fusion (American-Filipino/Asian)
    Servings: 2 servings
    Calories: 1139kcal
    Author: Lainey
    Prevent your screen from going dark

    Ingredients

    Main:

    • 1 pound block tempeh cut into 1x1-inch cubes
    • 1 large red or green bell pepper cut into large dice
    • ¼ cup cherry tomatoes

    Marinade:

    • ⅔ cup olive oil
    • 1 cup lemon juice from about 4 lemons
    • 1½ teaspoons salt
    • ¼ teaspoon ground black pepper
    • 1 tablespoon Italian seasoning
    • 1½ teaspoons dried rosemary
    • 1 tablespoon garlic paste

    Instructions

    Prepare the Marinade:

    • In a mason jar or container with a lid, combine all the marinade ingredients.
    • Shake vigorously to emulsify. (Alternatively, whisk in a bowl until well combined.)

    Marinate the Ingredients:

    • Pour the marinade into a food-safe container or resealable bag.
    • Add the tempeh, bell peppers, and cherry tomatoes, making sure everything is well coated.
    • Marinate in the refrigerator for at least 2 hours or overnight for deeper flavor.

    Assemble the Skewers:

    • Thread the marinated ingredients onto bamboo or steel skewers in the following pattern:
    • Bell pepper → Tempeh → Bell pepper → Tempeh → Bell pepper → Tempeh → Cherry tomato
    • Repeat the pattern until the skewer is full. Continue with the remaining ingredients.

    Grill and Serve:

    • Preheat a grill or grill pan to medium heat.
    • Grill the skewers for 5–10 minutes, turning occasionally, until grill marks appear and veggies are tender.
    • Brush the skewers with the leftover marinade while grilling to keep them moist and flavorful.
    • Serve hot and enjoy!
    Leave a Comment
    Serving: 1gCalories: 1139kcalCarbohydrates: 38gProtein: 44gFat: 97gSaturated Fat: 15gPolyunsaturated Fat: 16gMonounsaturated Fat: 59gSodium: 1774mgPotassium: 1293mgFiber: 3gSugar: 6gVitamin A: 2008IUVitamin C: 130mgCalcium: 323mgIron: 8mg

    Watch The Recipe Video!

    QR Code
    Did you make this recipe?Share it on instagram or tag @simplybakings or #simplybakings!

    You Might Also Like:

    • Garlic Fried Rice
    • Asian Cucumber Salad
    • Tofu Stir Fry with Snow Peas

    Recipes for Every Moment

    Planning a picnic, a cookout, or something light yet satisfying? This Tempeh Marinade is the perfect go-to - easy to prep, grill, and share!

    New Recipes on the Blog, Side Dishes, Vegan Filipino Recipes

    Soft and Cozy Sweet Potato Oatmeal Muffins

    Oct 1, 2025 · 16 Comments

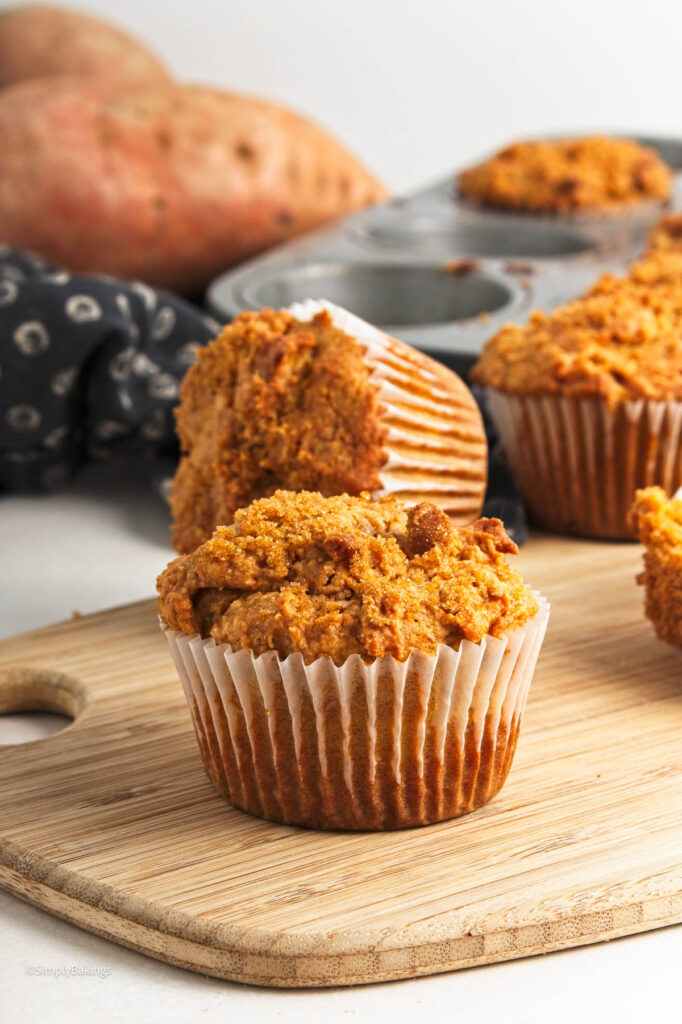
    Sweet Potato Oatmeal Muffins on a wooden board

    These Sweet Potato Oatmeal Muffins are soft, moist, and filled with cozy cinnamon flavor in every bite. Made with oats and sweet potato puree, they bake into the perfect breakfast, snack, or fall treat with a warm homemade taste that feels comforting and satisfying.

    Pair your muffins with Rice Coffee or a side of Ginisang Repolyo. It’s a comforting combo!

    A few muffins on a wooden board
    [feast_advanced_jump_to]

    Why You’ll Love This Recipe

    These sweet potato muffins are vegan-friendly, dairy-free, and made with simple pantry ingredients. No mixer needed - just one bowl and a spoon!

    Sweet potato adds fiber, vitamins, and natural sweetness. Oat flour makes it hearty but still soft. Cinnamon, nutmeg, and a dash of sea salt give them that warm, spiced flavor you’ll love.
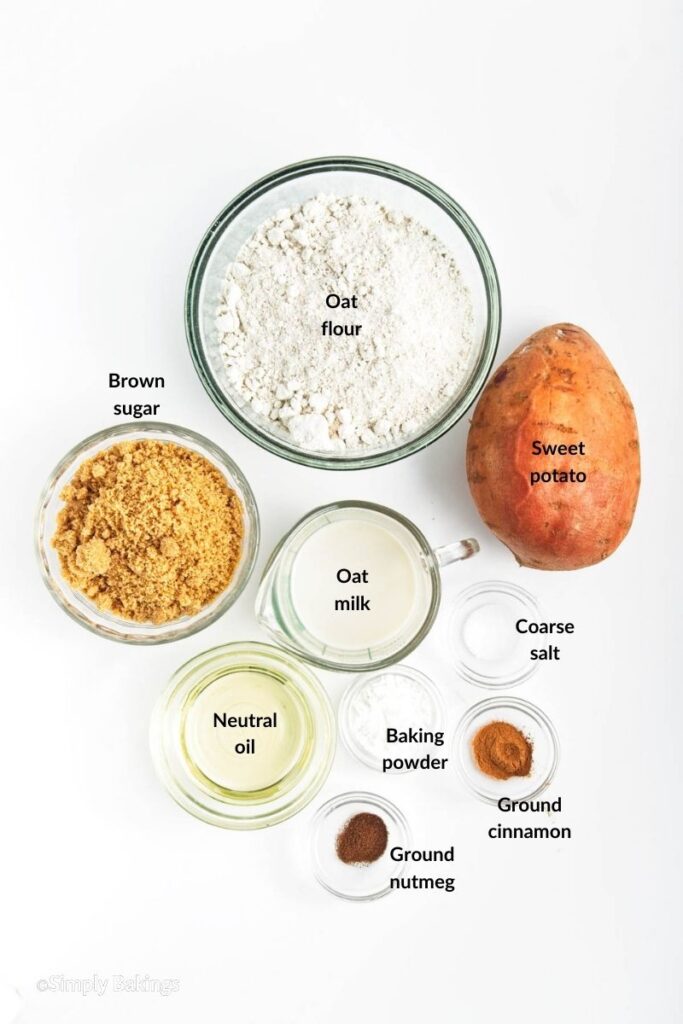
    Ingredients

    Listed below are all the ingredients you will need: (affiliates)

    • Oat flour
    • Baking powder
    • Coarse salt
    • Ground nutmeg
    • Ground cinnamon
    • Dark brown sugar
    • Sweet potato
    • Oat milk
    • Neutral oil

    See recipe card for quantities.

    Ingredients in separate white bowls

    Instructions

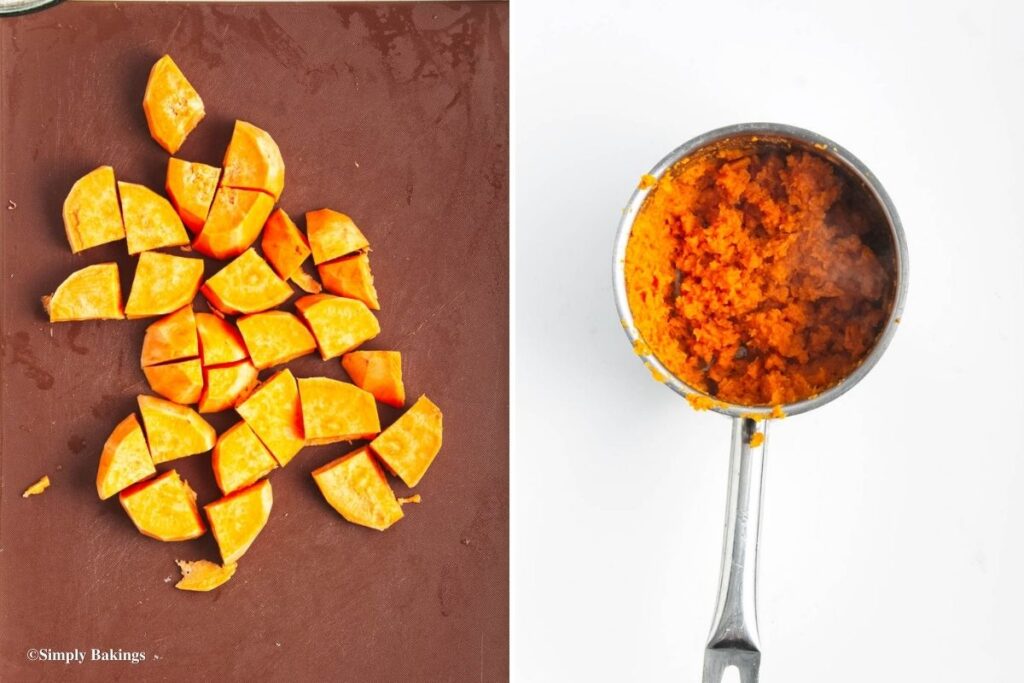
    1. Peel and chop the sweet potato into chunks. Boil or steam until very soft, then mash and let cool.

    Sweet potato chopped and mashed

    2. Preheat oven to 350°F. Line a 12-cup muffin pan with muffin liners or grease lightly.

    3. In a large mixing bowl, mix brown sugar, oat milk, and mashed sweet potato until smooth.

    4. Stir in cinnamon, nutmeg, salt, and oil until the mixture is well combined.

    5. Add oat flour and baking powder. Stir dry ingredients until no lumps remain.

    Mixing bowl filled with flour and spices

    6. Divide batter evenly in the muffin tray, filling each almost to the top. You can sprinkle some brown sugar on top.

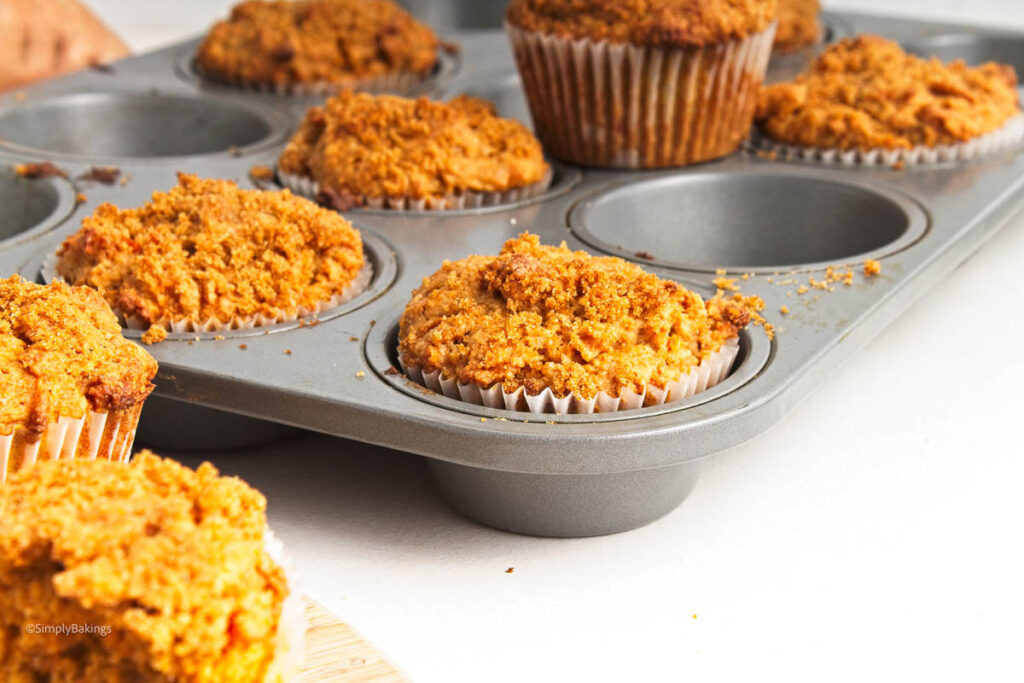
    7. Bake for 30–35 minutes or until a toothpick inserted in the center comes out clean. Let muffins rest in the pan for 30 minutes.

    Some muffins in a baking tray and table

    8. Then serve and enjoy!

    Substitutions & Variations

    • Ingredient Swap
      Swap oat milk with almond or soy milk.
      Don’t have oat flour? Use whole wheat flour or a gluten-free blend.
    • Variation
      You can add chopped nuts, chocolate chips, or even canned pumpkin for flavor twists.
    • Mistake to Avoid
      Avoid overbaking or they’ll dry out.
    • Storage Tips
      • These muffins freeze well for up to 2 months.
      • Store in an airtight container for 2–3 days at room temperature.
      • Or keep them in the refrigerator to stay fresh longer.
    Baking tray with muffins in and out

    FAQs

    Why do you need flour in muffins?

    The all-purpose flour gives the muffins structure. Stir just until no dry spots of flour remain, but avoid over-mixing so that the muffins remain tender.

    Is sweet potato a good substitute for bread?

    Cooked sweet potato slices make an excellent and tasty substitute for bread buns, especially with burgers. They may also be used in a variety of recipes for grain-free breads and flatbreads.

    Can I eat sweet potatoes on a sugar-free diet?

    During 30-day no sugar challenges, participants are encouraged to fill up on whole, nutrient-dense foods, including:
    - Vegetables: broccoli, cauliflower, spinach, carrots, asparagus, zucchini, sweet potatoes.
    - Fruits: apples, oranges, berries, grapes, cherries, grapefruit.

    A Sweet Potato Oatmeal Muffin on a white surface
    5 from 7 votes
    Print Pin Recipe

    Soft and Cozy Sweet Potato Oatmeal Muffins

    Need a healthy snack? Make yourself a helping of some delicious Sweet Potato Oatmeal Muffins. It's moist, tender and lightly spiced for your taste.
    Prep Time30 minutes mins
    Bake Time35 minutes mins
    Total Time1 hour hr 5 minutes mins
    Course: Breakfast, Snack
    Cuisine: Vegan
    Servings: 12 muffins
    Calories: 254kcal
    Author: Lainey
    Prevent your screen from going dark

    Ingredients

    • 2½ cups Oat flour
    • 1 tablespoon Baking powder
    • ¼ teaspoon Coarse salt
    • ¼ teaspoon Ground nutmeg
    • ½ teaspoon Ground cinnamon
    • 1 cup Dark brown sugar packed
    • 1½ cups Mashed cooked sweet potato about 1 large
    • ½ cup Oat milk
    • ⅓ cup Neutral oil vegetable or canola
    • 2 tablespoons Dark brown sugar for sprinkling on top optional

    Instructions

    • Peel and chop the sweet potato into chunks. Boil or steam until very soft, then mash and let cool.
    • Preheat oven to 350°F (175°C). Line a 12-cup muffin tin with paper liners or grease lightly.
    • Combine wet ingredients: In a large bowl, mix brown sugar, oat milk, and mashed sweet potato until smooth.
    • Stir in cinnamon, nutmeg, salt, and oil until the mixture is well combined.
    • Add oat flour and baking powder. Stir until no lumps remain.
    • Divide batter evenly among the muffin cups, filling each to about ¼”/6mm below the top.
    • Sprinkle brown sugar over the top of each muffin.
    • Bake for 30–35 minutes or until a toothpick inserted in the center comes out clean.
    • Let muffins rest in the pan for 30 minutes before removing and serving.
    Leave a Comment
    Serving: 1muffinCalories: 254kcalCarbohydrates: 41gProtein: 4gFat: 9gSaturated Fat: 1gPolyunsaturated Fat: 3gMonounsaturated Fat: 5gTrans Fat: 0.02gSodium: 179mgPotassium: 181mgFiber: 2gSugar: 21gVitamin A: 2379IUVitamin C: 0.4mgCalcium: 110mgIron: 1mg

    Watch The Recipe Video!

    QR Code
    Did you make this recipe?Share it on instagram or tag @simplybakings or #simplybakings!

    You Might Also Like:

    • Mini Banana Muffins
    • Pina Colada Cupcakes
    • Mini Chocolate Cupcakes
    • Blueberry Lemon Poppy Seed Muffins

    Recipes for Every Moment

    Kids are hungry after school and you want a quick, healthy treat? These Sweet Potato Oatmeal Muffins are soft, filling, and ready in no time!

    Breakfast & Brunch, New Recipes on the Blog, Snacks, Thanksgiving Brunch, Thanksgiving Sides

    Soft and Chewy Matcha Cookies

    Sep 24, 2025 · 11 Comments

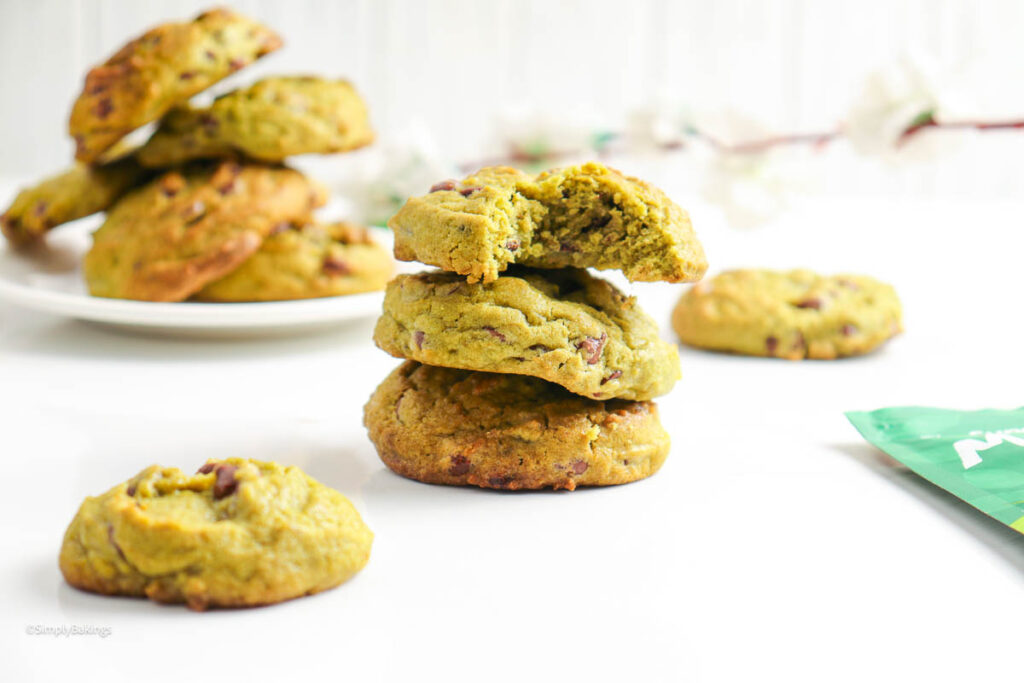
    Matcha Cookie stack with a chunk bit off the top one

    These soft and chewy matcha cookies are packed with rich matcha flavor and perfectly balanced sweetness in every bite. Made with ceremonial grade matcha, these easy cookies have a vibrant green color, crisp edges, and a soft center that pairs perfectly with coffee or a warm matcha latte.

    Craving cookies? Don’t miss our satisfying Rice Krispies Cookies or Nutella Peanut Butter Cookies!

    White table with some Matcha Cookies on it
    [feast_advanced_jump_to]

    Why You’ll Love This Recipe

    These matcha cookies are easy to make and delicious. You don’t need expensive tools or skills to make this. You just need a bowl, a whisk, and an appetite!

    They’re not vegan or dairy-free by default, but they can be easily adapted. The star ingredient, matcha powder or green tea powder, is full of antioxidants and has natural calming properties, making these cookies not just tasty but mood-boosting, too.

    Use a cookie scoop to make evenly sized cookies. The dough comes together fast, and they bake in less time than many other treats. Expect a soft, chewy texture that pairs well with milk or tea.

    Ingredients

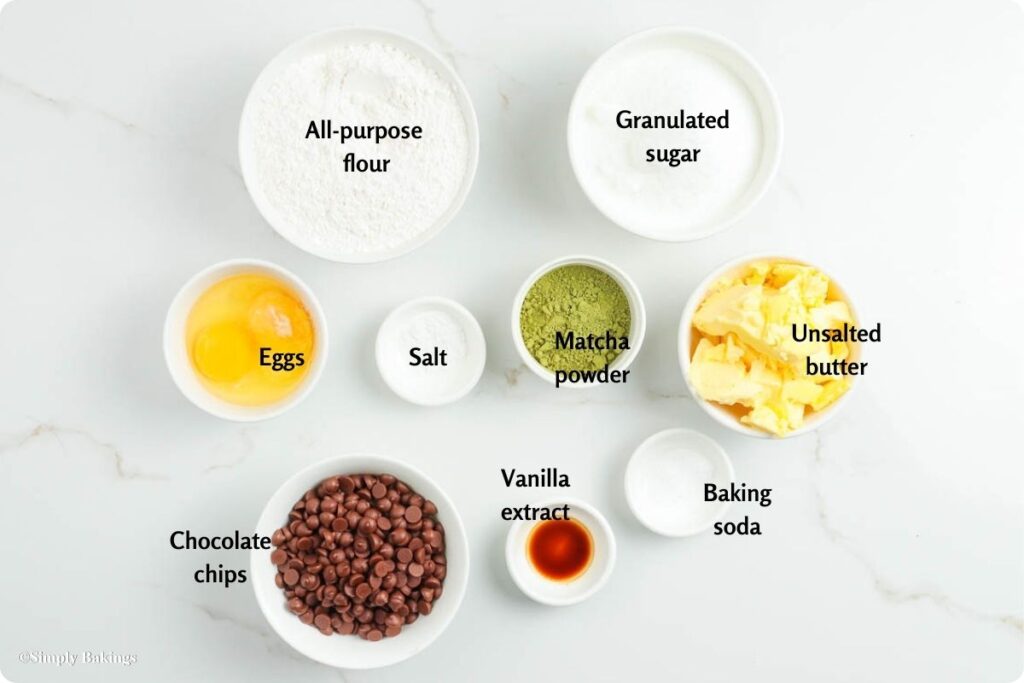
    Listed below are all the ingredients you will need:

    • Unsalted butter
    • Granulated sugar
    • Eggs
    • Vanilla extract
    • All-purpose flour
    • Baking soda
    • Matcha powder
    • Salt
    • Semi-sweet milk chocolate drops or droplets

    See the recipe card for quantities.

    All ingredients for Matcha Cookies in separate bowls

    Instructions

    Make the Dough:

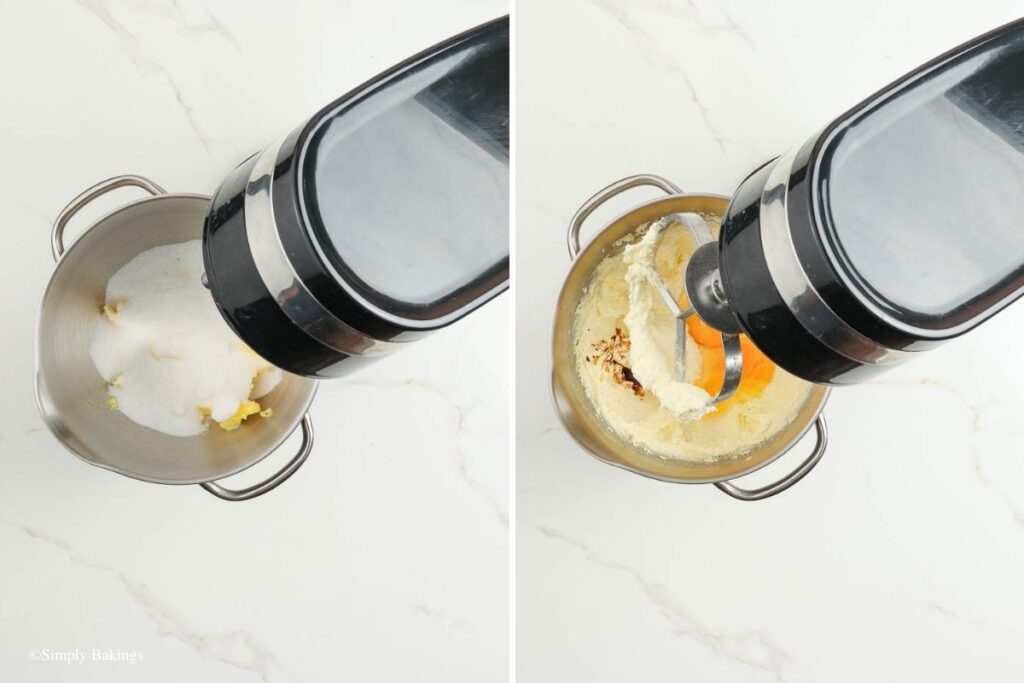
    1. Cream the butter and sugar until light and fluffy using a stand mixer with a paddle attachment.

    2. Add eggs and vanilla extract; mix until fully incorporated.

    Ingredients for the cookies mixed together

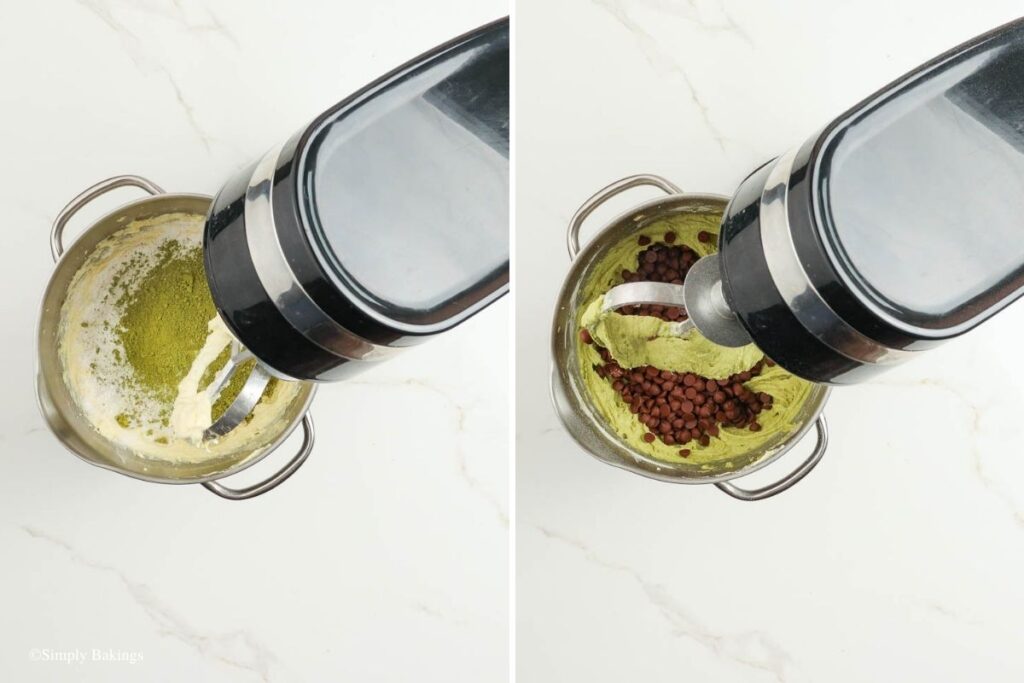
    3. Carefully add flour, baking soda, and sifted matcha powder; mix until just combined.

    4. Fold in milk chocolates.

    Ingredient mixture added with matcha powder and chips

    5. Cover with cling film and chill in the fridge for 1 hour.

    Bake the Cookies:

    6. Preheat oven to 350°F (175°C).

    7. Line a baking sheet with parchment paper.

    8. Scoop 12 portions of dough using an ice cream scooper onto the sheet.

    Baking tray filled with ready-to-bake Matcha cookies

    9. Bake for 12 minutes. Let cool completely before serving.

    Matcha Cookie stack with a chunk bit off the top one

    Substitutions & Variations

    • Variation
      Swap the milk chocolates with white chocolate chips. Dark chocolates will also do, but for a deeper contrast.
      Replace white sugar with coconut sugar for a more caramel-like taste.
    • Mistake to Avoid
      Avoid overbaking! They can get dry and lose their chewiness.
      Make sure the butter melts properly before creaming it with the wet ingredients.
    • Storage Tips
      • These cookies freeze well for up to 2 months. Store extra cookie dough in the freezer and bake when you need a quick treat.
      • For fridge storage, keep them in an airtight container for up to 1 week.
      • If storing dough, roll into balls and freeze. Bake from frozen, adding 1–2 minutes. Use a pan lined with parchment paper for the best results.
    Matcha Cookies on a white surface

    FAQs

    Can I use ceremonial-grade matcha instead?

    Yes, but it’s more expensive and may have a slightly different taste. Culinary grade works best here.

    Can I make this dough ahead of time?

    Absolutely! Chill it for up to 48 hours. Chilled dough enhances flavor and texture.

    Why did my cookies turn out flat?

    The butter may have been too soft or the dough too warm. Try chilling it before baking.

    Delicious Matcha Cookies piled on top of one another
    5 from 8 votes
    Print Pin Recipe

    Soft and Chewy Matcha Cookies

    These soft & chewy Matcha Cookies are buttery and sweet. Perfectly balanced with white chocolate or nuts, they’re a unique and elegant take on a classic cookie!
    Prep Time1 hour hr 8 minutes mins
    Cook Time12 minutes mins
    Total Time1 hour hr 20 minutes mins
    Course: Dessert, Snack
    Cuisine: Japanese
    Servings: 12 cookies
    Calories: 285kcal
    Author: Lainey
    Prevent your screen from going dark

    Ingredients

    • ⅔ cup unsalted butter room temperature
    • 1 ½ cups granulated white sugar
    • 2 large eggs
    • ½ teaspoon vanilla extract
    • 2 cups all-purpose flour
    • 1 teaspoon baking soda
    • 3 tablespoons matcha powder sifted
    • ¼ teaspoon salt
    • ½ cup semi-sweet milk chocolate drops or droplets

    Instructions

    Make the Dough

    • Cream the butter and sugar until light and fluffy using a stand mixer with a paddle attachment.
    • Add eggs and vanilla extract; mix until fully incorporated.
    • Carefully add flour, baking soda, and sifted matcha powder; mix until just combined.
    • Fold in milk chocolates.
    • Cover with cling film and chill in the fridge for 1 hour.

    Bake the Cookies

    • Preheat oven to 350°F (175°C).
    • Line a baking sheet with parchment paper.
    • Scoop 12 portions of dough using an ice cream scooper onto the sheet.
    • Bake for 12 minutes. Let cool completely before serving.
    Leave a Comment

    Notes

    • Depending on the size of the ice cream scooper, the yield may vary from 12 to 20 pieces.
    • You can also use smaller scoops to make bite-sized cookies.
    • You may use white chocolate chips instead of milk chocolates.
    Serving: 1cookieCalories: 285kcalCarbohydrates: 41gProtein: 5gFat: 11gSaturated Fat: 7gPolyunsaturated Fat: 1gMonounsaturated Fat: 3gTrans Fat: 0.4gCholesterol: 54mgSodium: 152mgPotassium: 36mgFiber: 1gSugar: 25gVitamin A: 542IUCalcium: 11mgIron: 2mg

    Watch The Recipe Video!

    QR Code
    Did you make this recipe?Share it on instagram or tag @simplybakings or #simplybakings!

    You Might Also Like:

    • Oreo Cheesecake Cookies
    • PB Reese’s Cookies
    • Shamrock Cookies

    Recipes for Every Moment

    Want something sweet, but don’t want to bake for hours? These Soft & Chewy Matcha Cookies come together fast and satisfy your sweet tooth with every bite!

    Cookies, Desserts, Filipino Desserts, New Recipes on the Blog, Snacks

    Creamy Ube Cassava Cake

    Sep 17, 2025 · 17 Comments

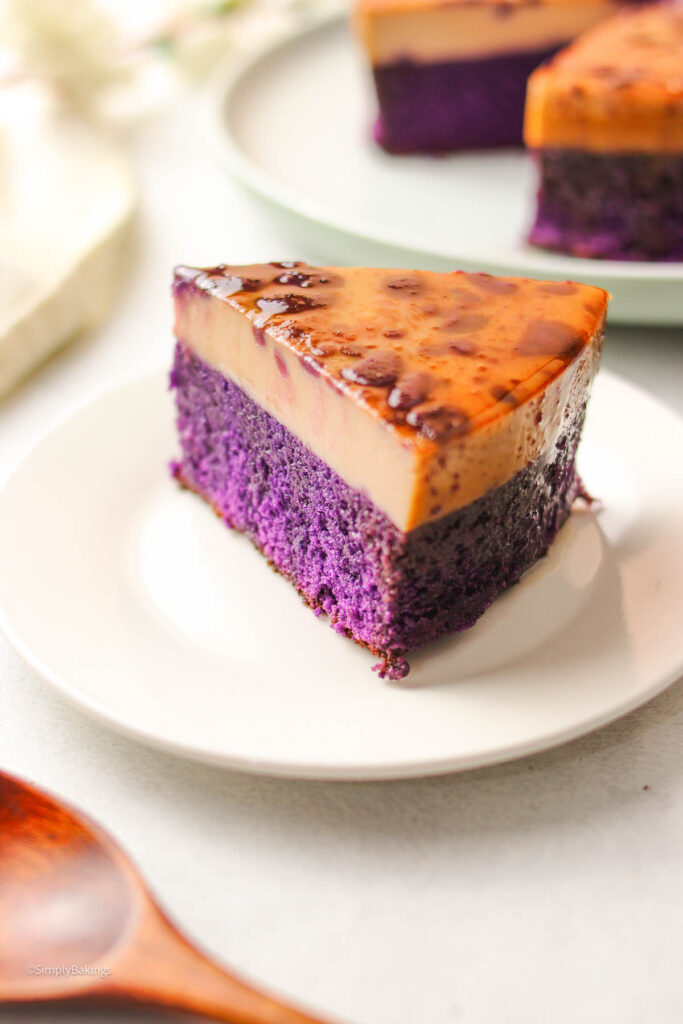
    A slice of Ube Cassava Cake on a small white plate

    This creamy ube cassava cake combines chewy cassava, rich coconut milk, and sweet ube halaya into one comforting Filipino dessert. With its soft texture, vibrant purple color, and perfectly balanced sweetness, this easy cassava cake recipe is perfect for holidays, potlucks, or whenever you’re craving a homemade ube treat.

    If you love trying new cakes, don't miss my delicious Vanilla Custard Cake and Quick and Easy Coffee Cake!

    Yummy Ube Cassava Cake with cheese topping
    [feast_advanced_jump_to]

    Why You’ll Love This Recipe

    This ube cassava cake is a beginner friendly dessert recipe and doesn’t require special tools. Just mix the ingredients, bake, and top with melty cheese. You can also bake it in individual ramekins for single servings.

    Cassava is naturally gluten-free and rich in fiber. Ube adds antioxidants and vibrant color. With coconut milk, condensed milk, and cheese, the texture is creamy, dense, and satisfying.

    This delicious mash-up of cassava and ube has layers of flavor. Each layer brings sweetness, saltiness, and rich creaminess. You’ll love every bite!

    The Story Behind Ube Cassava Cake

    Cassava is also known as yuca, manioc, or tapioca root. You can use fresh cassava or frozen, and even grate it in a food processor for ease. Want even more ube taste? Add ube extract for a stronger ube flavor and purple color!

    Cassava Cake is a beloved Filipino kakanin (native delicacy). Many grew up eating it at fiestas and birthdays. This version adds ube halaya for a unique, modern twist that has become increasingly popular in recent years.

    Some versions include toppings such as macapuno strings, leche flan, or additional grated cheese. It’s a versatile dessert that fits both traditional and modern cravings.

    Where Ube Cassava Cake Comes From

    Cassava Cake has long roots in Filipino kitchens. It started with simple cassava, coconut milk, and sugar. Later, families began adding cheese, condensed milk, and other toppings.

    The addition of ube halaya is more recent, likely started by home bakers and online food creators. Today, it's a hit at parties and dessert tables across the Philippines and abroad.

    Ingredients

    Listed below are all the ingredients you will need:

    • grated cassava
    • coconut milk
    • evaporated milk
    • eggs
    • butter
    • quickmelt cheese
    • condensed milk
    • white sugar
    • salt
    • ube halaya
    • coconut cream
    • cheddar cheese

    See recipe card for quantities.

    All ingredients for Ube Cassava Cake in separate bowls

    Instructions

    Prepare the Pan:

    1. Preheat oven to 350°F (175°C).

    2. Line a 10-inch loose bottom cake pan with parchment paper or spray with baking spray. Set aside.

    10-inch Cake pan with parchment paper

    Mix the Topping:

    3. In a small bowl, combine condensed milk, coconut cream, and orange cheddar cheese. Mix well and set aside.

    Coconut cream, milk and cheese in a small bowl

    Make the Cassava Batter:

    4. In a large mixing bowl, combine grated cassava, coconut milk, condensed milk, evaporated milk, eggs, melted butter, grated quickmelt cheese, white sugar, and salt.

    5. Stir until fully incorporated.

    Large mixing bowl filled with the ingredients

    Assemble the Cake:

    6. Pour the cassava batter into the prepared baking pan.

    7. Using an ice cream scoop, drop spoonfuls of ube halaya evenly into different areas of the batter. Do not stir.

    Cassava batter in the pan dropped with ube

    Bake the Cake:

    8. Bake in the preheated oven for 40–50 minutes or until the top is lightly golden and the center is set.

    Baked Ube Cassava Cake fresh out of the oven

    Add the Topping Then Serve:

    9. Remove from the oven and pour the coconut cream cheese mixture on top.

    10. Return to the oven and bake for another 10 minutes until the topping is set and slightly browned.

    11. Let the cake cool completely before slicing. Serve warm or chilled!

    Delicious Ube Cassava Cake slice on a white plate

    Substitutions & Variations

    • Ingredient Swap
      No ube halaya? Use ube powder or add ube extract to the mix.
      No Quickmelt cheese? Try orange cheddar cheese or mozzarella.
    • Variation
      Want it less sweet? Add spices like cinnamon or nutmeg for extra warmth.
    • Mistake to Avoid
      Don’t underbake or overbake. Wait for a firm center and a lightly golden brown top.
    • Storage Tips
      • This cake doesn’t freeze well. Store in the freezer for no more than 2 weeks.
      • Keep leftovers in the refrigerator for 2–3 days.
      • Cover with plastic wrap or a lid to keep it moist and fresh.
    Two slices of Ube Cassava Cake in plates

    FAQ

    What does cassava cake taste like?

    Cassava cake is sweet, creamy, and slightly chewy. It has a rich coconut flavor with a hint of buttery goodness.

    What food is similar to cassava?

    Cassava is similar to sweet potato or taro. They’re all starchy and often used in desserts or snacks.
    How healthy is cassava cake?

    Cassava cake is tasty but not very healthy. It’s high in sugar, carbs, and fat, so it’s best enjoyed in moderation.
    a slice of homemade ube cassava cake on a small white plate
    5 from 10 votes
    Print Pin Recipe

    Creamy Ube Cassava Cake

    This Ube Cassava Cake is a rich and creamy Filipino dessert. Topped with a golden cheese-coconut glaze, every slice is a gooey, chewy delight. It’s perfect for potlucks, birthdays, or merienda!
    Prep Time15 minutes mins
    Cook Time50 minutes mins
    Total Time1 hour hr 5 minutes mins
    Course: Dessert, Snack
    Cuisine: Filipino
    Servings: 12 -16 servings
    Calories: 349kcal
    Author: Lainey
    Prevent your screen from going dark

    Ingredients

    For the Cake Base:

    • 2 lb grated cassava
    • 2 cups coconut milk
    • ½ cup evaporated milk
    • 4 large eggs
    • ¼ cup butter melted
    • 1 cup quickmelt cheese grated
    • 1 ½ cups condensed milk
    • ¾ cup white sugar
    • ¼ teaspoon salt
    • 3 cups ube halaya

    For the Toppings:

    • ¼ cup condensed milk
    • ¼ cup coconut cream
    • ¼ cup cheddar cheese crumbled or grated

    Instructions

    Prepare the Pan:

    • Preheat oven to 350°F (175°C). Line a 10-inch loose bottom cake pan with parchment paper or spray with baking spray. Set aside.

    Mix the Topping:

    • In a small bowl, combine condensed milk, coconut cream, and orange cheddar cheese. Mix well and set aside.

    Make the Cassava Batter:

    • In a large mixing bowl, combine grated cassava, coconut milk, condensed milk, evaporated milk, eggs, melted butter, grated quickmelt cheese, white sugar, and salt. Stir until fully incorporated.

    Assemble the Cake:

    • Pour the cassava batter into the prepared baking pan.
    • Using an ice cream scoop, drop spoonfuls of ube halaya evenly into different areas of the batter. Do not stir.

    Bake the Cake:

    • Bake in the preheated oven for 40–50 minutes or until the top is lightly golden and the center is set.

    Add the Topping:

    • Remove from the oven and pour the coconut cream-cheese mixture on top.
    • Return to the oven and bake for another 10 minutes until the topping is set and slightly browned.

    Cool and Serve:

    • Let the cake cool completely before slicing. Serve warm or chilled.
    Leave a Comment
    Serving: 1servingCalories: 349kcalCarbohydrates: 38gProtein: 7gFat: 20gSaturated Fat: 14gPolyunsaturated Fat: 1gMonounsaturated Fat: 3gTrans Fat: 0.2gCholesterol: 83mgSodium: 746mgPotassium: 318mgFiber: 0.1gSugar: 25gVitamin A: 342IUVitamin C: 2mgCalcium: 171mgIron: 2mg

    Watch The Recipe Video!

    QR Code
    Did you make this recipe?Share it on instagram or tag @simplybakings or #simplybakings!

    You Might Also Like:

    • Easy Pretzel Cake
    • Strawberry Bundt Shortcake
    • Nutella Mug Cake
    • Simple Lemon Cake

    Recipes for Every Moment

    Hosting last minute guests and need a dessert that looks and tastes amazing? This Ube Cassava Cake is easy to bake, rich, and always a showstopper!

    Cake, Desserts, Filipino Desserts, New Recipes on the Blog, Ube Recipes

    Cold Buckwheat Noodle Salad

    Sep 10, 2025 · 16 Comments

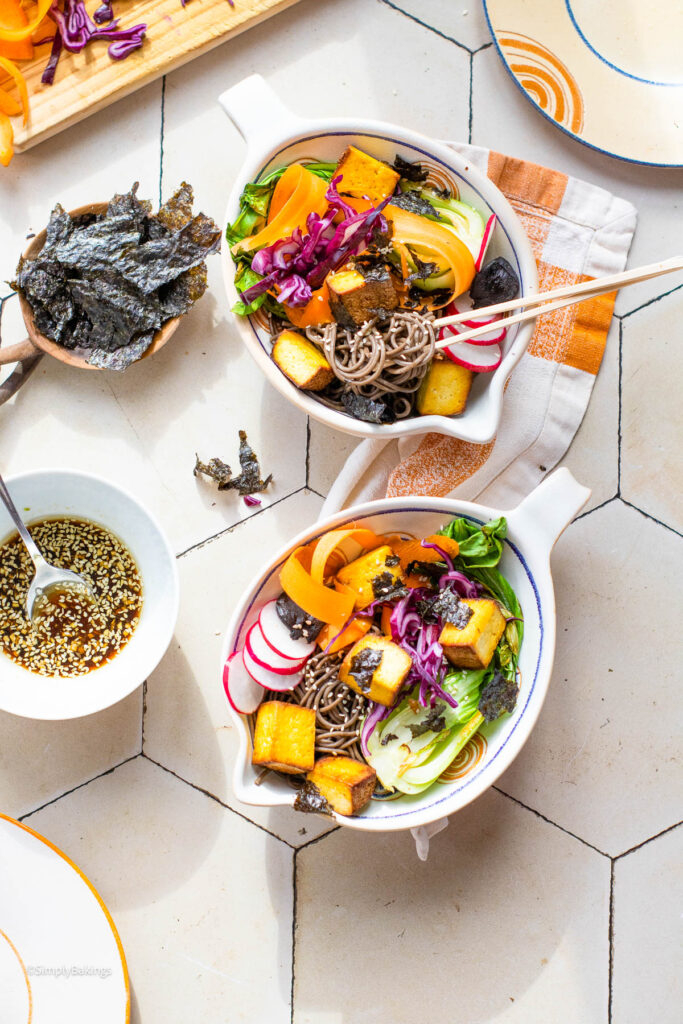
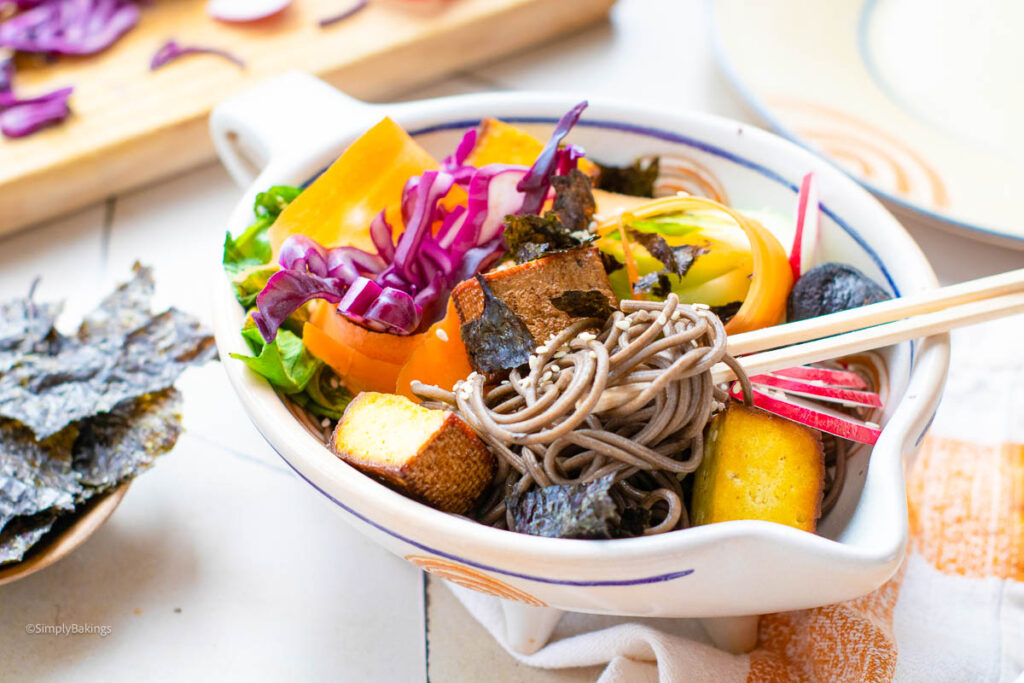
    Large bowl filled with Cold Buckwheat Noodle Salad

    Cold Buckwheat Noodle Salad is a light, refreshing, and nutrient packed dish perfect for hot days. It’s vegan, beginner friendly, and full of texture - from crispy radishes to smoky tofu. Great for those looking for a healthy, no fuss meal with bold Asian flavors!

    If you love this fresh salad, you’ll also enjoy our leafy Talbos ng Kamote Salad.

    Two serving bowls of Cold Buckwheat Noodle Salad
    [feast_advanced_jump_to]

    Why You’ll Love This Recipe

    This cold soba noodle salad is completely vegan, dairy-free, and beginner-friendly. It’s perfect for anyone craving something cold, crunchy, and flavorful with minimal cooking.

    Buckwheat flour gives soba noodles their earthy taste and fiber-rich benefits. Just check the label, some noodles also contain wheat flour, so choose 100% buckwheat if gluten-free. Add in colorful vegetables, scallions, and smoked tofu, and you’ve got a well-balanced meal in one large bowl.

    Ingredients

    Listed below are all the ingredients you will need:

    For the Poke Bowl:

    • Smoked tofu
    • Soba noodles
    • Small Bok choy
    • Radishes
    • Carrot
    • Purple cabbage
    • Nori
    • Black garlic
    • Sesame oil

    For the Soy Sauce Dressing:

    • Soy sauce
    • Rice vinegar
    • Mirin
    • Fresh ginger
    • Sesame seeds
    • Garlic

    See the recipe card for quantities.

    Instructions

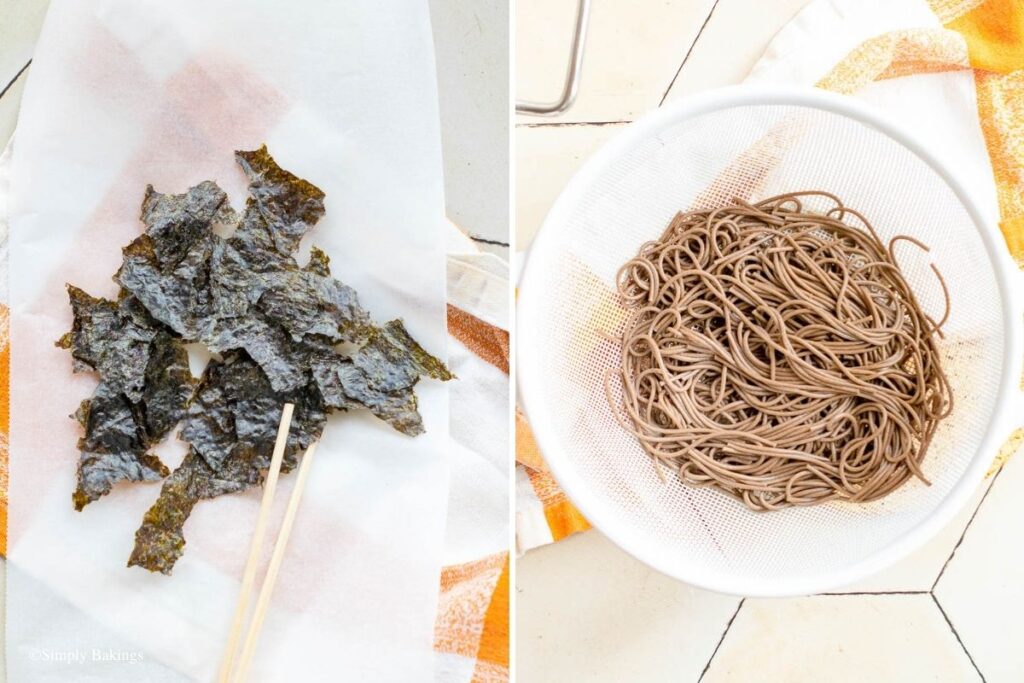
    Prepare the Nori:

    1. Preheat the oven to 275°F (135°C).

    2. Line a baking sheet with parchment paper. Lay the nori sheet pieces flat on the pan.

    3. Bake for 5–7 minutes, or until crispy and slightly darkened at the edges. Watch carefully to avoid burning.

    4. Remove from the oven and let cool completely. Set aside.

    Nori and Soba noodles in separate bowls

    Cook the Soba Noodles:

    5. Bring a pot of water to a boil. Cook the soba noodles according to package instructions.

    6. Drain and rinse under cold water to stop the cooking. Set aside.

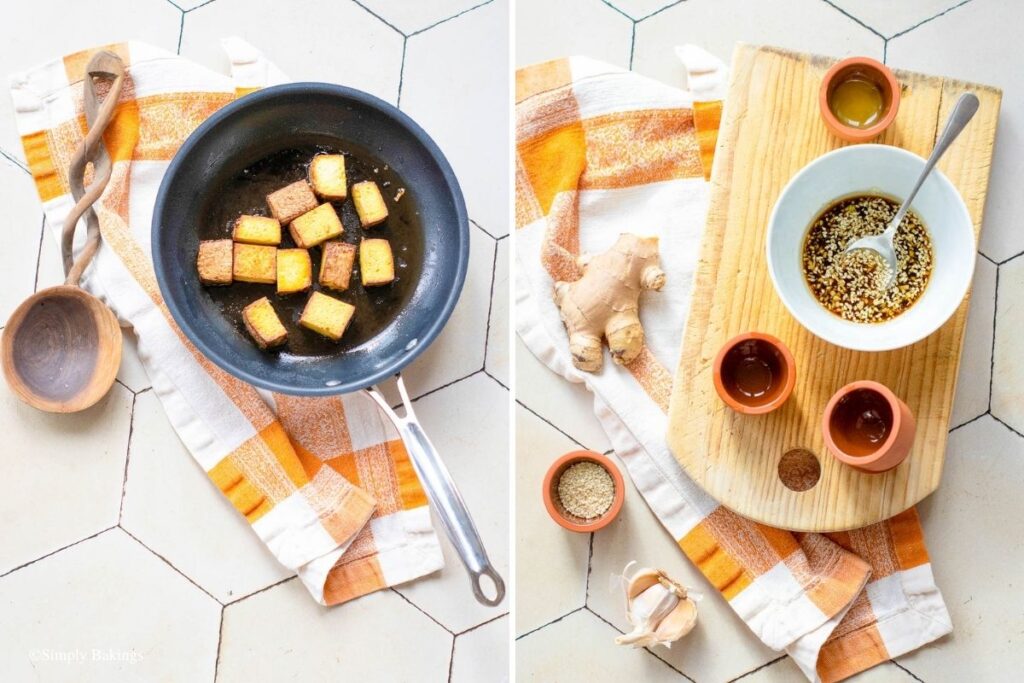
    Sauté the Tofu and Bok Choy:

    7. In a pan, heat 1 tablespoon sesame oil over medium heat.

    8. Add the cubed tofu and sauté for 4–5 minutes, turning until golden and crispy on all sides. Set aside.

    9. In the same pan, quickly sauté the bok choy for 2–3 minutes until slightly wilted but still crunchy. Remove from heat.

    Tofu in the pan and other ingredients

    Make the Dressing:

    10. In a small bowl, whisk together the soy sauce, rice vinegar, sesame oil, mirin, grated ginger, minced garlic, and sesame seeds (if using).

    Assemble the Salad:

    11. Garnish with additional sesame seeds or chili flakes (optional). Serve immediately.

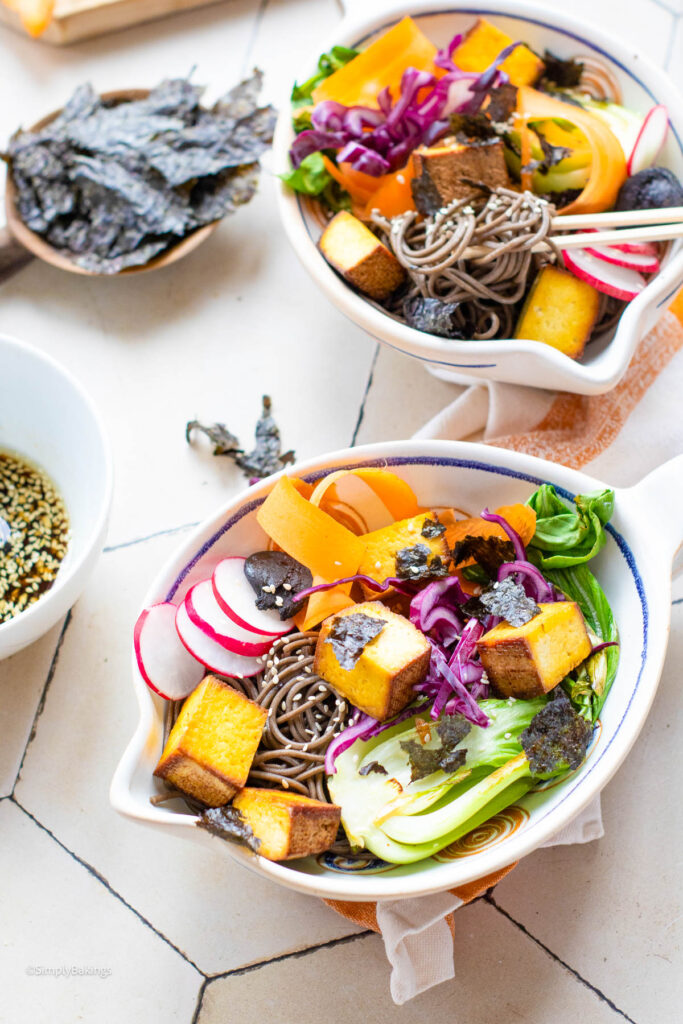
    12. Divide the cold soba noodles between two bowls.

    13. Arrange the bok choy, radishes, carrot ribbons, shredded purple cabbage, and crisped tofu on top.

    Chopped vegetables prepared for the recipe

    14. Add a small amount of mashed black garlic for umami flavor.

    15. Sprinkle the crispy nori chips over the bowls.

    16. Drizzle with the soy-ginger dressing and toss gently to combine.

    Cold Buckwheat Noodle Salad in two serving bowls

    Substitutions & Variations

    • Ingredient Swap
      Can’t find smoked tofu? Use baked tofu, tempeh, or even grilled mushrooms for a similar texture.
      Swap soba noodles with rice noodles, zucchini noodles, or whole wheat spaghetti.
      You can also use zaru soba, a chilled version traditionally served with a dipping sauce.
    • Variation
      Out of black garlic? Try roasted garlic or a small amount of garlic oil for depth.
    • Mistake to Avoid
      Don’t overcook the soba noodles - they get mushy fast. Rinse them under cold water right after cooking to stop the cooking process and keep them springy.
    • Storage Tips
      • These ingredients don’t stand up well to freezing, especially soba noodles and fresh veggies, which can turn mushy and lose their crunch.
      • Store tofu, noodles, and dressing in separate airtight containers, and keep the veggies separate to maintain freshness.
      • Best enjoyed fresh, but if stored properly, it can last in the fridge for up to 2–3 days.
    Cold Buckwheat Noddle Salad in a white bowl

    FAQs

    Can I use dry tofu instead of smoked tofu?

    Yes! You can pan-fry or bake regular tofu for a firmer, flavorful texture if smoked tofu isn’t available.

    Can I use regular vinegar instead of rice vinegar?

    You can, but rice vinegar has a milder, slightly sweet flavor that really complements the dish. If subbing, use a light hand and adjust to taste.

    Is this dish served hot or cold?

    It’s best served cold or room temperature - perfect for warm days or meal prep lunches.

    Is this recipe gluten-free?

    Only if you use gluten-free tamari and make sure your soba noodles are 100% buckwheat. Many soba noodles are blended with wheat, so check the label!

    A bowl of Cold Buckwheat Noodle Salad
    5 from 10 votes
    Print Pin Recipe

    Cold Buckwheat Noodle Salad

    This Cold Buckwheat Noodle Salad is a refreshing and vibrant poke-style bowl. Perfectly paired with a bold soy-ginger dressing, it's a delicious and satisfying meal!
    Prep Time15 minutes mins
    Cook Time10 minutes mins
    Total Time25 minutes mins
    Course: Main Course, Salad
    Cuisine: Fusion (American-Filipino/Asian)
    Servings: 2 servings
    Calories: 464kcal
    Author: Lainey
    Prevent your screen from going dark

    Ingredients

    For the Salad Bowl:

    • 7 oz smoked tofu, cubed
    • 3.5 oz soba noodles, dry (about ⅔ cup)
    • 1 small bok choy chopped
    • 4 radishes thinly sliced
    • 1 small carrot shaved into ribbons
    • 1 cup purple cabbage shredded
    • 1 sheet nori torn into bite-sized pieces
    • 1 tablespoon black garlic mashed or finely chopped
    • 1 tablespoon sesame oil for stir-frying the tofu

    For the Soy Sauce Dressing:

    • 3 tablespoons soy sauce or tamari for gluten-free
    • 1 tablespoon rice vinegar
    • 1 tablespoon sesame oil
    • 1 tablespoon mirin or honey for non-vegan sweetness
    • 1 teaspoon fresh ginger grated
    • 1 garlic clove minced
    • 1 teaspoon sesame seeds optional

    Instructions

    Prepare the Nori:

    • Preheat the oven to 275°F (135°C).
    • Line a baking sheet with parchment paper. Lay the nori sheet pieces flat on the pan.
    • Bake for 5–7 minutes, or until crispy and slightly darkened at the edges. Watch carefully to avoid burning.
    • Remove from the oven and let cool completely. Set aside.

    Cook the Soba Noodles:

    • Bring a pot of water to a boil. Cook the soba noodles according to package instructions.
    • Drain and rinse under cold water to stop the cooking. Set aside.

    Sauté the Tofu and Bok Choy:

    • In a pan, heat 1 tablespoon sesame oil over medium heat.
    • Add the cubed tofu and sauté for 4–5 minutes, turning until golden and crispy on all sides. Set aside.
    • In the same pan, quickly sauté the bok choy for 2–3 minutes until slightly wilted but still crunchy. Remove from heat.

    Make the Dressing:

    • In a small bowl, whisk together the soy sauce, rice vinegar, sesame oil, mirin, grated ginger, minced garlic, and sesame seeds (if using).

    Assemble the Salad:

    • Divide the cold soba noodles between two bowls.
    • Arrange the bok choy, radishes, carrot ribbons, shredded purple cabbage, and crisped tofu on top.
    • Add a small amount of mashed black garlic for umami flavor.
    • Sprinkle the crispy nori chips over the bowls.
    • Drizzle with the soy-ginger dressing and toss gently to combine.
    • Garnish with additional sesame seeds or chili flakes (optional). Serve immediately.
    Leave a Comment
    Serving: 1servingCalories: 464kcalCarbohydrates: 60gProtein: 24gFat: 18gSaturated Fat: 3gPolyunsaturated Fat: 8gMonounsaturated Fat: 6gSodium: 1695mgPotassium: 1665mgFiber: 7gSugar: 11gVitamin A: 24423IUVitamin C: 218mgCalcium: 542mgIron: 7mg

    Watch The Recipe Video!

    QR Code
    Did you make this recipe?Share it on instagram or tag @simplybakings or #simplybakings!

    You Might Also Like:

    • Green Beans in Black Bean Sauce
    • Ginisang Repolyo
    • Vegan Ginataang Puso ng Saging

    Recipes for Every Moment

    Meal prepping for the week and need a refreshing, veggie-packed bowl? This Cold Buckwheat Noodle Salad is light, nourishing, and easy to customize with whatever produce you have on hand. Plus, it keeps beautifully for a few days, making lunch decisions way easier!

    Main Entree, New Recipes on the Blog, Soups and Salads

    Crispy Vegan Pumpkin Waffles

    Sep 3, 2025 · 12 Comments

    stack of Vegan Pumpkin Waffles on a white plate

    These Crispy Vegan Pumpkin Waffles are golden on the outside, fluffy on the inside, and filled with cozy pumpkin spice flavor. Made without eggs or dairy, they’re easy to make and perfect for fall breakfasts, brunches, or holiday mornings.

    Pair these waffles with my favorite Nutella Hot Chocolate for a delightful breakfast.

    A white plate of Vegan Pumpkin Waffles
    [feast_advanced_jump_to]

    Why You’ll Love This Recipe

    • Easy beginner friendly recipe with simple mix, pour, and cook steps
    • Made with oat milk and coconut oil for a completely dairy free breakfast
    • Pumpkin puree adds moisture, softness, and rich pumpkin flavor
    • Crispy edges with a fluffy and tender center

    Ingredients

    Listed below are all the ingredients you will need:

    • All-purpose flour
    • Oat milk (make your own with my easy recipe)
    • Pumpkin puree
    • Coconut oil
    • Organic pure cane sugar
    • Baking powder
    • Baking soda
    • Cinnamon
    • Salt

    See recipe card for quantities.

    All Vegan Pumpkin Waffles ingredients in separate bowls

    Instructions

    Mix the wet ingredients:

    1. Pour the pumpkin puree, oat milk, coconut oil, and sugar into a medium bowl.

    2. Whisk until smooth and well combined.

    Oat milk and other ingredients being mixed well

    Add the dry ingredients:

    3. To the same bowl, add all-purpose flour, baking powder, baking soda, cinnamon, and salt.

    Wire whisk in a large bowl with batter

    4. Whisk again until the batter is smooth and lump-free.

    Cook the Waffles:

    5. Preheat your waffle iron to medium-high heat and lightly spray it with non-stick spray.

    6. Pour about ⅓ cup of batter onto the waffle iron and cook for 3–4 minutes or until golden and crisp.

    Batter in the bowl ready for waffle iron

    7. Repeat with the remaining batter.

    8. Serve warm with your favorite toppings like maple syrup, vegan butter, or chopped nuts. Enjoy!

    Glass of juice next to Vegan Pumpkin Waffles

    Substitutions & Variations

    • Ingredient Swap
      Swap oat milk with almond milk or soy milk.
      Use maple syrup instead of sugar for a natural sweetness.
    • Variation
      Add ground nutmeg or ground cloves for more spice.
      Add vanilla extract if desired.
    • Mistake to Avoid
      Don’t overmix the batter! It will make the waffles dense.
    • Storage Tips
      • These waffles freeze well for up to 1 month.
      • Store leftovers in the fridge for 2–3 days.
      • Reheat in a toaster for the best texture.
    Golden stack of Vegan Pumpkin Waffles

    FAQ

    Can I add cinnamon to the waffle mix?

    Yes, you should be able to add cinnamon to the waffle mix, and then just follow the instructions on the package for adding any liquids or eggs.

    Can I mix pumpkin puree into pancake mix?

    Add your canned pumpkin puree for a Fall inspired touch then fold in your pumpkin pie spice. Together, with one mix, you can transform plain pancakes to pumpkin spice pancakes. Drizzle with pure maple syrup and enjoy with fresh berries or fruit of choice. Soft, fluffy, and irresistible.

    What does pumpkin puree do in baking?

    Not only does pumpkin purée act as a sweetener, a creamy moisturizer, and a fat substitute in everything from muffins to soup. It also tastes delicious in everything!

    Vegan Pumpkin Waffles on a white plate
    5 from 10 votes
    Print Pin Recipe

    Crispy Vegan Pumpkin Waffles

    These Vegan Pumpkin Waffles are fluffy on the inside, crispy on the outside, and filled with warm fall flavors in every bite. The rich pumpkin puree and hint of cinnamon make this a cozy breakfast or brunch favorite.
    Prep Time10 minutes mins
    Cook Time20 minutes mins
    Total Time30 minutes mins
    Course: Breakfast, Snacks
    Cuisine: American
    Servings: 4 -6 waffles
    Calories: 483kcal
    Author: Lainey
    Prevent your screen from going dark

    Ingredients

    • 2 ¼ cups All-purpose flour
    • 2 cups Oat milk
    • 1 15 oz Pumpkin puree
    • ¼ cup Coconut oil
    • ¼ cup Organic pure cane sugar
    • 2 teaspoons Baking powder
    • ½ teaspoon Baking soda
    • ½ teaspoon Cinnamon
    • ¼ teaspoon Salt

    Instructions

    Mix the Wet Ingredients:

    • In a medium bowl, add pumpkin puree, oat milk, coconut oil, and sugar.
    • Whisk until smooth and well combined.

    Add the Dry Ingredients:

    • To the same bowl, add all-purpose flour, baking powder, baking soda, cinnamon, and salt.
    • Whisk again until the batter is smooth and lump-free.

    Cook the Waffles:

    • Preheat your waffle iron to medium-high heat and lightly spray it with non-stick spray.
    • Pour about ⅓ cup of batter onto the waffle iron and cook for 3–4 minutes or until golden and crisp.
    • Repeat with the remaining batter.

    Serve:

    • Serve warm with your favorite toppings like maple syrup, vegan butter, or chopped nuts. Enjoy!
    Leave a Comment
    Serving: 1servingCalories: 483kcalCarbohydrates: 79gProtein: 9gFat: 15gSaturated Fat: 11gPolyunsaturated Fat: 1gMonounsaturated Fat: 1gSodium: 552mgPotassium: 137mgFiber: 3gSugar: 22gVitamin A: 286IUVitamin C: 0.02mgCalcium: 303mgIron: 4mg

    Watch The Recipe Video!

    QR Code
    Did you make this recipe?Share it on instagram or tag @simplybakings or #simplybakings!

    You Might Also Like:

    • Ice Cream Cone Cake Pops
    • Pretzel Bites
    • S’mores Cupcakes
    • Zucchini Pancakes

    Recipes for Every Moment

    Craving something cozy on a chilly morning? These Vegan Pumpkin Waffles warm you up and fill your home with the smell of cinnamon and fall!

    Breakfast & Brunch, New Recipes on the Blog, Snacks, Thanksgiving Brunch

    Filipino Polvorones Recipe (Soft and Buttery)

    Aug 27, 2025 · 6 Comments

    Polvorones Cookies beside a pumpkin on a wooden surface

    These soft and crumbly Polvorones melt in your mouth with every bite. Made with toasted pecans and cozy pumpkin spice, this Filipino inspired cookie recipe is buttery, nutty, and perfect for the holidays or fall baking season.

    Here's another a fan favorite cookie you will enjoy, 3 Ingredient Macaroon Cookies.

    A bowl of powdered Polvorones Cookies
    [feast_advanced_jump_to]

    Why You’ll Love This Recipe

    Inspired by classic Filipino polvoron, these vegan pumpkin pecan polvorones are soft, crumbly, buttery, and packed with warm fall flavor. Made with pumpkin, toasted pecans, and plant based ingredients, this easy cookie recipe delivers the rich, melt in your mouth texture that makes polvoron such a beloved Filipino treat.

    Ingredients

    Listed below are all the ingredients you will need:

    • Pecan pieces
    • Coconut oil
    • Pumpkin puree
    • Powdered sugar
    • Pumpkin spice blend
    • Pure vanilla extract
    • Salt
    • All-purpose flour

    See recipe card for quantities.

    All ingredients for Polvorones Cookies in separate bowls

    Instructions

    Toast the Pecans

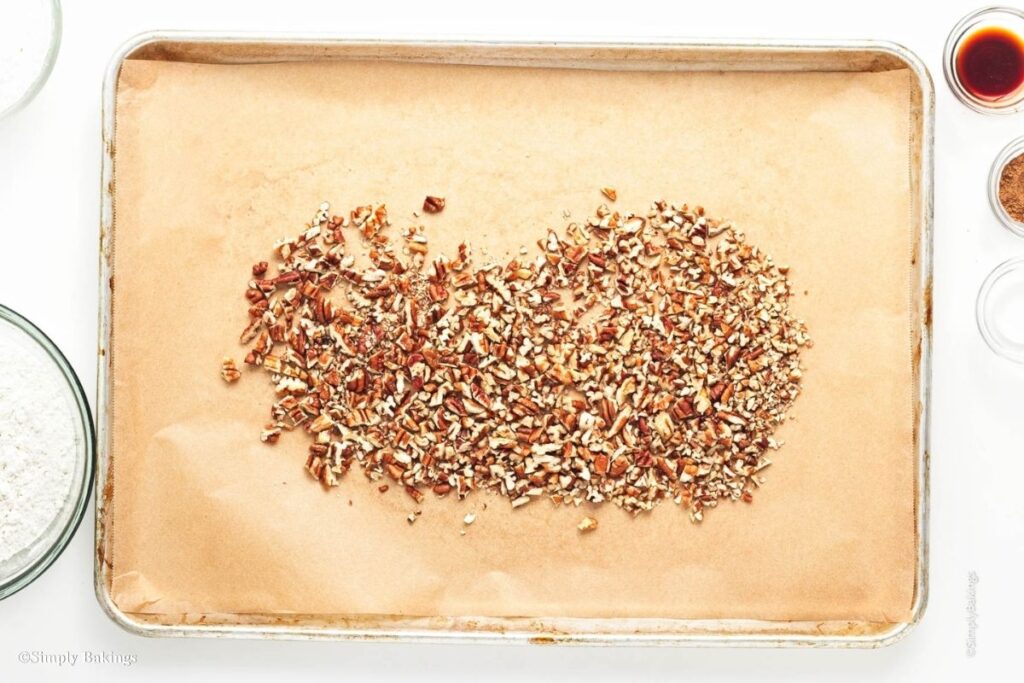
    1. Preheat oven to 350°F (175°C). Line a baking sheet with parchment paper or a cookie sheet.

    2. Chop pecans finely and spread in an even layer on the baking sheet.

    3. Then toast for 4–5 minutes, or until fragrant but not too dark. Remove and cool slightly. Leave the oven on.

    Pieces of pecans on a chopping board

    Make the Dough

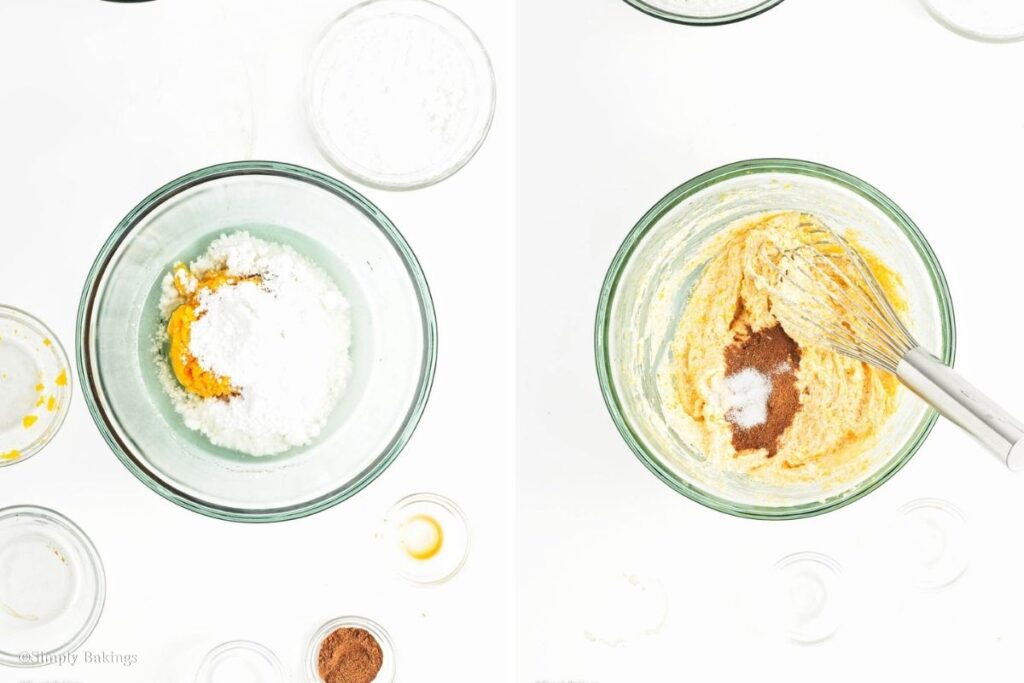
    4. In a large bowl, whisk together pumpkin puree, ½ cup + 2 tablespoons (71g) of the powdered sugar, vanilla extract, and coconut oil until pale and fluffy.

    The chilled pumpkin will resolidify the coconut oil, giving the cookies a crumbly texture.

    5. Add pumpkin spice blend and salt; stir to combine.

    Flour, pumpkin spice and salt to the bowl

    6. Fold in flour until completely incorporated and no lumps remain.

    7. Fold in toasted pecans. The dough will be slightly crumbly but should hold its shape when rolled.

    Shape and Bake

    8. Scoop 1–2 tablespoon-sized portions and roll into balls using your hands.

    9. Place on the parchment-lined baking sheet (can be reused from toasting the pecans). Repeat with the remaining dough.

    Cookies will not spread, so they can be placed quite close together.

    10. Bake for 14–15 minutes, until bottoms are lightly golden and cookies feel firm (you can even pick one up to check).

    11. Remove from oven and let cool for 5 minutes.

    Powdered sugar in a bowl next to tray

    Coat in Powdered Sugar

    12. Place the remaining ½ cup (57g) of powdered sugar in a small bowl.

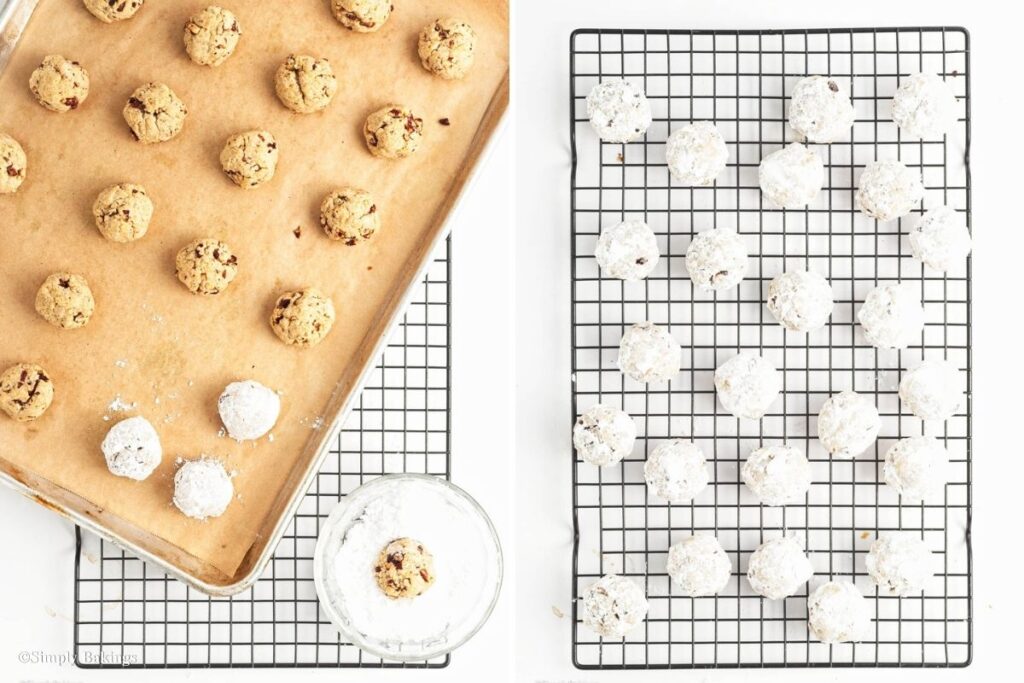
    13. While still warm (but not hot), roll each cookie in the powdered sugar (or with sprinkles) until fully coated.

    14. Set aside to cool completely before serving!

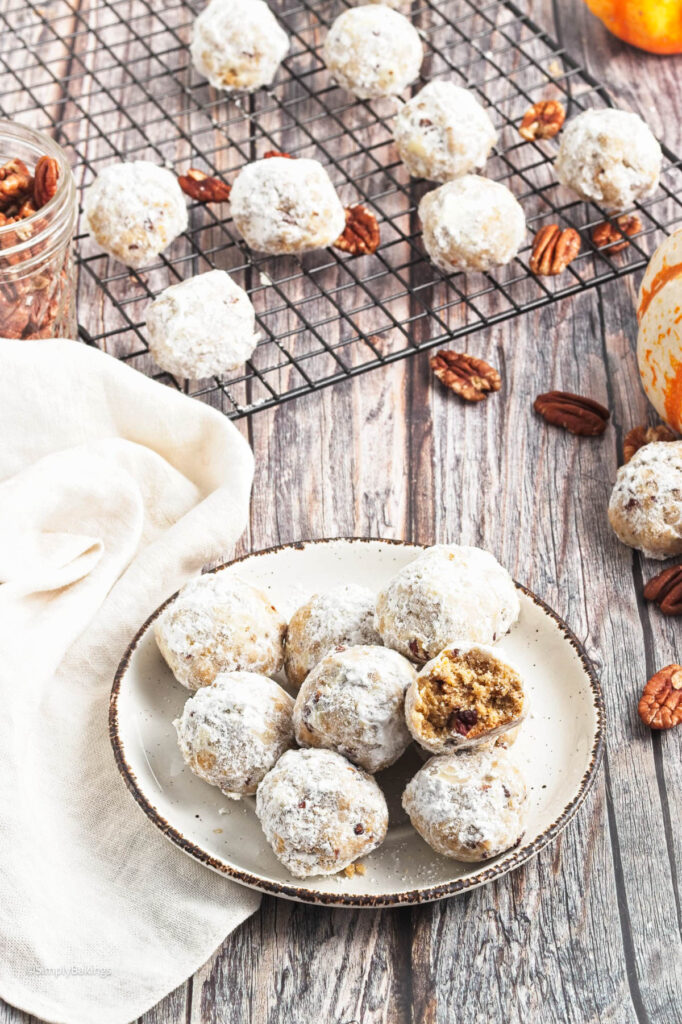
    Polvorones Cookies on a cooling rack and in a bowl

    Substitutions & Variations

    • Ingredient Swap
      Swap pecans for walnuts or almonds.
      You can also use vegan butter instead of coconut oil.
    • Variation
      No pumpkin puree? Use mashed banana or applesauce.
    • Mistake to Avoid
      Don’t overbake them or they’ll lose their soft texture.
    • Storage Tips
      • They don’t freeze well. Best to eat fresh or store in a sealed container.
      • Store at room temperature for up to 5 days in an airtight jar to keep them soft and crumbly.

    FAQs

    What are Mexican wedding cookies called?

    Mexican wedding cookies are also called polvorones. Some people also know them as biscochitos, Russian tea cakes, or snowball cookies.

    What is polvorone in English?

    Polvorone means "dust" or "powder" in Spanish. It's a crumbly shortbread cookie made with flour, sugar, milk, and nuts.

    Why are they called polvorones?

    They are called polvorones because they are crumbly like powder. The name comes from the Spanish word “polvo,” which means dust.

    Polvorones Cookies served on a white plate
    5 from 4 votes
    Print Pin Recipe

    Filipino Polvorones Recipe (Soft and Buttery)

    These Filipino polvorones are soft, buttery, melt-in-your-mouth cookies made with toasted pecans and warm pumpkin spice for the perfect fall treat.
    Prep Time20 minutes mins
    Cook Time15 minutes mins
    Total Time35 minutes mins
    Course: Cookies, Dessert, Snack
    Cuisine: Fusion (Asian-Filipino)
    Servings: 24 cookies
    Calories: 154kcal
    Author: Lainey
    Prevent your screen from going dark

    Ingredients

    • 1 cup Pecan pieces
    • ½ cup Coconut oil soft or melted and cooled
    • ½ cup Pumpkin puree chilled
    • 1 cup + 2 tablespoons Powdered sugar divided
    • 1 ½ teaspoons Pumpkin spice blend
    • 1 teaspoon Vanilla extract
    • ½ teaspoon Salt
    • 2 cups All-purpose flour

    Instructions

    Toast the Pecans:

    • Preheat oven to 350°F (175°C). Line a baking sheet with parchment paper.
    • Chop pecans finely and spread in an even layer on the baking sheet.
    • Toast the pecans for 4–5 minutes, or until fragrant but not too dark. Remove from oven (leave oven on) and allow to cool.

    Make the Dough:

    • In a large bowl, whisk together the pumpkin puree, ½ cup + 2 tablespoons (71g) powdered sugar, vanilla extract, and coconut oil until pale and fluffy. The chilled pumpkin will resolidify the coconut oil, giving the cookies a crumbly texture.
    • Add pumpkin spice blend and salt; stir to combine.
    • Fold in flour until completely incorporated and no lumps remain.
    • Fold in toasted pecans. The dough will be crumbly but should hold shape when rolled.

    Shape and Bake:

    • Scoop 1–2 tablespoon-sized portions of the mixture and roll into balls using your hands.
    • Place on the parchment-lined baking sheet (can be reused from toasting the pecans). Repeat with the remaining dough.
      These cookies won’t spread, so you can space them closely.
    • Bake for 14–15 minutes, until bottoms are lightly golden and cookies feel firm (you can even pick one up to check).
    • Remove from oven and let cool for 5 minutes.

    Coat in Powdered Sugar:

    • Place the remaining ½ cup (57g) of powdered sugar in a small bowl.
    • While still warm (but not hot), roll each cookie in the powdered sugar until fully coated.
    • Set aside to cool completely before serving.
    Leave a Comment

    Notes

    No pumpkin spice blend? Make your own by combining ½ tsp cinnamon, ½ tsp ground ginger, ¼ tsp ground nutmeg, and ¼ tsp ground cloves.
    Serving: 1gCalories: 154kcalCarbohydrates: 20gProtein: 2gFat: 8gSaturated Fat: 4gPolyunsaturated Fat: 1gMonounsaturated Fat: 2gSodium: 49mgPotassium: 41mgFiber: 1gSugar: 11gVitamin A: 797IUVitamin C: 0.3mgCalcium: 6mgIron: 1mg

    Watch The Recipe Video!

    QR Code
    Did you make this recipe?Share it on instagram or tag @simplybakings or #simplybakings!

    You Might Also Like:

    It's a line of cookie-related recipes down here:

    • Cookie Dough Bites
    • Snickers Cookies
    • Easy Sugar Cookies
    • Brownie Meringue Cookies | 5 Ingredients ONLY

    Recipes for Every Moment

    Need a last-minute treat for a potluck or surprise guests? These Polvorones Cookies are quick to bake, look fancy, and melt in your mouth with every bite!

    Cookies, Desserts, Filipino Desserts, New Recipes on the Blog, Snacks

    The Best Filipino Egg Pie Recipe (Creamy & Easy!)

    Aug 20, 2025 · 4 Comments

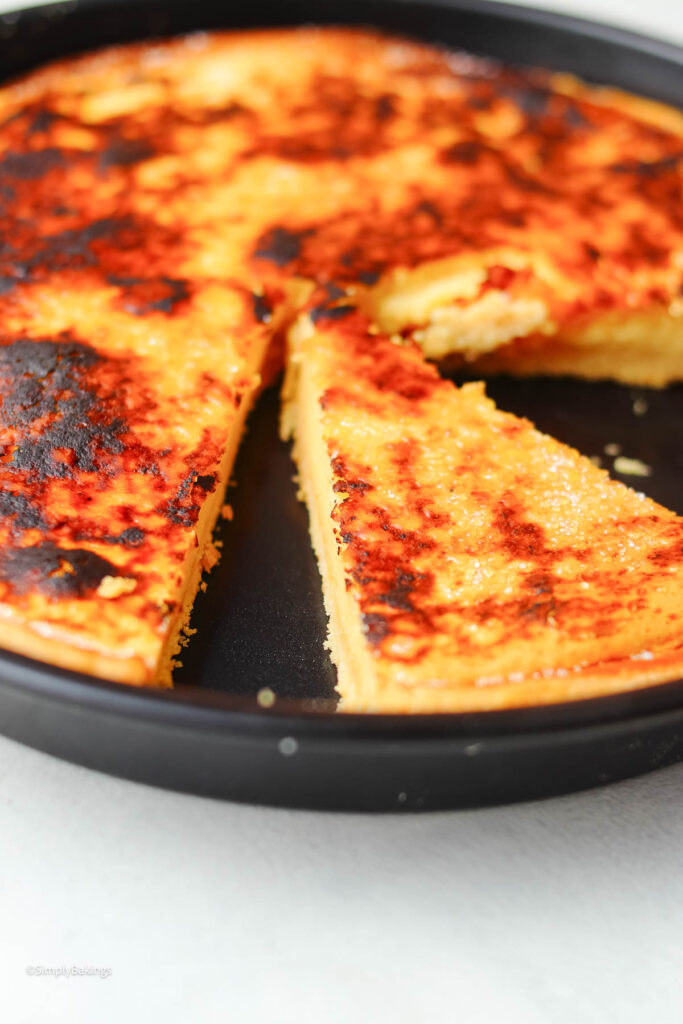
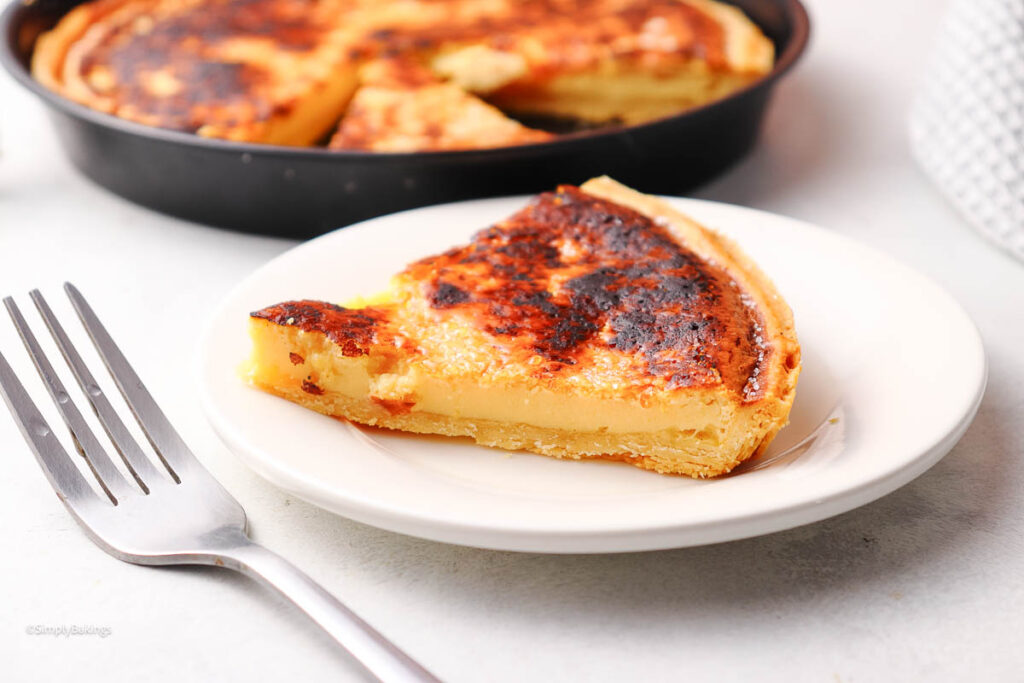
    a slice of Filipino Egg Pie served on a white plate

    This Filipino Egg Pie recipe features a rich and creamy egg custard filling baked in a buttery flaky crust with a beautifully golden top. Made with condensed milk for its signature smooth texture and sweet flavor, this classic Filipino dessert is simple enough for beginner bakers yet impressive enough for holidays and family gatherings.

    Looking for more Filipino desserts? Try the popular Creamy Filipino Mango Sticky Rice.

    A slice of Filipino Egg Pie on a serving plate
    [feast_advanced_jump_to]

    Why You’ll Love This Recipe

    This Filipino egg pie recipe is simple and great for beginners. You just have to mix the filling, pour it into the crust, and bake. No fancy techniques needed!

    The condensed milk adds sweetness and a creamy texture. Egg yolk gives the filling its rich color and depth. Eggs are packed with protein and vitamins, making this dessert rich and satisfying. Serve it warm or chilled—either way, it melts in your mouth.

    You’ll also love how easy the crust is. Just combine the flour mixture with cold unsalted butter and a bit of ice water. Chill the dough in the refrigerator, then roll it out with a rolling pin before pressing it into your pie pan.

    Where Filipino Egg Pie Comes From

    Filipino Egg Pie was inspired by Western custard pies, but Filipinos made it sweeter and more affordable. Local bakeries adapted the recipe using condensed milk and simple ingredients.

    It became popular in the mid-1900s and remains a favorite today. Though no single person is credited for it, many believe its roots began in community bakeries across Luzon.

    Ingredients

    Listed below are all the ingredients you will need:

    • Pie crusts (make your own with this recipe)
    • Eggs
    • Cream cheese
    • Condensed milk
    • Salt
    • Vanilla extract
    • Granulated white sugar

    See recipe card for quantities.

    All ingredients for Filipino Egg Pie recipe

    Instructions

    Blind Bake the Crusts:

    1. Thaw pie crusts according to package instructions.

    2. Preheat oven to 375°F (190°C).

    3. Place parchment paper over each crust and fill with baking weights (or dried rice/beans).

    Pie crusts with parchment paper over each one

    4. Blind bake for 15 minutes. Remove from oven, discard weights, and allow crusts to cool completely.

    Prepare the Filling:

    5. In a large mixing bowl, beat the softened cream cheese until light and fluffy using an electric mixer.

    6. Add the 3 eggs, condensed milk, salt, and vanilla extract.

    Large bowl of ingredients mixed together

    7. Mix until smooth and fully incorporated (you may whisk or blend for an ultra-smooth texture).

    Assemble the Pies:

    8. Brush the cooled pie crusts with 1 beaten egg.

    9. Divide and pour the cream mixture evenly into both crusts placed in a 9-inch pie pan or other pans.

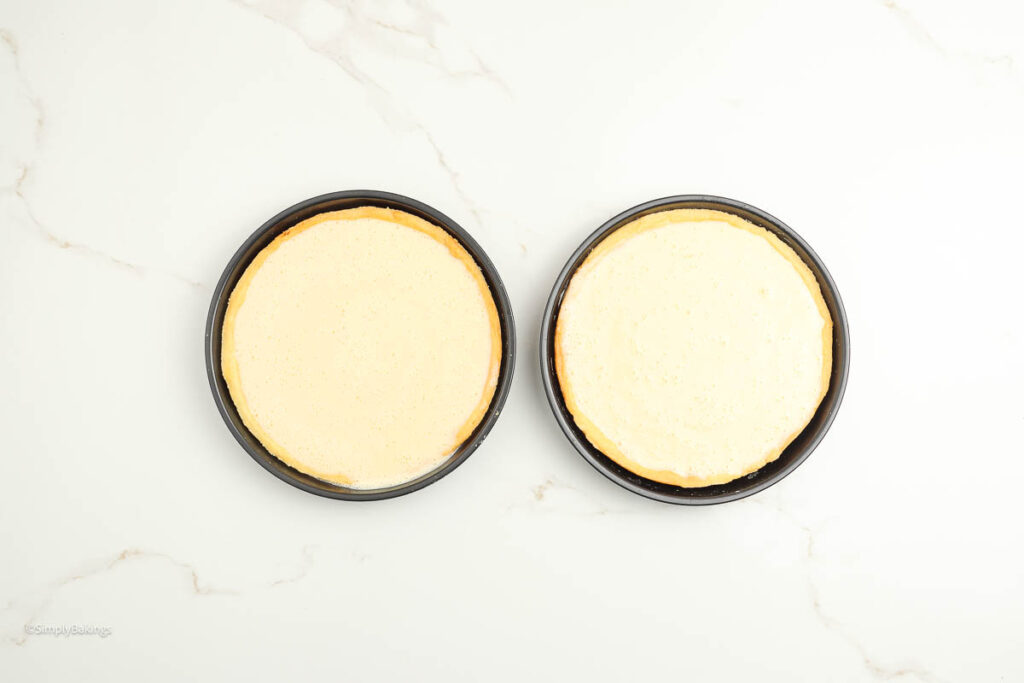
    Egg pie mixture poured into pie crusts

    Bake the Egg Pies:

    10. Lower oven temperature to 300°F (150°C). Bake for 35 minutes, or until the centers are set.

    Finish and Serve:

    11. Remove pies from the oven and sprinkle the top of the egg pie with granulated white sugar.

    12. Use a kitchen torch to caramelize the sugar until golden brown.

    13. Let pies cool completely before slicing and serving!

    sliced Filipino Egg Pie on a baking pan

    Substitutions & Variations

    • Mistake to Avoid
      Don’t overbake or the filling will crack.
    • Storage Tips
      • Egg pie doesn’t freeze well. It gets watery.
      • Store leftovers in the fridge. It’s best eaten within 2-3 days.
    Fork next to a serving of Filipino Egg Pie

    FAQs

    What is the famous Filipino egg dish?

    One famous Filipino egg dish is Tortang Talong, or eggplant omelet. It’s made by grilling eggplant, dipping it in beaten eggs, and frying it until golden. It’s simple, savory, and often served with rice. Another sweet favorite is Filipino Egg Pie, known for its creamy custard and flaky crust.

    What is the difference between egg pie and egg tart?

    Egg pie is a large, single pie with a thick, custard-like filling and a soft brown top. Egg tarts are smaller, individual pastries with a lighter, silkier filling. Egg pie is richer and often uses condensed milk, while egg tarts are more delicate and usually less sweet.

    Are egg pudding and flan the same?

    Egg pudding and flan are similar but not the same. Flan has a smooth, caramel-topped custard made with eggs, milk, and sugar. Egg pudding is thicker, sometimes with added cornstarch, and doesn’t always have caramel. Both are creamy, but flan is softer and more common in Filipino desserts.

    Delicious Filipino Egg Pie on a white plate
    5 from 2 votes
    Print Pin Recipe

    The Best Filipino Egg Pie Recipe (Creamy & Easy!)

    This Filipino Egg Pie is rich, creamy, and perfectly sweet with a caramelized sugar top and flaky crust. Made with cream cheese and condensed milk, it’s a delicious twist on the classic bakery-style egg pie!
    Prep Time15 minutes mins
    Cook Time1 hour hr
    Total Time1 hour hr 15 minutes mins
    Course: Dessert, Snack
    Cuisine: Filipino
    Servings: 2 (9-inch) pies
    Calories: 555kcal
    Author: Lainey
    Prevent your screen from going dark

    Ingredients

    • 2 (9-inch) Pie crusts
    • 4 large Eggs
    • 8 oz (226 g) Cream cheese softened
    • 1 (10 oz) can Condensed milk
    • ¼ teaspoon Salt
    • ½ teaspoon Vanilla extract
    • 1 tablespoon Granulated white sugar for topping

    Instructions

    Blind Bake the Crusts:

    • Thaw pie crusts according to package instructions.
    • Preheat oven to 375°F (190°C).
    • Place parchment paper over each crust and fill with baking weights (or dried rice/beans).
    • Blind bake for 15 minutes. Remove from oven, discard weights, and allow crusts to cool completely.

    Prepare the Filling:

    • In a large bowl, beat the softened cream cheese until light and fluffy.
    • Add eggs, condensed milk, salt, and vanilla extract. Mix until smooth and fully incorporated (you may blend for an ultra-smooth texture).

    Assemble the Pies:

    • Brush the cooled pie crusts with 1 beaten egg.
    • Divide and pour the cream mixture evenly into both crusts.

    Bake the Egg Pies:

    • Lower oven temperature to 300°F (150°C). Bake for 35 minutes, or until the centers are set.

    Finish and Serve:

    • Remove pies from the oven and sprinkle the top of each with granulated white sugar.
    • Use a kitchen torch to caramelize the sugar until golden brown.
    • Let pies cool completely before slicing and serving.
    Leave a Comment

    Notes

    To fully incorporate the filling, you may blend it until smooth, with no visible clumps of cream cheese.
    Serving: 1(9-inch) pieCalories: 555kcalCarbohydrates: 14gProtein: 18gFat: 48gSaturated Fat: 26gPolyunsaturated Fat: 3gMonounsaturated Fat: 13gTrans Fat: 0.04gCholesterol: 442mgSodium: 777mgPotassium: 276mgFiber: 0.03gSugar: 11gVitamin A: 1999IUVitamin C: 0.01mgCalcium: 161mgIron: 2mg

    Watch The Recipe Video!

    QR Code
    Did you make this recipe?Share it on instagram or tag @simplybakings or #simplybakings!

    You Might Also Like:

    • French Silk Pie
    • White Chocolate Strawberry Pie
    • No-Bake Oreo Pie
    • NO BAKE Banana Strawberry Pie

    Recipes for Every Moment

    Hosting a family dinner and need a simple but impressive dessert? Filipino Egg Pie looks fancy but is easy to bake and always wins hearts!

    Christmas Desserts, Desserts, Filipino Desserts, New Recipes on the Blog, Pie, Snacks, Thanksgiving Desserts

    Creamy Biscoff Milkshake

    Aug 13, 2025 · 6 Comments

    Delicious Biscoff Milkshake in a glass

    This creamy Biscoff Milkshake blends smooth vanilla ice cream with rich cookie butter for a thick, caramelized dessert drink packed with warm spiced flavor. Easy to make in minutes, this indulgent milkshake is perfect for Biscoff lovers craving something cold, sweet, and extra creamy.

    Looking for more dessert drinks? Try my famous Buko Pandan.

    Biscoff biscuits on top of Biscoff Milkshake
    [feast_advanced_jump_to]

    Why You’ll Love This Recipe

    This creamy Biscoff milkshake is rich, smooth, and packed with warm cookie butter flavor in every sip. Made with simple ingredients like vanilla ice cream and Lotus Biscoff cookies, this easy dessert comes together in minutes and is perfect for satisfying sweet cravings. You can also make it dairy free with simple ingredient swaps without losing its creamy texture.

    Ingredients

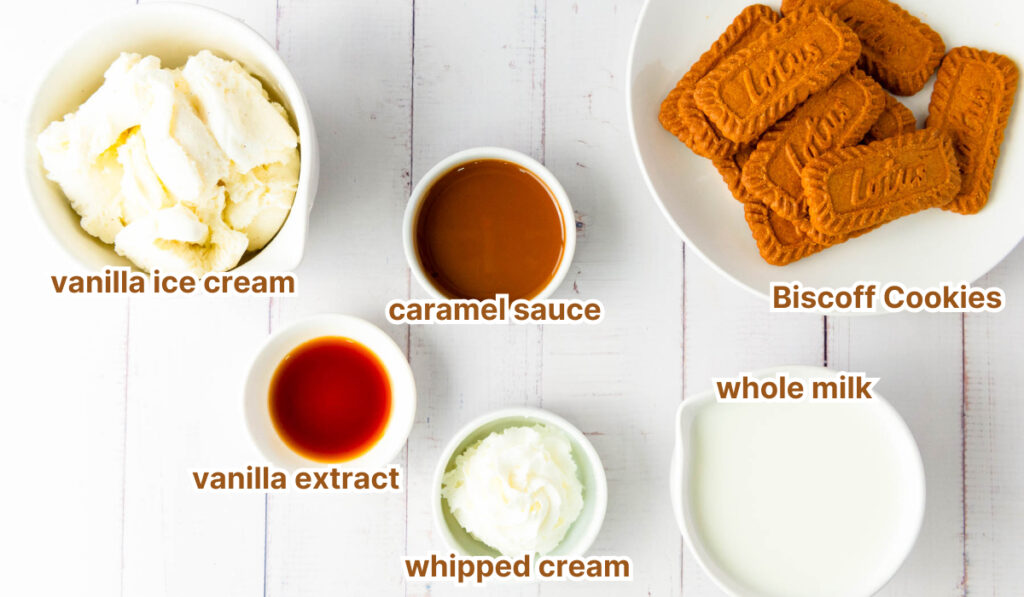
    Listed below are all the ingredients you will need:

    • Vanilla ice cream
    • Whole milk
    • Biscoff cookies
    • Vanilla extract
    • Whipped cream
    • Caramel sauce

    See recipe card for quantities.

    All ingredients of Biscoff Milkshake recipe in separate bowls

    Instructions

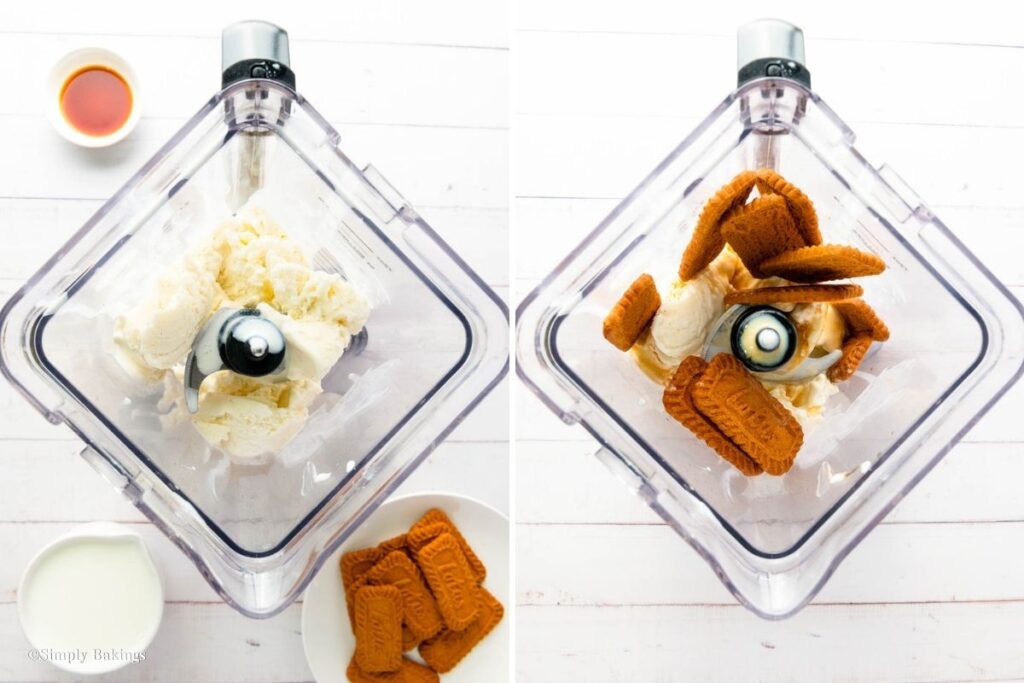
    At the bottom of the blender, combine vanilla ice cream, whole milk, Biscoff cookies, and vanilla extract. Then, blend until smooth and creamy.

    Pour into glasses, top with whipped cream if desired, then sprinkle crushed Biscoff biscuits on top.

    Blender filled with all ingredients ready to mix

    Substitutions & Variations

    • Ingredient Swap
      Swap whole milk for oat milk or almond milk for a dairy-free milk twist.
      Don’t have caramel sauce? Use chocolate drizzle or maple syrup instead.
    • Variation
      You can even blend in a frozen banana for extra creaminess.
      Add crushed cookies or peanuts on top for an extra crunch.
    • Mistake to Avoid
      Don’t skip softening your ice cream a bit. It blends better!
    • Storage Tips
      • This milkshake doesn’t freeze well. It separates after thawing.
      • Best to drink right after making, but you can put it in the fridge for 1 day in a tightly sealed container.
    Glasses of Biscoff Milkshakes on table with cookies around it

    FAQs

    What is the flavour of Biscoff?

    If you're not familiar, Biscoff cookies are speculoos cookies, which originate from Belgium. They are a shortbread cookie and have a deep caramel and spiced flavor paired with a crispy texture.

    What is so special about Biscoff?

    Everything about the Biscoff cookie is iconic: its unique taste, crunchy bite, and typical shape. Its distinctive red wrapping is recognized by people all over the world. Even though Biscoff started small, today more than 7 billion cookies a year are savored by consumers across the globe.

    Are Biscoff cookies dairy-free?

    Lotus Biscoff is vegan and entirely dairy-free. In addition to being vegan, these items are free of preservatives, artificial colouring, and artificial flavours. Read on to learn what goes into making these delicious and classic cookies and spreads.

    Biscoff Milkshake in tall glasses topped with biscuits
    5 from 6 votes
    Print Pin Recipe

    Creamy Biscoff Milkshake

    This ultra-creamy Biscoff Milkshake is full of caramelized cookie flavor in every sip. Topped with crushed Biscoff and whipped cream, it's a dreamy dessert you’ll crave all year round!
    Prep Time5 minutes mins
    Total Time5 minutes mins
    Course: Dessert, Drinks
    Cuisine: American
    Servings: 2 (16-oz) milkshake glasses
    Calories: 400kcal
    Author: Lainey
    Prevent your screen from going dark

    Equipment

    • Blender

    Ingredients

    • 2 cups Vanilla ice cream
    • 1 cup Whole milk
    • 10 Biscoff cookies crushed (plus extra for garnish)
    • 1 teaspoon Vanilla extract
    • Whipped cream optional, for topping
    • 2 tablespoons Caramel sauce optional, for drizzling
    • Crushed Biscoff cookies for garnish

    Instructions

    Blend the Milkshake:

    • In a blender, combine vanilla ice cream, whole milk, crushed Biscoff cookies, and vanilla extract.
    • Blend until smooth and creamy.

    Prepare the Glasses:

    • If using caramel sauce, drizzle it along the insides of two 16-oz milkshake glasses.

    Pour and Top:

    • Divide the milkshake evenly between the glasses.
    • Top with whipped cream, if desired.
    • Sprinkle extra crushed Biscoff cookies over the whipped cream for added crunch.

    Serve:

    • Enjoy immediately!
    Leave a Comment
    Serving: 1glassCalories: 400kcalCarbohydrates: 45gProtein: 6gFat: 22gSaturated Fat: 12gCholesterol: 55mgSodium: 220mgFiber: 1gSugar: 30g

    Watch The Recipe Video!

    QR Code
    Did you make this recipe?Share it on instagram or tag @simplybakings or #simplybakings!

    You Might Also Like

    • Sweet Potato Juice
    • Cantaloupe Smoothie
    • Buko Salad Drink
    • Jackfruit Smoothie

    Recipes for Every Moment

    Craving dessert but don’t want to turn on the oven? This Biscoff Milkshake cools you down and satisfies your sweet tooth in minutes!

    Desserts, Drinks, Filipino Desserts, New Recipes on the Blog

    Crispy Wasabi Tofu with Creamy Coconut Sauce

    Aug 6, 2025 · 6 Comments

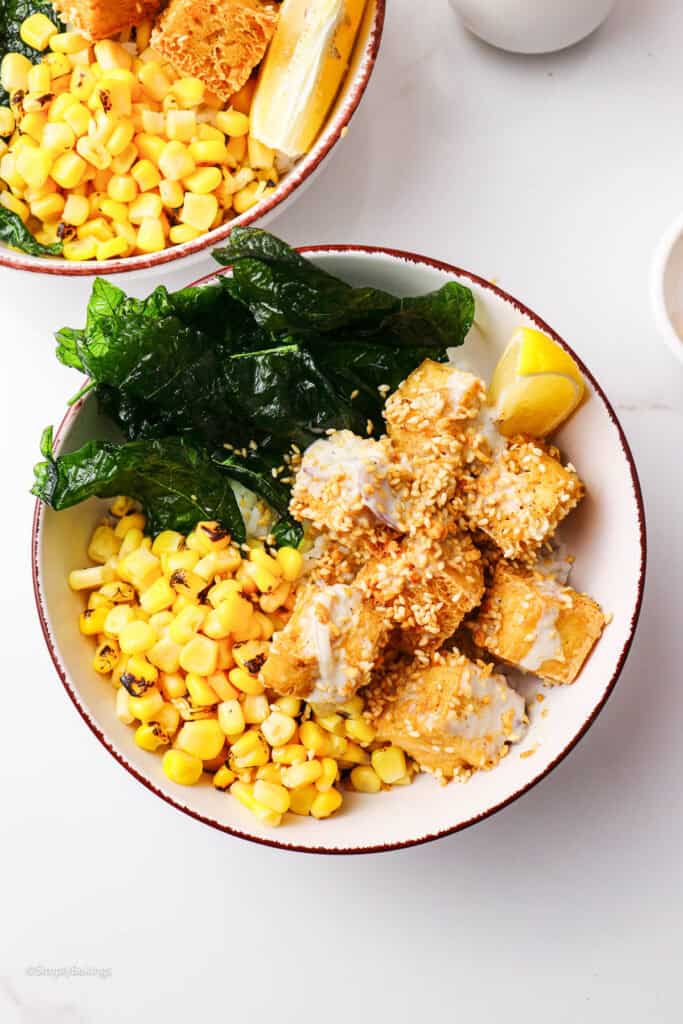
    Wasabi Tofu with sweet corn kernels and fried water spinach

    This crispy sesame crusted wasabi tofu is crunchy on the outside, tender in the center, and packed with bold savory flavor. Paired with a creamy coconut wasabi sauce, this easy tofu recipe delivers the perfect balance of heat, nuttiness, and crisp texture in every bite.

    Try our Tofu Sisig and Tofu in Coconut Milk for a creamy, comforting dish!

    A white bowl of yummy Wasabi Tofu
    [feast_advanced_jump_to]

    Why You’ll Love This Recipe

    Wasabi Tofu is vegan, dairy-free, and beginner-friendly. It’s easy to make, and the flavours are bold but balanced. You can put this in wraps, salads, or on top of rice. For extra crunch, try topping it with wasabi peas, pickled ginger, or nori strips.

    The tofu cubes, rich in protein, cook quickly and absorb flavor well. The wasabi adds just the right kick that wakes up the taste buds, but not overpowering. The coconut milk gives it a rich texture and adds healthy fats.

    This dish is customizable, so you can add avocado slices or veggies such as shredded carrots, edamame, cabbage, cucumber slices, or a dollop of vegan mayo on the side at your choice. It also makes a fun twist on sushi night at home and is great any time of year!

    Ingredients

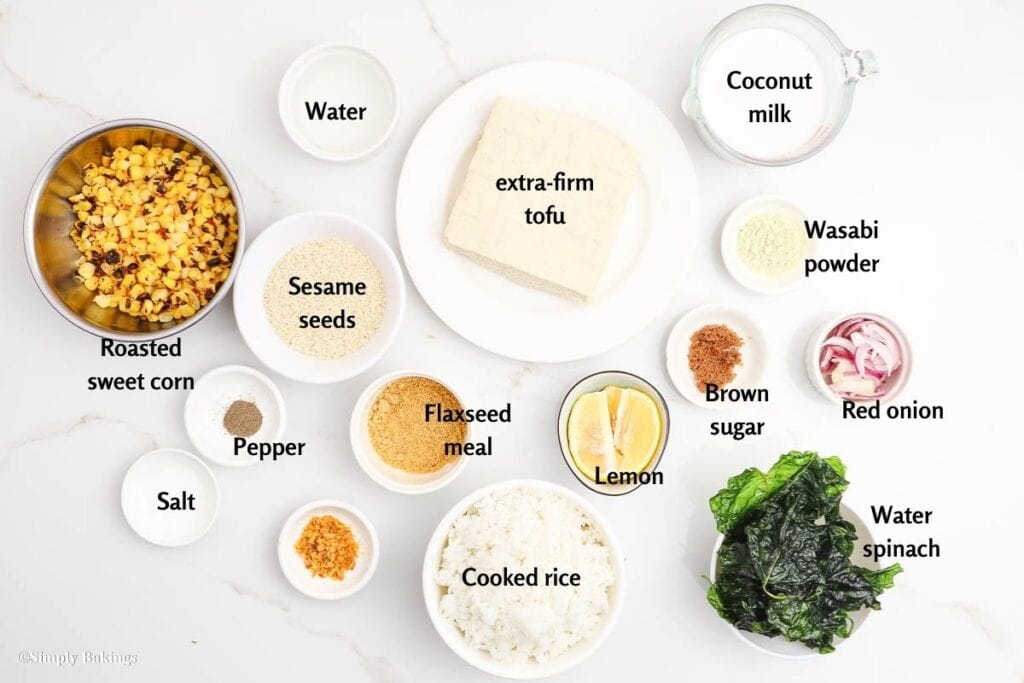
    Listed below are all the ingredients you will need:

    • Extra firm tofu
    • Flaxseed meal
    • Water
    • Sesame seeds
    • Salt
    • Ground black pepper
    • Cooking oil
    • Red onion
    • Coconut milk
    • Wasabi powder
    • Brown sugar
    • Cooked rice
    • Fried water spinach (optional)
    • Roasted sweet corn (optional)
    • Lemons

    See recipe card for quantities.

    All ingredients for Wasabi Tofu in white bowls

    Instructions

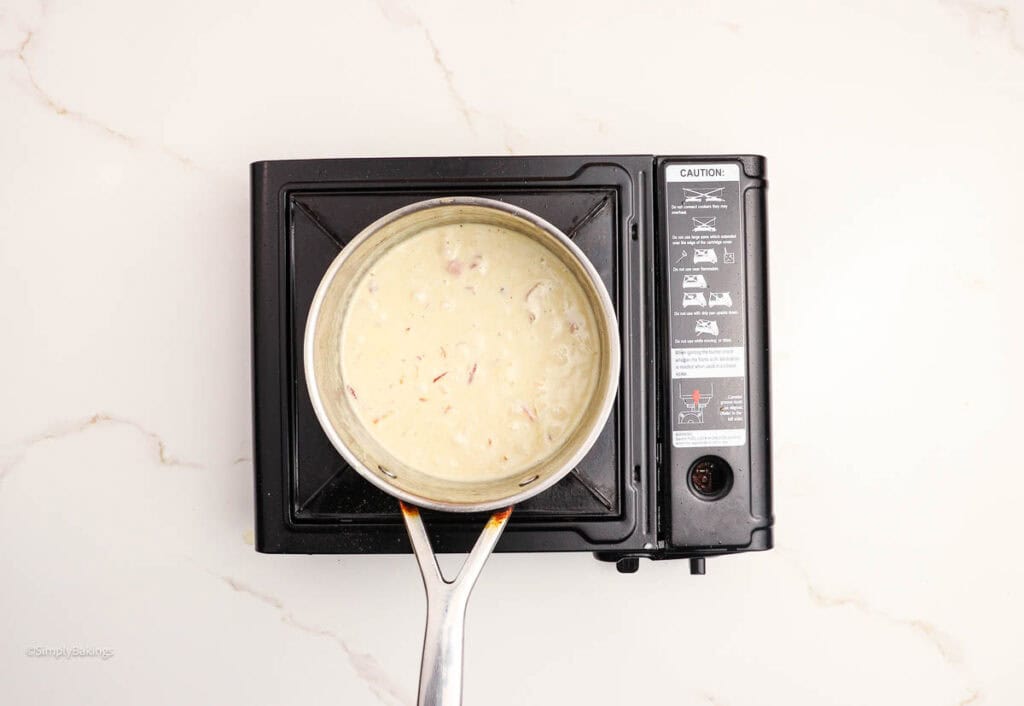
    Make the Coconut-Wasabi Sauce

    1. In a small pot, heat 1 tablespoon of oil over low heat and sauté sliced red onions until translucent.

    2. Add coconut milk, wasabi powder, and brown sugar. Then, stir and bring to a boil. Reduce to a simmer and cook for 5 minutes until slightly thickened

    3. Season with salt and black pepper to taste. Then, remove the pot from the heat and set it aside.

    Mixture in sauce pan over medium heat

    Prepare the Sesame-Crusted Tofu

    4. In a bowl, combine flaxseed meal and water. Let it bloom for 15 minutes, then stir well.

    5. Next, season the bloomed flaxseed mixture with salt and black pepper.

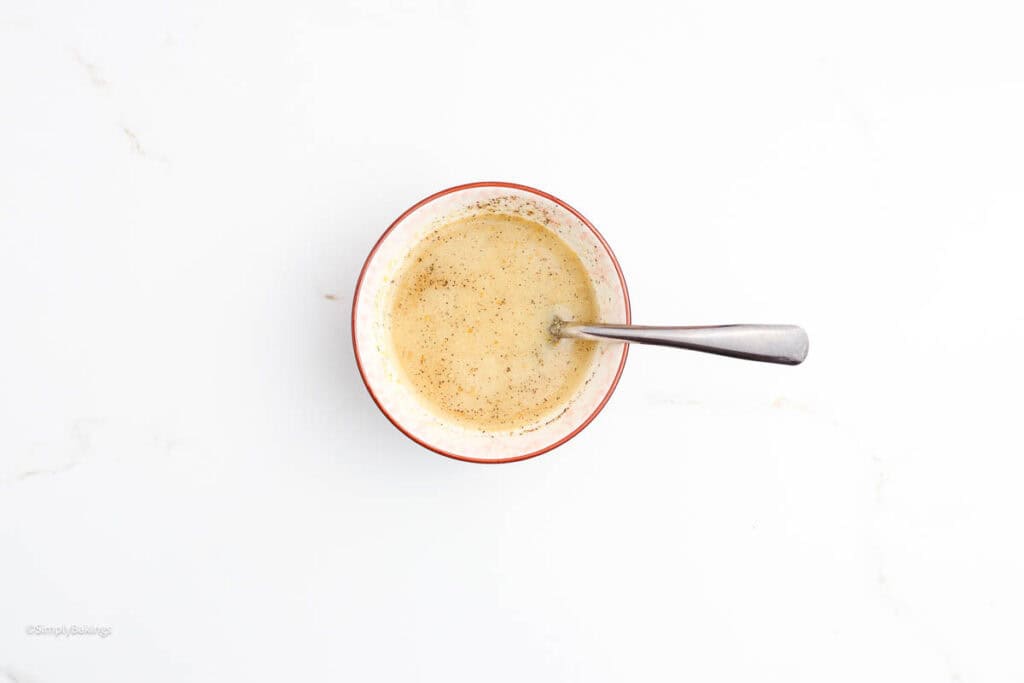
    Flaxseed mixture and sesame seeds in a bowl

    6. Cut the pressed tofu into bite-sized cubes.

    7. Dip each tofu cube into the flaxseed mixture, then roll in sesame seeds until fully coated. Let the coated tofu rest for 2 minutes.

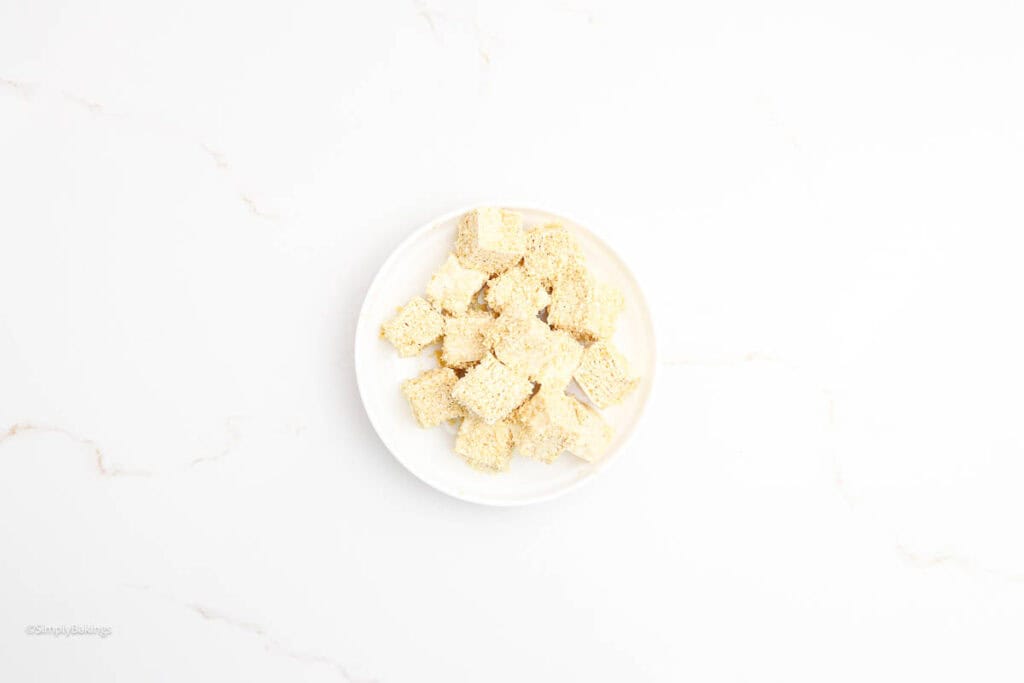
    A white plate of some coated tofu cubes

    8. After that, heat oil in a pan or pot for deep-frying. Then, fry the tofu until golden and crispy.

    9. Transfer to a paper towel-lined plate to drain excess oil and strain any leftover sesame seeds to use as garnish.

    10. Serve crispy tofu over hot cooked rice and drizzle generously with coconut-wasabi sauce.

    11. Add fried water spinach, roasted sweet corn on the side, or sprinkle more sesame seeds, if desired. Then, serve with lemon wedges or a splash of lime juice for a zesty finish!

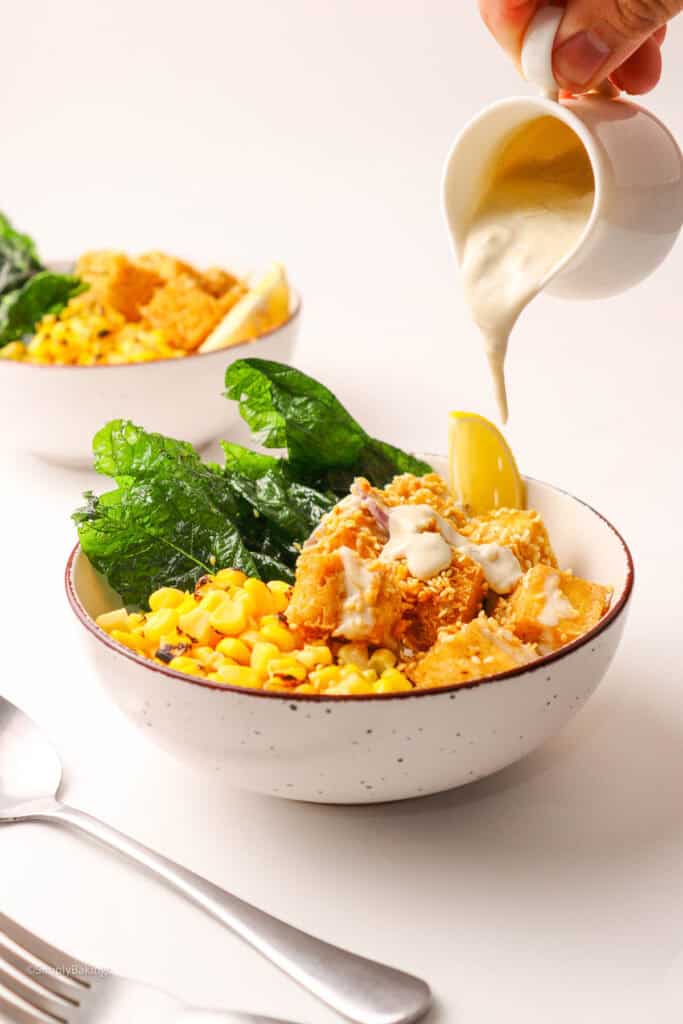
    Coconut-wasabi sauce poured over Wasabi Tofu

    Substitutions & Variations

    • Ingredient Swap
      You can swap coconut milk with cashew cream if you prefer.
      Out of flaxseed meal? Try chia seeds or breadcrumbs to bind the tofu.
    • Variation
      No wasabi powder? Horseradish with lemon works in a pinch.
    • Mistake to Avoid
      Avoid overcooking the tofu. It should stay crispy outside, soft inside.
    • Storage Tips
      • This dish doesn’t freeze well because of the coconut sauce.
      • Store leftovers in the fridge for up to 2 days. Keep the sauce and tofu separate for the best texture when reheating.
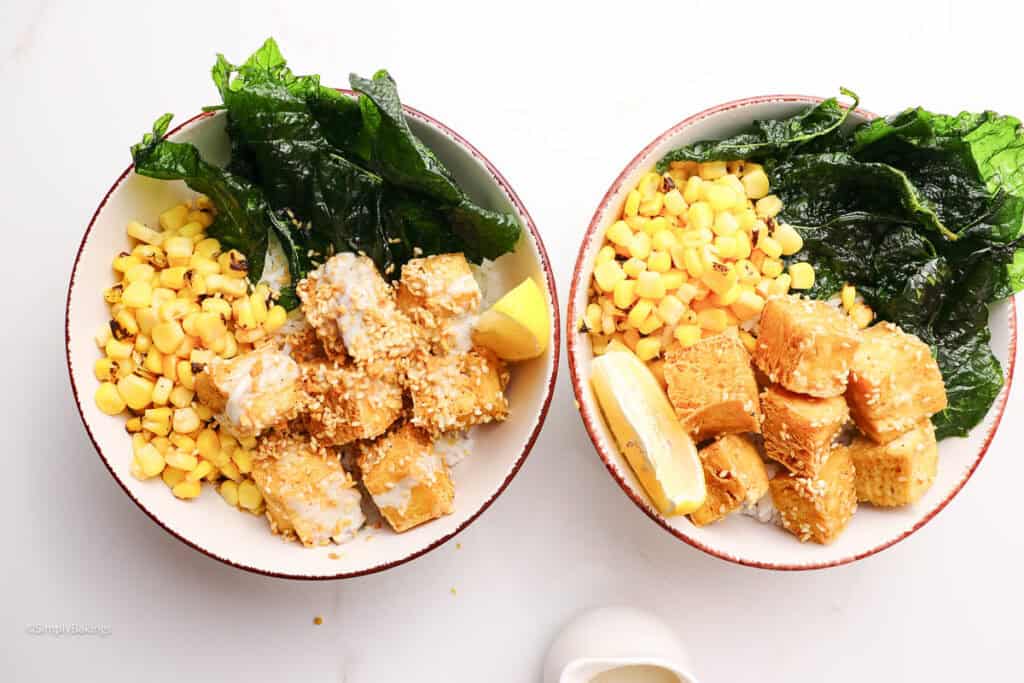
    Wasabi Tofu in two serving bowls

    FAQ

    Why is wasabi not vegan?

    Real wasabi is vegan. But some store-bought versions have non-vegan additives like milk or artificial flavorings.

    Is wasabi good or bad for health?

    Wasabi is good for health in small amounts. It can reduce inflammation, ease pain, and support joint health.

    What does wasabi soy taste like?

    It tastes mildly spicy with a bit of sweetness from the soy sauce.

    Delicious Wasabi Tofu in a white bowl
    5 from 6 votes
    Print Pin Recipe

    Crispy Wasabi Tofu with Creamy Coconut Sauce

    This wasabi tofu, drizzled with wasabi-coconut sauce, is bold, spicy, healthy, and comforting all at once! Serve with hot rice for a delicious plant-based meal!
    Prep Time20 minutes mins
    Cook Time15 minutes mins
    Total Time35 minutes mins
    Course: Main Course
    Cuisine: Asian
    Servings: 2 servings
    Calories: 620kcal
    Author: Lainey
    Prevent your screen from going dark

    Ingredients

    • cooking oil of your choice for frying

    For the Coconut-Wasabi Sauce:

    • 1 small red onion thinly sliced
    • 1 cup coconut milk
    • 1 tablespoon wasabi powder
    • 1 teaspoon brown sugar
    • salt and pepper to taste

    For the Sesame Crusted Tofu:

    • 1 ½ tablespoons flaxseed meal
    • 4 tablespoons water
    • 1 teaspoon salt
    • ¼ teaspoon ground black pepper
    • 1 (8 oz.) pack extra-firm tofu pressed to release excess water
    • ¼ cup sesame seeds

    To Serve:

    • 2 cups cooked rice
    • fried water spinach optional
    • roasted sweet corn optional
    • 1 ½ lemon cut into wedges

    Instructions

    Make the Coconut-Wasabi Sauce:

    • In a small pot, heat 1 tablespoon of oil over low heat and sauté sliced red onions until translucent.
    • Add coconut milk, wasabi powder, and brown sugar. Stir and bring to a boil.
    • Reduce to a simmer and cook for 5 minutes until slightly thickened.
    • Season with salt and black pepper to taste. Remove from heat and set aside.

    Prepare the Sesame-Crusted Tofu:

    • In a bowl, combine flaxseed meal and water. Let it bloom for 15 minutes, then stir well.
    • Season the bloomed flaxseed mixture with salt and black pepper.
    • Cut the pressed tofu into bite-sized cubes.
    • Dip each tofu cube into the flaxseed mixture, then roll in sesame seeds until fully coated. Let the coated tofu rest for 2 minutes.
    • Heat oil in a pan or pot for deep-frying. Fry the tofu until golden and crispy.
    • Transfer to a paper towel-lined plate to drain excess oil. Strain any leftover sesame seeds to use as garnish.

    Assemble and Serve:

    • Serve crispy tofu over hot cooked rice.
    • Drizzle generously with coconut-wasabi sauce.
    • Add fried water spinach and roasted sweet corn on the side if desired.
    • Serve with lemon wedges for a zesty finish.
    Leave a Comment
    Serving: 1servingCalories: 620kcalCarbohydrates: 69gProtein: 12gFat: 36gSaturated Fat: 23gPolyunsaturated Fat: 6gMonounsaturated Fat: 5gSodium: 1189mgPotassium: 648mgFiber: 8gSugar: 7gVitamin A: 23IUVitamin C: 49mgCalcium: 274mgIron: 8mg

    Watch The Recipe Video!

    QR Code
    Did you make this recipe?Share it on instagram or tag @simplybakings or #simplybakings!

    You Might Also Like:

    • Tofu Salpicao
    • Tofu Katsu
    • Tofu Adobo
    • Tofu Scramble Recipe – Filipino Style

    Recipes for Every Moment

    Want a quick meal that feels fancy but is easy to make? This Wasabi Tofu adds heat, flavor, and comfort—perfect for weeknights or impressing your vegan friends!

    Lunch & Dinner, Main Entree, New Recipes on the Blog, Vegan Filipino Recipes, Vegetarian Filipino Recipes, Vegetarian Meat

    Best Ever Matcha Tiramisu

    Jul 30, 2025 · 5 Comments

    a slice of matcha tiramisu topped with matcha powder served on a white dessert plate

    This creamy no bake Matcha Tiramisu combines layers of fluffy whipping cream, delicate ladyfingers, and rich matcha flavor for a refreshing twist on the classic Italian dessert. Perfect for matcha lovers and beginner bakers alike, this easy make ahead dessert is light, elegant, and surprisingly simple to prepare at home.

    If you're craving more matcha delicious desserts or sweets, try my Matcha Strawberry Bread or my Matcha Pancakes!

    Matcha tiramisu dusted with green tea powder
    [feast_advanced_jump_to]

    Why You’ll Love This Recipe

    This matcha tiramisu is a beginner-friendly recipe that doesn’t require baking. It’s a fun kitchen project with a beautiful, matcha flavor that shines through. The matcha flavor is earthy and slightly sweet. For a smooth mix and better flavor, use a matcha whisk.

    Cream cheese and heavy whipping cream create a signature silky tiramisu texture. Some use mascarpone cream for a richer version. In making this dessert, you can also use a saucepan or regular pan and bring the hot water to a light simmer.

    We use ceremonial grade matcha in this recipe for its vibrant color and smoother flavor. Matcha is naturally rich in antioxidants and contains caffeine and L-theanine, which many people enjoy for a more balanced, steady energy boost. If you love matcha or want to try an easy matcha dessert at home, this creamy no bake matcha tiramisu is a great place to start.

    Ingredients

    Listed below are all the ingredients you will need:

    • Water
    • Ladyfinger biscuits
    • Matcha powder
    • Whipping cream
    • Cream cheese
    • Granulated white sugar
    • Matcha syrup

    See the recipe card for quantities.

    All ingredients for Matcha Tiramisu in separate bowls

    Instructions

    Make the Matcha Syrup:

    1. In a small bowl, whisk together 3 tablespoons matcha powder and ⅓ cup warm water until smooth and frothy. Use a bamboo whisk if available.

    2. Set aside 2 tablespoons of the syrup for the cream filling.

    Small bowl of matcha syrup

    Prepare the Matcha Cream Cheese Filling:

    3. In a stand mixer or large mixing bowl, or with a hand mixer, whip the whipping cream and cream cheese until light and fluffy.

    4. Add 2 tablespoons matcha syrup and white sugar, then whip again until fully incorporated and smooth.

    5. Transfer the mixture into a pastry bag and refrigerate until ready to use.

    Matcha cream whipped and put into a pipe

    Soak the Ladyfingers:

    6. Add the half cup of water to the remaining matcha syrup to thin it out.

    7. Quickly dip each ladyfinger into the matcha mixture - do not oversoak. Repeat until all biscuits are coated.

    Assemble the Tiramisu:

    8. In a baking dish, arrange a layer of dipped ladyfinger cookies.

    9. Pipe a generous amount of matcha cream over the ladyfingers and smooth it out using a spatula.

    10. Repeat the layers - ladyfingers, then cream - until the dish is filled, ending with a layer of cream on top.

    Layering Ladyfingers and syrup for the tiramisu

    Finish and Chill:

    11. Lightly dust the top with 1 tablespoon matcha powder.

    12. Chill in the refrigerator for at least 2 hours, or until set. Serve cold and enjoy!

    matcha tiramisu in a baking dish topped with matcha powder, then served a slice of on a small white plate

    Substitutions & Variations

    • Ingredient Swap
      Out of ladyfingers? Use sponge cake or even graham crackers.
      You can also sweeten with maple syrup instead of sugar.
      Try using savoiardi or substitute mascarpone cheese with a dairy-free option.
    • Variation
      You can add vanilla extract for extra aroma and taste.
      To change the base, make a single layer of ladyfingers dipped in matcha syrup. This adds structure and flavor.
    • Mistake to Avoid
      Don’t skip the chill time! It helps the flavors and texture set beautifully. Also, fold the mascarpone mixture gently to keep the filling light and airy.
    • Storage Tips
      • Store in the fridge, covered, for up to 3 days.
      • Not suitable for freezing as the texture may change.
      • Best enjoyed chilled - allow to set for at least 2 hours before serving.
    Glass tray and plate of Matcha Tiramisu

    FAQs

    Can I use culinary-grade matcha?

    Yes! It’s more budget-friendly and works fine in this recipe. Just make sure it’s fresh for that vibrant green color.

    What are ladyfingers?

    They’re light, crisp sponge biscuits used in tiramisu. You can find them in most grocery stores or bake them at home.

    Can I make this dairy-free?

    Yes! Use vegan cream cheese and a dairy-free whipping cream alternative. Make sure it whips well.

    Delicious Matcha Tiramisu on a white plate
    5 from 5 votes
    Print Pin Recipe

    Best Ever Matcha Tiramisu

    A delicious Japanese twist on a classic Italian dessert! This Matcha Tiramisu is a delicious layer of soft ladyfinger biscuits and matcha cream cheese filling for an indulgent no-bake treat that’s perfect for green tea lovers!
    Prep Time2 hours hrs 15 minutes mins
    Total Time2 hours hrs 15 minutes mins
    Course: No-bake Dessert
    Cuisine: Fusion (Asian-Filipino)
    Servings: 8
    Calories: 405kcal
    Author: Lainey
    Prevent your screen from going dark

    Ingredients

    • ½ cup water
    • 20 –30 ladyfinger biscuits
    • 1 tablespoon matcha powder for dusting

    Matcha Syrup:

    • 3 tablespoons matcha powder
    • ⅓ cup warm water

    Matcha Cream Cheese Filling:

    • 1½ cups whipping cream
    • 2 cups cream cheese
    • 2 tablespoons matcha syrup
    • ⅓ cup granulated white sugar

    Instructions

    Make the Matcha Syrup:

    • In a small bowl, whisk together matcha powder and warm water until smooth and frothy. Use a bamboo whisk if available.
    • Set aside 2 tablespoons of the syrup for the cream filling.

    Prepare the Matcha Cream Cheese Filling:

    • In a stand mixer or large mixing bowl, whip the whipping cream and cream cheese until light and fluffy.
    • Add 2 tablespoons matcha syrup and white sugar, then whip again until fully incorporated and smooth.
    • Transfer the mixture into a pastry bag and refrigerate until ready to use.

    Soak the Ladyfingers:

    • Add the half cup of water to the remaining matcha syrup to thin it out.
    • Quickly dip each ladyfinger into the matcha mixture—do not oversoak. Repeat until all biscuits are coated.

    Assemble the Tiramisu:

    • In a baking dish, arrange a layer of dipped ladyfingers.
    • Pipe a generous amount of matcha cream over the ladyfingers and smooth it out.
    • Repeat the layers - ladyfingers, then cream - until the dish is filled, ending with a layer of cream on top.
    • Smooth the final layer with a spatula.

    Finish and Chill:

    • Lightly dust the top with 1 tablespoon matcha powder.
    • Chill in the refrigerator for at least 2 hours, or until set. Best served cold!
    Leave a Comment
    Serving: 1servingCalories: 405kcalCarbohydrates: 13gProtein: 9gFat: 36gSaturated Fat: 22gPolyunsaturated Fat: 2gMonounsaturated Fat: 9gCholesterol: 108mgSodium: 192mgPotassium: 117mgSugar: 12gVitamin A: 1793IUVitamin C: 0.3mgCalcium: 85mgIron: 1mg

    Watch The Recipe Video!

    QR Code
    Did you make this recipe?Share it on instagram or tag @simplybakings or #simplybakings!

    You Might Also Like:

    • Matcha Milkshake
    • Matcha Soufflé Pancakes
    • Vegan Dalgona Matcha

    Recipes for Every Moment

    Is it scorching hot outside, and you need to cool down as soon as possible? This no-bake Matcha Tiramisu is the ultimate refreshing treat that chills you out in every creamy bite!

    Desserts, Filipino Desserts, New Recipes on the Blog, No Bake Dessert Recipes, Thanksgiving Desserts, Vegetarian Filipino Recipes

    Coconut Ube Milk Bread

    Jul 24, 2025 · 10 Comments

    Slices of Coconut Ube Milk Bread

    Coconut Ube Milk Bread is a soft, fluffy, and beautifully marbled loaf. It blends earthy ube flavor with delicious creamy coconut milk. Perfect for beginner bakers and sweet bread lovers, this recipe is as stunning as it is satisfying.

    Love all things ube? Be sure to try our pillowy Ube Beignets and super cute Ube Donut Holes!

    sliced Coconut Ube Milk Bread on a white cloth
    [feast_advanced_jump_to]

    Why You’ll Love This Recipe

    Coconut ube milk bread is beginner friendly and doesn’t require fancy tools, just a little time and love. The recipe uses real ingredients, such as coconut milk and butter, to create a tender loaf that’s naturally rich. You may use the bowl of a stand mixer to help you mix with ease.

    This easy bread recipe is perfect for breakfast, merienda, or even dessert. You’ll love the ube extract for its sweet, earthy notes and the coconut milk for its creamy depth. If you love ube rolls or ube bread rolls, this one’s a must-try!

    Where Coconut Ube Milk Bread Comes From

    This fusion-style bread likely evolved from Japanese milk bread and Filipino ube desserts. While its exact origin is unknown, bakers in the Philippines and abroad started combining ube with soft, enriched doughs to create beautiful, flavorful loaves. A bench scraper is then often used to divide the dough cleanly before shaping.

    When is this Dish Typically Enjoyed?

    Coconut Ube Milk Bread is perfect year-round but especially popular during holidays like Christmas or Easter in Filipino homes. It's also great for gifting during birthdays, fiestas, or family gatherings when baked goods bring everyone together.

    Ingredients

    Listed below are all the ingredients you will need:

    • All-purpose flour
    • Unsweetened milk
    • Water
    • Self-rising flour
    • Granulated white sugar
    • Dry active yeast
    • Salt
    • Eggs
    • Unsweetened coconut milk
    • Unsalted butter
    • Ube extract

    See the recipe card for quantities.

    All ingredients for Coconut Ube Milk Bread in separate bowls

    Instructions

    Make the Tangzhong or Bread Starter:

    1. In a medium pot, combine all-purpose flour, milk, and water.

    2. Cook over medium heat, stirring constantly, for about 5 minutes, or until the mixture thickens to a mashed potato consistency.

    3. Remove from heat, transfer to a small bowl, and cover with cling film. Let it cool completely at room temperature.

    Tangzhong mixture cooking in a medium pot

    Make the Ube Dough:

    4. In a stand mixer with a dough hook attachment, combine self-rising flour, sugar, yeast, and salt.

    5. Add half of the Tangzhong, whisked eggs, and coconut milk. Then, mix until a rough dough forms.

    6. Add the softened butter and ube extract. Then, continue mixing until the butter is fully incorporated.

    7. Knead for 12 minutes, or until the dough pulls away from the sides of the bowl.

    8. Transfer the ube dough to a lightly greased bowl, cover with cling film. Let it rest and proof in a humid area for 60 minutes.

    self-rising flour, sugar, yeast, salt, tangzhong, whisked eggs, and coconut milk mixed in a stand mixer to make an ube dough

    Make the Coconut Milk Dough:

    9. In a stand mixer with a whisk attachment, combine self-rising flour, sugar, yeast, and salt.

    10. Switch to the dough hook attachment, then add the remaining Tangzhong, whisked egg, coconut milk, and butter. Mix until a rough dough forms.

    11. Knead for 12 minutes, or until the dough is smooth and elastic.

    12. Transfer to a lightly greased bowl and cover with cling film. Let it rest and proof for 60 minutes in a humid area.

    self-rising flour, sugar, yeast, salt, tangzhong, whisked egg, coconut milk, and butter combined using a stand mixer to make a coconut milk dough

    Assemble the Loaves:

    13. Grease two 9x5-inch loaf pans and set aside.

    14. Punch down both the ube dough and the coconut milk dough. Then transfer to a lightly floured working surface.

    15. Then divide each dough into 2 equal pieces using a bench scraper and cover them with a cling wrap to prevent them from drying out.

    15. Roll one ube dough and one coconut milk dough portion each into 8-inch logs, then braid together gently. Repeat with the remaining dough to make the second loaf.

    16. Place braided dough into the prepared pans. Cover with cling film and let it proof for 45 minutes in a humid area.

    ube dough and coconut milk dough on a slightly floured surface, divided in logs, braided together, and placed into the loaf pans

    Bake the Bread:

    17. Meanwhile, preheat the oven to 350°F (175°C).

    18. Once proofed, remove cling film and bake for 45–50 minutes, rotating pans halfway through.

    19. Let the bread cool in pans for 5 minutes. Unmold and transfer to a wire rack to cool completely. Then, slice and serve!

    freshly baked coconut ube milk bread on a cooling rack then sliced to be served

    Substitutions & Variations

    • Ingredient Swap
      No ube extract? Try purple sweet potato or food coloring with a dash of vanilla.
      You can also substitute taro for a similar taste and texture.
    • Variation
      Out of coconut milk? Use almond or oat milk for a dairy-free twist.
      You can even turn this into ube rolls instead of loaves for individual servings. Top with a simple glaze for extra shine.
    • Mistake to Avoid
      Don’t rush the proofing – let the dough rise fully for a light texture. Use a sharp knife to score the top gently before baking.
    • Storage Tips
      • This bread freezes well for up to 2 weeks if tightly wrapped in plastic wrap and parchment paper, then foil.
      • Store any cut slices in an airtight container at room temperature for up to 2 days, or in the refrigerator for 4–5 days.
      • For longer storage, use the freezer. For best results, warm before serving to bring back softness.
    Hands holding a sliced loaf of Coconut Ube Milk Bread

    FAQs

    Can I make this without ube extract?

    Yes! You can use mashed purple sweet potato or skip it entirely for a plain coconut milk bread version.

    Do I need a stand mixer?

    Nope! You can knead the dough by hand—it just takes a bit more muscle and time.

    Can I use instant yeast instead?

    Yes, just skip the blooming step and mix it straight into the dry ingredients.

    Is this recipe sweet or savory?

    It’s lightly sweet—perfect for pairing with jam, butter, or even cream cheese.

    Coconut Ube Milk Bread on the table
    5 from 9 votes
    Print Pin Recipe

    Coconut Ube Milk Bread

    This Coconut Ube Milk Bread is soft, fluffy, and beautifully marbled with layers of ube and coconut milk dough. It’s a comforting, lightly sweet bread that combines Filipino flavors in a loaf!
    Prep Time2 hours hrs 15 minutes mins
    Cook Time45 minutes mins
    Total Time3 hours hrs
    Course: Breakfast, Dessert, Snack
    Cuisine: Filipino
    Servings: 2 (9x5 inch) loaves
    Calories: 2378kcal
    Author: Lainey
    Prevent your screen from going dark

    Ingredients

    Tangzhong / Bread Starter:

    • ⅓ cup all-purpose flour
    • ½ cup unsweetened milk
    • ½ cup water

    Ube Dough:

    • 3 cups self-rising flour
    • ½ cup granulated white sugar
    • 1½ tablespoons dry active yeast
    • 1 teaspoon salt
    • 2 large eggs whisked
    • ¾ cup full fat unsweetened coconut milk
    • ⅓ cup unsalted butter softened
    • 3 tablespoons ube extract

    Coconut Milk Dough:

    • 2 cups self-rising flour
    • ¼ cup granulated white sugar
    • 2 teaspoons dry active yeast
    • ½ teaspoon salt
    • 1 large egg whisked
    • ¼ cup full-fat unsweetened coconut milk
    • ¼ cup unsalted butter softened

    Instructions

    Make the Tangzhong / Bread Starter:

    • In a medium pot, combine all-purpose flour, milk, and water.
    • Cook over medium heat, stirring constantly, for about 5 minutes, or until the mixture thickens to a mashed potato consistency.
    • Remove from heat, transfer to a small bowl, and cover with cling film. Let cool completely at room temperature.

    Make the Ube Dough:

    • In a stand mixer with a dough hook attachment, combine self-rising flour, sugar, yeast, and salt.
    • Add half of the Tangzhong, whisked eggs, and coconut milk. Mix until a rough dough forms.
    • Add the softened butter and ube extract. Continue mixing until butter is fully incorporated.
    • Knead for 12 minutes, or until the dough pulls away from the sides of the bowl.
    • Transfer to a lightly greased bowl and cover with cling film. Let it rest and proof in a humid area for 60 minutes.

    Make the Coconut Milk Dough:

    • In a stand mixer with a whisk attachment, combine self-rising flour, sugar, yeast, and salt.
    • Switch to the dough hook attachment, then add the remaining Tangzhong, whisked egg, coconut milk, and butter. Mix until a rough dough forms.
    • Knead for 12 minutes, or until the dough is smooth and elastic.
    • Transfer to a lightly greased bowl, cover, and proof for 60 minutes in a humid area.

    Assemble the Loaves:

    • Grease two 9x5-inch loaf pans and set aside.
    • Punch down both doughs and transfer to a lightly floured surface.
    • Divide each dough (ube and coconut) into 2 equal pieces. Keep covered to prevent drying.
    • Roll one ube and one coconut dough portion each into 8-inch logs, then braid together gently.
    • Repeat with the remaining dough to make the second loaf.
    • Place braided dough into the prepared pans, cover with cling film, and proof for 45 minutes in a humid area.

    Bake the Bread:

    • Preheat the oven to 350°F (175°C).
    • Once proofed, remove cling film and bake for 45–50 minutes, rotating pans halfway through.
    • Let the bread cool in pans for 5 minutes, then unmold and transfer to a wire rack to cool completely.
    • Slice and serve.
    Leave a Comment

    Notes

    • You can prepare the dough the night before, just make sure to place it in the fridge overnight before proofing. 
    • Proofing the bread in a humid area helps the yeast to activate and double the dough.
    Serving: 1servingCalories: 2378kcalCarbohydrates: 328gProtein: 55gFat: 96gSaturated Fat: 62gPolyunsaturated Fat: 7gMonounsaturated Fat: 19gTrans Fat: 2gCholesterol: 388mgSodium: 1899mgPotassium: 890mgFiber: 13gSugar: 80gVitamin A: 2143IUVitamin C: 3mgCalcium: 203mgIron: 7mg

    Watch The Recipe Video!

    QR Code
    Did you make this recipe?Share it on instagram or tag @simplybakings or #simplybakings!

    You Might Also Like:

    • Ube Pancakes
    • Ube Halaya
    • Ube Jelly Salad

    Recipes for Every Moment

    Weekend mornings, and the house smells quiet and cozy? This Coconut Ube Milk Bread is the ultimate treat! Bake it ahead and enjoy soft, sweet slices all week long.

    Bread, Breakfast & Brunch, Filipino Desserts, New Recipes on the Blog, Snacks, Ube Recipes, Vegetarian Filipino Recipes

    Best Ice Cream Makers for Summer Dessert Lovers

    Jul 22, 2025 · Leave a Comment

    best ice cream makers such as Whynter ICM-201SB, DASH My Pint Ice Cream Maker, and Breville Smart Scoop

    No doubt about it - summer is incredibly hot in the Philippines. And if it means it’s super frozen treat time, then we need the best ice cream makers!

    This 2025 guide covers everything from budget ice cream machines to high-end churners. You’ll also get a list of ice cream recipes and a few quick buying tips. Let's shop smart before Amazon Prime Day!

    collage of the best ice cream makers in 2025

    I know it’s easy to grab a taste or pint from the store. But there’s something more satisfying about making your frozen dessert at home. Whether it’s mango ice cream, chocolate ice cream, or a fruity blend, homemade ice cream always hits differently. There's no hidden ingredients with full control over them.

    Discover the ice cream makers below, which are perfect for home cooks who want control over every batch of ice cream!

    Our Top Picks at a Glance

    • Best Budget Model: Hamilton Beach 68330N
    • Best for Vegan Desserts: Ninja Creami Deluxe
    • Best High-End Option: Breville Smart Scoop
    • Best Classic Compressor: Whynter ICM-201SB
    • Best Compact Design: DASH My Pint
    • Best Nostalgia Option: Nostalgia Electric Bucket
    • Best for Custom Mix-ins: Ninja Swirl
    Delicious scoops of ice cream in a white bowl

    BEST BUDGET MODEL

    Hamilton Beach 68330N

    Price Range: ~$60

    Pros: This ice cream maker model is one of the best affordable options out there. Simple, reliable, and makes up to 4 quarts. Just add your ingredients, ice, and salt, then let it churn.

    Scoop out your creamy ice cream with your favorite spoons and enjoy hassle-free servings. Its overall ease of use makes it perfect for beginners.

    Cons: You’ll need ice and salt to freeze the ice cream, which can be messy to handle. The machine is also large and needs storage space. Best to use in spacious areas.

    Hamilton Beach 68330N with ice cubes inside and a cup of ice cream beside it
    See on Amazon

    BEST FOR VEGAN DESSERTS

    Ninja Creami Deluxe

    Price Range: ~$200

    Pros: This machine blends and freezes in one. It’s perfect for vegan desserts, smoothies, or soft serve. Use nut butter or even Greek yogurt. The re-spin feature helps you customize the texture!

    Try this with frozen bananas and peanut butter—it makes the creamiest cream.

    Cons: It’s a bit noisy, and you’ll need to freeze your base in specific containers beforehand. Not ideal if you want multiple flavors at once.

    Ninja Creami Deluxe ice cream maker
    See on Amazon

    BEST HIGH-END OPTION

    Breville Smart Scoop

    Price Range: ~$499

    Pros: This is a premium pick with 12 hardness settings. It chills automatically and keeps your mix cold after churning. Great if you're making a custard base that needs precision.

    Cons: It’s heavy, pricey, and takes up more counter space. Best for serious home chefs rather than casual users.

    Breville Smart Scoop ice cream maker
    See at Amazon

    BEST CLASSIC COMPRESSOR

    Whynter ICM-201SB

    Price Range: ~$290

    Pros: A top pick among compressor ice cream makers. No pre-freezing needed. Produces pro-quality ice cream and gelato. Large 2.1-quart capacity and consistent results. Unlike models that rely on freezer bowls, this one chills automatically.

    I recommend this to friends who want a no-pre-freeze option without splurging too much. The ICE-100 has solid blades and a built-in timer to control every batch.

    Cons: It’s bulky and a bit loud, but delivers great results.

    Whynter ICM-201SB ice cream maker
    See on Amazon

    BEST COMPACT DESIGN

    DASH My Pint Ice Cream Maker

    Price Range: $25–$30

    Pros: This is tiny but mighty! It’s perfect for dorms or small servings. Add condensed milk and blended frozen fruit for quick dessert experiments. No fancy features - just plug, switch on, churn, and chill!

    Cons: It only makes about half a pint at a time. You also need to freeze the bowl ahead. Not ideal for families or parties, but best for personal consumption or with a friend or two.

    DASH My Pint Ice Cream Maker beside a glass of ice cream drizzled with caramel syrup
    See on Amazon

    BEST NOSTALGIA OPTION

    Nostalgia Electric Bucket

    Price Range: ~$50

    Pros: Craving old-school vibes? This salt-and-ice bucket churner makes 4 quarts of creamy dessert. It's best for families and backyard parties. Toss in cream or pre-made mix and enjoy! You’ll need rock salt to help the ice do its job.

    Cons: It’s bulky and needs ice and salt, which can be messy. It also takes longer than modern machines and may form large ice crystals if not churned evenly.

    Nostalgia Electric Bucket ice cream maker with photos of different ice cream
    See on Amazon

    BEST FOR CUSTOM MIX-INS

    Ninja Swirl Ice Cream Maker

    Price Range: ~$350

    Pros: A 2025 favorite for mix-in lovers. It swirls and spins everything from strawberry blends to coconut milk ice cream base. A great option for creative kitchens.

    It's a fun weekend project with kids. You can layer flavors like strawberry and mango. Get smooth consistency with just a touch of the switch.

    Cons: It’s not the fastest machine, and cleanup can be a bit much with all the parts. Better for those who love to experiment.

    Ninja Swirl Ice Cream Maker
    See on Amazon

    What to Look for in an Ice Cream Maker

    Before you buy, think about:

    • Freezing method:
      Canister-style machines need the bowl to be frozen overnight. Compressor-style models chill automatically, but they are more expensive. Some newer stand mixer attachments - like those for KitchenAid - can work well, too.
    • Size & Capacity:
      Are you feeding one or prepping for a party? Machines range from 1 pint to 4 quarts. Think about how many batches of ice cream you’ll make each week.
    • Noise Level:
      Some churners can be loud, especially the high-powered ones like the Whynter or ICE-70 models.
    • Ease of Cleaning:
      Look for dishwasher-safe parts and smooth paddle or blade designs that don’t trap mixture.

    So Which One Should You Buy?

    Still deciding? Here’s a quick overview with my suggestions:

    • If on a tight budget or just starting:
      Go for the Hamilton Beach 68330N. It makes big batches and is easy to use. Just add ice and salt before churning. This is great for anyone who wants creamy ice cream with minimal fuss.
    • If looking for dairy-free and vegan-friendly options:
      The Ninja Creami Deluxe is a standout. It blends, spins, and re-spins frozen bases to silky perfection, even with just bananas, almond milk, or coconut cream. It’s ideal for health-conscious dessert lovers and busy home cooks who want more control over ingredients.
    • If you want professional results and zero waiting:
      Consider investing in a compressor model like the Breville Smart Scoop or the Whynter ICM-201SB. These compressor ice cream makers offer a consistent creamy texture without needing freezer bowls. Just pour and churn!
    • If needing something compact or fun for the family:
      The DASH My Pint and Nostalgia Electric Bucket are fun picks. DASH is great for tiny kitchens or dorms, while Nostalgia’s big-batch style brings back the joy of making ice cream the old-fashioned way (but without the elbow grease).
    • If you want full flavor control with a modern twist:
      Try the Ninja Swirl. It’s one of 2025’s trendiest releases and lets you experiment with mix-ins, flavors, and creamy textures. It’s like soft serve meets science lab in the best way.

    Hope it helps you make a good choice based on your needs!

    Top Ice Cream Recipes

    Use one of the ice cream makers above to perfect my top ice cream picks:

    • Filipino Mango Ice Cream
    • Banana Pudding Ice Cream
    • Ube Ice Cream

    👉 Check out all of my ice cream recipes here!

    FAQs

    Do I need to freeze the bowl before using an ice cream maker?

    Yes, if you’re using a canister-style machine like the Cuisinart ICE-21 or DASH My Pint. You’ll need to freeze the bowl for at least 12 to 24 hours beforehand. Compressor models don’t require this step.

    What kind of ingredients can I use?

    Most machines can handle dairy milk, cream, plant-based alternatives, sweeteners, and mix-ins like fruit, cookies, or nuts. For best texture, some recipes use a custard base (milk, sugar, egg yolks).

    Can I make ice cream without dairy?

    Absolutely! Machines like the Ninja Creami are excellent for making vegan desserts using bananas, coconut milk, oat milk, or nut butters.

    How long does it take to make a batch of ice cream?

    Prep time varies, but most machines take 15 to 30 minutes to churn. Some recipes may need chilling beforehand for best results.

    Is a stand mixer ice cream attachment worth it?

    If you already own a KitchenAid stand mixer, the ice cream bowl attachment is a great space-saving option. It’s good for small batches and occasional use.

    Affiliate Disclosure: This post contains affiliate links. We may earn a small commission if you purchase through these links, at no extra cost to you.

    Tools to Level Up Your Kitchen

    Tamarind Drink

    Jul 16, 2025 · 11 Comments

    Tamarind Drink next to tamarind pods on table

    Quench your thirst with this easy to make and naturally vegan Tamarind Drink! This sweet tangy Filipino inspired refreshment is made with real tamarind pods and ginger. It's perfect for anyone craving a bold, zesty flavor with a hint of spice!

    If you're into refreshing and feel-good treats, you’ll love our buko pandan drink and mais con yelo for a cooling treat.

    Glass of Tamarind Drink next to a pitcher
    [feast_advanced_jump_to]

    Why You’ll Love This Recipe

    This tamarind drink is vegan, dairy-free, and beginner-friendly. You only need five simple ingredients. No fancy tools needed - just a large pot, fine-mesh sieve, and a large bowl to catch the liquid.

    Tamarind is high in antioxidants and can help with digestion. Ginger adds natural warmth and may help fight colds. The tartness from tamarind and a touch of honey or vanilla extract can boost both flavor and comfort.

    This is a popular drink not just in the Philippines, but around the world. It’s perfect when you need to quench your thirst fast.

    The Story Behind Tamarind Drink

    Tamarind drink is a nostalgic Filipino favorite. Many remember it from local markets or being served cold during hot summer days. It’s also known as agua de tamarindo, a type of agua fresca loved for its sweet and tangy taste.

    It's also enjoyed in many Asian and Latin American countries. But in the Philippines, it often feels like comfort in a glass.

    Where Tamarind Drink Comes From

    This tamarind drink likely started in tropical countries where tamarind trees grow. In the Philippines, tamarind (or “sampalok”) has long been used for soups, candies, and drinks.

    Local families and street vendors alike made their versions. Some add lime juice or lime slices for extra tang. It’s both traditional and adaptable.

    When is this Dish Typically Enjoyed?

    This drink is popular during summer or on any hot day. It's also a staple in Filipino households during fiestas or family reunions. Always served cold, best with ice, and even better if you chill it before serving. Have a try!

    Ingredients

    Listed below are all the ingredients you will need:

    • Sparkling water
    • Passionfruit syrup
    • Mint leaves
    • Ice cubes
    • Tamarind pods
    • Ginger
    • Water
    • Granulated white sugar

    See the recipe card for quantities.

    All ingredients for Tamarind Drink in separate bowls

    Instructions

    Make the Tamarind-Ginger Tea Base:

    1. In a pot, combine the tamarind pods, sliced ginger, and 5 cups of water.

    2. Bring to a boil and let it simmer for 5 minutes.

    Pot with Tamarind and ginger simmering in it

    3. Turn off the heat and let it steep for 30 minutes, until the liquid cools completely.

    4. Once cooled, strain and remove the tamarind and ginger pieces. Set the tea base aside.

    Make the Simple Syrup:

    5. In a separate pot, combine the white sugar and water.

    6. Bring to a boil, stirring until the sugar fully dissolves.

    Clear simple syrup in a small pot

    7. Turn off the heat and let the syrup cool completely.

    Assemble the Drink:

    8. In a pitcher or large mixing bowl, combine the simple syrup, tamarind-ginger tea base, and passionfruit syrup. Mix well.

    Reddish-brown Tamarind Drink in the pot

    9. Fill glasses with ice cubes, then pour in the tamarind mixture to about ¾ full.

    10. Top off with sparkling water to fill each glass.

    11. Garnish with mint leaves, and serve immediately.

    Tamarind Drink served cold with mint and ice

    Substitutions & Variations

    • Ingredient Swap
      No fresh tamarind? You can use tamarind paste or concentrate.
      Swap white sugar with brown sugar or coconut sugar for a deeper flavor.
    • Variation
      Add mint or lemon for a twist! Blend the mixture in a blender for a smooth texture.
    • Mistake to Avoid
      Don’t skip straining the tamarind bits - it makes the drink gritty. Use a fine-mesh sieve to remove all solids. Tamarind can be sticky, so don’t forget to clean your tools well.
    • Storage Tips
      • Store the tamarind-ginger tea base and simple syrup separately in the refrigerator for up to 5 days.
      • Once mixed, the drink is best enjoyed immediately to preserve the fizz.
      • Keep leftover passionfruit syrup refrigerated in an airtight jar for up to 2 weeks.
    Cool Tamarind Drink served on a coaster

    FAQs

    Can I use tamarind paste instead of pods?

    Yes! Use about 2 tablespoons of paste and adjust to taste.

    Is this drink spicy because of the ginger?

    No—it’s warm, not spicy. You can use less if sensitive.

    Can I make this sugar-free?

    Yes, try stevia or monk fruit as alternatives.

    Do I need to boil the tamarind?

    Yes, boiling helps release the flavor and makes straining easier.

    One glass of Tamarind Drink with ice cubes and mint leaves
    5 from 10 votes
    Print Pin Recipe

    Tamarind Drink

    This refreshing and delicious Tamarind Drink blends the tangy richness of tamarind with the warmth of ginger and the tropical sweetness of passionfruit. Then, finished with sparkling water and mint!
    Prep Time35 minutes mins
    Cook Time5 minutes mins
    Total Time40 minutes mins
    Course: Drinks
    Cuisine: Filipino
    Servings: 8 glasses
    Calories: 139kcal
    Author: Lainey
    Prevent your screen from going dark

    Ingredients

    Drink Base:

    • 2 (12 fl oz) cans Sparkling water
    • ¼ cup Passionfruit syrup
    • Mint leaves for garnish
    • Ice cubes for serving

    Tamarind-Ginger Tea Base:

    • 4 oz Tamarind pods washed and peeled
    • 2 thumb-sized pieces of ginger washed and sliced
    • 5 cups water

    Simple Syrup:

    • 1 cup Granulated white sugar
    • 1 cup Water

    Instructions

    Make the Tamarind-Ginger Tea Base:

    • In a pot, combine the tamarind pods, sliced ginger, and 5 cups water.
    • Bring to a boil and let it simmer for 5 minutes.
    • Turn off the heat and let it steep for 30 minutes, until the liquid cools completely.
    • Once cooled, strain and remove the tamarind and ginger pieces. Set the tea base aside.

    Make the Simple Syrup:

    • In a separate pot, combine the granulated white sugar and water.
    • Bring to a boil, stirring until the sugar fully dissolves.
    • Turn off the heat and let the syrup cool completely.

    Assemble the Drink:

    • In a pitcher or large mixing bowl, combine the simple syrup, tamarind-ginger tea base and passionfruit syrup. Then, mix well.
    • Fill glasses with ice cubes, then pour in the tamarind mixture to about ¾ full.
    • Top off with sparkling water to fill each glass.
    • Garnish with mint leaves, and serve immediately.
    Leave a Comment
    Serving: 1gCalories: 139kcalCarbohydrates: 36gProtein: 1gFat: 0.2gSaturated Fat: 0.05gPolyunsaturated Fat: 0.04gMonounsaturated Fat: 0.04gSodium: 15mgPotassium: 122mgFiber: 2gSugar: 31gVitamin A: 98IUVitamin C: 3mgCalcium: 17mgIron: 1mg

    Watch The Recipe Video!

    QR Code
    Did you make this recipe?Share it on instagram or tag @simplybakings or #simplybakings!

    You Might Also Like:

    • Tropical Green Smoothie
    • Pineapple Mango Smoothie
    • Strawberry Whipped Milk

    Recipes for Every Moment

    Entertaining guests on a hot afternoon? Serve this icy tamarind drink for a refreshing Filipino twist they’ll love.

    Drinks, New Recipes on the Blog, Summer Desserts, Vegan Filipino Recipes

    Creamy Black Sesame Pudding

    Jul 9, 2025 · 10 Comments

    A glass of delicious Black Sesame Pudding

    This creamy black sesame pudding is made with toasted sesame seeds and coconut milk for a rich, nutty dessert with a silky smooth texture. Lightly sweetened and easy to make, it’s the perfect Asian inspired treat to enjoy chilled.

    Try a fan favorite, my comforting Banana Pudding from Scratch - you’ll thank me later!

    Black Sesame Pudding topped with  a whipped cream in a glass
    [feast_advanced_jump_to]

    Why You’ll Love This Recipe

    It’s not too sweet, so it's perfect as a light dessert or a mid-day snack. Plus, it can be made with dairy-free ingredient alternatives, making it a great option for plant-based eaters or anyone with lactose sensitivity.

    Ingredients

    Listed below are all the ingredients you will need:

    • Ground toasted black sesame seeds
    • Coconut milk
    • Condensed milk
    • Cornstarch
    • Water
    • Whipped cream

    See recipe card for quantities.

    All ingredients for the Black Sesame Pudding recipe

    Instructions

    1. In a pot, mix black sesame seeds, coconut milk, and condensed milk. Stir often.

    2. Over medium heat, let it gently simmer for 2 minutes. Keep stirring to prevent burning.

    Black sesame seeds, coconut milk, and condensed milk simmered in a pot

    3. In a small bowl, mix cornstarch and cold water. Slowly stir the cornstarch mix into the pot.

    4. Keep stirring until the mixture thickens a little. Then, turn off the heat.

    Cornstarch mixture added to the pot

    5. Pour into cups, let cool to room temperature, then chill for at least 30 minutes before topping with whipped cream and sesame seeds, if desired. Serve and enjoy!

    Substitutions & Variations

    • Ingredient Swap
      You can use oat milk or almond milk instead of coconut milk for a lighter taste. You can also swap the coconut milk with whole milk or even heavy cream for a richer version.
    • Variation
      For extra flavor, you can stir in a splash of vanilla extract or a spoonful of honey. A small pinch of salt can also enhance the nutty flavor.
    • Mistake to Avoid
      Don’t skip stirring - coconut milk can burn fast if left alone.
    • Storage Tips
      • This pudding doesn’t freeze well; it changes texture. Best to eat within 3–4 days when chilled.
      • Store pudding and whipped cream separately in the fridge. Combine just before serving for the best texture.
    Cream swirled on top of the Black Sesame Pudding

    FAQs

    What does black sesame pudding taste like?

    It has a rich, nutty flavor with a hint of sweetness. Think peanut butter, but earthier and deeper.

    Can I make this without condensed milk?

    Yes! Use coconut cream and a natural sweetener like maple syrup or agave for a similar texture and taste.

    Do I need to toast the sesame seeds first?

    Yes, toasting brings out their flavor. If you buy them pre-ground, make sure they're toasted or toast whole seeds before grinding.

    Black Sesame Pudding in a glass topped with whipped cream
    5 from 9 votes
    Print Pin Recipe

    Creamy Black Sesame Pudding

    Black Sesame Pudding is rich, creamy, and deeply nutty. It's a unique treat that’s naturally dairy-free and easy to prepare. Chill, top with whipped cream (vegan or regular), and enjoy!
    Prep Time35 minutes mins
    Cook Time5 minutes mins
    Total Time40 minutes mins
    Course: No-bake Dessert
    Cuisine: Fusion (Asian-Filipino)
    Servings: 3 servings
    Calories: 552kcal
    Author: Lainey
    Prevent your screen from going dark

    Ingredients

    • 4 tablespoons ground toasted black sesame seeds
    • 2 cups coconut milk
    • ½ cup condensed milk or vegan condensed milk
    • 2 teaspoons cornstarch
    • ⅛ cup water
    • ½ cup whipped cream regular or coconut-based

    Instructions

    • In a pot over medium-low heat, combine ground black sesame seeds, coconut milk, and condensed milk. Stir continuously.
    • Bring to a gentle simmer and cook for 2 minutes, stirring constantly to avoid burning.
    • In a small bowl, mix cornstarch and water to create a slurry.
    • Slowly pour the slurry into the simmering coconut mixture while stirring.
    • Continue stirring until the mixture thickens slightly, then remove from heat.
    • Pour into dessert cups and allow to cool to room temperature.
    • Chill in the refrigerator for at least 30 minutes.
    • Top with whipped cream before serving. Optionally, sprinkle with more toasted sesame seeds for added texture.
    Leave a Comment

    Notes

    Watch out as the coconut milk burns easily.
    Serving: 1servingCalories: 552kcalCarbohydrates: 37gProtein: 9gFat: 44gSaturated Fat: 33gPolyunsaturated Fat: 3gMonounsaturated Fat: 5gCholesterol: 25mgSodium: 87mgPotassium: 585mgFiber: 1gSugar: 29gVitamin A: 206IUVitamin C: 3mgCalcium: 286mgIron: 7mg

    Watch The Recipe Video!

    QR Code
    Did you make this recipe?Share it on instagram or tag @simplybakings or #simplybakings!

    You Might Also Like:

    • Bread Pudding
    • Easy Banana Pudding Ice Cream Recipe
    • Peanut Butter Cheesecake Pudding Cookies

    Recipes for Every Moment

    Craving a sweet treat without turning on the oven? This Black Sesame Pudding is what you need - no baking required!

    Desserts, Filipino Desserts, New Recipes on the Blog, No Bake Dessert Recipes

    Corn Fritters With Pancake Mix

    Jul 2, 2025 · 10 Comments

    stacks of Corn Fritters with Pancake mix in a white bowl

    These Corn Fritters with Pancake Mix are golden on the outside and soft on the inside. The sweet corn kernels make a delicious burst of flavor and texture. You can use fresh corn off the cob or canned. They are so easy to make and even easier to love. Give this corn fritters recipe a try!

    Are you a fan of pancakes? Try my easy Kalabasa Pancakes and Ube Pancakes recipe!

    Corn Fritters with Pancake Mix on a white plate
    [feast_advanced_jump_to]

    Why You’ll Love This Recipe

    This recipe is quick, beginner-friendly, and uses simple pantry ingredients. It’s vegetarian and can be made dairy-free by swapping the buttermilk.

    Cornmeal adds texture and crunch. Red bell peppers and green onions bring color and flavor. You'll love how these fritters come together in one large bowl and cook up fast.

    Fry them in canola oil, and be sure to drain on a paper towel to remove excess oil.

    Ingredients

    Listed below are all the ingredients you will need:

    • Pancake mix
    • Large egg
    • Buttermilk
    • Red bell pepper
    • Corn kernels
    • Spring onions
    • Olive oil

    See recipe card for quantities.

    All ingredients for Corn Fritters With Pancake Mix

    Instructions

    Make the Batter:

    1. In a medium bowl, combine pancake mix, beaten egg, buttermilk, red bell pepper, corn kernels, and spring onions.

    2. Mix well until the batter is smooth and everything is evenly distributed.

    pancake mix, beaten egg, buttermilk, red bell pepper, corn kernels, and spring onions combined in a medium bowl

    Cook the Fritters:

    3. Heat a nonstick pan over medium heat and brush with olive oil.

    4. Scoop 2 tablespoons of batter and pour into the pan. Cook until bubbles appear on the surface, just like pancakes.

    nonstick pan with olive oil heated over a medium heat

    5. Flip and cook for another 2 minutes with the lid on, until golden brown and cooked through.

    6. Repeat with the remaining batter, adding more oil to the pan as needed.

    three corn fritters fried in a pan over a medium heat

    7. Serve with your favorite dipping sauce such as aioli, ranch, ketchup, cheese sauce, or maple syrup.

    servings of Corn Fritters with Pancake Mix in a white plate next to maple syrup

    Substitutions & Variations

    • Ingredient Swap
      No buttermilk? Use regular milk with a splash of vinegar.
      No red bell pepper? Try grated carrots or zucchini.
    • Variation
      Add cheddar, jalapenos, or cooked sausage for a heartier fritter.
      You can also mix in fresh green onions for brightness.
    • Mistake to Avoid
      Don’t overcrowd the pan, it lowers the temperature and makes them soggy.
    • Storage Tips
      • These fritters don’t do well in the freezer beyond 1 month.
      • In the refrigerator, store in an airtight container for 2–3 days.
      • Reheat in a pan or toaster oven to bring back the crispiness.
    stack of corn Fritters with pancake mix in a white plate beside a fork

    FAQs

    Can you use pancake batter for corn fritters?

    Using pancake mix ensures the batter mixes up quickly, and these fritters are shallow-fried, so they use a lot less oil. Depending on how you serve them, they can lean sweet or savory. Drizzle fritters with hot honey, serve with your favorite dipping sauce or dish them up alongside barbecue chicken thighs.

    What is the difference between a pancake and a fritter?

    A pancake is often griddled with just a bit of fat (your butter, your lard, your oil, whatever); a fritter is properly fried (more tempura than pancake, kakiage being a cardinal example).

    Can you use pancake mix for frying?

    Pancake Mix makes the easiest, tastiest frying batter. This easy-to-remember ratio can turn even the most boring veggies into a fine snack.

    stacks of Corn Fritters with Pancake Mix in a bowl
    5 from 9 votes
    Print Pin Recipe

    Corn Fritters with Pancake Mix

    Corn Fritters with Pancake Mix are soft, fluffy, and filled with sweet corn in every bite. Enjoy them with your favorite dipping sauce for a quick and tasty snack!
    Prep Time10 minutes mins
    Cook Time15 minutes mins
    Total Time25 minutes mins
    Course: Appetizer, Side Dish, Snack
    Cuisine: American
    Servings: 4 servings
    Calories: 204kcal
    Author: Lainey
    Prevent your screen from going dark

    Ingredients

    • 1 cup pancake mix
    • 1 large egg beaten
    • ⅓ cup buttermilk
    • ¼ red bell pepper deseeded and finely chopped
    • 1 ½ cups canned corn kernels drained
    • 1 tablespoon finely chopped spring onions
    • 2 tablespoons olive oil

    Instructions

    Make the Batter:

    • In a medium bowl, combine pancake mix, beaten egg, buttermilk, red bell pepper, corn kernels, and spring onions.
    • Mix well until the batter is smooth and everything is evenly distributed.

    Cook the Fritters:

    • Heat a nonstick pan over medium heat and brush with olive oil.
    • Scoop 2 tablespoons of batter and pour into the pan. Cook until bubbles appear on the surface, just like pancakes.
    • Flip and cook for another 2 minutes with the lid on, until golden brown and cooked through.
    • Repeat with the remaining batter, adding more oil to the pan as needed.

    Serve:

    • Serve with your favorite dipping sauce such as aioli, ranch, ketchup, cheese sauce, or maple syrup.
    Leave a Comment

    Notes

    • If you want a kid-friendly taste, you may omit the spring onions and serve it with a cheese sauce.
    • If the batter is too thick, add a splash of milk to lighten it a little bit. You want the batter to be a little bit runny.
    Serving: 1gCalories: 204kcalCarbohydrates: 20gProtein: 6gFat: 12gSaturated Fat: 3gPolyunsaturated Fat: 2gMonounsaturated Fat: 7gTrans Fat: 0.01gCholesterol: 66mgSodium: 327mgPotassium: 208mgFiber: 2gSugar: 4gVitamin A: 449IUVitamin C: 11mgCalcium: 103mgIron: 1mg

    Watch The Recipe Video!

    QR Code
    Did you make this recipe?Share it on instagram or tag @simplybakings or #simplybakings!

    You Might Also Like:

    Filipinos also love crispy recipes, which you might want to try. Check them below:

    • Crispy Kangkong
    • Turon
    • Rice Krispies Cookies

    Recipes for Every Moment

    Kids are home from school, demanding a snack, and you're out of ideas? These Corn Fritters with Pancake Mix are quick, crispy, and kid-approved!

    Appetizers, New Recipes on the Blog, Pancakes, Side Dishes, Snacks, Vegetarian Filipino Recipes

    Ube Flan

    Jun 25, 2025 · 11 Comments

    Slice of Ube Flan prepared to be served

    Ube Flan is a rich dessert with two dreamy layers - smooth flan and fluffy ube chiffon cake. Made with real ube halaya and flavored with sweet ube extract, it’s the perfect mix of silky, sweet, and slightly earthy flavors in every bite!

    Do you love ube desserts? Try my Ube Buchi and Ube Hopia recipe, too!

    One slice of delicious Ube Flan ready to be served
    [feast_advanced_jump_to]

    Why You’ll Love This Recipe

    Ube Flan is a layered Filipino dessert made with leche flan on top and ube cake on the bottom, similar in concept to crème caramel but with a fun twist. It combines two classic Pinoy favorites into one colorful dessert.

    The key ingredient is ube halaya, a sweet purple yam jam that brings vibrant color and deep flavor. It's soft, creamy, and melts in your mouth, with a caramel glaze that forms a shiny caramel layer on top once flipped.

    The Story Behind Ube Flan

    Ube Flan is a modern twist on traditional Filipino desserts. It's inspired by two well-loved treats: ube cake and leche flan, both staples at Filipino celebrations. Combining them gives a layered dessert that's both nostalgic and new.

    Where Ube Flan Comes From

    It's difficult to pinpoint the exact origin of ube flan but its rise came from online food trends and potluck favorites. It then become a popular dessert in the recent years.

    Ube and leche flan are both popular in the Philippines. Home bakers and food vloggers started combining the two for visual appeal and richer flavor. Nowadays, it’s a must-try in Filipino dessert culture.

    When is this Dish Typically Enjoyed?

    Ube Flan is often served during holidays like Christmas, New Year, and Fiestas, but it’s also great for birthdays and special gatherings. Because of its festive look and indulgent flavor, it’s a popular dessert choice for potlucks and family parties. Read on to learn how to make this deliciously sweet dessert!

    Ingredients

    Listed below are all the ingredients you will need:

    • Brown sugar
    • Water
    • Egg yolks
    • Whole milk
    • Condensed milk
    • Vanilla extract
    • Lemon juice
    • Unsalted butter
    • Granulated white sugar
    • Eggs
    • Cream of tartar
    • Ube extract
    • Cake flour
    • Baking powder
    • Ube halaya
    • Salt

    See recipe card for quantities.

    All ingredients for Ube Flan in separate bowls

    Instructions

    Make the Caramel

    1. In a nonstick skillet over low or medium heat, combine brown sugar and water. Without stirring, swirl the pan gently until the sugar turns an amber color.

    2. Pour into an 8-inch cake pan and swirl to coat evenly at the bottom of the pan. Let it cool completely until hardened.

    3. Brush the sides of the pan with oil or butter to prevent sticking.

    caramelized the sugar in a nostick skillet then poured into a 8-inch cake pan

    Prepare the Flan Base

    4. In a large mixing bowl, whisk together egg yolks, milk, condensed milk, vanilla extract, and lemon juice using a silicone spatula or spoon.

    5. Mix gently to avoid creating air bubbles. Cover and place in the fridge to rest while making the cake base.

    Make the Ube Cake Base

    6. In a separate large bowl, whisk together ¾ of the sugar, cake flour, baking powder, and salt.

    7. Add egg yolks, ube extract, milk, butter, and ube halaya. Mix until smooth (do not overmix).

    prepared ube flan and ube cake base in separate mixing bowls

    Make the Meringue

    8. In a stand mixer, whisk egg whites, cream of tartar, and remaining sugar until medium stiff peaks form.

    9. Gently fold half the meringue into the cake batter, then fold in the remaining half until just incorporated.

    whisked the egg whites, cream of tartar, and remaining sugar until medium stiff peaks form using a stand mixer in a bowl

    Assemble and Bake

    10. Pour the chilled flan mixture over the hardened caramel in the cake pan.

    11. Slowly pour the ube cake batter over the flan and level the top.

    12. Place the cake pan into a larger baking tray filled with hot water (water bath).

    13. Bake in a preheated 320°F (160°C) oven for 45 minutes or until a toothpick comes out clean.

    14. Let the cake cool completely. Use a wire rack.

    15. To remove, flip onto a serving plate and gently heat the bottom using a kitchen torch if needed.

    16. Cover with plastic wrap and chill before serving!

    Substitutions & Variations

    • Ingredient Swap
      You can swap ube extract with real mashed purple yam if available.
      Use evaporated milk in place of whole milk for a lighter texture.
    • Variation
      No cream of tartar? A dash of lemon juice helps stabilize the meringue.
    • Mistake to Avoid
      Avoid overbeating the egg whites, or your cake layer will deflate.
    • Storage Tips
      • This dessert doesn’t freeze well. Flan gets watery.
      • Store leftovers in the fridge for up to 3 days in an airtight container.
    a slice of Ube Flan on a white plate next to a wooden spoon on a white surface

    FAQs

    How is Filipino flan different?

    Filipino flan uses only egg yolks, which makes it richer and creamier compared to other flans that use whole eggs.

    Why is ube so delicious?

    Ube is naturally sweet, moist, and has a nutty flavor. It’s also packed with vitamin A, vitamin C, and potassium, making it tasty and nutritious.

    Is ube Hawaiian or Filipino?

    Ube is a purple yam native to Southeast Asia. It’s mostly used in Filipino cooking and is a big part of many Filipino desserts.

    a slice of ube flan served on a white plate
    5 from 10 votes
    Print Pin Recipe

    Ube Flan

    Have yourself a dreamy Filipino dessert, Ube Flan! It has layers of sweet and delicious caramel flan and soft ube chiffon cake. The blend of earthy ube, sweet caramel, and silky custard creates a show-stopping treat!
    Prep Time30 minutes mins
    Cook Time45 minutes mins
    Total Time1 hour hr 15 minutes mins
    Course: Dessert
    Cuisine: Filipino
    Servings: 8 slices
    Calories: 301kcal
    Author: Lainey
    Prevent your screen from going dark

    Ingredients

    Caramel:

    • ¼ cup brown sugar
    • 2 tablespoons water

    Flan Base:

    • 4 egg yolks
    • ⅔ cup whole milk
    • ⅔ cup condensed milk
    • ½ teaspoon lemon juice
    • ¼ teaspoon vanilla extract

    Ube Cake Base:

    • ¼ cup unsalted butter slightly softened
    • ½ cup granulated white sugar divided
    • 2 large eggs separate the egg whites and yolks
    • ½ teaspoon cream of tartar
    • 1 teaspoon vanilla extract
    • 1 ½ tablespoons ube extract
    • ½ cup cake flour
    • 1 teaspoon baking powder
    • ¼ teaspoon salt
    • ⅓ cup whole milk
    • ¼ cup ube halaya

    Instructions

    Make the Caramel:

    • In a nonstick skillet, heat brown sugar with water until it turns to amber like color over low heat. DO NOT MIX with a spoon or a spatula.
    • Then swirl the melted brown sugar and pour it into an 8-inch cake pan. Let it cool completely until hardened. Brush the sides of the pan with oil or butter to prevent sticking.

    Prepare the Flan Base:

    • In a bowl, mix egg yolks, whole milk, condensed milk, lemon juice, and vanilla extract using a spatula.
    • Stir until well combined, then place in the chiller and set aside while preparing the cake layer.

    Make the Ube Cake Base:

    • In a separate bowl, combine ¾ of the granulated white sugar, cake flour, baking powder, and salt using a handheld mixer or a stand mixer.
    • Add egg yolks, ube extract, milk, butter, and ube halaya. Then, mix completely, but do not overmix. Set aside.

    Make the Meringue:

    • In a stand mixer, whisk egg whites, cream of tartar, and remaining sugar until medium peaks form.
    • Add half of the meringue over the cake batter and mix well. Then pour the remaining half over and slowly fold into the mixture.

    Assemble and Bake:

    • Pour the chilled flan base over the hardened caramel in the cake pan.
    • Slowly pour the ube cake batter over the flan and level the top.
    • Place the cake pan into a larger baking tray with hot water inside as a water bath.
    • Bake in a preheated 320°F (160°C) oven for 45 minutes or until a toothpick comes out clean.

    Cool and Serve:

    • Remove from the oven and let it cool completely.
    • Flip the cake pan onto a large serving plate that can hold the entire flan. Then, gently torch the bottom of the pan to release the caramel and flan. You will notice the pan slightly lifting.
    • Slice and serve.
    Leave a Comment

    Notes

    • Brush the sides of the cake pan with butter or oil to help prevent the flan from sticking and to easily remove the flan from the cake pan.
    • You can use a small blowtorch to aid in removal.
    Serving: 1gCalories: 301kcalCarbohydrates: 41gProtein: 7gFat: 13gSaturated Fat: 7gPolyunsaturated Fat: 1gMonounsaturated Fat: 4gTrans Fat: 0.2gCholesterol: 166mgSodium: 193mgPotassium: 217mgFiber: 0.2gSugar: 35gVitamin A: 484IUVitamin C: 1mgCalcium: 166mgIron: 1mg

    Watch The Recipe Video!

    QR Code
    Did you make this recipe?Share it on instagram or tag @simplybakings or #simplybakings!

    More Ube Recipes

    • Ube Puto
    • Ube Malasadas
    • Easy Ube Ice Candy
    • Ube Cheese Pandesal

    Recipes for Every Moment

    Celebrating a birthday, reunion, or just feeling extra nostalgic for something Filipino? This Ube Flan brings the wow factor to any table!

    Desserts, Filipino Desserts, New Recipes on the Blog

    Best Ever Pandan Jelly Dessert

    Jun 18, 2025 · 8 Comments

    Pandan Jelly Dessert served on a white plate

    This sweet, creamy, and delicious pandan jelly dessert is a tropical treat layered with full-fat coconut milk and fragrant pandan essence. Its soft texture and rich flavor make it a refreshing dessert everyone will love!

    Are you interested in trying more pandan desserts? Check out my Buko Pandan ice cream and Buko Pandan recipe!

    Pandan Jelly Dessert slice on a white plate
    [feast_advanced_jump_to]

    Why You’ll Love This Recipe

    Pandan Jelly Dessert is a sweet, creamy treat made with coconut milk, condensed milk, and pandan-flavored jelly. It has a soft, smooth texture that’s both soothing and satisfying. The batter of this dessert comes together easily on the stove. It also sets beautifully in the fridge. It's perfect as a make-ahead treat!

    One special ingredient is pandan. It's known for its unique aroma, green color, and flavor like grassy vanilla. Filipinos love using pandan in desserts because of its sweet, floral flavor. No wonder that this pandan jelly dessert is very popular in the Philippines and is often served cold.

    The Story Behind Pandan Jelly Dessert

    This dessert was inspired by traditional Filipino sweets such as buko pandan and leche flan. Filipino homes used simple ingredients like gelatin, coconut, and sugar for desserts. The use of pandan comes from Southeast Asia, and it’s been used for centuries in cooking and baking.

    Over time, families began adding layers to desserts. They used molds or small pots and improved the texture using tools like a potato ricer for smooth finishes. Then, it has become a cherished part of Filipino gatherings.

    Where Pandan Jelly Dessert Comes From

    Pandan Jelly Dessert comes from Southeast Asia, mainly the Philippines, Indonesia, and Malaysia. It uses pandan leaves for flavor and color. People have cooked with pandan for a long time, but the jelly version started when pandan was mixed with agar or gelatin. No one knows who made it first, but it’s now a popular treat at parties and gatherings.

    When is this Dish Typically Enjoyed?

    Pandan Jelly Dessert is most popular during the hot summer months since it's served cold and is very light. It’s also enjoyed at Christmas, birthdays, fiestas, and other family celebrations.

    Because it’s easy to make in big batches, it’s a go-to dessert for potlucks and special events. Try making this in your kitchen whenever you can!

    Ingredients

    Listed below are all the ingredients you will need:

    Pandan Jelly

    • Whole milk
    • White sugar
    • Pandan food color and flavor
    • Green gelatin powder

    Coconut Jelly

    • Coconut milk
    • Condensed milk
    • Colorless gelatin powder

    Find the ingredients in Asian supermarkets or grocery stores and see the recipe card for quantities.

    All ingredients for Pandan Jelly Dessert

    Instructions

    Make the Pandan Jelly:

    1. In a pot, whisk together whole milk, white sugar, pandan food color and flavor, and green gelatin powder. Then stir until the sugar fully dissolves.

    2. Next, heat the pandan mixture over medium-high heat until it reaches a gentle simmer and small bubbles appear on the edges. Then mix occasionally.

    dissolving sugar with pandan and gelatin in a pot

    3. Pour the mixture into a 7-inch round cake pan and let it cool completely at room temperature or in the refrigerator until firm.

    Pandan mixture poured into the cake pan

    Make the Coconut Jelly:

    4. In a clean pot, combine coconut milk, condensed milk, and colorless gelatin powder. Then, stir until well blended and the sugar is dissolved.

    Another pot over heat with milk and gelatin

    5. Heat the mixture on low heat until it begins to simmer and small bubbles form around the edges. Stir occasionally.

    6. Gently pour the coconut mixture over the fully set pandan jelly layer. Let it cool and fully harden.

    Coconut mixture poured over pandan jelly layer

    7. Once set, remove the dessert from the pan. Slice and serve chilled!

    Layers of the Pandan Jelly Dessert on plate

    Substitutions & Variations

    • Ingredient Swap
      Instead of gelatin powder, use mung bean starch. For fresher pandan flavor, use pure pandan extract, pandan juice, or freshly blend pandan leaves.
    • Variation
      Mix in ¼ cup of sweet corn into the pandan coconut jelly layer for added texture and flavor.
    • Mistake to Avoid
      Don't forget to lightly score the surface of the pandan layer with a fork for better bonding.
    • Storage Tips
      • These ingredients don’t stand up well to freezing.
      • Store the dessert in an airtight container in the refrigerator. Let it set fully before slicing for the right consistency.
    A round of Pandan Jelly Dessert next to a slice of it served on a white plate

    FAQ

    What is the flavor of pandan jelly?

    Pandan jelly has a sweet, earthy vanilla flavor with a light floral taste. It's made using gulaman (agar-agar), a plant-based gelatin often used in Filipino desserts.

    Is pandan jelly healthy?

    Yes, pandan is rich in antioxidants and vitamins. It may help support the immune system and reduce the risk of illnesses like cancer, heart disease, and diabetes.

    Is pandan a Filipino flavor?

    Yes, pandan is a beloved flavor in the Philippines. It has a light, grassy vanilla taste with hints of coconut and is used in many traditional Filipino sweets.

    no bake pandan jelly dessert served on a white plate
    5 from 8 votes
    Print Pin Recipe

    Best Ever Pandan Jelly Dessert

    This Pandan Jelly Dessert is creamy, cool, and layered with refreshing pandan flavor and rich coconut jelly. The vibrant green base and silky white topping make it as beautiful as it is delicious!
    Prep Time2 hours hrs
    Cook Time10 minutes mins
    Total Time2 hours hrs 10 minutes mins
    Course: No-bake Dessert, Snack
    Cuisine: Filipino
    Servings: 8 servings
    Calories: 289kcal
    Author: Lainey
    Prevent your screen from going dark

    Ingredients

    Pandan Jelly:

    • 2 cups Whole milk
    • 1 cup White sugar
    • 1 tablespoon Pandan food color and flavor
    • 1 sachet (1 oz.) Green gelatin powder

    Coconut Jelly:

    • 1 ¾ cups Coconut milk
    • ½ cup Condensed milk
    • 1 sachet (1 oz.) Colorless gelatin powder

    Instructions

    Make the Pandan Jelly:

    • In a pot, whisk together whole milk, white sugar, pandan food color and flavor, and green gelatin powder.
    • Stir until the sugar fully dissolves.
    • Heat the mixture over low heat until it reaches a gentle simmer and small bubbles appear on the edges. Mix occasionally.
    • Pour the mixture into a 7-inch round cake pan. Let it cool completely at room temperature or in the refrigerator until firm.

    Make the Coconut Jelly:

    • In a clean pot, combine coconut milk, condensed milk, and colorless gelatin powder.
    • Stir until well blended and the sugar is dissolved.
    • Heat the mixture on low heat until it begins to simmer and small bubbles form around the edges. Stir occasionally.
    • Gently pour the coconut mixture over the fully set pandan jelly layer. Let it cool and fully harden.

    Serve:

    • Once set, remove the dessert from the pan. Slice and serve chilled.
    Leave a Comment
    Serving: 1gCalories: 289kcalCarbohydrates: 37gProtein: 5gFat: 14gSaturated Fat: 12gPolyunsaturated Fat: 0.2gMonounsaturated Fat: 1gCholesterol: 14mgSodium: 1200mgPotassium: 271mgSugar: 13gVitamin A: 150IUVitamin C: 1mgCalcium: 138mgIron: 2mg

    Watch The Recipe Video!

    QR Code
    Did you make this recipe?Share it on instagram or tag @simplybakings or #simplybakings!

    You Might Also Like

    • Ube Jelly
    • Avocado Sago Jelly
    • Peanut Butter and Jelly Cookies

    Recipes for Every Moment

    Need a refreshing treat after a spicy meal? This Pandan Jelly Dessert is light, cooling, and the perfect sweet finish.

    Desserts, Filipino Desserts, New Recipes on the Blog, No Bake Dessert Recipes, Snacks, Summer Desserts, Thanksgiving Desserts

    Lumpia in a Bowl

    Jun 11, 2025 · 14 Comments

    Lumpia in a bowl ready for serving

    Craving the savory crunch of lumpia without the wrapping and frying? This Lumpia in a Bowl gives you all the flavor with none of the hassle. It's garlicky, hearty, and filled with crisp vegetables and golden tofu. No wrappers. No deep frying. Just comfort in a bowl!

    Looking for more delicious lumpia dishes? Try my Lumpiang Sariwa and Vegetable Lumpiang Shanghai recipe!

    Vegan Lumpia in a Bowl served with dipping sauce in a separate white bowl
    [feast_advanced_jump_to]

    Why You'll Love This Recipe

    Lumpia in a Bowl has all the flavors of traditional lumpia spring rolls. It includes sautéed vegetables, garlic, soy sauce, and savory seasonings, but it skips the wrapper and frying.

    This version is lighter and easier, and it still tastes just as comforting. The unique ingredient here is tofu. It replaces meat and adds plant-based protein. It also gives a soft, chewy texture, and soaks up all the sauce.

    This lumpia dish uses flavorful ingredients like garlic powder, ginger, and vegetable broth, which bring depth and warmth to every bite.

    Where Lumpia in a Bowl Comes From

    Lumpia comes from Chinese cooking. It became popular in the Philippines through trade and cultural exchange. The original lumpia was rolled in wrappers and deep-fried. Fillings often included meat, celery, or bean sprouts.

    Lumpia in a Bowl is a modern twist. It likely started in vegan or Filipino-American kitchens. People wanted the flavor of lumpia without the work. It’s now a popular shortcut that keeps the taste but skips the grease.

    Ingredients

    Listed below are all the ingredients you will need:

    • Oil
    • White onion
    • Garlic
    • Extra firm tofu
    • Soy sauce
    • Dark oyster mushroom soy sauce (vegan)
    • Vegetable broth
    • Carrot
    • Green beans
    • Red bell pepper
    • Cabbage
    • Ground black pepper
    • Salt

    See recipe card for quantities.

    All ingredients for Lumpia in a Bowl

    Instructions

    Sauté Aromatics and Tofu:

    1. Heat a skillet over medium-low heat. Then, add 2 tbsp vegetable oil and sauté the onion until caramelized, about 5 minutes.

    2. Next, add garlic and sauté for another 2 minutes. Then, remove both from the skillet and set aside.

    Garlic added into the heated skillet

    3. Add the remaining oil to the same skillet. Then, cook tofu for 4 minutes, or until golden brown.

    Diced tofu and oil added into the pan

    4. Return sautéed onion and garlic to the pan. After that, add carrot, green beans, bell pepper, and cabbage.

    5. Sauté for 2 minutes over medium heat.

    carrot, green beans, bell pepper, and cabbage slices added to the pan

    6. Pour in soy sauce, dark mushroom soy sauce, and vegetable broth. Stir and bring to a simmer.

    7. Season with salt and black pepper to taste.

    added soy sauce, dark mushroom soy sauce, and vegetable broth to the pan then seasoned with salt and black pepper to taste

    8. Remove from the heat and transfer to a serving plate.

    9. Serve hot with white rice and sweet chili sauce on the side. Add these dipping sauces on the side for extra flavor.

    Substitutions & Variations

    • Ingredient Swap
      Use fish sauce or tamari instead of dark oyster mushroom soy sauce.
    • Variations
      Make a crunchy lumpia bowl by topping with crispy water chestnuts, or serve a lumpia salad bowl with shredded green cabbage on top.
    • Mistake to Avoid
      Caramelize the onions! It adds sweetness that balances the savory sauces and vegetables. Stir often to avoid burning.
    • Storage Tips
      • This dish stores well. Keep the tofu and veggies in the refrigerator for up to 3 days. You can also freeze it for up to 1 month.
      • To reheat, warm in a pan over medium-high heat. Let it sit on a paper towel after heating to drain extra moisture or oil.
    Lumpia in a Bowl with tofu and veggies

    FAQ

    What's the difference between lumpia and eggroll?

    The main difference is in the wrapper. Lumpia uses thin and delicate wrappers, sometimes made from rice or paper-thin crepes. Egg rolls, on the other hand, have thicker, doughier wheat-based wrappers that become bubbly and chewy when fried. Lumpia is often crispier and lighter, while egg rolls are heartier and heavier.

    What is so special about lumpia?

    Lumpia is special because of its perfect mix of textures and flavors. The crispy wrapper gives a satisfying crunch, while the filling is packed with savory goodness. It’s often made with fresh vegetables, spices, and sometimes meat or tofu.

    What is the secret of crispy lumpia?

    The secret lies in the oil temperature. If the oil is too hot, the wrapper burns quickly, and the filling stays undercooked. If it’s too cool, the lumpia turns soggy and absorbs too much oil. Keep the heat at a steady medium-high and fry in small batches for even crispiness.

    savory Lumpia in a bowl
    5 from 13 votes
    Print Pin Recipe

    Lumpia in a Bowl

    This Lumpia in a Bowl is a vegan take on the Filipino classic. It’s packed with sautéed vegetables, golden tofu, bold savory flavor, and pairs well with rice!
    Prep Time15 minutes mins
    Cook Time15 minutes mins
    Total Time30 minutes mins
    Course: Main Course
    Cuisine: Asian, Filipino, Vegan
    Servings: 2 servings
    Calories: 391kcal
    Author: Lainey
    Prevent your screen from going dark

    Ingredients

    • 4 tablespoons Oil
    • 1 White onion thinly sliced
    • 3 cloves Garlic minced
    • ½ pound Extra firm tofu semi-crumbled
    • 1 tablespoon Soy sauce
    • 1 tablespoon Dark oyster mushroom soy sauce vegan
    • ¼ cup Vegetable broth
    • 1 Carrot peeled and cut into fine strips
    • ¼ pound Green beans ends trimmed and cut into strips
    • ½ Red bell pepper deseeded and cut into strips
    • ¼ cup Cabbage shredded
    • ¼ teaspoon Ground black pepper
    • ½ teaspoon Salt

    To Serve:

    • Cooked White Rice
    • Sweet Chili Sauce

    Instructions

    Sauté Aromatics and Tofu:

    • Heat a skillet over medium-low heat. Add 2 tablespoons of oil and sauté the onion until caramelized, about 5 minutes.
    • Add garlic and sauté for another 2 minutes. Remove both from the skillet and set aside.
    • Add the remaining oil to the same skillet and cook the tofu for about 4 minutes, until lightly browned.

    Add the Vegetables:

    • Return sautéed onion and garlic to the pan. Add carrot, green beans, bell pepper, and cabbage.
    • Sauté the vegetables for 2 minutes over medium heat.

    Simmer and Serve:

    • Pour in soy sauce, dark mushroom soy sauce, and vegetable broth. Stir and bring to a simmer.
    • Season with salt and black pepper to taste.
    • Remove from the heat and transfer to a serving plate.
    • Serve hot with white rice and sweet chili sauce on the side.
    Leave a Comment

    Notes

    • Adding some shiitake mushrooms will also add a deeper flavor to the lumpiang hubad or lumpia in a bowl.
    • Toasted chopped peanuts can be added as additional texture.
    • You may also serve it with peanut sauce for a different perspective.
    Serving: 1gCalories: 391kcalCarbohydrates: 20gProtein: 13gFat: 31gSaturated Fat: 3gPolyunsaturated Fat: 9gMonounsaturated Fat: 18gTrans Fat: 0.1gSodium: 1474mgPotassium: 619mgFiber: 5gSugar: 9gVitamin A: 6429IUVitamin C: 55mgCalcium: 98mgIron: 3mg

    Watch The Recipe Video!

    QR Code
    Did you make this recipe?Share it on instagram or tag @simplybakings or #simplybakings!

    You Might Also Like

    More vegan recipes? Here are more:

    • Palabok
    • Pinakbet
    • Ginisang Repolyo
    • Vegan Misua Soup

    Recipes for Every Moment

    Craving your favorite comfort food for your low-carb, calorie diet? Lumpia in a Bowl gives you all the flavor with none of the mess or extra oil.

    Lunch & Dinner, Main Entree, New Recipes on the Blog, Vegan Filipino Recipes, Vegetarian Filipino Recipes, Vegetarian Meat

    Vegan Stuffed Zucchini

    Jun 4, 2025 · 16 Comments

    A fork next to the Vegan Stuffed Zucchini

    This vegan stuffed zucchini is packed with hearty quinoa, crunchy walnuts, and fresh herbs, making it an ideal choice for a healthy lunch or dinner. It's baked into tender vegan zucchini boats for the perfect mix of soft and crisp textures.

    And if you're looking for a sweet dessert to go with this, check out my friend's Lex's delicious Strawberry Mousse.

    Vegan Stuffed Zucchinis beside a stainless steel fork on a plate
    [feast_advanced_jump_to]

    Why You’ll Love This Recipe

    This Vegan Stuffed Zucchini recipe is a perfect fit for anyone looking for a plant-based, dairy-free, and beginner-friendly meal. Whether you're vegan or simply aiming to eat more vegetables, this dish offers a satisfying combination of fresh flavor and easy prep. It’s ideal for weeknight dinners or as a colorful side at gatherings.

    Each zucchini boat is packed with a flavorful mix of grains, herbs, and veggies - no complicated steps or hard-to-find ingredients. Even novice cooks can pull it off with confidence. Plus, it’s naturally gluten-free if you choose a gluten-free grain like quinoa or rice.

    Ingredients

    Listed below are all the ingredients you will need:

    • Quinoa
    • Zucchini
    • Walnuts
    • Golden raisins
    • Red onion
    • Ground coriander
    • Salt
    • Ground pepper
    • Lemon zest
    • Lemon juice
    • Garlic
    • Olive oil

    See recipe card for quantities.

    All Vegan Stuffed Zucchini ingredients in separate bowls

    Instructions

    Prepare the Zucchini Boats:

    1. Cook quinoa according to package instructions.

    2. Preheat oven to 375°F (190°C). Then, line a baking sheet with aluminum foil.

    3. Wash and dry zucchini. Then, slice off both ends and cut each in half lengthwise.

    4. After that, scoop out the centers, about 1 to 1½ inches deep. Then, set aside the scooped-out flesh and place the zucchini boats open side up on a baking sheet.

    Scooped Zucchini halves on a cutting board

    Make the Zucchini Filling:

    5. Coarsely chop raisins and walnuts.

    6. In a bowl, mix quinoa, walnuts, raisins, ½ cup diced red onion, coriander, pepper, lemon zest, and ½ teaspoon salt. Then, mix the filling thoroughly.

    7. Fill the zucchini boats with the quinoa mixture, packing it in tightly. Then, drizzle with 2 tablespoons of olive oil.

    8. Bake them in the baking tray or baking dish for 25 minutes or until the zucchini is slightly tender and the top is lightly browned.

    Chopped raisins and walnuts on the wooden board

    Make the Zucchini Purée:

    9. While the zucchini is baking, heat 2 tablespoons of olive oil in a saucepan over medium heat. Then, sauté the remaining ½ cup diced red onion for 4–5 minutes, stirring frequently until caramelized.

    10. Lower the heat to medium-low. Then, add the minced garlic, remaining ¼ teaspoon salt, reserved zucchini flesh, and lemon juice.

    11. Cook for 10 minutes, stirring regularly, until very soft. Then, blend using an immersion blender or transfer to a regular blender until smooth and creamy.

    Making puree in a medium-sized bowl

    12. Serve the puree with your freshly baked Vegan Stuffed Zucchini!

    Vegan Stuffed Zucchini served on plate with a fork

    Substitutions & Variations

    • Ingredient Swap
      Aside from quinoa, cooked rice, bulgur, or couscous can work.
    • Variation
      • Zucchini boats with tomato sauce – Serve with warm marinara sauce or a swirl of tomato paste for a classic Italian twist.
      • Spicy stuffed zucchini - try adding chili powder, cumin, paprika, and fresh basil
    • Mistake to Avoid
      Work gently to avoid breaking the zucchini shell. To make scooping easier, use a spoon or melon baller.
    • Storage Tips
      • These ingredients stand up well to freezing for up to 1 month.
      • Store stuffed zucchini and purée separately in airtight containers in the fridge. Reheat and recombine when ready to serve. Good for 2–3 days.
    Vegan Stuffed Zucchini on a plate with sauce beside a knife and fork

    FAQ

    Does zucchini need to be cooked?

    No, you can eat zucchini raw or cooked. It's safe either way and tasty with dip.

    Is zucchini a veg or non-veg?

    Zucchini is often called a vegetable, but it's a fruit.

    Is zucchini a healthy carb?

    Yes, zucchini is low in carbs and a healthy choice, especially for replacing pasta.

    Baked Vegan Stuffed Zucchini halves on a plate
    5 from 14 votes
    Print Pin Recipe

    Vegan Stuffed Zucchini

    Hearty, flavorful - Vegan Stuffed Zucchini is finished with a creamy, savory purée that makes each bite extra satisfying. Serve it warm with a side salad for a comforting and elegant plant-based main dish.
    Prep Time20 minutes mins
    Cook Time25 minutes mins
    Total Time45 minutes mins
    Course: Main Course
    Cuisine: American, Vegan
    Servings: 4 servings
    Calories: 511kcal
    Author: Lainey
    Prevent your screen from going dark

    Ingredients

    • ½ cup (90 grams) quinoa uncook
    • 4 medium (850 grams) zucchini or summer squash washed and dried
    • ½ cup (50 grams) walnuts coarsely chopped
    • ¼ cup (40 grams) golden raisins coarsely chopped
    • 1 cup (120 grams) diced red onion divided
    • 1 teaspoon (2 grams) ground coriander
    • ¾ teaspoon (5 grams) fine sea salt divided
    • ½ teaspoon (1 gram) ground black pepper
    • 2 teaspoons (4 grams) freshly grated lemon zest from about 1 lemon
    • 3 tablespoons (45 milliliters) freshly squeezed lemon juice from about 1 large lemon
    • 3 cloves (15 grams) garlic minced
    • 4 tablespoons (60 milliliters) extra virgin olive oil divided

    Instructions

    • Cook quinoa according to package instructions.
    • Preheat oven to 375°F (190°C). Line a baking sheet with aluminum foil.

    Prepare the Zucchini Boats:

    • Wash and dry zucchini. Slice off both ends and cut each in half lengthwise.
    • Scoop out the centers, about 1 to 1½ inches deep. Reserve the scooped-out flesh.

    Make the Filling and Bake:

    • Coarsely chop raisins and walnuts.
    • In a bowl, mix cooked quinoa, walnuts, raisins, ½ cup diced red onion, coriander, pepper, lemon zest, and ½ teaspoon salt.
    • Fill the zucchini boats with the quinoa mixture, packing it in tightly. Drizzle with 2 tablespoons of olive oil.
    • Place the filled zucchini on the baking sheet, open side up, and bake for 25 minutes or until the zucchini is slightly tender and the top is lightly browned.

    Make the Zucchini Purée:

    • While the zucchini is baking, heat 2 tablespoons of olive oil in a saucepan over medium heat.
    • Sauté the remaining ½ cup red onion for 4–5 minutes until caramelized.
    • Lower the heat to medium-low. Add the minced garlic, remaining ¼ teaspoon salt, reserved zucchini flesh, and lemon juice.
    • Cook for 10 minutes, stirring regularly, until very soft.
    • Blend using an immersion blender or transfer to a regular blender until smooth and creamy.

    Serve:

    • Serve the baked zucchini immediately with a generous spoonful of the purée on the side or underneath and enjoy!
    Leave a Comment
    Serving: 1gCalories: 511kcalCarbohydrates: 43gProtein: 10gFat: 36gSaturated Fat: 4gPolyunsaturated Fat: 17gMonounsaturated Fat: 14gSodium: 366mgPotassium: 539mgFiber: 7gSugar: 12gVitamin A: 19IUVitamin C: 13mgCalcium: 82mgIron: 3mg

    Watch The Recipe Video!

    QR Code
    Did you make this recipe?Share it on instagram or tag @simplybakings or #simplybakings!

    You Might Also Like

    For more vegetarian and vegan recipes, look down here:

    • Vegan Filipino Spaghetti – Without Condensed Milk
    • Filipino Vegetarian Chicken Adobo
    • No-Bake Vegan Chocolate Cake

    Recipes for Every Moment

    Trying to eat healthier but short on time after work? These Vegan Stuffed Zucchini boats come together quickly and are packed with feel-good ingredients.

    Lunch & Dinner, Main Entree, New Recipes on the Blog, Thanksgiving Sides

    Red Juice Recipe

    May 28, 2025 · 14 Comments

    a tall glass of red juice with a green straw

    This Red Juice Recipe isn’t just a drink. It’s a bold, nutrient packed powerhouse bursting with flavor and color! The secret ingredient? Beets! Their natural sweetness blends perfectly with carrots and citrus, creating a vibrant, energizing boost for your day!

    Who doesn't love refreshing but healthy drinks? Try my Sweet Potato Juice and Homemade Salabat too!

    Nutritious red juice in a glass with straw
    [feast_advanced_jump_to]

    What is the Red Juice Recipe?

    The Red Juice recipe is also called "Beet juice". Made with beets, carrots, and oranges, it isn’t traditionally Filipino but fits the country's love for fresh, health-boosting drinks. Inspired by global wellness trends, it blends natural sweetness with earthy depth. The standout ingredient, beets, is less common in Filipino cuisine but prized for boosting stamina and heart health.

    Health Benefits of Beets

    • Boosts stamina – Rich in nitrates that improve oxygen flow and endurance
    • Supports heart health - Helps lower blood pressure and improve circulation
    • Aids digestion - The pulp and fiber promote gut health
    • Enhances brain function - Increases blood flow to the brain
    • Strengthens body immunity - Packed with vitamin C and antioxidants

    Substitutions

    • Beets - Red bell pepper for milder sweetness or pomegranate seeds for rich color and antioxidants
    • Carrots - Sweet potatoes for similar sweetness or mangoes for a tropical twist
    • Oranges - Pineapple for tangy and sweet, or calamansi juice as a Filipino citrus alternative
    Straw in a tall glass of red juice

    Storage

    • Store this red juice in an airtight glass container for 2 days in the fridge.
    • Freeze in ice cube trays for up to 1 month, then blend or thaw before drinking. Shake before serving, as natural separation occurs.

      Note: It does not freeze well for more than 1 month, as its texture and nutrients degrade over time.

    Ingredients

    Listed below are all the ingredients you will need:

    • Beets
    • Carrots
    • Oranges

    See recipe card for quantities.

    All ingredients of red juice recipe on a white marble space

    Instructions

    Wash all produce thoroughly to remove any dirt and impurities. Then peel the oranges and trim off both ends of the carrots and beets.

    Next, gather the ingredients in one bowl and prepare the juicer. Then place the prepared carrots, orange, and beets into the juicer.

    Juice the prepared ingredients using your juicer.

    After that, thoroughly juice the prepared ingredients.

    Pour the red juice into a glass. Then serve and enjoy!

    ⭐ Top Tip

    For a smoother juice, strain using a fine-mesh strainer to remove excess pulp, or keep it in for extra fiber and folate.

    FAQ

    Is it good to drink beetroot juice daily?

    Beet juice can provide beneficial nutrients such as antioxidants, vitamins, and minerals. Drinking it regularly may help support your health, reduce inflammation, and increase your exercise stamina, among other benefits.

    What juice makes you lose weight fast?

    Lemon-ginger green juice can be a vibrant and delicious addition to a balanced weight loss diet. In particular, lemons can help add a zip of flavor to your drink while squeezing in some extra antioxidants. Some studies in humans and animals also show that ginger could help boost metabolism.

    Is it OK to drink red beet juice every day?

    Drinking a regular-sized glass of beetroot juice every day shouldn't cause any adverse effects, although one study did find that those who drank one 250ml glass a day lowered blood pressure but did experience a change in the colour of their urine.

    More Recipes

    Craving more smoothies and drinks? Try:

    • Sweet Potato Leaves Juice Recipe
    • BEST EVER Pineapple Banana Smoothie Bowl
    • Homemade Oat Milk
    A tall glass of healthy and refreshing red juice
    5 from 12 votes
    Print Pin Recipe

    Red Juice Recipe

    Get refreshed and nourished with a powerhouse of vitamins in this delicious red juice recipe!
    Prep Time10 minutes mins
    Total Time10 minutes mins
    Course: Drinks
    Cuisine: Fusion (American-Filipino/Asian)
    Servings: 3 cups
    Calories: 66kcal
    Author: Lainey
    Prevent your screen from going dark

    Equipment

    • 1 Juicer

    Ingredients

    • 1 pound beets
    • 4 pieces small carrots or 2 large carrots
    • 4 pieces navel oranges

    Instructions

    • Wash all produce thoroughly to remove any dirt and impurities.
    • Prepare the oranges by cutting off the peel and discarding it.
    • Trim the carrots by cutting off both ends, then discard them.
    • Prepare the beets by cutting off the root and leafy top, then discard them.
    • Juice the prepared ingredients using your juicer.
    • Stir, pour, and enjoy immediately for the best flavor and nutrition!
    Leave a Comment

    Notes

    * I used a Breville Juicer.
    Serving: 1gCalories: 66kcalCarbohydrates: 15gProtein: 2gFat: 0.3gSaturated Fat: 0.04gPolyunsaturated Fat: 0.1gMonounsaturated Fat: 0.05gSodium: 119mgPotassium: 497mgFiber: 4gSugar: 10gVitamin A: 237IUVitamin C: 8mgCalcium: 25mgIron: 1mg

    Watch The Recipe Video!

    QR Code
    Did you make this recipe?Share it on instagram or tag @simplybakings or #simplybakings!

    Drinks, New Recipes on the Blog

    Award Winning Steamed Taro Buns

    May 21, 2025 · 5 Comments

    a steamed taro bun sliced in halves with taro paste filling

    These Steamed Taro Buns are just what you need! Made with mashed taro root, coconut milk, and a hint of cane sugar, they offer the perfect balance of sweetness and nutty flavor in every bite!

    If you love soft and fluffy sweets, you might also enjoy my Pandesal or Ube Pancakes.

    A couple of steamed taro buns on the plate
    [feast_advanced_jump_to]

    What are Steamed Taro Buns?

    Steamed taro buns are soft and fluffy with a sweet and creamy taro filling. They are steamed until perfectly light and tender.

    The filling is made from mashed taro root, which is sweetened with cane sugar and enriched with coconut milk or butter. This gives it a smooth texture and a slightly nutty flavor.

    Substitutions

    • Taro – Substitute with purple sweet potato for a similar color and mildly sweet flavor.
    • Purple food coloring (optional) – Replace with ube extract or mashed purple yam for a natural purple hue.
    • Dry yeast – Use instant yeast (same amount, no proofing needed) or sourdough starter for a natural rise.
    • Parchment paper – Replace with banana leaves for a fragrant, traditional touch or wax paper (lightly greased) to prevent sticking
    A plate of a single steamed taro bun

    Storage

    • Refrigerator: Store steamed taro buns in an airtight container in the fridge for up to 4 days. Reheat by steaming for 5 minutes or microwaving with a damp paper towel for 30 seconds.
    • Freezer: Place buns in a single layer on a baking sheet to freeze, then transfer to a zip-top bag or an airtight container for up to 2 months. Steam for 10 minutes or microwave with a damp paper towel for 1 minute before serving.
    • Thawing: Thaw frozen buns in the fridge overnight or steam directly from frozen for the best texture.

    Ingredients

    Listed below are all the ingredients you will need:

    • Taro
    • Condensed milk
    • Purple food coloring (optional)
    • Vegetable oil
    • Salt
    • Cake Flour (or bao flour)
    • Baking powder
    • Warm water
    • Granulated white sugar
    • Dry yeast
    • Parchment paper

    See recipe card for quantities.

    All ingredients for steamed taro buns recipe in separate bowls

    Instructions

    To make the Taro Paste:

    In a pot, boil the cubed taro in water for about twenty minutes or until fork-tender. Then, drain and transfer the cooked taro to a blender or food processor.

    Cubed taro cooked in boiling hot water

    Add condensed milk, salt, food coloring (optional), and vegetable oil. Blend until smooth and dough-like. Transfer to a bowl and set aside.

    Taro and other ingredients in a blender

    To make the Bao Buns:

    In a small bowl, bloom the yeast by combining warm water, sugar, and yeast. Let it sit for fifteen minutes until foamy. In a mixing bowl, whisk together cake flour and baking powder.

    Cake flour and baking powder in mixer

    Pour in the yeast mixture and vegetable oil, then knead for twelve minutes in a stand mixer or fifteen minutes by hand until smooth and elastic.

    Yeast mixture and oil kneaded in mixer

    Cover with plastic wrap and let rest for twenty minutes. Divide the dough into eight equal pieces of dough.

    Eight dough balls arranged in a plate

    Flatten each piece using your hands or a rolling pin. Place one to two scoops of taro paste in the center of the dough.

    Taro purple paste added onto the dough

    Pleat the edges to seal the bun. Place it seam-side down on parchment paper.

    A dough ball on top of parchment paper

    Place the buns into a steamer with boiling water. Steam for fifteen minutes over high heat, then turn off the heat and let them sit for another five minutes without opening the lid.

    Lid closing a stove with steamed taro buns

    Once the steam dissipates, remove the lid and serve warm!

    a steamed taro bun sliced open

    Enjoy these delicious taro buns with your loved ones!

    Hint: For a lighter taro paste, skip the purple food coloring.

    ⭐ Top Tip

    If kneading by hand, work the dough for about 15 minutes until smooth and elastic.

    FAQ

    Does taro taste fishy?

    Though taro is often said to have no distinctive flavor, the larger varieties possess a slightly fishy, meaty taste that's unique in the root family.

    How do you steam taro buns without a steamer?

    You can replicate a steamer with very little effort by placing your buns in a common kitchen sieve or colander, then suspending it over boiling water. Creating a tower from plates and tea towels will stop the steam from escaping, causing your buns to steam cook!

    What does a taro bun taste like?

    Taro buns are very soft and fluffy, and melt in your mouth. They are sweet, earthy and with a hint of vanilla. The filling is made with real taro root paste, which can have hints of coconut.

    More Recipes

    • Pretzel Bites
    • Buns Stuffed with Lentils
    • Stuffed Filipino Potato Cakes
    • Monkey Bread with Cream Cheese
    Three yummy Steamed Taro Buns with parchment papers
    5 from 5 votes
    Print Pin Recipe

    Award Winning Steamed Taro Buns

    These homemade steamed taro buns are soft, fluffy, and packed with sweet taro flavor in every bite. Made with simple ingredients and inspired by classic Asian bakery favorites, this steamed taro buns recipe is perfect for snacks, dessert, or satisfying your taro cravings at home.
    Prep Time1 hour hr
    Cook Time30 minutes mins
    Total Time1 hour hr 30 minutes mins
    Course: Dessert, Snack
    Cuisine: Fusion (American-Filipino/Asian)
    Servings: 8 steamed taro buns
    Calories: 346kcal
    Author: Lainey
    Prevent your screen from going dark

    Ingredients

    Homemade Taro Paste:

    • 1 pound taro peeled and cubed
    • ¾ cup condensed milk
    • 1 tablespoon purple food coloring optional
    • 2 tablespoon vegetable oil
    • ¼ teaspoon salt

    Steamed Bao Buns:

    • 2 cups cake flour or bao flour for extra fluffiness
    • 1 teaspoon baking powder
    • ½ cup warm water
    • 2 tablespoons granulated white sugar
    • 1 tablespoon active dry yeast
    • 2 tablespoons vegetable oil
    • 8 cut-out parchment paper squares

    Instructions

    Make the Taro Paste:

    • In a pot, boil the peeled and cubed taro in water for about twenty minutes or until fork-tender.
    • Drain the water and transfer the cooked taro to a food processor.
    • Add condensed milk, salt, food coloring (optional), and vegetable oil. Blend until smooth and dough-like.
    • Transfer to a bowl and set aside.

    Prepare the Bao Dough:

    • In a small bowl, bloom the yeast by combining warm water, sugar, and yeast. Let sit for fifteen minutes until foamy.
    • In a mixing bowl, whisk together cake flour and baking powder.
    • Pour in the yeast mixture and vegetable oil, then knead for twelve minutes in a stand mixer or fifteen minutes by hand until smooth and elastic.
    • Cover the bao dough with cling film and let rest for twenty minutes.

    Assemble the Buns:

    • Divide the dough into eight equal portions. Flatten each piece using your hands or a rolling pin.
    • Place one to two scoops of taro paste in the center.
    • Pleat the edges to seal the bun, then place it seam-side down on parchment paper.

    Steam the Buns:

    • Place the buns into a steamer with boiling water.
    • Steam for fifteen minutes over high heat, then turn off the heat and let them sit for another five minutes without opening the lid.
    • Once the steam dissipates, remove the lid and serve warm!
    Leave a Comment

    Notes

    1. You may also knead the dough by hand for about 15 minutes or until it becomes smooth and elastic.
    2. For the homemade taro paste, you may optionally remove the food purple food coloring if you want a lighter hue of the taro paste. 
    3. All-purpose flour can be used in this recipe. However, if you can get a hold of bao flour which is a specialized flour for bao buns, then it is preferred as it has low protein and it makes a soft and fluffier bao buns.
    4. Extra taro paste can be stored in the chiller and can be used within 7 days.
    Serving: 1gCalories: 346kcalCarbohydrates: 58gProtein: 7gFat: 10gSaturated Fat: 3gPolyunsaturated Fat: 4gMonounsaturated Fat: 2gTrans Fat: 0.04gCholesterol: 10mgSodium: 171mgPotassium: 503mgFiber: 3gSugar: 19gVitamin A: 120IUVitamin C: 3mgCalcium: 142mgIron: 1mg

    Watch The Recipe Video!

    QR Code
    Did you make this recipe?Share it on instagram or tag @simplybakings or #simplybakings!

    Desserts, Filipino Desserts, New Recipes on the Blog, No Bake Dessert Recipes, Snacks, Ube Recipes, Vegetarian Filipino Recipes

    Addicting Black Sesame Ice Cream

    May 14, 2025 · 5 Comments

    Black Sesame Ice Cream in a white bowl

    Take your taste buds on a journey with Black Sesame Ice Cream, a Japanese-inspired dessert loved for its deep, nutty flavor and striking appearance! Short prep time, and with no need for an ice cream maker or ice cream machine, this whipped cream delight can surely satisfy your cravings!

    If you love homemade ice cream, don't miss my Ice Cream Sandwich Cookies or my Ube Ice Cream!

    Bowl with scoops of Black Sesame ice cream
    [feast_advanced_jump_to]

    What is Black Sesame Ice Cream?

    Black sesame ice cream has its roots in Japanese cuisine, where black sesame (or "kuro goma" in Japanese) is a staple ingredient used in Japanese-style traditional dishes and desserts.

    The use of the black sesame paste in sweet treats dates back centuries, as ground sesame seeds were valued in Asian cultures for their rich flavor and health benefits.

    Ground black sesame seeds were commonly used in making pastes, sauces, and desserts like goma dango (sesame rice balls) and wagashi (traditional Japanese confections).

    While not limited to holidays, this delicious sesame paste ice cream recipe might be featured during Lunar New Year celebrations or other events that highlight Asian-inspired cuisine, as it pairs well with the flavors and textures of traditional treats.

    Additionally, this ice cream mixture's elegant presentation makes it a favorite for formal dinners or special occasions where unique and exotic flavors are appreciated! Read on to know more about this unique ice cream recipe and consider trying it!

    Variations

    • Matcha-Black - add a swirl or whisk of green tea to the whole milk mixture's ice cream base for a complementary earthy flavor and a beautiful green-and-gray visual contrast.
    • Sweet and nutty - add honey or date syrup to the sesame mixture for a naturally sweet and floral flavor that balances the nuttiness of the sesame.
    • Spiced Up - add a spoon of spices like cinnamon, cardamom, or ginger for a warm and aromatic flavor profile. Use spice grinder if needed.
    Delicious scoops of Black Sesame ice cream in a white bowl with mint leaves

    Storage

    • To keep your homemade black sesame ice cream fresh and creamy, transfer it to a freezer-safe container to keep it in good condition.
    • Level the surface of the ice cream with a spatula, then cover it with a layer of plastic wrap or wax paper before sealing the lid. This reduces the forming of ice crystals.
    • For the best flavor and texture, enjoy the ice cream within 2–3 weeks of freezing. While it remains safe to eat longer, the quality may decline.
    • Minimize opening the container to prevent temperature fluctuations that can cause texture changes and super-freeze time.

    Ingredients

    Listed below are all the ingredients you will need:

    • Black sesame seeds
    • Sweetened condensed milk
    • Heavy cream
    • Vanilla extract
    • Salt

    See recipe card for quantities.

    All ingredients for black sesame ice cream recipe in separate white bowls

    Instructions

    In a cold skillet over low heat, add the sesame seeds and toast for about 2 minutes.

    Transfer the toasted sesame seeds to a blender and blend until they form into a rough paste.

    Black sesame seeds roasted in a skillet and blended in a blender

    Pour the condensed milk, heavy cream, vanilla extract, and salt. Blend for about 2 minutes until well-blended.

    Pour the mixture into a container and cover with a cling film. Place in the freezer overnight.

    added condensed milk, heavy cream, vanilla extract, and salt to the blender then poured the mixture into a rectangular container

    Serve and enjoy!

    scoops of black Sesame ice cream garnished with mint leaves and spoon held by a hand

    Hint: For the best flavor, toast the black sesame seeds before grinding them into a paste. Be sure to stir constantly while toasting to avoid burning!

    ⭐ Top Tip

    For an extra smooth and creamy black sesame ice cream, grind the toasted black sesame seeds into a fine paste using a high-powered blender or food processor.

    Strain the paste through a fine-mesh sieve to remove any coarse bits, ensuring a silky texture in your ice cream.

    FAQ

    Where can I find black sesame seeds or paste?

    You can find black sesame seeds or paste at Asian grocery stores, health food stores, or online retailers like Amazon. If you can’t find the paste, grind toasted black sesame seeds in a food processor with a little neutral oil until smooth.

    Can I make this recipe vegan?

    Replace sweetened condensed milk with coconut condensed milk. Replace heavy cream with coconut cream or cashew cream. Ensure your vanilla extract is vegan-friendly.

    Can I use white sesame seeds instead?

    Yes, but the flavor will be milder. Toasting the white sesame seeds can help bring out their nuttiness.

    More Recipes

    If you're as much of a fan of ice cream as I am, here are some other sweet icy treats for you:

    • Biscoff cheesecake ice cream
    • Banana Pudding cheesecake ice cream
    • Pineapple ice cream
    Ice cream garnished with green leaves
    5 from 5 votes
    Print Pin Recipe

    Addicting Black Sesame Ice Cream

    If you're looking for a dessert that’s as indulgent as it is unique, my black sesame ice cream recipe is a must-try!
    Prep Time10 minutes mins
    Freezing Time8 hours hrs
    Total Time8 hours hrs 10 minutes mins
    Course: Dessert
    Cuisine: Japanese
    Servings: 6 servings
    Calories: 589kcal
    Author: Lainey
    Prevent your screen from going dark

    Ingredients

    • ½ cup black sesame seeds
    • 1 ½ cups sweetened condensed milk
    • 2 cups heavy cream
    • 1 teaspoon vanilla extract
    • ¼ teaspoon salt

    Instructions

    Toast the Sesame Seeds:

    • Heat a cold skillet over low heat and add the black sesame seeds.
    • Toast for about 2 minutes, stirring occasionally, until fragrant.

    Blend the Mixture:

    • Transfer the toasted sesame seeds to a blender and blend until a rough paste forms.
    • Add the sweetened condensed milk, heavy cream, vanilla extract, and salt to the blender.
    • Blend for about 2 minutes, or until the mixture is smooth and well combined.

    Freeze the Mixture:

    • Pour the mixture into a container and cover it tightly with cling film.
    • Place the container in the freezer overnight to set.

    Serve:

    • Scoop the ice cream into bowls or cones and enjoy!
    Leave a Comment
    Serving: 1gCalories: 589kcalCarbohydrates: 47gProtein: 11gFat: 42gSaturated Fat: 23gPolyunsaturated Fat: 4gMonounsaturated Fat: 11gCholesterol: 116mgSodium: 217mgPotassium: 419mgFiber: 1gSugar: 44gVitamin A: 1372IUVitamin C: 2mgCalcium: 392mgIron: 2mg

    Watch The Recipe Video!

    QR Code
    Did you make this recipe?Share it on instagram or tag @simplybakings or #simplybakings!

    5 Ingredients or Less, Desserts, Filipino Desserts, Ice Cream, New Recipes on the Blog, No Bake Dessert Recipes

    Vegan Filipino BBQ

    May 7, 2025 · 9 Comments

    Golden-brown Filipino BBQ grilled

    If you love the bold flavors of barbecue but want a plant-based option, this Vegan Filipino BBQ is for you. Cooked to perfection, this dish delivers all the nostalgic flavors of classic Filipino street food, minus the meat!

    Craving more Filipino flavors without meat? Try my Vegan Fried Chicken Tofu for a crunchy, flavorful bite, or my Vegetarian Marinated Bangus for a tangy, savory dish.

    delicious vegan Filipino BBQ served in a white bowl and garnished with cilantro
    [feast_advanced_jump_to]

    What is Vegan Filipino BBQ?

    Vegan Filipino BBQ is a plant-based version of the famous Filipino street food recipe, barbecue skewers, known for their sweet, smoky, and savory taste.

    Instead of pork or chicken, this recipe uses seitan cutlets as a vegan meat substitute. Tofu or mushrooms can also be used for other meat alternatives. These ingredients absorb the flavorful marinade made with savory ingredients like the seasonings, lime juice, or lemon juice. It also includes either regular fruit-sweetened ketchup or low-sugar banana ketchup, which makes a delicious Filipino vegan dish.

    It is best served with steamed rice and is perfect for backyard barbecues, family gatherings, fiestas, potlucks, or as a street food snack!

    History of Vegan Filipino BBQ

    This flavor-packed Filipino barbecue was traditionally made with marinated pork or chicken, grilled on skewers, and often served with a savoury sauce made with a mix of soy sauce and white vinegar or calamansi juice.

    It became a favorite dish for its rich, smoky-sweet glaze and irresistible texture. Today, this vegan Filipino BBQ is a popular alternative for those who avoid meat. It shows how Filipino cuisine can evolve without losing its signature taste.

    Learn more about this healthy dish and add this to your list of vegan Filipino recipes!

    Substitutions

    • Hickory BBQ sauce – Any vegan BBQ sauce or homemade tomato-based BBQ sauce
    • Maple syrup – Agave nectar, honey (if not strictly vegan), or date syrup
    • Sriracha – Hot sauce, chili garlic sauce, or red pepper flakes mixed with vinegar
    delicious vegan Filipino BBQ in a white plate

    Storage

    • Refrigerator: Store leftover BBQ in an airtight container in the fridge for up to 4 days. Then, reheat in a pan, oven, or air fryer for the best texture.
    • Freezing (Uncooked BBQ): If making in advance, freeze marinated but uncooked BBQ in a sealed container or freezer bag for up to 3 months. Thaw in the refrigerator before frying or grilling, whichever you desire.
    • Freezing (Cooked BBQ): Store BBQ in an airtight container for up to 2 months. Reheat in the oven at 350°F for 10-12 minutes or in an air fryer at 375°F for 5-7 minutes.
    • Marinade Storage: Extra BBQ marinade can be kept in a jar in the refrigerator for up to 1 week or frozen in ice cube trays for easy portioning.

    Ingredients

    Listed below are all the ingredients you will need:

    • seitan cutlets
    • oil
    • oat milk
    • all-purpose flour
    • salt
    • ground black pepper
    • smoked paprika
    • garlic powder
    • Italian seasoning
    • brown sugar
    • chili powder
    • Hickory BBQ sauce
    • ketchup
    • maple syrup
    • Sriracha

    See recipe card for quantities.

    All ingredients in separate white bowl

    Instructions

    In a bowl, mix hickory BBQ sauce, banana ketchup, Sriracha, and maple syrup. Microwave for 30 seconds, mix again, and set aside.

    Mixture of different sauces in small bowl

    In a separate bowl, whisk together oat milk, all-purpose flour, salt, and a teaspoon of ground black pepper until smooth.

    A bowl with milk, flour, salt and black pepper

    Blend all dry seasoning ingredients in a blender until finely ground, then transfer to a bowl.

    All dry ingredients mixed in blender

    Dredge each seitan cutlet in the following order: Wet batter → Dry seasoning → Wet batter → Dry seasoning.

    Seitan cutlet coated in batter and seasoning

    Medium heat olive oil in a pan or large cast-iron skillet and fry the cutlets until golden and crispy.

    Pan filled with cooking oil and fried seitan cutlets

    Place fried cutlets in a bowl, add 3 tablespoons of BBQ sauce, and toss until well coated.

    Vegan Filipino BBQ in a mixing bowl of sauce

    Serve hot with steamed garlic turmeric rice or grilled vegetables.

    A plate of Vegan Filipino BBQ garnished with garnished with cilantro leaves

    Garnish with chopped green onion or celery for a more appealing dish. Enjoy!

    FAQ

    What is a vegan substitute for BBQ meat?

    Tofu, tempeh, and mushrooms are all great alternatives to meat for BBQ.

    What vegan items can you grill?

    Think zucchini, bell peppers, and corn in the summer, or heartier options like sweet potatoes and squash in cooler months. Fruits like pineapple, peaches, and watermelon also grill beautifully, adding a caramelized sweetness to your dishes.

    What is the Filipino word for barbecue?

    Inihaw is also commonly referred to as Filipino barbecue or (informally) Pinoy BBQ.

    More Recipes

    Want soup instead? Try some of my favorite soups:

    • Filipino Corn Soup
    • Ginataang Mais
    • Miso Sweet Potato Soup
    Vegan Filipino BBQ served in a white bowl
    5 from 9 votes
    Print Pin Recipe

    Vegan Filipino BBQ

    These sweet, smoky, and tangy Vegan Filipino BBQ are perfectly cooked and best enjoyed with steamed rice and a vinegar dipping sauce!
    Prep Time10 minutes mins
    Cook Time15 minutes mins
    Total Time25 minutes mins
    Course: Main Course
    Cuisine: Filipino
    Servings: 4
    Calories: 419kcal
    Author: Lainey
    Prevent your screen from going dark

    Ingredients

    Meat Alternative:

    • 1 pound seitan cutlets

    Wet Batter:

    • 1 cup oat milk
    • 2 tablespoons all-purpose flour
    • ½ teaspoon salt
    • ¼ teaspoon ground black pepper

    Dry Seasoning:

    • ½ cup all-purpose flour
    • 1 tablespoon salt
    • 1 teaspoon ground black pepper
    • 1 tablespoon smoked paprika
    • 2 tablespoons garlic powder
    • 2 teaspoons Italian seasoning
    • ¼ cup brown sugar
    • 1 tablespoon chili powder

    BBQ Sauce:

    • ½ cup Hickory BBQ sauce
    • ⅔ cup ketchup
    • 1 tablespoon maple syrup
    • 1 tablespoon Sriracha

    Instructions

    Prepare the BBQ Sauce:

    • In a bowl, mix hickory BBQ sauce, ketchup, sriracha, and maple syrup.
    • Microwave for 30 seconds, mix again, and set aside.

    Prepare the Wet Batter:

    • In a separate bowl, whisk together oat milk, all-purpose flour, salt, and black pepper until smooth.

    Prepare the Dry Seasoning:

    • Blend all dry seasoning ingredients in a blender until finely ground, then transfer to a bowl.

    Make the Crispy Seitan Cutlets:

    • Dredge each seitan cutlet in the following order: Wet batter → Dry seasoning → Wet batter → Dry seasoning.
    • Heat oil in a pan and fry the cutlets until golden and crispy.

    Coat with BBQ Sauce:

    • Place fried cutlets in a bowl, add three tablespoons of BBQ sauce, and toss until well coated.
    • Serve hot with steamed rice or grilled vegetables.
    Leave a Comment

    Notes

    The remaining BBQ Sauce can be stored in the chiller and could last up to 1 month.
    Serving: 1gCalories: 419kcalCarbohydrates: 73gProtein: 29gFat: 3gSaturated Fat: 0.2gPolyunsaturated Fat: 0.5gMonounsaturated Fat: 0.2gSodium: 3428mgPotassium: 428mgFiber: 5gSugar: 42gVitamin A: 1889IUVitamin C: 4mgCalcium: 158mgIron: 5mg

    Watch The Recipe Video!

    QR Code
    Did you make this recipe?Share it on instagram or tag @simplybakings or #simplybakings!

    Main Entree, Vegan Filipino Recipes, Vegetarian Filipino Recipes

    Durian Ice Cream

    Apr 30, 2025 · 9 Comments

    delicious durian ice cream servings in a clear glass garnished with peppermint leaves

    This durian ice cream recipe is a must try for adventurous durian fans! It is a perfect way to enjoy the smelliest fruit, and its creamy texture makes the bold taste easier to enjoy!

    Looking for more Filipino ice cream recipes? Try my Ube ice cream, Pineapple ice cream, or Buko Pandan ice cream!

    durian ice cream garnished with peppermint leaves
    [feast_advanced_jump_to]

    What is Durian Ice Cream?

    Durian ice cream isn’t only a Filipino dessert, but it’s very popular in the Philippines, especially in Davao City, where durian is easy to find.

    Thailand and Malaysia also have their versions of this ice cream. Mavens Creamery, an ice cream company, is known for its viral success. They introduced Mavens Durian ice cream to Costco and major East Coast cities, helping more people try its unique flavor.

    Substitutions

    • Durian Extract – Using fresh durian pulp gives a real durian flavor and a smooth, creamy consistency.
    durian ice cream in a glass with peppermint leaves

    Storage

    • Freeze: Store in an airtight container and put in the freezer for up to 2 weeks.
    • To prevent ice crystals, place a layer of plastic wrap directly on top before sealing.

    Ingredients

    Listed below are all the ingredients you will need:

    • durian extract
    • sweetened condensed milk
    • heavy cream
    • salt
    • durian pulp (optional)

    See the recipe card for quantities.

    All ingredients of durian ice cream in separate bowls

    Instructions

    In a blender, combine durian extract (or pre-blended frozen/fresh durian meat), condensed milk, heavy cream, and salt. Blend until smooth and well combined.

    durian ice cream ingredients mixed into creamy texture

    Pour the mixture into an airtight container. Cover tightly with cling film to prevent ice crystals from forming. Then, freeze the mixture for at least 12 hours, preferably overnight, for the best texture.

    durian ice cream in a container wrapped with cling film

    ⭐ Top Tip

    • If using fresh durian for your ice cream recipe, make sure to blend it thoroughly before adding other ingredients.

    FAQ

    Why are durians so expensive?

    Durian is expensive because of high demand and low supply. There's no study on how many people usually buy and why. It depends on their specific needs at that time.

    What is durian ice cream made of?

    Durian ice cream is made of a blend of durian, condensed milk, heavy cream, and salt. Although this durian ice cream is unorthodox, it tastes just as creamy as traditional ice cream and is full of durian flavor.

    Can dogs or cats eat durian ice cream?

    No, it's best to avoid feeding dogs or cats any durian-based desserts intended for human consumption, such as durian ice cream, durian cakes, durian mooncakes, and durian puffs.

    More Recipes

    Into the sweet aroma and creaminess of ice cream? I have more right here:

    • Filipino Mango Ice Cream
    • Lemon Ice Cream
    • Mocha Ice Cream
    • Banana Pudding Ice Cream
    scoops of durian ice cream served in a glass garnished with peppermint leaves
    5 from 9 votes
    Print Pin Recipe

    Durian Ice Cream

    Yummy, creamy, and exotic - make yourself the durian lovers' homemade durian ice cream treat! Enjoy the unique taste of durian in every scoop!
    Prep Time10 minutes mins
    Chill Time12 hours hrs
    Total Time12 hours hrs 10 minutes mins
    Course: Dessert
    Cuisine: Filipino
    Servings: 6 bowls
    Calories: 517kcal
    Author: Lainey
    Prevent your screen from going dark

    Ingredients

    • 1 ½ teaspoons durian extract or 1 cup of chopped fresh/frozen durian meat, blended*
    • 1 ½ cups sweetened condensed milk
    • 2 cups heavy cream
    • ¼ teaspoon salt
    • ½ cup durian pulp (optional, mashed or blended)

    Instructions

    Blend the Ingredients:

    • In a blender, combine durian extract (or blended durian meat), condensed milk, heavy cream, and salt.
    • Blend until smooth and well combined.

    Freeze the Mixture:

    • Pour the blended mixture into an airtight container.
    • Cover tightly with cling film to prevent ice crystals from forming.

    Set Overnight:

    • Freeze the mixture for at least 12 hours, preferably overnight for the best texture.

    Serve & Enjoy:

    • Scoop and serve it plain or garnish it with peppermint leaves, toasted coconut flakes, or crushed nuts for extra crunch.
    Leave a Comment

    Notes

    * If using a cup of chopped frozen/fresh durian meat instead of durian extract, blend it first before adding the remaining ingredients.
    Serving: 1bowlCalories: 517kcalCarbohydrates: 44gProtein: 8gFat: 35gSaturated Fat: 22gPolyunsaturated Fat: 2gMonounsaturated Fat: 9gCholesterol: 116mgSodium: 215mgPotassium: 365mgFiber: 0.05gSugar: 44gVitamin A: 1371IUVitamin C: 3mgCalcium: 270mgIron: 0.2mg

    Watch The Recipe Video!

    QR Code
    Did you make this recipe?Share it on instagram or tag @simplybakings or #simplybakings!

    Storytelling Time!

    The strong smell of durian has been compared to baby diapers, cat poo, and even a dead opossum - yet durian fans know that inside its thorny shell lies a sweet taste worth the surprise!

    Some people say durian is as love-it-or-hate-it as a bully stick for dogs. Others say its rich consistency is like a splash of chocolate, making it a fancy treat.

    One thing’s for sure - durian is an expensive fruit you won’t forget!

    5 Ingredients or Less, Desserts, Ice Cream, No Bake Dessert Recipes

    Ube Latte

    Apr 23, 2025 · 7 Comments

    Ube Latte in a clear glass with frothed milk

    Love creamy lattes and the sweet, nutty flavor of ube? This vibrant Ube Latte blends espresso and Ube for a rich, colorful twist on your coffee routine. Let’s make this trendy ube drink at home!

    More ube-inspired treats? Try my Ube Hopia, Ube Puto, and Ube Champorado.

    A homemade Ube latte drink with foamy swirl and a purple straw
    [feast_advanced_jump_to]

    What is Ube Latte?

    Ube Latte is a creamy, purple-hued coffee drink made with ube (purple yam), espresso, and milk. It combines the nutty, slightly sweet ube flavor with the bold richness of coffee, creating a unique and colorful latte.

    Often made using an espresso machine, this trendy drink is part of the growing love for ube drinks like ube ice cream, cakes, and cookies.

    Substitutions

    • Whole milk (or dairy-free alternative) - Half-and-half (for a richer taste), coconut milk, oat milk, almond milk, or soy milk
    • Brown sugar - Coconut sugar, muscovado sugar, maple syrup, honey, or agave syrup
    • Instant coffee - instant espresso, brewed strong coffee, or decaf coffee for a milder taste
    • Sugar - Honey, agave syrup, stevia, monk fruit sweetener, maple syrup, or sweetened condensed coconut milk for a creamy and rich sweetness
    • Ube extract - Ube halaya (purple yam jam, slightly diluted), or vanilla extract/vanilla syrup for a sweet, subtle alternative (though it won’t replicate the nutty ube taste)
    A tall glass of delicious Ube Latte on table

    Storage

    • Ube milk mixture can be stored in the fridge for up to 2 days – shake before using.
    • Whipped coffee foam (if used) can be refrigerated separately for up to 2 days and re-whisked before serving.
    • Use a blender to mix any separated ingredients for a smooth consistency. Store any extra cold foam in an airtight container and stir before use.

    Ingredients

    Listed below are all the ingredients you will need:

    • ice cubes
    • whole milk (or dairy-free alternative)
    • ube extract
    • brown sugar
    • instant coffee
    • sugar
    • hot water

    See the recipe card for quantities.

    Instructions

    In a bowl, whisk together instant coffee, sugar, and hot water until well combined.

    Coffee mixture in a white bowl with a blender

    Whisk by hand or use a hand mixer until light and fluffy with soft peaks (10-15 minutes if whisking manually). Set aside. In a cocktail shaker or jar, combine brown sugar, milk, and ube extract. Then, shake well until fully combined and frothy.

    Deep ube extract in a small steel cup

    Fill a glass with ice cubes. Then, pour the ube mixture over the ice. Gently top with whipped coffee and swirl before drinking.

    Thick whipped coffee foam on top of glass mug

    Serve and enjoy!

    ⭐ Top Tip

    Make it extra creamy by adding 1 tbsp condensed milk to the ube milk.

    FAQ

    Are Ube lattes healthy?

    Ube is also good for regulating blood pressure, maintaining weight loss, boosting your immune system, is diabetic-friendly, and super beneficial for your eyesight, skin health, and bones.

    What does purple yam latte taste like?

    The ube latte tastes super creamy and has this sweet, nutty vibe from the ube. It's a fun mix of rich milk and bold coffee that makes for a really tasty drink!

    What is the difference between ube and taro lattes?

    Ube lattes are sweet and nutty because of the purple yam, while taro lattes have a more mellow, earthy flavor from taro root. They’re both creamy, but ube pops with that bright purple color, while taro is more of a light lavender shade.

    More Recipes

    Craving more delicious ube recipes? Try these ube-infused treats:

    • Easy Ube Ice Candy
    • Ube Cheese Pandesal
    • Ube Biko
    • Ube Buchi
    • Ube Maja Blanca
    • Ube Pancakes
    espresso swirls on Ube Latte in a tall glass
    5 from 7 votes
    Print Pin Recipe

    Ube Latte

    Make yourself a creamy and vibrant ube latte and savor the sweet and nutty flavors paired with a rich coffee foam topping!
    Prep Time10 minutes mins
    Total Time10 minutes mins
    Course: Drinks
    Cuisine: Filipino
    Servings: 2 servings
    Calories: 212kcal
    Author: Lainey
    Prevent your screen from going dark

    Ingredients

    • 4 ounces ice cubes
    • 12 ounces whole milk or dairy-free alternative
    • 1 tablespoon ube extract
    • 2 tablespoons brown sugar
    • 2 tablespoons instant coffee
    • 2 tablespoons sugar
    • ¼ cup hot water

    Instructions

    Make the Coffee Foam:

    • In a bowl, mix instant coffee, sugar, and hot water.
    • Whisk by hand or use a hand mixer until light and fluffy with soft peaks (10-15 minutes if whisking manually).
    • Set aside.

    Prepare the Ube Milk:

    • In a cocktail shaker or jar, combine brown sugar, milk, and ube extract.
    • Shake well until fully combined and frothy.

    Assemble the Latte:

    • Fill a glass with ice cubes.
    • Pour the ube milk mixture over the ice.
    • Gently top with whipped coffee and swirl before drinking.
    • Serve immediately and enjoy!
    Leave a Comment
    Serving: 1servingCalories: 212kcalCarbohydrates: 35gProtein: 6gFat: 6gSaturated Fat: 3gPolyunsaturated Fat: 0.2gMonounsaturated Fat: 1gCholesterol: 20mgSodium: 74mgPotassium: 448mgSugar: 32gVitamin A: 276IUCalcium: 229mgIron: 0.3mg

    Watch The Recipe Video!

    QR Code
    Did you make this recipe?Share it on instagram or tag @simplybakings or #simplybakings!

    Desserts, Drinks, Filipino Desserts, Ube Recipes

    Agar Agar Drink

    Apr 16, 2025 · 10 Comments

    A tall glass of delicious Agar-Agar Drink

    Treat yourself to a delightful blend of sweet mango, coconut milk, and mango jelly cubes in this Agar Agar Drink, where silky, seaweed-derived jelly meets the tropical taste of fresh fruit.

    If you want more refreshing drinks, try my Buko Panda or my Green Mango Shake.

    agar agar drink in a clear glass on a circular  wooden base
    [feast_advanced_jump_to]

    What is Agar Agar Drink?

    This tropical beverage, Agar-Agar drink, is a jelly-based drink using agar-agar powder, a red algae-derived gelatinous substance, mostly used as a gelling agent and a vegan alternative for gelatin, which is popular in many Asian cuisines.

    In the Philippines, it’s commonly known as gulaman when used in drinks, and these drinks often include sago (tapioca pearls) and a special caramelized sugar syrup called arnibal, which gives it a distinctive sweetness and flavor.

    History of Agar Agar Drink

    Agar-agar was first noted in 17th-century Japan, where a chance freeze-thaw discovery led to its use as a gelling agent called “kanten.” From Japan, it spread to China and other parts of Asia, prized for its ability to set at room temperature.

    Over time, cooks recognized that adding small agar jellies to sweet drinks created a refreshingly chewy texture. It was then introduced through cultural exchange and trade, especially with Chinese merchants. It became a staple in Filipino “samalamig” or iced refreshments, like sago’t gulaman, featuring agar jellies, tapioca pearls, and arnibal.

    Agar Agar drink next to two bowls of mango cubes

    Storage

    • Mango agar agar pudding can be stored in an airtight container in the fridge for up to 3 days.
    • Coconut cream mixture stays fresh in the refrigerator for up to 5 days. Stir before using.
    • Do not freeze agar agar pudding, as it will lose its texture.

     Ingredients

    Listed below are all the ingredients you will need:

    • Coconut milk
    • Sweetened condensed milk
    • All-purpose cream
    • Whole milk
    • Mangoes
    • Water
    • Agar agar powder
    • Mint leaves
    • Ice cubes
    • Extra mango cubes

    See the recipe card for quantities.

    All ingredients of agar agar drink recipe in separate white bowls

    Instructions

    In a blender or food processor, combine whole milk and half of the mango cubes. Then, blend until smooth and set aside.

    Whole milk and mango cubes in a blender

    In a saucepan or large pot over low heat, mix water and agar agar powder from the packet until fully dissolved.

    Water and powder poured into a saucepan

    Pour in the mixture of sweeteners and thickeners, stirring continuously. Bring it to a quick boil, then immediately turn off the heat.

    boiling liquids in the pan over stove

    Next, pour the mixture into a square or rectangular cake pan and let it cool completely until firm. Once set, cut into small cubes and set aside.

    Agar Agar mixture cut into cubes in a cake pan

    In a separate saucepan, combine coconut milk, all-purpose cream, and condensed milk. Bring to a gentle simmer for 3 minutes.

    After that, stir occasionally then turn off the heat and let it cool completely before chilling in the refrigerator.

    A saucepan of blended milk over heat

    Once everything is done, assemble the drink in a highball glass, top off with pandan leaves and enjoy!

    Hint: For a richer mango flavor, use ripe, sweet mangoes like Carabao or Ataulfo.

    FAQ

    Can you drink agar agar?

    Agar agar, when consumed with water, forms a gel in the stomach. It can keep you full and reduce overeating and excess calorie intake. The substance itself does not contain calories and can be added to a weight loss diet.

    What does agar agar taste like?

    As it is derived from plants, not animals, it is suitable for use by vegans as a substitute for gelatin. Without taste, odour, or colour, agar agar can safely be used in desserts and other cooking without altering the taste or smell. It sets more firmly than gelatin and can even set at room temperature.

    Is agar agar good for health?

    Agar is a source of a large amount of dietary fibre, which exhibits multidirectional beneficial effects on health. It improves the function of the digestive system and prevents constipation. Because of its limited digestion, it gives a longer feeling of satiety and prevents rapid fluctuations in blood glucose levels.

    More Recipes

    • Guyabano Smoothie
    • Rice Coffee
    • Green Mango Shake
    • Mango Sago
    Two glasses of Agar Agar Drink with leaf on top
    5 from 10 votes
    Print Pin Recipe

    Agar Agar Drink

    A refreshing and creamy tropical dessert drink made with mango agar agar pudding and sweet coconut cream - perfect for warm days!
    Prep Time10 minutes mins
    Cook Time5 minutes mins
    Total Time15 minutes mins
    Course: Dessert, Drinks
    Cuisine: Asian, Filipino
    Servings: 4 servings
    Calories: 757kcal
    Author: Lainey
    Prevent your screen from going dark

    Ingredients

    For the Coconut Cream:

    • 2 cups coconut milk
    • 1 ¼ cups sweetened condensed milk
    • ½ cup all-purpose cream

    For the Mango Agar Agar Pudding:

    • 1 ¾ cups whole milk
    • 2-3 mangoes deseeded and cubed
    • ½ cup water
    • 1 tablespoon agar-agar powder

    Optional Garnishes:

    • Mint leaves
    • Ice cubes
    • Extra mango cubes

    Instructions

    Prepare the Mango Agar Agar Pudding:

    • In a blender or food processor, combine whole milk and half of the mango cubes. Blend until smooth and set aside.
    • In a saucepan over low heat, mix water and agar-agar powder until fully dissolved.
    • Pour in the blended mango and milk mixture, stirring continuously. Bring to a quick boil, then immediately turn off the heat.
    • Pour the mixture into a square or rectangular cake pan and let it cool completely until firm.
    • Once set, cut into small cubes and set aside.

    Prepare the Coconut Cream:

    • In a separate saucepan, combine coconut milk, all-purpose cream, and condensed milk.
    • Bring to a gentle simmer for 3 minutes, stirring occasionally.
    • Turn off the heat and let it cool completely before chilling in the refrigerator.

    Assemble the Drink:

    • Fill a glass with ice cubes (optional).
    • Add 2-3 tablespoons of mango pudding cubes.
    • Pour chilled coconut cream over the pudding.
    • Garnish with extra mango cubes and mint leaves.
    • Serve immediately and enjoy!
    Leave a Comment
    Serving: 1gCalories: 757kcalCarbohydrates: 77gProtein: 15gFat: 47gSaturated Fat: 36gPolyunsaturated Fat: 1gMonounsaturated Fat: 7gCholesterol: 79mgSodium: 187mgPotassium: 966mgFiber: 2gSugar: 72gVitamin A: 1985IUVitamin C: 41mgCalcium: 455mgIron: 4mg

    Watch The Recipe Video!

    QR Code
    Did you make this recipe?Share it on instagram or tag @simplybakings or #simplybakings!

    Desserts, Drinks, Filipino Desserts, No Bake Dessert Recipes, Snacks, Summer Desserts

    Gochujang Caramel Cookies

    Apr 9, 2025 · 9 Comments

    Stack of Gochujang Caramel Cookies on a white table

    Gochujang Caramel Cookies is a blend of the sweet richness of caramel with the subtle heat of gochujang. These soft and chewy cookies have a playful balance of savory spice and indulgent sweetness in each bite!

    While you're at it, make yourself a batch of Oreo Cheesecake Cookies or my Cinnabon Cookies!

    Stack of three Gochujang Caramel Cookies surrounded by other pieces
    [feast_advanced_jump_to]

    What are Gochujang Caramel Cookies?

    Inspired by a New York Times recipe by Eric Kim, gochujang caramel cookies add a spicy kick to a classic chewy sugar cookie. These cookies combine the sweet, buttery flavor of caramel with the gentle heat and savory depth of gochujang, a Korean fermented chili paste. Though not Filipino, they reflect a global trend of blending sweet and spicy notes in desserts.

    Gochujang’s unique fermented taste - mildly sweet, pleasantly spicy - enhances the cookie’s flavor, resulting in a modern fusion treat loved for its bold, balanced profile. Learn more about this recipe and try making this for a unique cookie treat!

    Substitutions

    • Dark Brown Sugar — Light brown sugar, granulated sugar, sugar mixed with molasses, or coconut sugar, all replicate the sweetness and flavor with subtle variations
    • Gochujang — Swap in chili garlic paste with added sugar, miso with chili and sugar, or harissa for a slightly different spicy-sweet taste
    • Ground Cinnamon — Try pumpkin pie spice, apple pie spice, or a pinch of nutmeg or cardamom for a similar warm flavor
    • Salt - coarse kosher salt
    • Brown Butter — Regular melted butter lacks the nutty depth, but ghee can offer a similarly toasty flavor
    • Lemon Juice — White vinegar, apple cider vinegar, or other citrus juices match the acidity if lemon isn’t available
    Gochujang Caramel Cookies cooling on a parchment paper

    Storage

    • Store in an airtight container at room temperature for up to 5 days.
    • Freeze cookie dough balls before baking for up to 3 months - bake straight from frozen, adding an extra 2 minutes of baking time.

     Ingredients

    Listed below are all the ingredients you will need:

    • dark brown sugar
    • gochujang
    • oil
    • all-purpose flour
    • baking powder
    • salt
    • baking soda
    • ground cinnamon
    • brown butter
    • lemon juice
    • large egg

    See recipe card for quantities.

    All ingredients of Gochujang Caramel Cookies recipe in separate white bowls

    Instructions

    In a small bowl, mix gochujang, dark brown sugar, and oil using a spoon or spatula until well combined. Set aside.

    Gochujang, sugar and oil mixed in small bowl

    In a large bowl, whisk together flour, baking soda, baking powder, salt, and a half teaspoon ground cinnamon.

    Dry ingredients whisked in a large mixing bowl

    In a stand mixer, beat the brown butter and dark brown sugar until fully incorporated.

    Then, add the egg and lemon juice and continue mixing for about 30 seconds.

    Stand mixer with butter and other ingredients

    Gradually fold in the dry ingredients until just combined - do not overmix.

    Then, gently mix in the sweet gochujang mixture, stirring for about 10 seconds to create a marbled effect.

    Dry ingredients and paste mixed together

    Portion the dough onto a baking sheet with parchment paper, large sheet pans, or silicone mats using an ice cream scoop.

    After that, chill the dough in the refrigerator for 15 minutes to help develop flavor and texture. Then preheat the oven to 350°F (175°C).

    Scoops of Gochujang Caramel Cookie dough arranged on baking pan

    Bake for 12 minutes, or until the edges are golden brown.

    Gochujang Caramel Cookies on parchment paper fresh from oven

    Remove from the oven and let cool completely before serving.

    Six Gochujang Caramel Cookies on top of each other like a tower

    Enjoy these delicious NYT-inspired gochujang caramel cookies!

    Hint: For a chewier cookie, chill the dough for at least 30 minutes before baking.

    ⭐ Top Tip

    • Adjust the gochujang amount for more or less spice. For extra caramelization, sprinkle a little sea salt on top before baking.

    FAQ

    Is all gochujang vegan?

    Most gochujang mixes are vegan. If you are buying the paste, check the ingredient list to make sure, but generally speaking the paste is vegan-friendly. Where can I buy gochujang? Gochujang has become more popular worldwide as it has begun being sold in big global chain supermarkets.

    What is gochujang paste made of?

    We've got you covered. What is it? Gochujang, a fundamental ingredient in Korean cooking, is a thick and spicy-sweet crimson paste made from red chile pepper flakes, glutinous rice (also known as sticky rice), fermented soybeans, and salt.

    Is Trader Joe's gochujang vegan?

    Yes! We believe this product is vegan as there are no animal or animal-derived ingredients listed on the label.

    More Recipes

    Want some drinks to go along with it? Here are some of my favorites:

    • Easy Buko Pandan
    • Mais Con Yelo
    • Mango Sago
    • Sweet Potato Juice
    a stack of gochujang caramel cookies on a white surface
    5 from 8 votes
    Print Pin Recipe

    Gochujang Caramel Cookies

    Sweet, spicy, and deeply flavorful, these Gochujang Caramel Cookies combine the rich, nutty taste of brown butter with unique heat and sweetness!
    Prep Time10 minutes mins
    Cook Time12 minutes mins
    Chilling Time15 minutes mins
    Total Time37 minutes mins
    Course: Cookies, Snack
    Cuisine: Fusion (Korean-American)
    Servings: 12 -16 cookies
    Calories: 222kcal
    Author: Lainey
    Prevent your screen from going dark

    Ingredients

    Gochujang Paste:

    • 1 tablespoon dark brown sugar
    • 2 teaspoons gochujang
    • 1 tablespoon oil

    Cookie Dough:

    • 2 cups all-purpose flour
    • 1 teaspoon baking powder
    • ½ teaspoon salt
    • ¾ teaspoon baking soda
    • ½ teaspoons ground cinnamon
    • ⅔ cup brown butter melted, slightly cooked over medium-low heat, then chilled
    • 1 teaspoon lemon juice
    • 1 piece large egg room temperature
    • ½ cup packed dark brown sugar

    Instructions

    Prepare the Gochujang Paste:

    • In a small bowl, mix gochujang, dark brown sugar, and oil until well combined. Set aside.

    Make the Cookie Dough:

    • In a large mixing bowl, whisk together flour, baking soda, baking powder, salt, and cinnamon.
    • In a stand mixer, beat the brown butter and dark brown sugar until fully incorporated.
    • Add the egg and lemon juice and continue mixing for about 30 seconds.
    • Gradually fold in the dry ingredients until just combined - do not overmix.
    • Gently mix in the sweet gochujang paste, stirring for about 10 seconds to create a marbled effect.

    Shape & Bake:

    • Using an ice cream scoop, portion the dough onto a parchment-lined baking sheet.
    • Chill the dough in the refrigerator for 15 minutes to help develop flavor and texture.
    • Preheat the oven to 350°F (175°C).
    • Bake for 12 minutes, or until the edges are golden brown.
    • Remove from the oven and let cool completely before serving.
    Leave a Comment
    Serving: 1gCalories: 222kcalCarbohydrates: 26gProtein: 3gFat: 12gSaturated Fat: 7gPolyunsaturated Fat: 1gMonounsaturated Fat: 4gTrans Fat: 0.4gCholesterol: 41mgSodium: 290mgPotassium: 48mgFiber: 1gSugar: 10gVitamin A: 337IUVitamin C: 0.3mgCalcium: 37mgIron: 1mg

    Watch The Recipe Video!

    QR Code
    Did you make this recipe?Share it on instagram or tag @simplybakings or #simplybakings!

    Cookies, Desserts, Snacks

    Lychee Smoothie Bowl

    Apr 2, 2025 · 15 Comments

    A bowl of delicious Lychee Smoothie next to a cup

    With a total time of just a few minutes and simple ingredients, make yourself a Lychee Smoothie Bowl, the magical combination of sweetness and earthy notes from matcha. It's a cool, refreshing, and flavorful way to start the day!

    Looking to make more smoothie recipes, try my Pink Pitaya Smoothie or my Pineapple Banana Smoothie Bowl.

    Almond milk poured over smoothie bowl
    [feast_advanced_jump_to]

    What is a Lychee Smoothie Bowl?

    Lychee Smoothie Bowl is a creamy, refreshing blend of tropical fruits, oats, and plant-based milk, served with fruit toppings. While not a traditional Filipino dish, it features lychee, a fruit commonly used in Filipino desserts.

    A unique ingredient in this recipe is matcha powder, which adds an earthy contrast to the sweetness of the fruits. Though matcha is not traditionally Filipino, it is becoming more popular in modern Filipino desserts and drinks.

    When Is This Dish Typically Enjoyed?

    This Lychee juice is typically enjoyed as a refreshing breakfast, snack, or light meal, especially during hot weather. It’s perfect for summer when tropical fruits like lychee, watermelon, and cantaloupe are in season.

    While this dish is not tied to any Filipino holiday, it fits well with warm-weather celebrations such as beach outings, family picnics, and summer gatherings. It can also be a great option for those observing a healthy diet after festive feasts like Christmas, New Year, or fiestas when lighter, fruit-based meals are preferred.

    Health Benefits of Lychee

    • Rich in Vitamin C – Supports a strong immune system and helps with collagen production for healthy skin.
    • Hydrating and Refreshing – Contains high water content, keeping you hydrated, especially in hot weather.
    • Good for Digestion – Provides dietary fiber, which aids digestion and prevents constipation.

    Substitutions

    • Old-Fashioned Rolled Oats - Quick oats (for a smoother texture) or chia seeds (for extra fiber and omega-3s)
    • Almond Milk - Coconut milk (for a richer, tropical flavor) or soy milk (for a neutral, protein-rich option)
    • Matcha Powder - Spirulina powder (for a superfood boost) or moringa powder (for an earthy, nutrient-dense alternative)
    • Maple Syrup - Agave syrup (for a light, neutral sweetness) or coconut nectar (for a caramel-like depth)
    delicious lychee smoothie bowl topped with chopped fruits

    Variations

    • Tropical – Features coconut milk, pineapple, and passion fruit for a refreshing tropical twist.
    • Berry – Combines mixed berries, granola, and vanilla for a sweet and tangy flavor.
    • Green Superfood – Includes spinach, matcha, and avocado for a nutrient-packed, creamy bowl.

    Storage

    • Best served fresh!

     Ingredients

    Listed below are all the ingredients you will need:

    • frozen banana
    • old-fashioned rolled oats
    • almond milk
    • frozen cantaloupe
    • canned lychee
    • matcha powder
    • frozen blueberries
    • frozen watermelon
    • lychee
    • maple syrup

    See the recipe card for quantities.

    All ingredients in separate white bowls

    Instructions

    In a bowl, combine rolled oats and almond milk. Cover and let it sit in the fridge overnight for a creamier texture.

    Rolled oats mixed into almond milk in a bowl

    In a food processor or blender, combine the soaked oats-almond milk mixture, frozen banana, cantaloupe, lychee, and matcha powder. Blend until smooth and creamy, like ice cream.

    Frozen dices of fruit in a food processor

    Divide the smoothie mixture into two bowls.

    Two small bowls of the Lychee smoothie

    Top each bowl with frozen blueberries, frozen watermelon, and chopped lychee. Drizzle with maple syrup and serve immediately!

    Creamy green smoothie bowl with matcha, oats, and banana

    Enjoy a healthy and delicious smoothie bowl!

    Hint: Adjust sweetness by adding more maple syrup or a drizzle of honey.

    ⭐ Top Tip

    For a creamier texture, use frozen almond milk cubes instead of liquid almond milk, and for added crunch, sprinkle granola, nuts, or chia seeds on top before serving.

    FAQ

    How healthy is a smoothie bowl?

    Smoothie bowls are every bit as healthy as regular smoothies. They're loaded with fruit, and as long as you keep the toppings healthy, too, they're maybe even more healthy than old-fashioned, through-a-straw smoothies because they're delivering even more fiber and good fat and protein.

    Do smoothie bowls have too much sugar?

    Adding the natural sugars of the fruit toppings, according to the website, people can be “dangerously close to consuming anywhere from 21-62 grams of sugar per serving and approximately 1,000 calories per acai bowl.”

    Are smoothie bowls a good meal replacement?

    Smoothies and bowls that provide a balanced nutrient profile ARE a healthy choice. They will keep you fuller for longer, provide you with a variety of vitamins and minerals to nourish your cells, and maintain steady blood sugar levels to keep you functioning at your very best!

    More Recipes

    • Pineapple Banana Smoothie Bowl
    • Brownie Cupcake Bowl
    • Filipino Taco Bowl
    lychee smoothie bowl topped with blueberries, lychee and watermelon slices, then drizzled with maple syrup
    5 from 14 votes
    Print Pin Recipe

    Lychee Smoothie Bowl

    This Lychee Smoothie Bowl is a refreshing and creamy tropical treat packed with nutritious fruits, matcha, and rolled oats. It's perfect for a quick breakfast or a healthy snack!
    Prep Time10 minutes mins
    Cook Time0 minutes mins
    Total Time10 minutes mins
    Course: Breakfast, Snack
    Cuisine: Asian
    Servings: 2 servings
    Calories: 373kcal
    Author: Lainey
    Prevent your screen from going dark

    Ingredients

    For the Smoothie:

    • 1 large frozen banana
    • ½ cup old-fashioned rolled oats
    • ⅔ cup almond milk
    • ½ cup frozen cantaloupe
    • ¼ cup canned lychee drained
    • 1 tablespoon matcha powder

    For the Toppings:

    • ½ cup frozen blueberries
    • ½ cup frozen watermelon
    • 1 cup lychee chopped
    • 3 tablespoons maple syrup

    Instructions

    • Prepare the Oats (Night Before): In a bowl, combine rolled oats and almond milk. Cover and let it sit in the fridge overnight for a creamier texture.
    • Make the Smoothie: In a food processor or blender, combine the soaked oats-almond milk mixture, frozen banana, cantaloupe, lychee, and matcha powder. Blend until smooth and creamy, like ice cream.
    • Assemble the Smoothie Bowl: Divide the smoothie mixture into two bowls.
    • Add Toppings: Top each bowl with frozen blueberries, frozen watermelon, and chopped lychee.
    • Drizzle with maple syrup and serve immediately!
    Leave a Comment
    Serving: 1servingCalories: 373kcalCarbohydrates: 80gProtein: 9gFat: 3gSaturated Fat: 0.4gPolyunsaturated Fat: 1gMonounsaturated Fat: 1gSodium: 127mgPotassium: 699mgFiber: 7gSugar: 54gVitamin A: 2002IUVitamin C: 105mgCalcium: 161mgIron: 3mg

    Watch The Recipe Video!

    QR Code
    Did you make this recipe?Share it on instagram or tag @simplybakings or #simplybakings!

    Breakfast & Brunch, Thanksgiving Brunch

    Spicy Basil Noodles

    Mar 26, 2025 · 8 Comments

    Glossy rice noodles filled with basil

    These Spicy Basil Noodles are packed with tender rice noodles, fragrant basil, and a deliciously spicy, savory sauce. Tossed with crispy tofu or your favorite protein, this quick stir-fry is perfect for a satisfying weeknight dinner.

    Sweet Potato Noodles, Stir-Fried Noodles, and Ginger Noodle Soup are also great noodle recipes!

    A plate of spicy basil noodles with fresh herbs
    [feast_advanced_jump_to]

    What is Spicy Basil Noodles?

    Spicy Basil Noodles is a bold and flavorful stir-fried dish inspired by Thai Pad See Ew, but with a Filipino twist. Traditionally, Pad See Ew is a savory Thai noodle dish made with wide rice noodles, dark soy sauce, and stir-fried protein. We took inspiration from this classic and infused it with Filipino ingredients and flavors, creating a unique dish that brings together the best of both cuisines.

    Like Filipino Pancit Canton, this dish is stir-fried over high heat, but it leans toward a spicier and more aromatic profile, thanks to Thai basil, chili, and garlic. The addition of Filipino seasonings and local ingredients enhances the umami depth while keeping the dish vibrant and well-balanced.

    Health Benefits of Basil

    • Rich in nutrients – Contains vitamin K, vitamin A, and manganese, supporting bone health, vision, and metabolism.
    • Powerful antioxidants – Helps protect cells from damage and support overall immunity.
    • Antibacterial effects – Fights harmful bacteria and supports a healthy immune system.

    Substitutions

    • Sriracha - Sambal oelek (for a chunkier texture), chili garlic sauce, or red pepper flakes with a dash of vinegar.
    • Vegan oyster mushroom sauce - Hoisin sauce (slightly sweeter), soy sauce mixed with mushroom broth, or a blend of miso paste and tamari.
    • Vegan fish sauce - Soy sauce mixed with lime juice, seaweed-infused water, or coconut aminos with a splash of vinegar.
    A bowl of noodles and veggies on a placemat

    Storage

    • Refrigerator: Store in an airtight container in the refrigerator for up to 3 days. Reheat in a pan over medium heat with a splash of water to loosen the sauce.
    • Freezer: Not recommended, as the noodles can become mushy when thawed. If necessary, freeze the sauce separately and cook fresh noodles when ready to serve.
    • Make-Ahead Tip: Cook the sauce and store it separately in the refrigerator for up to 1 week. Cook the noodles fresh and toss them with the reheated sauce for the best texture.
    • Avoid Sogginess: If meal prepping, store cooked noodles and sauce separately. Combine just before eating to keep the noodles from absorbing too much liquid.

     Ingredients

    Listed below are all the ingredients you will need:

    • soy sauce
    • sriracha
    • vegan oyster mushroom sauce
    • granulated white sugar or brown sugar
    • vegan fish sauce
    • water
    • ground cumin
    • ground coriander seeds
    • oil
    • garlic
    • extra-firm tofu
    • dry vermicelli noodles
    • thai basil or holy basil

    See the recipe card for quantities.

    All ingredients in separate white bowls

    Instructions

    Place the vermicelli noodles in a heat-proof bowl and pour boiling water over them. Let them soak for 10 minutes, then drain and set aside.

    Vermicelli noodles soaking in a steel bowl

    In a bowl, whisk together all sauce ingredients: soy sauce, Sriracha, vegan oyster sauce, sugar, vegan fish sauce, and water. Set aside now dark soy sauce.

    A mixture of sauces in a small bowl

    In a small bowl, mix the ground cumin and ground coriander seeds. Set aside.

    Earthy spices prepared for seasoning

    Heat oil in a wok or large pan over medium-high heat. Then, add the crumbled tofu and fry until slightly browned.

    Stir in the minced cloves garlic and sauté for another minute.

    Crumbled tofu frying in an oily pan

    Next, add the drained vermicelli noodles. Then, pour in the prepared sauce and sprinkle the cumin-coriander mixture.

    Stir-fry on high-heated large skillet for 2 minutes, ensuring everything is well coated.

    Noodles and spices added to the wok

    Toss in the fresh Thai basil leaves and mix well. Let it wilt slightly before turning off the heat.

    Fresh basil tossed into noodles in the pan

    Transfer to a serving plate and enjoy immediately!

    Hint: Reduce Sriracha if you prefer a milder dish, or add more for extra heat.

    ⭐ Top Tip

    Overcooked noodles get mushy when stir-fried. Rinse them with cold water after boiling to stop the cooking.

    an grocery stores.

    FAQ

    What is the spicy noodle called?

    The recipe is also called "Drunken Noodles" or "Pad Kee Mao" in Thai.

    What makes drunken noodles drunken?

    One explanation is that because the dish is so spicy, you would have to drink a lot to handle the spice. Another is that the extreme spice of the noodles is the only thing strong enough for inebriated people to taste.

    What does Pad Kee Mao taste like?

    The Thai dish also known as pad kee mao, consists of wide rice noodles, an array of vegetables, meat (or plant-based alternatives), soy sauce, fish sauce, garlic, and chili peppers. This combination of ingredients and flavors is a like party in your mouth. It's spicy, sweet, salty, and has pops of umami.

    More Recipes

    Craving soup instead? Here's some:

    • Misua Soup
    • Cabbage Soup
    • Macaroni Soup
    • Lemongrass Soup
    • Chicken Rice Soup

    Spicy Basil Noodles in a medium-sized bowl
    5 from 8 votes
    Print Pin Recipe

    Spicy Basil Noodles

    Spicy Basil Noodles is a flavorful stir-fry with rice noodles, Thai basil, chili, and a savory soy-based sauce, tossed with crispy tofu or your choice of protein.
    Prep Time10 minutes mins
    Cook Time15 minutes mins
    Total Time25 minutes mins
    Course: Main Course, Noodle Dish
    Cuisine: Asian, Thai
    Servings: 4 servings
    Calories: 138kcal
    Author: Lainey
    Prevent your screen from going dark

    Ingredients

    For the Sauce:

    • 1½ tablespoons soy sauce
    • 3 tablespoons Sriracha
    • 3 tablespoons vegan oyster mushroom sauce
    • 2 tablespoons granulated white sugar
    • 1½ tablespoons vegan fish sauce
    • ¼ cup water

    For the Seasoning:

    • 1 teaspoon ground cumin
    • 1 teaspoon ground coriander seeds

    For the Stir-fry:

    • 2 tablespoons oil
    • 2 tablespoons minced garlic
    • 1 pack 8 oz / 224g extra-firm tofu, crumbled
    • 3 bundles 5 oz dry vermicelli noodles
    • 1 cup basil or holy basil

    Instructions

    Prepare the Noodles:

    • Place the vermicelli noodles in a heat-proof bowl and pour boiling water over them.
    • Let them soak for 10 minutes, then drain and set aside.

    Make the Sauce:

    • In a bowl, whisk together the soy sauce, Sriracha, vegan oyster mushroom sauce, sugar, vegan fish sauce, and water. Set aside.

    Prepare the Seasoning:

    • In a small bowl, mix the ground cumin and ground coriander seeds. Set aside.

    Cook the Tofu:

    • Heat oil in a wok or large pan over medium-high heat.
    • Add the crumbled tofu and fry until slightly browned.
    • Stir in the minced garlic and sauté for another minute.

    Stir-fry the Noodles:

    • Add the drained vermicelli noodles to the wok.
    • Pour in the prepared sauce and sprinkle the cumin-coriander mixture over the noodles.
    • Stir-fry on high heat for 2 minutes, ensuring everything is well coated.

    Add the Basil:

    • Toss in the fresh basil and mix well. Let it wilt slightly before turning off the heat.

    Serve:

    • Transfer to a serving plate and enjoy immediately.
    Leave a Comment
    Serving: 1servingCalories: 138kcalCarbohydrates: 16gProtein: 3gFat: 7gSaturated Fat: 1gPolyunsaturated Fat: 2gMonounsaturated Fat: 5gTrans Fat: 0.03gSodium: 1377mgPotassium: 127mgFiber: 1gSugar: 7gVitamin A: 340IUVitamin C: 10mgCalcium: 38mgIron: 1mg

    Watch The Recipe Video!

    QR Code
    Did you make this recipe?Share it on instagram or tag @simplybakings or #simplybakings!

    Main Entree, Rice, Noodles, Potatoes, Vegan Filipino Recipes, Vegetarian Filipino Recipes

    Ube Bibingka

    Mar 19, 2025 · 8 Comments

    Delicious piece of Ube Bibingka on a plate

    Ube Bibingka is a soft and fluffy Filipino rice cake with a rich ube flavor and vibrant purple color. Inspired by traditional bibingka commonly served during Christmas in the Philippines, this homemade version has a lightly sweet taste and moist texture that pairs perfectly with coffee or tea.

    Looking for more Ube desserts? Try my Ube Cassava Cake or my Ube Maja Blanca.

    A few Ube Bibingkas beside a plate
    [feast_advanced_jump_to]

    What is Ube Bibingka?

    Ube Bibingka is a Filipino rice cake made with ube (purple yam), coconut milk, and glutinous rice flour. It’s a popular dessert during Christmas in the Philippines, often enjoyed after Simbang Gabi (night masses) alongside classic bibingka and puto bumbong.

    This warm, chewy rice cake has a naturally sweet, nutty flavor from ube and is often topped with butter, cheese, or coconut. Its vibrant purple color and soft texture make it an irresistible treat for any occasion!

    Why is Ube Bibingka So Popular?

    Filipino bibingka recipes have been around since the Spanish colonial era, traditionally baked in banana leaves with charcoal heat. Over time, Filipinos added ube, a beloved ingredient known for its creamy texture and earthy sweetness, creating this unique variation.

    Reasons to Love Ube Bibingka

    ✔️ Perfect for Christmas and special occasions
    ✔️ Naturally gluten-free (made with rice flour)
    ✔️ Soft, chewy, and bursting with ube flavor
    ✔️ Easy to make at home

    Substitutions

    • Rice Flour - Use glutinous rice flour for a chewier texture or all-purpose flour for a cake-like consistency.
    • Ube Flavoring - Use ½ cup mashed fresh ube for a natural taste or 1 tbsp ube powder + 1 tbsp water as a substitute.
    • Coconut Cream - Full-fat coconut milk works well but may be slightly thinner, while heavy cream adds richness.
    • Evaporated Milk - Fresh milk gives a similar taste, while almond milk is a dairy-free alternative.
    • Easymelt Cheese - Quick melt cheese is the closest substitute, but cheddar adds a sharper flavor, and mozzarella makes it gooier.
    Creamy Bibingka wrapped in banana leaves

    Storage

    • Refrigeration: Store Ube Bibingka in an airtight container in the refrigerator for up to 3 days. Reheat in the oven at 300°F (150°C) for 5-10 minutes or microwave for 20-30 seconds before serving.
    • Freezing: Ube Bibingka freezes well for up to 2 months. Wrap individual slices in plastic wrap, place them in an airtight container, and thaw them in the fridge before reheating.
    • Wet vs. Dry Ingredients: If using toppings like salted eggs, butter, or cheese, store them separately and add them after reheating for better texture.
    • Banana Leaves Consideration: If lined with banana leaves, they may become brittle after freezing - consider removing them before storing.

     Ingredients

    Listed below are all the ingredients you will need:

    • rice flour
    • salt
    • baking powder
    • granulated white sugar
    • unsalted butter
    • ube flavoring
    • coconut cream
    • evaporated milk
    • eggs
    • salted eggs
    • easymelt cheese
    • banana leaves
    • margarine or extra butter (for brushing)

    See the recipe card for quantities.

    All ingredients in separate white bowls

    Instructions

    Prepare the bibingka mold (3 oz) by adding cut-out banana leaves. Set aside for later use. Preheat the oven to 350 degrees Fahrenheit.

    Banana leaves arranged in a baking tray

    Meanwhile, whisk together rice flour, salt, and baking powder in a mixing bowl; set aside.

    Dry ingredients whisked together in a mixing bowl

    In another large mixing bowl, blend together unsalted butter and white sugar until pale in color for 2 minutes using the paddle attachment of the blender.

    Butter and sugar added and mixed in a bowl

    Then add the wet ingredients (ube flavoring, coconut cream, evaporated milk, and eggs), and mix well.

    Wet ingredients added to the electric mixer

    Add the dry ingredients and make sure no lumps are visible.

    All wet and dry ingredients mixed together

    Pour the ube bibingka batter over the prepared molds and place them on a prepared pan.

    Raw and baked Bibingka in a baking tray

    Add the slices of salted egg on each cup then bake in the preheated oven for 10 minutes at 350 degrees Fahrenheit.

    Easymelt Cheese put on top of each bibingka

    Remove from the oven and top with grated Easymelt cheese. The place it back in the oven and let it bake for another 5 minutes.

    Ube Bibingka freshly taken out from the oven

    Check using a toothpick for doneness. Once done, remove it from the oven and brush it with margarine.

    Baked Ube bibingka in a tray being cooled down

    Let it cool completely before serving.

    A couple of Ube Bibingkas prepared for serving

    Hint: Want a perfectly golden top? Brush a little coconut milk over the Bibingka before the final few minutes of baking - it adds a beautiful sheen and subtle coconut aroma!

    ⭐ Top Tip

    Visible white spots can be seen, this is okay since we are using coconut cream. Coconut cream and butter don’t mix well, especially in humid areas.

    For extra moisture and richness, use freshly grated ube instead of ube powder or extract. It gives the bibingka a more natural sweetness and a deep, earthy flavor!

    FAQ

    Why do Filipinos love bibingka?

    In Filipino culture, bibingka is a beloved and versatile treat. It's more than just a dessert; it's a symbol of togetherness and celebration. It's frequently enjoyed for breakfast, as a delicious dessert after a hearty meal, or simply as a snack.

    What does bibingka taste like?

    What does Bibingka taste like? Bibingka tastes like sweet rice cakes that have a hint of coconut milk and pairs well with various toppings like salted egg. They're known for their soft and slightly chewy texture.

    Why is bibingka famous in the Philippines?

    In the 16th century, Spanish colonisers introduced the Philippines to wheat flour, eggs, and milk. These ingredients were quickly incorporated into the bibingka recipe, making the cake more moist and flavorful. Bibingka became a popular snack or dessert in the Philippines during the Spanish colonial period.

    More Recipes

    I love cakes, too! Here are some of my favorites:

    • Chiffon Cake
    • Cassava Cake
    • Magic Cake
    • Pretzel Cake
    • Banana Chocolate Pound Cake
    A bunch of Ube Bibingka on a white plate
    5 from 8 votes
    Print Pin Recipe

    Ube Bibingka

    This Filipino-style Ube Bibingka is soft, fluffy, and packed with ube flavor, perfect for holiday gatherings or as a sweet snack!
    Prep Time15 minutes mins
    Cook Time25 minutes mins
    Total Time40 minutes mins
    Course: Dessert, Snack
    Cuisine: Filipino
    Servings: 12 -16 bibingka
    Calories: 318kcal
    Author: Lainey
    Prevent your screen from going dark

    Ingredients

    Dry Ingredients:

    • 1½ cups rice flour
    • ¼ teaspoon salt
    • 2 teaspoons baking powder

    Wet Ingredients:

    • 1 cup granulated white sugar
    • ½ cup unsalted butter softened
    • 2 tablespoons ube flavoring
    • ⅓ cup coconut cream
    • ⅓ cup evaporated milk
    • 4 eggs

    Toppings:

    • 3 salted eggs peeled and cut into 4 slices each
    • 1 cup easymelt cheese grated
    • Margarine or extra butter for brushing

    For Baking:

    • Banana leaves cut into round liners

    Instructions

    Prepare the Molds:

    • Line bibingka molds (3 oz size) with banana leaves and set aside.
    • Preheat the oven to 350°F (175°C).

    Mix the Dry Ingredients:

    • In a mixing bowl, whisk together the rice flour, salt, and baking powder. Set aside.

    Cream the Butter and Sugar:

    • In another mixing bowl, beat the unsalted butter and white sugar using a paddle attachment until pale and fluffy (about 2 minutes).

    Combine the Wet Ingredients:

    • Add the ube flavoring, coconut cream, evaporated milk, and eggs to the butter mixture. Mix well.

    Incorporate the Dry Ingredients:

    • Gradually add the dry ingredients to the wet mixture, stirring until smooth and no lumps remain.

    Fill the Molds:

    • Pour the batter into the prepared bibingka molds, filling each about ¾ full.

    Bake the Bibingka:

    • Place a slice of salted egg on top of each bibingka.
    • Bake in the preheated oven for 10 minutes at 350°F (175°C).

    Add the Cheese:

    • Remove the bibingka from the oven, top with grated easymelt cheese, and return to the oven.
    • Bake for another 5 minutes or until the cheese melts.

    Finish and Serve:

    • Remove from the oven and brush with margarine while still warm.
    • Let it cool completely before serving.
    Leave a Comment
    Serving: 1servingCalories: 318kcalCarbohydrates: 35gProtein: 7gFat: 16gSaturated Fat: 10gPolyunsaturated Fat: 1gMonounsaturated Fat: 4gTrans Fat: 0.3gCholesterol: 127mgSodium: 226mgPotassium: 107mgFiber: 1gSugar: 18gVitamin A: 486IUVitamin C: 0.3mgCalcium: 144mgIron: 1mg

    Watch The Recipe Video!

    QR Code
    Did you make this recipe?Share it on instagram or tag @simplybakings or #simplybakings!

    Desserts, Filipino Desserts, Ube Recipes, Vegetarian Filipino Recipes

    Sesame Tofu Salad

    Mar 12, 2025 · 14 Comments

    A white bowl of delicious Sesame Tofu Salad

    Light, crispy, and full of flavor, this Sesame Tofu Salad is the perfect balance of crunch and creaminess. Golden tofu bites, fresh veggies, and a rich, nutty sesame dressing come together for a refreshing dish that’s a must-try for tofu lovers!

    Looking for more salads? Try the fan favorite Filipino Talbos ng Kamote Salad recipe.

    Crispy tofu and fresh greens with sesame dressing
    [feast_advanced_jump_to]

    What is Sesame Tofu Salad?

    Sesame Tofu Salad is a light and flavorful dish made with crispy tofu, fresh vegetables, and a nutty sesame dressing.

    In this Filipino-inspired version, we infuse the tofu with a savory-sweet marinade featuring lemongrass, garlic, and calamansi juice, giving it a distinctively tropical and citrusy touch. The addition of mango and annatto oil further highlights the vibrant, bold flavors of Filipino cooking, while keeping the light, fresh essence of a sesame tofu salad.

    Health Benefits of Sesame Dressing

    • high in heart-healthy unsaturated fats, which help reduce bad cholesterol and support overall heart health.
    • contain sesamin and sesamol, powerful antioxidants that help fight inflammation and protect cells from damage.
    • great source of calcium, magnesium, and phosphorus, which help maintain strong bones.
    • help strengthen the immune system and improve skin health.
    • Vinegar in the dressing promotes gut health and digestion, while sesame oil may help lubricate the intestines and prevent constipation.

    Substitutions

    • Extra-firm tofu - Tempeh (for a firmer texture) or chickpea tofu (soy-free option)
    • Lemongrass stalks - Lemongrass paste (1 tsp per stalk) or zest of 1 lime for a citrusy aroma
    • Annatto oil - Paprika-infused oil or turmeric oil (for color and mild flavor)
    • Soy sauce - Tamari (gluten-free) or liquid aminos (lower sodium)
    • Brown sugar - Maple syrup for subtle sweetness or agave nectar for a different sweetness
    A vibrant bowl of salad with colorful veggies

    Storage

    • Refrigerator: Store the salad and dressing separately in airtight containers. The salad (without dressing) stays fresh for up to 3 days, while the dressing lasts up to 1 week. Add the dressing just before serving to keep the veggies crisp.
    • Tofu Storage: If using crispy tofu, store it separately in an airtight container for up to 3 days and reheat in a pan or air fryer to restore its texture.
    • Freezing: Not recommended, as fresh veggies and tofu can become soggy once thawed. However, the sesame dressing excess can be frozen for up to 2 months in a sealed container. Thaw in the refrigerator before using.

     Ingredients

    Listed below are all the ingredients you will need:

    • extra-firm tofu
    • lemongrass stalks
    • garlic
    • ginger
    • calamansi juice or lemon juice
    • annatto oil
    • brown sugar
    • soy sauce
    • salt
    • ground black pepper
    • sesame dressing
    • tomatoes
    • small cucumber
    • mango
    • romaine lettuce

    See recipe card for quantities.

    All ingredients in separate white bowls

    Instructions

    In a food processor, blend the lemongrass, garlic, ginger, calamansi juice, annatto oil, brown sugar, soy sauce, salt, and black pepper until smooth.

    Food processor filled with ingredients to blend

    Pour the blended marinade over the 1-inch cubes in a small bowl.

    Cover with cling film and let marinate for at least 30 minutes or overnight for deeper flavor.

    Dices of tofu marinated in a bowl

    Heat a grill or grill pan over medium heat.

    Grill the marinated tofu cubes until all sides are lightly charred. Remove from heat and set aside.

    Marinated dices of tofu being grilled

    In a large bowl, toss together the lettuce, tomatoes, cucumber, and mango. Then, drizzle with sesame dressing and mix well.

    A large bowl of veggies with sesame dressing

    Top the salad with grilled inasal tofu. Serve immediately and enjoy!

    A plate of tofu dish garnished with sesame dressing

    Hint: For a more flavorful Inasal-style Tofu, let it marinate overnight.

    ⭐ Top Tip

    Alternative Cooking Method: If you don’t have a grill, pan-fry the tofu over medium heat until crispy and browned.

    FAQ

    What does tofu go well with?

    Tofu is a versatile plant-based protein source that can be eaten with grains (rice, quinoa, barley, and more), pasta, veggies (stir fry, air fried, roasted, and more), on top of salads, and in buddha bowls.

    What does tofu taste best with?

    The combination of savory, tangy, and sweet flavors pairs well with virtually every protein, and especially tofu - because it's mild in flavor, the sweet and sour sauce truly shines.

    What kind of tofu is best for salads?

    Firm or extra-firm tofu is perfect for this salad. Look for Chinese-style tofu, which is the one in plastic packaging in the refrigerated section. Do not use Japanese silken tofu which is sold in a tetra pak. If you're new to tofu, the different types and their uses can be confusing.

    More Recipes

    If you're a fan of tofu recipes and salad recipes alike, here's some more for you to try:

    • Tofu Katsu
    • Tofu in Coconut Milk
    • Ube Jelly Salad
    • Asian Cucumber Salad
    Yummy and healthy Sesame Tofu Salad in a bowl
    5 from 12 votes
    Print Pin Recipe

    Sesame Tofu Salad

    A refreshing and flavorful salad with grilled lemongrass-marinated tofu, crunchy vegetables, and a creamy sesame dressing.
    Prep Time35 minutes mins
    Cook Time10 minutes mins
    Total Time45 minutes mins
    Course: Main Course, Salad
    Cuisine: Fusion (Japanese-Filipino)
    Servings: 4 servings
    Calories: 311kcal
    Author: Lainey
    Prevent your screen from going dark

    Ingredients

    For the Marinated Tofu:

    • 8 ounces extra-firm tofu pressed and diced
    • 2 lemongrass stalks chopped
    • 4 cloves garlic
    • 1 thumb-sized ginger sliced
    • ¼ cup calamansi juice or lemon juice
    • ¼ cup annatto oil
    • 2 tbsp brown sugar
    • ¼ cup soy sauce
    • 1 tsp salt
    • ½ tsp ground black pepper

    For the Salad:

    • ¼ cup sesame dressing
    • ½ cup tomatoes sliced
    • 1 small cucumber diced
    • 1 mango peeled and diced
    • 1 head romaine lettuce chopped (without the bottom part)

    Instructions

    Prepare the Marinade:

    • In a food processor, blend lemongrass, garlic, ginger, calamansi juice, annatto oil, brown sugar, soy sauce, salt, and black pepper until smooth.
    • Pour the mixture over the diced tofu, mix well, and cover with cling film. Let it marinate for at least 30 minutes or overnight for better flavor.

    Grill the Tofu:

    • Heat a grill pan or outdoor grill over medium heat.
    • Grill the tofu on all sides until slightly charred and golden brown. Remove from heat and set aside.

    Assemble the Salad:

    • In a large bowl, combine lettuce, tomatoes, cucumber, and mango.
    • Drizzle with sesame dressing and toss gently.

    Top with Grilled Tofu:

    • Arrange the grilled tofu on top of the salad.
    • Serve immediately and enjoy!
    Leave a Comment
    Serving: 1gCalories: 311kcalCarbohydrates: 22gProtein: 8gFat: 23gSaturated Fat: 2gPolyunsaturated Fat: 9gMonounsaturated Fat: 11gTrans Fat: 0.1gSodium: 1353mgPotassium: 473mgFiber: 2gSugar: 17gVitamin A: 1389IUVitamin C: 27mgCalcium: 61mgIron: 2mg

    Watch The Recipe Video!

    QR Code
    Did you make this recipe?Share it on instagram or tag @simplybakings or #simplybakings!

    Main Entree, Soups and Salads, Vegetables, Vegetarian Filipino Recipes

    Mango Mochi

    Mar 5, 2025 · 13 Comments

    Yummy mochi in a white bowl

    Soft, chewy, and bursting with tropical flavor, this Mango Mochi is a delightful treat! With a tender rice flour exterior and a juicy mango center, each bite is a perfect balance of natural sweetness and chewiness.

    Love Mango? Check out Mango Sago or Mango Float!

    Yummy mochi in a white bowl
    [feast_advanced_jump_to]

    What is Mango Mochi?

    The Mango Mochi recipe is a soft, chewy dessert made from glutinous rice flour and filled with sweet, juicy mango. While not a traditional Filipino recipe, this yummy rice cake blends well with Filipino flavors since the mango flavor and rice-based treats like tikoy are widely loved.

    Originating from Japan, mochi has evolved into many variations across Asia, with fruit-filled versions becoming popular in Hong Kong and Taiwan.

    Substitutions

    • Granulated white sugar - Coconut sugar, maple syrup, or honey (for a natural sweetener).
    • Milk or water - Coconut milk (for a richer flavor), almond milk, or oat milk (for a dairy-free option).o jam - fresh mango puree, apricot jam, or peach preserves (for a similar fruity filling).
    Soft and chewy mochi dusted with cornstarch

    Storage

    • Room Temperature: Store freshly made mochi in an airtight container at cool room temperature for up to 1 day. Keep them lightly dusted with cornstarch to prevent sticking.
    • Refrigerator: For longer storage, place mochi in an airtight container and refrigerate for up to 3 days. However, refrigeration can make the mochi slightly firmer, so let it sit at room temperature for a few minutes before eating.
    • Freezer: To freeze, wrap each mochi individually in plastic wrap and store them in an airtight container for up to 1 month. Thaw at room temperature for 10-15 minutes before enjoying.

     Ingredients

    Listed below are all the ingredients you will need:

    • granulated white sugar
    • milk or water
    • glutinous rice flour
    • cornstarch
    • mango jam

    See the recipe card for quantities.

    All ingredients in separate white bowls

    Instructions

    In a bowl, whisk together the milk and sugar until the sugar is fully dissolved.

    Stir into the liquid the glutinous rice flour and mix until a rough dough forms.

    A mixing bowl filled with milk and other ingredients

    Transfer the dough mixture to a heatproof container. Steam for about 10 minutes until fully cooked.

    Mango Mochi batter steamed in a pan

    Remove the steamed dough from the steamer and allow it to cool slightly.

    Sprinkle cornstarch on a clean working surface to prevent sticking.

    Dough cooled down and mixed with cornstarch

    Transfer the mochi mixture onto the cornstarch-dusted surface. Knead slightly and coat fully with cornstarch.

    Divide the dough into 8 equal portions and roll each into a ball.

    Batter kneaded and rolled into balls

    Flatten each dough ball slightly and place 1 teaspoon of mango jam in the center. Fold the edges together to seal, then roll back into a smooth ball.

    Mango jam inserted in every dough ball

    Repeat the process with the remaining dough. Serve chilled for the best texture!

    A bowl of Mango Mochi next to Mango jam

    Hint: Lightly dust with extra cornstarch to prevent sticking before serving.

    ⭐ Top Tip

    Choose mangoes that are sweet and ripe but still firm to prevent excess moisture from making the mochi too soft or watery. Overly juicy mangoes can cause the filling to seep out, affecting the texture of the mochi.

    Freezing or refrigerating the mango pieces for at least 30 minutes before wrapping helps them hold their shape inside the mochi. This also makes them easier to work with and prevents the warm mochi dough from softening them too quickly.

    FAQ

    What does mango mochi taste like?

    Mango Mochi is a delightful and unique dessert that combines the chewy texture of mochi with a sweet and juicy mango filling. This treat is perfect for any occasion, offering a delicious fusion of flavors and textures that is both satisfying and refreshing.

    Is mochi just smashed rice?

    Traditional mochi is a Japanese dessert made of whole rice grains or glutinous rice that is beaten with a wooden mallet until it becomes a flexible paste. There are several types of mochi, which all contain differing ingredients.

    Is mochi from Japan or Korea?

    Mochi is a Japanese cake or sweet made from pounding glutinous rice into a sticky paste and molding it into shape.

    More Recipes

    Here's a list of a few more of my favorite Mango recipes!

    • Banana Mango Smoothie
    • Peach Mango Pie (Jollibee Style!)
    • Filipino Mango Ice Cream
    • Vegan Mango Ice Candy
    A white bowl of three Mango Mochis
    5 from 13 votes
    Print Pin Recipe

    Mango Mochi

    Mango Mochi is a soft, chewy rice cake filled with sweet mango jam, offering a delicate balance of fruity freshness and smooth mochi texture!
    Prep Time30 minutes mins
    Cook Time10 minutes mins
    Total Time40 minutes mins
    Course: Dessert, Snack
    Cuisine: Asian, Japanese
    Servings: 8 pieces
    Calories: 227kcal
    Prevent your screen from going dark

    Ingredients

    • ⅓ cup granulated white sugar
    • ¾ cup milk or water as a substitute
    • 1¼ cups glutinous rice flour
    • ½ cup cornstarch for dusting
    • ½ cup mango jam

    Instructions

    Prepare the Dough:

    • In a bowl, whisk together the milk and sugar until the sugar is fully dissolved.
    • Stir in the glutinous rice flour and mix until a rough dough forms.

    Steam the Dough:

    • Transfer the dough mixture to a heatproof container.
    • Steam for about 10 minutes until fully cooked.

    Cool and Prepare the Work Surface:

    • Remove the steamed dough from the steamer and allow it to cool slightly.
    • Sprinkle cornstarch on a clean working surface to prevent sticking.

    Shape the Mochi:

    • Transfer the dough onto the cornstarch-dusted surface.
    • Knead slightly and coat fully with cornstarch.
    • Divide the dough into 8 equal portions and roll each into a ball.

    Fill the Mochi:

    • Flatten each dough ball slightly and place 1 teaspoon of mango jam in the center.
    • Fold the edges together to seal, then roll back into a smooth ball.

    Final Touches:

    • Repeat the process with the remaining dough.
    • Serve chilled for the best texture.
    Leave a Comment
    Serving: 1servingCalories: 227kcalCarbohydrates: 51gProtein: 2gFat: 1gSaturated Fat: 1gPolyunsaturated Fat: 0.1gMonounsaturated Fat: 0.3gCholesterol: 3mgSodium: 16mgPotassium: 70mgFiber: 1gSugar: 20gVitamin A: 37IUVitamin C: 2mgCalcium: 35mgIron: 0.2mg

    Watch The Recipe Video!

    QR Code
    Did you make this recipe?Share it on instagram or tag @simplybakings or #simplybakings!

    5 Ingredients or Less, Desserts, Filipino Desserts

    Pickled Mangoes (Burong Mangga)

    Feb 26, 2025 · 11 Comments

    a jar of pickled mangoes with red chilies and red onion slices

    Burong Mangga, or Filipino Pickled Mangoes, is a sweet, sour, and slightly spicy side dish made with crisp green mangoes. Popular in many Filipino homes, this easy homemade recipe is perfect for merienda, rice meals, or satisfying sour cravings.

    Want more pickled recipes? Try my Sautéed Pickled Mustard Greens with Eggs and Atsara (Pickled Green Papaya) recipe!

    pickled mango and red onion held by black chopsticks over a jar
    [feast_advanced_jump_to]

    What are Pickled Mangoes?

    These Pickled Mangoes, also known as burong mangga in the Philippines, are made of unripe green mangoes pickled in a white vinegar and granulated sugar mixture with red chilies and red onion slices. The unripe mangoes and spices are sliced and soaked in a pickling liquid before being left for a few days or weeks. This pickling process increases their tangy-sweet flavor while preserving their crisp texture.

    This traditional Filipino dish is commonly served as a snack, appetizer, or side dish. Its deliciously sour flavors also maintain the mangoes' vitamins and minerals which makes it a healthy dish to eat any time you want!

    Health Benefits of Pickled Mangoes

    • Promotes cardiovascular health.
    • Provides probiotics for gut nutrition.
    • It boosts the body's immune system.
    • Rich in anti-inflammatory properties.
    • Packed with antioxidants and vitamins.
    an opened jar of pickled mangoes

    Substitutions

    • Fruit - if unripe mangoes are unavailable, use unripe green papaya to provide the same crunchy texture and a little different, but equally excellent, sourness.
    • Vinegar - replace white vinegar with rice vinegar or apple cider vinegar for a slightly sweeter, more complex flavor.
    • Sugar - brown sugar can be used instead of white granulated sugar to achieve a richer, caramel-like sweetness in the pickling mix.
    • Onion - use shallots instead of red onions if you opt for a milder, sweeter onion flavor that blends well with the pickling liquid.
    • Chili - you may swap red chilies for jalapeños for milder heat and a unique peppery flavor.

    Storage

    • Refrigerate these pickled green mangoes (burong mangga) in sealed, sterilized jars to keep them fresh and crisp for up to a month.
    • Use clean utensils while serving to avoid infection or bacteria contamination and preserve shelf life.
    • Check for signs of spoilage before serving this dish.

    Ingredients

    Listed below are all the ingredients you will need:

    • white vinegar
    • granulated white sugar
    • unripe green mangoes
    • chopped red chilies
    • red onions

    See the recipe card for quantities.

    ingredients for the pickled mangoes (burong manga) recipe

    Instructions

    vinegar, sugar, mango, chilies, and onions in a jar

    Place white vinegar and granulated white sugar in a pot or saucepan to create the brine solution. Mix well and bring to a simmering boil for 3 minutes until the sugar has been dissolved. Then, remove it from the heat to cool it down fully.

    Place the peeled and sliced large green mangoes and the remaining ingredients in a large mason jar with a lid.

    poured the pickling liquid into the jar then closed the lid

    Pour the pickling liquid into the jar.

    Close the lid and let it pickle for at least 7-9 days in the fridge before serving.

    Hint: Make sure the mango slices are completely soaked in the pickling liquid for flavor absorption and even pickling.

    ⭐ Top Tips

    • You can add different spices and herbs to the pickling mixture, as it is up to you.
    • Make sure the sugar is fully dissolved before turning the heat off.

    FAQ

    Are pickled mangoes healthy?

    Yes, pickled mangoes are a good source of various vital vitamins and minerals that are essential to different body functions.

    Can I eat mango pickles every day?

    Mango pickles can be healthy, but it is not a good idea to consume them every day, especially when you have some health conditions for some pickles are made with salt. It is best to consult your doctor before consumption.

    What is the best mango for pickling mangoes?

    It is best to use firm and unripe green mango for pickling, like carabao mangoes.

    More Mango Recipes

    Looking for other recipes like this? Try these 3:

    • Best 3 ingredient Mango Smoothie
    • Piña Colada Mango Popsicles
    • Savory Mango Salad
    an open jar of pickles mangoes (burong mangga)
    5 from 10 votes
    Print Pin Recipe

    Pickled Mangoes (Burong Mangga)

    This pickled mangoes (burong mangga) recipe is a popular Filipino treat that has a tasty, tangy, and sweet flavor. This simple recipe demonstrates how to prepare delicious pickled mangoes at home, ideal for snacking or as a side dish!
    Prep Time10 minutes mins
    Cook Time5 minutes mins
    Total Time15 minutes mins
    Course: Appetizers
    Cuisine: Filipino
    Servings: 4 servings
    Calories: 578kcal
    Author: Lainey
    Prevent your screen from going dark

    Ingredients

    • 2 ½ cups white vinegar
    • 2 ½ cups granulated white sugar
    • 2 large unripe green mangoes deseeded & sliced
    • 1 tablespoon chopped red chilies
    • ¼ cup red onions sliced

    Instructions

    • Place white vinegar and granulated white sugar in a pot.
    • Mix well and bring to a simmer for 3 minutes until the sugar has been dissolved.
    • Remove from the heat to cool it down fully.
    • Place the remaining ingredients in a large jar with a lid.
    • Pour the pickling liquid into the jar.
    • Close the lid and let it pickle for at least 7-9 days in the fridge before serving.
    Leave a Comment

    Notes

    1) You can add different spices and herbs to the pickling mixture as it is up to you.
    2) Make sure the sugar is fully dissolved before turning the heat off.
    Serving: 375gCalories: 578kcalCarbohydrates: 141gProtein: 1gFat: 1gSaturated Fat: 0.1gPolyunsaturated Fat: 0.1gMonounsaturated Fat: 0.1gSodium: 6mgPotassium: 206mgFiber: 2gSugar: 140gVitamin A: 1156IUVitamin C: 44mgCalcium: 25mgIron: 0.3mg

    Watch The Recipe Video!

    QR Code
    Did you make this recipe?Share it on instagram or tag @simplybakings or #simplybakings!

    5 Ingredients or Less, Appetizers, Side Dishes, Vegan Filipino Recipes, Vegetarian Filipino Recipes

    Healthy Albondigas Recipe Filipino Style

    Feb 19, 2025 · 9 Comments

    A medium bowl of yummy Vegan Almondigas soup

    Healthy Albondigas Recipe Filipino Style is a plant-based twist on the classic Filipino meatball dish, featuring savory plant-based meatballs and vermicelli noodles in a rich, flavorful broth. It’s an easy, hearty dish perfect for any day of the week!

    If you enjoy cozy comfort dishes, you’ll also love my Veggie Ramen, Eggplant Chickpea Stew, and Filipino Corn Soup Recipe.

    Bowl of plant-based meatballs, noodles, and tomato broth
    [feast_advanced_jump_to]

    What is Healthy Almondigas Recipe Filipino Style?

    A lighter, plant-based version of the traditional Filipino meatball soup. Instead of pork meatballs, it uses plant-based alternatives, making it lower in fat and cholesterol. The dish still features misua (thin wheat noodles) and a flavorful broth, keeping it hearty and satisfying. This healthy twist retains the comforting flavors of the original while offering a more nutritious option.

    When is this usually served?

    Almondigas is a classic Filipino soup traditionally enjoyed as a comforting meal during cooler weather or rainy days. While it isn’t tied to specific holidays, it’s often served at family gatherings or as a hearty everyday dish.

    Substitutions

    • Shiitake Mushrooms - use button mushrooms, cremini mushrooms, portobello mushrooms, or even finely diced eggplant for a similar texture.
    • Tomato Paste - use ketchup, blended fresh tomatoes, or a dash of soy sauce with a pinch of sugar for flavor depth.
    • Vegetable Broth- replace with mushroom broth, miso broth, or water with a vegetable bouillon cube.
    Savory plant-based meatballs in a tomato broth with noodles

    Variations

    • Creamy version - Create a rich and indulgent version by stirring in coconut milk or cashew cream to the broth. For a creamy texture in the meatballs, add mashed sweet potato or butternut squash to the mixture.

    Storage

    • Refrigerator - Store leftover Vegan Almondigas in an airtight container in the refrigerator for up to 3 days. Keep the noodles and broth separate, if possible, to prevent the noodles from becoming overly soft. Reheat on the stovetop or microwave, adding a little vegetable broth if needed.
    • Freshness Check - Always check for any changes in smell, texture, or color before consuming leftovers to ensure they are safe to eat.

    Ingredients

    Listed below are all the ingredients you will need:

    • shiitake mushrooms
    • white onion
    • garlic powder
    • salted black beans
    • panko breadcrumbs
    • tomato paste
    • oil
    • garlic cloves
    • red onion
    • vegetable broth
    • vegan fish sauce
    • patola slices (luffa gourd)
    • misua noodles
    • salt
    • ground black pepper
    • spring onions

    See the recipe card for quantities.

    All soup ingredients in separate white bowls

    Instructions

    Preheat oven to 375°F (190°C). Place the sliced mushrooms on a baking sheet and roast for 15 minutes.

    Mushrooms on a tray and roasted

    Transfer the roasted mushrooms to a food processor. Add sliced white onion, garlic powder, black beans, panko breadcrumbs, and tomato paste. Pulse the mixture until well combined but with some small chunks of beans and mushrooms for texture. Add a splash of water if the mixture is too dry.

    Vegetables and other ingredients in a blender

    Scoop 1 tablespoon of the mixture and shape it into a ball. Repeat with the remaining mixture and set aside.

    Heat 2 tablespoons of oil in a large pot over medium heat. Fry the vegan meatballs until browned on all sides. Remove and set aside.

    Mixture rolled into meatballs and cooked

    In the same pot, sauté the red onion until translucent, then add the minced garlic and cook until fragrant.

    Pour into the pan the savory broth and vegan fish sauce.

    Sautéing veggies and boiling the soup

    Bring the soup to a medium-high heat boil. Add half of the cooked vegan meatballs and the patola slices to the pot. Simmer for 5 minutes.

    Stir in the misua noodles and season with salt and black pepper to taste.

    Vegan almondigas ingredients boiling in heat

    Simmer for an additional minute, or until the misua noodles are fully cooked. Turn off the heat and garnish with chopped spring onions.

    Vegan almondigas boiling in a pan

    Serve the meatball soup hot and enjoy!

    A bowl of delicious healthy Almondigas with fork

    Hint: To prevent the misua noodles from becoming too soft, cook them separately and add them to the soup just before serving.

    ⭐ Top Tip

    For extra flavor, let the bola bola meatballs sit in the broth for a few minutes after cooking to absorb the savory taste, making each bite more delicious!

    FAQ

    What makes a vegan a vegan?

    A vegan diet is based on plants (such as vegetables, grains, nuts, and fruits) and foods made from plants. Vegans do not eat foods that come from animals, including dairy products and eggs.

    Why are my albondigas tough?

    Undercooking or overcooking: If the meatballs are not cooked, they will be hard and not fully cooked. Overcooking meatballs can also make them tough. Be careful not to overcook your albondigas to keep them tender. Using too much masa: Makes the meatballs dense and dry.

    How to be vegan in a non-vegan family?

    Whether you are the main cook or not, try to get everyone involved when you are meal planning as a family. Work together to find vegan and non-vegan options, and perhaps you could agree to have a couple of nights together each week when everyone eats vegan, for example, Meatless Mondays.

    A delicious soup with veggies and meatballs in a bowl
    5 from 9 votes
    Print Pin Recipe

    Healthy Albondigas Recipe Filipino Style

    Here's a healthy Filipino-style albondigas recipe, a comforting soup with plant-based "meatballs," vermicelli noodles, and a savory tomato-based broth. It’s hearty, flavorful, and perfect for a cozy meal that's worth the try!
    Prep Time10 minutes mins
    Cook Time30 minutes mins
    Total Time40 minutes mins
    Course: Main Course, Soup
    Cuisine: Filipino, Spanish
    Servings: 4
    Calories: 147kcal
    Prevent your screen from going dark

    Ingredients

    For the Vegan Meatballs:

    • 8 ounces shiitake or button mushrooms sliced
    • ½ cup white onion sliced
    • 1 teaspoon garlic powder
    • 1 can (6 ounces) salted black beans rinsed and drained
    • 2 tablespoons panko breadcrumbs
    • 2 teaspoons tomato paste

    For the Soup Base:

    • 2 tablespoons oil
    • 4 garlic cloves minced
    • ½ cup red onion sliced
    • 6 cups vegetable broth
    • 1 tablespoon vegan fish sauce

    For the Add-ins:

    • ¼ cup patola slices luffa gourd
    • 4-6 ounces misua noodles

    For Seasoning and Garnish:

    • ¼ teaspoon salt
    • ¼ teaspoon ground black pepper
    • 2 tablespoons chopped spring onions

    Instructions

    Prepare the Vegan Meatballs:

    • Preheat the oven to 375°F (190°C). Place the sliced mushrooms on a baking sheet and roast for 15 minutes.
    • Transfer the roasted mushrooms to a food processor. Add sliced white onion, garlic powder, black beans, panko breadcrumbs, and tomato paste.
    • Pulse the mixture until well combined but with some small chunks of beans and mushrooms for texture. Add a splash of water if the mixture is too dry.
    • Scoop 1 tablespoon of the mixture and shape it into a ball. Repeat with the remaining mixture and set aside.

    Cook the Soup:

    • Heat 2 tablespoons of oil in a large pot over medium heat. Fry the vegan meatballs until browned on all sides. Remove and set aside.
    • In the same pot, sauté the red onion until translucent, then add the minced garlic and cook until fragrant.
    • Pour in the vegetable broth and vegan fish sauce. Bring the soup to a boil.

    Assemble the Soup:

    • Add half of the cooked vegan meatballs and the patola slices to the pot. Simmer for 5 minutes.
    • Stir in the misua noodles and season with salt and black pepper to taste.
    • Simmer for an additional minute, or until the misua noodles are fully cooked.

    Serve:

    • Turn off the heat and garnish with chopped spring onions.
    • Serve hot and enjoy!
    Leave a Comment
    Serving: 1servingCalories: 147kcalCarbohydrates: 19gProtein: 3gFat: 8gSaturated Fat: 1gPolyunsaturated Fat: 2gMonounsaturated Fat: 4gTrans Fat: 0.03gCholesterol: 2mgSodium: 1960mgPotassium: 306mgFiber: 3gSugar: 7gVitamin A: 829IUVitamin C: 5mgCalcium: 22mgIron: 1mg

    Watch The Recipe Video!

    QR Code
    Did you make this recipe?Share it on instagram or tag @simplybakings or #simplybakings!

    Rice, Noodles, Potatoes, Soups and Salads, Vegan Filipino Recipes, Vegetarian Filipino Recipes

    Miso Tofu Recipe

    Feb 12, 2025 · 12 Comments

    A bowl of hot Stir Fried Tofu in delicious Miso Sauce

    Craving a flavorful, protein-packed dish? This Miso Tofu is crispy on the outside, tender inside, and coated in a rich, umami miso glaze, offering the perfect balance of savory and slightly sweet flavors!

    Check out our fan favorite miso inspired dish, Miso Mushroom Pasta!

    Crispy tofu with sautéed vegetables on a plate
    [feast_advanced_jump_to]

    What is Miso Tofu?

    This Asian fusion dish takes miso, a popular Japanese seasoning, and gives it a Filipino twist for a unique, flavorful tofu recipe. Miso adds a deep, savory taste, while Filipino flavors bring a balance of sweet, tangy, and salty notes.

    The tofu is crispy on the outside, soft on the inside, and coated in a rich, umami-packed glaze. It’s a simple, tasty meal that goes great with rice or veggies!

    Health Benefits of Tofu

    • High-Quality Protein - Tofu provides a complete protein source, containing all nine essential amino acids, making it an excellent option for vegetarians and vegans.

    Substitutions

    • Dried shiitake mushrooms - Fresh shiitake, cremini, or button mushrooms (adjust cooking time).
    • Red bell pepper - Yellow or orange bell pepper, carrots (thinly sliced), or snap peas for color and crunch.
    • Baby bok choy - Spinach, napa cabbage, or Swiss chard for a similar leafy green texture.
    • White miso paste - Yellow miso (milder) or red miso (stronger flavor).
    • Teriyaki sauce - Soy sauce + 1 tsp maple syrup/honey or tamari for a gluten-free option.
    Golden-brown tofu in miso sauce

    Storage

    • Refrigerator: Store the cooked tofu in an airtight container in the refrigerator for up to 3 days. Reheat in a pan over medium heat or in the microwave for a few seconds before serving.
    • Freezer: Freezing is not recommended, as tofu’s texture changes when frozen after being cooked with sauce. However, if you must freeze it, store it in an airtight container for up to 1 month. Expect a slightly chewier texture upon reheating.
    • Sauce Storage: If you have extra miso teriyaki sauce, store it separately in an airtight jar in the refrigerator for up to 1 week or freeze it for up to 2 months.

     Ingredients

    Listed below are all the ingredients you will need:

    • extra firm tofu
    • vegetable oil
    • white onion
    • dried shiitake mushrooms
    • red bell pepper
    • baby bok choy
    • white miso paste
    • teriyaki sauce
    • ginger juice
    • cornstarch
    • water
    • salt
    • ground black pepper

    See the recipe card for quantities.

    All miso tofu ingredients in separate white bowls

    Instructions

    In a bowl, combine white miso paste, teriyaki sauce, ginger juice, cornstarch, and water. Mix well until fully incorporated. Set aside.

    Miso paste mixed with sauce and other juices

    Heat half of the vegetable oil in a skillet or pan over medium-high heat. Add the tofu cubes and pan-fry until crispy on all sides. Remove and set aside.

    Dices of tofu cooked in an oiled pan

    In the same skillet, heat the remaining oil. Sauté the white onion until translucent, then add the sliced shiitake mushrooms and cook for 1 minute.

    Pan cooking strips of shiitake mushrooms

    Stir in the red bell pepper and fried tofu, cooking for 1 minute.

    Cooked tofu and other veggies in a pan

    Add the baby bok choy and stir-fry for another minute. Pour the miso-teriyaki sauce mixture over the veggies and tofu.

    Stir well to coat everything evenly. Then, stir-fry for an additional 30 seconds.

    Cut bok choy added into the pan with veggies

    Turn off the heat. Sprinkle with salt and black pepper to taste. Then serve hot!

    Hint: For extra flavor absorption, press the tofu before cooking! Removing excess moisture helps it soak up the miso teriyaki sauce, making each bite more flavorful.

    ⭐ Top Tip

    Sear the tofu first before adding the sauce! This creates a crispy golden crust, preventing it from becoming too soft when the sauce is added.

    FAQ

    Which tofu is good for miso?

    I like to use extra-firm tofu when I'm baking tofu, but in this miso soup recipe, silken tofu is a must. With its super-smooth texture, it practically melts into the savory soup.

    Do you need to press tofu before stir frying?

    Some recipes recommend pressing your whole block of tofu to remove excess moisture before slicing. This works fine, but takes some time. Much easier is to slice the tofu, then lay the slices out flat on a cutting board or baking sheet lined with paper towels or a clean kitchen towel, then pressing more towels on top.

    Is miso sauce the same as soy sauce?

    They are are two distinct Japanese condiments. Miso is a thick, fermented paste used for soups and marinades, while soy sauce is a versatile, liquid seasoning ideal for dressings and stir-fries.

    More Recipes

    Loving veggies in new recipes? Get some more here:

    • Ginataang Gulay
    • Vegan Pinakbet
    • Vegan Laswa
    • Tofu Sisig
    Vegetables and tofu mixed in a bowl
    5 from 12 votes
    Print Pin Recipe

    Miso Tofu Recipe

    Marinate tofu in a miso-based paste, then grill, bake, or stir-fry for a rich, umami-packed dish - perfect for rice bowls or salads!
    Prep Time10 minutes mins
    Cook Time10 minutes mins
    Total Time20 minutes mins
    Course: Main Course, Side Dish
    Cuisine: Asian
    Servings: 4 servings
    Calories: 208kcal
    Prevent your screen from going dark

    Ingredients

    Main Ingredients:

    • 1 7-ounce package extra firm tofu, pressed and cut into medium dice
    • 4 tablespoons vegetable oil
    • ½ cup sliced white onion
    • 1 ounce dried shiitake mushrooms soaked in hot water overnight and sliced
    • 1 red bell pepper sliced
    • 3 ounces baby bok choy ends removed and sliced in half lengthwise

    For the Sauce:

    • ½ tablespoon white miso paste
    • 3 tablespoons teriyaki sauce
    • 2 teaspoons ginger juice
    • 2 teaspoons cornstarch
    • 4 tablespoons water

    Seasoning:

    • ¼ teaspoon salt
    • ¼ teaspoon ground black pepper

    Instructions

    Prepare the Sauce:

    • In a bowl, combine white miso paste, teriyaki sauce, ginger juice, cornstarch, and water. Mix well until fully incorporated. Set aside.

    Cook the Tofu:

    • Heat half of the vegetable oil in a skillet or pan over medium heat. Add the tofu and pan-fry until crispy on all sides. Remove and set aside.

    Sauté the Vegetables:

    • In the same skillet, heat the remaining oil. Sauté the white onion until translucent, then add the sliced shiitake mushrooms and cook for 1 minute.

    Add Remaining Ingredients:

    • Stir in the red bell pepper and fried tofu, cooking for 1 minute.
    • Add the baby bok choy and stir-fry for another minute.

    Add the Sauce:

    • Pour the miso-teriyaki sauce mixture over the vegetables and tofu. Stir well to coat everything evenly. Stir-fry for an additional 30 seconds.

    Season and Serve:

    • Turn off the heat and season with salt and ground black pepper to taste.
    • Serve immediately.
    Leave a Comment
    Serving: 153gCalories: 208kcalCarbohydrates: 14gProtein: 6gFat: 15gSaturated Fat: 2gPolyunsaturated Fat: 8gMonounsaturated Fat: 3gTrans Fat: 0.1gSodium: 791mgPotassium: 314mgFiber: 2gSugar: 5gVitamin A: 1881IUVitamin C: 49mgCalcium: 52mgIron: 1mg

    Watch The Recipe Video!

    QR Code
    Did you make this recipe?Share it on instagram or tag @simplybakings or #simplybakings!

    Main Entree, Side Dishes, Thanksgiving Main Dishes, Vegan Filipino Recipes, Vegetables, Vegetarian Filipino Recipes

    4 Ingredients Lengua De Gato

    Feb 5, 2025 · 10 Comments

    A cup filled with yummy Lengua De Gato

    Imagine biting into a cookie so light and buttery it melts in your mouth - welcome to the irresistible charm of Lengua de Gato! These elegant, slender cookies are a timeless treat and are as easy to make as they are to love.

    Cookies are the ultimate snack! But they aren't the only crunchy goodness you'll need. Try these Kamote Turon, Cheddar Biscuits, and Mushroom Chicharon.

    Cookies stuffed into a cute size cup
    [feast_advanced_jump_to]

    What is Lengua de Gato?

    The cookie’s roots trace back to the Spanish colonial period (1565–1898), reflecting the strong Spanish influence on Filipino cuisine. Similar cookies, called "lenguas," are popular in Spain and Latin America, but the Filipino version adapted local ingredients like sugar, flour, butter, and egg whites to create a light, crispy treat.

    Baguio City, a popular mountain destination in the Philippines, played a key role in popularizing Lengua de Gato. Bakeries and pasalubong centers like Good Shepherd Convent have become iconic for selling these cookies alongside other local treats like strawberry jam and peanut brittle.

    Lengua de Gato’s enduring appeal is also due to its inclusion in packages sent by overseas Filipinos, making it a nostalgic symbol of home. Today, it represents a rich cultural heritage, blending Spanish culinary influences with Filipino creativity, and remains a cherished snack both locally and abroad.

    These delicious cookies are typically enjoyed as a pasalubong gift, a snack with coffee or tea, or a treat during special occasions like holidays and gatherings.

    It’s also a nostalgic favorite for Filipinos abroad, adding sweetness to everyday moments and celebrations.

    A cup and a plate filled with Lengua De Gato

    Variations

    • Chocolate – Add 2 tablespoons of cocoa powder to the flour for a chocolate twist.
    • Lemon – Add 1 teaspoon of lemon zest for a refreshing citrus flavor.
    • Matcha – Mix in 1 teaspoon of matcha powder for a subtle green tea flavor.
    • Vanilla Almond – Use almond extract instead of vanilla extract for a nutty aroma.

    Storage

    • Room Temperature – Store cookies in an airtight container at room temperature for up to 1 week to keep them crisp and fresh.
    • Refrigeration – Place in an airtight container in the refrigerator for up to 2 weeks. Let the cookies come to room temperature before serving to enjoy their crisp texture.
    • Freezing – Freeze baked cookies in a sealed, freezer-safe container for up to 2 months. Thaw at room temperature before serving.
    • Prevent Moisture – Add a piece of parchment paper or silica gel packet (food-safe) to the container to absorb moisture and maintain crispness.

     Ingredients

    Listed below are all the ingredients you will need:

    • salted butter
    • powdered sugar
    • egg whites
    • cake flour

    See the recipe card for quantities.

    All ingredients for lengua de gato in separate bowls

    Instructions

    Preheat oven to 375°F (190°C).

    In an electric hand mixer or stand mixer, cream the slightly cold softened butter and powdered confectioner's sugar together at medium-high speed until the mixture is light and fluffy. This step is crucial for creating a delicate texture.

    Stand mixer filled with the wet ingredients

    Gradually add the egg whites to the creamed mixture. Continue beating all sides of your mixing bowl until the batter is smooth and fully combined.

    Egg whites added into the stand mixer

    Slowly add the cake flour and mix into the large bowl until just incorporated.

    Dry ingredients mixed into the batter

    Be careful not to overmix, as this can affect the final texture.

    Smooth batter mixed in a big bowl

    Transfer the batter to a piping bag fitted with a piping tip. Hold the piping bag at a 45-degree angle and use the "Push and Pull" technique: push the batter to create a 2-3 inch strip, then pull upward to cut the batter.

    Cookie batter transferred into the piping bag

    Repeat the process with the remaining batter, spacing the strips evenly on parchment-lined baking sheets - every inch of space possible. Bake pan in the preheated oven for 12 minutes, or until the edges turn golden brown.

    Batter formed into strips and put on tray

    Remove the lengua del gato from the baking tray and arrange them on a cooling rack to cool completely before serving.

    A plate and a cup of delicious cookies

    Hint: Dust the finished cookies with extra powdered sugar for added sweetness and presentation.

    ⭐ Top Tip

    Consistency Tip: Ensure the butter is slightly cold before creaming to achieve the perfect consistency.

    FAQ

    Why is it called lengua de gato?

    Before that, though, in case you're wondering about the name, lengua de gato is Spanish for “cat's tongue”. And these cookies are called that because of their shape. The cookies are oval, rectangular-ish, similar to a cat's tongue.

    How long is the shelf life of lengua de gato?

    Lengua de gato can be stored in an airtight container on the counter for about a week. Keeping them in an airtight container ensures they don't go stale or soft sooner. And make sure the cookies cool completely before storing.

    What does lingua de Gato mean?

    Their name means "cat's tongue" in Spanish, after their characteristic oval shape. They are very thin and crunchy.

    More Recipes

    Not into long cookies? If you prefer soft snacks, let me share three of my favorites:

    • Filipino Spanish Bread
    • Veggie Empanada
    • Chiffon Cake

    Yummy Lengua De Gato in a white cup
    5 from 10 votes
    Print Pin Recipe

    4 Ingredients Lengua de Gato

    Lengua de Gato is a crisp Filipino butter cookie, perfect with coffee or tea. Made with butter, sugar, egg whites, and flour, it’s a simple, sweet treat!
    Prep Time10 minutes mins
    Cook Time12 minutes mins
    Total Time22 minutes mins
    Course: Cookies, Snack
    Cuisine: Filipino
    Servings: 12 -16 crackers
    Calories: 147kcal
    Prevent your screen from going dark

    Ingredients

    • ½ cup salted butter use good-quality butter, slightly cold
    • 1 cup powdered sugar
    • 2 egg whites
    • 1 cup cake flour

    Instructions

    Preheat the Oven:

    • Preheat your oven to 375°F (190°C).

    Cream the Butter and Sugar:

    • In a mixing bowl, cream the slightly cold butter and powdered sugar together until the mixture is light and fluffy. This step is crucial for creating a delicate texture.

    Add Egg Whites:

    • Gradually add the egg whites to the creamed mixture. Continue beating until the batter is smooth and fully combined.

    Incorporate the Flour:

    • Slowly add the cake flour and mix until just incorporated. Be careful not to overmix, as this can affect the final texture.

    Prepare for Piping:

    • Transfer the batter to a piping bag fitted with a piping tip. Hold the piping bag at a 45-degree angle and use the "Push and Pull" technique: push the batter to create a 2-3 inch strip, then pull upward to cut the batter.

    Pipe and Bake:

    • Repeat the process with the remaining batter, spacing the strips evenly on a parchment-lined baking sheet.
    • Bake in the preheated oven for 12 minutes, or until the edges turn golden brown.

    Cool and Serve:

    • Remove the lengua de gato from the oven and let them cool completely on a wire rack before serving.
    Leave a Comment
    Serving: 1crackerCalories: 147kcalCarbohydrates: 18gProtein: 2gFat: 8gSaturated Fat: 5gPolyunsaturated Fat: 0.4gMonounsaturated Fat: 2gTrans Fat: 0.3gCholesterol: 20mgSodium: 70mgPotassium: 21mgFiber: 0.3gSugar: 10gVitamin A: 237IUCalcium: 4mgIron: 0.1mg

    Watch The Recipe Video!

    QR Code
    Did you make this recipe?Share it on instagram or tag @simplybakings or #simplybakings!

    5 Ingredients or Less, Cookies, Filipino Desserts, Vegetarian Filipino Recipes

    Pichi Pichi

    Jan 29, 2025 · 8 Comments

    A plate of colorful Pichi Pichi sprinkled with grated coconut

    Pichi Pichi is a beloved Filipino kakanin known for its soft, chewy texture and lightly sweet flavor. Commonly enjoyed during merienda, family gatherings, fiestas, and celebrations, this traditional Filipino dessert is made with cassava and coated in freshly grated coconut for a simple yet comforting treat.

    Looking for more Filipino desserts? Check out my Ube Biko, Buchi, and Buko Pie recipes!

    White plate with grated cassava rolls coated in grated coconut
    [feast_advanced_jump_to]

    What is Pichi Pichi?

    Pichi Pichi is a traditional Filipino dessert made from cassava, a root crop that is easy to grow. Cassava was introduced to the Philippines by Spanish colonizers in the 16th century, and it became an important food source because it grows well in the country’s tropical climate. Over time, Filipinos used cassava to create many delicious dishes, including Pichi Pichi.

    This Filipino snack likely started in areas where fresh cassava was common, like Luzon or the Visayas. Filipinos flavored it with pandan leaves, which give it a sweet, fragrant smell, and coated it with grated coconut, another ingredient widely used in Filipino cooking. The chewy texture comes from steaming the cassava mixture, and some people add lye water to make it even firmer.

    This Filipino delicacy shows how Filipinos turn basic ingredients into something special and delicious. Pichi Pichi is more than just food for special occasions - like suman, palitaw and cassava cake, it’s part of Filipino culture and tradition!

    Pichi-Pichi coated with coconut flakes on a plate

    Substitutions

    • Cassava - grate and steam sweet potato as an alternative with a slightly different texture.
    • White sugar - honey or maple syrup can work but reduce the liquid in the recipe slightly. Brown sugar is also fine.
    • Ube flavor - use beet juice or powder as a substitute or rehydrate purple yam powder and mix it into the batter.
    • Buko-pandan flavor - mix vanilla and coconut extracts together to mimic the flavor. Pandan extract or Pandan water can also work.

    Storage

    • Store for up to 3 days.
    • If coated with grated coconut, refrigerate immediately to slow spoilage.
    • Place in an airtight container or wrap each piece tightly in plastic wrap to prevent drying.

    Ingredients

    Listed below are all the ingredients you will need:

    • grated cassava
    • coconut milk
    • white sugar
    • butter
    • eggs
    • salt
    • vanilla extract
    • ube flavor
    • buko-pandan flavor
    • grated coconut

    See the recipe card for quantities.

    Ingredients on separate white bowls

    Instructions

    In a large mixing bowl, whisk together the thawed grated cassava, coconut milk, white sugar, melted butter, beaten eggs, salt, and vanilla extract. Give it a good mix until fully combined.

    Wet and dry ingredients in a mixing bowl

    Divide the mixture evenly into three separate bowls.

    Add ube flavor to one bowl and buko-pandan flavor to another. Leave the third bowl plain or unflavored. Mix each bowl until the flavors are fully incorporated.

    Pichi Pichi paste divided into three containers

    Pour or scoop the mixtures into plastic flan molds, one flavor at a time.

    Molds filled with Pichi Pichi and set in baking pan

    Bring water in a pot to a boil and set up steamer racks.

    Place the molds on the racks and put back the lid. Steam for about 20 minutes, or until the mixture is firm.

    Pichi Pichi in flan molds steamed in boiling pan

    Remove the molds from the steamer and let the pichi-pichi cool completely.

    Use a clean toothpick or spatula to gently remove the pichi-pichi from the molds.

    pichi pichi unmolded with a toothpick and cooling on a plate

    Roll the cooled pichi-pichi in freshly grated coconut.

    Coating colorful mounds of Pichi Pichi with freshly grated coconut

    Serve and enjoy!

    Hint: If coated with fresh grated coconut, refrigerate immediately, as coconut spoils quickly.

    ⭐ Top Tip

    You can add different flavors and food colors to make it a colorful Pichi Pichi recipe!

    FAQ

    What is the difference between pichi pichi and kutsinta?

    Kutsinta is a steamed rice cake made from tapioca served with coconut. Pichi-Pichi is made from cassava and topped with coconut.

    What is the English of Pichi Pichi?

    Pichi-pichi, also spelled pitsi-pitsi, is a Filipino dessert made from steamed cassava flour balls mixed with sugar and lye.

    What is the shelf life of pichi-pichi?

    You can keep coated pichi pichi in the refrigerator for up to 3 days. Note that they will harden the longer they sit so best to consume pichi pichi the day they're made.

    More Recipes

    Hungry for more Filipino food? Explore these:

    • Bibingka
    • Turon
    • Putong Bigas
    Mounds of cassava rolled and sprinkled with coconut flakes
    5 from 7 votes
    Print Pin Recipe

    Pichi Pichi

    A soft, chewy Filipino dessert made from cassava, steamed, and rolled in freshly grated coconut - simple, sweet, and perfect for any celebration!
    Prep Time10 minutes mins
    Cook Time20 minutes mins
    Total Time30 minutes mins
    Course: Dessert, Snack
    Cuisine: Filipino
    Servings: 24 pieces
    Calories: 177kcal
    Prevent your screen from going dark

    Ingredients

    For the Base:

    • 3 cups frozen grated cassava thawed
    • 1 cup coconut milk
    • 1 cup granulated white sugar
    • 1 cup melted butter
    • 2 whole eggs beaten
    • ¼ teaspoon salt
    • ½ teaspoon vanilla extract

    For Flavoring:

    • 2 teaspoons ube flavor
    • 2 teaspoons buko-pandan flavor

    For Coating:

    • 1 cup freshly grated coconut

    Instructions

    Prepare the Base Mixture:

    • In a mixing bowl, whisk together the thawed grated cassava, coconut milk, white sugar, melted butter, beaten eggs, salt, and vanilla extract. Mix well until fully combined.

    Divide and Add Flavors:

    • Divide the mixture evenly into three separate bowls.
    • Add ube flavor to one bowl and buko-pandan flavor to another. Leave the third bowl plain or unflavored. Mix each bowl until the flavors are fully incorporated.

    Mold the Mixture:

    • Scoop the mixtures into plastic flan molds, one flavor at a time.

    Steam the Pichi-Pichi:

    • Bring water in a pot to a boil and set up steamer racks.
    • Place the molds on the racks and steam for about 20 minutes, or until the mixture is firm.

    Cool and Unmold:

    • Remove the molds from the steamer and let the pichi-pichi cool completely.
    • Use a clean toothpick or spatula to gently remove the pichi-pichi from the molds.

    Coat and Serve:

    • Roll the cooled pichi-pichi in freshly grated coconut.
    • Serve and enjoy!
    Leave a Comment
    Serving: 1servingCalories: 177kcalCarbohydrates: 19gProtein: 1gFat: 11gSaturated Fat: 8gPolyunsaturated Fat: 0.4gMonounsaturated Fat: 2gTrans Fat: 0.3gCholesterol: 34mgSodium: 96mgPotassium: 110mgFiber: 1gSugar: 9gVitamin A: 260IUVitamin C: 6mgCalcium: 11mgIron: 1mg

    Watch The Recipe Video!

    QR Code
    Did you make this recipe?Share it on instagram or tag @simplybakings or #simplybakings!

    Desserts, Filipino Desserts, Vegetarian Filipino Recipes

    Healthy Bulalo Recipe

    Jan 22, 2025 · 9 Comments

    a bowl of healthy bulalo soup

    My yummy Healthy Bulalo recipe is a plant based twist on the beloved Filipino comfort soup, known for its rich, savory broth and hearty vegetables without all the cholesterol. It also includes lemongrass stalk which makes it healthy and delicious!

    Want some dessert after this? Give my Sweet Potato Turon, Filipino Macaroni Salad, and Chiffon Cake recipes a try!

    Bowl of soup with sweet corn, cabbage, and a rich, flavorful broth
    [feast_advanced_jump_to]

    Bulalo is especially popular during the cooler months in the Philippines, such as the rainy season or the "ber months" (September to December) when families crave warm, comforting dishes.

    While not traditionally tied to specific holidays, it is a common choice for festive gatherings, reunions, or Sunday family lunches due to its hearty and shareable nature.

    What is Vegan Bulalo?

    Bulalo is a beloved Filipino soup originating from the Batangas and Cavite regions, traditionally made with beef shank and bone marrow.

    Known for its rich broth, and tender beef, and may contain hearty ingredients like egg, celery, ginger, and whole black peppercorns, this vegetable soup is often enjoyed as a comforting meal during cooler weather or special family gatherings. The dish reflects the Filipino love for sharing warm, flavorful meals, often served with rice.

    As plant-based Filipino dishes gain popularity, this cooking pot has emerged to cater to health-conscious and environmentally mindful eaters. This modern adaptation celebrates Filipino culinary heritage while embracing global trends in mindful eating.

    Health Benefits of Lemongrass Stalk

    • Low in carbohydrates: Lemongrass is a great addition for those monitoring their carb intake.
    • Healthy fats: Contains monounsaturated fat and polyunsaturated fat, contributing to heart health.
    • Rich in fiber: Aids digestion and helps maintain a healthy gut.
    • Minerals: Provides potassium, and calcium, and is low in sodium, making it a heart-friendly option.
    • Vitamin C: High in vitamin C, which boosts the immune system.

    Substitutions

    • Fresh Shiitake Mushrooms - Substitute with portobello mushrooms, cremini mushrooms, or dried shiitake (reconstituted in warm water).
    • King Oyster Mushroom - Replace with button mushrooms, enoki mushrooms, or more shiitake mushrooms.
    • Saging Saba - Use unripe plantains, sweet potatoes, or taro for a similar starchy component.
    • Black Peppercorns - Replace with ground black pepper or whole white peppercorns.
    • Vegan Patis - Replace with soy sauce, tamari, or coconut aminos for a savory alternative.
    A steaming bowl of veggie soup beside rice

    Storage

    • Refrigerator: Store this vegan bulalo soup in an airtight container in the refrigerator for up to 3 days. For best results, keep the broth and vegetables separate to maintain their texture. Reheat on the stovetop or in the microwave before serving.
    • Freezer: Freeze the broth and vegetables (except for the cabbage and leeks, which may turn mushy) in a freezer-safe container for up to 2 months. Add fresh cabbage and leeks when reheating for a fresher taste. Thaw overnight in the refrigerator before reheating.

     Ingredients

    Listed below are all the ingredients you will need:

    • shiitake mushrooms
    • king oyster mushrooms
    • red onions
    • saging saba (plantains)
    • black peppercorns
    • lemongrass stalk
    • vegan patis (fish sauce)
    • sweet corn cob
    • chayote
    • vegetable broth
    • head cabbage
    • onion leeks
    • red chilies
    • salt

    See recipe card for quantities.

    All vegan bulalo ingredients in separate white bowls

    Instructions

    In a large pot, combine the sliced red onion, black peppercorns, saging saba, lemongrass, vegan patis, sliced corn, chayote, and vegetable broth.

    Sweet corn in a pot with other vegetables

    Bring the mixture to a boil over medium heat. Reduce the heat and let it simmer for 5 minutes.

    A pot of vegetables closed with a lid

    Add the shiitake and king oyster mushrooms to the pot. Continue simmering for another 5 minutes.

    Delicious soup in a big pot of vegetables

    Stir in the cabbage slices and onion leeks. Let the soup simmer for an additional 2 minutes until the vegetables are tender.

    Cut cabbage and onions added to the soup mixture

    Season with salt to taste. Sprinkle with chopped red chilies for a hint of spice.

    All ingredients mixed into a pot of soup

    Serve hot in a bowl with jasmine rice or brown rice on the side!

    Hot rice next to bowl of delicious vegan bulalo soup

    Hint: You can remove the chopped chilies for a milder flavor, letting the savory broth and vegetables stand out.

    ⭐ Top Tip

    Adding potato marbles and sliced carrots to your vegan bulalo not only enhances the dish with vibrant colors but also adds a delightful sweetness and satisfying texture.

    These simple additions make the soup even more hearty and visually appealing, perfect for sharing with family and friends.

    FAQ

    What is the difference between bulalo and nilaga?

    The nilaga is actually a beef broth while the bulalo is a beef stock. The difference is this: A broth is made with meaty cubes. This can be beef cubes as the case is for the nilaga or chicken or pork cubes for those basic broths. A stock recipe, however, is always made with bones.

    Are any Filipino foods vegan?

    A sweet stew of coconut milk, glutinous rice balls, tapioca pearls, and sweet potatoes. A mochi-like flat rice cake made with glutinous rice flour, covered in coconut flakes, and dipped in sugar. Rice cake made from glutinous sweet rice, coconut milk, and brown sugar.

    What is bone broth vegan?

    Vegan bone broth is a nutrient-rich and flavorful stock that is ready to serve in just 2 hours. It is made using all plant-based ingredients has a robust flavor it looks and tastes wonderful!

    More Recipes

    Wanna have something sweet with your dish? Here are a few suggestions:

    • Choco Mint Blossom cookies
    • Monkey Bread
    • Nestle Crunch Candy
    • Brownielike Mug Cake
    White bowl filled with delicious Vegan Bulalo soup
    5 from 7 votes
    Print Pin Recipe

    Healthy Bulalo Recipe

    This healthy bulalo recipe is a hearty plant-based version of the classic Filipino soup featuring a flavorful broth and a mix of vegetables. It’s a comforting dish anytime, anywhere!
    Prep Time10 minutes mins
    Cook Time15 minutes mins
    Total Time25 minutes mins
    Course: Soup
    Cuisine: Filipino
    Servings: 4 servings
    Calories: 165kcal
    Prevent your screen from going dark

    Ingredients

    • ½ pound shiitake mushrooms fresh
    • 1-2 king oyster mushrooms
    • 2 red onions peeled and quartered
    • 1-2 saging saba plantains, quartered
    • 2 teaspoons black peppercorns
    • 1 lemongrass stalk trimmed and bruised
    • ⅛ cup vegan patis fish sauce
    • 1 sweet corn cob sliced into 3-6 ribs
    • 4 ounces chayote peeled and sliced
    • 6 cups vegetable broth
    • ¼ head cabbage sliced
    • 2 stalks onion leeks chopped
    • 2 teaspoons chopped red chilies
    • salt to taste

    Instructions

    Prepare the Base:

    • In a pot, combine the sliced red onion, black peppercorns, saging saba, lemongrass, vegan patis, sliced corn, chayote, and vegetable broth.

    Simmer the Base:

    • Bring the mixture to a boil over medium heat. Reduce the heat and let it simmer for 5 minutes.

    Add the Mushrooms:

    • Add the shiitake and king oyster mushrooms to the pot. Continue simmering for another 5 minutes.

    Add the Greens:

    • Stir in the cabbage slices and onion leeks. Let the soup simmer for an additional 2 minutes until the vegetables are tender.

    Season and Garnish:

    • Season with salt to taste. Sprinkle with chopped red chilies for a hint of spice.

    Serve:

    • Serve hot with jasmine rice or brown rice on the side.
    Leave a Comment
    Serving: 1servingCalories: 165kcalCarbohydrates: 39gProtein: 5gFat: 1gSaturated Fat: 0.2gPolyunsaturated Fat: 0.2gMonounsaturated Fat: 0.1gTrans Fat: 0.003gSodium: 2004mgPotassium: 748mgFiber: 6gSugar: 19gVitamin A: 1452IUVitamin C: 42mgCalcium: 61mgIron: 2mg

    Watch The Recipe Video!

    QR Code
    Did you make this recipe?Share it on instagram or tag @simplybakings or #simplybakings!

    Soups and Salads, Vegan Filipino Recipes, Vegetarian Filipino Recipes

    • « Go to Previous Page
    • Page 1
    • Page 2
    • Page 3
    • Page 4
    • Interim pages omitted …
    • Page 17
    • Go to Next Page »

    Primary Sidebar

    Lainey holding a muffin pan in her kitchen

    I'm Lainey, the driving force behind SimplyBakings.com, where I'm on a mission to redefine Filipino cooking through a plant-based lens.

    More about me →

    Popular

    • cookie dough bites
      Easiest Cookie Dough Bites Ever
    • delicious and soft oreo cheesecake cookies
      Soft Oreo Cheesecake Cookies
    • mini chocolate cupcakes in a white rectangular plate
      Delicious and Easy Mini Chocolate Cupcakes
    • Filipino Custard Cake drizzled with powdered sugar
      Filipino Custard Cake
    • no bake oreo cheesecake in a mason jar
      Foolproof 3 Ingredients No Bake Oreo Cheesecake
    • 3 brownies stacked
      Best and Easiest Brownies

    Footer

    Sign Up for My Email List

    Latest Posts

    • Foolproof Taro Recipe
    • Best Matcha Strawberry Popsicles
    • Classic Filipino Lentil Soup
    • BEST Kinamatisang Tofu

    Quick Links

    Kitchen Essentials

    About Lainey

    Contact

    • Facebook
    • Instagram
    • YouTube
    • Pinterest
    • TikTok

    © 2025 Auburn Digital Services LLC. All Rights Reserved | Privacy Policy

    Rate This Recipe

    Your vote:


    A rating is required
    A name is required
    An email is required