
• Skip to primary navigation
  • Skip to main content
  • Skip to primary sidebar
Simply Bakings logo
  • Home
  • Recipes Index
  • Filipino Recipes
  • About Me
  • Nav Social Menu

menu icon
go to homepage
search icon
Homepage link
  • Recipes
  • Filipino Recipes
  • About Me
    • Facebook
    • Instagram
    • Pinterest
    • YouTube
  • ×

    Filipino Style Carrot Cake

    Filipino Style Carrot Cake

    Jan 15, 2025 · 10 Comments

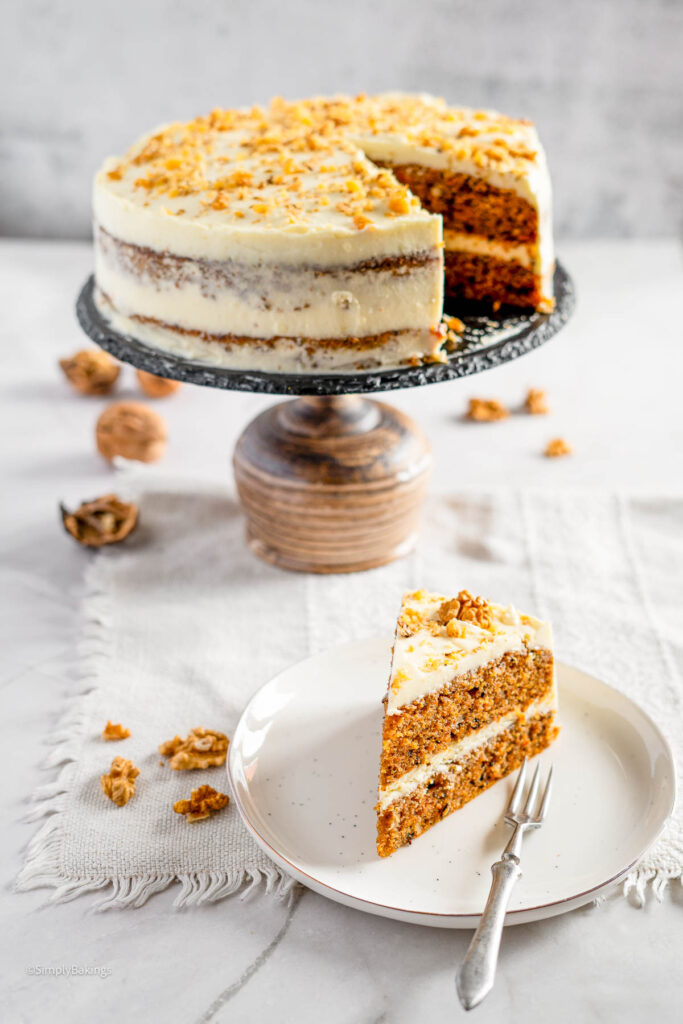
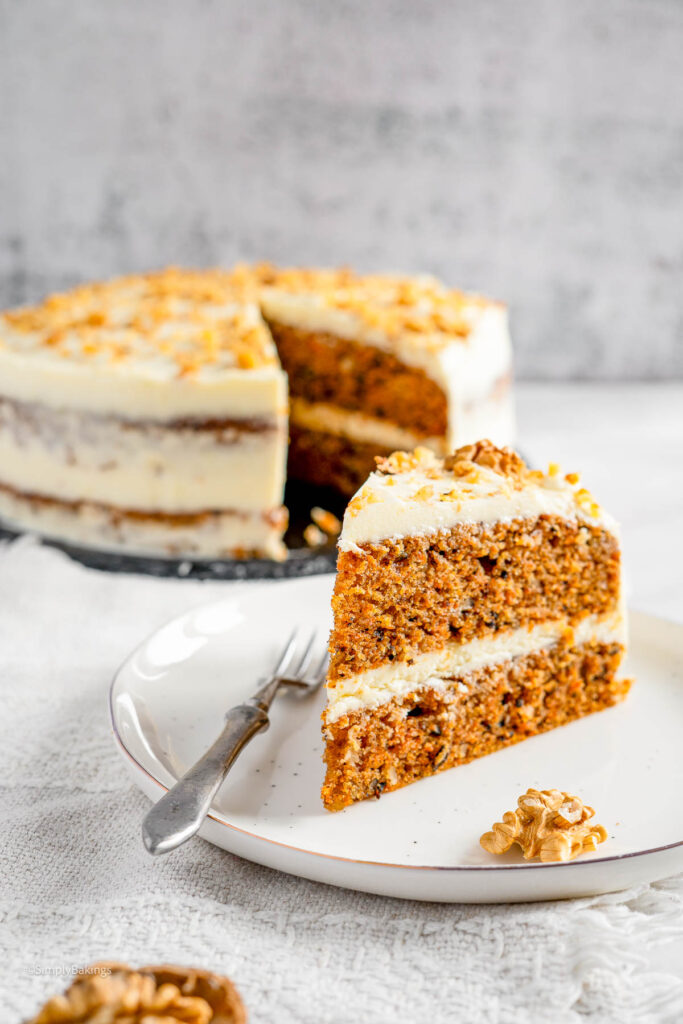
    Carrot cake on a white plate with fork

    Made with freshly grated carrots and simple pantry ingredients, this homemade cake has become a comforting favorite for many Filipino families. Whether served for merienda or dessert, this Filipino-style carrot cake is perfect for sharing with loved ones.

    Looking for more cake ideas? Try my Matcha cupcakes, Pina Colada cupcakes, and Red Velvet cupcakes.

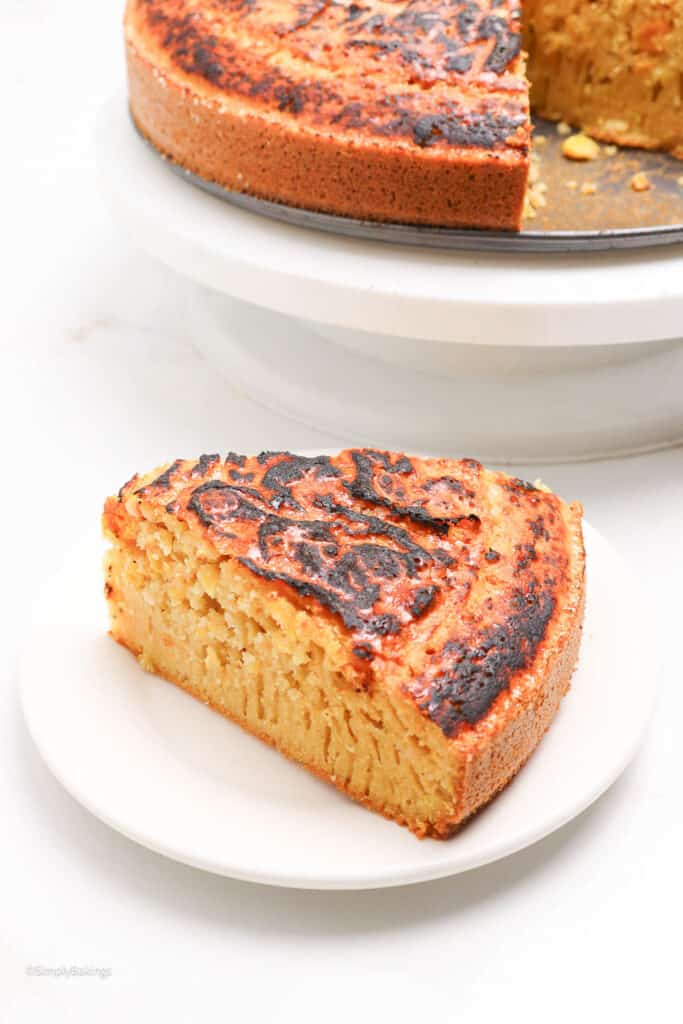
    Delicious filipino style carrot cake slice on a plate
    [feast_advanced_jump_to]

    Yes, Filipino-style carrot cake is especially popular during festive occasions and holidays like Christmas and Easter.

    Its rich, moist texture and sweet flavors make it a favorite for family gatherings and celebrations.

    What is Filipino Style Carrot Cake?

    Homemade carrot cake, while popular worldwide, takes on a unique twist in the Philippines by incorporating tropical ingredients. It reflects the Filipino love for incorporating local flavors into international dishes.

    The carrot cake recipe itself has roots tracing back to medieval times when carrots were used as a natural sweetener in desserts due to sugar being scarce and expensive.

    In the Philippines, the Filipinos turned the carrot cake mix into one that captures the essence of Filipino creativity and love for vibrant, flavorful desserts.

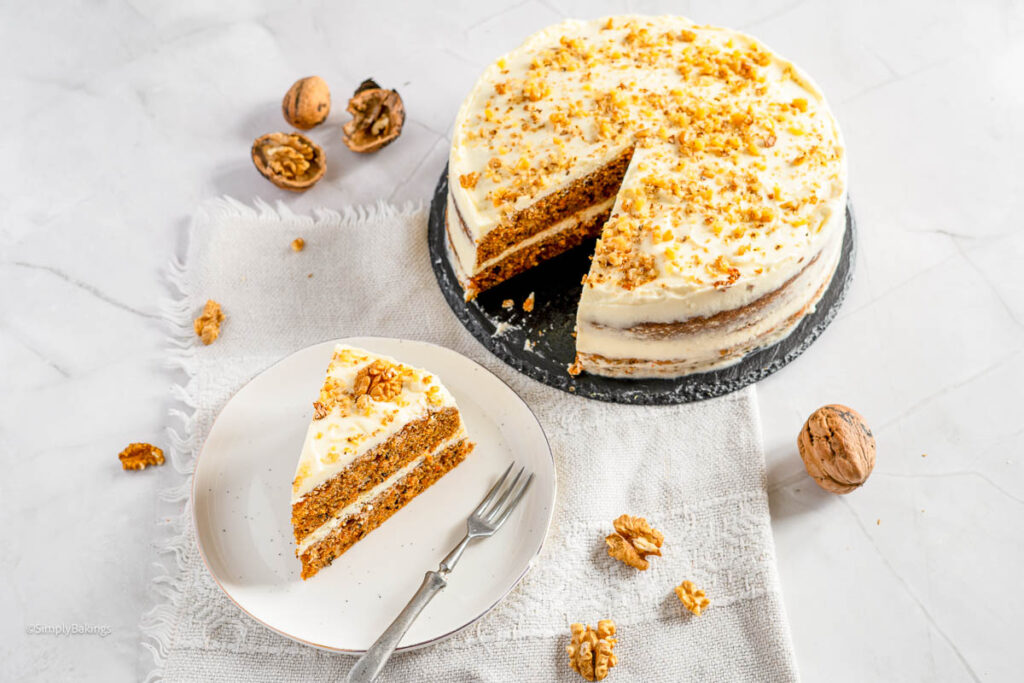
    A round of carrot cake sprinkled with nuts

    Substitutions

    • Ground Cinnamon - Replace with pumpkin pie spice or equal parts of allspice and cardamom for a slightly different spice profile.
    • Ground Nutmeg - Swap with an equal amount of allspice or mace.
    • Granulated Sugar - Substitute with coconut sugar, maple sugar, or raw sugar for a less processed option.
    • Unsalted Butter - Use vegan butter, coconut oil, or margarine.
    • Vanilla Extract - Swap with lemon extract or orange zest for a citrusy note.

    Storage

    • Store the cake in an airtight container in the refrigerator for up to 5 days.

     Ingredients

    Listed below are all the ingredients you will need:

    • all-purpose flour
    • baking powder
    • baking soda
    • ground cinnamon
    • ground ginger
    • ground nutmeg
    • ground cloves
    • salt
    • granulated sugar
    • brown sugar
    • vegetable oil
    • large eggs
    • vanilla extract
    • grated carrots
    • walnuts or pecans (optional)
    • cream cheese
    • unsalted butter
    • powdered sugar
    • milk

    See recipe card for quantities.

    All carrot cake ingredients in separate bowls

    Instructions

    Preheat the oven: Preheat your oven to 350°F (175°C). Then, grease and flour two 9-inch round cake pans. You can also put parchment paper in the pans instead. Prepare the first set of ingredients to use.

    Bowls of ingredients surrounding a big bowl

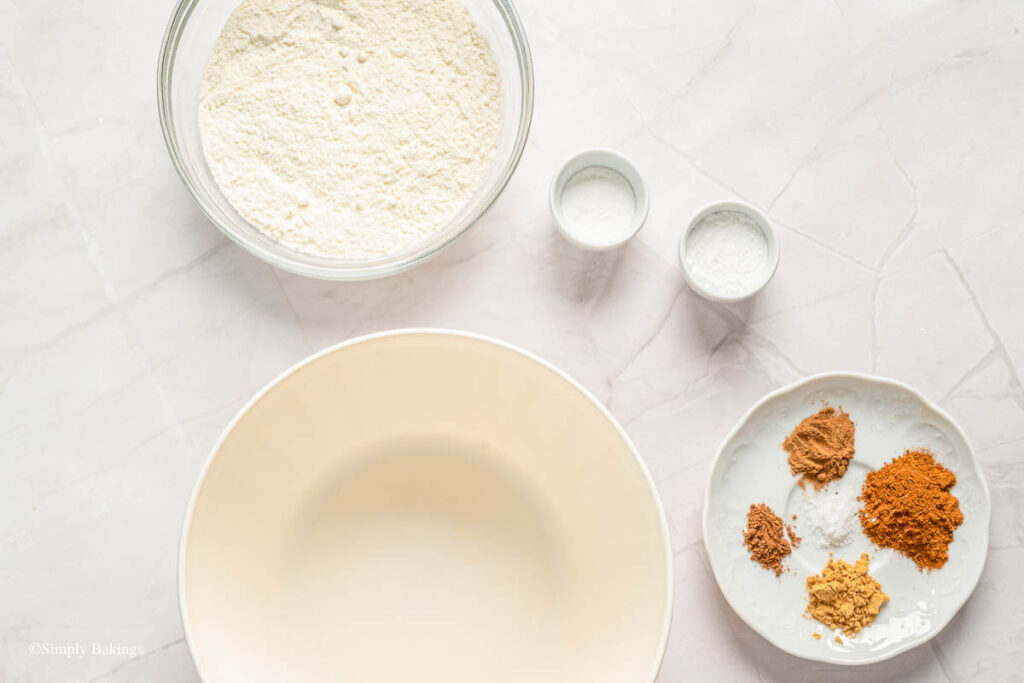
    Mix dry ingredients: In a large bowl, whisk together the flour, baking powder, baking soda, cinnamon, ginger, nutmeg, cloves, and salt. Set aside.

    A whisk and bowl to mix the dry ingredients together

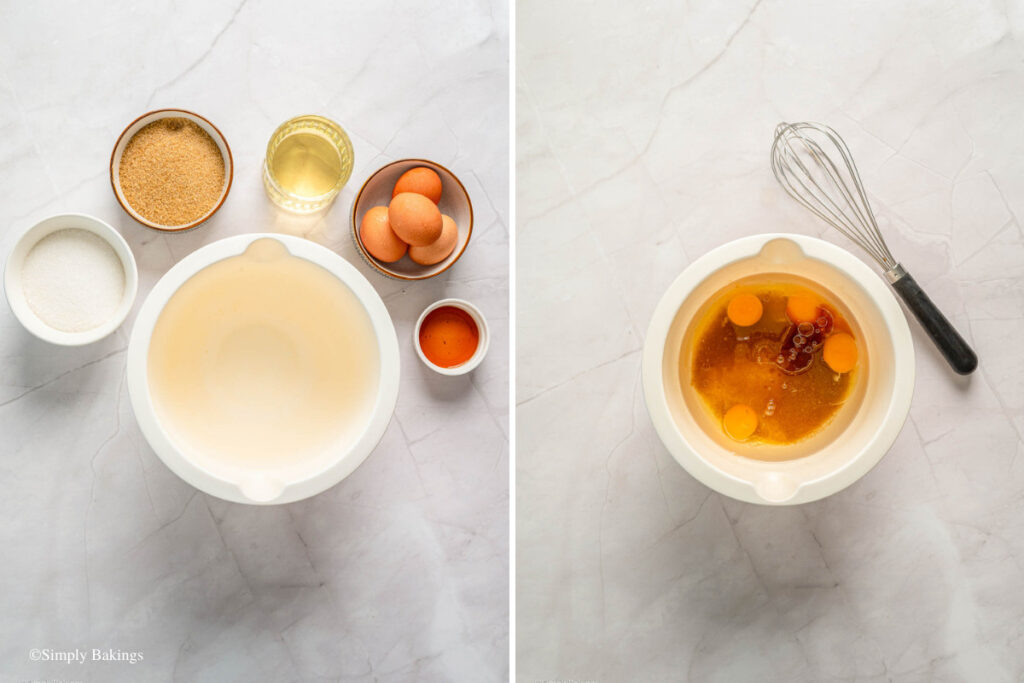
    Combine wet ingredients: In a separate bowl, blend by whisking the sugars, oil, eggs, and vanilla extract until smooth and combined.

    Eggs mixed with other ingredients

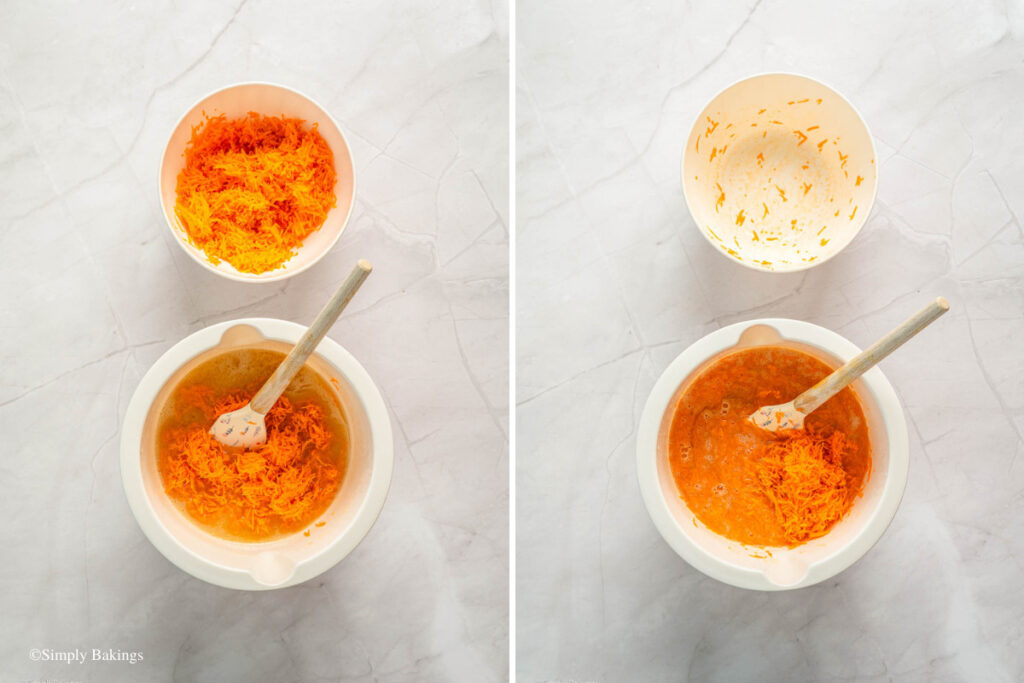
    Incorporate carrots: Gradually stir the grated carrots into the wet ingredients.

    Grated carrots folded into the cake batter

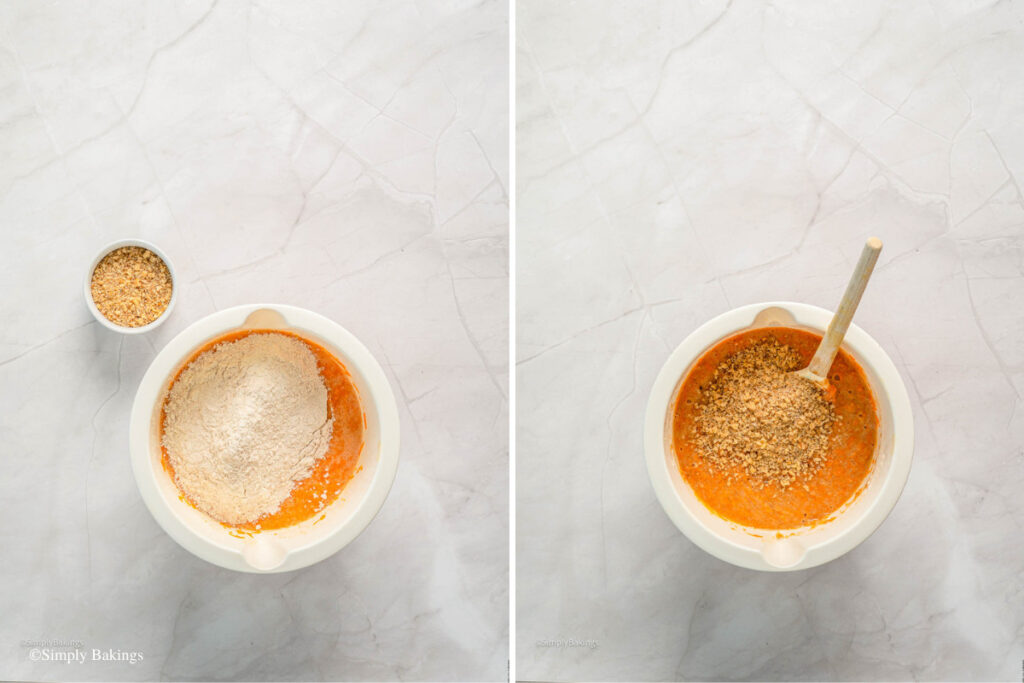
    Combine dry and wet mixtures: Add the dry ingredients (flour mixture) to the wet mixture, stirring until just combined.

    If using, fold in the chopped nuts.

    Wet and dry ingredients mixed together in bowl

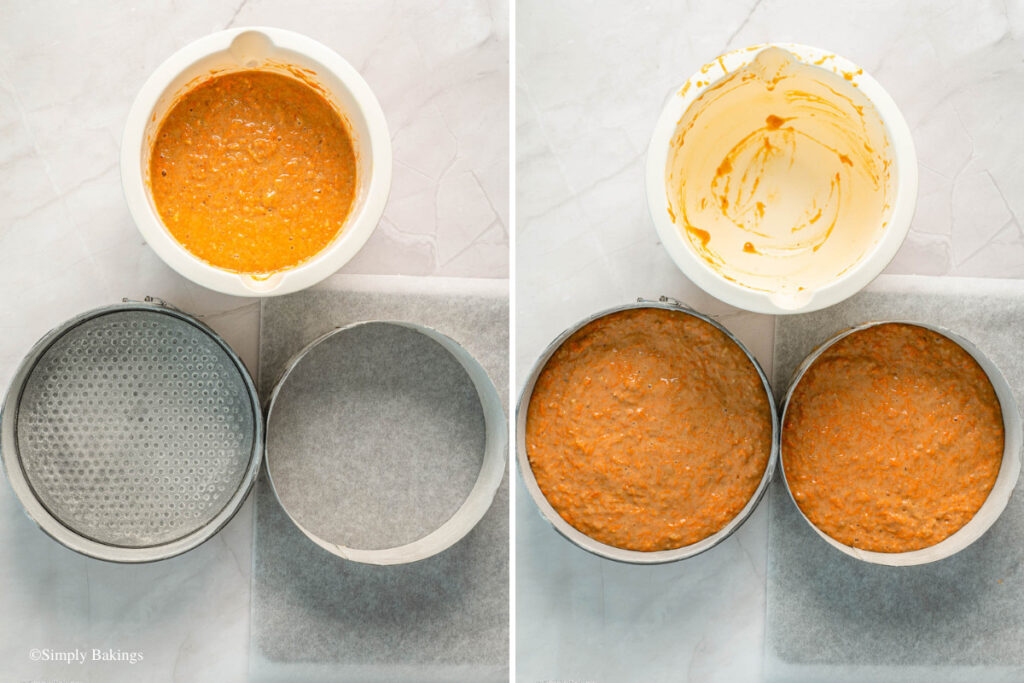
    Bake the cakes: Divide and pour batter evenly between the prepared pans. Bake for 35-40 minutes in the preheated oven or until a toothpick inserted into the center comes out clean.

    Allow the cakes to cool in the pans for 10 minutes, then transfer them to a wire rack to cool completely.

    Cake batter poured into two cake pans

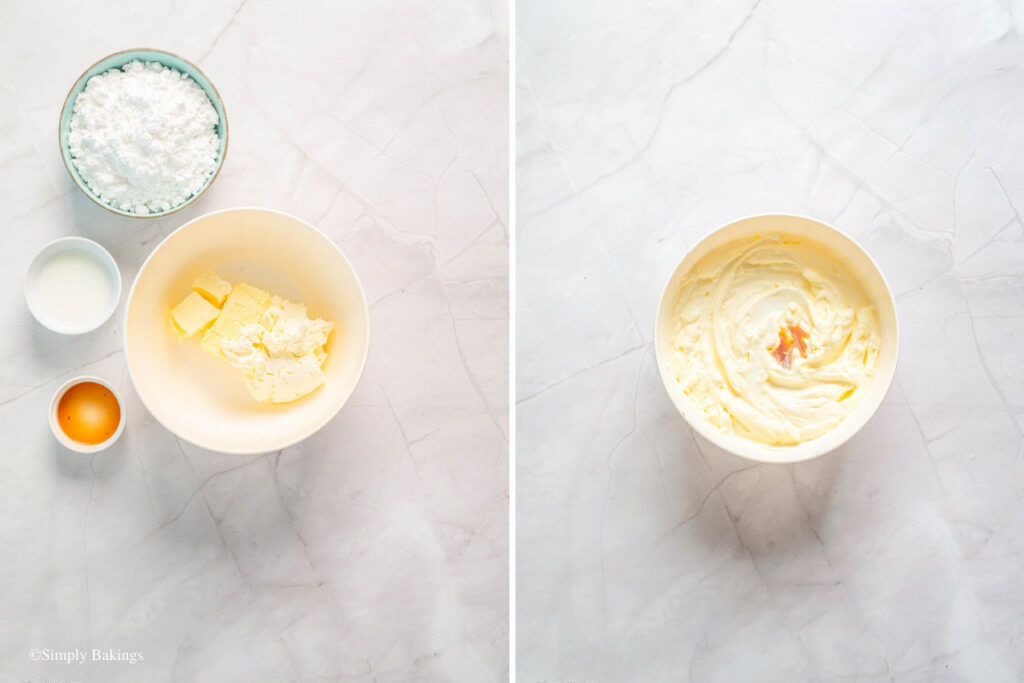
    Prepare the frosting: Beat the cream cheese and butter together until smooth and creamy.

    Gradually add the powdered white sugar, vanilla extract, and milk (if needed for spreading consistency) and beat until well combined.

    Butter mixed well with vanilla and sugars

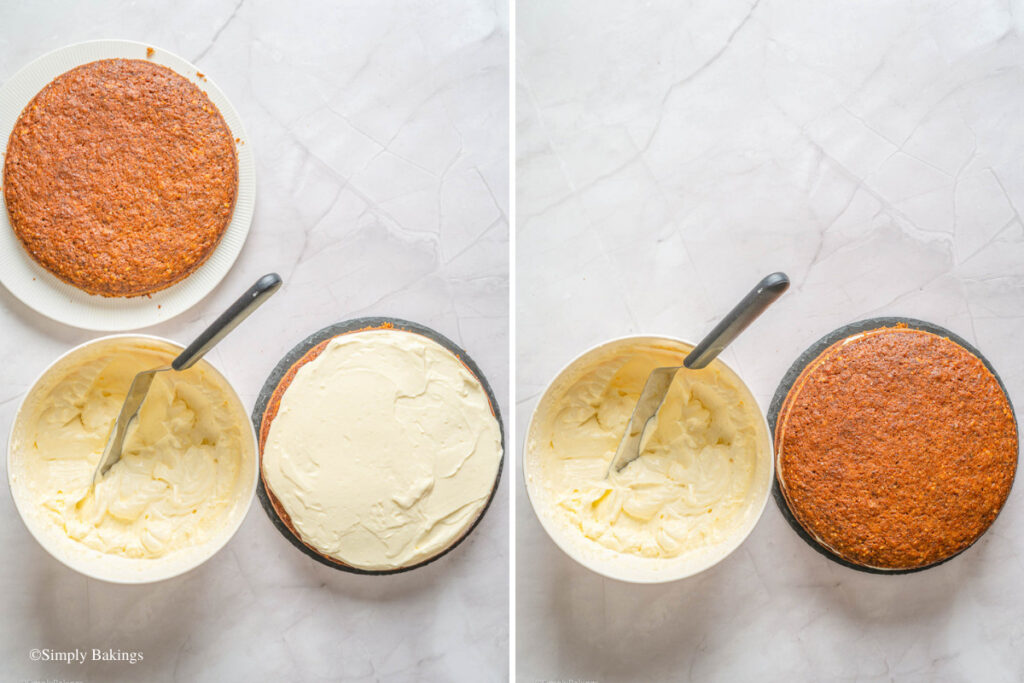
    Assemble the cake: Once the cakes are completely cool, spread a thick layer of cream cheese frosting over the top of one cake layer.

    Place the second layer on top and frost the top and sides of the cake.

    Two layers of cake on top of the other with cream

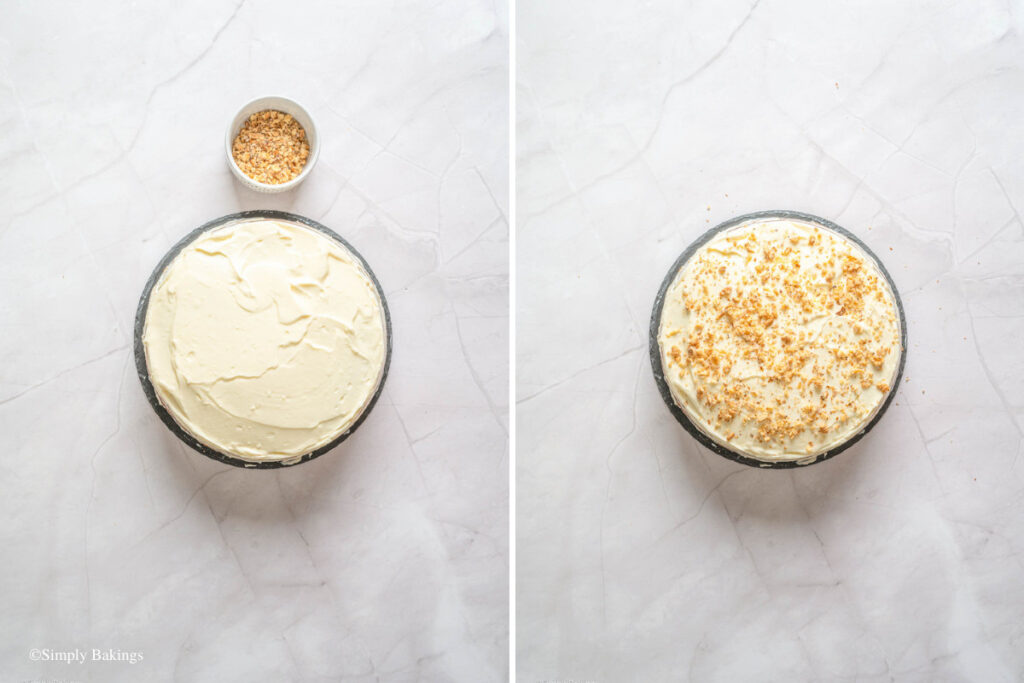
    Garnish: Optionally, garnish with additional chopped walnuts, shredded coconut, or carrot decorations.

    Nuts spread on a layer of white frosting

    Then enjoy!

    Moist carrot cake garnished with frosting and nuts

    Hint: Use freshly grated carrots for the best texture and flavor. Pre-packaged shredded carrots are often too dry and coarse for baking time. Also, this cake is great with a glass of pineapple juice!

    ⭐ Top Tip

    To make your carrot cake extra moist, don’t overmix the batter! Stir just until the ingredients are combined to avoid a dense cake.

    Adding a small amount of crushed pineapple or a splash of coconut milk can enhance the cake’s tropical flair.

    Hazelnuts and almonds on top of the first cake can also add beauty and yum to each slice!

    FAQ

    Can I omit the nuts or raisins?

    Absolutely! The nuts are optional and can be adjusted based on your preference or dietary needs.

    Is this carrot cake vegetarian-friendly?

    Yes, the traditional recipe is vegetarian-friendly. However, ensure any added ingredients like toppings or glazes are free from animal products if needed.

    What type of frosting pairs well with it?

    Cream cheese frosting is the classic choice, but you can also use a whipped cream frosting or a glaze made with powdered sugar and citrus juice for a lighter option.

    More Recipes

    Do Filipino recipes sound delicious? Here's three more:

    • Filipino Chiffon cake
    • Potato Cakes
    • Filipino Choco Rice Pudding
    slice of carrot cake on a white plate
    5 from 7 votes
    Print Pin Recipe

    Filipino Style Carrot Cake

    Topped with a creamy cream cheese frosting, my Filipino Style Carrot Cake has a tropical twist that makes it uniquely delicious and perfect for any occasion!
    Prep Time20 minutes mins
    Cook Time40 minutes mins
    Total Time1 hour hr
    Course: cake
    Cuisine: Dessert, Filipino
    Servings: 12
    Calories: 375kcal
    Prevent your screen from going dark

    Ingredients

    For the Cake:

    • 2 cups all-purpose flour
    • 1 ½ teaspoons baking powder
    • 1 teaspoon baking soda
    • 1 ½ teaspoons ground cinnamon
    • ½ teaspoon ground ginger
    • ¼ teaspoon ground nutmeg
    • ¼ teaspoon ground cloves
    • ½ teaspoon salt
    • 1 cup granulated sugar
    • ¾ cup brown sugar packed
    • 1 cup vegetable oil
    • 4 large eggs
    • 2 teaspoons vanilla extract
    • 2 ½ cups grated carrots
    • ½ cup walnuts or pecans (optional) chopped

    For the Cream Cheese Frosting:

    • 8 oz cream cheese (room temperature)
    • ½ cup unsalted butter (room temperature)
    • 3 cups powdered sugar
    • 1 teaspoon vanilla extract
    • 1-2 tablespoons milk optional for desired consistency

    Instructions

    • Preheat the oven: Preheat your oven to 350°F (175°C). Grease and flour two 9-inch round cake pans.
    • Mix dry ingredients: In a large bowl, whisk together the flour, baking powder, baking soda, cinnamon, ginger, nutmeg, cloves, and salt. Set aside.
    • Combine wet ingredients: In another bowl, whisk the sugars, oil, eggs, and vanilla extract until smooth and combined.
    • Incorporate carrots: Gradually stir the grated carrots into the wet ingredients.
    • Combine dry and wet mixtures: Add the dry ingredients to the wet mixture, stirring until just combined. If using, fold in the chopped nuts.
    • Bake the cakes: Divide the batter evenly between the prepared cake pans. Bake for 35-40 minutes or until a toothpick inserted into the center comes out clean. Allow the cakes to cool in the pans for 10 minutes, then transfer them to a wire rack to cool completely.
    • Prepare the frosting: Beat the cream cheese and butter together until smooth and creamy. Gradually add the powdered sugar, vanilla extract, and milk (if needed for spreading consistency) and beat until well combined.
    • Assemble the cake: Once the cakes are completely cool, spread a thick layer of cream cheese frosting over the top of one cake layer. Place the second layer on top and frost the top and sides of the cake.
    • Garnish: Optionally, garnish with additional chopped nuts, shredded coconut, or carrot decorations.
    Leave a Comment
    Serving: 1servingCalories: 375kcalCarbohydrates: 23gProtein: 6gFat: 28gSaturated Fat: 14gCholesterol: 55mgSodium: 400mgFiber: 2gSugar: 20g

    Watch The Recipe Video!

    QR Code
    Did you make this recipe?Share it on instagram or tag @simplybakings or #simplybakings!

    Desserts, Filipino Desserts, Vegetarian Filipino Recipes

    Filipino Baked Macaroni

    Jan 10, 2025 · 10 Comments

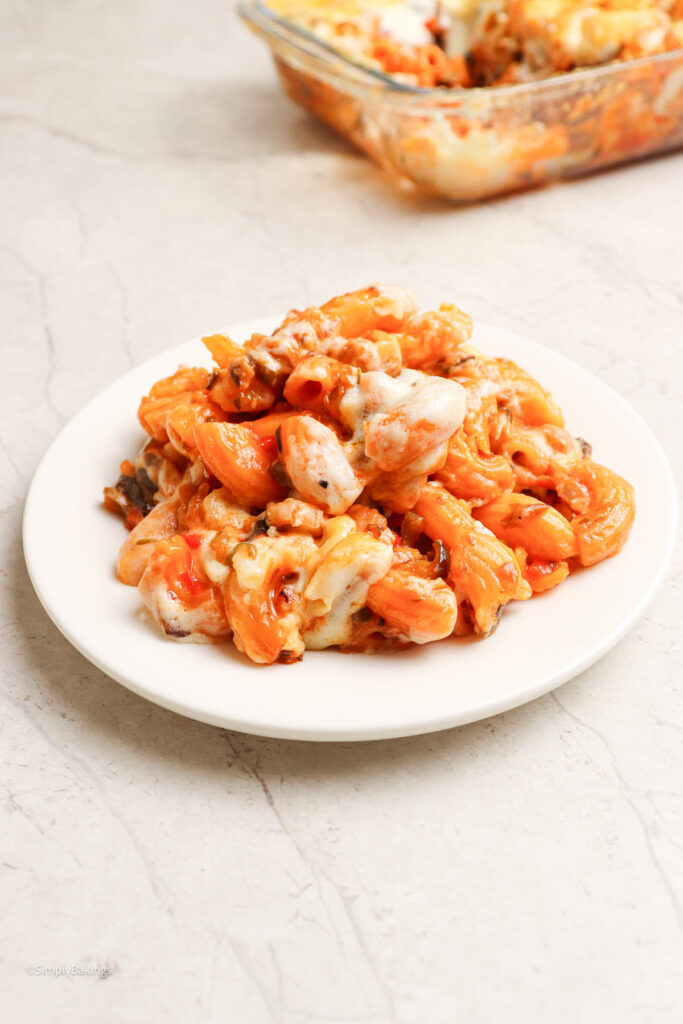
    Baked macaroni coated in cheese and sauce

    With creamy cheese sauce, yummy macaroni, and a surprising ingredient: eggplant, Filipino Baked Macaroni stands out from traditional cheesy baked macaroni recipes!

    If you're a fan of macaroni, try my ultimate Filipino Macaroni Salad and Vegan Macaroni Soup.

    Macaroni baked with melted cheese bubbling on top
    [feast_advanced_jump_to]

    What is Filipino Baked Macaroni?

    It is one of the most common and yet special Filipino recipes of the Macaroni dish that has a unique flavor profile, combining elements of elbow macaroni and local tastes.

    Traditional baked macaroni is usually layered with a rich tomato-based sauce, ground meat like beef, pork, or chicken, and plenty of melted cheese.

    This vegetarian version puts a unique twist on the classic comfort food by using eggplant as the star ingredient. It adds a delicious texture and hearty flavor while keeping the dish satisfying, cheesy, and full of comforting goodness.

    Health Benefits of Eggplant

    • high in vitamins, minerals, and antioxidants, including vitamins C, K, and potassium.
    • contains antioxidants like anthocyanins that may reduce inflammation and lower the risk of heart disease.
    • high fiber content promotes healthy digestion and helps prevent constipation.
    • low in calories and filling due to its fiber, making it great for weight control.
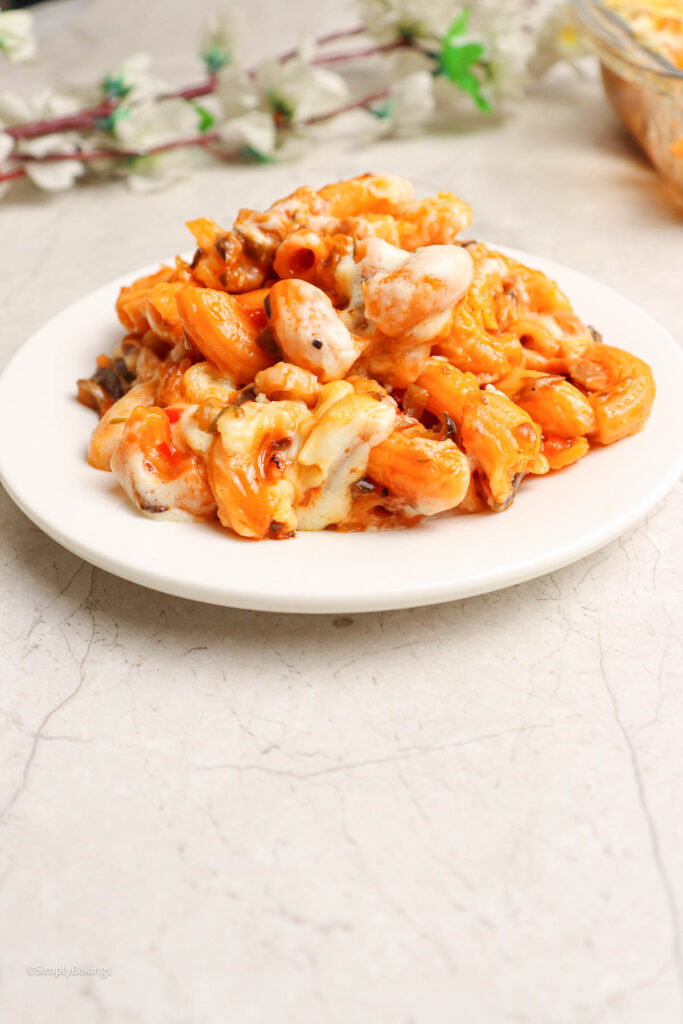
    creamy baked macaroni with layers of cheesy, meaty goodness

    Substitutions

    • Shiitake mushrooms - use the button, cremini, or portobello mushrooms
    • Italian seasoning - use a mix of dried oregano and dried thyme or basil, or replace with dried rosemary or marjoram.
    • Shredded parmesan cheese - substitute with Pecorino Romano or nutritional yeast for a dairy-free, cheesy flavor.
    • Butter - substitute with margarine, vegan butter, or coconut oil for a dairy-free version.

    Storage

    • Store in an airtight container in the refrigerator for up to 3 days.

     Ingredients

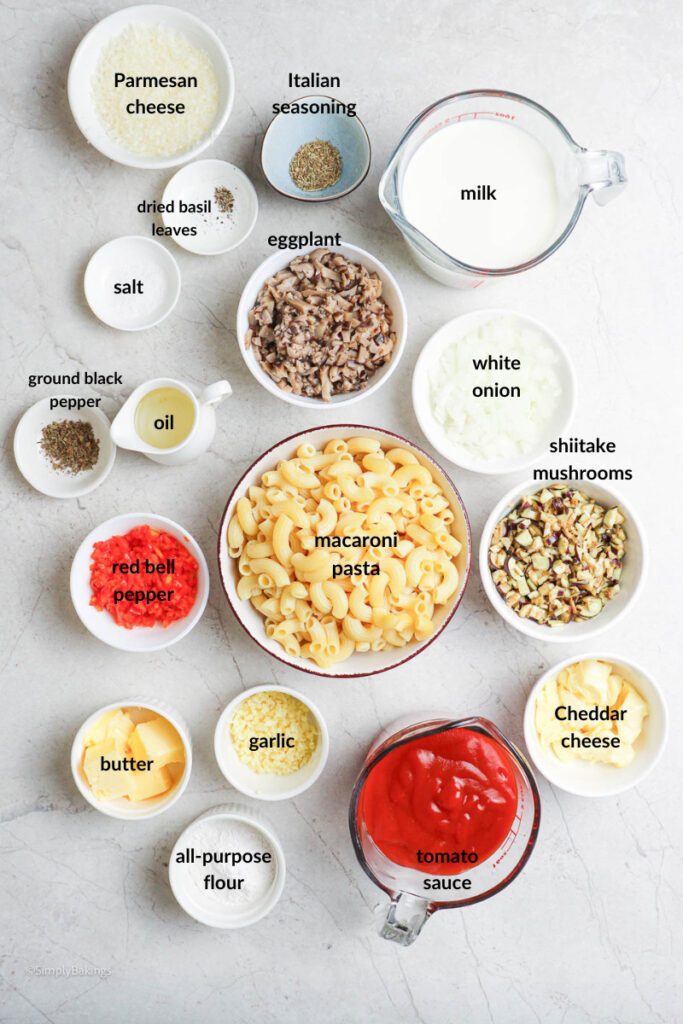
    Listed below are all the ingredients you will need:

    • oil
    • white onion
    • garlic
    • eggplant
    • shiitake mushrooms
    • red bell pepper
    • tomato sauce
    • macaroni pasta
    • Italian seasoning
    • salt
    • ground black pepper
    • butter
    • all-purpose flour
    • milk
    • shredded cheddar
    • shredded parmesan cheese
    • dried basil leaves

    See the recipe card for quantities.

    All ingredients in separate bowls

    Instructions

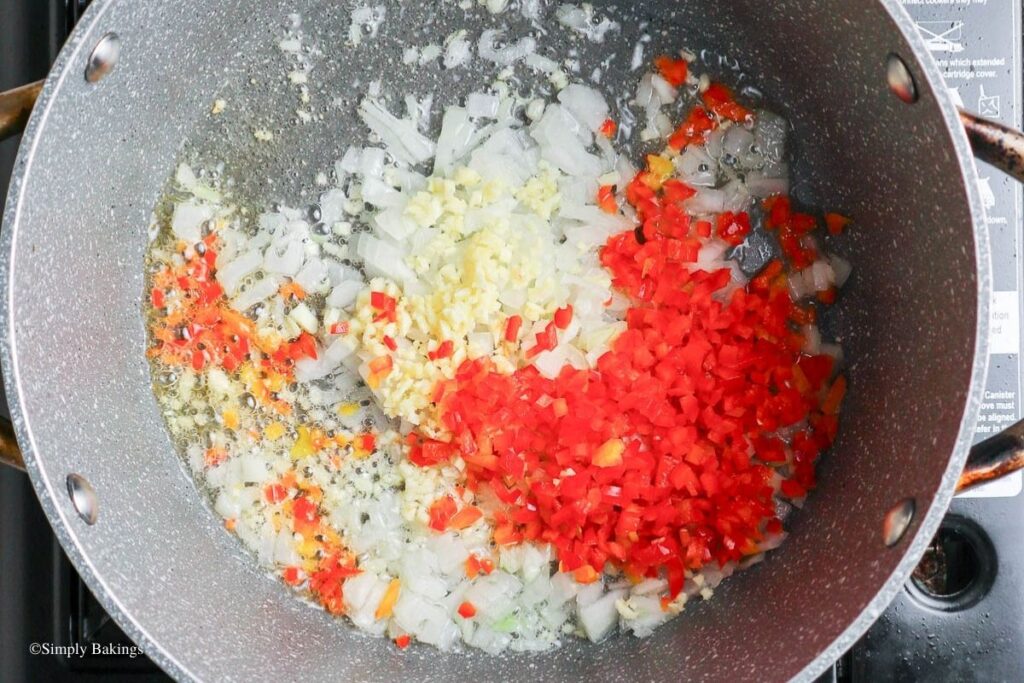
    In a heated pot or skillet, add oil and sauté onions, garlic, & chopped red bell pepper for about a minute.

    A pan filled with dices of vegetables

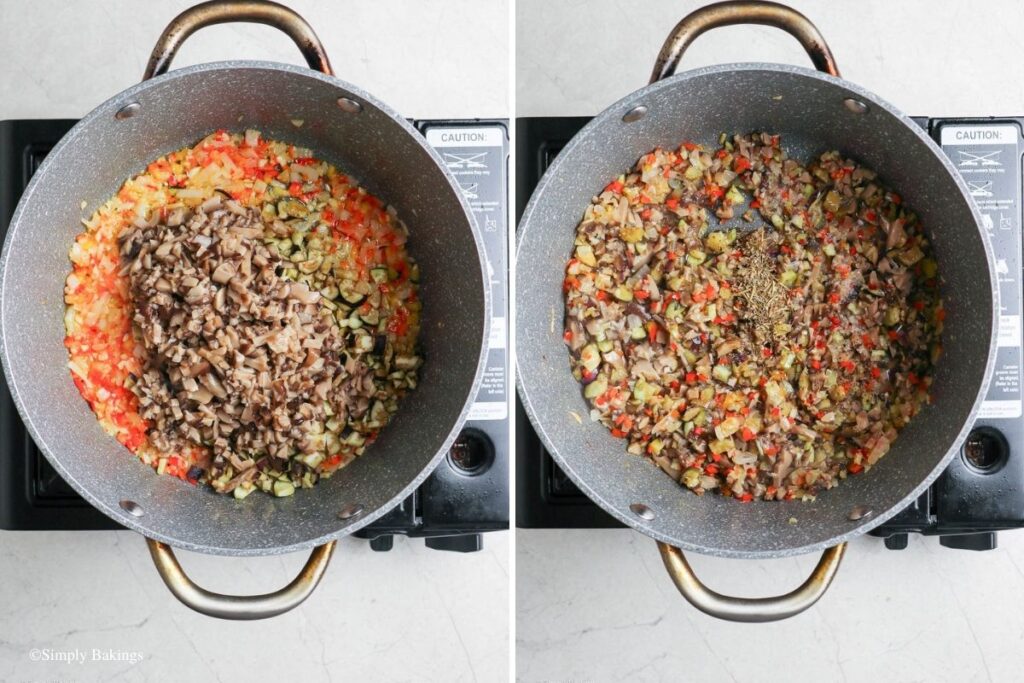
    Add the eggplant and shiitake mushrooms; continue sautéing for another 2 minutes.

    Season with Italian seasoning, salt, and ground black pepper.

    Eggplant added with other ingredients

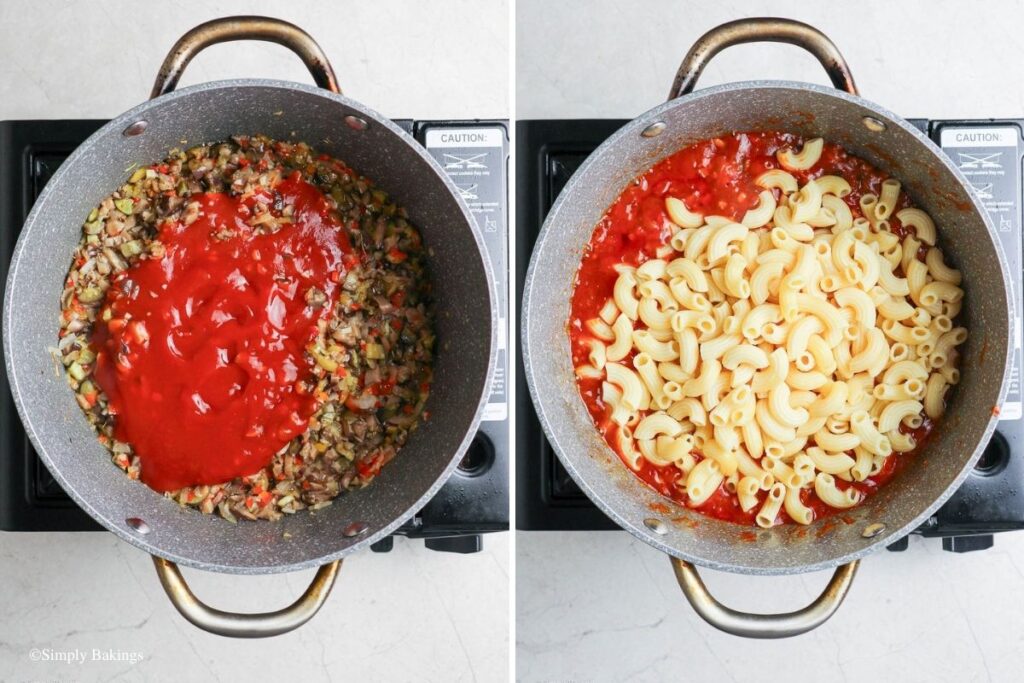
    Pour the tomato sauce and mix well; simmer for 5 minutes.

    Mix in the cooked pasta and mix well; cook for another minute.

    Sauce and macaroni mixed together

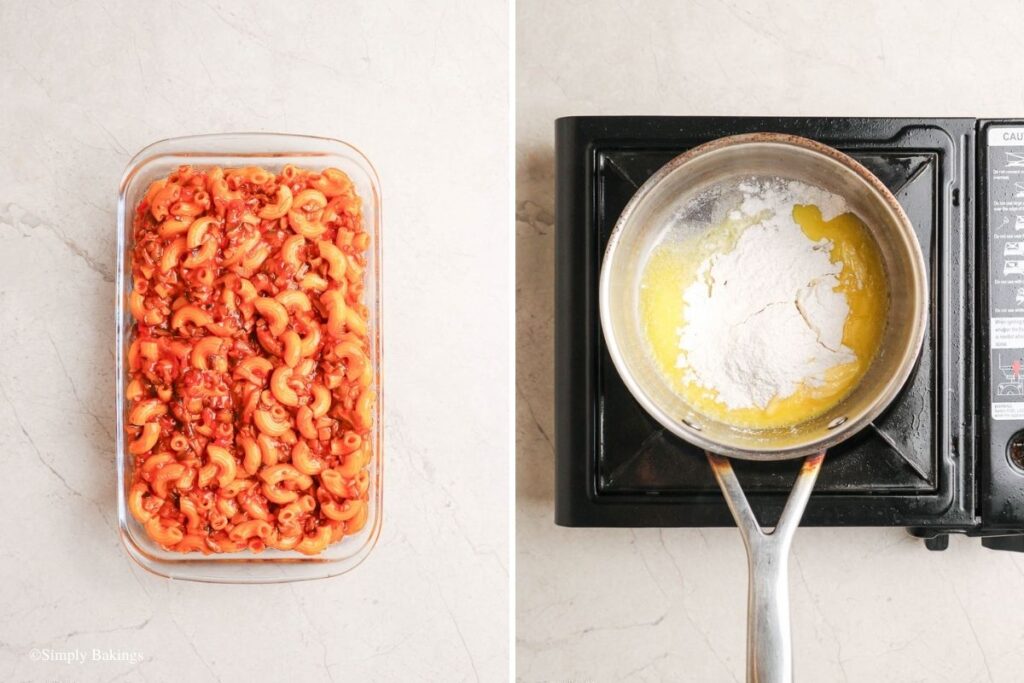
    Transfer to a baking dish and set aside.

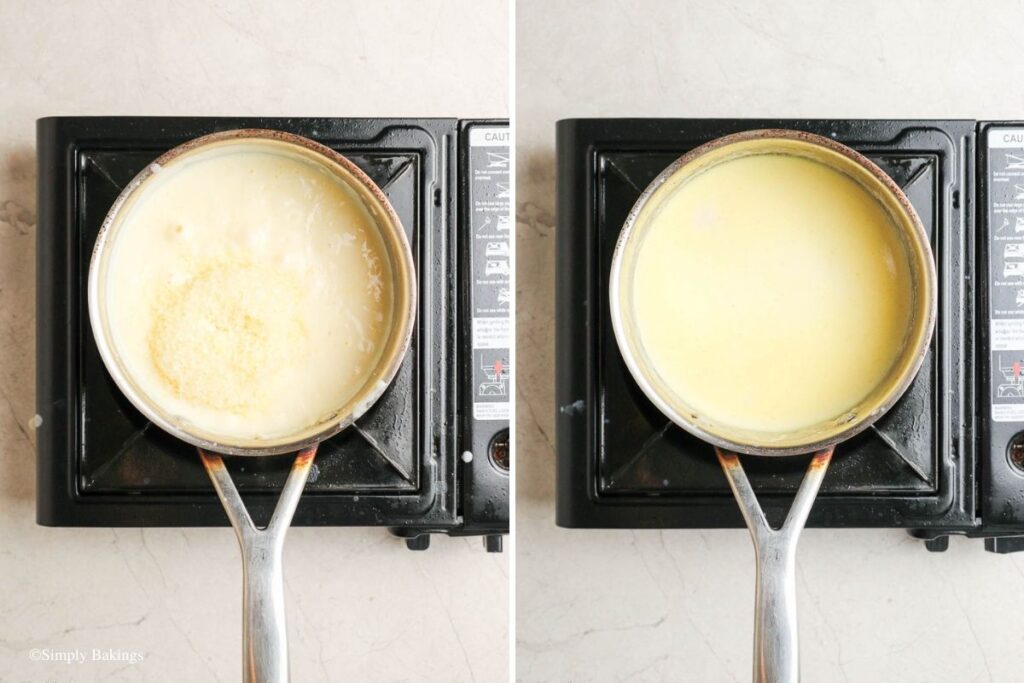
    Meanwhile, create the cheese sauce by cooking equal parts of butter and flour in another pan.

    Baked macaroni from the pot to container

    Cook until the flour is cooked through for about 2 minutes. Slowly add the milk and mix well.

    Once the milk has fully incorporated with the roux, turn off the heat, and add the cheddar & the parmesan cheese; mix until melted.

    Sauce pan filled with cheese and macaroni

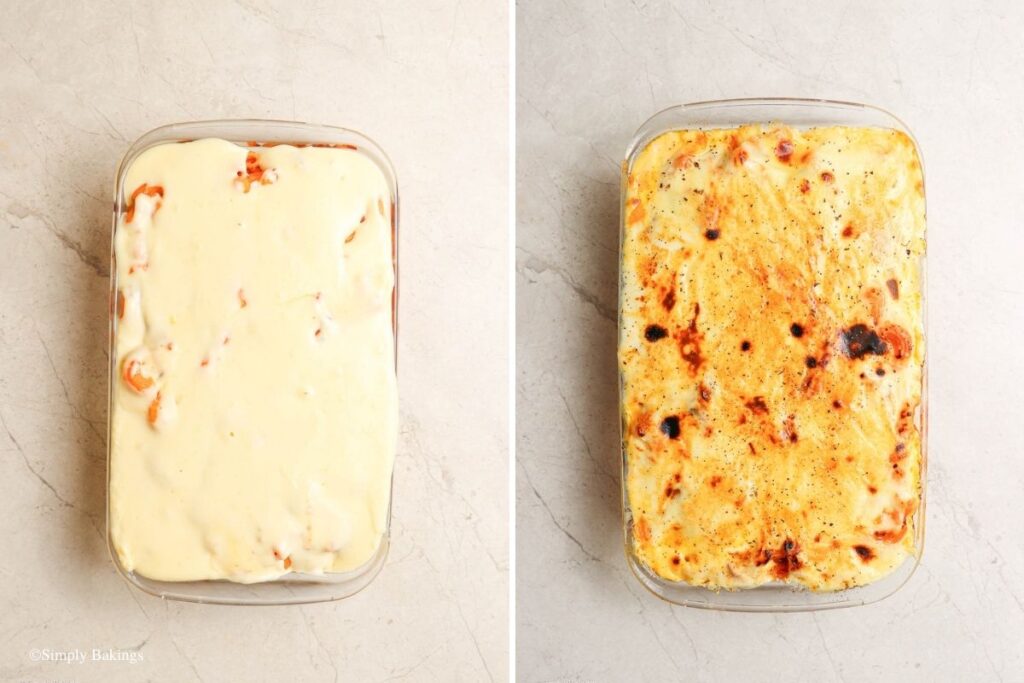
    Pour the white sauce mixture over the macaroni.

    Then baked it in the preheated oven for 25 minutes or until the cheese are nice and golden.

    Baked macaroni filled with cheese on top

    Remove and sprinkle with dried basil; serve.

    hearty pasta dish with golden cheese topping, ready to enjoy

    Hint: For best results, cook the pasta in Al Dente. Do not overcook!

    ⭐ Top Tip

    You can use different cheeses such as Grana Padano, Sharp Cheddar, or any hard cheese that is available to you.

    Use a mix of quick-melting cheese and cheddar for the topping to achieve the perfect balance of creamy and sharp flavors, and bake until golden and bubbly for that classic Filipino-style baked macaroni!

    FAQ

    Can I make this recipe ahead of time?

    Yes! You can assemble the macaroni and sauce in a baking dish, cover it tightly, and refrigerate for up to 24 hours. When you’re ready to serve, simply add the cheese topping and bake until heated through and bubbly.

    What’s the best pasta to use for Filipino Baked Macaroni?

    Macaroni is the traditional choice, but any short pasta like penne, rigatoni, or rotini works well. These shapes hold the sauce nicely, making each bite flavorful.

    Can I freeze Filipino Baked Macaroni?

    Yes, you can freeze it before or after baking. Assemble the dish, let it cool, then cover it tightly with plastic wrap and aluminum foil. Freeze for up to 2 months. When ready to bake, thaw it in the refrigerator overnight, then bake as directed.

    More Recipes

    Interested in other baked recipes? Try:

    • Berries and Banana Oats
    • Mini Pecan Pies
    • Pumpkin Spice Granola
    Delicious baked macaroni in a glass container
    5 from 9 votes
    Print Pin Recipe

    Filipino Baked Macaroni

    Whether you’re serving it for a special occasion or just to enjoy at home, Filipino Baked Macaroni will make you smile!
    Prep Time15 minutes mins
    Cook Time35 minutes mins
    Total Time50 minutes mins
    Course: Main Course
    Cuisine: Filipino
    Servings: 6 servings
    Calories: 400kcal
    Prevent your screen from going dark

    Ingredients

    For the Pasta and Sauce:

    • 2 tablespoons oil
    • ¼ cup white onion finely chopped
    • 3 cloves garlic minced
    • ¼ cup red bell pepper chopped
    • ½ cup eggplant chopped
    • 1 cup shiitake mushrooms chopped
    • ½ teaspoon Italian seasoning
    • 1 teaspoon salt
    • ½ teaspoon ground black pepper
    • 2 cups tomato sauce
    • 3 cups cooked macaroni pasta

    For the Cheese Sauce:

    • ¼ cup butter
    • ¼ cup all-purpose flour
    • 2 cups milk
    • ½ cup shredded cheddar cheese
    • ½ cup shredded parmesan cheese

    For Garnish:

    • ¼ teaspoon dried basil leaves

    Instructions

    Prepare the Pasta Sauce:

    • Heat oil in a pot or skillet over medium heat.
    • Sauté the chopped onions, minced garlic, and red bell pepper for about 1 minute.
    • Add the eggplant and shiitake mushrooms, and sauté for another 2 minutes.
    • Season with Italian seasoning, salt, and black pepper.
    • Pour in the tomato sauce and mix well. Let it simmer for 5 minutes.
    • Add the cooked macaroni pasta to the sauce and mix until well coated. Cook for 1 more minute.
    • Transfer the pasta mixture to a baking dish and set aside.

    Make the Cheese Sauce:

    • In a separate pan, melt the butter over medium heat.
    • Add the flour and whisk until smooth. Cook the roux for about 2 minutes.
    • Slowly pour in the milk, whisking constantly to avoid lumps.
    • Once the milk is fully incorporated, turn off the heat and add the cheddar and parmesan cheese. Stir until melted and smooth.

    Assemble and Bake:

    • Pour the cheese sauce over the macaroni in the baking dish, spreading it evenly.
    • Bake in a preheated oven at 375°F (190°C) for 25 minutes, or until the cheese is golden and bubbly.

    Garnish and Serve:

    • Remove from the oven and sprinkle with dried basil leaves.
    • Serve hot and enjoy!
    Leave a Comment
    Serving: 1servingCalories: 400kcalCarbohydrates: 39gProtein: 15gFat: 21gSaturated Fat: 10gPolyunsaturated Fat: 2gMonounsaturated Fat: 7gTrans Fat: 0.3gCholesterol: 45mgSodium: 1067mgPotassium: 583mgFiber: 4gSugar: 9gVitamin A: 1081IUVitamin C: 15mgCalcium: 295mgIron: 2mg

    Watch The Recipe Video!

    QR Code
    Did you make this recipe?Share it on instagram or tag @simplybakings or #simplybakings!

    Main Entree, Side Dishes, Thanksgiving Main Dishes, Vegetarian Filipino Recipes

    Biscoff Cheesecake Bars

    Dec 18, 2024 · 5 Comments

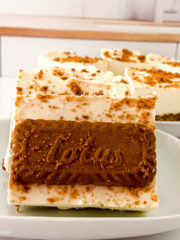
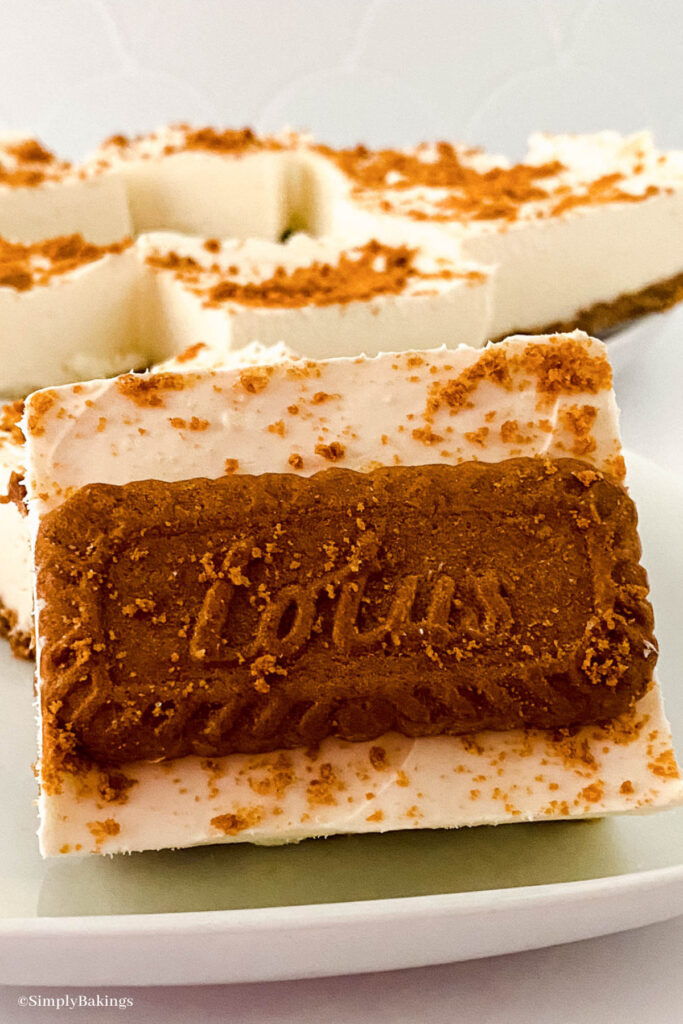
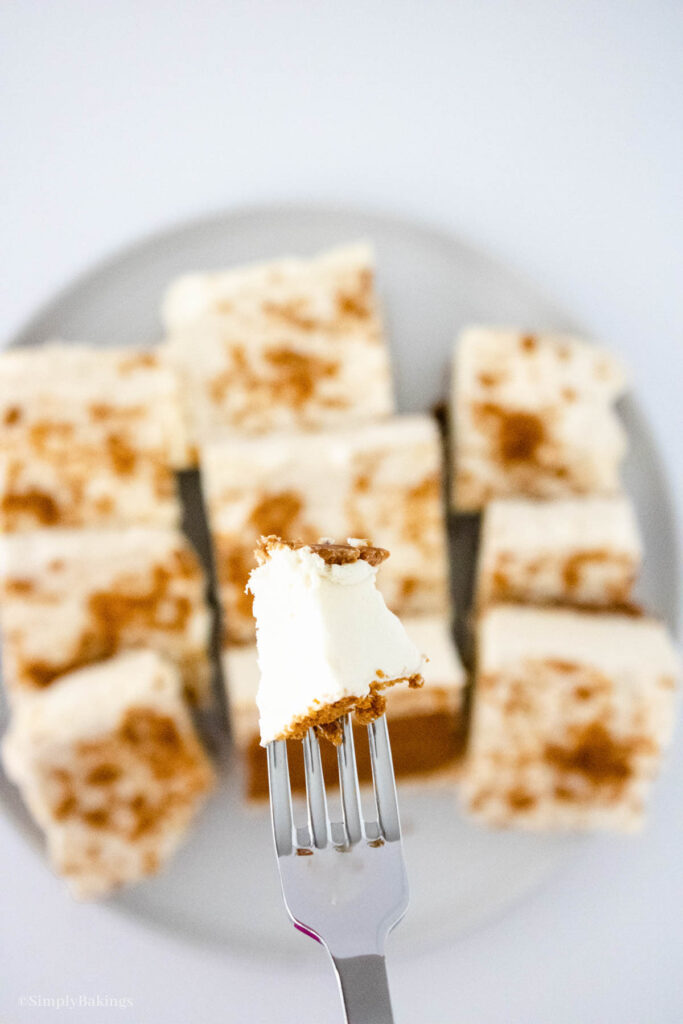
    Biscoff Cheesecake Bars slice on a plate

    These delectable Biscoff Cheesecake Bars combine creamy cheesecake and spiced Biscoff cookies that will satisfy your sweet craving. It is a simple dessert that is perfect for any occasion. Check out this recipe now and enjoy a slice of pure happiness!

    Looking for more cheesecake recipes? Try my Snickers Bites Cheesecake, Chocolate Chip Cheesecake, and Oreo Cheesecake Bites recipe!

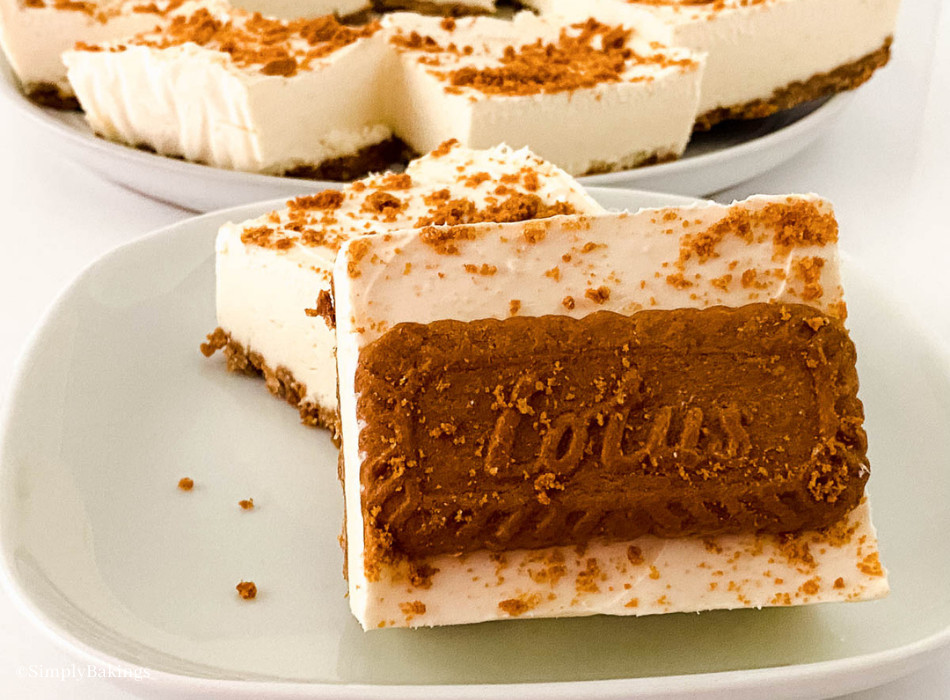
    slices of lotus biscoff cheesecake bars on a plate
    [feast_advanced_jump_to]

    What are Biscoff Cheesecake Bars?

    Biscoff Cheesecake Bars are a fusion dessert that combines American cheesecake and Belgian Biscoff cookies to make a unique and decadent treat. They are made of a buttery Biscoff cookie crust topped with creamy cheesecake and garnished with crushed cookies, making them a favorite among dessert fans.

    The cheesecake layer is made of cream cheese, sugar, container cool whip, and pure vanilla extract, while the crust is made of crushed lotus Biscoff cookies combined with melted butter. They make a wonderful blend of creamy richness and spicy, caramelized flavor.

    Learn how to prepare this delectable dessert and make your own batch for a delightful treat! Let's start with this biscoff cheesecake recipe!

    Variations

    • Chocolate Chip: Add chocolate chips to the cheesecake batter for a delicious chocolatey flavor.
    • Caramel Drizzle: Drizzle caramel sauce over the baked cheesecake bars for an extra delicious treat.
    • Toasted Coconut: Sprinkle toasted coconut flakes over the cheesecake bars for a crisp texture and a tropical flavor.
    • Peanut Butter Swirl: For a rich, nutty flavor, swirl creamy peanut butter into the cheesecake mixture.
    slices of biscoff cheesecake bars topped with lotus cookie on a grayish plate

    Substitutions

    • Crust: Substitute crushed Graham crackers or digestive biscuits for the crust if Biscoff cookies are unavailable.
    • Cheesecake: For a richer and creamier texture in the cheesecake layer, replace cream cheese with mascarpone, or for a lighter and tangier cheesecake filling, use Greek yogurt.
    • Butter: For a dairy-free option, substitute unsalted butter with margarine or coconut oil. Ghee can also be used to enhance the flavor.
    • Sugar: Try using honey, maple syrup, or coconut sugar instead of sugar for a natural sweetener.
    • Cool Whip: You may use homemade whipped cream instead by beating heavy whipping cream with a little sugar. Dairy-free options include coconut whipped cream.

    Storage

    • Refrigerate Biscoff Cheesecake Bars in an airtight container for up to 5 days.
    • Individually wrapped bars can be frozen in plastic wrap and stored in a freezer-safe container for up to two months.
    • Before serving, thaw the frozen bars in the refrigerator overnight.

     Ingredients

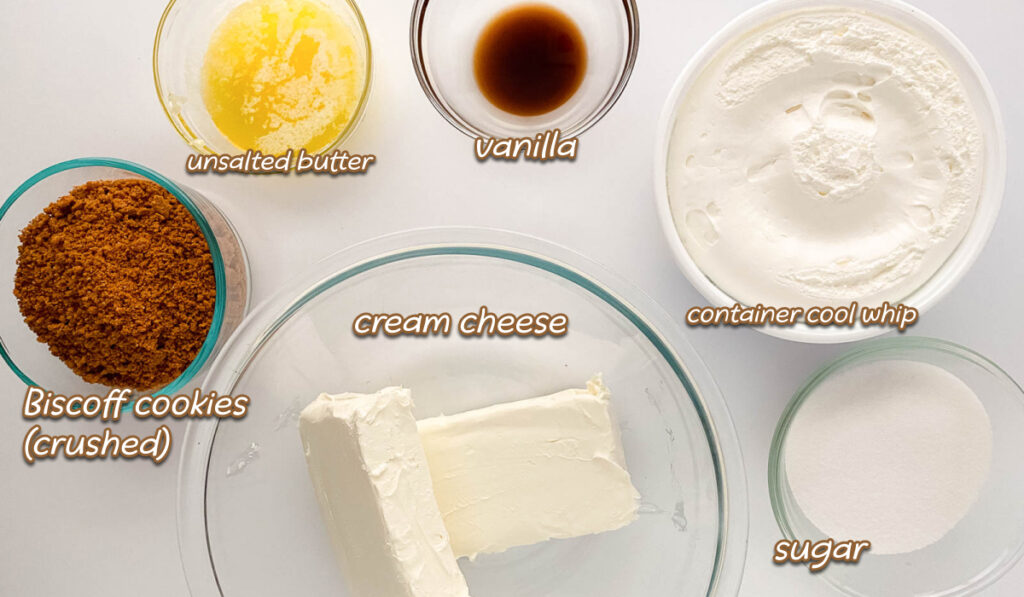
    Listed below are all the ingredients you will need:

    • Biscoff cookies
    • unsalted butter
    • container cool whip
    • cream cheese
    • sugar
    • vanilla

    See recipe card for quantities.

    ingredients for biscoff cheesecake bars recipe

    Instructions

    Preheat the oven to 350 degrees.

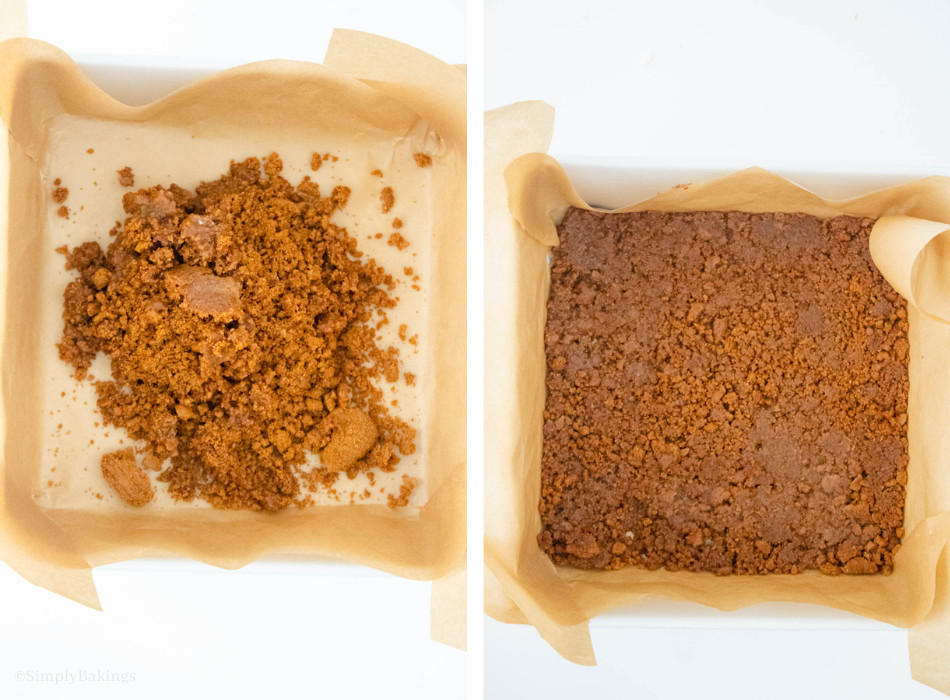
    flattened biscoff cookie crumbs and melted butter mixture into the bottom of a baking dish

    Crush the Biscoff cookies into fine crumbs using a food processor and mix with the melted butter.

    Flatten the buttery crumbs into the bottom of the baking dish or pan with parchment paper. Then, cook for 10 minutes, remove, and let it cool.

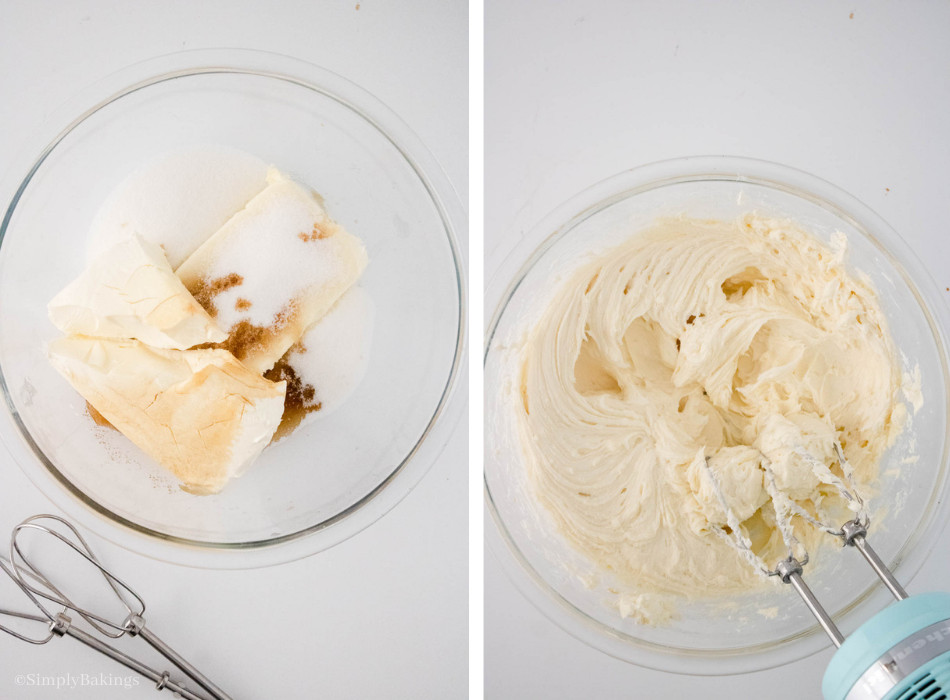
    cream cheese, granulated sugar, and vanilla extract mixed altogether in a large transparent bowl using a handheld mixer

    Put the cream cheese, granulated sugar, and vanilla extract in a large bowl.

    Mix until smooth, using an electric mixer.

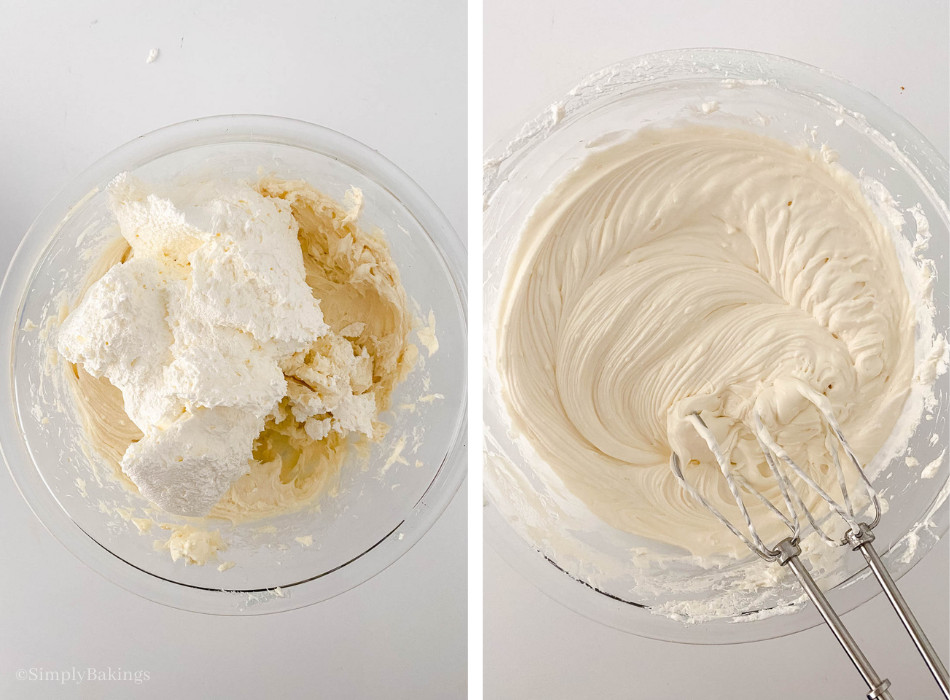
    added the cool whip into the mixture then combined together using a handheld mixer

    Add the cool whip to the bowl.

    Whip until well-incorporated.

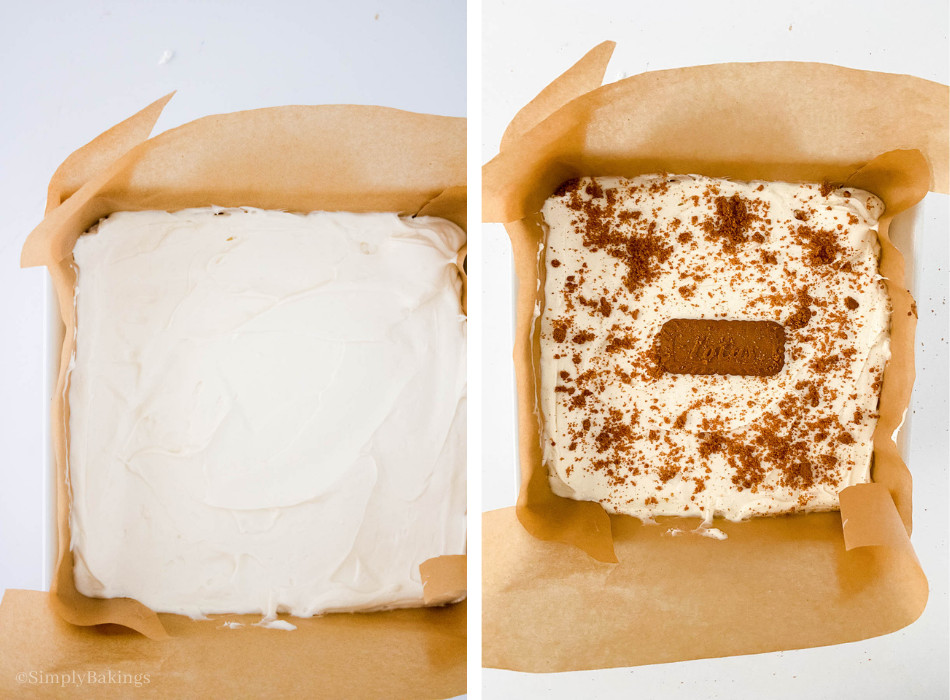
    poured the mixture on top of the cooled crumbs and garnished with more crushed cookies and a whole lotus cookie

    Pour the cheesecake mixture on top of the cooled Biscoff cookie crumbs.

    Garnish with more crushed cookies and let chill for 2-4 hours.

    a small slice of biscoff cheesecake bar in a stainless steel fork

    Slice the chilled cheesecake with a knife. Then, serve and enjoy!

    Hint: To achieve a smooth, creamy texture, soften the cream cheese to room temperature before blending with the sugar and vanilla extract.

    ⭐ Top Tips

    • For perfectly cut slices, freeze the cheesecake instead of placing it in the fridge.
    • Swirl melted Biscoff spread into the cheesecake batter before chilling for an added flavor boost.

    FAQ

    What is the flavor of Biscoff?

    Biscoff Cookies are a sweet and delightful biscuit with touches of cinnamon, buttery richness, and caramel flavor.

    Do Biscoff cookies have dairy in them?

    No, the orginal Biscoff cookies are good for a dairy-free diet because they don't contain dairy. However, to be sure they fit your dietary requirements, always make sure to check the packaging for the most recent ingredient information.

    What is Lotus Biscoff cheesecake made of?

    It is a rich buttery biscoff biscuit crust, topped with delectable cream cheese.

    More Cheesecake Recipes

    Looking for other recipes like this? Try these 3:

    • Oreo Pumpkin Cheesecake
    • No Bake Oreo Cheesecake
    • Best Vegan Fruit Cheesecake
    slices of Biscoff Cheesecake Bars arranged in a round plate
    5 from 2 votes
    Print Pin Recipe

    Biscoff Cheesecake Bars

    Here's a rich and creamy dessert or snack recipe made with a delectable cheesecake layer on top of a buttery Biscoff cookie crust. These biscoff cheesecake bars are ideal for dessert lovers because they are simple to make and provide a unique and delicious treat!
    Prep Time10 minutes mins
    Rest Time2 hours hrs
    Total Time2 hours hrs 10 minutes mins
    Course: Dessert, Snack
    Cuisine: American, Belgian
    Servings: 9
    Calories: 600kcal
    Author: Simply Bakings Kitchen Team
    Prevent your screen from going dark

    Equipment

    • food processor
    • large mixing bowl
    • hand held or stand mixer

    Ingredients

    • 1½ cups Biscoff cookies crushed (about 14 cookies)
    • 4 tablespoons unsalted butter melted
    • 16 ounces cream cheese softened
    • ⅔ cup sugar
    • 1 teaspoon vanilla
    • 18 ounces container cool whip

    Instructions

    • Preheat the oven to 350 degrees.
    • Crush the biscoff cookies into fine crumbs using a food processor and mix with the melted butter.
    • Flatten the buttery crumbs into the bottom of the baking dish or pan with parchment paper.
    • Then, cook for 10 minutes, remove, and let it cool.
    • In a large bowl, mix softened cream cheese, granulated sugar, and vanilla until smooth.
    • Add in the cool whip and whip until well incorporated.
    • Pour the mixture on top of the cooled crumbs.
    • Garnish with more crushed cookies and let chill for 2-4 hours.
    • Slice the chilled cheesecake into bars with a knife. Then, serve and enjoy!
    Leave a Comment
    Calories: 600kcalCarbohydrates: 53gProtein: 7gFat: 41gSaturated Fat: 19gPolyunsaturated Fat: 1gMonounsaturated Fat: 7gTrans Fat: 0.2gCholesterol: 73mgSodium: 200mgPotassium: 130mgFiber: 0.2gSugar: 39gVitamin A: 932IUCalcium: 112mgIron: 0.1mg
    QR Code
    Did you make this recipe?Share it on instagram or tag @simplybakings or #simplybakings!

    Cheesecake, Desserts

    Lumpiang Sariwa

    Dec 5, 2024 · 1 Comment

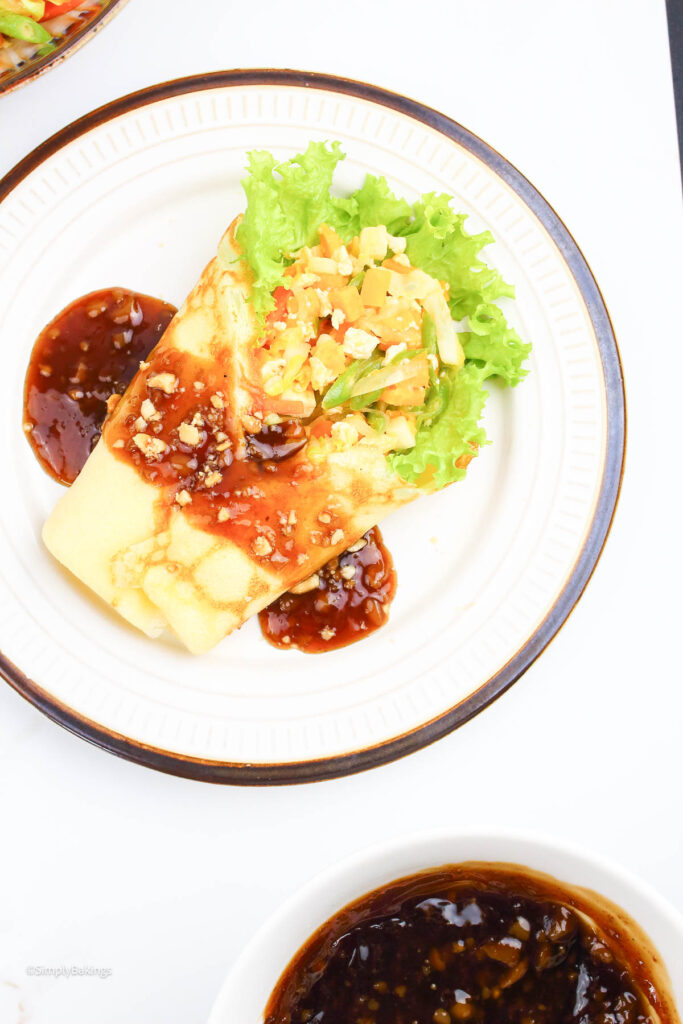
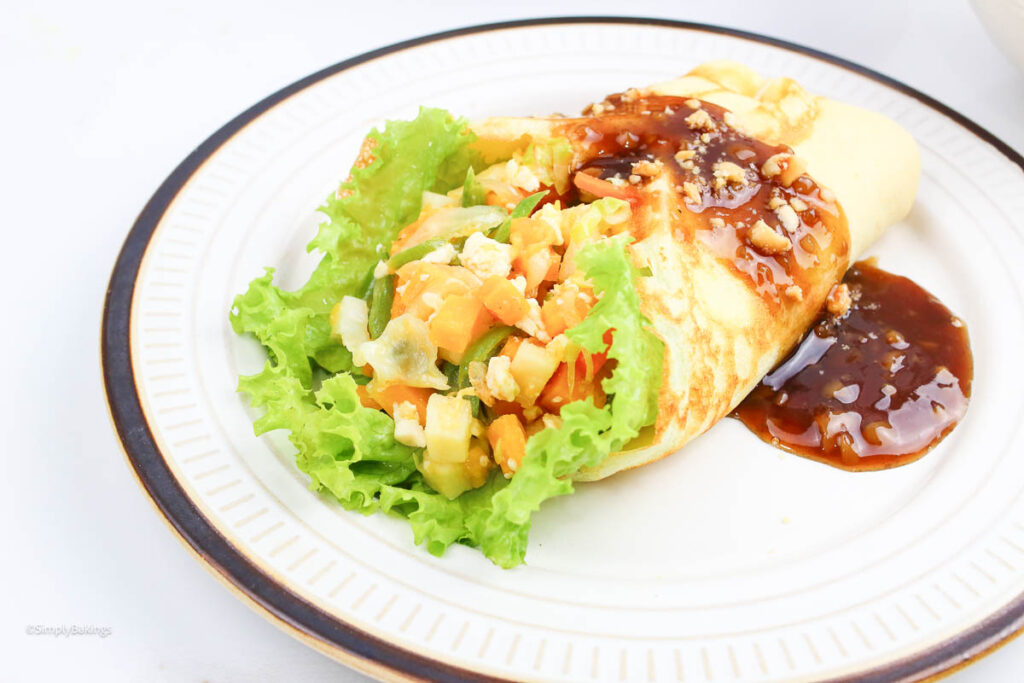
    Lumpiang Sariwa on a white plate

    Enjoy the taste of Filipino culture with our delectable Lumpiang Sariwa recipe! This classic dish, packed with fresh vegetables and savory protein and wrapped in homemade fresh lumpia wrapper, provides a delicious blend of flavors and textures. Join us as we discover the secrets to making this famous Filipino staple suitable for every occasion!

    Looking for more vegetable wrap recipes? Try my tofu wrap, curried chickpea wrap, and vegan burrito recipe!

    a small bowl of peanut sauce and a lumpiang sariwa served on a white plate drizzled with a peanut sauce
    [feast_advanced_jump_to]

    What is Lumpiang Sariwa?

    Lumpiang Sariwa, also known as fresh lumpia or fresh spring rolls, was introduced to the Philippines by Chinese immigrants who brought their culinary traditions with them. It evolved over time into a distinctively Filipino dish, mixing fresh veggies, tofu, and a sweet-savory sauce wrapped in a thin crepe-like wrapping. Today, this dish is often served both for special occasions and for ordinary meals.

    Learn how to make this savory fresh lumpia recipe with our step-by-step guide, which is suitable for both newbie chefs and experienced cooks. Let's go into the realm of lumpiang sariwa and expand your culinary skills!

    Health Benefits Romaine Lettuce

    • Its potassium content promotes heart health.
    • It supports hydration with its high water content.
    • It contains dietary fiber, which improves digestion.
    • Its low calories and high water content aid in weight management.
    • Loaded with essential vitamins and minerals that maintain overall health.

    Variations

    • Vegetable Filling - you may choose bean sprouts, mushrooms, water chestnuts, thinly sliced jicama, bamboo shoots, or shredded daikon radish as an addition or a replacement, if desired.
    • Protein - feel free to add other plant-based proteins or any meat of your choice.
    • Spicy - add chili flakes, chili peppers, or spicy sauce to the filling mixture and adjust the spiciness as desired.
    • Dipping Sauces - this dish can be served with a sweet and savory peanut sauce, vinegar-based dipping sauce with garlic and chili, or a hoisin-based sauce.
    delicious lunpiang sariwa with peanut sauce on top

    Substitutions

    • Wrappers - instead of homemade lumpia wrappers, you can use store-bought spring roll wrappers or rice paper wrappers as substitutes. Also, you can alternatively use gluten-free wrappers made from rice flour or tapioca starch for those with gluten allergies.
    • Carrots - you may use bell peppers, zucchini, singkamas, or celery if carrots are unavailable
    • Tofu- if you are allergic to tofu, you can leave it out or replace it with cooked and crumbled tempeh.

    Storage

    • Refrigeration: Keep the lumpiang sariwa in an airtight container or wrap them tightly in plastic wrap. Place them in the refrigerator as soon as possible, and they should last for at least 2–3 days.
    • Separate Components: To avoid soggy wrappers, store the sauce separately from the lumpia. Keep the sauce in one container, and the lumpia in another.
    • Avoid Freezing: Lumpiang Sariwa is best-savored fresh, and freezing might affect the texture of the wrappers and filling. It is not advisable to freeze them since they may turn mushy when thawed.
    • Reheating: To prevent drying out the wrapper or overcooking the fresh lumpia, reheat them gently if needed. You can either quickly steam them or give them a quick microwave reheat to ensure they are thoroughly heated.
    • Serve chilled: Fresh Lumpia can be served chilled straight out of the fridge. Just be careful to keep it covered to avoid drying it out.

     Ingredients

    Listed below are all the ingredients you will need:

    Peanut Sauce:

    • soy sauce
    • vegetarian oyster mushroom sauce
    • vegetable broth
    • brown sugar
    • garlic
    • cornstarch
    • water
    • salt
    • crushed peanuts

    Filling:

    • vegetable oil
    • sweet potatoes
    • jicama
    • vegan fish sauce
    • cabbage
    • carrots
    • vegetable broth
    • romaine lettuce leaves
    • firm tofu
    • green beans
    • sweet onions
    • garlic
    • salt
    • ground black pepper

    Wrap Ingredients:

    • all-purpose flour
    • large eggs
    • vegetable oil
    • salt
    • whole milk
    • butter

    See the recipe card for quantities.

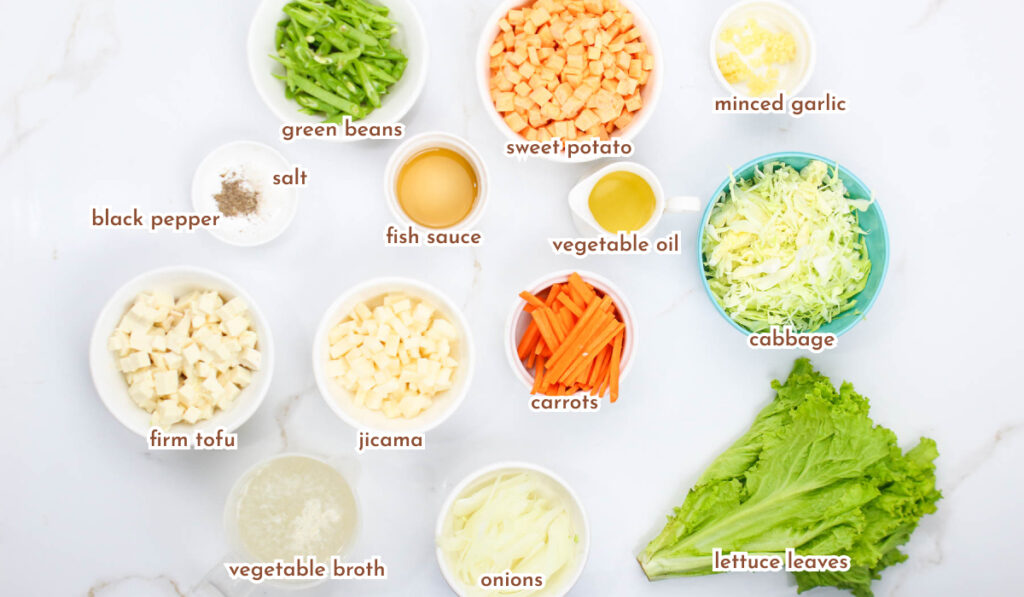
    ingredients for lumpiang sariwa recipe

    Instructions

    Gather and prepare all the ingredients for this recipe. Then, let’s begin!

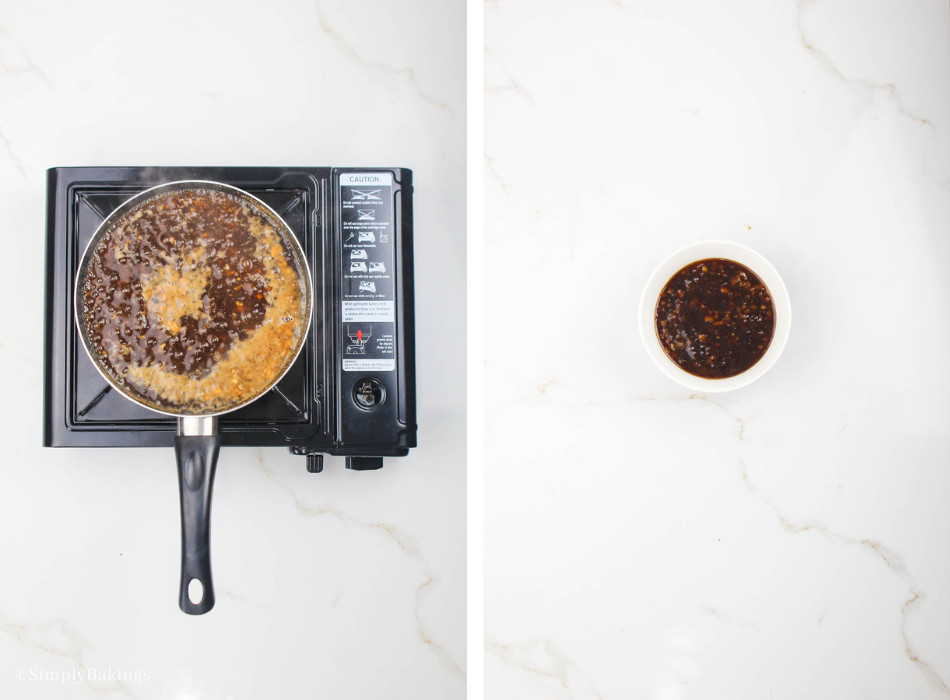
    peanut sauce ingredients boiled in a pan until thickened then transferred to a small white bowl

    Combine all the peanut sauce ingredients.
    Bring the mixture to a boil in a saucepan and reduce to a simmer until thickened while stirring once in a while.

    Once thickened, transfer the lumpia sauce to a bowl and set aside.

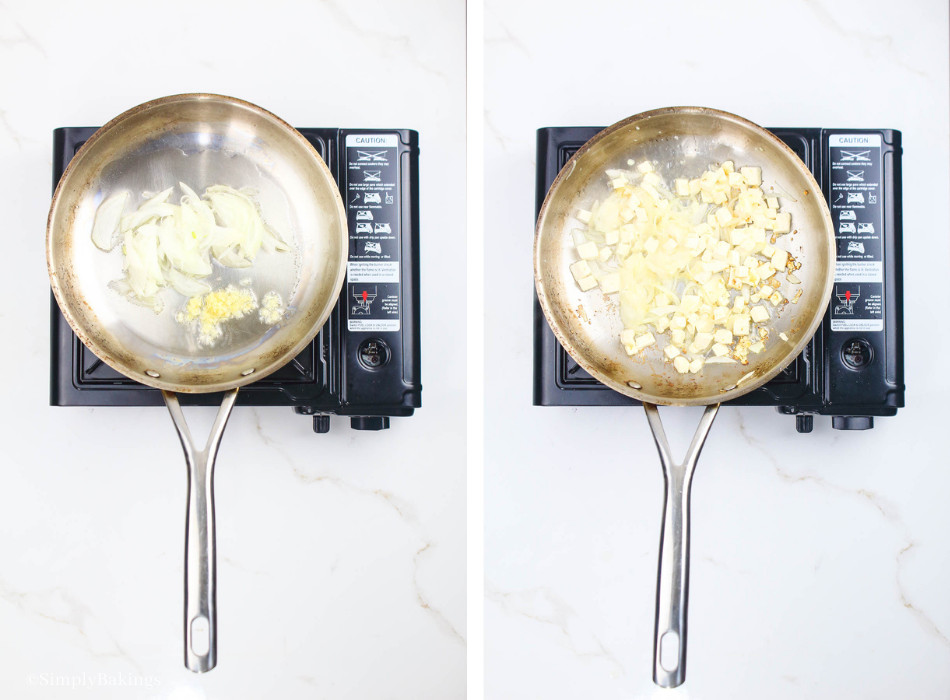
    sautéed minced garlic and chopped sweet onions in a heated skillet then added the firm tofu

    Cook the filling by adding the oil to a heated skillet. Sauté minced garlic and chopped sweet onions for 60 seconds on medium-low heat.

    Add the firm tofu cubes and cook until browned.

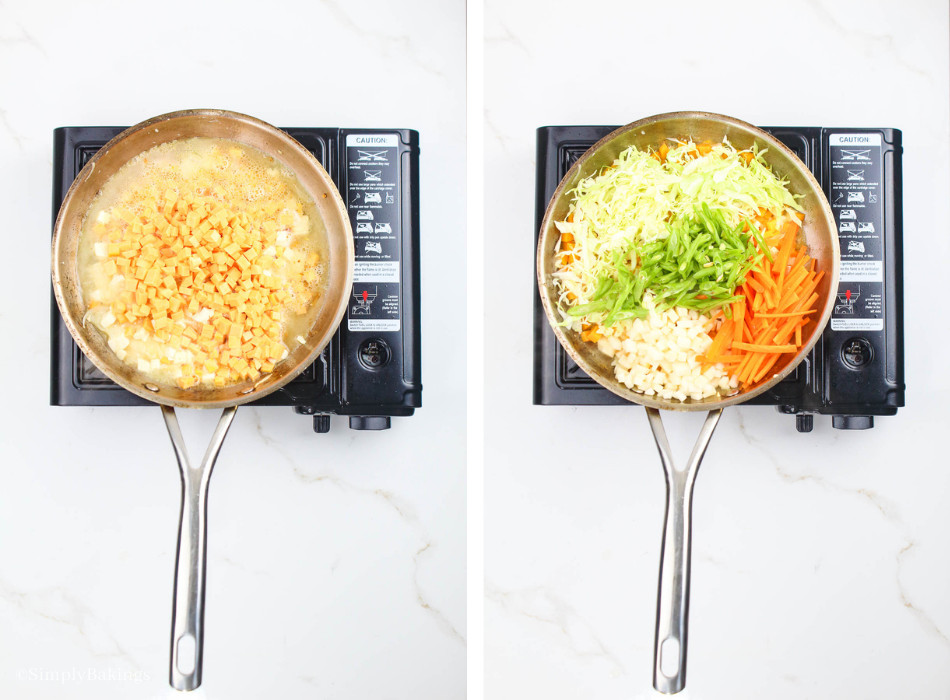
    added the sweet potatoes, water, jicama, carrots, green beans, and shredded cabbage into the skillet

    Add the sweet potatoes and pour in the water. Bring the mixture to a boil and reduce to a simmer for 5 minutes.

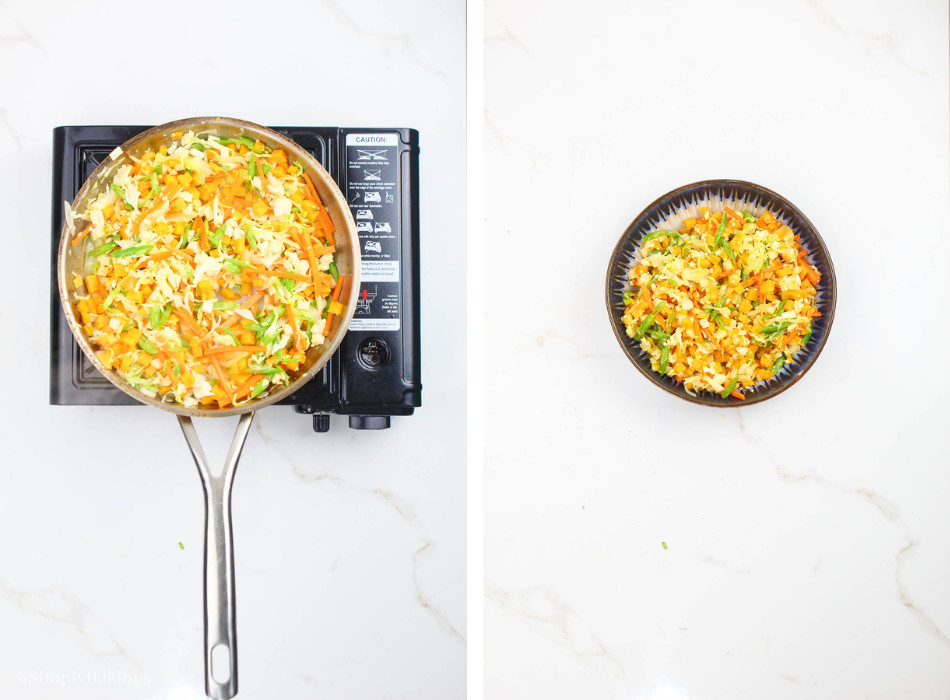
    Add the jicama, carrots, green beans, and shredded cabbage, and stir fry for another 3 minutes while mixing constantly.

    added a splash of vegan fish sauce to the mixture and seasoned with salt and ground black pepper and transferred into a bowl

    Add a splash of vegan fish sauce. Season with salt and ground black pepper, to taste.

    Transfer to a serving bowl and set aside.

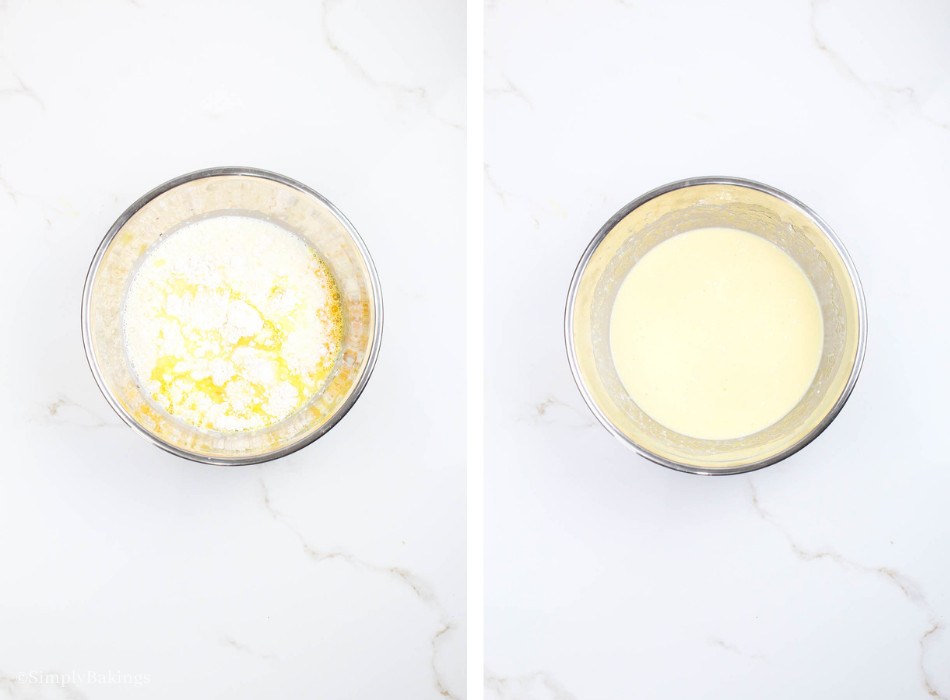
    the wrap ingredients (except the butter) whisked together in a mixing bowl

    Place all the wrap ingredients (except the butter) in a mixing bowl.

    Whisk together until fully incorporated.

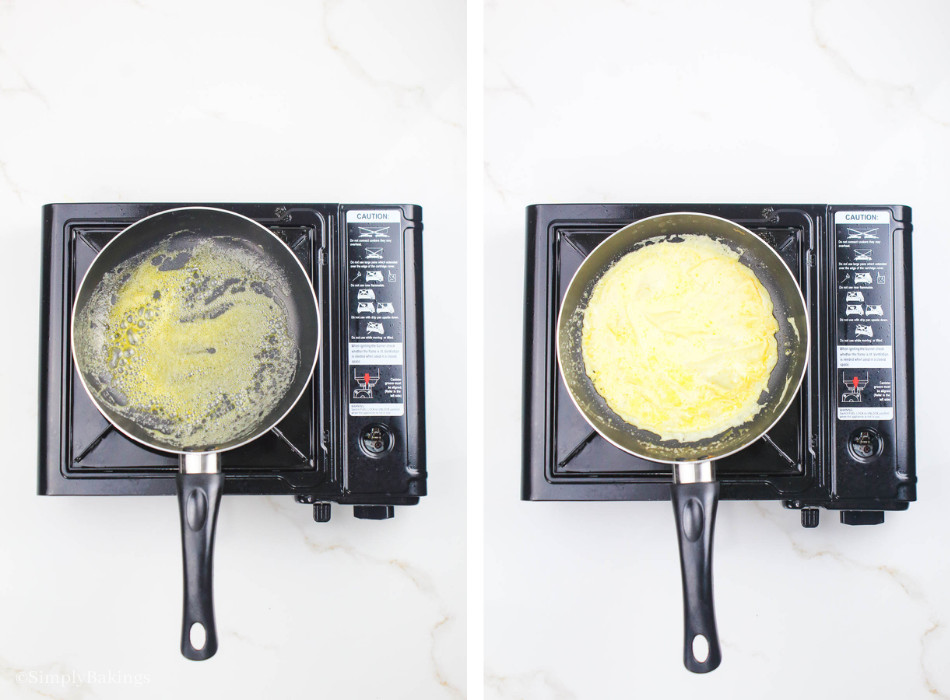
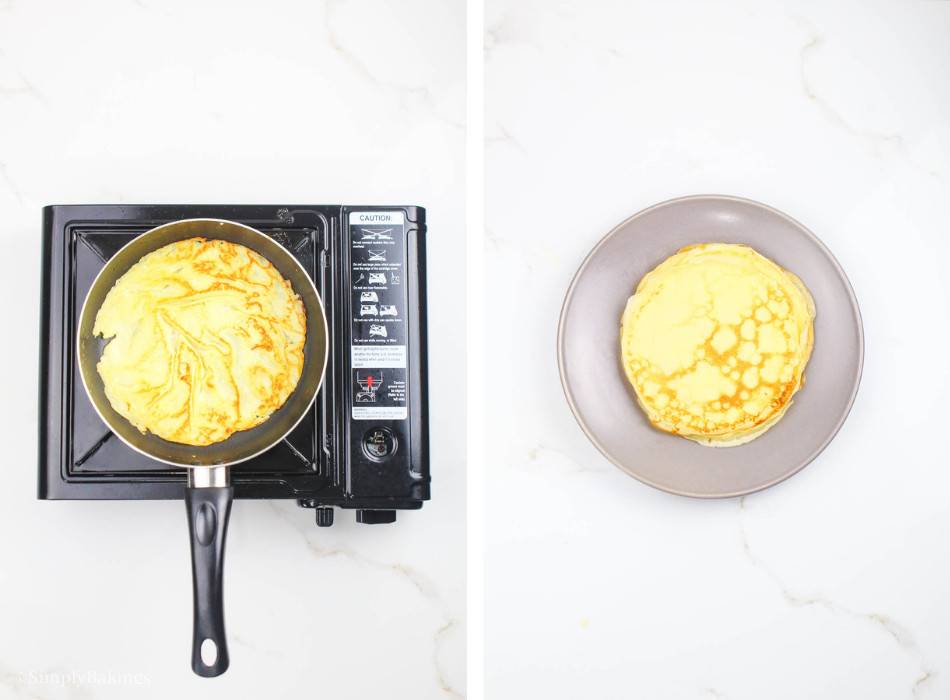
    spread the butter to the skillet, poured half a cup of the mixture into it, and swirled until the wrap mixture covers all the surfaces of the pan.

    Add the butter to a nonstick skillet.

    Scoop and pour half a cup of the mixture into the hot pan. Swirl until it covers all the surfaces of the pan.

    flipped the wrap, cooked the other side, then transferred to a plate

    Cook until the top becomes dry before flipping using a spatula.

    Cook for another minute and remove from the skillet. Repeat the process with the remaining wrap batter.

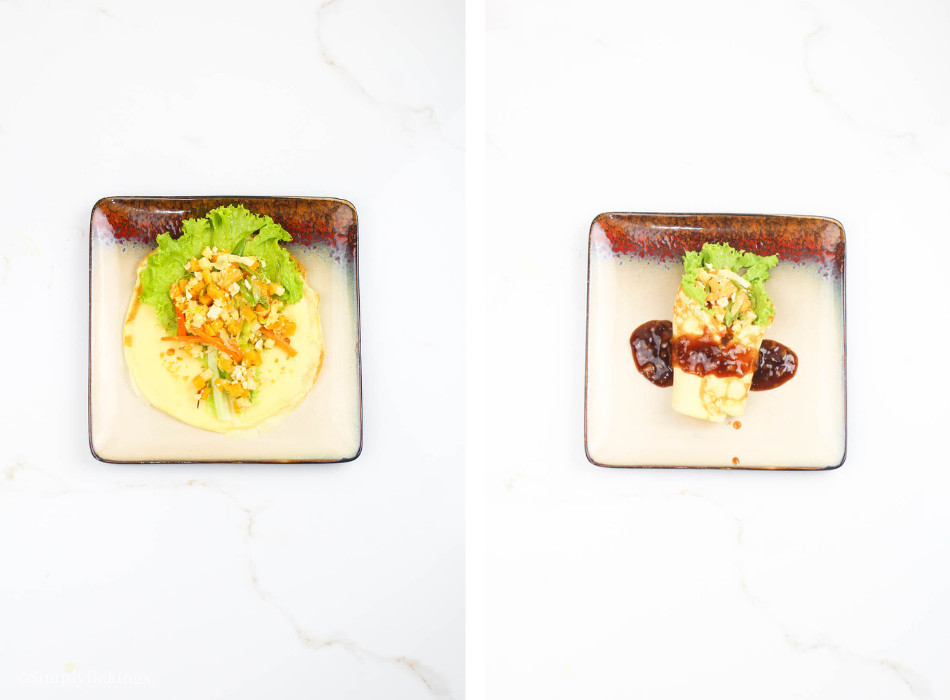
    a lumpiang sariwa assembled on a plate with the romaine lettuce leaf in the center of each wrap, vegetable fillings on top, then folded and drizzled with peanut sauce

    To assemble, place the romaine lettuce leaf in the center of each wrap. Add in a couple of tablespoons of the lumpia filling and wrap or fold.

    Drizzle with the peanut sauce. Serve immediately.

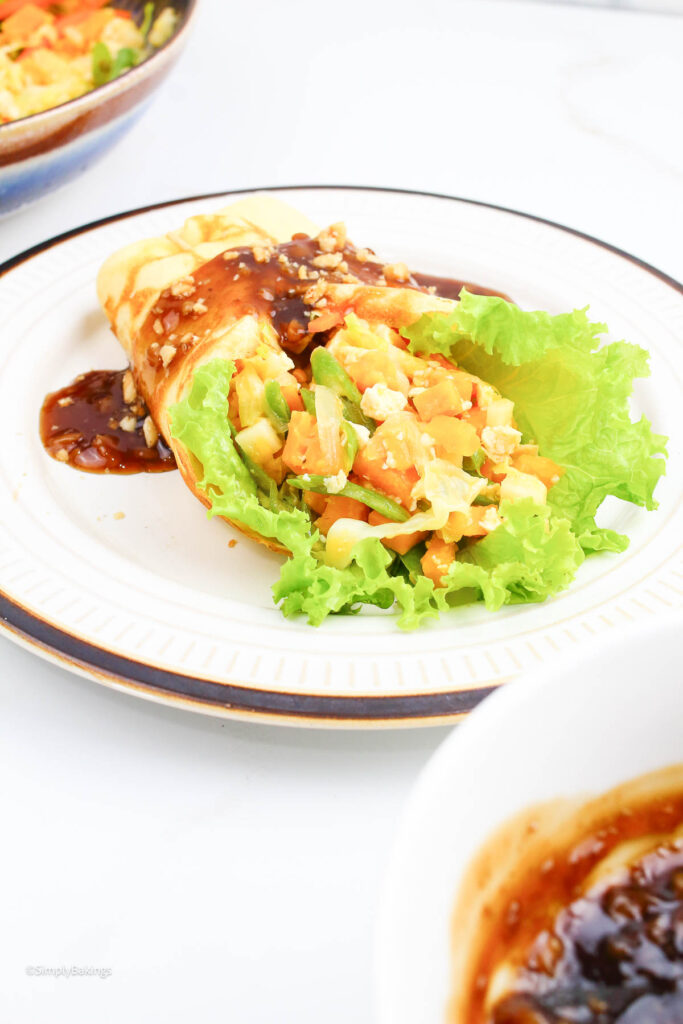
    lumpiang sariwa served on a white plate drizzled with peanut sauce

    Hint: Roll the dough thinly and evenly to achieve a delicate feel when making homemade wraps. Allow the freshly cooked wrappers to rest briefly before filling and rolling to prevent tearing and ensure they keep their shape during the cooking.

    ⭐ Top Tip

    To make the best lumpiang sariwa, don't overcook your vegetables—keeping their texture adds to the dish's freshness. Also, when wrapping, gently tuck the filling to avoid ripping the delicate wrapper, resulting in an attractive display and a delightful eating experience.

    FAQ

    What is lumpia sariwa made of?

    Lumpiang Sariwa, also known as Fresh Spring Rolls, is a vegetable dish made out mixed vegetables wrapped in a soft, unfried wrapper and topped with crushed peanuts and sweet sauce.

    What is the difference between Lumpiang Ubod and Lumpiang Sariwa?

    Lumpiang Ubod is a variation of Lumpiang Sariwa that uses hearts of palm (ubod ng nyog) as the filling. It is also known as "heart of palm spring rolls."

    Is lumpiang sariwa healthy?

    Yes, fresh lumpia is a very healthy dish because the vegetables are still fresh and have retained their natural nutrients. Additionally, because it is fibrous, it is typically consumed without rice, like Filipinos do. One lumpia is substantial enough to serve as a single meal.

    More Vegetable Wrap Recipes

    Looking for other recipes like this? Try these 3:

    • Vegan Collard Wraps
    • Tofu Adobo Lettuce Wraps
    • Vegetable Lumpia Shanghai
    lumpiang sariwa with peanut sauce on a round white plate
    5 from 1 vote
    Print Pin Recipe

    Lumpiang Sariwa

    Discover the flavors of Lumpiang Sariwa, a delicious Filipino dish that combines tofu and fresh vegetables wrapped with a homemade lumpia wrapper and served with a savory-sweet peanut sauce. It's ideal for enjoying a bit of the Philippines at home on any occasion!
    Prep Time15 minutes mins
    Cook Time35 minutes mins
    Total Time50 minutes mins
    Course: Appetizer, Main Course, Snack
    Cuisine: Filipino
    Servings: 6
    Calories: 428kcal
    Author: Simply Bakings Kitchen Team
    Prevent your screen from going dark

    Equipment

    • small and medium-sized bowls
    • whisk or spoon
    • nonstick skillet
    • saucepan
    • plates
    • spatula

    Ingredients

    Peanut Sauce:

    • 2 cups vegetable broth
    • ½ cup brown sugar
    • 3 tablespoons chopped peanuts
    • 2 tablespoons cornstarch diluted with 1⁄4 cup water
    • 1 tablespoon soy sauce
    • 2 teaspoons vegetarian oyster mushroom sauce
    • 1 teaspoon minced garlic
    • ¼ teaspoon salt

    Filling:

    • 2 tablespoons vegetable oil
    • 2 teaspoons minced garlic
    • ½ cup chopped sweet onions
    • ½ cup firm tofu cut into strips
    • 2 cups diced sweet potatoes
    • ½ cup vegetable broth
    • 1 cup shredded cabbage
    • ½ cup diced jicama
    • ½ cup thinly sliced carrots
    • ½ cup chopped green beans
    • 1 tablespoon vegan fish sauce
    • ¼ teaspoon salt
    • ¼ teaspoon ground black pepper
    • 6 romaine lettuce leaves

    Wrap Ingredients:

    • 1 cup all-purpose flour
    • 2 large eggs beaten
    • 1½ cups whole milk
    • 2 tablespoons vegetable oil
    • ¼ teaspoon salt
    • 2 teaspoons butter

    Instructions

    Peanut Sauce:

    • Combine all the peanut sauce ingredients. Then, bring the mixture to a boil and reduce to a simmer until thickened while stirring once in a while.
    • Once thickened, transfer to a bowl and set aside.

    Filling:

    • Cook the filling by adding the oil to a heated skillet. Then, sauté minced garlic and chopped sweet onions for 60 seconds on medium-low heat.
    • Add the firm tofu and cook until browned. Then, add the sweet potatoes and pour in the water or vegetable broth.
    • Bring the mixture to a boil and reduce to a simmer for 5 minutes.
    • Add the shredded cabbage, jicama, carrots, and green beans, and stir fry for another 3 minutes while mixing constantly.
    • Add a splash of vegan fish sauce. Then, season with salt and ground black pepper, to taste.
    • Transfer to a serving bowl and set aside.

    Wrap:

    • Place all the wrap ingredients (except the butter) in a mixing bowl. Then, whisk together until fully incorporated.
    • Add the butter to a skillet. Then, scoop and pour half a cup of the mixture into the hot pan.
    • Swirl until it covers all the surfaces of the pan. Cook until the top becomes dry before flipping.
    • Cook for another minute and remove from the skillet. Repeat the process with the remaining wrap batter.
    • To assemble, place the romaine lettuce leaf in the center of each wrap. Then, add in a couple of tablespoons of the filling and wrap or fold.
    • Drizzle with the peanut sauce. Then, serve immediately.
    Leave a Comment
    Calories: 428kcalCarbohydrates: 58gProtein: 12gFat: 17gSaturated Fat: 4gPolyunsaturated Fat: 7gMonounsaturated Fat: 5gTrans Fat: 0.1gCholesterol: 62mgSodium: 1231mgPotassium: 555mgFiber: 5gSugar: 27gVitamin A: 10978IUVitamin C: 12mgCalcium: 178mgIron: 3mg

    Watch The Recipe Video!

    QR Code
    Did you make this recipe?Share it on instagram or tag @simplybakings or #simplybakings!

    Appetizers, Main Entree, Rice, Noodles, Potatoes, Side Dishes, Vegetables, Vegetarian Filipino Recipes

    Vegan Apple Pie Cookies

    Nov 14, 2024 · 13 Comments

    tasty apple cookies on a wire rack

    Made with fresh apples, cinnamon, and a flaky crust, these Vegan Apple Pie Cookies are the perfect way to satisfy your sweet tooth while staying true to your vegan lifestyle. Plus, they make your kitchen smell amazing while they're baking!

    Looking for more healthy cookie recipes? Try my Oatmeal Cookies, Best Coconut Flour Chocolate Chip Cookies, and Sweet Potato Cookies.

    freshly baked apple pie cookies cooled on a wire rack
    [feast_advanced_jump_to]

    This no-egg recipe is absolutely perfect for the fall season! The delightful blend of baked apple and cinnamon is just what you need to embrace the autumn weather.

    Health Benefits of Apples

    • Rich in dietary fiber, aiding digestion and promoting gut health
    • Packed with antioxidants, helping to reduce the risk of chronic diseases
    • Low in calories and fat, making them a weight-friendly snack option
    • Contains vitamins and minerals, such as vitamin C and potassium

    Variations

    • Spicy Twist: Add a pinch of nutmeg, cloves, or ginger to the apple filling for a warm and aromatic touch.
    • Flavor Boost: Enhance the taste with a splash of vanilla extract in the dough or filling for added depth.
    • Citrus Zing: Add a squeeze of lemon juice to the apple mixture to brighten the flavors and balance the sweetness.
    • Feel free to fold in chopped nuts or dried fruits into the filling for added texture and flavor.
    tasty vegan cookies with apple filling

    Substitutions

    • Brown Sugar Swap: For a richer flavor, substitute granulated sugar with brown or coconut sugar
    • Festive Blend: Experiment with pumpkin pie spice instead of cinnamon for a seasonal twist on these cookies.

    Storage

    • These dairy-free Apple Pie Cookies can be stored in an airtight container in the fridge for up to 3 days or in the freezer for up to 1 month.
    • To enjoy, simply thaw frozen cookies at room temperature or microwave them for a quick warm-up.
    • Unbaked cookie desserts can be frozen for up to 1 month and baked directly from frozen.

     Ingredients

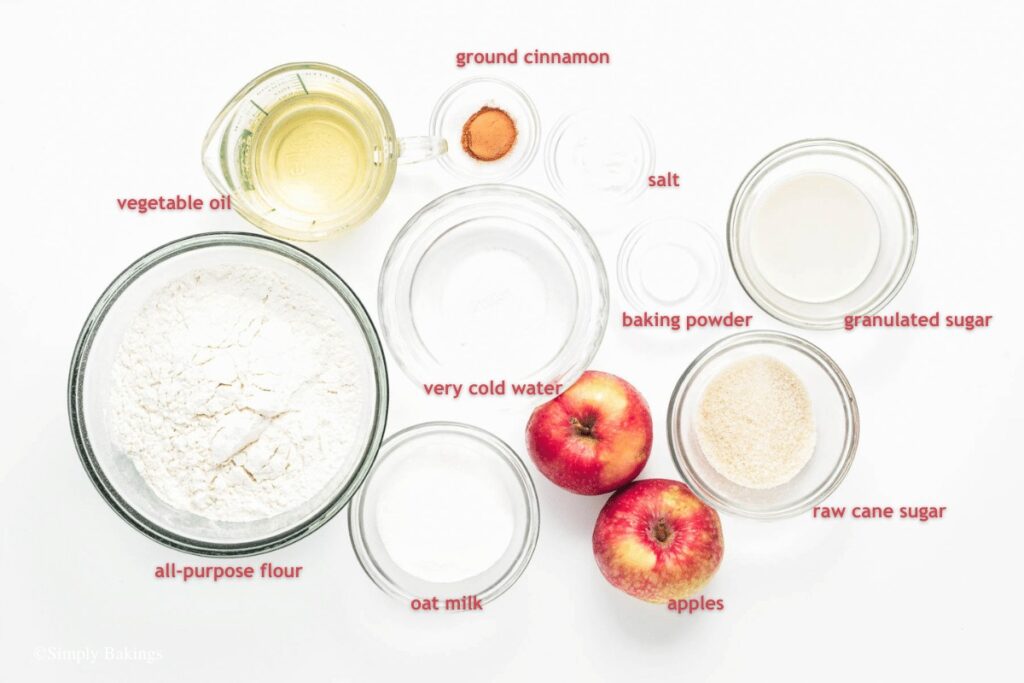
    list of ingredients of vegan apple pie cookies

    Listed below are all the ingredients you will need:

    • all-purpose flour
    • granulated sugar
    • salt
    • baking powder
    • vegetable oil
    • very cold water
    • apples
    • ground cinnamon
    • oat milk
    • raw cane sugar

    See recipe card for quantities.

    Instructions

    Crust:

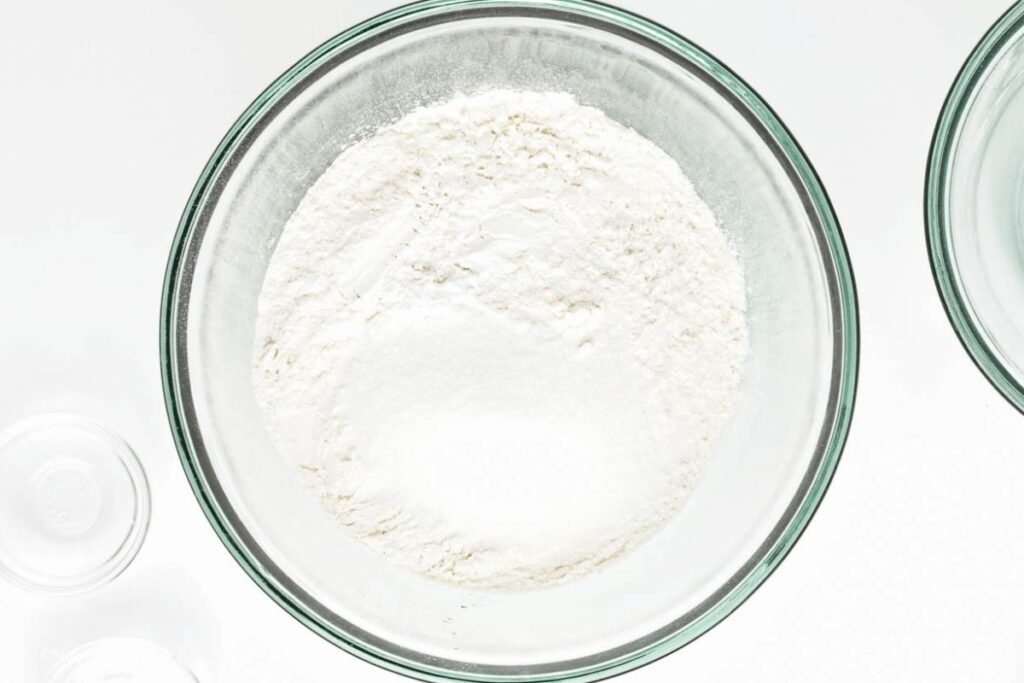
    combined dry ingredients on a bowl

    In a large bowl, combine the dry ingredients: flour, sugar, baking powder, and salt. Stir to evenly distribute.

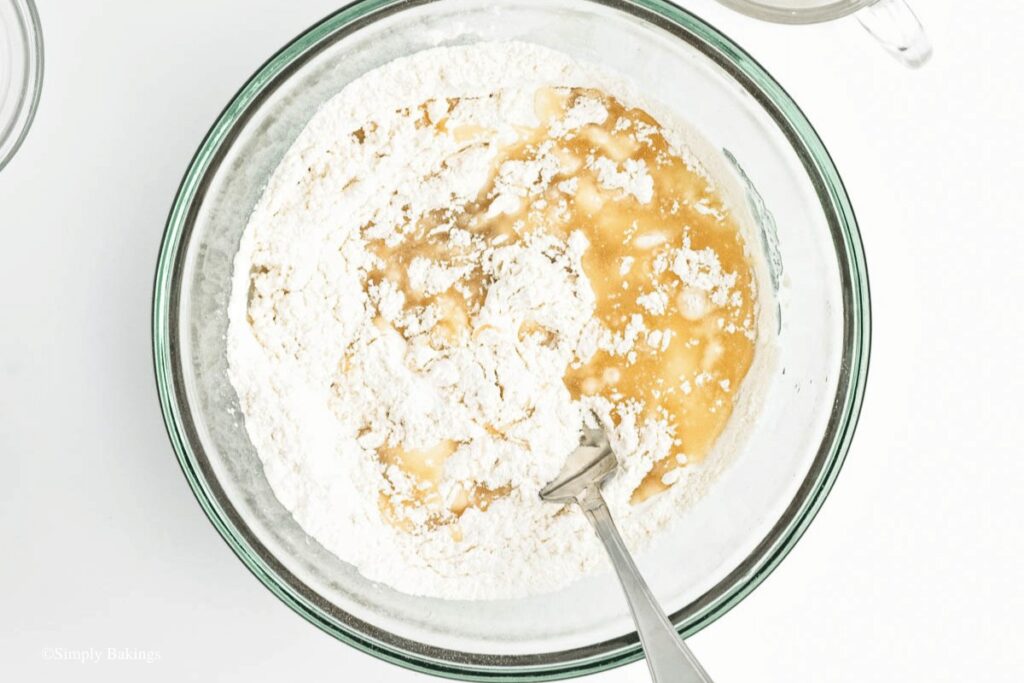
    added oil on the flour mixture

    Pour the oil into the flour mix. Stir or whisk to incorporate, mixing until clumps form.

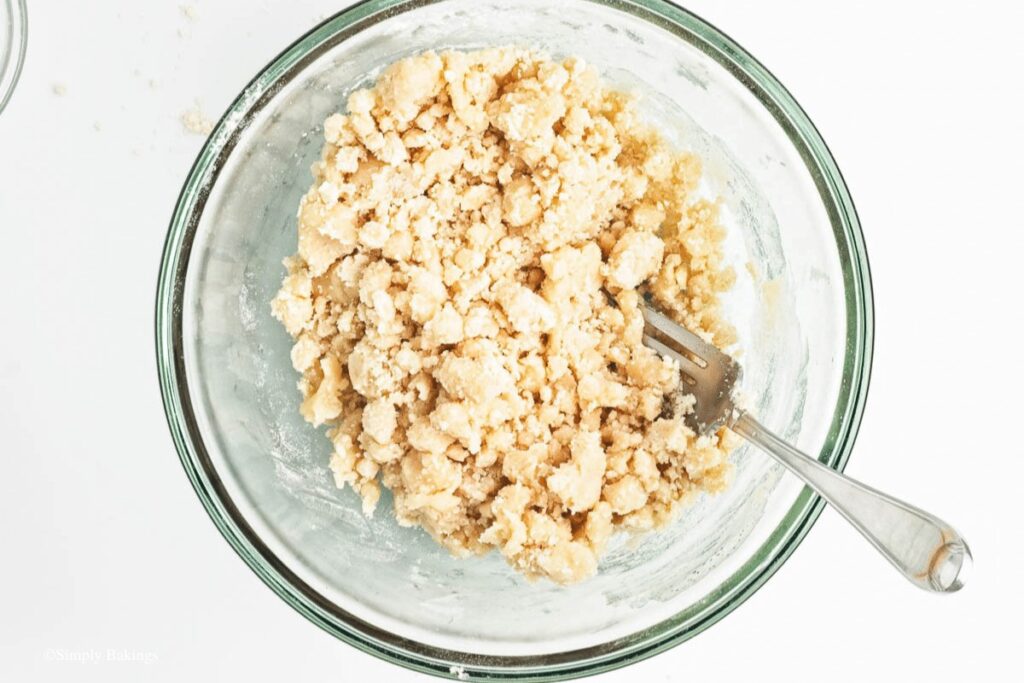
    stirred dough

    Add in cold water, stir until a dough forms. Some crumbles may remain, but do not over mix.

    pulled together cookie dough

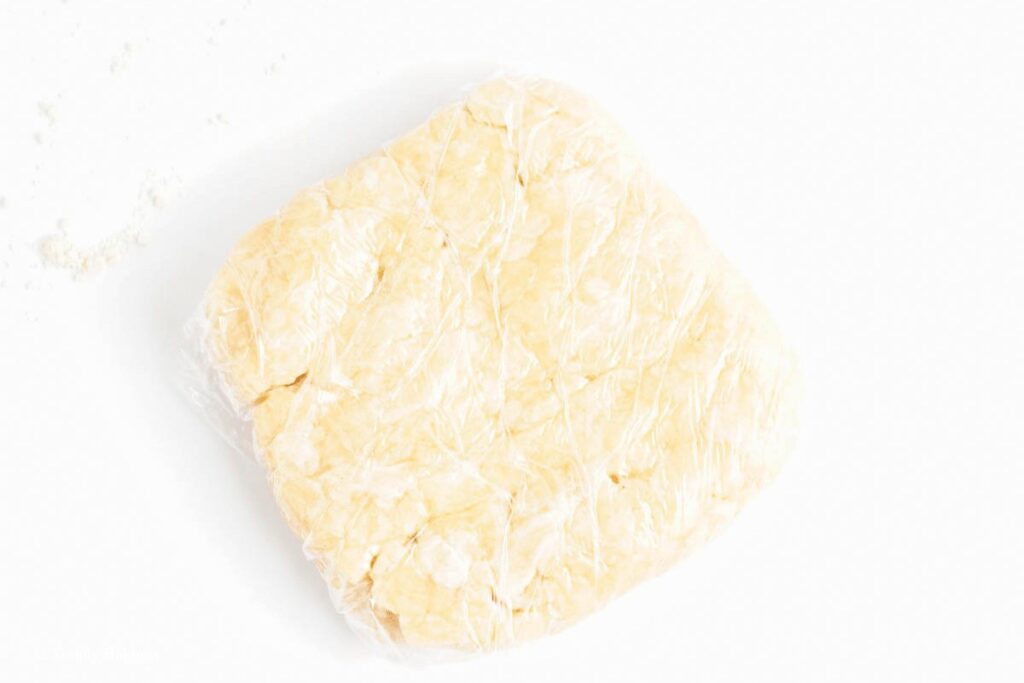
    Pull cookie dough together. Form into a disc and wrap in plastic wrap. Leave to chill in the fridge for at least 30 minutes.

    Filling:

    finely diced apples

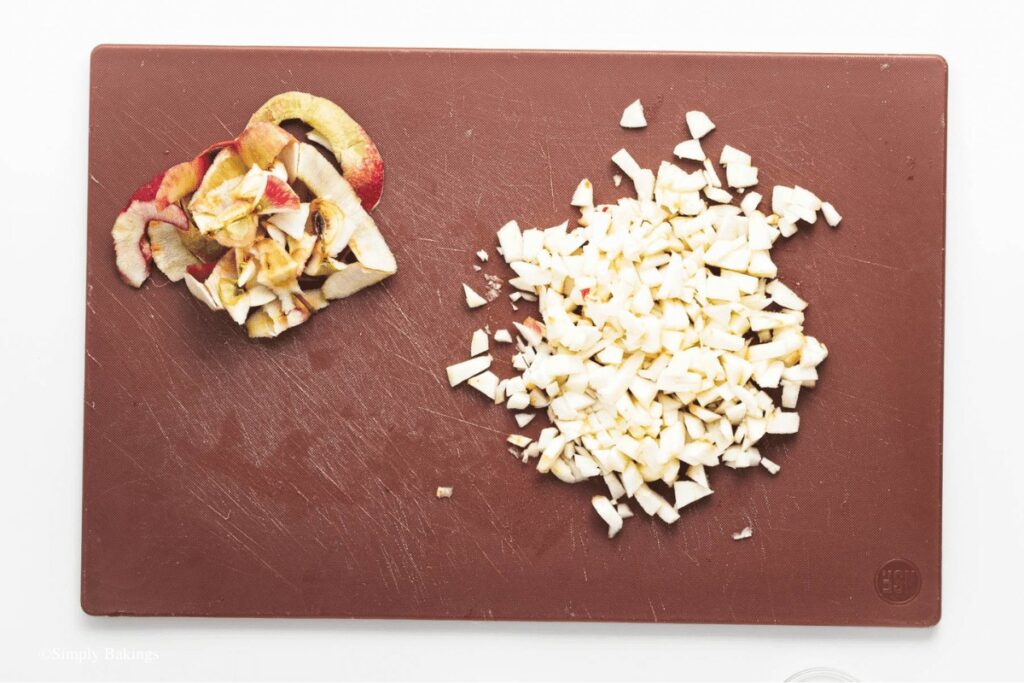
    Peel and finely dice (the smaller the better) the apples.

    diced apples covered with sugar and cinnamon

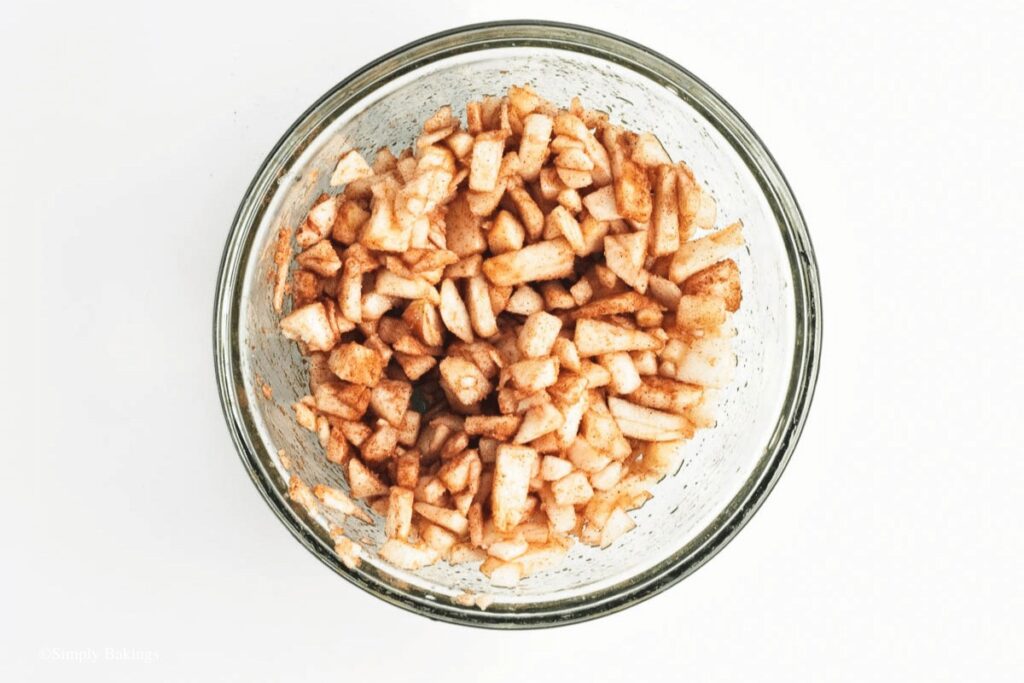
    Add apples to a small bowl and cover with sugar and cinnamon.

    apple pie filling

    Toss to coat.

    Assemble:

    rolled dough on parchment paper

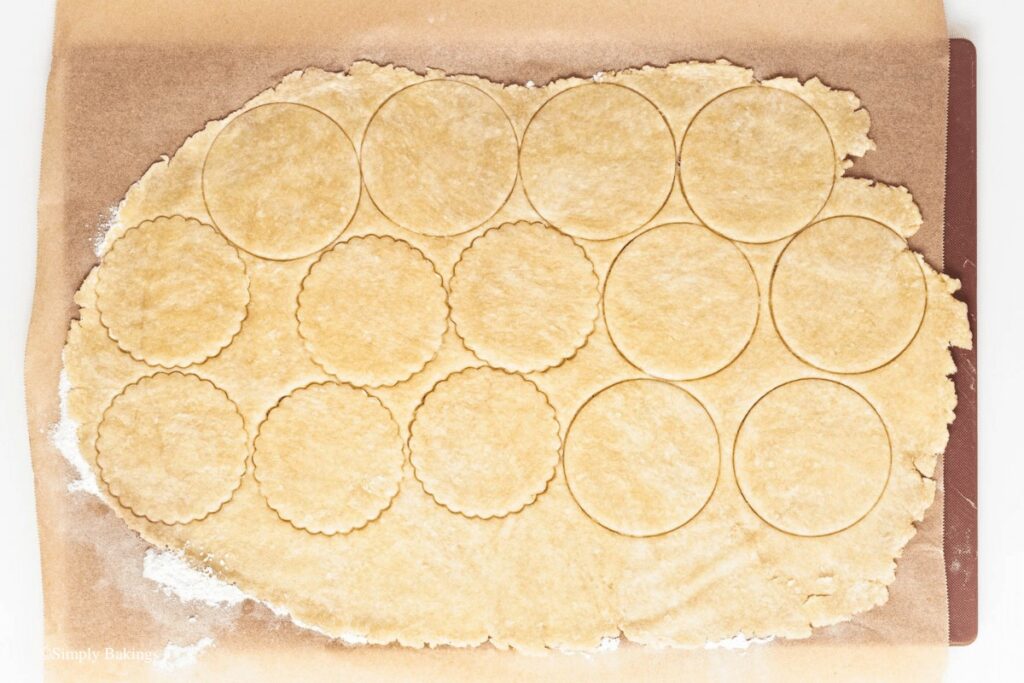
    Line baking trays with parchment. Roll dough out to ¼”/6mm thick between two layers of lightly floured parchment.

    cut rounds from flattened dough

    Cut out even 3”/7.5cm rounds (fluted edges optional). Try to cut as many rounds out from the first roll as possible. Dough scraps can be rerolled once, but it gets tough very quickly.

    apple filling on crust pieces

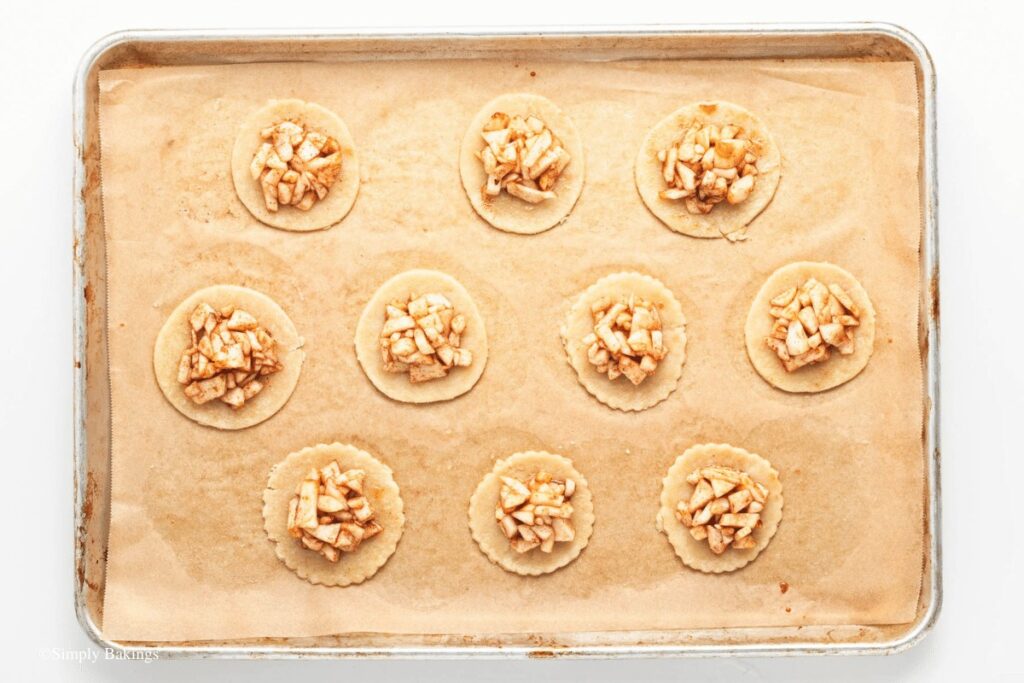
    Place half the pie crust pieces on one of the prepared baking sheets. Scoop a heaping 1 tbsp/15ml of apple pie filling into the center of each piece.

    cut piece of dough on top of the filling

    Brush the edges of the dough (around the filling) with a little bit of oat milk or water. Place another cut piece of dough on top of the filling, lining up the edges. Press gently to remove any trapped air and make sure there are no leakages.

    brushed milk on cookie tops

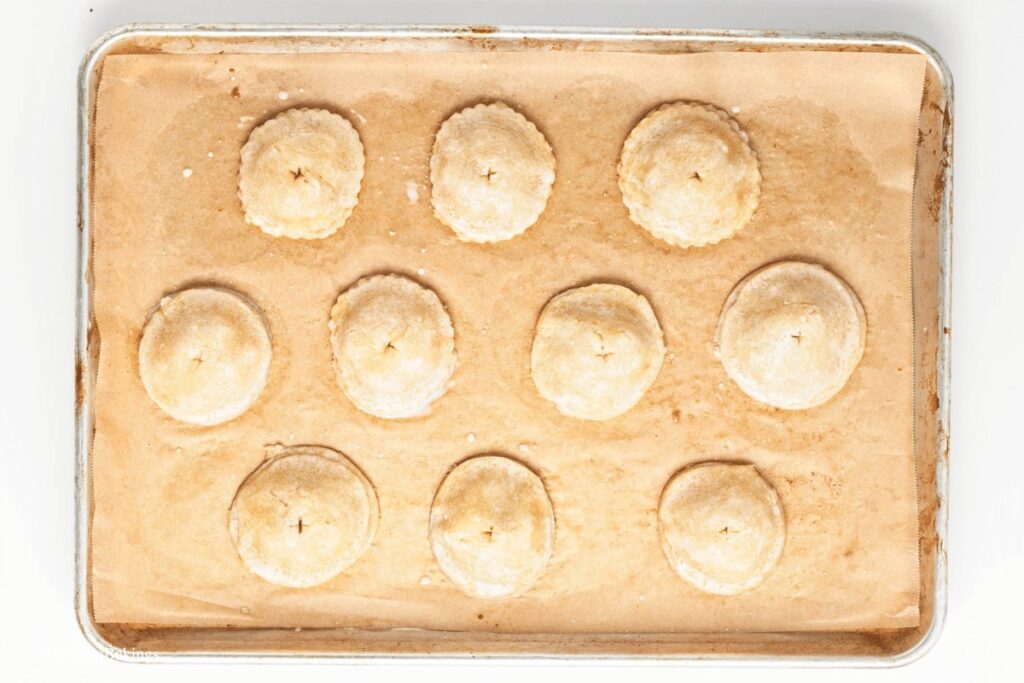
    Brush the tops with oat milk and sprinkle with raw cane sugar. Use a sharp knife to cut a small vent in the top of each one.

    freshy baked apple cookies

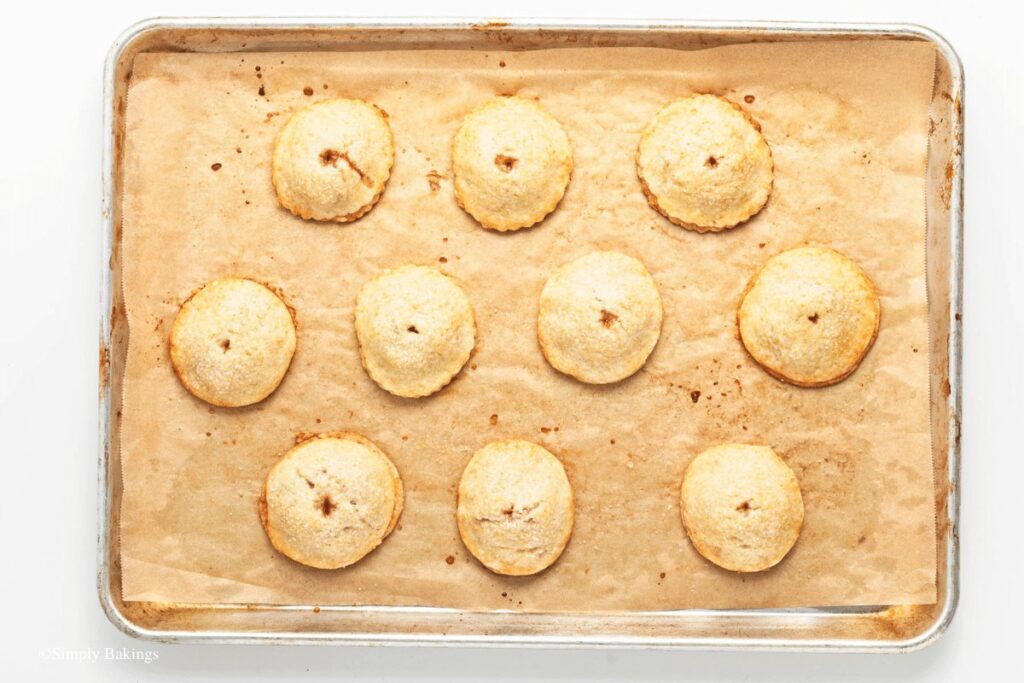
    Chill in the fridge for 15 minutes before baking.Preheat oven to 375°F/190 C about 10 minutes before ready to bake. Bake for 24-27 minutes until golden brown on edges. Remove from oven and allow to cool completely.

    bitten in half apple pie cookies

    Hint: To prevent the dough from sticking while rolling it out, lightly dust both sides with flour and roll it between two sheets of parchment paper. This makes the process easier and ensures a smooth, uniform crust for your Vegan Apple Pie Cookies.

    ⭐ Top Tip

    Be sure to finely dice the apples for the filling to ensure even cooking and a perfect blend of flavors in the cookie. Uniformly sized apple pieces will also give your Vegan Apple Pie Cookies a delightful texture in every bite.

    FAQ

    Can I use whole wheat flour instead of all-purpose flour?

    Yes, you can substitute whole wheat flour for all-purpose flour, but keep in mind that it may result in a denser texture.

    Can I use a different type of oil in the crust?

    Certainly! You can experiment with coconut oil or melted vegan butter for different flavor profiles.

    Can I make these cookies gluten-free?

    While this recipe isn't inherently gluten-free, you can try using a gluten-free flour blend as a substitute. Adjustments may be needed for texture and consistency.

    More Recipes

    Looking for other recipes like this? Try these 3:

    • Nutella Peanut Butter Cookies
    • Rice Krispies Cookies
    • Nutella Cookies
    tasty Vegan Apple Pie Cookies on wire rack
    5 from 9 votes
    Print Pin Recipe

    Vegan Apple Pie Cookies

    Whip up this guilty-free apple pie cookies, perfect for those on the lookout for flavor and wholesome ingredients!
    Prep Time45 minutes mins
    Cook Time25 minutes mins
    Resting Time45 minutes mins
    Total Time1 hour hr 55 minutes mins
    Course: Breakfast, Snacks, Vegan
    Cuisine: Cookies
    Servings: 10 3” “cookies”
    Calories: 205kcal
    Prevent your screen from going dark

    Ingredients

    Crust:

    • 2 cups /240g all-purpose flour
    • 2 tablespoons /25g granulated sugar
    • ¼ teaspoon /2g salt
    • ½ teaspoon /2g baking powder
    • ½ cup /120ml vegetable oil
    • 4 tablespoons /60ml very cold water

    Filling:

    • 2 medium/250g apples peeled and finely diced
    • 2 tablespoons /25g granulated sugar
    • 1 teaspoon /2g ground cinnamon

    Topping:

    • 2 tablespoons /30ml oat milk
    • 2 tablespoons /25g raw cane sugar

    Instructions

    Crust:

    • In a large bowl, combine the flour, sugar, baking powder, and salt. Stir to evenly distribute.
    • Pour the oil into the flour mix. Stir to incorporate, mixing until clumps form.
    • Add in cold water, stir until a dough forms. Some crumbles may remain, but do not over mix.
    • Pull dough together. Form into a disc and wrap in plastic wrap. Leave to chill in the fridge for at least 30 minutes.

    Filling;

    • Peel and finely dice (the smaller the better) the apples.
    • Add apples to a small bowl and cover with sugar and cinnamon. Toss to coat.

    Assemble:

    • Line baking sheets with parchment.
    • Roll dough out to ¼”/6mm thick between two layers of lightly floured parchment.
    • Cut out even 3”/7.5cm rounds (fluted edges optional). Try to cut as many rounds out from the first roll as possible. Dough scraps can be rerolled once, but it gets tough very quickly.
    • Place half the pieces on one of the prepared baking sheets. Scoop a heaping 1 tbsp/15ml of apple mixture into the center of each piece.
    • Brush the edges of the dough (around the filling) with a little bit of oat milk or water.
    • Place another cut piece of dough on top of the filling, lining up the edges. Press gently to remove any trapped air and make sure there are no leakages.
    • Brush the tops with oat milk and sprinkle with raw cane sugar. Use a sharp knife to cut a small vent in the top of each one.
    • Chill in the fridge for 15 minutes before baking.*
    • Preheat oven to 375°F/190°C about 10 minutes before ready to bake.
    • Bake for 24-27 minutes until golden brown on edges.
    • Remove from oven and allow to cool completely.
    • Baked cookies can be stored in an airtight container in the fridge for 3 days or in the freezer for up to 1 month. Serve at room temperature.
    Leave a Comment

    Notes

    1. Unbaked cookies can be frozen for up to 1 month and baked directly from frozen.
    Serving: 1cookieCalories: 205kcalCarbohydrates: 25gProtein: 1gFat: 11gSaturated Fat: 1gSodium: 88mgFiber: 1gSugar: 7g

    Watch The Recipe Video!

    QR Code
    Did you make this recipe?Share it on instagram or tag @simplybakings or #simplybakings!

    Desserts, Thanksgiving Desserts, Vegan Baking

    Mini Pecan Pies Recipe

    Nov 7, 2024 · 4 Comments

    Mini Pecan Pies 1

    Are you searching for a decadent dessert that is simple to prepare and suitable for any occasion- like Thanksgiving or the holidays? Check out these mini pecan pies! These bite-sized pies are ideal to make whenever you want a delicious treat without having to bake a full-sized pie. Enjoy!

    Craving for more delicious mini dessert recipes? Try my Mini Fruit Pizza Filling, Mini Apple Pie Pops, and Mini Chocolate Chip Cookies recipe!

    freshly baked mini pecan pies on a cooling rack
    [feast_advanced_jump_to]

    What is Mini Pecan Pies Recipe?

    Mini pecan pies are sweet, delicious, and quick desserts that are perfect for parties or any gatherings. With their golden crusts and sweet, nutty filling, these bite-sized treats will quickly become a favorite. They provide all of the warmth and flavor of traditional pecan pie in a handy, easy-to-serve form.

    This mini pecan pie recipe lets you quickly make a batch of delicious sweet treats. Try making this dessert for your next event, or keep it on hand for a delicious pick-me-up. Regardless of how you serve these mini pecan pies, they will surely be a hit!

    Read more below to learn the tips and instructions for making these delicious mini pecan pies in your kitchen. Enjoy!

    Health Benefits of Pecans

    • Rich in antioxidants like vitamin E that help combat oxidative stress.
    • A rich source of dietary fiber that promotes gut health.
    • It contains healthy fats that reduce the risk of heart disease.
    • It has magnesium, which can help manage blood sugar levels.
    • It is rich in calcium which is necessary for strong, healthy bones.

    Variations

    • Mini Chocolate Pecan Pies - add chocolate chips, cocoa powder, or a drizzle of melted chocolate on top
    • Mini Salted Caramel Pecan Pies - add caramel sauce on top after baking or add caramel into the filling for a gooey, indulgent delight
    • Mini Coconut Pecan Pies - add shredded coconut to the filling or top with coconut flakes for a tropical flavor.
    • Mixed Nut Mini Pies - consider adding other nuts to the filling, such as walnuts, almonds, or hazelnuts, to improve its protein content and texture.
    delicious mini pecan pies placed on a cooling rack

    Substitutions

    • Syrup - replace the corn syrup with maple syrup, honey, or agave nectar to give your mini pecan pies a more natural, fragrant sweetness.
    • Butter - feel free to use plant-based butter substitutes to make dairy-free pecan pies
    • Sweetener - you may use healthier sugar alternatives like stevia, coconut sugar, or monk fruit sweetener instead of brown sugar
    • Flour - for people with gluten allergies or celiac disease, use a gluten-free flour pie crust.

    Storage

    • Cooling: Before refrigerating, make sure that the mini pecan pies are cooled completely to prevent moisture buildup, which might result in a soggy texture.
    • Refrigeration: Place the mini pecan pies in a single layer in an airtight container or wrap each one individually in plastic wrap. Then refrigerate them for 3-4 days. To prevent odor absorption, store them in a different area of the refrigerator from items with strong odors.
    • Freezing: You can freeze the pies to keep them good for several months. To prevent freezer burn, tightly cover each pie in plastic wrap and then foil.
    • Reheating: Allow the mini pecan pies to come to room temperature before serving, or gently warm them in the oven for a more fresh taste.

     Ingredients

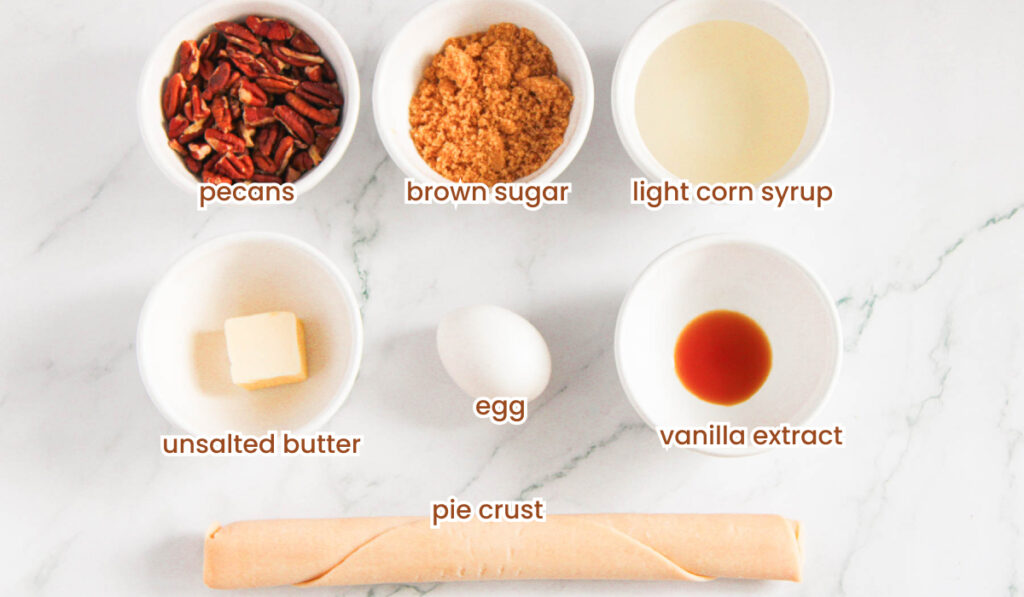
    Listed below are all the ingredients you will need:

    • pie crust
    • light corn syrup
    • brown sugar
    • unsalted butter
    • egg
    • vanilla extract
    • pecans

    See recipe card for quantities.

    ingredients for the mini pecan pies recipe

    Instructions

    Preheat the oven to 350 degrees.

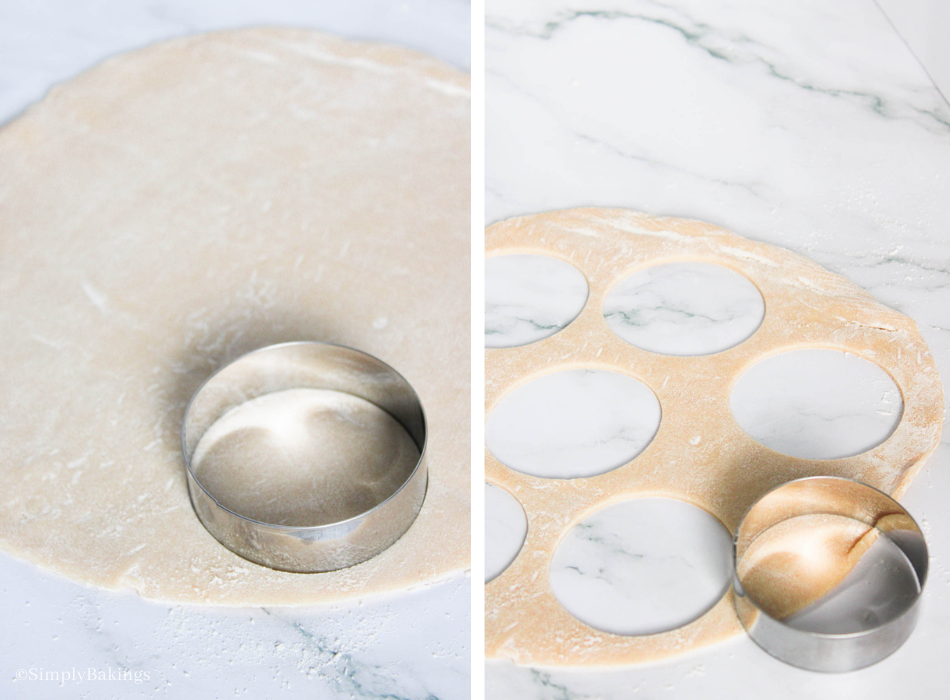
    pie crust rolled out on a floured surface then cut circles using 3-inch cookie cutter

    Gently roll out the pie crust on a floured surface.

    With a 3-inch cookie cutter or glass, cut out 12 circles from the pie crust.

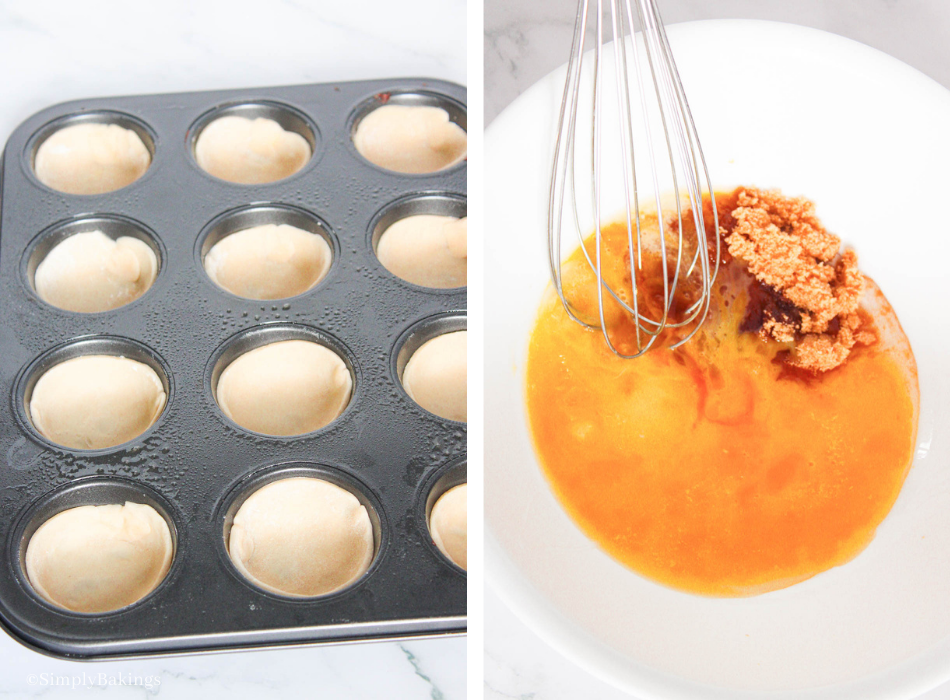
    placed each piece of pie crust in the muffin pan cavities then mixed the corn syrup, brown sugar, melted butter, egg, and vanilla extract using a whisk in a white bowl

    Generously coat a 12-count muffin tin with nonstick cooking spray and carefully place each piece of pie crust in each muffin cavity (each piece should come up the sides about halfway in each muffin cavity).

    Combine the corn syrup, brown sugar, melted butter, large egg, and vanilla extract until combined.

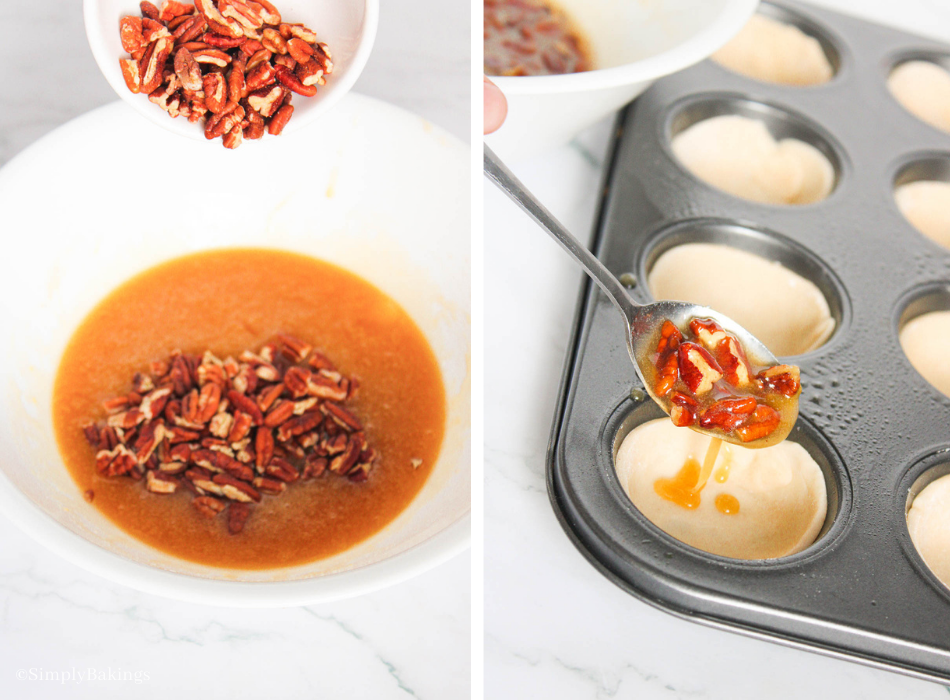
     added the chopped pecans into the mixture then filled each pie crust with about 1 tablespoon of filling

    Then, add the chopped pecans.

    Fill each pie crust with about 1 tablespoon of pecan pie filling (the filling should not rise above the edges of the crust).

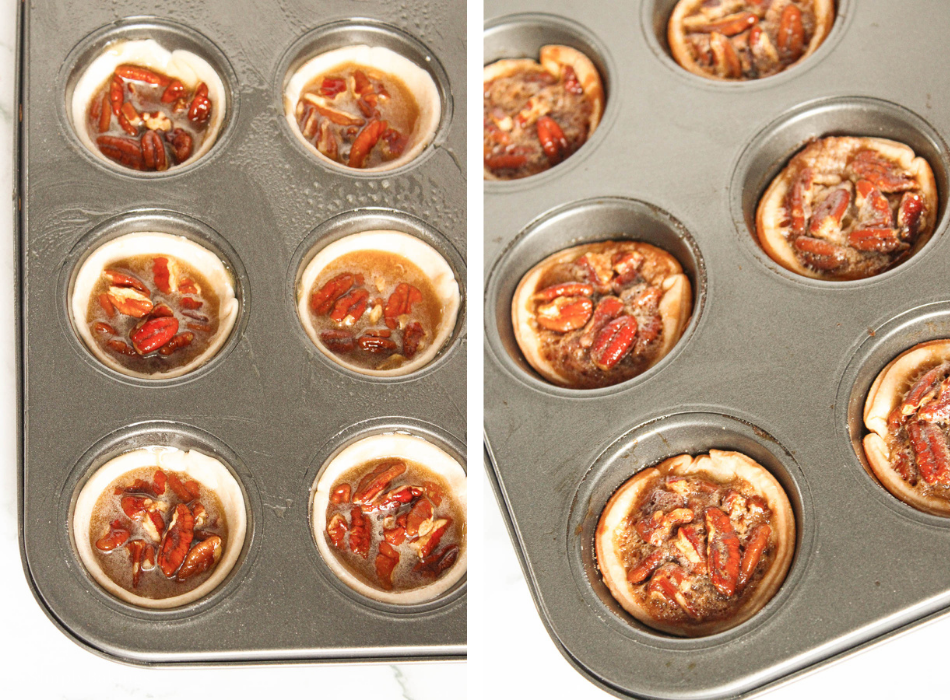
    baked the mini pecan pies then cooled in the pan for a few minutes before removing

    Bake for 25 minutes, or until the filling begins to solidify.

    Cool completely in the pan for 10 minutes before removing.

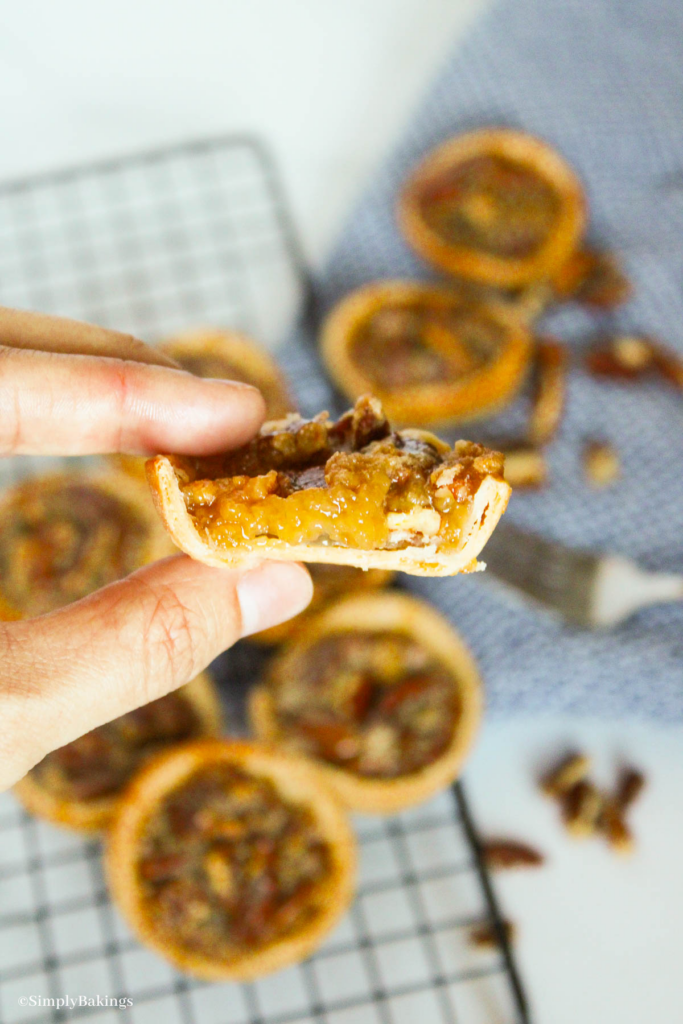
    a half of mini pecan pie held by a hand

    You can pair these mini pecan pies with smoothies, vanilla ice cream, and milk, or add a dollop of whipped cream on top. Enjoy!

    Hint: To avoid soggy crusts in mini pecan pies, you may blind bake them for 5-7 minutes before filling.

    ⭐ Top Tips

    • Use a mini muffin pan or mini tart pan to ensure consistent size and structure. Also, lightly grease or line your muffin tins or tart pans to prevent sticking and easy removal after baking.
    • Make sure you don't overfill the crusts with the filling, since it will overflow during baking. Ideally, it should be two-thirds to three-quarters full.
    • These mini pecan pies bake more quickly than regular pies, so keep an eye on them and check their doneness after 15 to 20 minutes.

    FAQ

    How to tell when mini pecan pies are done?

    When the pies are done, the filling will be puffed in the center and spring back when gently tapped.

    How do you keep mini pecan pies from sticking?

    Use nonstick mini muffin tins, lightly greased pans, or cupcake liners to prevent the mini pecan pies from sticking.

    Do mini pecan pies need to be refrigerated?

    Yes, mini pecan pies should be refrigerated to keep them fresh and prevent them from spoiling, particularly if not eaten within a day or two. For maximum preservation, store them in an airtight container in the refrigerator.

    More Pie Recipes. Looking for other recipes like this? Try these 3:

    • Keto Pumpkin Whoopie Pie
    • Vegan Pumpkin Pie
    • No Bake Oreo Pie
    mini pecan pies on a white plate
    5 from 2 votes
    Print Pin Recipe

    Mini Pecan Pies Recipe

    These bite-sized mini pecan pies are a traditional dessert. They're the ideal sweet treat for any occasion, whether it's a party or a holiday, thanks to their rich, gooey pecan filling and buttery shell. They are easy to prepare and unbelievably tasty!
    Prep Time30 minutes mins
    Cook Time25 minutes mins
    Total Time55 minutes mins
    Course: pastry
    Cuisine: Dessert
    Servings: 30 mini pecan pies
    Calories: 63kcal
    Author: Simply Bakings Kitchen Team
    Prevent your screen from going dark

    Equipment

    • oven
    • 3-inch cookie cutter or glass
    • muffin pan
    • nonstick cooking spray
    • Mixing bowl
    • Whisk
    • tablespoon

    Ingredients

    • 1 pie crust
    • ⅓ cup light corn syrup
    • ¼ cup brown sugar
    • 1½ tablespoons unsalted butter melted
    • 1 egg lightly beaten
    • ½ teaspoon vanilla extract
    • ½ cup chopped pecans

    Instructions

    • Preheat the oven to 350 degrees.
    • Gently roll out the pie crust on a floured surface. With a 3-inch cookie cutter or glass, cut out 12 circles from the pie crust.
    • Generously coat a 12-count muffin pan with nonstick cooking spray and carefully place each piece of pie crust in each muffin cavity (each piece should come up the sides about halfway in each muffin cavity).
    • Combine the corn syrup, brown sugar, melted butter, egg, and vanilla extract until combined, then add the chopped pecans.
    • Fill each pie crust with about 1 tablespoon of filling (the filling should not rise above the edges of the crust).
    • Bake for 25 minutes, or until the filling begins to solidify.
    • Cool completely in the pan for 10 minutes before removing.
    Leave a Comment
    Calories: 63kcalCarbohydrates: 8gProtein: 1gFat: 4gSaturated Fat: 1gPolyunsaturated Fat: 1gMonounsaturated Fat: 2gTrans Fat: 0.02gCholesterol: 7mgSodium: 28mgPotassium: 18mgFiber: 0.3gSugar: 5gVitamin A: 26IUVitamin C: 0.02mgCalcium: 5mgIron: 0.2mg

    Watch The Recipe Video!

    QR Code
    Did you make this recipe?Share it on instagram or tag @simplybakings or #simplybakings!

    Desserts

    Chai Spice Cinnamon Rolls

    Oct 17, 2024 · 18 Comments

    egg-free Chai Spice Cinnamon Rolls in baking pan

    Start your day with our Chai Spice Cinnamon Rolls! Bursting with the warm, aromatic spices of chai and the classic sweetness of cinnamon, these nut-free and egg-free rolls are perfect for breakfast or dessert—either way, they're sure to become your next favorite!

    Looking for other beginner-friendly bread recipes like this? Bake my Vegan Cinnamon Raisin Bread, Addicting Filipino Ensaymada Recipe, and Easiest Ever Cinnamon Roll Bites.

    homemade cinnamon rolls with chai spice
    [feast_advanced_jump_to]

    Health Benefits of Chai

    • Strengthens the immune system.
    • Improves digestion and reduces nausea.
    • Reduces inflammation.
    • Fights free radicals.
    • Lowers blood pressure and cholesterol.
    • Provides a natural energy boost.

    Substitutions

    • If you don't have all the spices on hand, you can use a store-bought chai spice mix.
    • For a richer flavor, use whole milk instead of low-fat milk.
    • For a vegan version, substitute the butter with a plant-based alternative and use a non-dairy milk.

    Variations

    • Add a teaspoon of vanilla extract to the dough for a richer flavor.
    • Combine powdered sugar with a little milk or cream cheese and drizzle over the rolls.

    Storage

    • If you have any leftover Chai Spice Cinnamon Rolls, store them in an airtight container at room temperature for up to 2 days. For longer storage, you can refrigerate them for up to a week or freeze them for up to a month.
    • To reheat, simply warm them in the microwave for a few seconds or in a preheated oven at 350°F for about 10 minutes.
    fluffy chai cinnamon rolls

    Ingredients

    Listed below are all the ingredients you will need:

    Dough:

    • instant yeast
    • all-purpose flour
    • light brown sugar
    • unsalted butter, softened
    • whole milk, warmed
    • coarse salt

    Filling:

    • unsalted butter, softened
    • ground cardamom
    • ground cinnamon
    • ground ginger
    • ground nutmeg
    • ground cloves
    • packed light brown sugar

    Pan Sauce:

    • unsalted butter
    • heavy cream
    • packed light brown sugar

    See recipe card for quantities.

    ingredients of chai spiced cinnamon rolls

    Instructions

    Prepare the dough:

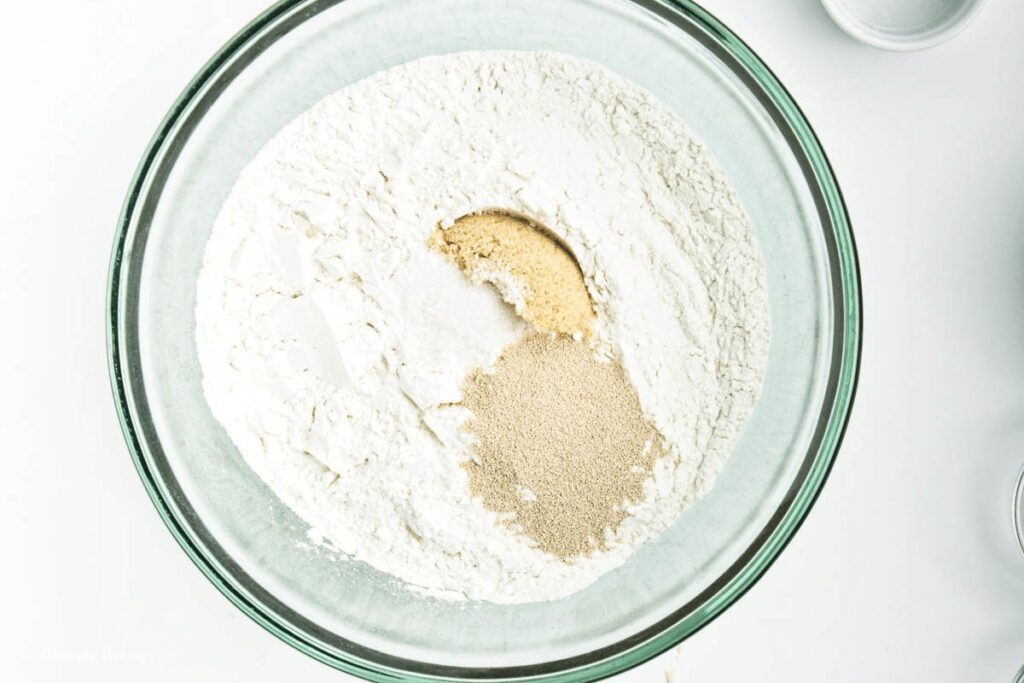
    combined flour, yeast, salt, and brown sugar in bowl

    In a large bowl, combine the flour, yeast, ½ teaspoon salt, and 1 tbsp/13g brown sugar.

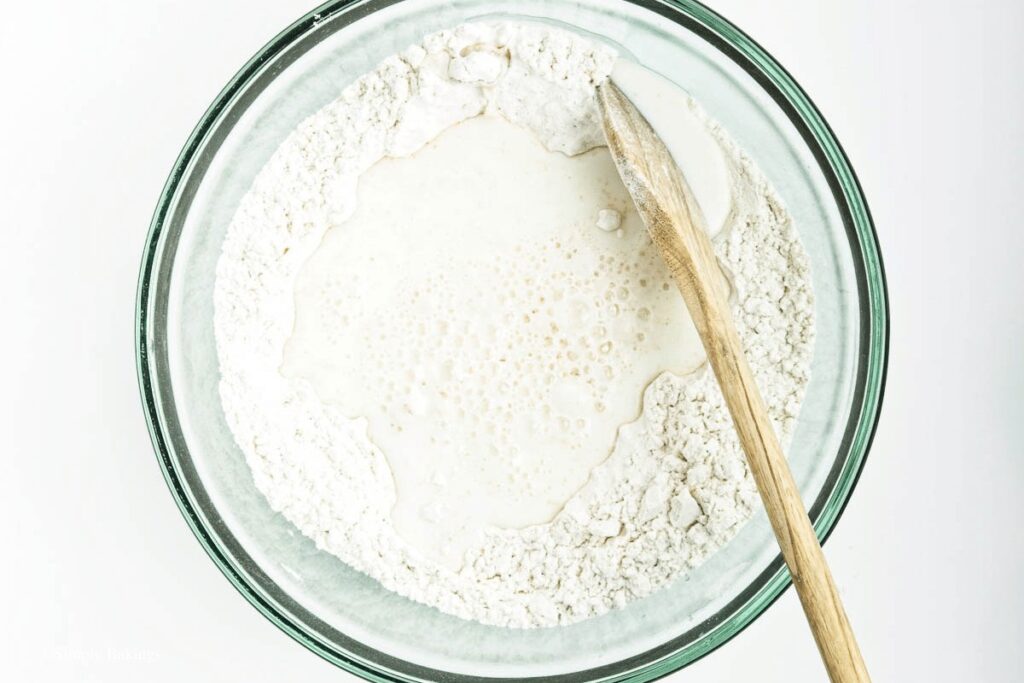
    stirred in warm milk

    Add the warm milk and stir until a shaggy mass forms.

    added cubbed butter

    Add the 3 tbsp/45g butter in small cubes and mix to completely combine, using your hands as needed to help work the butter in.

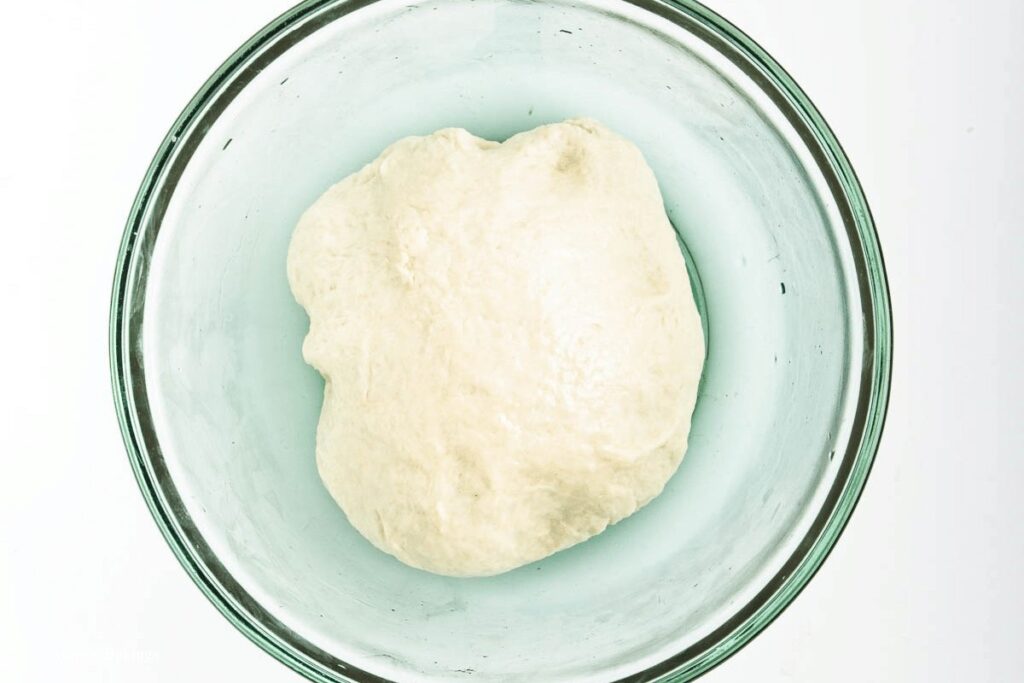
    dough on floured surface
    kneaded dough

    Knead for 5-7 minutes on a lightly floured surface until the dough is smooth and stretchy.

    rested dough in oiled bowl

    Place the ball in an oiled bowl and cover with plastic wrap or a damp towel. Place in a warm place and allow to rise until doubled in size, about 1 hour.

    Prepare the pan sauce:

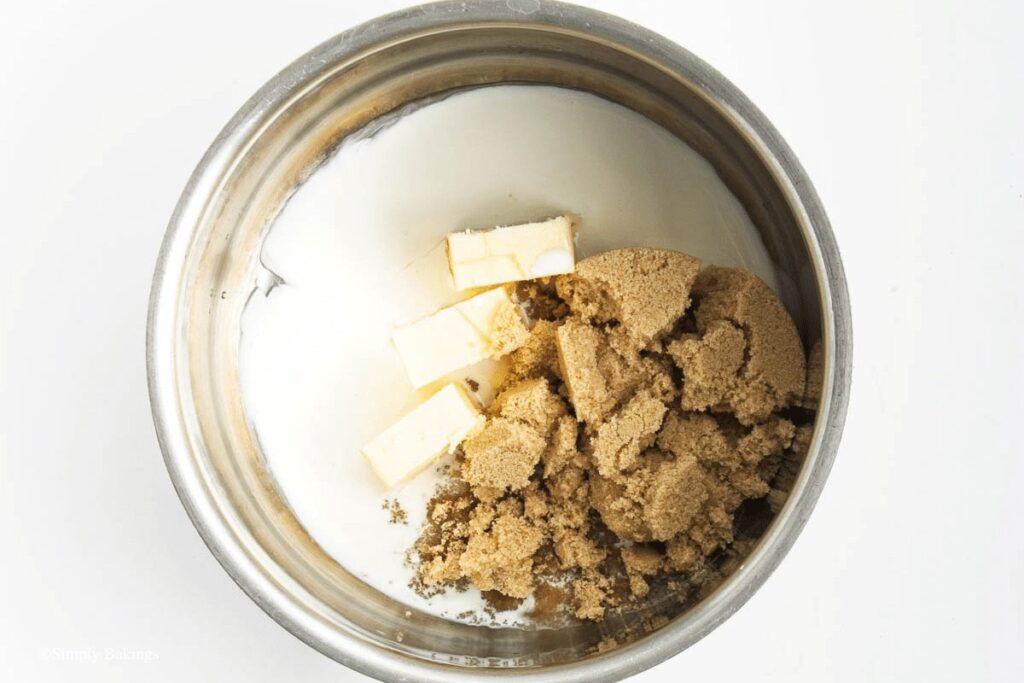
    sugar, butter, and cream in pan

    Grease a 9” x 13”/22.5cm x 32.5cm baking pan. Prepare the brown sugar.

    heated sugar mixture

    In a small saucepan, combine 3 tbsp/45g butter, 2 tbsp/30ml cream, and ½ cup/100g brown sugar over medium heat.

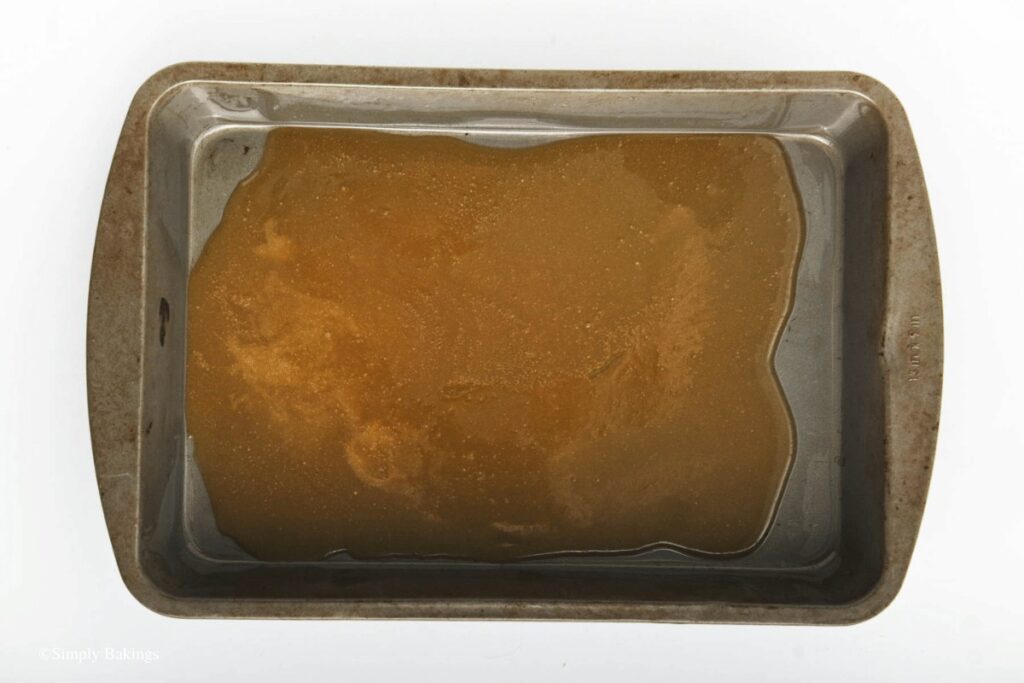
    sugar glaze poured to baking pan base

    Pour into the base of the baking pan and spread around.

    Prepare the filling:

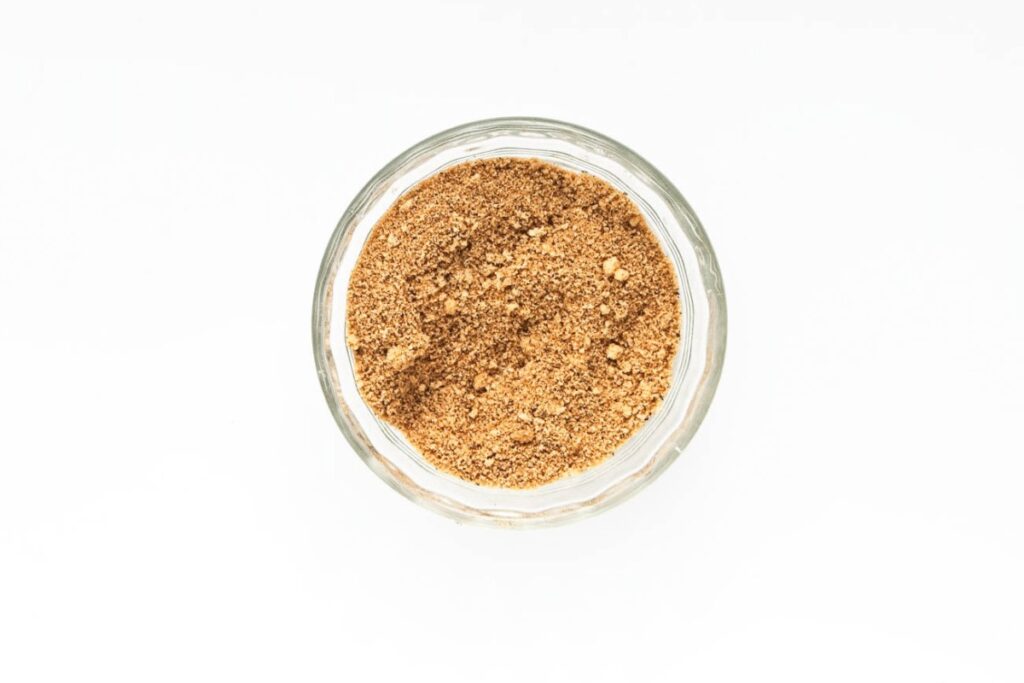
    combined sugar and spices in small bowl

    In a small bowl, combine ½ cup/100g granulated sugar and all the spices. Stir until evenly distributed.

    Assemble the rolls:

    risen dough rolled into a rectangle

    Turn out the risen dough onto a lightly floured surface. Roll into a rectangle about 12” x 16”/35cm x 50cm.

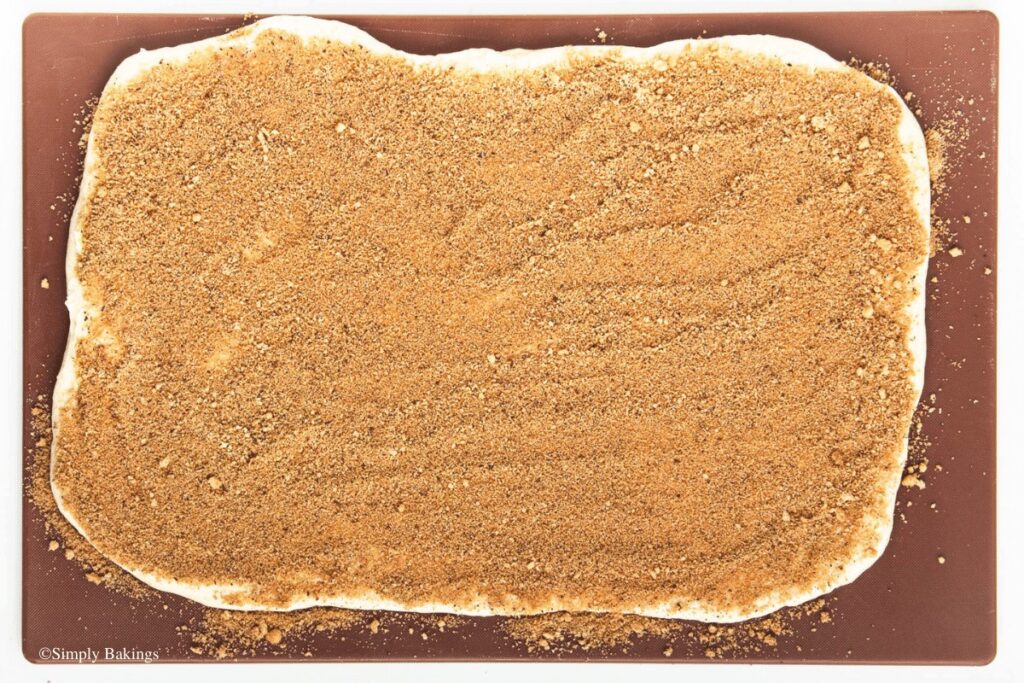
    spiced sugar spread on dough

    Spread 2 tbsp/30g softened butter onto surface. Sprinkle spiced sugar into an even layer over the surface, getting all the way to the edges.

    dough rolled up

    Starting on a short end, roll the dough up gently but tightly. Turn the dough so the seam is underneath.

    cut rolled dough

    Cut dough into 12 even segments with a very sharp knife. Place them in the prepared baking dish so that they are evenly spaced.

    chai spice cinnamon dough rolls placed in baking pan

    Cover with plastic wrap or a damp cloth. Allow to rise again until doubled (about 30-45 minutes).

    During the last rise, preheat the oven to 350°F.

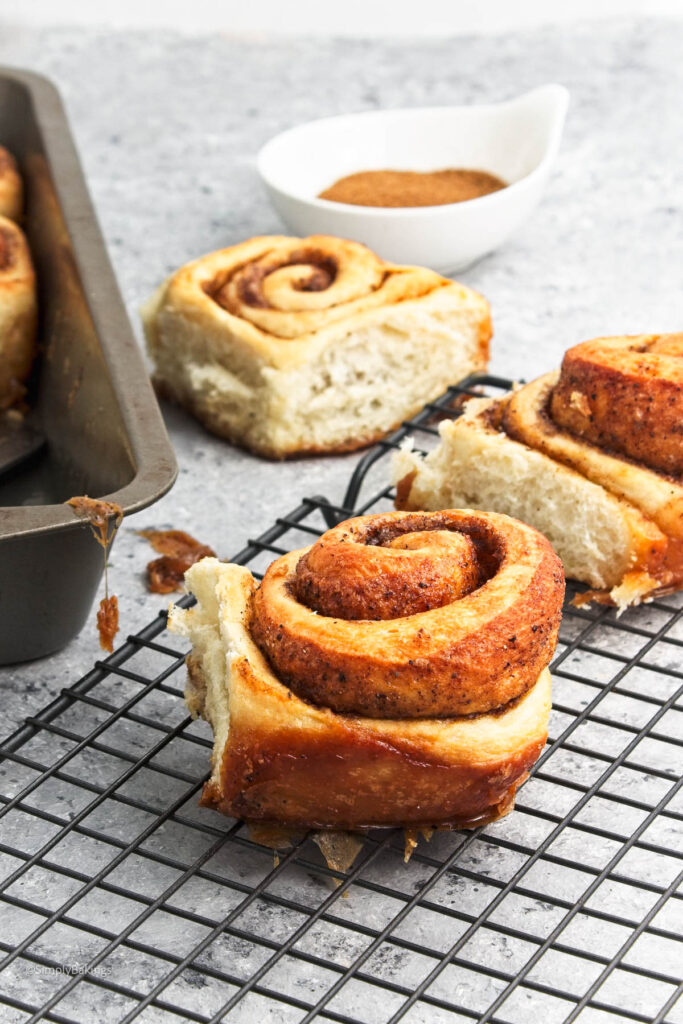
    baked cinnamon rolls with chai

    Once risen, remove the plastic and bake for 25-30 minutes until just starting to go golden brown on top.

    Remove from the oven and cool for 15 to 20 minutes before serving.

    easy Chai Spice Cinnamon Rolls on baking pan

    ⭐ Top Tips

    Make sure the milk is warm, not hot, to help the yeast activate properly. Milk should be at 100° F-115° F/37-45 C for best results. Cold milk works but it will take longer to rise.

    FAQ

    Is chai a spice?

    No, chai is not a single spice. It's a blend of different spices used to make a spiced tea.

    What are the ingredients in chai spice?

    Chai spice usually includes cinnamon, cardamom, ginger, cloves, and nutmeg. Sometimes other spices like black pepper and allspice are added too.

    What is the difference between cinnamon bun and cinnamon roll?

    Cinnamon buns often have nuts and a sticky glaze on top. Cinnamon rolls are usually without nuts and have a frosting or icing on top.

    a tasty cinnamon chai spiced roll
    4.88 from 8 votes
    Print Pin Recipe

    Chai Spice Cinnamon Rolls

    Get ready to roll with our Chai Spice Cinnamon Rolls! Bursting with chai and cinnamon, these nut-free, egg-free treats are perfect for breakfast or dessert. Warm, fluffy, and oh-so-delicious!
    Prep Time30 minutes mins
    Cook Time25 minutes mins
    Resting Time1 hour hr 30 minutes mins
    Total Time2 hours hrs 25 minutes mins
    Course: Bread, Breakfast, Desserts, Snacks, Soy-free
    Cuisine: American
    Servings: 12 servings
    Calories: 270kcal
    Prevent your screen from going dark

    Ingredients

    Dough:

    • 2 ¼ teaspoons / 7g instant yeast
    • 3 cups / 360g all-purpose flour
    • 1 tablespoon / 13g light brown sugar
    • 3 tablespoons / 45g unsalted butter softened
    • 1 cup / 235ml whole milk warmed
    • ½ teaspoon / 3g coarse salt

    Filling:

    • 2 tablespoons / 30g unsalted butter softened
    • 1 ½ teaspoons / 3g ground cardamom
    • 1 ¼ teaspoons / 3g ground cinnamon
    • 1 teaspoon / 2g ground ginger
    • ½ teaspoon / 1g ground nutmeg
    • ½ teaspoon / 1g ground cloves
    • ½ cup / 10g packed light brown sugar

    Pan Sauce:

    • 3 tablespoons / 45g unsalted butter
    • 2 tablespoons / 30ml heavy cream
    • ½ cup / 100g packed light brown sugar

    Instructions

    Prepare the dough:

    • In a large bowl, combine the flour, yeast, salt, and 1 tbsp/13g brown sugar. Add the warm milk and stir until a shaggy mass forms.
    • Add the 3 tbsp/45g butter in small cubes and mix to completely combine, using your hands as needed to help work the butter in.
    • Knead for 5-7 minutes on a lightly floured surface until the dough is smooth and stretchy.
    • Place the ball in an oiled bowl and cover with plastic wrap or a damp towel. Place in a warm place and allow to rise until doubled in size, about 1 hour.*

    Prepare the pan sauce:

    • Grease a 9” x 13”/22.5cm x 32.5cm baking pan.
    • In a small saucepan, combine 3 tbsp/45g butter, 2 tbsp/30ml cream, and ½ cup/100g brown sugar over medium heat.
    • Heat, stirring until all of the sugar is dissolved and the solution is syrupy and bubbling. Pour into the base of the baking pan and spread around.

    Prepare the filling:

    • In a small bowl, combine ½ cup/100g brown sugar and all the spices. Stir until evenly distributed.

    Assemble the rolls:

    • Turn out the risen dough onto a lightly floured surface. Roll into a rectangle about 12” x 16”/35cm x 50cm.
    • Spread 2 tbsp/30g softened butter onto surface. Sprinkle spiced sugar into an even layer over the surface, getting all the way to the edges.
    • Starting on a short end, roll the dough up gently but tightly. Turn the dough so the seam is underneath.
    • Cut dough into 12 even segments with a very sharp knife. Place them in the prepared baking dish so that they are evenly spaced.
    • Cover with plastic wrap or a damp cloth. Allow to rise again until doubled (about 30-45 minutes).
    • During the last rise, preheat the oven to 350°F.
    • Once risen, remove the plastic and bake for 25-30 minutes until just starting to go golden on top.
    • Remove from the oven and cool for 15 to 20 minutes before serving.
    Leave a Comment

    Notes

    *Milk should be at 100° F-115° F/37-45 C for best results. Cold milk works but will take longer to rise.
    Rising time will vary depending on how warm the ambient temperature is. Warmer dough (under 115°F/45 C or the yeast will be killed off) will rise faster.
    To prepare the rolls ahead of time for easy morning consumption, proceed with the instructions up until the second rise the night before. Before allowing the second rise to happen, cover the pan tightly and place in the fridge overnight. In the morning, remove the rolls from the fridge and allow them to come to room temperature before baking.
    Baked rolls can be stored in an airtight container in the fridge or freezer and reheated in the oven before eating.
    Serving: 1rollCalories: 270kcalCarbohydrates: 43gProtein: 4gFat: 9gSaturated Fat: 5gCholesterol: 25mgSodium: 150mgFiber: 1gSugar: 20g

    Watch The Recipe Video!

    QR Code
    Did you make this recipe?Share it on instagram or tag @simplybakings or #simplybakings!

    Bread, Breakfast & Brunch

    Pumpkin Spice Granola

    Oct 3, 2024 · 2 Comments

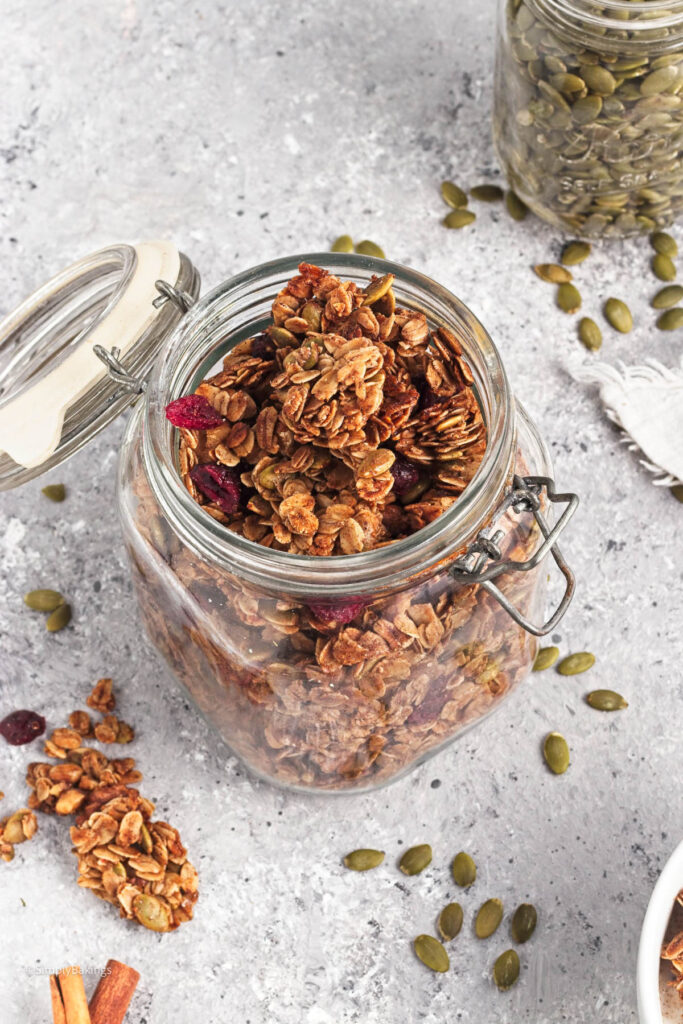
    healthy pumpkin spice granola stored in a mason jar

    Make a delicious batch of gluten-free Pumpkin Spice Granola with oats, walnuts, pumpkin seeds, and a hint of maple syrup. It's infused with cinnamon, ginger, cloves, and nutmeg, and topped with tasty dried cranberries. Perfect for a satisfying snack or a delightful breakfast treat!

    Add this to your favorite smoothie bowl like this Easy Smoothie Bowl for added crunch. For a cozy evening treat, enjoy it with a warm mug of Tsokolate or this Easy Dalgona Matcha.

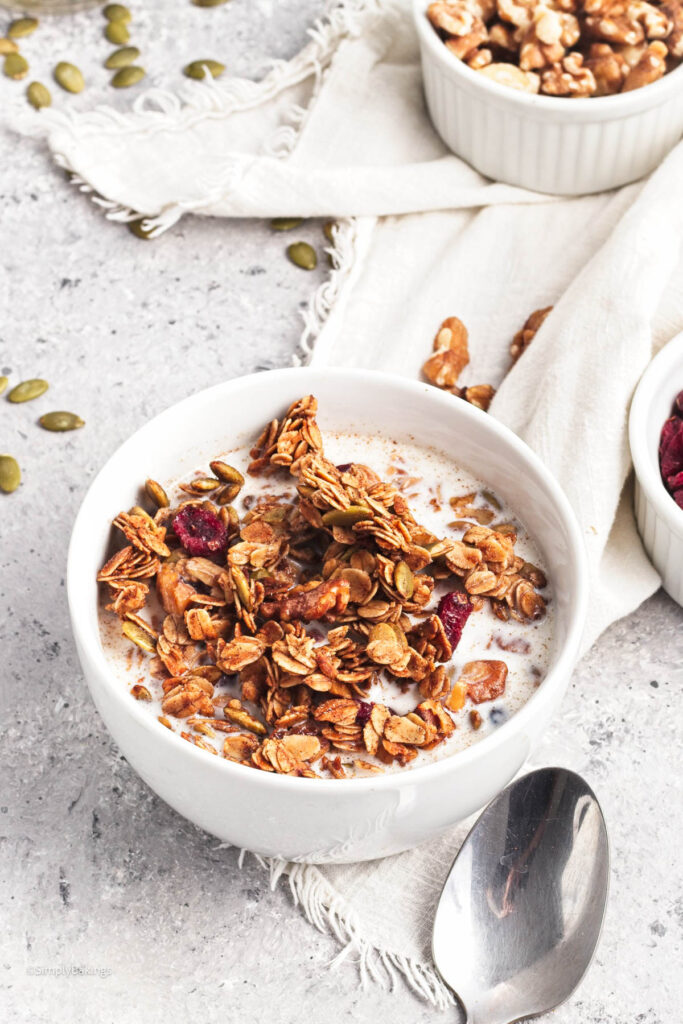
    vegan pumpkin spice granola with milk on a small bowl
    [feast_advanced_jump_to]

    Pumpkin Spice Granola is super popular in the fall, especially during Thanksgiving and Halloween. People love its spicy, cozy flavor during holiday get-togethers and baking sessions. It's like a warm hug in a bowl!

    Health Benefits of Pumpkin Spice

    Pumpkin spice contains a blend of spices like cinnamon, ginger, cloves, and nutmeg, each offering potential health benefits:

    • Cinnamon may help regulate blood sugar levels and reduce inflammation.
    • Ginger has anti-inflammatory properties and aids digestion.
    • Cloves are rich in antioxidants and may have antimicrobial properties.
    • Nutmeg may support brain health and digestion.

    Variations

    • Creamy Delight: Serve with yogurt instead of milk for a creamy and protein-packed breakfast or snack.
    • Pumpkin-infused Goodness: Mix in pumpkin puree for extra fall flavor and moistness in your granola recipes.
    • Chocolate Indulgence: Sprinkle in chocolate chips for a decadent treat that satisfies any sweet tooth.
    • Seeds of Goodness: Add sunflower seeds alongside pepitas for extra crunch and nutrition.
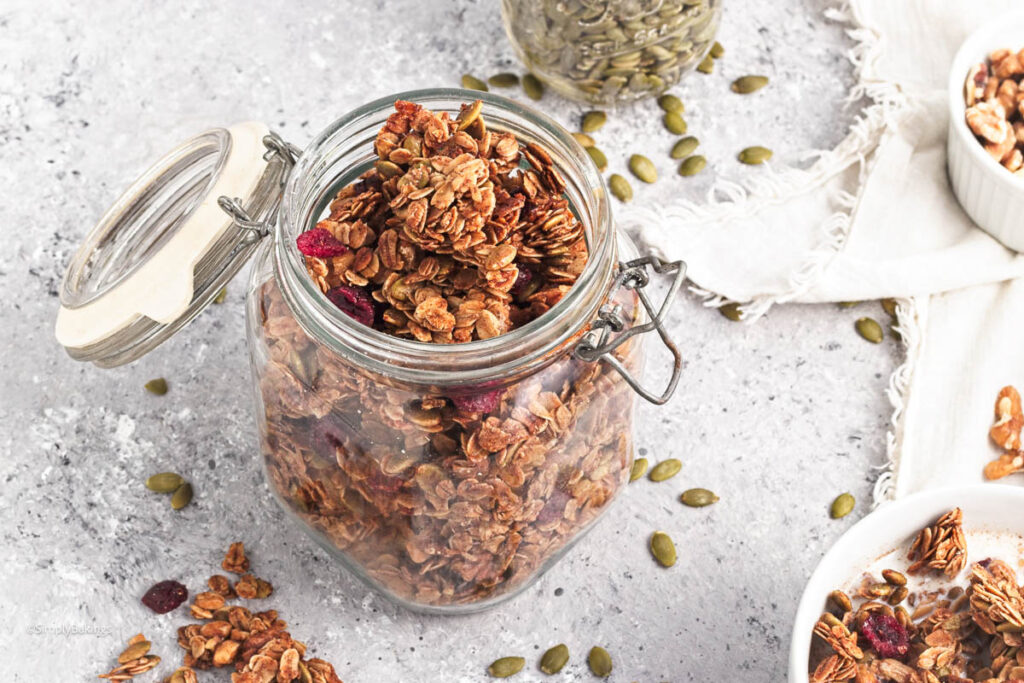
    crunchy pumpkin spice granola in an open lid jar

    Substitutions

    • Nutty Twist: Substitute walnuts with pecans for a richer, nuttier flavor profile.
    • Pumpkin Pie Spice Blend: Replace individual spices with pumpkin pie spice for a convenient shortcut.
    • Olive Oil Elixir: Swap coconut oil with olive oil for a lighter option packed with healthy fats.
    • Spice it Up: Experiment with allspice or vanilla extract for a unique twist on traditional flavors.

    Storage

    • Store the Pumpkin Spice Granola in an airtight container at room temperature for up to 10 days for optimal freshness.
    • If you prefer a longer shelf life, you can store it in the fridge for up to 2 weeks or freeze it for up to 3 months.

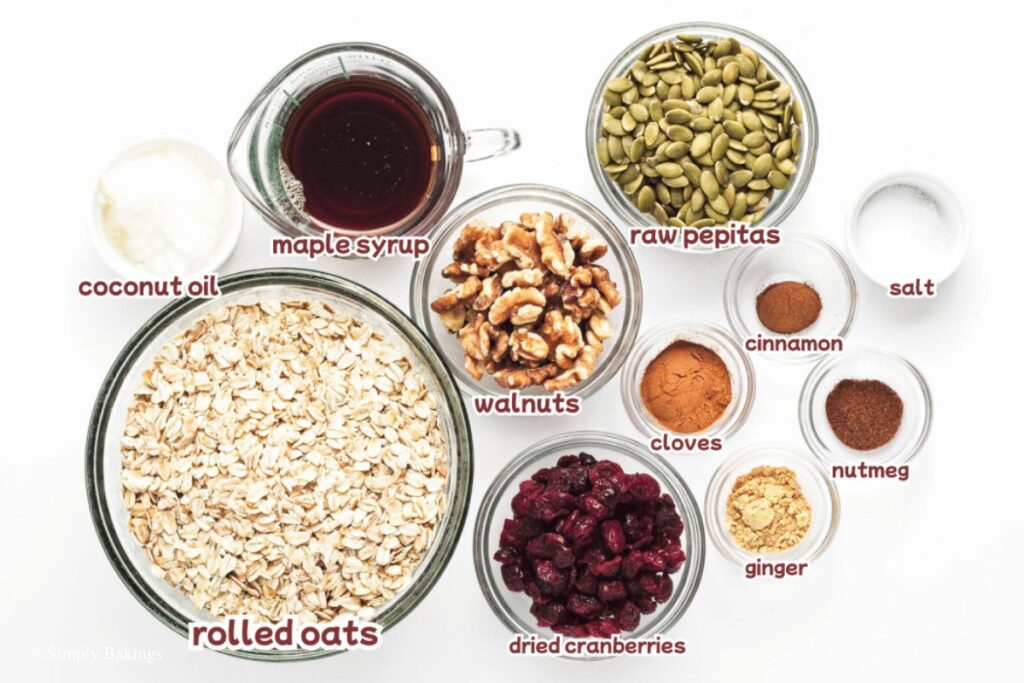
     Ingredients

    Listed below are all the ingredients you will need:

    • rolled oats
    • walnuts
    • raw pepitas (pumpkin seeds)
    • maple syrup
    • coconut oil
    • salt
    • ground cinnamon
    • ground ginger
    • ground cloves
    • ground nutmeg
    • dried cranberries

    See recipe card for quantities.

    list of ingredients of pumpkin spice granola

    Instructions

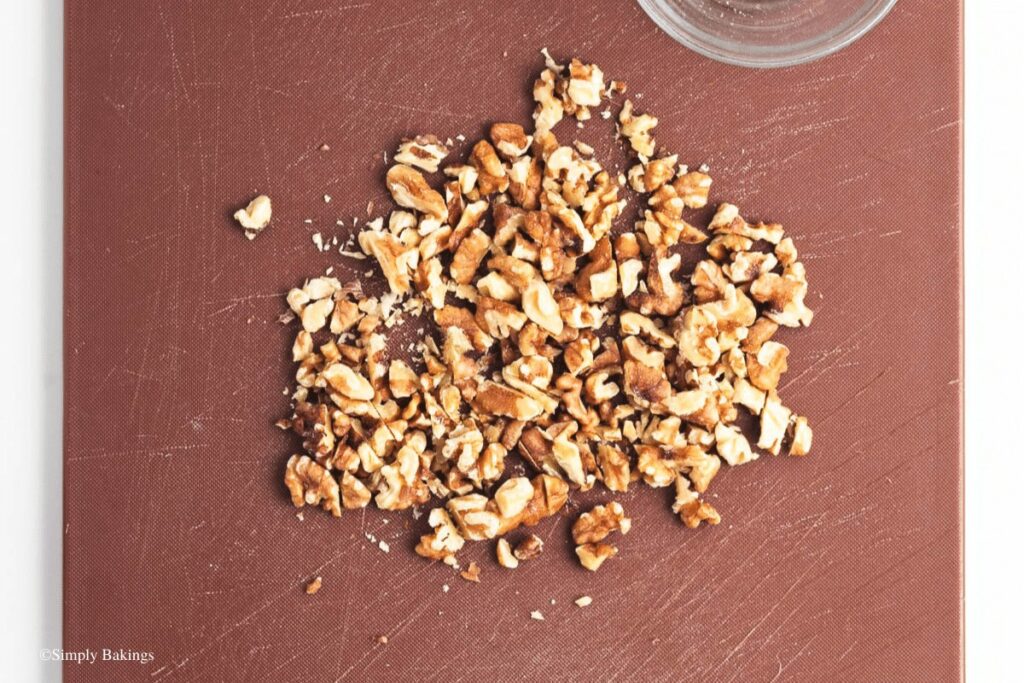
    chopped walnuts

    Preheat oven to 300°F/150 C. Line a baking sheet with parchment paper or a silicon baking mat. Meanwhile, roughly chopped the walnuts.

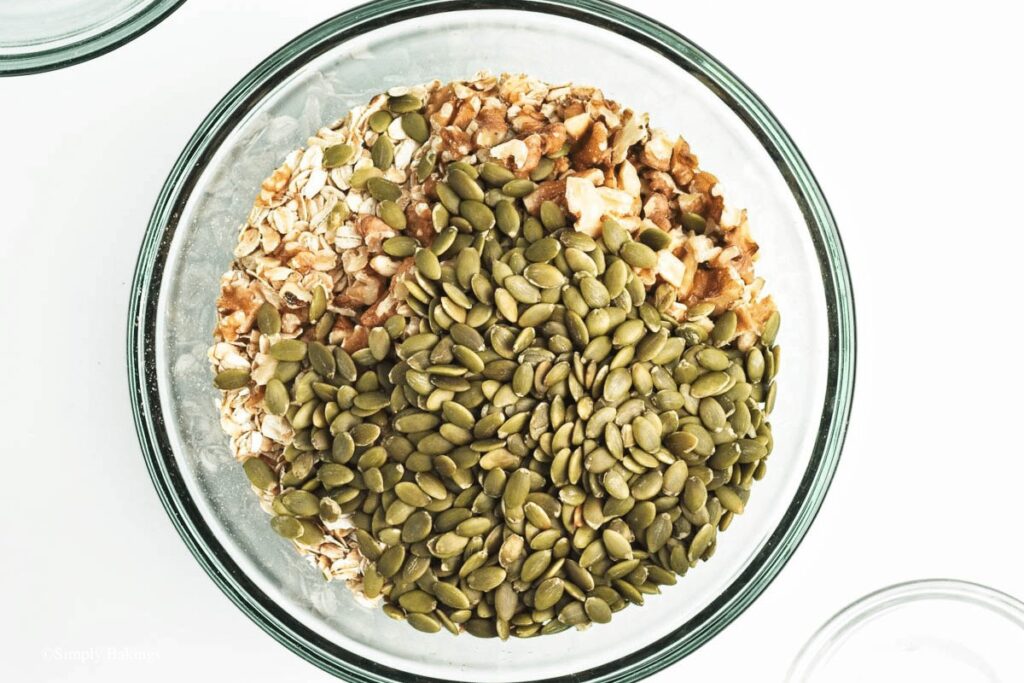
    rolled oats, chopped walnuts, and pepitas on a bowl

    In a large bowl, combine the rolled oats, chopped walnuts, and pepitas.

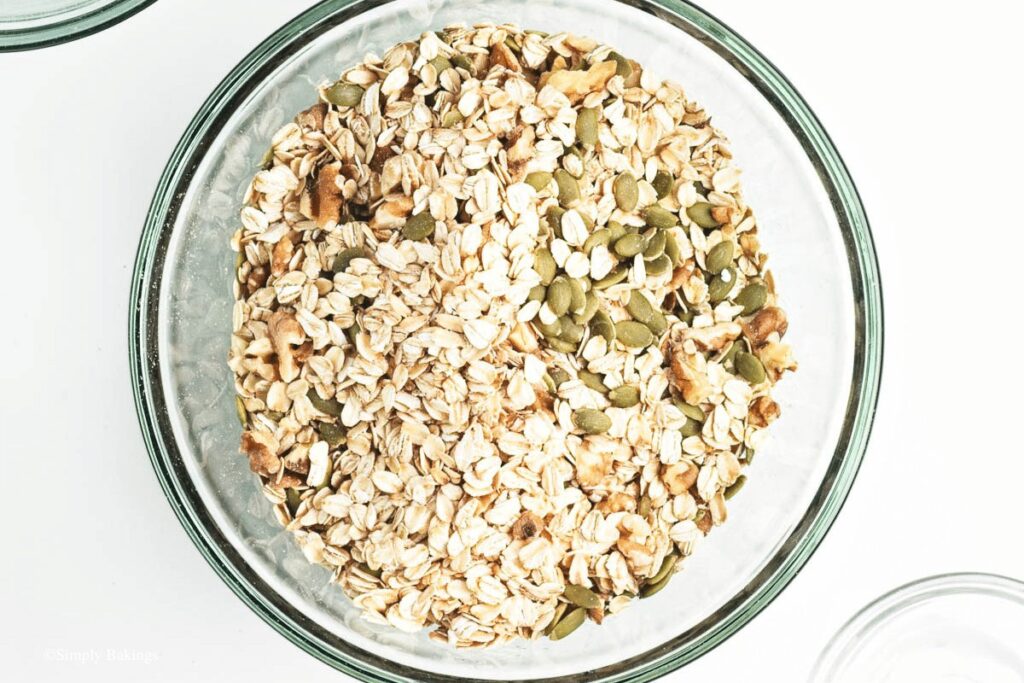
    combined oats, chopped walnuts, and pepitas

    Stir to distribute.

    hot mixture of coconut oil and maple syrup

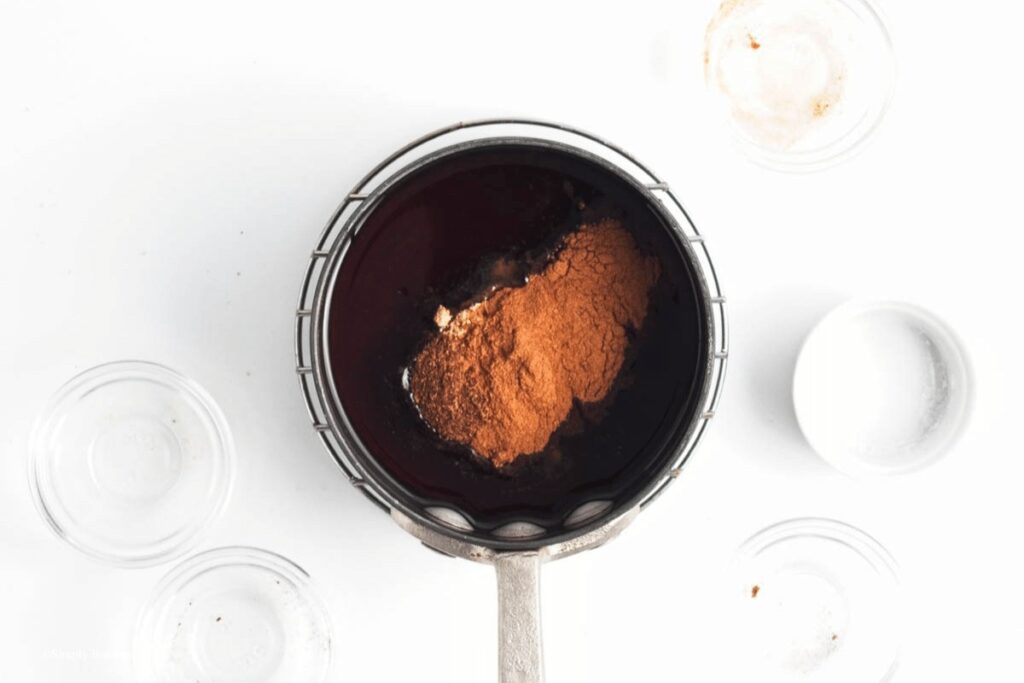
    In a small saucepan, heat the coconut oil and maple syrup until the coconut oil is melted. Remove from heat and stir in the salt and spices.

    mixed maple mixture to dry ingredients

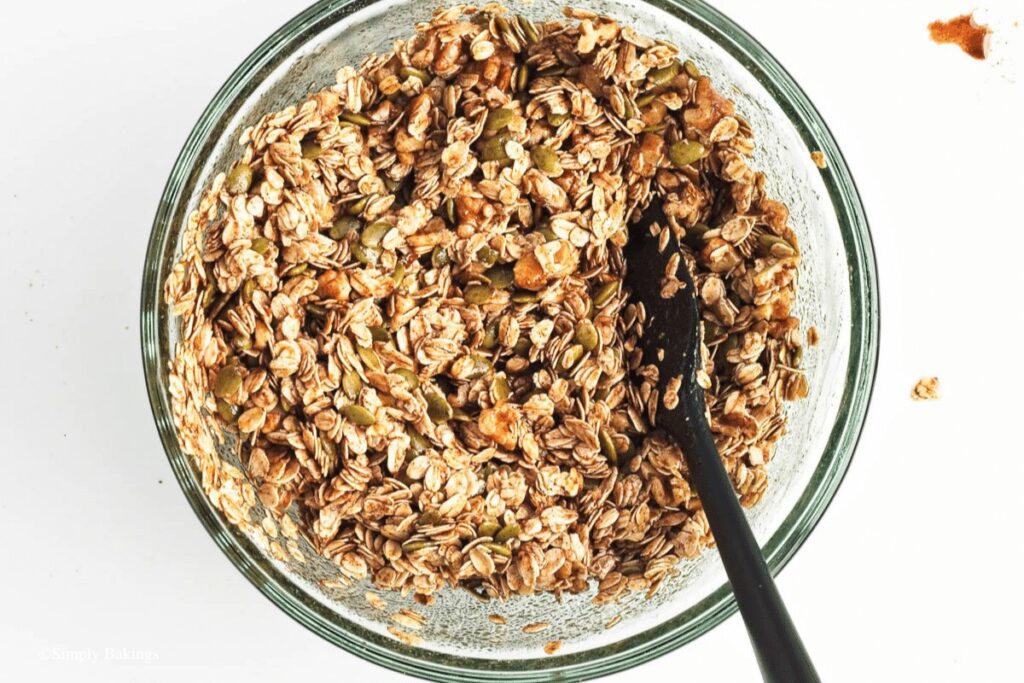
    Pour the maple mixture over the dry ingredients. Stir until everything is well coated.

    mixture  spread evenly on baking sheet

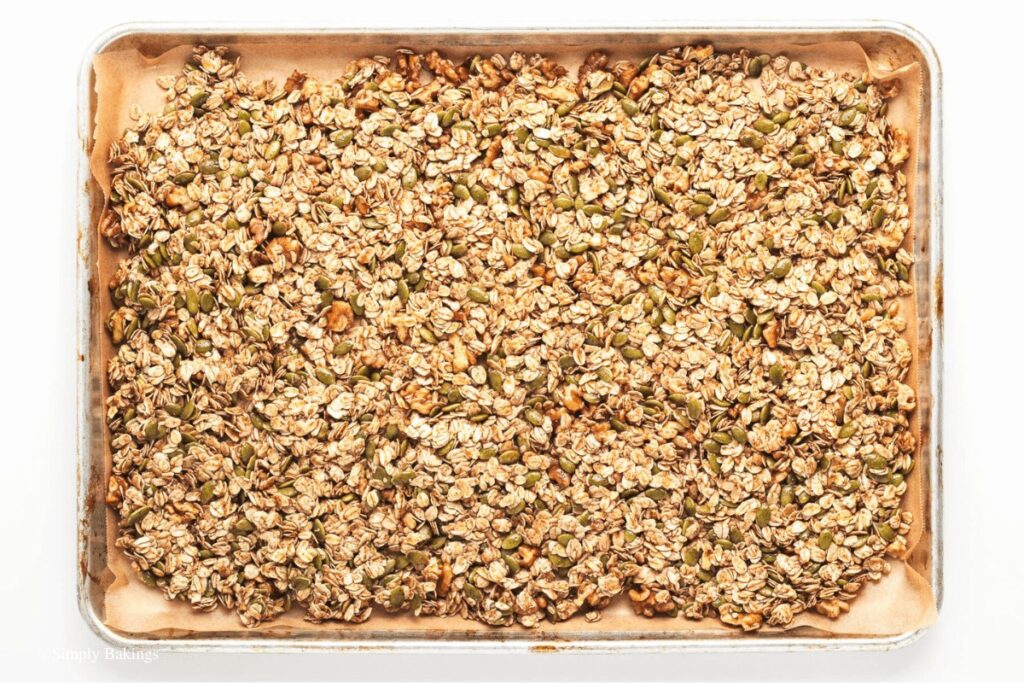
    Spread out the mixture on the prepared baking sheet into an even layer. Bake for 30-40 minutes without stirring until golden brown.

    baked mixture

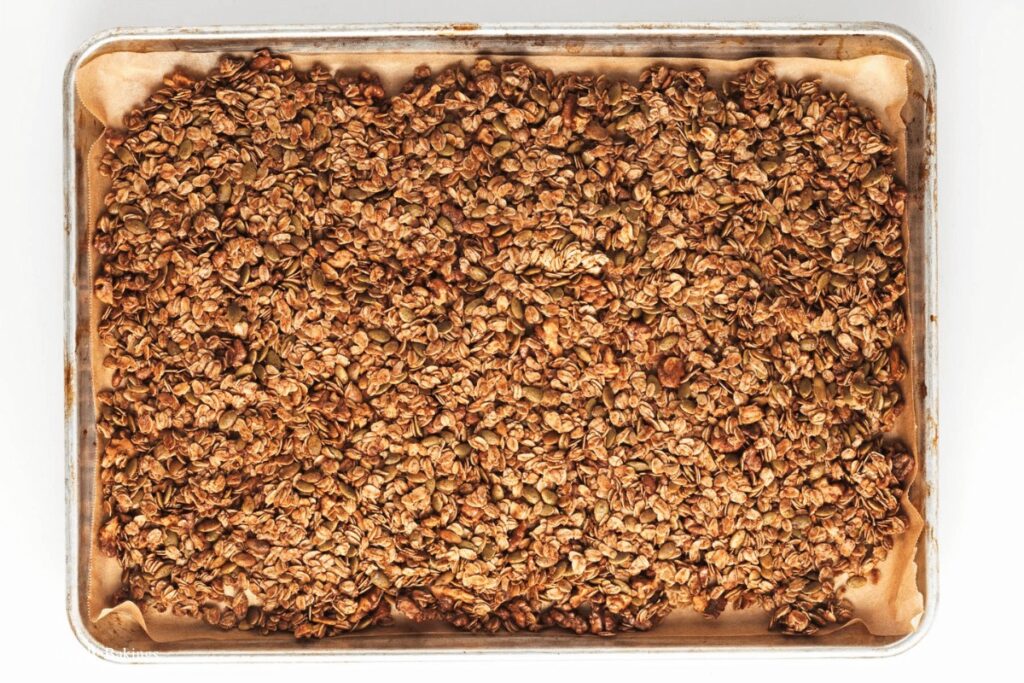
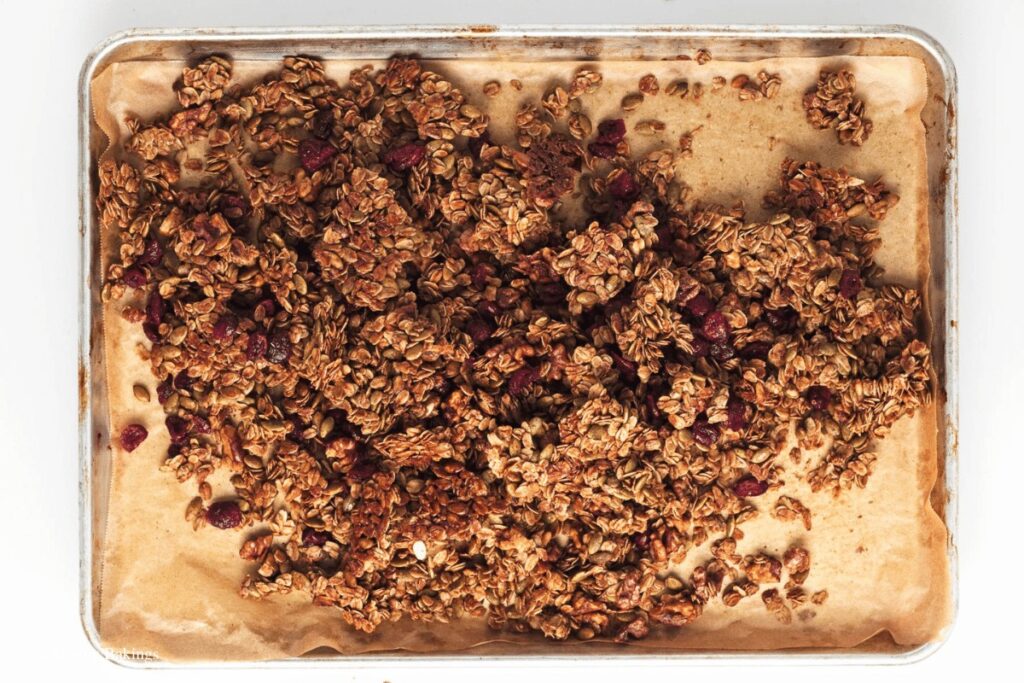
    Remove from oven and allow to cool completely without disrupting the mixture. The less the mixture moves while baking and cooling, the more clusters will form.

    crumbled mixture with cranberries

    Sprinkle the cranberries over the mixture and break the granola into pieces.

    granola pumpkin spice inside a mason jar with lid opened

    Hint: For extra crunchy clusters, resist the urge to stir the granola while it bakes. Patience is key for achieving that perfect texture!

    ⭐ Top Tips

    • Take your time to thoroughly mix the dry ingredients with the maple syrup and coconut oil mixture to ensure every oat and nut is coated for maximum flavor.
    • Bake the granola without stirring to allow clusters to form. Once baked, let it cool completely before breaking it into pieces for the perfect balance of crunch and chewiness.

    FAQ

    Why are homemade granola not crunchy?

    Homemade granola may not be crunchy if it's not baked long enough or if it's stirred too often during baking, preventing clusters from forming.

    Is pumpkin spice just cinnamon?

    No, pumpkin spice typically includes a blend of cinnamon, ginger, cloves, and nutmeg, creating a warm and aromatic flavor profile.

    Does homemade granola harden as it cools?

    Yes, homemade granola typically hardens as it cools, resulting in crunchy clusters.

    More Recipes

    Looking for other recipes like this? Try these 3:

    • Easy Homemade Granola
    • 4 Ingredient Granola Bars
    • Oreo Peanut Butter Bark
    crunchy and yummy pumpkin spice granola in a mason ar
    5 from 1 vote
    Print Pin Recipe

    Pumpkin Spice Granola

    Whip up crunchy Pumpkin Spice Granola with oats, walnuts, and pumpkin seeds. Sweetened with maple syrup and spiced with cinnamon, ginger, cloves, and nutmeg. Top it off with dried cranberries for a tasty snack or breakfast!
    Prep Time10 minutes mins
    Bake Time40 minutes mins
    Total Time50 minutes mins
    Course: Breakfast, Snacks, Vegan
    Cuisine: American
    Servings: 2 quarts
    Calories: 240kcal
    Prevent your screen from going dark

    Ingredients

    • 3 ½ cups / 325g rolled oats
    • ¾ cups / 75g walnuts coarsely chopped
    • ¾ cups / 125g raw pepitas (pumpkin seeds)
    • ½ cup / 120ml maple syrup
    • ⅓ cup / 78ml coconut oil
    • ½ teaspoon / 3g salt
    • 2 teaspoons / 4g ground cinnamon*
    • 1 ½ teaspoons / 3g ground ginger*
    • ½ teaspoon / 1g ground cloves*
    • ½ teaspoon / 1g ground nutmeg*
    • ¾ cups / 95g dried cranberries

    Instructions

    • Preheat oven to 300°F/150 C. Line a baking sheet with parchment or a silicon baking mat.
    • In a large bowl, combine the rolled oats, chopped walnuts, and pepitas. Stir to distribute.
    • In a small saucepan, heat the coconut oil and maple syrup until the coconut oil is melted.
    • Remove from heat and stir in the salt and spices.
    • Pour the maple mixture over the dry ingredients. Stir until everything is well coated.
    • Spread out the mixture on the prepared baking sheet into an even layer.
    • Bake for 30-40 minutes without stirring until golden brown.
    • Remove from oven and allow to cool completely without disrupting the mixture. The less the mixture moves while baking and cooling, the more clusters will form.
    • Sprinkle the cranberries over the mixture and break the granola into pieces.
    • Store in an airtight container at room temperature for up to 10 days.
    Leave a Comment

    Notes

    *Spices can be replaced with a total of 4 ½ tsp of preferred pumpkin spice blend.
    Serving: 0.5cupCalories: 240kcalCarbohydrates: 29gProtein: 5gFat: 13gSaturated Fat: 5gSodium: 90mgFiber: 4gSugar: 10g

    Watch The Recipe Video!

    QR Code
    Did you make this recipe?Share it on instagram or tag @simplybakings or #simplybakings!

    Breakfast & Brunch, Desserts, Thanksgiving Brunch, Vegan Baking

    Ginisang Patola with Mushroom

    Sep 24, 2024 · 4 Comments

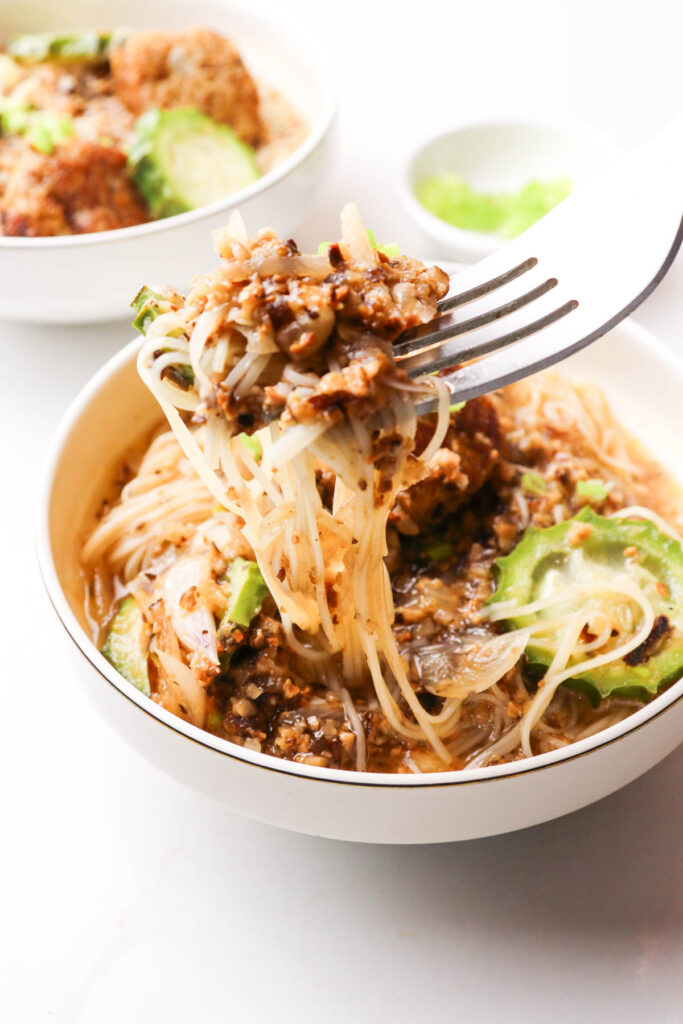
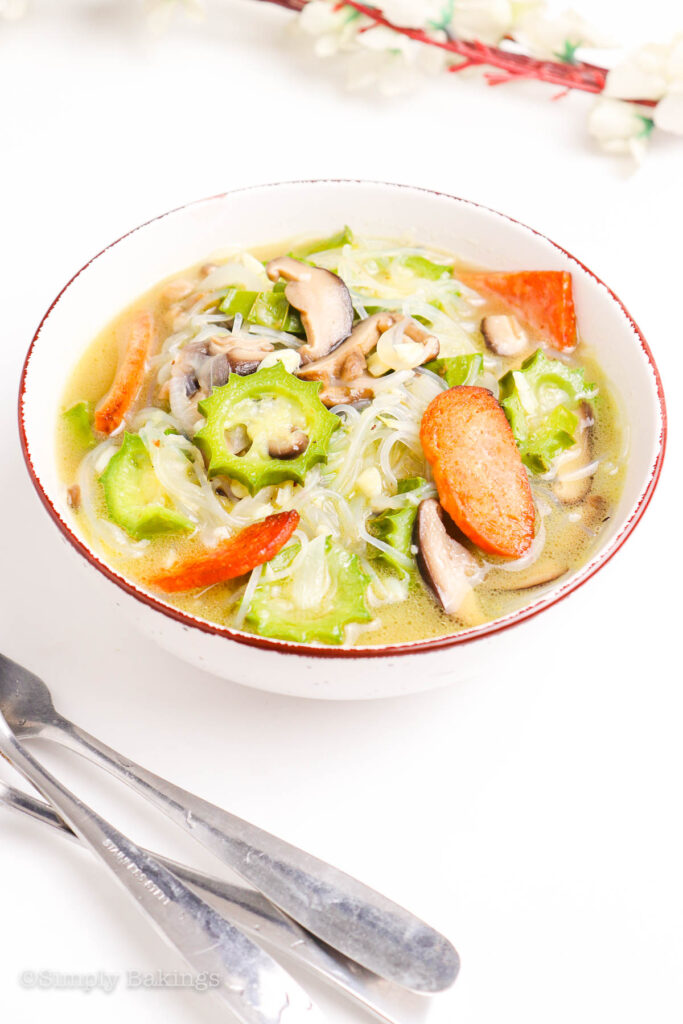
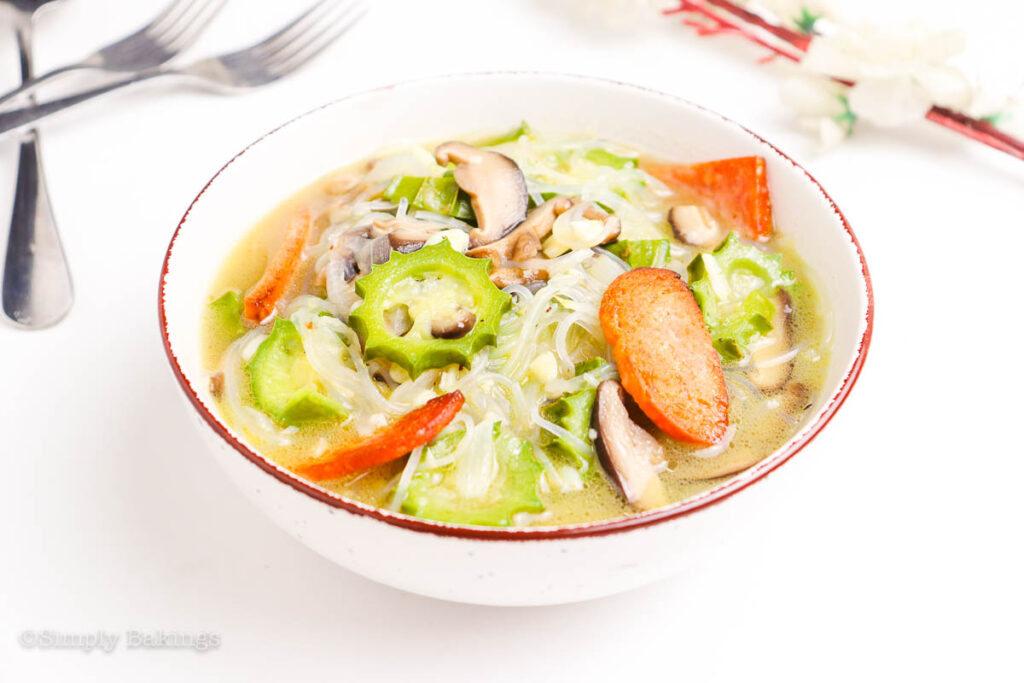
    healthy and delicious ginisang patola in a white bowl

    This Ginisang Patola with Mushroom recipe is a must-try if you're searching for an easy and delicious Filipino dish! Patola (sponge gourd) is sautéed in a rich mixture of shiitake mushrooms, vermicelli noodles, and plant-based meat substitute slices which makes a healthy option for lunch or dinner.

    Looking for more easy stir-fried vegetable recipes? Try Stir-Fry Mung Bean Sprouts, Easy Stir Fry Cabbage, and Tofu Stir Fry with Snow Peas recipes!

    a bowl of delicious ginisang patola with mushroom
    [feast_advanced_jump_to]

    What is Ginisang Patola with Mushroom?

    Ginisang Patola with Mushroom is a classic Filipino dish made with sautéed sponge gourd and mushrooms. It's a simple, versatile, and nutritious recipe that can be served as a side dish or as a main course. It's a comforting soup that exemplifies Filipino cuisine by blending fresh veggies with a sautéing technique to produce a quick and easy meal.

    This stir-fry recipe is made with plant-based meat substitute slices and vermicelli noodles for a vegetarian version which makes it a healthier option for lunch or dinner. Read more about this simple Filipino dish and give it a try. Happy cooking!

    Health Benefits of Patola (Sponge Gourd)

    • Aids blood sugar management.
    • A rich source of vitamins and minerals.
    • It helps lower the risk of chronic diseases.
    • Improves weight management and digestion.

    Variations

    • Vegetable Mix: Add more vegetables for color and texture. To add diversity to the sauté mix, try adding snap peas, bell peppers, or carrots.
    • Protein Selection: Feel free to use tofu, tempeh, or any meat of your choice for a source of protein.
    • Flavor twist: You may add chili peppers for a spicy kick, or ginger, roasted garlic, and soy sauce for a slightly distinct flavour profile.
    ginisang patola with mushroom served in a white bowl

    Substitutions

    • Patola (Sponge Gourd or Luffa): Zucchini or cucumber can be used if patola is unavailable. When cooked, they both have a mild flavor and a similar texture.
    • Mushroom: You can replace shiitake mushrooms with cremini, portobello, or button mushrooms. They provide a unique flavor and texture.
    • Garlic and Onions: If fresh garlic or onions are not available, garlic and onion powder can be used. Leeks and shallots are also good onion alternatives.

    Storage

    • Store it in an airtight container to avoid moisture loss and contamination, and refrigerate for up to 3-4 days.
    • If you decide to freeze, use a freezer-safe container or a resealable freezer bag and store in the freezer for up to two months. To track storage time, label the container with the date.

     Ingredients

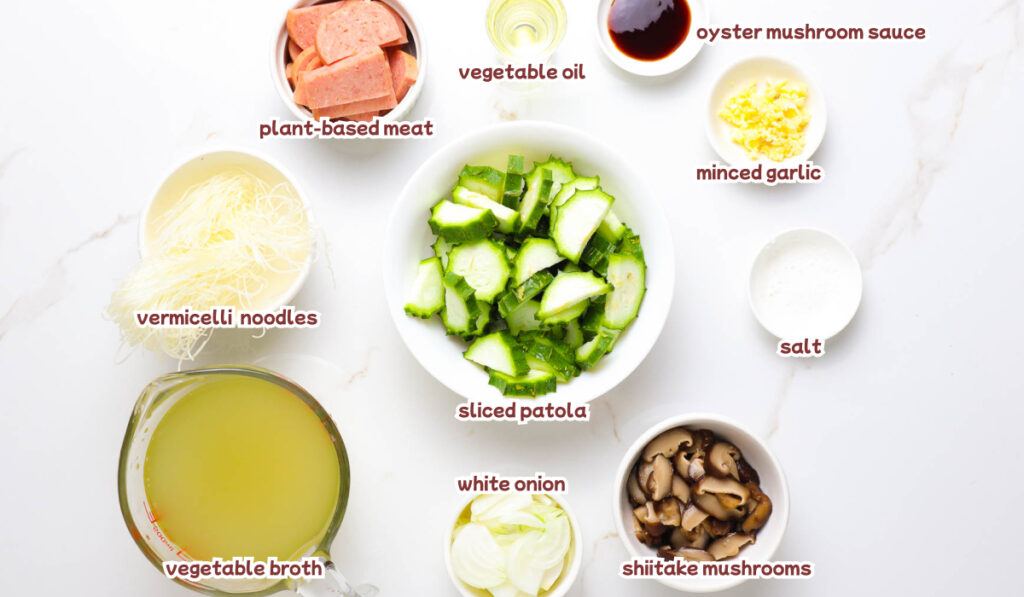
    Listed below are all the ingredients you will need:

    • vegetable oil
    • white onion
    • garlic
    • plant-based meat substitute
    • shiitake mushrooms
    • oyster mushroom sauce
    • patola
    • vegetable broth
    • vermicelli noodles
    • ground black pepper
    • salt

    See recipe card for quantities.

    ingredients for the ginisang patola with mushroom recipe

    Instructions

    Prepare all the ingredients and let’s begin!

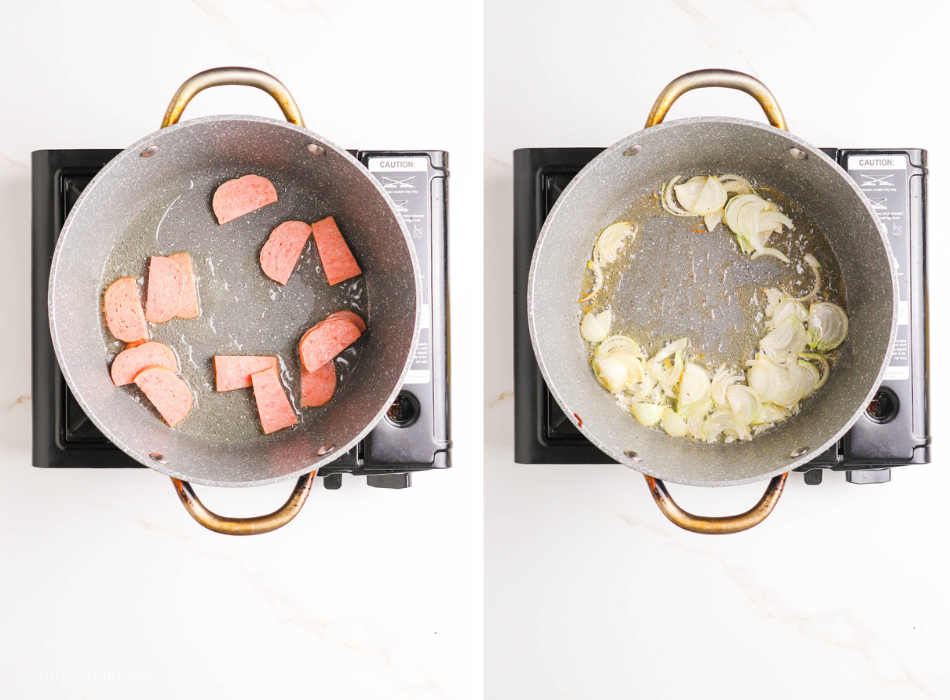
    fried plant-based meat and sautéed onion in a skillet

    Heat oil on skillet over medium heat and add the sliced plant-based meat substitute. Fry until crisp, and then remove from the skillet.

    In the same pan, sauté onions until fragrant.

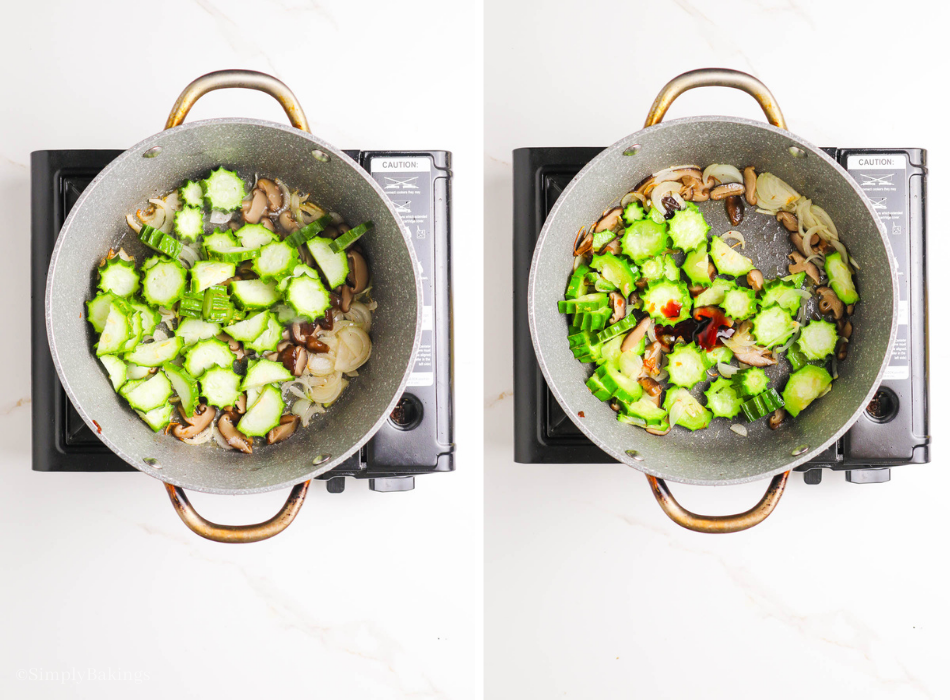
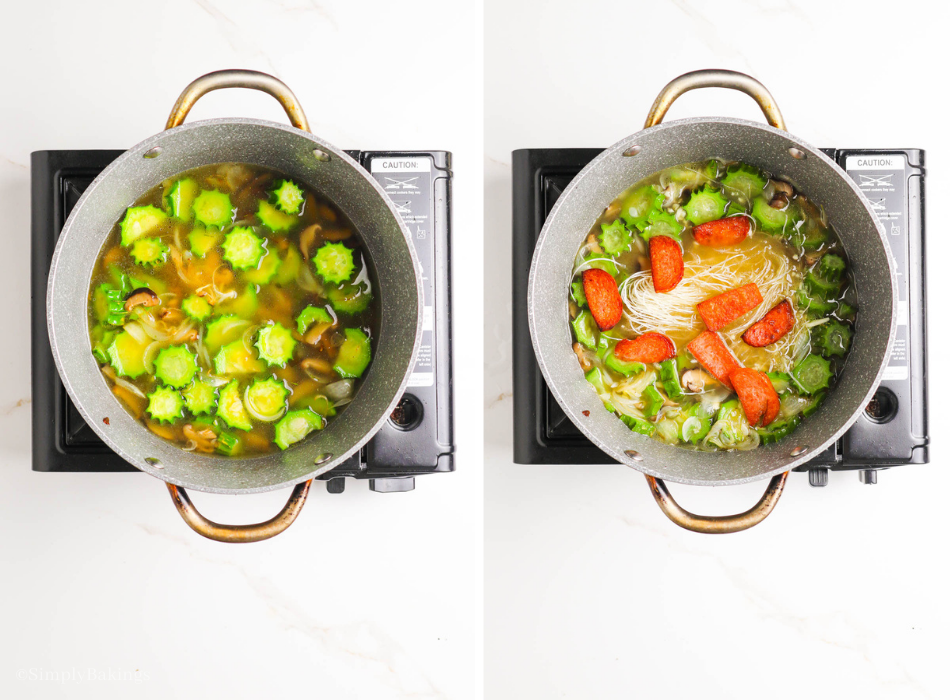
    added shiitake mushrooms, patola, and oyster sauce

    Add the shiitake mushrooms and the sliced patola, and continue sautéing for another minute.

    Pour in the oyster mushroom sauce and mix well.

    added broth, garlic, vermicelli, and fried plant-based meat.

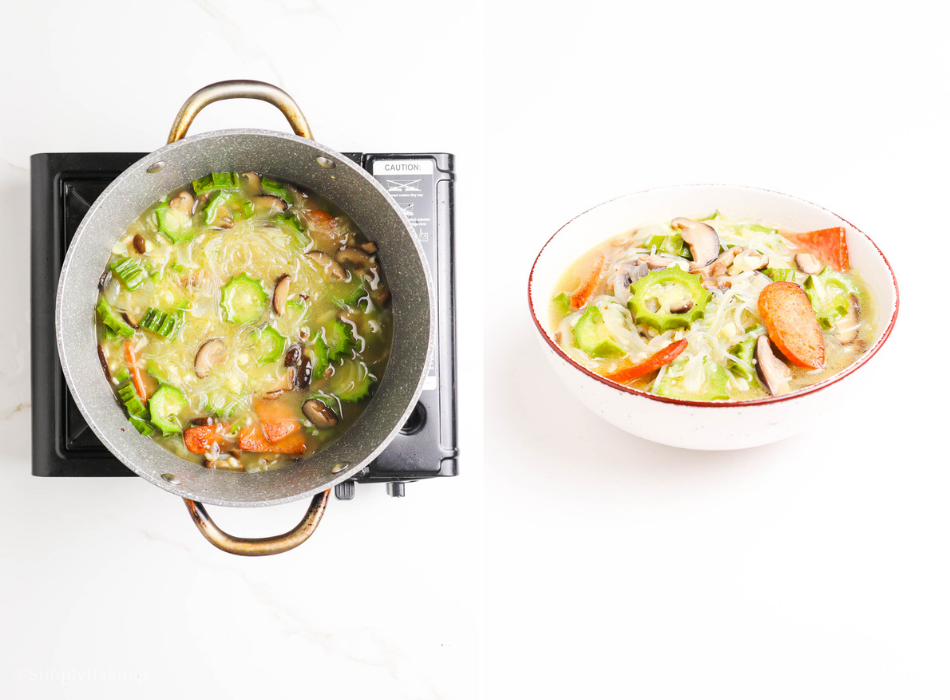
    Add the vegetable broth and bring the mixture to a boil; reduce to a simmer and cook for 10 minutes or until the patola is soft.

    Add the garlic, chinese vermicelli noodles, and the fried plant-based meat.

    seasoned with salt and pepper, served in a bowl

    Season with salt and ground black pepper, to taste.

    Serve in a bowl with rice and garnish with green onions. Enjoy this healthy dish!

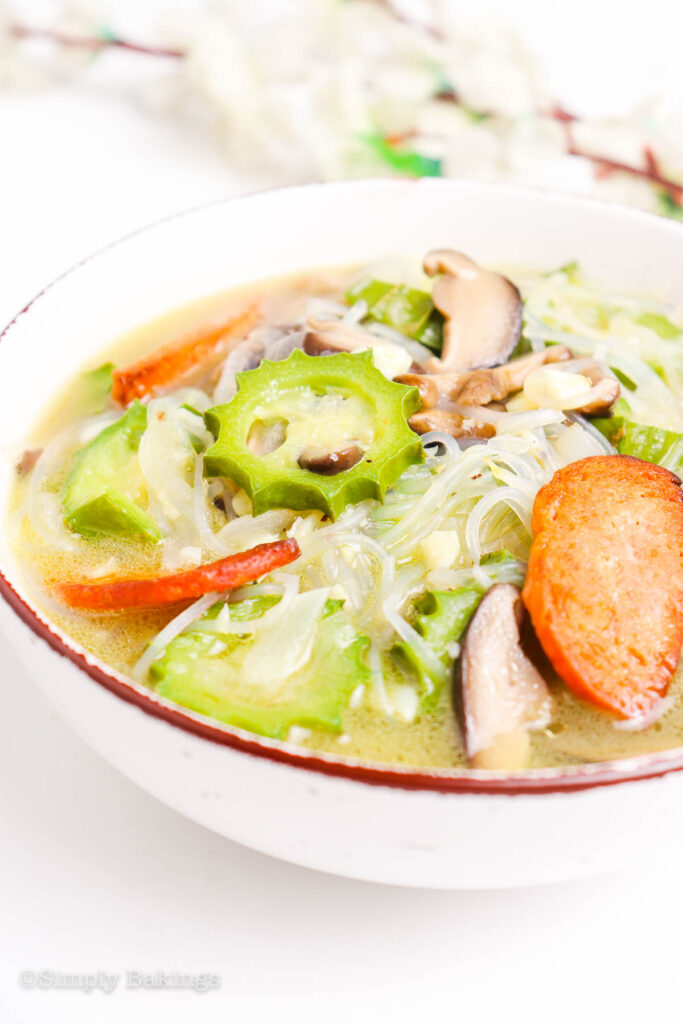
    ginisang patola with mushrooms, plant-based meat, and noodles

    Hint: To achieve the best flavor in Ginisang Patola with Mushroom, sauté the spices until fragrant before adding the patola and mushrooms. This makes a rich base and keeps the vegetables from becoming too soft while cooking.

    ⭐ Top Tip

    Avoid overcooking the mushrooms and patola (sponge gourd), which can become mushy or rubbery. Add them near the end of the sautéing process to preserve their crisp-tender texture and enhance the overall flavor of the dish.

    FAQ

    What does Ginisang Patola with Mushroom taste like?

    This recipe has a savory flavor with notes of sweetness from the vegetables and earthy flavor from the mushrooms.

    Can I make Ginisang Patola with Mushroom ahead of time?

    Yes, you can make this dish ahead of time and keep it in the refrigerator. Just reheat before serving, and adjust the seasoning as needed.

    More Filipino Vegetable Recipes

    Looking for other recipes like this? Try these 3:

    • Vegetarian Pinakbet
    • Ginisang Repolyo
    • Ginataang Gulay
    a bowl of hearty and delicious ginisang patola with mushroom
    5 from 2 votes
    Print Pin Recipe

    Ginisang Patola with Mushroom

    Here's a quick and easy Filipino dish made of sautéed patola (sponge gourd) with mushrooms, noodles, and vegetarian meat in a flavorful broth. Enjoy this healthy dish as a side or main entrée for a satisfying lunch or supper!
    Prep Time10 minutes mins
    Cook Time15 minutes mins
    Total Time25 minutes mins
    Course: Side Dish
    Cuisine: Filipino
    Servings: 4
    Calories: 183kcal
    Author: Simply Bakings Kitchen Team
    Prevent your screen from going dark

    Ingredients

    • 2 tablespoons vegetable oil
    • ¼ cup white onion sliced
    • 1 tablespoon minced garlic
    • ½ cup choice of plant-based meat substitute sliced
    • ½ cup shiitake mushrooms sliced
    • 1 tablespoon oyster mushroom sauce
    • 1 ½ cups sliced patola peeled
    • 2 cups vegetable broth
    • 1 ounce vermicelli noodles prep in accordance with package instructions
    • ¼ teaspoon ground black pepper
    • ½ teaspoon salt

    Instructions

    • Add oil to a heated skillet over medium heat and add the sliced plant-based meat substitute. Fry until crisp, and then, remove from the skillet.
    • In the same pan, sauté onions until fragrant.
    • Add the shiitake mushrooms and the sliced patola, and continue sauteing for another minute.
    • Pour in the oyster mushroom sauce and mix well.
    • Add the vegetable broth and bring the mixture to a boil; reduce to a simmer and cook for 10 minutes or until the patola are soft.
    • Add the garlic, vermicelli noodles, and the fried plant-based meat.
    • Season with salt and ground black pepper to taste; serve.
    Leave a Comment
    Calories: 183kcalCarbohydrates: 17gProtein: 10gFat: 9gSaturated Fat: 1gPolyunsaturated Fat: 5gMonounsaturated Fat: 2gTrans Fat: 0.04gSodium: 1067mgPotassium: 256mgFiber: 2gSugar: 3gVitamin A: 251IUVitamin C: 9mgCalcium: 29mgIron: 5mg

    Watch The Recipe Video!

    QR Code
    Did you make this recipe?Share it on instagram or tag @simplybakings or #simplybakings!

    Rice, Noodles, Potatoes, Side Dishes, Vegan Filipino Recipes, Vegetarian Filipino Recipes, Vegetarian Meat

    Miso Sweet Potato Soup

    Sep 5, 2024 · 2 Comments

    vegan sweet potato soup with miso garnished with basil

    This Miso Sweet Potato Soup is made with a rich blend of sweet potatoes, miso paste, and a variety of vegetables, creating a deliciously satisfying flavor profile. The addition of miso not only adds depth to the soup but also provides beneficial probiotics for gut health. 

    Want more easy soup recipes? Try cooking my Ginger Noodle Soup, Lemongrass Soup, or this easy Sour Cabbage Soup.

    vegan sweet potato soup with miso garnished with basil
    [feast_advanced_jump_to]

    What is Miso Sweet Potato Soup?

    Miso Sweet Potato Soup is a tasty and healthy soup that combines sweet potatoes' natural sweetness with miso paste's savory depth. The soup is also made with a variety of fresh vegetables, such as onions, carrots, and celery, that are cooked together to create a tasty, balanced broth.

    Miso, a fermented soybean paste, adds umami and probiotics to this soup, making it both delicious and nutritious. It's a simple yet filling soup for anyone looking for wholesome, vegan options. Give this a try!

    Benefits of Sweet Potatoes

    • Packed with vitamins (A, C), potassium, and manganese.
    • Promotes digestion and provides a sense of fullness.
    • Fights oxidative stress for overall health.
    • Low glycemic index supports stable blood sugar levels.
    • Vitamin A content contributes to a robust immune system.
    • Contains compounds that help reduce inflammation.
    • Beta-carotene converts to vitamin A for healthy vision.
    • Potassium and fiber aid in heart health.
    a tasty spoonful of miso soup of sweet potatoes

    Substitution

    • Miso Paste: Experiment with different types such as red or brown miso for varied flavor profiles.
    • Vegetable Broth: Swap with a homemade version or use a low-sodium alternative.
    • Neutral Oil: Canola or grapeseed oil make excellent substitutes for a neutral flavor.
    • Vegetables: Feel free to customize with your favorite veggies – zucchini, bell peppers, or kale work well.
    • Ground Ginger: Fresh ginger can be used for a more intense and aromatic kick.

    Storage

    • In the Fridge: Allow the soup to cool completely before transferring it to airtight containers. Stored properly, it can last for up to 4-5 days.
    • In the Freezer: Portion the soup into freezer-safe containers, leaving some room for expansion. Freeze for up to 3 months for a quick and convenient meal option.
    • On the Counter: While the soup can be kept at room temperature for a short period, it's advisable to refrigerate or freeze for longer shelf life.
    spoon dipped on the bowl of miso soup laid on a wooden table

    Ingredients

    Listed below are all the ingredients you will need:

    • sweet potato
    • yellow onion
    • celery
    • carrots
    • garlic
    • neutral oil
    • ground ginger
    • vegetable broth
    • miso paste (white or yellow)
    • coarse salt
    • ground black pepper
    list of ingredients of sweet potato miso soup

    Instructions

    To prepare the Miso Sweet Potato Soup, start by peeling and cubing the sweet potatoes. The smaller you cut them, the faster they'll cook. Next, mince the cloves garlic and celery:

    chopped celery and sweet potatoes

    Peel and dice the carrot. Finely dice the onion to add a burst of flavor:

    peeled and diced carrots and onion

    In a large, heavy-bottomed pot, heat the oil over medium heat. Add the diced onion, celery, carrot, and minced garlic.

    Stir regularly for 5 minutes until the onion becomes translucent, creating a fragrant base for your soup:

    sautéed onion, celery. carrot and garlic on a pot with heated oil

    Introduce the cubed sweet potatoes, ground ginger, and vegetable broth along with 1 cup of water.

    Cover the pot and let the mixture boil then simmer over medium-low heat for 30-40 minutes until all the vegetables reach a delightful level of softness:

    added sweet potatoes, ground ginger, and vegetable broth with water.

    Once the vegetables are tender, add the miso paste, salt, and pepper, infusing the soup with savory richness.

    Remove the pot from the heat, and using an immersion blender, pulse everything until you achieve a smooth consistency. Alternatively, if using a regular blender, allow the mixture to cool slightly before blending:

    added miso paste, salt, and pepper to the veggies then blended

    Taste the soup and adjust the salt to your preference. Transfer sweet potato miso soup to a bowl. Enjoy!

    tasty spoonful of miso paste sweet potato mushroom soup

    Frequently Asked Questions

    Can I freeze miso sweet potato soup?

    Absolutely! Freeze this soup in portions for a convenient go-to meal. Ensure proper airtight packaging to preserve its flavors.

    Any suggestions for recipe variations?

    Certainly! Consider adding a handful of kale or spinach for an extra nutrient boost. Craving a protein kick? Toss in some tofu cubes during the simmering stage.

    What's the best way to reheat leftovers?

    Reheating is a breeze. Simply warm the soup on the stove over low heat, stirring occasionally, until it reaches your desired temperature.

    creamy miso soup in bowl with spoon
    5 from 1 vote
    Print Pin Recipe

    Miso Sweet Potato Soup

    Savor the depth of this miso soup, a powerhouse of nutrients. Sweet potatoes contribute a natural sweetness, while miso paste adds a savory umami kick.
    Prep Time10 minutes mins
    Cook Time40 minutes mins
    Active Time5 minutes mins
    Total Time55 minutes mins
    Course: Main Course
    Cuisine: Asian
    Servings: 4 servings
    Calories: 483kcal
    Prevent your screen from going dark

    Ingredients

    • 1 ½ pounds / 675g sweet potato (about 2-3 large) cubed
    • 1 medium / 175g yellow onion
    • 2 stalks / 100g celery
    • 2 large / 175g carrots
    • 2 cloves / 10g garlic
    • 2 tablespoons / 30ml neutral oil
    • 2 teaspoons / 4g ground ginger
    • 3 cups / 710ml vegetable broth
    • 4 tablespoons / 60g miso paste (white or yellow)
    • ½ teaspoon / 3g coarse salt
    • 1 teaspoon / 2g ground black pepper

    Instructions

    • Peel and cube the sweet potato. The smaller you cut them the faster they will cook.
    • Dice the onion and celery finely. Peel and dice the carrot. Peel and mince the garlic.
    • In a large, heavy bottomed pot, heat the oil over medium heat.
    • Add the onion, celery, carrot, and garlic. Cook for 5 minutes, stirring regularly, until the onion starts to get translucent.
    • Add the sweet potato, ground ginger, and broth plus 1 cup/240ml water.
    • Cover and cook over medium-low heat for 30-40 minutes until all the vegetables are extremely soft.
    • Add the miso paste, salt, and pepper.
    • Remove from the heat and use an immersion blender to pulse everything until smooth. Alternatively, allow to cool slightly and then use a regular blender.
    • Taste and adjust the salt to preference.
    Leave a Comment
    Serving: 1servingCalories: 483kcalCarbohydrates: 79gProtein: 8gFat: 16gSaturated Fat: 1gPolyunsaturated Fat: 5gMonounsaturated Fat: 10gTrans Fat: 0.1gSodium: 2398mgPotassium: 1227mgFiber: 12gSugar: 18gVitamin A: 48934IUVitamin C: 8mgCalcium: 120mgIron: 3mg

    Watch The Recipe Video!

    QR Code
    Did you make this recipe?Share it on instagram or tag @simplybakings or #simplybakings!

    Main Entree

    Skillet Brookie

    Aug 29, 2024 · 2 Comments

    sweet and delicious skillet brookie topped with vanilla ice cream and chocolate chips

    Satisfy your sweet cravings with this delicious Skillet Brookie, which combines chewy cookies and rich, fudgy brownies into a harmonious dessert. This delicious dessert, which comes in a handy pan, is skillfully made to satisfy your sweet tooth with the ideal balance of flavors and textures. Try this out and treat yourself!

    Looking for more brownie cookie recipes for a tasty treat this holiday season? No Bake Double Chocolate Brownie Cookies, Brownie Cookies, and Espresso Brownie Cookies are all delicious options.

    sweet and delicious skillet brookie topped with vanilla ice cream and chocolate chips
    [feast_advanced_jump_to]

    What is Skillet Brookie?

    Skillet Brookie is a delectable dessert that combines two beloved treats: brownies and cookies. Its name is derived from the words "brownie" and "cookie," and the delicacy is commonly made by baking a layer of brownie batter and a layer of cookie dough together in a skillet or baking dish. The outcome is a sweet and delicious dessert that combines the fudgy richness of brownies and the chewy texture of cookies into a single, decadent delight.

    Health Benefits of Cocoa Powder

    • Rich in antioxidants.
    • Promotes cardiovascular health.
    • Improves mood and mental health.
    • It boosts cognitive function and protects the brain from aging.
    • A good source of minerals such as magnesium, iron, and potassium.

    Top Tips

    • Preheat the Skillet: To ensure consistent baking, you may pre-heat your skillet before adding the batter.
    • Grease the Skillet Properly: To prevent sticking, grease the skillet well with butter or nonstick cooking spray.
    • Layering Consistency: Maintain a uniform layer of brownie batter and cookie dough for a balanced taste in every bite.
    • Monitor Baking Time: Keep an eye on the baking time to avoid overcooking. For a fudgy texture, a slightly gooey center is preferable.
    • Add Mix-Ins Uniformly: For a consistent texture, distribute chocolate chips, nuts, or other mix-ins equally.

    Substitutions

    • Butter:
      • Coconut Oil: For a dairy-free option with a hint of coconut flavor.
      • Vegan Butter: For a plant-based alternative.
      • Margarine: For a lower-fat option.
    • White Sugar:
      • Coconut Sugar: For a lower glycemic index and a subtle caramel flavor.
      • Maple Syrup: For a natural sweetener with a distinct flavor (reduce the liquid slightly in the recipe).
      • Agave Syrup: For a vegan and mild-flavored liquid sweetener.
    • Brown Sugar:
      • Coconut Sugar: For a healthier, less refined option.
      • Maple Syrup: For a different texture but a rich flavor.
      • Honey: For a non-vegan natural sweetener (reduce the liquid slightly in the recipe).
    • Baking Soda:
      • Baking Powder: For a similar leavening effect (use 3x the amount).
      • Potassium Bicarbonate: For a low-sodium alternative (reduce the salt in the recipe).
    • Salt:
      • Sea Salt: For a slightly different mineral content and flavor.
      • Kosher Salt: For a coarser texture and less salty flavor (adjust to taste).
      • Pink Himalayan Salt: For added minerals and a subtle flavor.
    • Chocolate Chips:
      • Dark Chocolate Chips: For a richer, slightly more bitter flavor.
      • Vegan Chocolate Chips: For a dairy-free option.
      • White Chocolate Chips: For a sweeter, creamier taste.
    • Vanilla Extract:
      • Almond Extract: For a nutty flavor (use half the amount).
      • Maple Syrup: For a slightly different flavor with added sweetness.
      • Lemon Extract: For a citrusy twist (use sparingly).

    Storage

    • Keep the skillet brookie in an airtight container or carefully wrap the skillet in plastic wrap to keep it fresh. For the first day, keep it at room temperature and in a cool, dry place.
      If you have leftovers after the first day, store them in the refrigerator for another 2–3 days. Before sealing the container, place a piece of parchment paper or wax paper over the brookie to keep its delightful texture and prevent it from drying out.
    • Reheating: Warm individual slices in the microwave for a few seconds or reheat the skillet in the oven at a low temperature. Remember that the skillet brookie is best served warm, so consume it as soon as possible.
    deliciously baked skillet brookie topped with vanilla ice cream and chocolate chips

    Ingredients

    Listed below are all the ingredients you will need:

    Chocolate Chip Batter

    • unsalted butter
    • dark brown sugar
    • vanilla extract
    • egg
    • all-purpose flour
    • salt
    • semisweet chocolate chips

    Brownie Batter

    • unsalted butter
    • white granulated sugar
    • pure vanilla extract
    • large egg
    • cocoa powder
    • baking powder
    • salt
    • all-purpose flour
    • vegetable oil
    • water

    Topping

    • Vanilla Ice Cream
    • Extra chocolate chips
    ingredients for skillet brookie recipe

    Instructions

    Preheat the oven to 350 degrees Fahrenheit. 

    In a mixing bowl, make the chocolate chip batter by adding the softened butter and brown sugar together. Mix until combined. Then, add in the vanilla and egg, and mix again until the mixture is smooth:

    softened butter, brown sugar, vanilla extract, and egg combined  in a clear mixing bowl

    Pour in the flour and salt, and mix the dough once more until a thick chocolate chip batter is formed. Fold in the chocolate chips. Set this bowl aside:

    added the flour, salt, chocolate chips to make a thick chocolate chip batter

    In another smaller bowl, add the melted butter and white sugar together. Mix until combined. Then add the egg and vanilla extract. Whisk together until smooth:

    mixed the melted butter, white sugar, egg, and vanilla extract in a smaller bowl

    Add in the dry ingredients of cocoa powder, baking powder, salt, and flour. Mix until a thick batter is formed. Thin out this brownie batter slightly by adding vegetable oil and water. Mix until there are no lumps in the batter:

    added the cocoa powder, baking powder, salt, flour, vegetable oil and water to make a brownie batter

    Take your cast iron skillet and place large tablespoonfuls of the chocolate chip batter around the bottom of the pan. Fill the pan with the brownie batter between the chocolate chip batter. Continue going back and forth until the skillet is filled.

    Bake in the oven for 17–20 minutes, or until the chocolate chip batter gets slightly golden brown. Do not overbake, or the brownie batter will become tough:

    filled the cast iron skillet with the brownie batter between the chocolate chip batter then baked to perfection

    Let it cool in the oven for a few minutes. Then top with a few scoops of vanilla ice cream and extra chocolate chips:

    deliciously baked skillet brookie topped with a few scoops of vanilla ice cream and chocolate chips

    Serve immediately, and enjoy!

    a spoonful of skillet brookie with vanilla ice cream and chocolate chips toppins

    Frequently Asked Questions

    What is a brookie made of?

    Brookie is a dessert mashup that consists of a layer of cookie dough topped with a layer of brownie batter and baked to deliciousness.

    What's the difference between a blondie and a brookie?

    Lorem ipsum dolor sit amet, consectetur adipiscing elit, sed do eiusmod tempor incididunt ut labore et dolore magna aliqua. Ut enim ad minim veniam, quis nostrud exercitation ullamco laboris nisi ut aliquip ex ea commodo consequat.

    Why are Brookies so good?

    Brookies taste good because they are a combination of two of everyone's favorite desserts - a brownie and a cookie, both of which are unquestionably delicious.

    Cookie skillet on a marble table
    5 from 1 vote
    Print Pin Recipe

    Skillet Brookie

    A delicious combination of chewy cookies and fudgy brownies, perfectly baked in a skillet. This rich treat offers a well-balanced combination of flavors and textures, making your dessert experience even better. Give it a try right now!
    Prep Time15 minutes mins
    Bake Time20 minutes mins
    Total Time35 minutes mins
    Course: Dessert
    Cuisine: American
    Servings: 1 skillet brookie
    Calories: 2000kcal
    Author: Simply Bakings Kitchen Team
    Prevent your screen from going dark

    Equipment

    • Cast Iron Pan

    Ingredients

    Chocolate Chip Batter

    • 3 tablespoons unsalted butter softened
    • ½ cup dark brown sugar
    • ¾ teaspoons vanilla extract
    • 1 egg
    • ½ cup all-purpose flour
    • ⅛ teaspoon salt
    • ⅓ cup semisweet chocolate chips

    Brownie Batter

    • ½ tablespoon unsalted butter melted
    • ⅓ cup white granulated sugar
    • 1 teaspoon vanilla extract
    • ½ egg
    • ¼ cup cocoa powder
    • ⅛ teaspoon baking powder
    • ⅛ teaspoon salt
    • 2 tablespoons all-purpose flour
    • 1½ tablespoons vegetable oil
    • 1 tablespoon water

    Toppings

    • Vanilla Ice Cream
    • Extra chocolate chips

    Instructions

    Preheat the Oven:

    • Preheat your oven to 350°F (175°C).

    Make the Chocolate Chip Batter:

    • In a mixing bowl, combine the softened butter and brown sugar. Mix until smooth.
    • Add the vanilla extract and egg, and mix again until combined.
    • Stir in the flour and salt until a thick dough forms.
    • Fold in the chocolate chips and set the batter aside.

    Make the Brownie Batter:

    • In a smaller bowl, mix together the melted butter and sugar until combined.
    • Add the egg and vanilla extract, whisking until smooth.
    • Add the cocoa powder, baking powder, salt, and flour. Mix until the batter thickens.
    • Stir in the vegetable oil and water to thin out the brownie batter slightly, ensuring there are no lumps.

    Assemble the Skillet:

    • Take a cast iron skillet and drop large spoonfuls of the chocolate chip batter around the bottom.
    • Fill the spaces between the chocolate chip batter with the brownie batter. Alternate between both batters until the skillet is filled.

    Bake:

    • Bake in the oven for 17–20 minutes, or until the chocolate chip batter is golden brown. Be careful not to overbake, as the brownie batter may become tough.

    Serve:

    • Let the skillet cool for a few minutes.
    • Top with vanilla ice cream and extra chocolate chips.
    • Serve immediately and enjoy!
    Leave a Comment
    Serving: 1skillet brookieCalories: 2000kcalCarbohydrates: 279gProtein: 25gFat: 93gSaturated Fat: 45gPolyunsaturated Fat: 16gMonounsaturated Fat: 25gTrans Fat: 2gCholesterol: 354mgSodium: 778mgPotassium: 1011mgFiber: 15gSugar: 197gVitamin A: 1611IUCalcium: 248mgIron: 12mg

    Watch The Recipe Video!

    QR Code
    Did you make this recipe?Share it on instagram or tag @simplybakings or #simplybakings!

    Desserts

    Vegan Fried “Chicken” Tofu

    Aug 15, 2024 · 4 Comments

    crispy vegan fried chicken on a white plate

    Enjoy the delicious taste of Vegan Fried "Chicken" Tofu, a unique recipe that turns tofu into a crispy delight. It's made with firm tofu soaked in a vegetable broth and coated with garlic, paprika, and thyme, giving you a mouth-watering plant-based meal.

    Craving more vegan options? Experiment with my Vegan Bolognese, Easy Vegan Burritos, and Vegan Blondies.

    deep fried chicken nuggets vegan
    [feast_advanced_jump_to]

    Health Benefits of Tofu

    • Rich in protein.
    • Improves brain health.
    • Boosts the immune system.
    • Promotes muscle health.
    • Lowers the risk of certain cancers.
    • Reduces menopause symptoms.

    Substitutions

    Firm Tofu:

    • Tempeh: For a firmer texture and nutty flavor.
    • Seitan: For a chewier, more meat-like texture.
    • Chickpea Tofu: For a soy-free alternative with a slightly different texture.

    Vegetable Broth:

    • Mushroom Broth: For an umami-rich alternative.
    • Water with Soy Sauce: For added flavor if vegetable broth is unavailable.
    • Miso Broth: For a deep, savory flavor.

    Whole Milk:

    • Almond Milk: For a nutty, dairy-free option.
    • Soy Milk: For a creamy, dairy-free option with a neutral flavor.
    • Coconut Milk: For a richer, slightly sweet flavor (use light coconut milk for less richness).

    Hot Sauce:

    • Sriracha: For a similar heat with a bit of sweetness.
    • Cayenne Pepper: For a dry spice alternative.
    • Chili Flakes: For a different texture and spiciness.

    Apple Cider Vinegar:

    • White Vinegar: For a similar tangy flavor.
    • Lemon Juice: For a citrusy acidity.
    • Rice Vinegar: For a milder, slightly sweet flavor.
    bitten off piece of fried chicken tofu

    All-Purpose Flour:

    • Whole Wheat Flour: For a healthier, fiber-rich option.
    • Gluten-Free Flour Blend: For a gluten-free alternative.
    • Chickpea Flour: For a protein-rich, gluten-free option.

    Cornstarch:

    • Arrowroot Powder: For a similar thickening and crisping effect.
    • Potato Starch: For a thicker, more substantial coating.
    • Tapioca Starch: For a slightly chewier texture.

    Garlic Powder:

    • Fresh Garlic: Minced for a stronger, more pungent flavor.
    • Onion Powder: For a different but complementary flavor.
    • Shallot Powder: For a milder, sweeter garlic-like flavor.

    Salt:

    • Sea Salt: For a different mineral content and flavor.
    • Kosher Salt: For a coarser texture.
    • Soy Sauce: For added umami and saltiness in the batter.

    Smoked Paprika:

    • Regular Paprika: For a milder flavor without the smoky element.
    • Chipotle Powder: For a smoky and slightly spicy alternative.
    • Chili Powder: For a spicier, non-smoky flavor.

    Dried Thyme:

    • Fresh Thyme: Use a smaller amount, as fresh herbs are more potent.
    • Dried Rosemary: For a similar earthy flavor.
    • Italian Seasoning: For a mix of herbs including thyme.

    Dried Oregano:

    • Fresh Oregano: Use a smaller amount of fresh oregano as it's more potent.
    • Basil: For a slightly different but complementary herb flavor.
    • Marjoram: For a milder, sweet flavor.

    Ground Black Pepper:

    • White Pepper: For a milder, less pungent flavor.
    • Cayenne Pepper: For added heat.
    • Smoked Paprika: For a smoky twist with mild spice.

    Vegetable Oil:

    • Canola Oil: For a neutral flavor with a high smoke point.
    • Sunflower Oil: For a similar neutral flavor with a high smoke point.
    • Avocado Oil: For a healthier option with a high smoke point.
    homemade vegan fried tofu nuggets served on a plate

    Storage

    • In the Fridge: Store any leftovers in an airtight container in the refrigerator for up to two days. For optimal reheating, use the oven.
    • In the Freezer: To freeze, separate the tofu pieces with parchment paper to prevent sticking. Store it in a freezer-safe container for up to one month. Thaw in the refrigerator before reheating.
    • On the Counter: Enjoy your crispy creation immediately after frying for the best texture and flavor. If storing for later, follow the fridge or freezer guidelines for lasting freshness.

    Ingredients

    Listed below are all the ingredients you will need:

    • firm tofu
    • vegetable broth
    • whole milk
    • hot sauce
    • apple cider vinegar
    • all-purpose flour
    • cornstarch
    • garlic powder
    • salt
    • smoked paprika
    • dried thyme
    • dried oregano
    • ground black pepper
    • vegetable oil
    list of ingredients of vegan fried chicken tofu

    Instructions

    To begin with, slice the thawed tofu (you can use either medium or extra firm tofu) into bite-sized chunks. Subsequently, place the tofu in a large bowl along with the vegetable broth, allowing it to brine for a flavorful ten minutes:

    tofu chunks marinated in vegetable broth

    Meanwhile, in a separate bowl, combine the whole milk, hot sauce, and apple cider vinegar; set aside for the next step.

    Moving on, whisk together all-purpose flour, cornstarch, garlic powder, salt, smoked paprika, dried thyme, dried oregano, and ground black pepper in a bowl; set aside:

    mixed wet ingredients and dry ingredients on separate bowls

    Then, dip each tofu piece in the milk mixture first, followed by the seasoned flour mixture. For an extra layer of crispiness, repeat the dipping process twice, ensuring each piece is evenly coated before placing them on a wire rack.

    Deep-fry the tofu until golden brown:

    deep fried chicken tofu dipped on milk mixture then coated by seasoned flour

    You can remove the excess oil from the vegan chicken nuggets by dabbing them with paper towels. After that, transfer them to a serving bowl or plate and serve them right away. Enjoy your meal!

    crispy vegan fried chicken with hot sauce on the side

    Frequently Asked Questions

    Should I boil tofu before cooking?

    Should I boil tofu before cooking?
    There is no need to boil tofu before cooking; simply press it to remove excess water for a firmer texture and enhanced flavor.

    Is tofu a complete protein?

    Tofu is not a complete protein on its own but can become one when combined with complementary proteins like grains or legumes

    Can I achieve vegan "fried" chicken by baking the tofu?

    Certainly! While the traditional recipe involves frying, you can also achieve a crispy texture by baking the tofu. Simply coat the tofu pieces with the seasoned flour mixture and bake in a preheated oven until golden brown for a delicious baked version of vegan "fried" chicken.

    fried vegan tofu chunks set on a plate
    5 from 2 votes
    Print Pin Recipe

    Vegan Fried “Chicken” Tofu

    This one-of-a-kind recipe transforms humble tofu into a crispy delight reminiscent of classic fried chicken. With a perfect blend of firm tofu, a savory vegetable broth brine, and a flavorful coating featuring garlic, paprika, and thyme, this dish promises a crunchy, plant-based experience like no other.
    Prep Time15 minutes mins
    Cook Time9 minutes mins
    Total Time25 minutes mins
    Course: Appetizer
    Cuisine: Vegan
    Servings: 2 servings
    Calories: 3545kcal
    Prevent your screen from going dark

    Ingredients

    • 16 ounces firm tofu frozen & thawed
    • 1 cup vegetable broth
    • 1 cup whole milk
    • 1 tablespoon hot sauce
    • 1 tablespoon apple cider vinegar
    • 1 cup all-purpose flour
    • ½ cup cornstarch
    • 2 tablespoons garlic powder
    • 2 teaspoons salt
    • ½ tablespoon  smoked paprika
    • ½ teaspoon dried thyme
    • ½ teaspoon dried oregano
    • ½ teaspoon ground black pepper
    • 3 cups vegetable oil for frying

    Instructions

    • Slice the thawed tofu into chunks.
    • Place the tofu in a large bowl with the vegetable broth and let it brine for 10 minutes.
    • Meanwhile, combine milk, hot sauce, and apple cider vinegar in a bowl’ set aside.
    • Whisk together all-purpose flour, cornstarch, garlic powder, salt, smoked paprika, dried thyme, dried oregano, and ground black pepper in a bowl; set aside.
    • Dip the tofu in the milk mixture, followed by the flour mixture.
    • Repeat the dipping process twice and place it in a wire rack.
    • Fry the tofu until golden brown.
    • Transfer to a serving bowl or plate, and serve immediately.
    Leave a Comment

    Notes

    1. You can substitute all-purpose flour with rice flour or nut flour.
    Calories: 3545kcalCarbohydrates: 97gProtein: 32gFat: 342gSaturated Fat: 53gPolyunsaturated Fat: 194gMonounsaturated Fat: 78gTrans Fat: 2gCholesterol: 15mgSodium: 3033mgPotassium: 410mgFiber: 5gSugar: 8gVitamin A: 1333IUVitamin C: 5mgCalcium: 463mgIron: 7mg

    Watch The Recipe Video!

    QR Code
    Did you make this recipe?Share it on instagram or tag @simplybakings or #simplybakings!

    Side Dishes, Vegetarian Filipino Recipes

    Biscoff Cheesecake Ice Cream

    Jul 18, 2024 · 2 Comments

    no churn biscoff ice cream on a loaf pan and cone

    Enjoy the creamy taste of Biscoff Cheesecake Ice Cream! It's made with simple ingredients like heavy whipping cream, sweetened condensed milk, and crushed Biscoff cookies. This delicious frozen treat is perfect for satisfying your sweet tooth.

    In search of quick and easy ice cream recipes? Whip up my Mocha Ice Cream, Vegan Chocolate Ice Cream, and 2-Ingredient Pineapple Ice Cream.

    luscious cheesecake biscoff icecream served on a pan and cone

    What is Biscoff Cheesecake Ice Cream?

    The Biscoff Cheesecake Ice Cream has a cool history. It comes from mixing classic cheesecake with Biscoff cookies (with the more popular Lotus Biscoff ones), creating a tasty frozen treat. People wanted something new, so they added whipped cream, sweetened condensed milk, and vanilla. Layering it all together made a delicious dessert loved worldwide.

    What makes it truly fun is the combination of rich flavors from the creamy no-bake cheesecake, the irresistible crunch of Biscoff cookies, and the decadent sweetness of cookie butter. The best part?

    It's surprisingly easy to make! With just a few simple steps and minimal prep time, you'll have homemade ice cream that will impress your friends and family. So go ahead, unleash your creativity, and enjoy the satisfaction of creating a delicious frozen dessert that everyone will love.

    Benefits of Biscoff Cookies

    • They contain less fat than other types of cookies, making them a slightly healthier option.
    • They are also free from artificial colors, flavors, and preservatives.
    • Biscoff cookies are vegan and do not contain any animal products or by-products.
    • They are also suitable for people with nut allergies, as they do not contain any nuts.
    • However, Biscoff cookies are high in sugar and should be consumed in moderation as part of a balanced diet.
    no churn ice cream with biscoff crushed cookies

    Substitution

    • Different Cookies: If you can't find Biscoff cookies, go for Speculoos cookies; they're like cousins and will still taste great.
    • Spread Options: If you don't have Biscoff cookie butter, try Nutella or almond butter instead. They bring their own yummy flavors to the mix.
    • Change the Flavor: Instead of vanilla extract, try almond or coconut extract for a different taste.

    Variations

    • Sweetened Condensed Milk
      • Sweetened condensed coconut milk (for a dairy-free option)
      • Heavy cream with added sugar
      • Homemade sweetened condensed milk
    • No-Bake Cheesecake
      • Cheesecake-flavored pudding mix
      • Cream cheese with added sugar and lemon juice
      • Mascarpone cheese
    • Lotus Biscoff Biscuits
      • Graham crackers
      • Digestive biscuits
      • Oreo cookies (without the cream filling)
      • Ginger snap cookies
    • Biscoff Cookie Butter
      • Peanut butter
      • Nutella
      • Homemade cookie butter (made from graham crackers or other cookies)
      • Almond butter
    • Vanilla Extract
      • Vanilla bean paste
      • Vanilla flavoring
      • Almond extract (use sparingly)
      • Maple syrup (for a different flavor twist)

    Storage

    • Freezer: Pop it in a closed container in the freezer. For a softer treat, wait 6 hours; for a firmer one, go for 8 or more.
    • Fridge: The fridge isn't the best for long-term storage, but if you have leftovers, move them to the freezer to keep the ice cream cool.
    • Counter: Don't leave the ice cream out too long; it'll get too soft. But a short time on the counter before serving can make it easier to scoop.
    tasty cheesecake icecream spread on a loaf pan with cones and lotus biscoff biscuits on the side

    Ingredients

    Listed below are all the ingredients you will need:

    • heavy whipping cream
    • sweetened condensed milk
    • no-bake cheesecake
    • Lotus biscoff biscuits
    • biscoff cookie butter
    • vanilla extract
    homemade biscoff ice cream with cheesecake ingredients

    Instructions

    Begin by whipping the heavy cream for 2-3 minutes until it reaches a frothy consistency. Add in the vanilla and sweetened condensed milk, mixing on high until soft peaks form.

    Then, stir in crushed Biscoff biscuits with the irresistible cinnamon and caramel notes that make Biscoff a beloved treat:

    whipped heavy cream with crushed Biscoff biscuits

    Add ⅓ of the mixture to your loaf pan or cake tin. Then, introduce melted Biscoff cookie butter, creating pockets of gooey goodness using a spatula.

    Dollop a few spoonfuls of no-bake cheesecake for added richness. Continue layering with another round of whipped cream mixture, topped with more Biscoff cookie butter and no-bake cheesecake:

    no-bake cheesecake and melted Biscoff cookie butter added to the mixture

    Complete your frozen masterpiece with a final layer of whipped cream, drizzled with Biscoff cookie butter, and adorned with dollops of no-bake cheesecake:

    multiple layer of biscoff mixture put in the pan

    Cover the pan with plastic wrap and let the biscoff ice cream freeze for 6 hours for a soft set or 8+ hours for a more firm texture. Patience is key; the longer you wait, the more rewarding the final result. Enjoy!

    a big scoop of biscoof cookie ice cream

    Frequently Asked Questions

    Can I use a different type of cookie?

    Can I use a different type of cookie?
    Absolutely! Experiment with your favorite cookies to customize the flavor profile of your ice cream.

    Can I substitute the Biscoff cookie butter?

    Of course! Nutella or almond butter can be delightful alternatives, offering a unique twist to the recipe.

    Is Biscoff just peanut butter?

    No, Biscoff is not peanut butter. It is a type of cookie butter made from ground speculoos cookies, which are caramelized Dutch shortbread cookies, and does not contain any peanuts.

    melting goodness of cheesecake ice cream with biscoff on a cone
    5 from 1 vote
    Print Pin Recipe

    Biscoff Cheesecake Ice Cream

    Taste the irresistible allure of Biscoff Cheesecake Ice Cream! This dreamy dessert combines creamy no-bake cheesecake, luscious whipped cream, and the delectable crunch of Biscoff cookies. With its rich flavors and velvety texture, this frozen treat is sure to satisfy your sweet cravings.
    Prep Time10 minutes mins
    Freeze8 hours hrs
    Total Time8 hours hrs 10 minutes mins
    Course: Desserts
    Cuisine: American
    Servings: 9 servings
    Calories: 184kcal
    Prevent your screen from going dark

    Equipment

    • 1 Loaf pan
    • 1 Hand or stand mixer

    Ingredients

    • 2 cups heavy whipping cream
    • 1 14 ounces can sweetened condensed milk
    • 1 tablespoon vanilla extract
    • 5-7 biscoff cookies
    • ¼ cup biscoff cookie butter
    • 1½ cups no-bake cheesecake

    Instructions

    • Whip the heavy cream for about 2–3 minutes until frothy.
    • Add in the sweetened condensed milk and vanilla extract, and mix on high until soft peaks form.
    • Stir in crushed biscoff cookies.
    • Add ⅓ to your pan.
    • Add melted biscoff cookie butter and a few dollops of no bake cheesecake.
    • Add another layer of whipped cream mixture.
    • Top with cookie butter and no bake cheesecake.
    • Add a final layer of whipped cream, cookie butter, and no-bake cheesecake.
    • Cover with plastic wrap and freeze 6 hours for a soft set or 8+ hours until ready to serve.
    Leave a Comment
    Calories: 184kcalCarbohydrates: 2gProtein: 2gFat: 19gSaturated Fat: 12gPolyunsaturated Fat: 1gMonounsaturated Fat: 5gCholesterol: 60mgSodium: 14mgPotassium: 52mgSugar: 7gVitamin A: 777IUVitamin C: 0.3mgCalcium: 35mgIron: 0.1mg

    Watch The Recipe Video!

    QR Code
    Did you make this recipe?Share it on instagram or tag @simplybakings or #simplybakings!

    Desserts, No Bake Dessert Recipes

    Easy Banana Pudding Ice Cream Recipe

    Jul 11, 2024 · 2 Comments

    luscious Banana Pudding Cheesecake with nilla cookies

    Experience the perfect blend of rich cheesecake and creamy banana pudding in our delectable Easy Banana Pudding Ice Cream Recipe. Treat yourself to a heavenly dessert that will leave you craving more!

    On the lookout for more frozen delights? Get creative in the kitchen with our 3-Ingredient No Bake Cheesecake, whip up some Strawberry Stuffed Cheesecake, or satisfy your sweet tooth with our scrumptious Best Vegan Fruit Cheesecake.

    banana cheesecake ice cream with a Chessman cookie
    [feast_advanced_jump_to]

    Health Benefits of Bananas

    • May help regulate blood pressure.
    • High in dietary fiber that aids digestion.
    • Rich in potassium that promotes heart health.
    • Supports healthy skin with essential nutrients.
    • Supports healthy skin with essential nutrients.
    • Natural energy booster due to natural sugars.
    • Contains antioxidants, supporting overall health.
    • It contains vitamins B6 and C, boosting immunity.
    creamy no bake banana pudding ice cream in a bread pan

    Top Tip

    • To enhance the banana, add banana flavoring!
    • Drizzle caramel sauce or peanut butter before serving.

    Substitution

    • Sweetened Condensed Milk: For a lighter option, consider using coconut milk or evaporated milk.
    • No-Bake Cheesecake: If you can't find the no-bake version, try a traditional cheesecake or cream cheese, but adjust the preparation accordingly.
    • Cookies: Experiment with graham crackers or your favorite biscuit if Nilla Wafers or Chessman Cookies are unavailable.

    Storage

    • In the Fridge: After preparing, cover the dessert with plastic wrap or an airtight container. It can stay fresh in the fridge for up to a week.
    • In the Freezer: For longer storage, the dessert can be frozen. Use a freezer-friendly container, and it will keep well for several weeks. Remember to allow some time for thawing before serving.
    • On the Counter: Avoid leaving the banana pudding ice cream on the counter for extended periods, especially in warmer climates, as it contains dairy and may spoil. Always prioritize refrigeration or freezing for preservation.
    a serving of cheesecake ice cream with banana slices

    Ingredients

    Listed below are all the ingredients you will need:

    • sweetened condensed milk
    • vanilla extract or vanilla bean paste
    • heavy cream
    • brown sugar
    • cinnamon
    • nutmeg
    • salt
    • fresh bananas (optional)
    • nilla wafers, chessman cookies or vanilla wafer cookies
    • Philadelphia's no bake cheesecake filling
    ingredients of banana ice cream with cheesecake

    Instructions

    Start by whipping 2 cups of heavy whipping cream, brown sugar, cinnamon, nutmeg, and salt in a stand mixer until fully blended (4-5 minutes, or 2 minutes with a Bosch):

    whipped cream with spices in a mixer

    Next, in a large bowl, whisk together sweetened condensed milk and vanilla extract:

    whisked sweetened condensed milk and vanilla extract in a bowl

    Carefully fold the whipped cream into the condensed milk mixture until it reaches a uniform texture:

    whipped cream folded into the condensed milk mixture

    For the next step, line a bread pan with foil and pour ⅓ of the pudding mix:

    bread pan lined with foil

    Now, add slices of no-bake cheesecake, ripe bananas, and cookies. Continue the layering process, considering optional additions like caramel or butterscotch drizzle between layers:

    layered no-bake cheesecake, bananas, and cookies in a bread pan

    A crucial note: the no-bake cheesecake comes in a tub at Walmart. Additionally, for a helpful tip, flip your bread pan upside down for easier foil lining.

    When it comes to the cookies, crushed Cheeseman Cookies work best, while Nilla wafers are ideal as chunks. Remember, ensure no large cookie chunks for a smoother texture.

    Freeze this homemade ice cream for at least 8 hours or overnight. Enjoy!

    two servings of fresh banana ice cream cheesecake

    Frequently Asked Questions

    How do you keep bananas from turning black in pudding?

    How do you keep bananas from turning black in pudding?
    To prevent bananas from turning black in pudding, add a touch of lemon juice to the sliced bananas, as the citric acid helps inhibit oxidation. Alternatively, keep the banana slices submerged in the pudding to limit exposure to air.

    How can I ensure a smooth texture without lumps?

    How can I ensure a smooth texture without lumps?
    Thoroughly whip the cream and fold gently for a smooth, lump-free texture in your banana pudding cheesecake ice cream.

    Why put cream cheese in banana pudding?

    Cream cheese is added to banana pudding to make it richer and creamier. It gives the pudding a smooth texture and a slight tangy flavor that balances the sweetness. The cream cheese also helps the pudding stay thick and firm, making it perfect for layering or filling. This addition makes the banana pudding taste even better and more satisfying.

    tasty banana cheesecake ice cream on a cone
    5 from 1 vote
    Print Pin Recipe

    Easy Banana Pudding Ice Cream Recipe

    Spoil in the frozen delight of Banana Pudding Cheesecake Ice Cream—a blissful blend of whipped cream, condensed milk, and delightful banana layers, creating a visual and flavorful masterpiece.
    Prep Time10 minutes mins
    Freeze Time8 hours hrs
    Total Time8 hours hrs 10 minutes mins
    Course: Desserts
    Cuisine: American, Filipino
    Servings: 8 servings
    Calories: 374kcal
    Author: Lainey
    Prevent your screen from going dark

    Equipment

    • Mixer (Hand or Stand)
    • Pairing Knife
    • Cutting Board
    • Large Bowl
    • Whisk
    • Loaf pan
    • Aluminum Foil

    Ingredients

    • 14 ounces sweetened condensed milk
    • 2 teaspoons vanilla extract or 1 tsp vanilla bean paste
    • 2 cups heavy cream
    • 2 tablespoons brown sugar
    • 1 teaspoon cinnamon
    • ⅛ teaspoon nutmeg
    • ⅛ teaspoon salt
    • 2-3 bananas optional
    • 12 Nilla Wafers or Chessman Cookies
    • 1 (24.3 oz) Philadelphia no bake cheesecake filling

    Instructions

    • Add 2 cups heavy cream, brown sugar, cinnamon, nutmeg, and salt to a stand mixer and mix until whipped (4-5 minutes, or if you’re using a Bosch, 2-3 minutes).
    • In a large bowl whisk together sweetened condensed milk and vanilla extract.
    • Fold the whipped cream into the condensed milk mixture until no streaks of color are present.
    • Pour ⅓ of the mixture into a foil-lined bread pan (see notes).
    • Add sliced drops of no-bake cheesecake, bananas, and cookies. Repeat with the mixture, bananas, and cookies. Other things that can be added are caramel or butterscotch drizzle between the layers.
    • Freeze for at least 8 hours or overnight. Then, serve and enjoy!
    Leave a Comment

    Notes

    -The no bake cheesecake comes in a tub at Walmart.
    -TIP: Flip your bread pan upside down and place the foil on the outside of it.  Then flip it over and place the foil inside. 
    -Cheeseman Cookies are best crushed as opposed to chopped, Nilla wafer work well as chunks, just keep this in mind while making it, if you have texture issues just don’t leave any large chunks of cookies.
    Calories: 374kcalCarbohydrates: 32gProtein: 6gFat: 26gSaturated Fat: 16gPolyunsaturated Fat: 1gMonounsaturated Fat: 7gCholesterol: 84mgSodium: 116mgPotassium: 246mgFiber: 0.1gSugar: 32gVitamin A: 1008IUVitamin C: 2mgCalcium: 185mgIron: 0.2mg

    Watch The Recipe Video!

    QR Code
    Did you make this recipe?Share it on instagram or tag @simplybakings or #simplybakings!

    Filipino Desserts, Ice Cream, No Bake Dessert Recipes

    Hunan Chow Mein

    Jun 27, 2024 · Leave a Comment

    Hunan Chow Mein in a white bowl

    Enjoy a fusion of Filipino and Asian flavors with our delicious Hunan Chow Mein. This dish combines the savory taste of chow mein noodles with a medley of fresh vegetables and crispy fried tofu. Each bite is a delicious mix of flavors that honors tradition with a modern touch!

    Looking for more easy and healthy noodle recipes? Try my Vegan Thai Noodle Soup, Pancit Glass Noodles (Pancit Sotanghon), and Bam.i recipe!

    delicious Hunan Chow Mein in a white bowl with a stainless steel fork
    [feast_advanced_jump_to]

    What is Hunan Chow Mein?

    Hunan Chow Mein is a colorful and flavorful Chinese dish that originates from Hunan Province, which is famous for its bold and spicy ingredients. It's perfect for those looking for a tasty and satisfying lunch or dinner with a hint of fire.

    This recipe is a plant-based version of the classic hunan chow mein, made with stir-fried chow mein noodles, fresh vegetable slices, mushrooms, and diced tofu in a delicious, spicy sauce. It's a healthy vegan dish that has a great balance of textures and a rich, aromatic flavor.

    Feel free to serve this stir-fried noodles as the main course or as a side dish for an authentic Asian dining experience. Interested in trying this savory noodle dish? Learn more below!

    Health Benefits of Tofu

    • Rich in essential nutrients.
    • Aids in weight management.
    • Aids in cancer risk reduction.
    • Great source of plant-based protein.
    • Lowers cholesterol levels and improves heart health.

    Variations

    • Spicy twist - spice up your chow mein with Szechuan peppercorns, fresh chilies, and chili paste.
    • Extra veggies - use broccoli, bok choy, bean sprouts or any other vegetables you like for more fiber, vitamins, and minerals.
    • Texture - add crushed cashews or peanuts for a crispy texture.
    • Flavor - add a bit of pineapple juice or vegan sweet and sour sauce to your chow mein for a unique sweet-savory flavor.
    • Toppings - you may top this dish with green onion slices, celery, or calamansi halves
    a bowl of delicious Hunan Chow Mein with a stainless steel fork

    Substitutions

    • Protein - you can use tempeh or seitan instead of tofu or any protein of your choice.
    • Sweeteners - for a healthy sweet-savory balance, use agave syrup or maple syrup instead of brown sugar.
    • Gluten-free Noodles - feel free to replace the traditional chow mein noodles with rice noodles or gluten-free noodles for individuals with gluten allergies.

    Storage

    • Store the leftover hunan chow mein in airtight containers and refrigerate for up to 3-4 days.
    • For a longer storage, place it in a freezer-safe container and put in the freezer can last up to 2-3 months.
    • If possible, separate the sauce from the noodles and just mix them when reheating to avoid sogginess.
    • Cover with a damp paper towel when reheating in the microwave to keep moisture in. To restore crispiness, stir fry with a small bit of oil on the stovetop.

     Ingredients

    Listed below are all the ingredients you will need:

    • silken tofu
    • green cabbage
    • vegetable oil
    • garlic
    • chow mein noodles
    • carrot
    • brown beech mushrooms
    • green onions
    • vegetable stock
    • red bell pepper
    • salt
    • snow peas

    Sauce:

    • cornstarch
    • teriyaki sauce
    • vegetarian oyster sauce
    • black rice vinegar
    • brown sugar
    • sesame oil
    • ground black pepper

    See recipe card for quantities.

    ingredients for the Hunan Chow Mein recipe

    Instructions

    Prepare all your ingredients and place them near to your cooking area for a quick and smooth cooking. Then, let's begin!

    sauce mix in a small white bowl then marinated the diced tofu in a large bowl with the sauce

    In a small bowl, combine the sauce ingredients.

    Place the diced tofu in a large bowl and add the sauce to marinate for 10 minutes.

    sautéed the dice tofu and minced garlic in a pan

    In a heated pan or wok, add oil and minced garlic. Sauté for a minute.

    Add marinated tofu and cook for high heat.

    added the slices of carrots, mushrooms, snow peas, and bell peppers into the pan then the vegetable stock and green cabbage slices

    Stir in carrots, mushrooms, snow peas, and bell peppers on high heat.

    Stir in vegetable stock and green cabbage. Cook for 2 minutes until reduced.

    added the chow mein noodles and the remaining marinade into the mixture

    Add the chow mein noodles and the remaining marinade.

    Stir in to thoroughly combine, and cook for another 2 minutes until the sauce is absorbed. Season with salt.

    Noodles with vegetables and tofu in a white bowl

    Hint: Keep everything moving and use a very hot wok. This high-heat stir-frying technique keeps the veggies and noodles crunchy while allowing them to absorb sauce tastes without becoming mushy.

    ⭐ Top Tip

    Preheat your wok or skillet over high heat before adding the ingredients to guarantee a quick stir-fry and avoid sogginess. To ensure that your cooking process runs smoothly and efficiently, prepare all of your ingredients ahead of time. Finally, add the sauce at the end to prevent overcooking and maintain the chow mein's unique crispy texture.

    FAQ

    What's the difference between chow mein and lo mein noodles?

    Mein, or mian, is the Chinese name for noodles. The main difference between these two mein recipes is in how the noodles are made. Lo mein means "tossed noodles," whereas chow mein or chao mian refers to "fried noodles."

    What is Chinese Hunan sauce made of?

    Hunan sauce often contains soy sauce, rice vinegar, sugar, garlic, ginger, and chili peppers. These ingredients are combined to provide a savory, slightly sweet, and spicy flavor profile.

    What are the different types of Chinese chow mein?

    Chow mein can be categorized into two types: steamed and crispy. Steamed chow mein noodles are long, rounded, and soft, whereas crispy chow mein noodles are fried, flat, and crisp.

    Looking for other recipes like this? Try these 3:

    • Vegan Pancit Canton
    • Quick and Easy Pancit Bihon
    • Vegan Batchoy
    Hunan Chow Mein served in a white bowl
    No ratings yet
    Print Pin Recipe

    Hunan Chow Mein

    Stir-fried chow mein noodles with a colorful mix of vegetable slices and diced tofu marinated with savory Hunan-style sauce for an authentic Chinese meal. It's easy to prepare and full of flavor, making it ideal for any meal!
    Prep Time10 minutes mins
    Cook Time5 minutes mins
    Total Time15 minutes mins
    Course: Entree, Side Dish
    Cuisine: American Chinese
    Servings: 2
    Author: Simply Bakings Kitchen Team
    Prevent your screen from going dark

    Equipment

    • small bowl
    • Large Bowl
    • pan or wok

    Ingredients

    • 6 ounces silken tofu diced
    • 3 ounces green cabbage shredded
    • 2 tablespoons vegetable oil
    • 2 cloves garlic minced
    • 7 ounces chow mein noodles
    • 3 ounces carrot julienned
    • 2 ounces brown beech mushrooms
    • 1 ounce green onions
    • ¼ cup vegetable stock
    • 1 ounce red bell pepper julienned
    • salt to taste
    • 1 ounce snow peas

    Sauce

    • 2 tablespoons cornstarch
    • 2 tablespoons teriyaki sauce
    • 2 tablespoons vegetarian oyster sauce
    • 1 tablespoon black rice vinegar
    • 2 teaspoons brown sugar
    • ½ teaspoon sesame oil
    • ¼ teaspoon ground black pepper

    Instructions

    • In a small bowl, combine the sauce ingredients.
    • Place the diced tofu in a large bowl and add the sauce to marinate for 10 minutes.
    • In a heated pan or wok, add oil and minced garlic. Sauté for a minute.
    • Add the marinated tofu and cook over high heat.
    • Stir in carrots, mushrooms, snow peas, and bell peppers on high heat.
    • Stir in vegetable stock and green cabbage. Cook for 2 minutes until reduced.
    • Add the chow mein noodles and the remaining marinade. Stir in to thoroughly combine and cook for another 2 minutes until the sauce is absorbed.
    • Season with salt and garnish with chopped spring onions before serving.
    Leave a Comment

    Watch The Recipe Video!

    QR Code
    Did you make this recipe?Share it on instagram or tag @simplybakings or #simplybakings!

    Rice, Noodles, Potatoes, Side Dishes, Vegetarian Filipino Recipes

    Tiramisu Tartlets

    Jun 13, 2024 · 1 Comment

    delicious tiramisu tartlets dusted with cocoa powder

    These Tiramisu Tartlets are pretty delicious bite-sized treats with a delightful combination of the traditional flavors of tiramisu with the convenience of tartlet shells. They are quick, easy to make, and ideal desserts or snacks for any occasion!

    Looking for more easy and delicious tart recipes? Try these fig tarts, ube tarts, and mini phyllo tarts!

    tiramisu tartlets on a white surface and dusted with cocoa powder
    [feast_advanced_jump_to]

    What is Tiramisu Tartlet Recipe?

    Tiramisu tartlets are a delicious twist on the traditional tiramisu, a popular Italian dessert. They are often made by filling little tartlet shells, instead of the classic tiered cake form, with a creamy mixture of mascarpone cheese, sugar, espresso, and sometimes a dash of liqueur like Marsala wine or rum.

    In this recipe, tiramisu tartlets are made by filling tartlet shells with a creamy mixture of whipped cream cheese, chocolate, sugar, and coffee flavor. The tartlet shells give a crisp and buttery contrast to the rich and delicious filling. These little sweets, dusted with cocoa powder, provide all of the deliciousness of tiramisu in a compact, handheld size.

    These bite-sized treats are ideal for parties, gatherings, or any occasion where you want to indulge in a classy dessert experience. Learn more below and try this easy pastry recipe!

    Health Benefits of Cream Cheese

    • A good source of calcium.
    • It offers a quick supply of energy.
    • It is often fortified with vitamin A.
    • It contains a moderate amount of protein.
    • May contain probiotics that support gut health.

    It's important to remember that, while cream cheese has some health benefits, it should be used in moderation as part of a healthy diet.

    Variations

    • Filling: Stir in either the Nutella or shredded coconut to the creamy mixture to add flavor and texture.
    • Toppings: Feel free to add a layer of fresh berries or sliced fruits, such as strawberries, raspberries, sliced bananas, or salted caramel sauce, over the creamy filling.
    • Flavor: For a unique green tea flavor, mix matcha powder with the filling instead of coffee syrup, and dust with matcha powder instead of cocoa powder for a vibrant and attractive dessert.
    delicious tiramisu tartlets with cocoa powder dusting

    Substitutions

    • Mascarpone cheese: Instead of softened cream cheese, you can use mascarpone cheese, which has a little different flavor and texture but creates equally excellent results.
    • Cocoa Powder: Instead of dusting the tartlets with cocoa powder, garnish them with grated dark chocolate, chopped chocolate, chocolate shavings, chocolate ganache, or even a sprinkling of cinnamon for a unique flavor profile.
    • Sweeteners: Alternative sweeteners such as honey, maple syrup, or agave nectar can be used instead of white sugar for a different taste. Just adjust the level of sweetness to your preference.
    • Flavorings: For a unique twist, try adding almond extract, vanilla extract, orange zest, or mint extract to the creamy filling mixture.

    Storage

    • Refrigeration: When stored in an airtight container in the refrigerator, Tiramisu tartlets may last for 3 to 4 days without losing their quality. However, in order to get the greatest taste and texture, they should be consumed right away.
    • Room Temperature: If left at room temperature for an extended period of time, the tartlets' creamy filling may become excessively soft, increasing the danger of bacterial growth. As a result, it's better to put them in the fridge right away and keep them out for no more than a few hours.
    • Freezing: Tiramisu tartlets can be frozen, although the texture of the creamy filling and cookie shell may change when thawed. Frozen tartlets should be consumed within one to two months.

     Ingredients

    Listed below are all the ingredients you will need:

    • tartlets
    • melted chocolate
    • whipped cream
    • cream cheese
    • instant coffee
    • water
    • white sugar
    • cocoa powder (for dusting)

    See the recipe card for quantities.

    ingredients for tiramisu tartlets recipe

    Instructions

    Gather the ingredients for this tiramisu tartlet recipe. Once the ingredients are all ready, let’s begin!

    tartlet shells on an oval-shaped bowl and a coffee syrup mix in a small white bowl

    Prepare the frozen tartlets following the package instructions. Once done, let the tart shells cool completely.

    Meanwhile, combine instant coffee, water, and a tablespoon of white sugar to make a coffee syrup. Mix well. Set aside.

    a mixture of beaten cream cheese, sugar, whipped cream, and coffee syrup in a bowl with spatula then transferred to a piping bag

    Beat the cream cheese in a large bowl until fluffy, then add the sugar, whipped cream, and coffee syrup; continue to beat until a medium peak.

    Transfer to a piping bag and set aside.

    chocolate-dipped tartlet shells on a baking pan then filled with tiramisu

    To assemble, dip all the tartlets into the melted chocolate and arrange on a pan.

    Pipe the tiramisu into each of the tartlets.

    tiramisu tartlets dusted with cocoa powder

    Dust with the cocoa powder.

    Serve immediately.

    a delicious tiramisu tartlet with a bite

    Enjoy this mini tiramisu tart with loved ones! 🙂

    Lainey's Hint: Chill the tartlet shells in the refrigerator for 15–30 minutes before filling them with the delectable mascarpone mixture. This helps to keep their crispness, resulting in a beautiful texture contrast in each mouthful of your Tiramisu tartlets!

    ⭐ Lainey's Top Tip

    Before filling the tartlet shells with tiramisu, dip or lightly brush them with melted chocolate. This forms a barrier that keeps the shells crisp even after adding the creamy filling that lets the tiramisu tartlets have the right texture with every bite!

    Frequently Asked Questions

    What does tart consist of?

    A tart is made with a light, flaky pastry dough or a dense, crumbly short crust. It is often made with flour, unsalted butter, sugar, and ice-cold water. It is designed to be served as an open crust with sweet or savory fillings.

    Can you use Goya ladyfingers for tiramisu?

    Definitely yes. You may use Pavesini biscuits, sponge cake, biscotti, or pound cake aside from tartlets, too.

    What is the difference between a tartlet and a galette?

    Tartlets and galettes are quite similar in that they are often filled with fruit, but unlike galettes, tarts don't have an egg wash or sugar coating.

    Looking for other recipes like this? Try these:

    • Berry Fruit Tart
    • White Chocolate Fruit Tart
    • Quick and Easy Guava Danish
    delicious tiramisu tartlet with a bite
    5 from 1 vote
    Print Pin Recipe

    Tiramisu Tartlets

    This quick and easy Tiramisu Tartlets recipe features a delectable combination of creamy filling, rich espresso, and subtle chocolate flavors. These bite-sized treats are perfect for satisfying sweet cravings and wowing guests!
    Prep Time15 minutes mins
    Total Time15 minutes mins
    Course: Dessert, pastry
    Cuisine: Italian
    Servings: 12 tiramisu tartlets
    Calories: 215kcal
    Author: Simply Bakings Kitchen Team
    Prevent your screen from going dark

    Ingredients

    • 12 frozen tartlets
    • 1 cup melted chocolate
    • 1 cup whipped cream
    • 1 cup cream cheese cut into chunks
    • ½ teaspoon instant coffee
    • 1 tablespoon water
    • ½ cup + 1 tablespoon white sugar
    • 1 tablespoon cocoa powder (for dusting)

    Instructions

    • Prepare the frozen tartlets following the package instructions. Once done, let it cool completely.
    • Meanwhile, combine instant coffee, water, and a tablespoon of white sugar to make a coffee syrup. Mix well. Set aside.
    • Beat the cream cheese until fluffy, then add the sugar, whipped cream, and coffee syrup; continue to beat until medium peak.
    • Transfer to a pipping bag and set aside.
    • To assemble, dip all the tartlets into the melted chocolate.
    • Pipe the tiramisu into each of the tartlets.
    • Dust with the cocoa powder and serve immediately.
    Leave a Comment
    Calories: 215kcalCarbohydrates: 25gProtein: 3gFat: 12gSaturated Fat: 6gPolyunsaturated Fat: 0.3gMonounsaturated Fat: 2gCholesterol: 26mgSodium: 103mgPotassium: 46mgFiber: 1gSugar: 18gVitamin A: 291IUCalcium: 27mgIron: 1mg

    Watch The Recipe Video!
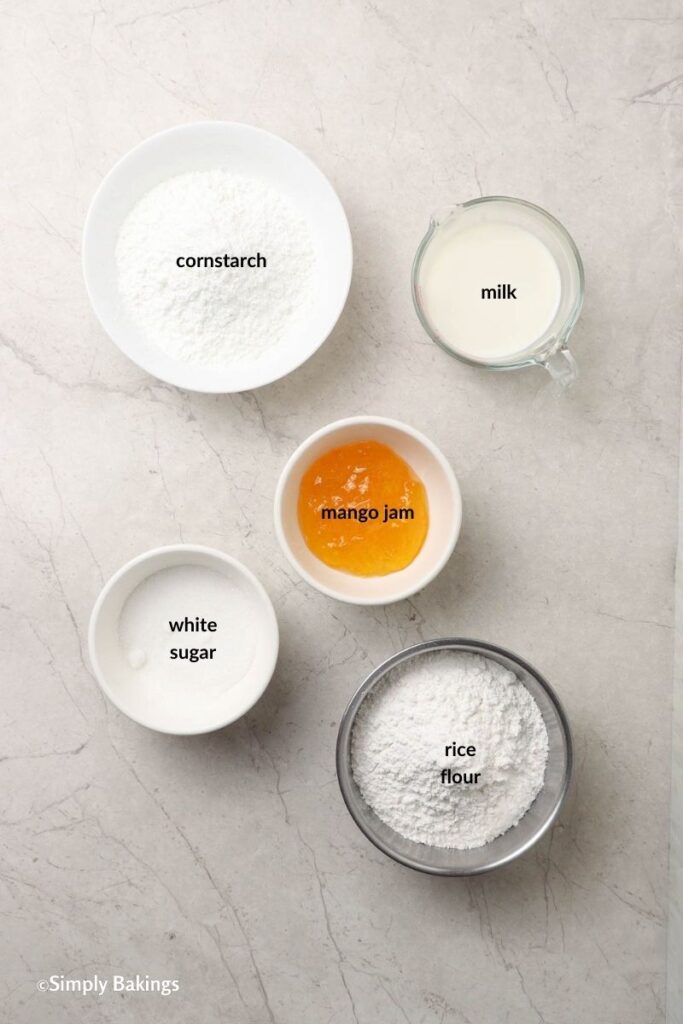
    QR Code
    Did you make this recipe?Share it on instagram or tag @simplybakings or #simplybakings!

    Desserts

    Vegan Fried Dilis

    May 30, 2024 · 2 Comments

    filipino fired dilis garnished with spring onions

    Vegan Fried Dilis is a unique take on a favorite Filipino treat. Instead of anchovies, this recipe uses banana hearts, giving it a crispy texture and delicious flavor. With ingredients like gochujang, nori, and soy sauce, each bite is packed with exciting tastes that you won't want to miss!

    Looking for more yummy recipes? Try pairing your vegan Fried Dilis with a refreshing Asian Cucumber Salad and Banana Mango Smoothie, or a side of Filipino Style Omurice for a complete meal.

    tasty filipino vegan fried fish served with rice and dipping sauce
    [feast_advanced_jump_to]

    What is Vegan Fried Dilis?

    Vegan Fried Dilis is a tasty twist on a favorite Filipino snack made with small, salty anchovies called "dilis." But in this new version, we use banana hearts instead of anchovies.

    Banana hearts are the soft, tear-shaped flowers at the end of a banana bunch. They might not be well-known, but they add a tender texture and just the right taste to this dish.

    Banana hearts are rich in fiber and essential nutrients, making this dish not only delicious but also nutritious.

    Health Benefits of Banana Heart (Blossom)

    • High Fiber: Aids digestion and prevents constipation.
    • Nutrient-Rich: Contains essential vitamins and minerals.
    • Gluten-Free: Suitable for those with gluten sensitivities.
    • Energy Boost: Provides sustained energy with complex carbohydrates.
    crunchy and healthy fried dilis garnished with fresh spring onions

    Substitutions

    • Swap cornstarch with all purpose flour.
    • Substitute soy sauce with salt, pepper, and garlic powder.
    • Use artichoke hearts or hearts of palm instead of banana hearts.
    • Any type of oil, like sesame oil or even olive oil, can be used for frying if you don't have vegetable oil on hand.
    • Bake or use an air fryer to cook the coated banana hearts for a healthier option.

    Variations

    • Add lemon juice to the marinade for a tangy flavor
    • For a different take on the dish, try making Vegan Fish Tacos. Simply chop the fried banana hearts into smaller pieces and serve them in taco shells with your favorite toppings, like vegan tartar sauce, pickles, and shredded lettuce.
    • You can also use the Vegan Fried Dilis as a base for Vegan Fish Sticks. Just cut them into strips before coating them in breadcrumbs and baking or frying until crispy.

    Storage

    • To store Vegan Dilis leftovers, place them in an airtight container and refrigerate for up to 24 hours.
    • When ready to enjoy again, reheat in a toaster oven or conventional oven until warmed through. Avoid reheating in the microwave to preserve the crispy texture.

     Ingredients

    • banana heart
    • nori sheet
    • gochujang
    • water
    • soy sauce
    • cornstarch

    See recipe card for quantities.

    list of ingredients of fried dilis vegan

    Instructions

    water, gochujang and chopped nori on a bowl

    Remove the pulp from the main core by feeling off the heart’s skin. Rinse with warm water and air-dry. In a small bowl, whisk water, gochujang, and chopped nori; mix well until fully incorporated.

    banana pulps added to bowl mixture

    Add in the air-dried banana pulps and soy sauce, and mix well to coat properly. Let it marinate for 5–10 minutes.

    mixed cornstarch and add the marinated banana pulps

    In another bowl, add the cornstarch and the marinated banana pulps. Coat well with the cornstarch.

    fried banana pulp

    Fry the coated banana pulp in medium-heat oil until golden brown and crisp. Dab excess oil with paper towels or dry in a wire rack.

    Serve together with spiced vinegar and a choice of rice. Enjoy!

    fried vegan dilis with spicy vinegar dip on a white plate

    Hint: For best results, ensure your oil is hot enough before frying by testing it with a small drop of the mixture – it should sizzle immediately.

    ⭐ Top Tip

    Make sure to thoroughly coat the banana hearts with cornstarch before frying. This helps create a crispy outer layer that makes the Vegan Fried Dilis extra delicious.

    Frequently Asked Questions

    What is dried dilis in English?

    Dried dilis, also known as dried anchovies, are a type of dried fish that originated in the Philippines. 

    Can I make Gluten-Free Vegan Fried Dilis?

    Absolutely! To make this recipe gluten-free, swap out the soy sauce for a gluten-free alternative, such as tamari or coconut aminos. Additionally, ensure that the cornstarch used is certified gluten-free.

    What can I serve with Vegan Fried Dilis?

    Vegan Fried Dilis pairs beautifully with a side of steamed rice and a refreshing cucumber salad. For a complete meal, consider adding some stir-fried vegetables or tofu for added protein and nutrients.

    More Recipes

    Looking for other Vegan seafood recipes like this? Try these:

    • Vegan Fried Fish Balls
    • Vegan Tinola
    • Vegan Bagoong
    crunchy vegan fried dilis fish on a serving plate
    5 from 1 vote
    Print Pin Recipe

    Vegan Fried Dilis

    Vegan Fried Dilis is a new version of a popular Filipino snack. Instead of using anchovies, this recipe uses banana hearts, which makes it crispy and tasty. With ingredients like gochujang, nori, and soy sauce, each bite is full of exciting flavors you won't want to miss!
    Prep Time12 minutes mins
    Cook Time10 minutes mins
    Total Time22 minutes mins
    Course: Appetizers
    Cuisine: Filipino
    Servings: 4 servings
    Calories: 102kcal
    Prevent your screen from going dark

    Ingredients

    • 1 banana heart
    • 1 nori sheet chopped
    • ½ cup gochujang
    • ⅔ cup water
    • 2 tablespoons soy sauce
    • ½ cup cornstarch

    Instructions

    • Remove the pulp from the main core by feeling off the heart’s skin.
    • Rinsed with warm water and air dry.
    • In a mixing bowl, combine water, gochujang, and chopped nori; mix well until fully incorporated.
    • Add in the air-dried banana pulps, soy sauce, and mix well to coat properly. Let it marinate for 5-10 minutes.
    • In another bowl, add the cornstarch and add the marinated banana pulps. Coat well with the cornstarch.
    • Fry the coated banana pulp in a heated oil until golden and crisp.
    • Serve together with spiced vinegar and a choice of rice.
    Leave a Comment
    Serving: 1servingCalories: 102kcalCarbohydrates: 25gProtein: 2gFat: 0.1gSaturated Fat: 0.02gPolyunsaturated Fat: 0.1gMonounsaturated Fat: 0.02gSodium: 513mgPotassium: 148mgFiber: 0.4gSugar: 3gVitamin A: 100IUVitamin C: 6mgCalcium: 11mgIron: 1mg

    Watch The Recipe Video!
    QR Code
    Did you make this recipe?Share it on instagram or tag @simplybakings or #simplybakings!

    Appetizers, Vegan Filipino Recipes, Vegetarian Filipino Recipes

    Stuffed Filipino Potato Cakes

    May 16, 2024 · 1 Comment

    Stuffed Filipino Potato Cakes on a white plate

    With this delicious Stuffed Filipino Potato Cakes recipe, you can add a wonderful touch to classic Filipino cuisine. These savory treats have a crispy potato crust and a rich variety of ingredients that create a perfect blend of textures and tastes for a healthy family meal!

    Are you craving more vegetable-stuffed recipes? Try my Beans Stuffed with Lentils, Filipino Empanada, and Vegan Quesadilla recipe!

    a stack of stuffed Filipino potato cakes on a white plate
    [feast_advanced_jump_to]

    What is Stuffed Filipino Potato Cakes Recipe?

    Stuffed Filipino Potato Cakes recipe is a savory dish that calls for mashing potatoes, forming them into a dough, and stuffing them with a tasty mix of veggies and spices for deliciousness. It can be served anytime you want and on any occasion with a sauce or dip of your choice!

    The history of this potato cake recipe can be traced back to the Philippines' colonial period, particularly during the Spanish and American occupation. Potatoes, introduced by Spanish colonists, gradually became part of Filipino cuisine as local tastes and cooking skills developed. In the meantime, American baking traditions influenced the concept of stuffed or filled pastries. Then, the Filipinos adapted this technique to make stuffed Filipino potato cakes.

    The best thing about this dish is that it can be customized according to your liking. Try this one-of-a-kind Filipino recipe today and boost your culinary experience! Learn more below, and enjoy reading!

    Health Benefits of Potatoes

    • It is rich in fiber, which promotes digestive health.
    • Its potassium content improves heart health.
    • A good source of energy and various essential nutrients.
    • It contains antioxidants that help neutralize free radicals in the body.

    Variations

    • Cheese: Consider adding cheese to the filling for a creamy texture and flavor. You may use regular cheese or Filipino cheeses such as kesong puti or quick-melt cheese.
    • Filipino Condiments: To enhance the flavor profile of the potato cakes, dip them in Filipino condiments such as banana ketchup or Mang Tomas all-purpose sauce. These condiments provide a sweet and tangy bite to the savory potato cakes.
    delicious stuffed Filipino potato cakes served on a white plate

    Substitutions

    • Sweet Potato: For a healthy variation on the cakes, use sweet potatoes instead of regular potatoes. Sweet potatoes have a somewhat sweeter flavor profile and are high in fiber and vitamins.
    • Filling: Feel free to replace or add ingredients, like tofu, tempeh, soy sauce, or bell pepper, to the filling as you desire.

    Storage

    • Refrigeration: Let the potato cakes cool completely at room temperature, then store them properly in an airtight container or wrap them tightly in plastic wrap. It can last for 3 to 5 days in the fridge.
    • Freezing: Potato cakes can last for up to 1-2 months when frozen and stored in a freezer-safe bag or container. However, it is still best to consume them within the first month of freezing.
    • Quality Check: Before eating any leftovers, always do a visual and smell check. If the potato cakes show signs of spoiling, such as an unpleasant odor, mold development, or changes in appearance, discard them.

    Ingredients

    Listed below are all the ingredients you will need:

    ingredients for stuffed Filipino potato cakes recipe
    • garlic
    • sweet onion
    • carrots
    • shiitake mushrooms
    • sweet potatoes
    • cabbage
    • oyster mushroom sauce
    • black rice vinegar
    • salt
    • ground black pepper
    • cumin
    • vegetable broth
    • chili sauce
    • vegetable oil
    • potatoes
    • all-purpose flour

    See the recipe card for quantities.

    Instructions

    Prepare all the ingredients for this recipe. Then, let’s begin!

    seasoned broth mixture in a bowl and oil heating in a skillet

    In a bowl, mix oyster mushroom sauce, black rice vinegar, cumin, chili sauce, and vegetable broth; set aside.

    Add half of the oil to a heated skillet over medium heat.

    sautéed veggies in a skillet

    Sauté sweet onions and minced garlic for a minute.

    Add in carrots, mushrooms, sweet potatoes, and shredded cabbage; cook for another 2 minutes while stirring constantly.

    added the sauce, salt, and ground black pepper on the mixture

    Add the prepared sauce and mix well.

    Season with salt and ground black pepper. Then, transfer to a serving plate and set aside.

    cooked the peeled potatoes in a pot and transferred to a large bowl

    Peel the potatoes and cook the potatoes in boiling water until tender and cooked through.

    Remove from the boiling water and transfer to a large bowl.

    mashed potatoes in a bowl, added flour

    Mash the cooked potatoes and let them cool.

    Add the flour to the mashed potatoes.

    Shaped potato-flour dough into six portions on a baking pan

    Mix until it forms a rough dough.

    Divide the dough into six portions.

    flattened each dough and put the filling at the center

    Flatten each piece of dough.

    Add the filling at the center.

    folded, sealed, and fried until golden brown

    Fold to seal the edges, and form into a round shape.

    Fry each potato cake for 4 minutes on each side until golden. Then, transfer to a serving plate and serve immediately.

    half-opened potato cake on a white plate

    Hint: To get perfectly crispy stuffed Filipino potato cakes, chill the formed potato cakes for at least 30 minutes before frying. This helps them maintain their shape and keeps the filling from seeping out while cooking. Enjoy a satisfying crunch with each bite!

    ⭐ Top Tips

    • Mixing: Ensure that the potato mixture has been well-seasoned and cooled. This allows the flavors to combine and makes it simpler to mold the potato cakes without them coming apart.
    • Forming: Seal the edges properly to keep the filling from spilling out while cooking. Proper sealing preserves the potato cakes' integrity and offers a delicious blast of flavors in every bite.
    • Frying: Avoid overcrowding the pan when frying the potato cakes. Fry them in batches if necessary, ensuring that there is enough space between each cake for even cooking and browning.

    Frequently Asked Questions

    Why are my potato cakes soggy?

    Soggy potato cakes are often the result of not cooking them long enough, overloading the pan, or failing to keep the pan hot enough.

    Can I make stuffed Filipino potato cakes ahead of time?

    Yes, stuffed Filipino potato cakes can be made ahead of time and kept in the fridge or freezer for later consumption. Simply follow the recipe's storage directions and reheat when ready to serve for an easy and tasty snack or side dish.

    What's the best way to serve stuffed Filipino potato cakes?

    Stuffed Filipino Potato Cakes can be served as a tasty snack on their own, with your favorite dipping sauce for extra flavor, or as a delectable side dish alongside other Filipino foods.

    More Filipino Recipes

    Looking for other easy and healthy Filipino recipes like this? Try these:

    • Filipino Vegetarian Chop Suey
    • Filipino Taco Bowl
    • Filipino Hot Soup
    a stack of deliciously Stuffed Filipino Potato Cakes on a white plate
    5 from 1 vote
    Print Pin Recipe

    Stuffed Filipino Potato Cakes

    Here's an easy and delicious Filipino vegetable dish made of mashed potatoes stuffed with tasty Filipino ingredients for a crunchy, savory treat for any occasion!
    Prep Time10 minutes mins
    Cook Time1 hour hr
    Total Time1 hour hr 10 minutes mins
    Course: Side Dish, Snack
    Cuisine: Filipino
    Servings: 6
    Calories: 282kcal
    Author: Simply Bakings Kitchen Team
    Prevent your screen from going dark

    Equipment

    • skillet
    • Mixing bowl

    Ingredients

    Sauce

    • ¼ cup vegetable broth
    • 4 tablespoons oyster mushroom sauce
    • 1 tablespoon black rice vinegar
    • 2 teaspoons chili sauce
    • ⅛ teaspoon cumin

    Vegetable Filling

    • 4 tablespoons vegetable oil
    • ½ cup sweet onion thinly sliced
    • 2 cloves garlic minced
    • 1 cup grated carrots
    • 1 cup finely chopped shiitake mushrooms
    • ½ cup finely diced sweet potatoes
    • ½ cup shredded cabbage
    • ¼ teaspoon salt
    • ¼ teaspoon ground black pepper

    Potatoes

    • 32 ounces potatoes
    • ½ cup all-purpose flour

    Instructions

    Creating the Filling

    • In a bowl, mix vegetable broth, oyster mushroom sauce, black rice vinegar, chili sauce, and cumin; set aside.
    • Add half of the oil to a heated skillet over medium heat and sauté sweet onions and minced garlic for a minute.
    • Add in carrots, mushrooms, sweet potatoes, and shredded cabbage; cook for another 2 minutes while stirring constantly.
    • Add the prepared sauce and mix well.
    • Season with salt and ground black pepper.
    • Transfer to a serving plate and set aside.

    Making the Potatoes

    • Peel the potatoes and cook the potatoes in boiling water until tender and cooked through. Then remove from the boiling water and transfer to a large bowl.
    • Mash the cooked potatoes and let them cool.
    • Add the flour to the mashed potatoes and mix until it forms a rough dough.
    • Divide the dough into six portions.
    • Flatten each dough and add the filling at the center.
    • Fold to seal the edges, and form into a round shape.
    • Fry each potato cake for 4 minutes on each side until golden.
    • Transfer to a serving plate and serve immediately.
    Leave a Comment
    Serving: 1gCalories: 282kcalCarbohydrates: 45gProtein: 6gFat: 10gSaturated Fat: 1gPolyunsaturated Fat: 5gMonounsaturated Fat: 2gTrans Fat: 0.1gSodium: 522mgPotassium: 912mgFiber: 6gSugar: 5gVitamin A: 5178IUVitamin C: 35mgCalcium: 43mgIron: 2mg

    Watch The Recipe Video!
    QR Code
    Did you make this recipe?Share it on instagram or tag @simplybakings or #simplybakings!

    Main Entree, Rice, Noodles, Potatoes, Side Dishes, Vegan Filipino Recipes

    Best Okoy Recipe (The Healthy Way)

    May 9, 2024 · 4 Comments

    healthy filipino okoy garnished with spring onions

    This Okoy Recipe is easy, healthy, and will leave you wanting more. Instead of shrimp, we're using plant-based ingredients: grated cassava, spring onions, and a touch of annatto powder giving you all the delicious flavors without the cholesterol.

    Looking for more vegetable recipes? Try pairing your vegan Okoy with a refreshing Mango Salad, a hearty Vegan Adobong Kangkong, or a side of Garlicky Fried Rice for a complete and satisfying meal.

    crispy okoy in plate with dipping sauce
    [feast_advanced_jump_to]

    What is Okoy?

    Okoy or Ukoy is a Filipino recipe originally made from baby shrimp fritters. It comes from Laguna Province in the Philippines and is loved by many as a snack or appetizer.

    This recipe transforms the original dish into a vegan one. Cassava, a key ingredient, is a root vegetable from South America. It's known for its versatility, and it's used in this Okoy recipe to make a tasty batter.

    Cassava adds texture and nutrition to Okoy. It's full of carbs, fiber, and nutrients, making it a healthy choice.

    Health Benefits of Cassava

    • High Fiber: Aids digestion, prevents constipation.
    • Nutrient-Rich: Contains essential vitamins and minerals.
    • Gluten-Free: Suitable for those with gluten sensitivities.
    • Energy Boost: Provides sustained energy with complex carbohydrates.

    Variations

    • More veggies: Add grated carrots, sliced bean sprouts, minced garlic and onion to the batter
    okoy on a white plate with vinegar-dipping sauce

    Substitutions

    • Swap grated cassava with grated sweet potato or kalabasa (squash) for a unique twist on this classic dish.
    • Sprinkle cilantro on top instead of using spring onions as a garnish.
    • Use a frying pan instead of a skillet if you don't have one on hand.

    Storage

    • If you happen to have any leftover Okoy (though it's unlikely!), you can store them in an airtight container in the refrigerator for up to two days.
    • To reheat, simply pop them in the oven or toaster oven for a few minutes until warmed through.
    • You can freeze leftover Okoy for up to one month. Place them in a single layer on a baking sheet and freeze until solid, then transfer them to a freezer-safe container or bag.

     Ingredients

    • grated cassava
    • spring onions
    • annato powder
    • salt
    • ground black pepper
    • mushroom seasoning
    • oil

    See the recipe card for quantities.

    lisit of ingredients of okoy

    Instructions

    all ingredients in mixing bowl

    In a large mixing bowl, combine all the ingredients.

    mixed okoy ingredients

    Mix well until fully incorporated.

    mix okoy using hands

    Divide the mixture into four portions and slightly flatten.

    frying okoy in pan

    Fry in medium-high heat until golden brown for about 2–3 minutes. Place the fried okoy on paper towels to absorb excess oil.

    Serve with your favorite spiced vinegar-dipping sauce. Enjoy!

    Hint: For best results, ensure your oil is hot enough before frying by testing it with a small drop of the mixture; it should sizzle immediately.

    ⭐ Top Tip

    To achieve crispy Okoy with a soft and chewy center, make sure to fry them in hot oil for just the right amount of time, about 2-3 minutes per side. Avoid overcooking, as it can result in dry and tough fritters.

    Frequently Asked Questions

    What is the meaning of Okoy?

    Okoy is a Filipino word referring to a type of fritter or pancake typically made with shrimp and vegetables.

    Where is Okoy from?

    Okoy originates from Laguna, Philippines.

    What is the English term for Okoy?

    The English translation of "Okoy" is "fritter" or "pancake."

    some fried okoy and a dipping sauce served on a white plate garnished with chopped spring onions

    More Recipes

    Looking for other recipes like this? Try these:

    • Vegan Isaw
    • Vegan Tocino
    • Vegan Bopis
    tasty okoy garnished with spring onions
    5 from 2 votes
    Print Pin Recipe

    Best Okoy Recipe (The Healthy Way)

    Try the crispy delight of vegan Okoy, made with grated cassava and spring onions. A Filipino favorite with a plant-based twist!
    Prep Time15 minutes mins
    Cook Time10 minutes mins
    Total Time25 minutes mins
    Course: Appetizers, Snacks
    Cuisine: Filipino
    Servings: 4 servings
    Calories: 745kcal
    Prevent your screen from going dark

    Ingredients

    • 2 cups grated cassava
    • ¼ cup spring onions
    • ¼ teaspoon annato powder
    • 1 teaspoon salt
    • ½ teaspoon mushroom seasoning
    • 1½ cup oil

    Instructions

    • In a large mixing bowl, combine all ingredients and mix well until fully incorporated.
    • Divide the mixture into four portions and slightly flatten.
    • Fry in a hot oil until cooked through for about 2-3 minutes.
    • Serve with your favorite vinegar dipping sauce.
    Leave a Comment
    Calories: 745kcalCarbohydrates: 0.5gProtein: 0.1gFat: 84gSaturated Fat: 6gPolyunsaturated Fat: 24gMonounsaturated Fat: 53gTrans Fat: 0.3gSodium: 582mgPotassium: 19mgFiber: 0.2gSugar: 0.2gVitamin A: 62IUVitamin C: 1mgCalcium: 5mgIron: 0.1mg

    Watch The Recipe Video!
    QR Code
    Did you make this recipe?Share it on instagram or tag @simplybakings or #simplybakings!

    Appetizers, Vegetarian Filipino Recipes

    Ginataang Mais

    Apr 25, 2024 · 1 Comment

    delicious Filipino ginataang mais served in bowls beside a fresh sweet corn and a few white flowers

    Indulge in the creamy, coconut-infused richness of this popular Filipino dish, Ginataang Mais, and take a culinary adventure to the Philippines! Learn how to make this easy corn recipe, and let's taste the flavors of heritage and comfort together!

    This was inspired by my sweet ginataang munggo and cornmeal mush recipe on this site, and it pairs well with vegan fried fish balls, tsokolate (Filipino hot chocolate), and any other recipes that can complement its creamy and sweet flavors.

    sweet and delicious ginataang mais served  in bowls

    What is Ginataang Mais?

    Ginataang Mais, which means "corn in coconut milk," also known as "lugaw na mais" or "lelut mais" is an authentic Filipino dessert or snack made of corn kernels, coconut milk, glutinous rice, and sugar, perfectly cooked to deliciousness!

    The comforting flavors of creamy coconut milk, sticky rice, and sweet corn in this easy ginataang mais recipe make a lovely delicacy that's ideal for any occasion. It is not just a dessert or sweet snack, but also a symbol of warmth and friendliness in the Philippines. It delivers happiness to the family table, whether it's consumed as a dessert, snack, or even breakfast.

    Try this quick Filipino dessert recipe today and experience the flavor of tradition with every bite. Read more below for tips and instructions. Enjoy!

    [feast_advanced_jump_to]

    Health Benefits of Corn

    • Aids in weight management.
    • Promotes eye and heart health.
    • A good source of carbohydrates.
    • Rich in dietary fiber and antioxidants.
    • Loaded with essential vitamins and minerals.
    two bowls of ginataang mais with a fresh corn husk

    Ingredients

    Listed below are all the easy-to-find ingredients you will need:

    ingredients for the ginataang mais recipe
    • glutinous rice
    • water
    • coconut milk
    • canned cream of corn
    • corn kernels
    • white sugar
    • coconut cream

    See the recipe card for quantities.

    Instructions

    Gather the ingredients for this easy ginataang mais recipe. Once the ingredients are all ready, let’s start!

    cooked glutinous rice with coconut milk and corn

    Combine glutinous rice, water, coconut milk, and cream of corn in a pot.

    Bring the mixture to a boil and stir once in a while until the glutinous rice is cooked through and soft.

    added the corn kernels, white sugar, and coconut cream into the pot

    Add water if it starts to dry out. Then, add the corn kernels, white sugar, and coconut cream.

    freshly cooked ginataang mais in a bowl with a spoon

    Mix the ingredients well. Then, serve immediately. Enjoy!

    Hint: Simmer the mixture in the pot until the corn is soft and cooked all the way through, and until it thickens to your desired consistency.

    Substitutions

    • Coconut Milk: Feel free to use almond milk or soy milk for a dairy-free alternative.
    • Sweeteners: Brown sugar or palm sugar can be used if white sugar is unavailable.
    • Corn: Fresh corn kernels can be used for this recipe instead of canned sweet corn kernels.

    Variations

    • Corn: Try different varieties of corn, such as sweet, purple, or white corn, to get interesting flavors and hues.
    • Texture: Diced taro, sweet potatoes, or sago can be added for more texture and flavor.
    • Flavor: Add ripe jackfruit (langka) for extra sweetness and pandan leaves or extract to enhance the flavor, if desired.
    • Toppings: Sprinkle toasted sesame seeds, toasted coconut flakes, crushed peanuts or cashews, and ground cinnamon or nutmeg on top for added flavor and visual appeal.

    Equipment

    The good thing about this ginataang mais recipe is that it only needs a few ingredients and a pot to cook and mix. It's amazing how simple this Filipino dessert recipe is!

    Storage

    • Allow ginataang mais to cool to room temperature. Then pour it in an airtight container and refrigerate for 3–4 days.
    • When ready to consume, gently reheat it in the microwave or on the stovetop in a low heat.
    • If the refrigerated dish shows indications of spoilage, discard it to avoid foodborne illness.

    Top tip

    Allow the mixture to simmer slowly and gently for the best result. Avoid heating the coconut milk (gata) too much, since this can cause it to separate and curdle. Instead, keep a gentle simmer on low to medium heat, stirring occasionally, to avoid sticking and promote equal cooking.

    This slow-cooking procedure allows the flavors to combine beautifully, resulting in a creamy, rich texture that highlights the dish's sweet corn and coconut sweetness.

    a spoonful of ginataang mais served in a bowl

    FAQ

    Can I use regular rice for ginataang mais?

    Yes, you can use regular rice instead of glutinous rice, but the creaminess and texture will be different.

    What is the English of ginataan?

    Ginataan, also known as guinataan, is a Filipino name for dish prepared with gatâ (coconut milk). Thus, ginataan literally means "done with coconut milk".

    Can you freeze ginataang mais?

    Yes, you can freeze Ginataang Mais for future consumption.

    a bowl of creamy and delicious ginataang mais
    5 from 1 vote
    Print Pin Recipe

    Ginataang Mais

    Discover the delights of this Ginataang Mais made with corn, glutinous rice, and creamy coconut milk. It is a Filipino dessert or snack that is quick, easy, and irresistibly tasty!
    Prep Time10 minutes mins
    Cook Time20 minutes mins
    Total Time30 minutes mins
    Course: Dessert, Snack
    Cuisine: Filipino
    Servings: 4
    Calories: 923kcal
    Author: Simply Bakings Kitchen Team
    Prevent your screen from going dark

    Equipment

    • 1 Pot

    Ingredients

    • 1½ cups glutinous rice rinsed twice
    • 3 cups coconut milk
    • 2 cups water
    • 1 cup canned cream of corn
    • 1 cup white sugar
    • ¾ cup corn kernels
    • ½ cup coconut cream

    Instructions

    • Combine glutinous rice, coconut milk, water, and cream of corn in a pot.
    • Bring the mixture to a boil and stir once in a while until the glutinous rice is cooked through and soft. Add water if it starts to dry out.
    • Add the white sugar, corn kernels, and coconut cream; mix well.
    • Serve immediately.
    Leave a Comment
    Calories: 923kcalCarbohydrates: 118gProtein: 11gFat: 48gSaturated Fat: 42gPolyunsaturated Fat: 1gMonounsaturated Fat: 2gSodium: 2473mgPotassium: 619mgFiber: 4gSugar: 3gVitamin A: 32IUVitamin C: 4mgCalcium: 47mgIron: 8mg

    Watch The Recipe Video!

    QR Code
    Did you make this recipe?Share it on instagram or tag @simplybakings or #simplybakings!

    Food safety

    We sometimes take for a granted that we have years (or decades) of cooking experience, that the average visitor may not. Add to, or remove from, the list below with health and safety tips.

    • Cook to a minimum temperature of 165 °F (74 °C)
    • Don't leave food sitting out at room temperature for extended periods
    • Never leave cooking food unattended
    • Always have good ventilation when using a gas stove

    See more guidelines at USDA.gov.

    Filipino Desserts, Vegan Filipino Recipes, Vegetarian Filipino Recipes

    Best Huli Huli Cauliflower

    Apr 11, 2024 · 2 Comments

    a bowl of vegan cauliflower bites with huli huli sauce, garnished with cilantro and lemon slices with fork on the side, image created by SimplyBakings

    Whip up your next appetizer with our Vegan Huli Huli Cauliflower Bites! Trust me, they're amazing, and I'm not just saying that. These bites take a classic Hawaiian dish and give it a veggie twist that'll have you coming back for seconds, thirds, and maybe even fourths.

    This was inspired by my other Hawaiian recipe and pairs well with this Pineapple Ice Cream for a light and refreshing option.

    cauliflower dish with huli huli sauce served with cilantro and lemon slices, image created by SimplyBakings

    So, you might be wondering, when's the best time to indulge in these bites? Well, here's the deal - they're perfect for any occasion! Whether it's a sunny summer BBQ or during game days, these bites bring a taste of the tropics to your table, no matter the season.

    [feast_advanced_jump_to]

    Ingredients

    Cauliflower is the star of the show here; it's hearty, versatile, and soaks up all that delicious sauce like a sponge. Whole wheat flour adds a wholesome touch, while whole milk brings creaminess to the batter.

    Pineapple adds a sweet and tangy flavor that's quintessentially Hawaiian, and the soy sauce, sesame oil, and ginger give it that signature Huli Huli kick.

    Garlic and chili flakes bring the heat, while brown sugar and ketchup add sweetness and depth. Bell peppers add color and crunch, rounding out this flavor-packed dish.

    list of ingredients of vegan huli huli cauliflower bites, image created by SimplyBakings
    • cauliflower florets
    • whole wheat flour
    • whole milk
    • pineapple chunks in juice (separate juice)
    • dark soy sauce
    • sesame oil
    • brown sugar
    • ketchup
    • rice vinegar
    • grated ginger
    • garlic cloves
    • salt
    • red chili flakes
    • cornstarch
    • red bell pepper

    See recipe card for quantities.

    Instructions

    mixing huli huli sauce, image created by SimplyBakings

    1. Whisk together pineapple juice, salt, soy sauce, sesame oil, brown sugar, ketchup, rice vinegar,
    grated ginger, minced garlic, chili flakes, and cornstarch in a saucepan.

    Bring the mixture to a simmer and whisk until thickened for 3 minutes. Set aside.

    combined whole wheat flour and whole milk, image created by SimplyBakings

    2. Combine whole wheat flour and whole milk in a mixing bowl. Mix well until fully incorporated.

    coated cauliflower florets on batter, image created by SimplyBakings

    3. Toss the cauliflower florets and mix well to coat properly.

    battered florets lined on cooling rack, image created by SimplyBakings

    4, Place batter florets in a tray lined with a cooling rack to drip excess batter.

    florets transferred to a baking sheet, image created by SimplyBakings

    5. Transfer to a baking sheet with baking paper or a silicone mat. Bake in the preheated oven for
    20 minutes at 350 degrees Fahrenheit.

    baked florets brushed with huli huli sauce, image created by SimplyBakings

    6. Remove from the oven and brush with the Huli Huli sauce.

    Place back in the oven and continue baking for another 10 minutes at 375 degrees Fahrenheit.

    remaining ingredients added to baked cauliflower bites, image created by SimplyBakings

    7. Remove from the oven and transfer to a mixing bowl. Add all the remaining ingredients, including the remaining Huli Huli sauce, and mix well.

    Serve immediately, and enjoy!

    baked cauliflower dish with huli huli sauce served with cilantro in a bowl, image created by SimplyBakings

    Substitutions

    • For a dairy-free option, swap whole milk with almond milk, soy milk, or oat milk.
    • Try other vegetables like zucchini, eggplant, or even sweet potatoes for a hearty and satisfying dish. Don't forget to adjust the cooking time for different veggies to ensure they're cooked thoroughly.

    Variations

    • Spicy - add more heat by incorporating cayenne pepper, chili powder, or hot sauce to the Huli Huli sauce
    • Asian - replace the sesame oil with toasted sesame oil, and add a splash of mirin or sake to the sauce. Garnish with chopped scallions or cilantro.
    • Tropical - serve with a side of coconut rice or tropical fruits like mango or papaya
    a forkful of saucy cauliflower bites with huli huli sauce served with juice, image created by SimplyBakings

    Equipment

    • Baking Sheet: Opt for a sturdy baking sheet that can withstand high temperatures without warping. Line it with parchment paper or a silicone mat to prevent sticking and make cleanup a breeze.
    • Saucepan: Choose a medium-sized saucepan with a heavy bottom for even heat distribution.
    • Mixing Bowl: Use a large mixing bowl to combine the cauliflower florets with the batter. Look for one with a non-slip base to keep it steady while you mix.
    • Cooling Rack: Place a cooling rack on top of your baking sheet to allow excess batter to drip off the cauliflower florets before baking.
    • Brush: Invest in a good-quality pastry brush for evenly coating the cauliflower bites with the huli huli sauce. Look for one with silicone bristles that won't shed and are easy to clean.
    • Grill (optional): If you prefer a smokier flavor, you can grill the bites instead of baking them. Make sure your grill grates are clean and well-oiled to prevent sticking.

    Storage

    • In the Fridge: Store the saucy cauliflower bites separately from the dry ingredients in an airtight container for 2–3 days.
    • On the counter: Enjoy freshly baked or grilled vegan cauliflower bites immediately. Avoid leaving them out for too long to prevent spoilage.
    • In the Freezer: Unfortunately, these bites don't freeze well and are best enjoyed fresh.
    a bowl of vegan cauliflower bites with huli huli sauce, garnished with cilantro and lemon slices, image created by SimplyBakings

    Hint: Here's the secret sauce to nailing this recipe: don't overcook the cauliflower! You want them golden and crispy on the outside, but still tender on the inside. Oh, and that Huli Huli sauce? Slather it on generously for an extra flavor kick.

    FAQs

    Are cauliflower bites good for you?

    Yep, cauliflower bites can be good for you! They're low in calories and high in vitamins, minerals, and fiber. Just keep them baked or grilled with less oil for a healthier snack or side dish.

    Do I need to soak the cauliflower before cooking?

    Nope, there is no need to soak cauliflower before cooking. Just give it a quick rinse under cold water if you want to get rid of any dirt or stuff.

    Why is my cauliflower not crispy?

    It might be because of too much moisture. Make sure to pat those florets dry before cooking, and bake or grill them at a higher temperature for a bit longer until they're nice and golden.

    baked cauliflower with huli huli sauce in a bowl, image created by SimplyBakings
    5 from 1 vote
    Print Pin Recipe

    Huli Huli Dauliflower

    Try our Huli Huli Cauliflower Bites! They're crispy cauliflower with a special sauce made of pineapple, soy sauce, and ginger. It's like a yummy Hawaiian treat for your taste buds!
    Prep Time20 minutes mins
    Cook Time35 minutes mins
    Total Time55 minutes mins
    Course: Appetizer, Appetizers, Vegan
    Cuisine: Hawaiian
    Servings: 4 servings
    Calories: 273kcal
    Prevent your screen from going dark

    Ingredients

    • 2 cups cauliflower florets
    • ¾ cup whole wheat flour
    • 1 cup whole milk
    • 2 red bell pepper quartered

    Sauce

    • 2 cups pineapple chunks in juice separate juice
    • ⅛ cup dark soy sauce
    • 1 teaspoon sesame oil
    • ⅛ cup brown sugar
    • ¼ cup ketchup
    • 1 tablespoon rice vinegar
    • ½ teaspoon grated ginger
    • 3 garlic cloves minced
    • ⅛ teaspoon salt
    • ¼ teaspoon red chili flakes
    • 1 teaspoon cornstarch

    Instructions

    Sauce

    • Whisk together pineapple juice, salt, soy sauce, sesame oil, brown sugar, ketchup, rice vinegar, grated ginger, minced garlic, chili flakes, and cornstarch in a saucepan. Bring the mixture to a simmer and whisk until thickened for 3 minutes. Set aside.

    Huli Huli Assembly

    • Combine whole wheat flour and whole milk in a mixing bowl. Mix well until fully incorporated.
    • Toss the cauliflower florets and mix well to coat properly.
    • Place batter florets in a tray lined with a cooling rack to drip excess batter.
    • Transfer to a baking sheet with baking paper or a silicone mat. Bake in the preheated oven for 20 minutes at 350 degrees Fahrenheit.
    • Remove from the oven and brush with the Huli Huli sauce.
    • Place back in the oven and continue baking for another 10 minutes at 375 degrees Fahrenheit.
    • Remove from the oven and transfer to a mixing bowl. Add all the remaining ingredients, including the remaining Huli Huli sauce, and mix well.
    • Best served immediately with steamed white rice.
    Leave a Comment

    Notes

    1. You may substitute whole milk with plant-based milk such as almond milk, soy milk, and oat milk.
    Serving: 1gCalories: 273kcalCarbohydrates: 56gProtein: 8gFat: 4gSaturated Fat: 1gPolyunsaturated Fat: 1gMonounsaturated Fat: 1gCholesterol: 7mgSodium: 660mgPotassium: 674mgFiber: 6gSugar: 33gVitamin A: 2137IUVitamin C: 113mgCalcium: 131mgIron: 2mg

    Watch The Recipe Video!
    QR Code
    Did you make this recipe?Share it on instagram or tag @simplybakings or #simplybakings!

    Food safety

    • Don't leave food sitting out at room temperature for extended periods
    • Never leave cooking food unattended
    • Use oils with high smoking point to avoid harmful compounds
    • Always have good ventilation when using a gas stove

    See more guidelines at USDA.gov.

    Appetizers, Vegetables

    Easiest Bilo-Bilo

    Apr 1, 2024 · 3 Comments

    creamy filipino bilo bilo on a bowl with wooden spoon

    This ginataang Bilo-Bilo recipe is a comfort food from the Philippines featuring chewy, glutinous rice balls in creamy coconut milk. This Filipino dessert recipe includes cassava, sweet plantains, and optional jackfruit strips for added flavor. It's quick to make and perfect for rainy days!

    The bilo-bilo (chewy rice balls) created in this recipe can also be added to Binignit and Sweet Ginataang Munggo.

    Creamy ingredients in a bowl
    [feast_advanced_jump_to]

    Bilo-bilo with coconut cream can be eaten hot or cold, making it great for both dessert and an afternoon snack.

    With a cup of coffee or tea, it's even a great choice for breakfast. People love this warm treat even more when it's raining outside.

    What is Bilo-Bilo?

    Ginataang bilo-bilo dish likely evolved gradually rather than appearing at a single point in time. Its fundamental elements - sweet coconut milk, root crops, bananas, sago pearls or small tapioca pearls and glutinous rice - trace back to pre-Hispanic cuisine.

    Over centuries, with the influence of Spanish-era sweeteners and the natural evolution of local culinary traditions, the ginataan dessert soup took on its present form.

    Today, it’s celebrated as a comforting, nostalgic dessert that carries echoes of the Philippines’ ancient food heritage.

    Health Benefits of Jackfruit

    Although it’s optional in the recipe, adding jackfruit can enhance both flavor and nutrition. This tropical fruit is rich in:

    • Dietary Fiber: Helps support healthy digestion and regularity.
    • Antioxidants (Vitamin C): Supports the immune system, helps with collagen production, and can contribute to overall skin health.
    • Essential Nutrients: Contains a range of vitamins and minerals, including several B vitamins, potassium, protein and magnesium, all of which are important for maintaining energy levels, proper nerve function, and heart health.

    Variations

    • Citrus Twist - Add a few drops of calamansi juice or lemon zest to the rice ball dough for a subtle citrus aroma to brighten the creamy base.
    • Root Crops Galore - Include diced sweet potato (kamote), purple yam (ube chunks), or taro (gabi) to add layers of natural sweetness, color, and texture.
    • Thin or Thick - Adjust the thickness by adding more water or coconut milk if you prefer a more soupy consistency, or simmer it longer for a thicker, heartier dessert.
    bilo-bilo in coconut milk

    Substitutions

    • Glutinous rice flour - Substitute with regular rice flour, mixed with a bit of tapioca starch.
    • White sugar - Use coconut sugar or brown sugar instead for a healthier alternative.
    • Ube extract - Stir in and replace ube extract with vanilla extract instead.
    • Coconut milk - is key for flavor. But if not available, use milk alternatives plus coconut essence.

    Storage

    Store any leftovers in an airtight container in the refrigerator for up to 3 days.

    While this dessert can technically be frozen, the texture may change upon thawing. For best results, enjoy it fresh or refrigerated.

    Ingredients

    Listed below are all the ingredients you will need (omitting quantities):

    • ube extract
    • glutinous rice flour
    • water
    • chopped cassava
    • chopped saba banana
    • white sugar
    • coconut milk (canned)
    • water
    • sliced jackfruit (langka)

    See the recipe card for quantities.

    all ingredients in separate bowls

    Instructions

    In a bowl, combine the glutinous rice flour, ube extract, and ½ cup of water. Knead the mixture until well blended and smooth.

    Using a spoon, portion out small amounts of dough and roll into small balls. Set aside.

    Water, milk and sugar mixed and kneaded

    In a large pot, combine 2 cups of water, coconut milk, and white sugar.

    Bring to a boil over medium heat.

    All wet ingredients boiled in a pot

    Add the chopped cassava and prepared glutinous rice balls to the boiling coconut mixture. Cook until slightly soft, about 8-10 minutes.

    Stir in the chopped saba (sweet plantains) and let the mixture simmer until the plantains are fully cooked.

    Bilo-bilo ingredients in a pot over fire

    If using, add the sliced jackfruit and mix well. Check the sweetness, adjust if needed, and serve warm!

    A bowl of delicious bilo-bilo

    ⭐ Top Tip

    To avoid scorching and ensure even cooking, stir the coconut milk mixture frequently but gently. Coconut milk can burn at the bottom of the pot if not stirred, and the bilo-bilo can stick together if left in one spot too long.

    FAQ

    What is bilo-bilo made of?

    Pinaltok or Bilo-bilo is a Filipino dessert made of small glutinous balls (sweet sticky rice flour rounded up by adding water) in coconut milk and sugar. Then jackfruit, saba bananas, sweet potatoes, taro, and tapioca pearls or sago (regular and mini size pearls) are added.

    What is the English of bilo-bilo?

    Bilo bilo comes from the Tagalog word “bilog,” which means “round.” Ginataang bilo bilo translates to rice balls cooked in coconut milk.

    What is the difference between Bilo Bilo and Binignit?

    One of the differences is that bilo-bilo has sticky rice balls, made from glutinous rice flour, while binignit uses glutinous rice to thicken the coconut milk as it cooks.

    More Recipes

    • Caramel Hot Chocolate
    • Smoothie Bowls
    • Carrot Cake Oatmeal
    • Dirt Pudding
    sticky rice ball in milk with jackfruit
    5 from 3 votes
    Print Pin Recipe

    Easiest Bilo-Bilo

    This Bilo-Bilo recipe is a Filipino dessert that combines rice balls, milk, cassava, banana, and jackfruit for a tropical twist!
    Prep Time10 minutes mins
    Cook Time20 minutes mins
    Total Time30 minutes mins
    Course: Desserts, Vegan
    Cuisine: Filipino
    Servings: 6 servings
    Calories: 443kcal
    Prevent your screen from going dark

    Equipment

    • Large pot
    • Mixing bowl
    • Spoon for portioning dough
    • Knife for chopping fruits
    • Measuring cups and spoons

    Ingredients

    For the Dough:

    • 1 cup glutinous rice flour
    • 1 teaspoon ube extract
    • ½ cup water

    For the Soup Base:

    • 2 cups water
    • 3 cups coconut milk
    • 1 cup white sugar

    For the Add-ins:

    • 1 cup chopped cassava
    • 1½ cups chopped saba sweet plantains
    • ½ cup sliced jackfruit optional

    Instructions

    Prepare the Glutinous Rice Balls:

    • In a mixing bowl, combine the glutinous rice flour, ube extract, and ½ cup of water.
    • Knead the mixture until a smooth dough forms.
    • Use a spoon to portion out small amounts of dough and roll them into small balls. Set aside.

    Prepare the Sweet Coconut Soup Base:

    • In a large pot, combine 2 cups of water, coconut milk, and white sugar. Bring the mixture to a boil over medium heat.

    Cook the Ingredients:

    • Add the chopped cassava and prepared glutinous rice balls to the boiling coconut mixture. Cook until the cassava and rice balls become slightly soft (about 8-10 minutes).
    • Add the chopped saba (sweet plantains) and simmer until everything is cooked through and tender.

    Optional Add-In:

    • If using, add the sliced jackfruit and mix well.

    Taste and Serve:

    • Check if the sweetness is to your liking, adjust if needed, and serve hot or warm.
    Leave a Comment
    Serving: 1gCalories: 443kcalCarbohydrates: 54gProtein: 4gFat: 24gSaturated Fat: 21gPolyunsaturated Fat: 0.4gMonounsaturated Fat: 1gSodium: 1548mgPotassium: 269mgFiber: 1gSugar: 0.03gVitamin C: 1mgCalcium: 26mgIron: 4mg

    Watch The Recipe Video!
    QR Code
    Did you make this recipe?Share it on instagram or tag @simplybakings or #simplybakings!

    Desserts, Filipino Desserts, Ube Recipes, Vegetarian Filipino Recipes

    Stir Fry Pickled Mustard Greens Recipe

    Mar 14, 2024 · Leave a Comment

    Sautéed Pickled Mustard Greens with Eggs in a white serving plate

    Enjoy the savory tastes of Pickled Mustard Greens stir fried with eggs in this easy and amazing side dish recipe. Bursting with tangy, delicious goodness, this dish offers a symphony of flavors and textures that will excite your taste buds and leave you wanting more!

    This dish was inspired by my Ampalaya Guisado (Sautéed Bitter Melon) recipe on this site and pairs well with rice recipes like steamed rice, fried rice and garlic fried rice.

    sautéed pickled mustard greens with eggs in a white bowl with a stainless spoon beside

    This Pickled Mustard Greens recipe draws inspiration from Asia's rich culinary traditions, where pickled vegetables are often used to add depth and complexity to dishes. Typically paired with pork or chicken, we’ve made it vegetarian by adding eggs! The mustard greens, with their unique tangy flavor, are first pickled in brine with a touch of vinegar to bring out their natural sourness.

    Once pickled, the greens—both leaves and stems—are sautéed with eggs to create a delicious combination of textures and flavors. If you have leftover pickled greens, simply store them in a jar with a tight lid and keep them in the fridge for future use. This recipe brings a fresh twist to traditional comfort food, perfect for adding richness to soups or other dishes that require a savory kick. Whether you find them at Asian grocery stores or make your own, these pickled greens are sure to impress with their brilliant colors and bold flavors.

    [feast_advanced_jump_to]
    delicious sautéed pickled mustard greens with eggs in a white bowl

    Health Benefits of Mustard Greens

    • Promote heart health.
    • Loaded with antioxidants.
    • Rich source of vitamins and minerals.
    • Rich in fiber that supports healthy digestion.
    • Packed with anti-inflammatory and anti-cancer properties.

    Ingredients

    Listed below are all the simple and healthy ingredients you will need:

    ingredients for the sautéed pickled mustard greens with eggs recipe
    • mustard greens
    • vegetable oil
    • garlic cloves
    • red onions
    • tomatoes
    • eggs
    • salt
    • ground black pepper

    See the recipe card for quantities.

    Instructions

    Gather the ingredients for this sautéed pickled mustard greens with eggs recipe. Once the ingredients are all ready, let’s begin!

    Sautéed minced garlic and sliced red onions on a heated skillet with oil

    Add oil to a heated skillet over medium heat.

    Sauté minced garlic and sliced red onions for a minute.

    Added the chopped pickled mustard greens, chopped tomatoes, and eggs into the skillet

    Add the chopped pickled mustard greens and chopped tomatoes, and sauté for another 2 minutes.

    Pour in the beaten eggs and stir well. Then, cook until the eggs are cooked through.

    Seasoned with salt and ground black pepper then transferred to a white serving plate

    Season with salt and ground black pepper.

    Transfer to a serving plate and serve immediately.

    Hint: Check if the flavors are balanced by adjusting the amount of seasoning and acidity from the pickled mustard greens. Start by tasting the pickled greens before cooking and adjusting the amount based on their intensity. If they're particularly tangy or salty, use less and add a touch of sweetness, like a pinch of sugar or a splash of honey.

    Substitutions

    • Pickled Mustard Greens: instead of pickled mustard greens, you can use pickled turnip greens, pickled radish greens, or pickled cabbage.
    • Egg: use either scrambled tofu, quorn eggs, egg whites only for a lower cholesterol option, or small pieces of any meat of your choice
    • Vegetable Oil: you can replace vegetable oil with olive oil or sesame oil in this recipe
    • Garlic: feel free to use garlic powder for minced garlic

    Variations

    • Spicy Kick: To add some spice, sauté the greens and eggs with red chili peppers
    • Soy Sauce Twist: Drizzle a little soy sauce over the final dish to add an extra depth of umami flavor that balances the tangy mustard greens.
    • Creamy Addition: Before cooking the beaten eggs with the pickled mustard greens, add a dollop of cream or coconut milk.
    • Rice Accompaniment: Serve the sautéed pickled mustard greens and eggs over steaming rice or alongside rice noodles for a more hearty meal.
    • Veggie Medley: In addition to the pickled mustard greens, try adding chopped bell peppers, sliced mushrooms, broccoli florets, or thinly sliced carrots.

    Equipment

    I used a skillet in this sauteed pickled mustard greens with egg recipe for easy cooking. Feel free to use any pan or wok available in your kitchen that is good for stir-fry.

    Storage

    • Refrigeration: Let the dish cool completely before storing it in an airtight container. Keep it refrigerated for up to 2–3 days.
    • Freezing: While it is best served fresh, leftovers can be frozen for later use. Place the cooled dish in a freezer-safe container, giving it enough room for expansion, and seal tightly. Freeze for up to 1–2 months.
    • Reheating: When ready to eat, defrost frozen portions in the refrigerator overnight, if applicable. Reheat the dish in a skillet over medium heat until thoroughly cooked, stirring periodically to ensure even cooking. Individual servings can also be microwaved on microwave-safe plates for 30-second intervals until they are warmed to your satisfaction.
    • Quality Check: Before consuming refrigerated or thawed leftovers, look for indications of spoilage, such as an unusual odor, texture, or appearance. If in doubt, discard them to avoid foodborne illness.

    Top Tip

    Make sure your skillet is hot before adding the ingredients. Preheating it helps the greens and eggs cook quickly, preserving their flavors and textures while keeping them from becoming soggy. Avoid overcrowding the pan, since this might result in uneven cooking and steaming rather than sautéing.

    sautéed pickled mustard greens with eggs  served in a white plate

    Frequently Asked Questions

    Are pickled mustard greens healthy?

    Yes, mustard greens are high in micronutrients and have several health benefits, including immune system support and the potential to prevent cancer.

    Can pickled mustard greens be eaten raw?

    Yes, but depending on your spicy taste tolerance. Cooking reduces the spiciness, making it more enjoyable for more people.

    What are 3 ways you can eat mustard greens?

    Mustard greens can be easily added to your diet. They can be eaten fresh, steamed, or stir-fried.

    Is thee a difference if I use Chinese mustard greens?

    Yes, there is a difference if you use Chinese mustard greens (also known as gai choy) in the recipe. Chinese mustard greens tend to be milder and slightly sweeter compared to the more tangy and pungent flavor of traditional mustard greens.

    Looking for other recipes like this? Try these Poqui Poqui, Broccoli and Tofu in Spicy Almond Sauce, and Stir Fry Cabbage recipes in the comfort of your own kitchen!

    Sautéed Pickled Mustard Greens with Eggs in a white serving plate
    5 from 1 vote
    Print Pin Recipe

    Stir Fry Pickled Mustard Greens Recipe

    Here's an Asian-inspired vegetarian dish made with a delicious combination of tangy pickled mustard greens and velvety eggs. This is a quick, easy, and satisfying recipe that is bursting with flavor and perfect for busy weeknights or casual dinners!
    Prep Time6 minutes mins
    Cook Time6 minutes mins
    Total Time12 minutes mins
    Course: Side Dish
    Cuisine: Filipino
    Servings: 2
    Calories: 232kcal
    Author: Simply Bakings Kitchen Team
    Prevent your screen from going dark

    Ingredients

    • 1 cup pickled mustard greens chopped
    • 2 tablespoons vegetable oil
    • 2 garlic cloves minced
    • ½ cup red onions sliced
    • ¼ cup chopped tomatoes
    • 2 large eggs beaten
    • ½ teaspoon salt
    • ¼ teaspoon ground black pepper

    Instructions

    • Add oil to a heated skillet over medium heat.
    • Sauté minced garlic and sliced red onions for a minute.
    • Add the chopped pickled mustard greens and chopped tomatoes.
    • Sauté for another 2 minutes.
    • Pour the beaten eggs and stir well.
    • Cook until the eggs are cooked through.
    • Season with salt and ground black pepper.
    • Transfer to a serving plate and serve immediately.
    Leave a Comment

    Notes

    1) You may also toss some broccoli florets and thinly sliced carrots to add nutritional value to the dish.
    Calories: 232kcalCarbohydrates: 11gProtein: 8gFat: 18gSaturated Fat: 3gPolyunsaturated Fat: 9gMonounsaturated Fat: 5gTrans Fat: 0.1gCholesterol: 164mgSodium: 897mgPotassium: 831mgFiber: 3gSugar: 4gVitamin A: 417IUVitamin C: 7mgCalcium: 86mgIron: 2mg
    QR Code
    Did you make this recipe?Share it on instagram or tag @simplybakings or #simplybakings!

    Appetizers, Side Dishes, Vegetables, Vegetarian Filipino Recipes

    Filipino Corn Soup Recipe

    Feb 22, 2024 · 3 Comments

    Spoon in a bowl of Filipino Corn Soup

    Enjoy the heartwarming tastes of this Filipino Corn Soup, a delicious and comforting dish. It's bursting with the sweetness of corn kernels and veggies. Through this blog, let's discover the tips and steps in making this beloved Filipino dish. This not only tantalizes the taste buds but also conveys the essence of Filipino culinary culture!

    Don't forget to try my Vegan Misua Soup and Vegan Chicken Rice Soup!

    Two bowls of Filipino Corn Soup with spoon
    [feast_advanced_jump_to]

    Why You’ll Love This Recipe

    This light and comforting dish is inspired by the popular sweet corn soup commonly served in Indian restaurants. This vegetarian version is made with the delicious flavor combination. Then it's cooked in a hearty vegetable broth with beaten egg and potato starch.

    Consider making this quick and easy Filipino sweet corn soup recipe today for a simple yet healthy and heartwarming lunch or dinner.

    The Story Behind Filipino Corn Soup

    This recipe has long been a Filipino household favorite, especially for merienda or light dinners. Its flavor is humble but comforting, often reminding people of home and warmth shared around the family table.

    Many Filipinos grew up with versions of this soup made from scratch or fresh corn kernels, making it both nostalgic and practical.

    Where Filipino Corn Soup Comes From

    This Filipino soup draws inspiration from Chinese-style egg drop soups. Filipinos made it their own by adding local vegetables and sweet corn.

    It first became popular in home kitchens and school canteens, where easy, hearty meals were always welcome. Over time, it evolved into a Filipino comfort classic, loved for its simplicity and versatility.

    When is this Dish Typically Enjoyed?

    It’s the go-to comfort meal! It’s also a popular merienda or side dish during family gatherings and potluck dinners, especially in the rainy months. No need for sauce, shrimp or pork. This dish is all the comfort you need!

    Food safety

    • Cook to a minimum temperature of 165 °F (74 °C)
    • Don't leave food sitting out at room temperature for extended periods
    • Never leave cooking food unattended
    • Use oils with high smoking point to avoid harmful compounds
    • Always have good ventilation when using a gas stove

    Ingredients

    Listed below are all the ingredients you will need:

    • ginger
    • sweet onions
    • carrots
    • sweet corn kernels
    • red bell pepper
    • vegetable broth
    • egg
    • potato starch
    • water
    • salt
    • ground white pepper
    • green onions

    See the recipe card for quantities.

    All ingredients for the Filipino Corn Soup in bowls

    Instructions

    Make the Slurry

    1. In a small bowl, mix potato starch and water. Set aside.

    Small bowl and pot ready for cooking

    Sauté the Aromatics

    2. In a heated, heavy-bottomed pot, add vegetable oil.

    3. Sauté sweet onions and ginger for 2 minutes over medium-low heat until fragrant.

    Cook the Vegetables

    4. Add sweet corn kernels, carrots, and diced red bell pepper.

    Chopped vegetables in the cooking pot

    5. Sauté for 3 minutes, stirring constantly.

    Simmer the Soup

    6. Add vegetable broth and bring to a boil.

    7. Reduce to a simmer for 5 minutes.

    Soup being boiled in a pot on the stove

    Add Egg and Slurry

    8. Slowly drop in the beaten egg while stirring to create egg ribbons.

    9. Stir in the potato starch mixture.

    10. Continue simmering for another 2 minutes.

    Season and Serve

    11. Season with salt and ground white pepper.

    12. Transfer to serving bowls, garnish with green onions, and serve immediately.

    Filipino Corn Soup being served in the bowl

    Substitutions & Variations

    • Ingredient Swap
      Replace whole kernels with creamed corn for a thicker texture.
      Use chicken broth instead of vegetable broth for a richer taste.
    • Variation
      Add tofu for extra protein or skip the egg for a fully vegan version.
      Turn off the heat once the veggies turn tender. The soup will turn thick, and the taste will suit your liking.
    • Mistake to Avoid
      Avoid overcooking the eggs - they should swirl gently into ribbons, not clump together.
    • Storage Tips
      • This soup doesn’t stand up well to freezing, but keeps nicely in the fridge for 2–3 days.
      • Store it in an airtight container and reheat gently over low heat to maintain the smooth texture.
    Spoon holding up a scoop of Filipino Corn Soup

    FAQs

    Can I make this soup vegan?

    Yes! Simply skip the egg and use vegetable broth—it’s still delicious and flavorful.

    Can I use fresh corn instead of canned?

    Absolutely! Freshly cut corn adds extra sweetness and texture.

    How can I make the soup thicker?

    Add more potato starch slurry or simmer longer until it reaches your desired consistency.

    Filipino Corn Soup served in a white bowl with steel spoon
    5 from 2 votes
    Print Pin Recipe

    Filipino Corn Soup

    Here's a quick and easy vegetarian corn soup for a comforting Filipino dish! It's a delicious, creamy, and filling soup loaded with sweet corn kernels, diced carrots, and a beaten egg. Try this for a simple yet healthy dinner soup!
    Prep Time10 minutes mins
    Cook Time15 minutes mins
    Total Time25 minutes mins
    Course: Soup
    Cuisine: Filipino
    Servings: 3 servings
    Calories: 250kcal
    Author: Simply Bakings Kitchen Team
    Prevent your screen from going dark

    Ingredients

    • 1 potato starch
    • ¼ cup water
    • 2 tablespoons vegetable oil
    • ½ cup sweet onions thinly sliced
    • ⅛ cup ginger sliced thinly
    • ½ cup carrots finely diced
    • 2 cups canned sweet corn kernels drained
    • 1 red bell pepper finely diced
    • 3 ½ cups vegetable broth
    • 1 large egg beaten
    • ½ teaspoon salt
    • ¼ teaspoon ground white pepper
    • ⅛ cup green onions for garnish

    Instructions

    Make the Slurry

    • In a small bowl, mix potato starch and water. Set aside.

    Sauté the Aromatics

    • In a heated, heavy-bottomed pot, add vegetable oil.
    • Sauté sweet onions and ginger for 2 minutes over medium-low heat until fragrant.

    Cook the Vegetables

    • Add sweet corn kernels, carrots, and diced red bell pepper.
    • Sauté for 3 minutes, stirring constantly.

    Simmer the Soup

    • Add vegetable broth and bring to a boil.
    • Reduce to a simmer for 5 minutes.

    Add Egg and Slurry

    • Slowly drop in the beaten egg while stirring to create egg ribbons.
    • Stir in the potato starch mixture.
    • Continue simmering for another 2 minutes.

    Season and Serve

    • Season with salt and ground white pepper.
    • Transfer to serving bowls, garnish with green onions, and serve immediately.
    Leave a Comment

    Notes

    1) You can use cornstarch instead of potato starch.
    2) Adding leafy greens such as cabbages and bokchoy will enhance the soup's flavor profile.
    Serving: 1gCalories: 250kcalCarbohydrates: 33gProtein: 7gFat: 12gSaturated Fat: 2gPolyunsaturated Fat: 6gTrans Fat: 0.1gCholesterol: 62mgSodium: 1530mgPotassium: 462mgFiber: 4gSugar: 11gVitamin A: 5792IUVitamin C: 60mgCalcium: 33mgIron: 1mg

    Watch The Recipe Video!
    QR Code
    Did you make this recipe?Share it on instagram or tag @simplybakings or #simplybakings!

    You Might Also Like:

    • Cornmeal Mush
    • Bibingka Cornbread
    • Snickerdoodle Candy Corn Cookies

    Recipes for Every Moment

    Craving something warm on a rainy afternoon? Filipino Corn Soup is your quick, cozy fix that feels like a hug in a bowl.

    Side Dishes, Soups and Salads, Vegetarian Filipino Recipes

    Quick and Easy Cream Cheese Icing

    Feb 18, 2024 · 2 Comments

    cream cheese icing in a jar for cupcakes

    Treat yourself to the heavenly delight of our homemade Quick and Easy Cream Cheese Icing! With its perfect balance of creaminess and sweetness, this fan-freaking-fantastic recipe promises to take your baked goods to a whole new level.

    This was inspired by my Lemon Cupcakes on this site, and pairs well with this Matcha Cupcakes.

    quick and easy cream cheese icing in a jar with a gray background
    [feast_advanced_jump_to]

    🥘Ingredients

    • full-fat cream cheese
    • unsalted butter
    • vanilla extract
    • powdered sugar

    See the recipe card for quantities.

    powdered sugar, vanilla extract, cream cheese, butter on a marble table

    🔪Instructions

    In a mixing bowl, combine softened cream cheese and butter using an electric mixer, beat until smooth and creamy, then add vanilla extract and blend well. I opted for a stand mixer as it made mixing easier and allowed me to step away, but feel free to use a hand mixer if you prefer.

    Gradually incorporate powdered sugar until reaching the desired sweetness and consistency, then beat the icing on medium-high speed for 2-3 minutes until fluffy.

    cream cheese icing in b a bowl being made

    💭 Hint: A good tip is to ensure that your ingredients, particularly cream cheese and butter, are at room temperature before making cream cheese icing. This helps them blend more easily and results in a smoother texture for your icing.

    📋Substitutions

    • Cream Cheese: You can substitute cream cheese with an equal amount of mascarpone cheese for a slightly different flavor profile. Alternatively, if you're looking for a dairy-free option, you can use vegan cream cheese.
    • Butter: If you prefer a lighter option, you can substitute part or all of the butter with an equal amount of vegetable shortening. However, keep in mind that this may alter the flavor and texture of the icing slightly.
    • Vanilla Extract: You can swap vanilla extract with other flavorings such as almond extract, lemon extract, or even a bit of citrus zest for a different flavor profile.
    • Powdered Sugar: If you don't have powdered sugar on hand, you can make your own by blending granulated sugar in a blender or food processor until it reaches a powdery consistency. Alternatively, you can use a sugar substitute like erythritol or stevia for a lower-calorie option.
    holding cream cheese icing on a whisk

    📖Variations

    • Lemon Cream Cheese Icing: Add some fresh lemon zest and a splash of lemon juice to the cream cheese icing for a tangy and refreshing flavor.
    • Cinnamon Cream Cheese Icing: Mix in some ground cinnamon to the cream cheese icing for a warm and spicy twist. This pairs particularly well with carrot cake or spice cake.
    • Maple Cream Cheese Icing: Substitute some of the powdered sugar with maple syrup for a rich and indulgent flavor. Drizzle a little extra maple syrup on top for an added touch of sweetness.
    • Chocolate Cream Cheese Icing: Mix in some cocoa powder or melted chocolate to the cream cheese icing for a rich and decadent chocolate flavor. You can adjust the amount of cocoa powder or melted chocolate to suit your taste preferences.
    • Berry Cream Cheese Icing: Fold in some mashed berries or berry jam to the cream cheese icing for a fruity and colorful twist. This works well with strawberries, raspberries, blueberries, or blackberries.

    Storage

    • Refrigeration: Cream cheese icing should be stored in an airtight container in the refrigerator. Due to the dairy content, it is perishable and can spoil if left out at room temperature for too long.
    • Use Within a Few Days: Cream cheese icing is best when consumed fresh. It can typically be stored in the refrigerator for up to 3-4 days. After that, it may start to lose its freshness and flavor.
    • Avoid Freezing: While cream cheese icing can technically be frozen, it may change in texture and consistency upon thawing. The icing may become watery or grainy, which can affect its overall quality.
    • Bring to Room Temperature: If you've stored cream cheese icing in the refrigerator, allow it to come to room temperature before using it. This will make it easier to spread and ensure a smoother texture.
    • Check for Spoilage: Before using cream cheese icing that has been refrigerated, always check for any signs of spoilage, such as an off smell or unusual texture. If in doubt, it's best to discard it and make a fresh batch.

    Looking for more dessert ideas? Try my favorite Nutella Peanut Butter Cookies.

    Frequently Asked Questions

    Can I make cream cheese frosting ahead of time?

    Yes, you can make cream cheese icing ahead of time and store it in the refrigerator. Just be sure to store it in an airtight container and use it within 3-4 days for the best quality.

    Can I freeze cream cheese icing?

    While technically possible, freezing cream cheese icing is not recommended as it may change in texture and consistency upon thawing. It may become watery or grainy, affecting its overall quality.

    My cream cheese icing is too thin. How can I thicken it?

    If your cream cheese icing is too thin, you can try adding more powdered sugar, a little at a time, until you reach the desired consistency. Alternatively, you can refrigerate the icing for a short while to firm it up.

    cream cheese icing in a small glass jar
    Print Recipe Leave a Comment
    5 from 3 votes

    Quick and Easy Cream Cheese Icing

    Discover a hassle-free recipe for delicious cream cheese icing that's both quick and easy to make!
    Prep Time10 minutes mins
    Total Time10 minutes mins
    Course: Dessert
    Cuisine: American, Filipino
    Servings: 4 cups
    Calories: 687kcal

    Ingredients

    • 8 oz cream cheese softened
    • ½ cup butter softened
    • 1 teaspoons vanilla
    • 4 cups powdered sugar
    Prevent your screen from going dark

    Instructions

    • In a mixing bowl, combine softened cream cheese and butter until smooth and creamy.
    • Add vanilla extract to the mixture and blend well.
    • Gradually add powdered sugar, mixing until the desired sweetness and consistency are achieved.
    • Once all ingredients are incorporated, beat the icing on medium-high speed for 2-3 minutes until fluffy.
    • Use immediately to frost cakes, cupcakes, or any other baked goods, or store in the refrigerator for later use.

    Nutrition

    Serving: 1g | Calories: 687kcal | Carbohydrates: 124g | Protein: 4g | Fat: 20g | Saturated Fat: 12g | Polyunsaturated Fat: 1g | Monounsaturated Fat: 5g | Cholesterol: 61mg | Sodium: 212mg | Potassium: 119mg | Sugar: 121g | Vitamin A: 811IU | Calcium: 91mg | Iron: 0.1mg
    DID YOU MAKE THIS RECIPE? Share it on instagram or tag @simplybakings or #simplybakings!

    See more guidelines at USDA.gov.

    One of my friends from YouTube Julie and I got together and made some Halloween treats!  For this recipe, I decided to use a cake box mix which tasted DELICIOUS!  I was very surprised at the texture and taste and I was very pleased with it!  For the frosting I made a cream cheese frosting which had a beautiful texture and was very sweet and rich!

    Note: Recipe has been updated on 2/18/2024, originally published on October 2013

    5 Ingredients or Less, Cake, Cupcakes

    Best Poqui Poqui

    Feb 8, 2024 · 3 Comments

    filipino poqui poqui served on a ceramic bowl

    This Poqui-Poqui recipe is a delicious Ilocano dish that combines the sweet and smoky flavors of grilled eggplants, onions, and tomatoes. It's quick, tasty, and gives you a taste of rich history in just 16 minutes!

    Eager to discover more Filipino culinary delights? Taste my Empanada, Filipino Vegetarian Chopsuey, Porbidang Kangkong, and Filipino Style Spinach.

    tasty grilled egglant poki served in a bowl
    [feast_advanced_jump_to]

    What is Poqui Poqui?

    This is a typical Ilocano meatless breakfast or dinner meal that consists of grilled, peeled, mashed, and cooked eggplants together with tomatoes, onions, garlic, and egg.

    The dish's name origin can be traced back to the 1980s, according to Chita Sanculi of Divine Word College in Ilocos Sur.

    Many Filipinos moved to Hawaii at that time in order to produce pineapples. In Hawaii, the word "poki" implies "to cut up" or "mash." It's also how the name of the well-known poke bowl came about!

    Health Benefits of Eggplant

    • Rich in antioxidants
    • Supports heart health
    • Aids digestion
    • Low in calories
    • Contains vitamins and minerals
    delicious Ilocano poqui dish with red tomatoes

    Substitutions

    • Eggplant Alternatives: If you're out of eggplant, zucchini or bell peppers can be excellent substitutes, providing a similar texture and flavor profile.
    • Oil Options: While olive oil adds a distinct taste, you can experiment with avocado oil or even coconut oil for a unique twist.

    Variations

    • Spices: Customize the dish by playing with different spices. Try cumin, paprika, or a hint of garlic powder for added depth.

    Storage

    • In the Fridge: Store any leftover poqui in an airtight container in the refrigerator. It stays fresh for up to 2 days, and reheating is a breeze.
    • Freezer-Friendly: Yes, you can freeze poqui! Portion it into freezer-safe containers, and it can last for up to a month. Just thaw and reheat for a quick, satisfying meal.
    • Counter Consideration: While the dish can sit on the counter briefly, it's best to refrigerate promptly to maintain freshness and flavor.

    Top Tips

    • Make sure to grill the eggplant until the skin is charred and the flesh is soft. This will give the dish a delicious smoky flavor.
    • Choose juicy, flavorful tomatoes for the best results. The sweetness and acidity of the tomatoes help balance the richness of the eggs and eggplant.
    filipino poqui poqui served on a  ceramic bowl

    Ingredients

    Listed below are all the ingredients you will need:

    • eggplant
    • olive oil
    • whole white onions
    • chopped tomatoes
    • eggs
    • salt
    • ground white pepper
    list of ingredients of Poqui Poqui

    Instructions

    Firstly, grill the eggplant over gas stove flames until the skins are charred. Once done, remove it from the heat and allow it to cool.

    Subsequently, peel off the charred skin from the cooled eggplant, chop or mash the flesh, and transfer it to a bowl:

    grilled eggplant then peeled and mashed

    Next, heat oil in a skillet over medium heat. Consequently, sauté sweet onions, chopped juicy tomatoes, and grilled eggplant for 2 minutes:

    sautéed sweet onions, tomatoes, and eggplant

    Following that, add beaten eggs to the mixture and ensure thorough mixing.

    Cook for an additional 4 minutes, or until the eggs are cooked through. Season with salt and ground white pepper:

    added eggs and spices to the mixture

    Thoroughly mix and transfer the delicious concoction to a serving plate.

    Finally, serve immediately and enjoy the flavors of Poqui Poqui!

    quick and easy poqui poqui dish served on a bowl

    Frequently Asked Questions

    Why is it called Poqui Poqui?

    It is thought that the name comes from the Ilocano language, where it means to mix or scramble. This perfectly describes how the dish is made: by mixing different ingredients together.

    Is it necessary to peel the eggplant?

    Peeling the eggplant after grilling is essential for achieving a smoother texture. However, if you enjoy a bit of texture, feel free to leave some of the charred skin on.

    Can I make Poqui dish in advance for meal prep?

    Certainly! Follow the recipe up to the sautéing step, then refrigerate. When ready to serve, reheat and add the beaten eggs for a fresh and quick meal.

    tasty traditional filipino poqui poqui in a bowl
    5 from 3 votes
    Print Pin Recipe

    Best Poqui Poqui

    Enjoy the quick cooking magic of Poqui Poqui! In just 16 minutes, grilled eggplant, sweet onions, and tomatoes dance with beaten eggs to make a delicious food you would want to try!
    Prep Time6 minutes mins
    Cook Time10 minutes mins
    Total Time16 minutes mins
    Course: Appetizers
    Cuisine: Filipino
    Servings: 4 servings
    Calories: 118kcal
    Prevent your screen from going dark

    Ingredients

    • 1 large eggplant
    • 2 tablespoons olive oil
    • ¼ cup sweet onions thinly sliced
    • ½ cup chopped tomatoes
    • 3 large eggs beaten
    • ½ teaspoon salt
    • ¼ teaspoon ground white pepper

    Instructions

    • Grill the eggplant over the gas stove until the skins are charred.
    • Remove from the heat and let it cool.
    • Once the grilled eggplant has cooled down, peel off the charred skin, chop the eggplant meat, transfer a bowl.
    • Add the oil in a heated skillet over medium heat.
    • Saute sweet onions, chopped tomatoes, and grilled eggplant for 2 minutes.
    • Add in beaten eggs and mix well.
    • Cook for another 4 minutes or until the egg is cooked through.
    • Season with salt and ground white pepper.
    • Mix well and transfer to a serving plate.
    • Serve immediately.
    Leave a Comment
    Serving: 1gCalories: 118kcalCarbohydrates: 2gProtein: 4gFat: 10gSaturated Fat: 2gPolyunsaturated Fat: 1gMonounsaturated Fat: 6gTrans Fat: 0.01gCholesterol: 123mgSodium: 381mgPotassium: 114mgFiber: 0.4gSugar: 1gVitamin A: 213IUVitamin C: 3mgCalcium: 30mgIron: 1mg

    Watch The Recipe Video!

    QR Code
    Did you make this recipe?Share it on instagram or tag @simplybakings or #simplybakings!

    Appetizers, Breakfast & Brunch, Side Dishes, Vegetarian Filipino Recipes

    Vegan Marinated Bangus

    Jan 25, 2024 · 3 Comments

    Marinated Bangus on a black round plate

    Hashtag #PanlasangPinoy! No need to look any further. Here’s a quick and easy way to treat your taste buds. The Marinated Bangus recipe combines marinated tofu, a crispy strip of nori, and a tasty mix of spices. It’s all done in the simplest way!

    Exploring additional healthy Filipino recipes? Sample my Best Ever Tofu Adobo Rice, Vegan Bistek, and Vegan Pancit Canton.

    Marinated Bangus on a black round plate
    [feast_advanced_jump_to]

    What is Marinated Bangus?

    Marinated Bangus is a Filipino dish made with milkfish. It’s soaked in a flavorful vinegar-based marinade. The fish is often seasoned with garlic, black pepper, and sometimes chilies. These spices add a little heat. It’s a classic Filipino recipe. It’s also a staple in many homes. The result is a savory, tangy fish. It’s usually fried until crispy.

    History of Marinated Bangus

    Marinated Bangus likely started in coastal Filipino towns. These areas commonly farm milkfish or bangus. Locals began marinating fish in vinegar and spices. This helped preserve the fish before refrigerators existed. The dish became popular because it was easy to make. It was full of flavor and also budget-friendly. Over time, it spread across the Philippines. It became a well-loved and familiar dish.

    When is this Dish Typically Enjoyed?

    Marinated Bangus is usually eaten as a regular meal. People enjoy it for breakfast, lunch, or dinner. It’s not just for special occasions. It's especially common in everyday breakfasts with garlic rice and eggs. It’s not tied to any holiday. But many eat it during Holy Week when people avoid meat. It’s a comforting dish that shows up year-round!

    Health Benefits of Bangus (Milkfish)

    • Rich in Omega-3 fatty acids for heart health
    • High protein content supports muscle development
    • Essential nutrients like Vitamin B12 for energy
    • Selenium boosts immune function
    • Low in saturated fat, promoting overall cardiovascular health
    Marinated Bangus served on a dish

    Substitutions

    • Firm tofu – Use tempeh or banana blossom for a different vegan fish texture.
    • Nori – Swap with soaked kombu or seaweed flakes for a similar flavor.
    • Canned shiitake mushrooms – Use rehydrated dried shiitake; soak in hot water for 15 minutes.
    • Black rice vinegar – Use cane vinegar or apple cider vinegar for a tangy profile.
    • Cornstarch – Use rice flour or arrowroot powder for crispiness.

    Recipe Variations

    • Baked version – Bake marinated tofu at 400°F (200°C) for 25–30 minutes, flipping halfway.
    • Spicy bangus – Add more chilies or a dash of chili oil to the marinade.
    • Bangus rice bowl – Serve over garlic fried rice with pickled veggies and a lemon wedge.
    • Soy-free version – Use jackfruit or eggplant as the base and a tamari-free marinade.

    Storage

    • In the Fridge: Store leftovers in an airtight container. It stays fresh for up to 3 days.
    • In the Freezer: You can freeze it, but tofu texture may change slightly. Reheat in an oven or air fryer for best results.
    • On the Counter: It’s best eaten right after frying. That way, it stays crispy. Refrigerate leftovers quickly.

    Ingredients

    Listed below are all the ingredients you will need:

    • firm tofu
    • sheets of nori
    • canned shiitake mushrooms
    • water
    • black rice vinegar
    • ground black pepper
    • salt
    • garlic cloves
    • chopped chilies
    • cornstarch
    • vegetable oil

    See recipe card for quantities.

    All ingredients for Marinated Bangus in separate bowls

    Instructions

    To begin, place one sheet of nori, shiitake mushrooms, and water into a high-speed blender. Subsequently, blend the ingredients for 7 seconds.

    Following the blending process, transfer the mixture into a mixing bowl. Then, add black rice vinegar, salt, minced cloves of garlic, ground black pepper, and chopped chilies. Set this flavorful liquid blend aside for later use.

    Blended nori, shiitake mushrooms, and water mixture with spices

    Now, cut the block of tofu into four slices. Using chopsticks, carefully cut the tofu slices horizontally, creating a pocket for the marinade.

    cut tofu slices on a green chopping board

    Once the tofu is prepared, place all the slices in a tray together with the vinegar and mushroom mixture. Allow them to marinate for a minimum of 2 hours or, for a more intense flavor, overnight.

    Meanwhile, cut the remaining nori sheet into strips resembling a bangus belly.

    tofu slices on vinegar and mushroom mixture, and cut nori sheets

    Position these nori strips on one side of each tofu slice.

    Are you ready for the next step? Dredge the tofu slices in the cornstarch, ensuring an even coating.

    dredged tofu slices into cornstarch

    In a hot oil-filled pan, fry the tofu slices until they achieve a golden, crispy exterior.

    fried tofu slices with nori sheet in a pan

    Finally, serve your Marinated Bangus immediately for a delightful dining experience!

    Tasty Marinated Bangus with calamansi slices

    Hint: Use chopsticks as a guide when slicing tofu to avoid cutting through completely - it helps keep the bangus look and texture.

    ⭐ Top Tip

    Let the tofu marinate as long as possible to absorb all the deep umami flavors. Overnight is best. When frying, make sure the oil is hot enough to crisp the outside without overcooking the center. And don't skip the nori! It adds that signature “seafood” aroma and taste.

    FAQ

    What does milkfish taste like?

    Milkfish has a distinct, mild flavor with a slightly sweet undertone, making it versatile for various culinary preparations.

    How long can you leave fish out to thaw?

    It is not recommended to leave fish out to thaw at room temperature. Instead, thaw it in the refrigerator or under cold running water for optimal safety.

    Can I fry bangus in air fryer?

    Yes, you can fry bangus in an air fryer for a healthier alternative, ensuring a crispy exterior while reducing oil usage.

    More Recipes

    Want to try other fish and vegan recipes? Check down here:

    • Vegan Fish Balls
    • Vegan Siopao
    • Sweet & Sour Fish
    • No Bake Vegan Chocolate Cake
    fried vegetarian bangus served with rice and hot sauce
    5 from 2 votes
    Print Pin Recipe

    Vegan Marinated Bangus

    You are in for a flavor explosion with the umami-infused tofu, a perfect harmony of crispy exterior and tender interior - Marinated Bangus recipe! Plus, it's packed with protein and nutritious shiitake mushrooms. Try it today!
    Prep Time10 minutes mins
    Cook Time15 minutes mins
    Marinate Time2 hours hrs
    Total Time2 hours hrs 25 minutes mins
    Course: Main Course
    Cuisine: Filipino
    Servings: 4 servings
    Calories: 294kcal
    Author: Lainey
    Prevent your screen from going dark

    Ingredients

    • 16 oz Firm tofu
    • 2 sheets Nori seaweed, divided
    • ½ cup Canned shiitake mushrooms drained
    • ¼ cup Water
    • 1 cup Black rice vinegar
    • ¼ teaspoon Ground black pepper
    • 1 ¼ teaspoons Salt
    • 8 cloves Garlic minced
    • 1 tablespoon Chopped chilies
    • ¼ cup Cornstarch
    • ½ cup Vegetable oil

    Instructions

    Make the Marinade:

    • In a high-speed blender, blend 1 sheet of nori, drained shiitake mushrooms, and water for about 7 seconds.
    • Transfer the mixture to a mixing bowl. Add black rice vinegar, salt, minced garlic, ground black pepper, and chopped chilies. Stir and set aside.

    Prepare the Tofu:

    • Cut the tofu block into 4 thick slices.
    • Slice each tofu piece horizontally using chopsticks as a guide to prevent cutting all the way through.
    • Place all tofu slices in a tray and pour over the marinade. Let sit for at least 2 hours or overnight in the fridge.

    Assemble and Fry:

    • Cut the remaining nori sheet into thin strips to resemble bangus belly skin. Place one strip on each marinated tofu slice.
    • Dredge each tofu slice in cornstarch until evenly coated.
    • Heat oil in a skillet over medium heat. Fry tofu slices until golden and crispy, about 3–4 minutes per side.

    Serve:

    • Serve hot with rice, suka (vinegar dipping sauce), or steamed vegetables.
    Leave a Comment
    Serving: 1gCalories: 294kcalCarbohydrates: 10gProtein: 1gFat: 27gSaturated Fat: 4gPolyunsaturated Fat: 16gMonounsaturated Fat: 6gTrans Fat: 0.2gSodium: 731mgPotassium: 44mgFiber: 0.3gSugar: 0.3gVitamin A: 105IUVitamin C: 8mgCalcium: 18mgIron: 0.2mg

    Watch The Recipe Video!
    QR Code
    Did you make this recipe?Share it on instagram or tag @simplybakings or #simplybakings!

    Storytelling Time!

    Instead of using the usual fish-based marinade, I built this vegan dish around firm tofu, which gives each bite a hearty texture. I tried to recreate the umami-rich flavor profile of the original bangus sauce by adding a mix of nori and shiitake mushrooms to the dish.

    And let me tell you, it's so good. The tofu soaks up the flavors, making a dish that's tasty and filling all by itself. If you want a plant-based dish that doesn't skimp on taste or tradition, try this Vegetarian Marinated Bangus and see for yourself how delicious it is!

    Main Entree, Vegetarian Filipino Recipes

    Bibingka Cornbread

    Jan 22, 2024 · Leave a Comment

    Filipino cornmeal bibingka topped with torched sugar

    Wake up in the warmth of Caramelized Corn Bibingka, a sweet treat that mixes caramelized sugar that goes well with the rich coconut and cream-style corn. Perfect for people who love different tastes and want to try food from the Philippines!

    Want more Filipino comfort food recipes? Test out my Putong Bigas (Steamed Rice Cake), Ube Buchi, Hot Cakes, and Vegan Binignit.

    tasty slice of cornmeal bibingka caramelized served on a plate
    [feast_advanced_jump_to]

    What is Caramelized Corn Bibingka?

    In Filipino culture, bibingka is a traditional dish that has a long history that dates back to the holidays, especially Christmas. In a clay pot, families would gather around and mix rice flour, sugar, oil, a teaspoon of salt, and the fragrant smell of coconut milk.

    I modernized this recipe by adding cornmeal instead of only rice flour. I then used a cake pan instead of a clay pot to simplify preparation. It's delicious—the caramelization on top adds crunch to the creamy middle. It's no surprise that this dish has endured the test of time. Try it!

    baked bibingka using cornmeal flour in a baking bowl

    How to Make Corn Bibingka

    Listed below are all the ingredients you will need:

    • eggs
    • egg yolk
    • brown sugar
    • rice flour
    • yellow cornmeal
    • salt
    • baking powder
    • baking soda
    • coconut milk
    • cream-style corn
    • melted butter
    • salted egg, sliced
    • white sugar
    ingredients for caramelized corn bibingka

    Start by preheating your oven to 350 degrees Fahrenheit and greasing a baking pan. Meanwhile, in a mixing bowl, whisk together 3 eggs and 1 egg yolk with brown sugar until smooth.

    Next, add rice flour, yellow cornmeal, salt, baking powder, and baking soda into the egg mixture. Ensure there are no lumps by mixing thoroughly:

    eggs, sugar, flour, cornmeal, salt, and leaveners mixed in a bowl.

    Following that, pour in coconut milk, creamed corn, and melted butter. Blend until you achieve a smooth batter.

    Pour the batter mixture into the prepared baking pan and bake in the preheated oven for 35 minutes:

    added coconut milk, creamed corn, and melted butter into egg mixture

    Once done, sprinkle the top with white sugar. To achieve a golden, crispy layer, use a blowtorch for caramelization before serving:

    sprinkled white sugar on baked bibingka then blowtorched

    Pair your caramelized cornmeal bibingka with a hot cup of coffee or grated cheese. The bibingka's unique tastes go well with these combinations. Enjoy!

    delicious slice of caramelized bibingka

    Storage

    • On the Counter: Store any leftovers in an airtight container at room temperature for up to two days.
    • In the Fridge: For an extended shelf life, refrigerate the cornbread bibingka in an airtight container for a few additional days.
    • In the Freezer: This Filipino rice cake can be frozen for longer storage. Ensure it's well-wrapped to maintain freshness. To thaw, transfer it to the fridge overnight.

    Substituions

    • Cream-Style Corn: If short on time, opt for store-bought cream-style corn for a quick and convenient substitute.
    • Coconut Milk: Regular milk can be used as a substitute if you prefer a milder flavor.
    • Gluten-Free Option: For a gluten-free version, swap the rice flour with a gluten-free flour blend.

    Pro Tip

    • Add a touch of vanilla extract to enhance the overall taste.
    • Do not use any other corn except for the cream style version. This is what MAKES the recipe.

    Frequently Asked Questions

    What is bibingka made of?

    Slightly sour galapong (ground fermented sticky rice), coconut milk, water, and sugar.

    Why is it jggly in the middle?

    Cornbread being jiggly in the middle might indicate undercooking; ensure it bakes for the recommended time until a toothpick comes out clean from the center.

    Do I need a blowtorch for caramelization?

    A blowtorch creates the signature crispy top, but if you don't have one, you can use your oven's broiler for a similar effect.

    tasty caramelized cornmeal filipino bibingka
    5 from 1 vote
    Print Pin Recipe

    Bibingka Cornbread

    This Caramelized Corn Bibingka is a Filipino delight blending coconut, cream-style corn, and a crispy blowtorched sugar top. Try this unique, gluten-free treat in just 45 minutes!
    Prep Time10 minutes mins
    Cook Time35 minutes mins
    Total Time45 minutes mins
    Course: Desserts, Snacks
    Cuisine: American, Filipino
    Servings: 8
    Calories: 539kcal
    Prevent your screen from going dark

    Ingredients

    • 3 eggs + 1 egg yolk
    • 1 cup brown sugar
    • 1½ cups rice flour
    • ¾ cup yellow cornmeal
    • ¼ teaspoon salt
    • 2 teaspoons baking powder
    • 1 teaspoon baking soda
    • 2 cups coconut milk
    • 2 cups cream-style corn
    • ½ cup melted butter
    • 1 salted egg sliced
    • 2 tablespoons white sugar

    Instructions

    • Preheat the oven to 350 degrees Fahrenheit and grease a baking pan.
    • Meanwhile, cream the eggs and the brown sugar in a bowl.
    • Add the dry ingredients and start to mix.
    • Followed by the wet ingredients and mix until no lumps are visible.
    • Pour the mixture into the prepared baking pan.
    • Bake in the oven for 35 minutes.
    • Once done, remove and sprinkle with white sugar on top.
    • Using a blowtorch, toast the top of the bibingka until the sugar have been caramelized before serving.
    Leave a Comment
    Serving: 1gCalories: 539kcalCarbohydrates: 77gProtein: 6gFat: 25gSaturated Fat: 18gPolyunsaturated Fat: 1gMonounsaturated Fat: 4gTrans Fat: 0.5gCholesterol: 31mgSodium: 686mgPotassium: 321mgFiber: 3gSugar: 29gVitamin A: 402IUVitamin C: 3mgCalcium: 101mgIron: 3mg

    Watch The Recipe Video!
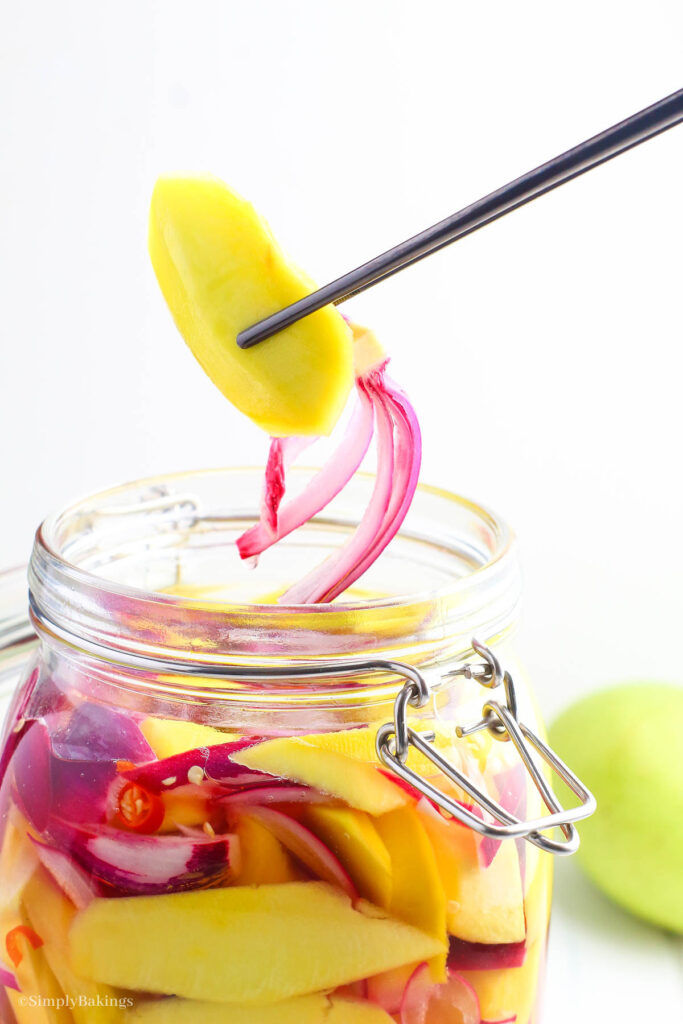
    QR Code
    Did you make this recipe?Share it on instagram or tag @simplybakings or #simplybakings!

    Christmas Desserts, Desserts, Filipino Desserts, Vegetarian Filipino Recipes

    Quick & Easy Guava Danish

    Dec 15, 2023 · 3 Comments

    a stack of sweet and delicious guava danish on a white surface

    If you're looking for a dessert that's quick and easy to make, then you've come to the right place! This Quick & Easy Guava Danish recipe is the perfect combination of flaky puff pastry, creamy no-bake cheesecake, and sweet guava fruit preserves. Try and enjoy!

    Hungry for more fruity treats? Create my Vegan Berry Cheesecake, 4 Ingredient Fruit Popsicles, and Mixed Berry Cobbler.

    delicious cream cheese danish with guava filling served on a plate
    [feast_advanced_jump_to]

    What is Guava Danish?

    Guava Danish is one of the delicious fruit cream cheese pastries that is often enjoyed as a breakfast, dessert, or snack item. The dough is typically made with butter, flour, and yeast, which gives it a light and flaky texture.

    The filling is made with Cuban guava jam or paste, which is a thick and sweet fruit spread that is commonly used in Cuban pastries or Latin American cuisines. The guava filling is usually mixed with cream cheese or sweetened condensed milk to balance out the tartness of the guava.

    Some variations of guava cream cheese danish may also include other ingredients such as cinnamon, nuts, or powdered sugar for added flavor and texture.

    Guava is a tropical fruit that gives the recipe a bright, sweet flavor. The rich, no-bake cheesecake filling ties everything together, turning these different parts into a tasty treat that easily combines the best of both worlds.

    Health Benefits of Guava

    • Low in calories and fat, making them a weight-friendly choice.
    • The vitamins and antioxidants in guavas enhance skin and hair health.
    • Support heart health by lowering blood pressure and bad cholesterol levels.
    • Provide a high dose of vitamin C, promoting immune health and skin vitality.
    array of tasty guava cheese pastry

    Substitutions

    • If you can't find no-bake cheesecake, you can use cream cheese mixed with a bit of sugar and vanilla extract as a substitute.
    • Feel free to experiment with different fruit preserves if you want to customize the flavor. Apricot, raspberry, or strawberry preserves are great alternatives to guava.

    Storage

    • In the Fridge: Store leftover Guava Danish in an airtight container in the fridge for up to 3–4 days. Reheat it in the oven at a low temperature to maintain its crispiness.
    • In the Freezer: Before brushing with egg wash, you can freeze unbaked pastries. Wrap them tightly in plastic wrap and place them in an airtight container. They can be stored in the freezer for up to 2–3 months. Bake frozen, adding a few extra minutes to the baking time.
    • On the Counter: It's best to enjoy these pastries fresh on the day of baking for the crispiest texture and best flavor.

    Top Tips

    • When rolling out the puff pastry sheet, make sure to do it on a lightly floured surface to prevent sticking.
    • For a perfectly golden crust, consider applying an egg wash or sprinkling turbinado sugar (cane sugar) onto your pastries before baking. This will give them a beautiful finish.
    bitten danish pastry made of guava cheesecake

    Ingredients

    Listed below are all the ingredients you will need:

    • puff pastry dough
    • no bake cheesecake
    • guava fruit preserves
    list of ingredients of guava creamcheese danish

    Instructions

    Begin by carefully unrolling the folds of the puff pastry dough on a work surface. This delicate step sets the stage for your cheesy masterpiece.

    Next, precision is key. Using a sharp knife or pizza cutter, cut the dough horizontally into thirds and then vertically into thirds, creating neat squares that will cradle the cheesy goodness:

    cut puff pastry dough into horizontal and vertical thirds

    Score a square in the dough about ¼ inch from the outside. Be gentle; you don't want to cut all the way through.

    Use a fork to poke holes inside the scored area. This helps release steam and ensures your danish bakes up perfectly:

    scored square-shaped and poked holes for each pastry dough

    Now comes the indulgent part. Add a heaping spoonful or two of the no-bake cheesecake filling to the scored square on the parchment paper. Spread it evenly, making sure every bite is delightfully creamy:

    added cheese cake filling for each scored-square dough

    For an extra layer of flavor, consider adding fruit preserves (optional). Choose your favorite or mix and match for a playful twist:

    If you prefer a more golden crust, go for the optional egg wash. Brush it over your danish. Preheat your oven to the perfect temperature, and then bake your creations for 15 minutes or until golden brown at 375°F (190°C):

    baked dough with guava preserves until golden brown

    That's it. Enjoy this guava cream cheese pastry with a steaming cup of freshly brewed coffee or a refreshing glass of iced tea!

    delicious guava danish with cream cheese served on a plate

    Frequently Asked Questions

    What is the difference between guava paste and guava jelly?

    Yes, guava pastry should be refrigerated to keep it fresh. If left out, it can spoil quickly, especially in warm temperatures.

    Does guava pastry need to be refrigerated?

    Guava paste is thick and solid, almost like a fruit leather. Guava jelly is more like a spreadable, smooth jam.

    What does guava paste taste like?

    Guava paste has a sweet and intensely fruity flavor, with notes of tropical guava and a concentrated sweetness. Its texture is dense and firm, similar to a thick fruit jelly or fruit leather.

    cheese danish with guava filling
    5 from 2 votes
    Print Pin Recipe

    Quick & Easy Guava Danish

    Try making this quick and easy Guava Danish recipe in just 20 minutes. Imagine a buttery puff pastry embracing creamy no-bake cheesecake and sweet guava preserves—a delightful treat waiting for you to savor!
    Prep Time5 minutes mins
    Bake Time15 minutes mins
    Total Time20 minutes mins
    Course: Dessert, Snacks
    Cuisine: Dessert, Filipino
    Servings: 9 servings
    Calories: 360kcal
    Prevent your screen from going dark

    Equipment

    • 2 Parchment lined sheet pans
    • Knife or Pizza cutter

    Ingredients

    Base Ingredients:

    • 1 package puff pastry dough
    • 2 cups no-bake cheesecake filling
    • 1 cup guava fruit preserves optional

    Instructions

    Prepare the Pastry:

    • Carefully roll out the puff pastry dough on a lightly floured surface.
    • Cut the dough horizontally into thirds, then vertically into thirds, creating 9 equal squares.
    • Lightly score a smaller square about ¼ inch from the edges of each square. Be careful not to cut all the way through the dough.
    • Use a fork to poke holes inside the scored area of each square to prevent it from puffing up too much during baking.

    Assemble the Pastries:

    • Add a heaping spoonful or two of the no-bake cheesecake filling inside the scored square of each pastry.
    • Spread the filling evenly within the scored area.
    • If using, add a spoonful of guava fruit preserves on top of the cheesecake filling.

    Optional Steps:

    • If you prefer a more golden crust, brush the edges of the pastry with an egg wash.

    Bake the Pastries:

    • Preheat your oven to 375°F (190°C).
    • Place the assembled pastries on a baking sheet lined with parchment paper.
    • Bake for 15 minutes, or until the pastries are golden brown and puffed up.

    Serve:

    • Allow the pastries to cool slightly before serving. Enjoy warm or at room temperature.
    Leave a Comment

    Notes

    If you're wondering where to find no-bake cheesecake filling, you can conveniently locate it at Walmart or your local grocery store. Check it out here.
    Serving: 1gCalories: 360kcalCarbohydrates: 30gProtein: 4gFat: 24gSaturated Fat: 7gPolyunsaturated Fat: 3gMonounsaturated Fat: 12gCholesterol: 20mgSodium: 250mgPotassium: 33mgFiber: 1gSugar: 10gVitamin A: 1IUCalcium: 5mgIron: 1mg

    Watch The Recipe Video!
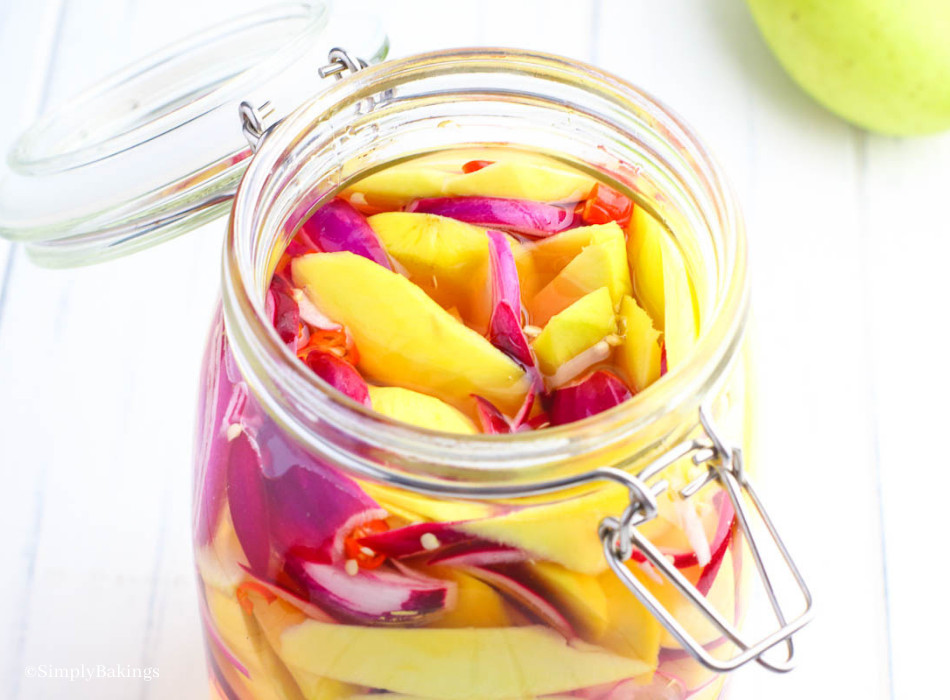
    QR Code
    Did you make this recipe?Share it on instagram or tag @simplybakings or #simplybakings!

    5 Ingredients or Less, Desserts, Filipino Desserts, Vegetarian Filipino Recipes

    Lemon White Chocolate Madeleines

    Dec 7, 2023 · Leave a Comment

    Lemon madeleine cakes covered with white chocolate set on a white plate

    Lemon White Chocolate Madeleines are a delightful fusion of zesty citrus and creamy white chocolate, encapsulated in a delicate, shell-shaped pastry. If you're a dessert enthusiast with a penchant for something a little extra, you've stumbled upon the perfect recipe.

    Seeking another chocolate-coated dessert? Whip up my Chocolate Pretzel Rods and Pretzel Pumpkins.

    fluffy and elegant lemon madeleines with melted white chocolate

    What is Lemon White Chocolate Madeleine?

    The origin of Lemon White Chocolate Madeleine can be traced back to the early 18th century in the Lorraine region of France. These cakes were originally made with plain butter, without the modern citrus and white chocolate twist.

    However, flavor connoisseurs and bakers have experimented with many combinations over time, eventually arriving at the delicious combination of lemon and white chocolate that we enjoy so much today.

    I remember eating Lemon White Chocolate Madeleines as a child and loving how the tart lemon and sweet white chocolate went together so well. It's no surprise that these madeleines have stood the test of time and become a treat that people all over the world love.

    So, if you want a delicious treat that is both elegant and delicious, give this recipe a try and see for yourself how good it is!

    Health Benefits of Lemons:

    • Rich in vitamin C, boosting immune health.
    • Aid in digestion and weight loss due to fiber content.
    • Support heart health by reducing cholesterol levels.
    • Contain antioxidants that combat free radicals.
    • Promote skin health with collagen-boosting properties.
    • Its alkalizing effect helps balance body pH levels.
    white chocolate dipped madeleines set on a baking rack

    Tips and Procedures:

    • Substitutions and Additions:
      • Liqueur: You can swap the lemon or orange liqueur with other liqueurs, like Grand Marnier, for a different flavor profile.
      • Citrus: Experiment with different citrus fruits for unique flavors, like lime or grapefruit zest.
      • Chocolate: If white chocolate isn't your favorite, try dark or milk chocolate for coating the cookies.

    • Preparation:
      • Ensure your eggs are at room temperature for better volume when beating.
      • Don't overmix the batter when incorporating the dry ingredients to keep the madeleines light and fluffy.
      • Use a non-stick madeleine mold or grease it thoroughly to prevent sticking.
      • Allow the batter mixture to rest for the recommended time to achieve the best texture.

    • Storage:
      • In the Fridge: Store Lemon White Chocolate Madeleines in an airtight container in the fridge for up to 2 days to maintain freshness.
      • In the Freezer: Freeze in an airtight container, separating layers with parchment paper, for up to one month. Thaw at room temperature when ready to enjoy.
      • On the Counter: Best consumed on the same day for the freshest taste.
    White chocolate lemon Madeleines on a plate garnished with lemon

    How to Make Lemon Madeleines:

    Listed below are all the ingredients you will need:

    • all-purpose flour
    • baking powder
    • salt
    • large eggs
    • egg yolk
    • granulated sugar
    • lemon zest
    • lemon juice
    • unsalted butter
    • white chocolate
    • coconut oil
    • lemon or orange liqueur (optional)
    list of ingredients of lemon white chocolate madeleines

    In a small bowl, combine the flour, salt, and baking powder. Stir to break up any clumps. This ensures the even distribution of these dry ingredients in your batter.

    In a large bowl, whisk the eggs, egg yolk, and sugar on medium-high speed with a stand mixer until the mixture turns very pale yellow, forms ribbons, and more than doubles in volume. This step is crucial for creating the characteristic texture of madeleines:

    beaten eggs and sugar in a bowl

    Gently stir in the lemon zest and lemon juice to infuse that delightful citrus flavor into your batter.

    Fold in the flour mixture in four additions, incorporating it gently and breaking up any pockets of flour without deflating the air too much. This gentle folding ensures your madeleines are light and airy:

    lemon zest added to the mixture then dry ingredients

    Stir in the melted butter until fully incorporated. The butter adds richness and moisture to your madeleines:

    melted butter stirred into the batter

    Cover the batter and allow it to rest in the fridge for at least 30 minutes (up to 2 hours). This resting period enhances the flavor and texture of your madeleines:

    fully mixed butter and flour mixture

    While the batter is resting, preheat your oven to 375°F (190°C). Brush melted butter into a madeleine pan (or mini muffin pan), dust with flour, and pour out any excess.

    When the batter is ready, scoop a heaping tablespoon (15 ml) of batter into each well of the pan. There's no need to level it out; it will do so as it bakes. Bake for 9–12 minutes until golden brown at the edges and they bounce back in the center when lightly touched:

    batter put into the madeleine pan then baked until golden brown

    Allow the madeleines to cool for 3-5 minutes in the pan. Use a paring knife to work around the edges, and pop the cakes out to cool completely. If you have more batter and only one pan, clean the wells out and recoat with butter and flour to bake a second batch:

    cooled lemon madeleines on a wire rack

    Break the white chocolate chips or bars into small pieces and combine them in a microwave-safe bowl with the coconut oil. Microwave for 30–40 seconds until starting to melt, then 15-second bursts until mostly melted. Stir to finish melting and create a smooth chocolate.

    If using liqueur, add it now, stirring gently:

    melted white chocolate

    Holding the madeleines at an angle, dip them halfway into the melted chocolate, shake off the excess, and set them on a cooling rack to firm up. Alternatively, you can just drizzle the chocolate over the cakes in a zigzag pattern:

    dipped lemon madeleines into melted chocolate

    These madeleines are at their best when eaten the same day. However, you can store them in an airtight container in the fridge for up to 2 days. Enjoy!

    tasty white chocolate dipped madeleines with lemon

    Frequently Asked Questions:

    Why are my madeleines dry?

    Dry madeleines can result from overbaking or overmixing the batter, so ensure you follow the recipe's suggested baking time and avoid overworking the batter to maintain their moistness.

    What is so special about madeleines?

    Madeleines are special due to their distinctive seashell shape and the delightful combination of a buttery, sponge-like interior with a slightly crispy exterior, making them a unique and elegant treat.

    Why does a madeleine batter have to rest?

    Madeleine batter should rest to allow the flour to fully hydrate and absorb moisture, resulting in a softer and more tender texture in the finished cakes.

    chocolate dipped lemon madeleines in white square plate
    5 from 1 vote
    Print Pin Recipe

    Lemon White Chocolate Madeleines

    Enjoy a wonderful mix of tangy lemon and smooth white chocolate in these madeleines. A classy sweet or nibble for any celebration. Incredible flavor with minimal effort required to prepare. Stay on the ball!
    Prep Time35 minutes mins
    Cook Time10 minutes mins
    Rest Time30 minutes mins
    Total Time1 hour hr 15 minutes mins
    Course: Dessert, Snack
    Cuisine: French
    Servings: 20 pieces
    Calories: 90kcal
    Author: Lainey
    Prevent your screen from going dark

    Ingredients

    Madeleines:

    • 1 cup + 2 tablespoons (135g) all-purpose flour
    • ½ teaspoon (2g) baking powder
    • ⅛ teaspoon (1g) salt
    • 2 large eggs
    • 1 egg yolk
    • ½ cup + 2 tablespoons (125g) granulated sugar
    • 1½ tablespoons (5g) lemon zest
    • 1 tablespoon (15ml) lemon juice
    • ½ cup (115g) unsalted butter melted and cooled (plus more for pan)

    White Chocolate Coating:

    • 4 ounces (115g) white chocolate
    • 1 tablespoon (15ml) coconut oil
    • 2 teaspoons (10ml) lemon or orange liqueur* optional

    Instructions

    • In a small bowl, combine the flour, baking powder, and salt. Stir to break up any clumps.
    • In a large bowl, beat the eggs, egg yolk, and sugar on medium-high speed until very pale yellow, forming ribbons, and more than doubled in volume.
    • Gently stir in the lemon zest and lemon juice.
    • Fold in the flour mix in four additions, incorporating gently and breaking up any pockets of flour without deflating the air too much.
    • Stir in the melted butter until fully incorporated.
    • Cover and allow it to rest in the fridge for at least 30 minutes (up to 2 hours).
    • While the batter is resting, preheat the oven to 375°F/190 C. Brush melted butter into a madeleine pan (or mini muffin pan). Dust with flour and pour out any excess.
    • When ready to bake, scoop a heaping tablespoon (15 ml) of batter into each well. No need to level it out; it will do so as it bakes.
    • Bake for 9–12 minutes until golden brown at the edges and bounces back in the center when lightly touched.
    • Allow to cool for 3-5 minutes in a pan. Use a paring knife to work around the edges, and pop the cakes out to cool completely. If you still have more batter and only one pan, clean the wells out and recoat with butter and flour to bake a second batch.
    • Once the cakes are completely cool, prepare a white chocolate coat.
    • Break the white chocolate into small pieces and combine them in a microwave-safe bowl with the coconut oil. Microwave for 30–40 seconds until starting to melt, then 15-second bursts until mostly melted. Stir to finish melting and create a smooth chocolate.**
    • If using liqueur, add it now, stirring gently.
    • Holding the madeleines at an angle, dip them half in the melted chocolate, shake off the excess, and set them on a cooling rack to firm up.
    • Alternatively, you can just drizzle the chocolate over the cakes in a zigzag.
    • It is best eaten the same day but can be stored in an airtight container in the fridge for 2 days.
    Leave a Comment

    Notes

    *If adding the liqueur, add another 1-2 tsp/5-10 ml of coconut oil.
    **Alternatively, you can melt them in the top of a double boiler (or in a heat-safe bowl over a pan of simmering water). Do not allow the water to touch the bottom of the bowl.
    Calories: 90kcalCarbohydrates: 8gProtein: 1gFat: 60gSaturated Fat: 4gPolyunsaturated Fat: 0.1gMonounsaturated Fat: 0.3gCholesterol: 30mgSodium: 19mgPotassium: 7mgSugar: 6gVitamin A: 37IUCalcium: 4mgIron: 0.1mg

    Watch The Recipe Video!
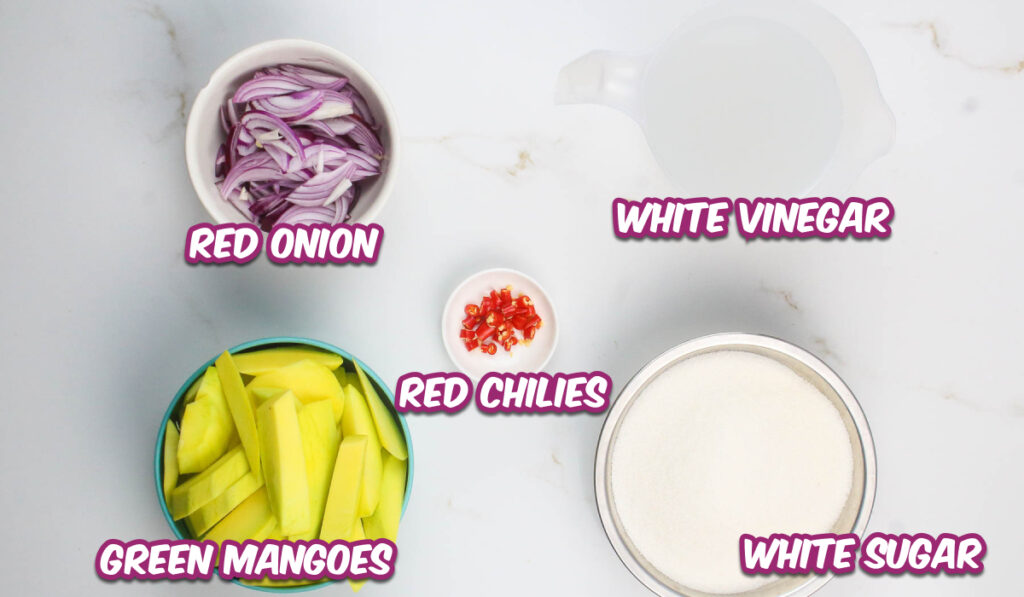
    QR Code
    Did you make this recipe?Share it on instagram or tag @simplybakings or #simplybakings!

    Desserts

    Broccoli and Tofu in Spicy Almond Sauce

    Dec 3, 2023 · Leave a Comment

    a bowl of broccoli and tofu in spicy almond sauce

    Elevate your dinner nights with a symphony of taste in our Broccoli and Tofu in Spicy Almond Sauce. Imagine the satisfying crunch of broccoli, the succulent tofu, and the zing of almond butter and lime juice coming together in a tantalizing dance of flavors.

    In search of more vegetable recipes? Sample my Pinakbet (Stir Fry Vegetables), Stir Fry Okra, or my Adobong Kangkong (Stir Fry Water Spinach).

    delicious and spicy broccoli and tofu dish

    What is a Broccoli and Tofu in Spicy Almond Sauce Recipe?

    This broccoli and tofu in spicy almond sauce recipe has a fascinating backstory that stems from the blending of multiple cuisines.

    This enticing meal combines the bold flavors of Western spices with the vivid colors and textures of Asian cuisine.

    It has undergone a delightful evolution from its humble beginnings in households to modern menus, and this transition is something to be savored.

    Tofu and broccoli have been commonly used in Asian cooking for their versatility and health benefits. A daring cook once decided to combine these ingredients and dress them in a delicious almond-based sauce. Check out this recipe and try it at the comfort of your own kitchen. Enjoy!

    Health Benefits of Broccoli:

    • Rich source of vitamins C and K.
    • High in dietary fiber for digestive health.
    • Packed with antioxidants that combat free radicals.
    • Supports the immune system with essential nutrients.
    • Contains compounds that may aid in cancer prevention.
    • Supports bone health due to its calcium and vitamin K content.
    • Low in calories and carbohydrates, suitable for weight management.
    • Contributes to heart health by promoting healthy cholesterol levels.
    yummy Almond Butter broccoli and Tofu scooped with a spoon

    Tips and Procedures:

    Substitutions:

    • Swap tofu for crispy tempeh or seitan to add a different texture.
    • Experiment with tamari soy sauce or teriyaki sauce as alternatives to oyster sauce.
    • Transform the almond butter into a peanut butter-based sauce for a nutty twist.
    • Elevate the heat factor by using spicy peanut sauce or chili garlic sauce.
    • Alternatively, cider vinegar or lemon juice can be used if lime juice is unavailable.

    Serving and Pairings:

    • Serve over a bed of rice or noodles for a satisfying meal.
    • Add bell peppers and steamed broccoli to amp up the veggie content.
    • Sprinkle with sesame seeds and minced scallions for extra flair.

    Storage:

    • In the Fridge: Keep leftovers of this tofu stir fry in an airtight container in the fridge for up to 3 days.
    • In the Freezer: Freeze the tofu stir fry without sauce for longer storage. Reheat and add freshly made sauce upon serving.
    • On the Counter: Allow the tofu stir fry to sit at room temperature for no more than 2 hours to maintain its quality and freshness.
    spicy broccoli and tofu with almond sauce in a white bowl

    How to Make Broccoli and Tofu in Spicy Almond Sauce:

    Listed below are all the ingredients you will need:

    Almond sauce:

    • water
    • almond butter 
    • lime juice
    • brown sugar 
    • paprika 
    • salt
    • cayenne pepper 
    • ginger

    Stir-fry Broccoli and Tofu:

    • vegetable oil 
    • onions
    • tofu 
    • broccoli florets 
    • carrots
    • oyster sauce 
    • chili flakes 
    • salt and pepper

    Combine half cup water, almond butter, lime juice, brown sugar, paprika, half a teaspoon salt, cayenne pepper, and grated ginger in a small bowl. Set aside.

    Add oil in a heated skillet:

    mixed spicy almond sauce ingredients in a small clear bowl with a stainless teaspoon then heated an oil in a skillet

    Sauté minced onions on medium-high heat for 1 minute.

    Add tofu cubes and continue sautéing for 3–4 minutes until golden:

    minced onions sautéed in a skillet

    Add broccoli florets, oyster sauce, carrots, and chili flakes. Cook for another minute. 

    Add in the almond sauce and reduce for 2 minutes:

    added the broccoli florets, oyster sauce, carrots, chili flakes, and almond sauce into the skillet

    Season with salt and pepper to taste. Enjoy!

    delicious tofu broccoli in a spicy almond butter sauce served  in a white bowl

    Frequently Asked Questions:

    Can broccoli tolerate frost?

    Broccoli can tolerate light frost, which can even enhance its flavor. However, prolonged exposure to severe frost can damage its texture and taste.

    Which tofu should I buy for this recipe?

    For this recipe, choose firm or extra firm tofu to ensure it holds its shape during cooking and absorbs the flavors of the dish.

    What to do when broccoli turns brown?

    If broccoli turns brown, it's likely overcooked. To prevent this, blanch it briefly and shock it in cold water after cooking, or store it in an airtight container in the refrigerator to maintain freshness.

    tasty Broccoli Tofu in Spicy Almond Sauce
    No ratings yet
    Print Pin Recipe

    Broccoli and Tofu in Spicy Almond Sauce

    Try making this Broccoli and Tofu in Spicy Almond Sauce for a quick and healthy dinner option. The crispy broccoli, finely chopped tofu, and rich sauce make a delicious meal in just 20 minutes!
    Prep Time10 minutes mins
    Cook Time10 minutes mins
    Total Time20 minutes mins
    Course: Main Course, Side Dish, Vegan
    Cuisine: Filipino
    Servings: 3
    Calories: 462kcal
    Author: Lainey
    Prevent your screen from going dark

    Ingredients

    Spicy Almond Sauce

    • ½ cup water
    • ⅓ cup almond butter
    • 1 tablespoon lime juice
    • 2 teaspoons brown sugar
    • ½ teaspoon paprika
    • ½ teaspoon salt
    • ¼ teaspoon cayenne pepper
    • ¼ teaspoon ginger grated

    Stir-Fry Broccoli and Tofu

    • 2 tablespoons vegetable oil
    • ½ ounce onions minced
    • 6 ounces tofu diced
    • 4 ounces broccoli florets drained
    • 1 ounce carrots julienned
    • 1 teaspoon oyster sauce
    • ¼ teaspoon chili flakes
    • salt and pepper to taste

    Instructions

    • Combine half a cup of water, almond butter, lime juice, brown sugar, paprika, half a teaspoon salt, cayenne pepper, and grated ginger in a small bowl. Set aside.
    • Add oil to a heated skillet.
    • Sauté minced onions on medium-high heat for 1 minute.
    • Add diced tofu and continue sautéing for 3–4 minutes until golden.
    • Add broccoli florets, carrots, oyster sauce, and chili flakes.
    • Cook for another minute.
    • Add in the almond sauce and reduce for 2 minutes.
    • Season with salt and pepper to taste.
    Leave a Comment
    Serving: 4servingsCalories: 462kcalCarbohydrates: 47gProtein: 18gFat: 25gSaturated Fat: 3gPolyunsaturated Fat: 9gMonounsaturated Fat: 11gTrans Fat: 0.1gSodium: 67mgPotassium: 269mgFiber: 7gSugar: 10gVitamin A: 1864IUVitamin C: 12mgCalcium: 208mgIron: 4mg
    QR Code
    Did you make this recipe?Share it on instagram or tag @simplybakings or #simplybakings!

    Main Entree, Side Dishes, Vegetables, Vegetarian Filipino Recipes

    Vegan Cinnamon Raisin Bread

    Nov 17, 2023 · Leave a Comment

    rich, moist vegan bread bursting with juicy raisins under a blanket of warm cinnamon flavor

    Get ready to devour our Vegan Cinnamon Raisin Bread! Imagine the cozy aroma of freshly baked bread infused with sweet raisins and a hint of cinnamon. This easy-to-follow bread recipe combines these delicious ingredients to create a heavenly treat that's perfect for breakfast or a tasty snack!

    Out for other vegan bread delights? Try my Malunggay Whole Wheat Bread, Banana Chocolate Muffins, or my healthy Berry Muffins.

    two slices of tasty vegan raisin bread served with coffee

    What is Vegan Cinnamon Raisin Bread?

    Dating back to ancient times, the combination of bread, raisins, and spices has been a cherished staple in many cultures worldwide. From the sweet cinnamon swirl loaves of medieval Europe to the spiced breads of the Middle East, this recipe pays homage to the rich history of bread-making and its enduring appeal.

    Instead of resorting to a traditional, non-vegan recipe loaded with dairy, I made this vegan version with creamy almond milk, a touch of coconut oil, and a dash of brown sugar. And let me tell you, it's so good that even non-vegans won't believe it's dairy-free.

    It's no wonder this recipe has stood the test of time, offering a comforting and flavorful treat for breakfast or snacking. So if you're looking for a guilt-free indulgence without compromising on taste, give this Cinnamon Raisin Bread a try and experience the deliciousness for yourself!

    Health Benefits of Raisins:

    • Rich in fiber, aids digestion
    • Natural source of energy, ideal for a quick snack
    • Packed with vitamins and minerals, including iron and potassium
    • Antioxidant properties may support overall health
    • May help regulate blood sugar levels
    sliced delicious raisin bread recipe with yeast served on a plate

    Tips and Procedures:

    Substitution:

    • Milk Alternative: Feel free to swap almond milk with any non-dairy milk you prefer, such as soy, oat, or coconut milk.
    • Flour Choices: Experiment with whole wheat flour for a heartier texture, or try a gluten-free flour blend for those with dietary restrictions.
    • Sweeteners: While dark brown sugar adds depth, you can use other sweeteners like maple syrup or agave nectar for a different flavor profile.

    Storage:

    • On the Counter: If you plan to devour it within a day or two, storing it on the counter, well-wrapped or in an airtight container, works perfectly. Keep it away from direct sunlight and heat.
    • In the Fridge: If you have leftovers, or if you want to extend the bread's shelf life for up to three days, refrigerate it in an airtight container or plastic wrap. Toast slices before serving for that fresh-out-of-the-oven feel.
    • In the Freezer: To preserve your bread for more extended periods, slice it, wrap each slice tightly in plastic or foil, and place them in a freezer bag. It can stay frozen for up to three months. Thaw and toast slices when you're ready to enjoy.
    one slice of  homemade raisin bread with aromatic cinnamon served with black coffee

    How to Make a Cinnamon Raisin Bread (Vegan):

    Listed below are all the ingredients you will need:

    Dough:

    • almond milk (or other non-dairy milk)
    • dark brown sugar
    • active dry yeast
    • all-purpose flour
    • coconut oil, melted
    • coarse salt
    • raisins

    Filling:

    • coconut oil, melted
    • dark brown sugar
    • ground cinnamon
    list of ingredients for raisin cinnamon loaf

    Begin by combining warm almond milk, dark brown sugar, and active dry yeast in a large mixing bowl. Allow it to sit until it becomes foamy, which should take around 10-15 minutes:

    warm almond milk, dark brown sugar, and active dry yeast combined in a large mixing bowl

    Add all-purpose flour, melted coconut oil, and coarse salt to the yeast mixture, stirring until you have a sticky dough:

    added all-purpose flour, melted coconut oil, and coarse salt to the yeast mixture then stirred

    Turn the dough out onto a floured surface and knead it for 4-5 minutes until it becomes smooth and holds together. If it's still too sticky, gradually incorporate more flour:

    turned dough out onto a floured surface then kneaded

    Next, spread out the raisins evenly in the dough, kneading it a few more times to ensure they are well distributed. Shape the dough into a ball and place it in an oiled bowl:

    raisins spread evenly in the dough then kneaded a few more times to ensure they are well distributed

    Cover the bowl with a damp kitchen towel or plastic wrap and let it rise until it has doubled in size. The rising time may vary depending on the room temperature, typically taking 45-75 minutes

    Grease a 9”x5”/22.5cm x 12.5cm loaf pan and whisk together melted coconut oil, packed dark brown sugar, and ground cinnamon for the filling.

    After the dough has doubled, transfer it to a clean surface and roll or stretch it into a large rectangle, ensuring one end is slightly smaller:

    risen raisin dough then stretched into a large rectangle

    Brush the dough's surface with melted coconut oil and sprinkle the cinnamon sugar mixture evenly over it.

    Roll the dough tightly, starting from the shortest edge, and tuck the edges underneath. Place the loaf seam side down in the greased pan:

    cinnamon sugar mixture sprinkled over the dough then rolled tightly

    Cover the pan and let the dough rise once more until it has doubled in size or reaches about 1”/2.5cm above the edge of the pan, typically in 45-60 minutes.

    During this final rise, preheat your oven to 350°F/175°C.

    Uncover the loaf and check the top for any large bubbles just below the surface. If you find any, use a knife to puncture them to prevent uneven swirls during baking. For a softer crust, brush the top with a bit more almond milk:

    risen dough to double size then brushed with milk

    Bake the cinnamon bread for 40-45 minutes until it turns deep golden brown and feels firm to the touch.

    Allow the bread to cool in the pan for at least 30 minutes before removing it and letting it cool completely on a wire rack:

    baked raisin with cinnamon loaf cooled on a wire rack

    For the best experience, enjoy the bread on the same day. If you refrigerate it, you can store it wrapped up for up to 3 days and toast it before serving!

    dense and light easy vegan cinnamon raisin loaf sliced and served on a plate

    Frequently Asked Questions:

    Is bread with raisins healthy?

    Bread with raisins can be a nutritious choice when enjoyed in moderation, providing fiber, vitamins, and minerals. Bread with raisins can be a nutritious choice when enjoyed in moderation, providing fiber, vitamins, and minerals.

    What is the effect of cinnamon in bread?

    Cinnamon in bread not only imparts a delightful flavor but may also offer health benefits, such as improving blood sugar control and providing antioxidants.

    Can I use a different type of non-dairy milk?

    Yes, you can substitute almond milk with other plant-based milk like soy milk, oat milk, or coconut milk.

    delicious vegan raisin cinnamon bread loaf sliced and served on a wood platter
    No ratings yet
    Print Pin Recipe

    Vegan Cinnamon Raisin Bread

    Indulge in the warm comfort of our Vegan Cinnamon Raisin Bread – a delightful, soy-free treat perfect for vegans and dessert lovers. Learn how to make this customizable, beginner-friendly recipe and enjoy it fresh or toasted for up to 3 days. Elevate your baking game today!
    Prep Time30 minutes mins
    Cook Time45 minutes mins
    Rest Time2 hours hrs
    Total Time3 hours hrs 15 minutes mins
    Course: Breakfast, Dessert, Snack, Soy-free, Vegan
    Cuisine: American
    Servings: 12 slices
    Calories: 200kcal
    Prevent your screen from going dark

    Ingredients

    Dough:

    • ¾ cup almond milk (or other non-dairy milk) warm
    • 2 tablespoons dark brown sugar
    • 2¼ teaspoons active dry yeast
    • 3 cups all-purpose flour
    • 2 tablespoons coconut oil melted
    • 1 teaspoon coarse salt
    • ¾ cup raisins

    Filling:

    • 1 tablespoon coconut oil melted
    • ½ cup dark brown sugar
    • 1 tablespoon ground cinnamon

    Instructions

    • In a large bowl, combine the almond milk with ¼ cup/60ml warm water and 2 tbsp./26g brown sugar. The whole mix should be warm – no hotter than 115°F/46 C. Sprinkle the active dry yeast on top and set aside for 10-15 minutes until foamy.
    • Add the flour, coconut oil, and salt. Stir to combine until everything comes together and a sticky dough forms.
    • Turn out on a lightly floured surface and knead for 4-5 minutes until just smooth and holding together (it will still be sticky but add more flour a little bit at a time if it still sticks more to your hands than each other).
    • Stretch out a bit and spread out the raisins. Knead 5-6 more times to evenly incorporate. Form into a ball and place into an oil-covered bowl.
    • Cover with a damp towel or plastic wrap and leave in a warm place to rise until doubled. The time to double will vary depending on the ambient temperature but is about 45-75 minutes.
    • Grease a 9” x 5”/22.5cm x 12.5cm loaf pan. Whisk the brown sugar and cinnamon together for the filling.
    • Turn out risen dough onto a clean surface. Stretch or roll into a large rectangle-ish. It is actually easier if one end is a little smaller.
    • Brush with 1 tbsp/15ml melted coconut oil. Sprinkle the cinnamon sugar mixture in an even layer over the dough.
    • Roll tightly starting at the shortest edge. Once it is all rolled up, tuck the edges underneath. Place seam side down in the greased loaf pan.
    • Cover and allow to rise until doubled again (or about 1”/2.5cm above the edge of the pan) for about 45-60 minutes.
    • During the final rise, preheat the oven to 350° F/175 C.
    • Uncover the loaf. Check the top with your fingers. If there’s a big bubble just below the surface, use a knife to puncture it or it will create a big bubble in the swirl when baking. If you want a softer crust, brush with a bit more almond milk before baking.
    • Bake for 40-45 minutes until deep golden brown and firm. Allow to cool in the pan for at least 30 minutes before removing from the pan and cooling completely.
    • Best served on the same day, but can be stored, wrapped up, in the fridge for up to 3 days. Toast before serving if refrigerated.
    Leave a Comment

    Notes

    Makes: 1 9”x5”/22.5cm x 12.5cm loaf – about 12 slices
    Calories: 200kcalCarbohydrates: 38gProtein: 4gFat: 4gSaturated Fat: 3gPolyunsaturated Fat: 0.3gMonounsaturated Fat: 0.4gSodium: 219mgPotassium: 82mgFiber: 2gSugar: 11gVitamin A: 2IUVitamin C: 0.2mgCalcium: 41mgIron: 2mg

    Watch The Recipe Video!
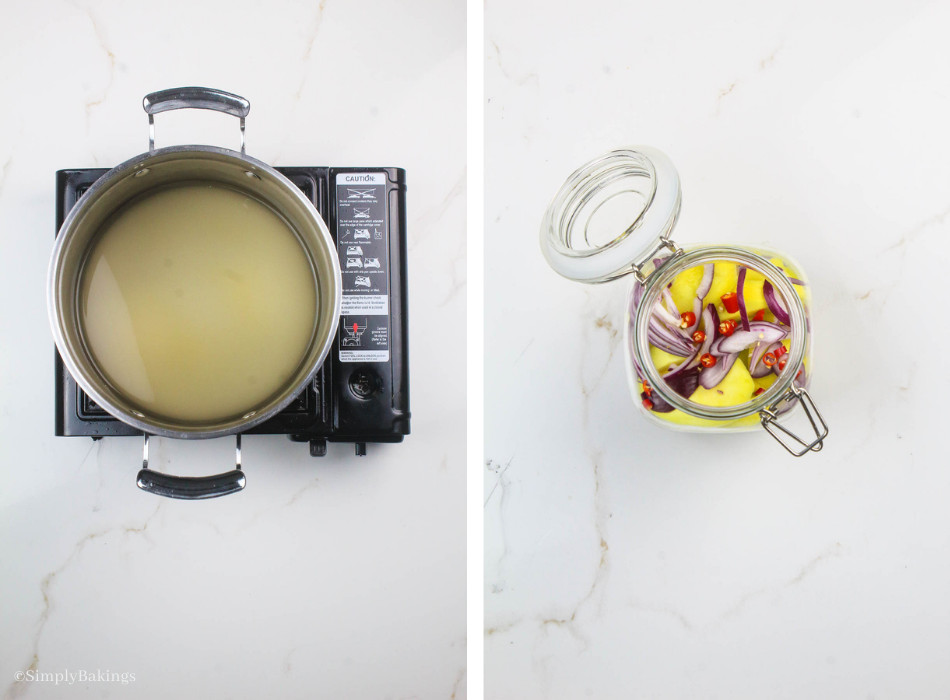
    QR Code
    Did you make this recipe?Share it on instagram or tag @simplybakings or #simplybakings!

    Bread, Breakfast & Brunch, Desserts, Vegan Baking

    Pinoy Hotcakes Recipe

    Nov 9, 2023 · 5 Comments

    a stack of delicious pinoy hotcakes on a plate

    Whether it's a leisurely Sunday brunch or a quick weekday treat, these Pinoy Hotcakes Recipe is made with flour, brown sugar, and a bit of vanilla are perfect for a tasty start to your day. Just mix, pour, and cook these fluffy pancakes in only 18 minutes.

    On the search for more Pinoy snack recipes? Try my Turon, Bibingka, or my oh-so-good Easy Suman Malagkit.

    filipino-style pancakes with orange juice on a table
    [feast_advanced_jump_to]

    What are Pinoy Hotcakes Recipe?

    Pinoy Hotcakes, also known as "hotcakes" or "pancakes," are a popular breakfast in the Philippines. They're fluffy and have a rich history in Filipino cuisine, influenced by Spanish colonization.

    These hotcakes use brown sugar, a touch of vanilla, and margarine, which gives them a sweet and rich flavor that Filipinos love.

    Read on for cooking tips and easy step-by-step instructions. Enjoy!

    Health Benefits of Pinoy Hot Cakes

    • Quick Energy: Hotcakes provide fast-release carbs to give you a morning energy boost.
    • Calcium Boost: Full-cream milk in the recipe supports strong bones and teeth.
    • Protein-Packed: Eggs add protein and essential vitamins for a balanced meal.
    • Gluten-Free Options: You can use different types of flour to make gluten-free hotcakes.
    • Nutritious Toppings: Adding fruits and nuts makes them even tastier and more nutritious
    filipino hot cakes stacked on a plate

    Ingredients

    Listed below are all the ingredients you will need:

    • all-purpose flour
    • brown sugar
    • baking powder
    • salt
    • full-cream milk
    • large eggs
    • vanilla
    • vegetable oil
    • softened margarine
    • granulated white sugar
    list of ingredients of filipino hotcake

    Instructions

    In a mixing bowl, combine the all-purpose flour, brown sugar, baking powder, and a pinch of salt. This forms the foundation of your hotcake batter.

    Pour the full-cream milk, beaten eggs, and vanilla extract into the flour mixture. Use an electric mixer to create a smooth batter. Set aside:

    mixed flour, sugar, baking powder, salt, milk, eggs, and vanilla

    Heat a nonstick pan over medium-low heat with a touch of vegetable oil. Scoop ⅓ cup of batter onto the pan and cook for about 2 minutes, until bubbles form on the surface.

    Gently flip the hotcake and cook for an additional minute. Transfer to a serving plate. Repeat with the remaining batter:

    hot cake mixture cooked in a skillet with oil

    As you go, spread softened margarine on each hotcake, followed by a sprinkle of granulated white sugar for a delectable touch of sweetness:

    filipino pancake with margarine spread and sprinkled white sugar

    Serve immediately and enjoy!

    stacks of hot cakes on plates in a well-lit room

    Substitutions

    • Sweeteners: Swap out the tbsp sugar for natural sweeteners like honey or maple syrup to give your hotcakes a different flavor.
    • Oil Choices: Instead of vegetable oil, try using coconut oil or tbsp melted margarine for a unique twist.
    • Egg-Free Option: If you want to make it vegan, replace the large egg with mashed bananas.
    • Milk Options: Use evaporated milk if you can’t find full-cream milk, or substitute with non-dairy milk if you have a dairy allergy.
    • Flour Choices: Almond flour, wheat flour, or chickpea flour can be used instead of all-purpose flour for gluten-free hotcakes.

    Variations

    • Filipino Pancake: Add a drop of yellow food color to the batter for a more authentic look of popular street food hotcakes.
    • Cheesy Twist: Mix in some cheese into the batter for a savory version of the Filipino pancake.
    pinoy pancakes stacked on a plate with a glass of orange juice

    Storage

    • Refrigeration: Store leftover hotcakes in an airtight container in the refrigerator for up to three days.
    • Freezing: Freeze cooked hotcakes in a single layer separated by parchment paper. Thaw and reheat in a toaster oven for a quick breakfast.
    • On-the-Go: Wrap individual hotcakes in parchment paper for a portable, mess-free breakfast option.

    Top Tips

    • Reheating: For the best texture, reheat hotcakes in a toaster oven instead of a microwave.
    • Clean-Up: Use a paper towel to wipe excess oil from the pan between batches to keep the hotcakes from getting too greasy.

    Simply Bakings Recommends

    Tap to view helpful kitchen picks

    Make your recipes easier and more enjoyable with tools and ingredients we personally love.

    • Shop pantry staples on Thrive Market
    • Keep food fresh with airtight containers (use code LAINEY5)
    • Upgrade your cookware for better results

    Disclosure: This box may contain affiliate links. If you purchase through them, Simply Bakings may earn a small commission at no extra cost to you.

    Frequently Asked Questions

    What can I use instead of milk for pancakes?

    You can use non-dairy milk like almond milk, soy milk, or coconut milk. You can also use water or evaporated milk if you don't have regular milk on hand.

    What is the trick to making pancakes fluffy?

    To make pancakes fluffy, don't overmix the batter. Just mix until the dry ingredients are combined with the wet ingredients. Also, let the batter rest for a few minutes before cooking. This helps the baking powder create air bubbles that make the pancakes light and fluffy.

    Is hotcake mix the same as pancake mix?

    Yes, hotcake mix and pancake mix are pretty much the same. Both are used to make similar breakfast treats. Hotcakes are just the Filipino version of pancakes, often a bit sweeter and sometimes have a slight yellow color from food coloring.

    stacked filipino hotcakes sprinkled with white sugar
    5 from 3 votes
    Print Pin Recipe

    Pinoy Hotcakes Recipe

    Indulge in morning magic with Pinoy Hotcakes Recipe – quick, fluffy, and infused with nostalgia. A symphony of vanilla, brown sugar, and warmth that'll redefine your breakfast cravings!
    Prep Time8 minutes mins
    Cook Time10 minutes mins
    Total Time18 minutes mins
    Course: Breakfast, Dessert, Snack, Snacks
    Cuisine: Filipino
    Servings: 4
    Calories: 490kcal
    Prevent your screen from going dark

    Ingredients

    • 2½ cups all-purpose flour
    • ½ cup brown sugar
    • 2 teaspoon baking powder
    • ¼ teaspoon salt
    • 2½ cups full-cream milk
    • 2 large eggs beaten
    • ¼ teaspoon vanilla
    • 2 teaspoons vegetable oil
    • ¼ cup granulated white sugar
    • ¼ cup softened margarine

    Instructions

    • Combine flour, brown sugar, baking powder, and salt in a mixing bowl and mix until well combined.
    • Pour milk, beaten eggs, and vanilla extract into the flour mixture and using an electric mixer, mix until thoroughly combined; set aside.
    • Heat the vegetable oil in a nonstick skillet over medium-low heat.
    • Scoop and pour ⅓ cup of the hotcake batter into the hot pan and cook on low for 2 minutes or until bubbles are formed on top.
    • Flip the hotcake and cook for another minute, then remove and transfer to a serving plate.
    • Continue with the remaining batter and once all the batter is done, spread the softened margarine into the pancake.
    • Sprinkle with granulated white sugar and serve Serve immediately with your favorite syrup and or berries.
    Leave a Comment

    Notes

    1. You can use evaporated milk if you can’t find full-cream milk or whole milk.
    2. Substitute with non-dairy milk if you have a dairy allergy. 
    3. Almond flour, wheat flour, chickpea flour can be substituted if you prefer gluten-free flour.
    Serving: 1gCalories: 490kcalCarbohydrates: 100gProtein: 11gFat: 5gSaturated Fat: 1gPolyunsaturated Fat: 2gMonounsaturated Fat: 1gTrans Fat: 0.02gCholesterol: 82mgSodium: 398mgPotassium: 152mgFiber: 2gSugar: 39gVitamin A: 119IUCalcium: 165mgIron: 4mg
    QR Code
    Did you make this recipe?Share it on instagram or tag @simplybakings or #simplybakings!

    Desserts, Filipino Desserts, Vegetarian Filipino Recipes

    Pumpkin Sheet Pan Pancakes

    Oct 26, 2023 · Leave a Comment

    Sheet pan pumpkin pancakes next to a cup of coffee.

    Get ready to cozy up with autumn vibes in every bite of these Pumpkin Sheet Pan Pancakes. This golden pancake features the rich essence of pumpkin with the heartwarming spices of cinnamon, ginger, and cloves. Yum!

    For other tasty pancake variations, try my Banana Oatmeal Pancakes, Chocolate Banana Pancakes, and TikTok Cereal Pancakes.

    delectable pumpkin sheet pan pancakes served on a plate

    What are Pumpkin Sheet Pan Pancakes?

    These Pumpkin Sheet Pan Pancakes are easy-to-bake and delicious vegan pancakes that are perfect fall breakfast treats and have a history that is both fun and creative. This new way of making pancakes came about because people are always looking for quick and tasty meals.

    This sheet pan pancake recipe is a good example of how old and new can work well together. It was inspired by the long-standing traditions of pumpkin-themed fall feasts. It has changed the way we eat traditional pancakes by making it much easier to make a big batch of perfectly cooked pancakes that can be shared with friends and family.

    So, as we look into the history of this dish, we find a recipe that both celebrates the timeless appeal of pumpkin-spiced decadence and connects the old and the new.

    Read more below for its cooking tips and quick and simple step-by-step instructions. Enjoy!

    Health Benefits of Pumpkin:

    • Loaded with vitamins A and C, plus potassium.
    • Supports healthy blood pressure.
    • High in fiber for digestion and satiety.
    • Low-calorie and filling.
    • Beta-carotene promotes healthy skin.
    • Fights free radicals for overall health.
    • Strengthens the immune system.
    • May reduce the risk of chronic diseases.
    tasty sheet pan pumpkin pancakes in a plate, laid on a table with fork. coffee, cinnamon powder, and honey

    Tips and Procedures:

    Substitutions and Additions

    • Flour Variations: If you prefer a different type of flour, such as whole wheat or gluten-free alternatives, feel free to substitute them for all-purpose flour. Adjust the quantity as needed to maintain the desired consistency.
    • Milk Choices: While almond milk is a popular choice, you can swap it for other plant-based or non-dairy milks like soy, oat milk, or coconut milk. Select your favorite for a personalized touch.
    • Sweeteners: Dark brown sugar adds a rich flavor, but you can experiment with alternative sweeteners like maple syrup, agave nectar, or coconut sugar to suit your taste.
    • Additions: Chocolate chips, dried fruits, nuts, and vanilla extract can be added to the pancake batter before baking for an added taste and texture.

    Storage

    • In the Fridge: To store any leftover pancakes, allow them to cool to room temperature, then place them in an airtight container or wrap them in plastic wrap. They can be refrigerated for up to 2–3 days.
    • In the Freezer: These pancakes freeze well for longer-term storage. Place them in a single layer on a baking sheet and freeze until firm. Then, transfer them to a resealable freezer bag or airtight container, separating layers with parchment paper to prevent sticking. They can be frozen for up to 2–3 months.
    • On the Counter: If you plan to consume the pancakes within a few hours, keeping them at room temperature is perfectly fine. Just ensure they're covered to prevent them from drying out.
    Pumpkin sheet pancakes on a plate with a fork, coffee, cinnamon powder, and honey on the table.

    How to Make Pumpkin Sheet Pan Pancakes:

    Listed below are all the ingredients you will need:

    • all-purpose flour
    • baking powder
    • ground cinnamon
    • ground ginger
    • ground cloves
    • coarse salt
    • pumpkin puree
    • almond milk (or other plant-based milk)
    • vegetable oil
    • dark brown sugar
    list of ingredients of ,baked pumpkin pancakes

    Preheat the oven to 350°F /175°C. Line a large, rimmed baking sheet with parchment paper (or grease it very well), pushing the parchment into the corners and pressing down the edges.

    In a small bowl or large measuring cup, mix the dry ingredients such as flour, baking powder, salt, and spices. Use a whisk to blend everything together. Set aside:

    flour, baking powder, salt, and spice mixed in a measuring cup

    In a large bowl, whisk together the pure pumpkin puree, vegetable oil, and brown sugar until smooth:

    whisked pumpkin puree, vegetable oil, and brown sugar

    Add ⅓ of the almond milk, whisking until smooth. Add ½ the flour mixture and stir until smooth:

    added almond milk and flour to the pumpkin mixture

    Alternately add the remaining almond milk and flour mixture, ending with the milk. You may have to switch to a spatula at the second addition of flour:

    adding alternately the remaining almond milk and flour mixture then whisked until smooth

    Scrape onto the prepared baking sheet. Spread to the edges until perfectly level.

    Bake for 22–25 minutes until it springs back when touched. For thicker pancakes, you can use a 9” x 13”/22.5cm x 32.5cm baking pan and bake for 25–30 minutes:

    mixture poured into baking sheet then baked

    Serve right away with vegan butter, maple syrup, extra cinnamon, or any other toppings. Happy eating!

    pumpkin sheet pancakes on a plate with fork and knife, served with black coffee

    Frequently Asked Questions:

    Can I use fresh pumpkin instead of pumpkin puree in this recipe?

    Yes, you can! Simply roast or steam fresh pumpkin until it's soft, then puree it until smooth. Use the same quantity (¾ cup/185g) in the recipe as you would with canned pumpkin puree.

    I'm out of almond milk. Can I use regular dairy milk as a substitute?

    Absolutely! You can replace almond milk with dairy milk or any other plant-based milk of your choice, like soy, oat, or coconut milk. Just ensure it aligns with your dietary preferences.

    Can I make the batter ahead of time and bake the pancakes later?

    While it's best to bake the pancakes immediately after preparing the batter for optimal results, you can make the batter ahead and store it in the fridge for up to 24 hours. Allow it to come to room temperature before baking for the best texture and flavor.

    honey-glazed pumpkin pancakes served with dark coffee
    No ratings yet
    Print Pin Recipe

    Pumpkin Sheet Pan Pancakes

    Here's a quick and easy vegan pancake recipe that offers a quick and delightful vegan, soy-free breakfast or dessert option. Make this delicious pumpkin treat in 35 minutes!
    Prep Time10 minutes mins
    Cook Time25 minutes mins
    Total Time35 minutes mins
    Course: Breakfast, Dessert, Vegan
    Cuisine: American, Dessert, Vegan
    Servings: 4 people
    Calories: 244kcal
    Author: Lainey
    Prevent your screen from going dark

    Ingredients

    • 1¼ cup all-purpose flour
    • 1 tablespoon baking powder
    • ½ teaspoon coarse salt
    • ¾ teaspoon ground cinnamon*
    • ½ teaspoon ground ginger*
    • ¼ teaspoon ground cloves*
    • ¾ cup pumpkin puree
    • 2 tablespoons vegetable oil
    • 2 tablespoons dark brown sugar
    • 1 cup almond milk (or other plant-based milk)

    Instructions

    • Preheat oven to 350° F/175 C. Line a large, rimmed baking sheet with parchment paper (or grease it very well), pushing the parchment into the corners and pressing down the edges.
    • In a small bowl or large measuring cup, mix the flour, baking powder, salt, and spices. Use a whisk to blend everything together. Set aside.
    • In a large bowl, whisk together the pumpkin puree, vegetable oil, and brown sugar until smooth.
    • Add ⅓ of the almond milk, whisking until smooth. Add ½ the flour mixture and stir until smooth. Alternately add the remaining almond milk and flour mixture, ending with the milk. You may have to switch to a spatula for the second addition of flour.
    • Scrape onto the prepared baking sheet. Spread to the edges until perfectly level.
    • Bake for 22-25 minutes until it springs back when touched. For thicker pancakes, you can use a 9” x 13”/22.5cm x 32.5cm baking pan and bake for 25-30 minutes.
    • Serve right away with vegan butter, maple syrup, extra cinnamon, or any other toppings.
    Leave a Comment

    Notes

    *You can substitute 1 ½ tsp/3g of your preferred pumpkin spice blend.
    Calories: 244kcalCarbohydrates: 41gProtein: 5gFat: 7gSaturated Fat: 1gPolyunsaturated Fat: 4gMonounsaturated Fat: 2gTrans Fat: 0.04gSodium: 614mgPotassium: 150mgFiber: 3gSugar: 7gVitamin A: 7150IUVitamin C: 2mgCalcium: 203mgIron: 3mg

    Watch The Recipe Video!
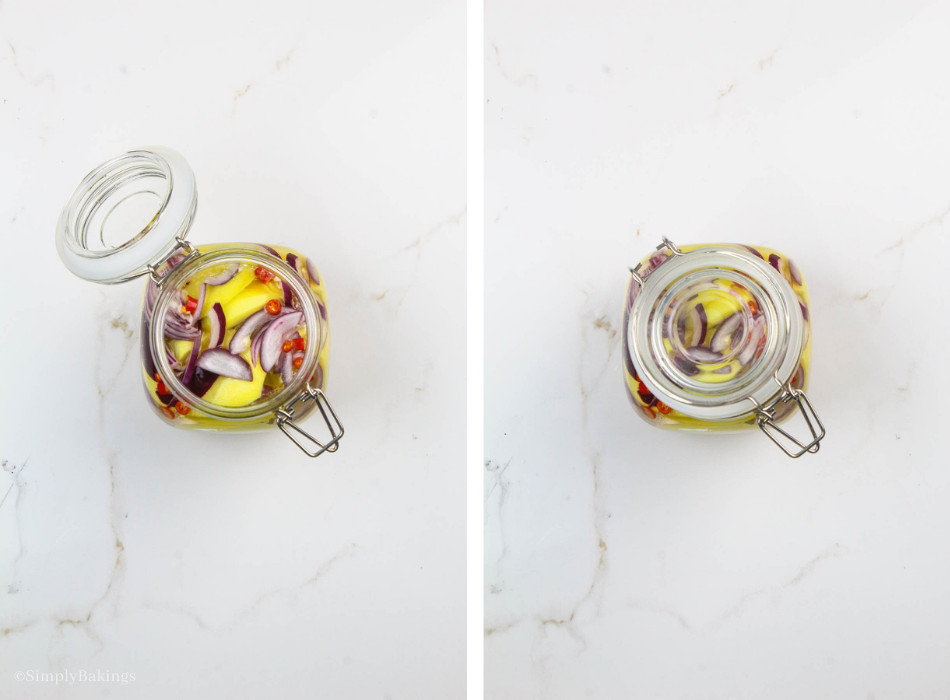
    QR Code
    Did you make this recipe?Share it on instagram or tag @simplybakings or #simplybakings!

    Breakfast & Brunch, Desserts, Thanksgiving Brunch, Vegan Baking

    Homemade Sweetened Condensed Milk

    Oct 22, 2023 · Leave a Comment

    delicious homemade sweetened condensed milk in a glass bowl and jar

    Discover the pleasure of making your own sweetened condensed milk at home with this simple and delicious recipe. Enjoy the rich, velvety sweetness of this homemade classic, which is ideal for enhancing your favorite sweets and drinks!

    homemade sweetened milk cooled in a clear  glass bowl with a striped black and white towel underneath and in a jar with a label "sweetened condensed milk"

    What is Sweetened Condensed Milk?

    This homemade sweetened condensed milk recipe is a simple alternative to canned sweetened milk made with just four pantry staple ingredients, such as whole milk, granulated sugar, unsalted butter, and vanilla extract, that allow you to adjust the sweetness to your desire.

    Enhance your culinary creations with this simple, delightful addition, and enjoy the satisfaction of home-cooked goodness. Discover the versatility of our sweetened condensed milk recipe, which adds a delectable touch to a range of delights. Embrace the wonder of homemade sweetness now!

    Health Benefits of Whole Milk:

    • Aids in weight management.
    • Promotes skin and bone health.
    • Good source of essential nutrients.
    • Promotes heart and mental health.
    • It helps with muscle growth and repair.

    Tips and Procedures:

    Cooking

    • Simmer Slowly: To avoid scorching the milk, begin on low to medium heat. Simmer it carefully to allow the water content to gradually evaporate and avoid burning.
    • Use Quality Ingredients: For the best flavor and texture, use high-quality whole milk and real sugar. Quality ingredients can have a big impact on the end result.
    • Stir Frequently: Stir the mixture frequently to keep it from sticking to the bottom of the pan and to achieve even thickening. This aids in achieving a smooth and creamy texture.
    • Adjust Sugar Levels: Adjust the sweetness to your liking. Start with a recommended amount of sugar and modify as needed during the cooking process.
    • Consistency Check: When the sweetened condensed milk reaches a thick, syrupy consistency, it's done. It will thicken further as it cools, so be careful not to overcook.
    • Experiment with Variations: Feel free to experiment with variations once you've mastered the basic recipe. Make chocolate-flavored sweetened condensed milk, for example, by adding cocoa powder during the cooking process.

    Substitutions

    • Vanilla: Gluten-free vanilla extract
    • Dairy-free: Coconut milk, dairy free unsweetened milk
    • Sweetener: Cane sugar, honey or maple syrup, brown sugar
    • Dairy: Almond milk, cashew milk, oat milk, evaporated milk, etc.

    Storage

    • Cool Gradually: Allow the sweetened condensed milk to cool gradually since it will continue to thicken as it cools. Rapid cooling may result in an unfavorable texture. Allow it to cool to room temperature before placing it in an airtight container or jar.
    • Storage: Keep in the refrigerator for up to 1 week or freeze for up to 3 months.
    a bowl and a jar of homemade sweetened condensed milk

    How to Make Sweetened Condensed Milk:

    Listed below are all the ingredients you will need:

    • whole milk
    • granulated sugar 
    • unsalted butter
    • vanilla extract
    ingredients for sweetened condensed milk recipe

    Pour milk and sugar into a medium saucepan and bring to medium heat. Whisk until the sugar has dissolved.

    Allow the milk to simmer for about 30 minutes; it will reduce by half. Stir frequently so that it doesn’t burn. Once it has reduced by half, remove the heat:

    milk and sugar mixed in a medium saucepan

    Add in butter and vanilla. Return to medium heat, whisking until it’s all combined:

    added butter and vanilla into the saucepan  then whisked until it’s all combined

    Pour into a container and let it come to room temperature, then move it to the fridge or use it right away. If the butter separates while cooling, just stir it back together:

    cooled the homemade sweetened condensed milk into glass containers

    Be sure to shake well before use. Enjoy!

    Frequently Asked Questions:

    Can you add water to evaporated milk to make whole milk?

    Yes, just add 1.5 cans of water to every can of evaporated milk.

    Are evaporated milk and condensed milk interchangeable?

    No. Condensed milk is sweet and thick, but evaporated milk is unsweetened. So replacing a can of evaporated milk with condensed milk will not produce the same results.

    Is homemade condensed milk better?

    Absolutely! Homemade condensed milk is not only less expensive, but it also tastes better since it uses less heat and sugar, allowing the flavor of the milk to stand out. In addition, canned condensed milk may contain preservatives or additives, whereas homemade condensed milk requires only a few ingredients and no preservatives.

    sweetened condensed milk in a jar with a label
    No ratings yet
    Print Pin Recipe

    Sweetened Condensed Milk

    Make your own Sweetened Condensed Milk from scratch! Creamy, adaptable, and simply delicious. Perfect for all of your delicious and sweet creations!
    Prep Time30 minutes mins
    Cook Time1 hour hr
    Total Time1 hour hr 30 minutes mins
    Course: Dessert
    Cuisine: American
    Servings: 8 oz
    Calories: 142kcal
    Author: Simply Bakings Kitchen Team
    Prevent your screen from going dark

    Equipment

    • Medium Saucepan
    • Whisk or Rubber Spatula
    • Glass Mason Jars or Air tight containers

    Ingredients

    • 1 cups whole milk
    • ¾ cups granulated sugar
    • 4 tablespoons unsalted butter
    • 1 teaspoon vanilla extract

    Instructions

    • Pour milk and sugar into a medium saucepan and bring to medium heat.
    • Whisk until the sugar has dissolved.
    • Allow the milk to simmer for about 30 minutes; it will reduce by half.
    • Stir frequently so that it doesn’t burn.
    • Once it has reduced by half, remove the heat.
    • Add in butter and vanilla.
    • Return to medium heat, whisking until it’s all combined.
    • Pour into a container and let it come to room temperature, then move it to the fridge or use it right away.
    • If the butter separates while cooling, just stir it back together.
    • Be sure to shake well before use.
    Leave a Comment
    Serving: 8ozCalories: 142kcalCarbohydrates: 20gProtein: 1gFat: 7gSaturated Fat: 4gPolyunsaturated Fat: 0.2gMonounsaturated Fat: 2gTrans Fat: 0.2gCholesterol: 19mgSodium: 13mgPotassium: 49mgSugar: 20gVitamin A: 224IUCalcium: 39mgIron: 0.01mg

    Watch The Recipe Video!
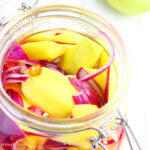
    QR Code
    Did you make this recipe?Share it on instagram or tag @simplybakings or #simplybakings!

    Desserts

    Best Porbidang Kangkong

    Oct 12, 2023 · 1 Comment

    a delicious and healthy bowl of porbidang kangkong

    Porbidang Kangkong is a delightful Filipino dish that brings together the freshness of kangkong leaves and stalks with the rich flavors of coconut milk and vegetarian oyster mushroom sauce. With its quick preparation and bold taste, it's an excellent addition to your Pinoy culinary journey.

    Pair this with my Fried Rice recipe for the perfect combination. You can also try my other kangkong dish, Vegetarian Kangkong with Quail Eggs.

    up-close creamy kangkong recipe topped with crispy fried garlic
    [feast_advanced_jump_to]

    What is Porbidang Kangkong?

    This simple Porbidang Kangkong recipe is a favorite dish in Bacolod, Philippines. It's said that its spicy taste is so strong that after trying it, people might say "Heaven forbid!" Hence the name "forbidden kangkong."

    This soup's magic comes from its simplicity. With just three main ingredients—kangkong (water spinach), coconut milk (gata), and siling labuyo (bird's eye chili)—it shows how amazing flavors can come from simple things.

    What is Kangkong?

    Kangkong, also known as water spinach, is a leafy green vegetable that grows in water or moist soil. It has long, hollow stems and green leaves with a slightly arrow-shaped appearance. Kangkong is commonly used in various Asian cuisines and is known for its crisp texture and mild flavor.

    It's rich in vitamins and minerals, making it a nutritious addition to meals. Kangkong can be stir-fried, steamed, boiled, or used raw in salads and smoothies.

    Health Benefits of Kangkong (Water Spinach):

    • It helps fight anemia.
    • It boosts the immune system.
    • Helps in treating liver problems.
    • It reduces cholesterol levels.
    • Prevents constipation.
    • It is anti-diabetic.
    • Aids in maintaining good eye sight.
    • Improves skin health.
    creamy water spinach in china bowl

    Substitutions

    • If KangKong (water spinach) is not available in yoru area, you can use Spinach, Swiss chard, or bok choy.
    • Vegetarian Oyster Mushroom Sauce: Replace with soy sauce or tamari for a savory umami flavor.
    • Red Chilies: Adjust the amount of red chillies based on your spice preference. You can also use dried chili flakes or omit them if desired.
    • Coconut Milk: Substitute with coconut cream for a richer texture or with non-dairy milk for a lighter version.
    • Vegetable Broth: Swap with water or any other broth you have on hand.
    • Sweet Onions: If sweet onions are unavailable, you can use regular onions, small shallots, or red onions for a slightly different flavor profile.
    • Red Bell Pepper: Feel free to use other colorful bell peppers like green or yellow for variety.

    Variations

    • Spicy Version: Add chopped chili peppers or chili flakes to the sauce for a spicy kick. You can adjust the amount of chili according to your preference for heat.
    • Garlicky Twist: Increase the amount of minced garlic in the sauce to enhance the garlic flavor. Garlic lovers will appreciate the extra punch of flavor.
    • Tofu Addition: Add cubes of tofu to the dish for added protein and texture. Pan-fry the tofu until golden brown before adding it to the sauce.
    • Peanut Butter Sauce: Incorporate peanut butter into the sauce for a nutty and savory flavor profile. Peanut butter adds depth to the sauce and pairs well with the greens.
    • Citrus Zest: Add grated citrus zest (such as lime or lemon) to the sauce for a bright and refreshing twist. Citrus zest adds a pop of flavor that complements the earthiness of the greens.
    • Sesame Seeds Garnish: Sprinkle toasted sesame seeds over the dish before serving for added crunch and a nutty flavor. Sesame seeds also add visual appeal to the dish.
    • Herb Infusion: Experiment with fresh herbs like cilantro, basil, or mint to add a burst of freshness to the dish. Simply chop the herbs and sprinkle them over the cooked greens before serving.

    Storage

    • Refrigeration: If you have leftovers, store them in an airtight container in the refrigerator for up to 2–3 days.
    • Freezing: While it's best enjoyed fresh, you can freeze this dish. However, note that the texture of the kangkong leaves might change upon thawing.
    • Reheating: To reheat, gently warm the dish in a pan over low heat, stirring occasionally to prevent sticking. Add a splash of coconut milk or vegetable broth if it looks dry.
    kangkong in coconut milk with fried garlic on a cloth

    Ingredients

    • olive oil
    • sweet onions
    • garlic cloves
    • red bell pepper
    • kangkong leaves
    • kangkong stalks
    • vegetarian oyster mushroom sauce
    • red chilies
    • coconut milk
    • vegetable broth
    • salt
    • ground black pepper
    • crispy fried garlic
    list of ingredients of porbidang kangkong

    Instructions

    Add olive oil to a heated skillet over medium heat. Sauté sweet onions and minced garlic for a minute while stirring constantly:

    Sautéed sweet onions and minced garlic in a heated skillet

    Add in kangkong stalks and red bell pepper strips; sauté for another 4 minutes. Toss in kangkong leaves, oyster mushroom sauce, and red chilies:

    added kangkong, bell pepper, sauce, and chilies

    Pour in the coconut milk and vegetable broth. Bring the mixture to a boil and then reduce to a simmer for 6 minutes. Season with salt and ground black pepper to taste:

    coconut milk poured in the mixture then boiled and simmered

    Top with crispy fried garlic and serve immediately. Enjoy!

    spicy and creamy water spinach in a china bowl on a white table

    Frequently Asked Questions

    Can I use regular mushrooms instead of vegetarian oyster mushroom sauce?

    Absolutely! Regular mushrooms can be a flavorful substitute for the vegetarian oyster mushroom sauce. Slice them and sauté them along with the other ingredients for a delicious twist.

    Can I make this dish ahead of time?

    While it's best enjoyed fresh, you can prepare the sautéed components ahead of time and assemble them with the coconut milk and vegetable broth just before serving. This helps maintain the texture and flavors

    How do I prevent the coconut milk from curdling?

    To prevent curdling, make sure to bring the coconut milk to a gentle simmer rather than a rapid boil. Stirring continuously while adding it to the skillet also helps prevent separation.

    Can kangkong leaves be eaten raw?

    Yes! You can eat young kangkong leaves fresh in salads or drinks after washing them well. The short, juicy tips can be eaten as they are, or you can blend the leaves and add them to a drink.

    delicious spicy porbidang kangkong dish in a china bowl
    5 from 1 vote
    Print Pin Recipe

    Best Porbidang Kangkong

    Transform your meals with Porbidang KangKong: a quick, vibrant Filipino dish harmonizing coconut milk, veggies, and spices in just 18 mins. Delight guaranteed!
    Prep Time6 minutes mins
    Cook Time12 minutes mins
    Total Time18 minutes mins
    Course: Main Course, Side Dish, Vegan
    Cuisine: Filipino
    Servings: 4
    Calories: 188kcal
    Prevent your screen from going dark

    Ingredients

    • 2 tablespoons olive oil
    • ¼ cup sweet onions finely chopped
    • 3 garlic cloves minced
    • ½ red bell pepper cut into thin strips
    • 3 cups kangkong leaves
    • 2 cups kangkong stalks
    • 1 tablespoon vegetarian oyster mushroom sauce
    • ¼ teaspoon red chilies chopped
    • 1 cup coconut milk
    • ½ cup vegetable broth
    • ¼ teaspoon salt
    • ¼ teaspoon ground black pepper
    • 1 tablespoon crispy fried garlic

    Instructions

    • Add oil in a heated skillet over medium heat.
    • Saute sweet onions and minced garlic for a minute while stirring constantly.
    • Add in kangkong stalks and red bell pepper strips; saute for another 4 minutes.
    • Toss in kangkong leaves, oyster mushroom sauce, and red chilies.
    • Pour the coconut milk and vegetable broth.
    • Bring the mixture to a boil and reduce to simmer for 6 minutes.
    • Season with salt and ground black pepper to taste.
    • Top with crispy garlic and serve immediately with steamed white rice.
    Leave a Comment
    Calories: 188kcalCarbohydrates: 5gProtein: 2gFat: 19gSaturated Fat: 12gPolyunsaturated Fat: 1gMonounsaturated Fat: 6gSodium: 395mgPotassium: 182mgFiber: 1gSugar: 1gVitamin A: 532IUVitamin C: 21mgCalcium: 19mgIron: 2mg

    Watch The Recipe Video!

    QR Code
    Did you make this recipe?Share it on instagram or tag @simplybakings or #simplybakings!

    Side Dishes, Vegan Filipino Recipes, Vegetables, Vegetarian Filipino Recipes

    Eggplant Chickpea Stew

    Sep 28, 2023 · Leave a Comment

    a bowl of hearty eggplant chickpea stew beside a stainless spoon and pile of books

    Learn how to make this tasty and nutritious Eggplant Chickpea Stew, a flavorful vegetarian dish that combines soft eggplant and robust chickpeas in a delicious stew. Ideal for a filling and nutritious supper. Try it out!

    eggplant chickpea stew with a spoon and books nearby

    What is Eggplant Chickpea Stew?

    Eggplant chickpea stew is a delicious and nutritious vegetarian or vegan dish made with eggplant and chickpeas cooked in a rich sauce. This stew is usually seasoned with herbs and spices to create a rich, aromatic flavor profile.

    This savory stew is also high in protein and fiber from chickpeas, making it a pleasant and healthful dinner for vegetarians and vegans. Feel free to adjust the flavors and spices to make your own version of this delectable dinner. Enjoy!

    Health Benefits of Eggplant:

    • Rich in antioxidants.
    • Promotes heart health.
    • Lower cholesterol levels.
    • Aids weight management.
    • Supports digestive health.
    • Loaded with essential nutrients and minerals.

    Tips and Procedures:

    Preparation

    • Choose Fresh Eggplants: Select eggplants that are smooth and firm, with no blemishes or bruises. Fresh eggplants have more flavor and texture.
    • Dice Eggplant Uniformly: Cut the eggplant into evenly sized cubes to promote even cooking. You can make 1-inch cubes.
    • Soak the Eggplant Slices: It is best to soak the sliced eggplants in water before cooking to prevent discoloration. The eggplant slices will turn brown if not soaked.
    • Salting and Draining Eggplant: You can optionally salt the diced eggplant and let it sit for 15-20 minutes to decrease bitterness and extra moisture. Before adding the stew, rinse and pat dry.

    Cooking

    • Sauté the Eggplant: Sauté the diced eggplant in a little oil before adding it to the stew to improve its flavor and prevent mushiness.
    • Use High-Quality Chickpeas: If you're using canned chickpeas, rinse them thoroughly to remove excess sodium and keep the natural flavor.
    • Taste and Adjust: As the stew cooks, taste it and adjust the spices to your preference. If necessary, season with additional salt, pepper, or spices.
    • Simmer for Flavor: Allow the stew to boil for a reasonable period of time over low heat to allow the flavors to mingle. This improves the overall flavor.
    • Control Thickness: If the stew becomes too thick during cooking, thin it out with extra vegetable stock or water. If it's too thin, leave it to simmer uncovered to decrease and thicken.

    Variations and Additions

    • Variety of Mushrooms: You can use a variety of mushrooms, including white mushrooms, button mushrooms, and shiitake mushrooms, for this recipe.
    • Vegetable Additions: Experiment with other vegetables to add flavor and nutrients, such as red bell peppers, zucchini, spinach, or carrots.
    • Protein: Tofu cubes, seitan, or tempeh can be added to increase the protein content. Non-vegetarian options include cooked chicken or ground beef.
    • Creamy Variation: Add a splash of coconut milk, cashew cream, or yogurt toward the end of cooking for a creamier stew.
    • Grains: To make the stew heartier, add cooked grains such as quinoa, rice, or couscous.
    • Nut Topping: To add crunch, top with toasted pine nuts, almonds, or sesame seeds.
    • Fresh Herbs: Add herbs like fresh parsley or cilantro right before serving for a blast of flavor and color.
    • Customize to Preferences: Don't be hesitant to adjust the recipe to your dietary choices and restrictions.

    Storage and Reheat

    • Storing Leftovers: Because the flavors continue to mix together, eggplant chickpea stew frequently tastes even better the next day. Refrigerate leftovers for up to 3–4 days in an airtight container.
    • Reheat Gently: Reheat carefully over low to medium heat to avoid overcooking and to keep the stew's texture.
    Eggplant chickpea stew in a bowl with a spoon and books

    How to Make Eggplant Chickpea Stew:

    Listed below are all the ingredients you will need:

    • olive oil 
    • red onion
    • garlic
    • eggplants
    • canned chickpea
    • canned mushrooms
    • tomato paste 
    • vegetable broth 
    • banana ketchup 
    • oyster mushroom sauce 
    • soy sauce 
    • nutritional yeast 
    • ground black pepper 
    ingredients for eggplant chickpea stew recipe

    Add oil to a heated pot and sauté red onions and minced garlic for 2 minutes over medium heat.

    Stir in eggplant slices, chickpeas, mushrooms, and tomato paste; sauté for another 3 minutes while stirring constantly. 

    sautéed onions, eggplant, chickpeas, and mushrooms in a pot

    Pour the vegetable broth, banana ketchup, oyster mushroom sauce, and soy sauce. Mix well, bring the mixture to a boil, and reduce to a simmer for 15 minutes.

    Season with nutritional yeast and ground black pepper.

    added broth, ketchup, mushroom, and soy sauce

    Serve immediately. Enjoy!

    eggplant chickpea stew in a white bowl

    Frequently Asked Questions:

    How do you cut eggplant for stew?

    Trim off the ends of the eggplant. Then, cut the eggplant into evenly sized cubes to promote even cooking.

    Can I make this Eggplant Chickpea Stew in advance?

    Absolutely! The stew is ideal for meal preparation. If you prepare a batch ahead of time, the tastes will continue to mix and improve the flavor. When you're ready to consume it, just reheat it in the refrigerator in an airtight container.

    Are there variations for a gluten-free version of the Eggplant Chickpea stew?

    Yes, just make sure the spices, vegetable broth, and canned chickpeas are all gluten-free before preparing the dish. Serve it with rice or quinoa, two gluten-free grains. It's a dish that may easily be modified to suit various dietary requirements.

    healthy and delicious eggplant chickpea stew in a white bowl
    No ratings yet
    Print Pin Recipe

    Eggplant Chickpea Stew

    A savory and hearty vegetarian gem bursting with flavors of chickpeas, eggplant, and other plant-based ingredients. Try this easy stew recipe for a healthy and delightful meal!
    Prep Time10 minutes mins
    Cook Time25 minutes mins
    Total Time35 minutes mins
    Course: Main Course, Vegan
    Cuisine: Filipino, Mediterranean
    Servings: 2
    Calories: 338kcal
    Author: Simply Bakings Kitchen Team
    Prevent your screen from going dark

    Ingredients

    • 1½ tablespoons olive oil
    • 1 red onion thinly sliced
    • 3 garlic cloves minced
    • 2 medium eggplants slice and soak in water to prevent discoloration

    • 1 (16oz) canned chickpea drained
    • 1 (4oz) canned mushrooms sliced
    • 1 tablespoon tomato paste
    • 2 cups vegetable broth
    • ½ cup banana ketchup
    • 1 tablespoon oyster mushroom sauce
    • 2 teaspoons soy sauce
    • 1 tablespoon nutritional yeast
    • ¼ teaspoon ground black pepper

    Instructions

    • Add oil to a heated pot and sauté red onions and minced garlic for 2 minutes over medium heat.
    • Stir in eggplant slices, chickpeas, mushrooms, and tomato paste; sauté for another 3 minutes while stirring constantly.
    • Pour the vegetable broth, banana ketchup, oyster mushroom sauce, and soy sauce. Mix well, bring the mixture to a boil, and reduce to a simmer for 15 minutes.
    • Season with nutritional yeast and ground black pepper.
    • Serve immediately.
    Leave a Comment

    Notes

    1. You can use a variety of mushrooms; white mushrooms, button mushrooms, and shiitake mushrooms.
    2. Eggplant slices must be soaked in water to prevent discoloration. The eggplant slices will turn brown if not soaked.
    Serving: 2servingsCalories: 338kcalCarbohydrates: 58gProtein: 9gFat: 12gSaturated Fat: 2gPolyunsaturated Fat: 2gMonounsaturated Fat: 8gSodium: 2144mgPotassium: 1494mgFiber: 16gSugar: 34gVitamin A: 1039IUVitamin C: 20mgCalcium: 79mgIron: 2mg

    Watch The Recipe Video!
    QR Code
    Did you make this recipe?Share it on instagram or tag @simplybakings or #simplybakings!

    Main Entree, Vegan Filipino Recipes, Vegetarian Filipino Recipes

    Vegan General Tso’s Jackfruit

    Sep 14, 2023 · 4 Comments

    delicious savory vegan jackfruit dish garnished with sesame seeds and green onions on white rice in a bowl

    You're in for a treat with this Vegan General Tso's Jackfruit recipe! It's a delightful and one-of-a-kind take on the traditional Chinese favorite. Our homemade sauce blends sweet, spicy, and tangy flavors to perfection, perfectly complementing the tender jackfruit.

    Check out my blog for other delicious jackfruit recipes, like Vegan Cansi, Jackfruit Humba, or my Jackfruit Smoothie. They're full of flavor and incredibly versatile!

    general tso's jackfruit vegan dish with rice on a bowl

    What is Vegan General Tso’s Jackfruit?

    Vegan General Tso's Jackfruit is like a new spin on the classic Chinese dish General Tso's Chicken! Originating in Hunan province, China, the original dish featured deep-fried chicken in a sweet and spicy sauce. It got all the same flavors you love, but with a more compassionate twist.

    Instead of chicken, I made this vegan recipe with jackfruit, a tropical fruit that has a meaty texture. And let me tell you, it's so good you won't even miss the chicken. The sweet and spicy sauce is the perfect match for the juicy jackfruit pieces, all fried up to a perfect golden brown.

    It's no wonder this stir fry dish is becoming so popular with plant-based diets on the rise. So if you're looking for a new culinary adventure, give this saucy Vegan General Tso's Jackfruit a try and experience the deliciousness for yourself!

    Health Benefits of Jackfruit:

    • Helps in healing cancer.
    • Weight loss agent.
    • Reduces blood pressure.
    • Improves digestion.
    • Helps in healing insomnia.
    • Diabetes friendly.
    • It maintains healthy eye and skin.
    • Helps in treating ulcer.
    • Supports the bone.
    • Boosts nerve system.
    vegan General Tso's jackfruit with rice, sesame, and cilantro

    Tips and Procedures:

    Substitutions and Variations:

    • Tamari can be replaced with regular soy sauce if needed.
    • Adjust the level of spiciness by increasing or decreasing the amount of red chili flakes. You may also use red pepper flakes, whichever is available.
    • If you want to use a young jackfruit, just make sure to parboil for 5 minutes before proceeding with the recipe. It will make the jackfruit tender and removes its bitter taste.
    • Feel free to garnish with coriander, steamed broccoli or any vegetable of your choice.

    Storage:

    • Fridge: Leftovers can be stored in an airtight container in the refrigerator for up to 3-4 days.
    • Freezer: If you want to freeze the dish, do so without the bell peppers, as they might become mushy upon thawing. Store in an airtight container for up to 2 months.
    • Counter: It's recommended to serve and consume the dish immediately for the best taste and texture. Leftovers should be promptly stored following the storage guidelines.
    forkful of jackfruit stir-fry with rice and veggies

    How to Make Vegan General Tso’s Jackfruit:

    Listed below are all the ingredients you will need:

    • rice vinegar
    • tamari
    • hoisin sauce
    • dark soy sauce
    • garlic powder
    • red chili flakes
    • cornstarch
    • turmeric powder
    • olive oil
    • sweet onion
    • canned green jackfruit in brine
    • salt
    • ground black pepper
    • red bell pepper
    • sesame seeds
    • green onions
    list of ingredients of vegan General Tso’s Jackfruit dish

    In a bowl, whisk together rice vinegar, tamari, hoisin sauce, dark soy sauce, garlic powder, red chili flakes, cornstarch, and turmeric powder; set aside.

    mixed rice vinegar, dark soy sauce, tamari, hoisin sauce, turmeric powder,  garlic powder, cornstarch, and red chili flakes on a small bowl

    Add oil to a heated skillet over medium heat. Sauté sweet onions for 2 minutes while stirring  constantly. Add in the jackfruit and continue sautéing for 3 minutes.

    Pour the hoisin mixture and mix well. Let it simmer for a couple of minutes over medium-low  heat:

    Sautéed sweet onions and jackfruit, then poured with the hoisin mixture

    Season with salt and ground black pepper. 

    Turn off the heat and stir in the sliced bell peppers:

    mixture seasoned with salt and pepper and added red bell peppers

    Sprinkle with sesame seeds and serve immediately with chopped green onions. Enjoy!

    chinese jackfruit dish sprinkled with sesame seeds and cilantro

    Frequently Asked Questions:

    Is jackfruit vegan?

    Yes, jackfruit is vegan as it's a plant-based fruit and not derived from animals.

    When is jackfruit ready to eat?

    Jackfruit is ready to eat when its flesh is soft, fragrant, and easily separable, usually indicating ripeness.

    Can jackfruit be eaten raw?

    Yes, jackfruit can be eaten raw, especially when fully ripe, offering a sweet and tropical flavor.

    saucy vegan jackfruit dish garnished with sesame seeds and green onions
    5 from 1 vote
    Print Pin Recipe

    Vegan General Tso’s Jackfruit

    Indulge in the magic of Vegan General Tso's Jackfruit—a quick, flavorful delight that transforms jackfruit into a savory masterpiece in just 20 minutes. Perfectly balanced, plant-based, and a true taste adventure!
    Prep Time10 minutes mins
    Cook Time10 minutes mins
    Total Time20 minutes mins
    Course: Main Course, Side Dish, Vegan
    Cuisine: American, Chinese
    Servings: 4
    Calories: 117kcal
    Prevent your screen from going dark

    Ingredients

    • 2 tablespoons rice vinegar
    • 2 tablespoons tamari
    • 2 tablespoons hoisin sauce
    • 1 tablespoon dark soy sauce
    • 1 teaspoon garlic powder
    • 1 teaspoon red chili flakes
    • ½ teaspoon cornstarch
    • ¼ teaspoon turmeric powder
    • 2 tablespoons olive oil
    • ¼ cup sweet onion thinly sliced
    • 3 cups canned green jackfruit in brine (20 oz) drained
    • ⅛ teaspoon salt
    • ⅛ teaspoon ground black pepper
    • 2 red bell pepper quartered
    • 1 teaspoon sesame seeds
    • 2 tablespoons green onions chopped

    Instructions

    • In a bowl, whisk together rice vinegar, tamari, hoisin sauce, dark soy sauce, garlic powder, red chili flakes, cornstarch, and turmeric powder; set aside.
    • Add oil to a heated skillet over medium heat. Saute sweet onions for 2 minutes while stirring constantly.
    • Add in the jackfruit and continue sauteing for 3 minutes.
    • Pour the hoisin mixture and mix well. Let it simmer for a couple of minutes over medium-low heat.
    • Season with salt and ground black pepper.
    • Turn off the heat and stir in the sliced bell peppers.
    • Sprinkle with sesame seeds and serve immediately with chopped green onions.
    Leave a Comment

    Notes

    1.  If you want to use a fresh green jackfruit, just make sure to parboil for 5 minutes before  proceeding with the recipe. It will make the jackfruit tender and removes its bitter taste.
    Calories: 117kcalCarbohydrates: 10gProtein: 3gFat: 8gSaturated Fat: 1gPolyunsaturated Fat: 1gMonounsaturated Fat: 5gCholesterol: 0.2mgSodium: 969mgPotassium: 209mgFiber: 2gSugar: 6gVitamin A: 2042IUVitamin C: 77mgCalcium: 22mgIron: 1mg

    Watch The Recipe Video!
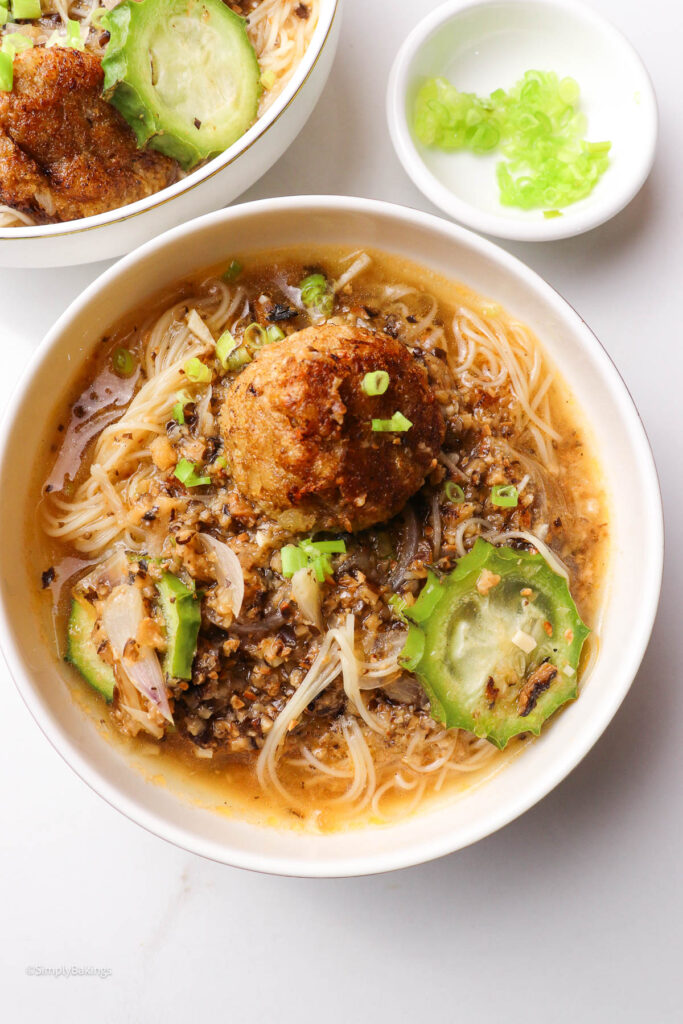
    QR Code
    Did you make this recipe?Share it on instagram or tag @simplybakings or #simplybakings!

    Main Entree, Side Dishes, Thanksgiving Main Dishes, Vegan Filipino Recipes, Vegetarian Filipino Recipes

    Filipino Taco Bowl

    Sep 4, 2023 · Leave a Comment

    two delicious and healthy vegan Filipino Taco Salad Bowls

    Embark on a delightful culinary journey with this easy Filipino Taco Bowl recipe, a symphony of flavors that promises to excite your taste buds while keeping your conscience free. Try this simple vegan recipe for a savory and healthy meal in a bowl!

    Looking for more meal prep ideas? Try my Easy Chili Bowl, Chickpeas Wraps, or my delicious Vegan Burrito.

    healthy and delicious Filipino Taco in a clear bowl

    What is a Filipino Taco Bowl?

    This Filipino Taco Bowl is a plant-based salad bowl recipe made of sautéed diced tofu, kangkong (water spinach), and spices, then assembled with steamed rice, black beans, corn kernels, peppers, and lemon wedges in a bowl. It's a delightful dish that offers a delectable medley of plant-based ingredients that honors Filipino and Mexican cultures.

    In this article, we'll walk you through the process of making this flavorful dish, learning the secrets behind its savory charm and the health benefits it provides. Whether you're a seasoned vegan or just a foodie on the go, this recipe guarantees a burst of flavors that balance tradition and innovation.

    Let's explore the world of culinary creativity with this Vegan Filipino Taco Salad Bowl. Prepare to have your taste buds tantalized and your body nourished with this wonderful creation!

    Health Benefits of Kangkong:

    • Boosts the immune system.
    • Promotes heart, bone, and blood health.
    • Loaded with essential vitamins and minerals.
    • Low in calories, which aids weight management.
    • High in dietary fiber that promotes digestive health.

    Tips and Procedures:

    Preparation and Assembly:

    • Chop and Dice: Cut and dice your fresh vegetables precisely to ensure uniform size and a balanced bite in every forkful.
    • Prepare the Greens: Wash the greens thoroughly and dry them if necessary.
    • Organized Setup: Arrange all of your ingredients in an orderly way to simplify assembly.

    Seasoning and Dressing:

    • Seasoning Distribution: Mix the seasonings evenly to cover all components of the salad.
    • Drizzle with Care: You can add vegan sour cream and salsa to this recipe and sprinkle evenly around the bowl for a balanced flavor.

    Serving and Storage:

    • Aesthetic Arrangement: Present your Vegan Filipino Taco Salad Bowl with style. For visual appeal, layer ingredients or arrange them creatively.
    • Freshness Matters: It is best to serve the salad immediately after assembling to keep the ingredients fresh and crunchy.
    • Garnish Gracefully: Top with fresh herbs like cilantro or parsley, avocado, cucumber, and tomato slices for added appeal.
    • Storage: You can place the meal prep in a microwave-safe container so that it can be easily reheated. It can be kept in the refrigerator for up to 4 days.
    freshly cooked and assembled Filipino Taco Bowl

    How to Make a Filipino Taco Bowl:

    Listed below are all the ingredients you will need:

    • olive oil
    • firm tofu
    • sweet onions
    • garlic
    • chopped kangkong
    • dark soy sauce
    • light soy sauce
    • red chili flakes
    • salt
    • ground black pepper
    • cooked white rice
    • canned sweet corn kernels
    • canned black beans
    • red onions
    • red bell pepper
    • green bell pepper
    • lemon
    ingredients for the Filipino Taco Bowl recipe

    Add oil to a heated skillet over medium heat and fry the diced tofu until crisp on all sides. Toss sweet onions and minced garlic; sauté for a minute.

     fried tofu, sautéed sweet onions and minced garlic in a skillet

    Add in the chopped kangkong, dark soy sauce, light soy sauce, and red chili flakes. Mix well and  continue cooking for another 2 minutes until the kangkong has wilted.

    Season with salt and ground black pepper. Remove from the skillet and transfer to a plate.

    added the chopped kangkong, dark soy sauce, light soy sauce, and red chili flakes into the skillet. then seasoned with salt and ground black pepper

    Divide and assemble all the components of the meal prep taco bowl, including the sautéed kangkong and tofu:

    assembled all the components of the meal prep taco bowl in a clear food container

    Store in the refrigerator. Can be kept in the refrigerator for up to 4 days. Enjoy!

    a spoonful of savory Filipino Taco Bowl

    Frequently Asked Questions:

    What is a taco bowl made of?

    A taco bowl is a deconstructed taco that is served over a bowl of rice with all of your favorite taco filler ingredients, including protein, cheese, corn, black beans, lettuce, tomatoes, salsa, sour cream, guacamole, etc.

    Where do taco bowls originate?

    Taco bowls originated in the USA, where tacups (tacos in cups) were served in a restaurant called Casa de Fritos. When tacup got popular enough, people wanted to make it bigger, and thus the taco salad, served in a full, main-dish-sized bowl, was created.

    Who invented the taco bowl?

    A taco bowl is a larger version of tacups, which were invented by Elmer Doolin, the founder of Fritos.

    Sautéed tofu and kangkong served with rice and vegetables in a bowl
    No ratings yet
    Print Pin Recipe

    Filipino Taco Bowl

    A simple and flavorful Filipino-style taco salad bowl perfect for quick and satisfying vegan meal prep!
    Prep Time15 minutes mins
    Cook Time10 minutes mins
    Total Time25 minutes mins
    Course: Entree, Salad
    Cuisine: Filipino
    Servings: 2
    Calories: 579kcal
    Author: Lainey
    Prevent your screen from going dark

    Ingredients

    • 2 tablespoons olive oil
    • ½ cup firm tofu pressed and cut into small dice
    • ¼ cup sweet onions sliced
    • 2 cloves garlic minced
    • 2 cups chopped kangkong
    • ⅛ cup dark soy sauce
    • 1 tablespoon light soy sauce
    • 2 teaspoons red chili flakes
    • ¼ teaspoon salt
    • ¼ teaspoon ground black pepper
    • 2 cups cooked white rice
    • 1 cup canned sweet corn kernels drained
    • ½ cup canned black beans
    • ¼ cup red onions finely diced
    • 1 red bell pepper deseeded and thinly sliced
    • 1 green bell pepper deseeded and thinly sliced
    • ½ lemon sliced in half

    Instructions

    • Add oil to a heated skillet over medium heat and fry the diced tofu until crisp on all sides.
    • Toss sweet onions and minced garlic; sauté for a minute.
    • Add in the chopped kangkong, dark soy sauce, light soy sauce, and red chili flakes. Mix well and continue cooking for another 2 minutes until the kangkong has wilted.
    • Season with salt and ground black pepper. Remove from the skillet and transfer to a plate.
    • Divide and assemble all the components of the meal prep taco bowl, including the sautéed kangkong and tofu.
    • Store in the refrigerator. Can be kept in the refrigerator for up to 4 days.
    Leave a Comment

    Notes

    You can place the meal prep in a microwave-safe container so that it can be easily reheated.
    Serving: 2servingsCalories: 579kcalCarbohydrates: 87gProtein: 21gFat: 19gSaturated Fat: 3gPolyunsaturated Fat: 4gMonounsaturated Fat: 11gSodium: 1877mgPotassium: 955mgFiber: 12gSugar: 11gVitamin A: 6416IUVitamin C: 178mgCalcium: 198mgIron: 5mg

    Watch The Recipe Video!
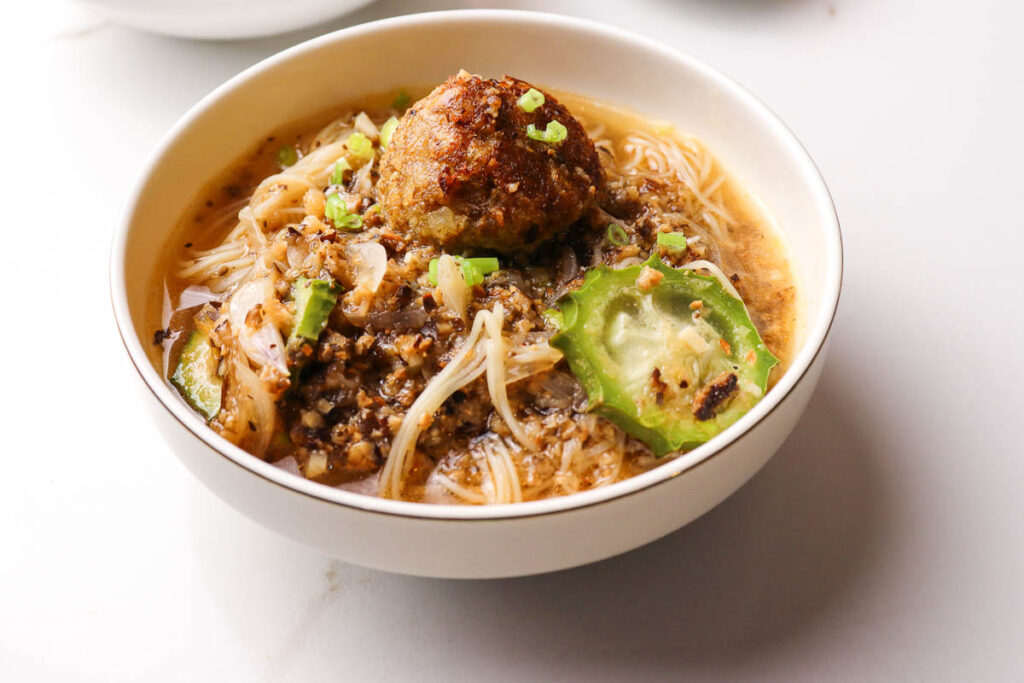
    QR Code
    Did you make this recipe?Share it on instagram or tag @simplybakings or #simplybakings!

    Main Entree, Vegan Filipino Recipes, Vegetarian Filipino Recipes

    One Pot Creamy Miso Mushroom Pasta

    Aug 24, 2023 · Leave a Comment

    tasty vegan miso pasta with mushrooms on a white bowl with books and flower decor

    Discover the magic of umami-packed miso and earthy mushrooms in this comforting miso mushroom pasta recipe! This easy one-pot meal is perfect for weeknights when you want a hearty meal but don't feel like slaving away in the kitchen.

    Looking for other pasta recipes? Try my Roasted Cauliflower Pasta and Easy Vegan Chili Pasta, all of which are suitable for vegans.

    healthy and delicious miso pasta on a white bowl topped with fresh cilantro

    What is One Pot Creamy Miso Mushroom Pasta?

    This One Pot Creamy Miso Mushroom Pasta is a delectable and simple pasta dish that mixes the rich flavors of miso, mushrooms, and pasta all in one pot. This culinary masterpiece is a combination of the heavenly umami-rich flavor of miso with the earthy essence of mushrooms.

    This dish has a rich history that can be traced back to its Japanese origins. The star ingredient of this recipe is miso! This delightful creation is a time-honored fermented soybean paste that has graced the tables of Japanese cuisine for countless generations.
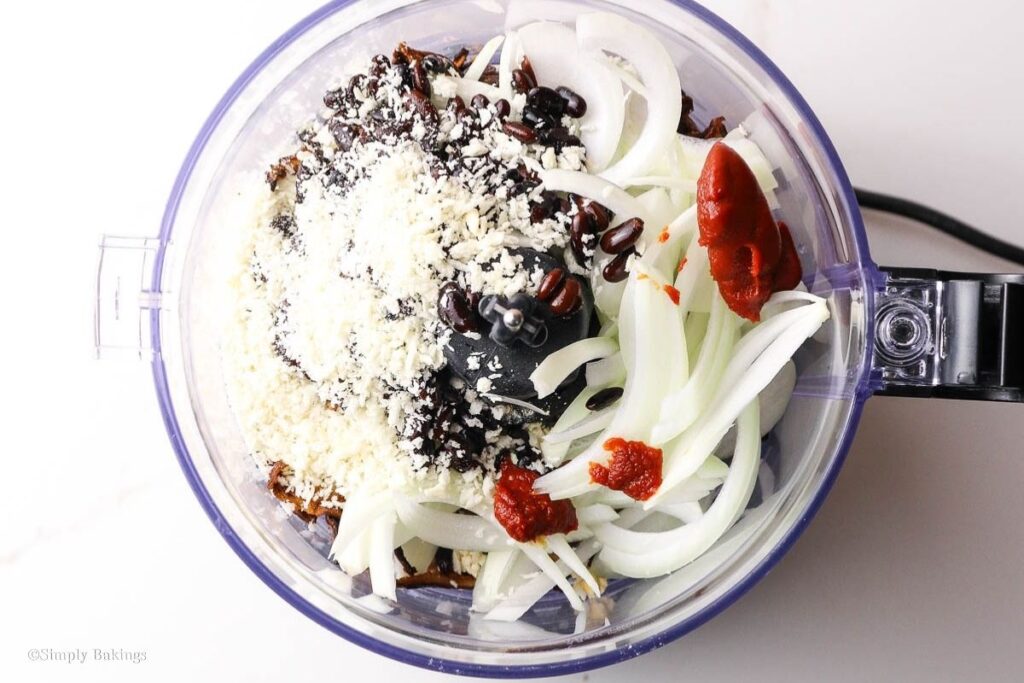
    Pasta, mushrooms, miso paste, nutritional yeast, and other seasonings are the common ingredients which makes this dish a favorite among those who enjoy hearty, umami-packed meals.

    One of its main advantages is that it requires little cooking equipment and is made in just one pot, making cleanup hassle-free.

    Read more below for its cooking tips and quick and simple step-by-step instructions. Enjoy!
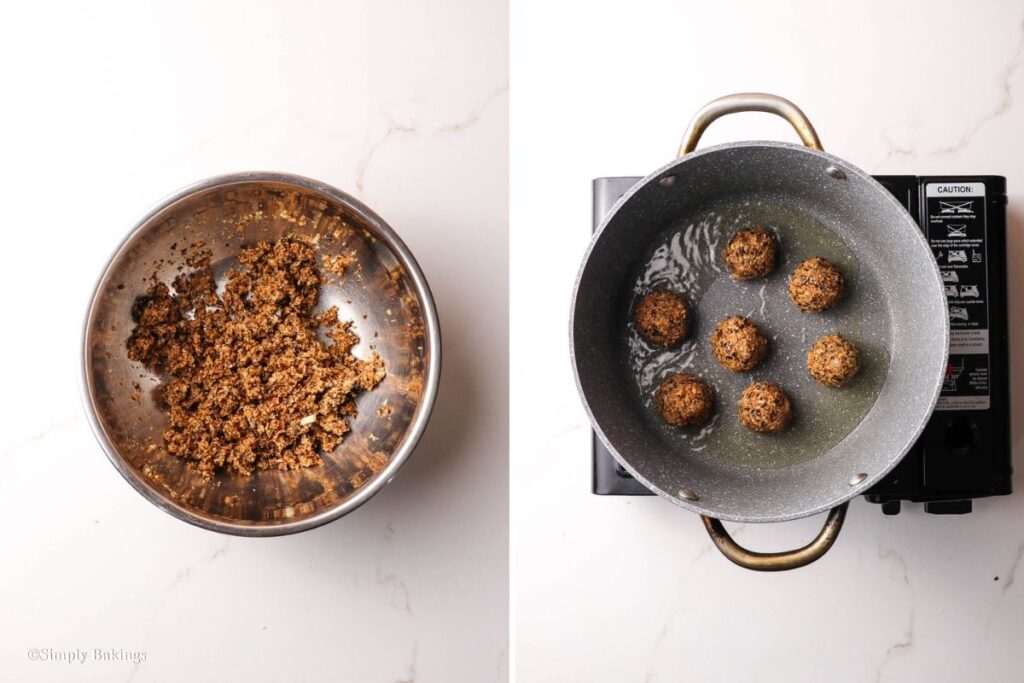
    Health Benefits of Miso Paste:

    • Contains live probiotics, promoting gut health and aiding digestion.
    • Strengthens the immune system, protecting against infections and illnesses.
    • May help lower blood pressure and reduce the risk of heart disease.
    • Loaded with antioxidants, miso paste combats free radicals and supports cell health.
    • Provides a vegetarian protein source, ideal for plant-based diets.
    • Low in calories, making it suitable for weight management.
    mushroom miso pasta laid on a white bowl with golden rim on a white bed

    Tips and Procedures:

    Flavor Adjustment

    • Umami Boost: Enhance the umami flavor of the pasta by adding a dash of soy sauce or a sprinkle of umami seasoning.
    • Spice it Up: For a kick of heat, incorporate crushed red pepper flakes or sliced chili peppers while sautéing the vegetables.
    • Herbal Infusion: Infuse the dish with additional herbal notes by stirring in fresh thyme, rosemary, or basil before serving.

    Ingredients Modification

    • Protein Power: Include your favorite protein source, such as tofu, tempeh, or cooked chickpeas, to make the pasta more filling and satisfying.
    • Greens Galore: Toss in a handful of baby spinach, arugula, or kale during the last few minutes of cooking for an extra dose of nutrients.
    • Mushroom Medley: Experiment with a mix of different mushrooms, like shiitake or porcini, to create a diverse texture and flavor profile.

    Serving and Pairings

    • Garnish Delight: Top the pasta with toasted sesame seeds, chopped scallions, or a drizzle of sesame oil for an extra layer of texture and taste.
    • Fresh Squeeze: Add a splash of fresh lemon juice just before serving to brighten up the flavors and cut through the creaminess.
    • Sidekick Salad: Accompany the pasta with a refreshing side salad tossed in a tangy vinaigrette for a balanced and satisfying meal.
    a bowl of creamy pasta with miso paste and mushrooms

    Preparation

    • Prep Ahead: There is no need to cook the pasta as it will be cooked during the simmering process. Chop the vegetables and measure the ingredients in advance for a quick and seamless cooking process.
    • Stirring Technique: There is no need to cook the pasta as it will be cooked during the simmering process. While sautéing the vegetables and pasta, stir constantly to ensure even cooking and prevent sticking.
    • Miso Dissolving: To prevent clumps, mix the miso paste with a small amount of warm water or vegetable broth before adding it to the pot.

    Storage

    • Refrigeration Tips: Store any leftover pasta in an airtight container in the refrigerator for up to 3 days.
    • Reheating: To retain the creamy texture, reheat the pasta gently in a pan with a splash of vegetable broth or almond milk.
    • Freezing Note: The creamy sauce may not freeze well, so it's best to enjoy this dish fresh or freeze the vegetables separately for future use.

    How to Make One Pot Creamy Miso Mushroom Pasta:

    Listed below are all the ingredients you will need:

    • olive oil
    • red onion
    • garlic cloves
    • carrots
    • celery ribs
    • canned button mushrooms
    • fresh shimeji mushrooms
    • farfalle pasta
    • vegetable broth
    • nutritional yeast
    • rice vinegar
    • miso paste
    • salt
    • ground black pepper
    • chopped spring onions
    ingredients for One Pot Creamy Miso Mushroom Pasta recipe laid on a white table

    Place oil in a heated pot over medium heat and sauté onion slices and minced garlic for 30 seconds. Then, stir in pasta, carrots, mushrooms, and celery.

    Continue sautéing for another 2 minutes while constantly stirring:

    sautéed onion a slices and minced garlic in a pan then tossed in carrots, celery, mushrooms, and pasta

    Pour the vegetable broth and nutritional yeast; mix well. Bring the mixture to a boil and reduce to a simmer for 15 minutes, or until the pasta is cooked. 

    Stir in miso paste and rice vinegar; mix until the miso paste has dissolved:

    added to the mixture vegetable broth and nutritional yeast and was simmered in the pan

    Season with salt and ground black pepper. Then, sprinkle with chopped spring onions:

    added seasonings and chopped spring onions into the pan

    Serve immediately, and happy eating!
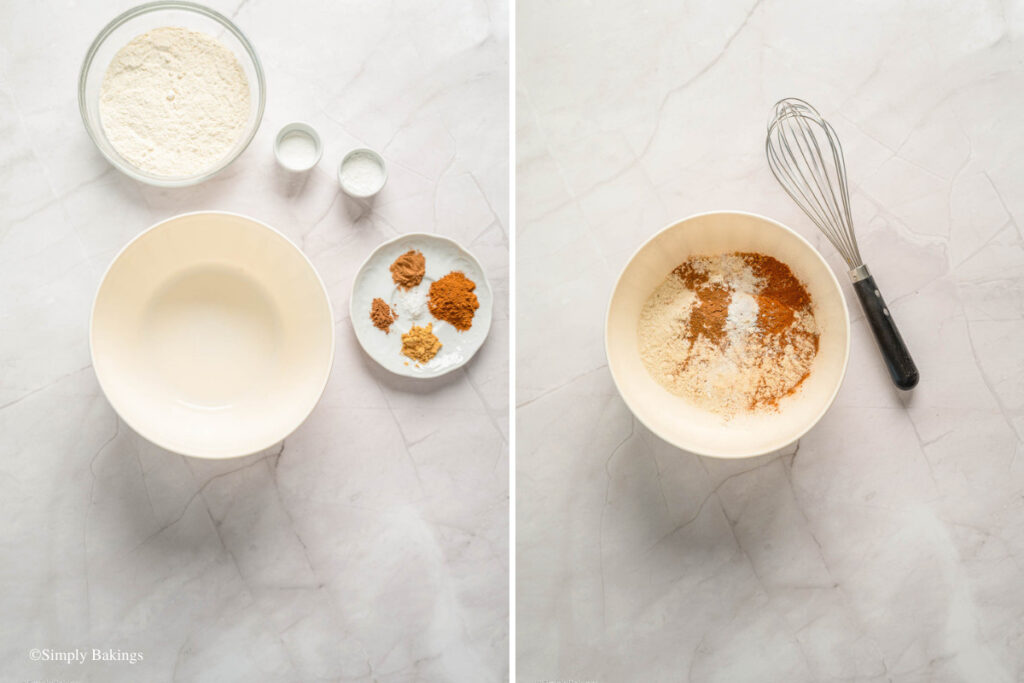
    A plate of miso mushroom pasta on a bed with books and dried flower decor

    Frequently Asked Questions:

    Where can you buy miso paste?

    Miso paste can be purchased at most grocery stores, health food stores, or Asian supermarkets. It is commonly found in the Asian food aisle or the refrigerated section.

    What can you use as a substitute for miso paste?

    Both soy sauce and tamari are excellent substitutes for miso paste. They offer a salty and savory flavor, contributing to the umami profile of the dish. Use about 1 tablespoon of soy sauce or tamari for every tablespoon of miso paste.

    Can you use dried mushrooms instead?

    Yes, you can use dried mushrooms instead of fresh ones. Dried mushrooms have a concentrated flavor, and they work well in dishes like this where they will rehydrate and infuse the broth with their rich taste. Replace the ½ cup of button mushrooms and 4 oz. of shimeji mushrooms with ½ cup of dried mushrooms (such as shiitake or porcini), rehydrated, and sliced.

    creamy one pot vegan miso mushroom pasta on a bowl with golden rim topped with fresh cilantro
    No ratings yet
    Print Pin Recipe

    One Pot Creamy Miso Mushroom Pasta

    This creamy vegan pasta is a delightful blend of umami-rich miso and a variety of mushrooms, creating a satisfying and plant-based version of the classic recipe.
    Prep Time10 minutes mins
    Cook Time25 minutes mins
    Total Time35 minutes mins
    Course: Main Course, pasta dish
    Cuisine: Japanese
    Keyword: creamy pasta, miso mushroom pasta, miso mushroom pasta recipe, miso pasta, mushroom pasta
    Servings: 4 servings
    Calories: 146kcal
    Author: Lainey
    Prevent your screen from going dark

    Ingredients

    • 2 tablespoons olive oil
    • 1 red onion sliced
    • 2 garlic cloves minced
    • 2 cups farfelle pasta
    • 2 carrots peeled and diced
    • 4 oz fresh shimeji mushrooms
    • ½ cup canned button mushrooms sliced
    • 2 celery ribs sliced
    • 5 cups vegetable broth
    • 2 tablespoons nutritional yeast
    • 3 tablespoons miso paste
    • 1 tablespoon rice vinegar
    • ¼ teaspoon salt
    • ¼ teaspoon ground black pepper
    • 1 tablespoon chopped spring onions

    Instructions

    • Place oil in a heated pot over medium heat and sauté onion slices and minced garlic for 30  seconds.
    • Stir in pasta, carrots, mushrooms, and celery. Continue sautéing for another 2 minutes while constantly stirring.
    • Pour the vegetable broth and nutritional yeast; mix well. Bring the mixture to a boil and reduce to a simmer for 15 minutes or until the pasta is cooked.
    • Stir in miso paste and rice vinegar; mix until the miso paste has dissolved.
    • Season with salt and ground black pepper.
    • Sprinkle with chopped spring onions and serve immediately.
    Leave a Comment

    Notes

    1. There is no need to cook the pasta as it will be cooked during the simmering process. 
    Calories: 146kcalCarbohydrates: 15gProtein: 5gFat: 8gSaturated Fat: 1gPolyunsaturated Fat: 1gMonounsaturated Fat: 5gSodium: 1821mgPotassium: 295mgFiber: 3gSugar: 6gVitamin A: 5757IUVitamin C: 5mgCalcium: 30mgIron: 1mg
    QR Code
    Did you make this recipe?Share it on instagram or tag @simplybakings or #simplybakings!

    Main Entree, Vegan Filipino Recipes, Vegetables, Vegetarian Filipino Recipes

    • « Go to Previous Page
    • Page 1
    • Page 2
    • Page 3
    • Page 4
    • Page 5
    • Interim pages omitted …
    • Page 17
    • Go to Next Page »

    Primary Sidebar

    Lainey holding a muffin pan in her kitchen

    I'm Lainey, the driving force behind SimplyBakings.com, where I'm on a mission to redefine Filipino cooking through a plant-based lens.

    More about me →

    Popular

    • cookie dough bites
      Easiest Cookie Dough Bites Ever
    • delicious and soft oreo cheesecake cookies
      Soft Oreo Cheesecake Cookies
    • mini chocolate cupcakes in a white rectangular plate
      Delicious and Easy Mini Chocolate Cupcakes
    • Filipino Custard Cake drizzled with powdered sugar
      Filipino Custard Cake
    • no bake oreo cheesecake in a mason jar
      Foolproof 3 Ingredients No Bake Oreo Cheesecake
    • 3 brownies stacked
      Best and Easiest Brownies

    Footer

    Sign Up for My Email List

    Latest Posts

    • Foolproof Taro Recipe
    • Best Matcha Strawberry Popsicles
    • Classic Filipino Lentil Soup
    • BEST Kinamatisang Tofu

    Quick Links

    Kitchen Essentials

    About Lainey

    Contact

    • Facebook
    • Instagram
    • YouTube
    • Pinterest
    • TikTok

    © 2025 Auburn Digital Services LLC. All Rights Reserved | Privacy Policy

    Rate This Recipe

    Your vote:


    A rating is required
    A name is required
    An email is required